
Painting Imperial Guard Infantry – Astra Militarum Getting Started – Part 10
Painting Imperial Guard - this is how I do mine.
I’ve been meaning to write this for some time. Like for years. Painting Imperial Guard infantry is something I’ve done a lot but I always have the same issues. This is mainly because I leave it so long between sessions. So today, I document my process for others to learn from! And for me to refer back too! And of course, when I say Painting Imperial Guard I also mean Painting Astra Militarum too…
Never miss an article? Subscribe!
I’ll be specifically covering my Cadians here. And this does follow the Warhammer TV method although I have refined it slightly from that video.
But, I’ll also cover other bits and pieces too. Such as the gear and tools I use, as well as handy methods such as using a wet palette. So stick with me, even if you’re not painting Cadians.
I decide to make this part of my Astra Militarum Getting Started series – simply because this could be of great use to new hobbyists starting with the Astra Militarum.
Got a question? Then please do ask if something isn’t clear or you want more info!
Painting Imperial Guard – Gear
I use the following painting gear if that’s even the right word…
Brushes
Oh man, this is probably an article in itself. And I’m no pro, so I’m not qualified to write such an article. But I have painted a few models before so here goes…
You can spend £1 on a brush or £20 on a brush. And like most things in life, you get what you pay for.
But there is a difference with brushes when compared against something like cars or houses. Brushes are more like wine. If I spend £2 on a bottle of wine I can tell the difference between that bottle and a £10 bottle. If I spent £1,000 on a bottle of wine it would probably taste the same to me as a £10 bottle.
The point being; as our skills and knowledge improve so should the brushes we use. That isn’t to say if you use a £1 brush you’re a terrible painter. It’s just how I’ve approached brushes in the past.
It can also spur you on. If you purchased or were given, an expensive bottle of wine, maybe you would read up on it – to fully experience it. I found this when I bought more expensive brushes. I read more about the methods I was using and generally took my time. I improved!
Start with whatever brushes you feel comfortable with using. I started with Games Workshop brushes then got Windsor and Newton Series 7 and now I use Artis Opus Series S.
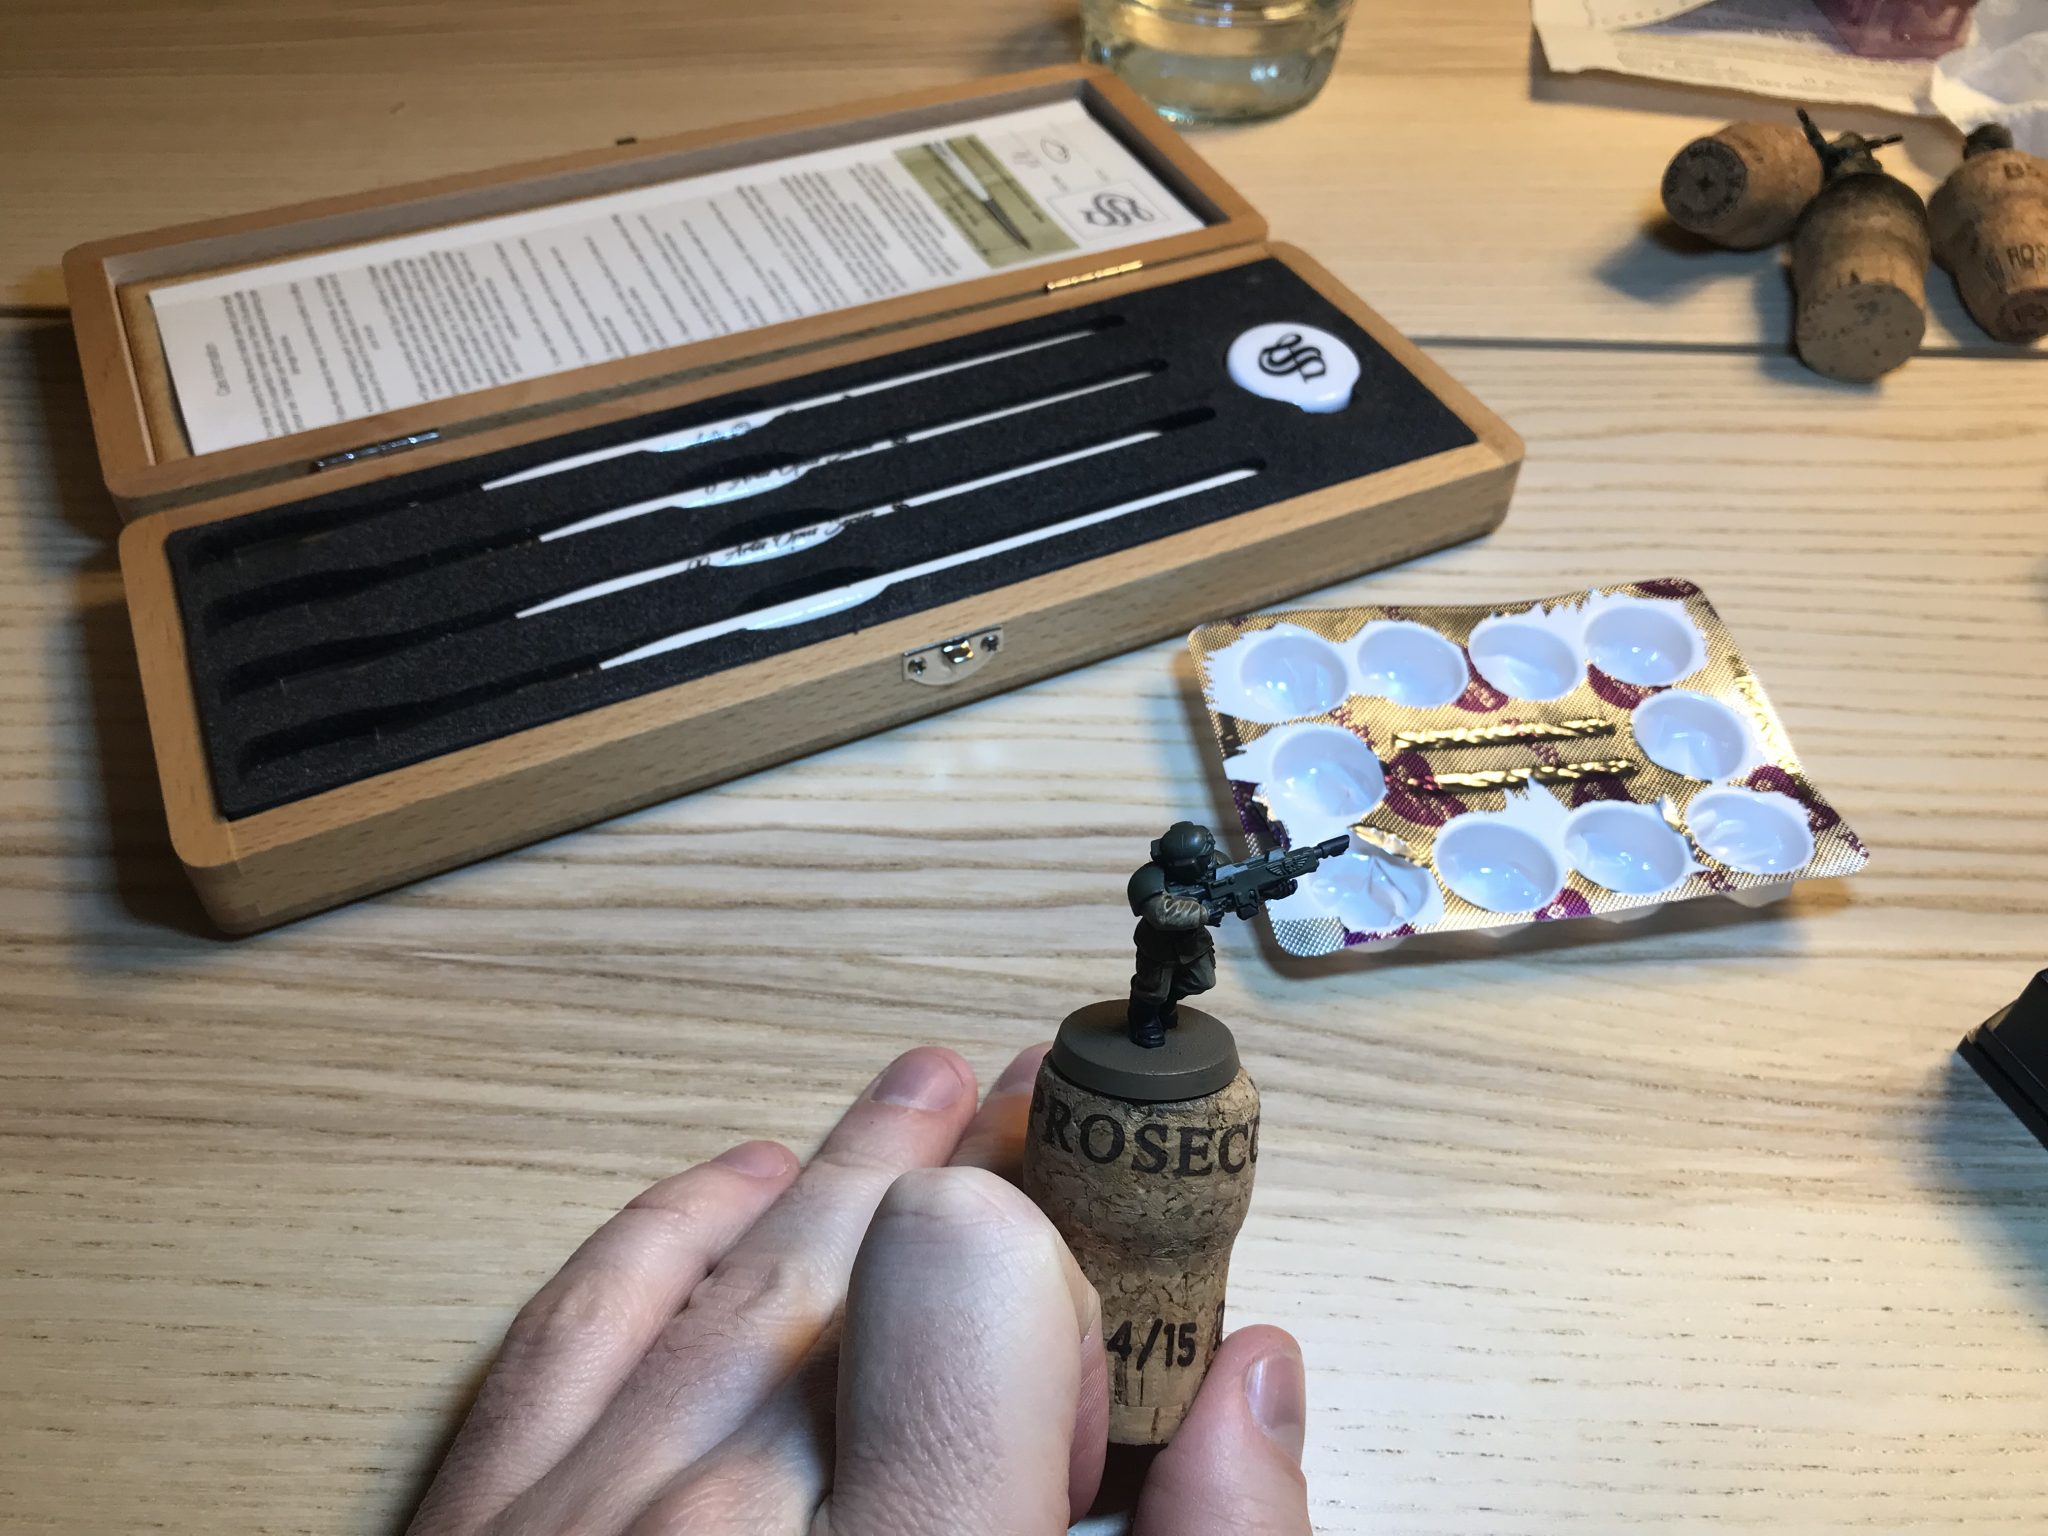
Artis Opus in action – April 2019
Wet Palette
It took me a couple of years to find out what a wet palette is and then a month or so to finally make one and use it.
It does change your painting instantly and it is the biggest single thing you can do right now to improve your painting.
The only issue is the cost. They are basically free. Which for us 40K players is very odd. But trust me, these things are free. You can go and make one right now. Free is OK, not all plastic costs the same as an A class drug.
This tutorial from Uncle Atom will do a much better job than I can of explaining it. Essentially all you need is:
- Paper Kitchen Towel
- Baking Parchment
- A Sealable Tub
- Water
In short, what it will do is keep your paint wet for longer. For hours! The first paint you put down will still be wet hours later when you’re packing away.
The main benefits I’ve noticed are:
- Less wasted paint
- Keeps paint thin because it’s always slightly mixed with water, this improves your layers and forces you to do thin layers
- Mix colours ever so slightly giving you nicer blends, and actually, the wet palette will give you the confidence to try blends if you haven’t before
- Quickly move between several colours to cover up mistakes and generally paint more quickly
The wet palette in action – August 2017
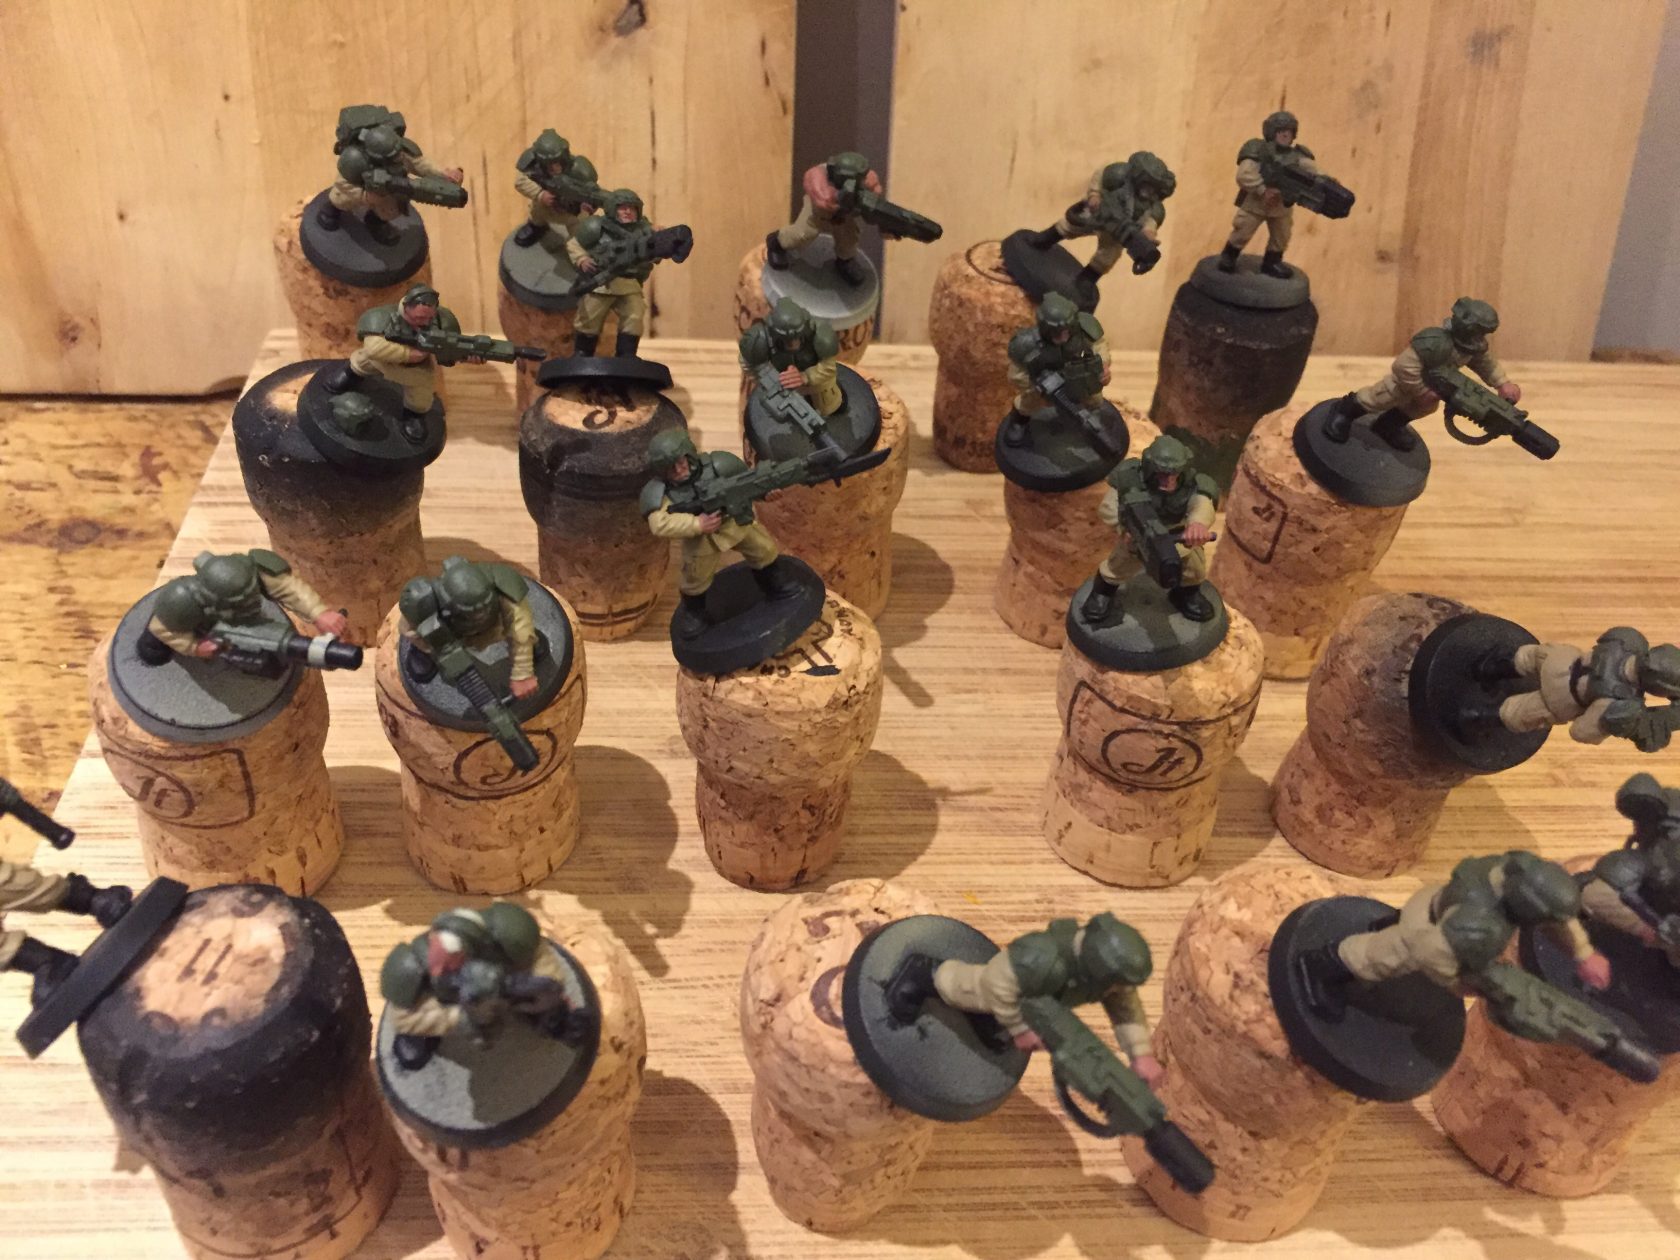
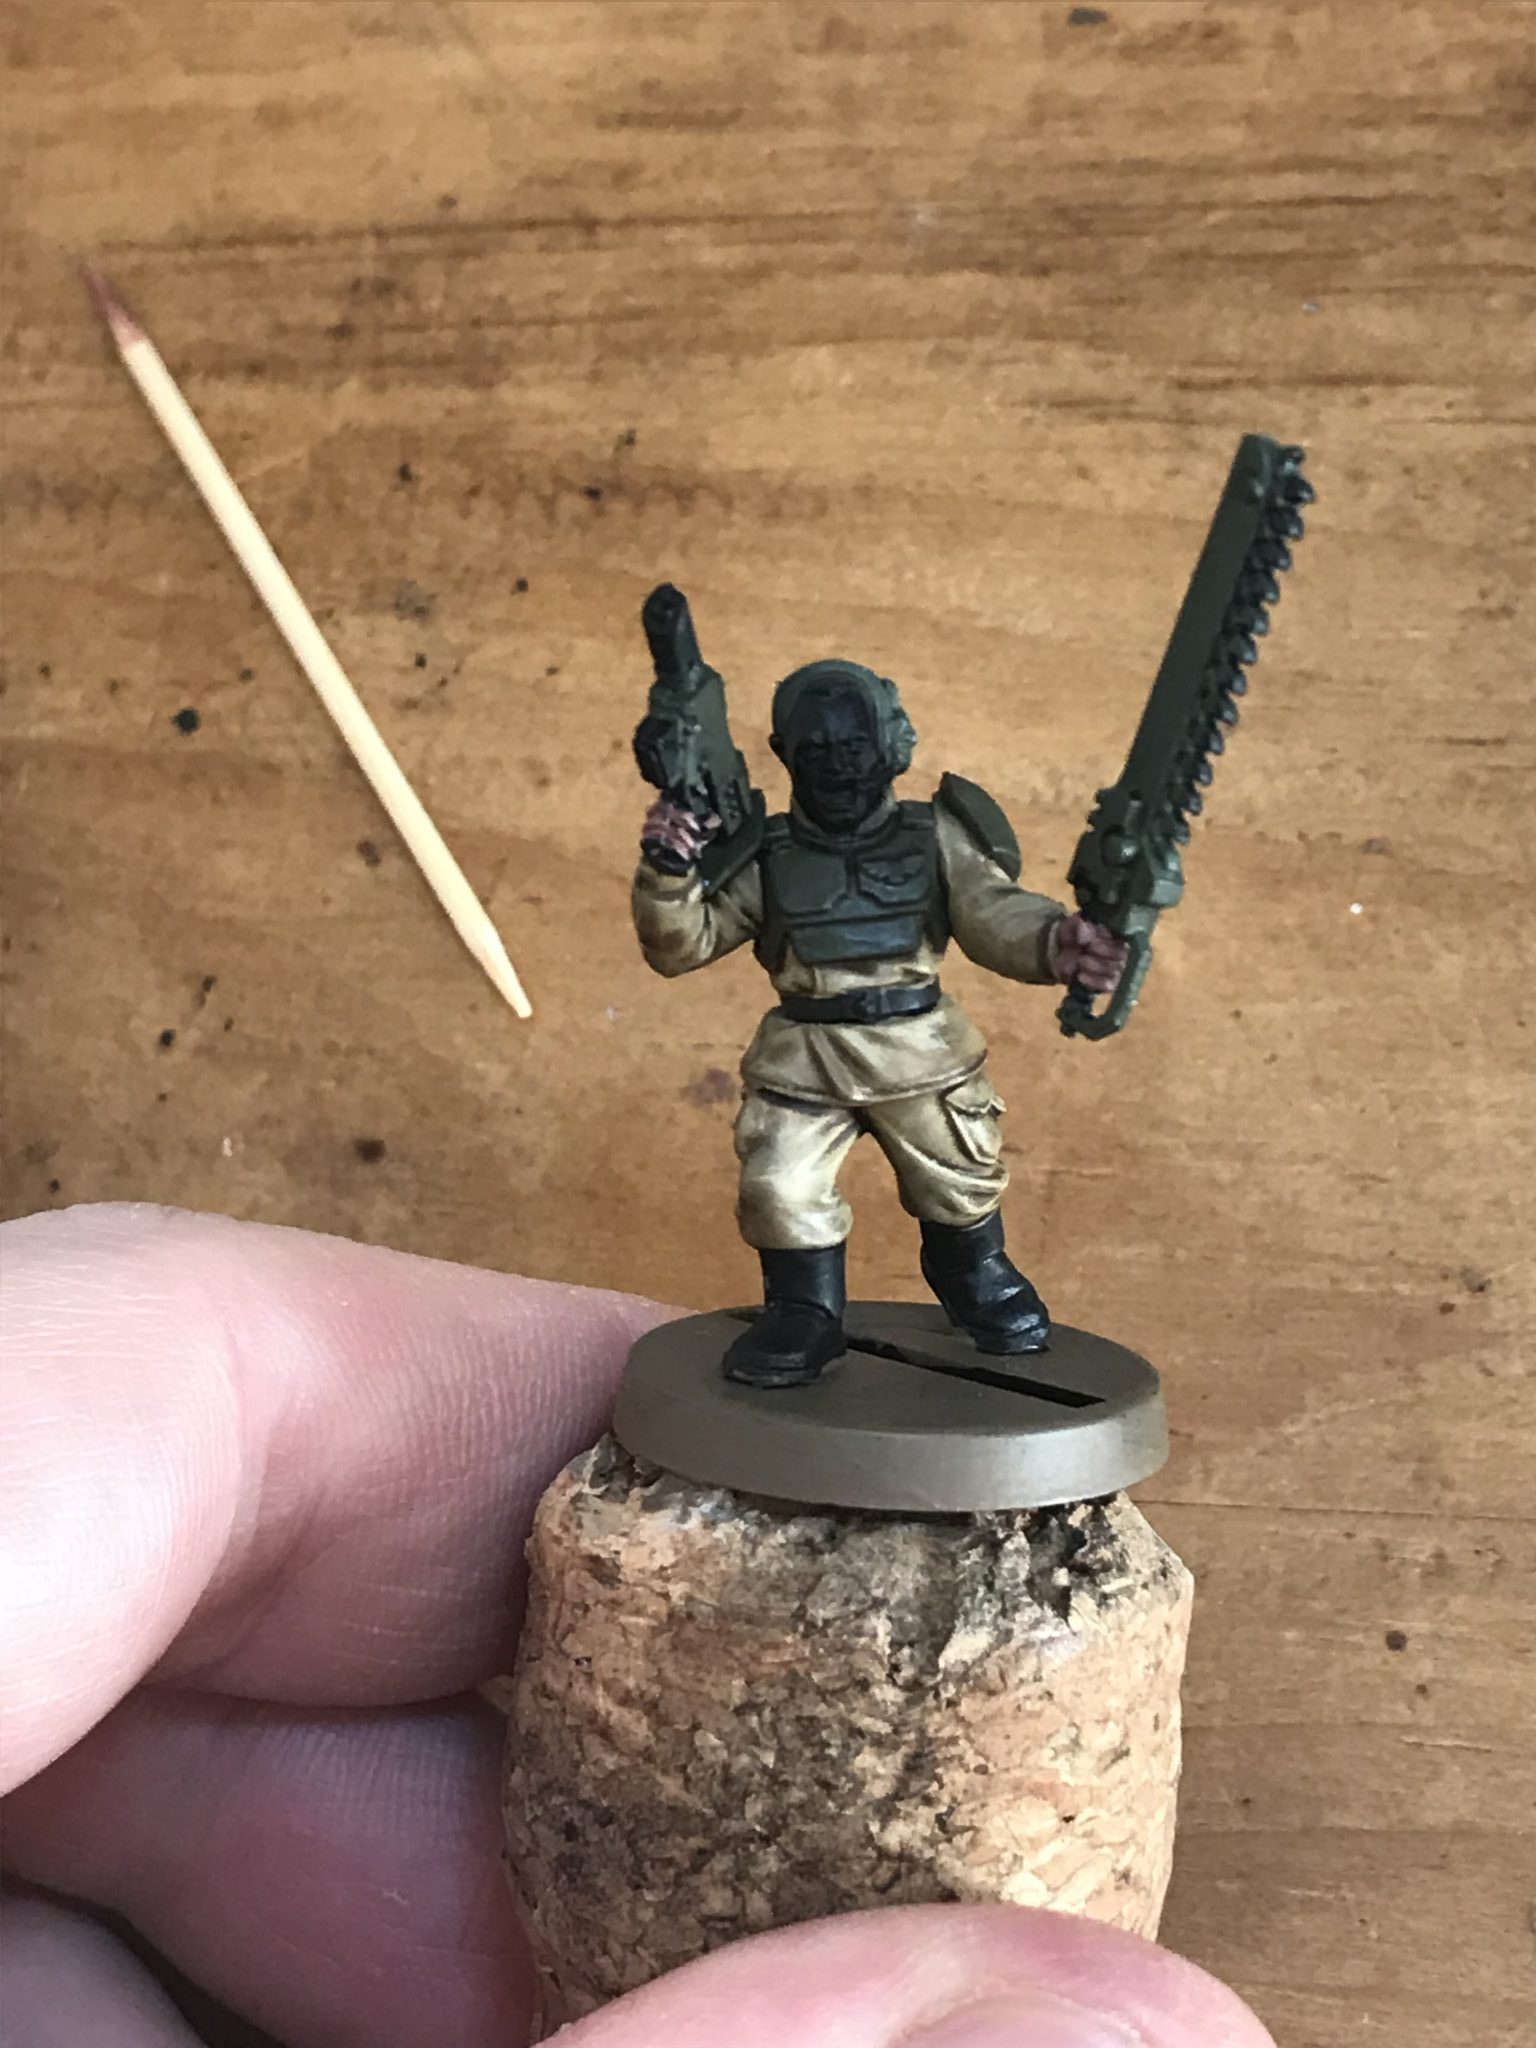
Corks, Knife & Super Glue
Corks for mounting models with the super glue. Knife for removing completed models and removing mould lines.
There are other ways to do this; with magnets or kebab sticks. But a cork works well for me. It gives you something bulky to hold onto, that isn’t the model or its base.
You can also hold the model more easily upside down or sideways for tricky areas. Trust me, it really helps.
Also, you can’t play games with a model once it is on the cork. Thus making you finish it before it can be used in a game. Motivation right there!
Corks, your new best friend
Brush Cleaner – Optional
I use Masters Brush Cleaner for my paint brushes. It works well, it gets the paint off and my brushes are not ruined. So yeah, I’m happy.
There was probably a year of painting where I had no brush soap. And I survived, as did my brushes. I’d say this is optional.
I have had the same pot for ages, it lasts ages.
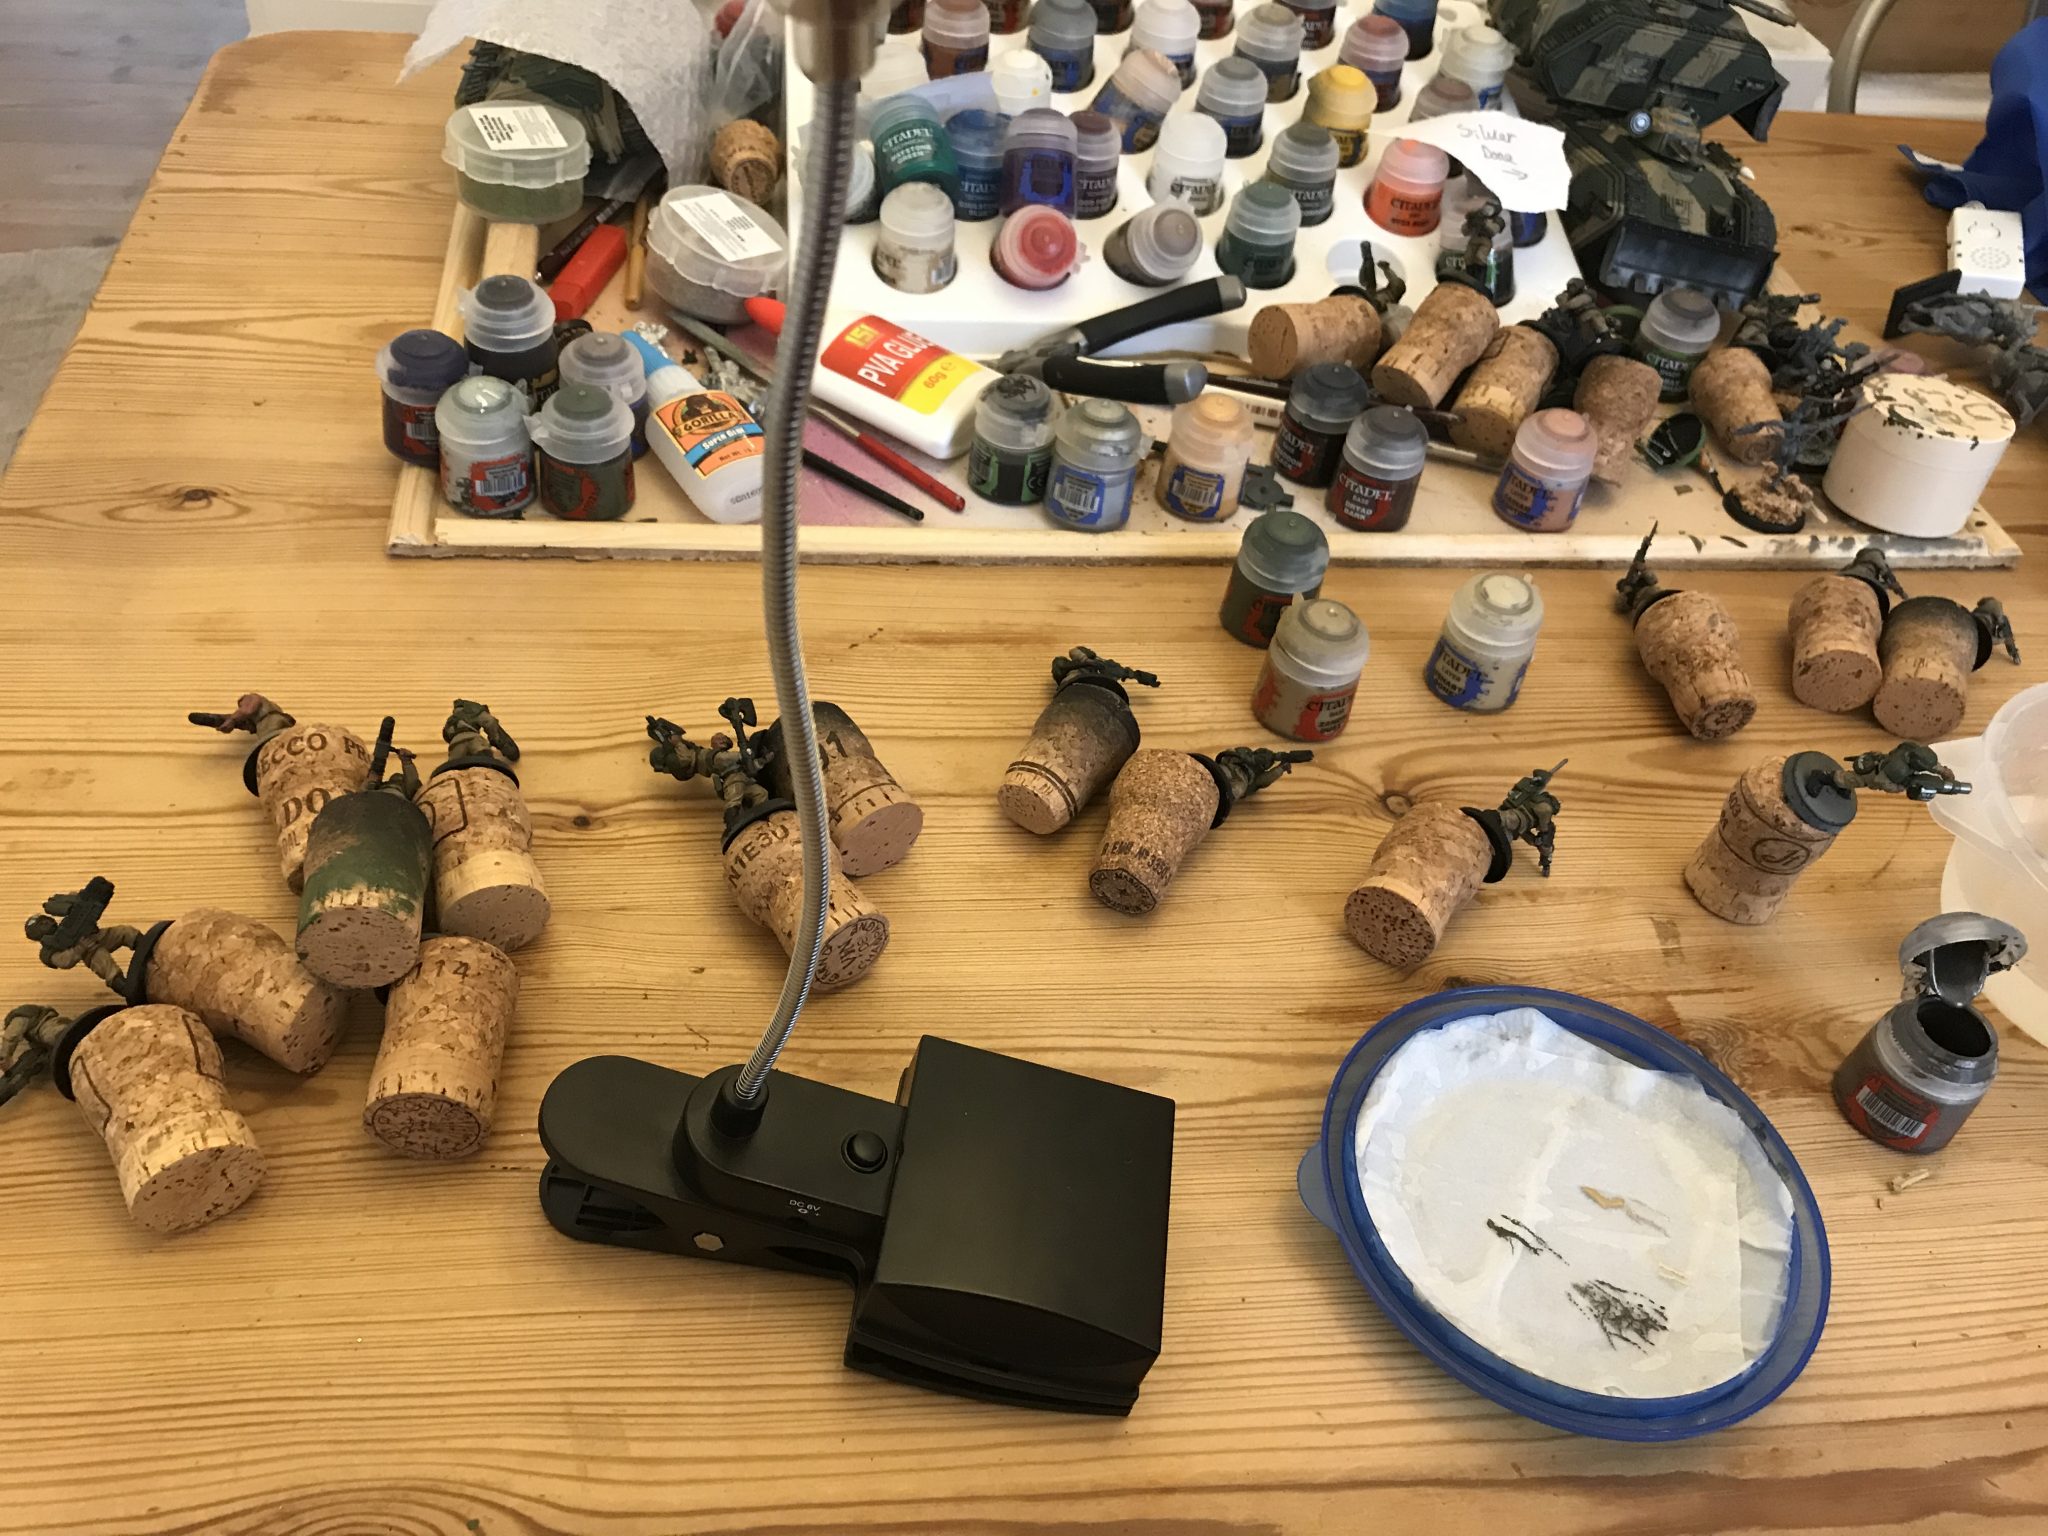
Airbrush – Optional
Another optional extra is an airbrush. This really is very optional and I’ve only ever used it for basing my models black, Castellan Green or Zandri Dust.
It’s quick yeah, but it’s annoying to set up and use unless you’re doing many models. You can read about my airbrushing exploits in Airbrushing 101.
Some Guardsmen getting an airbrushing – December 2016 – Painting Imperial Guard
Painting Imperial Guard – Process
OK, this is where we put brush to model. As mentioned above, this does follow the Warhammer TV method, but I’ll be more verbose than Duncan I expect.
There is a lot to be said for words on a page and hobby techniques – I think. It’s one thing to watch something being done on a video, but it’s an entirely different experience to read how and why something is done, in detail and then re-read it yourself a few times. Fairly often I find video tutorials miss out a vital step or reasoning.
Also, you can read specifically about Batch Painting on this blog.
In The Emperor’s name that will not happen here! We live for the granular!
Bases & Sub-Assemblies
This is one such time being detailed helps someone to understand something new. Some people paint in subassemblies and some paint with their models already fully built. Others paint with a base on and others don’t. There is no right answer to how you paint your models.
I used to build mine, play with them and then paint them. Now I have an army that is painted I have the luxury of being able to wait before I play with my models. Because I already have an army to play with.
Now I have started to paint in subassemblies and without a base. Purely because it’s easier. There is less need to try and thread a paintbrush between arms or legs if there is no base But each to their own. Try any and all methods and settle on the one you like.
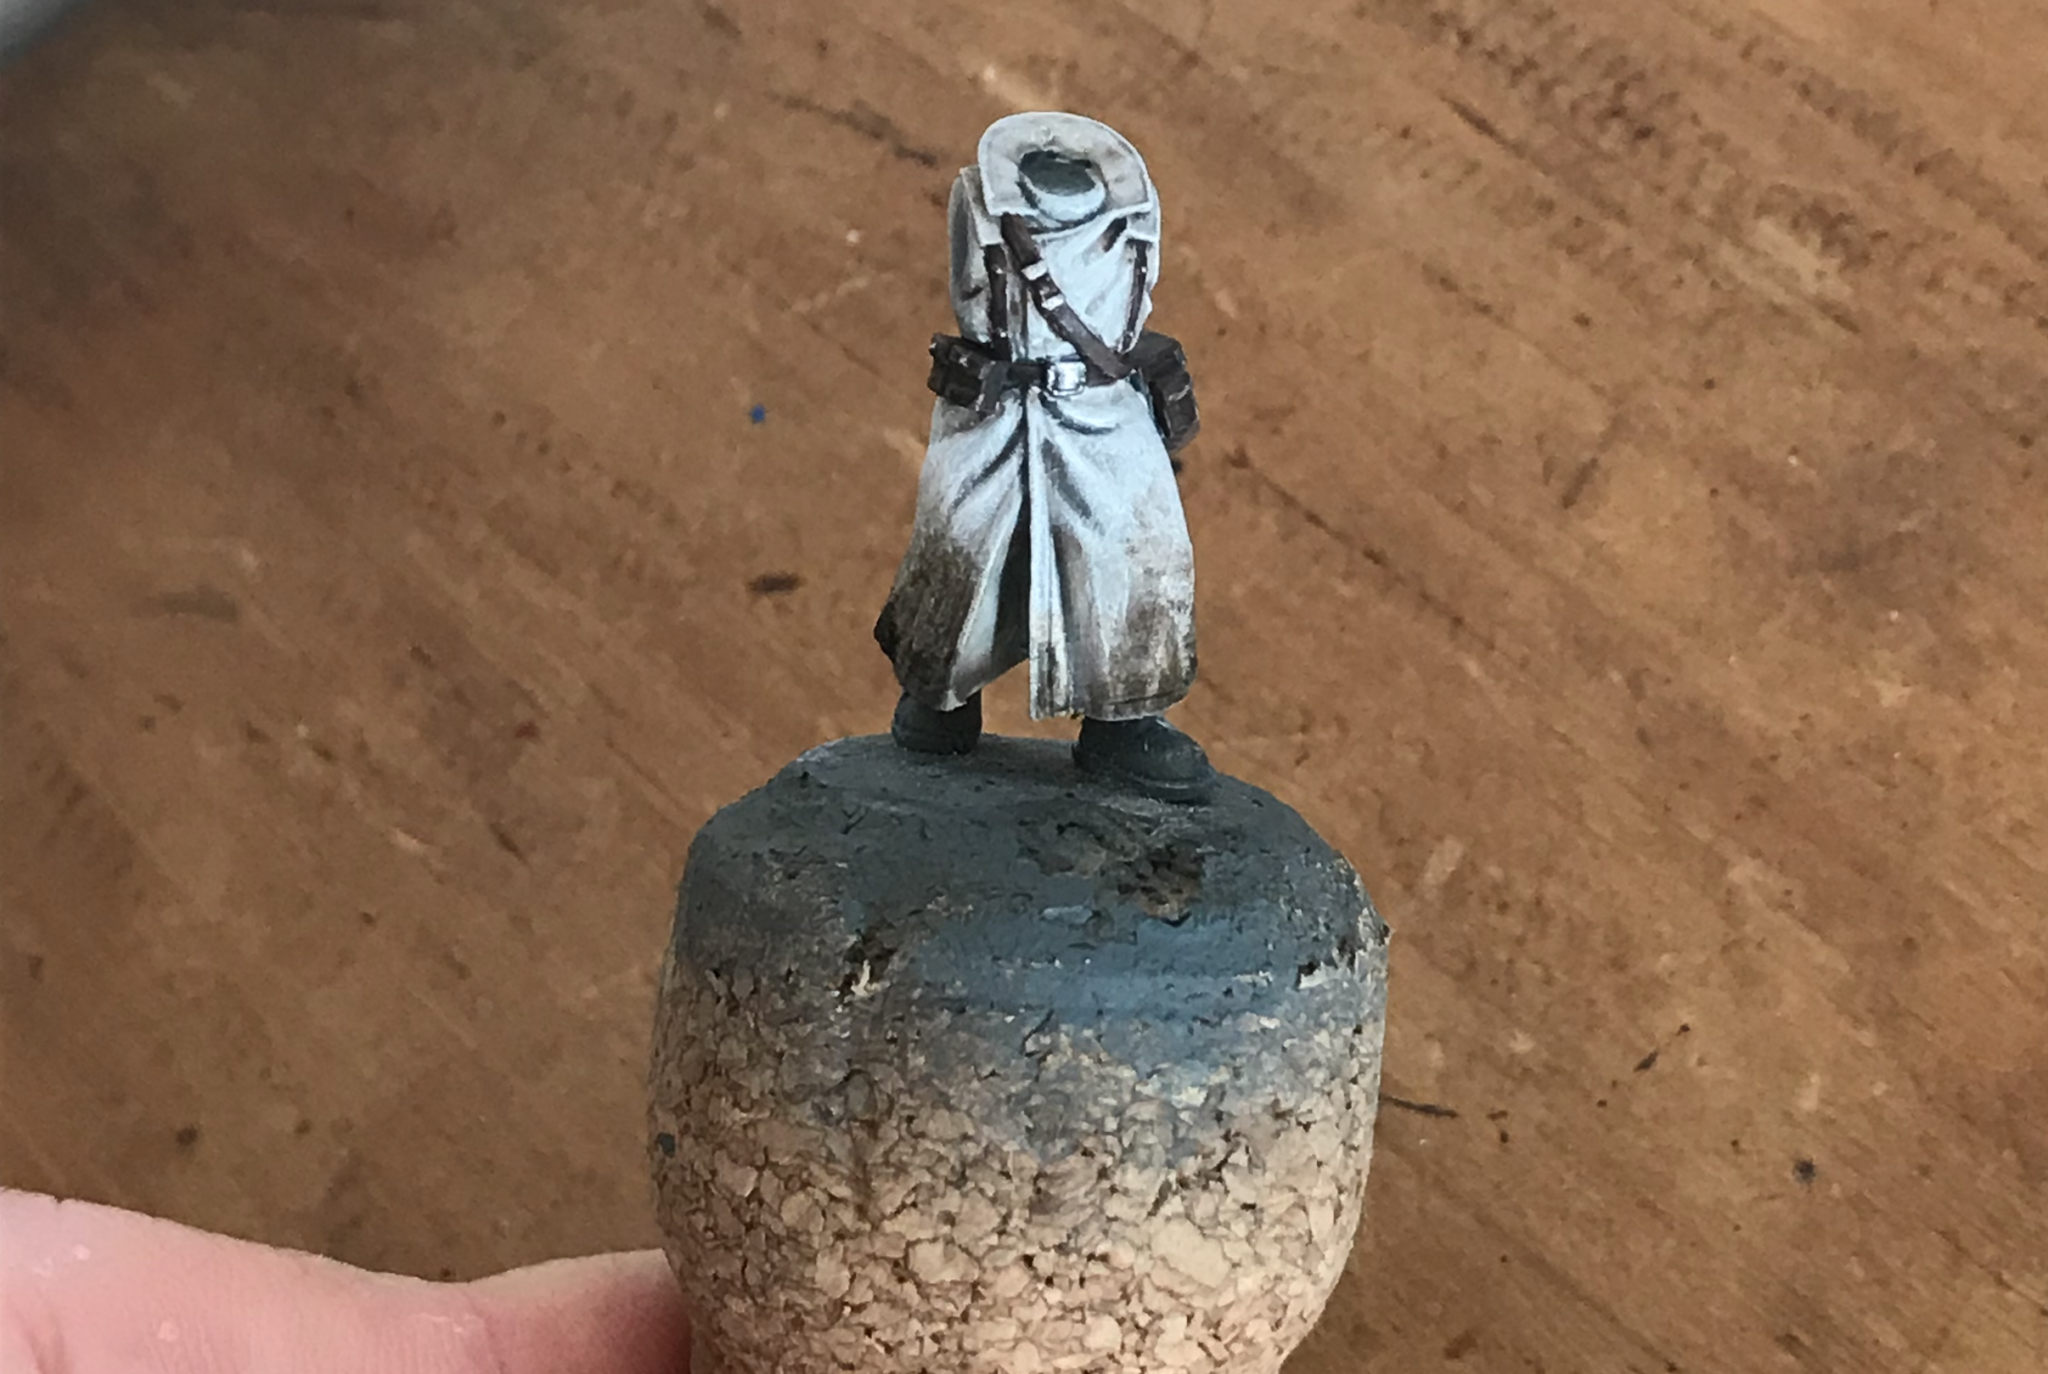
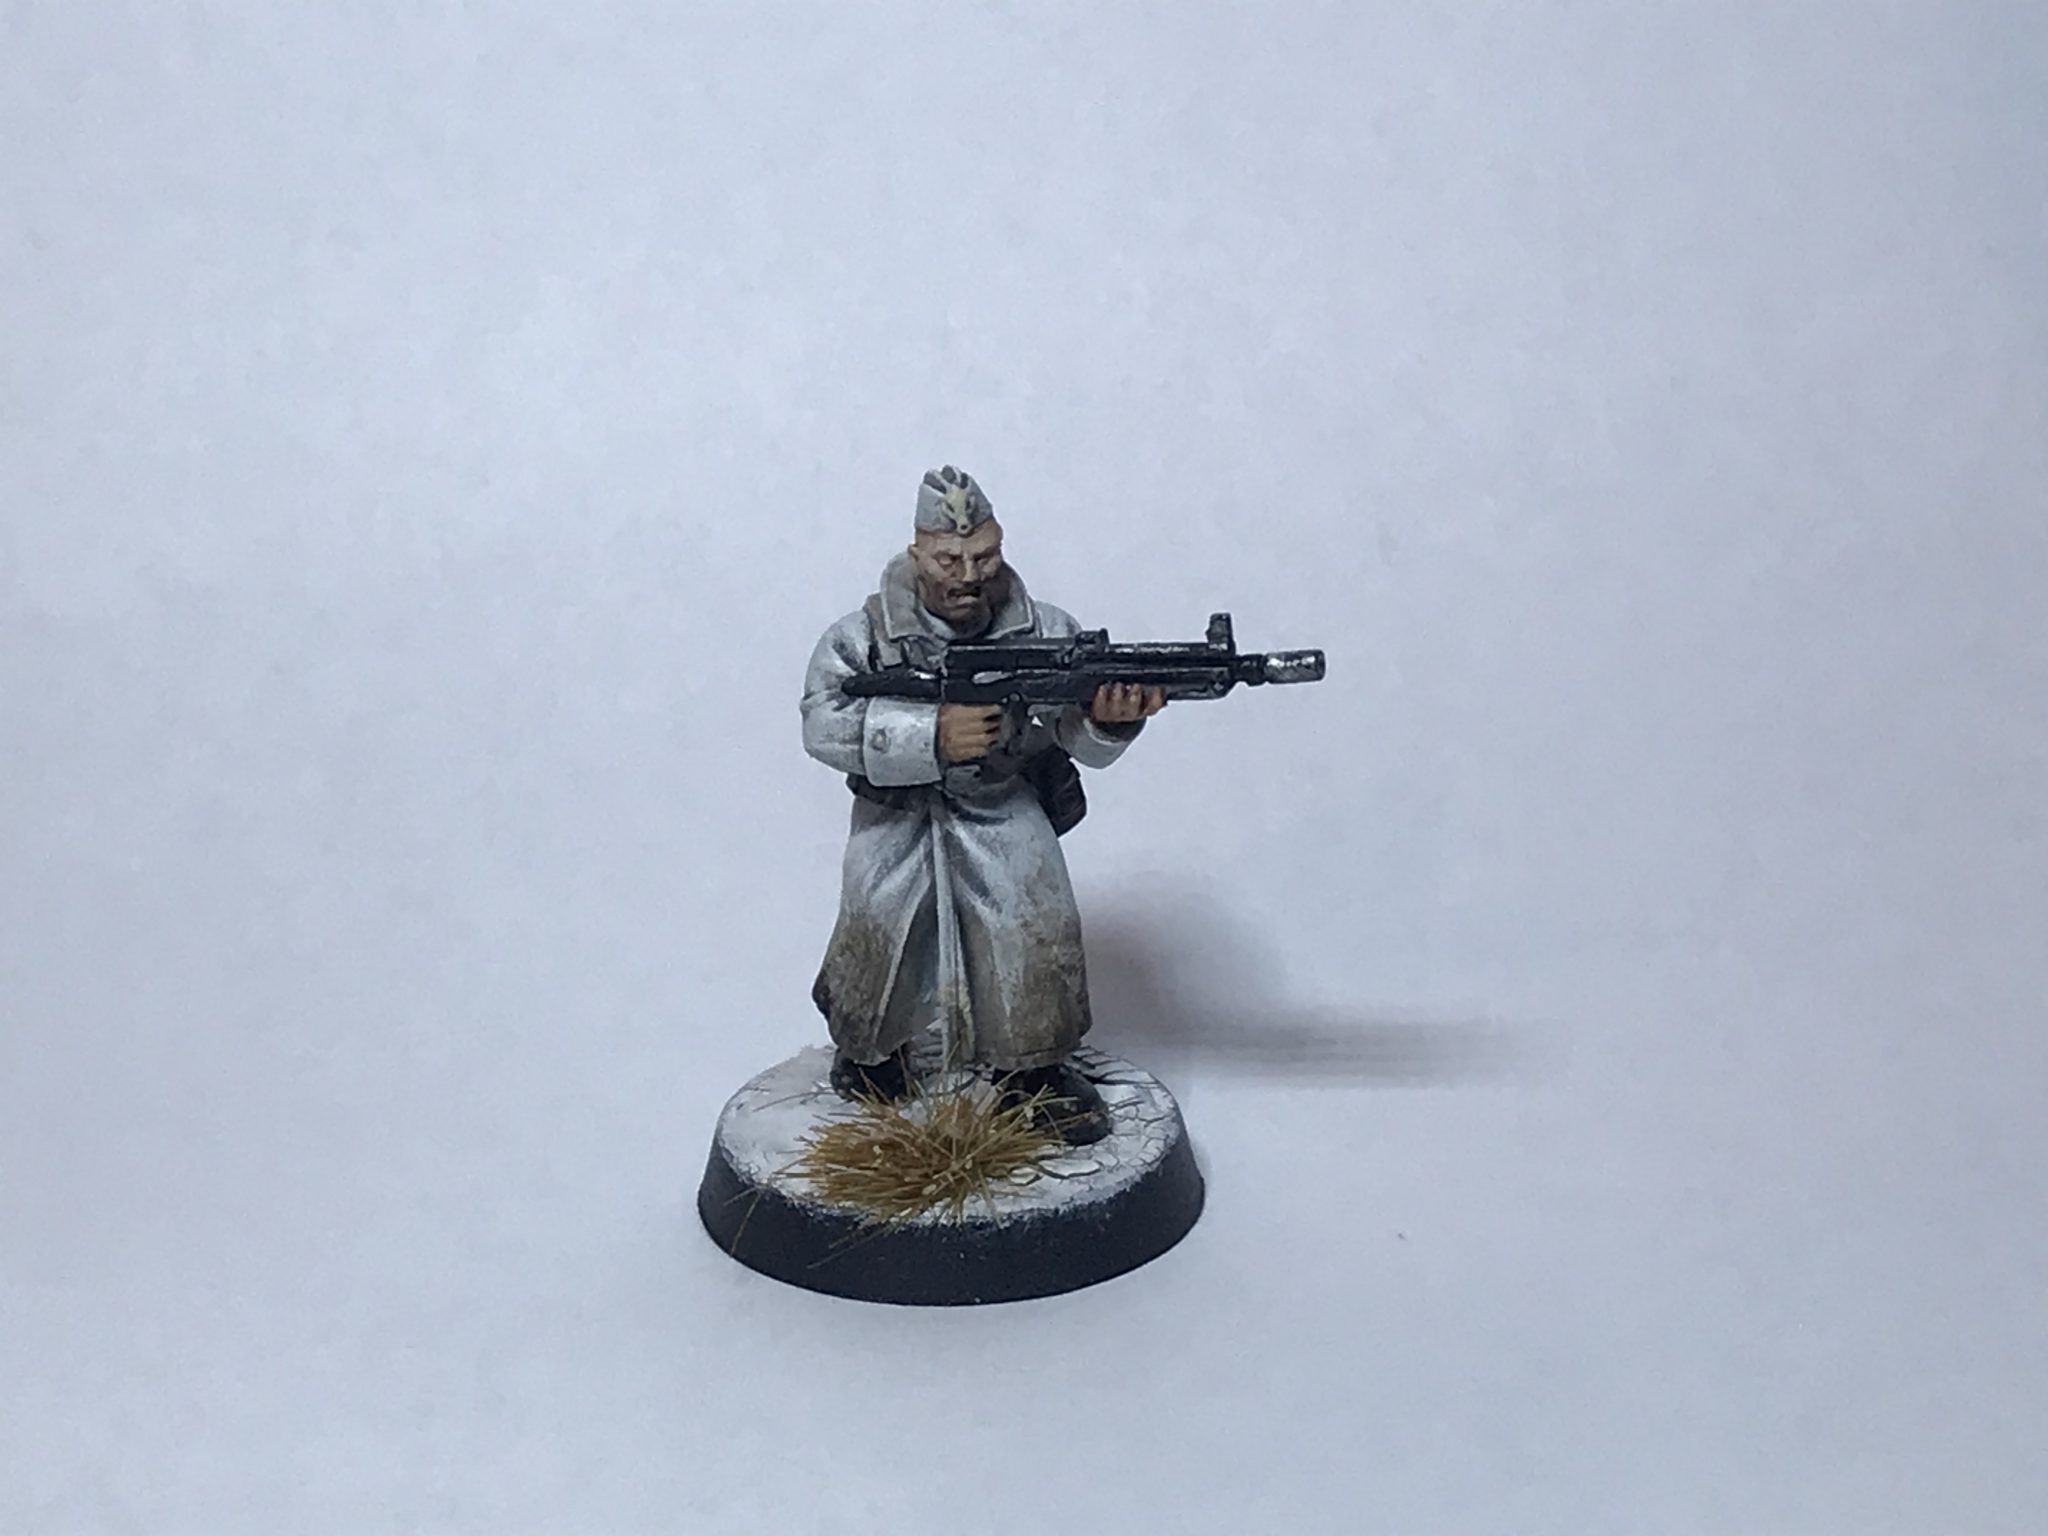
A Valhallan I recently did as a sub-assembly
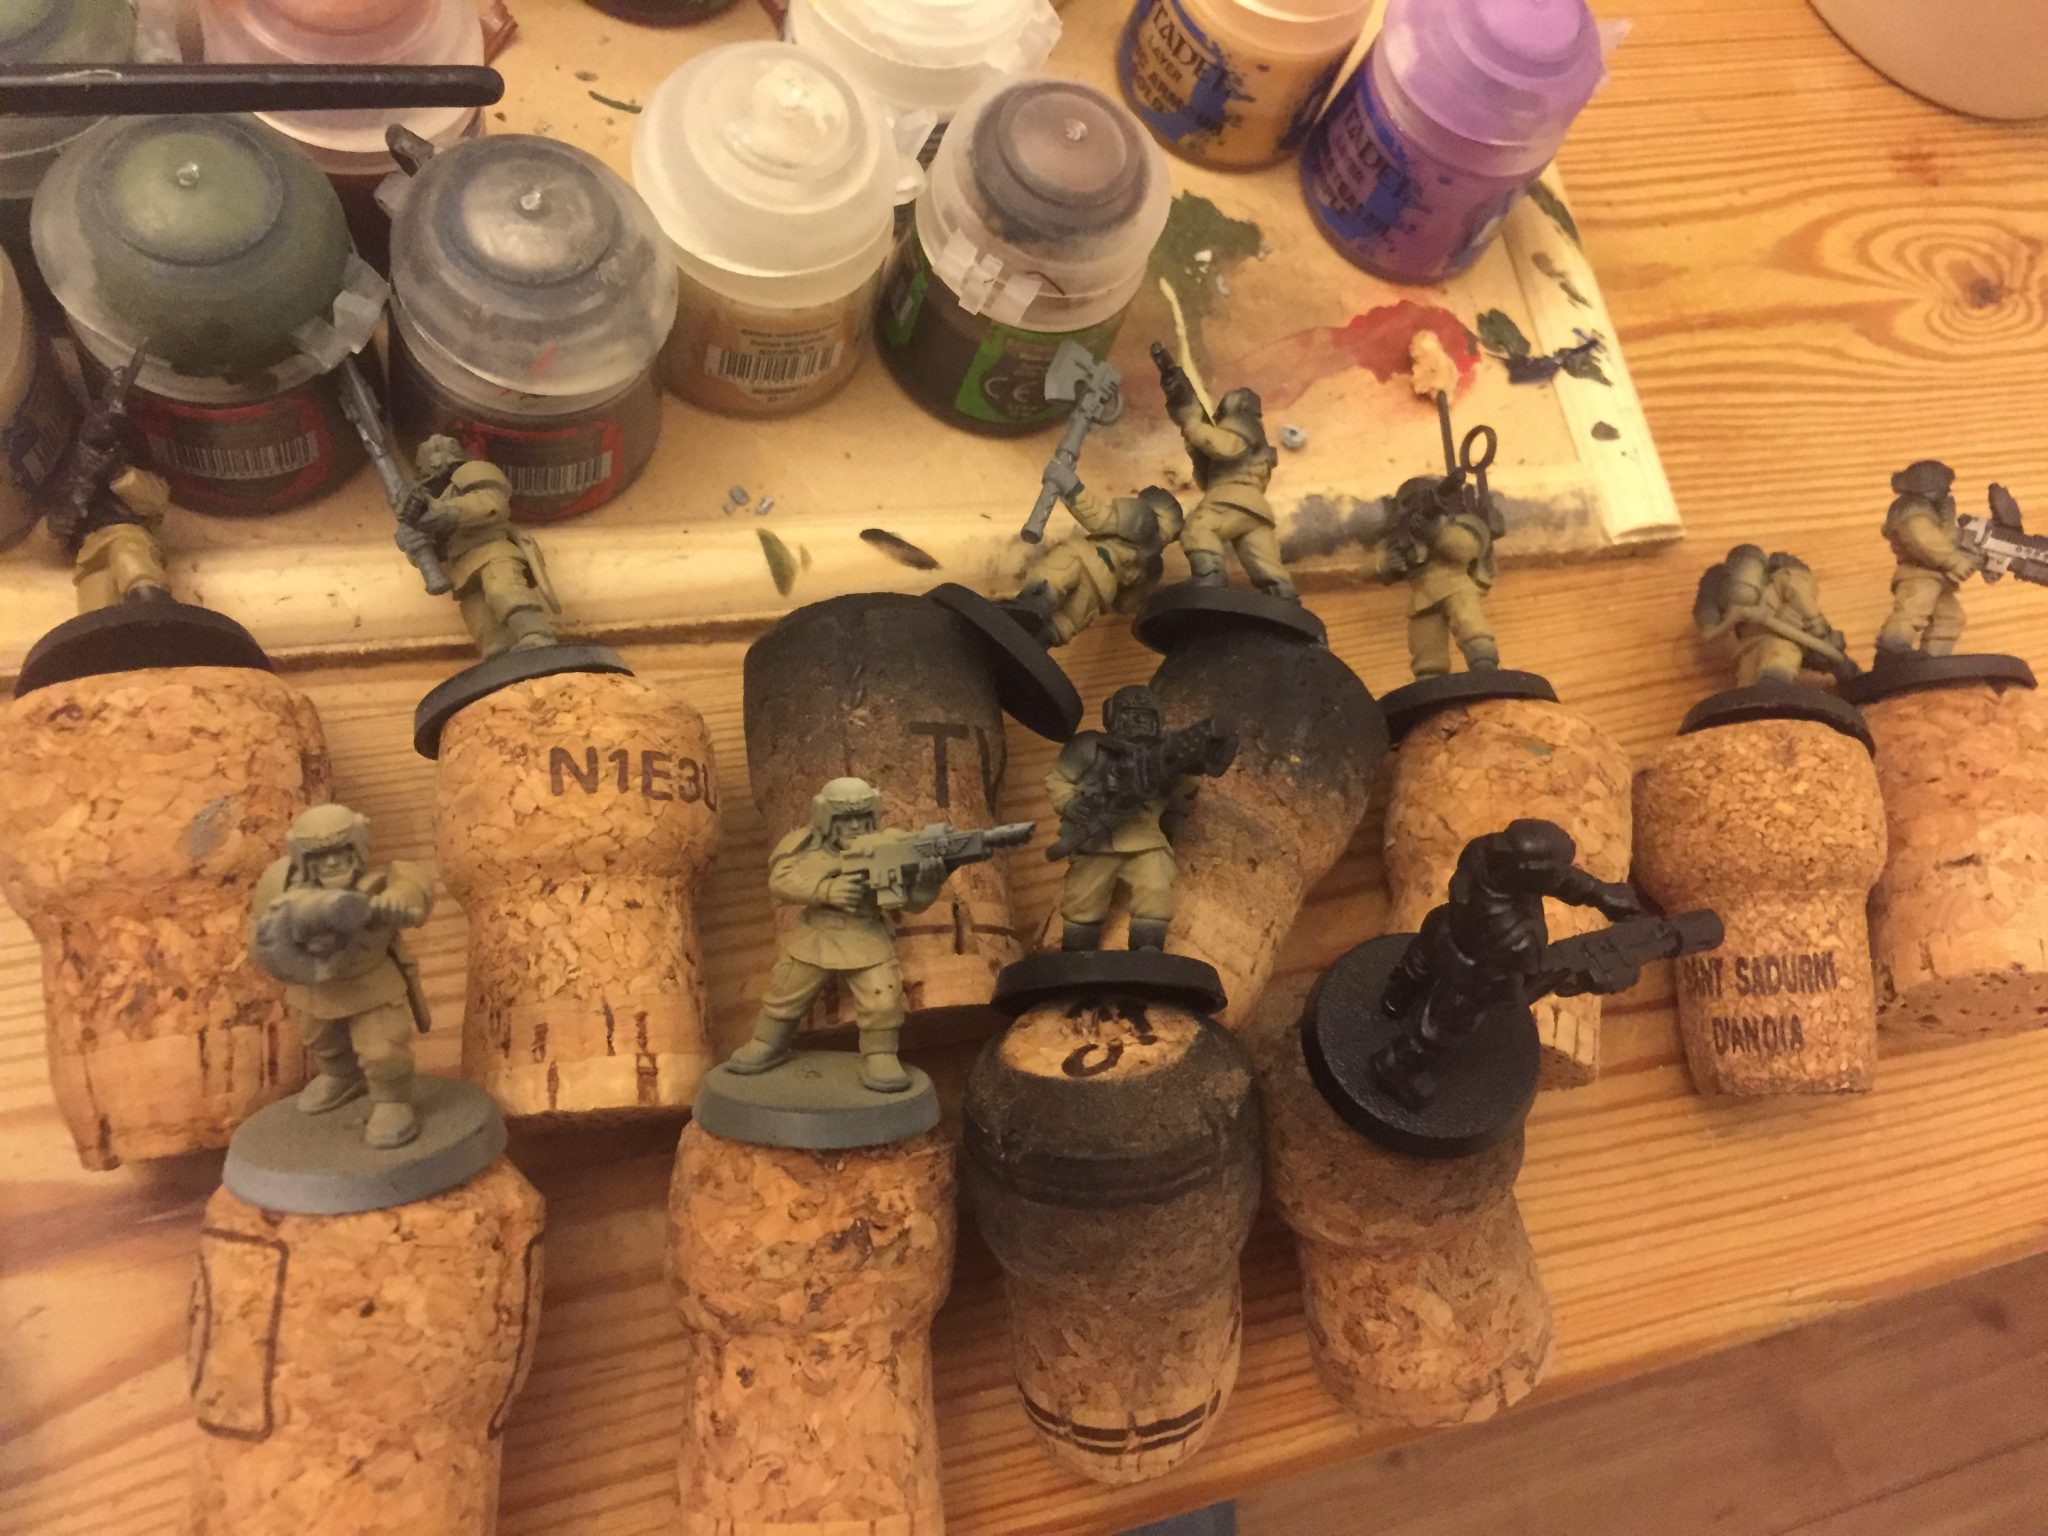
Base Colours – Painting Imperial Guard
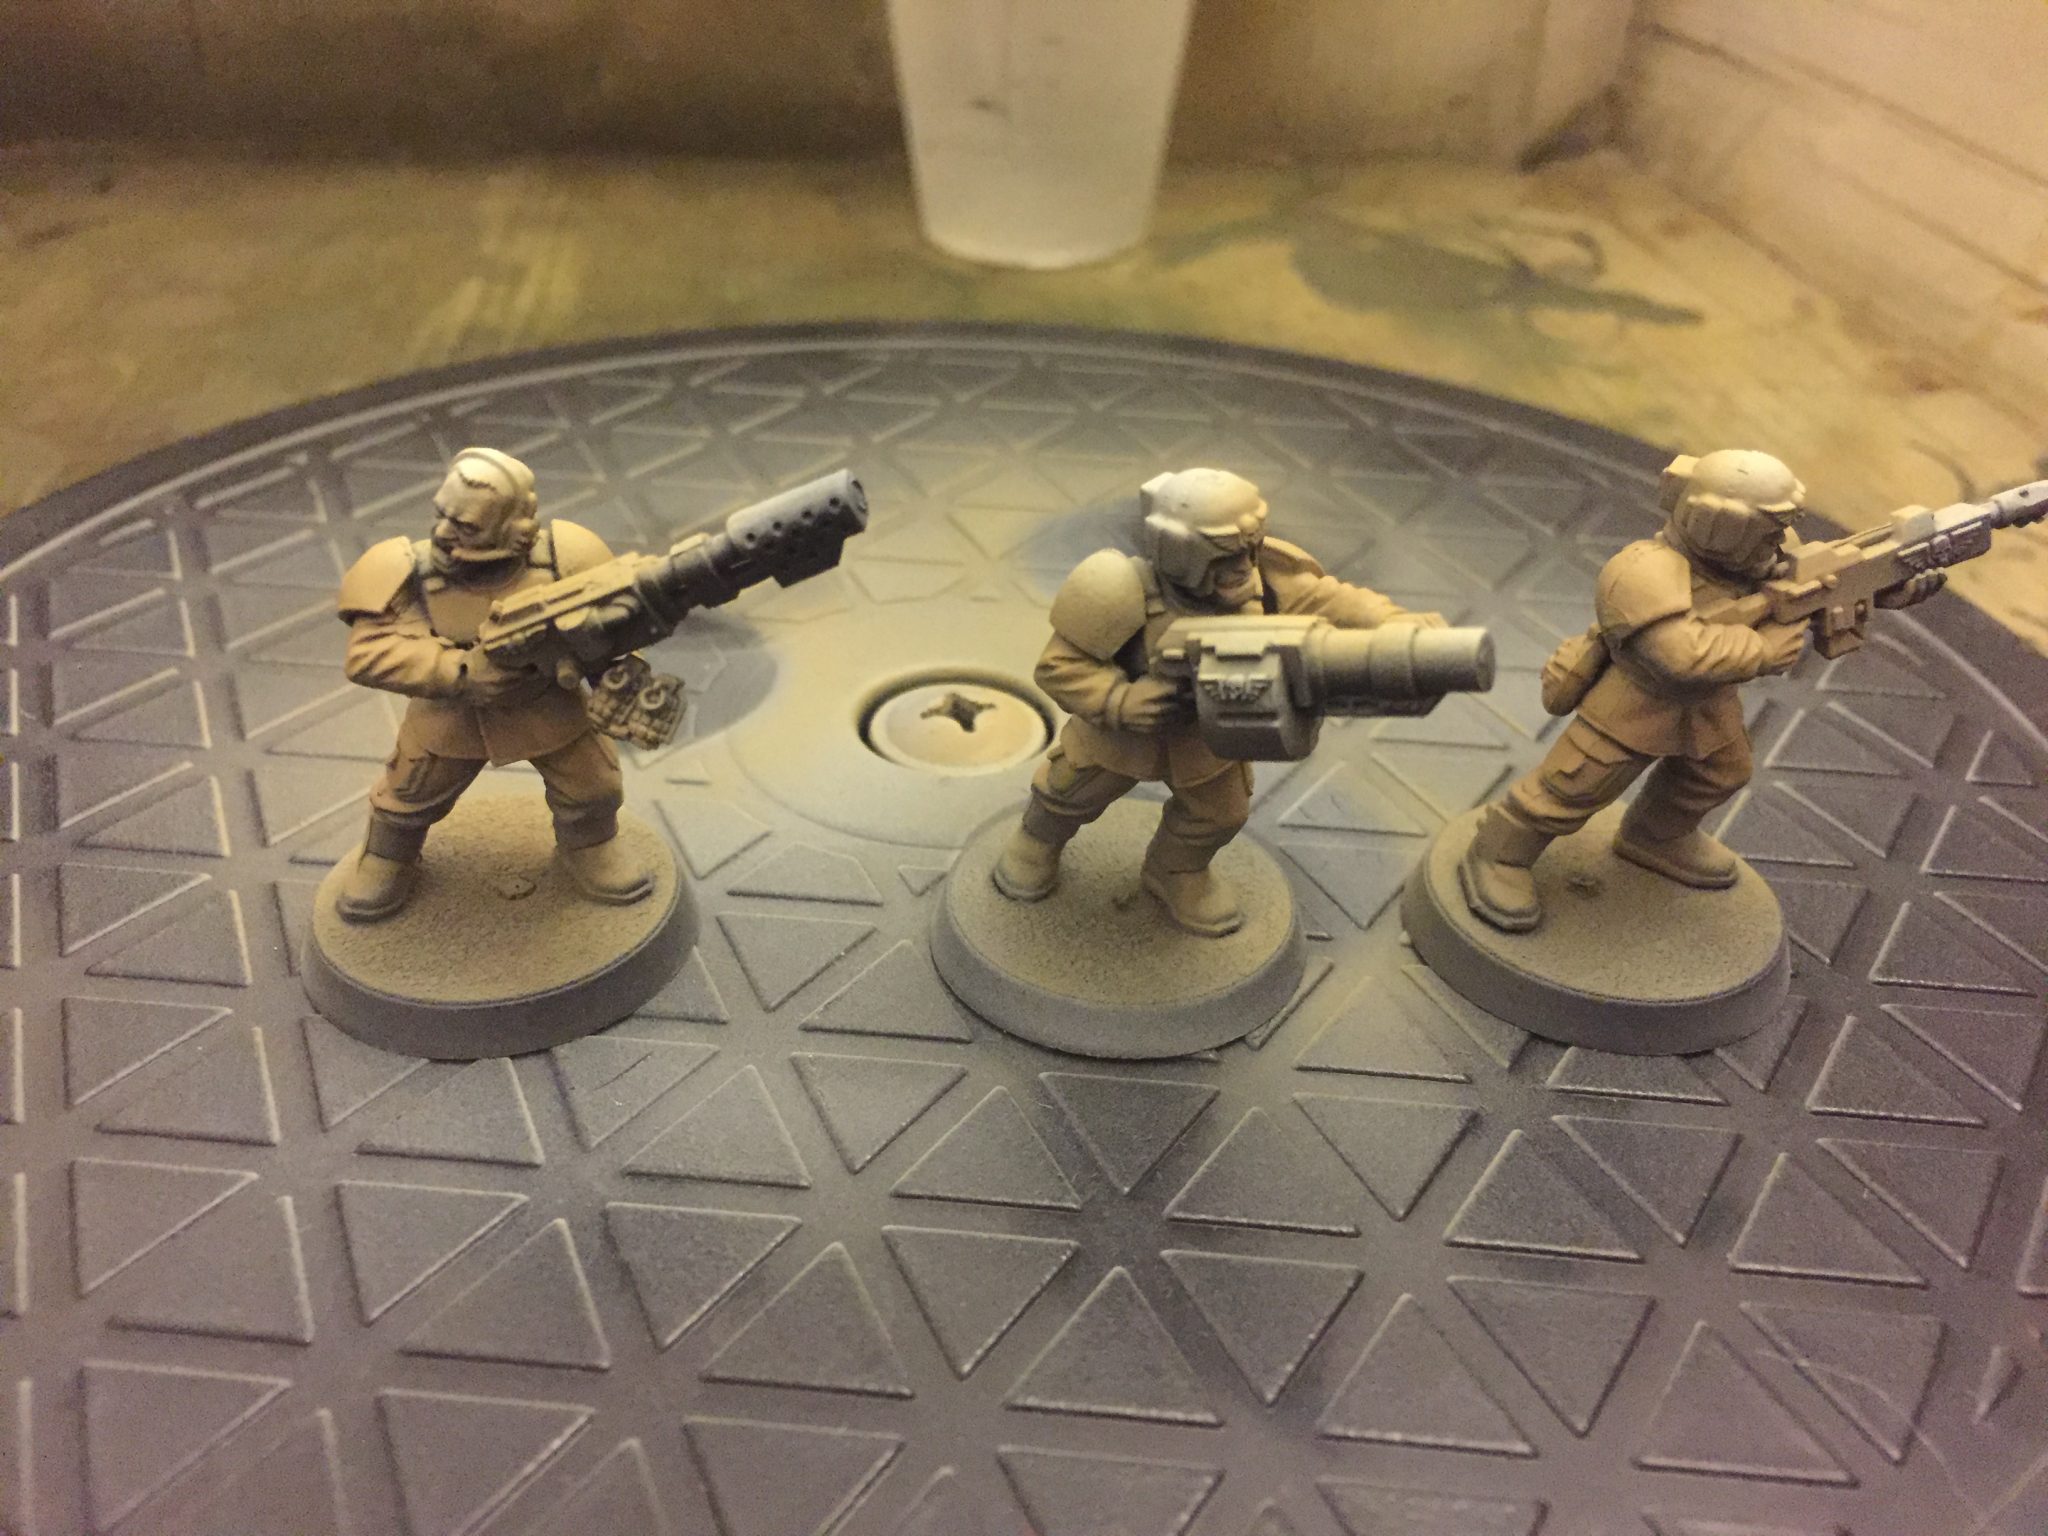
I prime my Cadians in Abaddon Black using a rattle can. I then do the armour in Castallen Green and all clothing in Zandri Dust.
These early stages can be quick and fairly messily done. A big help when painting a squad is to do one model through to completion. You’ll learn where you can afford to be messy and fast and where you need to be cautious. For example, if you’re painting the Lasgun completely silver, later on, don’t worry about getting bits of green on it.
This is especially the case with details such as magazines, bottles, pouches, grenades, etc. Don’t worry about spending loads of time not touching the grenades if they will be painted later anyway.
You’ll probably have to go back and forth between your base colours to get it right. I always get Castallen Green on the Zandri Dust and vice-a-versa. It just requires tidying up every now and again.
I also do my black too on the belt and boots before the next step.
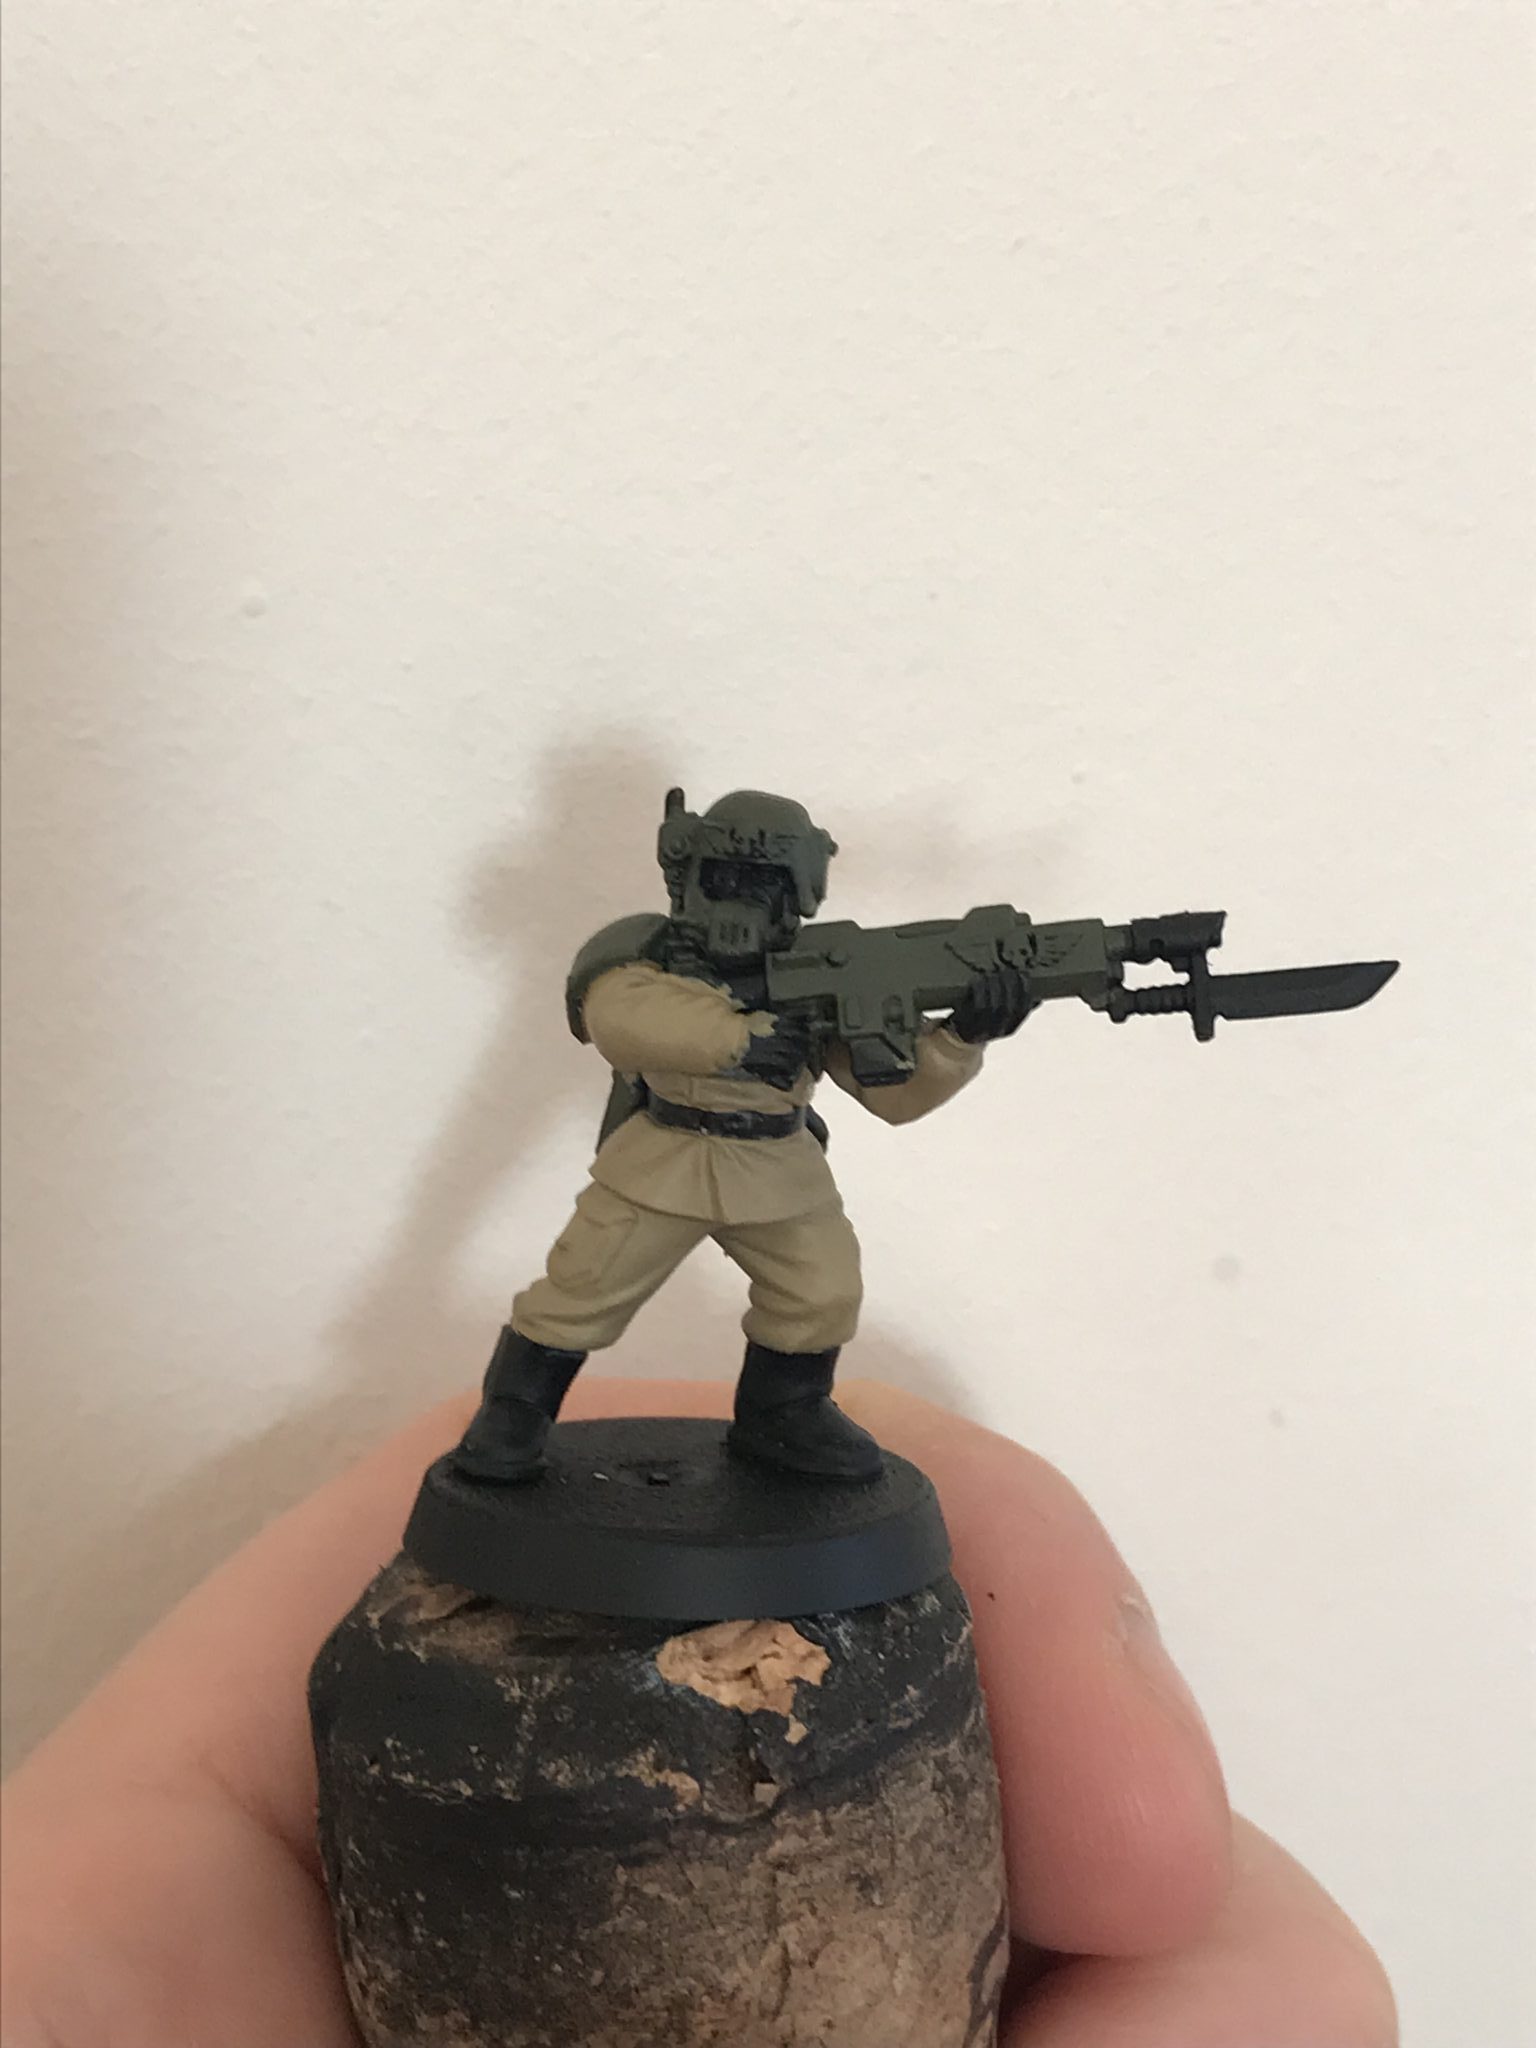
Base Colours Done – Painting Imperial Guard
Washes – Painting Imperial Guard
Once those base colours are completed it’s time to wash the model in Agrax Earthshade. Now then, the whole model is done in Agrax in the Warhammer TV video and I’ve found this to be overkill. I ended up washing the model to then just paint over most of it anyway.
I therefore now use a small brush and just wash the recesses of the Castallen Green and Zandri Dust. Rather than blindly doing every surface.
The other issue with washing the whole model, especially when you’re new to painting, is that you don’t want the wash to sit on the large flat areas of the model. If this happens you just end up with an odd looking area.
So wash the areas you want to be dark plus a little. Rather than the whole mode. Again, this is what I found to work for me and the final effects to wanted. Do experiment and try this yourself to find a way you like.
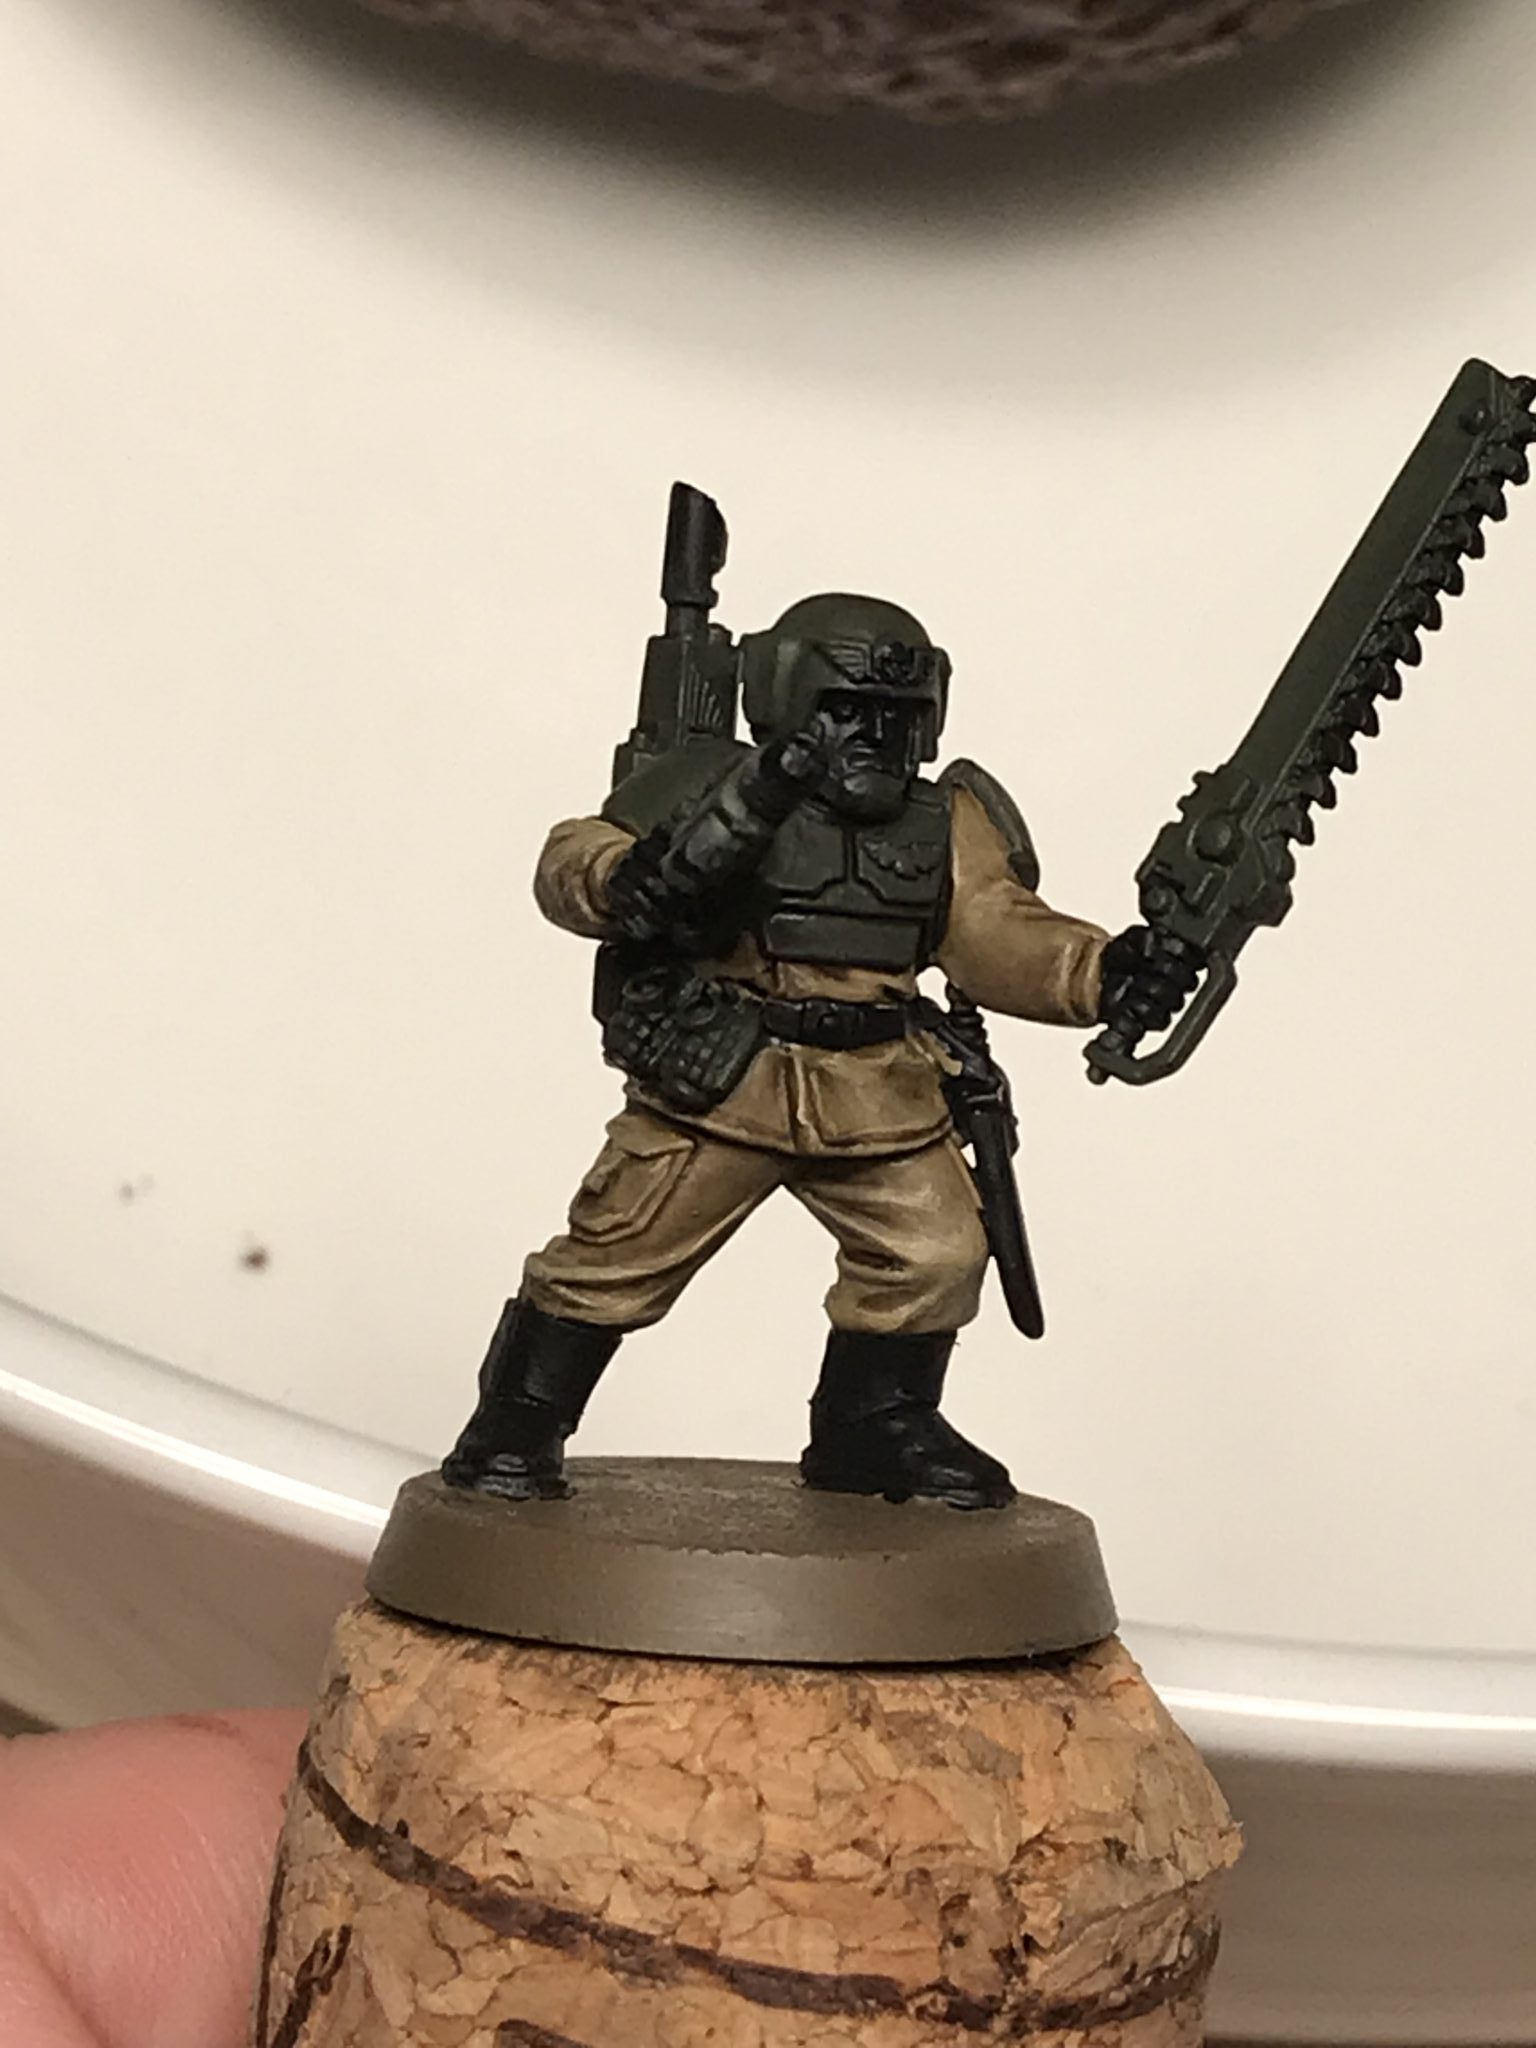
Agrax Wash Applied – Painting Imperial Guard
Highlights – Painting Imperial Guard
When I first started I didn’t really do any highlights because I thought of highlights as the very obvious highlights you sometimes see on models. I didn’t like them, purely because when I looked at them I saw a mode that had been highlighted rather than a model. I was just drawn to the really obvious highlight.
Now, these types of highlights probably look great on the tabletop from 2 or 3 feet away. So I’m not saying they look bad, they just weren’t for me.
After the washes I go over the raised areas a little with Castallen Green and Zandri Dust again – just to ensure a clean finish.
I’ve ended up with a happy medium – with a very subtle highlight using Loren Forest and Ushabti Bone. I try not to get a harsh line between the highlight and the main colour, I try for a subtle change between the too by using a very thinned down paint for the highlight. For me, a subtle and smooth highlight is preferred over a high contrast highlight.
It’s taken me five years to realise this and begin to practice it. But I’m happy with it.
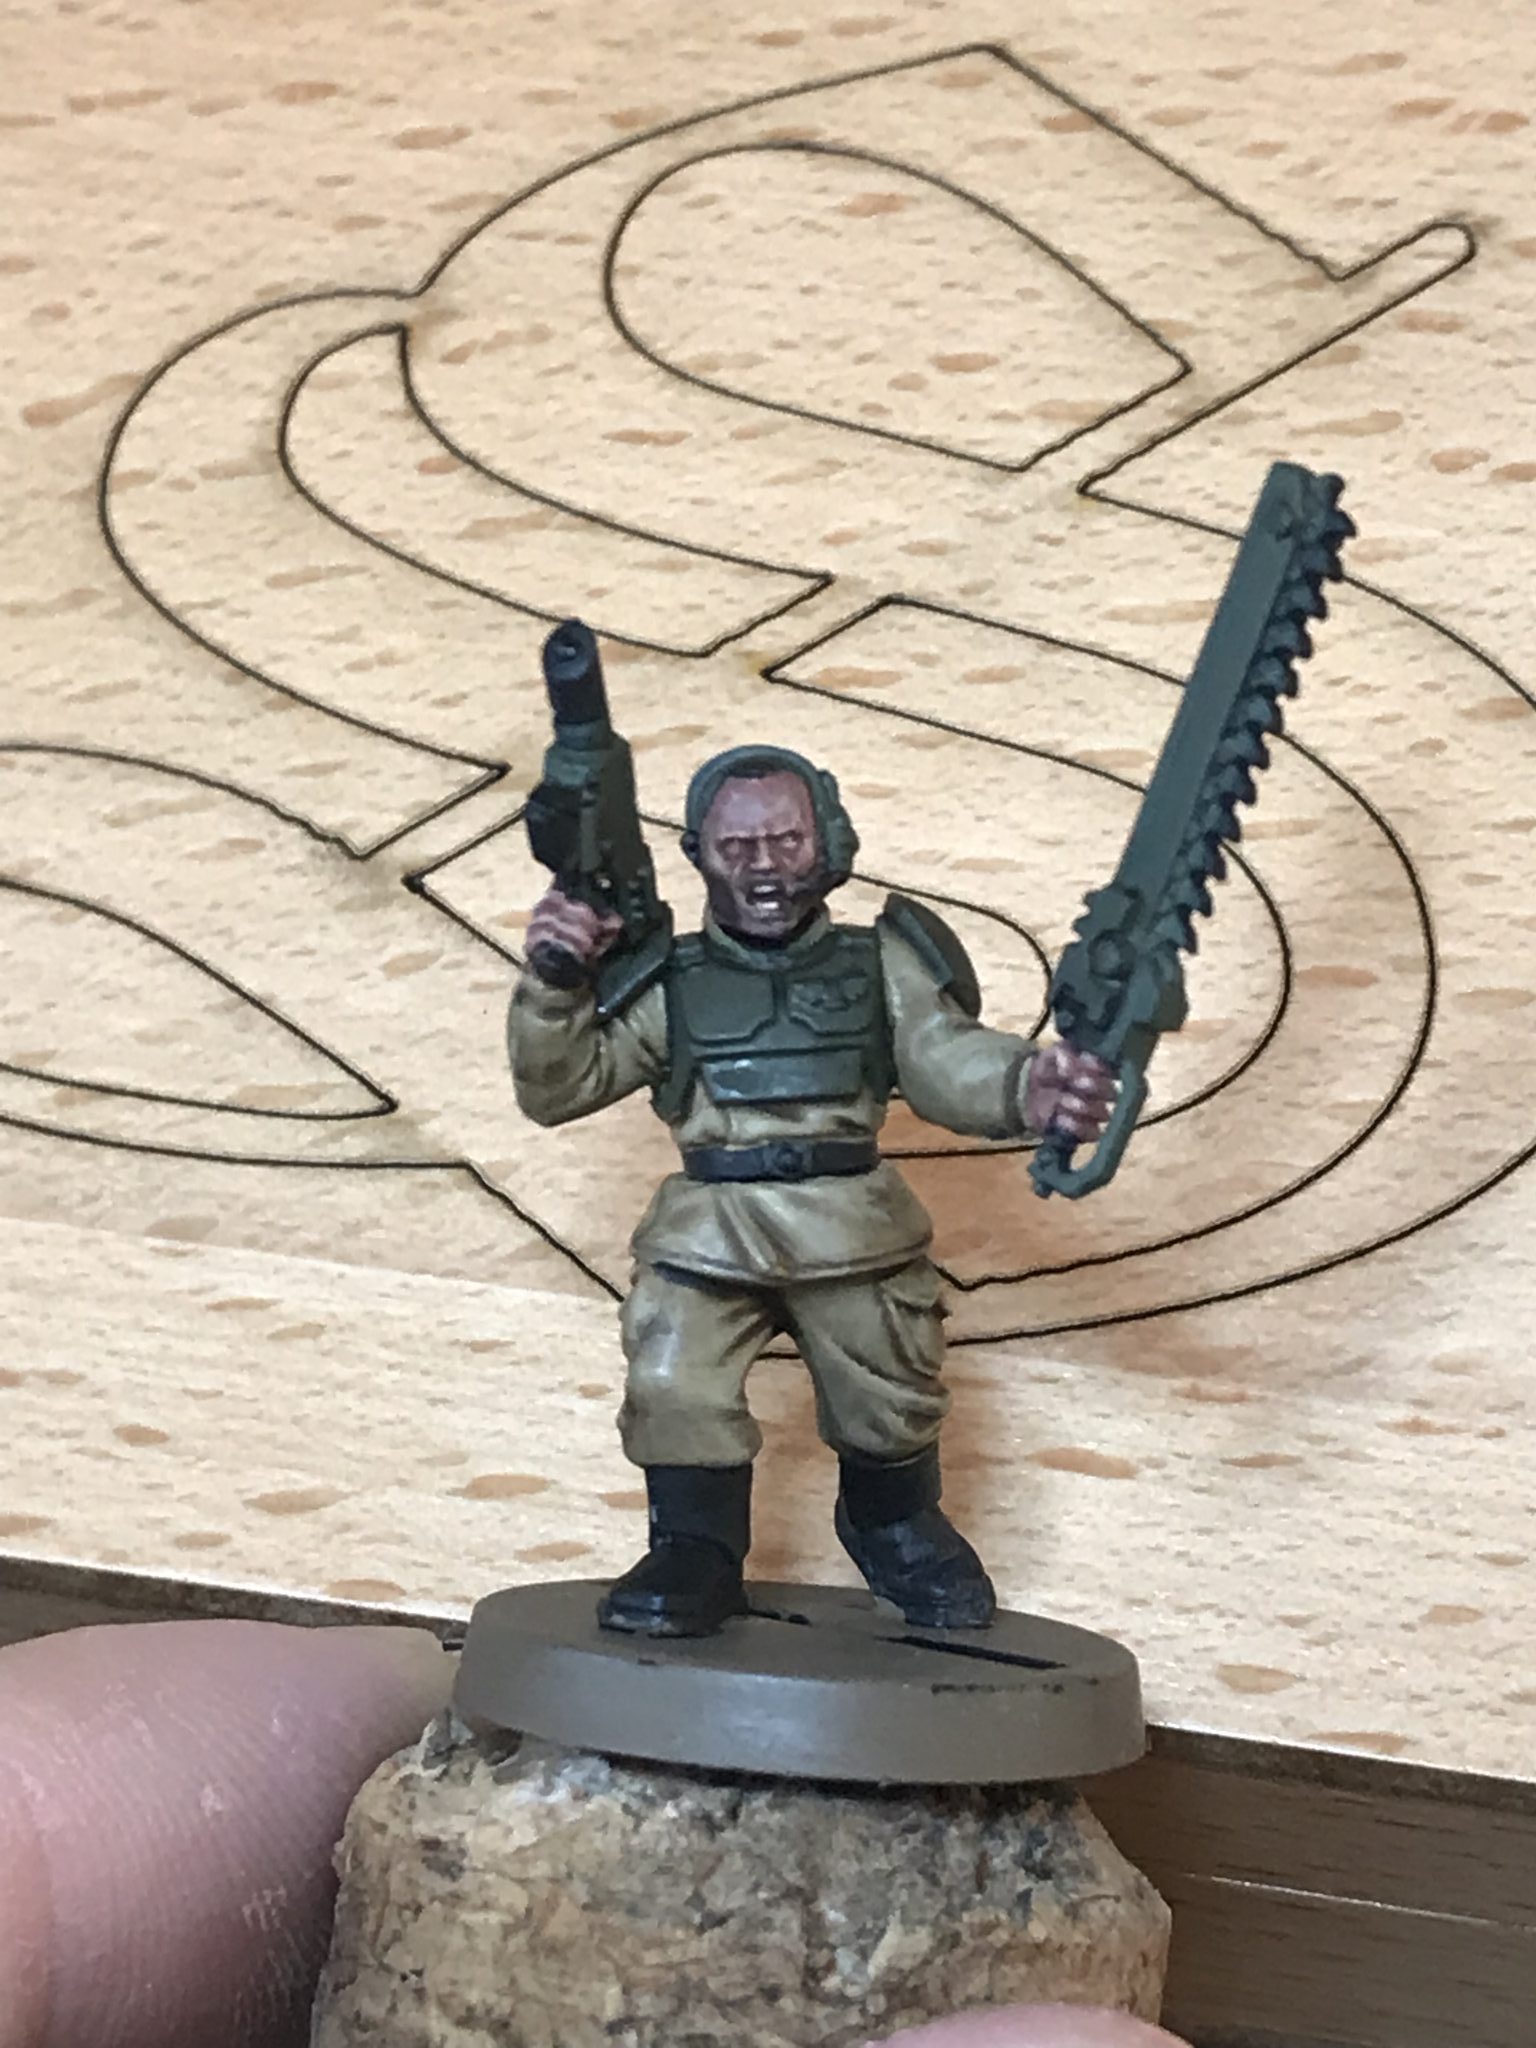
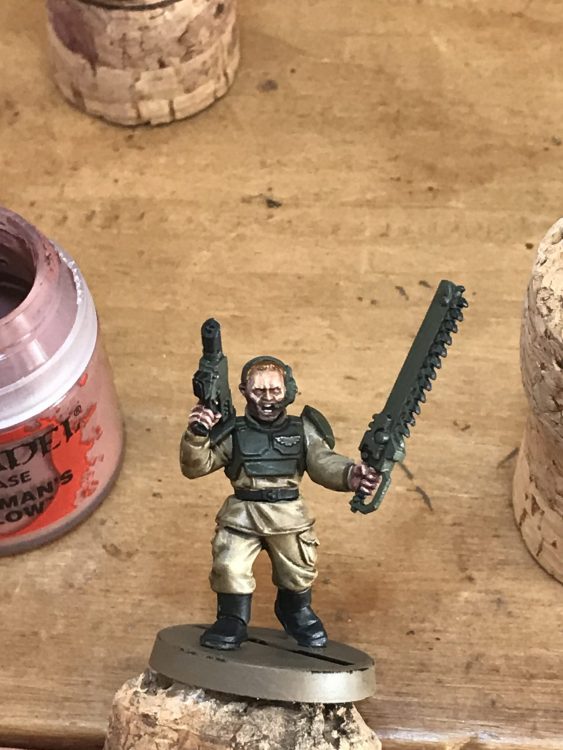
Highlights being applied to the clothes – Painting Imperial Guard
War Gear & Details
So we have our base colours completed which is most of the model. We can now move onto details.
This is where having a complete model helps because we can refer back to it and know which details are silver, which is bone coloured, which are red, etc. These decisions have been done already, on your first model so you can just go through and do all the red in one go on a squad, then all the silver etc. It saves you moving between colours and forgetting which parts are which colour.
The Aquilas and skulls I do in Ushabti Bone, with a wash of Nun Oil and highlight in Ushabti Bone again and then Screaming Skull.
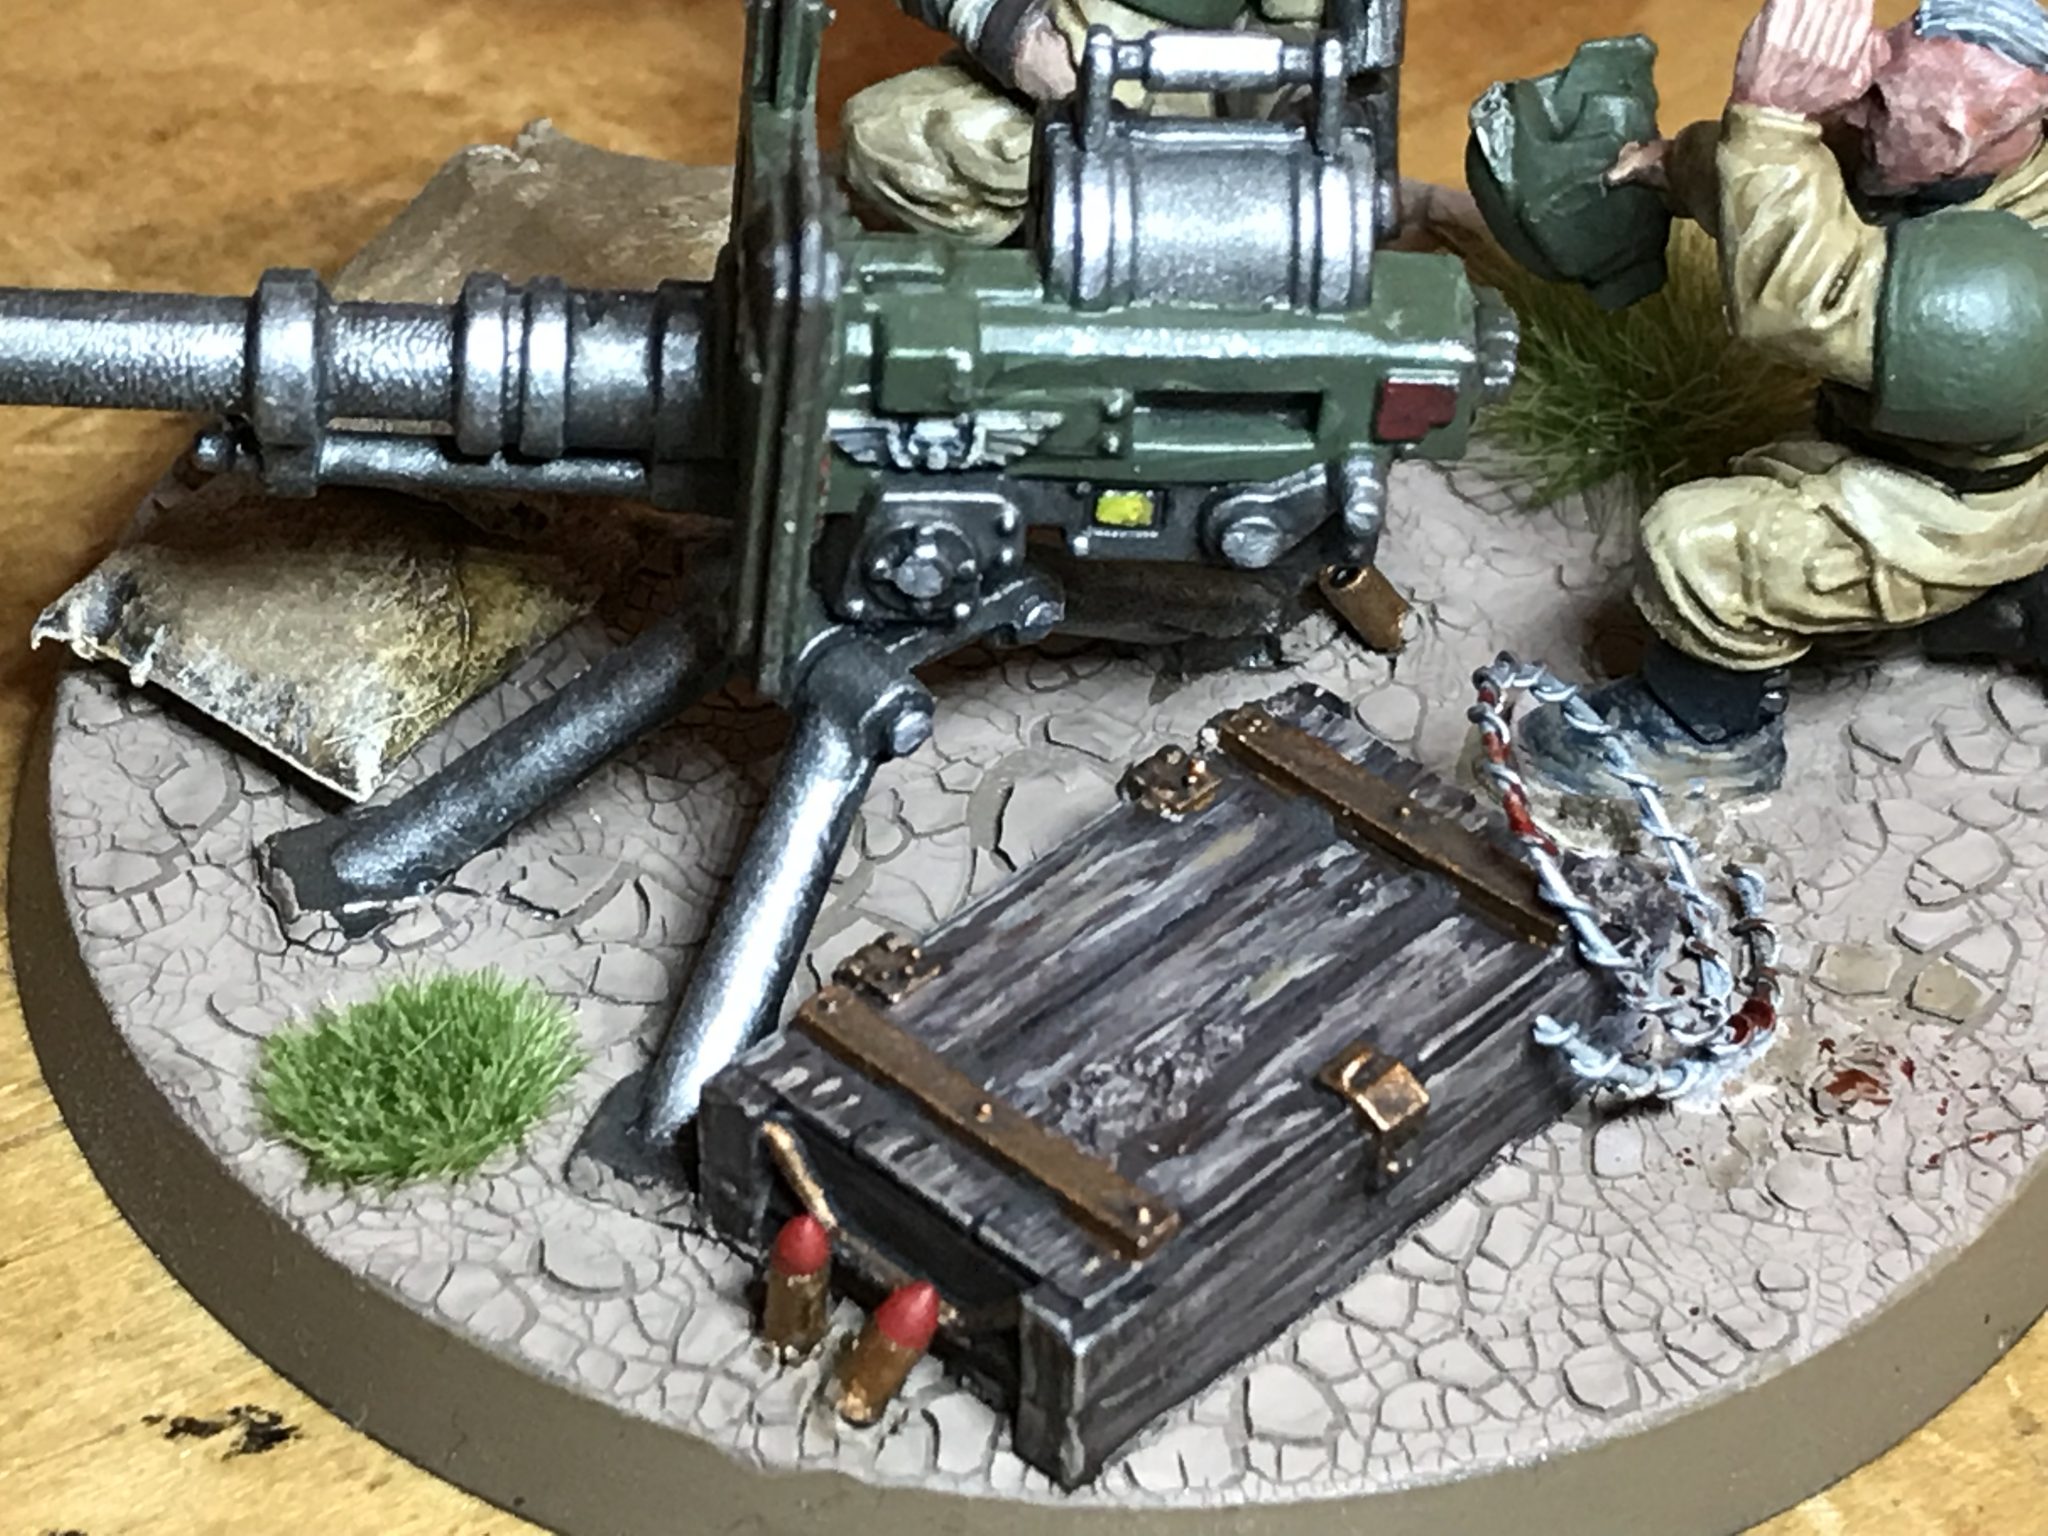
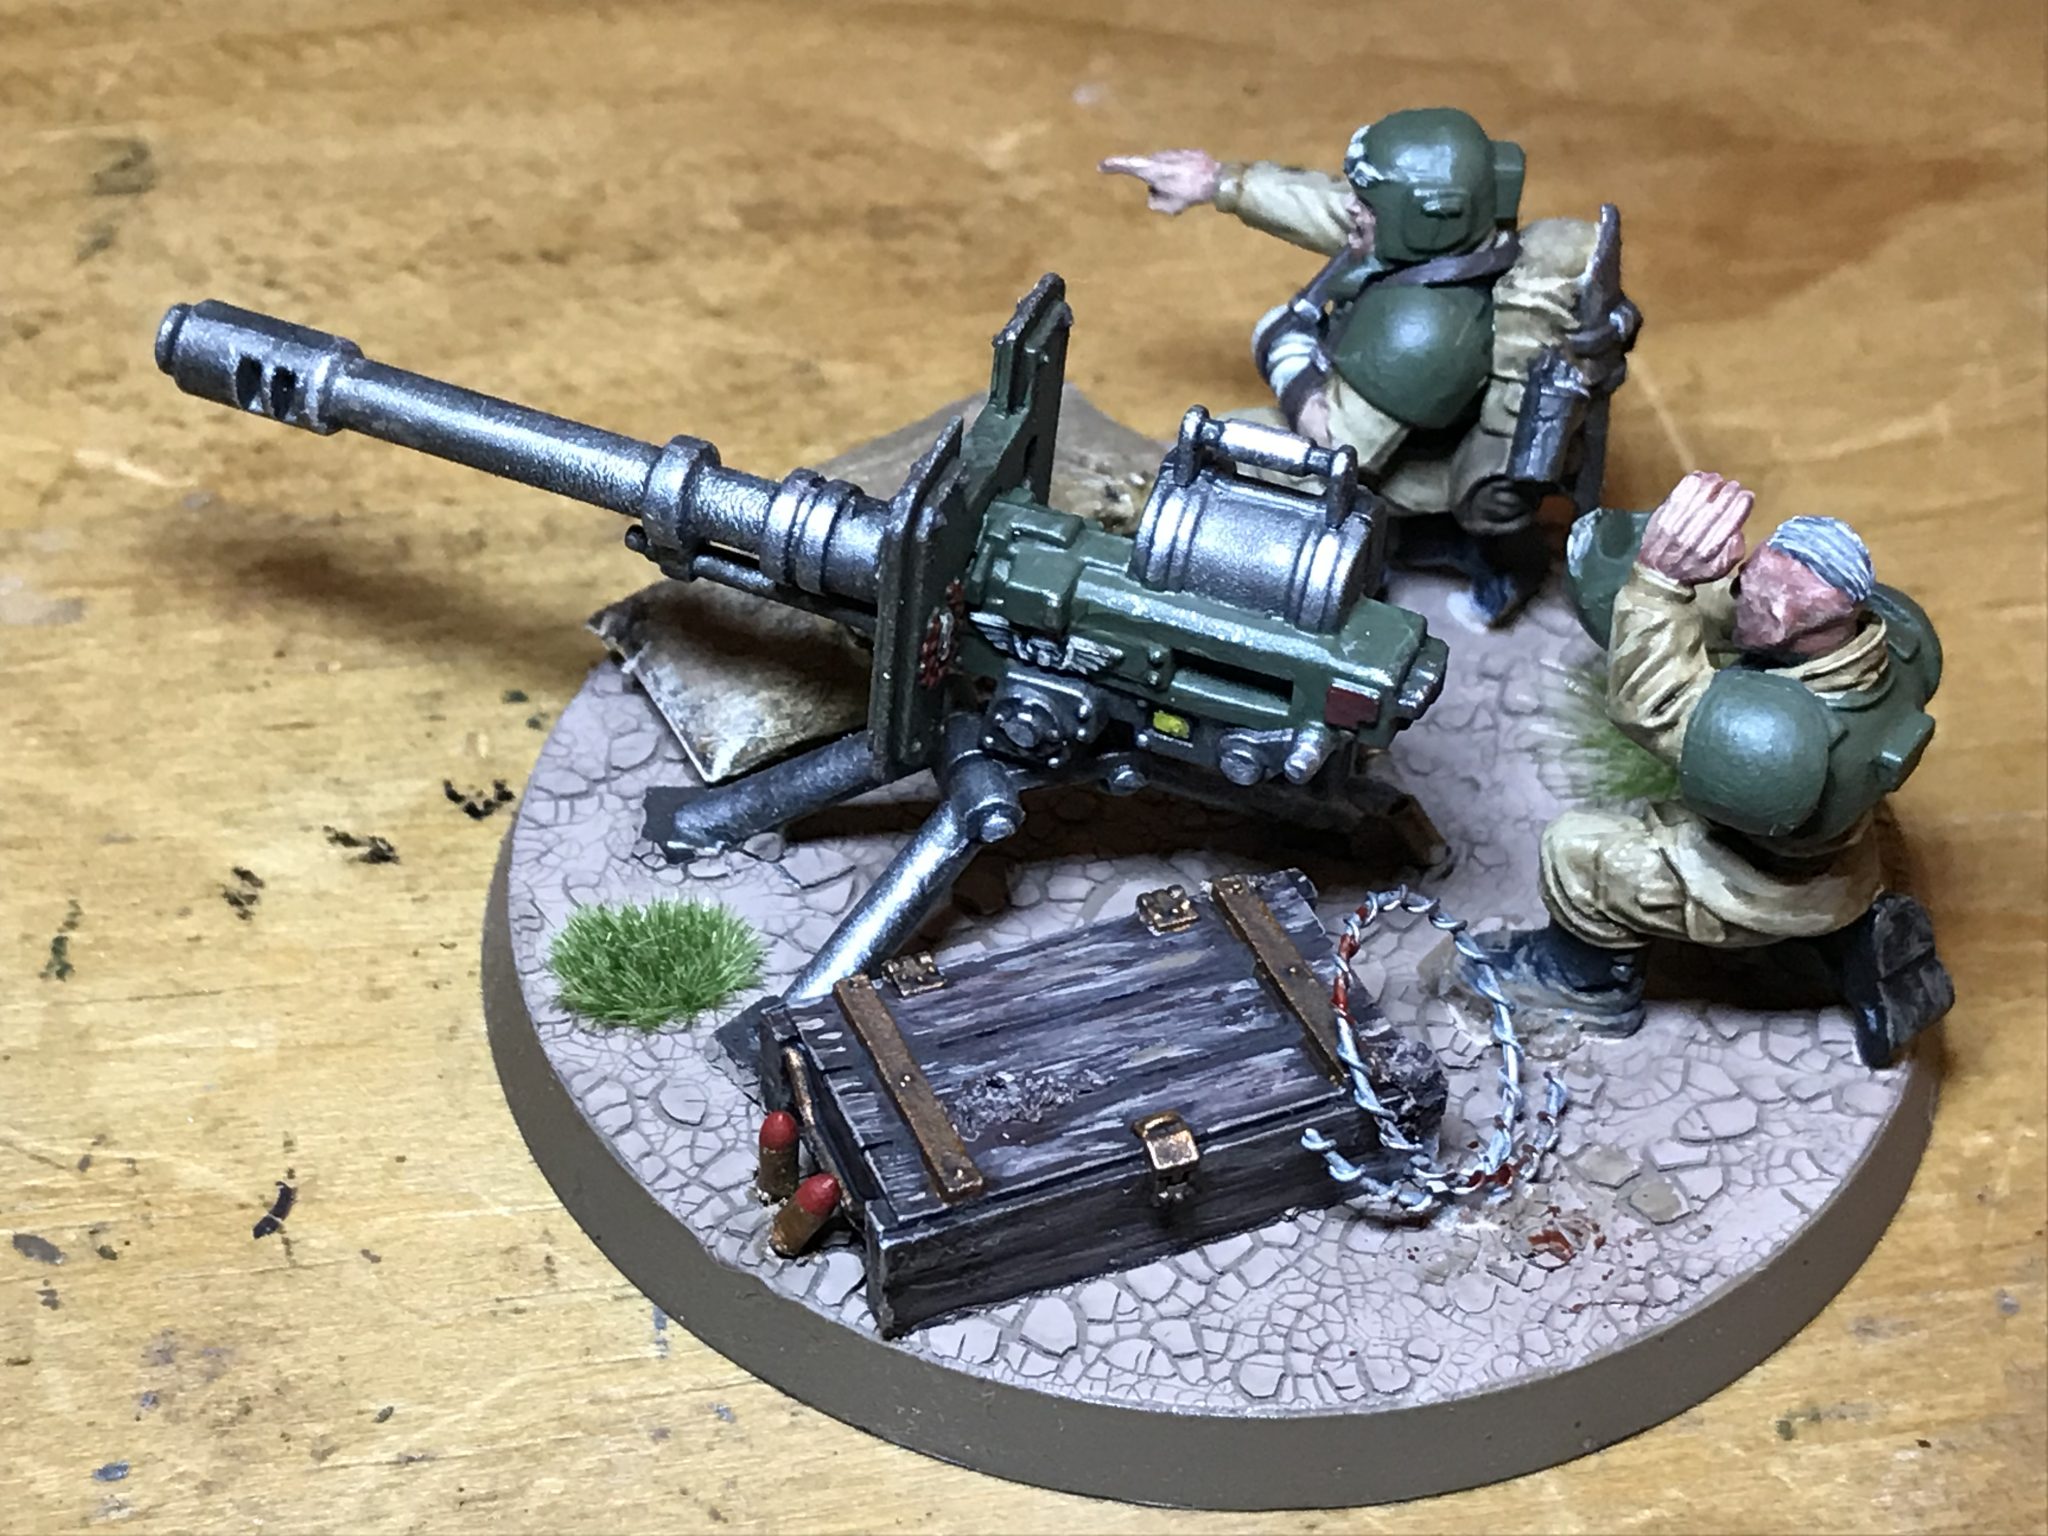
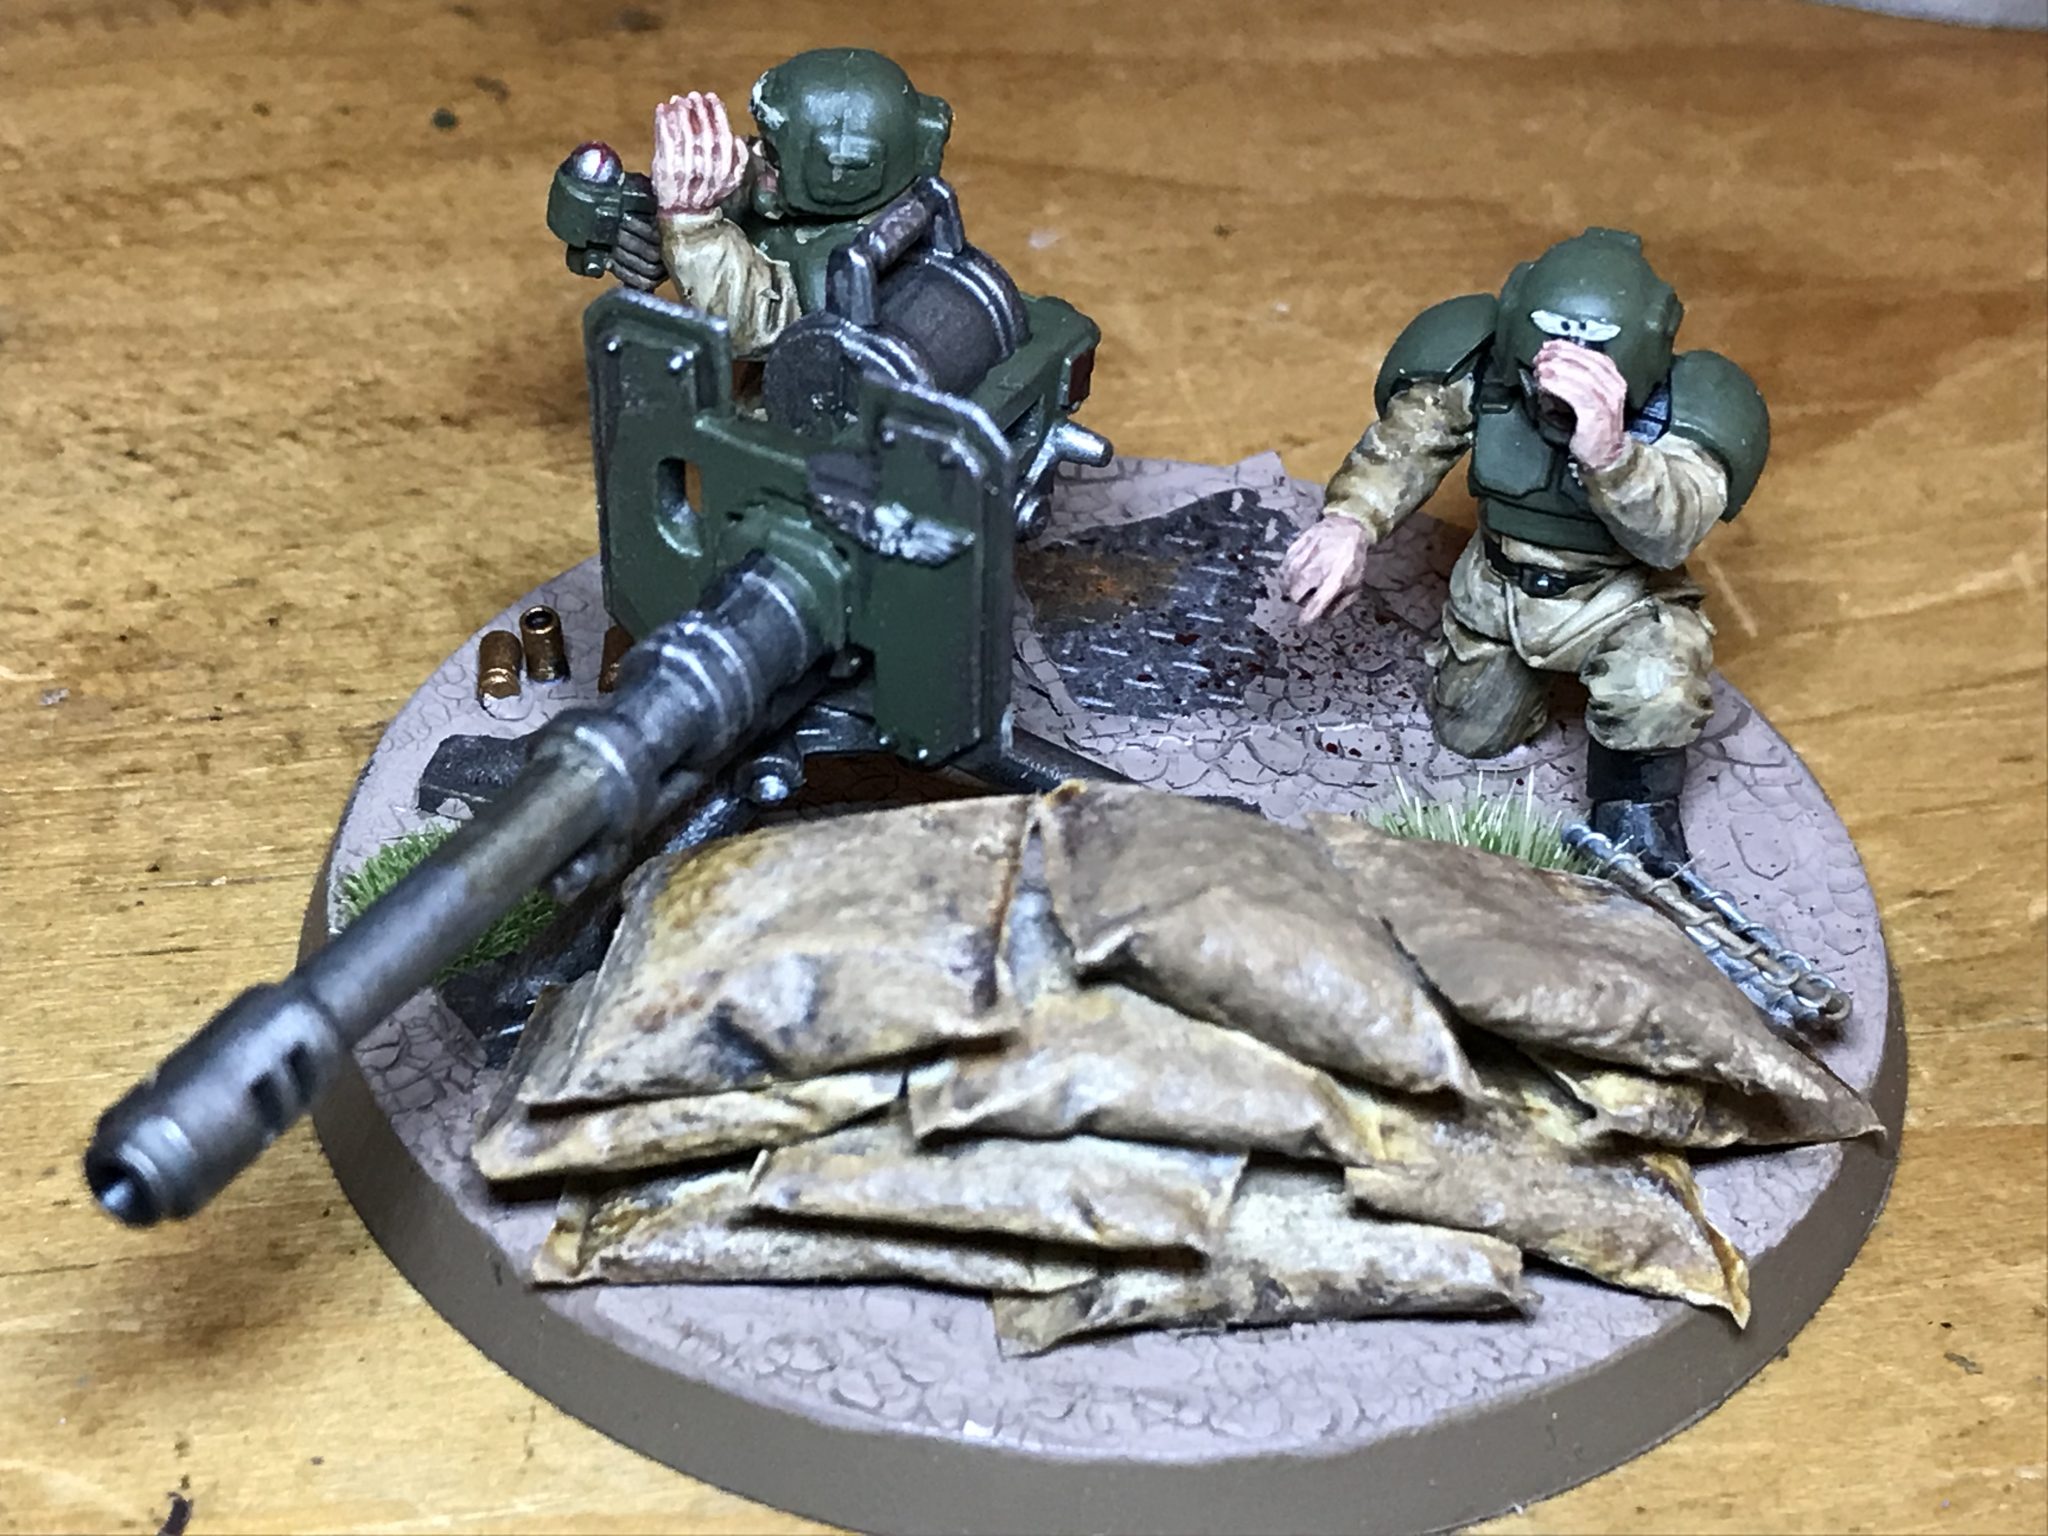
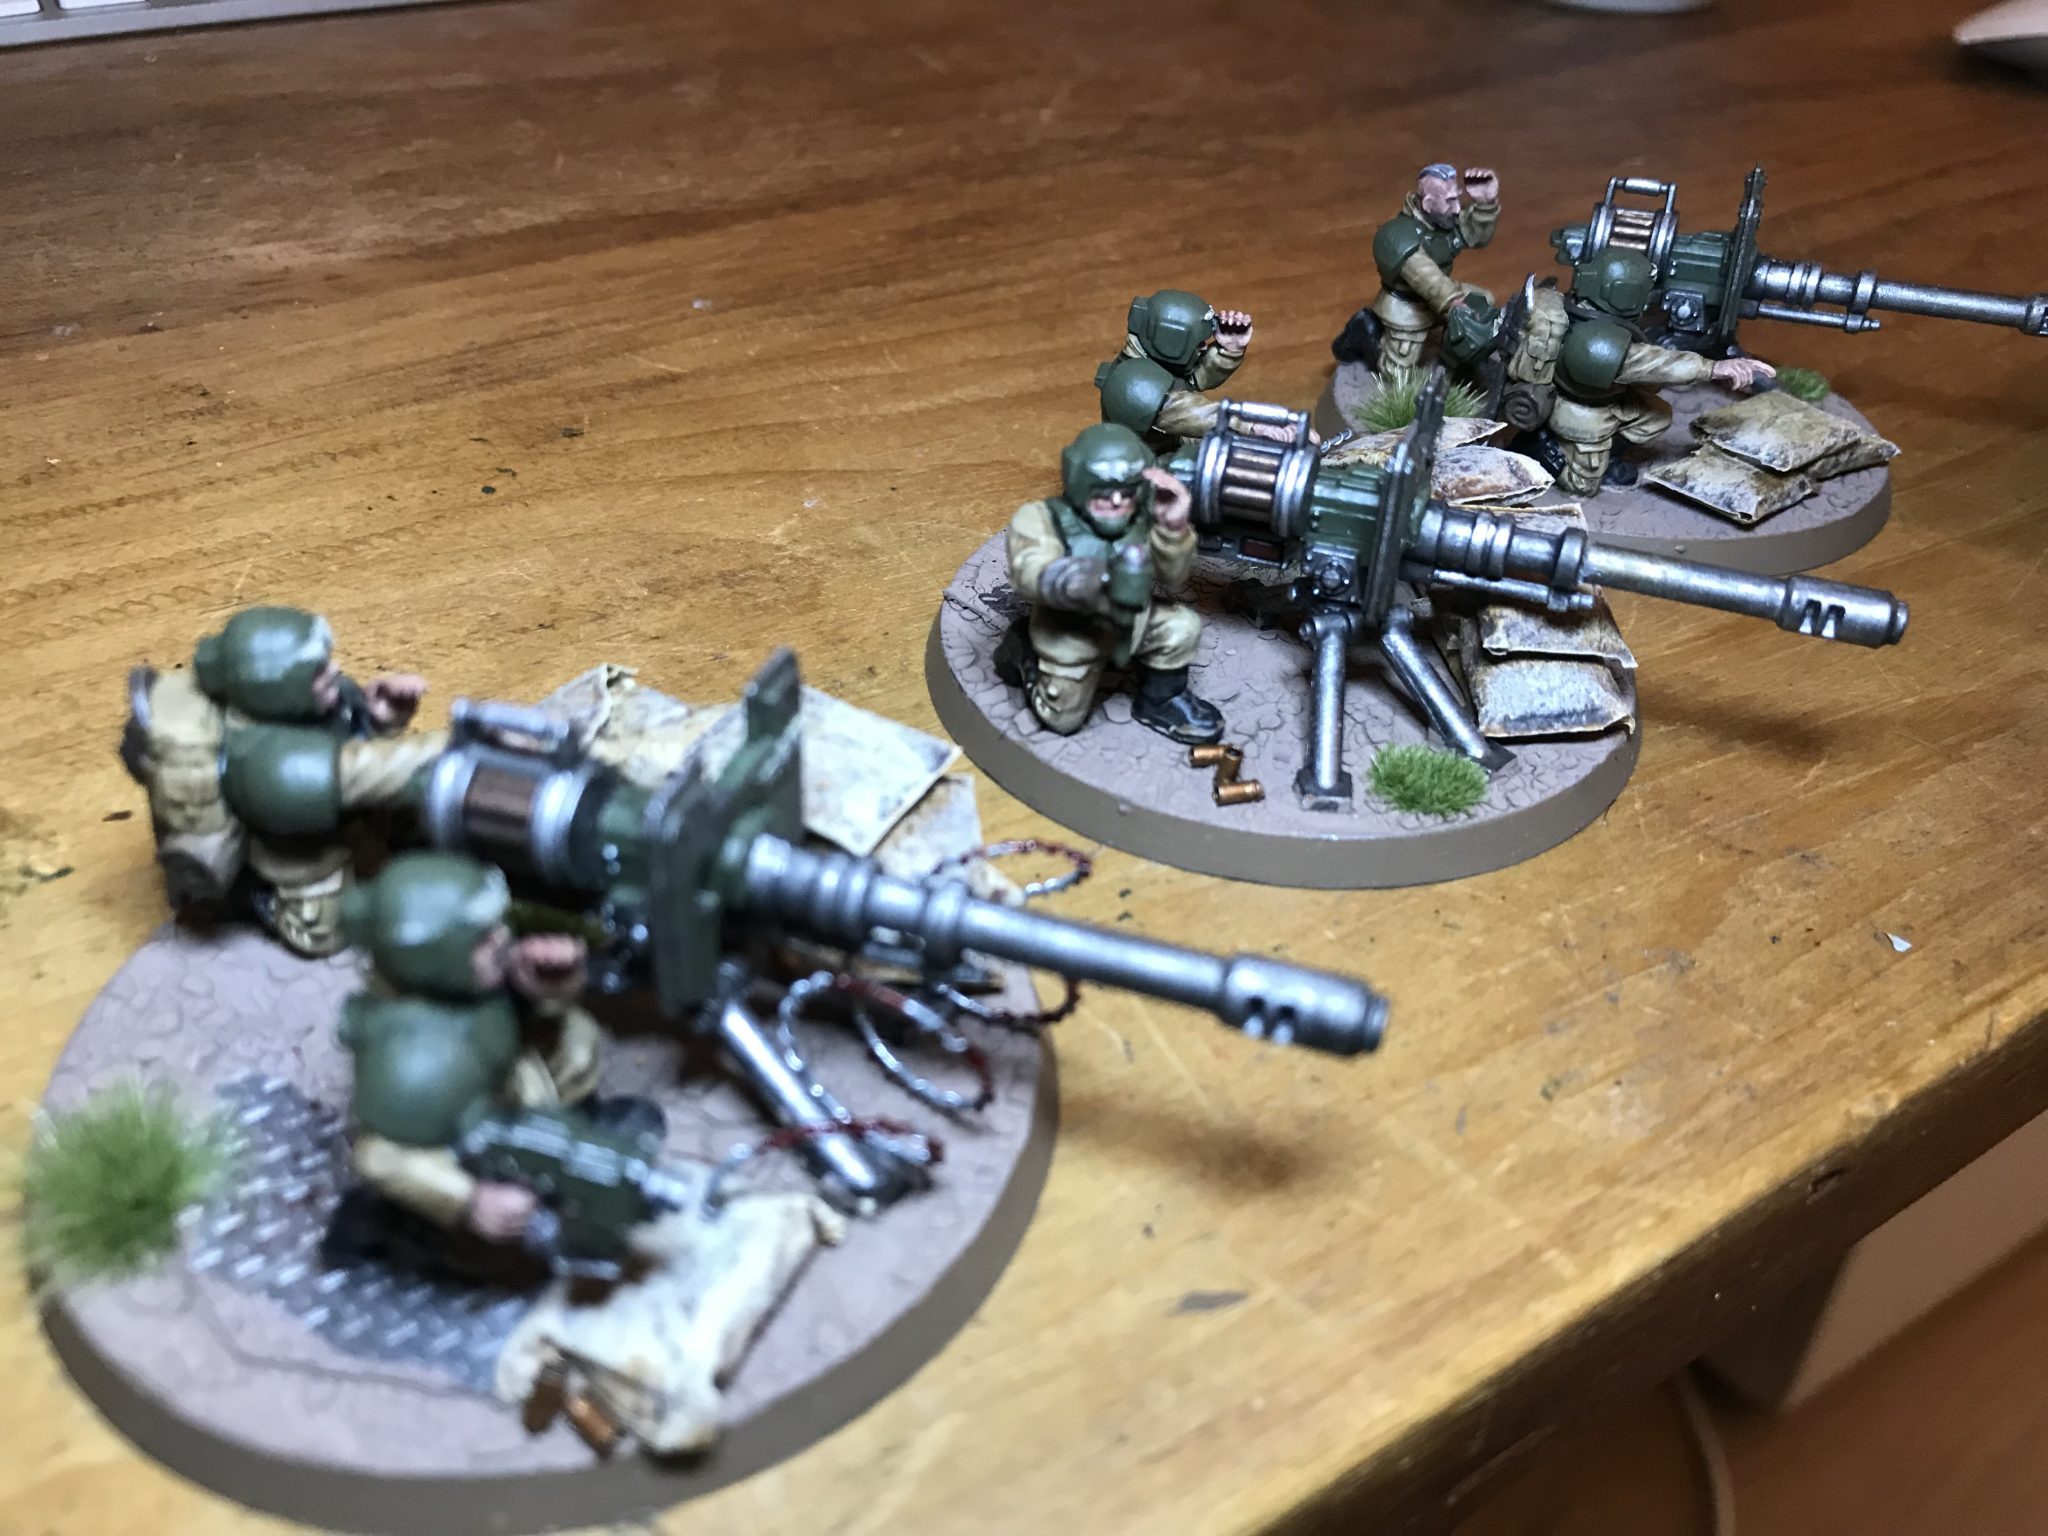
I do my silver Leadbelcher and wash with Nuln Oil. I do wash all of the silver in Nuln Oil, fairly heavily. I then come back with Runefang Steel to give the edges a brighter look. If you have the room and will not taint the rest of the model. Dry brushing Runefang Steel over the Nuln Oil wash can be a really good way of doing metal. This is how a lot of the metal was done on the Autocannons.
-


- Ammo Box
-

- Completed ammo box and Autocannon
-
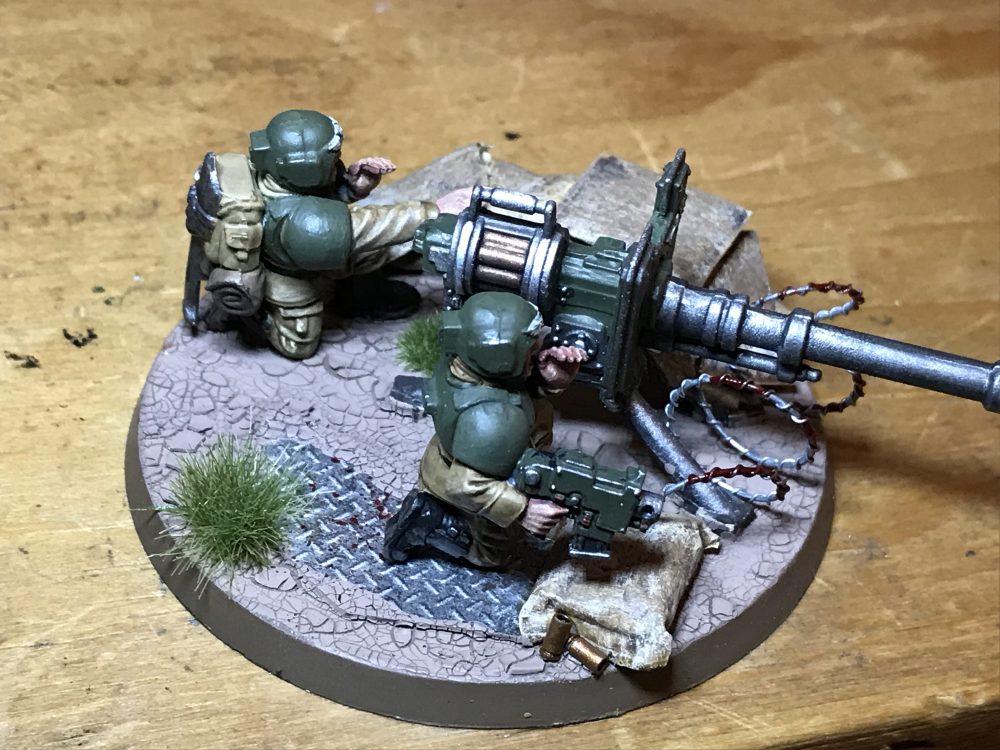
- Wire and plating

-

- Sandbags
Faces
Oh faces, the part I find the hardest on my models. One thing I will say about faces is that practising them really does help a lot. I mean if you paint Zandri Dust as a base layer 5 times then there is probably not much left to improve on. But your 6th face compared with your 5th face will be a lot better, and your 7th compared to your 6th will be better again. It is just putting in the time to do faces.
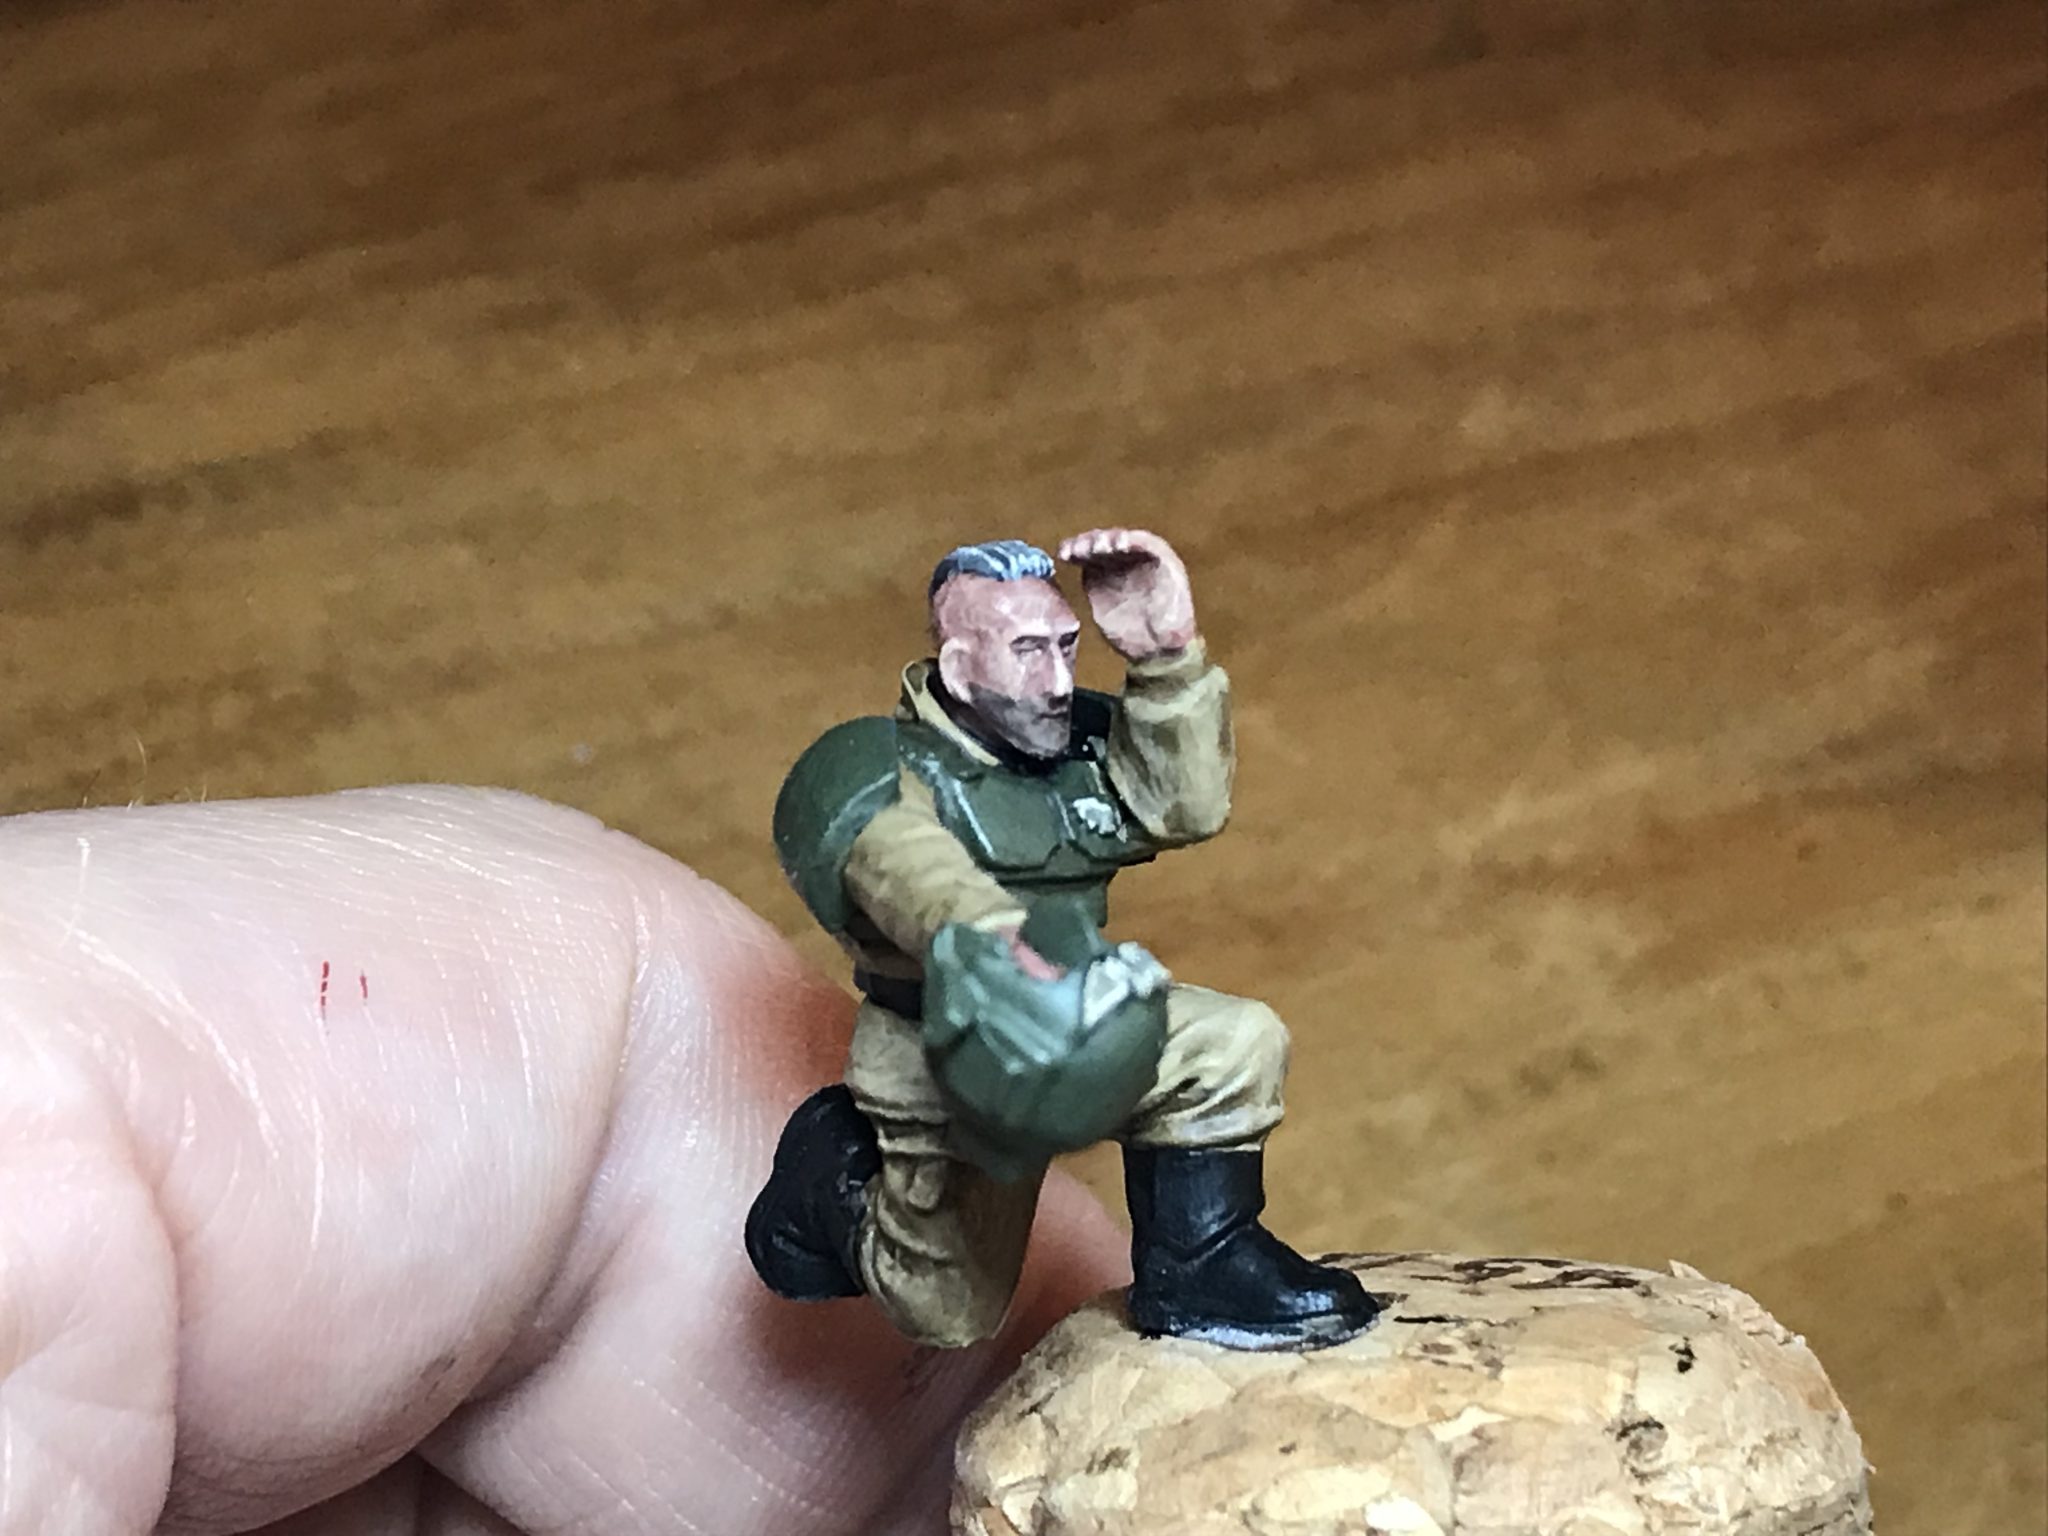
Face done in November 2018
You can hopefully see the difference in my faces from the above photo. This was in November 2018, while theone below was in Feburary 2019.
While I am not perfect and I am still learning with faces, here are some pointers and tips…
- Start with Bugman’s Glow which is a dark pink
- Cover this with Cadian Fleshtone
- Wash with Reikland Fleshshade
- Use a thinned down (with Lahmian Medium) Cadian Fleshtone again to start to bring out the high points on the face – brows, cheej bones, nose, lips, etc
- Again use a thinned down Kislev Flesh to highlight the high points of the face
- Keep doing this with Cadian Fleshtone and Kislev Flesh, don’t be afraid to use Reikland Fleshshade again to darken under the eyes, under the nose, inside the mouth and under the chin
- I give some of my guys a 5 o’clock shadow using Nuln Oil
-
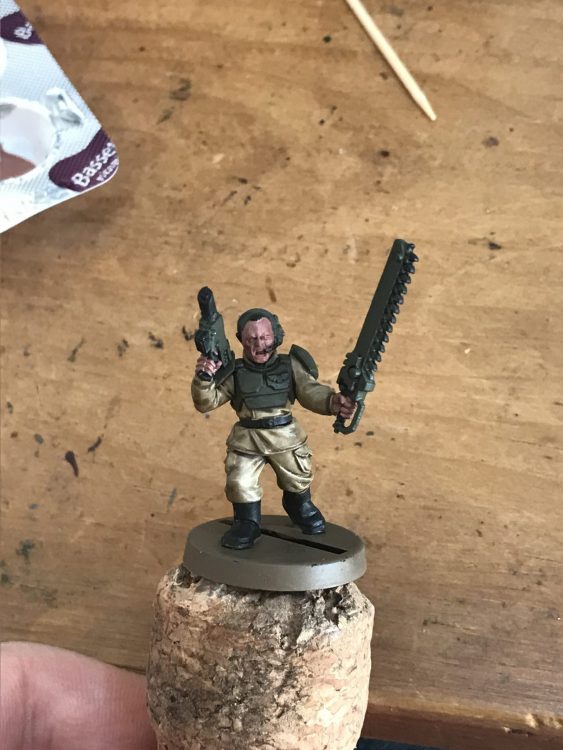

- Face step 1 – Bugman’s Glow

-
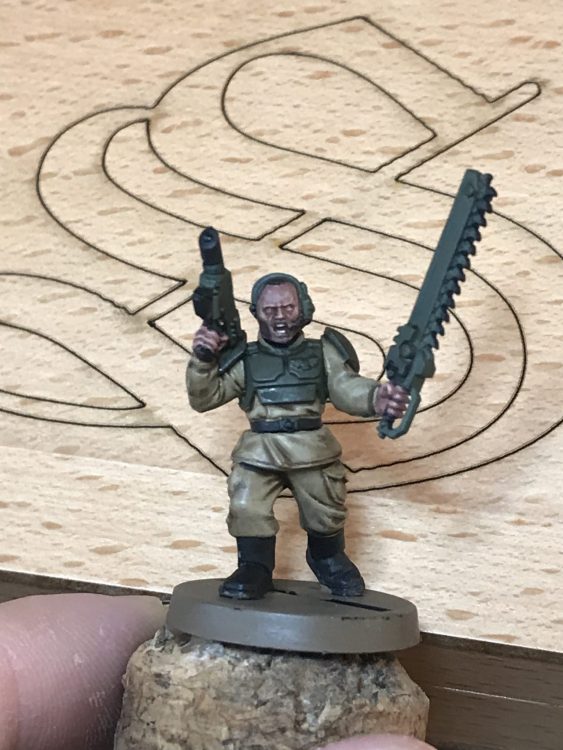
- Face step 2 – Cadian Fleshtone
-
- Face!

Basing
This is not specific to Painting Imperial Guard, but worth a mention.
This I always do the base last on a model. Why? Because it means I do not have to worry about getting paint on the base while I am painting the model. Assuming the model is on the base. As you paint it does not matter if you touch the base with your brush because you will come back at the end to finish off the base.
I base mine in Agrellan Earth and only Agrellan Earth. But this will change and I need to go back and fix all my Guardsmen. When basing the Raven Guard I used a Sepia wash on the Agrellan Earth and then dry brushed the base. It looks awesome. I want to go back and do all my Guardsmen like this too.
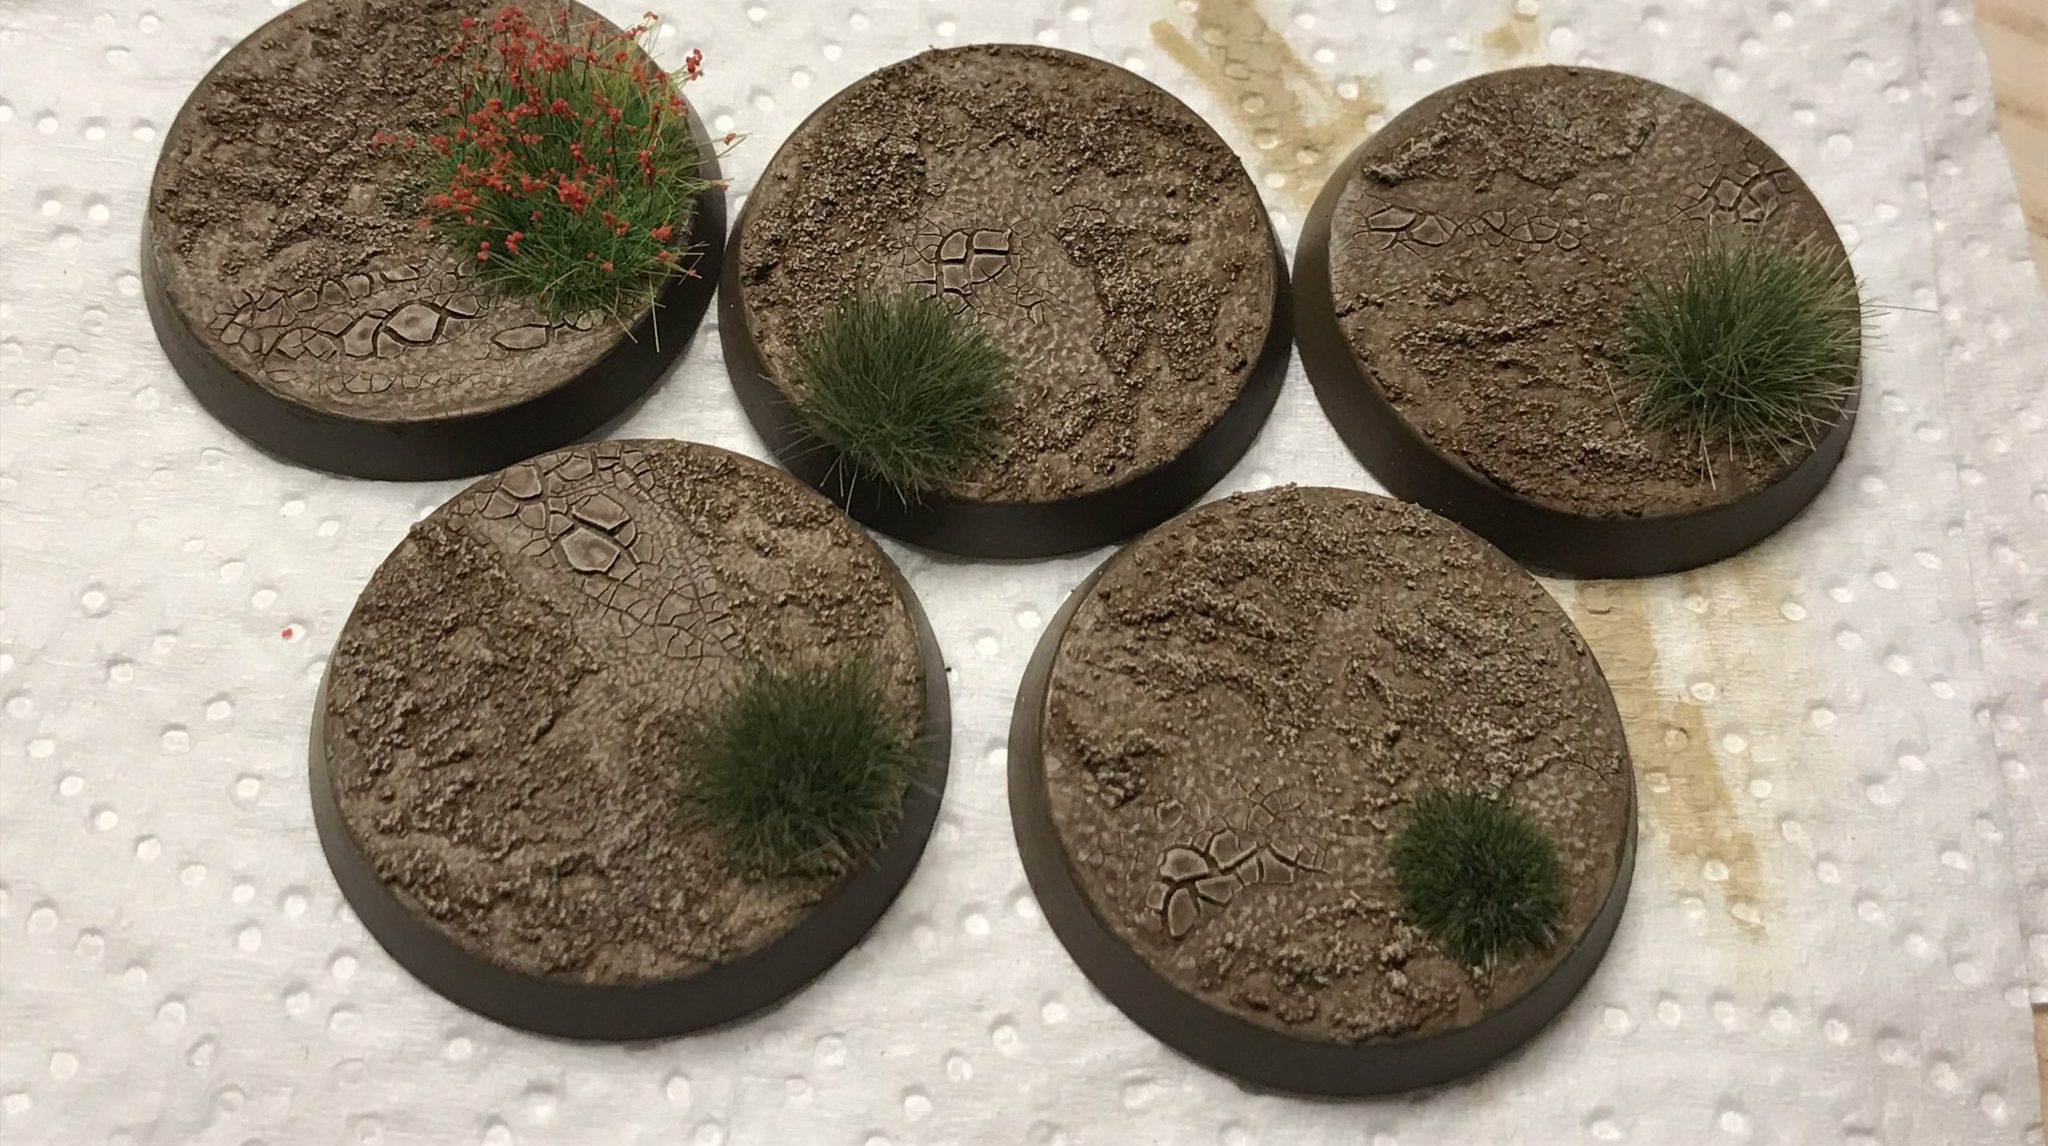
Raven Guard bases
Pinning
Again pinning is not specific to Painting Imperial Guard, but worth a mention.
This is something that does not get written about a lot nor talked about. I have written about pinning models before. Pinning a model to a base involves leaving the model off the base until the very end. You complete the base and the model separately as two different little projects.
I find this makes my basing a lot better, there is no model in the way and you can really go to town on details and effects on the base. It does leave you with an issue though. You have a perfect base with no place to glue a model.
If you glue a model’s foot to a base it will come off because the paint will peel off the base and leave your mini on the floor. Pinning fixes this.
You drill into the foot and into the base, then use a piece of sturdy wire to pin the model to the base. Simples!
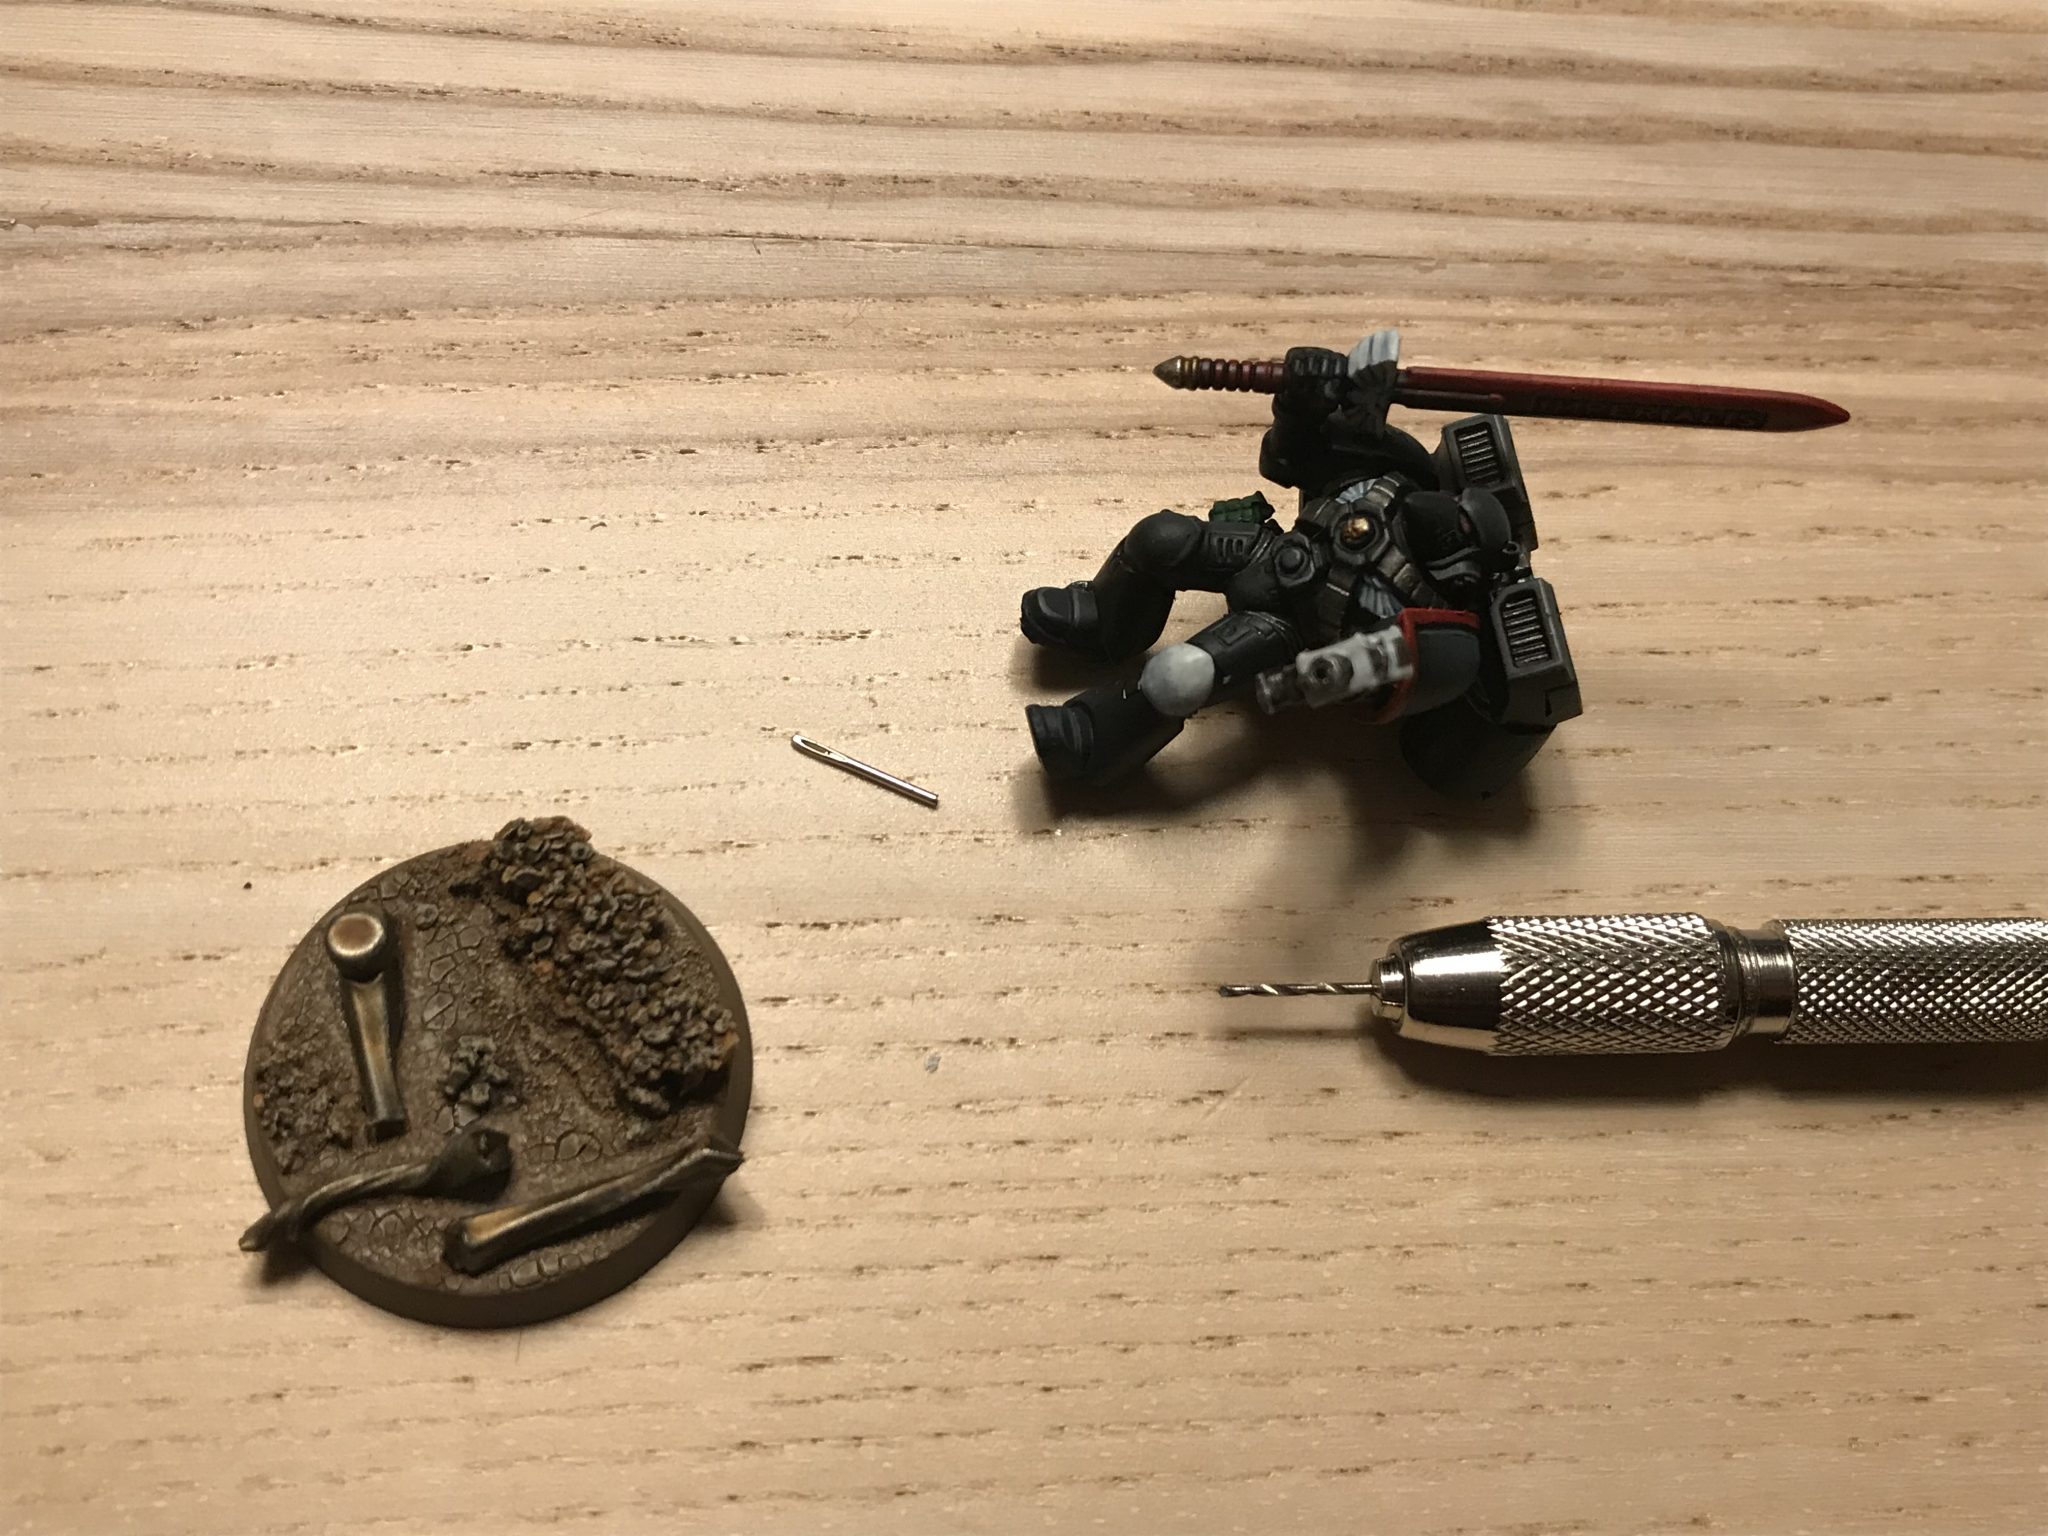
Setup – Pinning Models to Bases
Gallery of Completed Imperial Guard Infantry
-

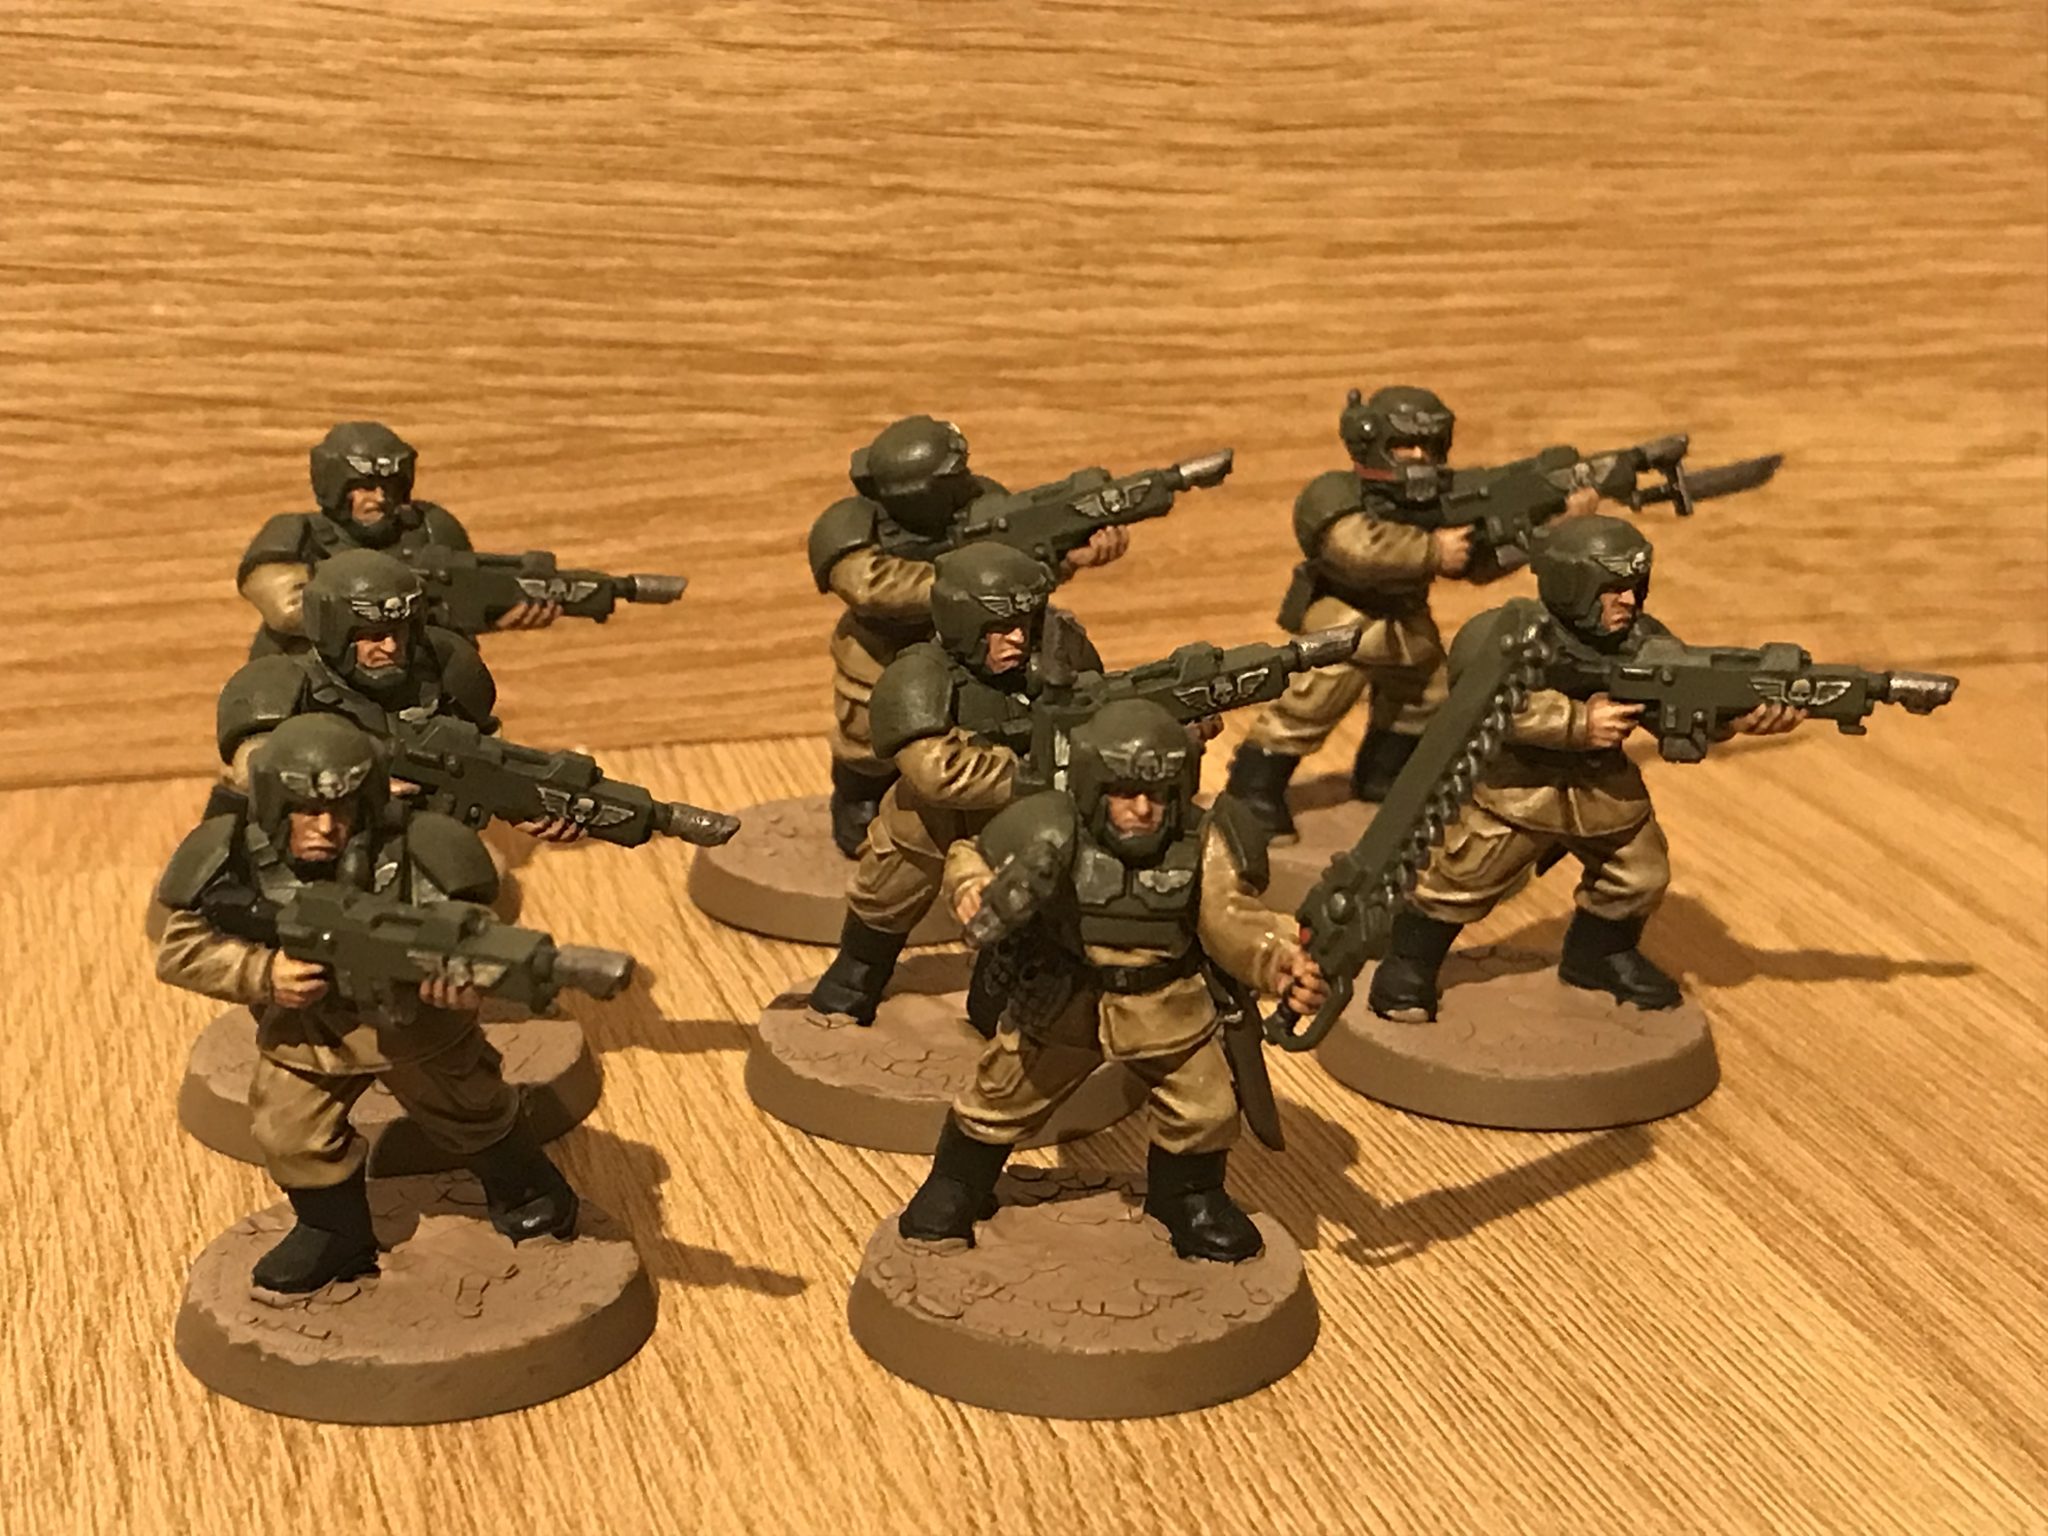
- Cadians
-

- Valhallans
-
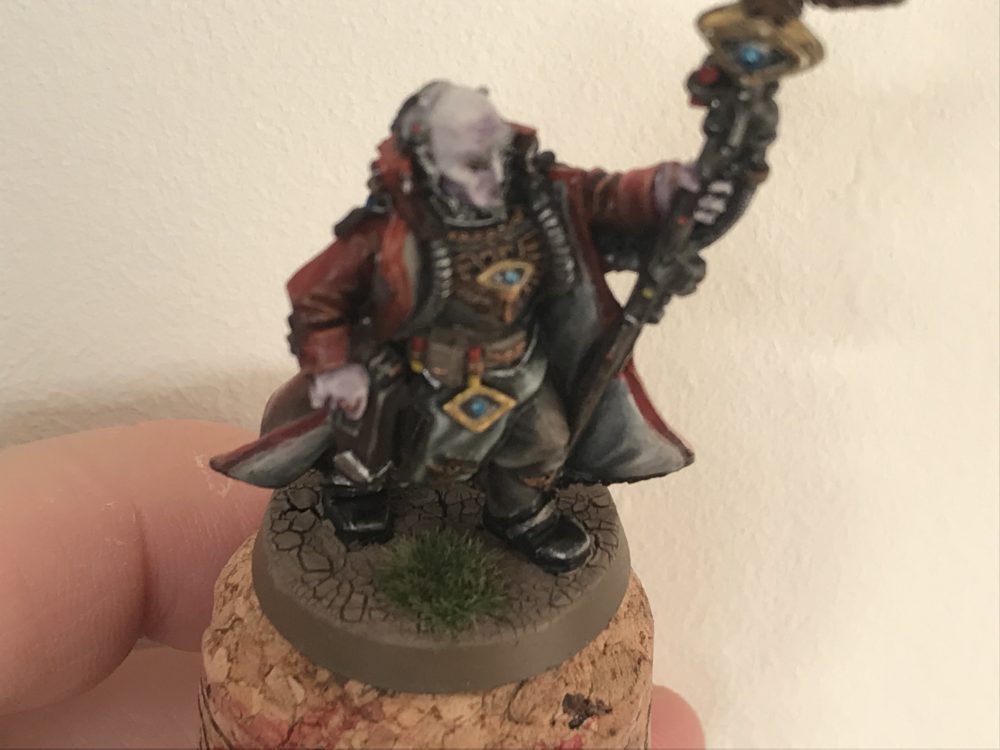
- Psychic Psymon

-

- Autocannons
Index of Getting Started Articles
- Part 1 – Introduction
- Part 2 – Summary of Astra Militarum Products
- Part 3 – Ways to Play 40K
- Part 4 – Ways to Play Astra Militarum
- Part 5 – Where to Play 40K
- Part 6 – First Purchase
- Part 7 – Playing your First Games
- Part 8 – Improving
- Part 9 – Astra Militarum Tips
- Part 10 – Painting Imperial Guard
- Part 11 – Start Collecting Box Breakdown
- Part 12 – Modelling Astra Militarum Special Weapons
- Part 13 – Astra Militarum Tactics Reset