
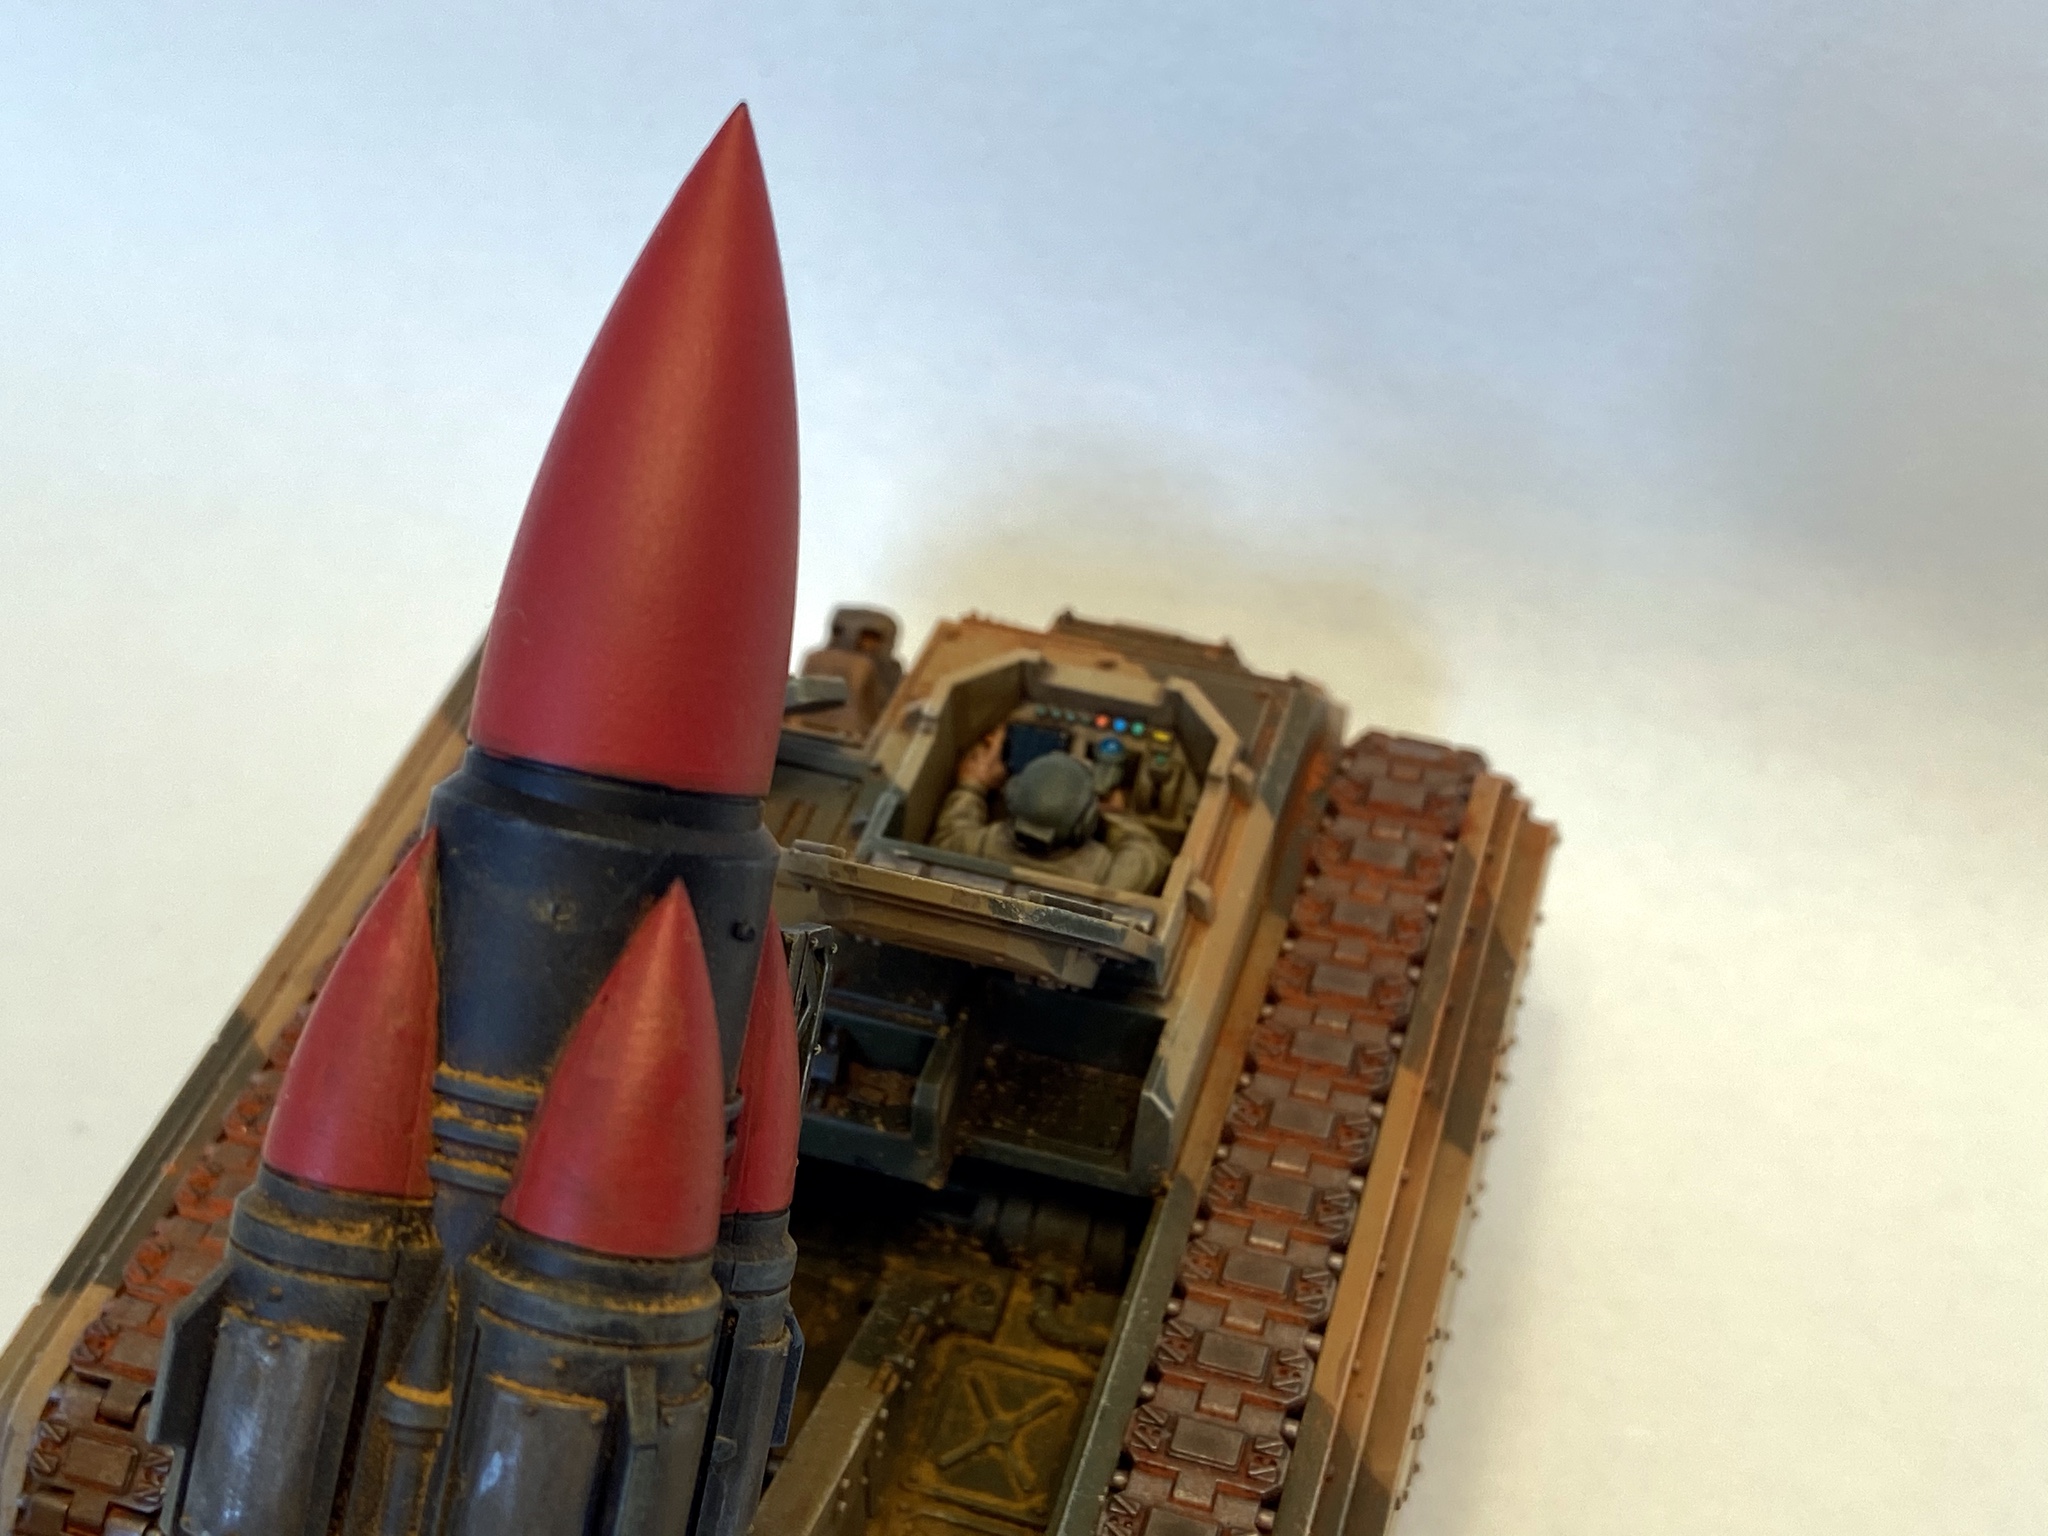
Manticore & Deathstrike Completed
Let it rain! Let it rain high explosives!
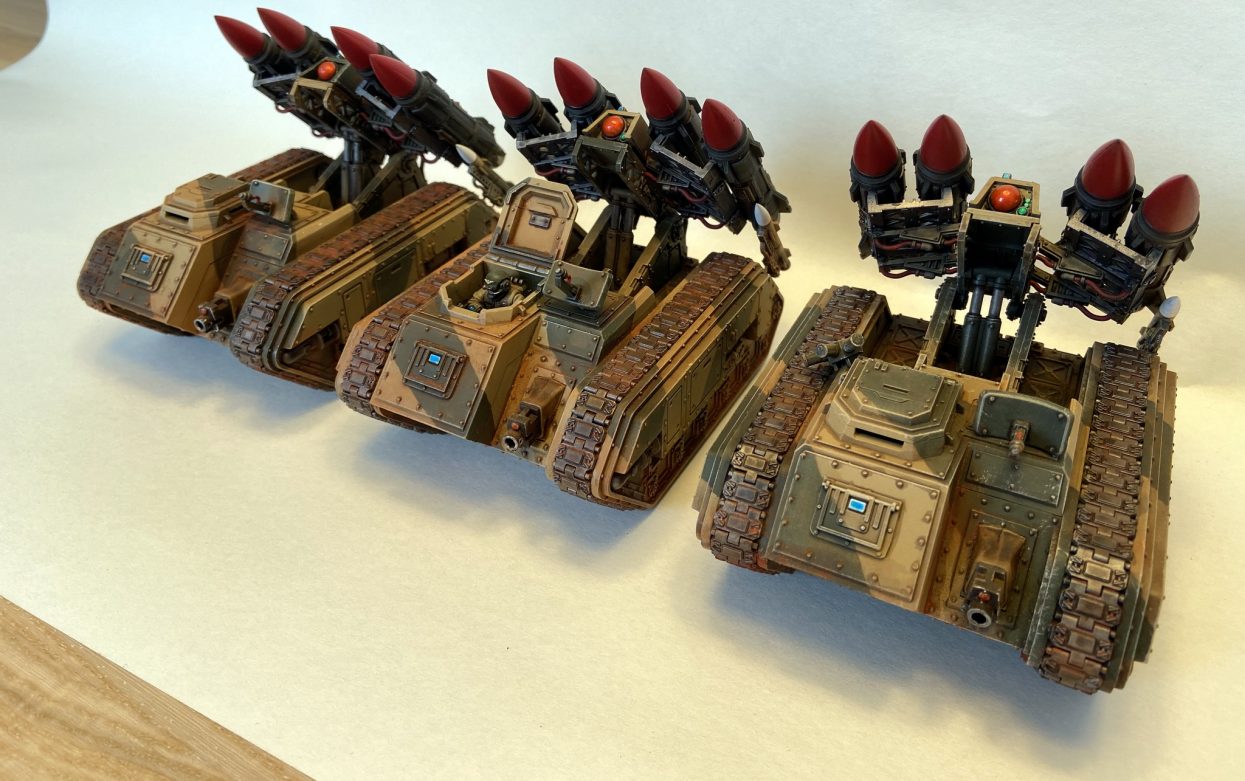
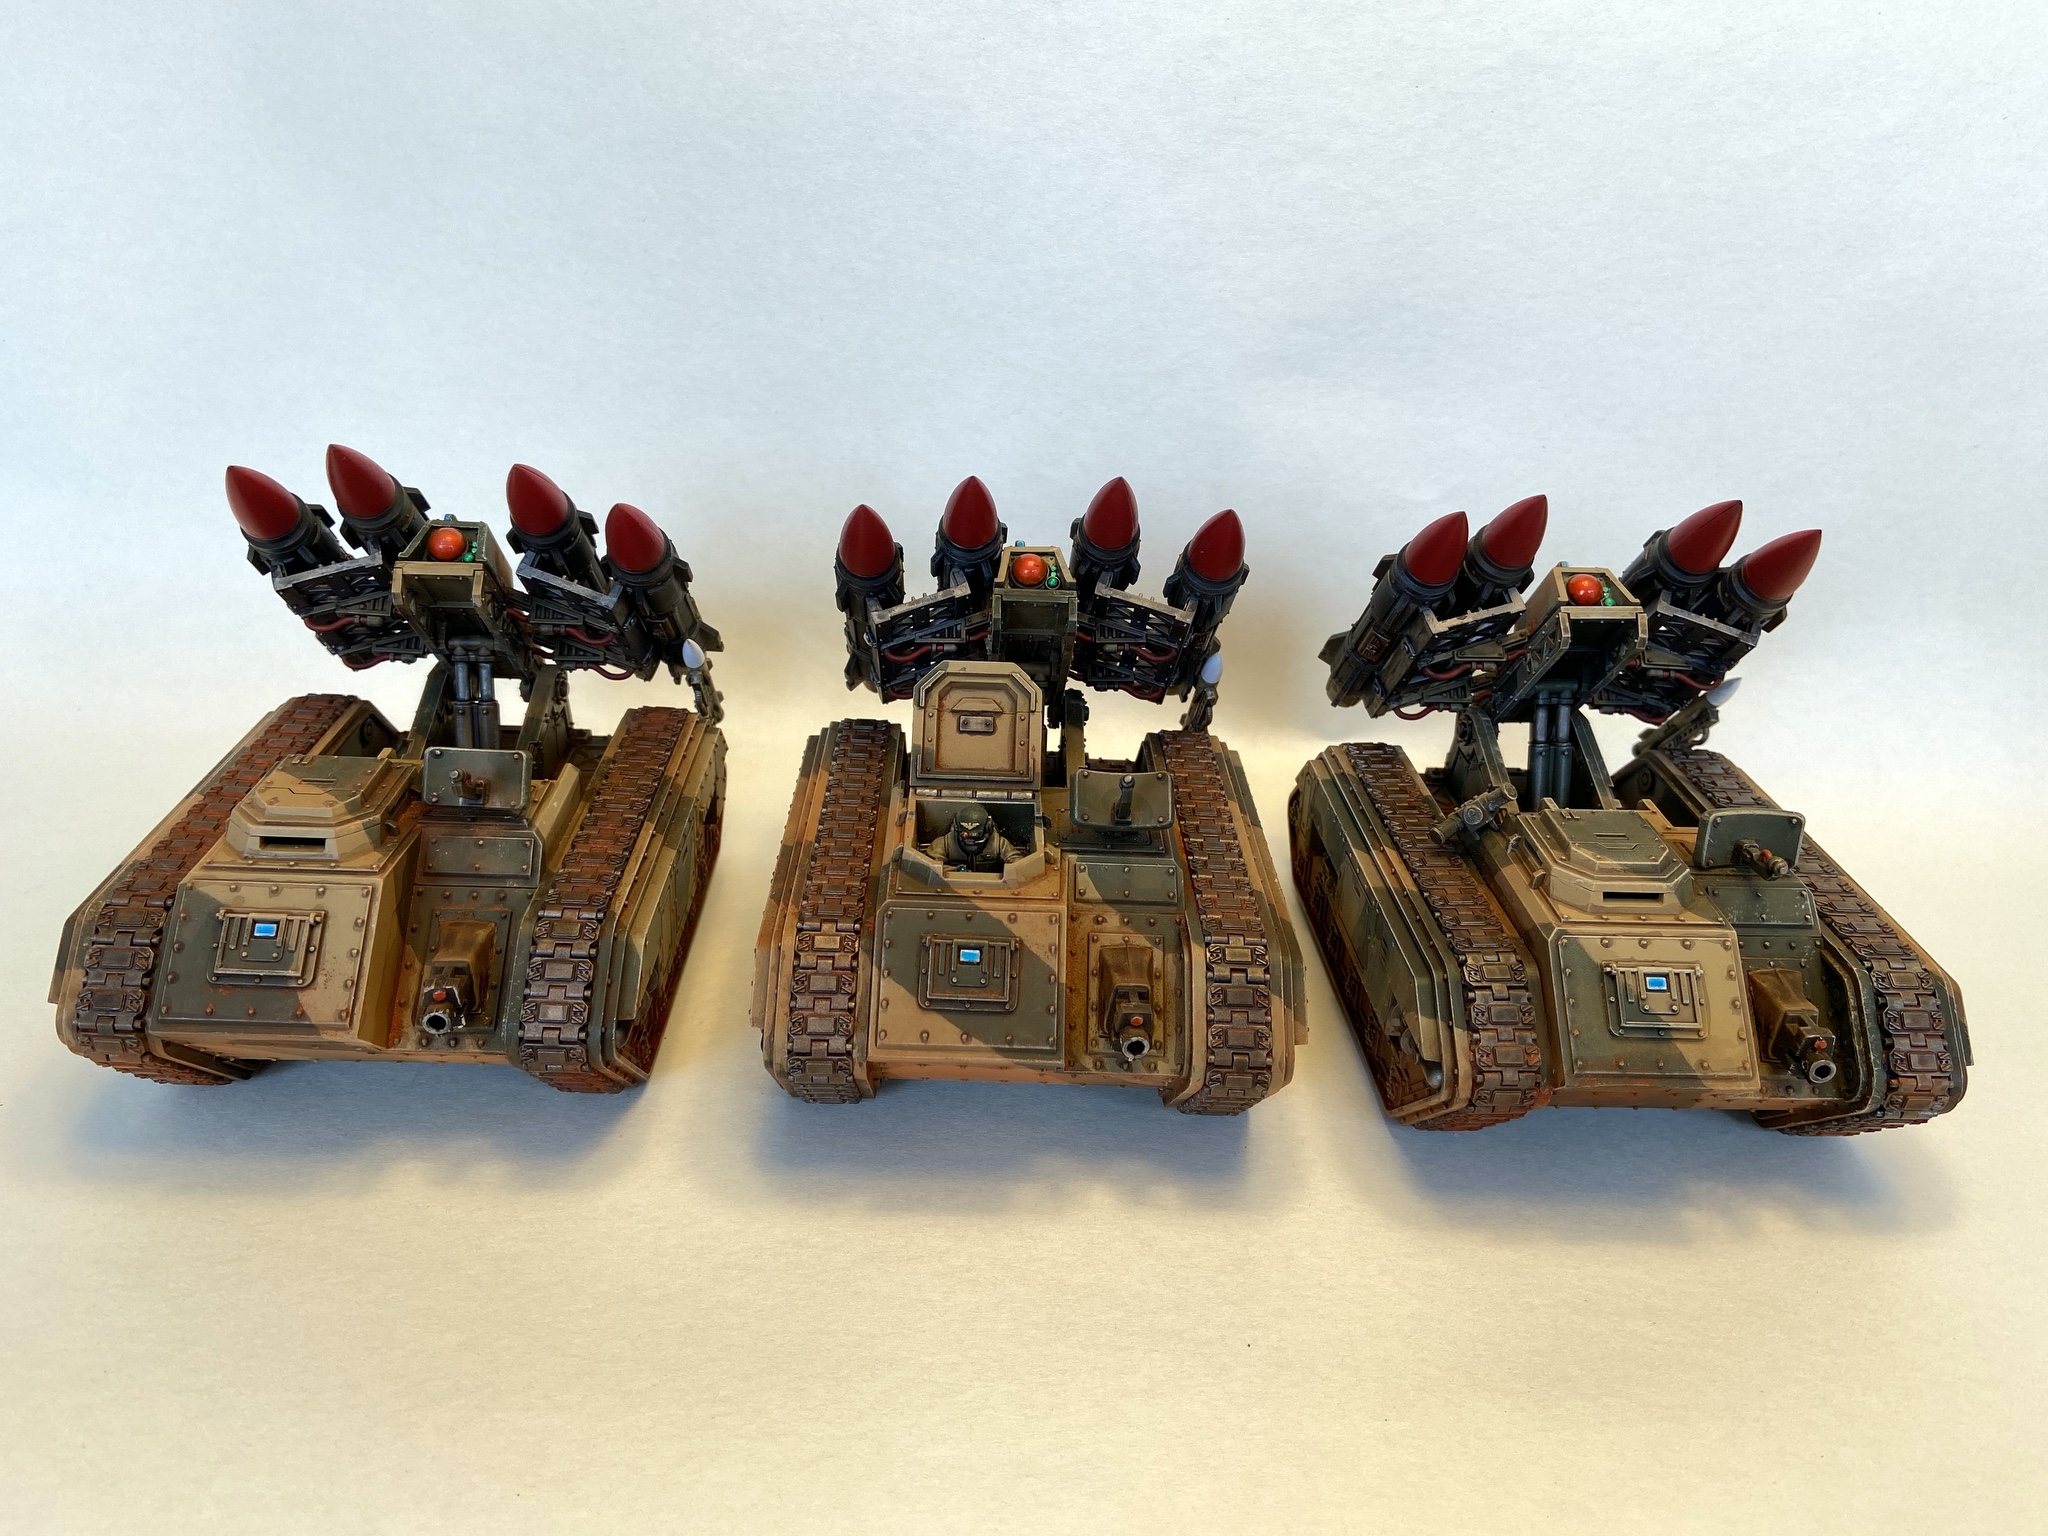
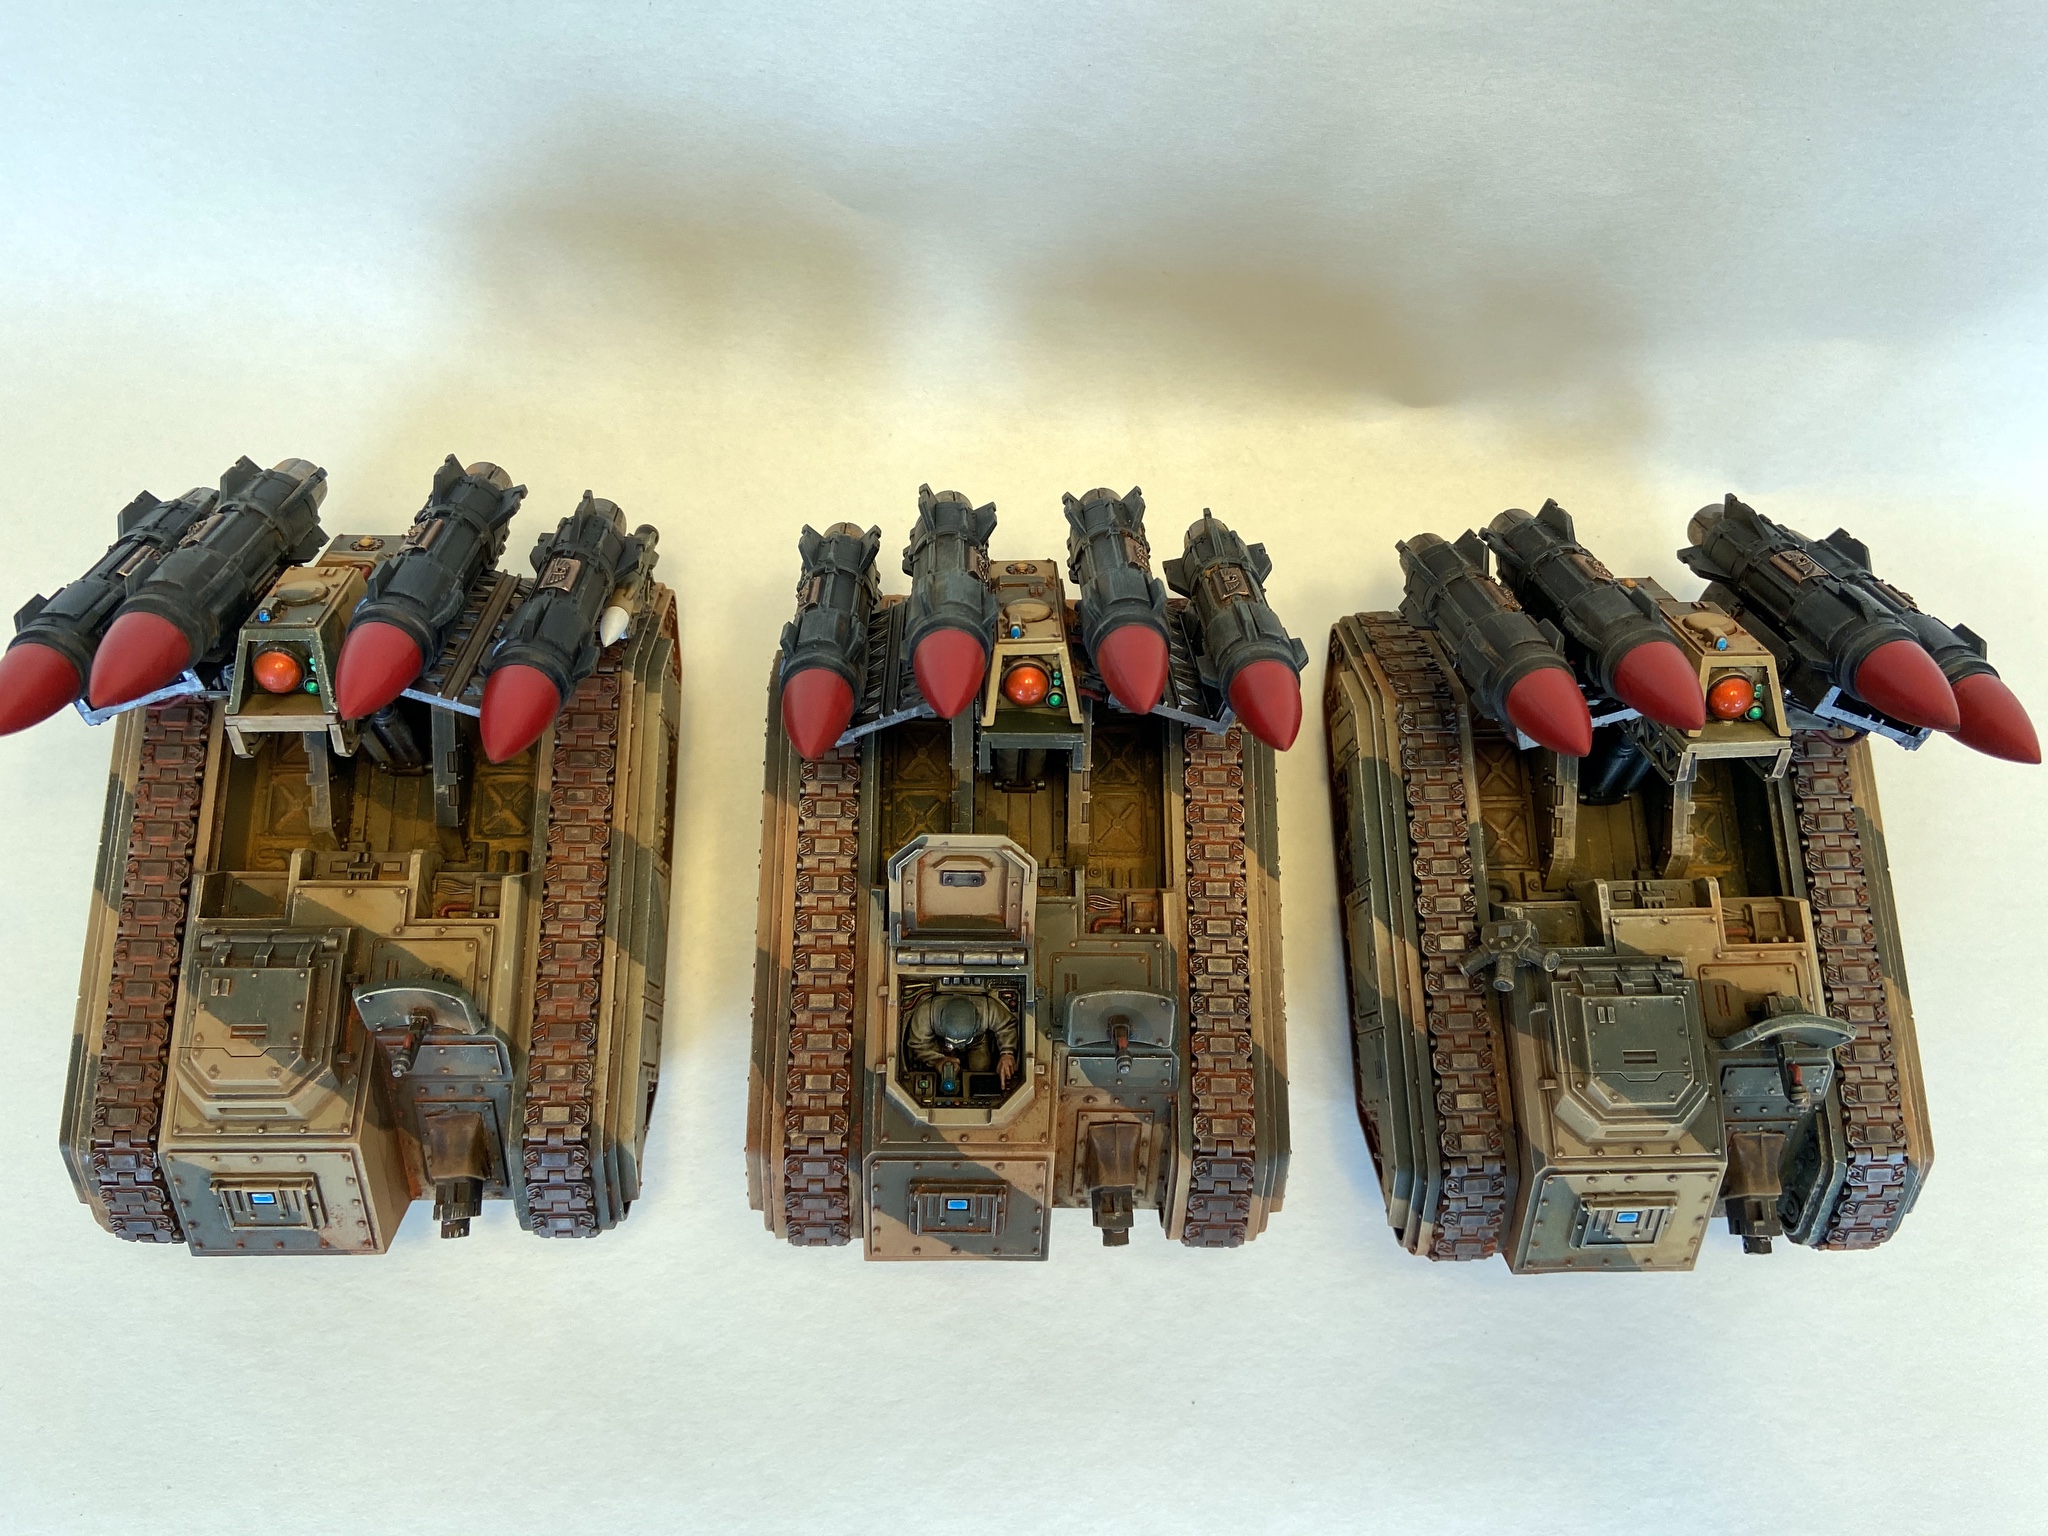
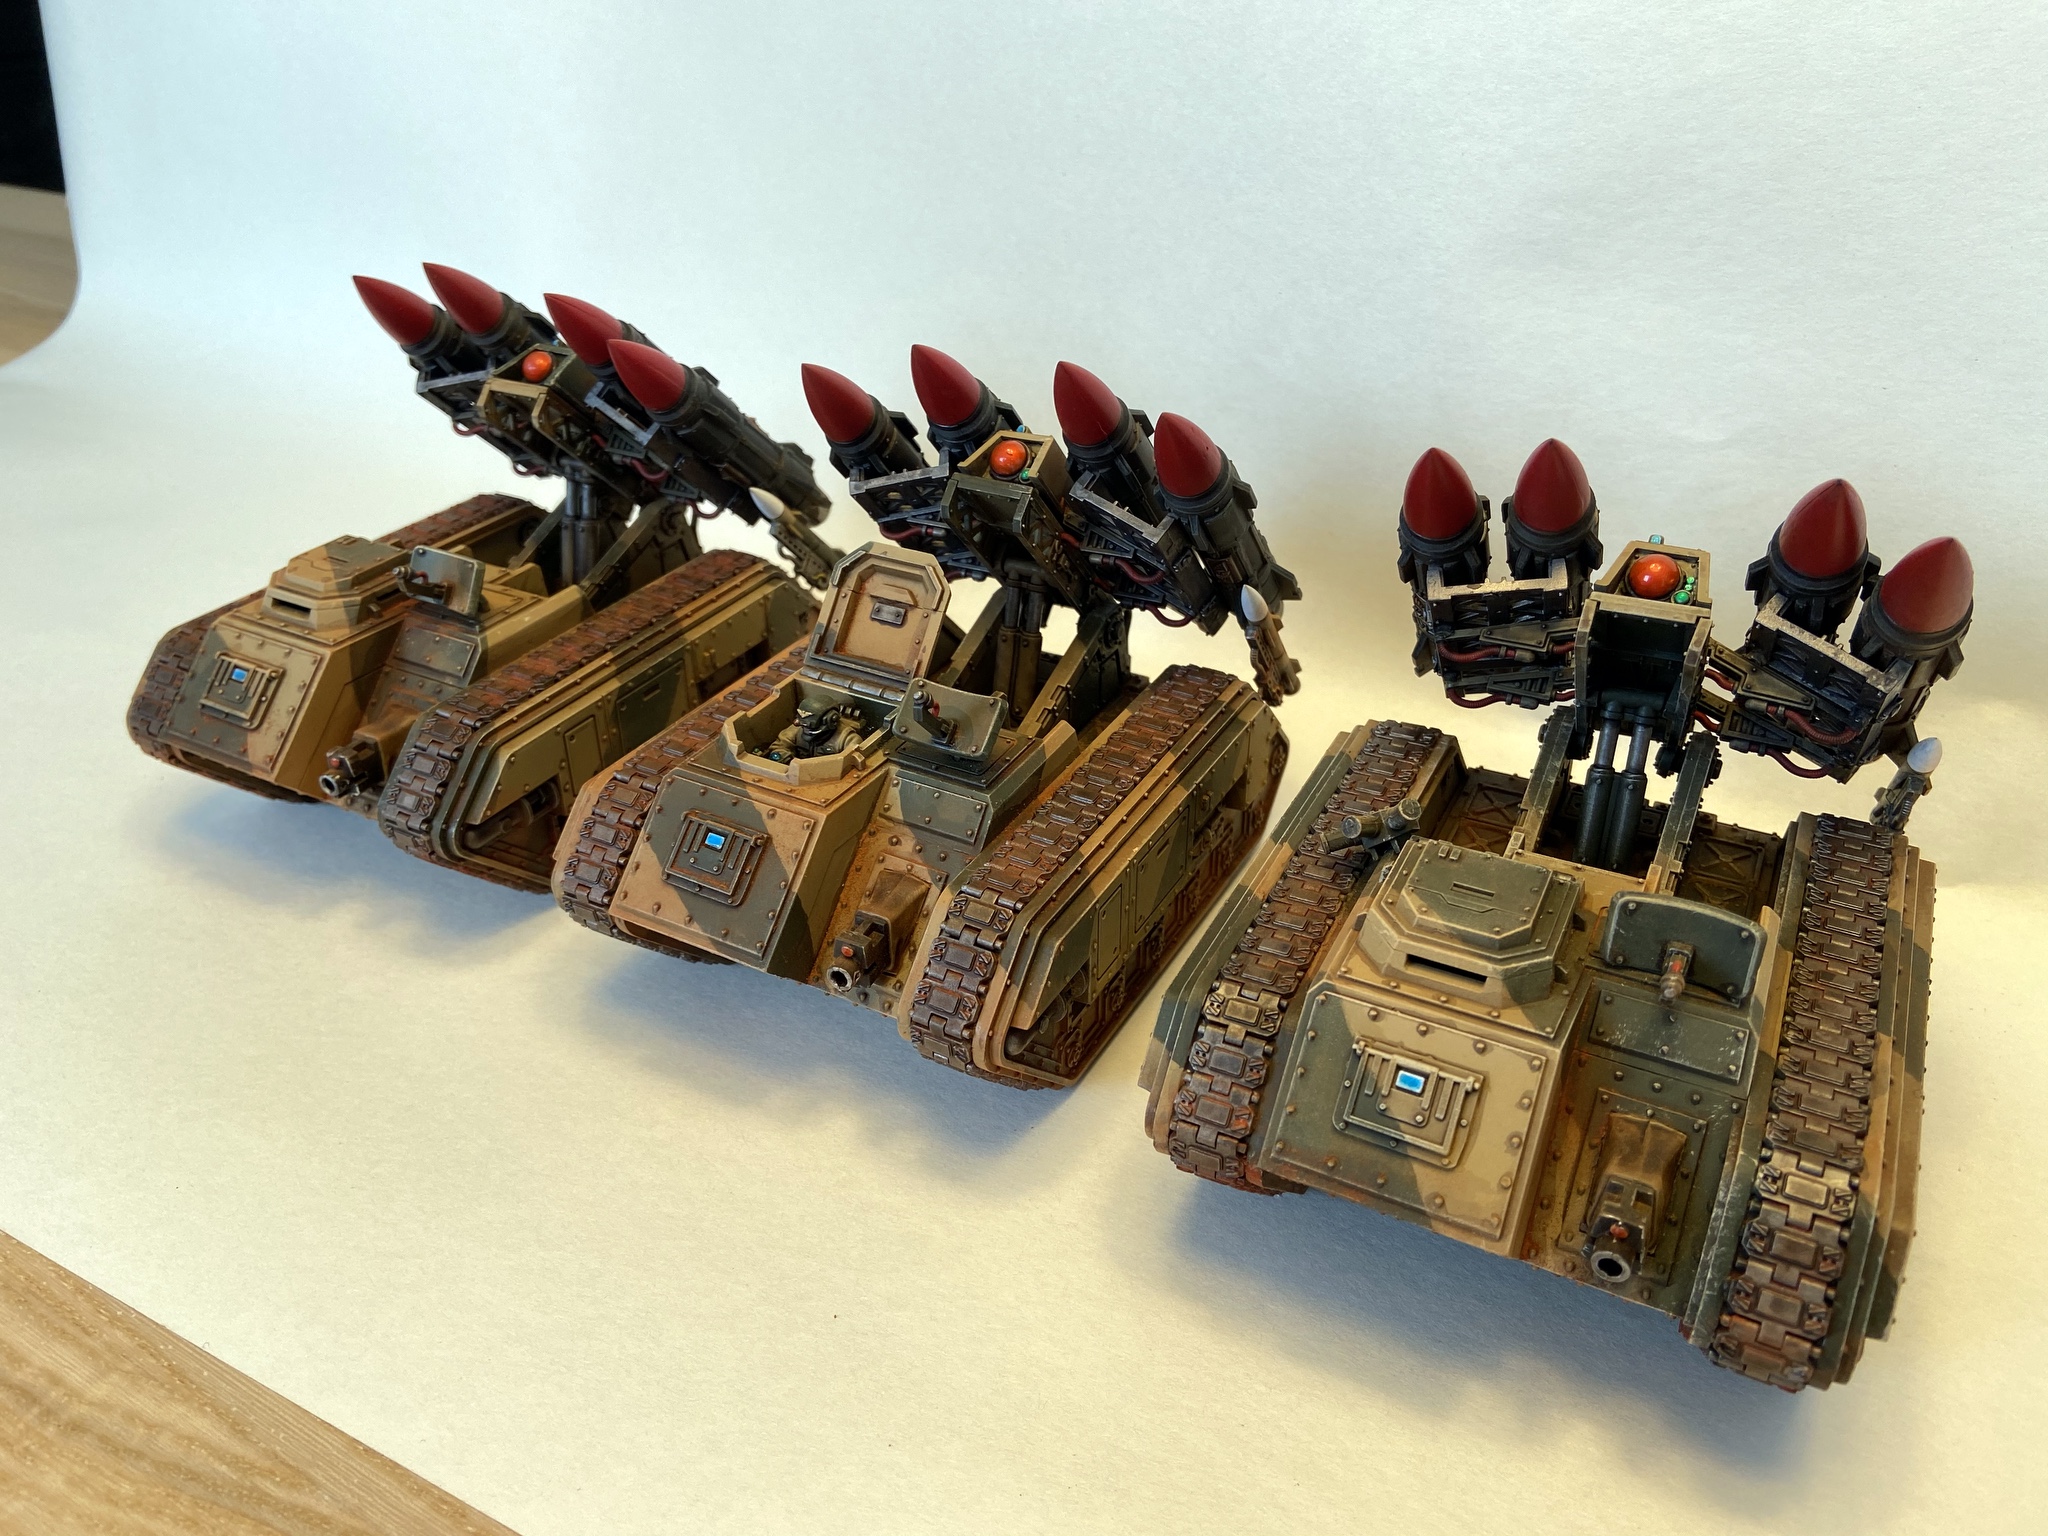
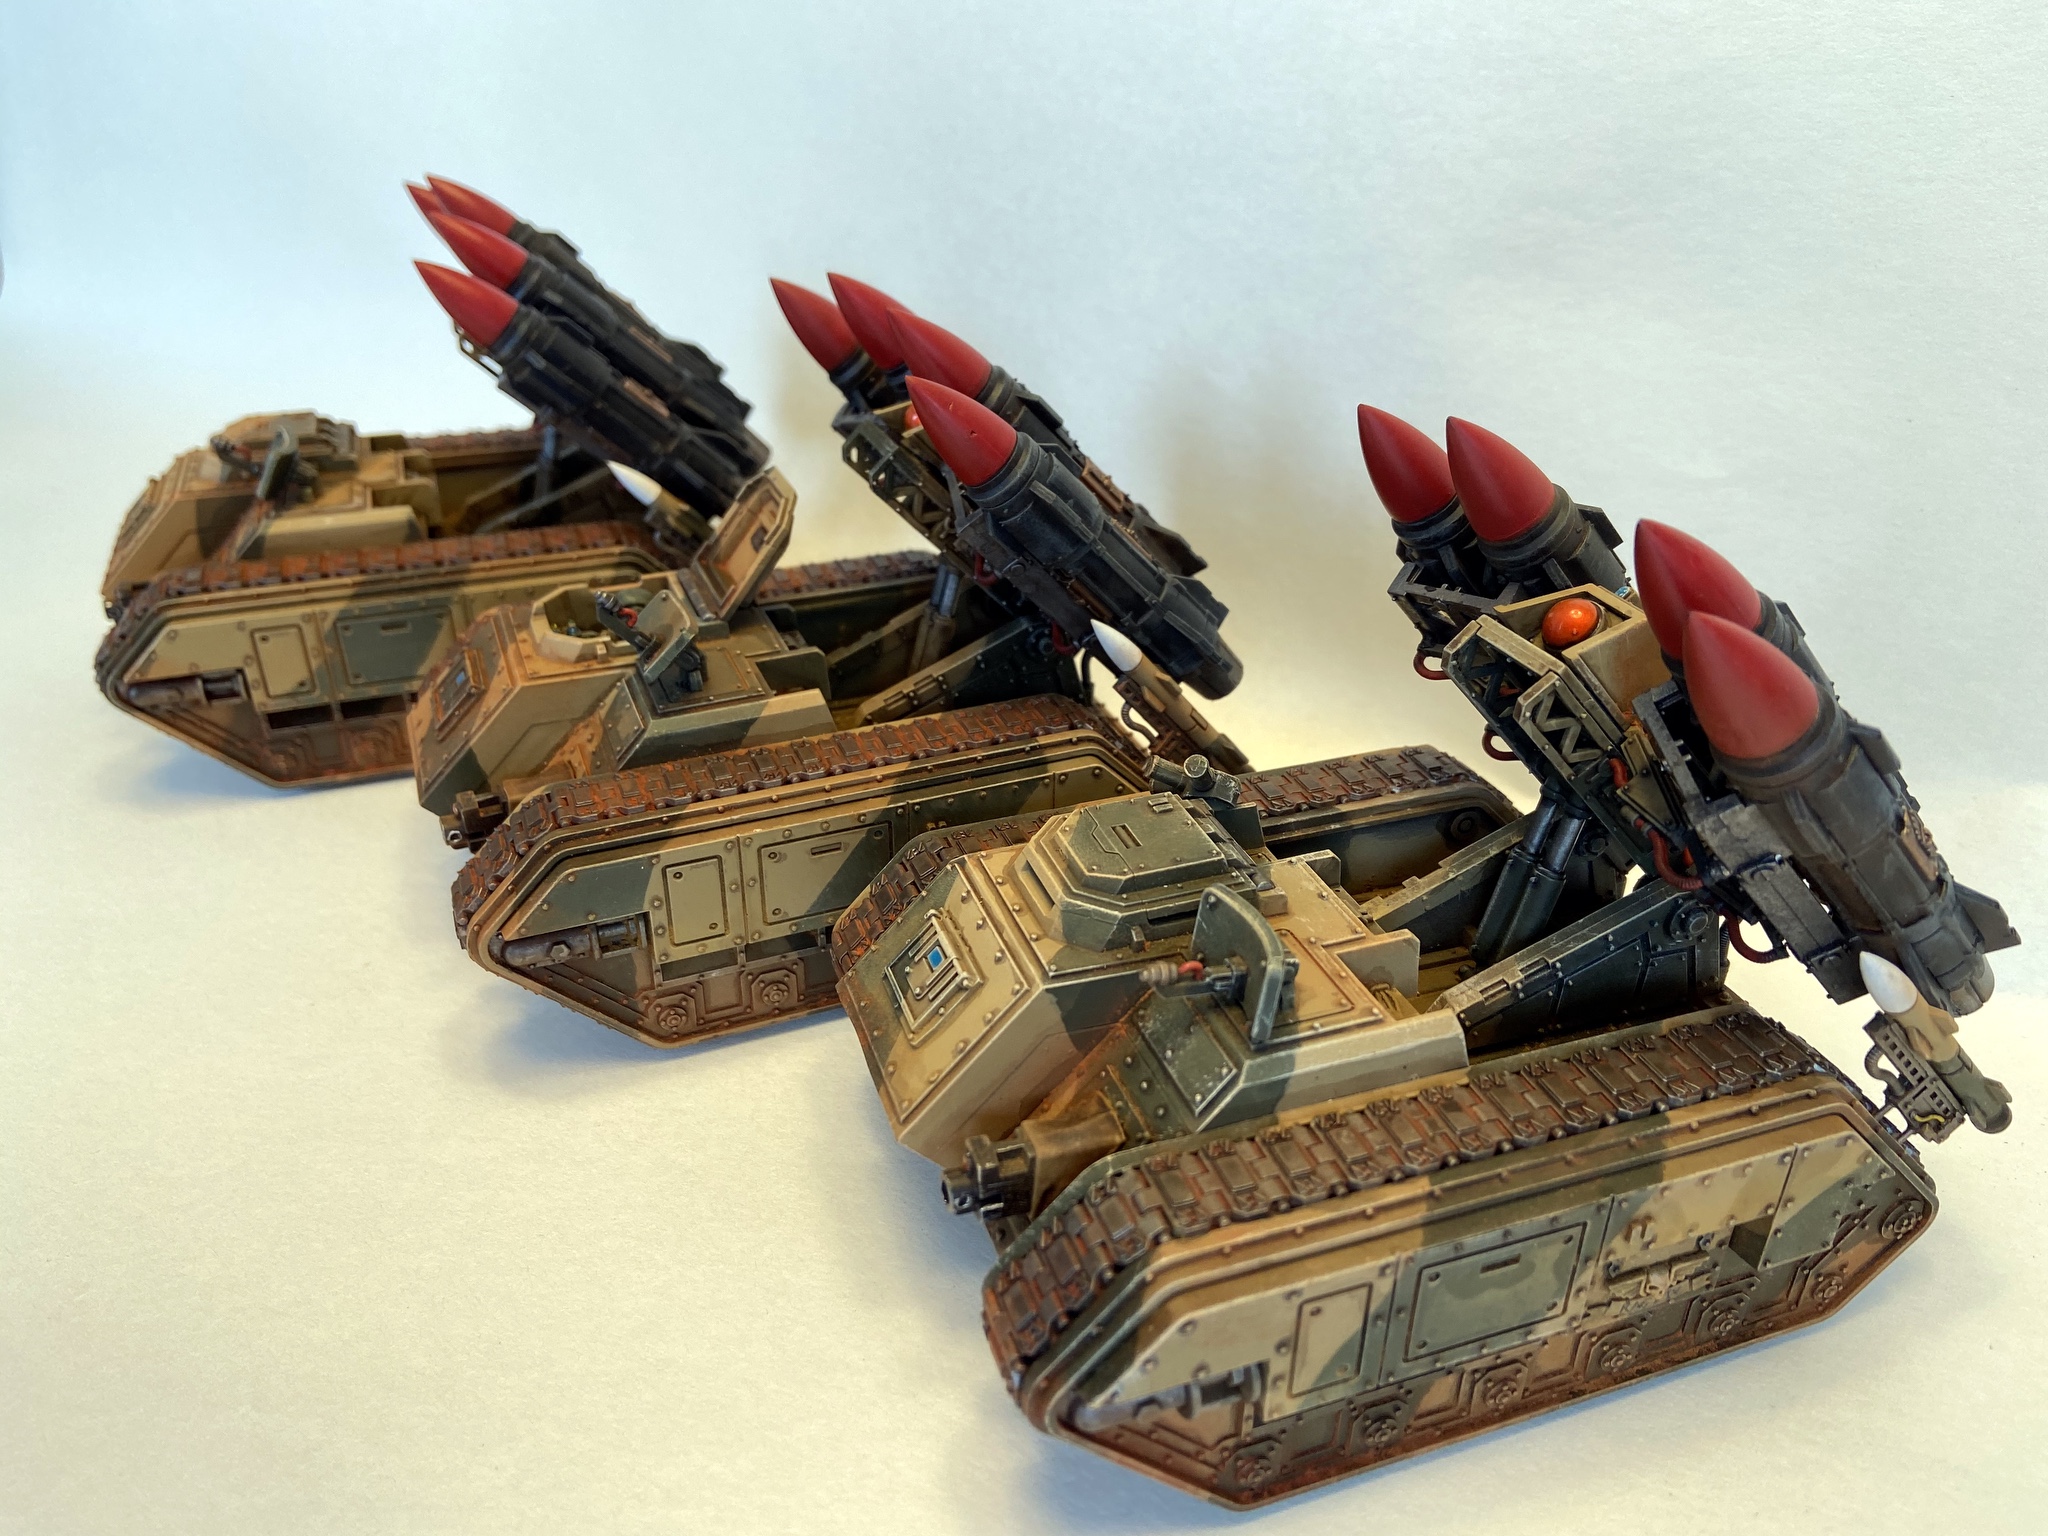
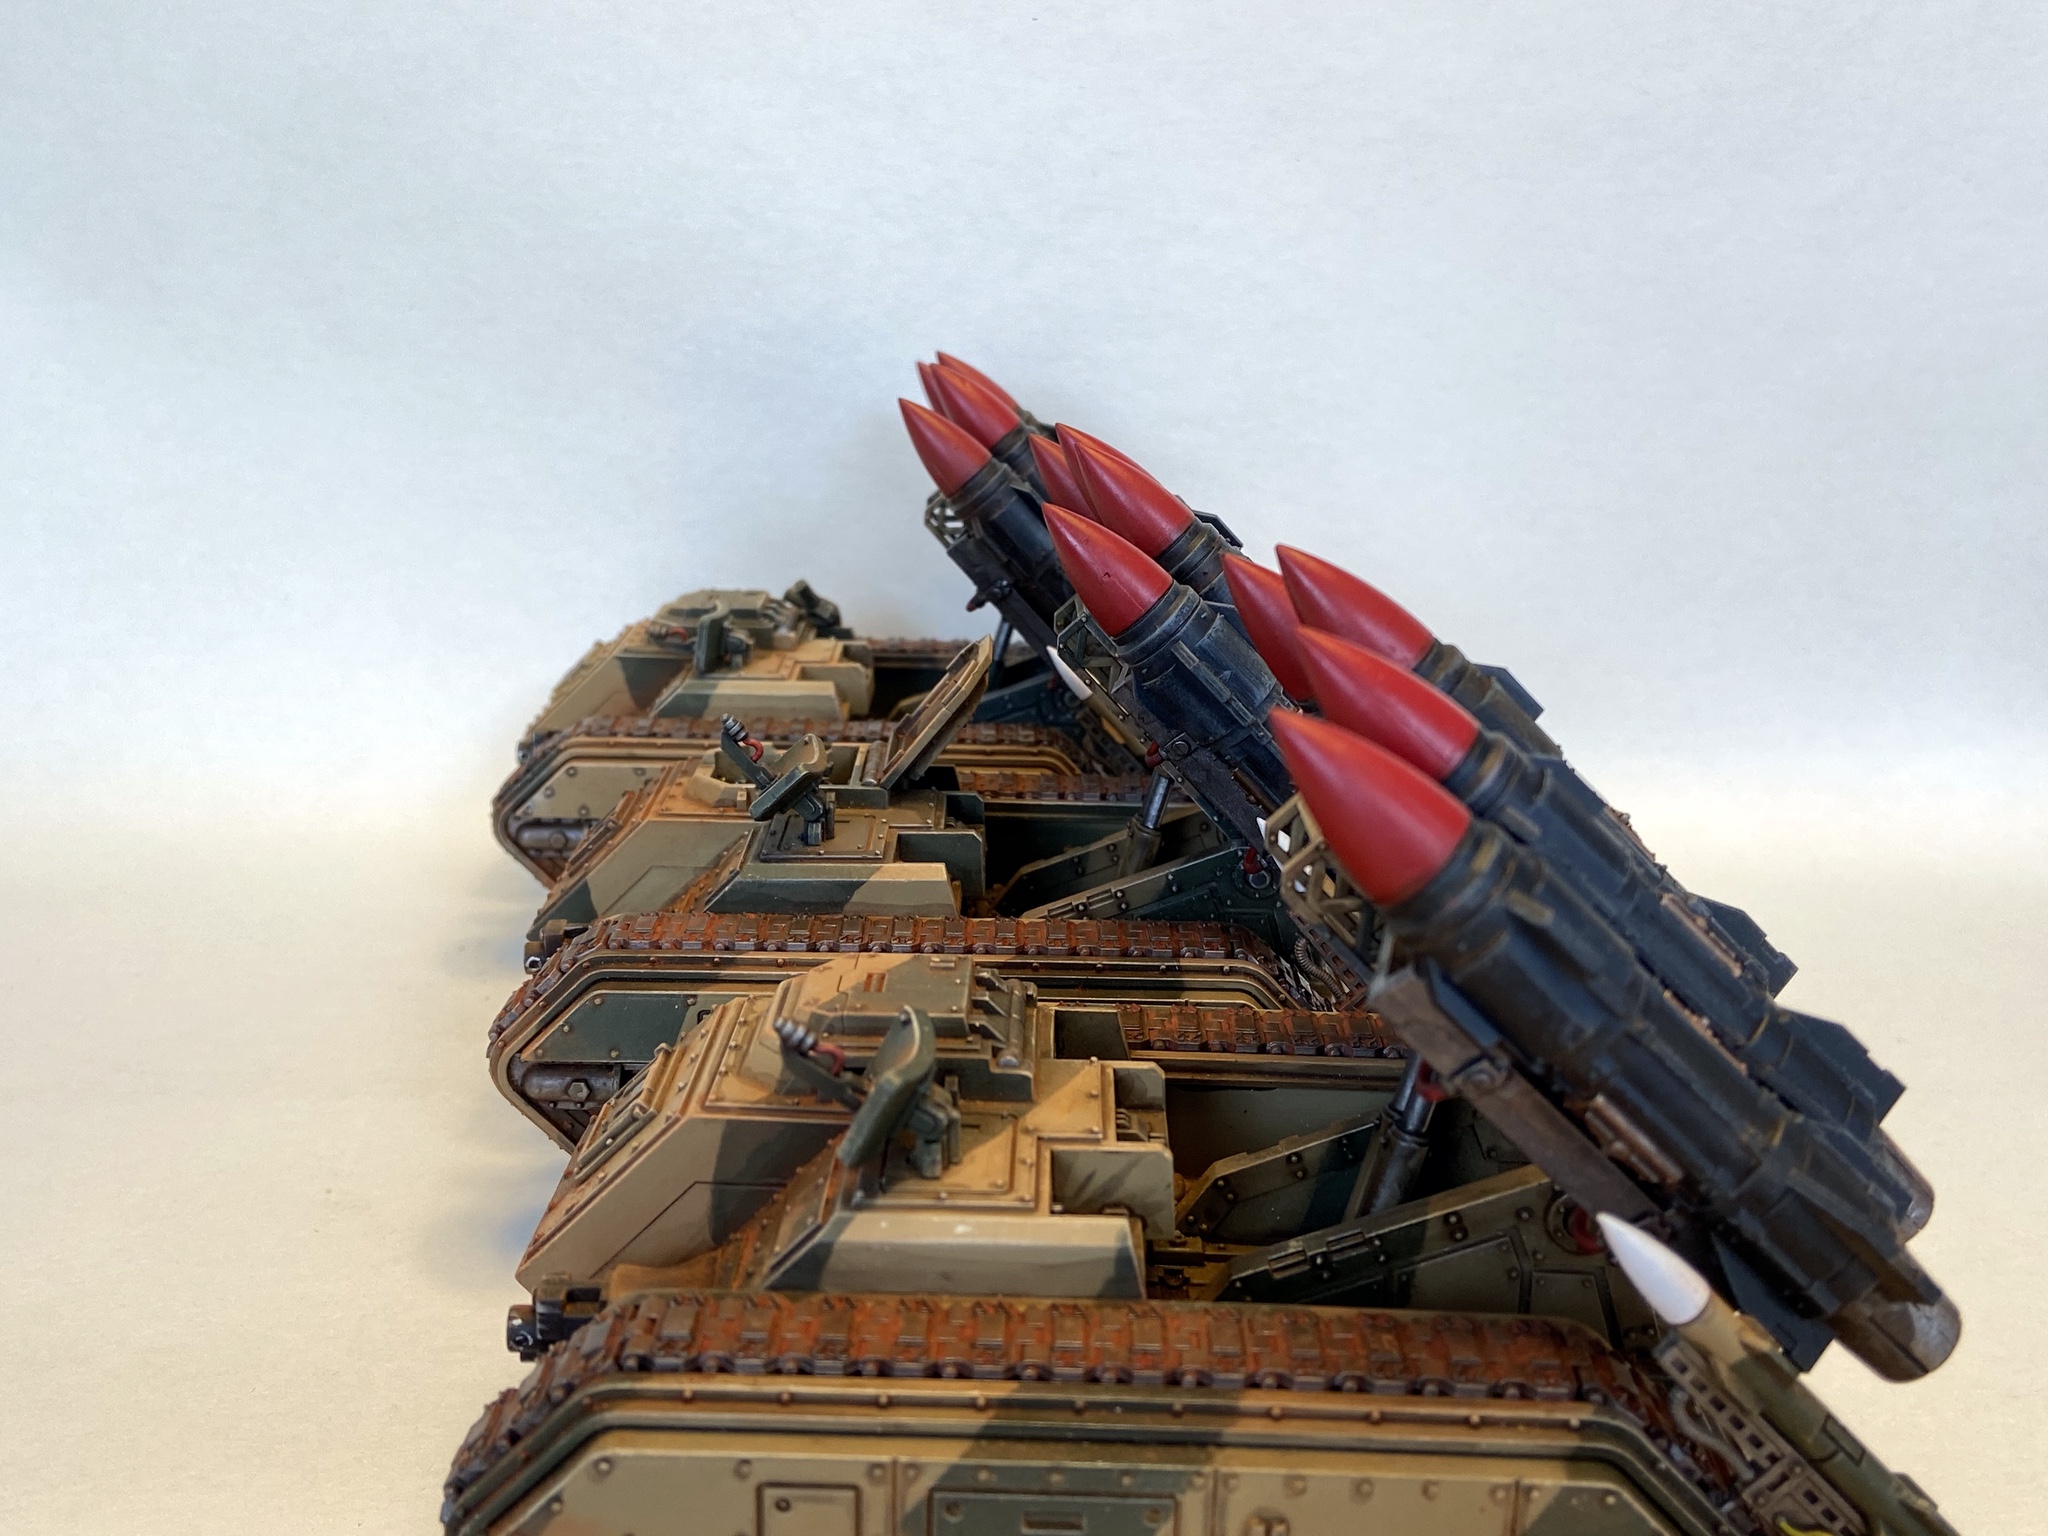
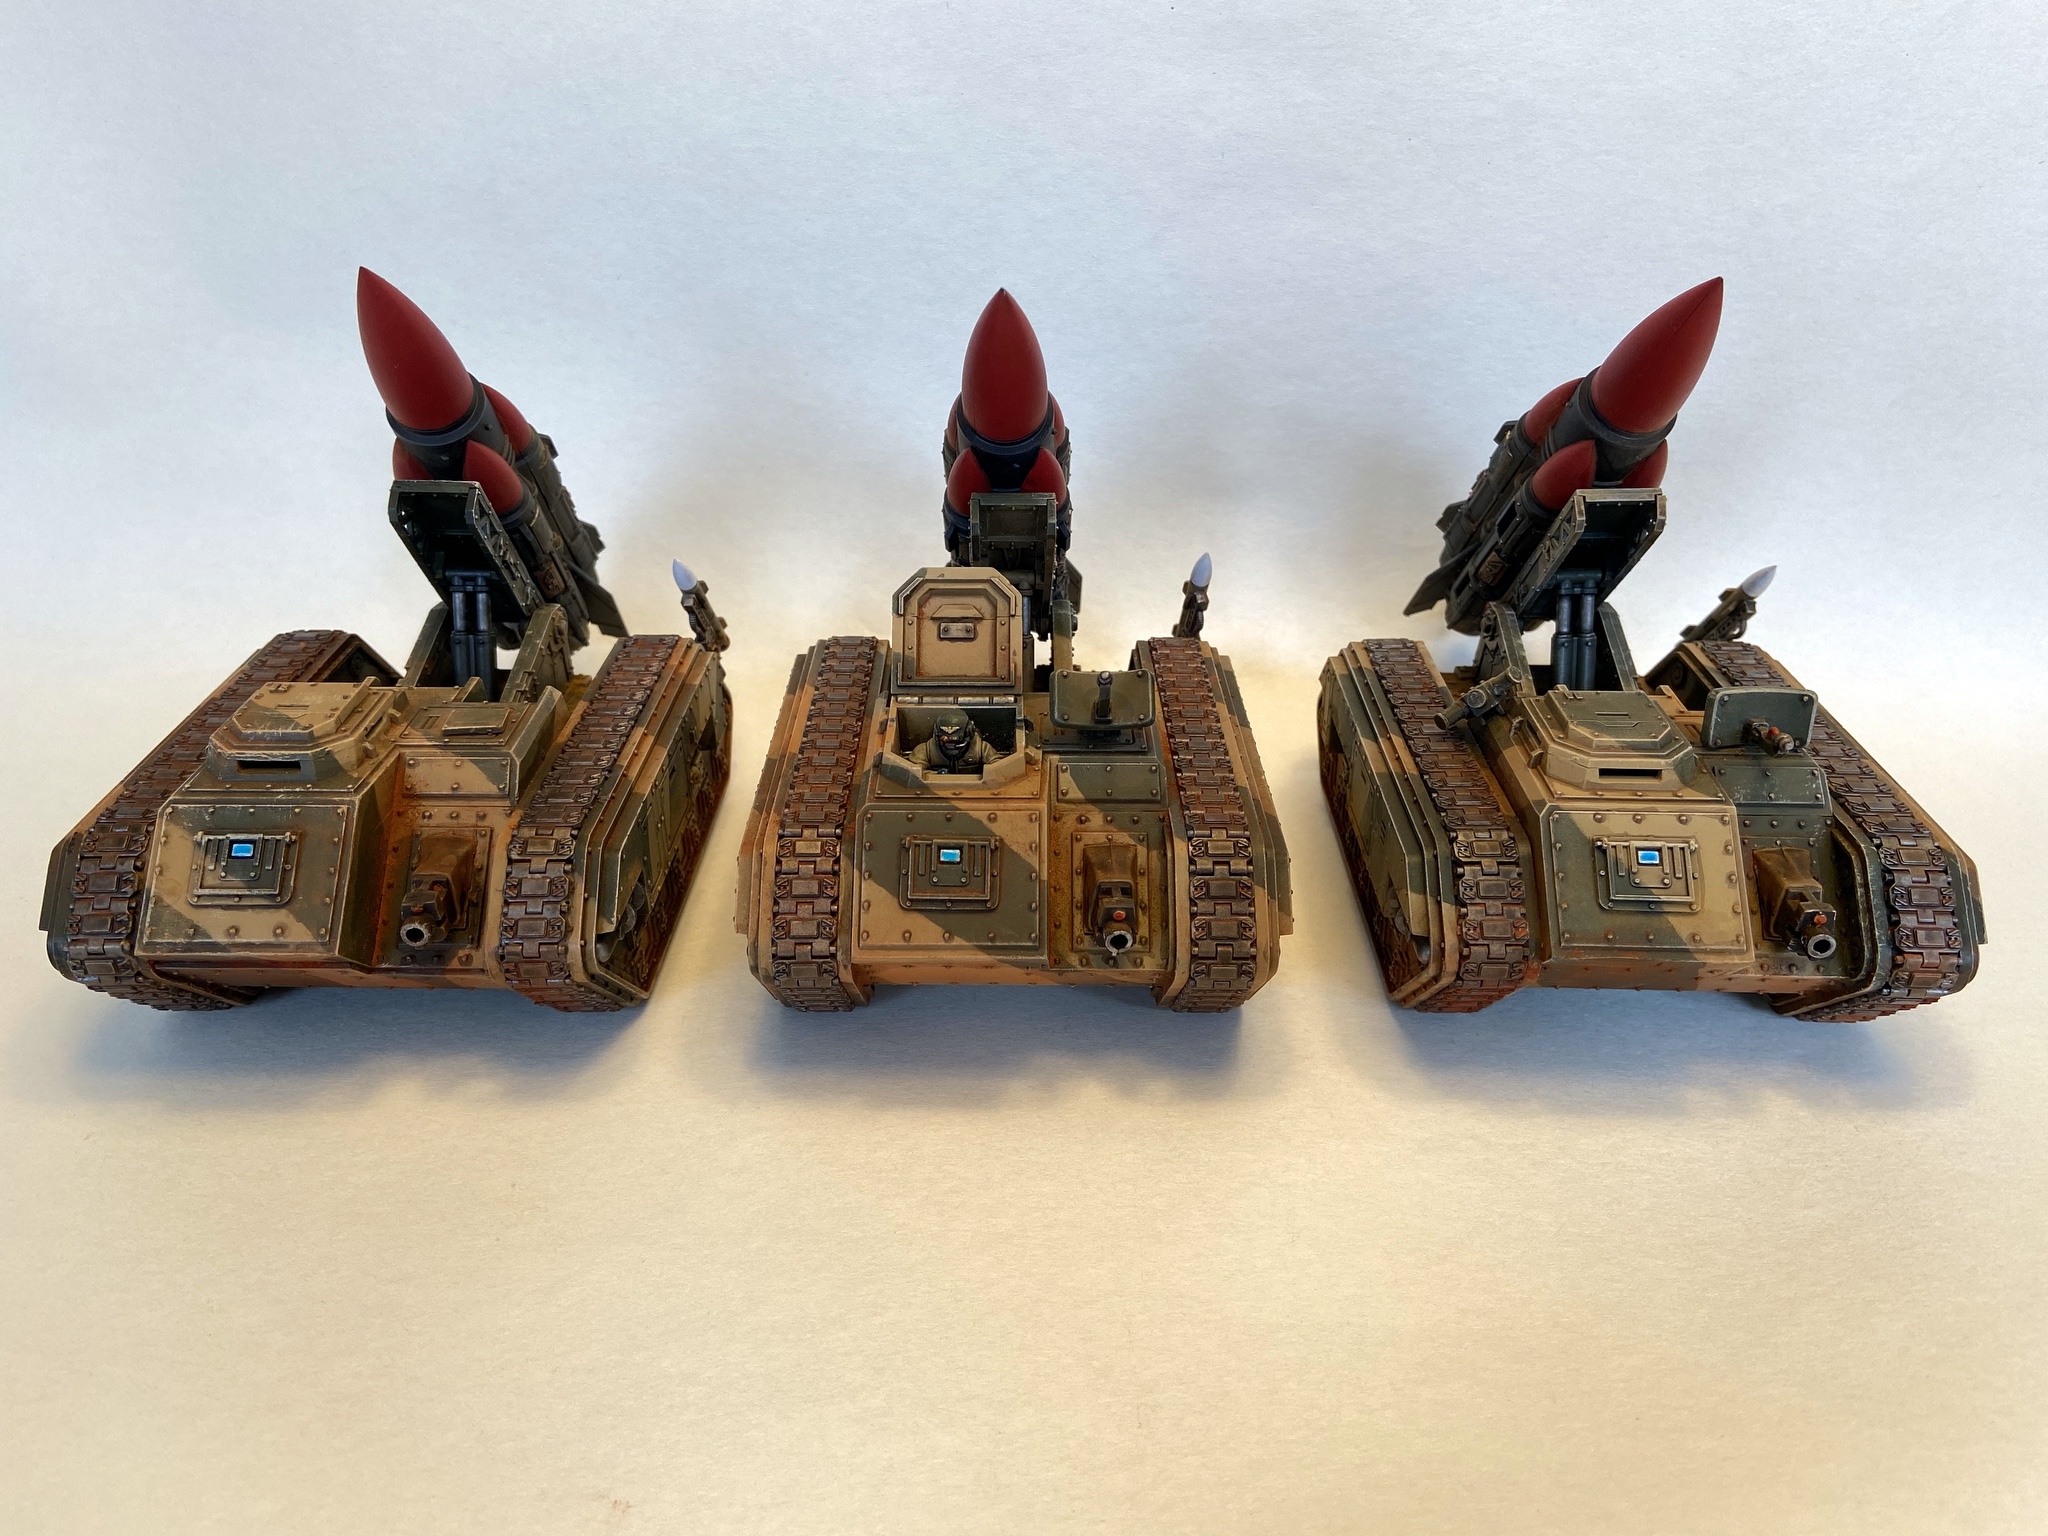
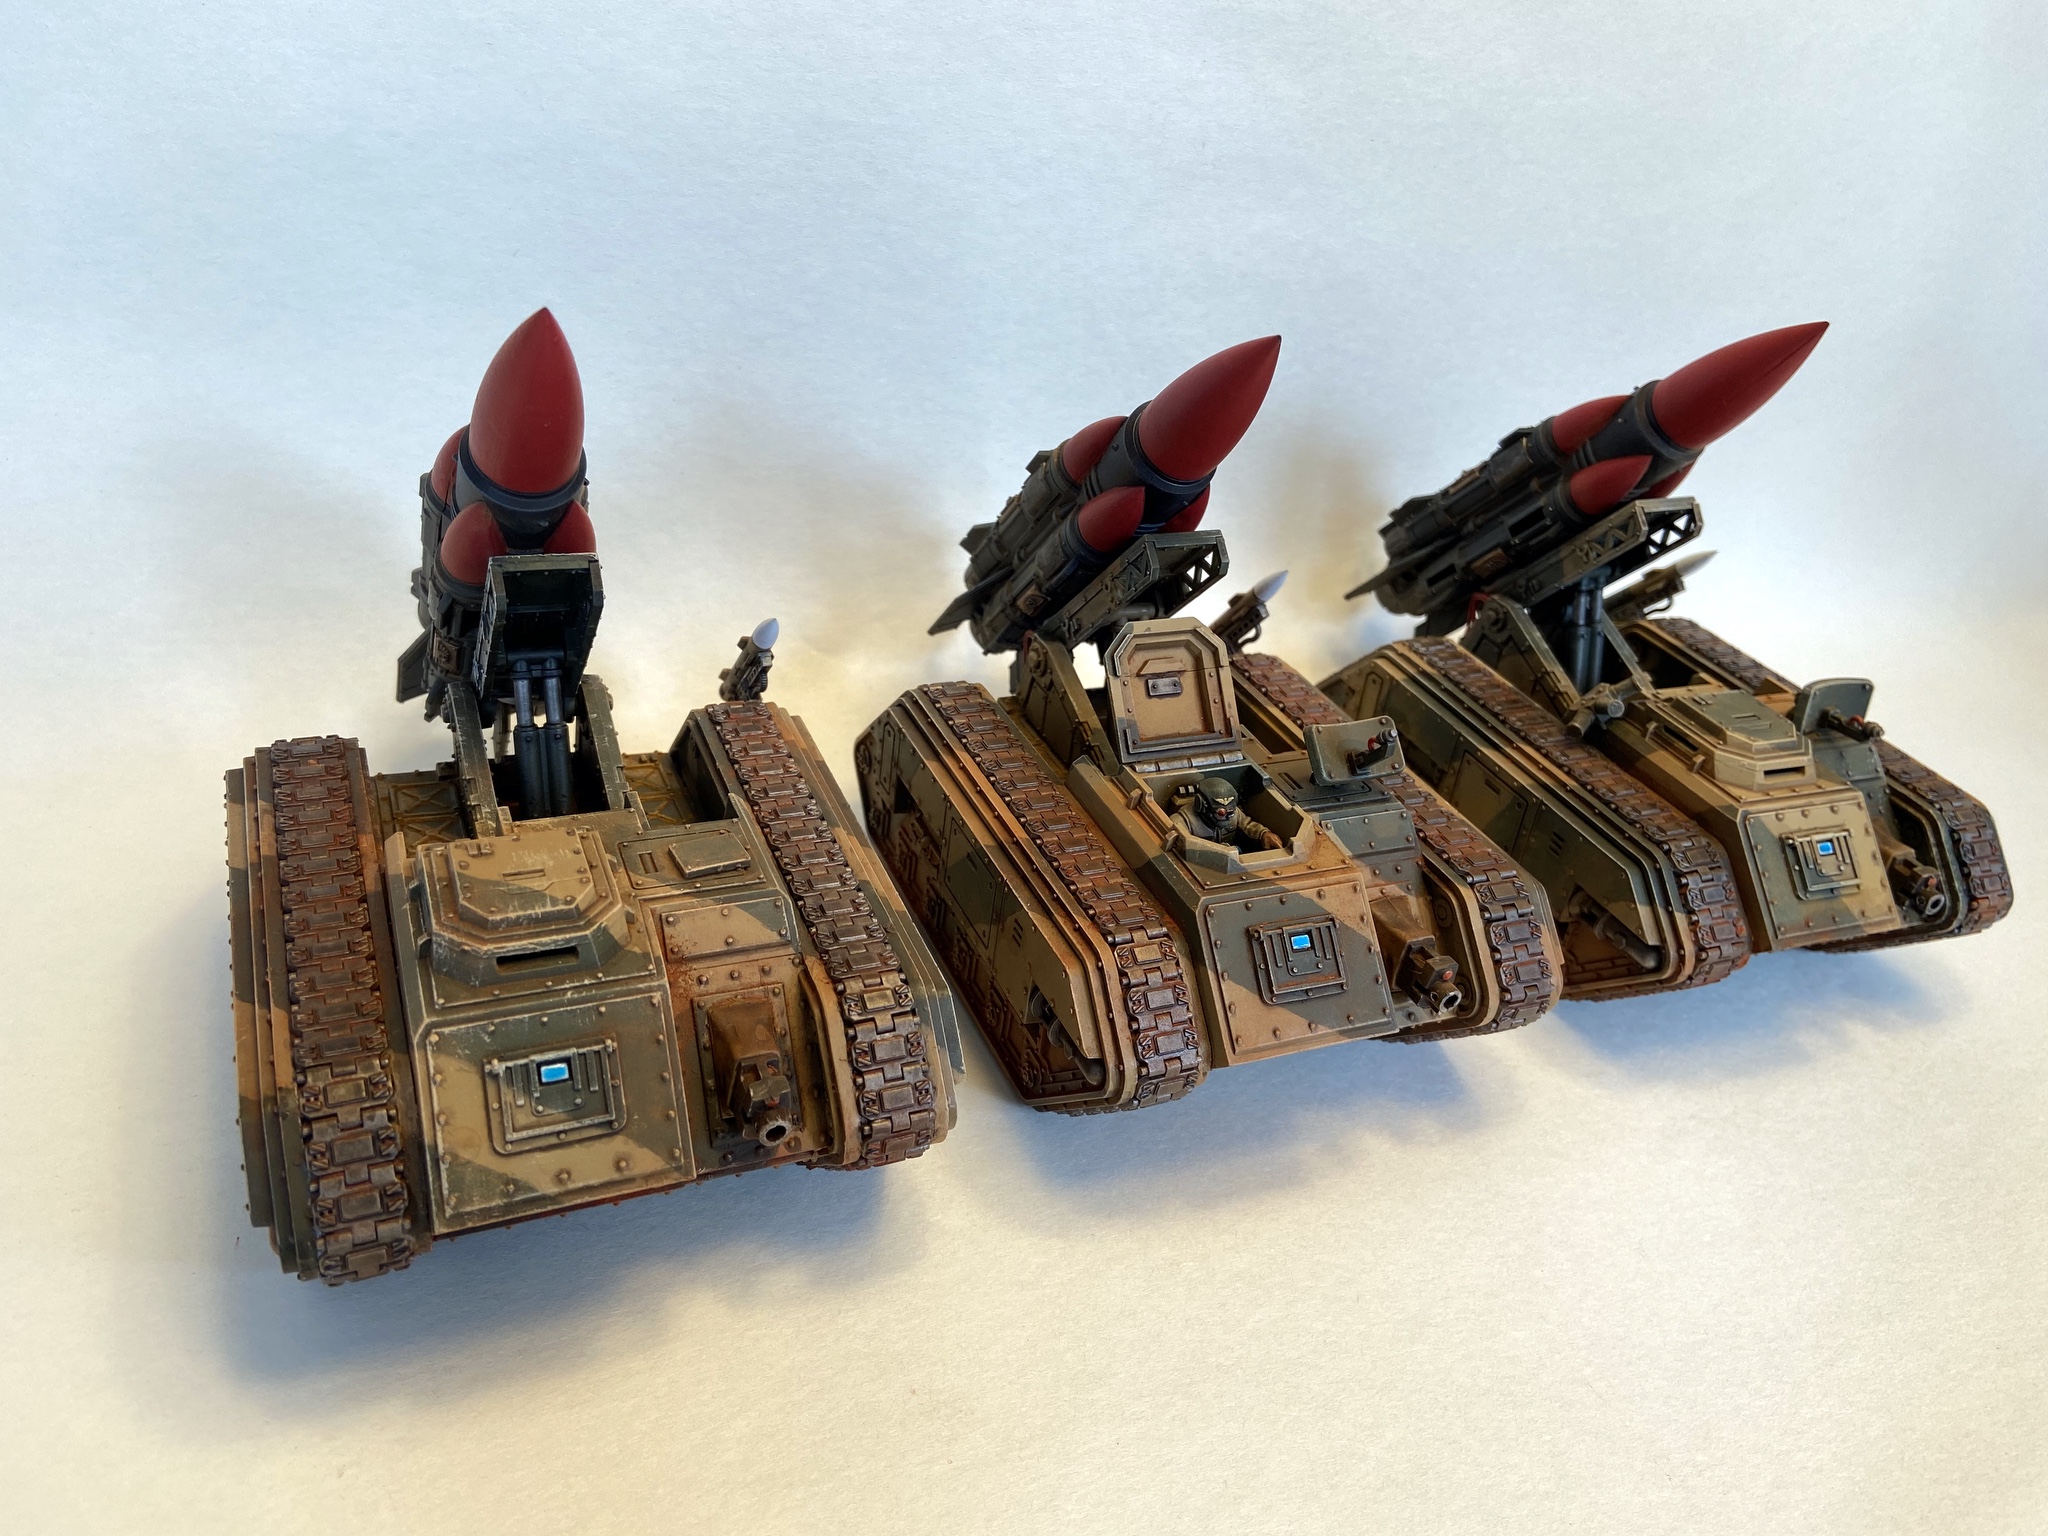
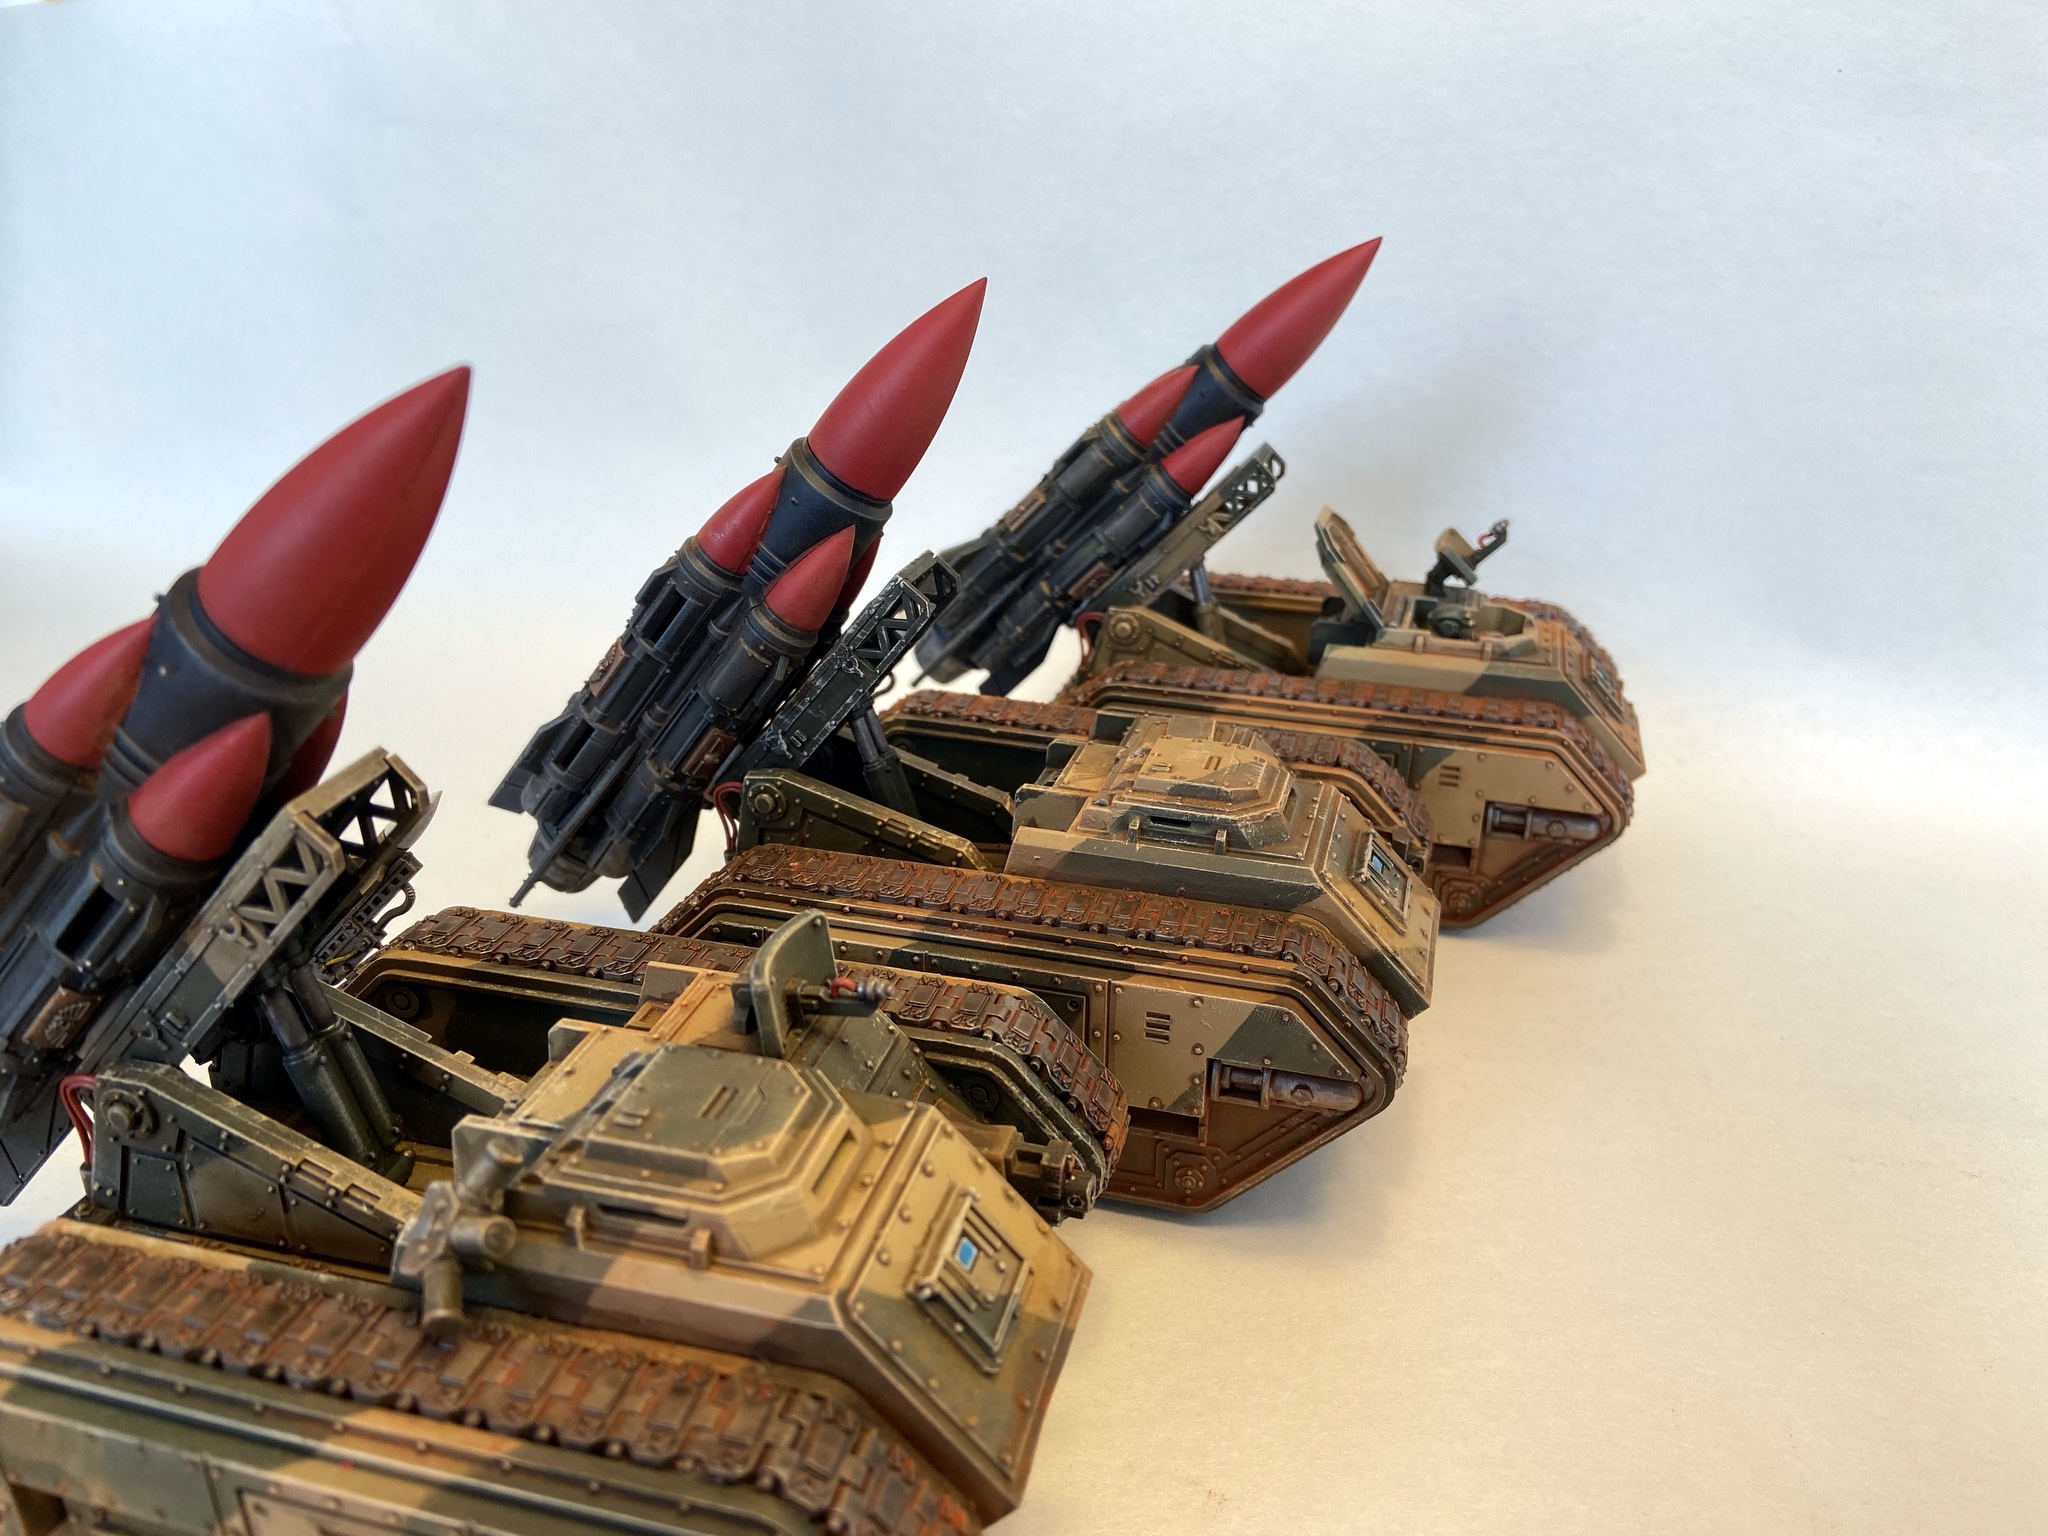
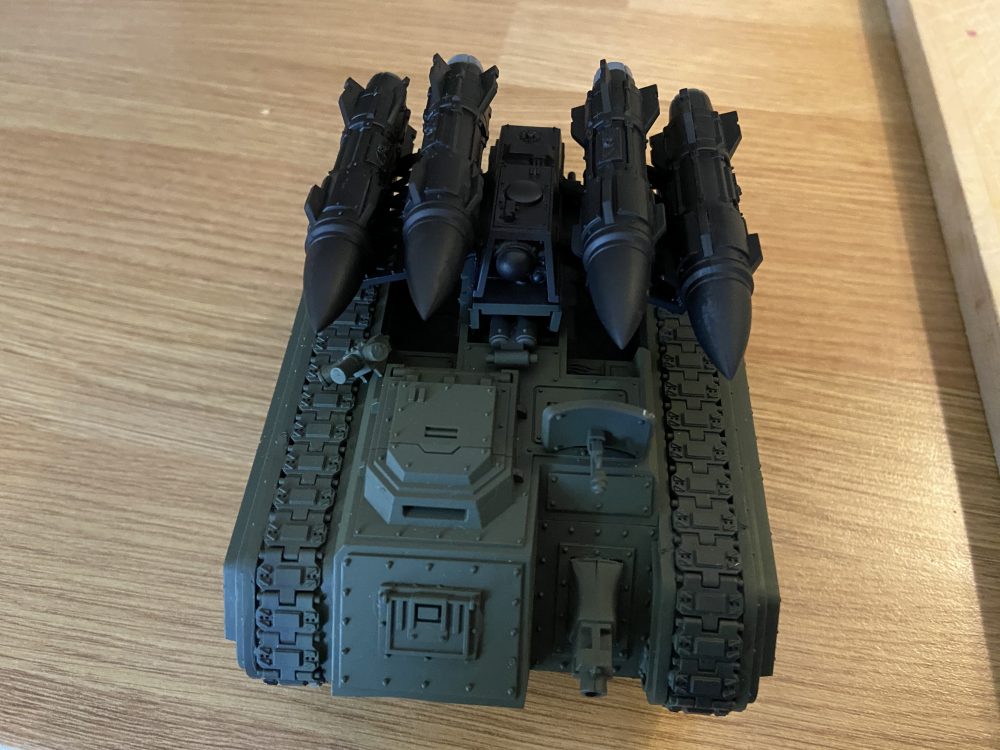
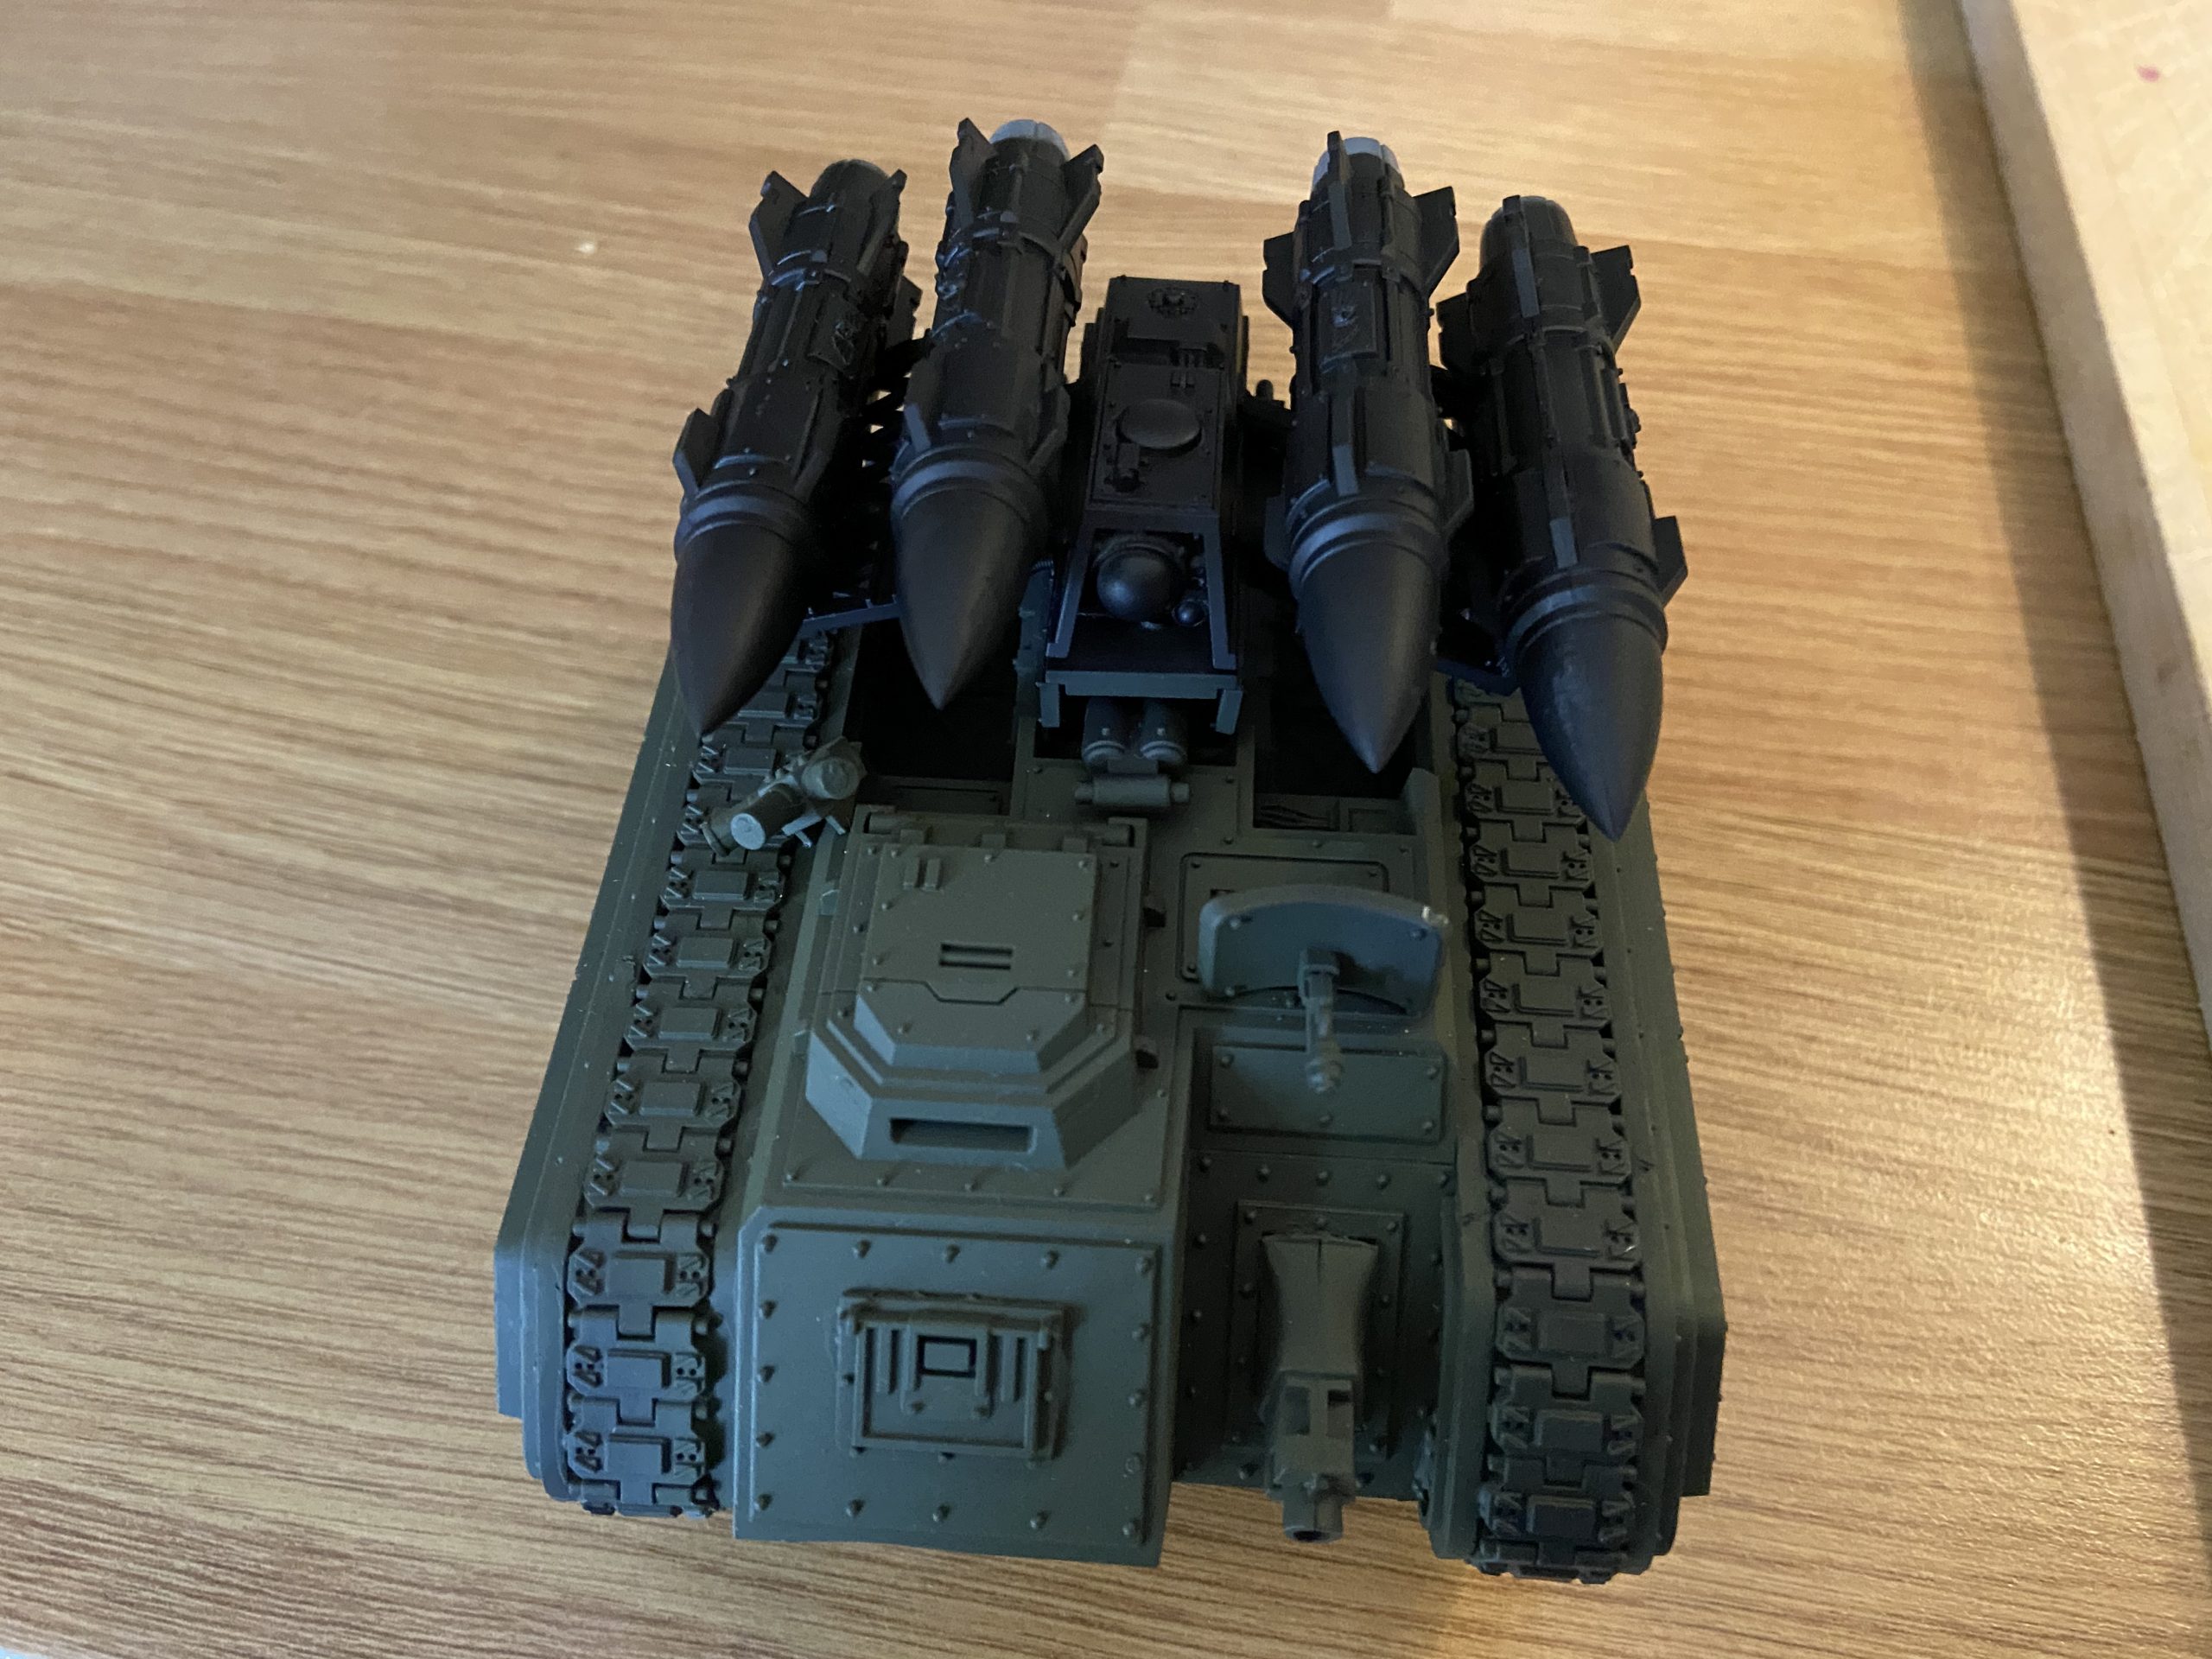
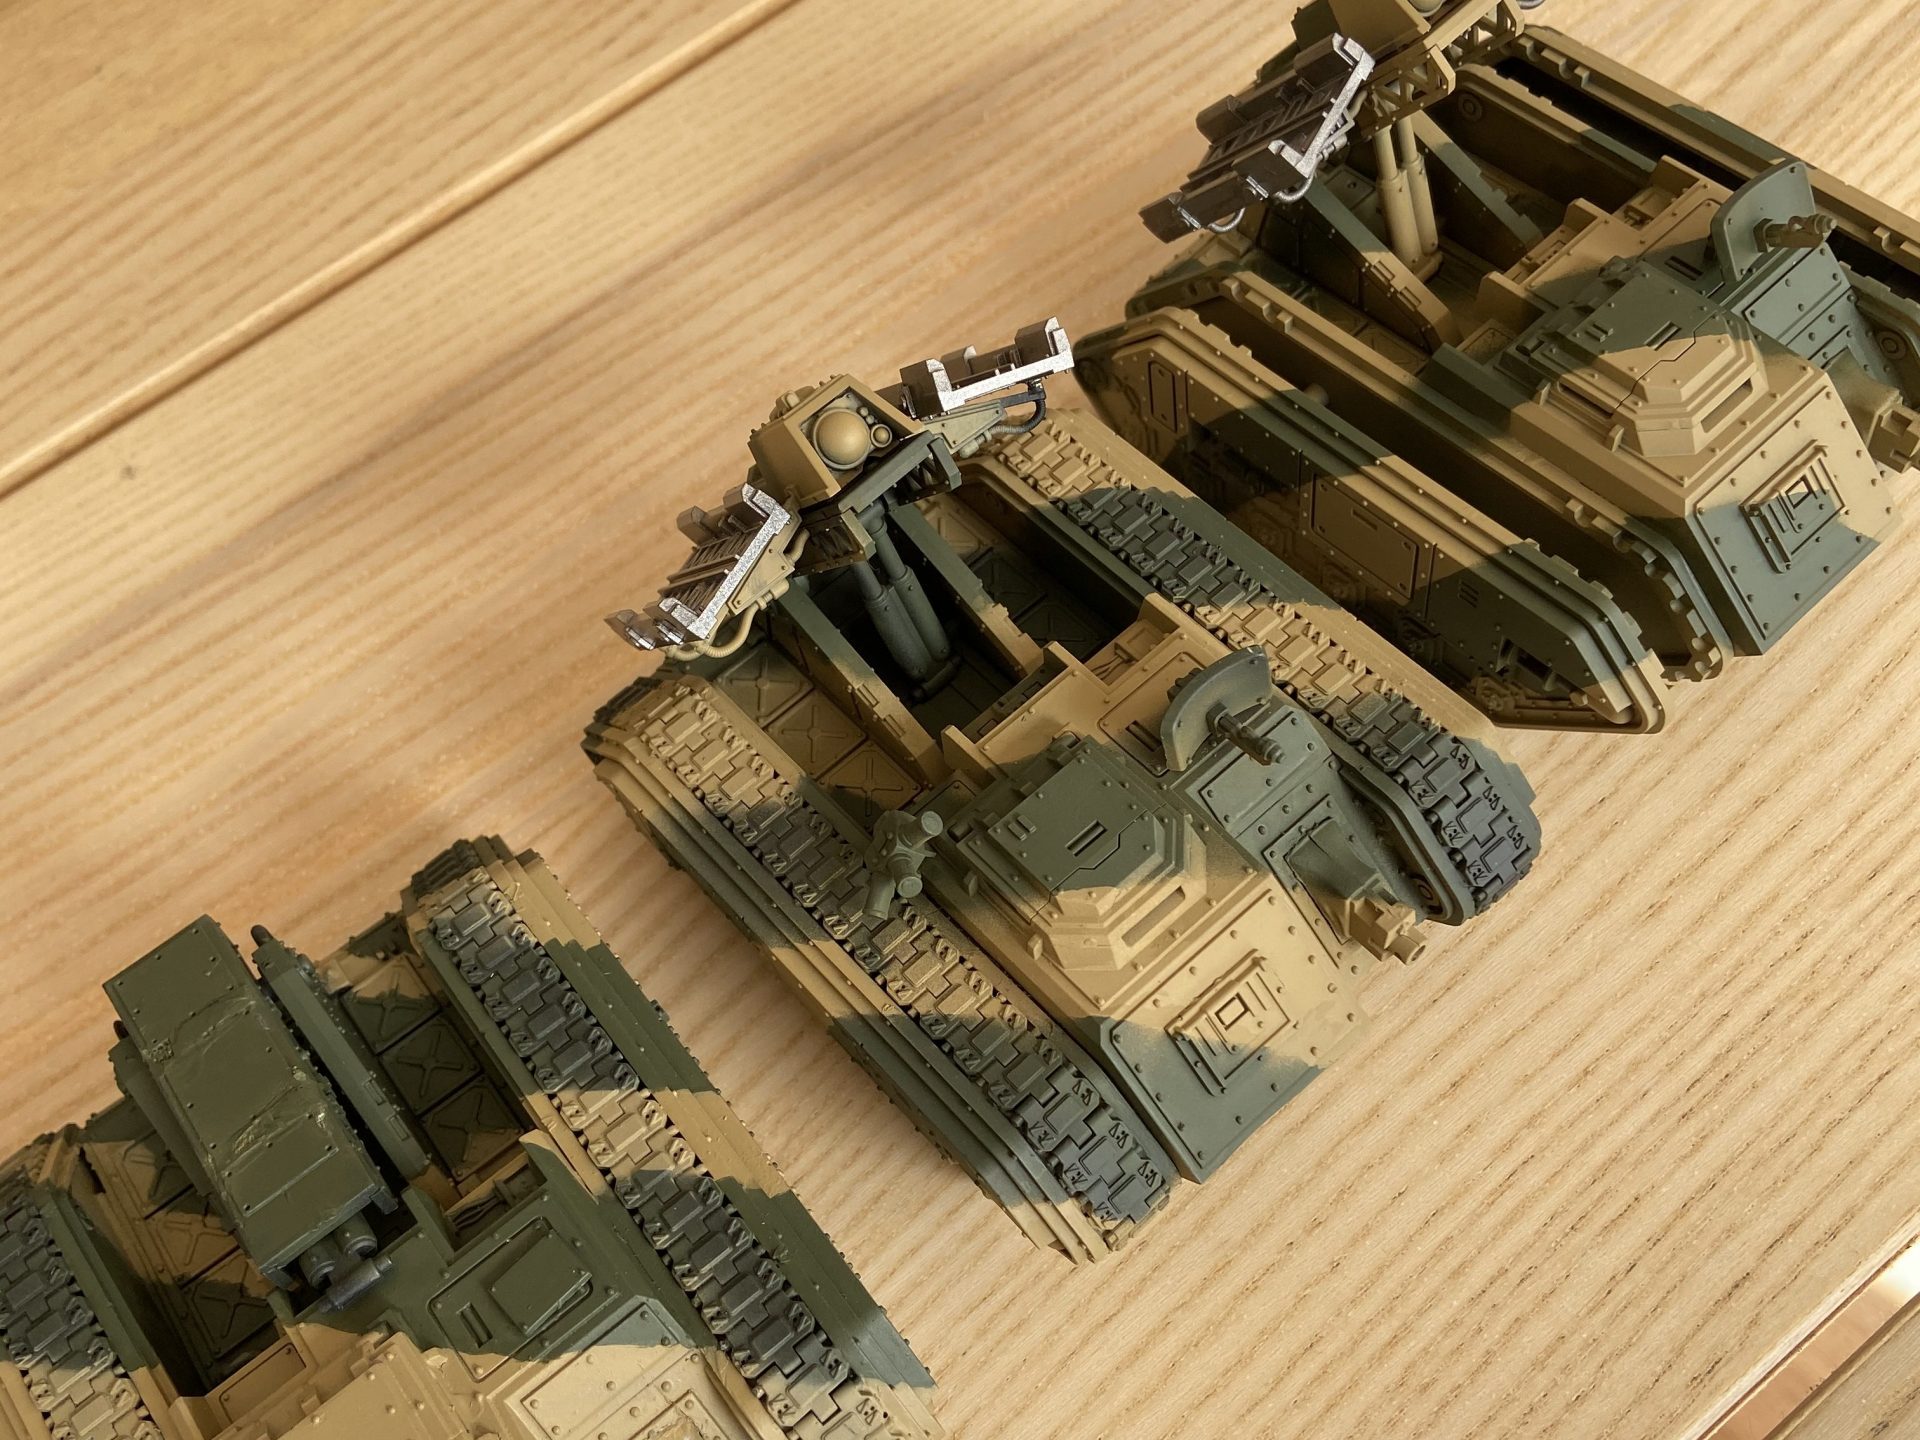
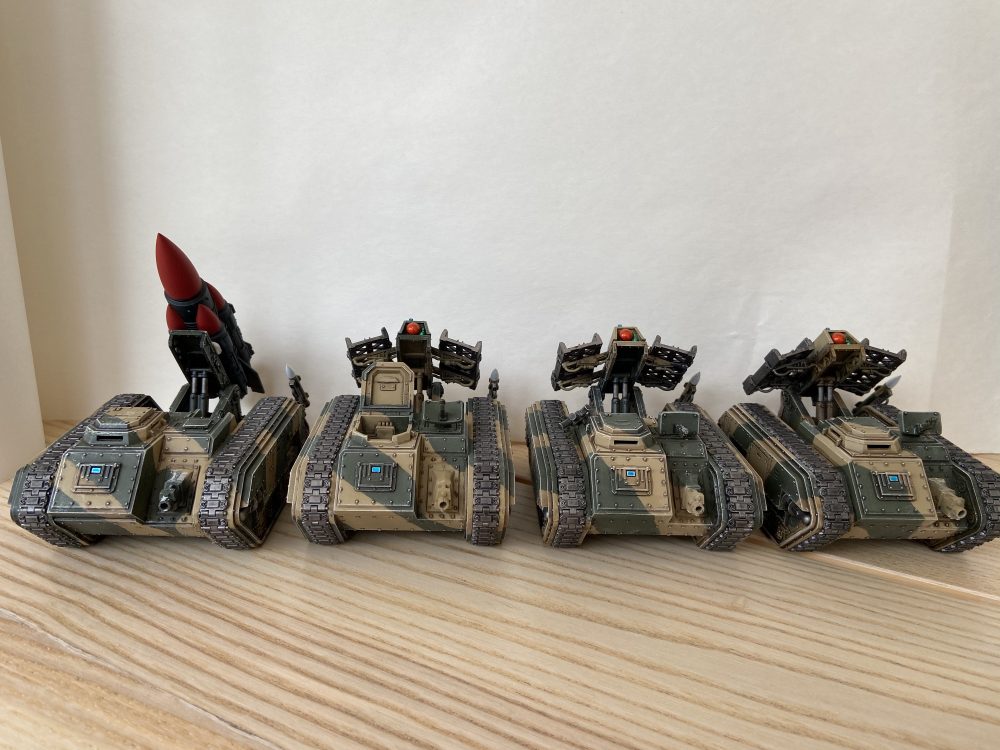
My Manticore and Deathstrike are now completed! Er, well I say Manticore and Deathstrike but I probably really mean three Manticores, with the option of having two of them as Deathstrike Missile Launchers!
Never miss an article? Subscribe!
My Pile of Shame Promise is going well – having completed my Hades Breaching Drills, Sabre Weapons Platforms and now these deadly missile-based artillery pieces. But I’ve realised a weakness in my painting process and just me in general, in the way, I approach things – and that is efficiency. For lack of a better word. But, perhaps a better way of putting it is perceived efficiency by me?
If I’m painting a Manticore using my Cadian Camo Scheme – then adding another Manticore to that project doesn’t double the time it takes. Doing the second one is easier to do at the same time as the first one. And, well if I’m doing two? Why not three? And if three, why not four? This is how I came to do seven Leman Russ as one project.
Anyway, this is what has happened…
The Manticore & Deathstrike Project
Feel free to skip this and get right into the photos and painting methods I used…
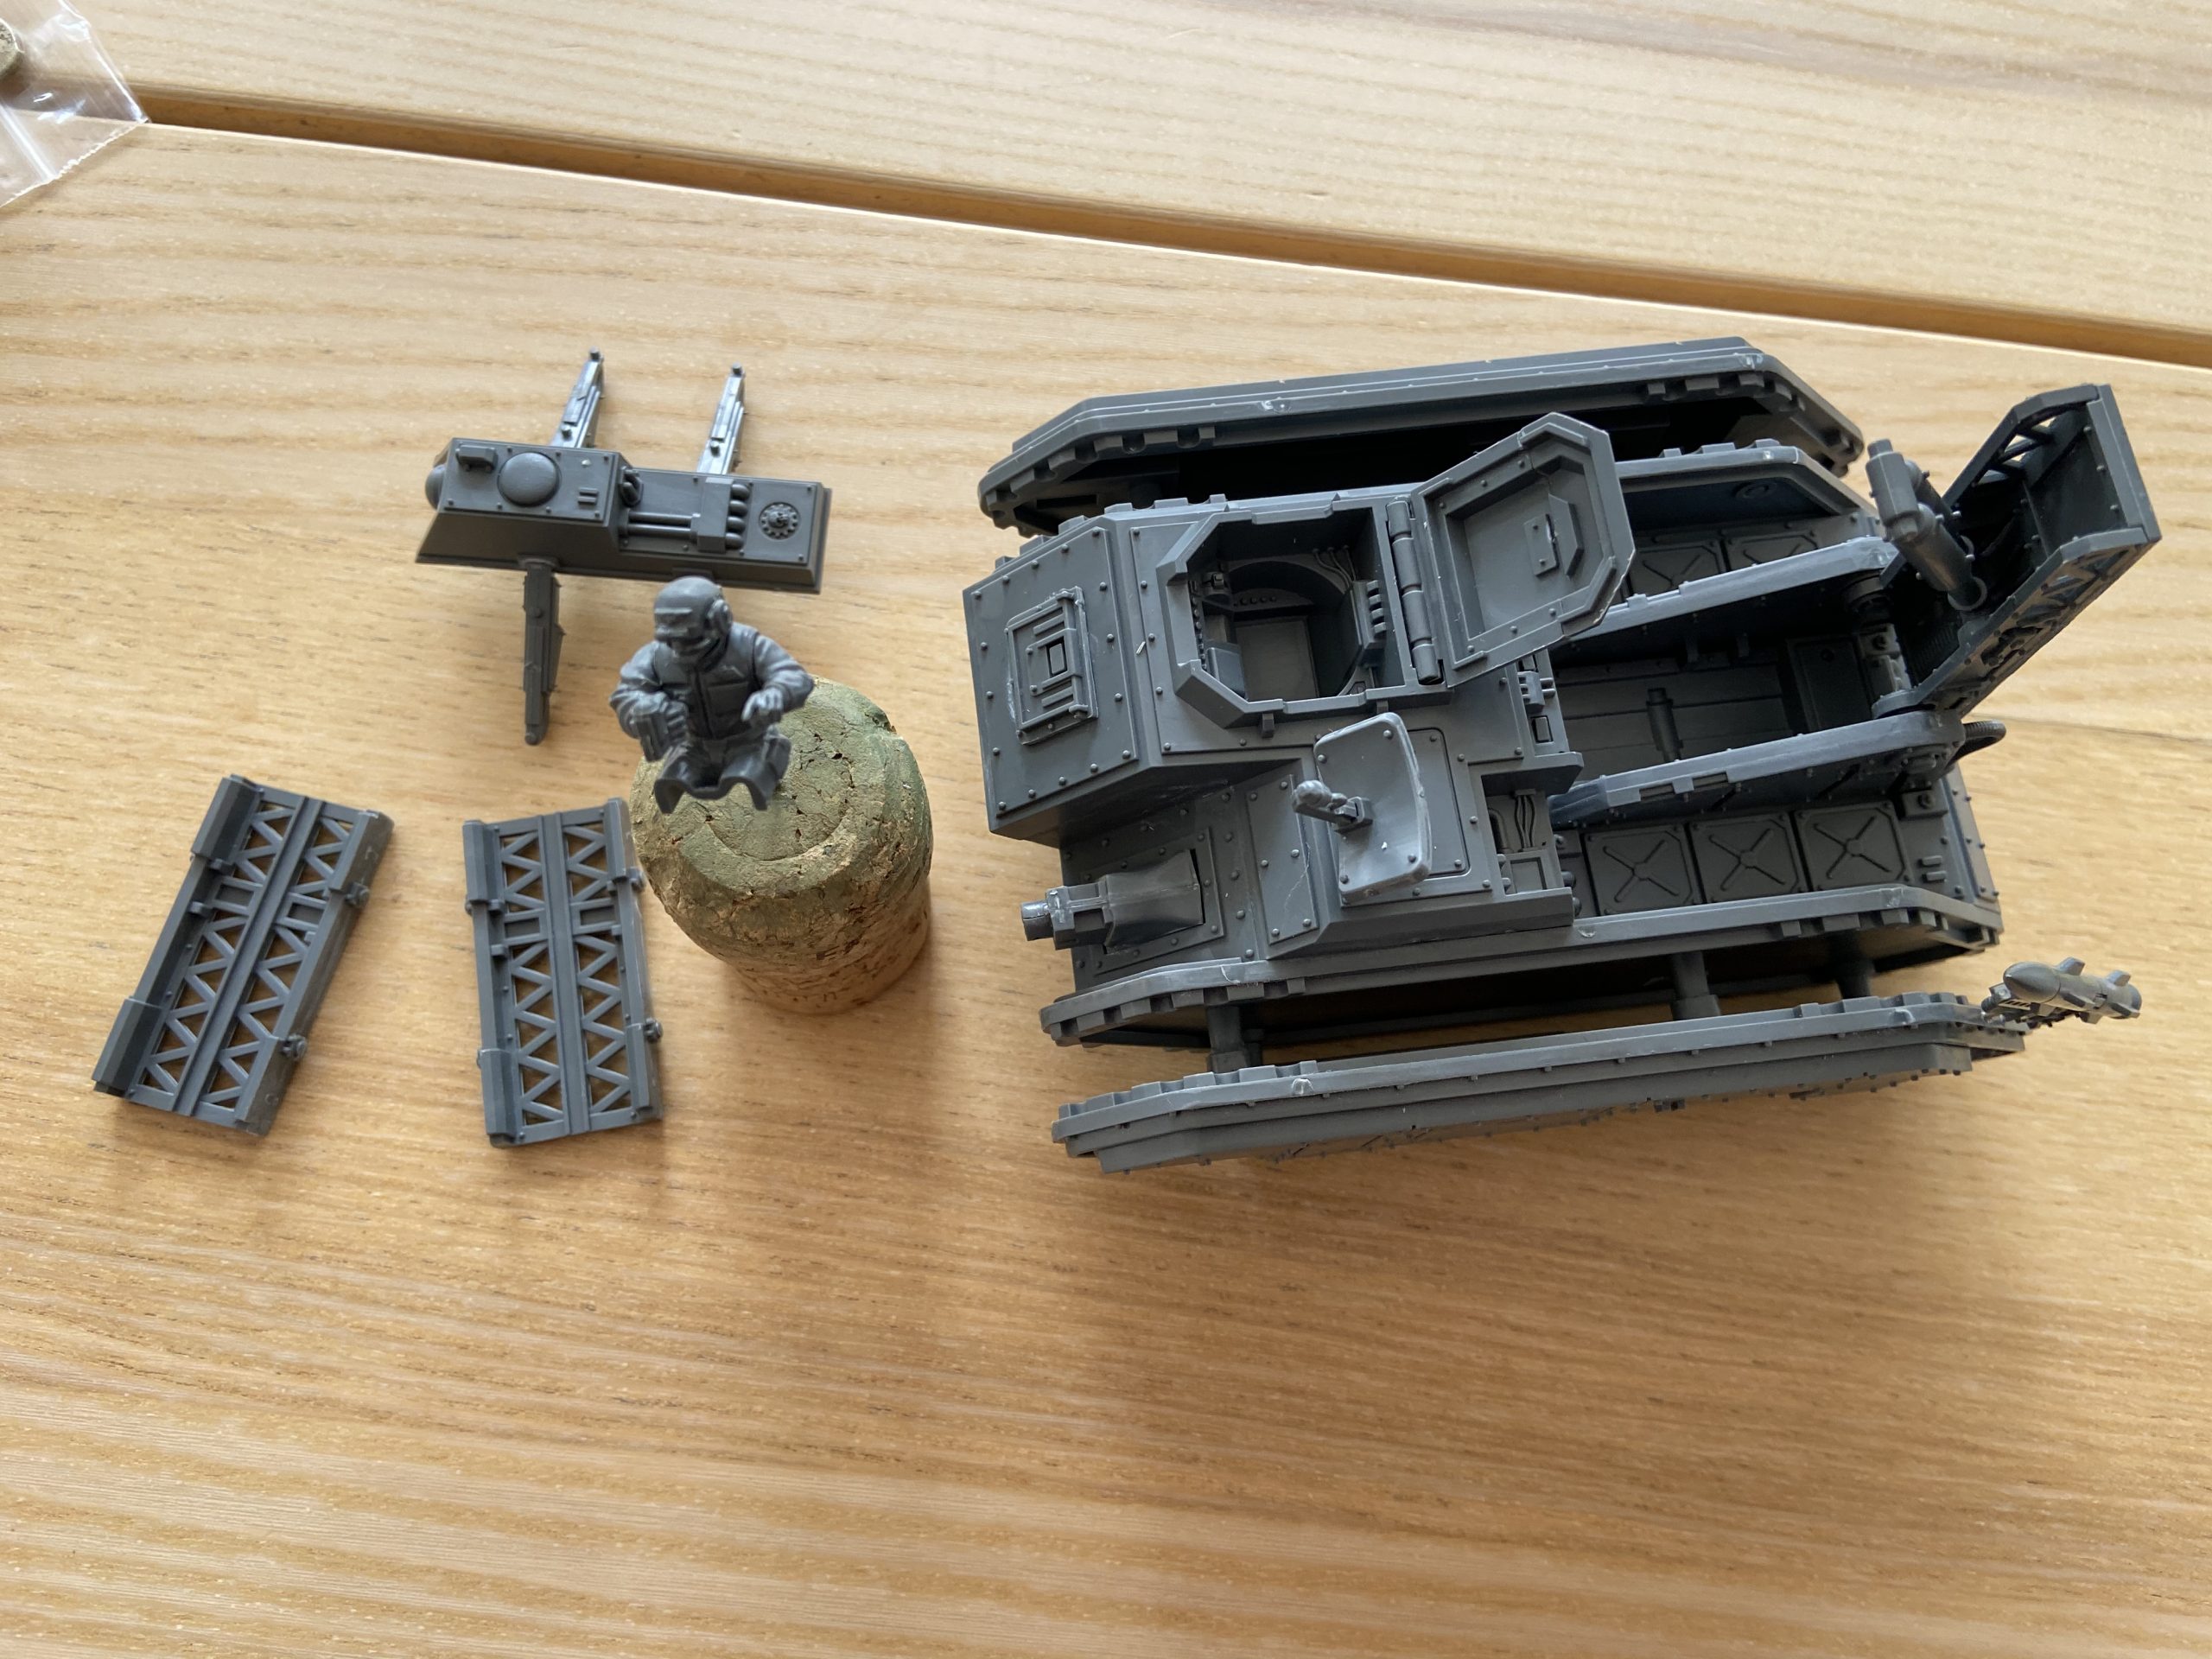
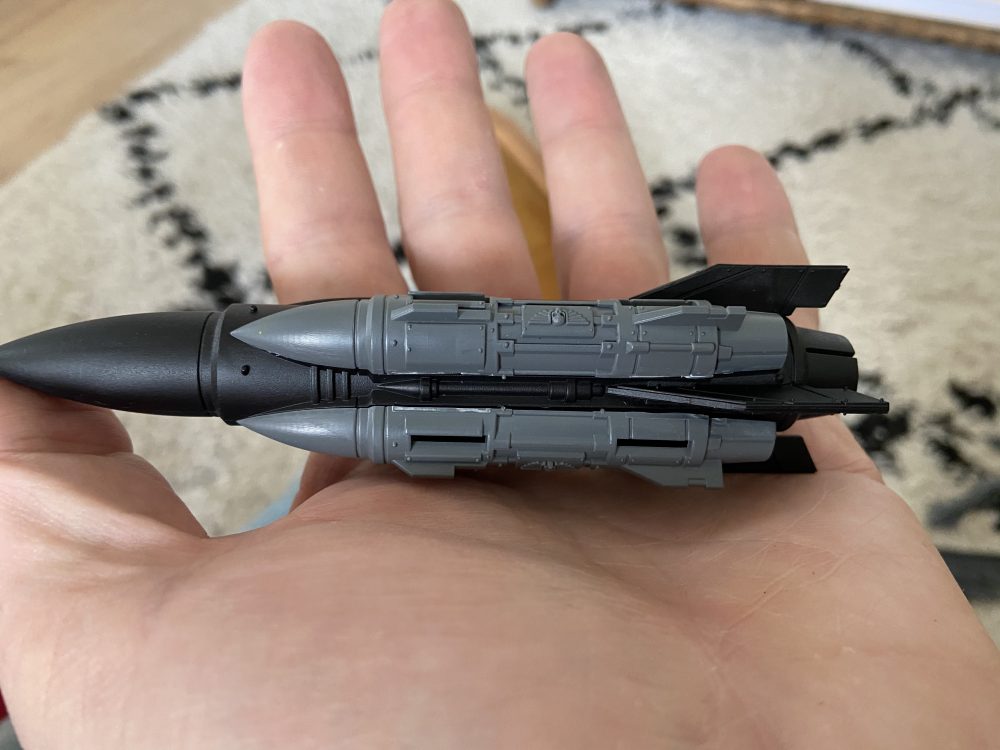
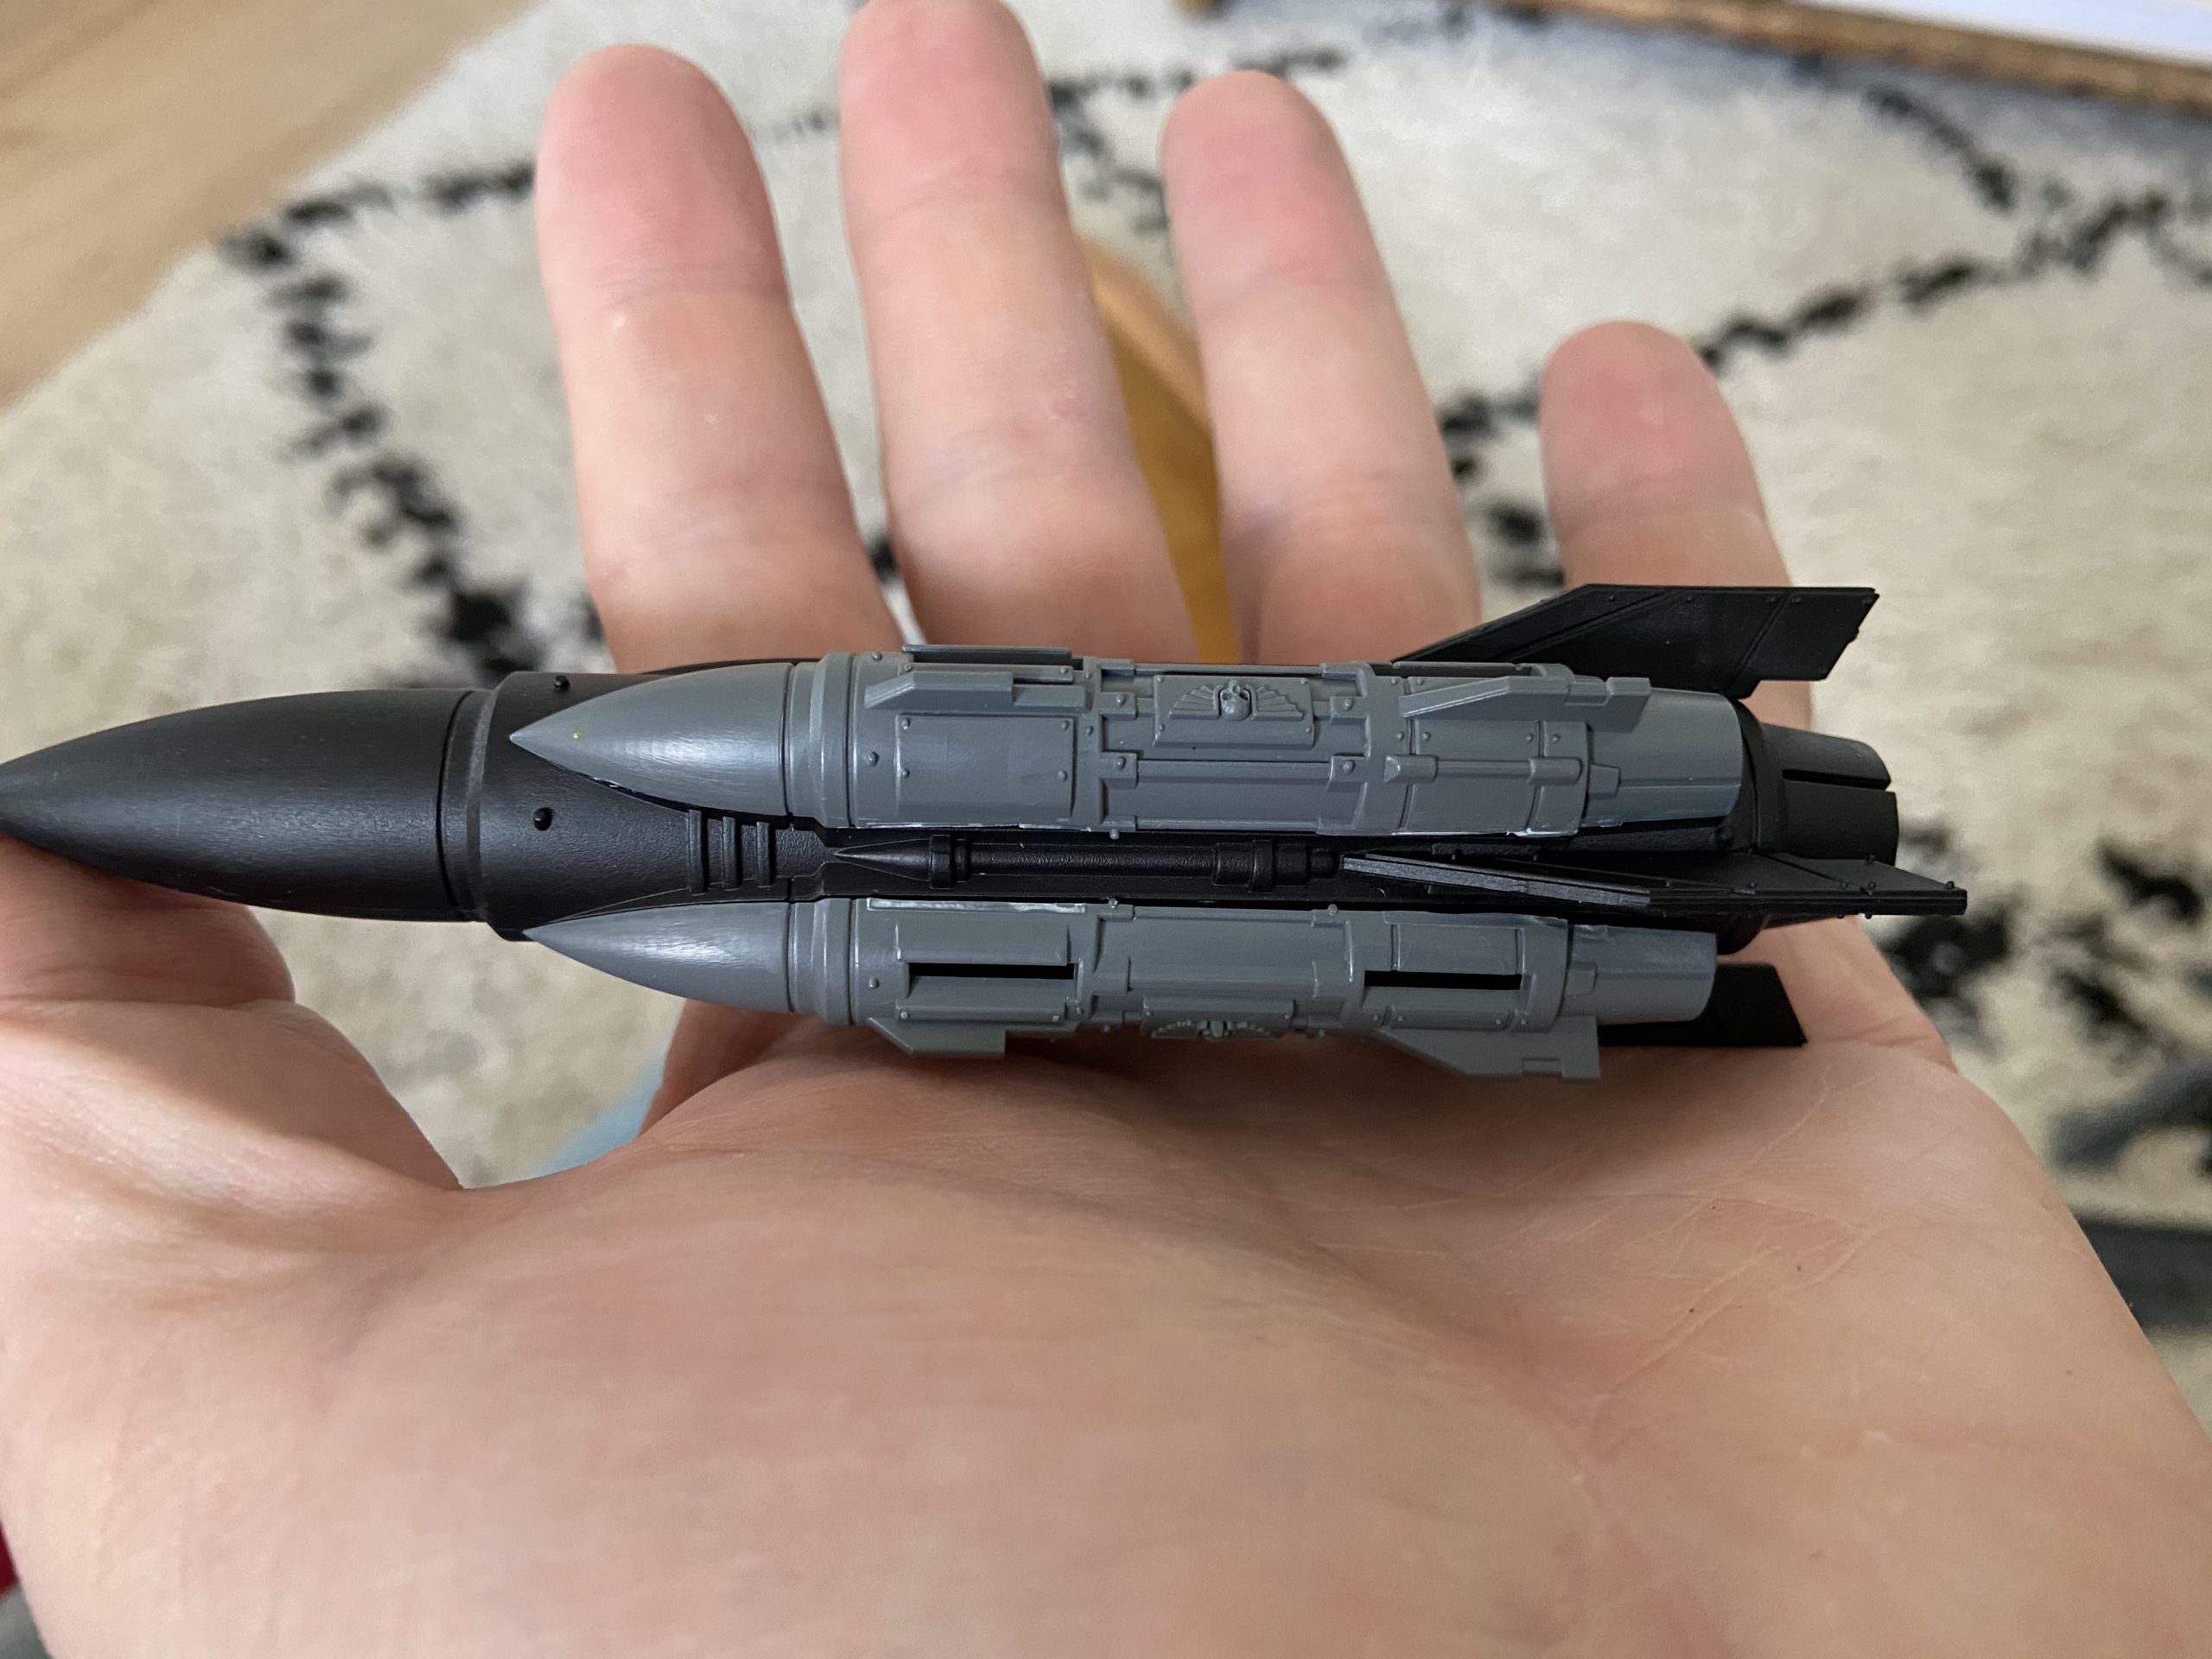
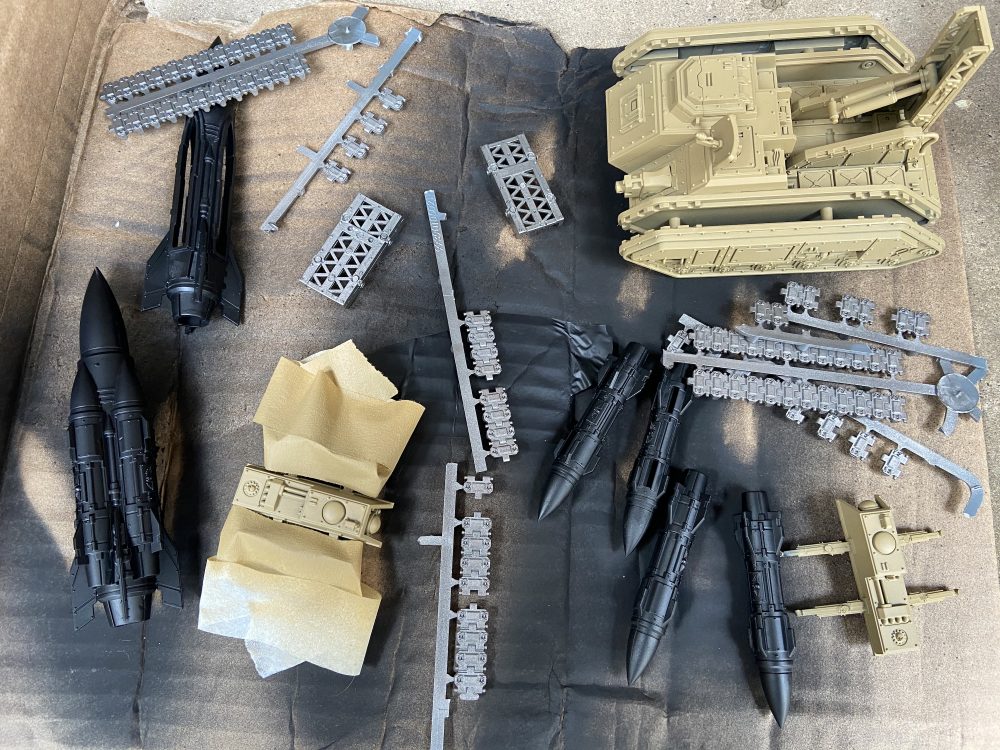
I built and magnetised one Manticore/Deathstrike a long time ago, four and a half years ago! It got painted Castellan Green – then was left in a box. Note, that to more easily magnetise this thing you need two kits for the missiles. The Manticore missiles make up part of the Deathstrike Missle, without the extra missile bits – which I got from eBay in the U.S.A – then you need to not only magnetise the mechanism for holding the missile(s), but also the missiles themselves. Anyway, I digress.
I think also around this time I acquired a cheap Manticore chassis from eBay – with no missiles. I guess I was going to buy more missile parts to make up for that fact? Or maybe it was so I could field one of each type?
The point is I have had the following for four and a half years;
- 4x Manticore Missiles (1 set)
- 1x Deathstrike Missile
- 2x Chassis
- 0x Finished Missile Carrying Models
This was no good! Going back to my perceived efficiency issue, this also seemed like a suboptimal project. Sure I would end up with one of each of the models, a Manticore and a Deathstrike by the end of it. But I would be so close to having three Manticores if I just bought a little extra? Right!
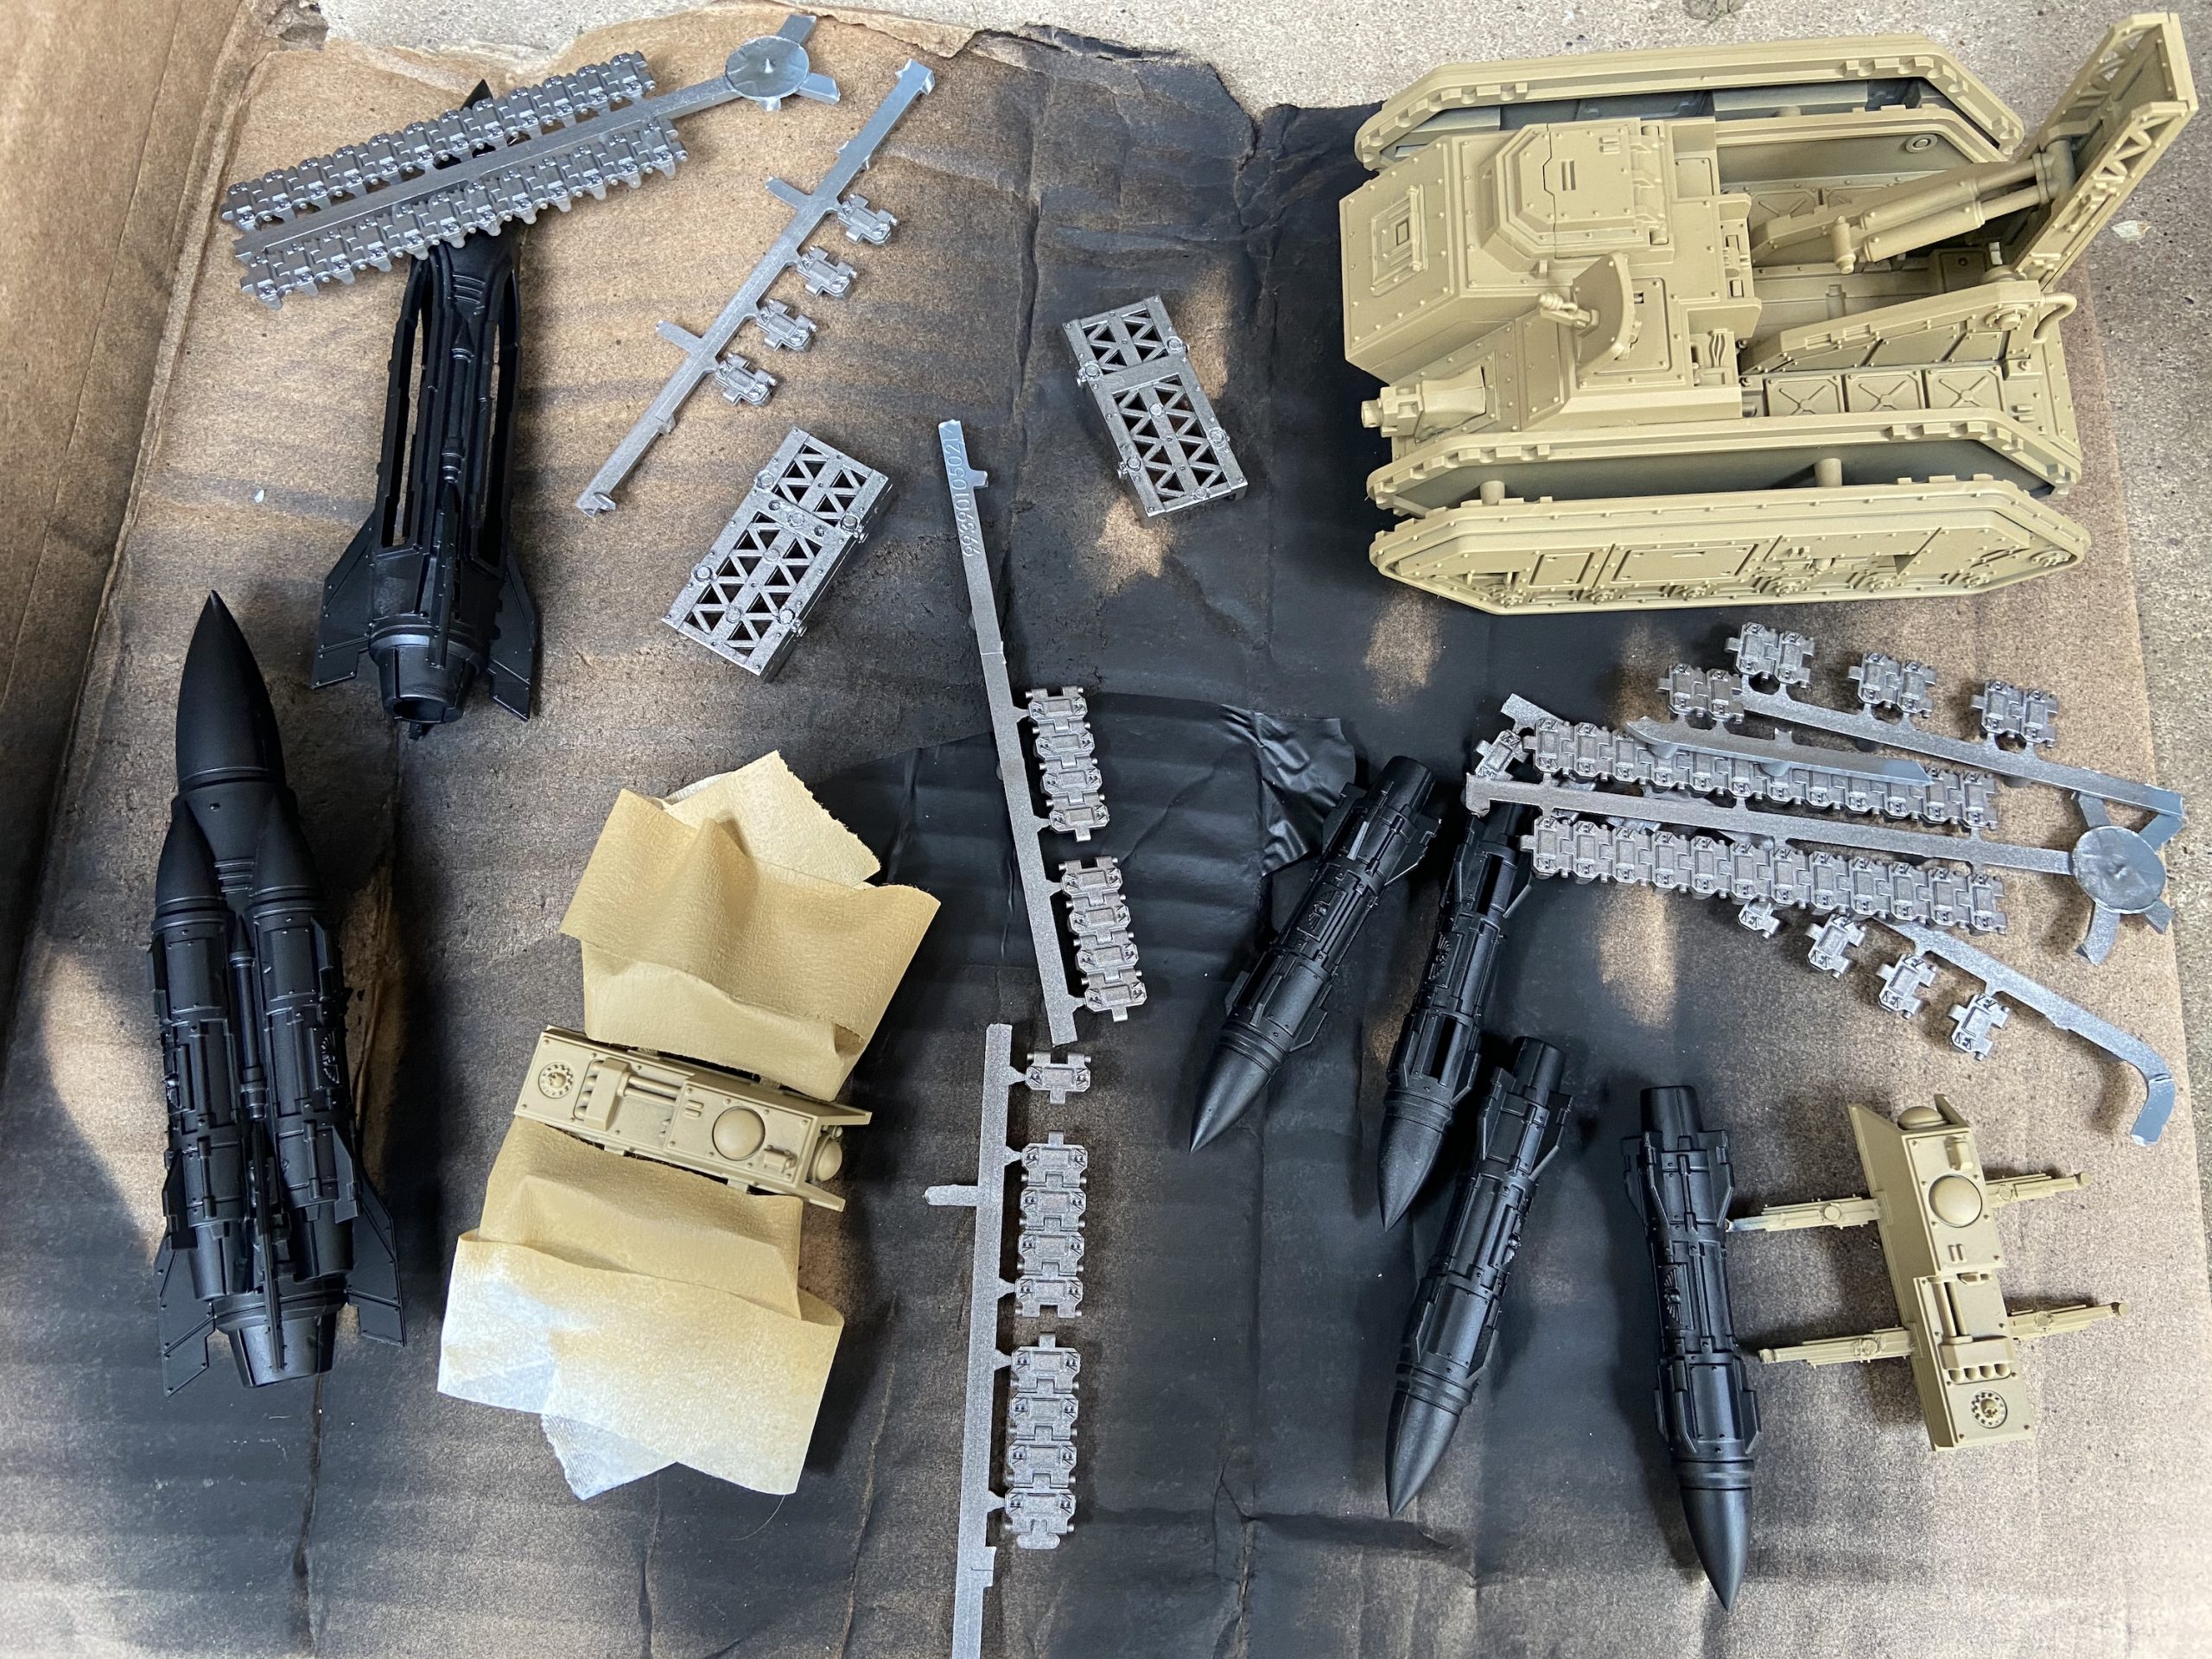
So today, at the time of writing it is March 29th and I have bought two new Manticores kits. I hope that this extra investment and breaking my rule of not buying any new models pay off!
At the end of this project, I will be able to field;
- 3x Manticore
- A Deathstrike
If I can obtain a couple of extra Manticore missile pieces then I can make a second and third Deaathstrike missile and then I could also field;
- A Manticore
- 3x Deathstrike
I wonder how long after March 29th this article will go out though and how long this project will all its extras will take me… well the article was published May 1st, but I finished them last night. So a month in all to get all four done. Not bad for me!
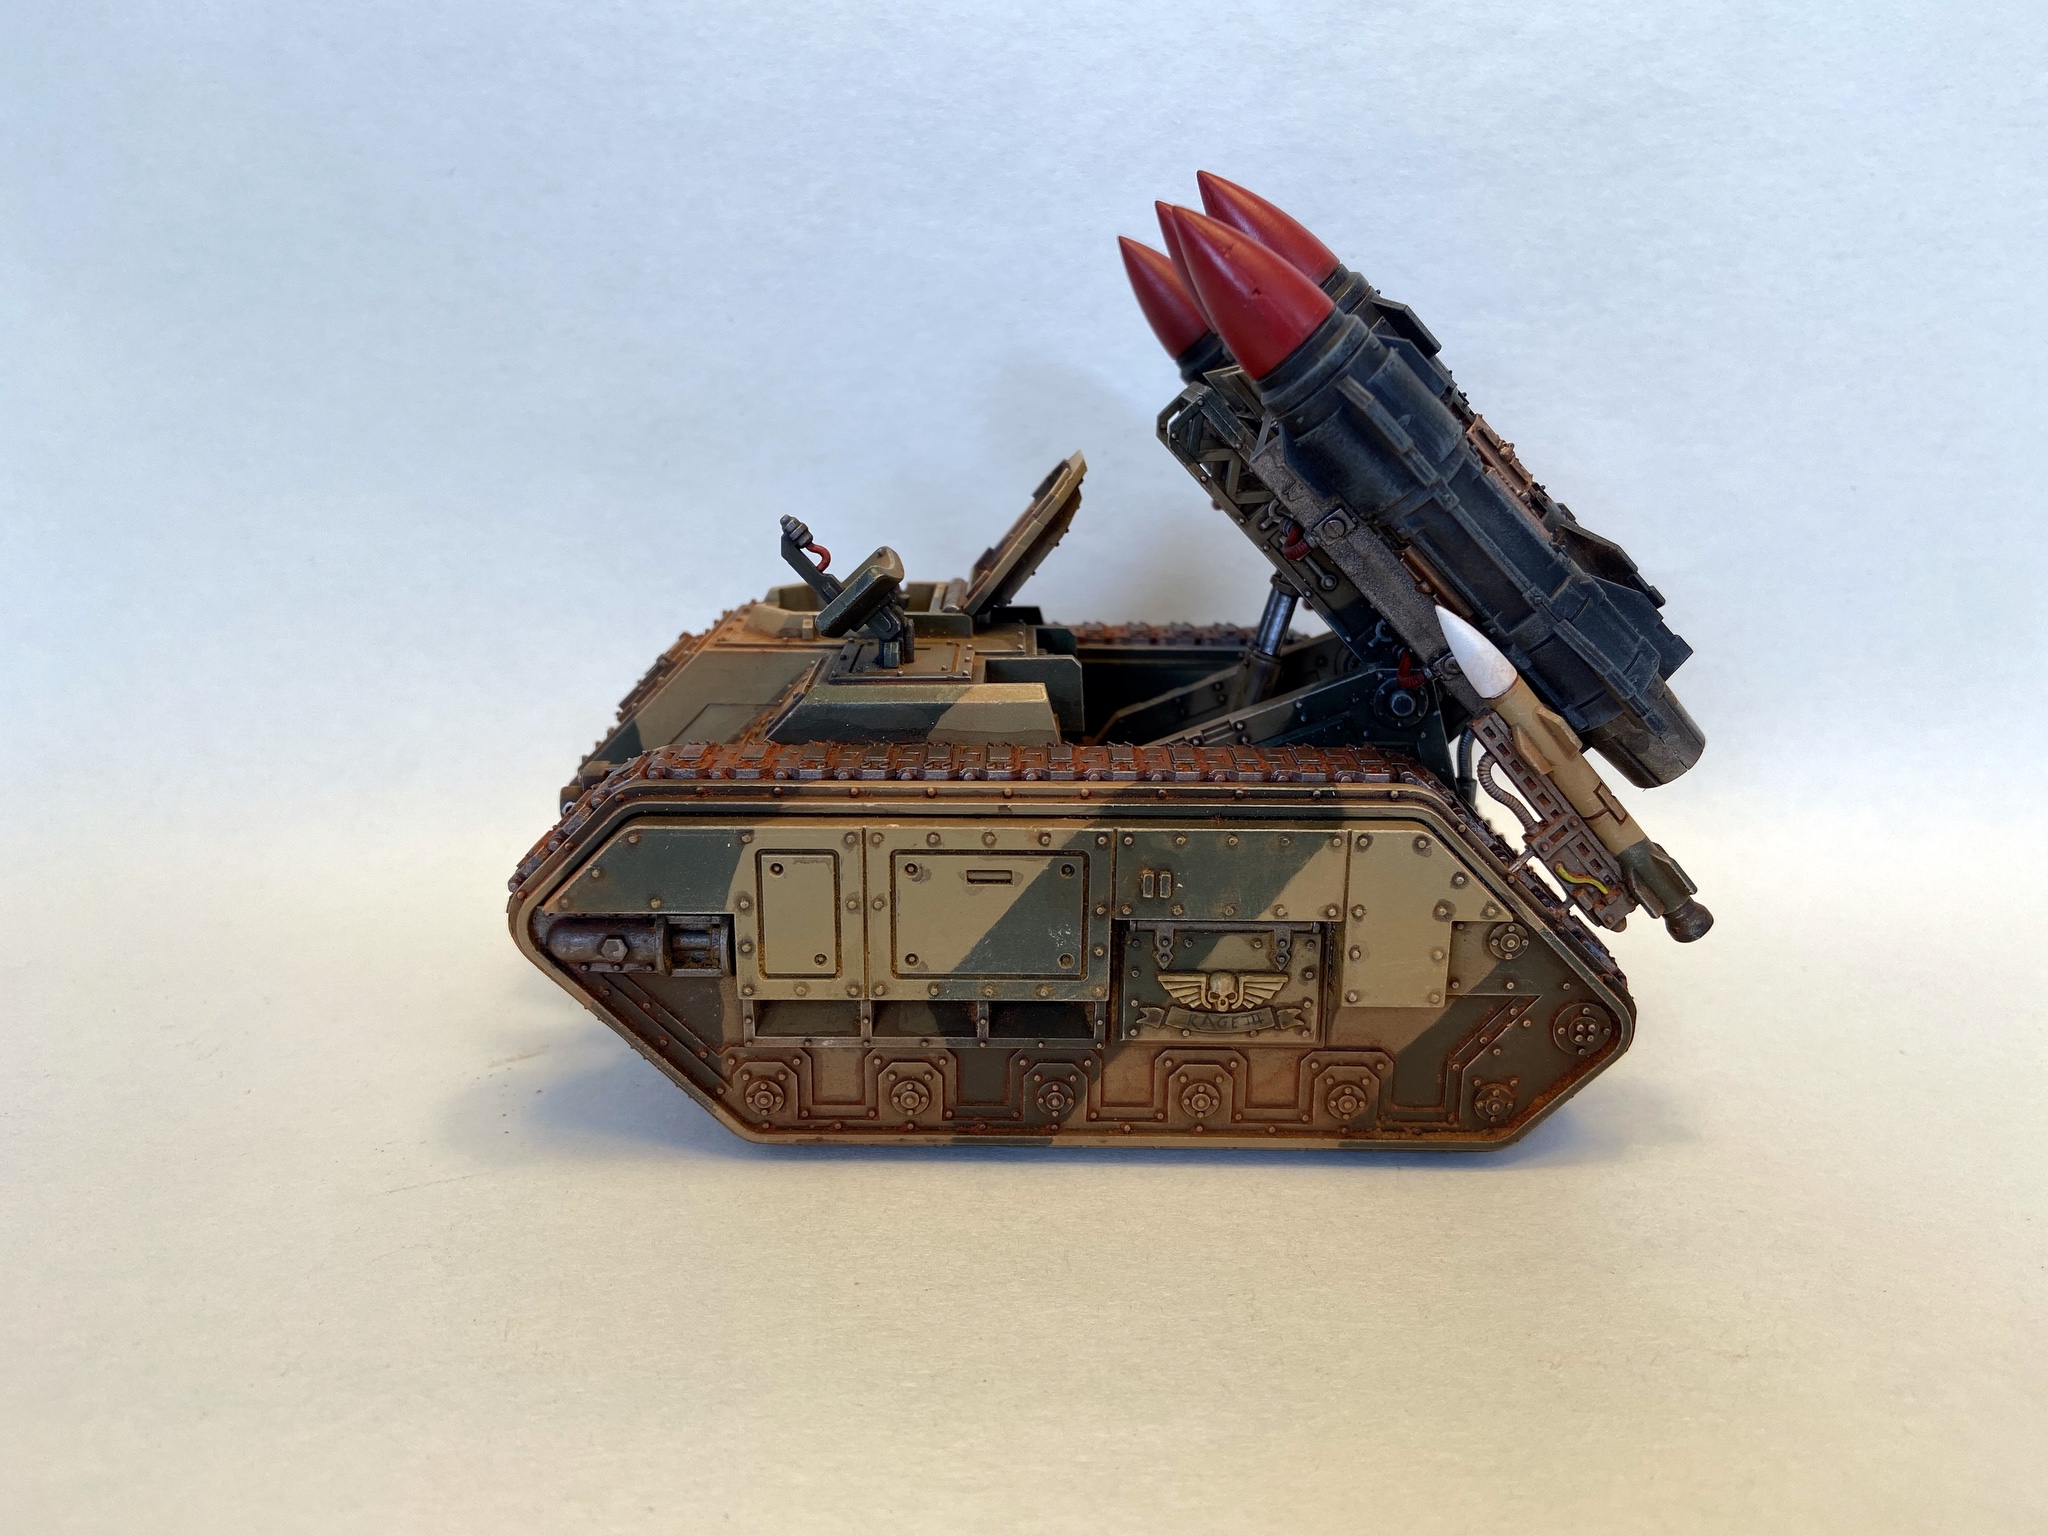
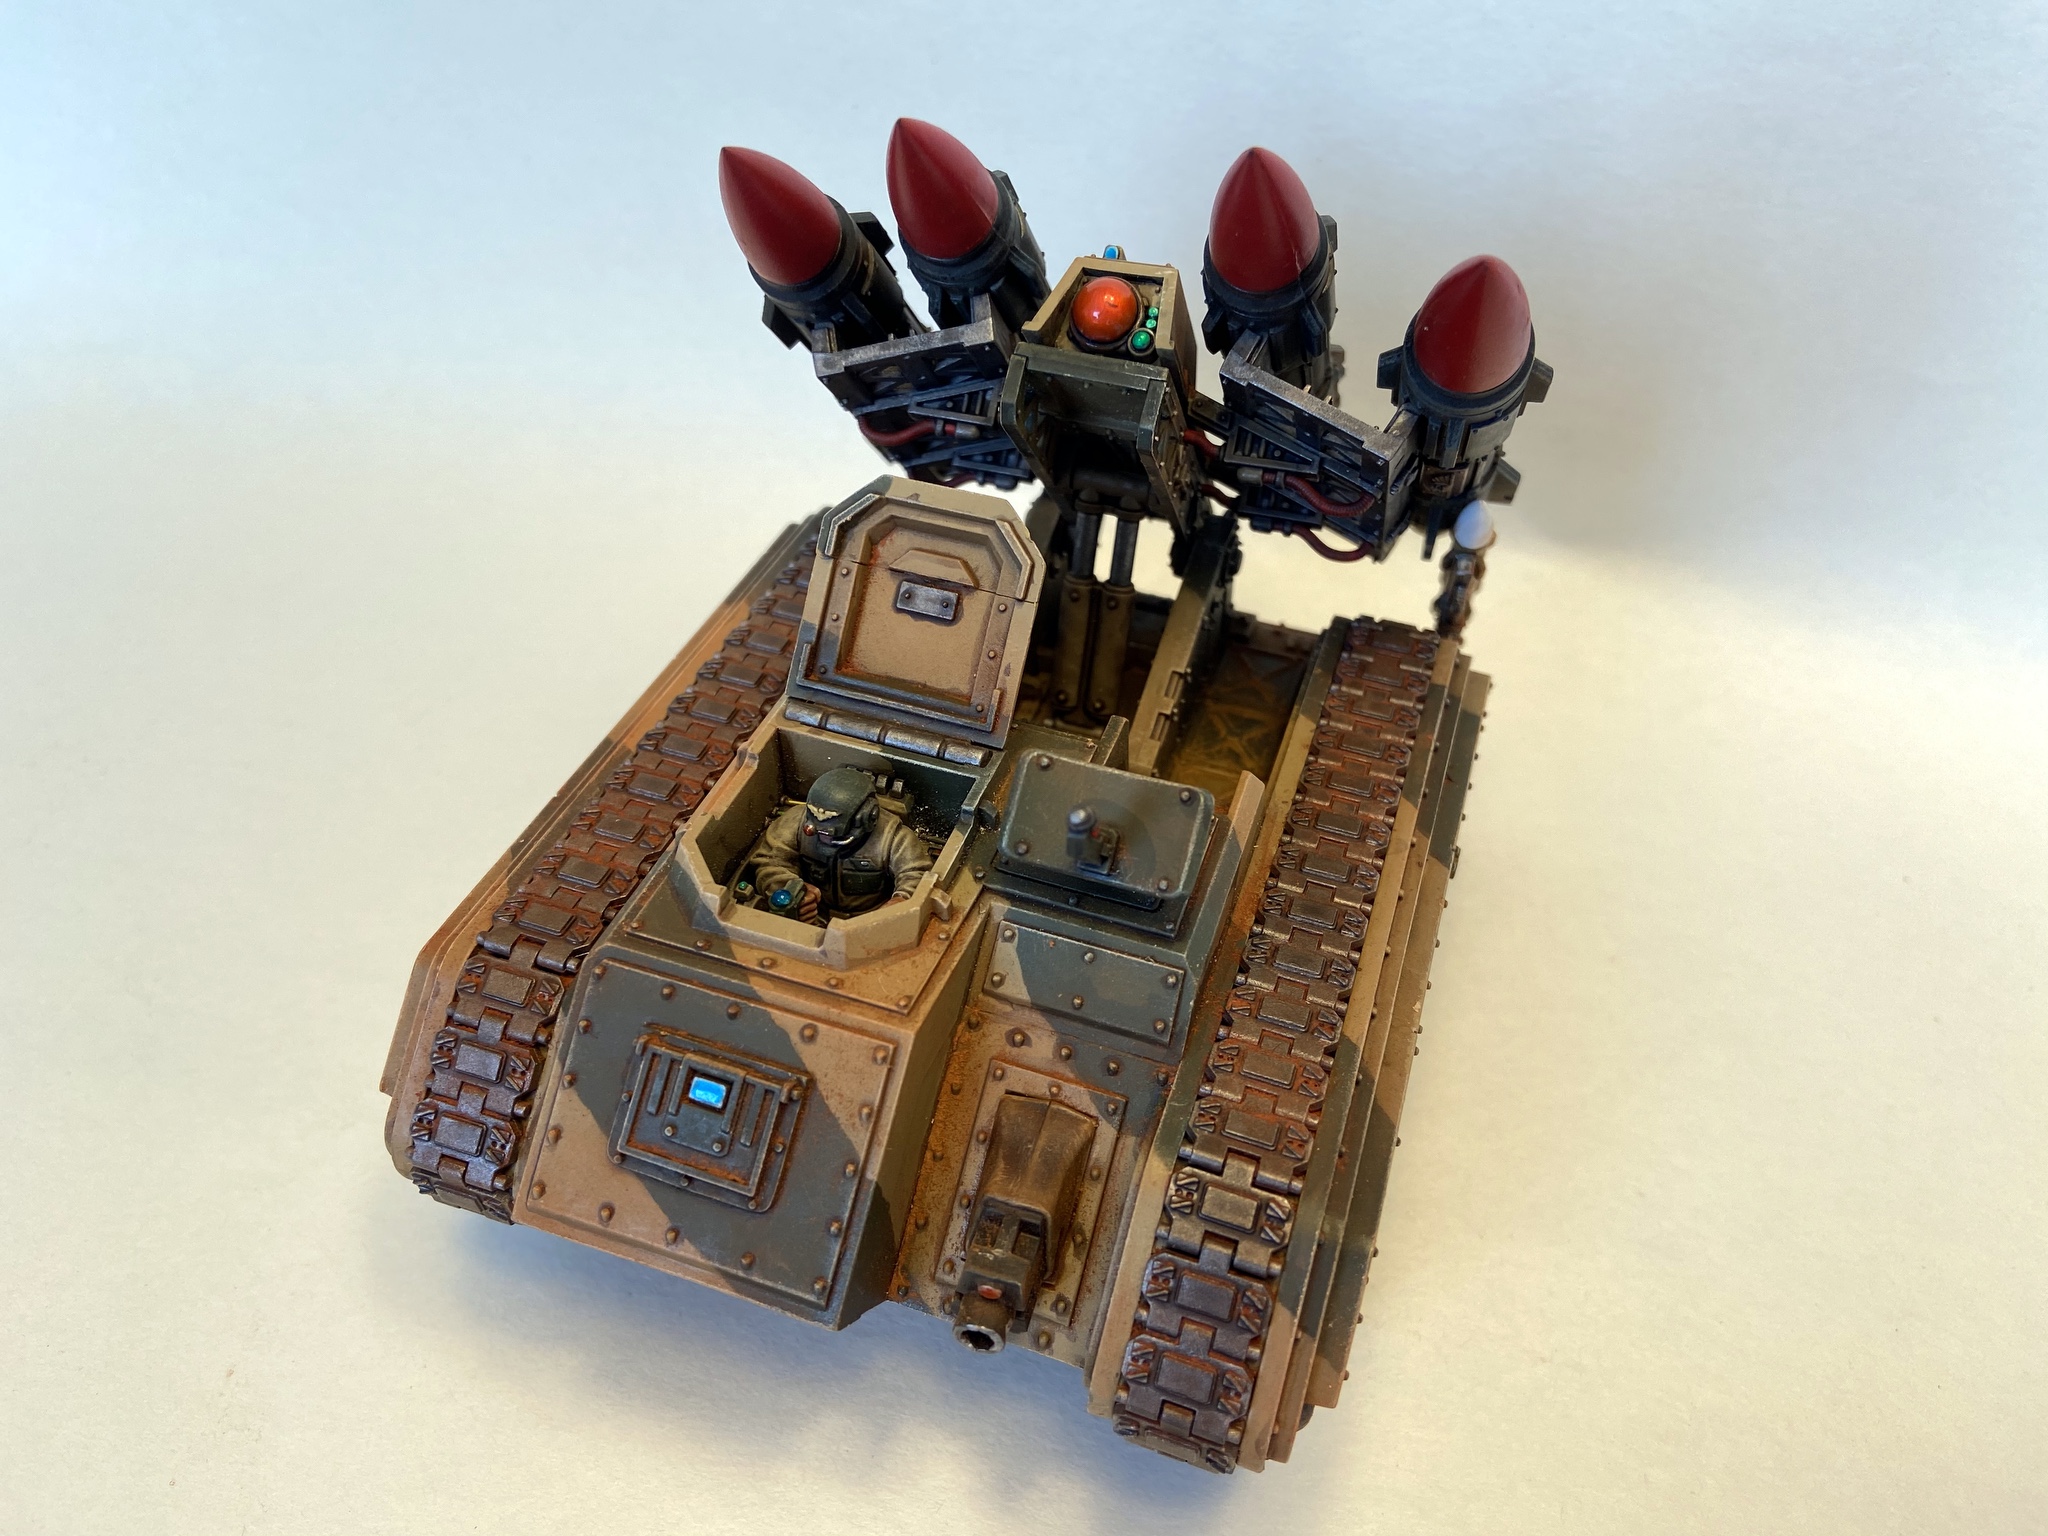
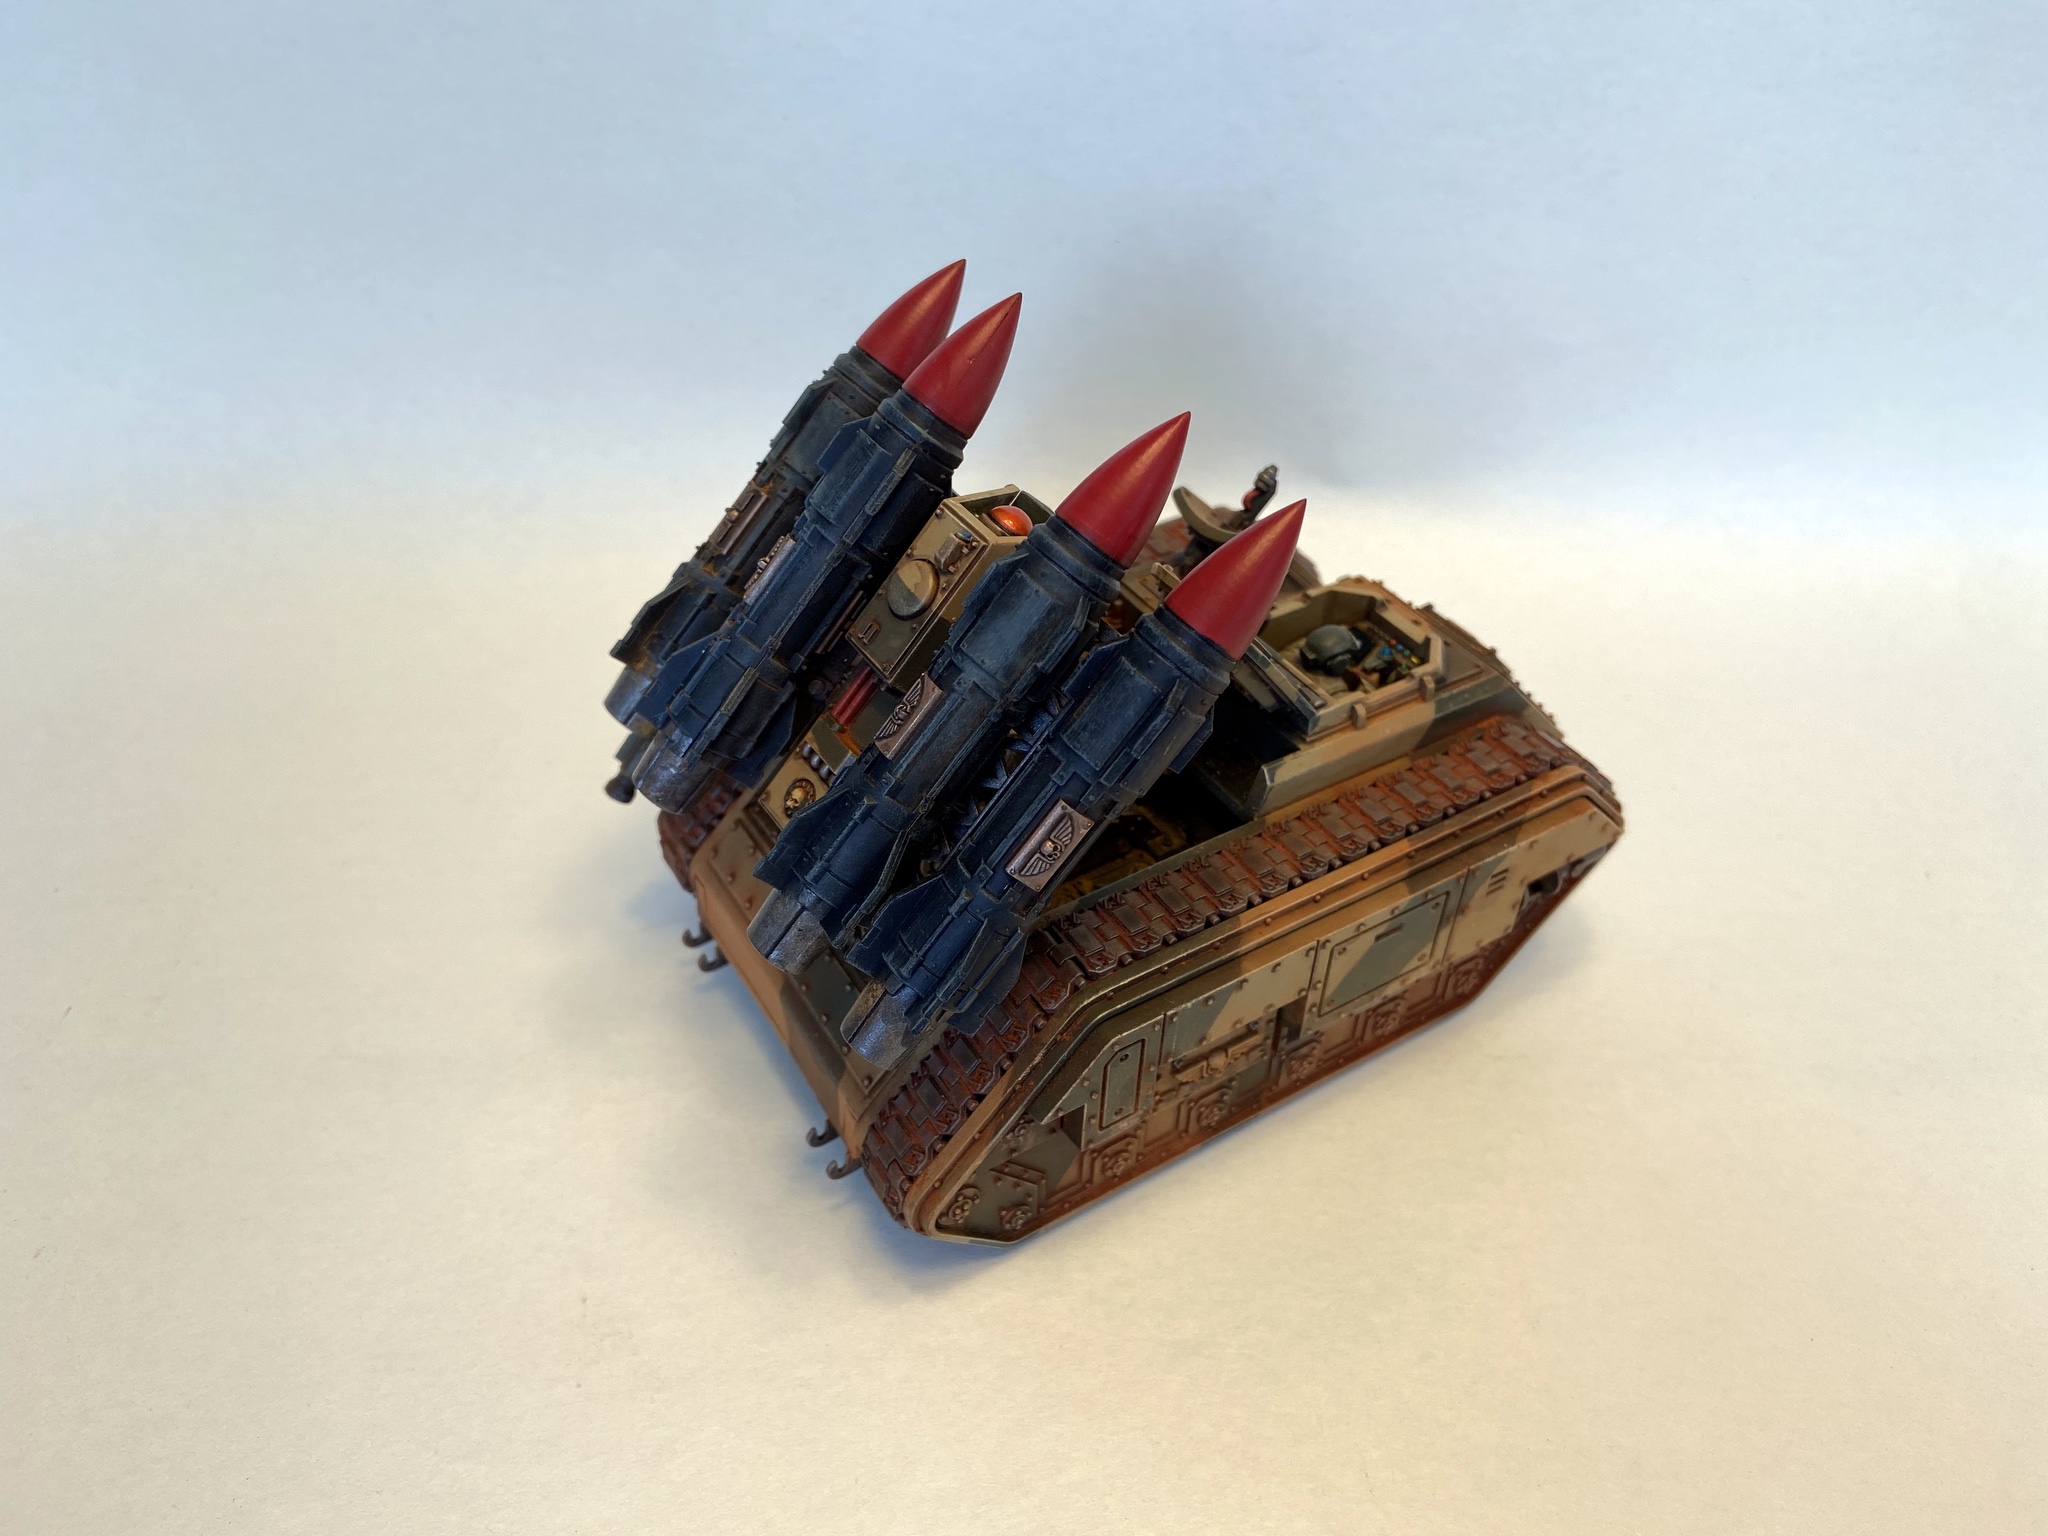
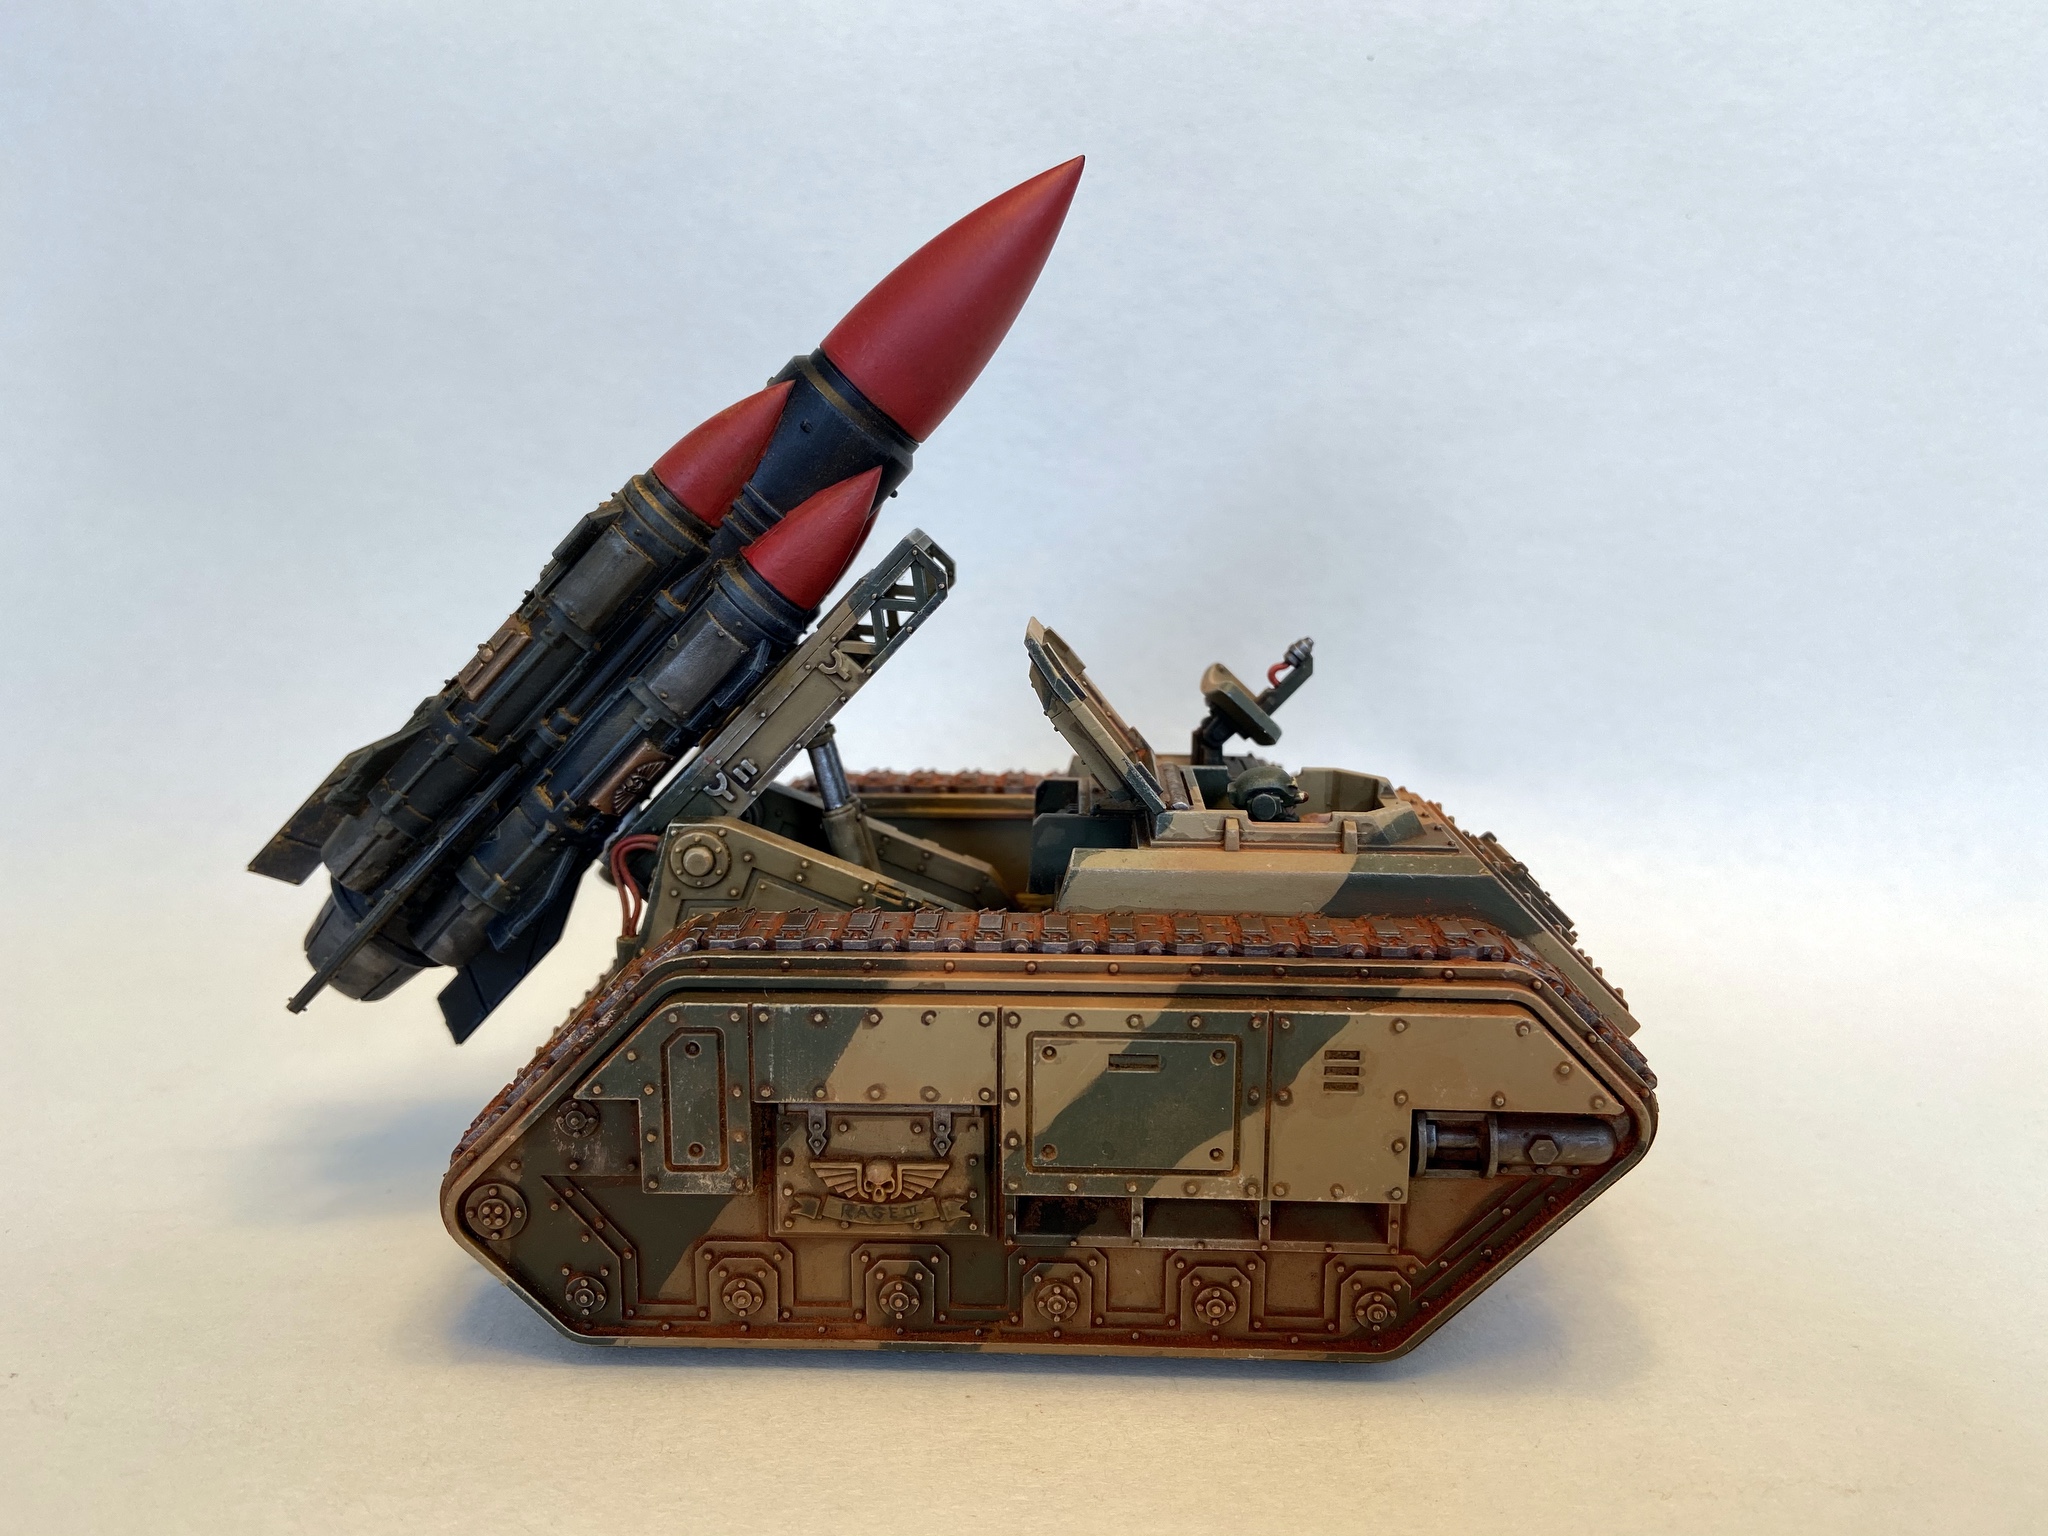
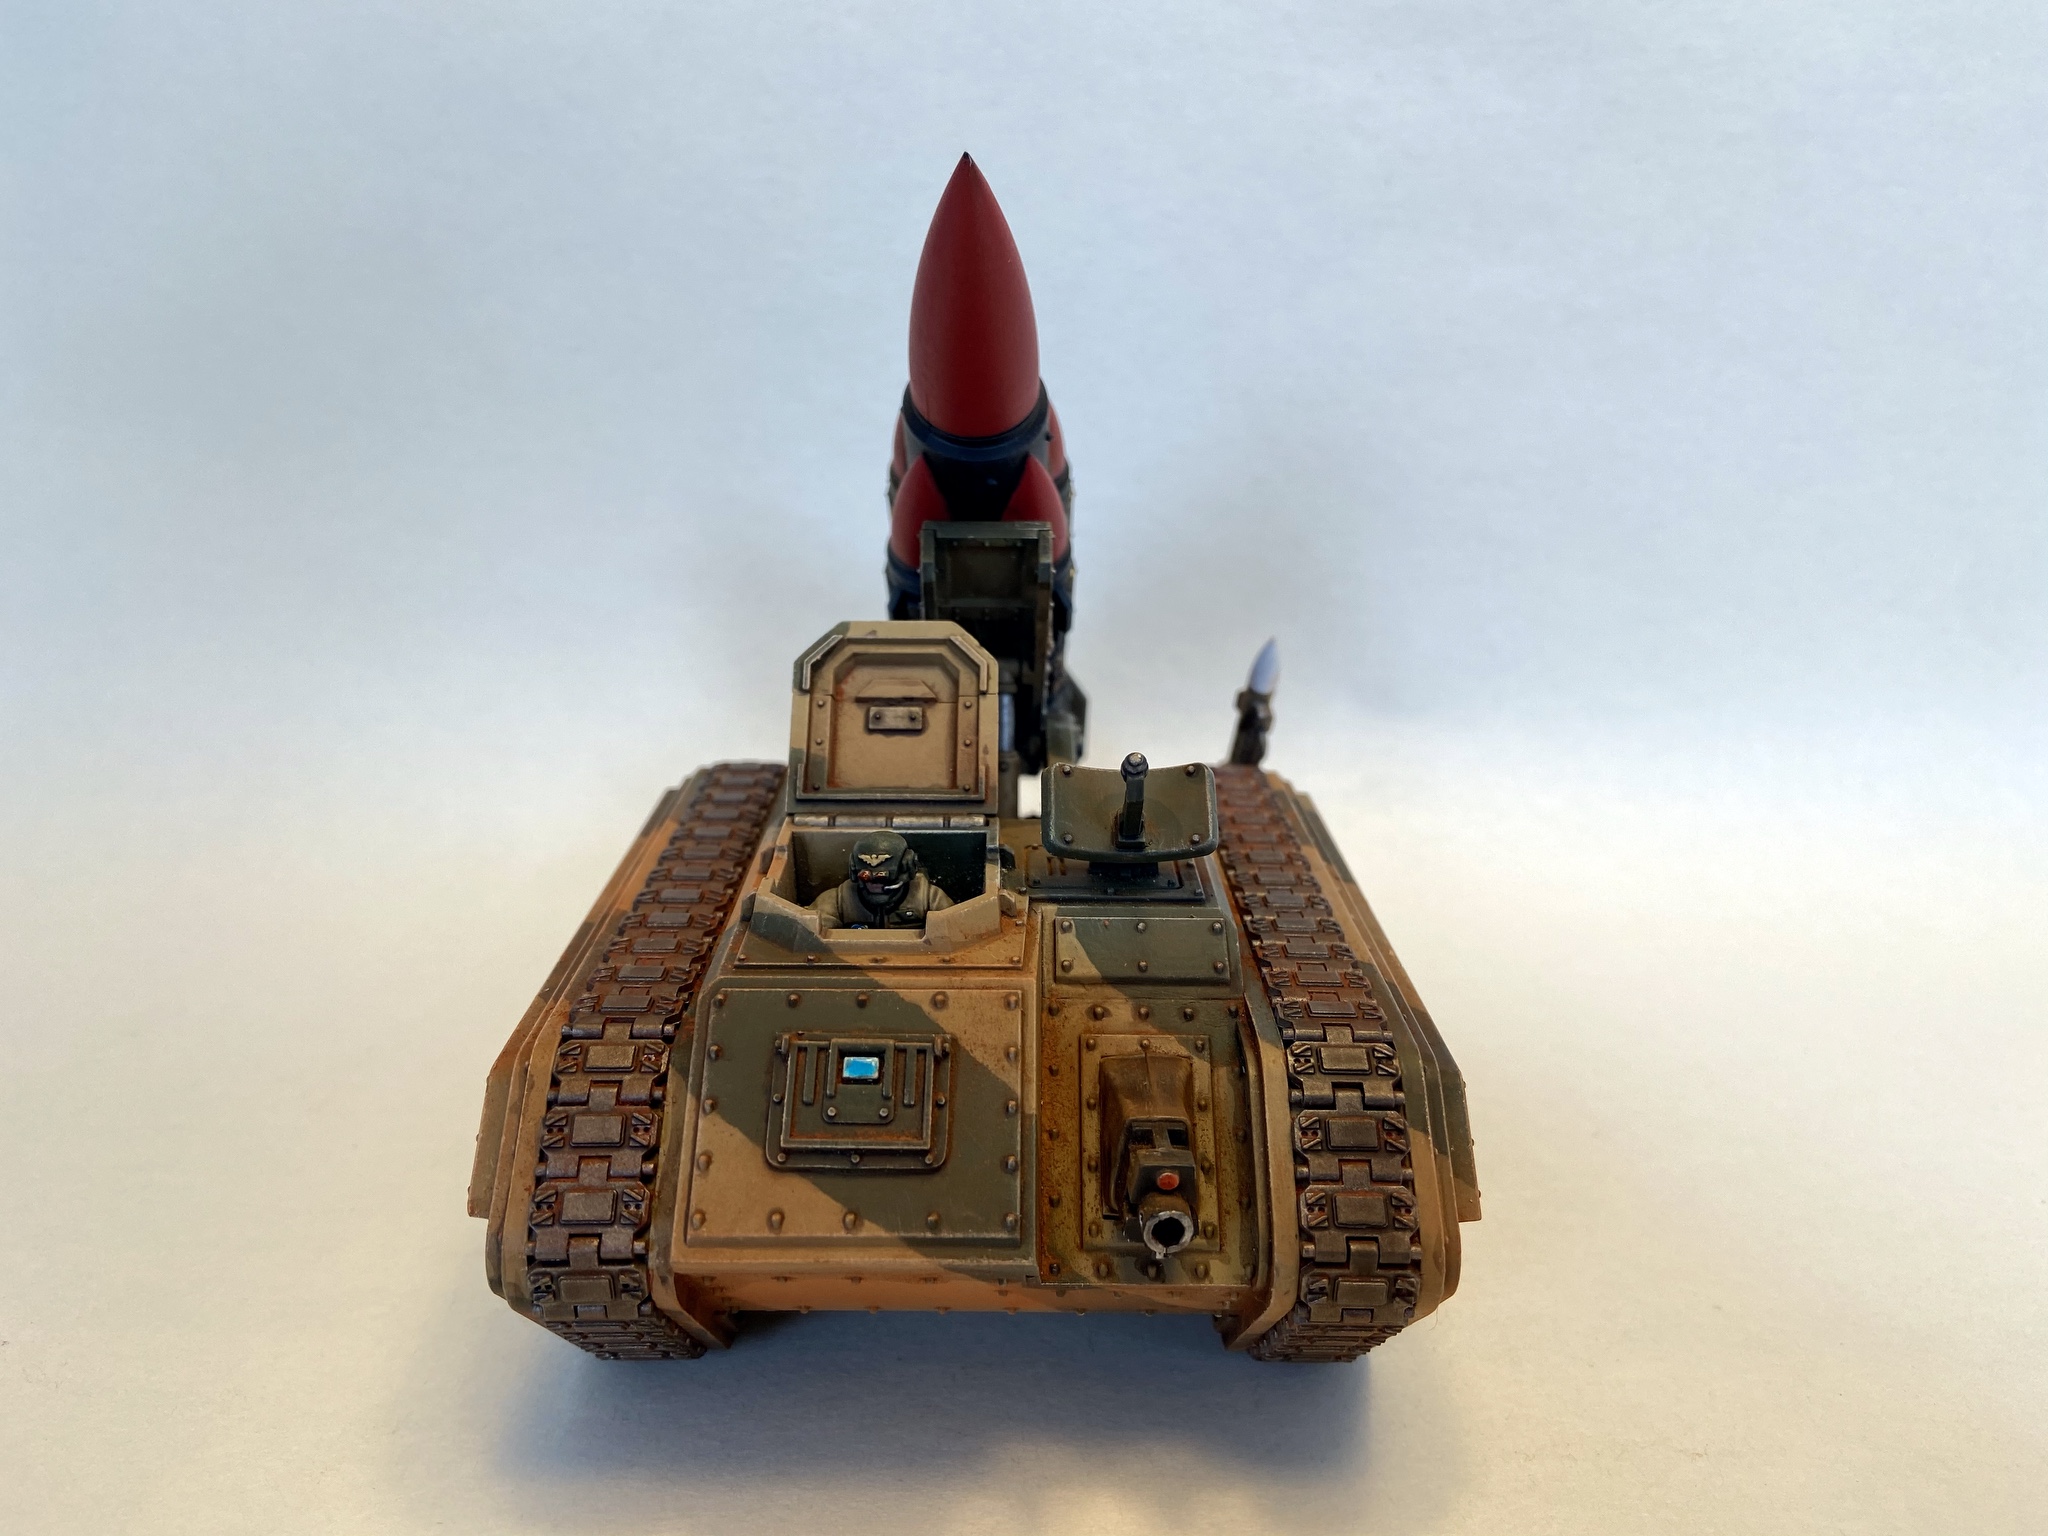
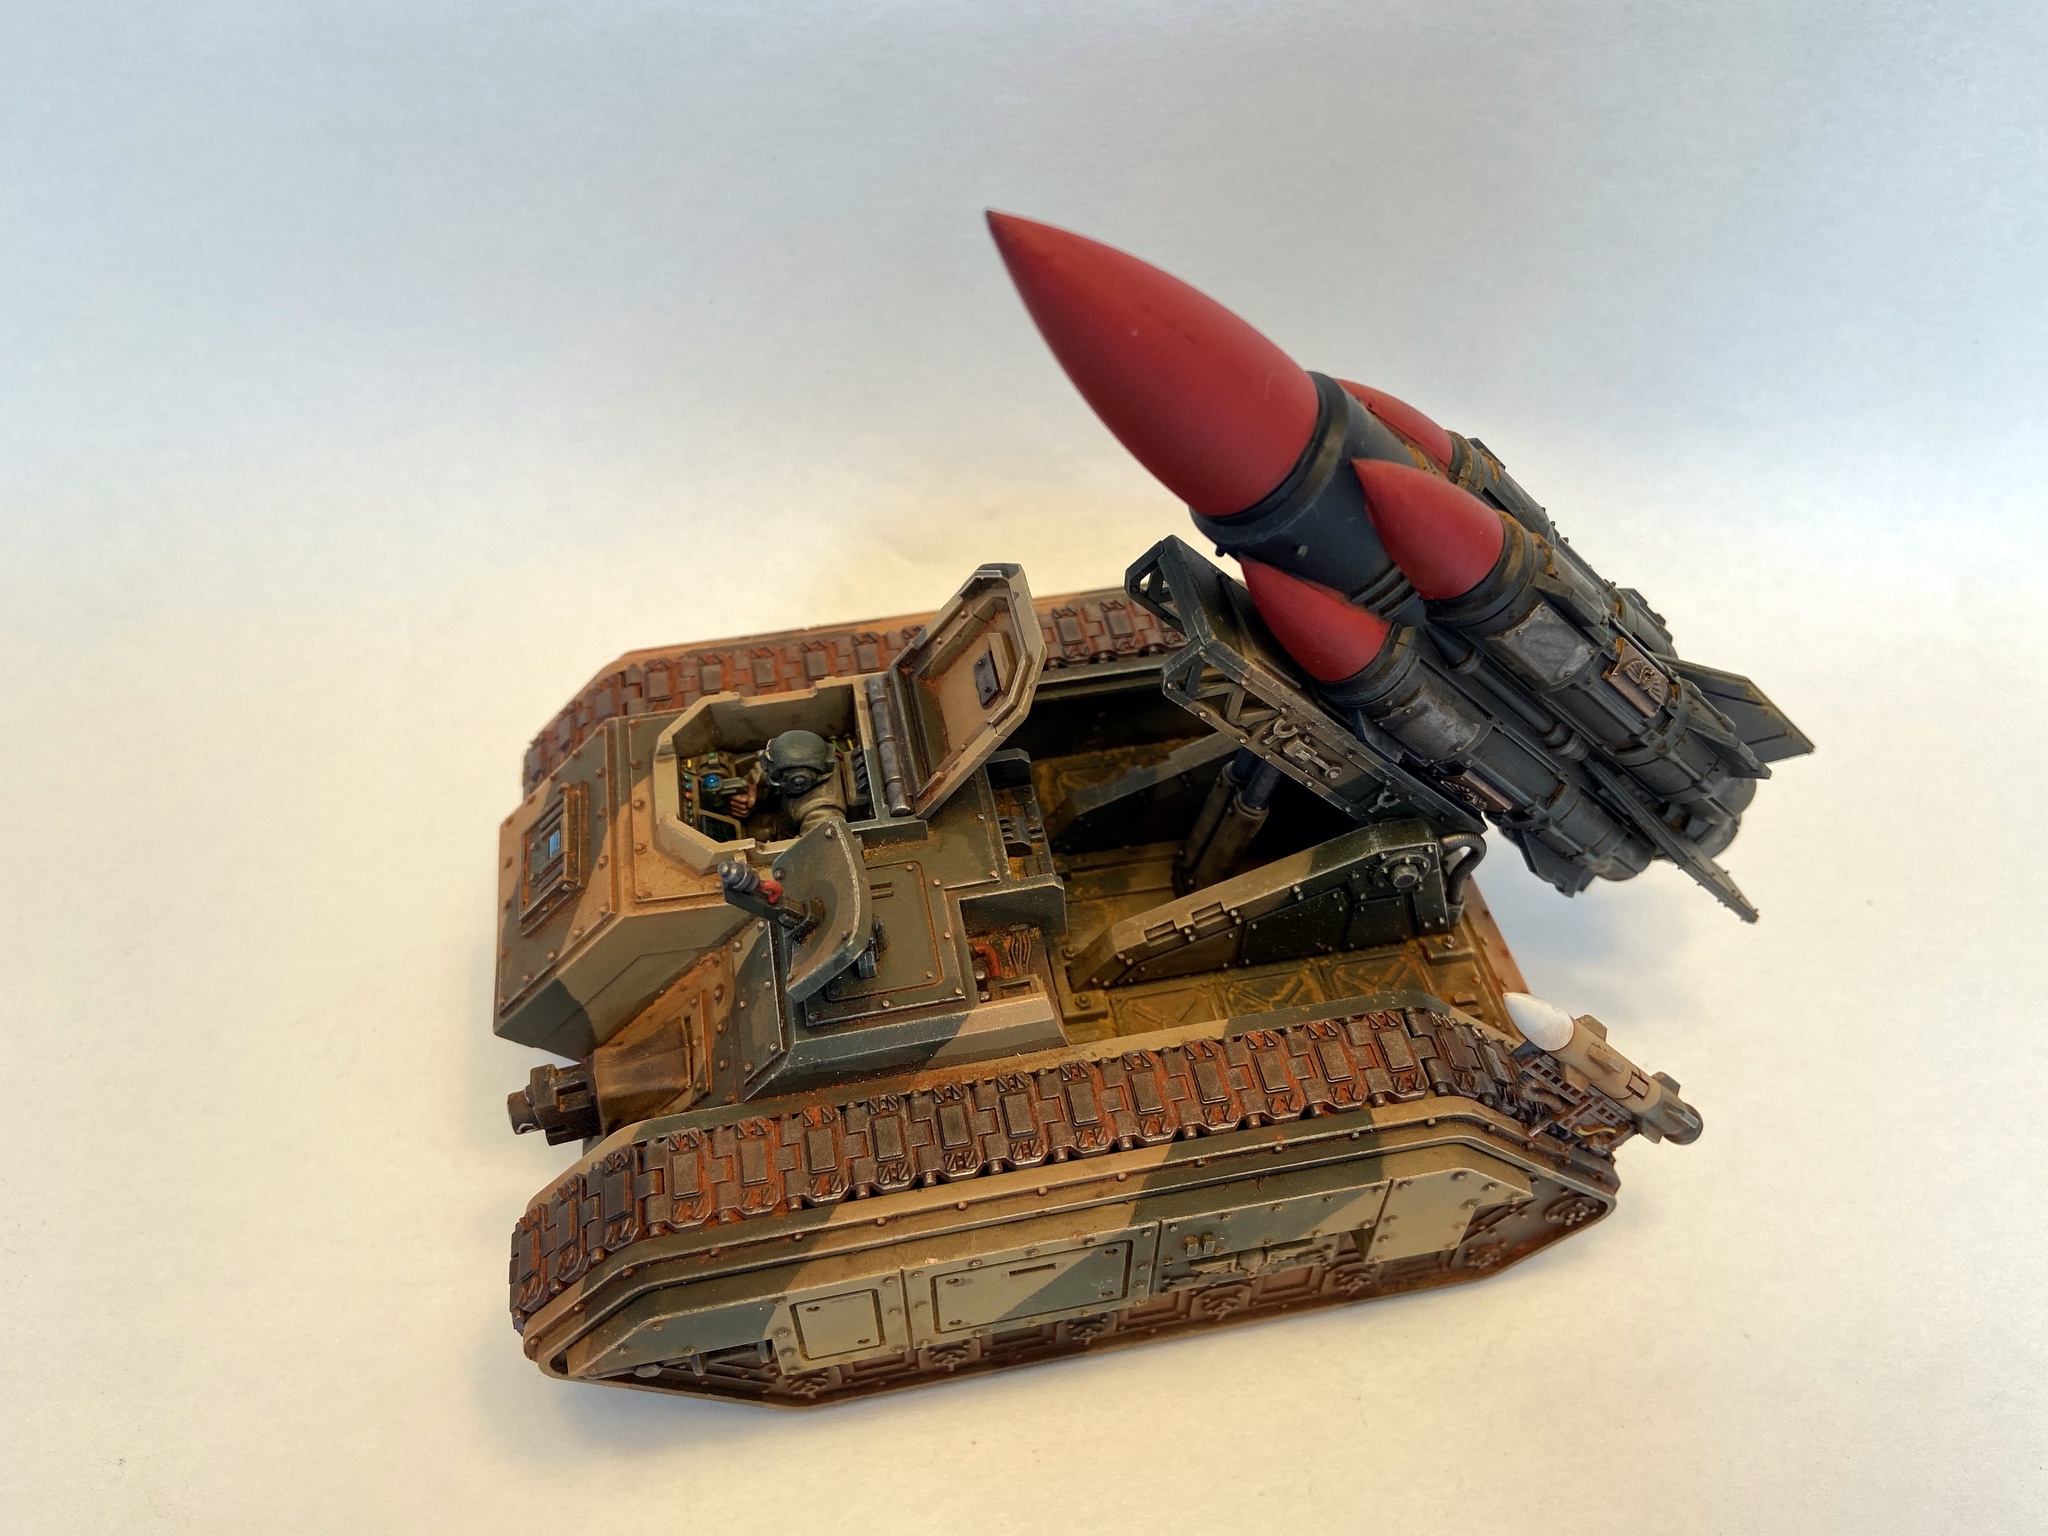
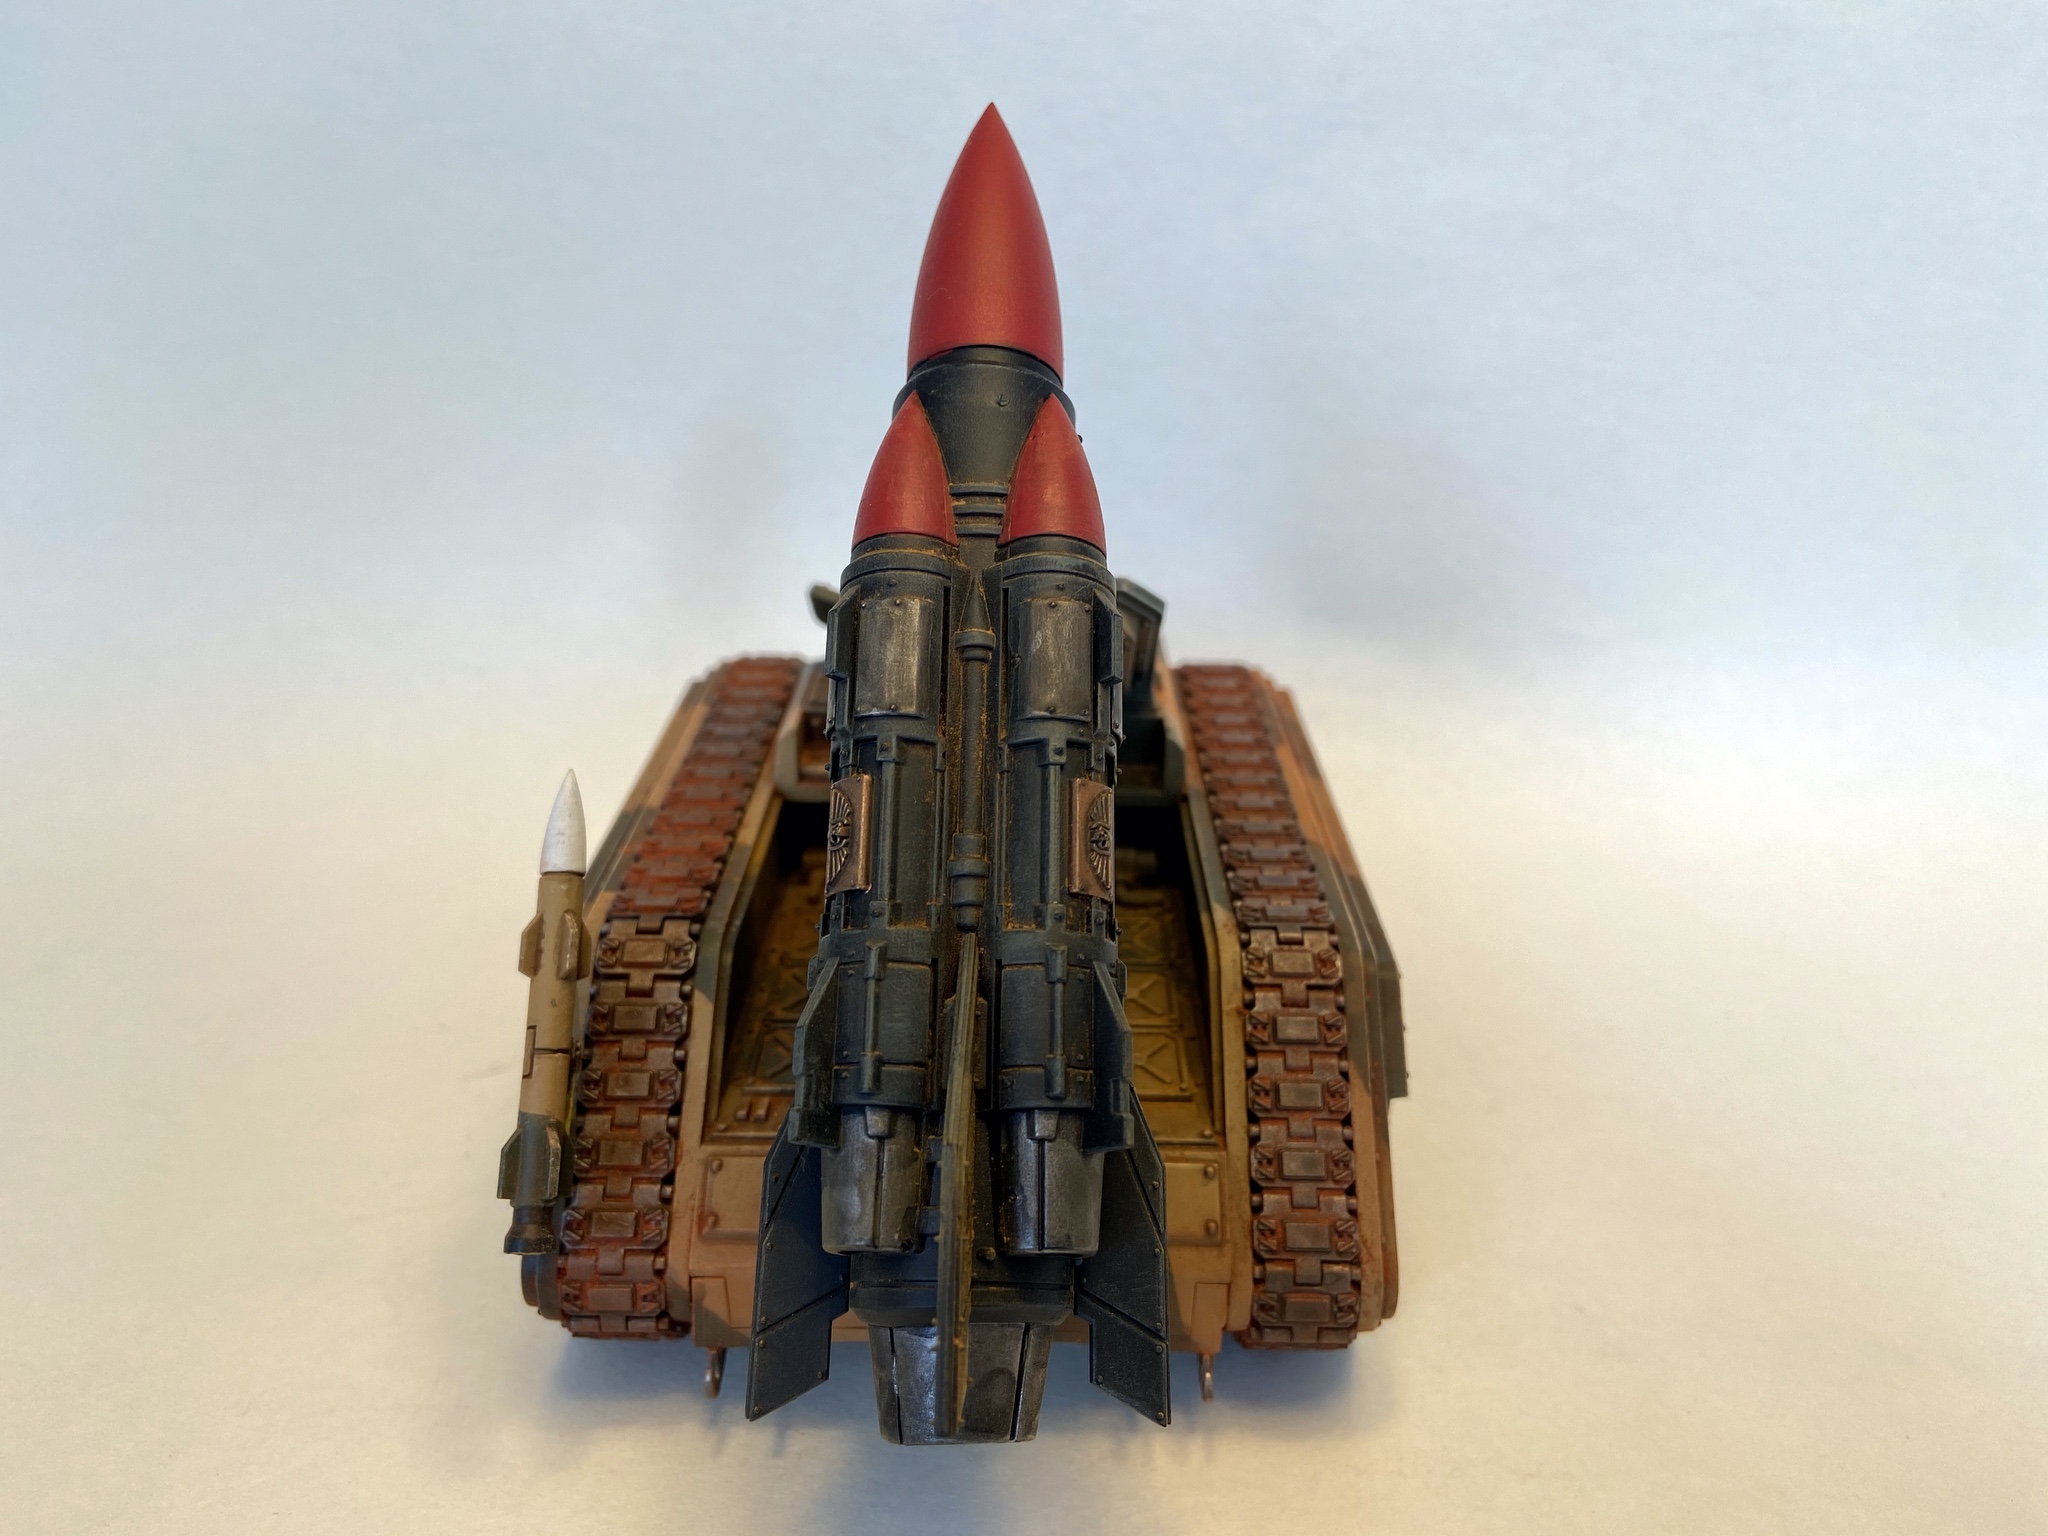
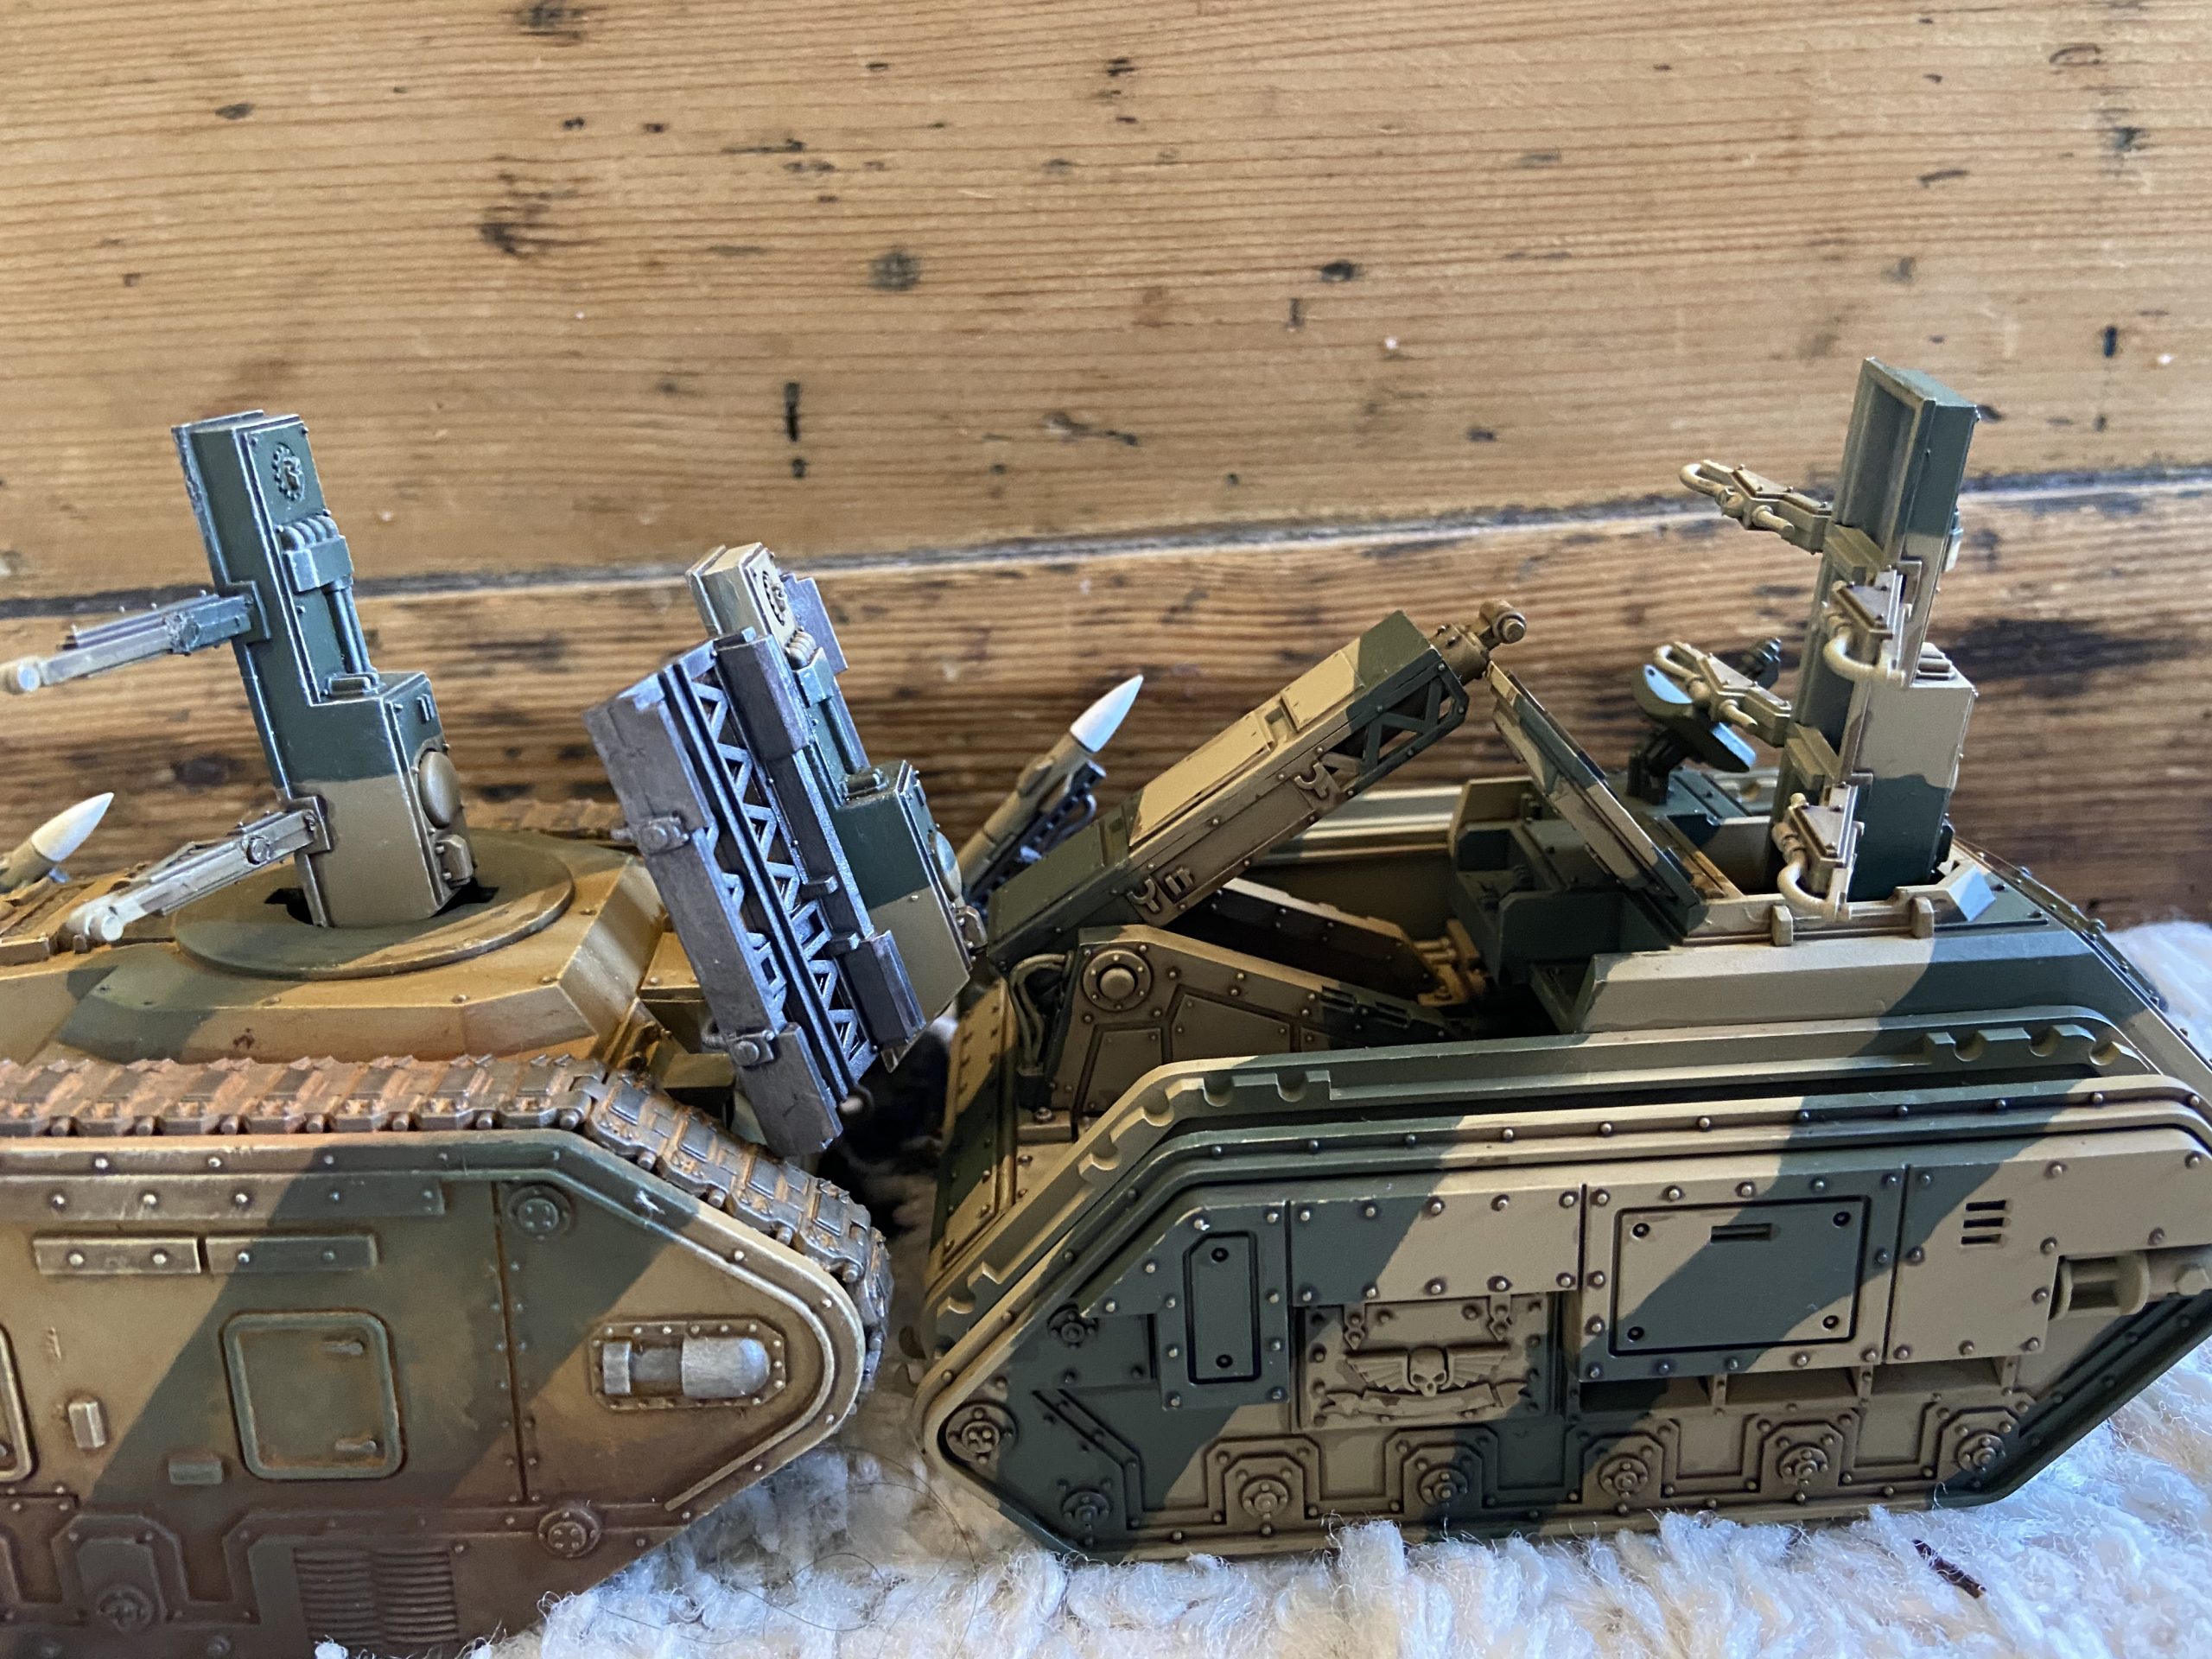
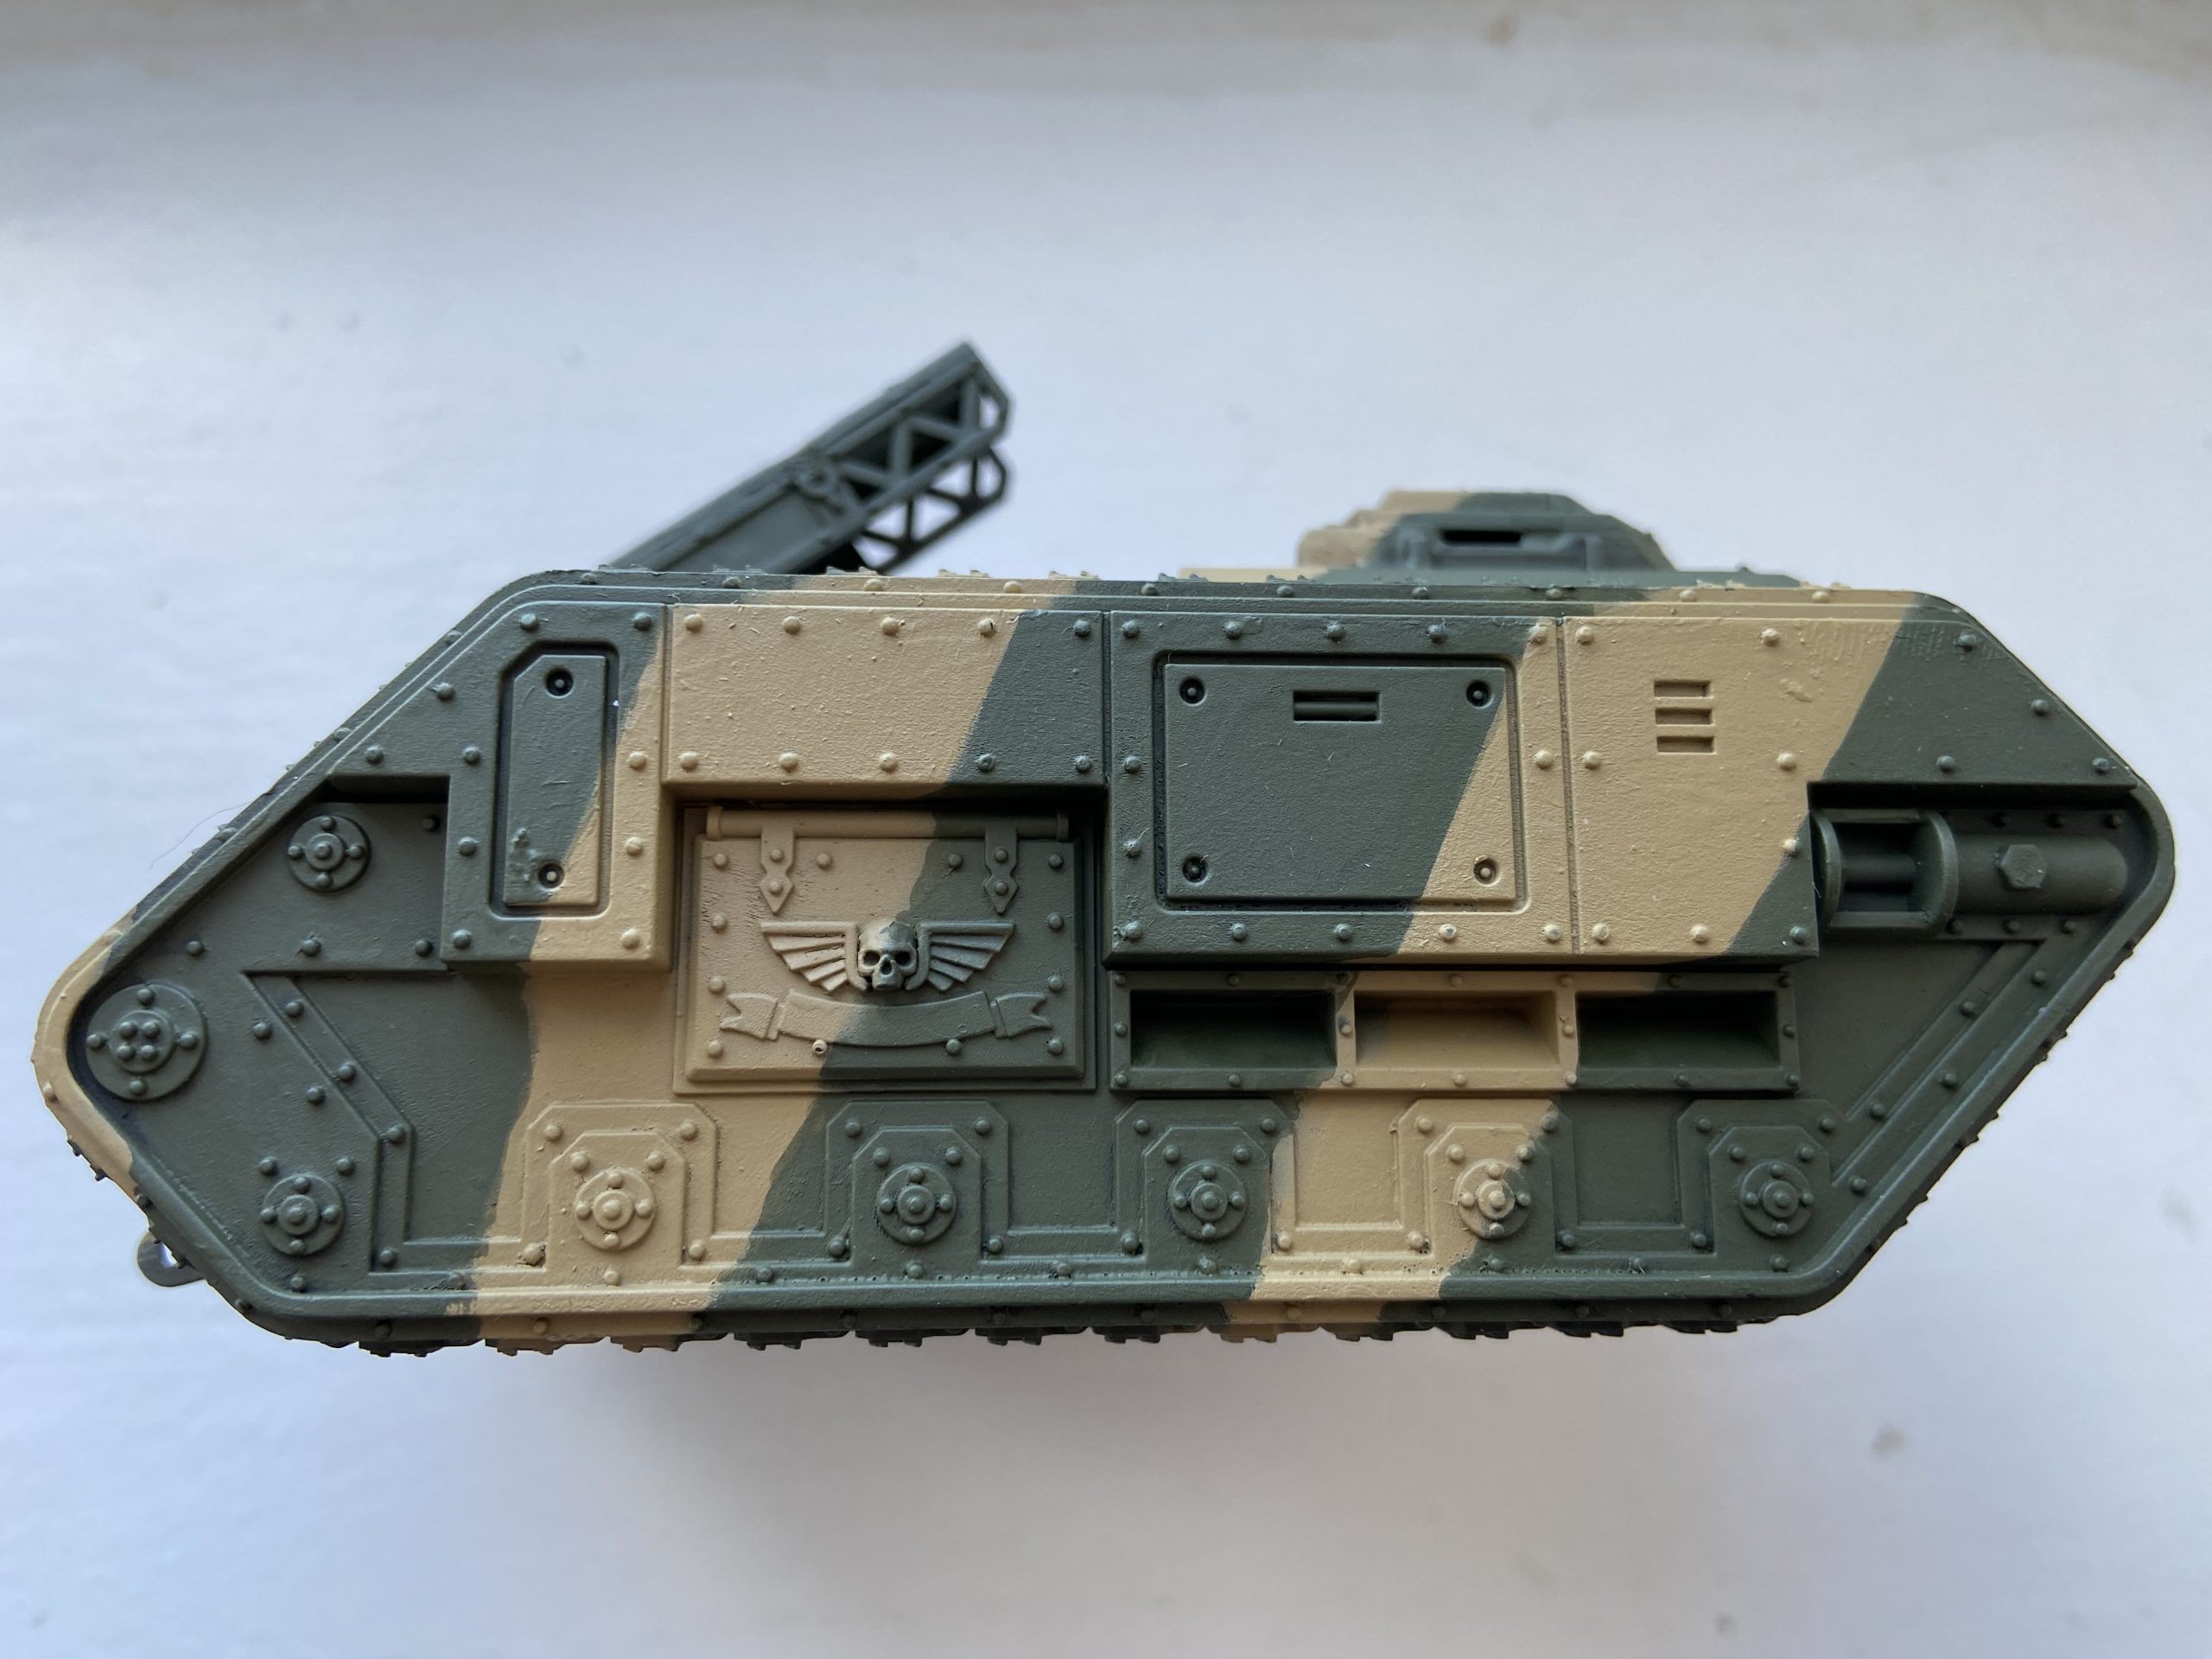
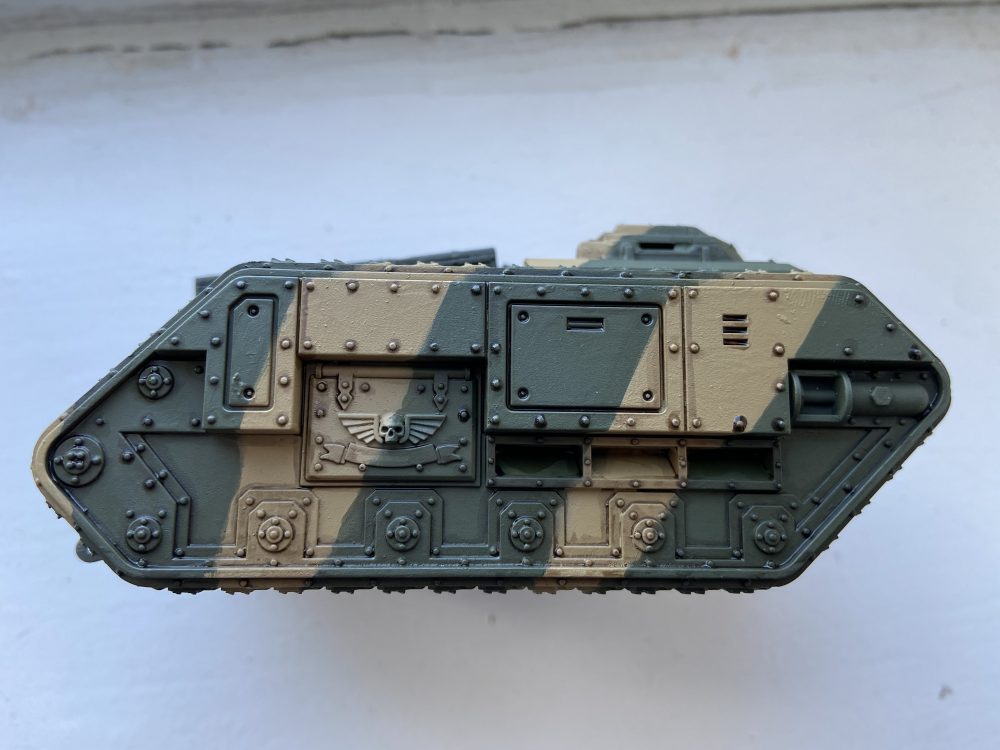
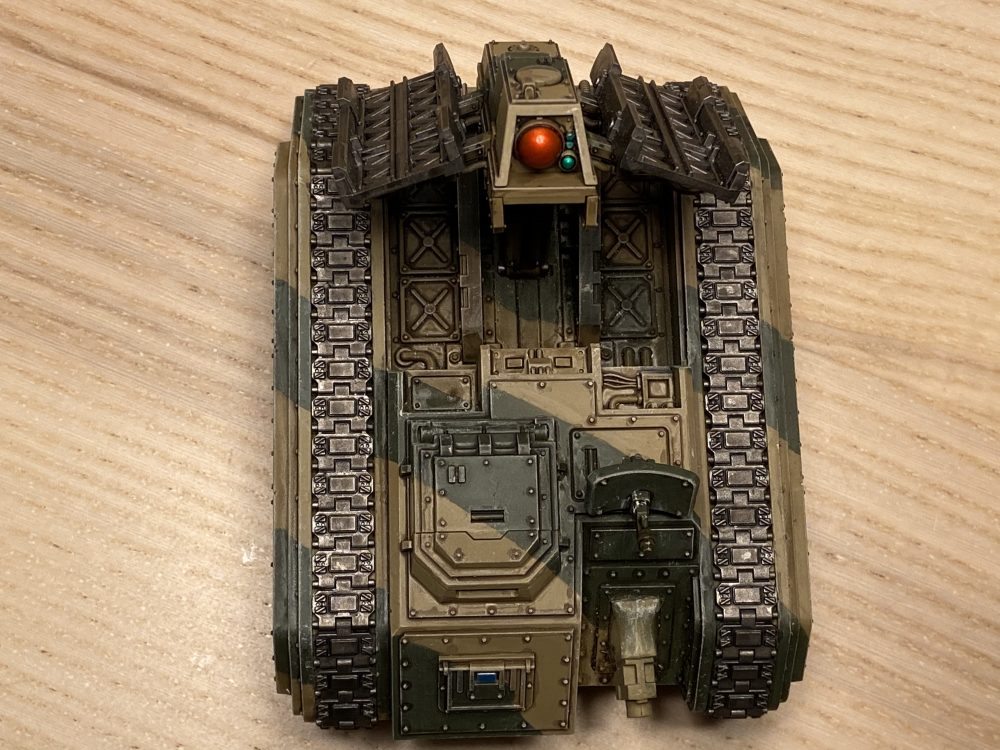
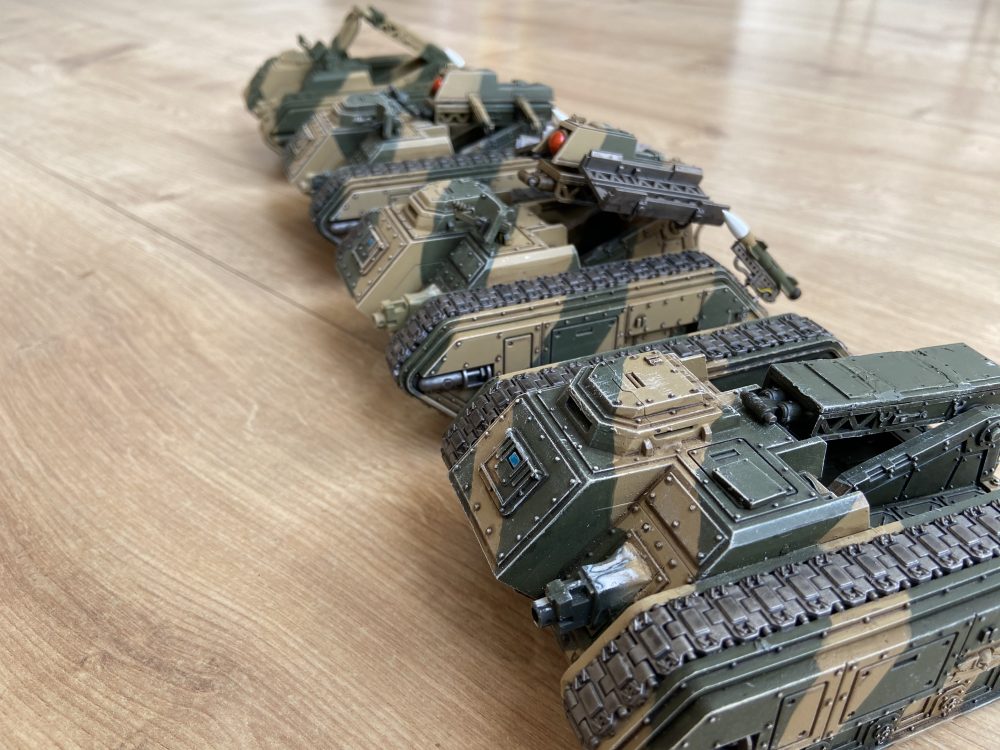
Manticore & Deathstrike Completed Gallery
Here is the gallery of completed models, below this gallery are a how-to for my black missiles, the lenses and a full WIP gallery.


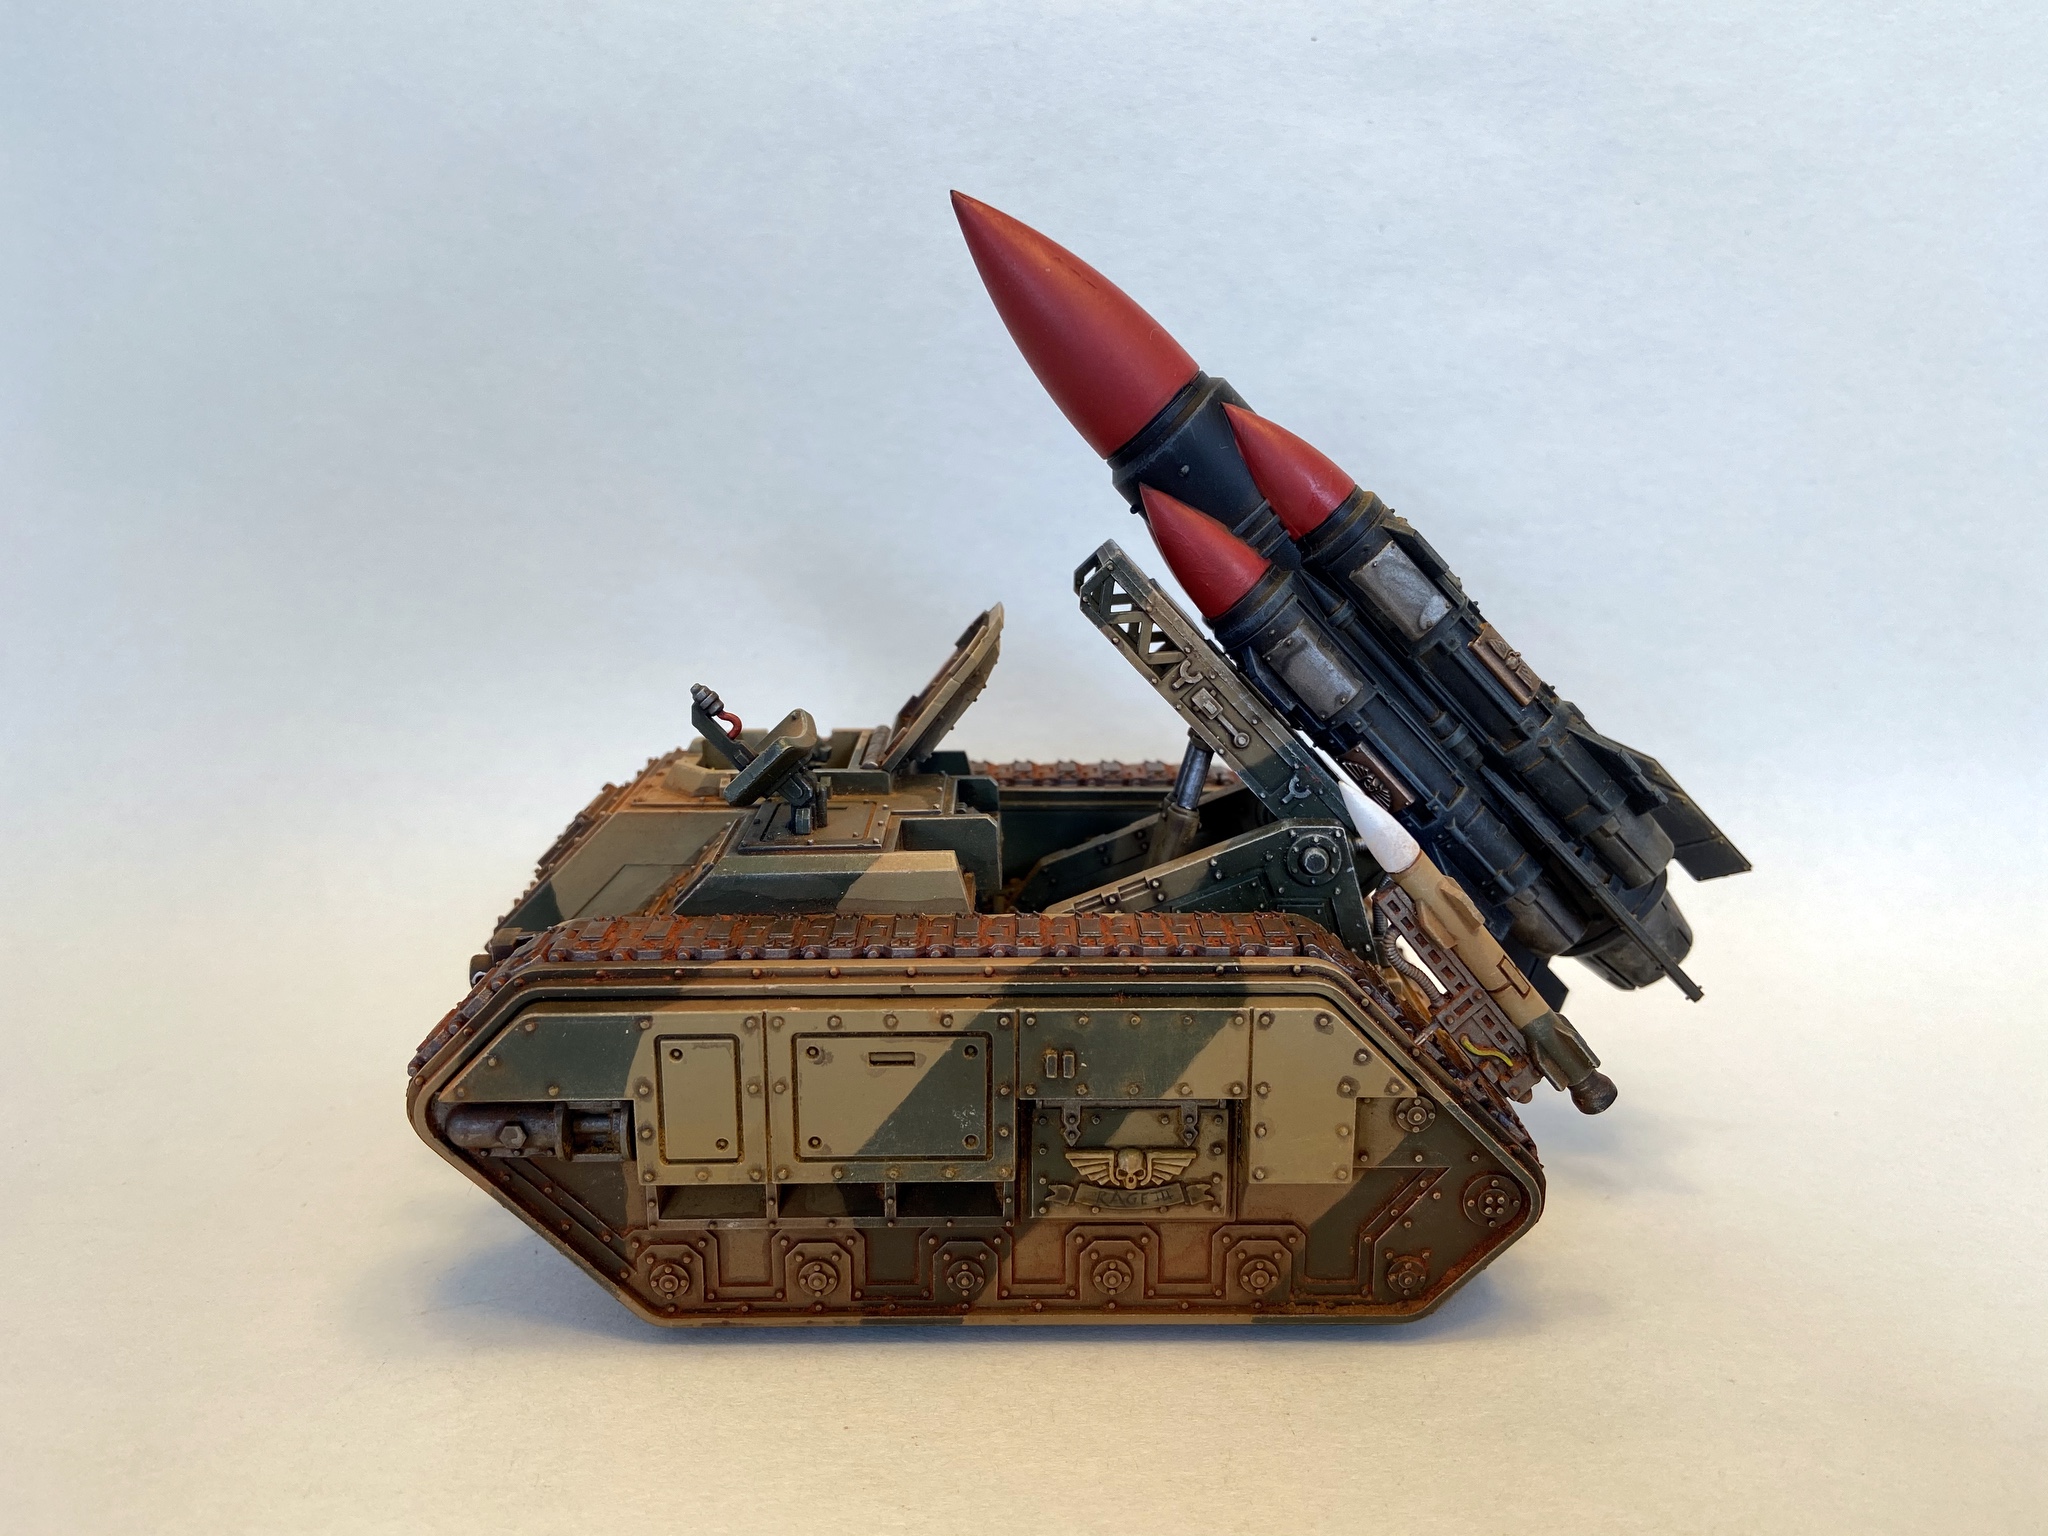
Single Manticore Completed Gallery


Single Deathstrike Completed Gallery
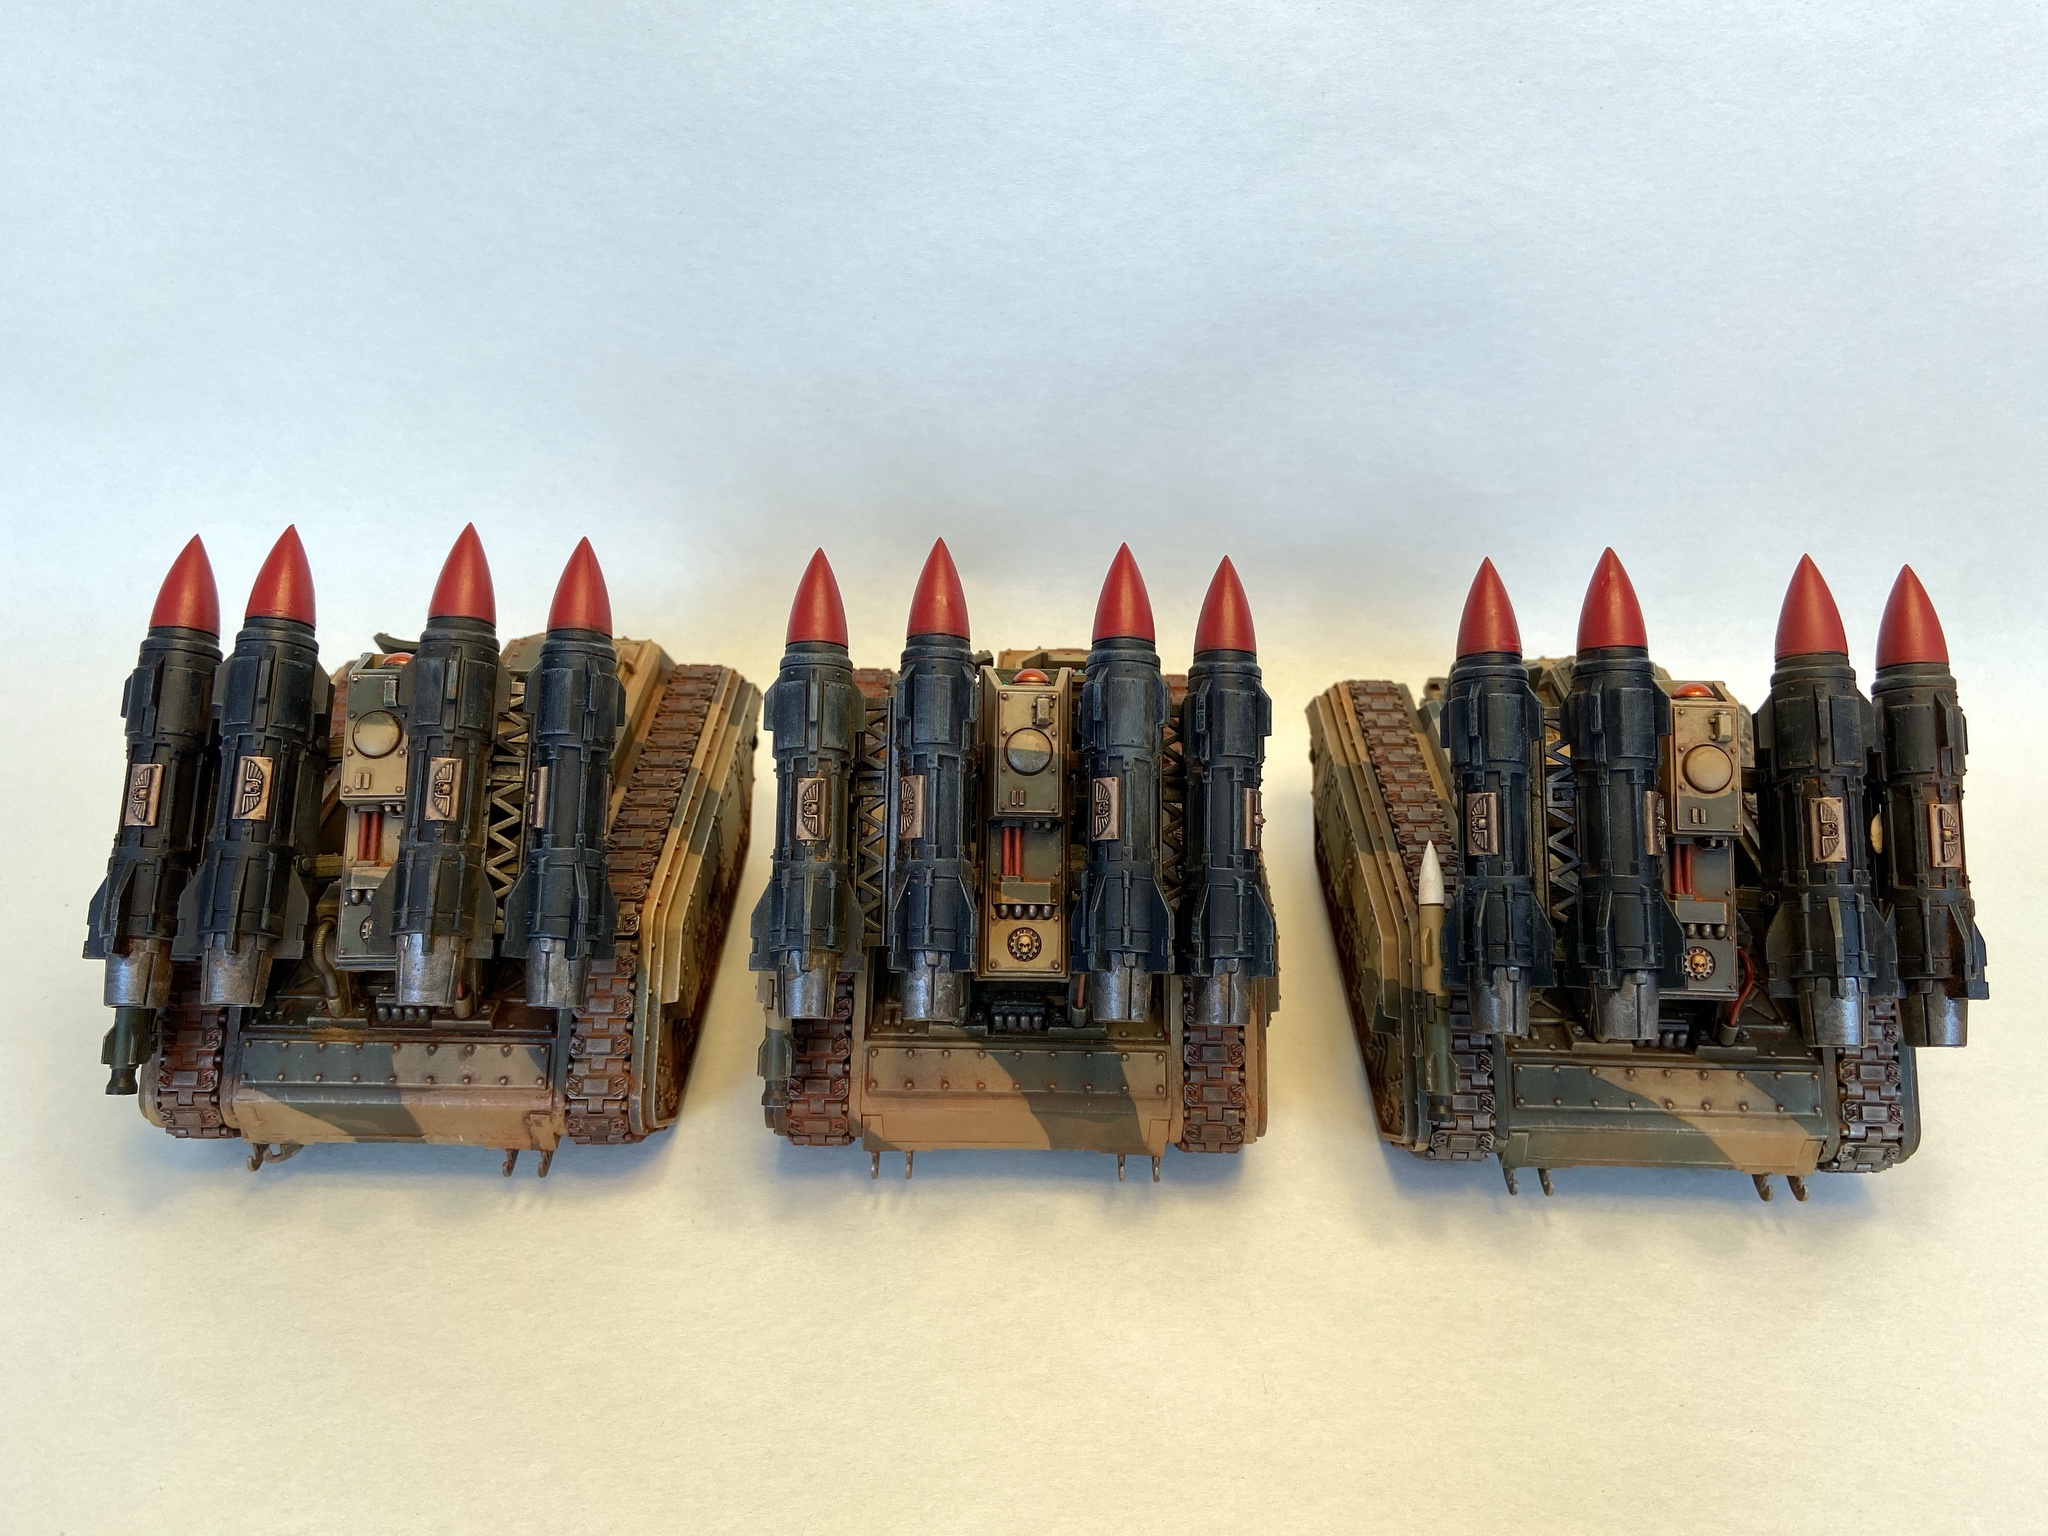
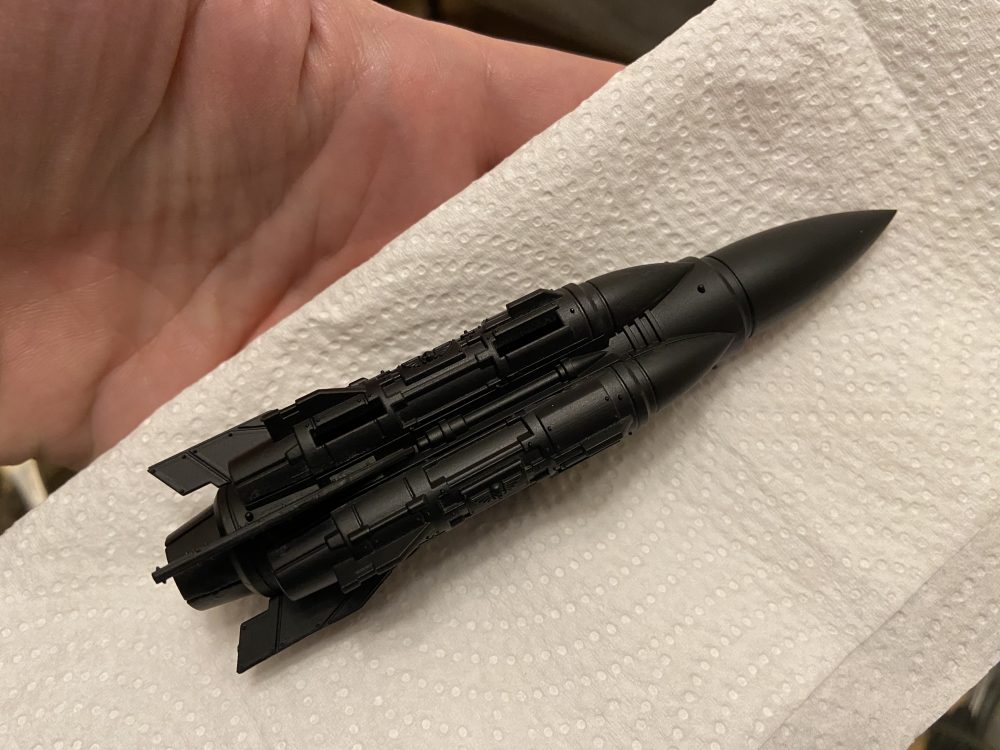
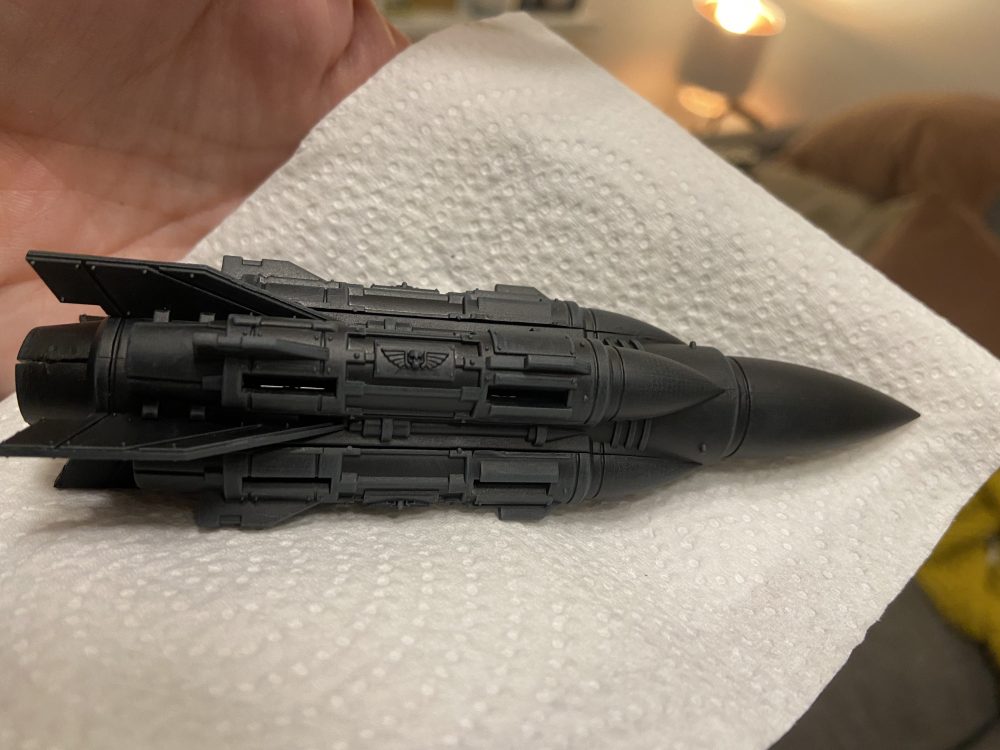
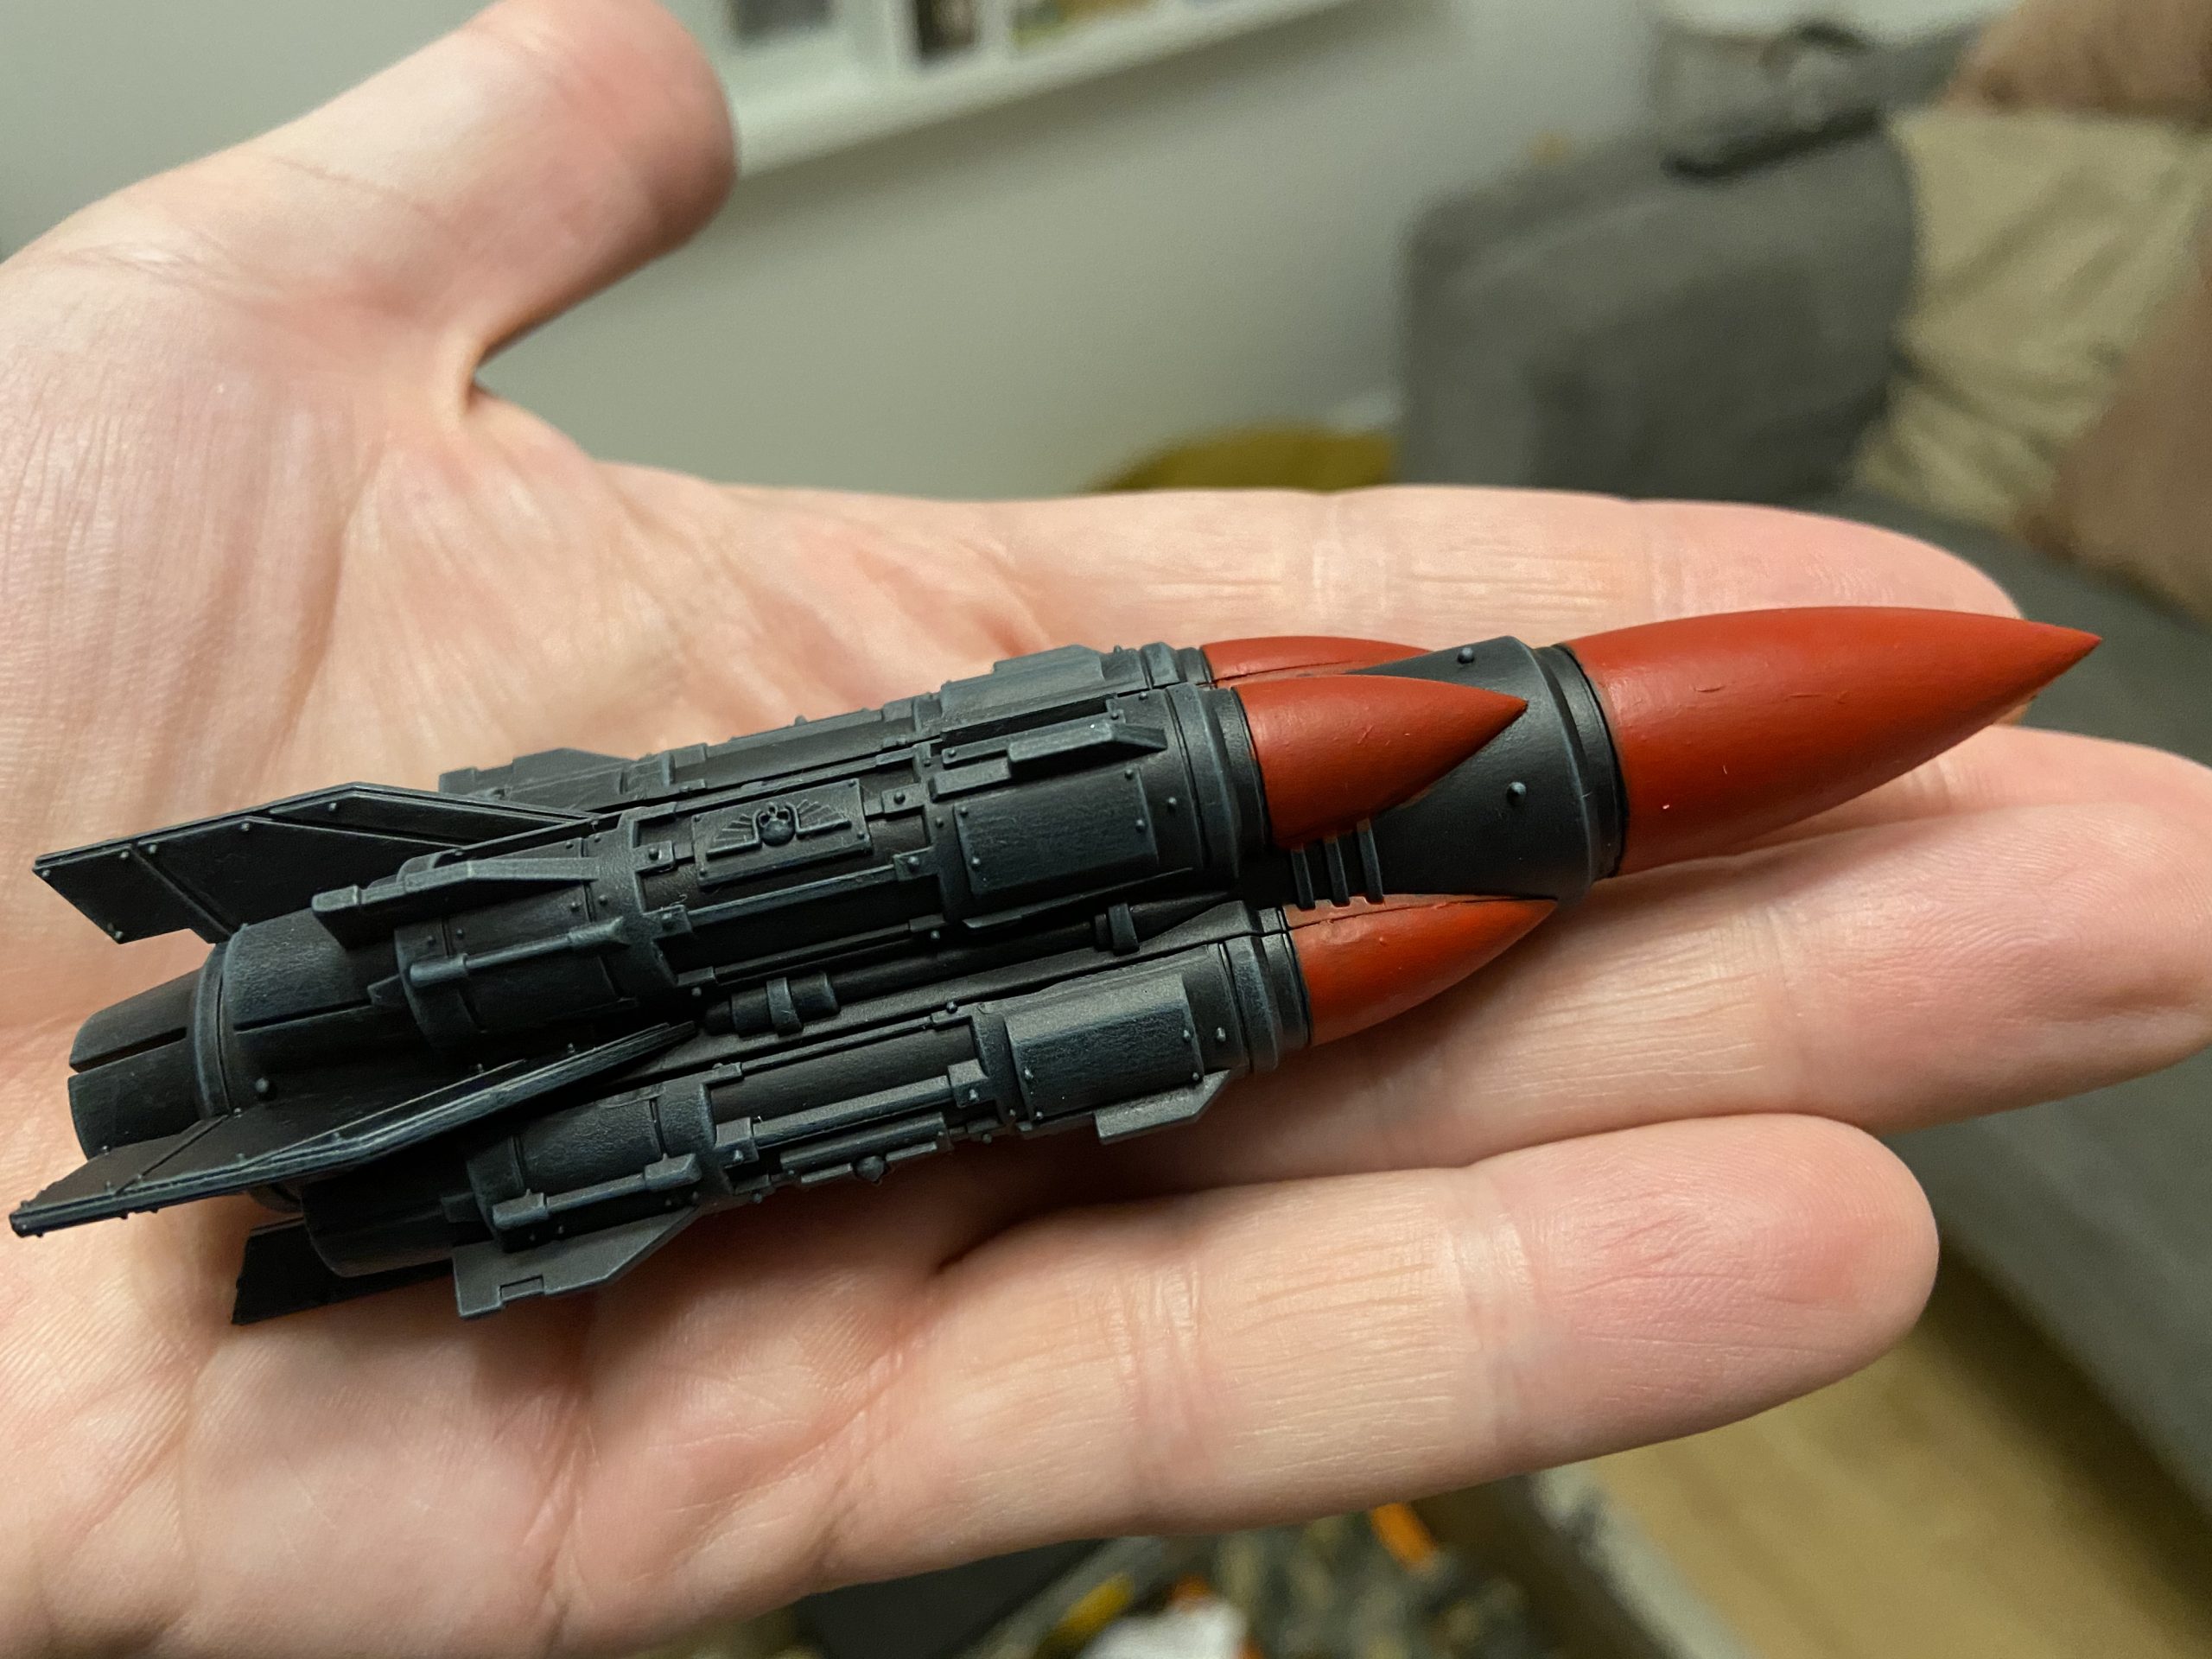
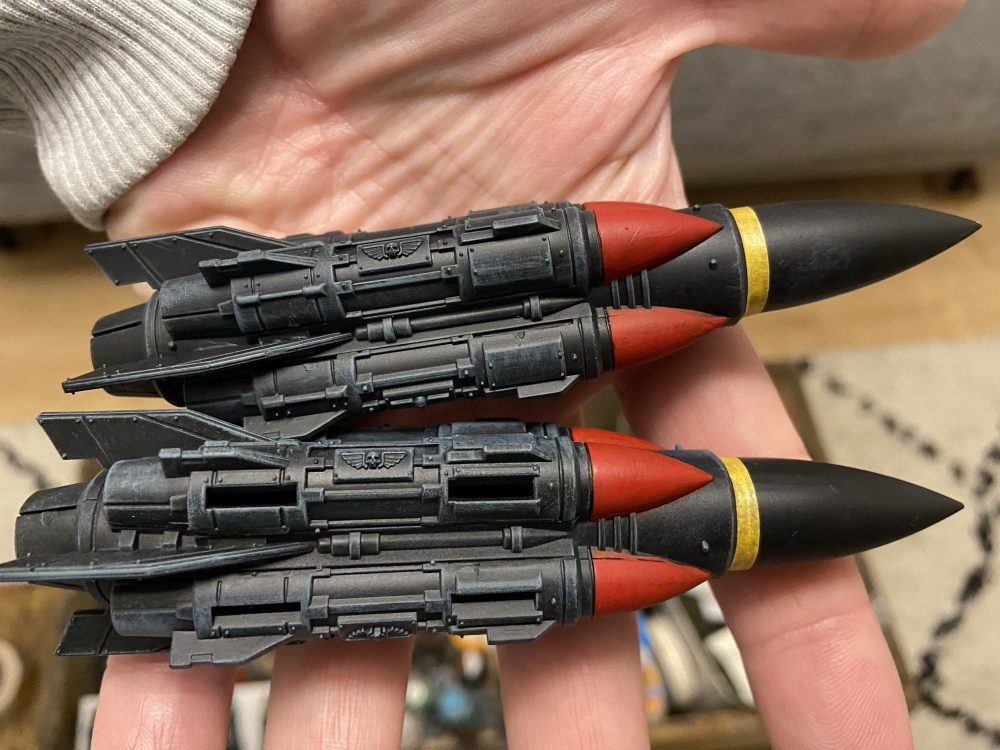
Manticore & Deathstrike Missile Recipe
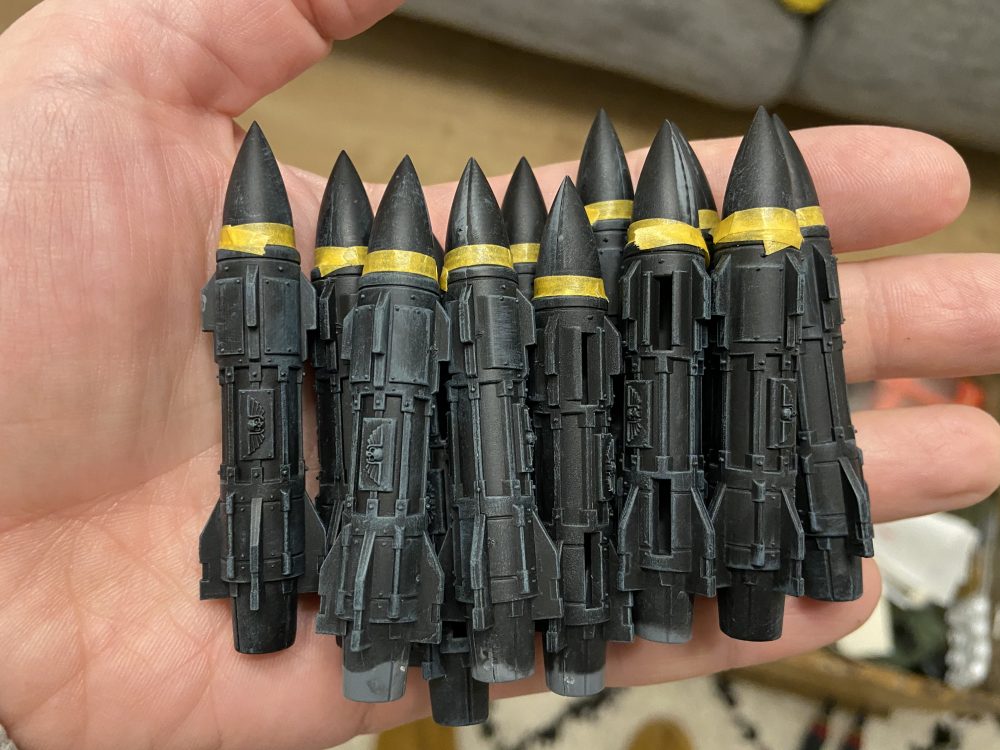
I had three Deathstrike and 12 Manticore missiles to do in this project, and I wanted to do them quickly – which meant dry brushing!
I used three black-ish paints from Secret Weapon Miniatures, as recommended by Bobby from Red Eagle Studio. These are the same paints he used on my Raven Guard models – so I knew they would add that pop to my black missiles.
These were pretty hard to get a hold of during 2020, which is when I ordered them. They were constantly out of stock on UK based web sites and any expected date was always pushed back once it got closer. I ended up ordering them direct from Secret Weapon Miniatures in the end, in the USA – and they arrived a couple of weeks later.
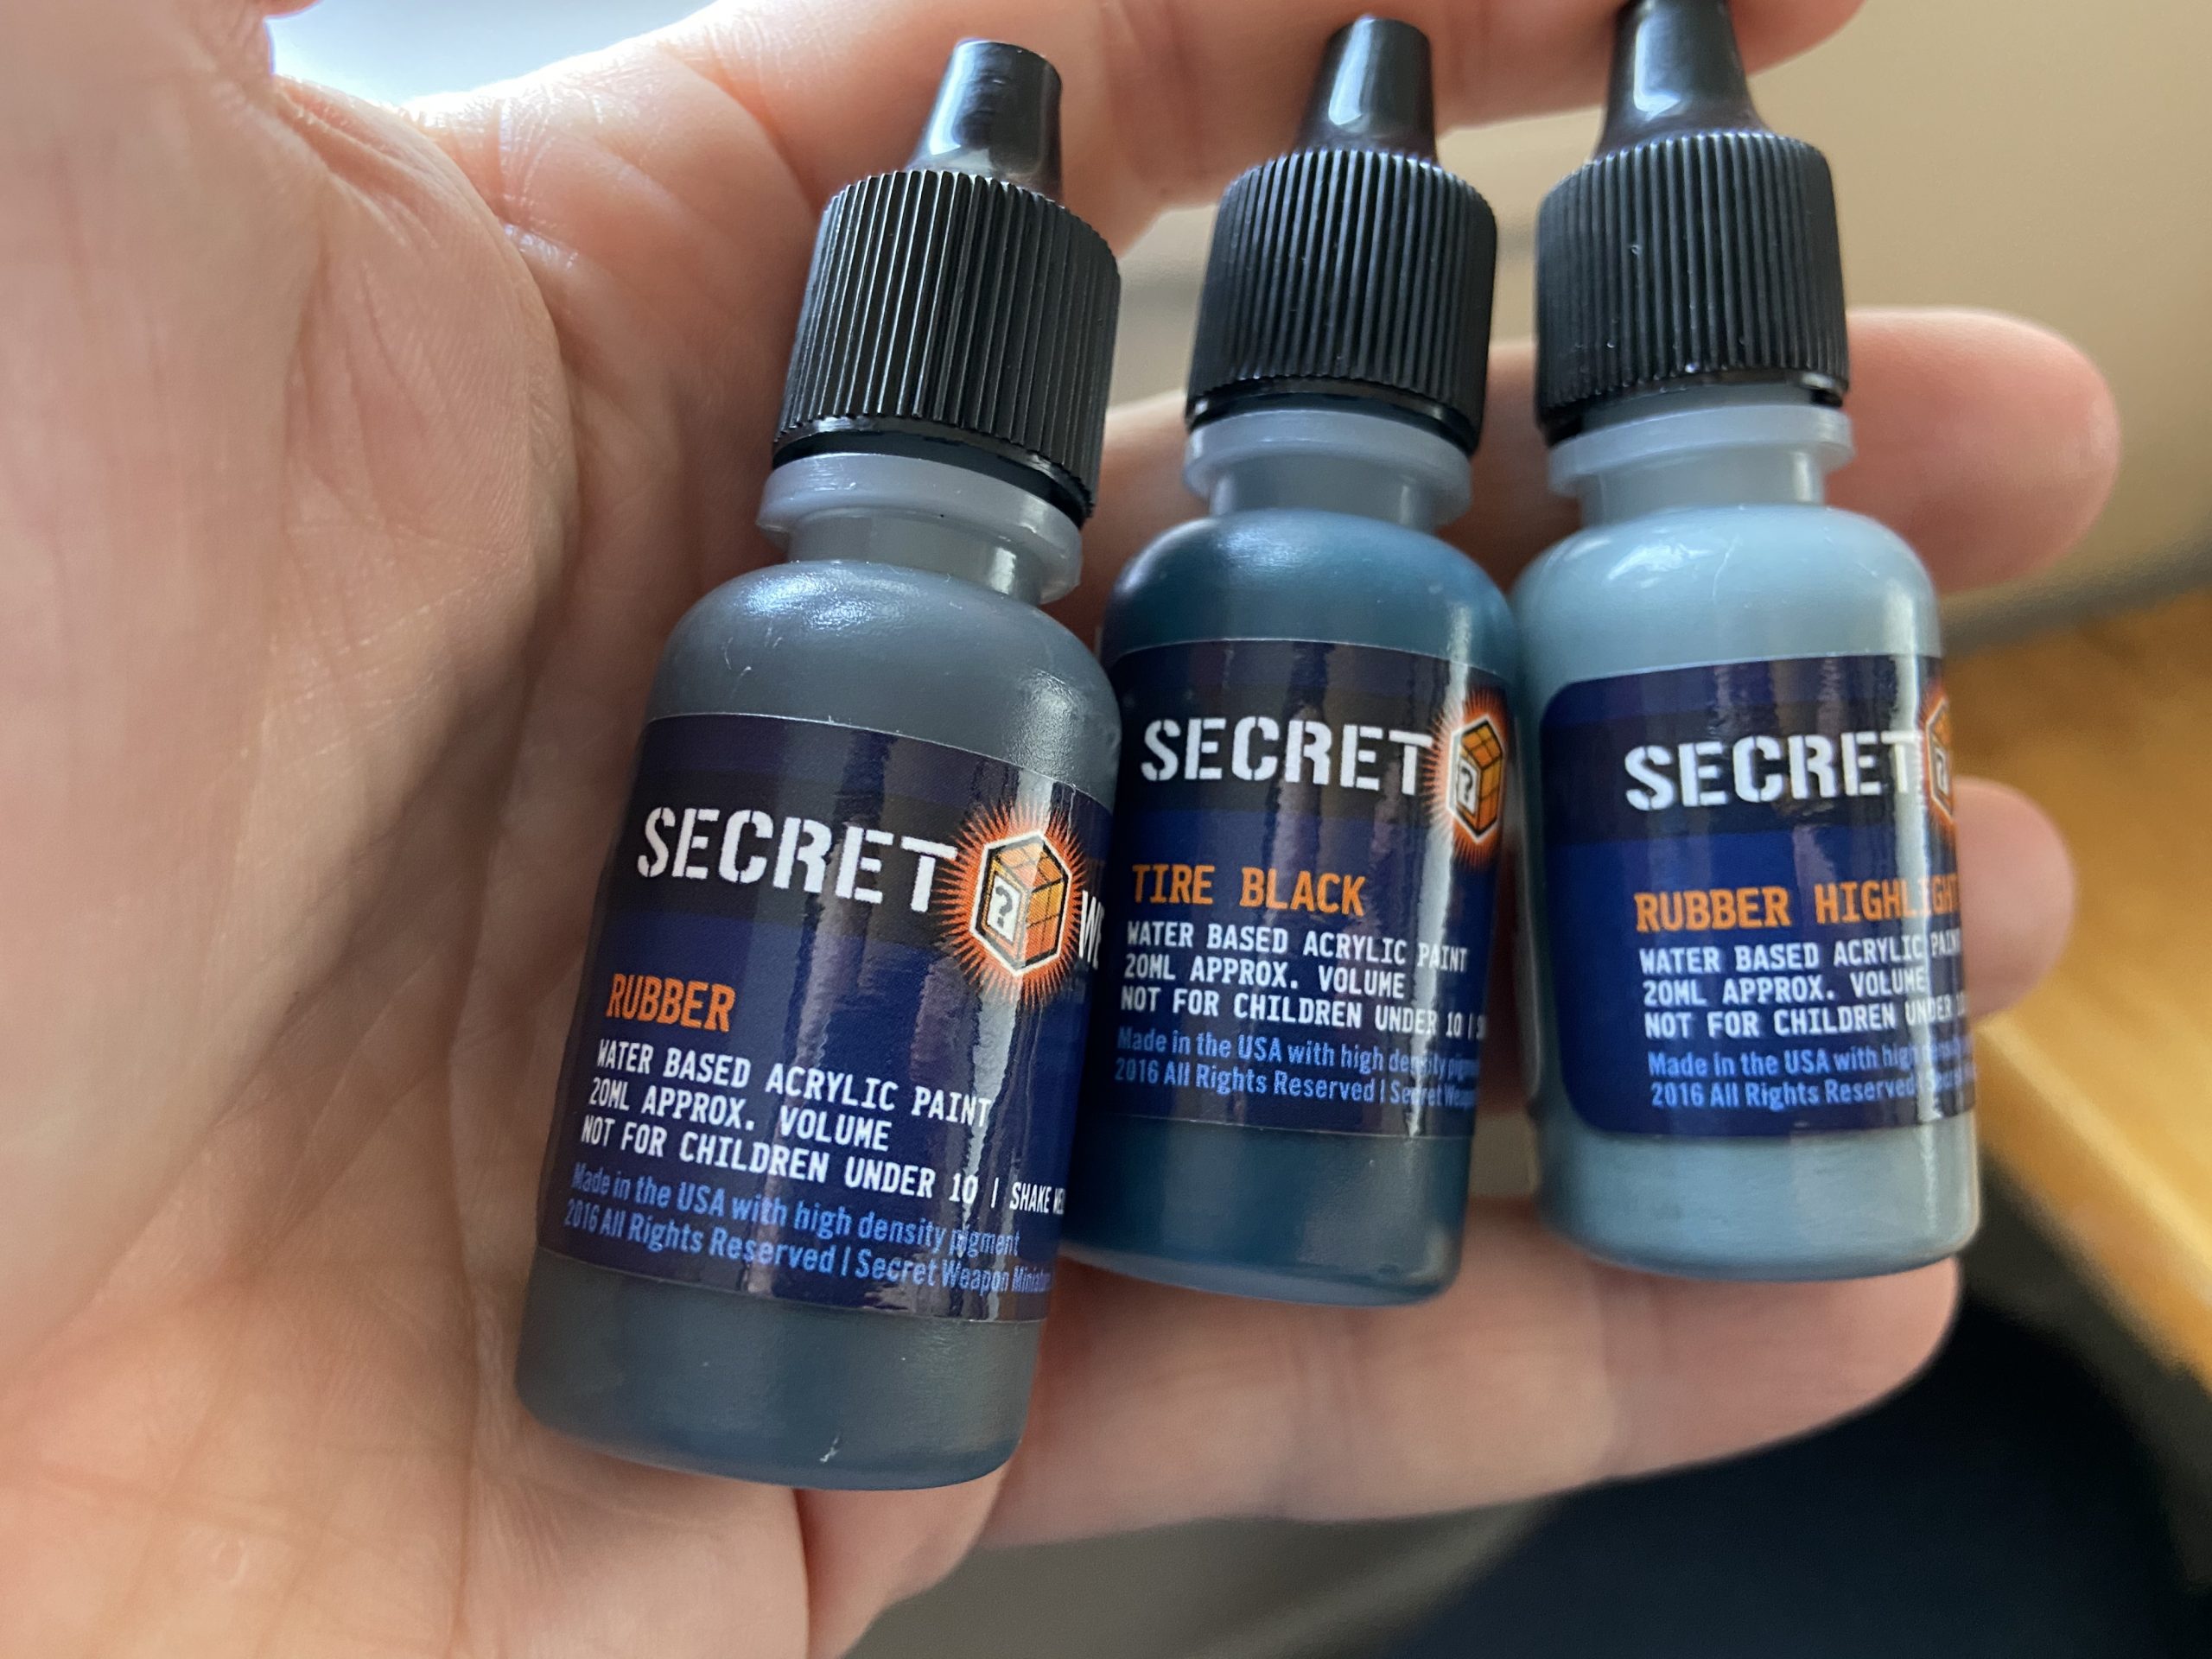
Black Acrylics Secret Weapon Miniatures
- Spray Chaos Black
- Dry Brush with Tire Black from Secret Weapon Miniatures
- Dry Brush with Rubber Highlight from Secret Weapon Miniatures
- Mephiston Red on the cones
Between steps two and three I did also try a dry brush of Rubber from Secret Weapon Miniatures, but it was too subtle and did not add anything to the missile. So I did not photograph it and skipped it on all the other missiles.
What is interesting about doing these is that I figured the weathering on them would be minimal, they are one use missiles and once fired they are gone and replaced with a new missile. So past a little wash and a little pigment dust on their underside, they are pretty easy to do.
Two of my Deathstrikes are made from spares. The Manticore Missiles come in two halves and if you make a Deathstrike one half is used on the Deathstrike Missile and the other half is surplus. The surplus half does not fit properly onto the Deathstrike and the other is very rare. I used the surplus halves to make two of my Deathstrikes – hence why it is a bit odd and ill-fitting. But, from 3 feet away on a tabletop – no one can tell!
-

- Started with Chaos Black Spray

-
- Dry Brush with Tire Black from Secret Weapon Miniatures

-

- Dry Brush with Rubber Highlight from Secret Weapon Miniatures

-

- Mephiston Red on the cone, plus more dry brush with Rubber Highlight
-
- I masked off the Manticore missiles to make it a bit quicker using an airbrush

-
- I also masked off the final two Deathstrike missiles

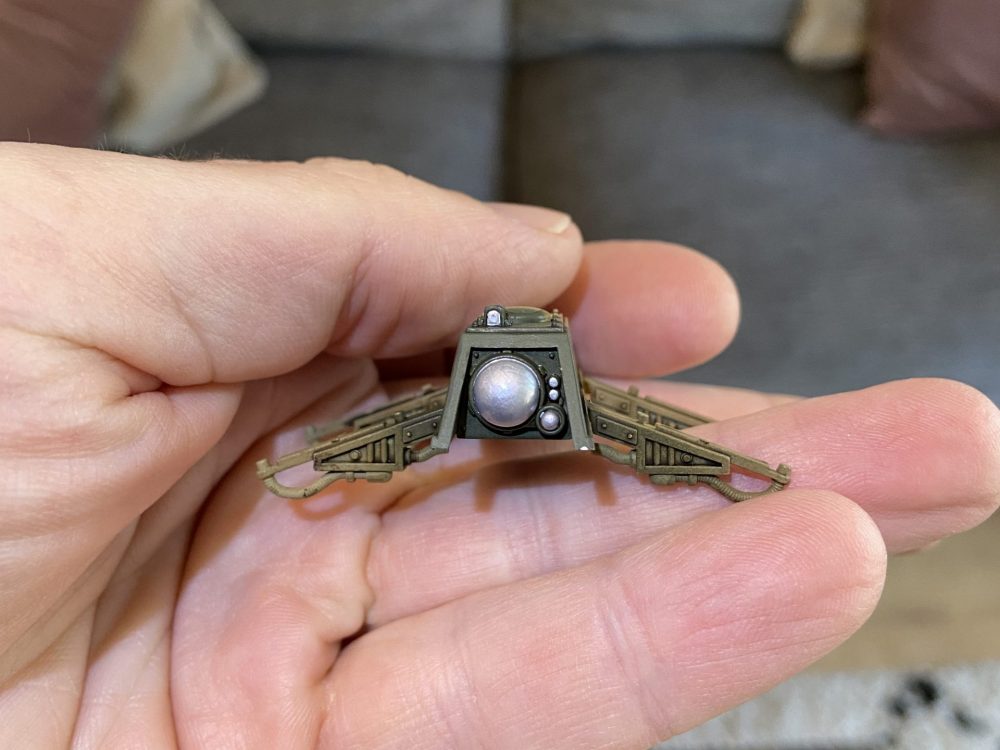
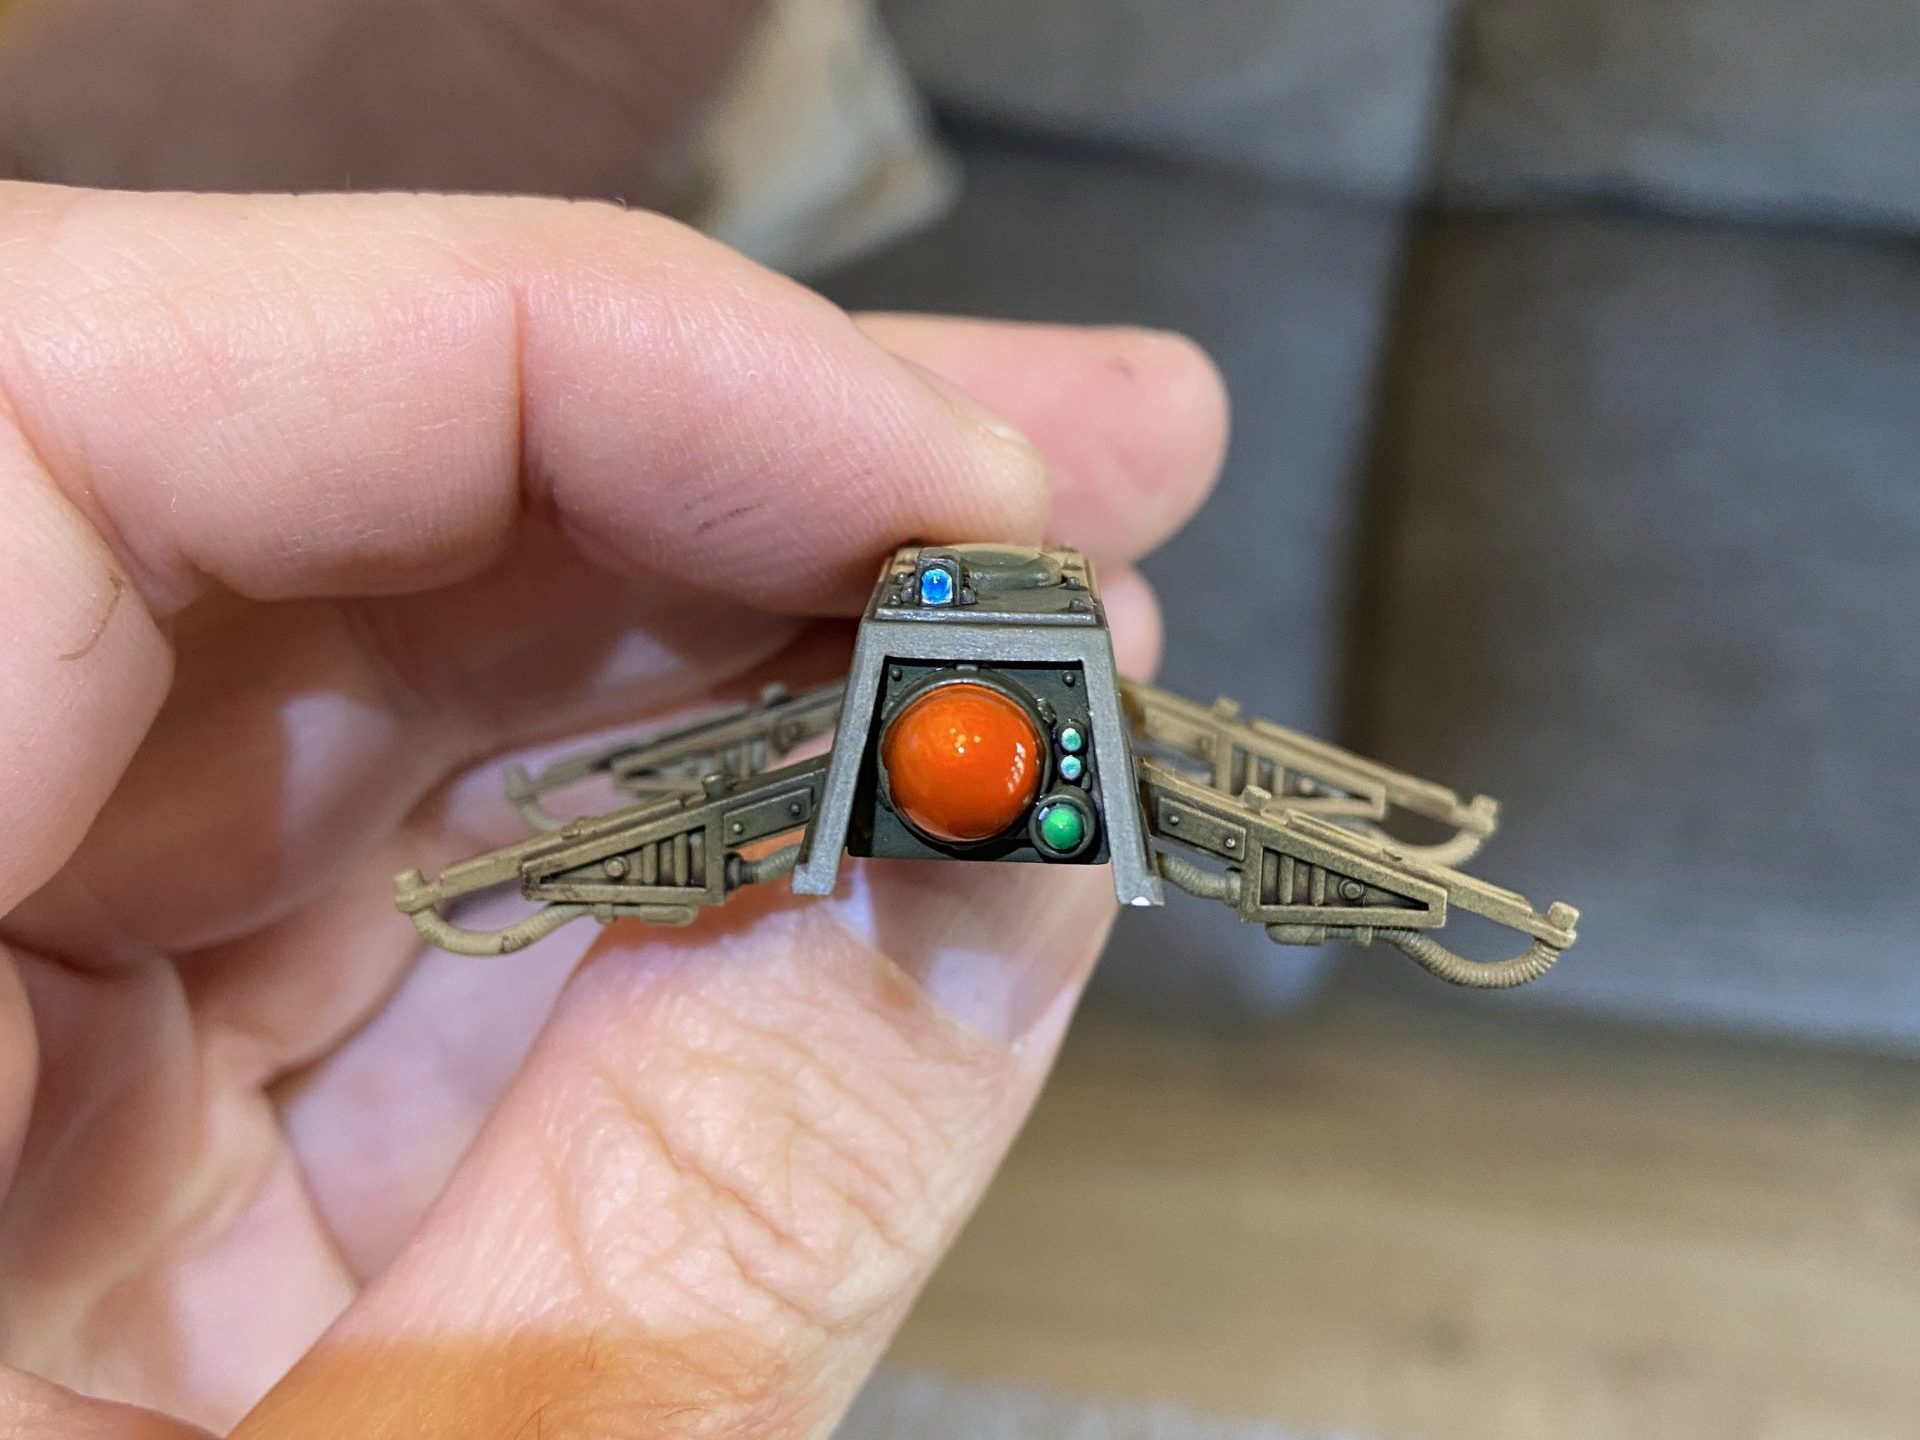
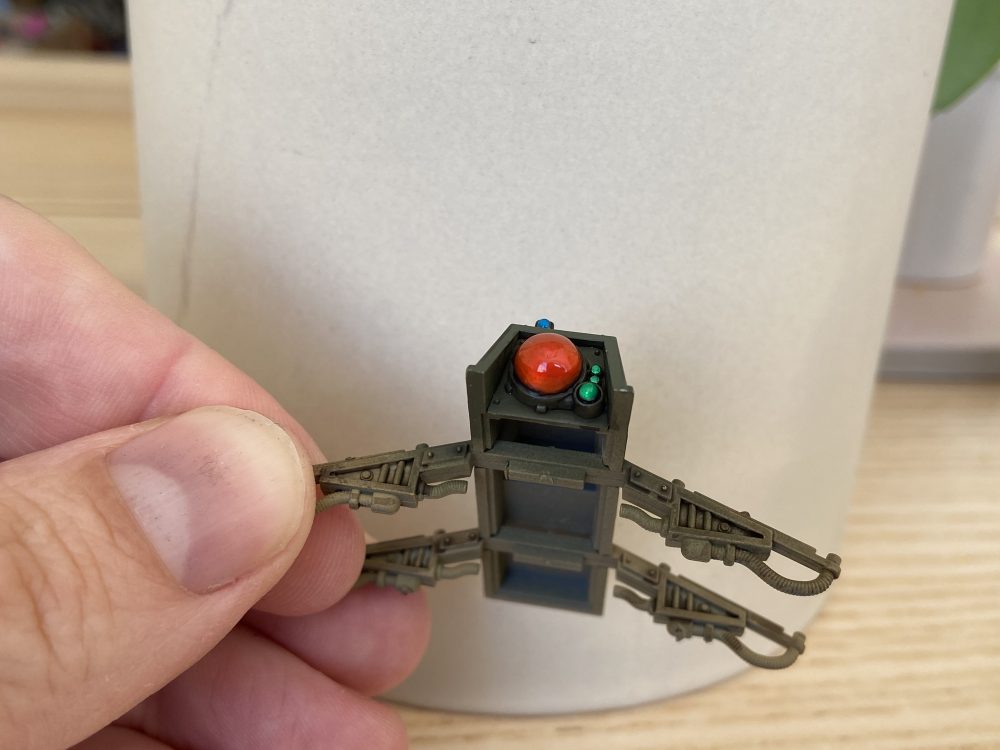
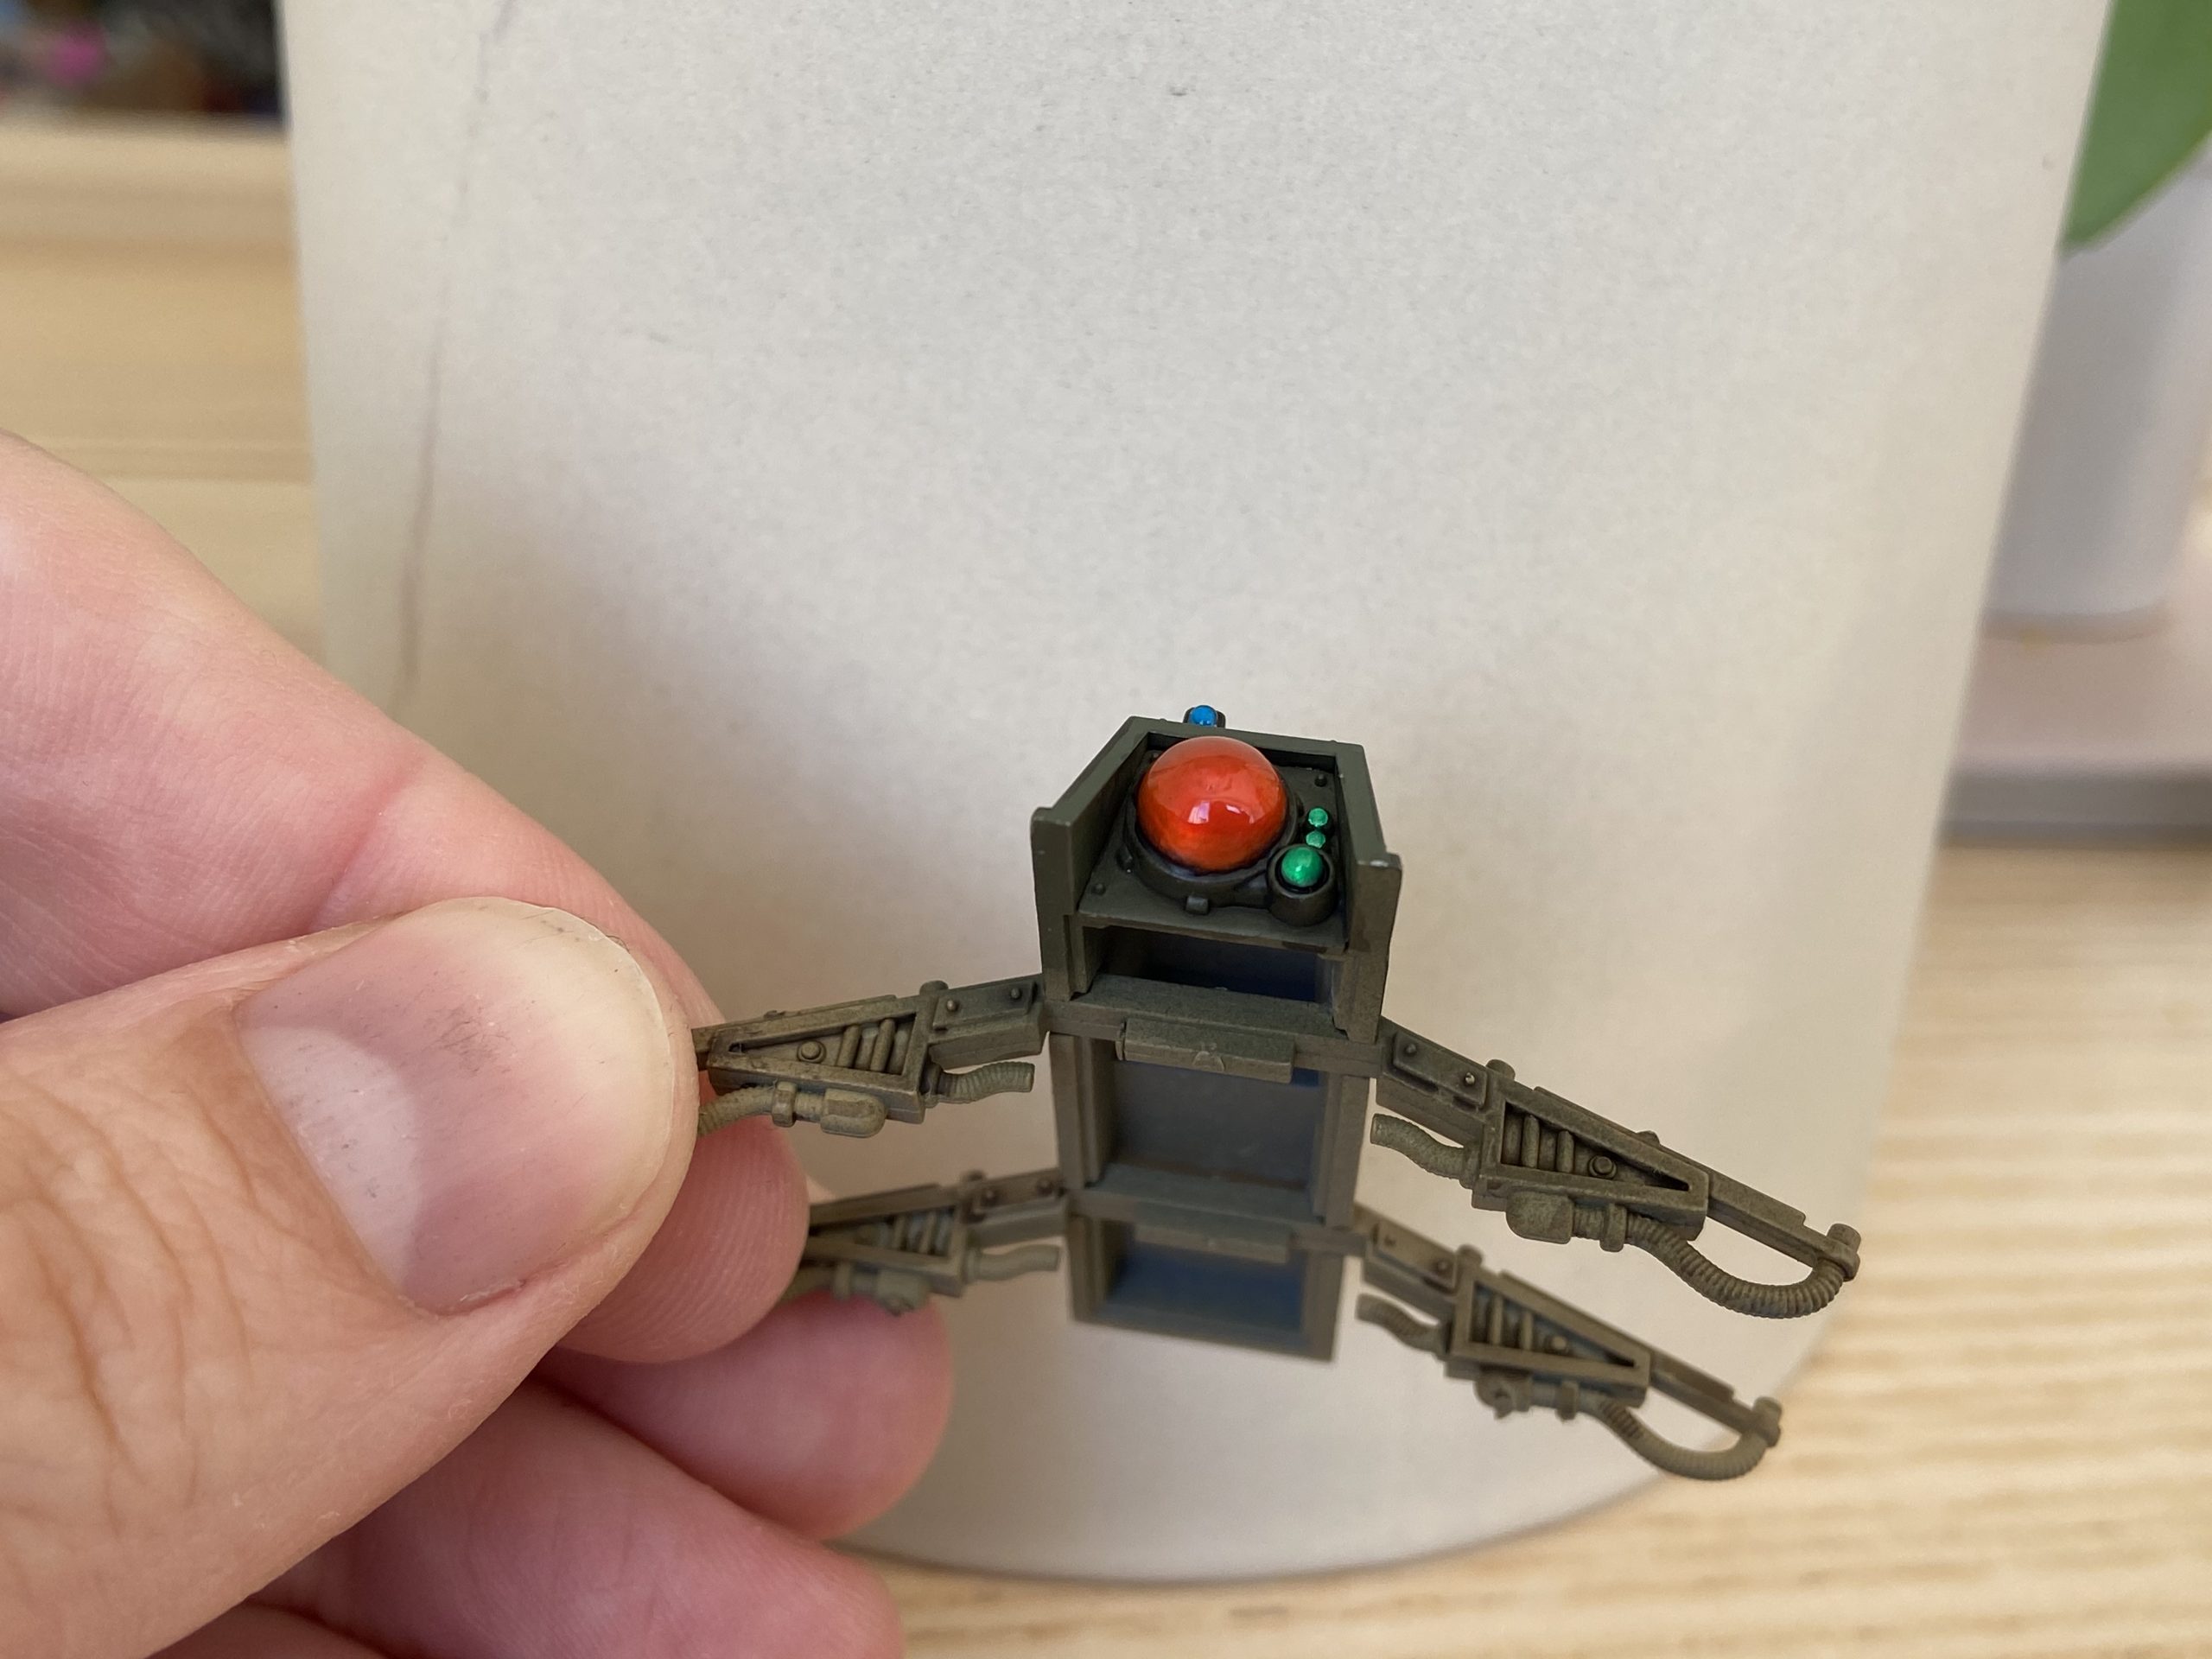
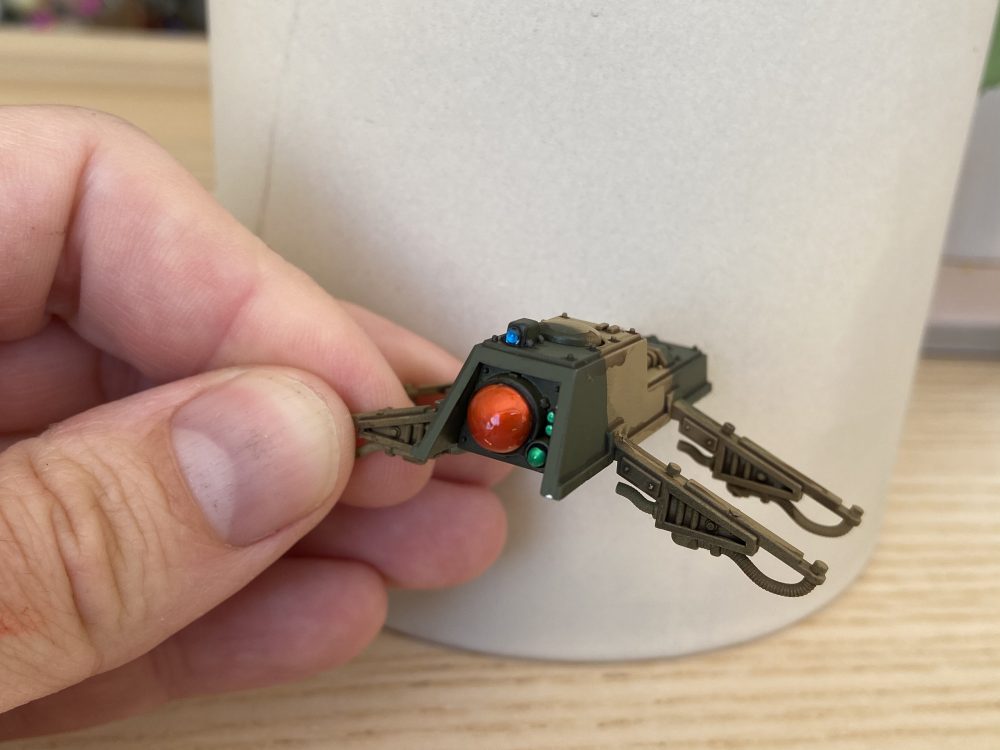
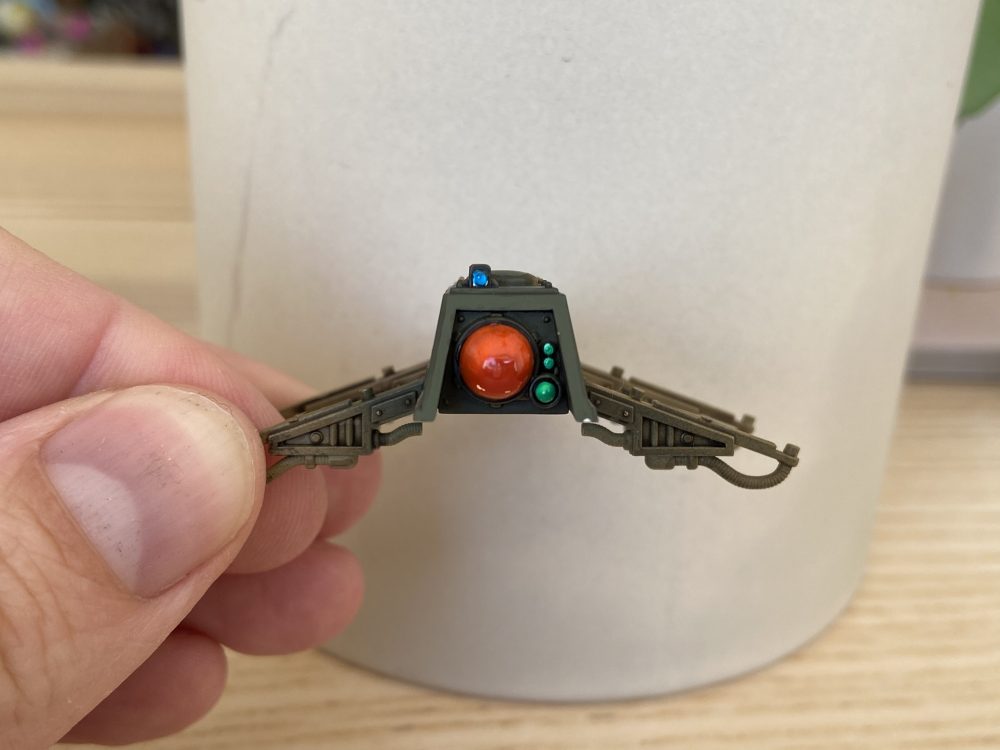
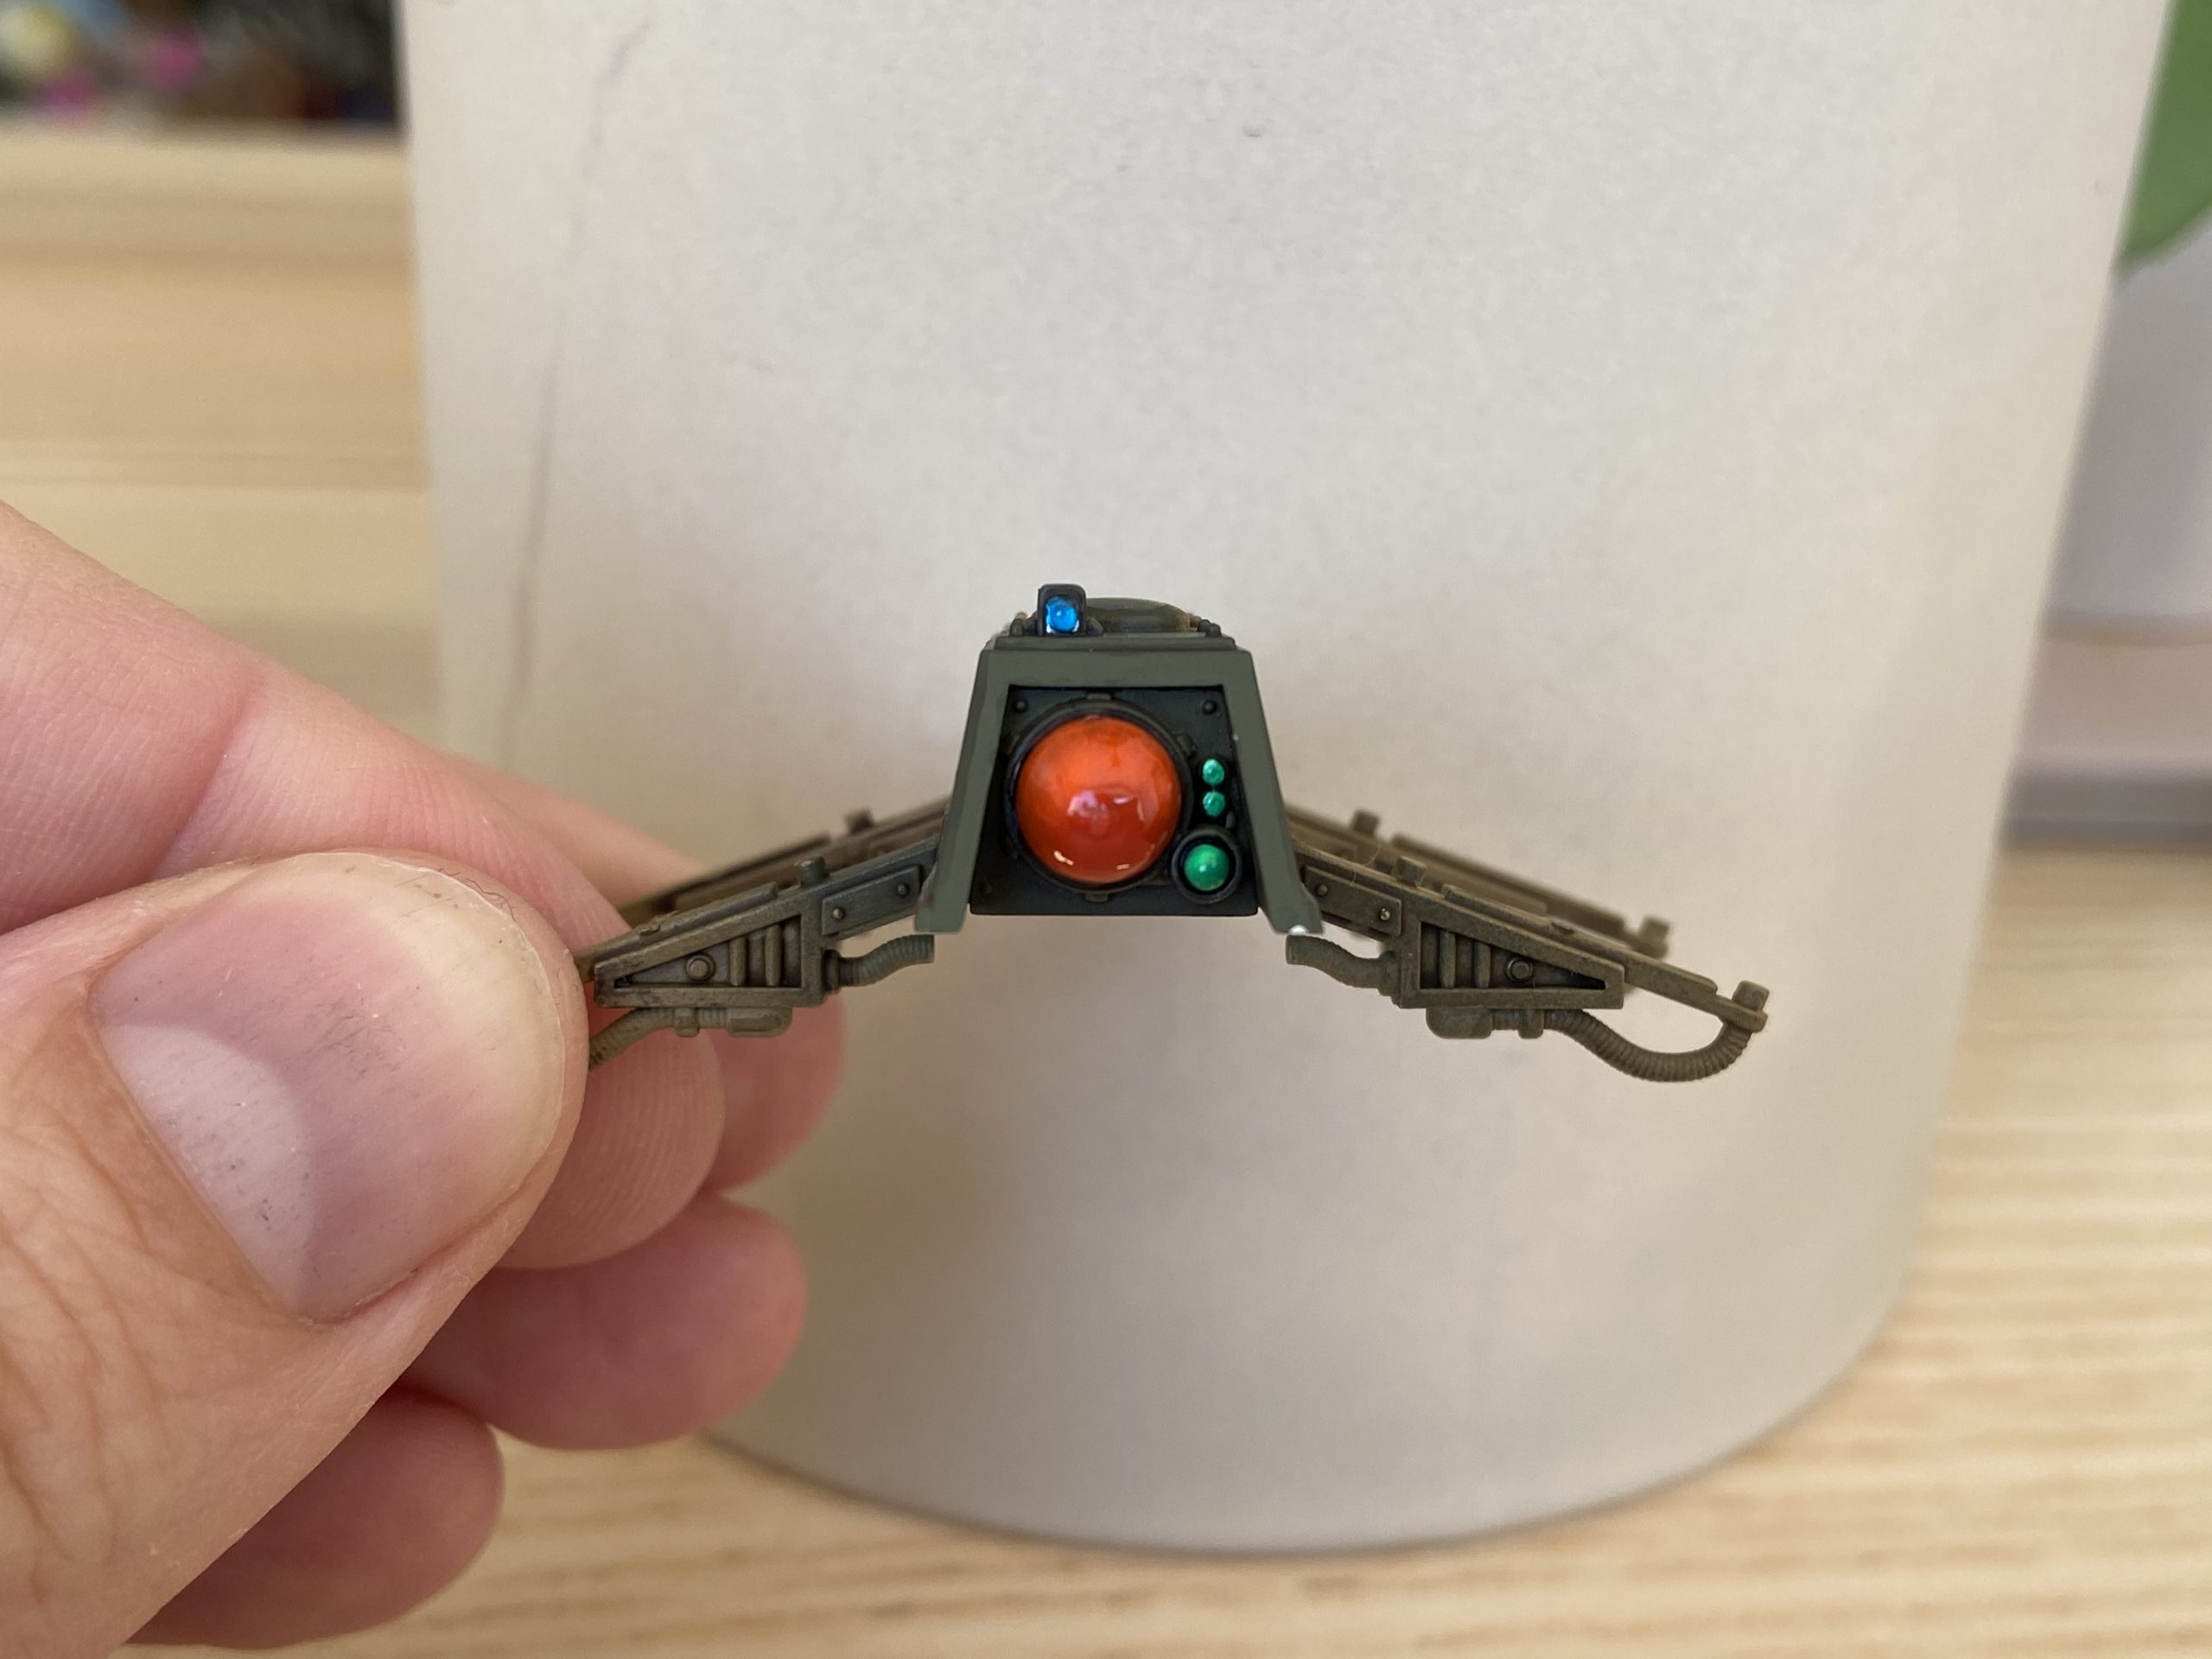
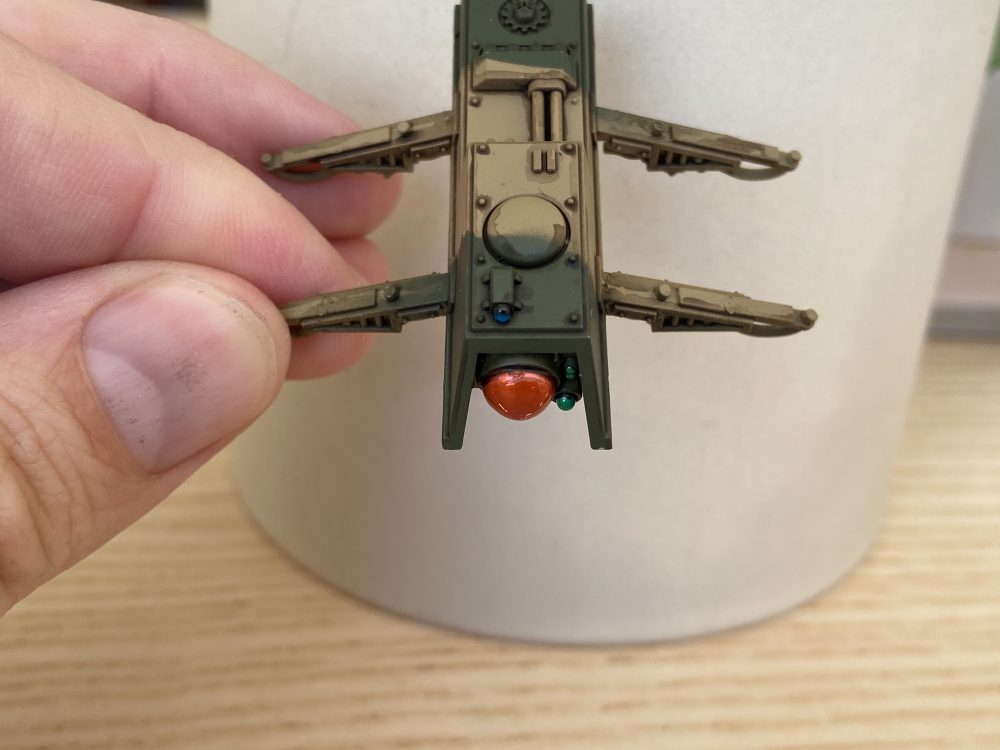
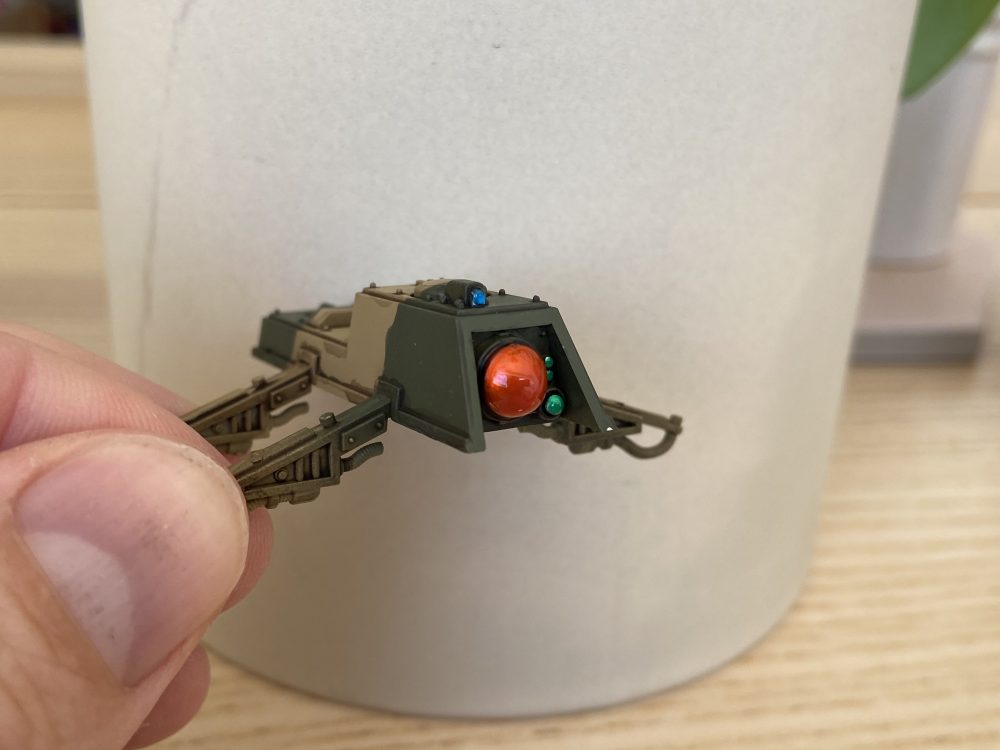
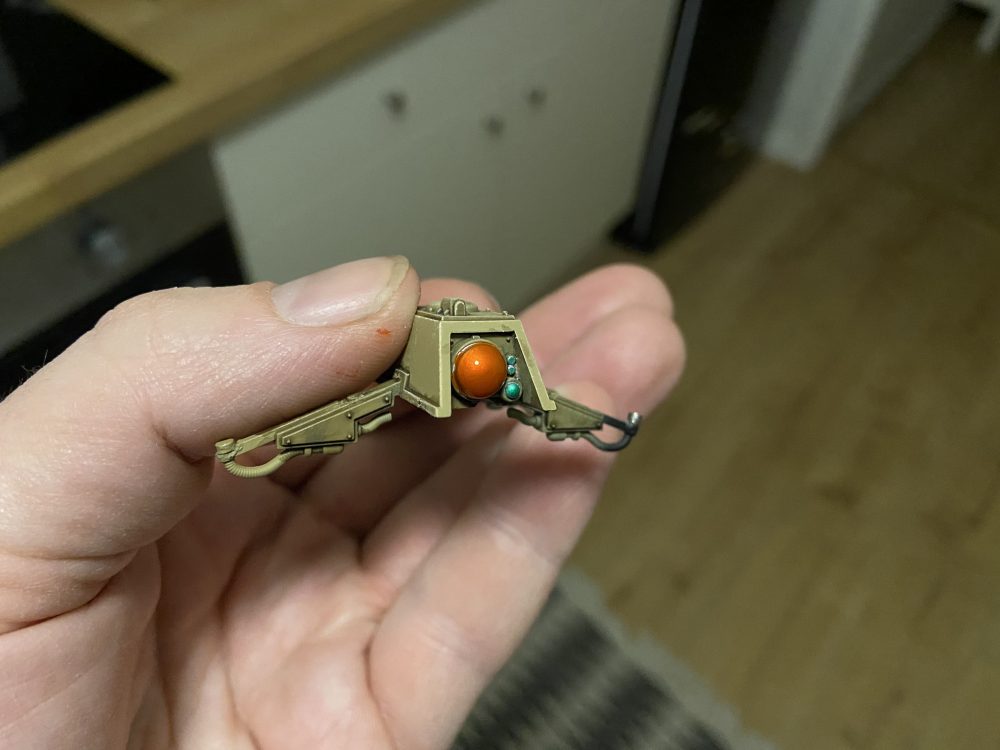
Manticore Lens Recipe
The lenses on my Manticores use the Games Workshop Gemstone paints, which are superb for doing this type of work. My method is similar to the Games Workshop video on them, but with a few extra steps to tidy it up.
- Start the lens off with bright silver, Runefang Steel from Games Workshop works well and is what I have used in the past. But on these, I used Vallejo Metal Color – Aluminium. This paint is amazing. All the Vallejo Metal Color paints I have are amazing. They are so bright with great coverage.
- Let that dry and then go in with a blob of Gemstone paint. This can be very hard to move around and get into the right place, but do not fret! I have a method of tidying it up with ease, in the next step…
- Once the Gemstone paint is dry use a dark wash to wash around the lens and tidy up any overspill of the Gemstone paint. Nuln Oil will work, but on these, I used an oil wash with Abteilung 502 Black. This just tidies up the Gemstone paint and frames it well I think.
- At this point, if the wash did not fix all the Gemstone overspill you may need to go back with the silver or your original armour colour to touch it up. With practice though you shouldn’t need to do this. I did on the first one, but not on the other two.
- Finally, once everything is dry use a layer of ‘ardCoat from Games Workshop to give the lens that extra shine. I dry them pointing down, to stop the ‘ardCoat pooling at the bottom of the lens.
This method also works well on vision ports too, I did mine blue and have done on all my other Cadian armour too.
-
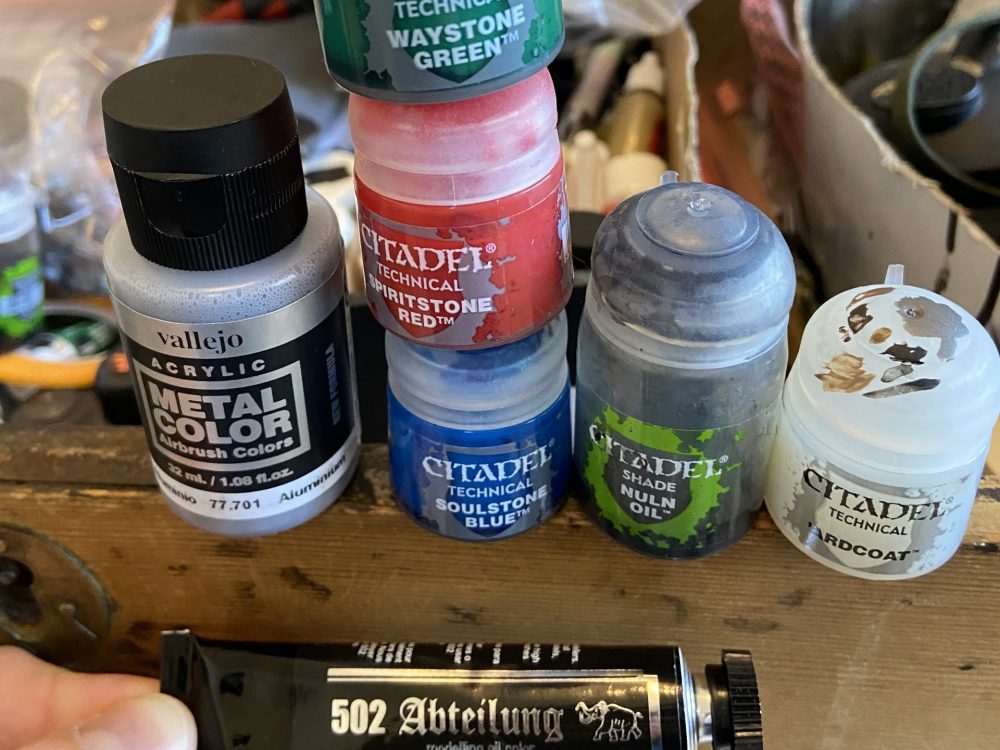
- Paints used

-

- Starting Point

-
- Silver is done

-

- Gemstone paints in place
-

- I let the ‘ardCoat dry like this, with them pointing down so it does not pool at the bottom of a lens
-
- Completed
-
- Completed

-
- Completed
-
- Completed

-
- Completed

WIP Gallery
-

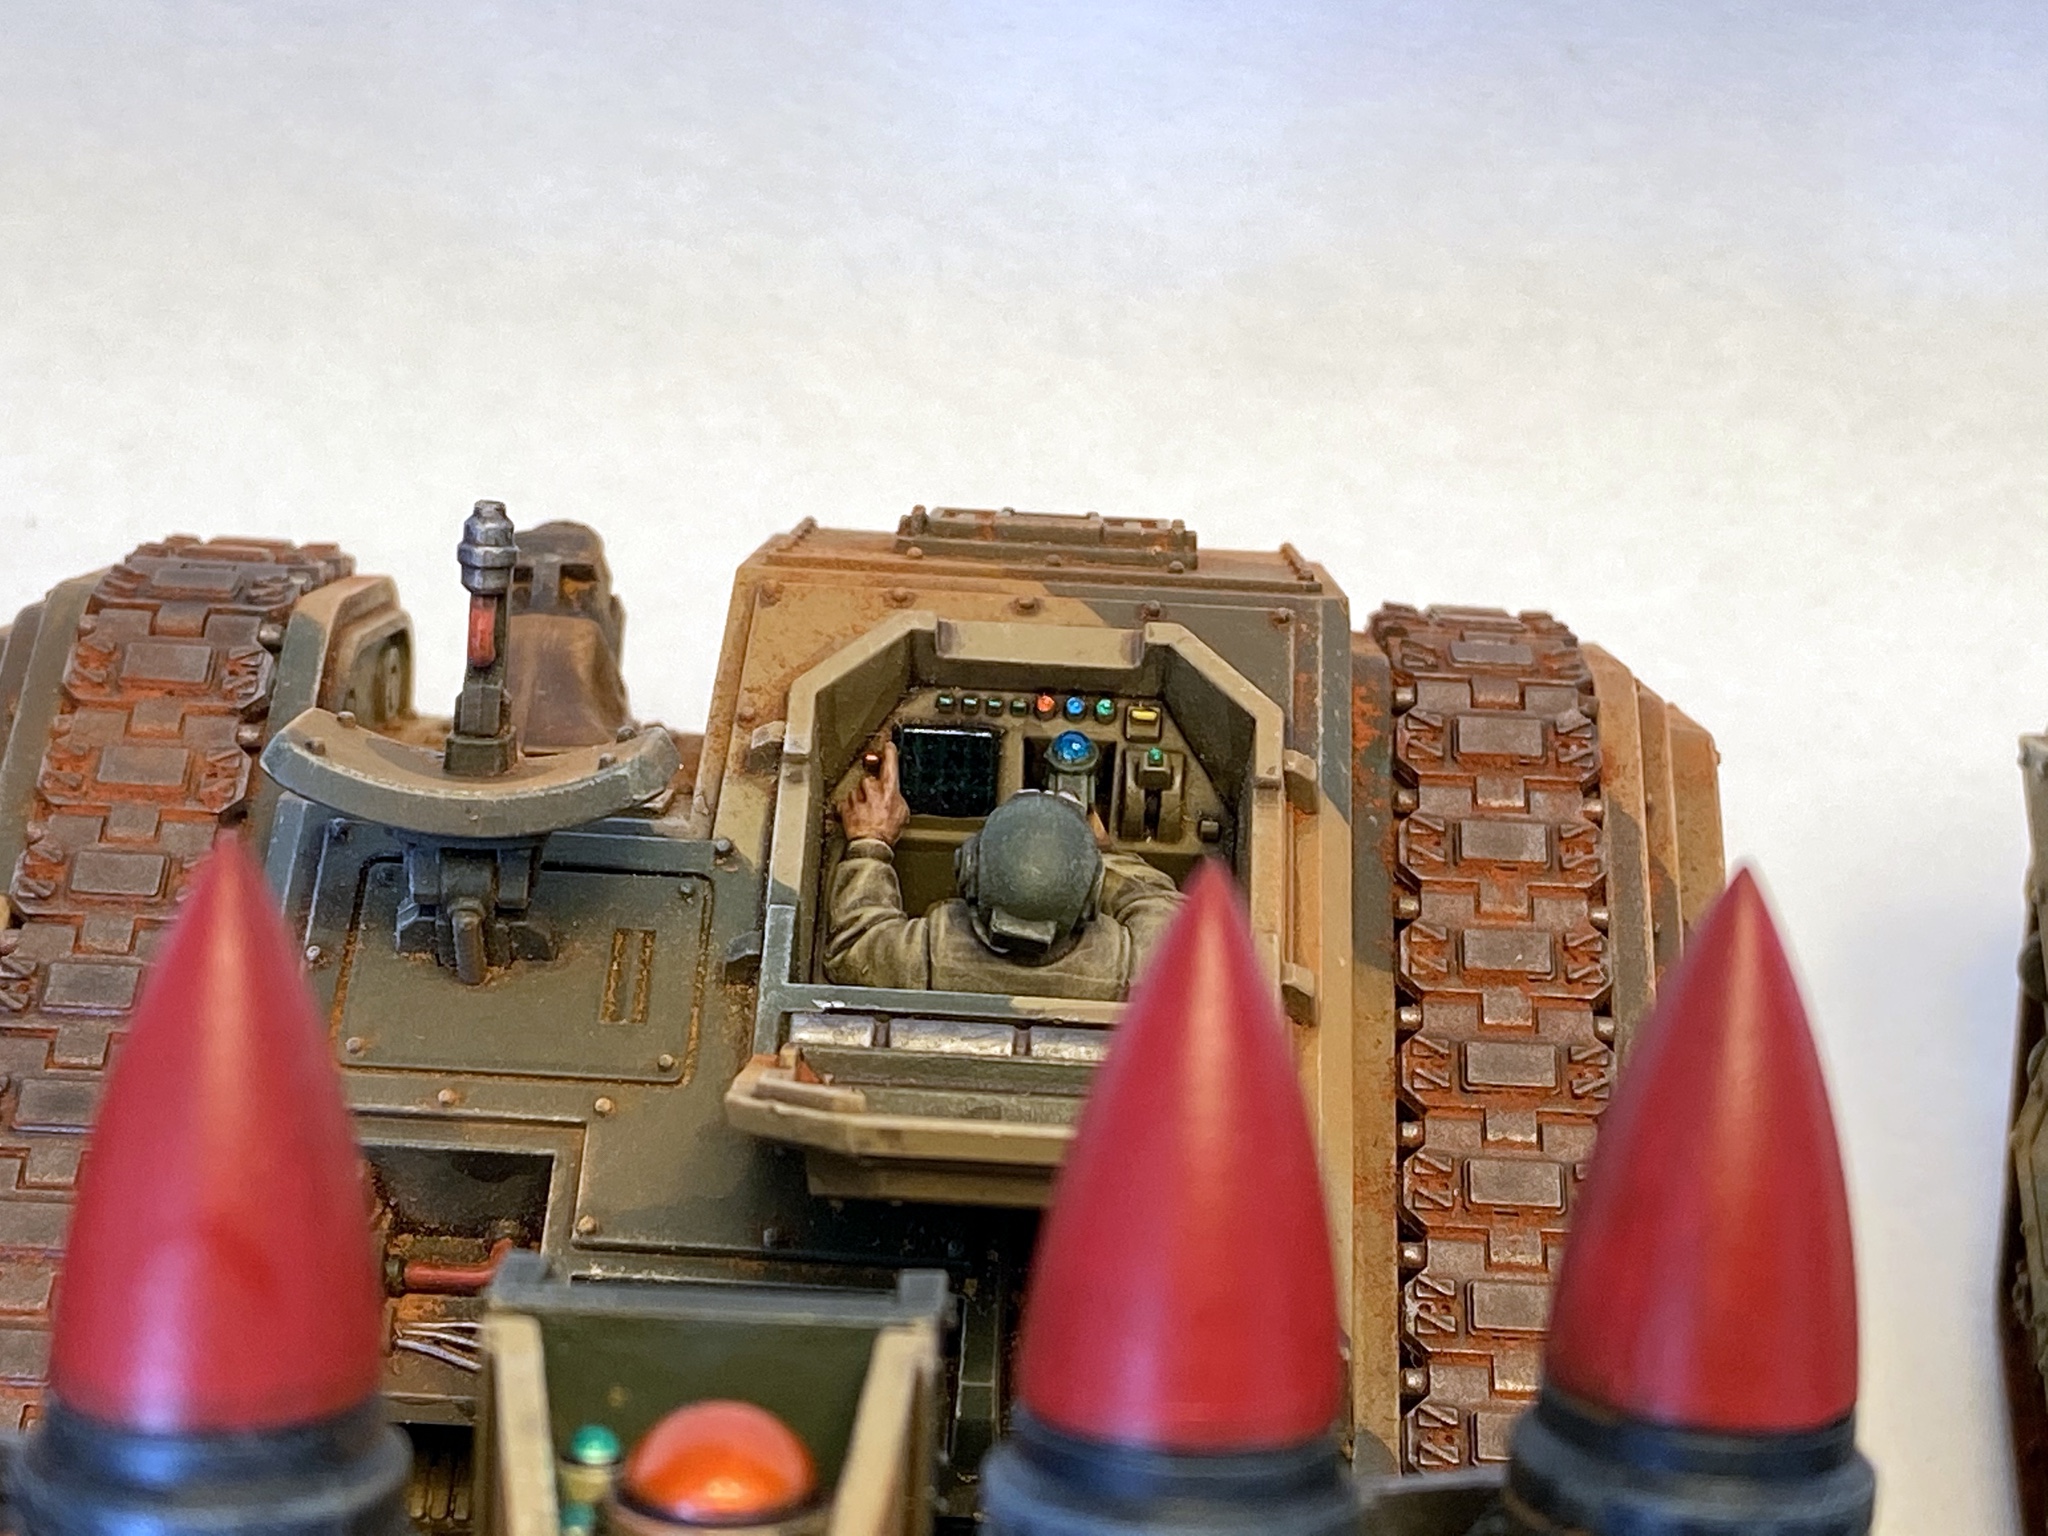
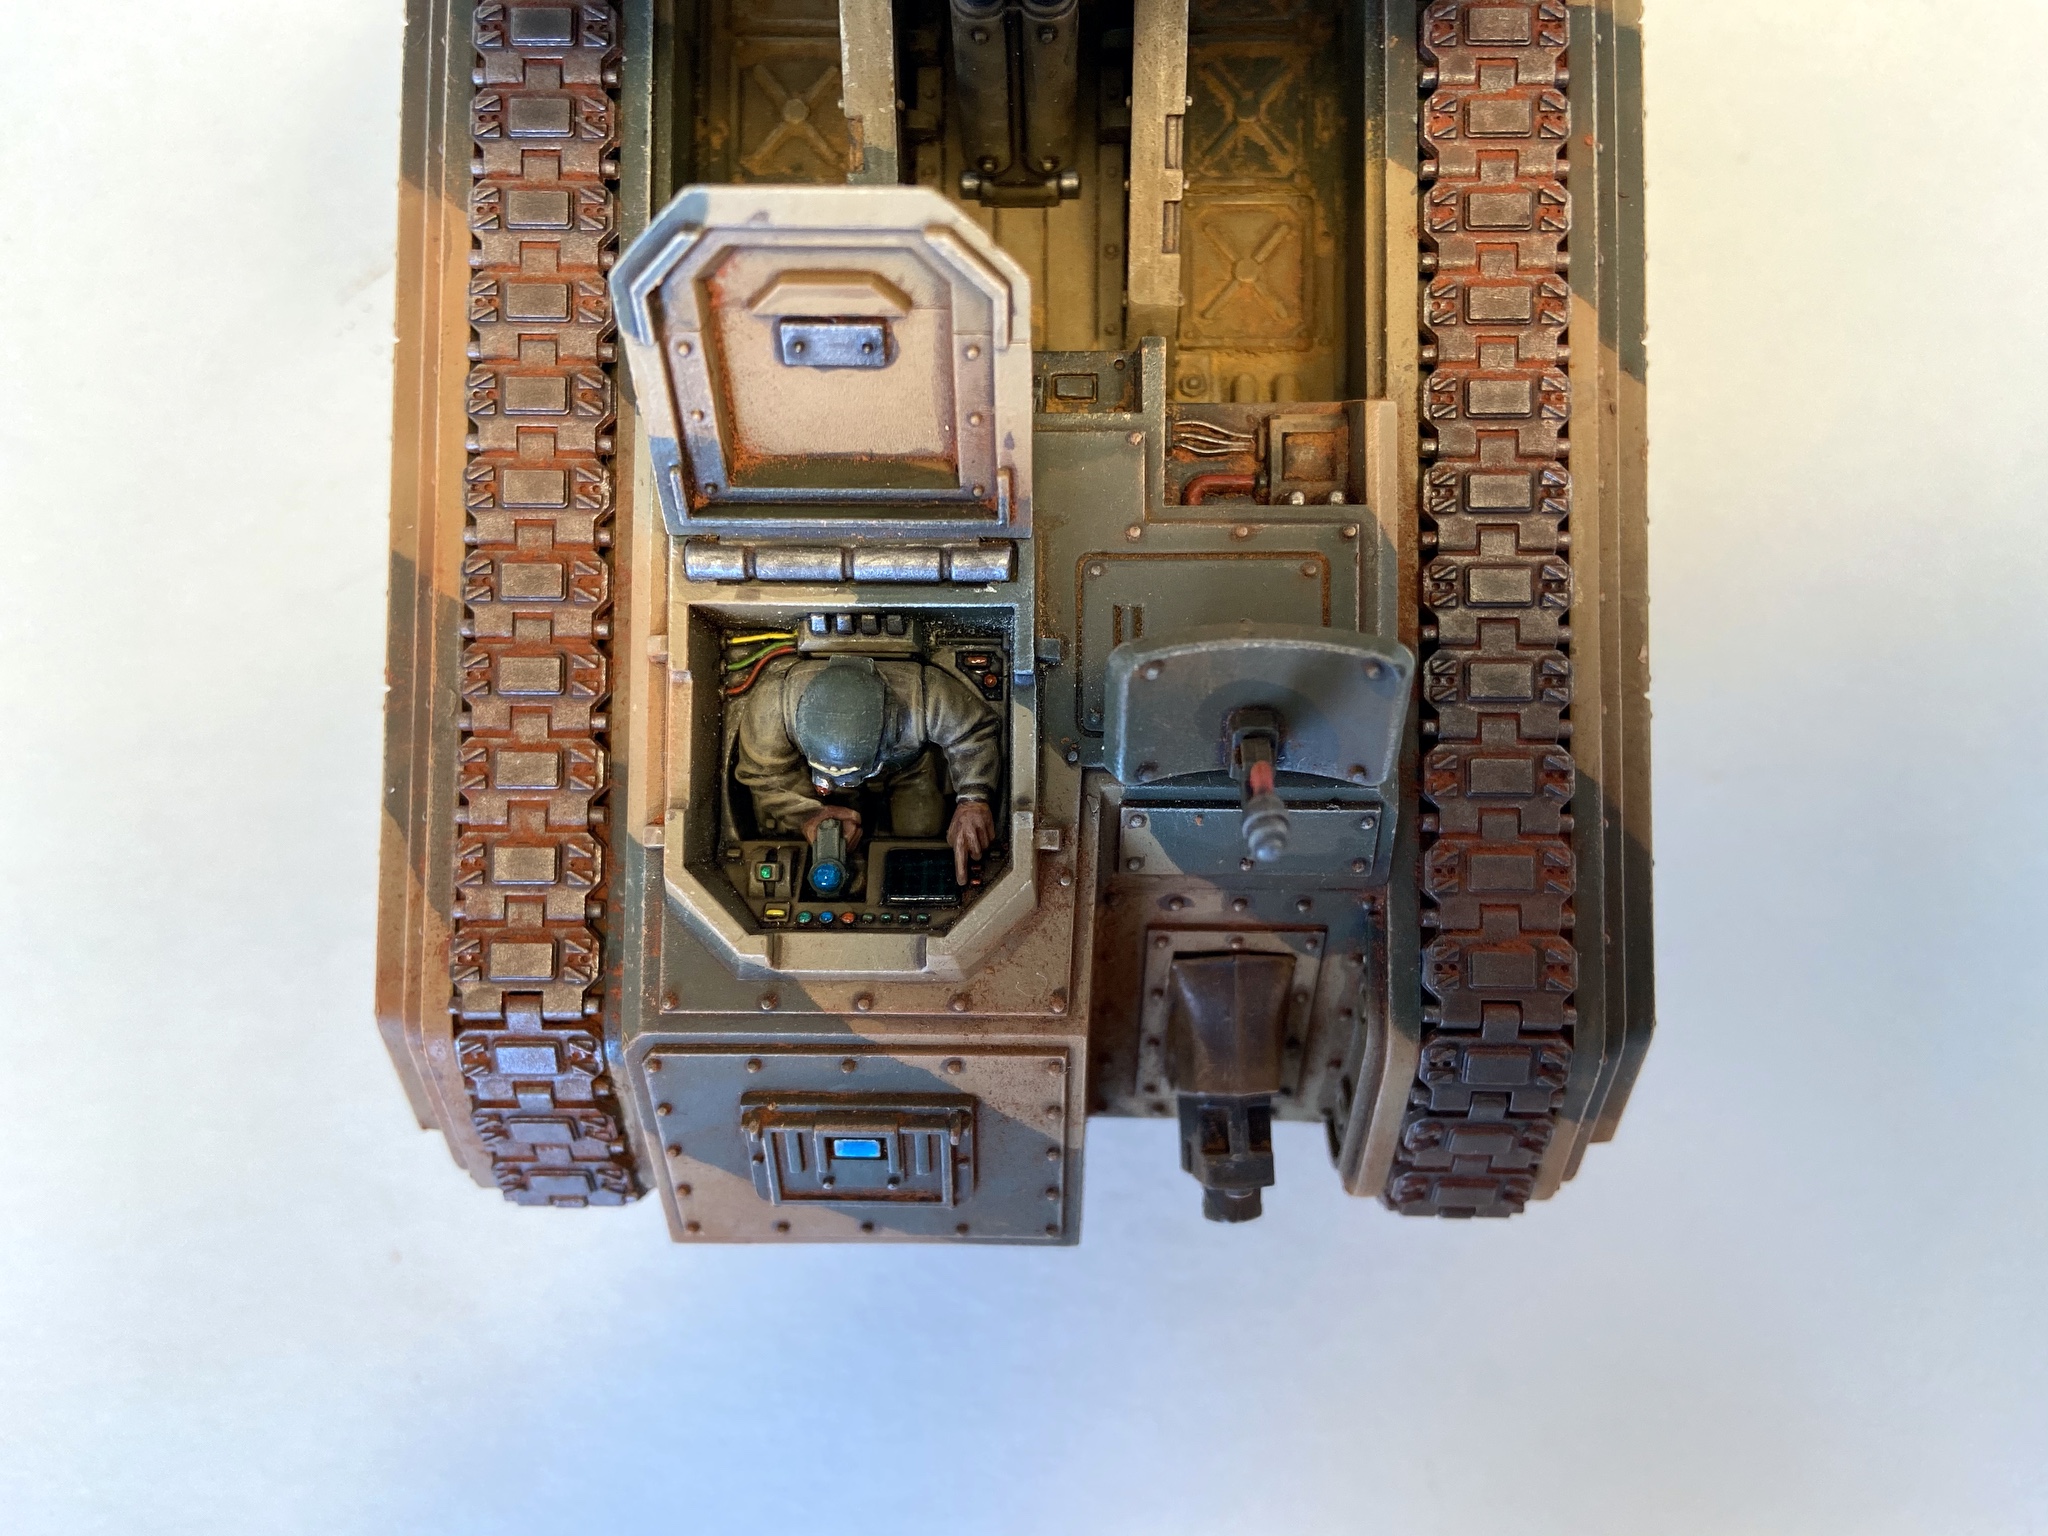
- The final Manticore build will have a crew member
-
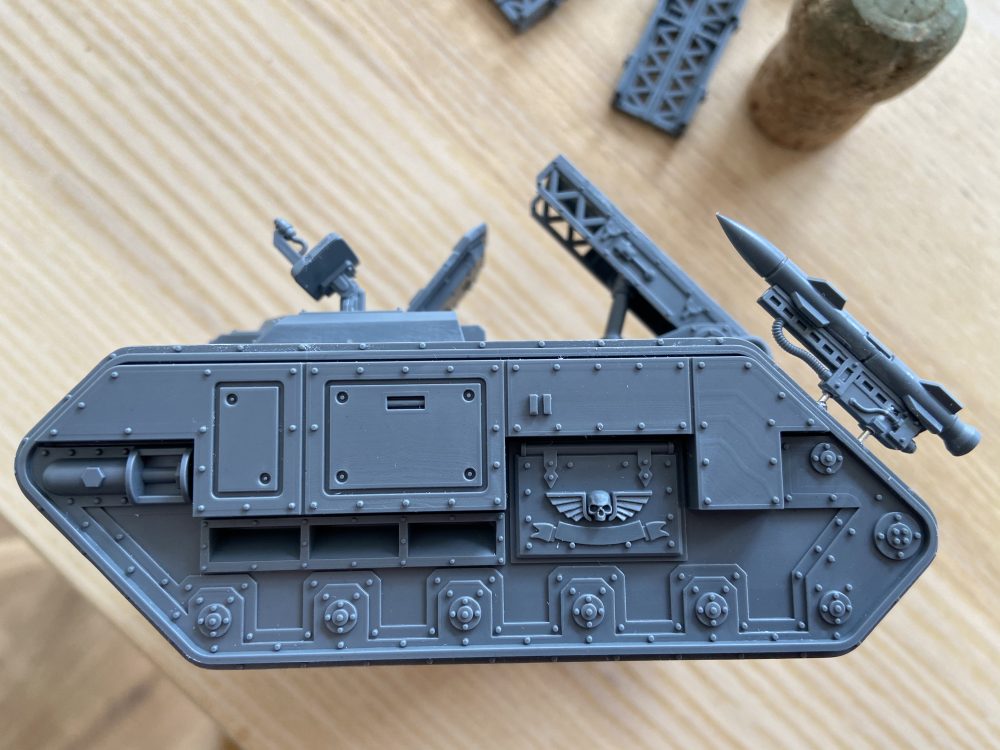
- Adding Hunter Killer Missile using a paper clip

-
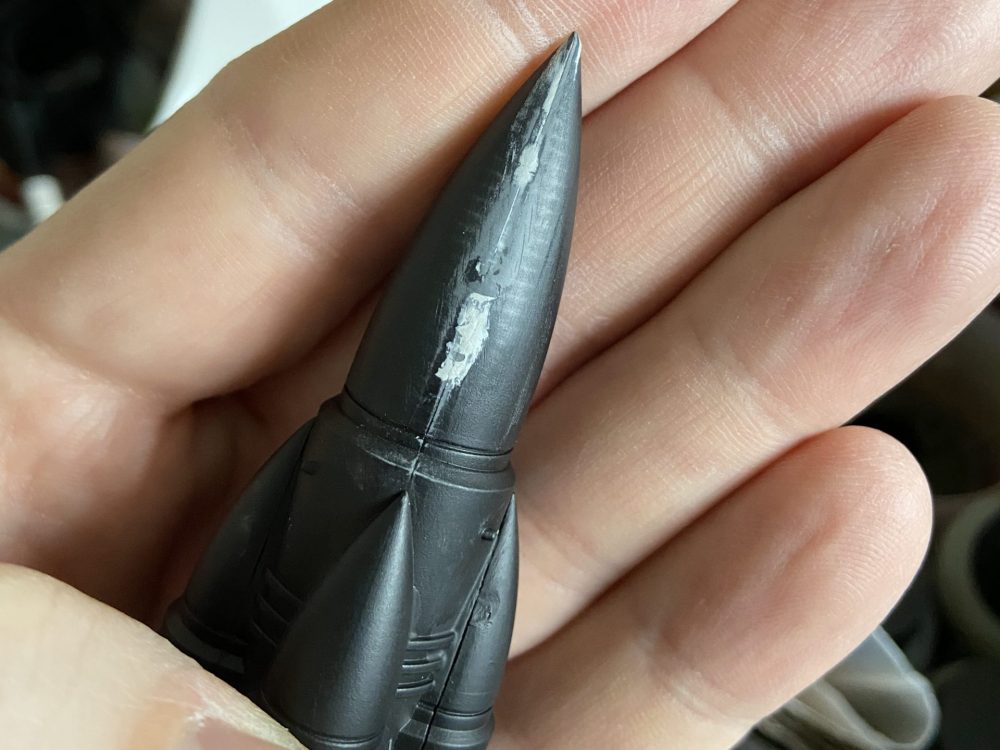
- Humbrol Model Filler to make sure the cone is perfect

-
- Making an extra Deathstrike from my spares and eBay bits
-
- Initial build and green from 4.5 years ago
-
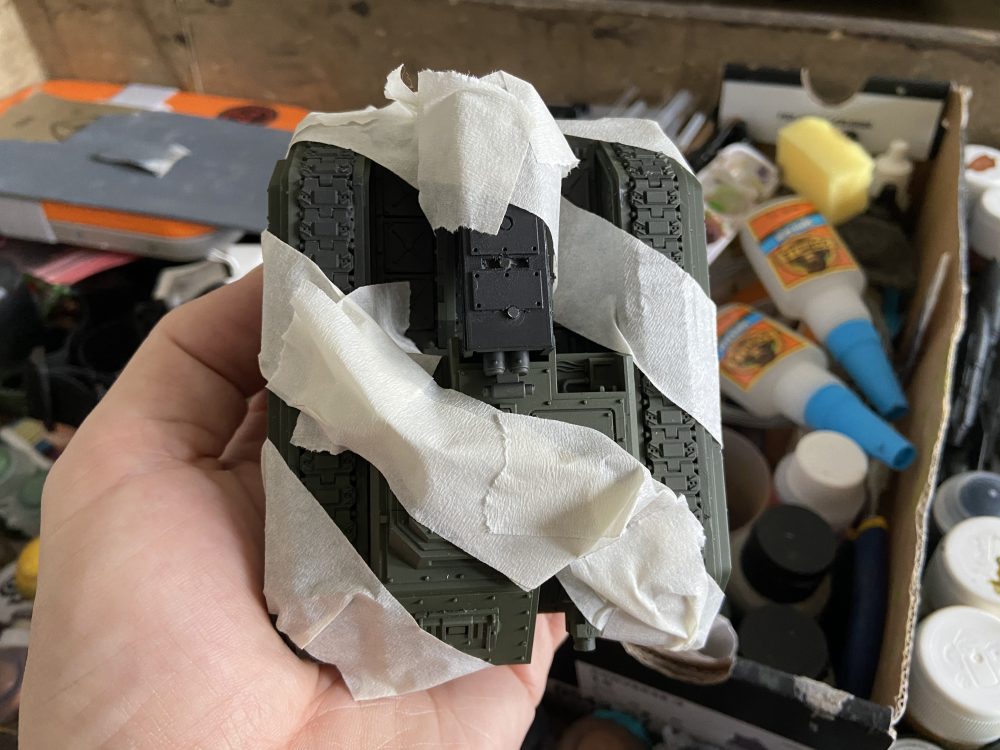
- Masking tape ready

-
- Another Manticore underway
-
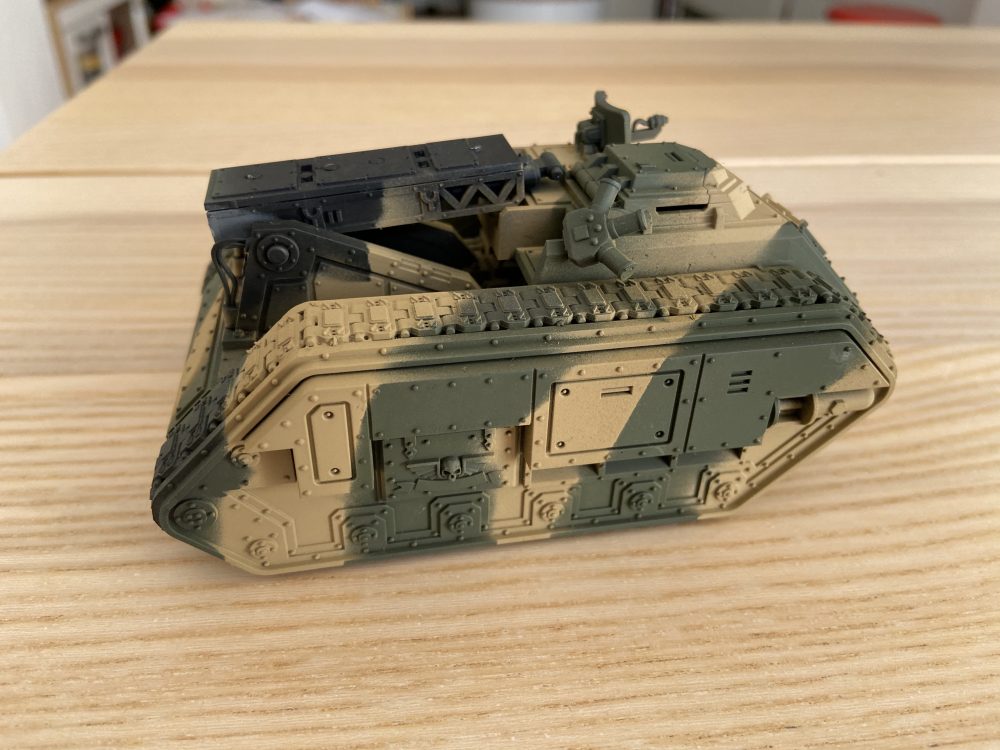
- Camo Right

-

- Camo Front
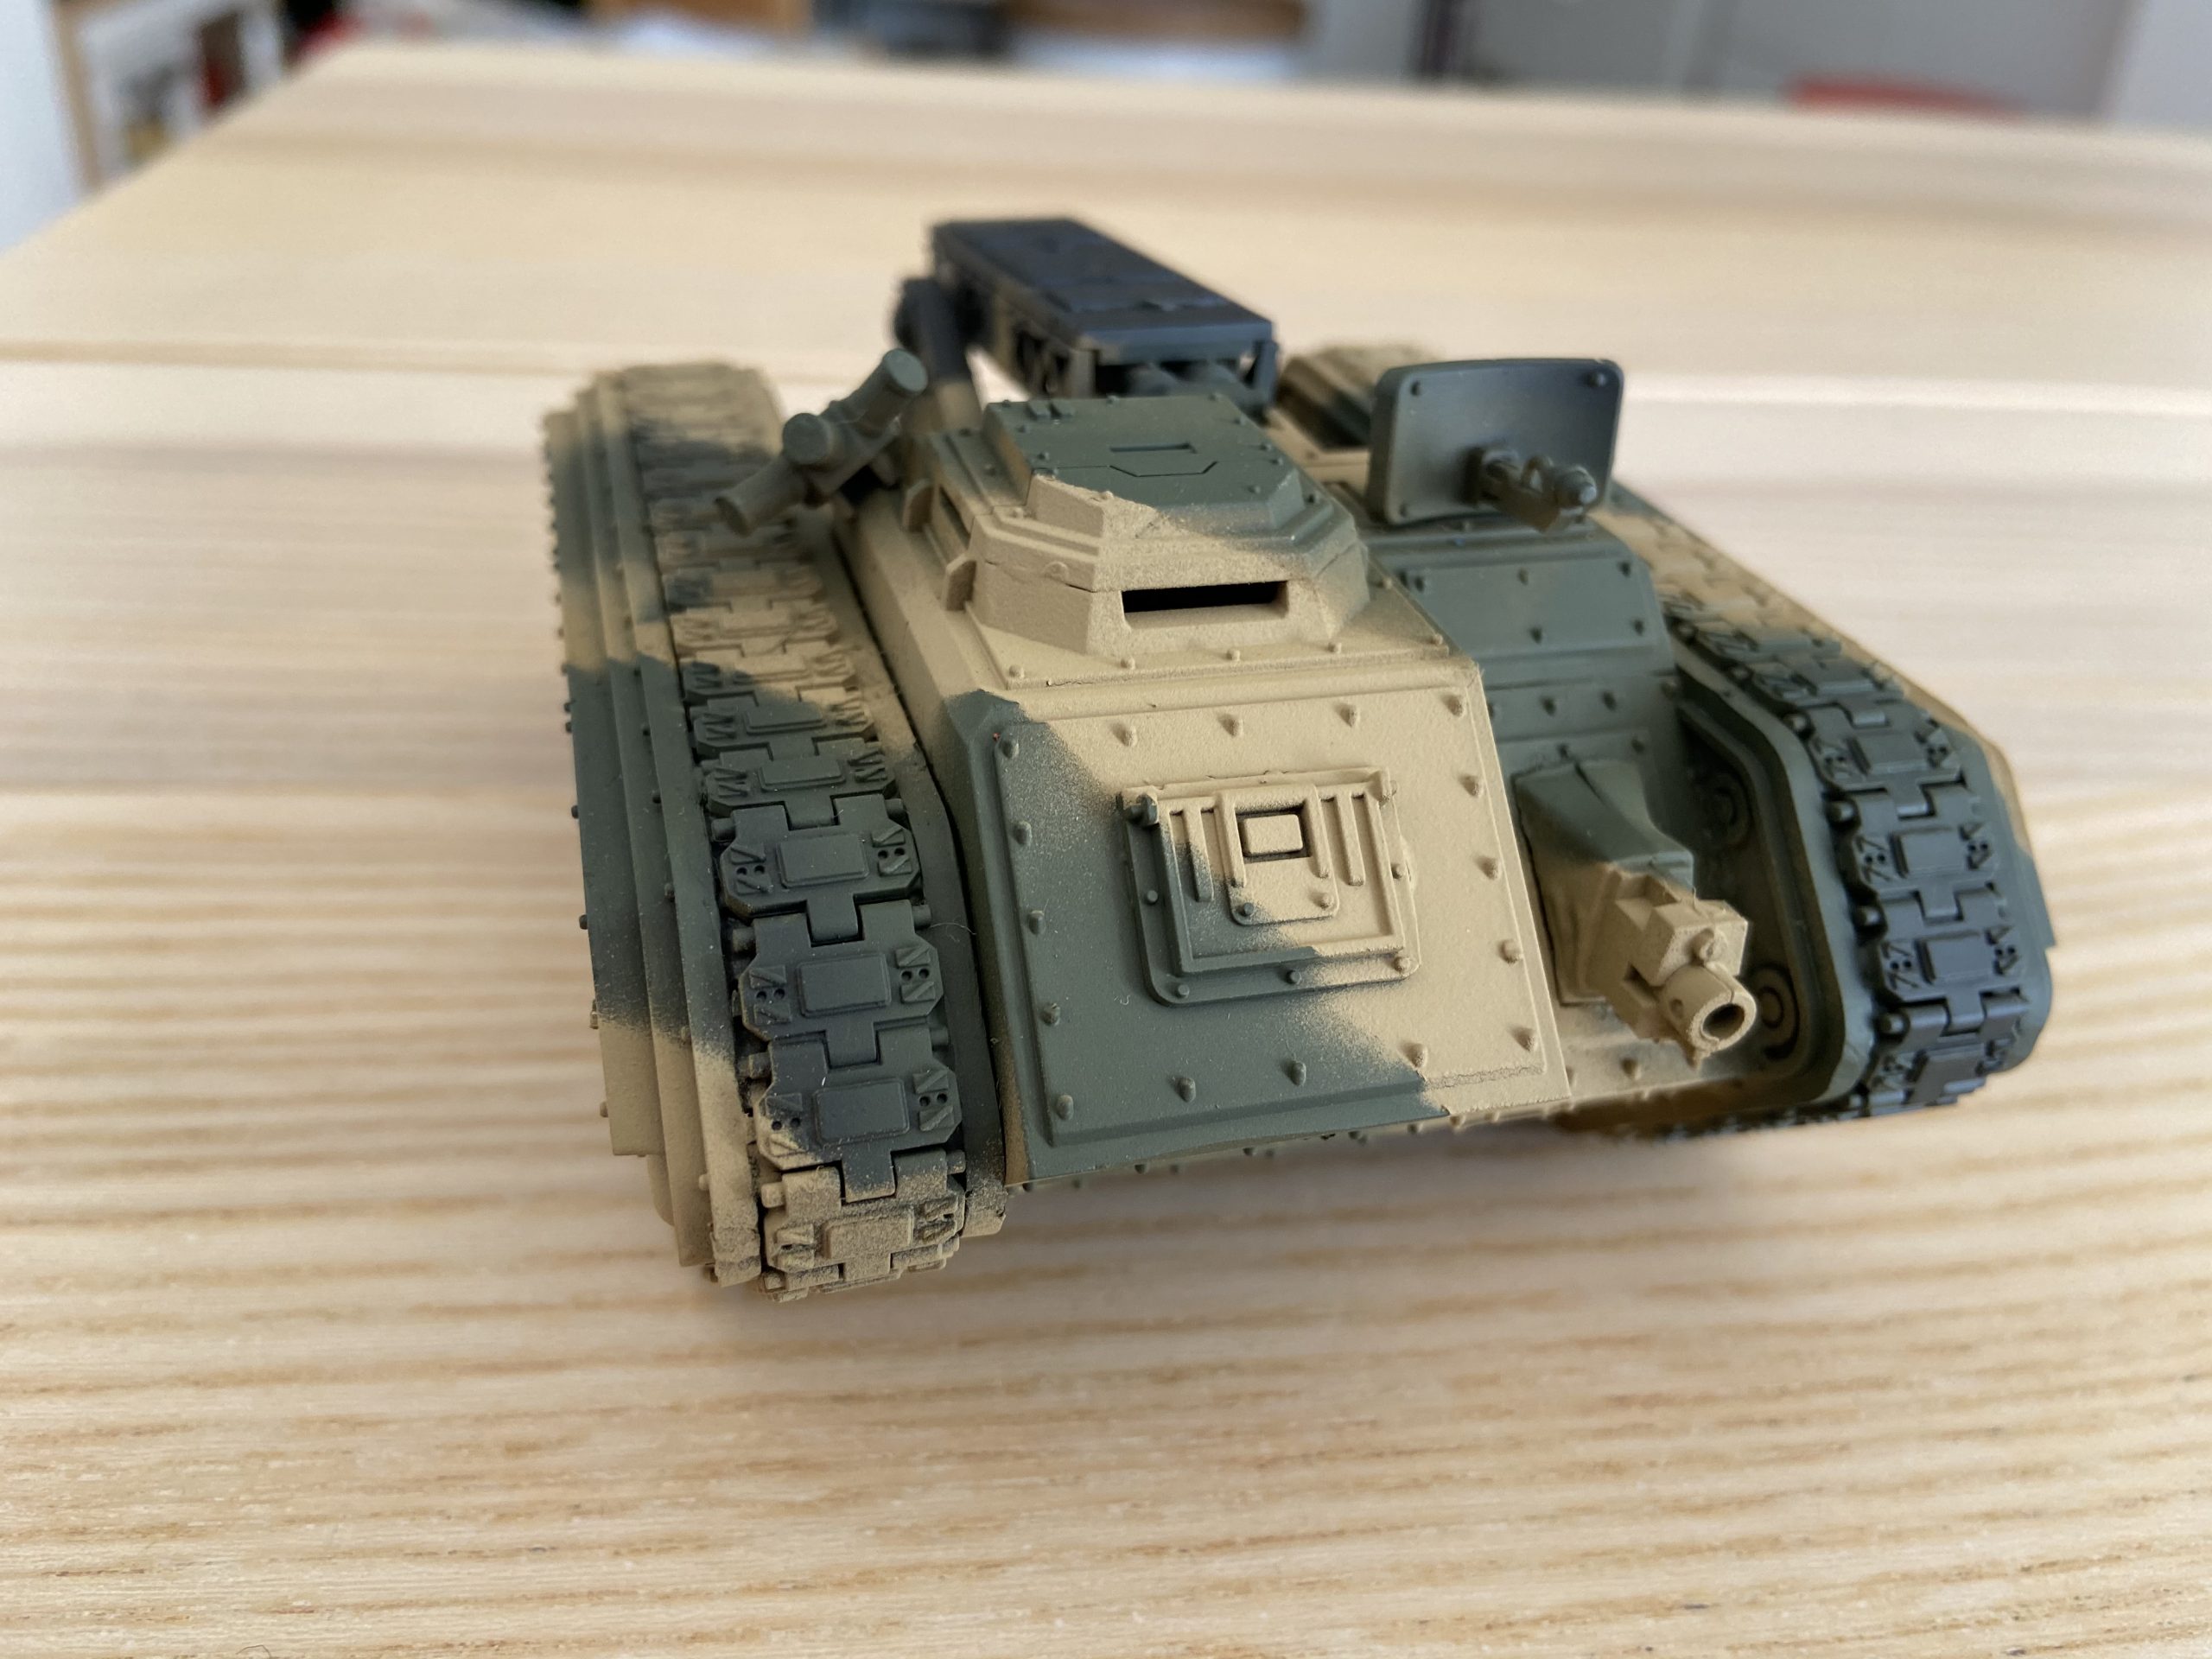
-

- Camo Left
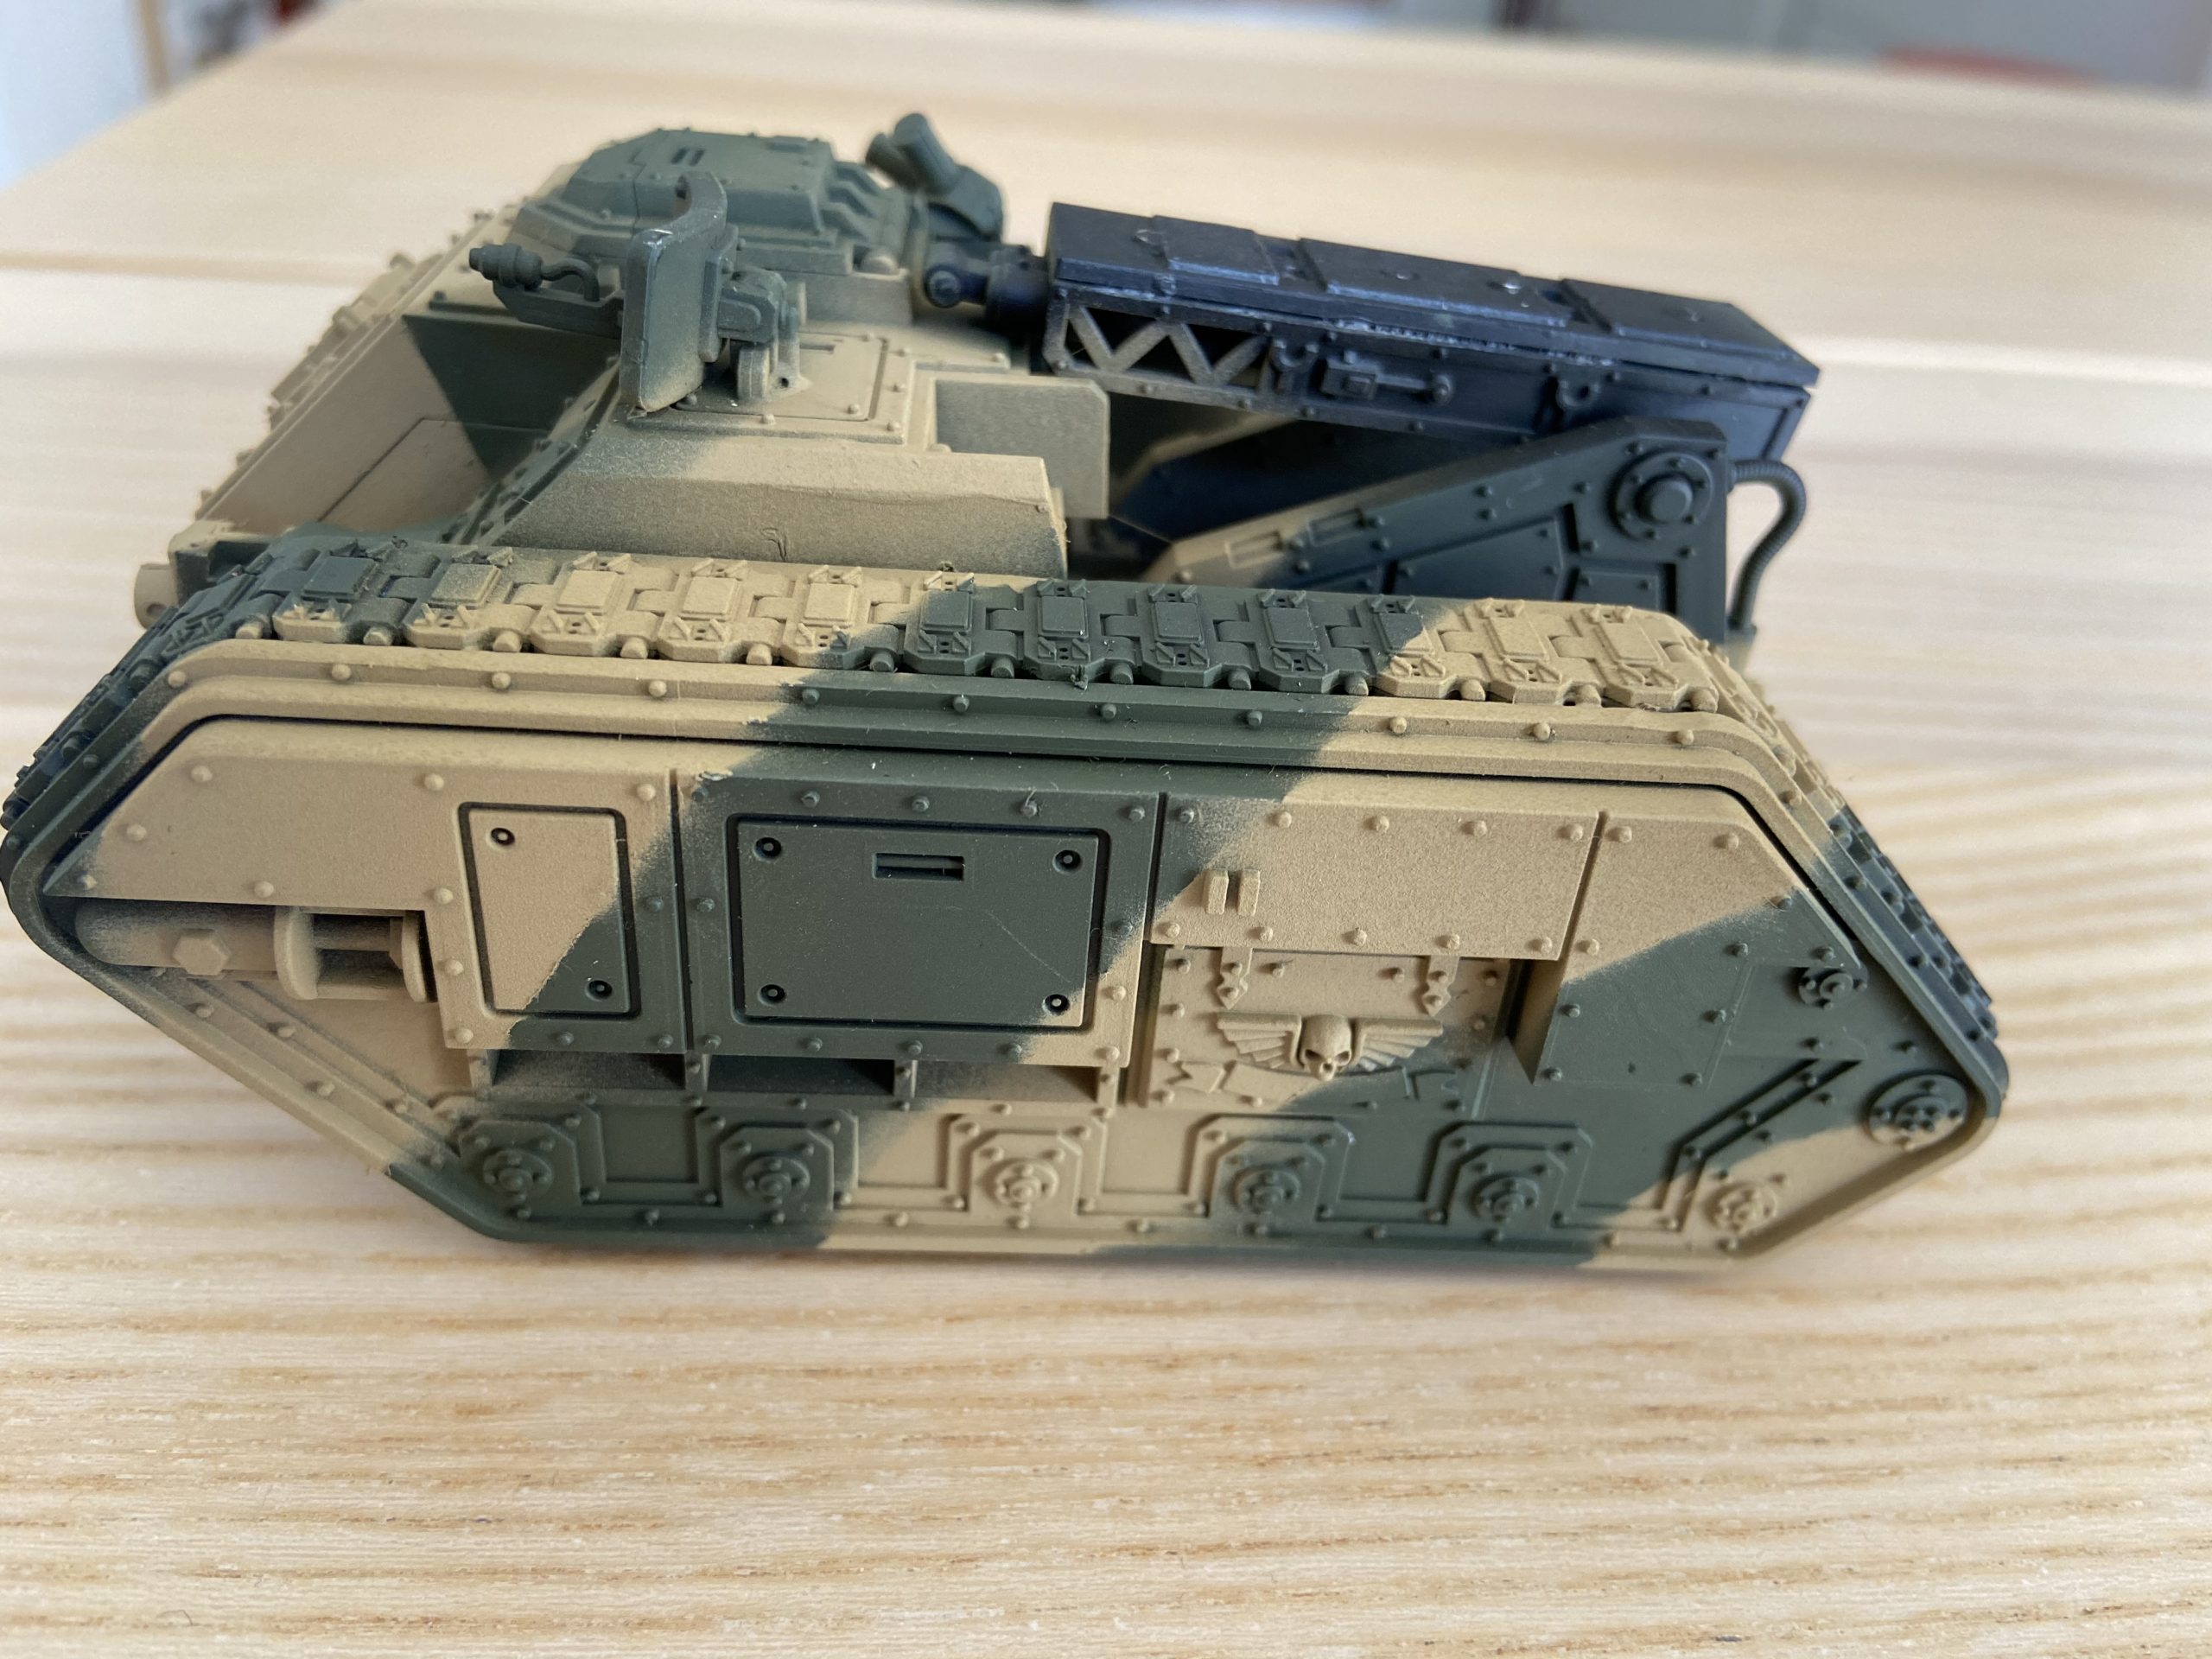
-
- Here I have started tidying the camo edges with a brush

-

- Progress on three
-

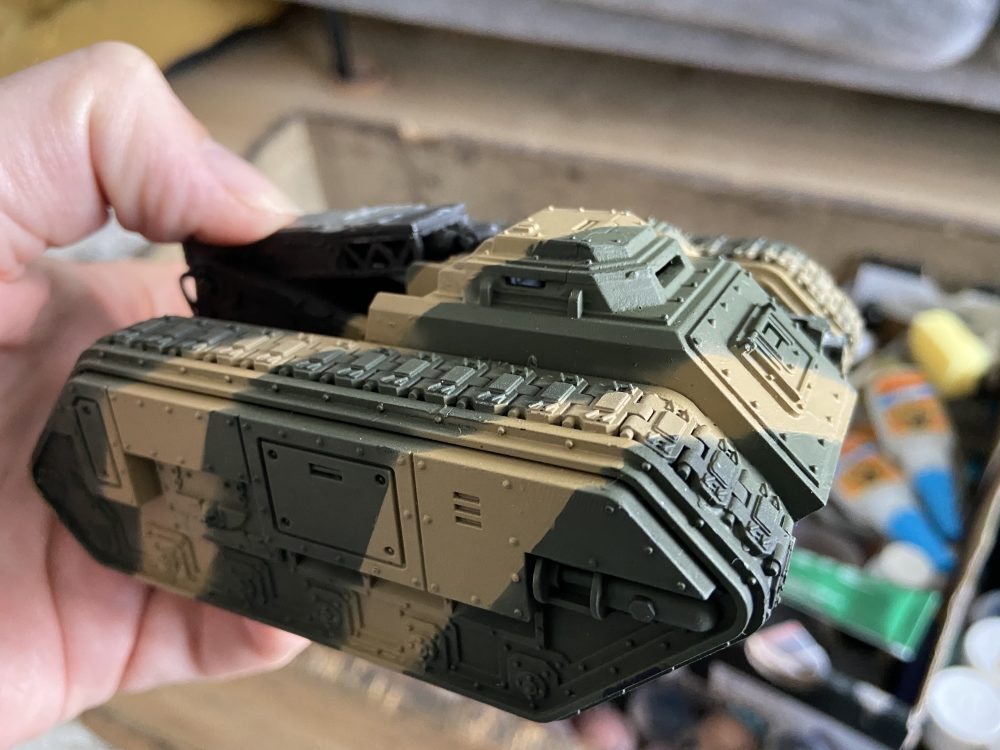
- Side section before wash
-
- Side section after wash

-
- Lens using Games Workshop Gemstone Paints

-
- Final lens effect

-

- Missile Experimenting

-
- Group Progress Photo

-
- All camo done, only missiles and details left to do

-
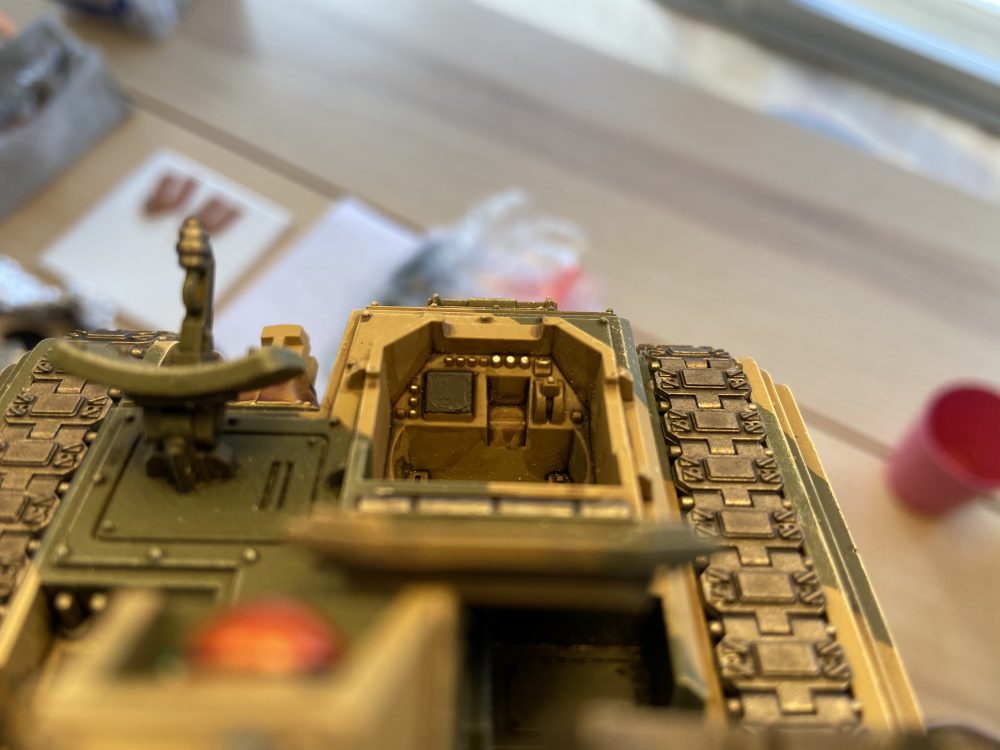
- Cockpit WIP

-

- Cockpit Done
