Hades Breaching Drills Completed
Crunch, Whirrr, Crunch, Whirrr, Crunch!
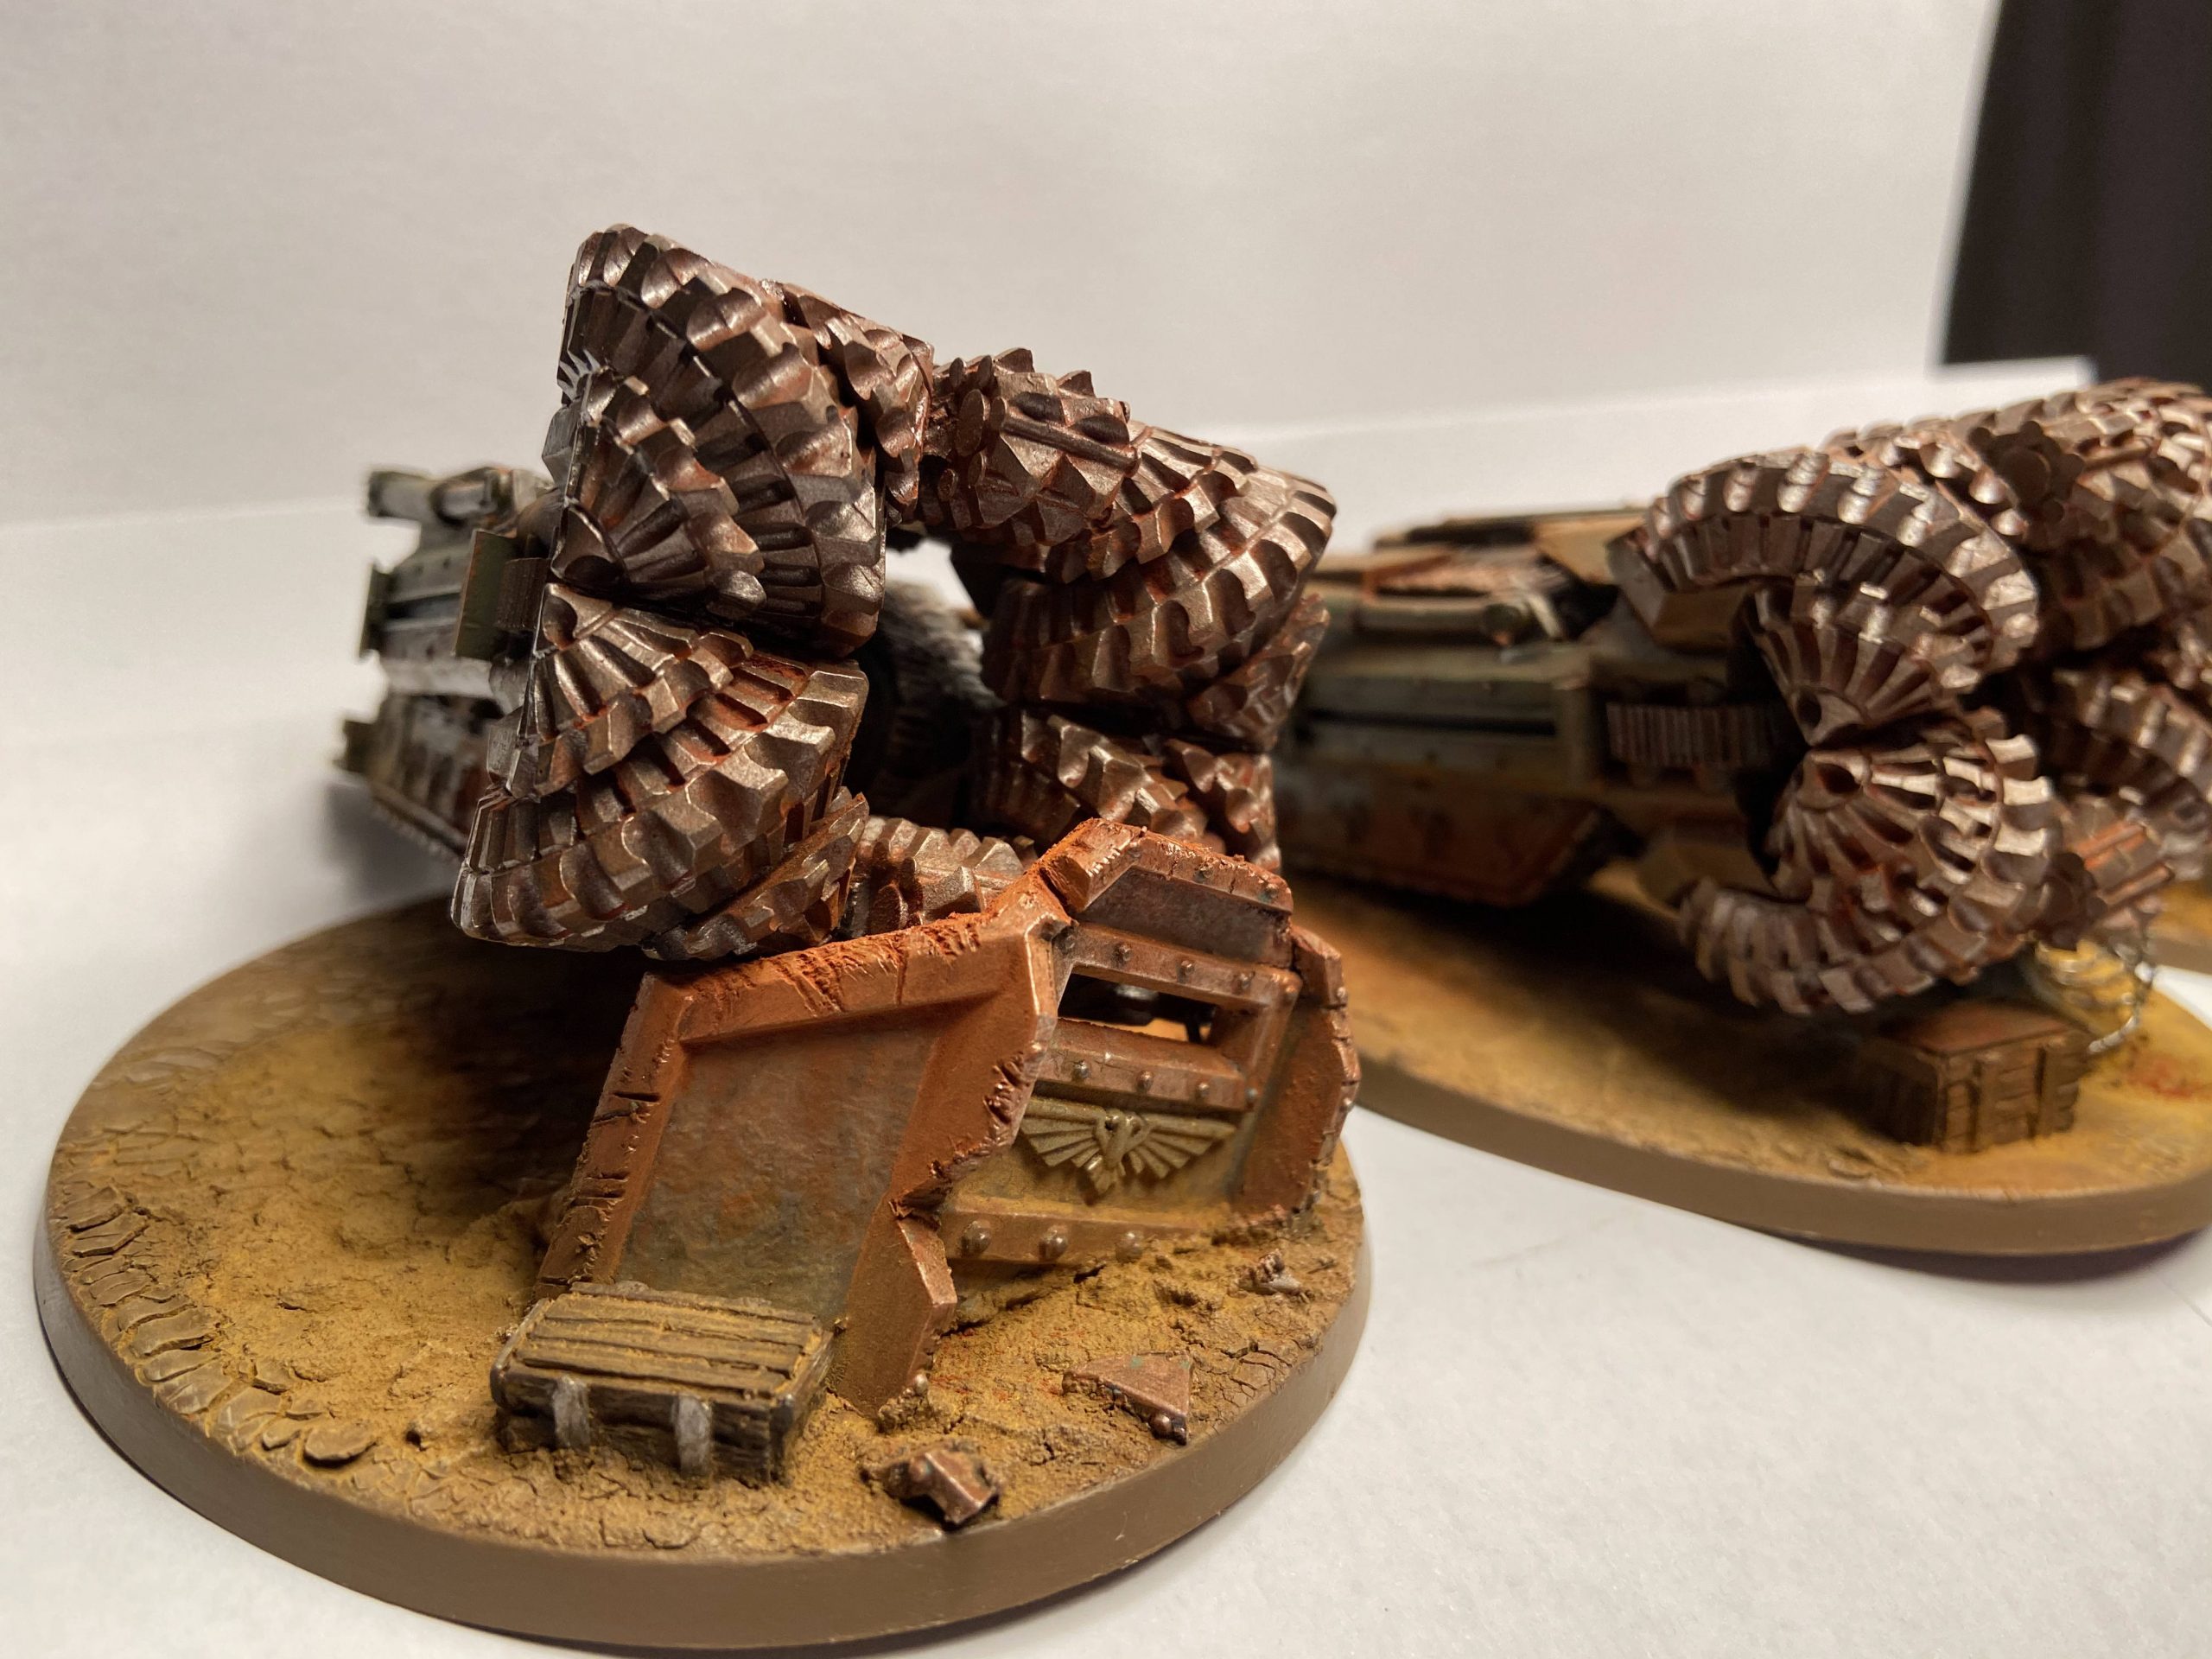
My latest Forgeworld models are now completed, three Hades Breaching Drills! With bases. They don’t come with bases, but after seeing them on that Hades Breaching Drill by @mediocre_hobbies – I just had to give it a try. This article is long, it is full of completed photos of my Hades Breaching Drills and work in progress photos too.
Also, quick heads up, I made it onto the Goblin Gaming Ultimate Tabletop Resources blog post – which is rather cool?! Please go check it out!
Never miss an article? Subscribe!


Hades Breaching Drills – Build
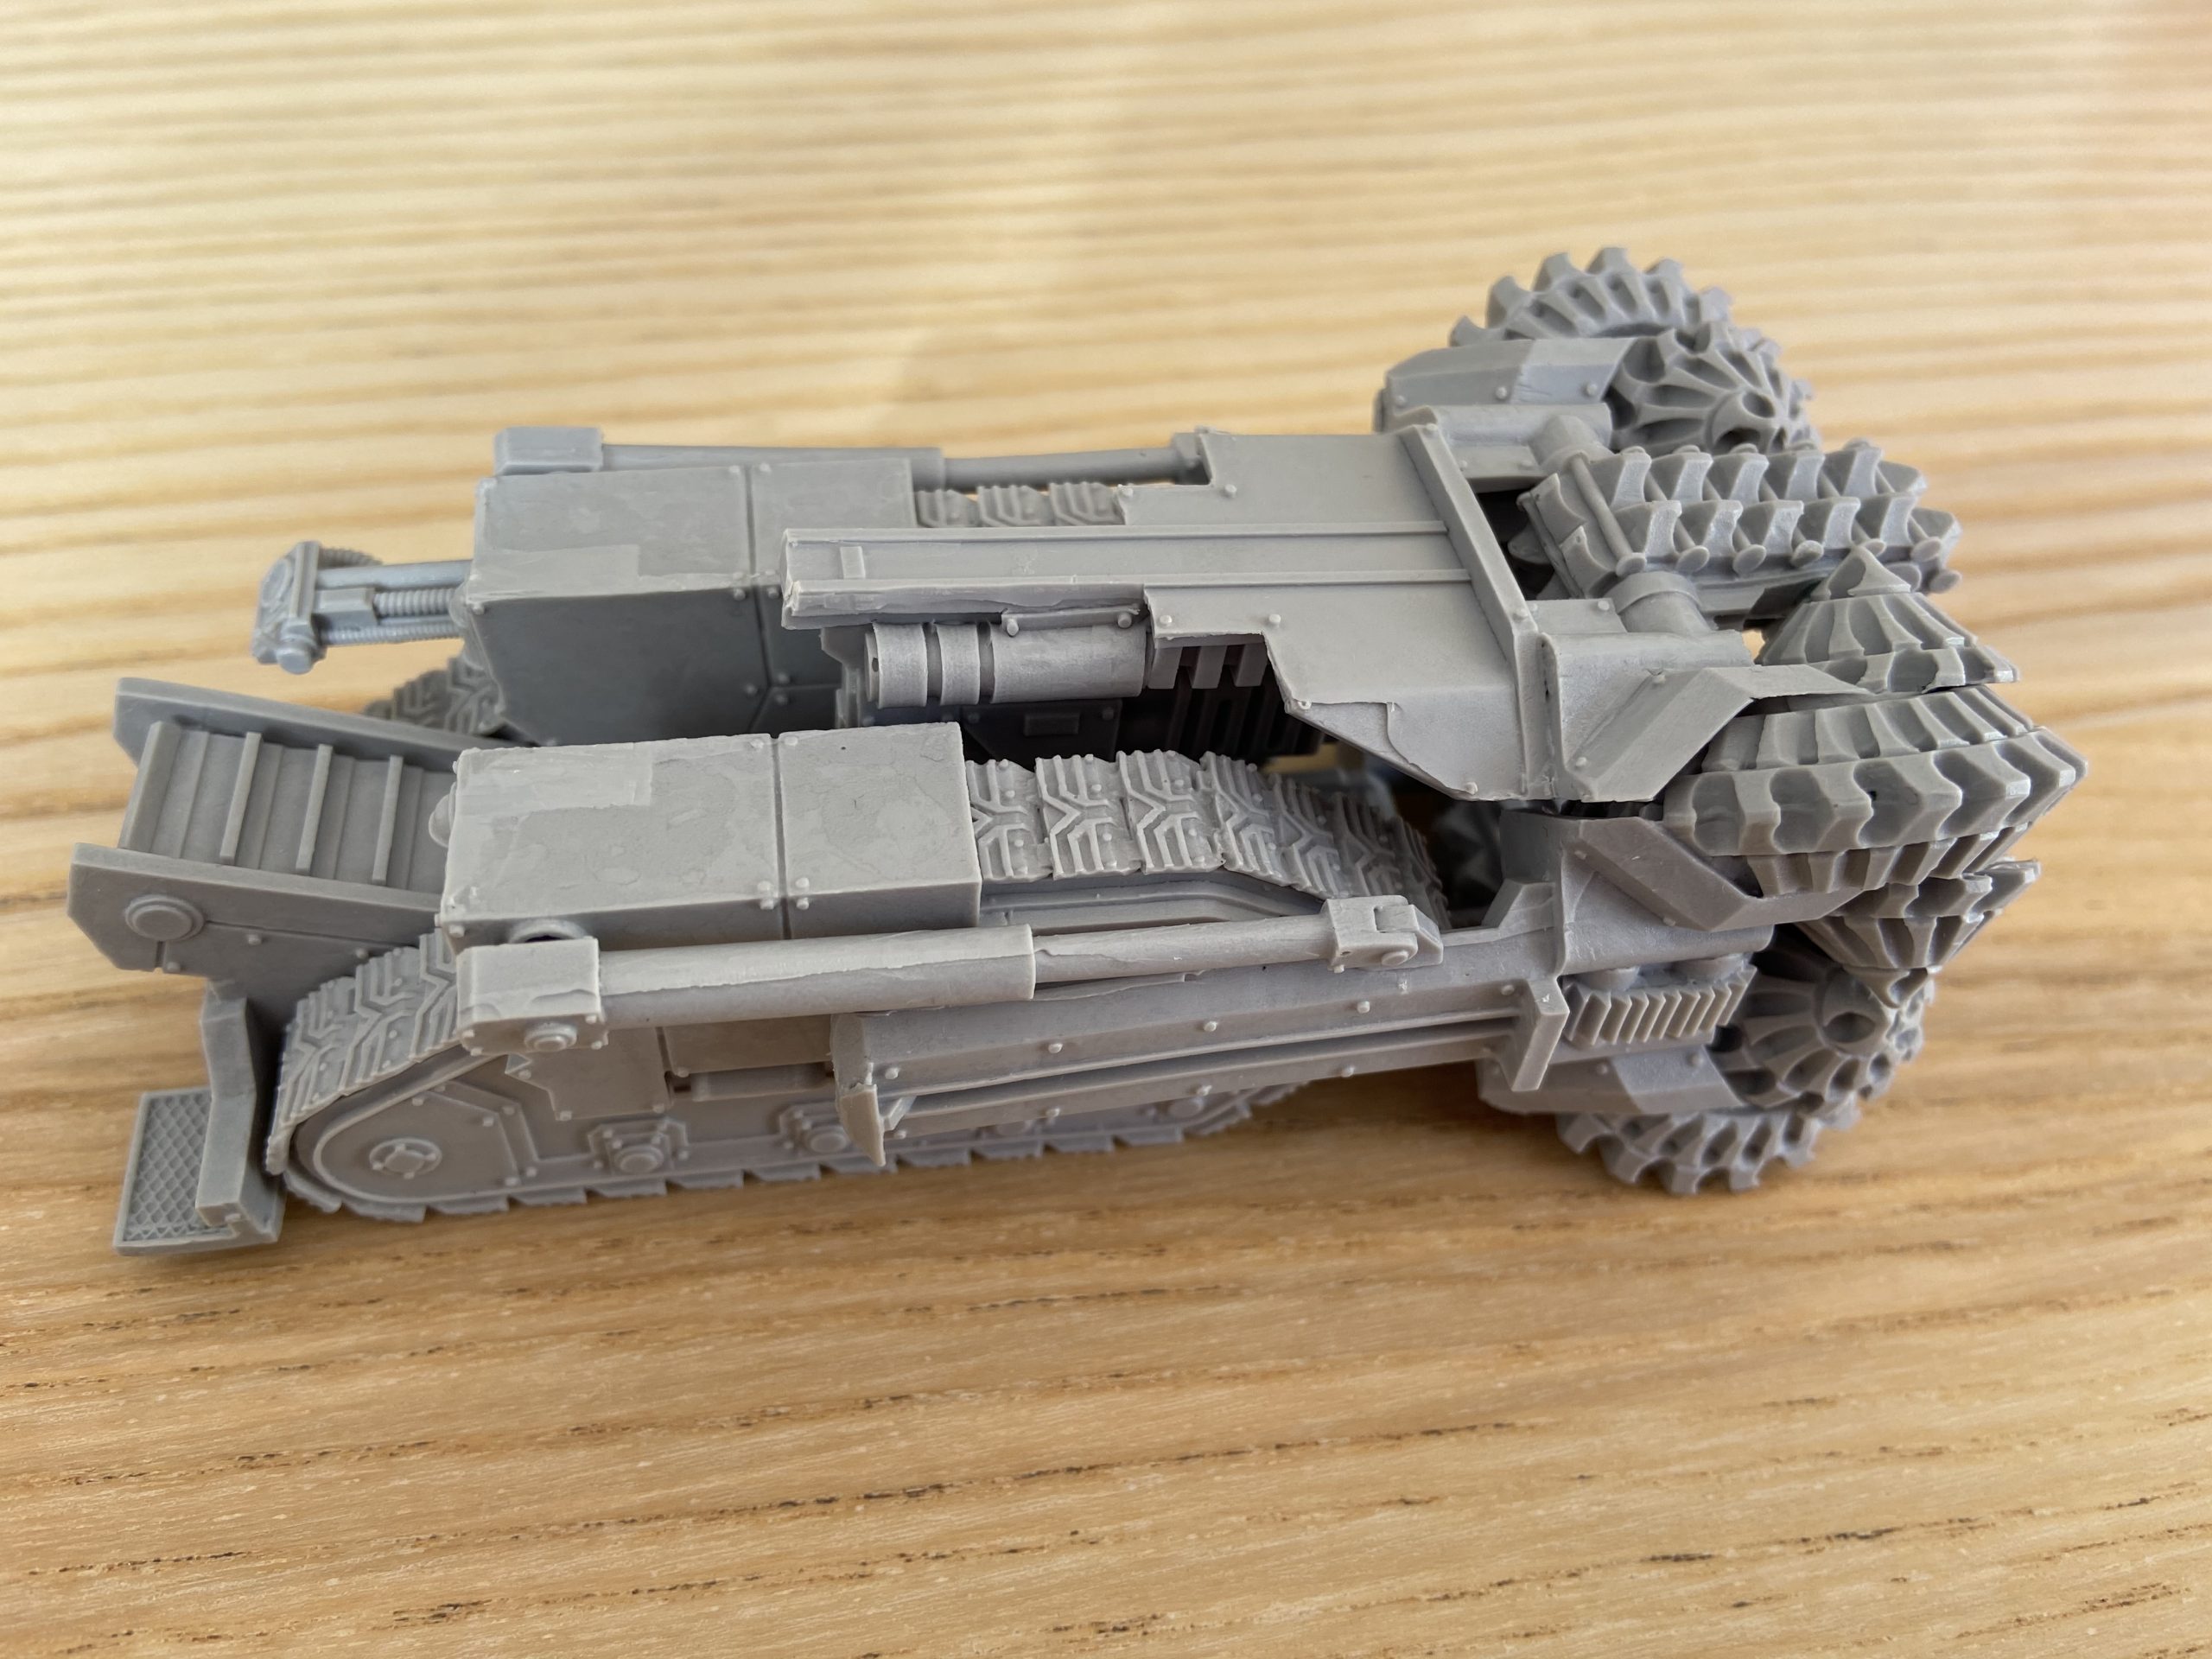
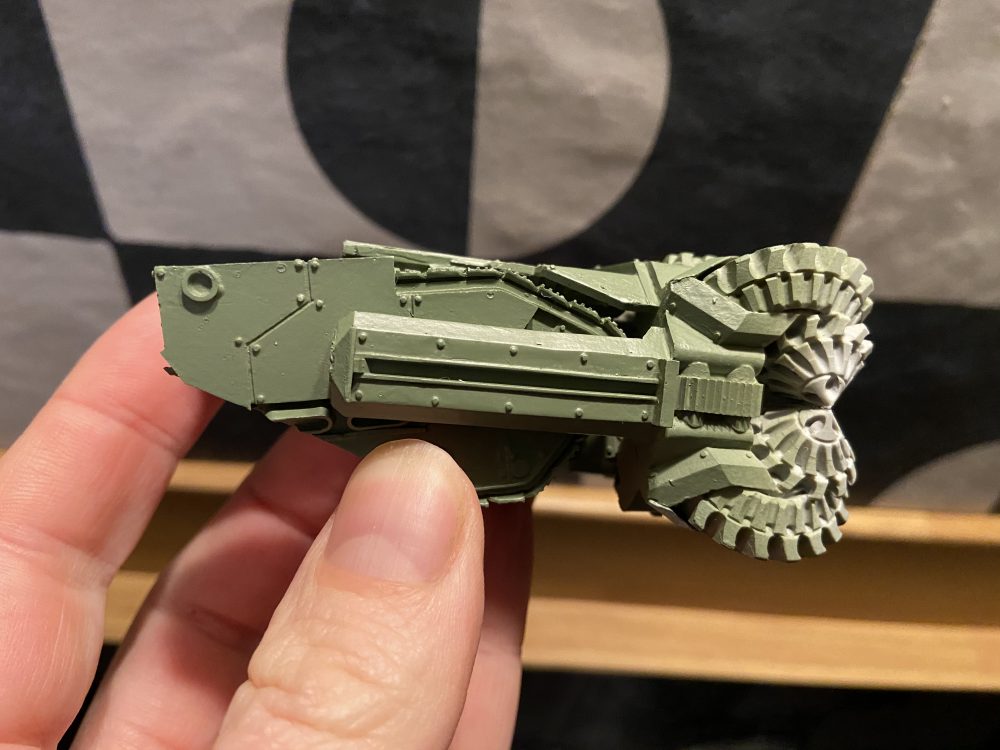
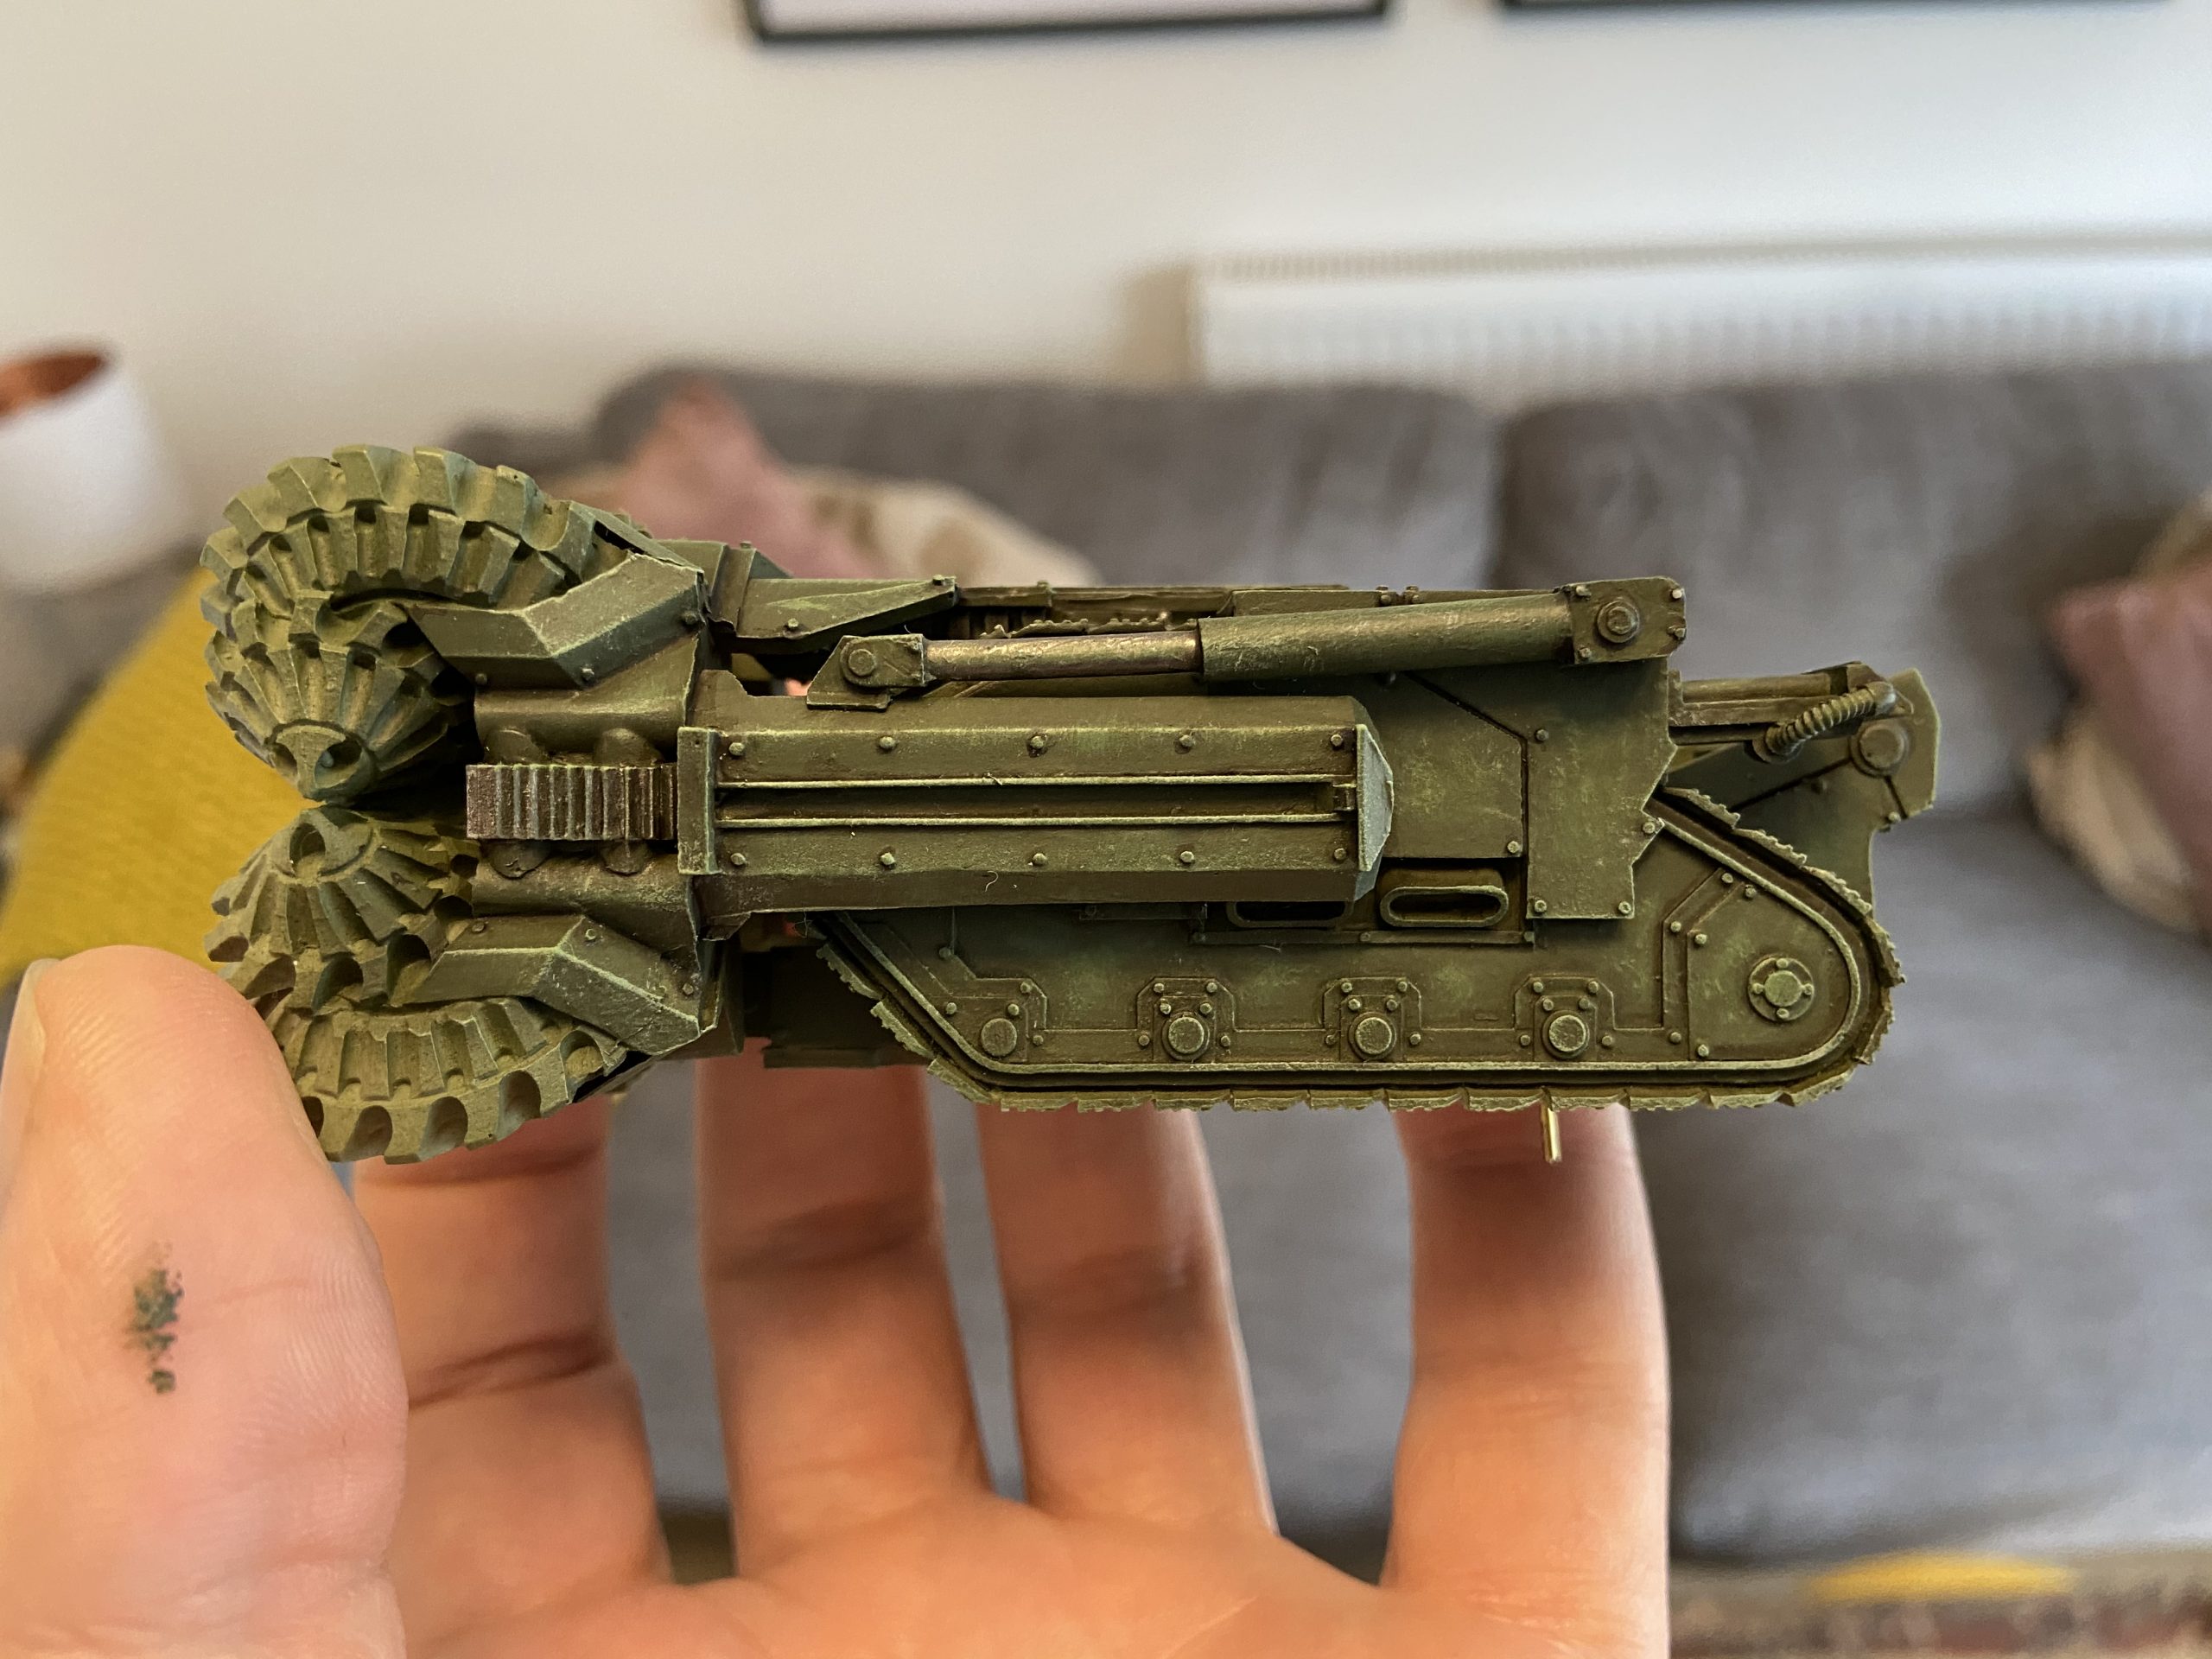
As Forgeworld models go, these were pretty easy. There are less than 20 parts, doing a quick count in my head, and they have large areas that fit together well. There was the odd issue, but in hindsight, this was mainly down to me being impatient rather than the model or the resin material that Forgeworld models are made from.
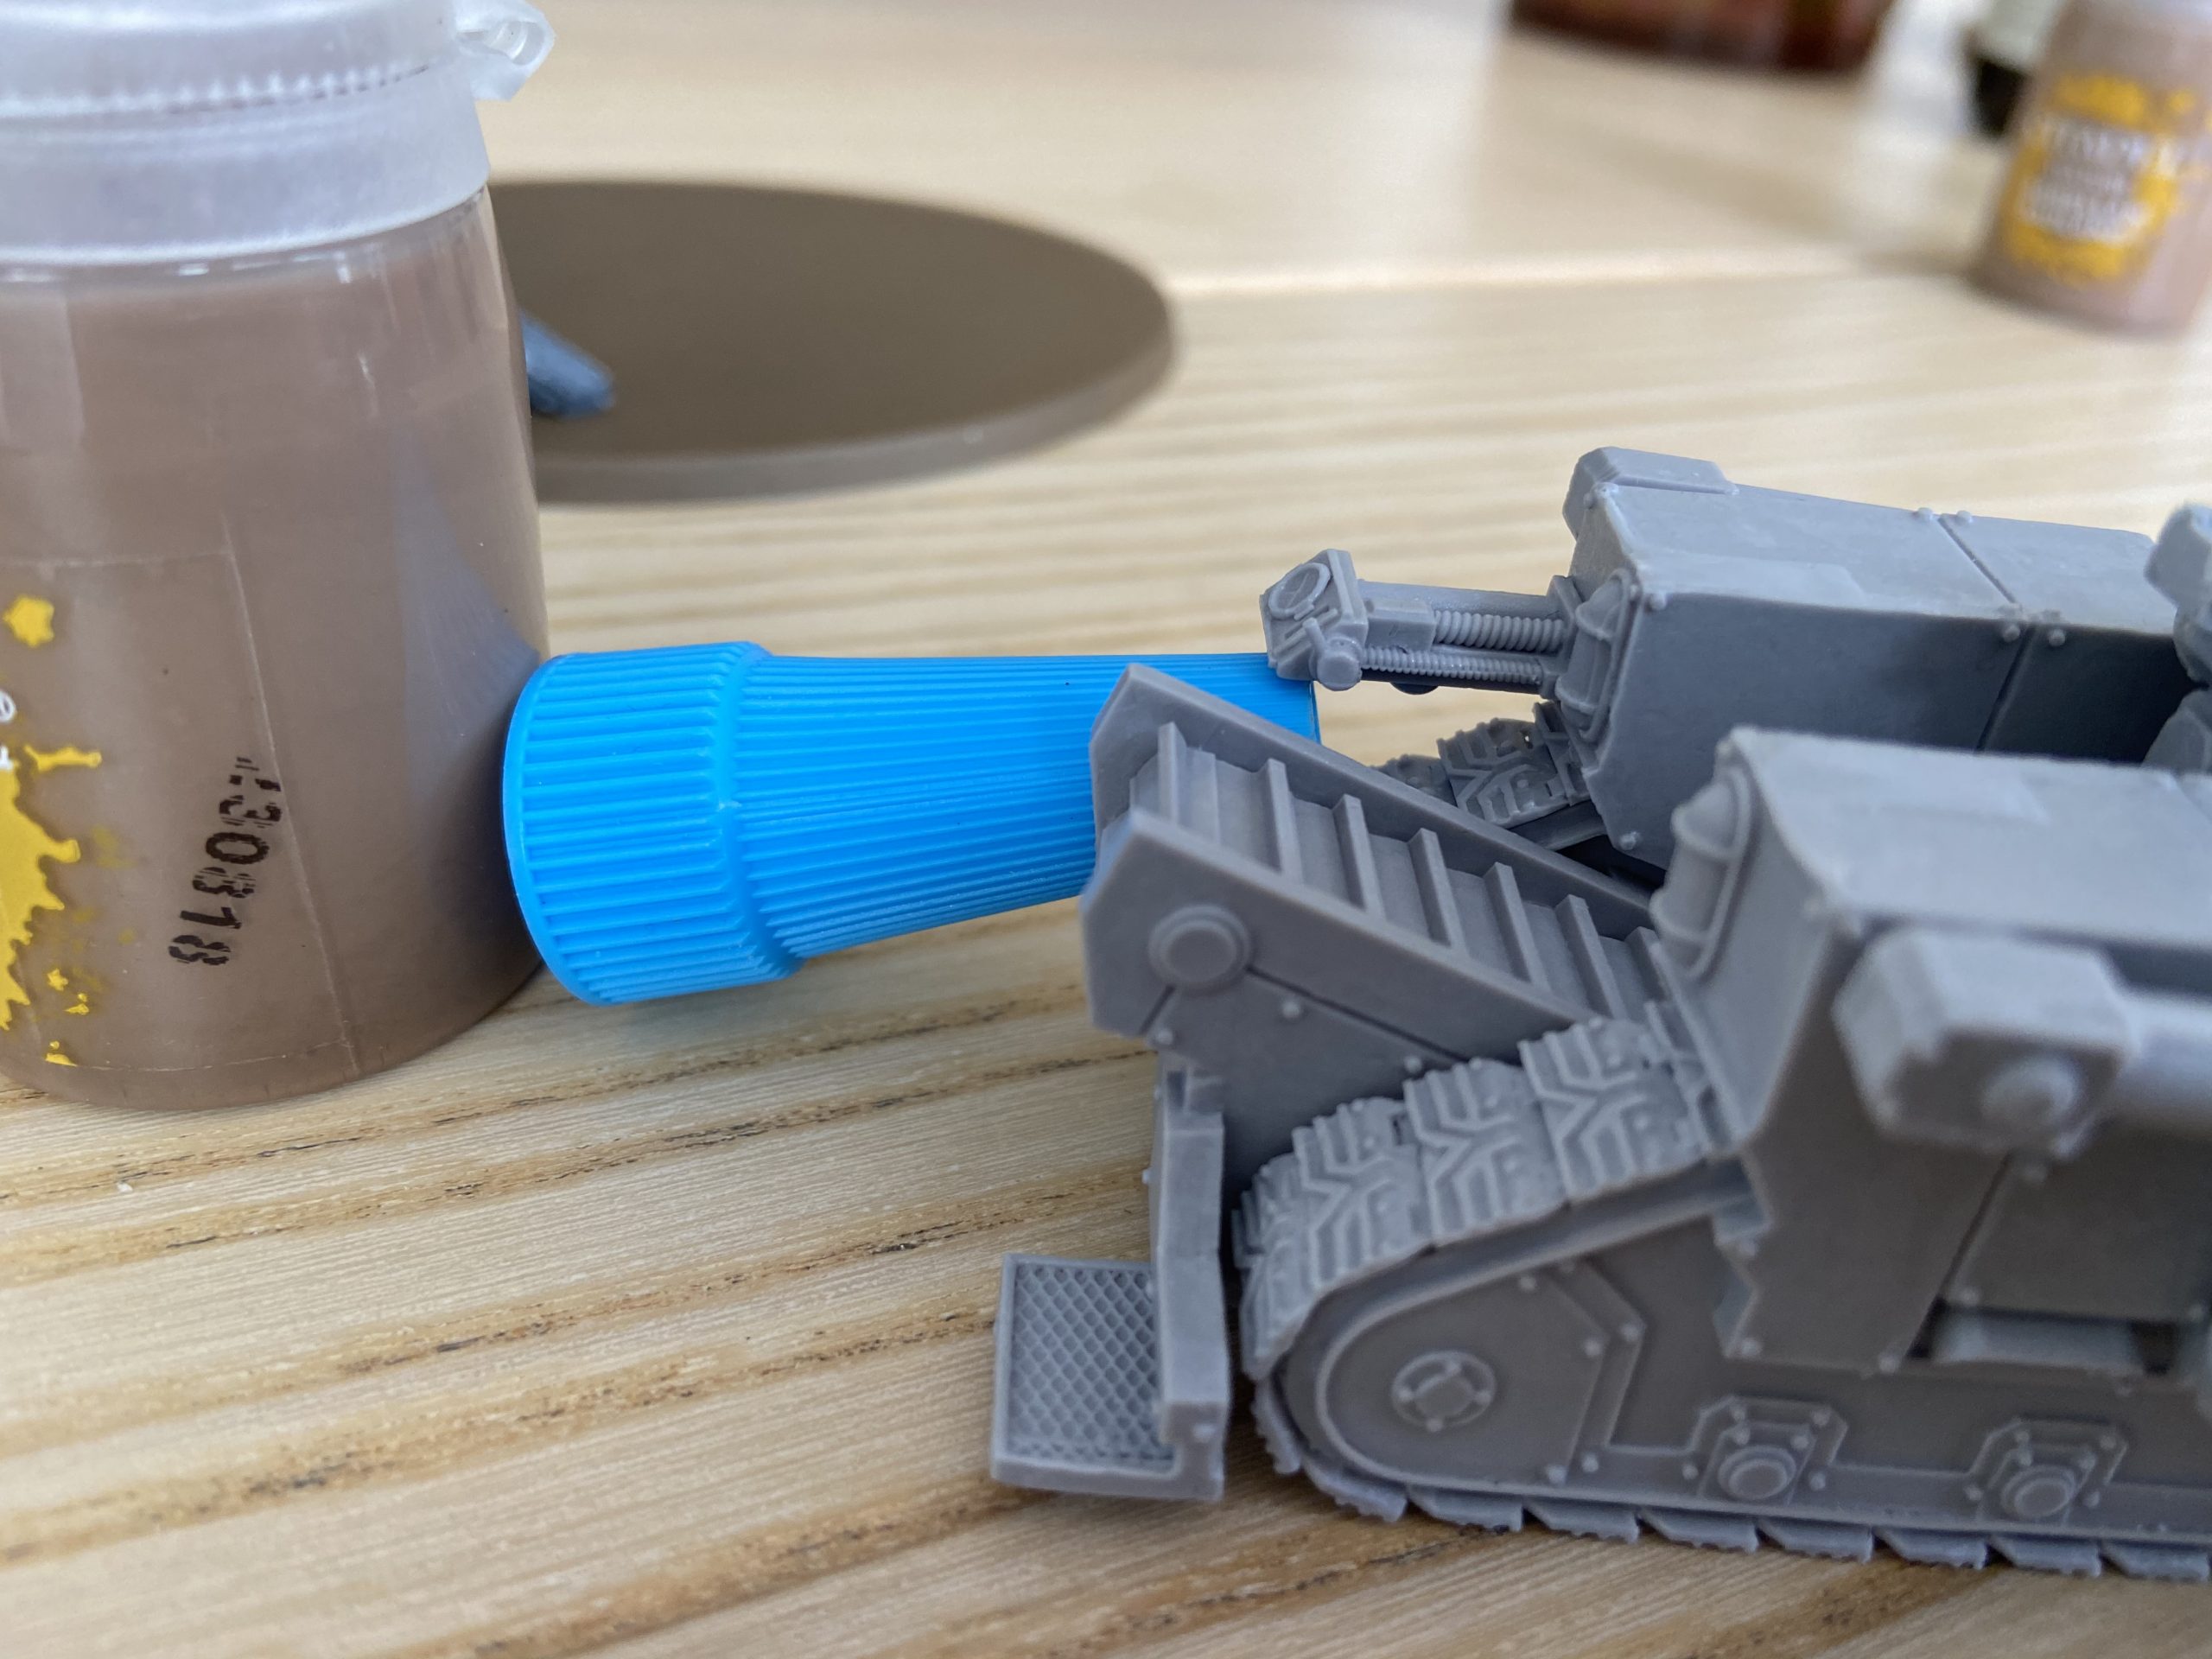
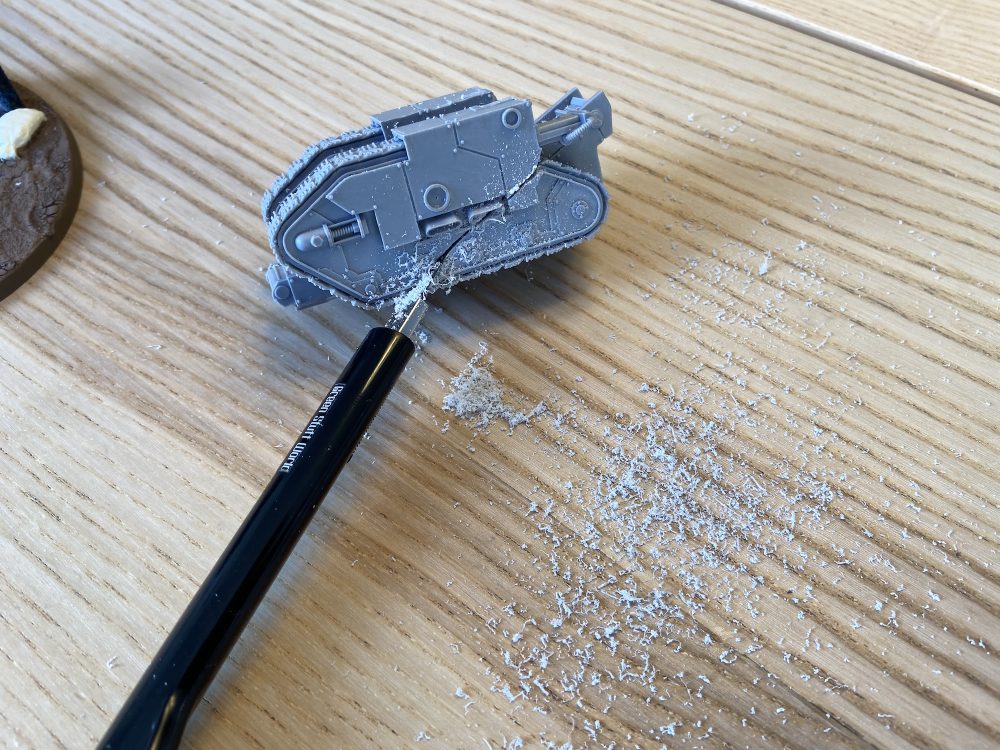
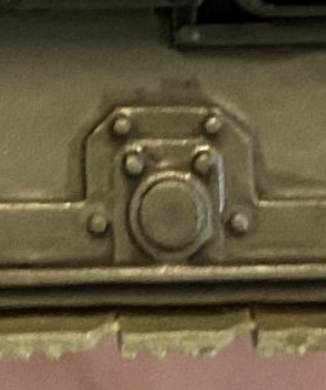
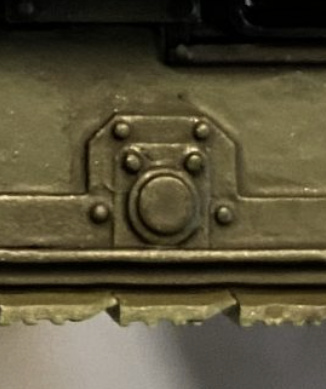
The only really fiddly bit was the control panel, which has no groove or recess to sit in. It’s just flat on flat, hovering in midair!

Control panel drying
Hades Breaching Drills – Painting
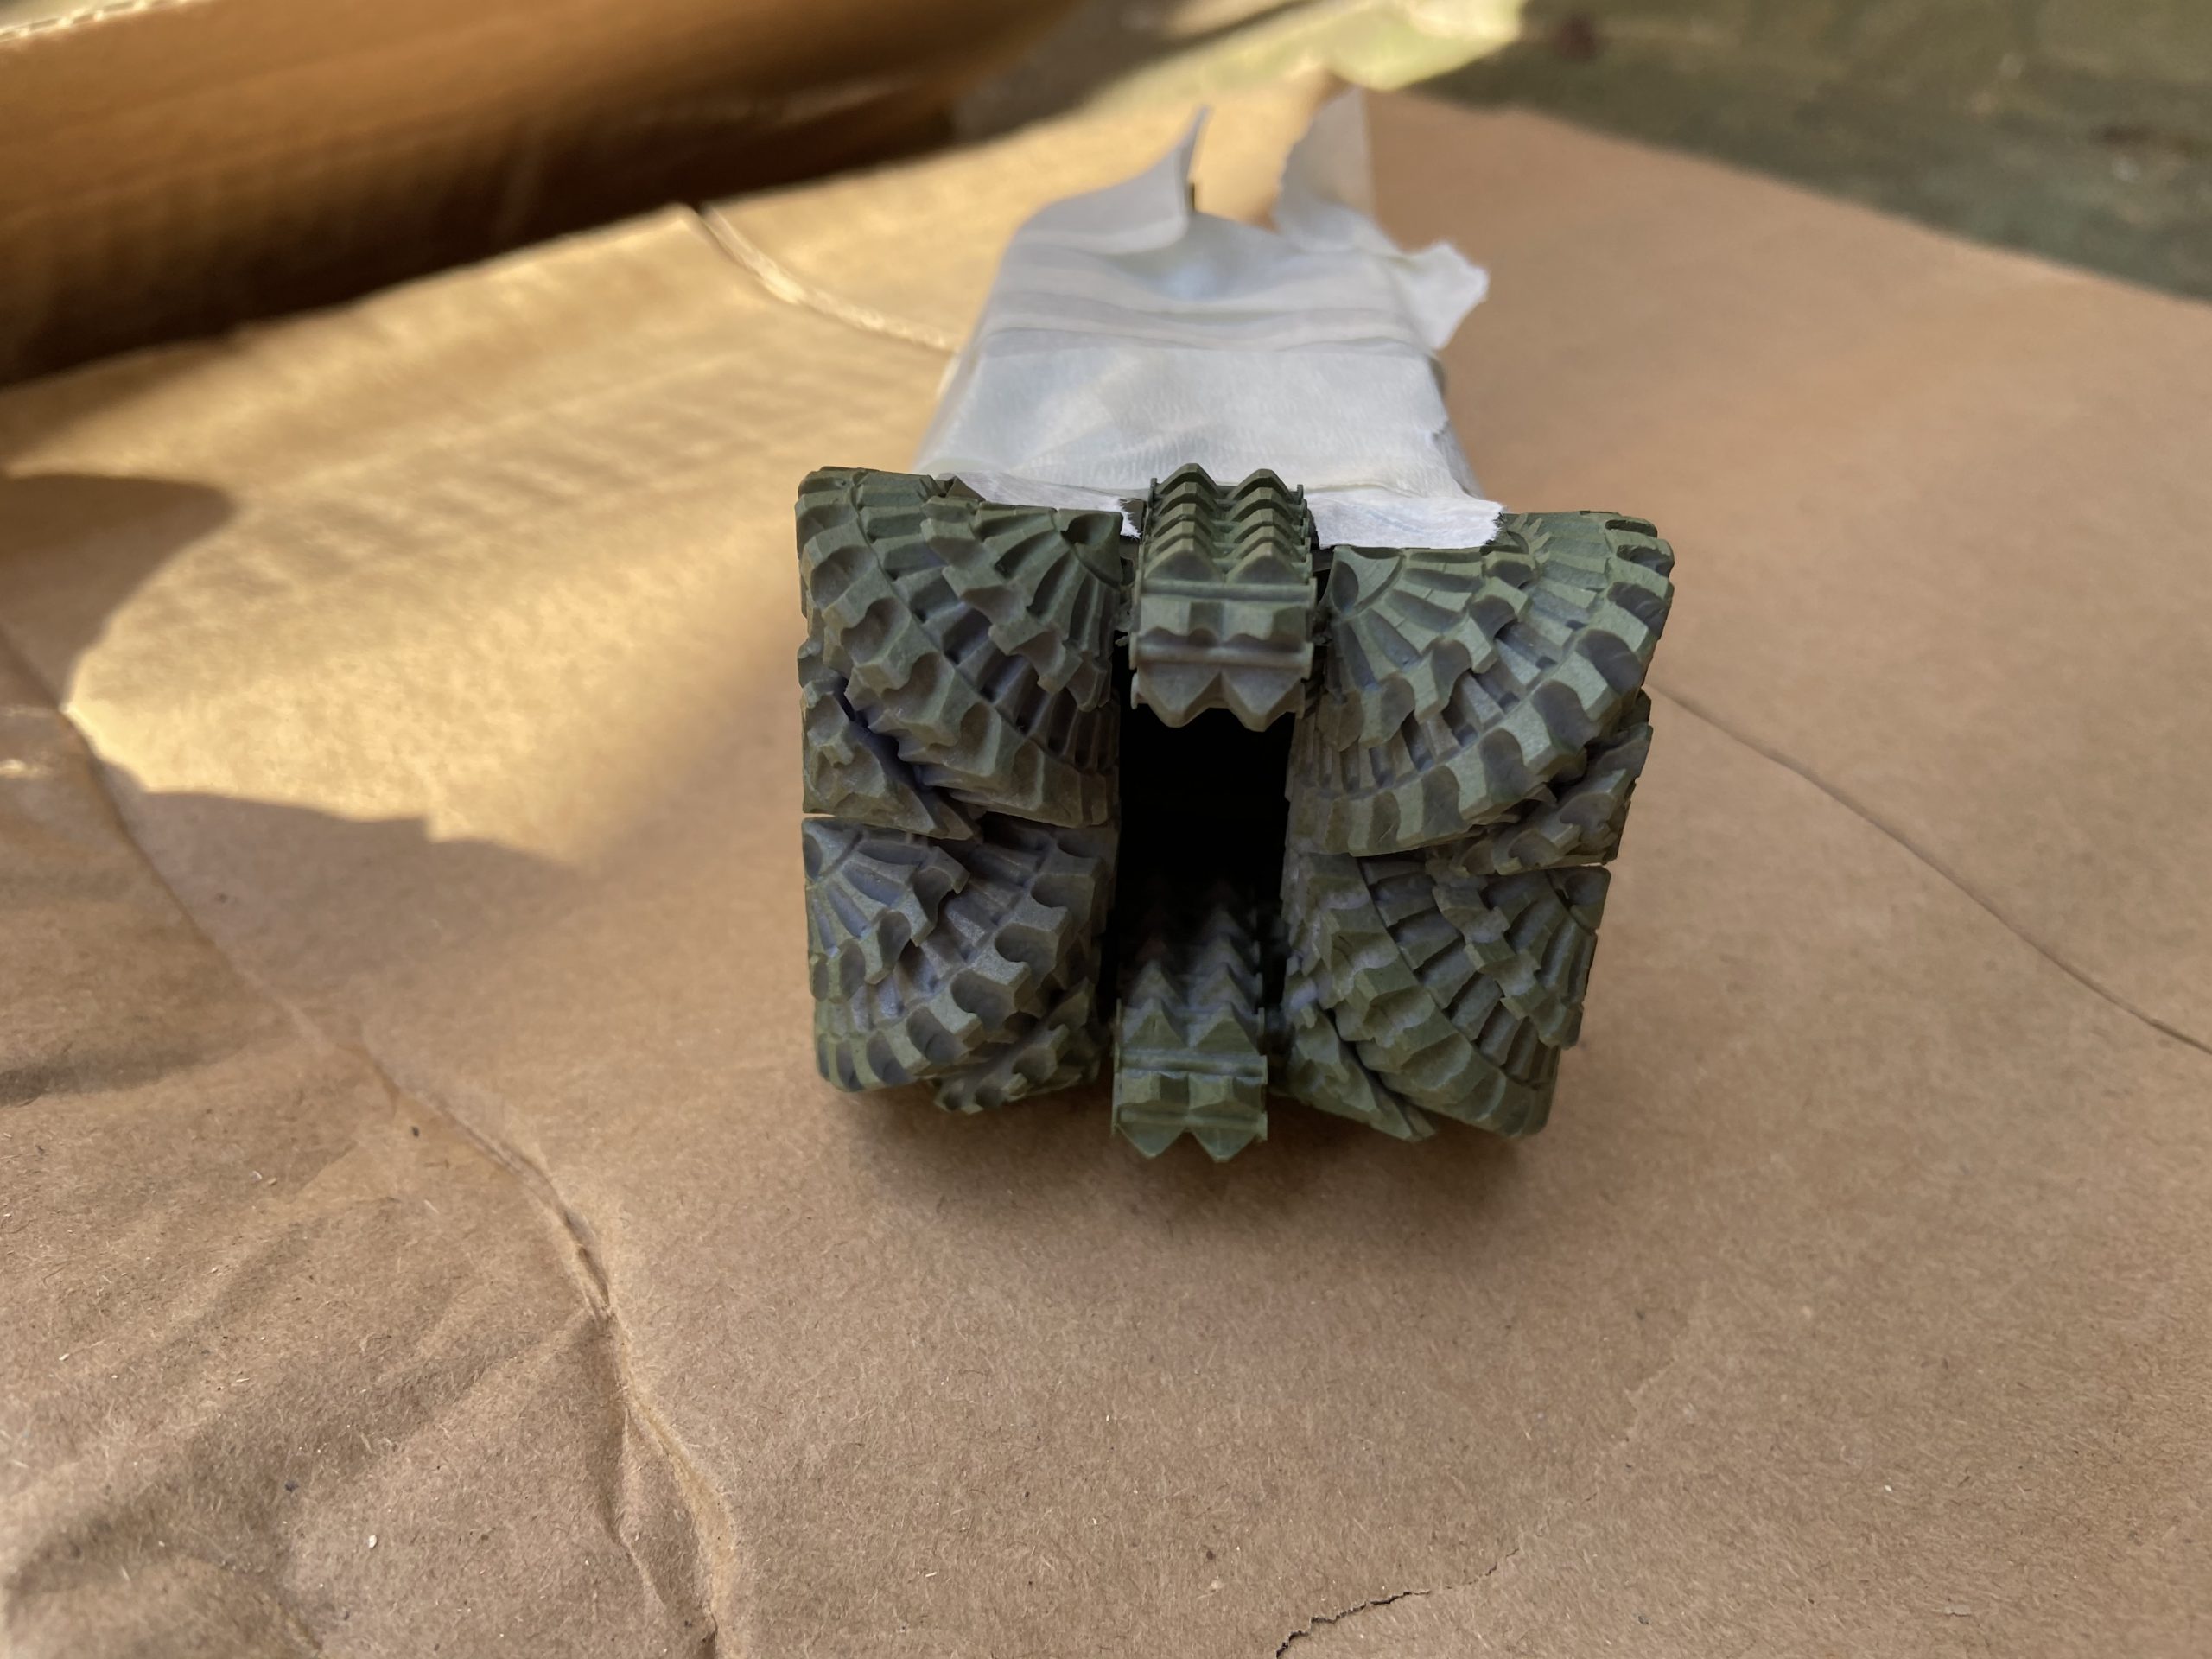
The Hades Breaching Drills I first primed in Army Painter Army Green. Ideally, I want to spray Castellan Green, a Games Workshop paint, but it does not come in a spray can. I opted for Army Green as it was the closest I could find, but it’s too light of a green.
The Castellan Green needs to be airbrushed onto a model to get good coverage, and this is how I have done it before – once I do something one way, I like to stick at it. I used the Mini Airbrush Compressor for this.
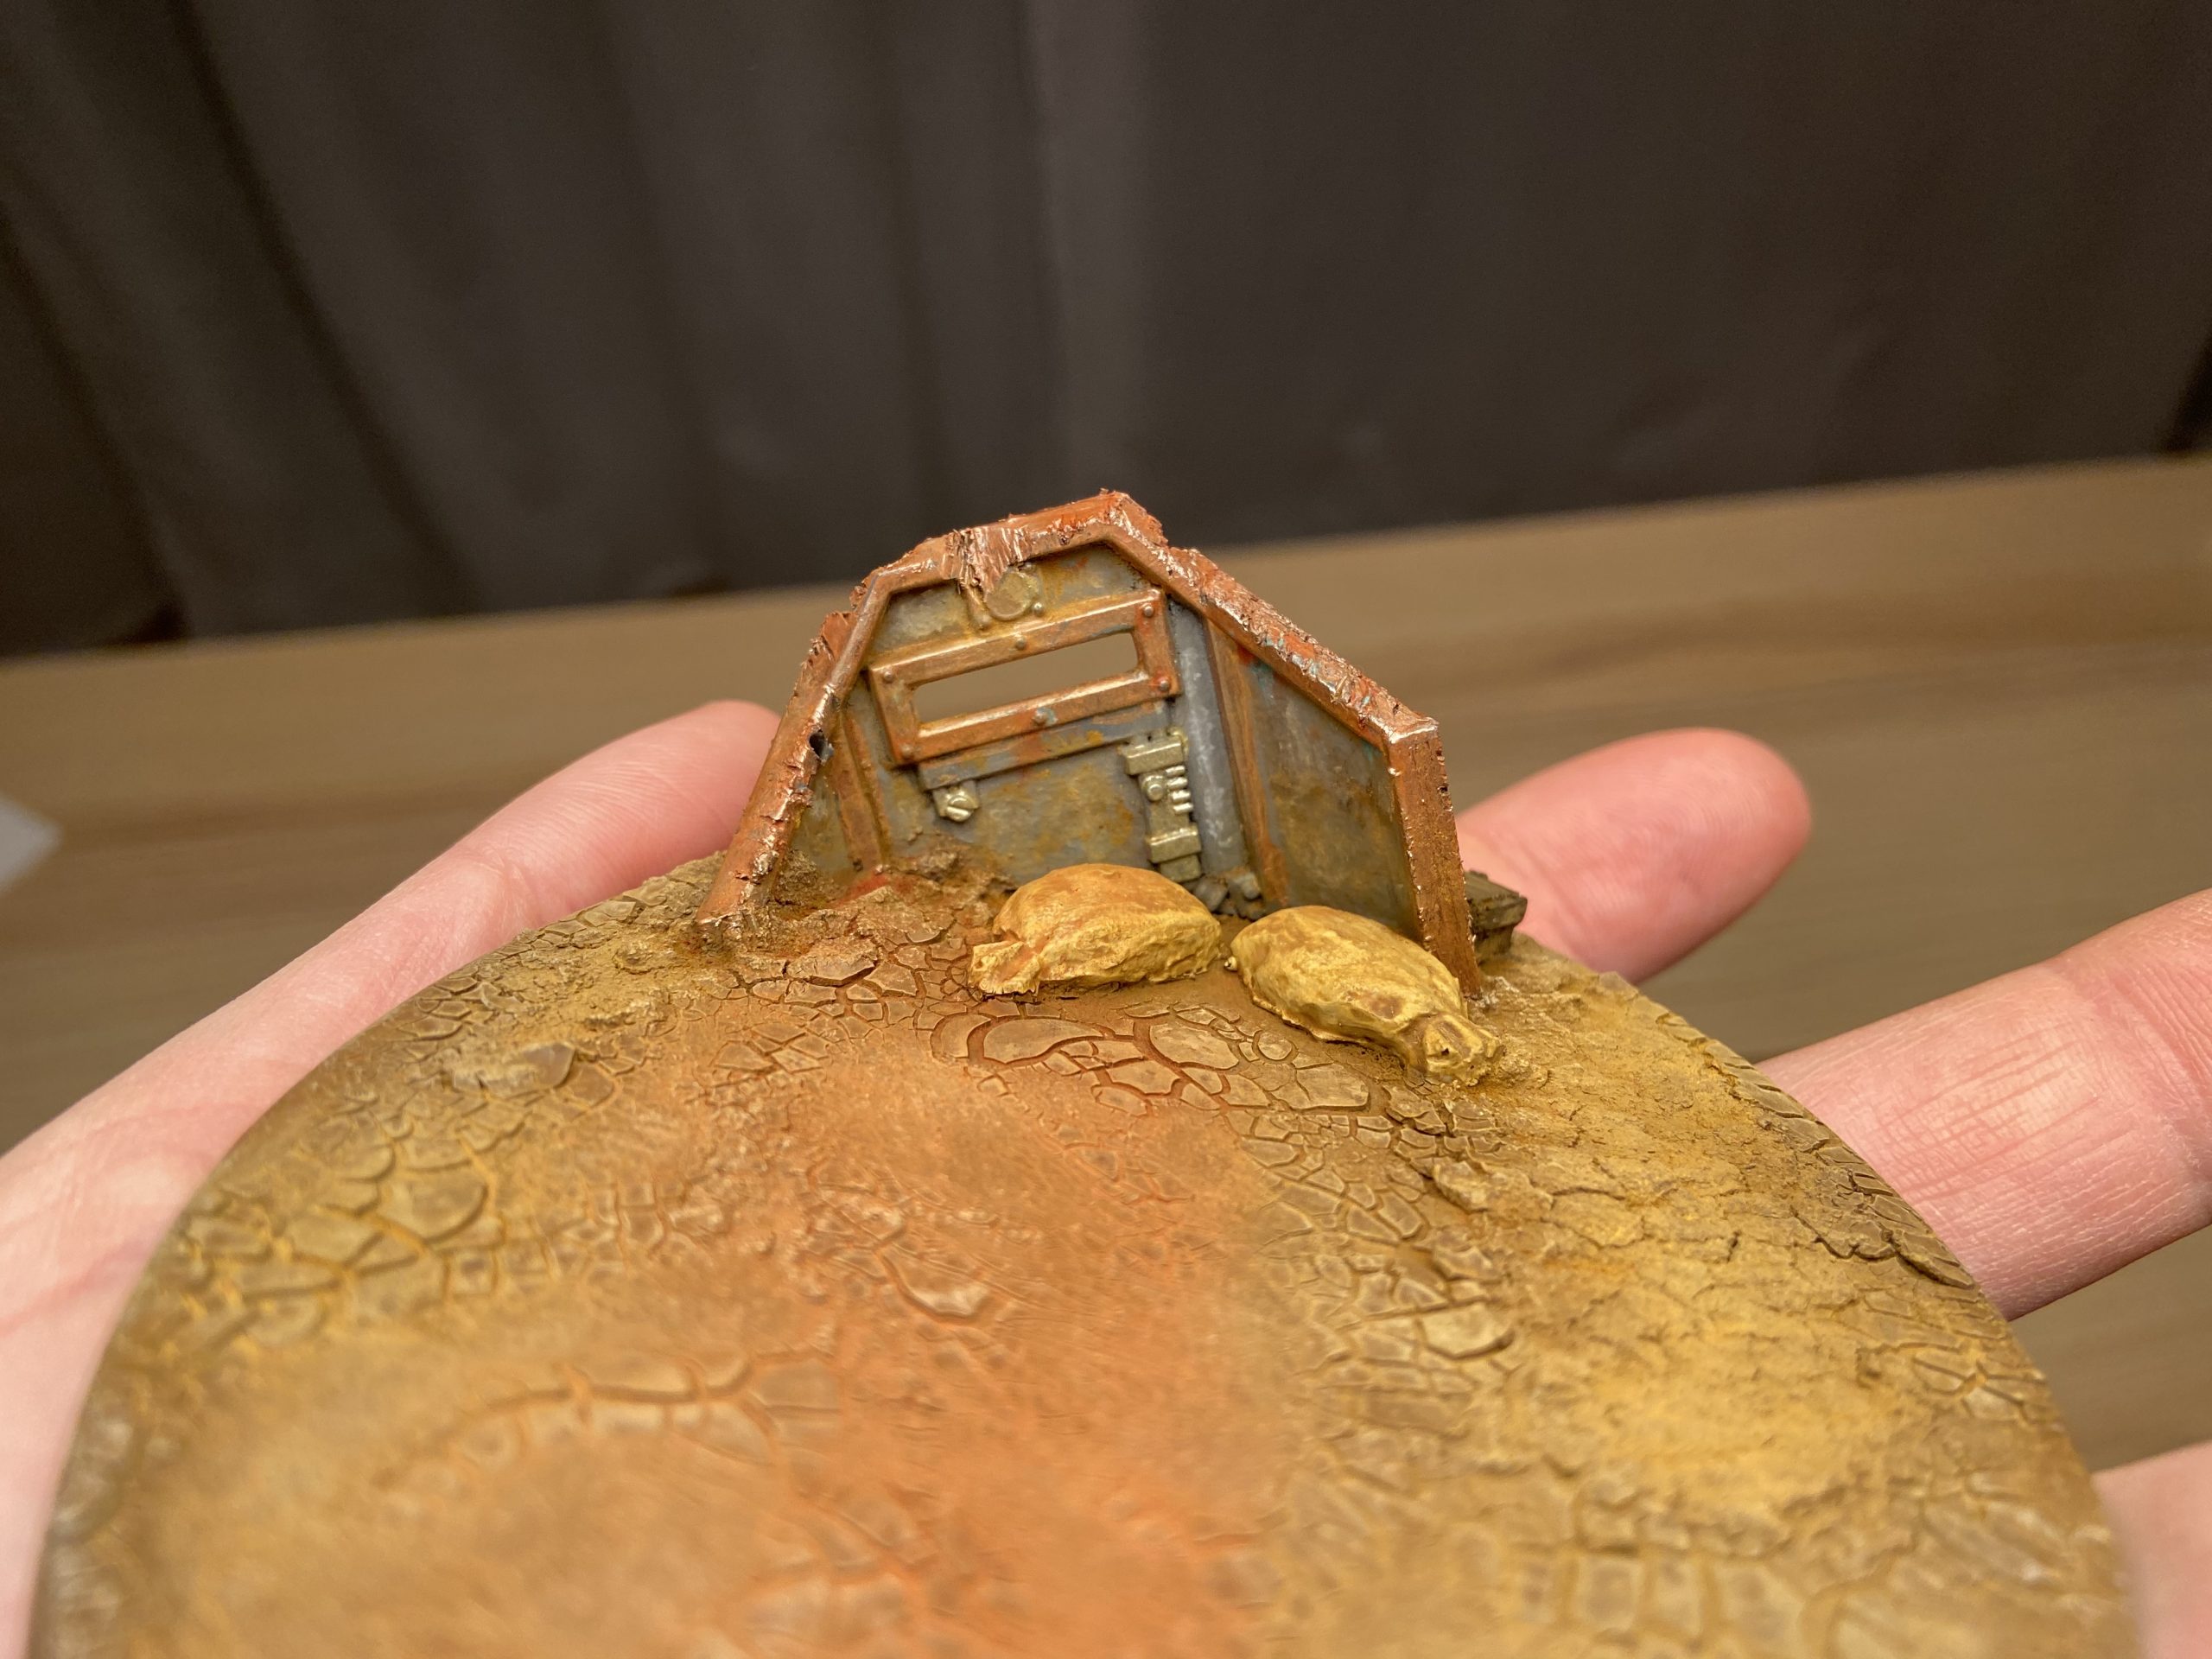
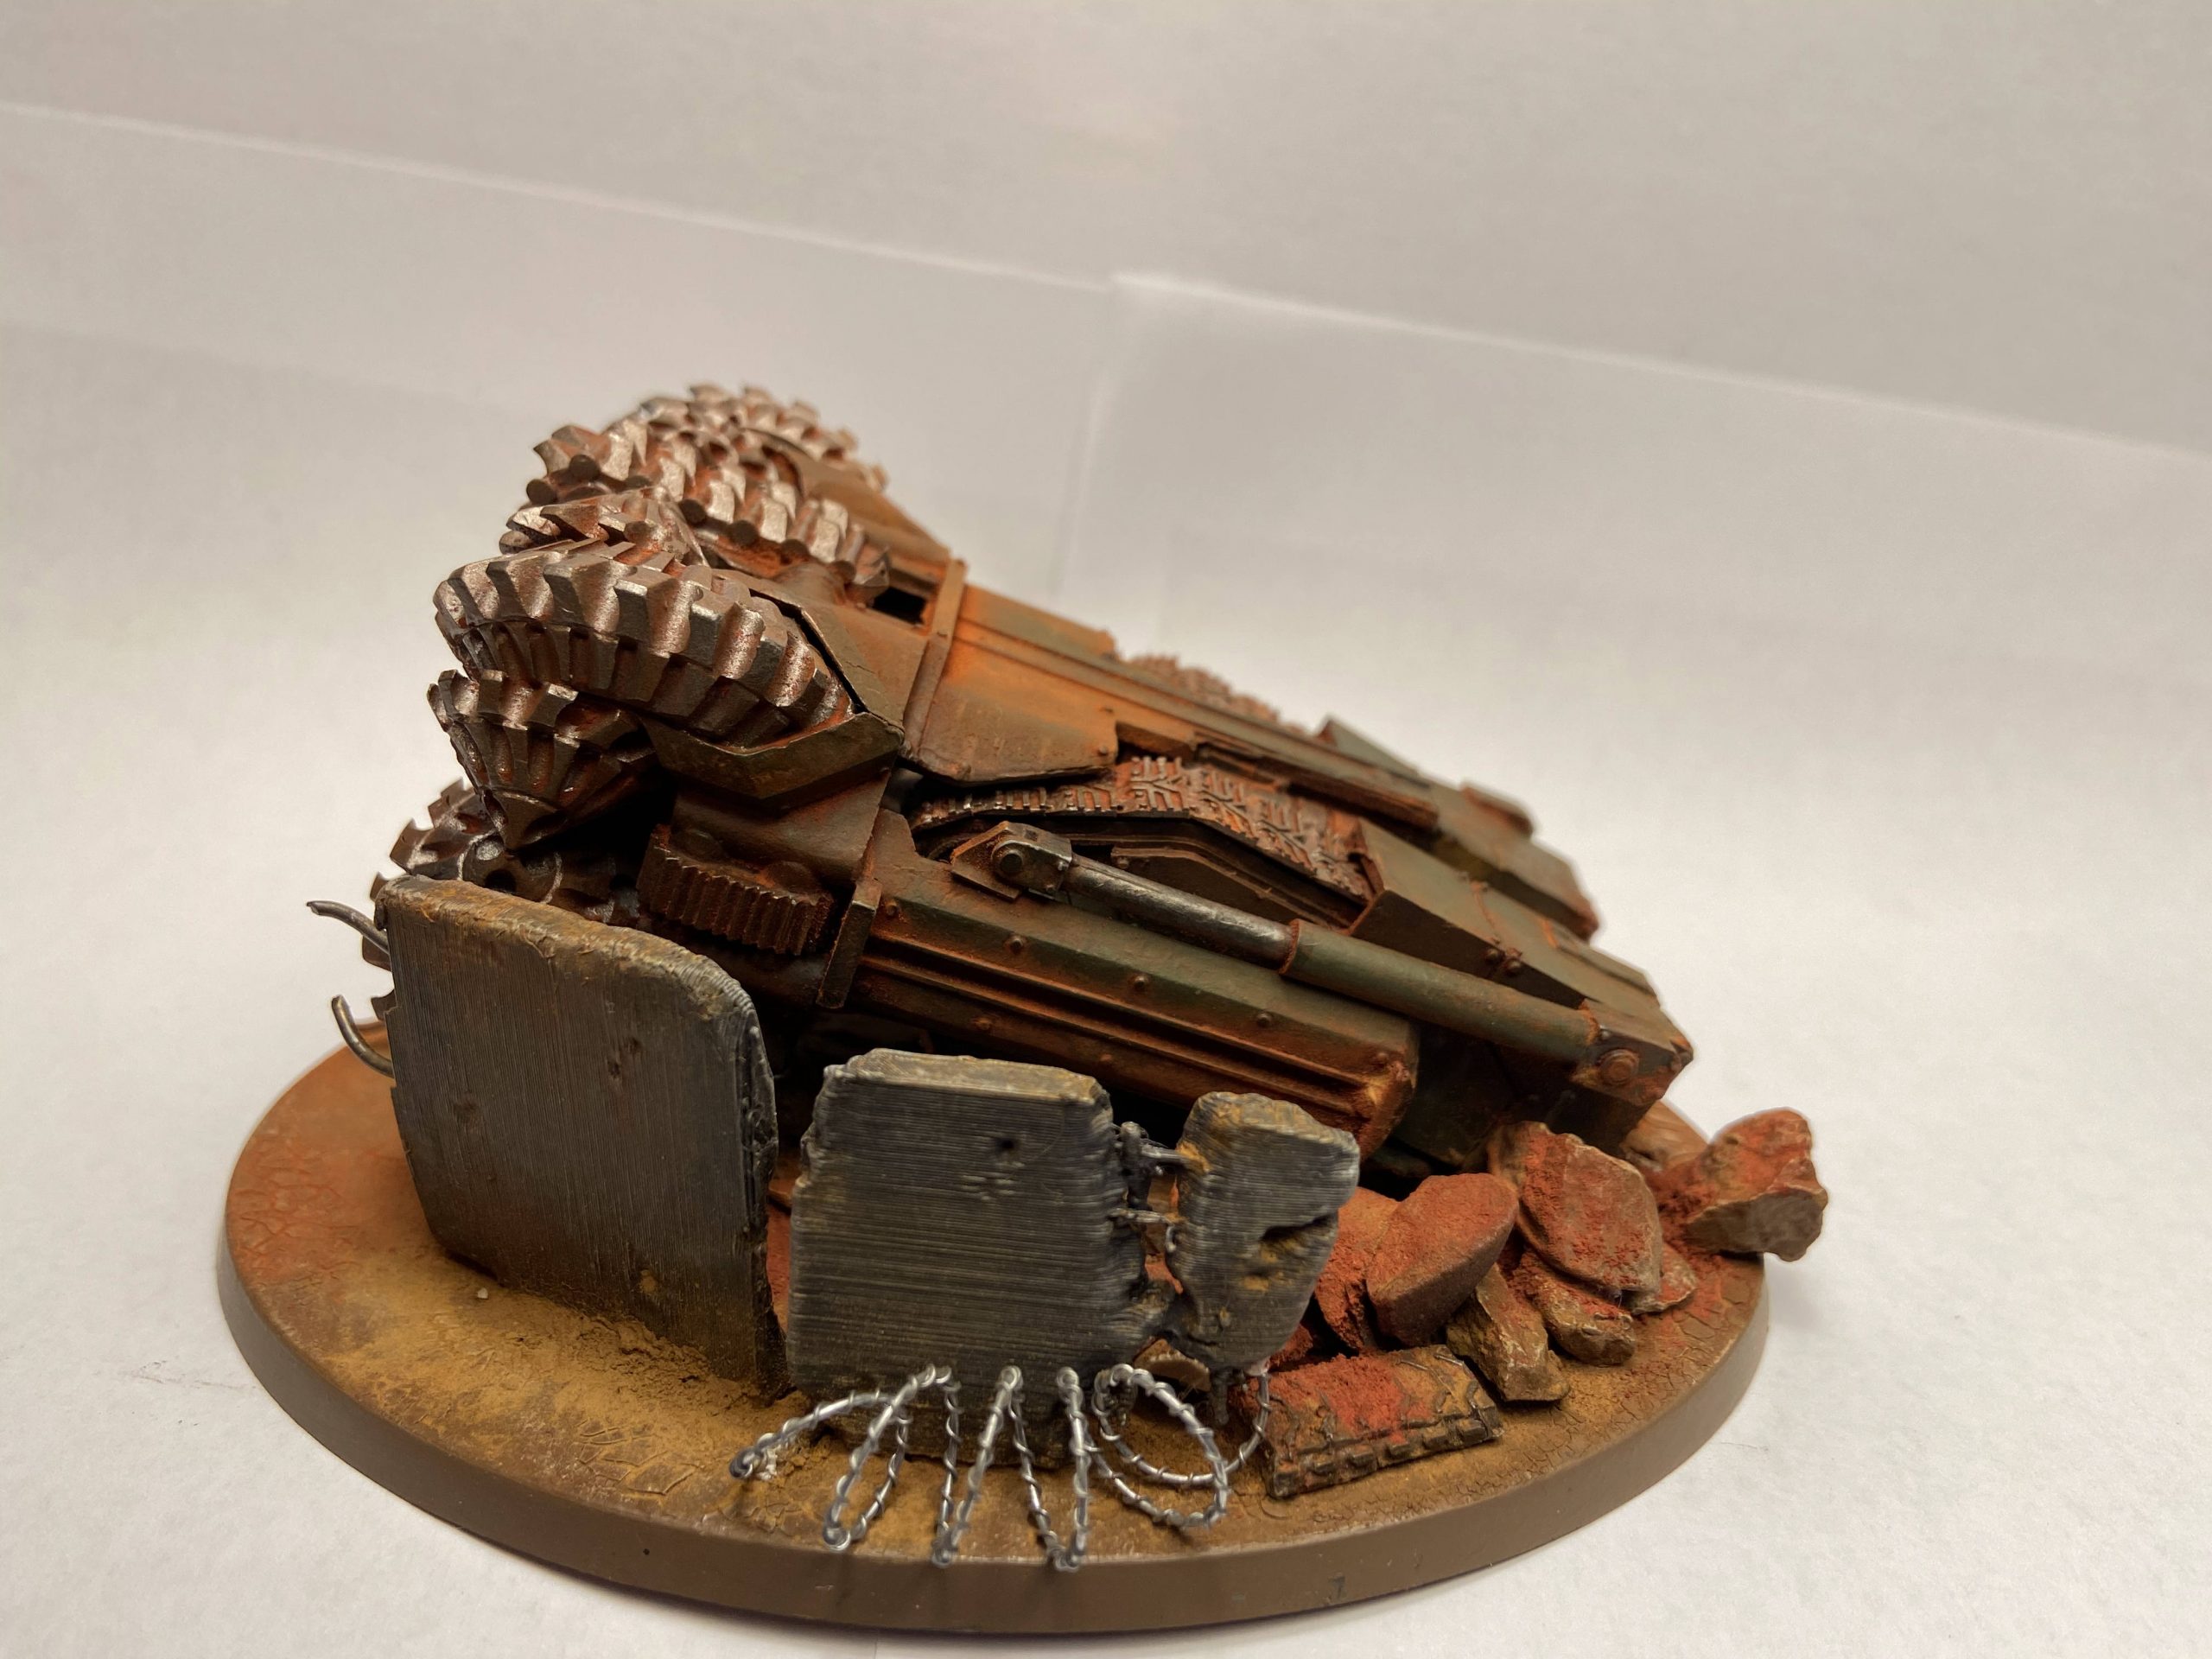
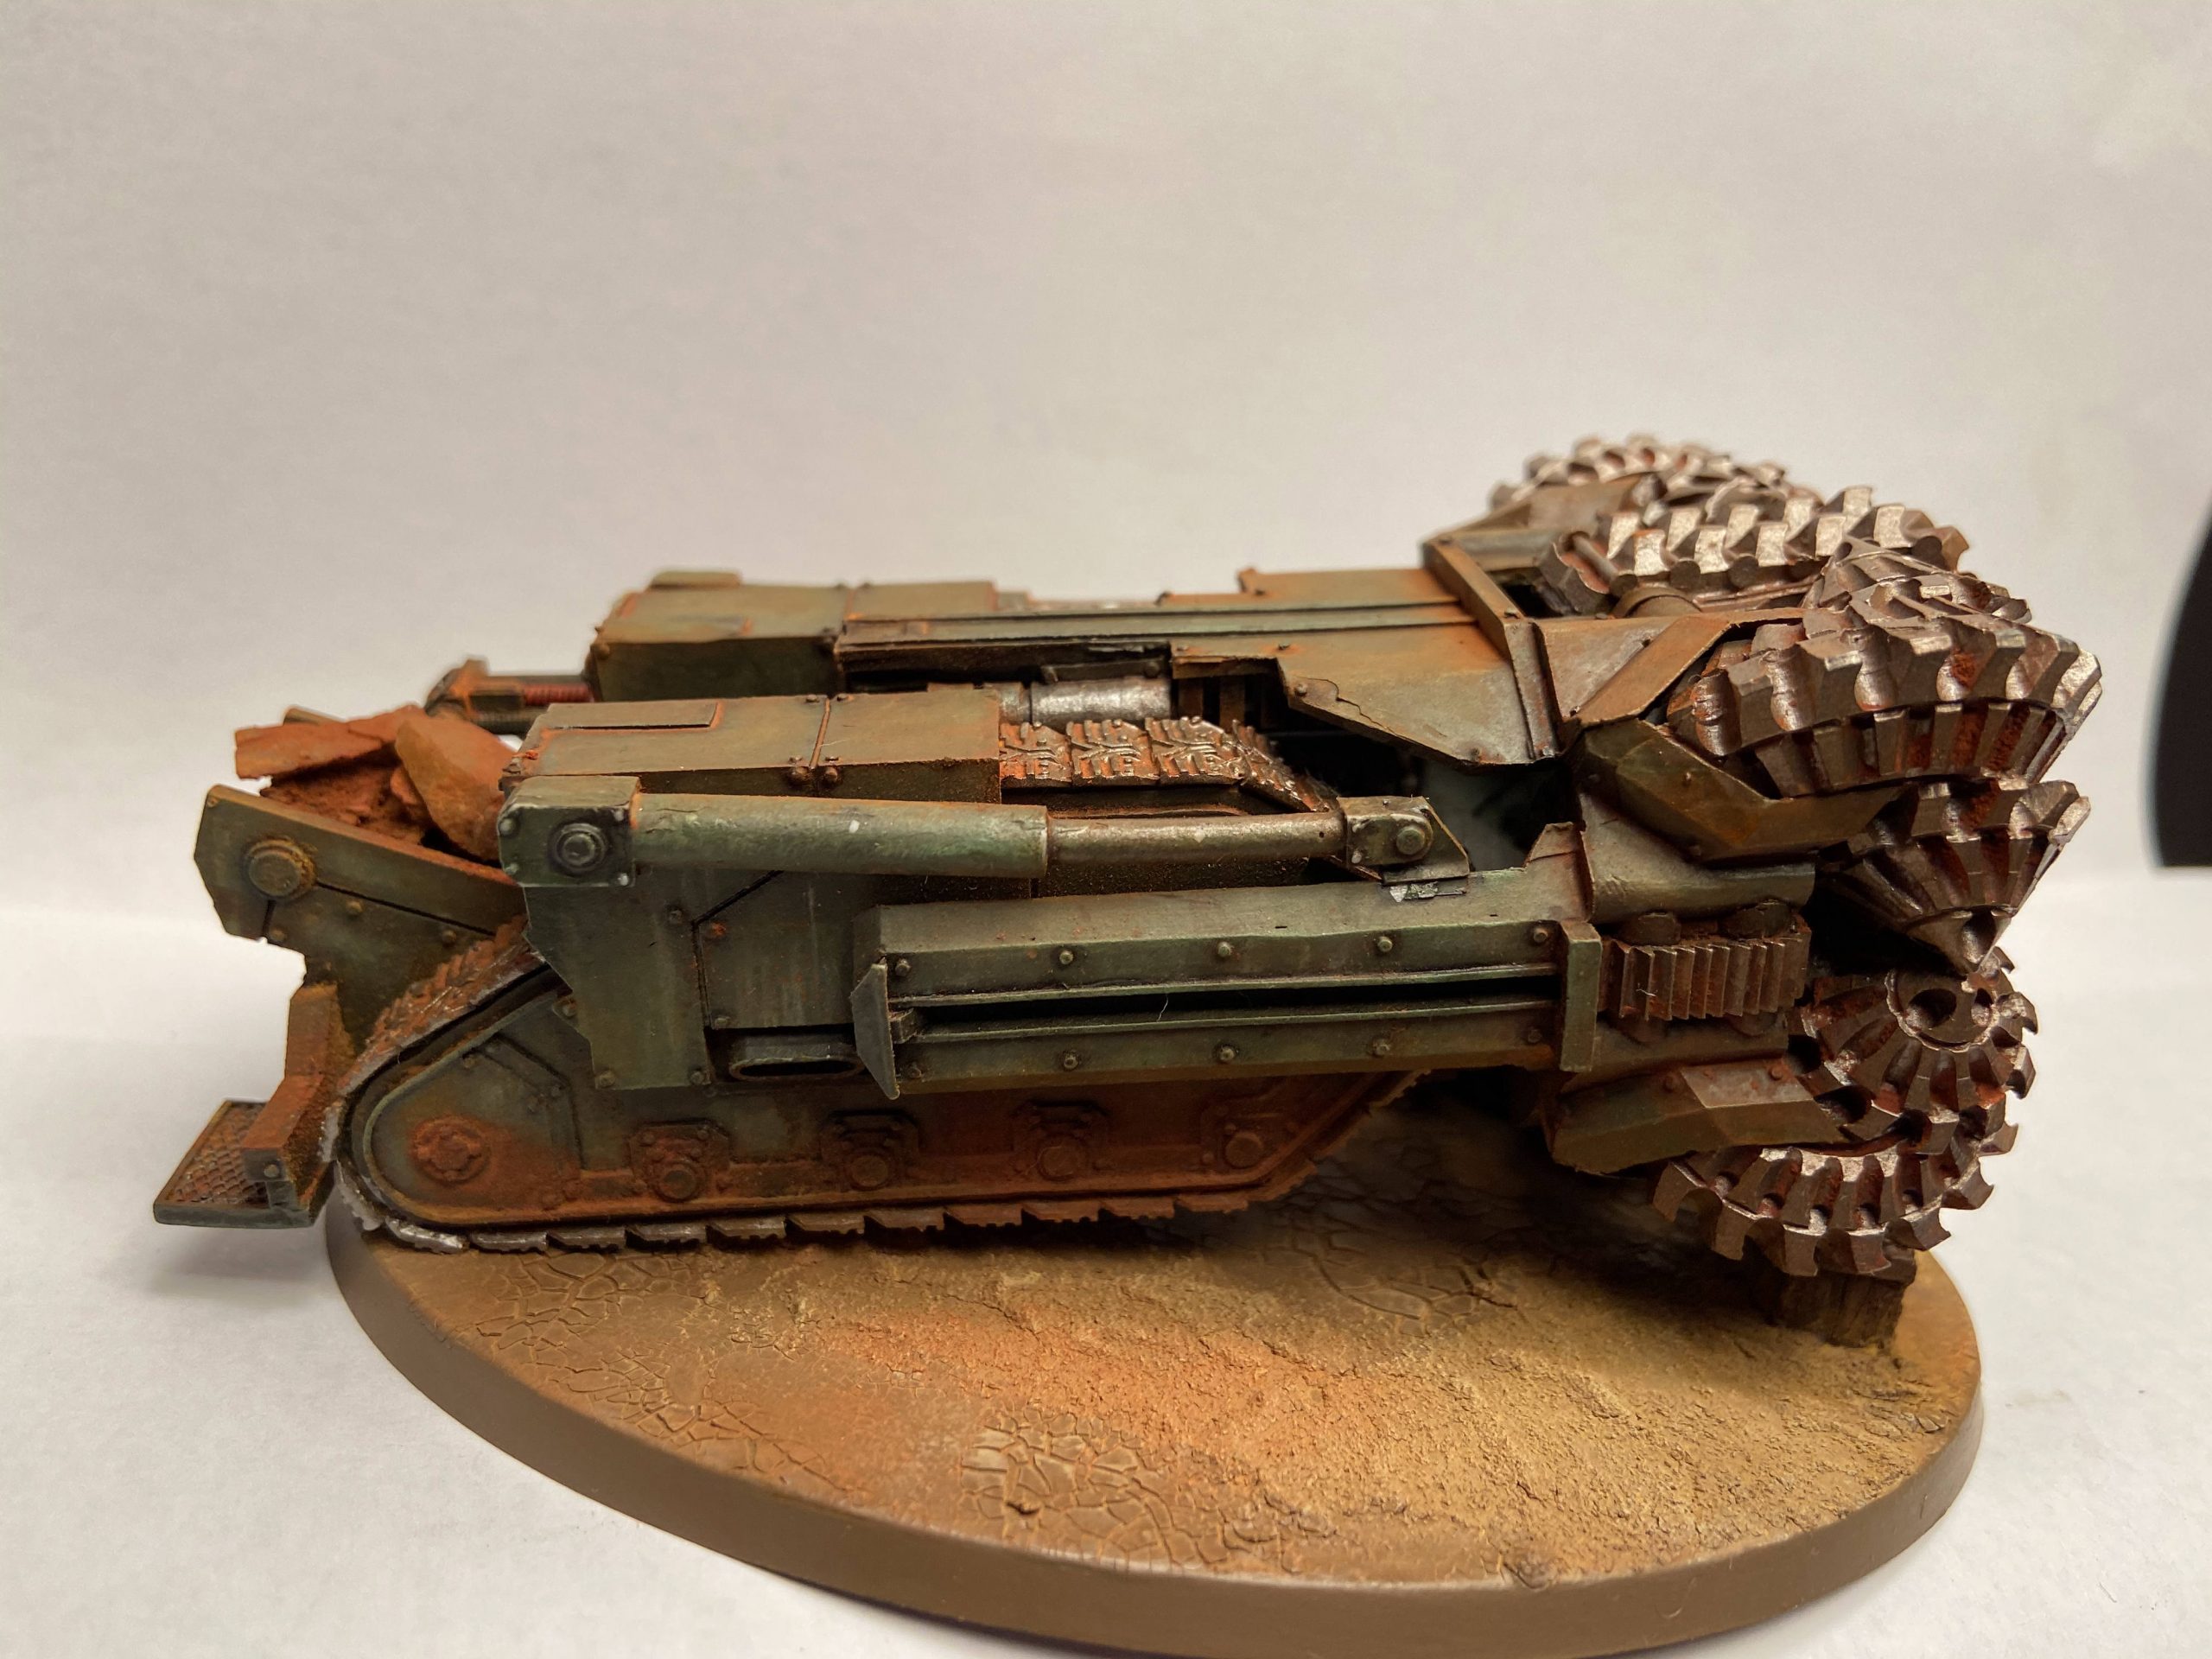
I went for a pretty simple scheme on these as the base has a lot of focus, and I did not want to draw too much away from the base – also, they are pretty simple models. I planned to add a fair bit of reddish pigment to the Hades Breaching Drills to make it look like they had come up through other material before arriving at the arid, sandy, desert surface.
That was the plan anyway!
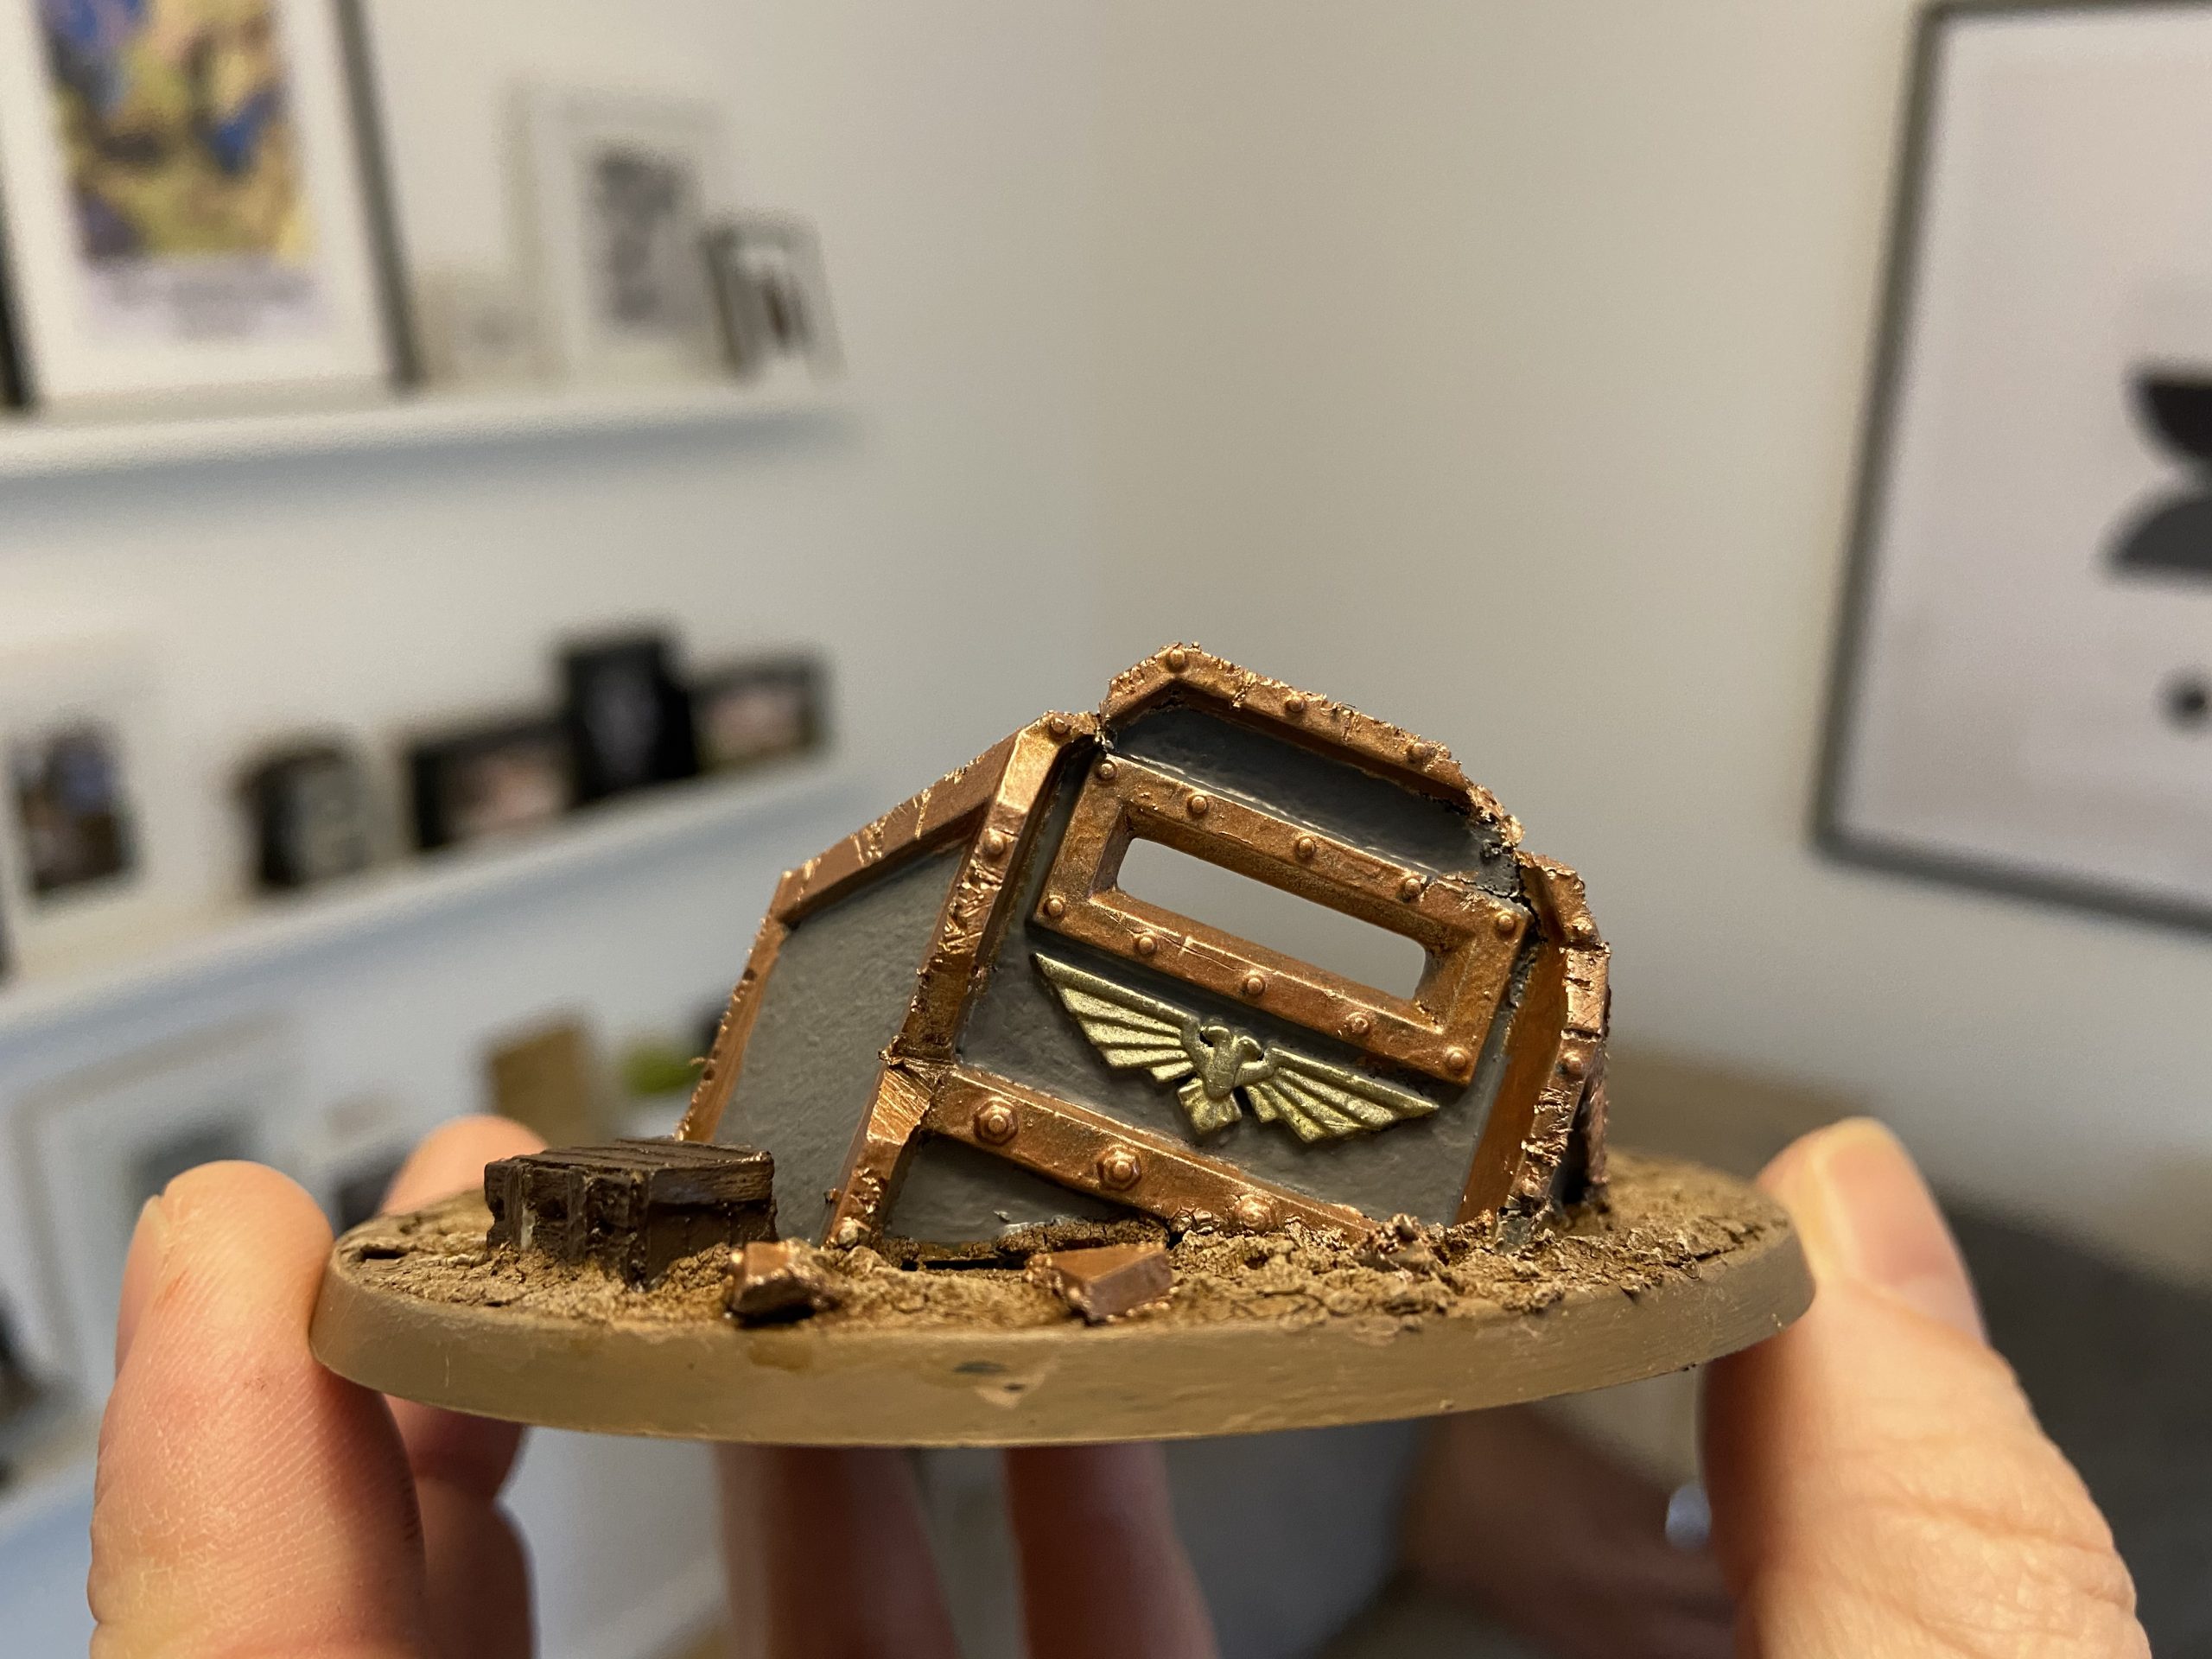
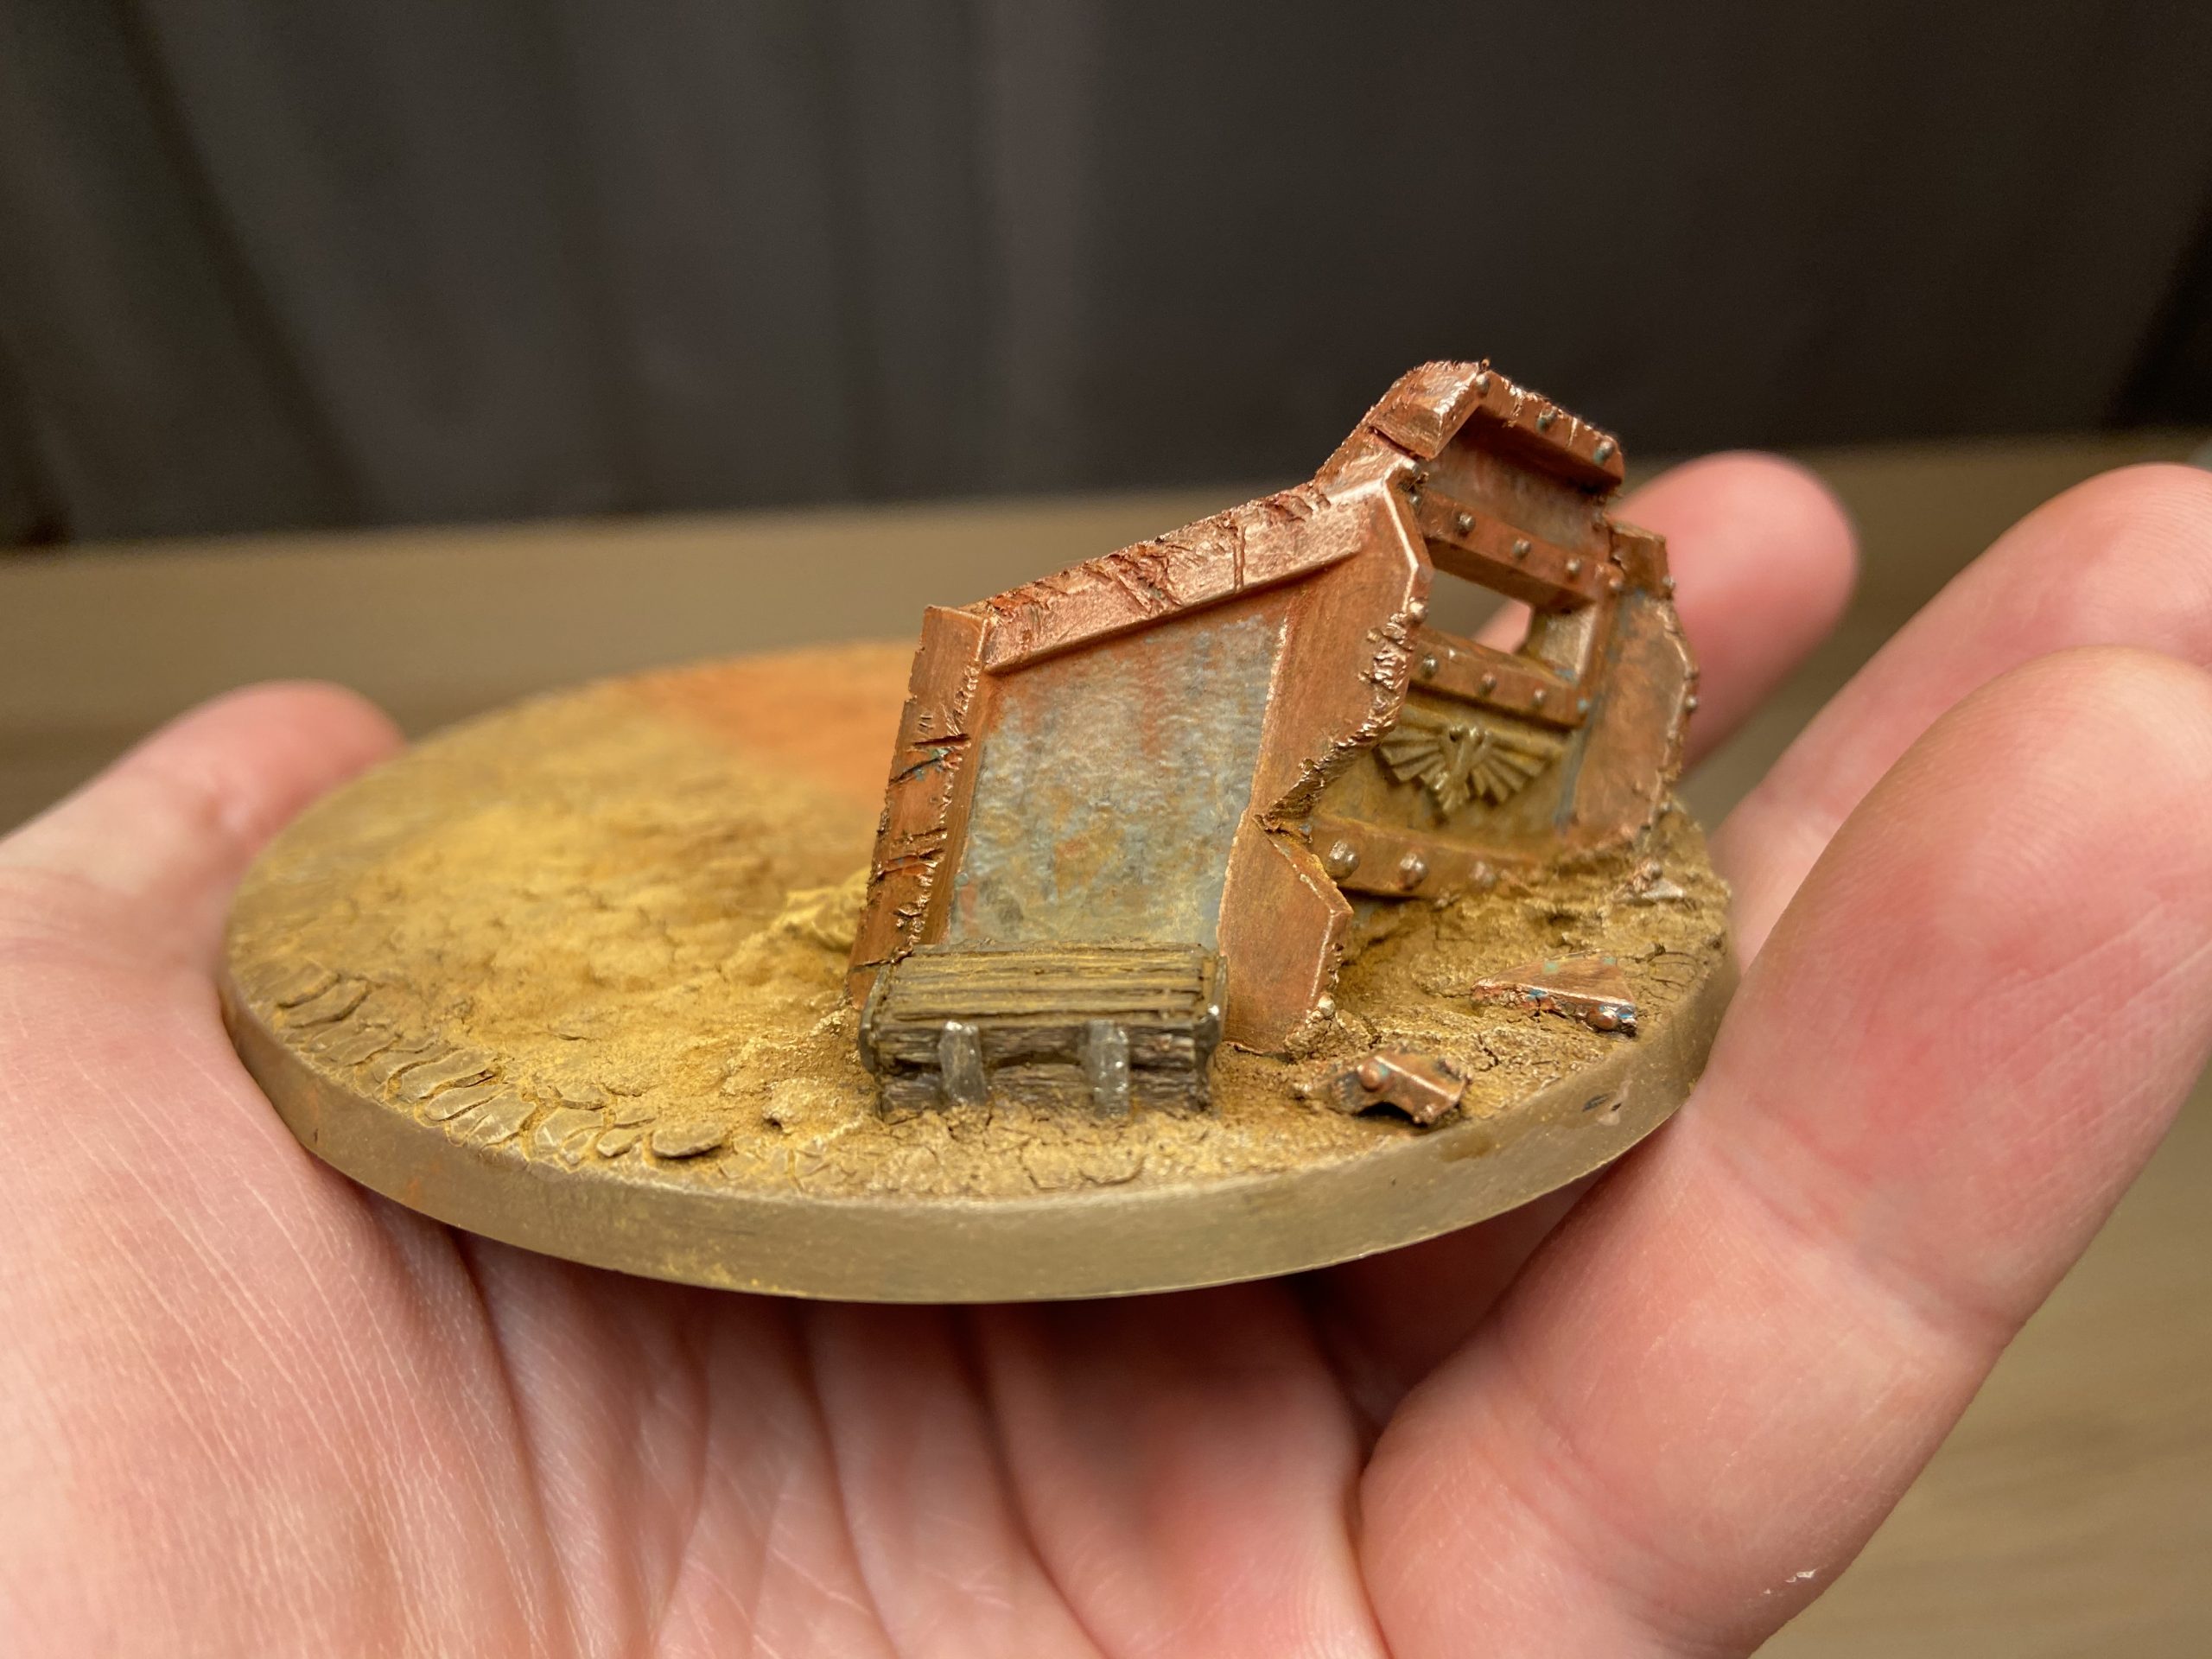
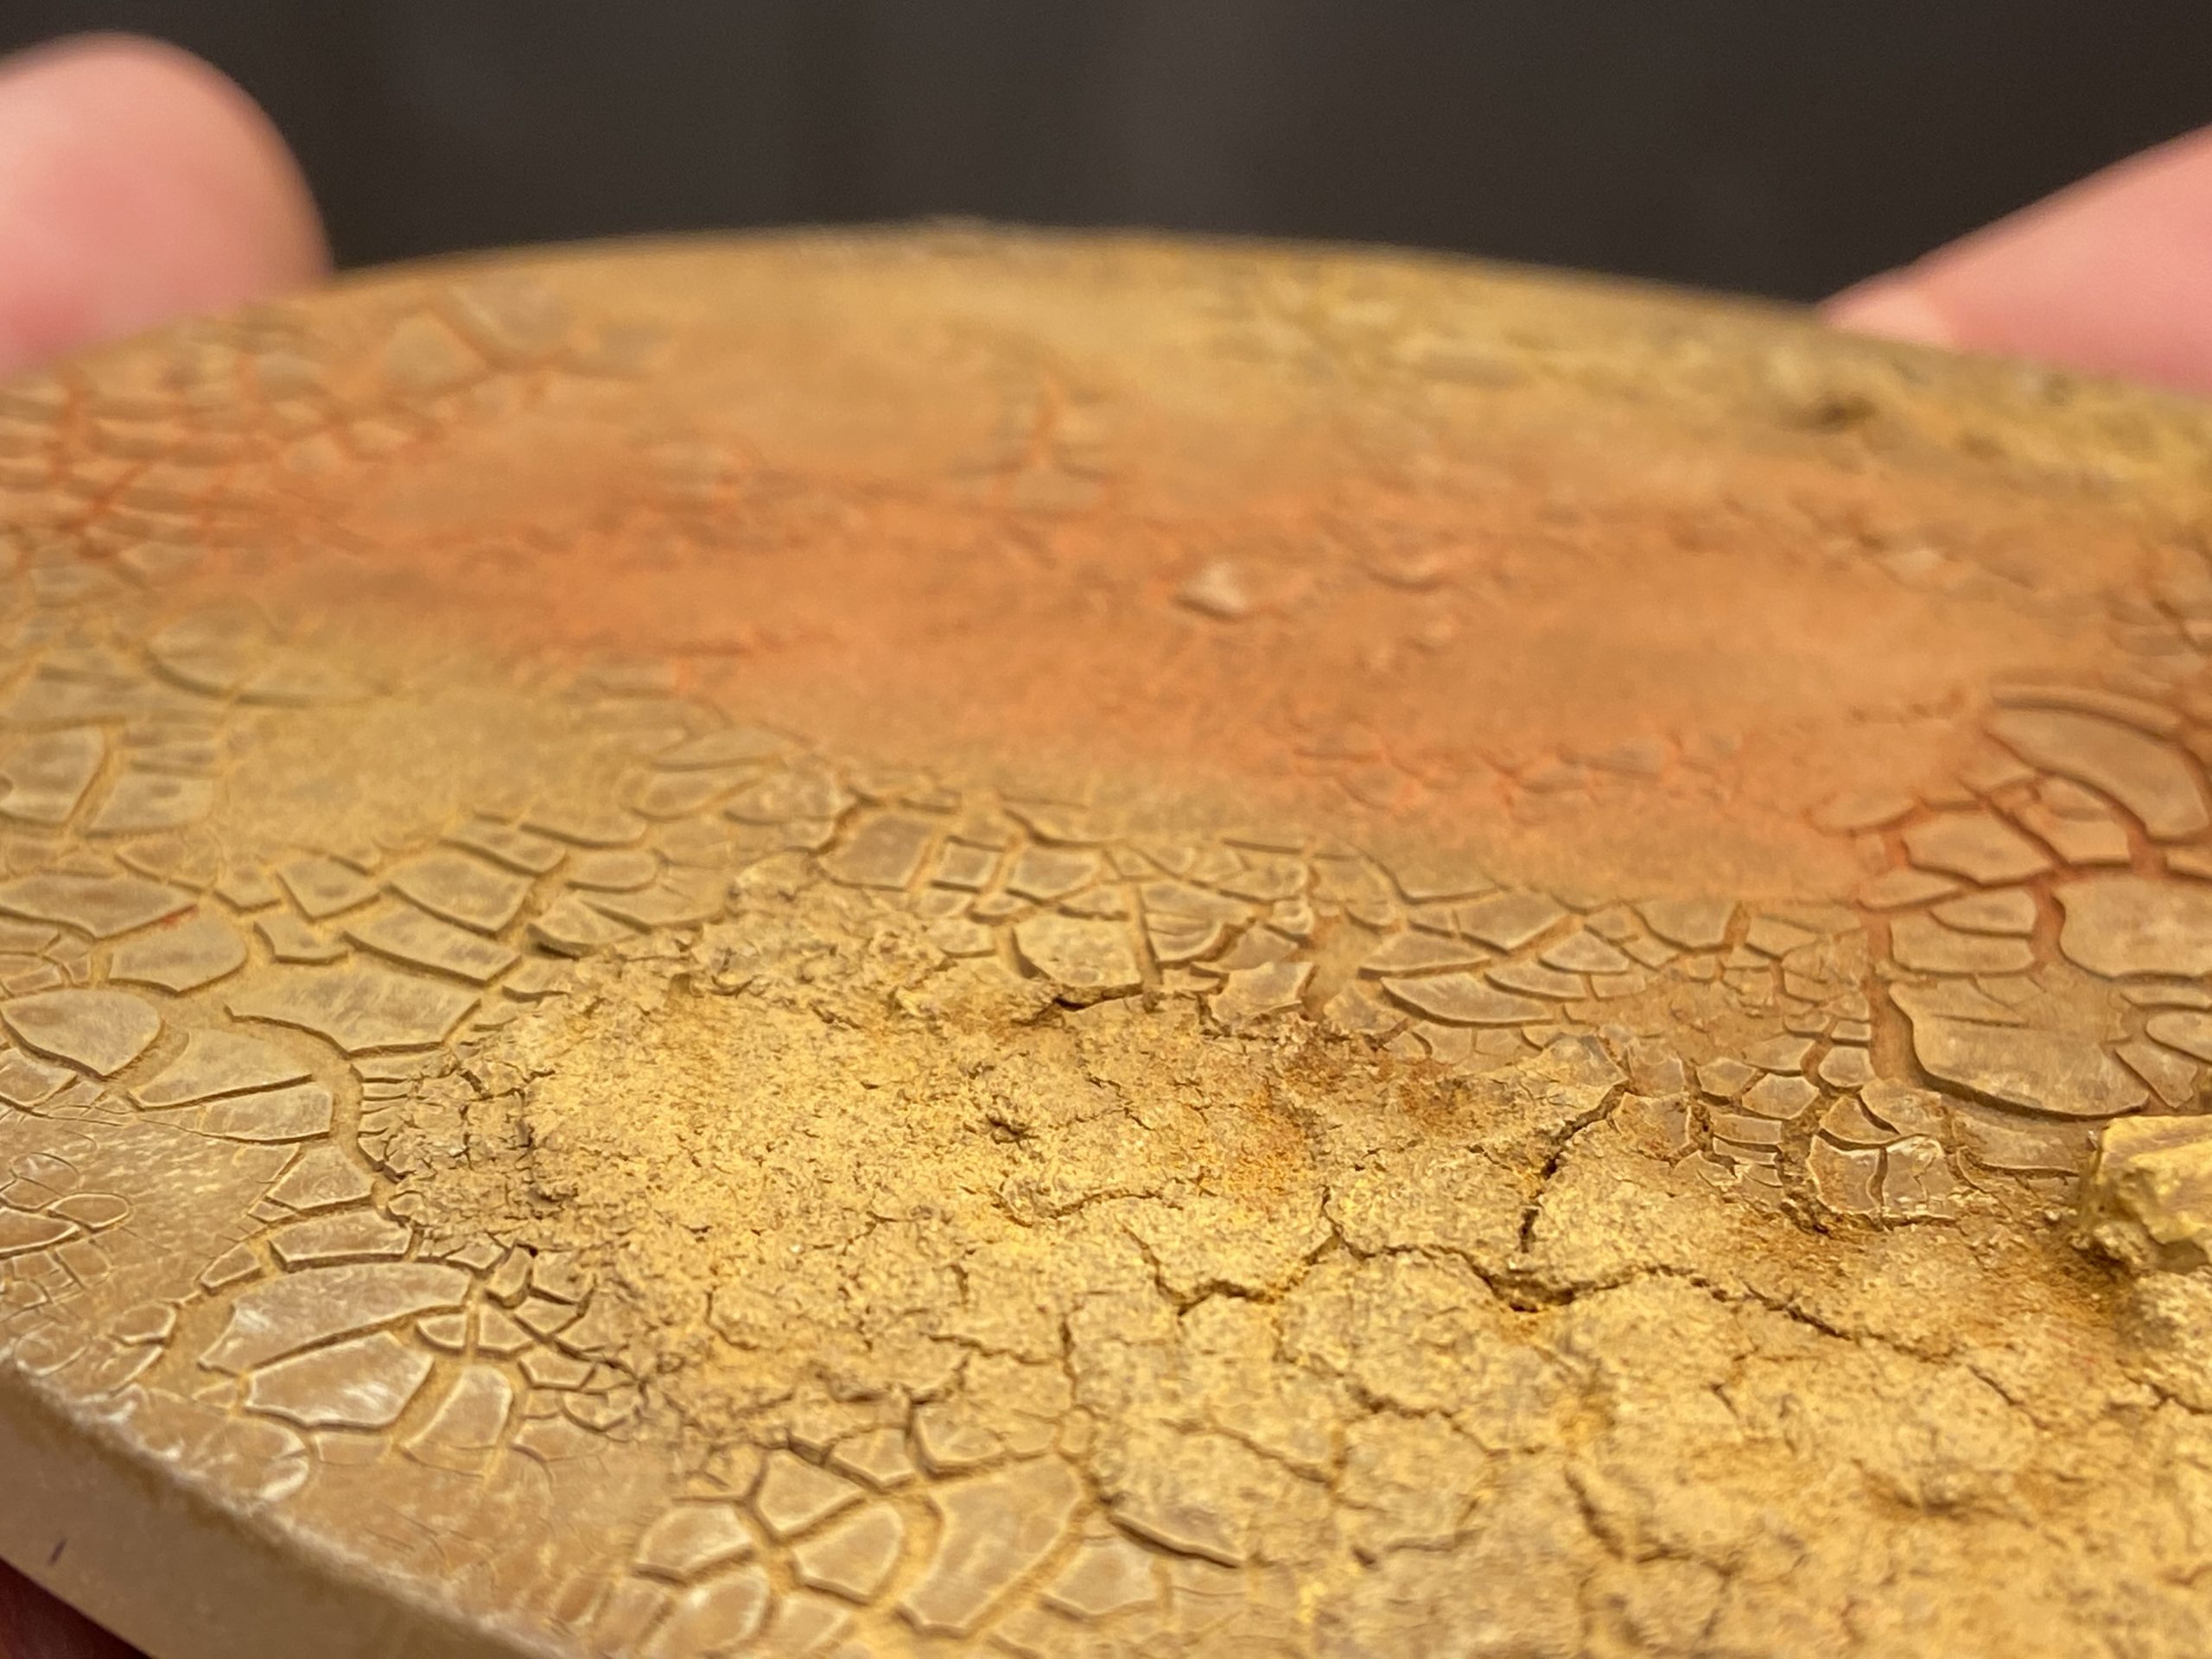
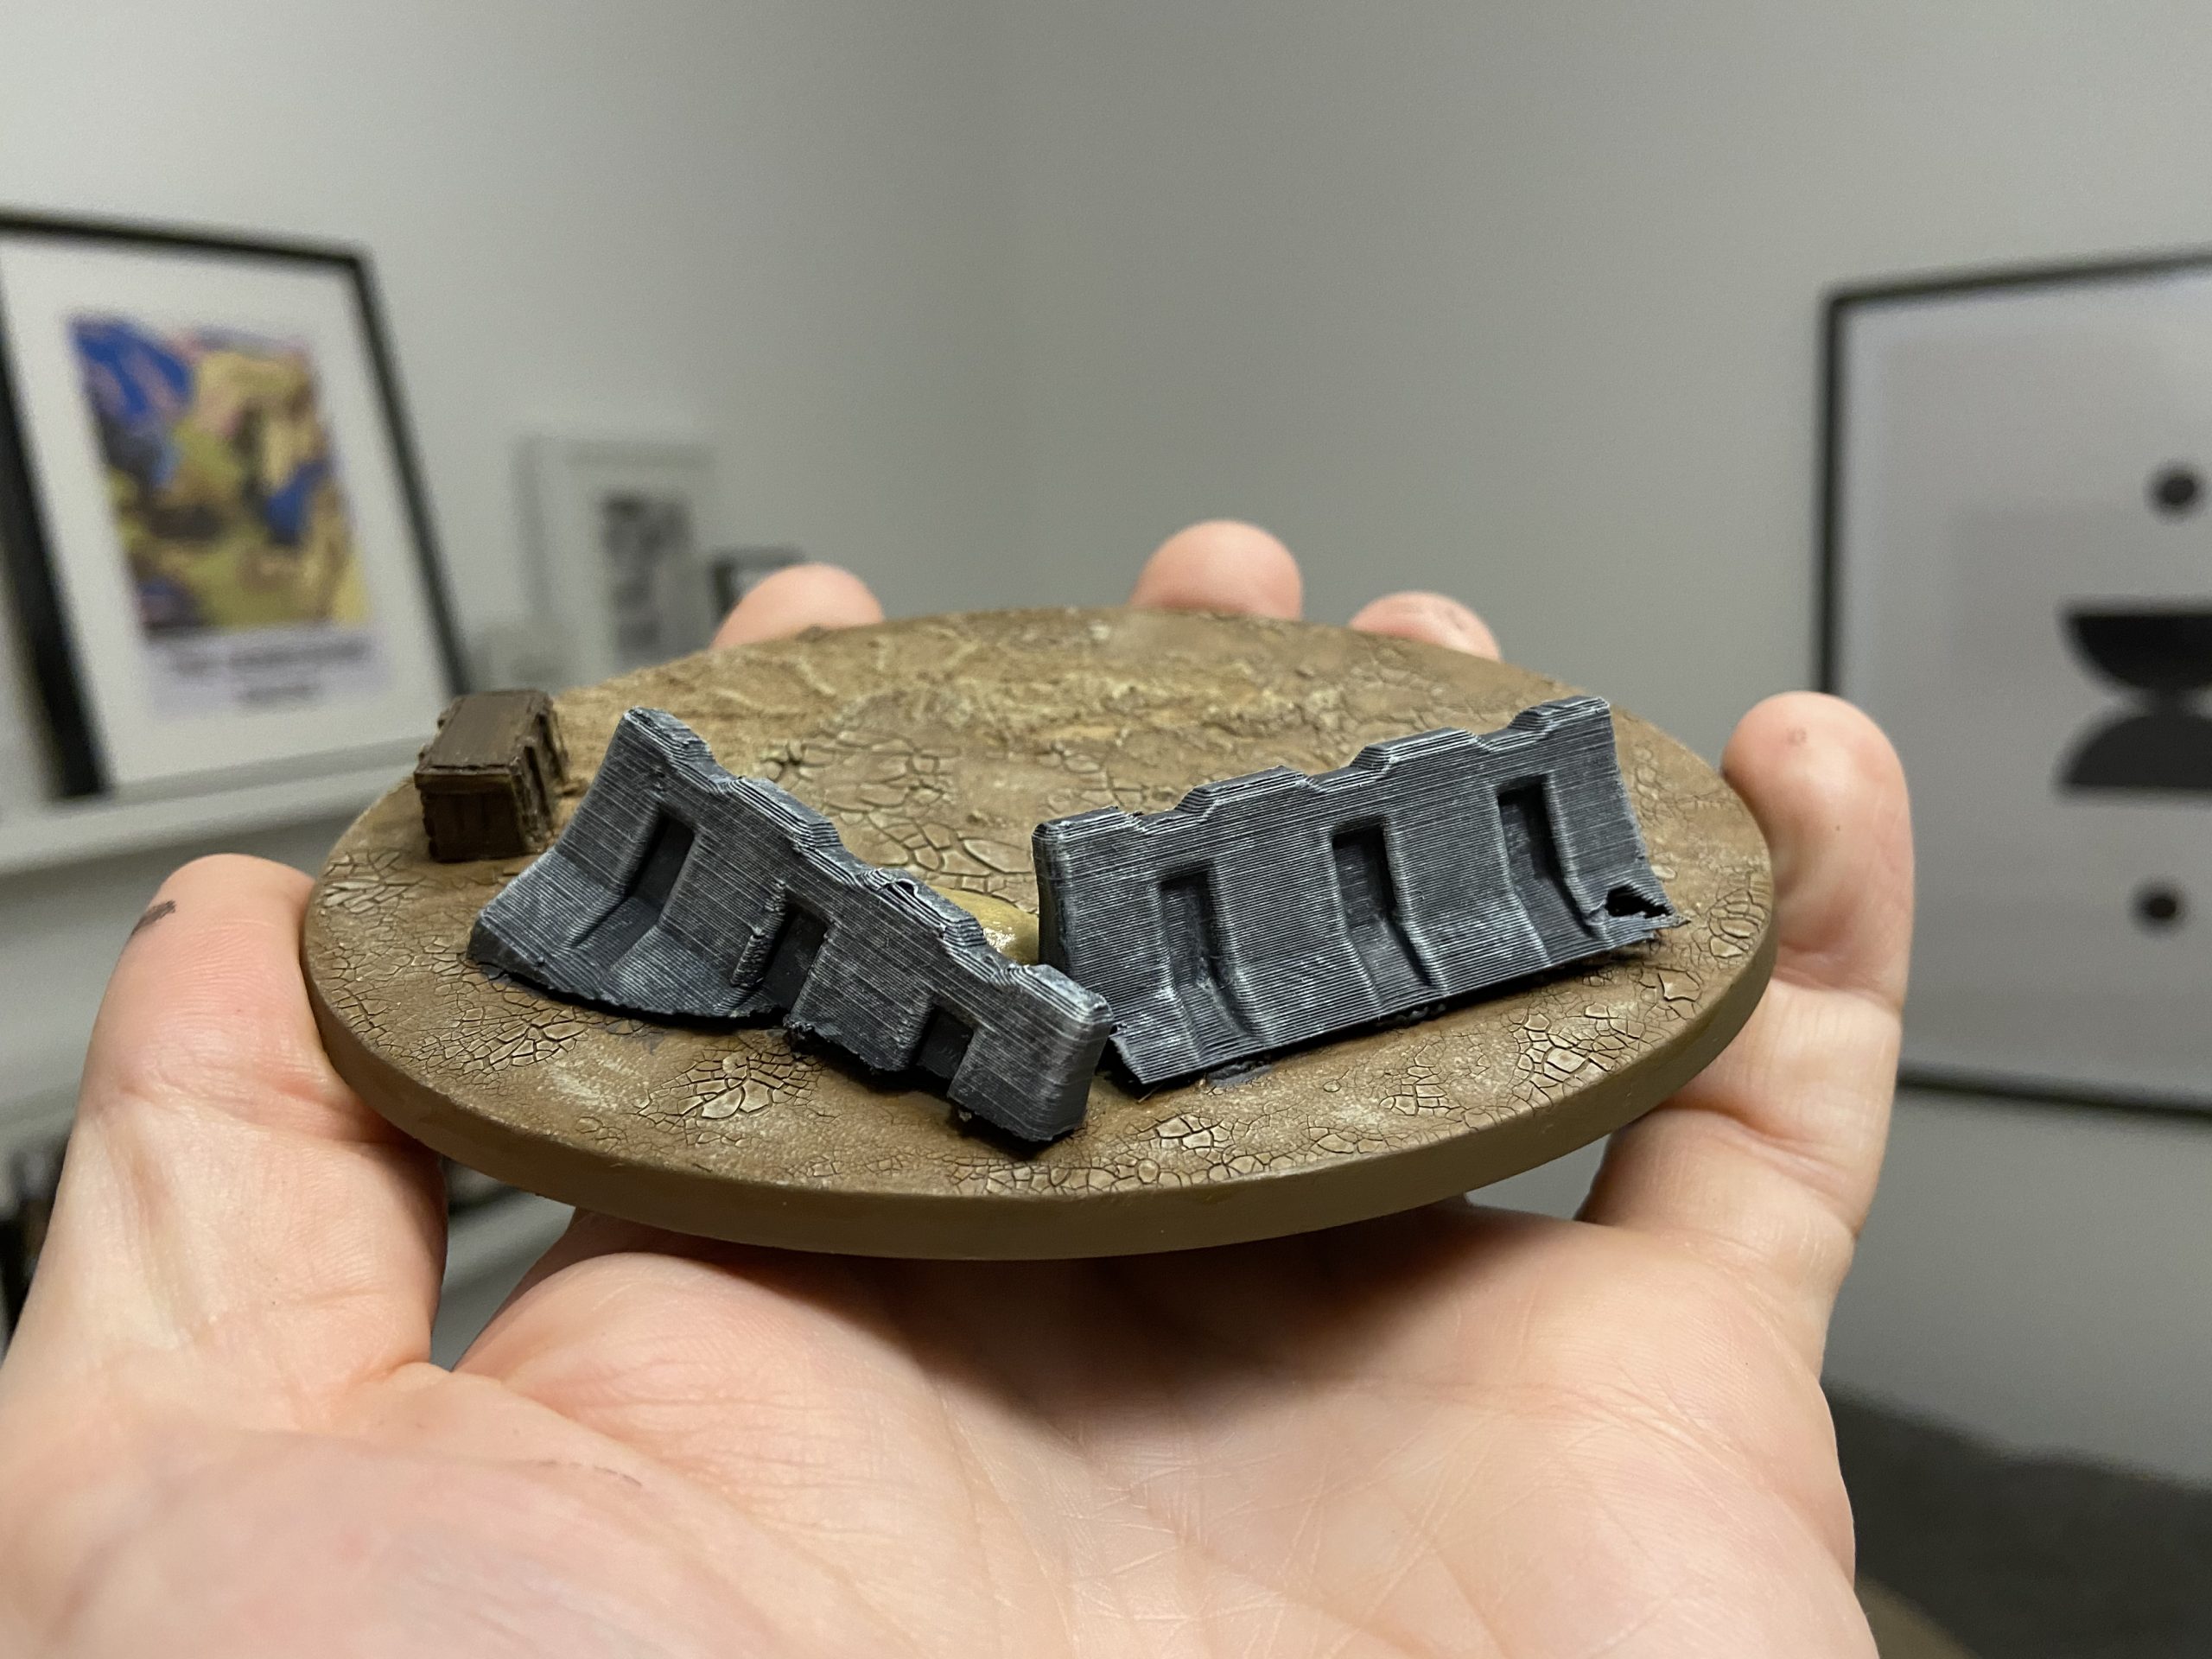
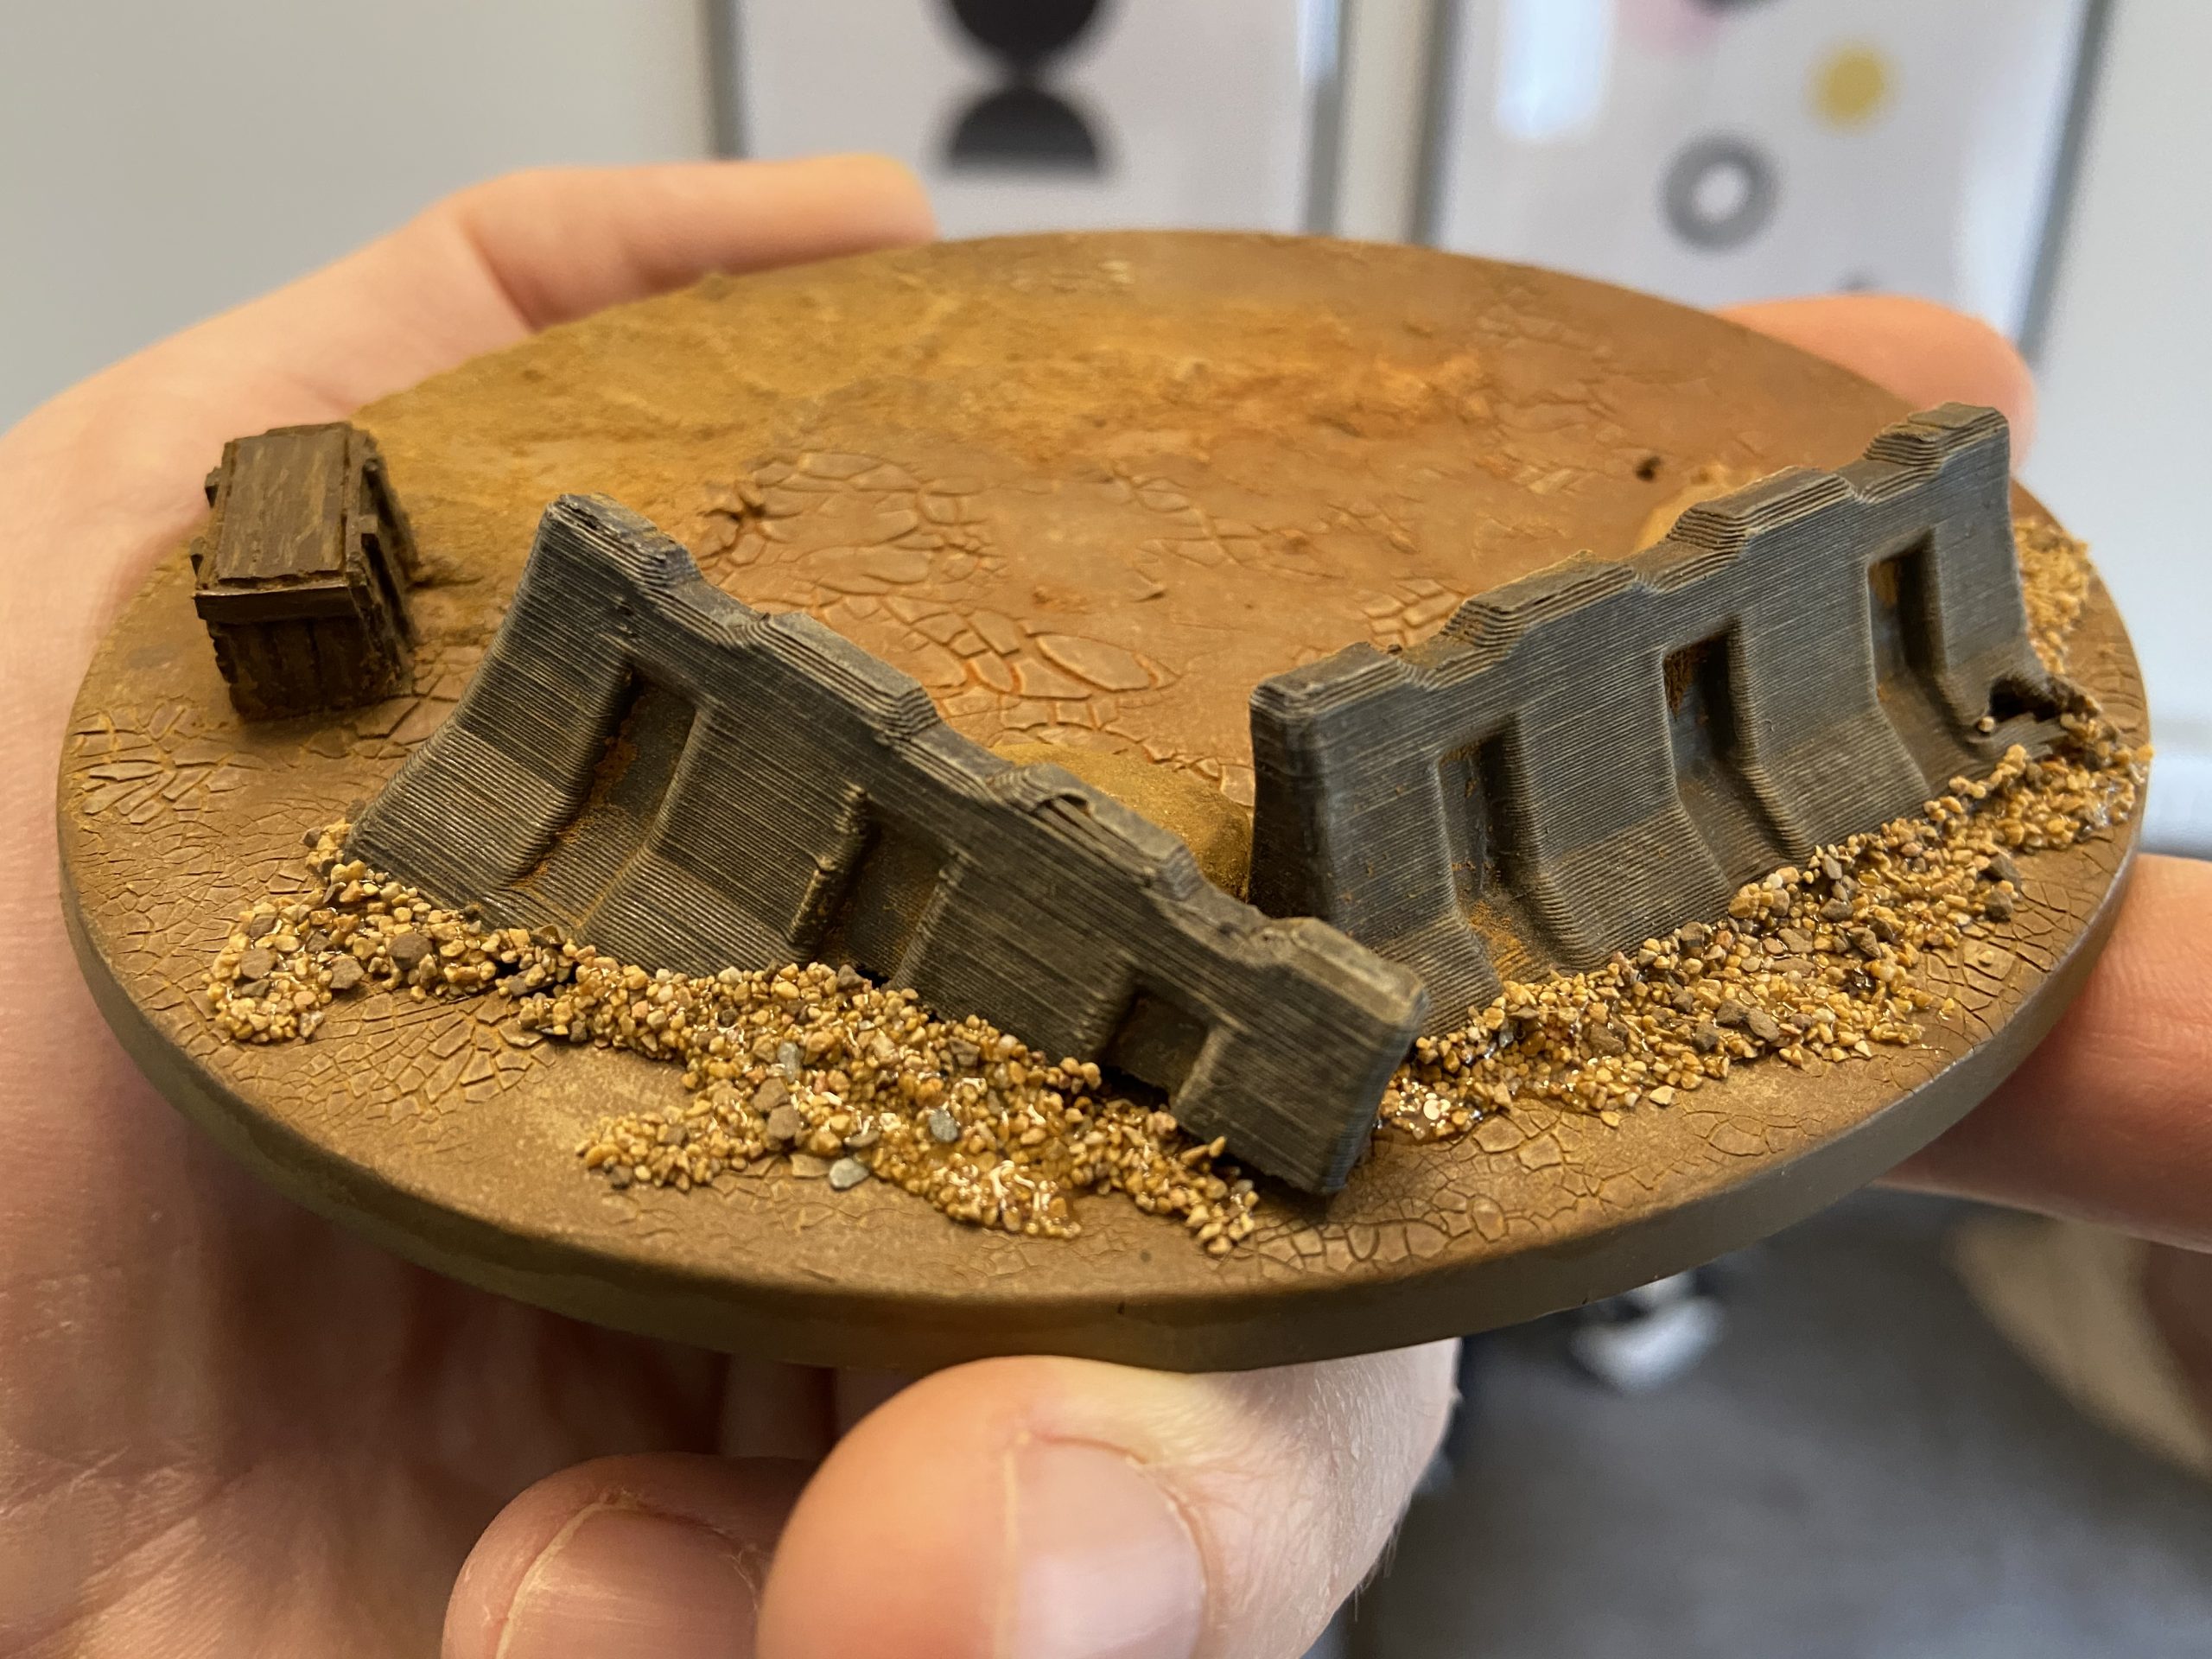
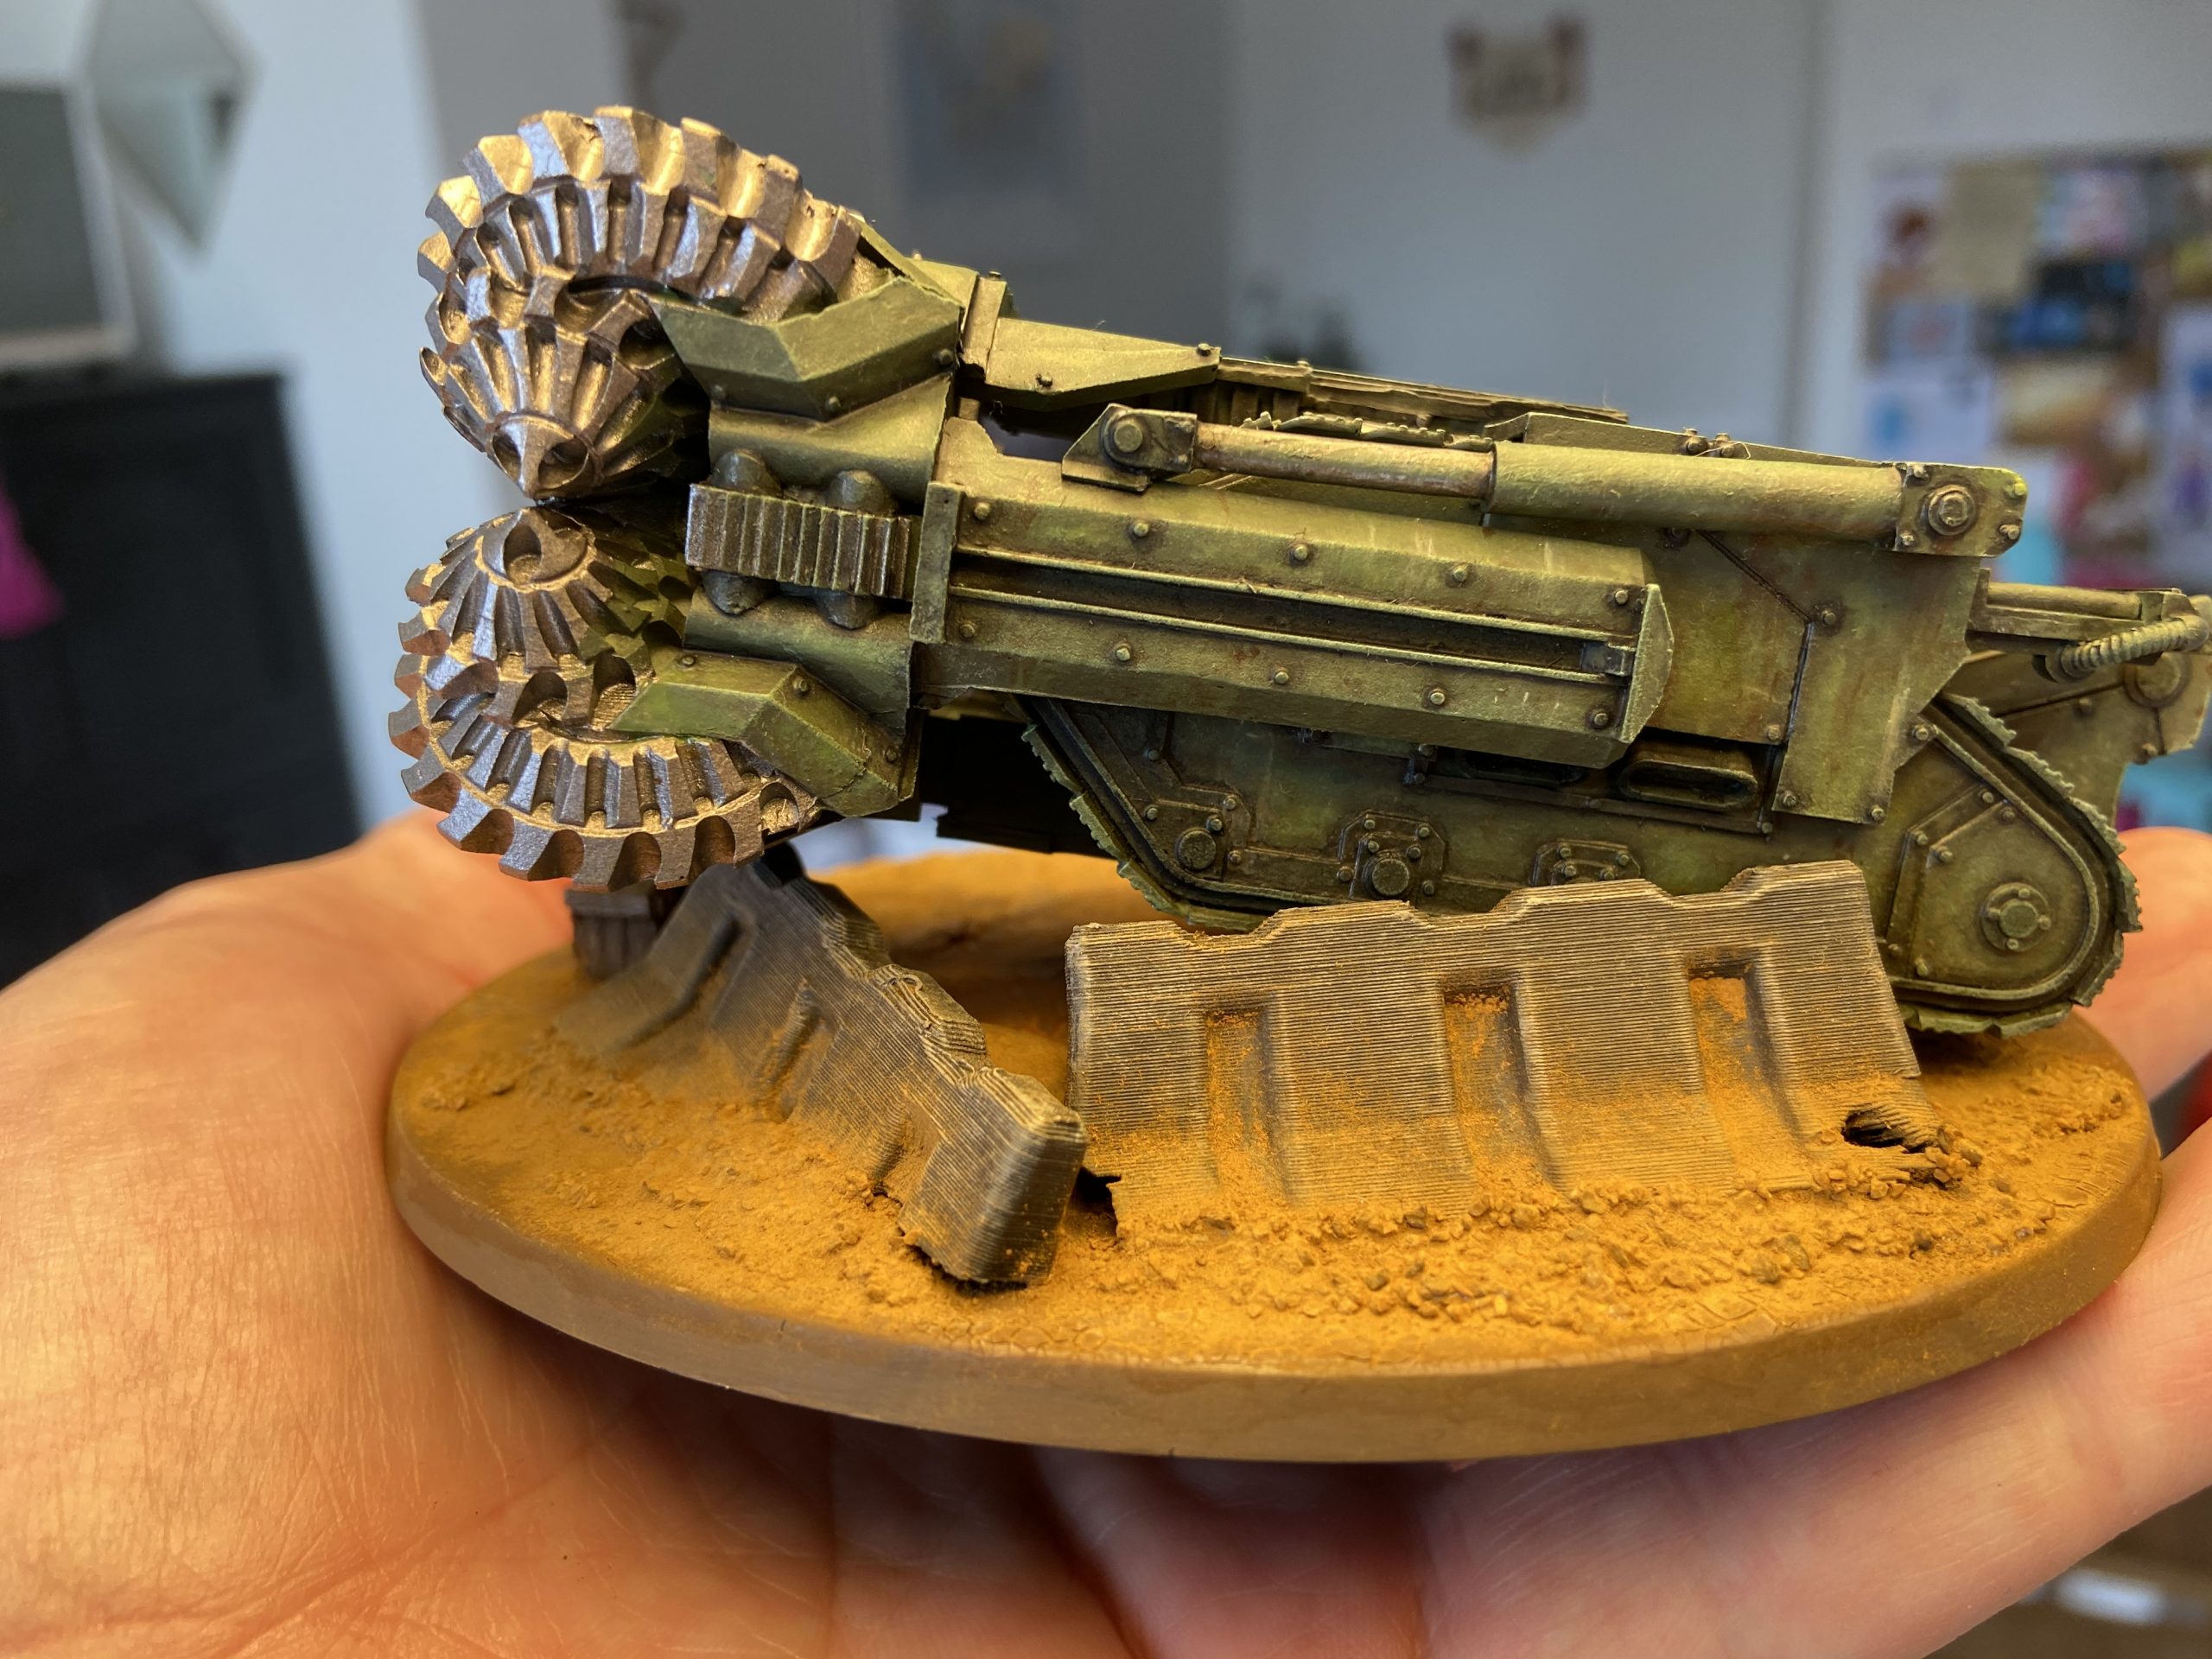
Hades Breaching Drills – Basing
As per the advice of @mediocre_hobbies, I used the 120mm Flyer bases from Games Workshop. These are a great fit for the Hades Breaching Drills and allow you to add a lot of character to the models.
I really enjoyed doing the bases for these models. They allow a lot of creativity and add a lot to the look of the model. I would recommend others do the same if they do not mind them being technically wrong for games. I will, of course, mention the bases to my opponents, and I think it only becomes an issue if you change direction?
And actually, lengthways, it’s only longer because some of them hang off the base – if we just took the base lengthways, then it’s fine – and ignore the overhang.
It’s a bit harder to account for widthways, as the base probably makes it 50% to 75% wider. But, oh well, I am sure it will make one charge and die anyway!
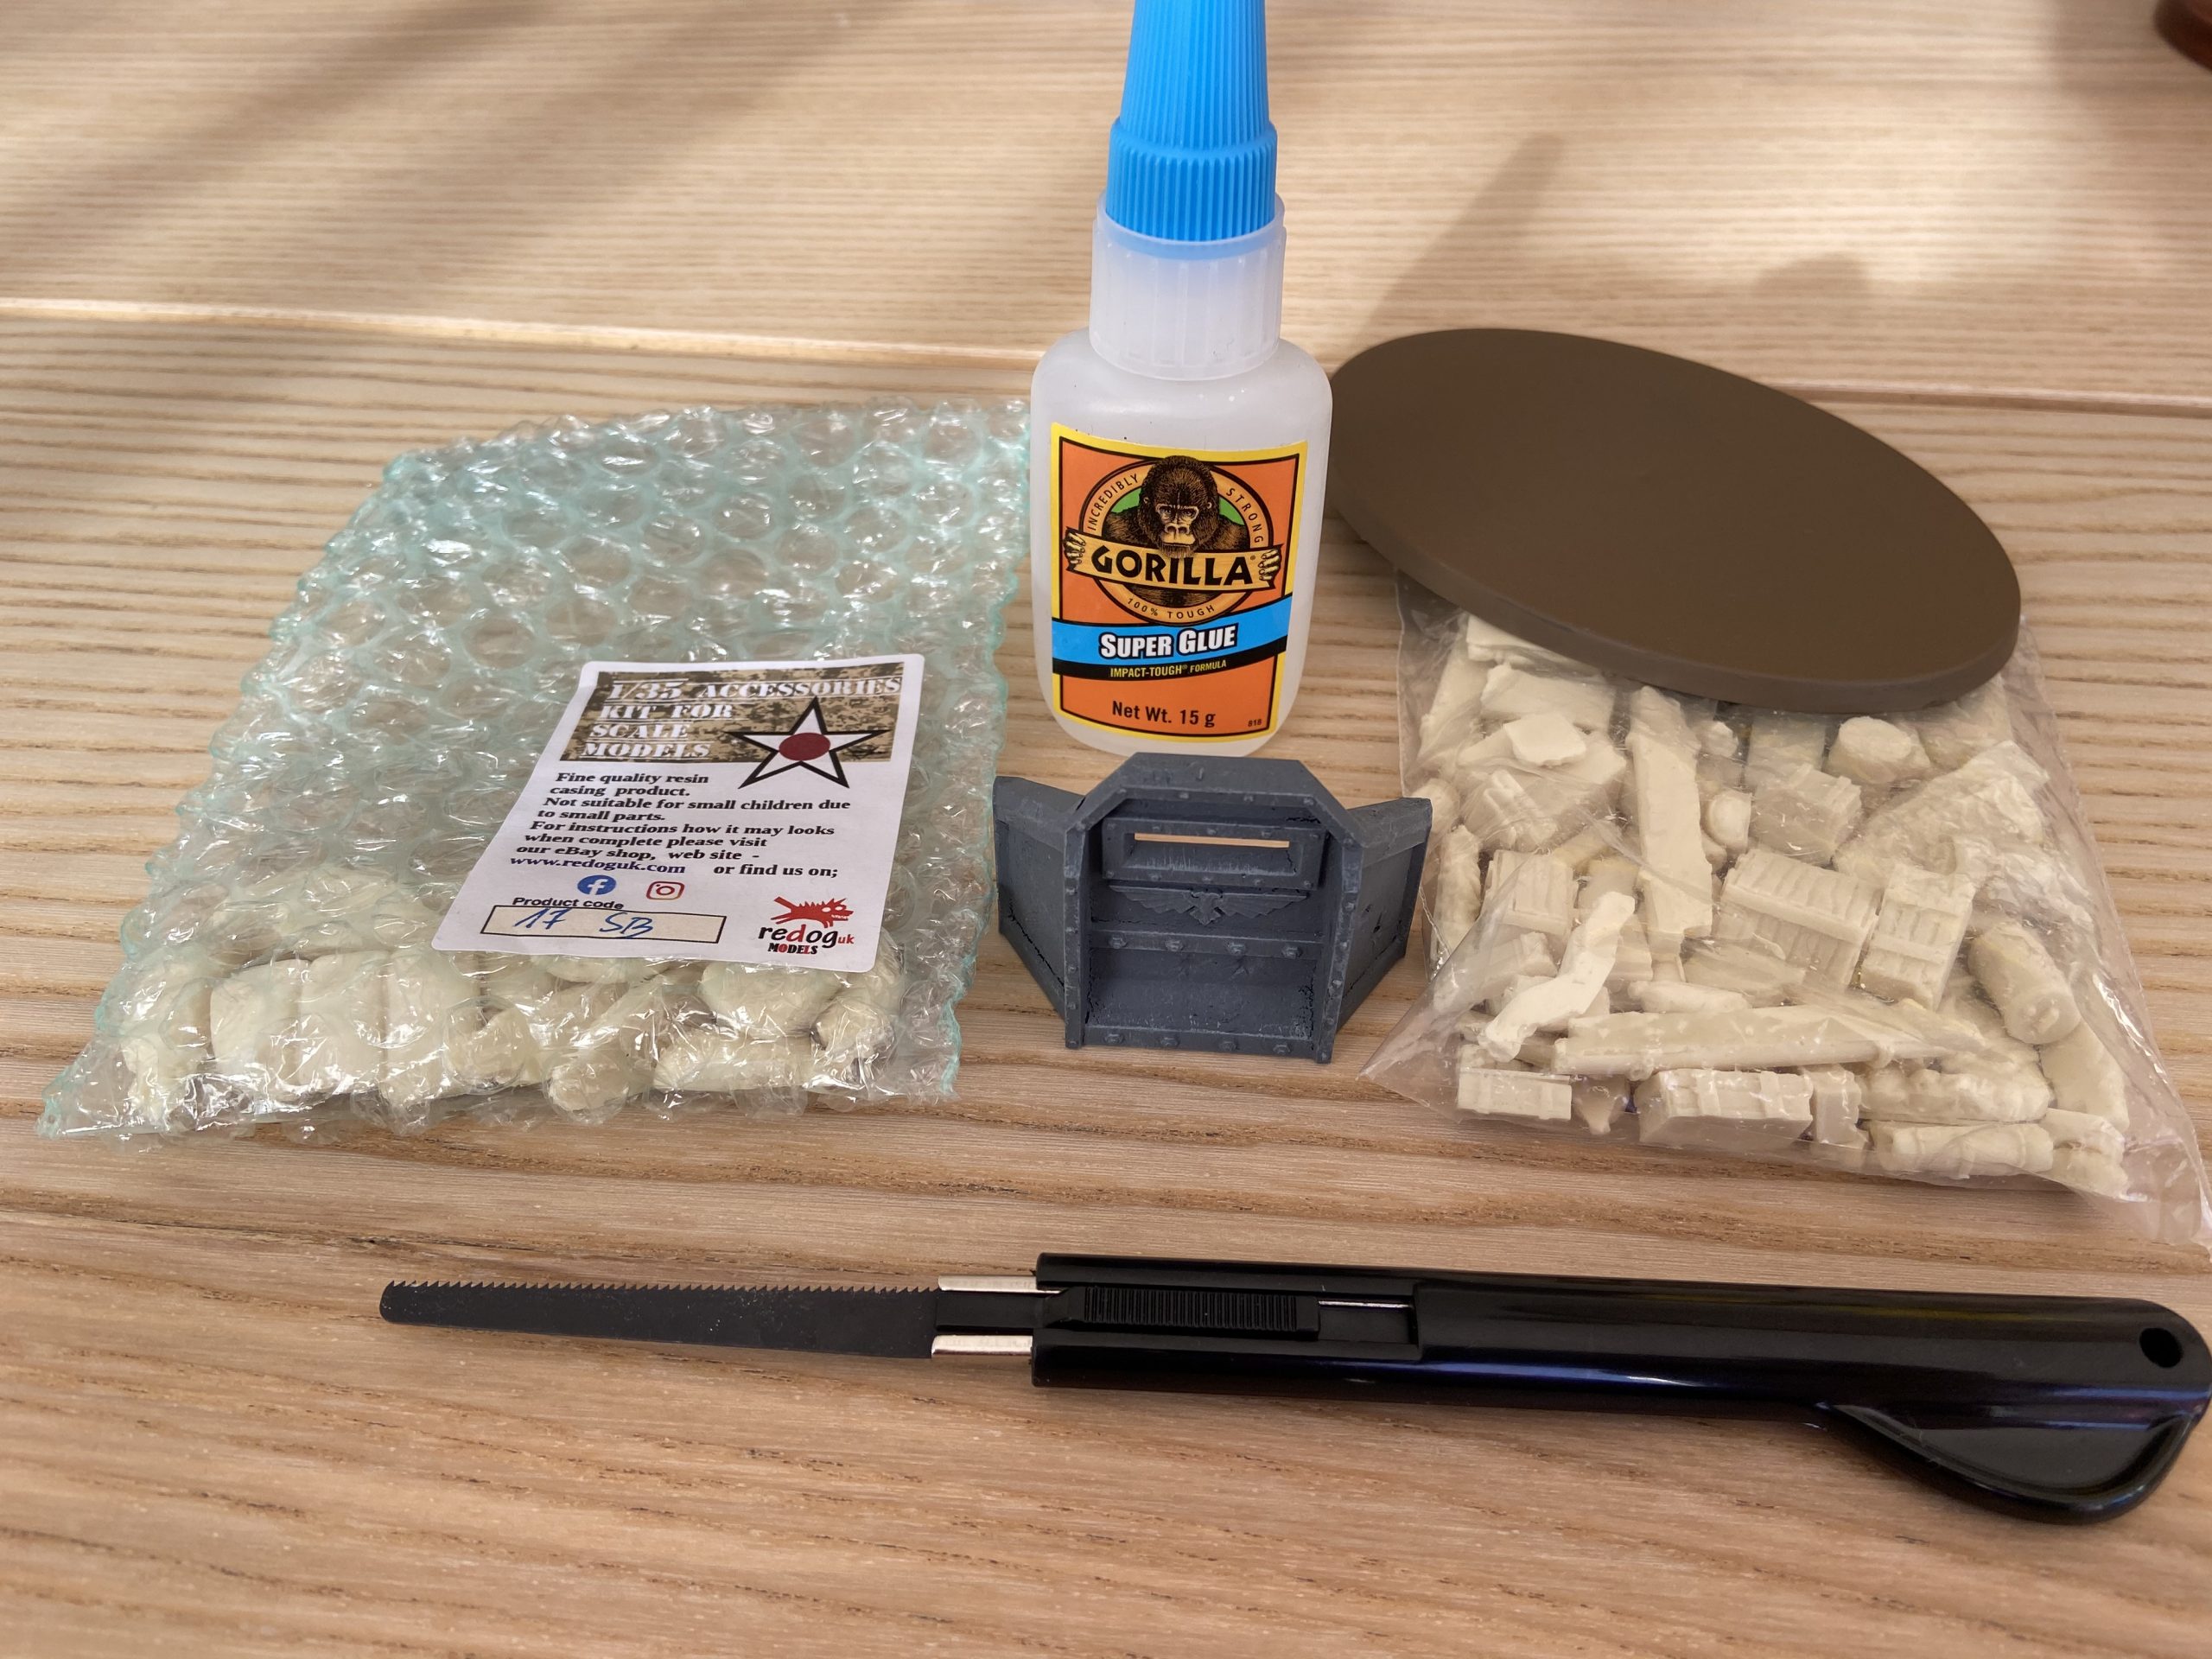
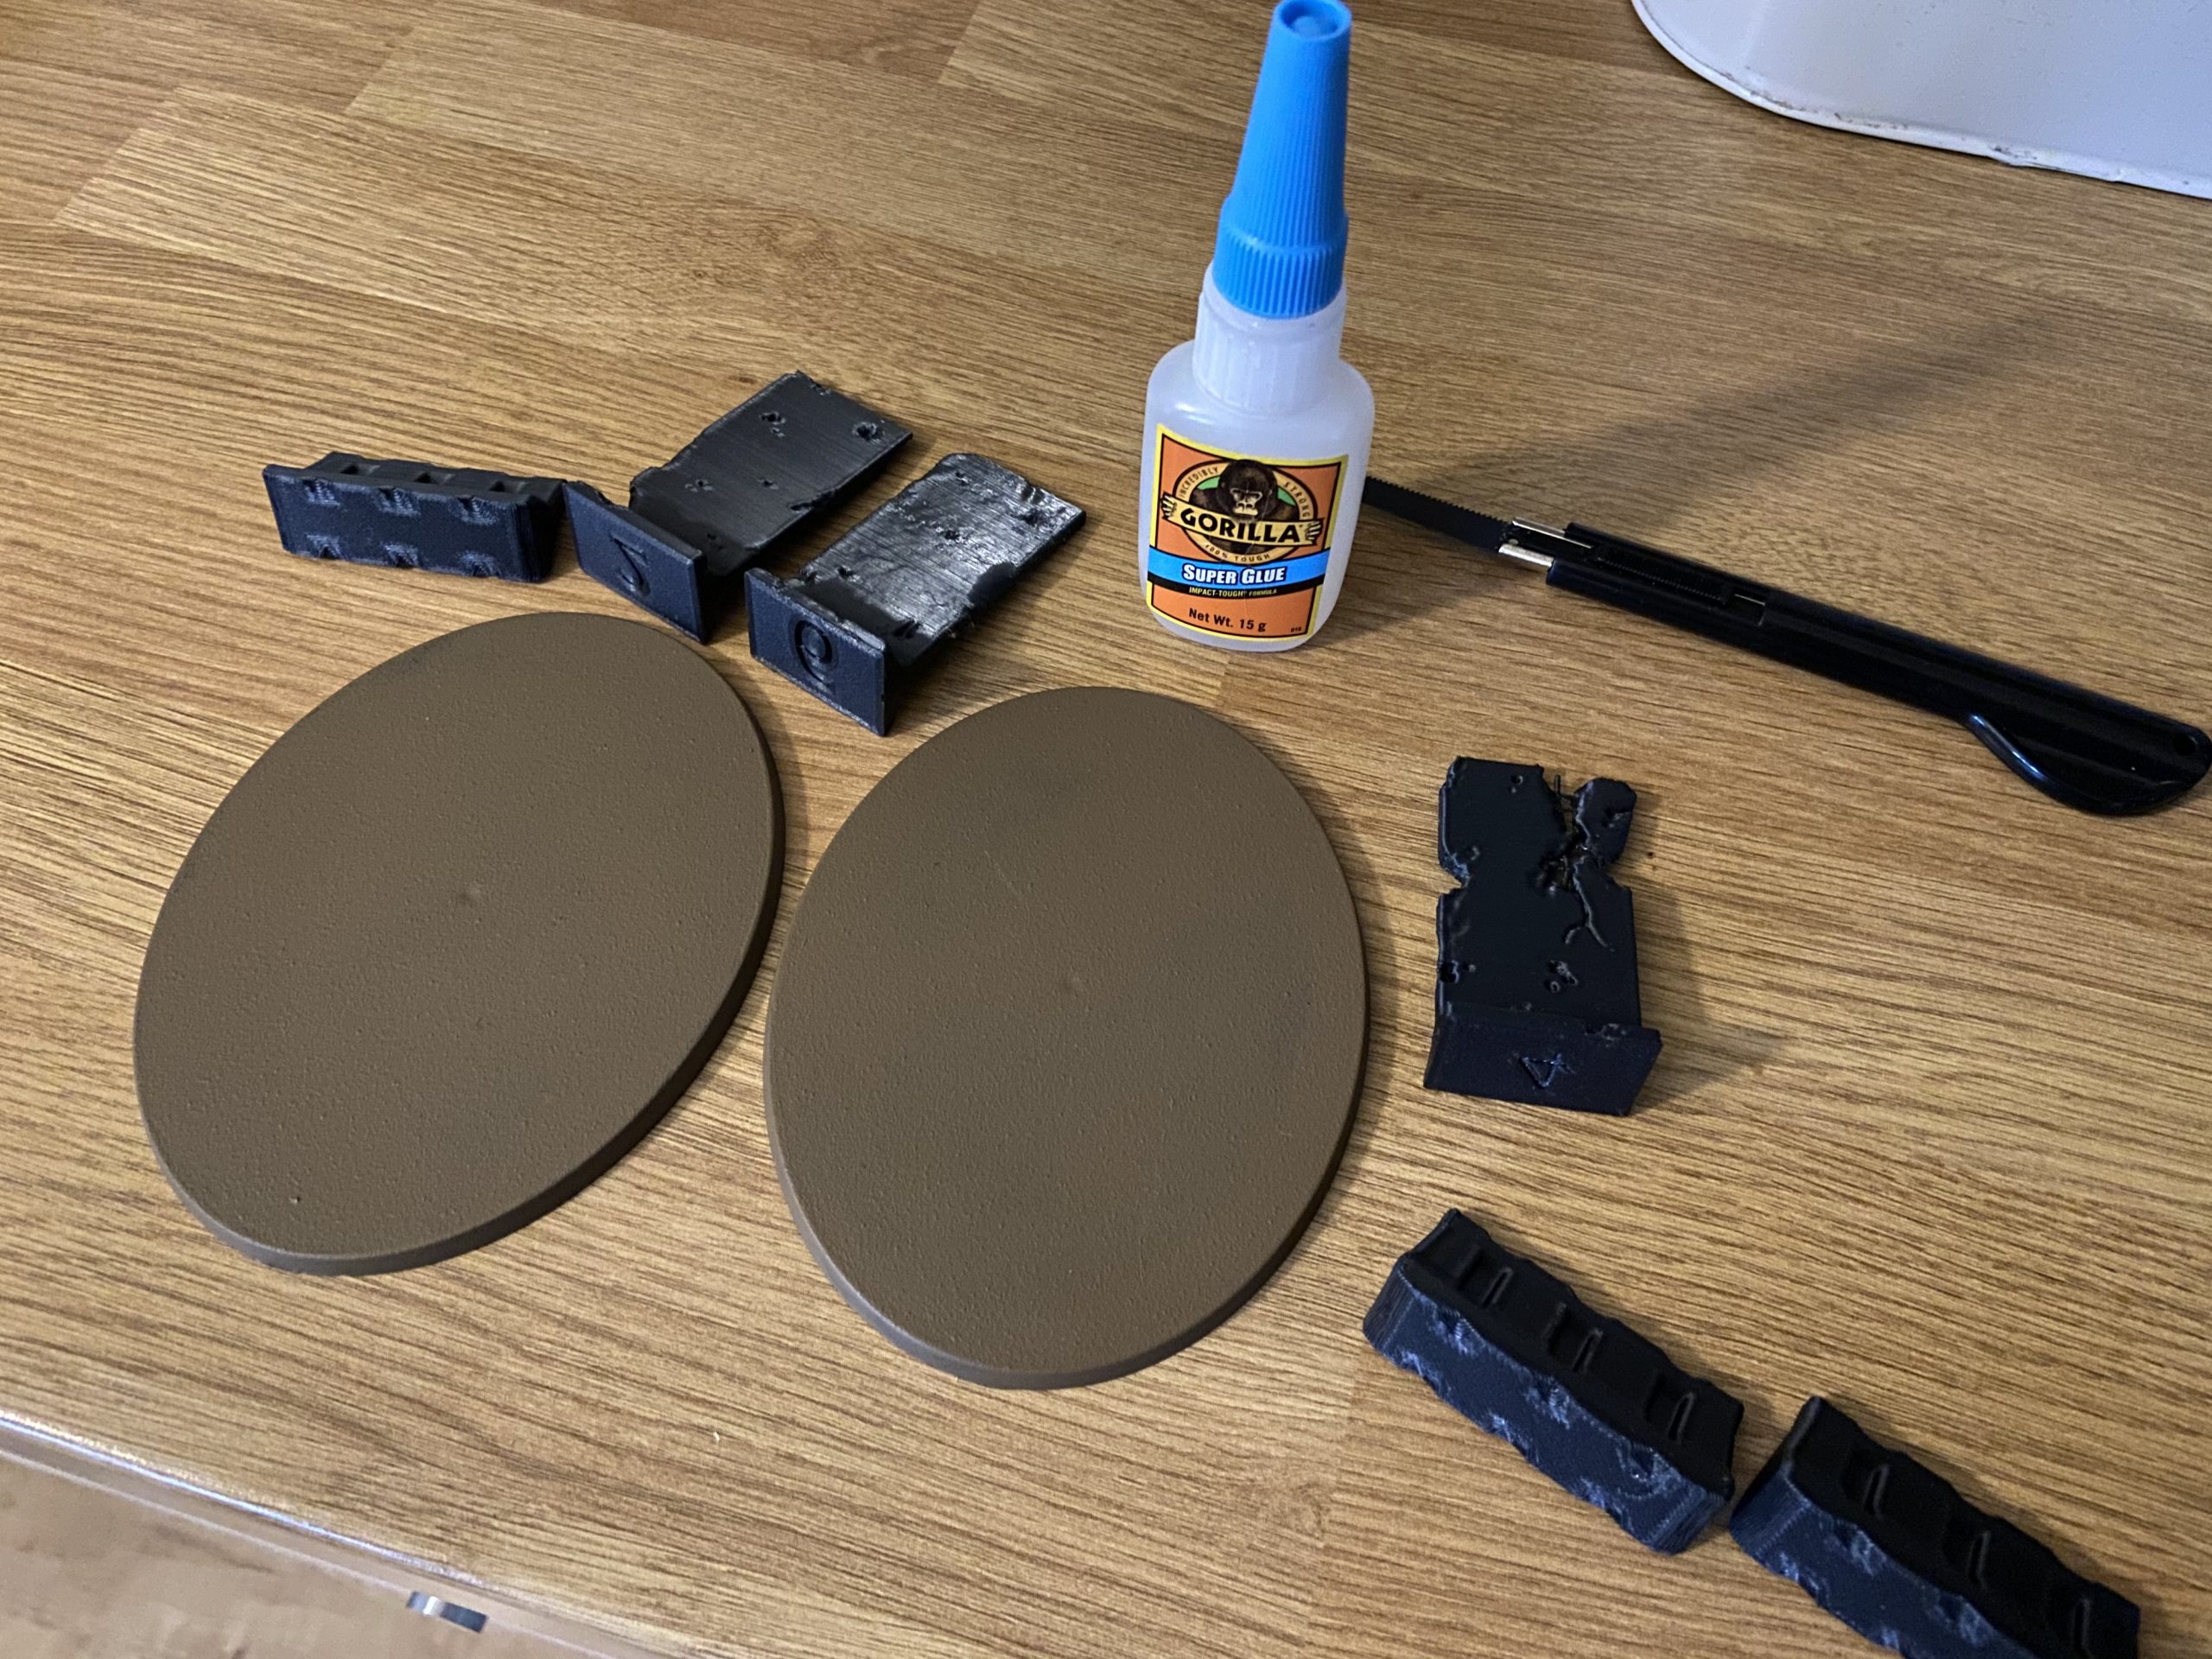
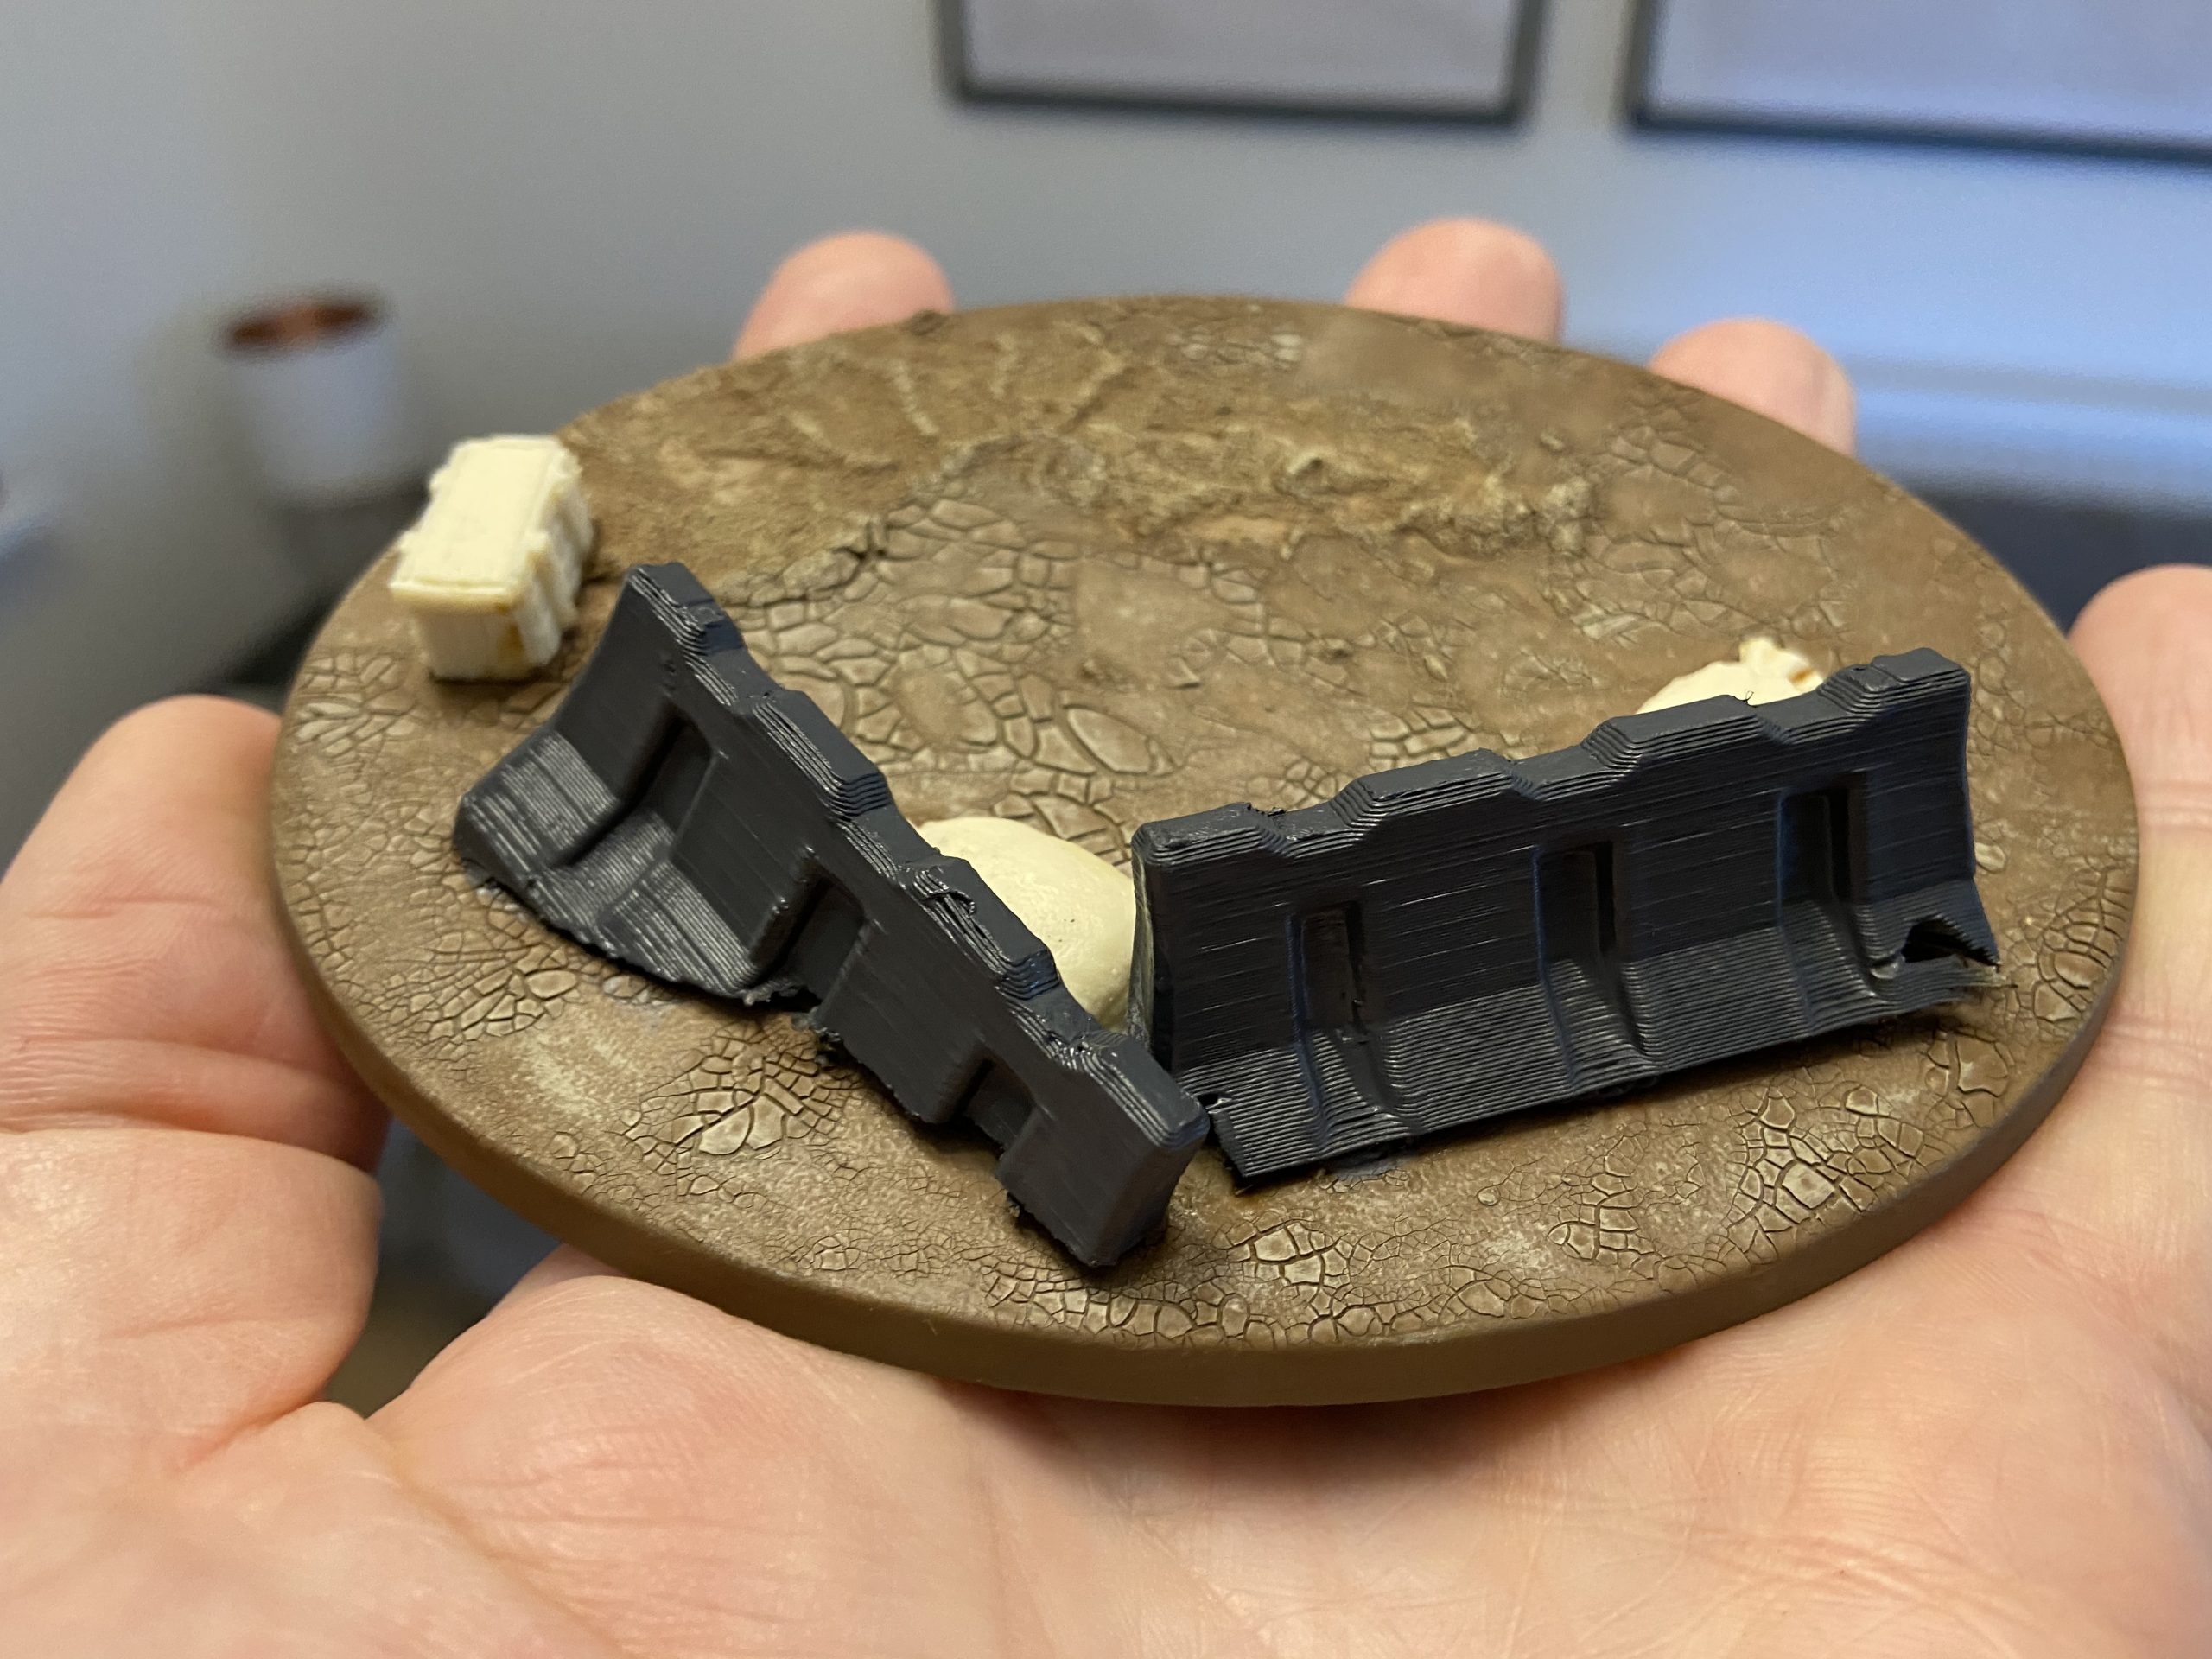
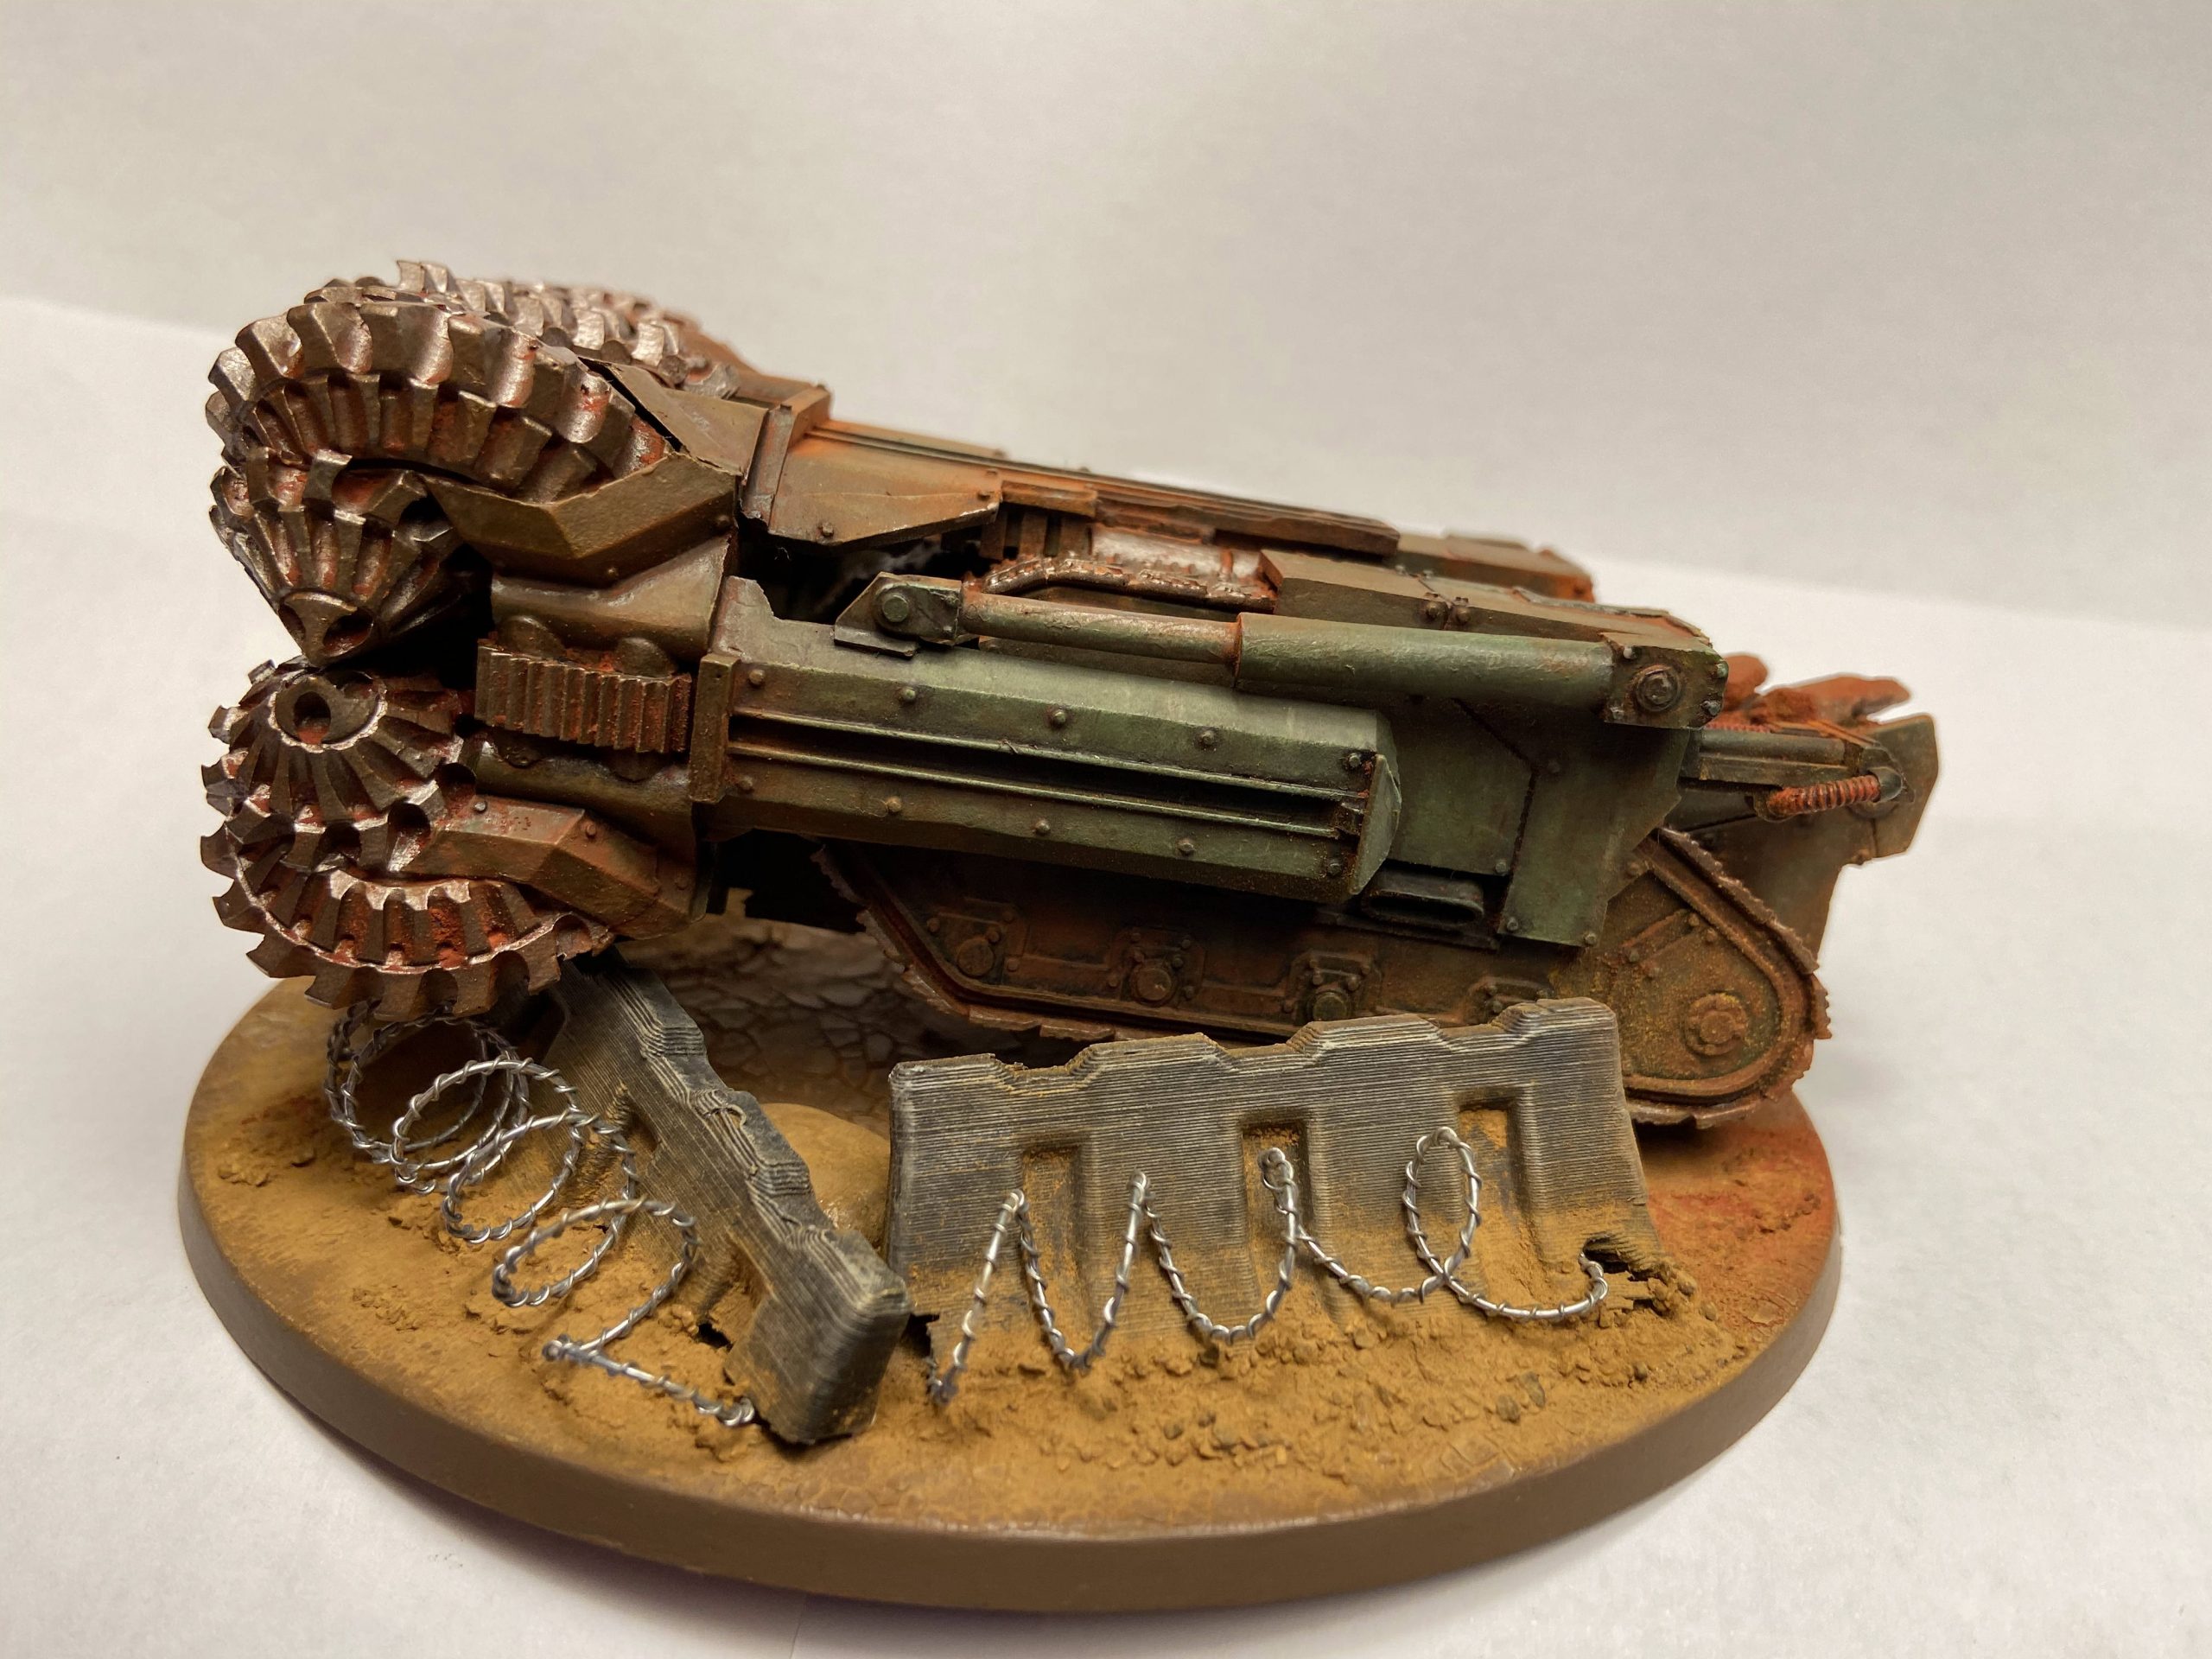
I used basing items from a selection of sources, including the Warforge 3DP Studio on eBay. Some of the sandbags are from Redog on eBay, and some are from a seller on eBay who just happened to be selling resin casts of various military battlefield stuff 28mm scale.
A hobby saw is very handy for this type of work!
Other products I used were:
- AK Interactive Pigments
- AK Interactive Pigment Fixer
- Abteilung 502 Oil Paints
- Games Workshop Agrellan Earth & Agrellan Badlands
-
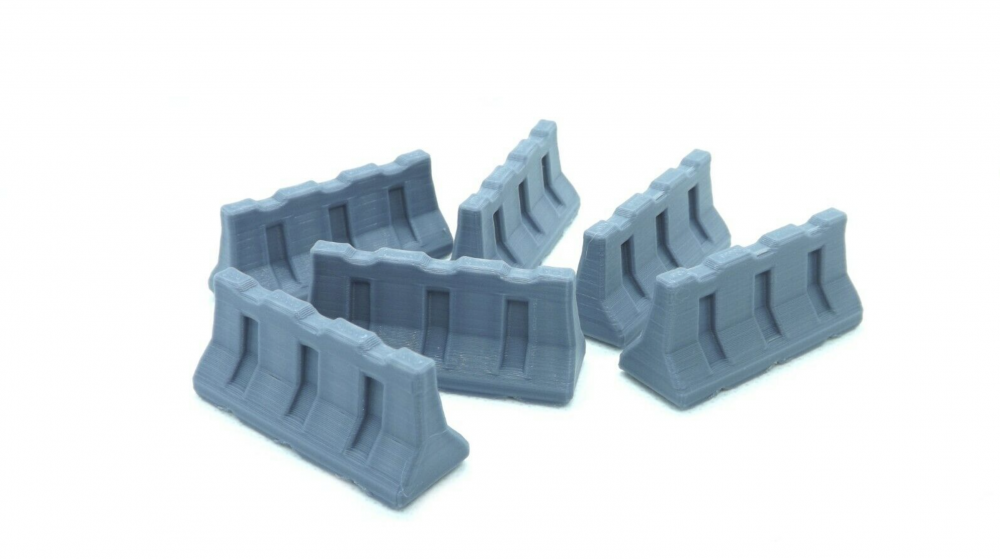

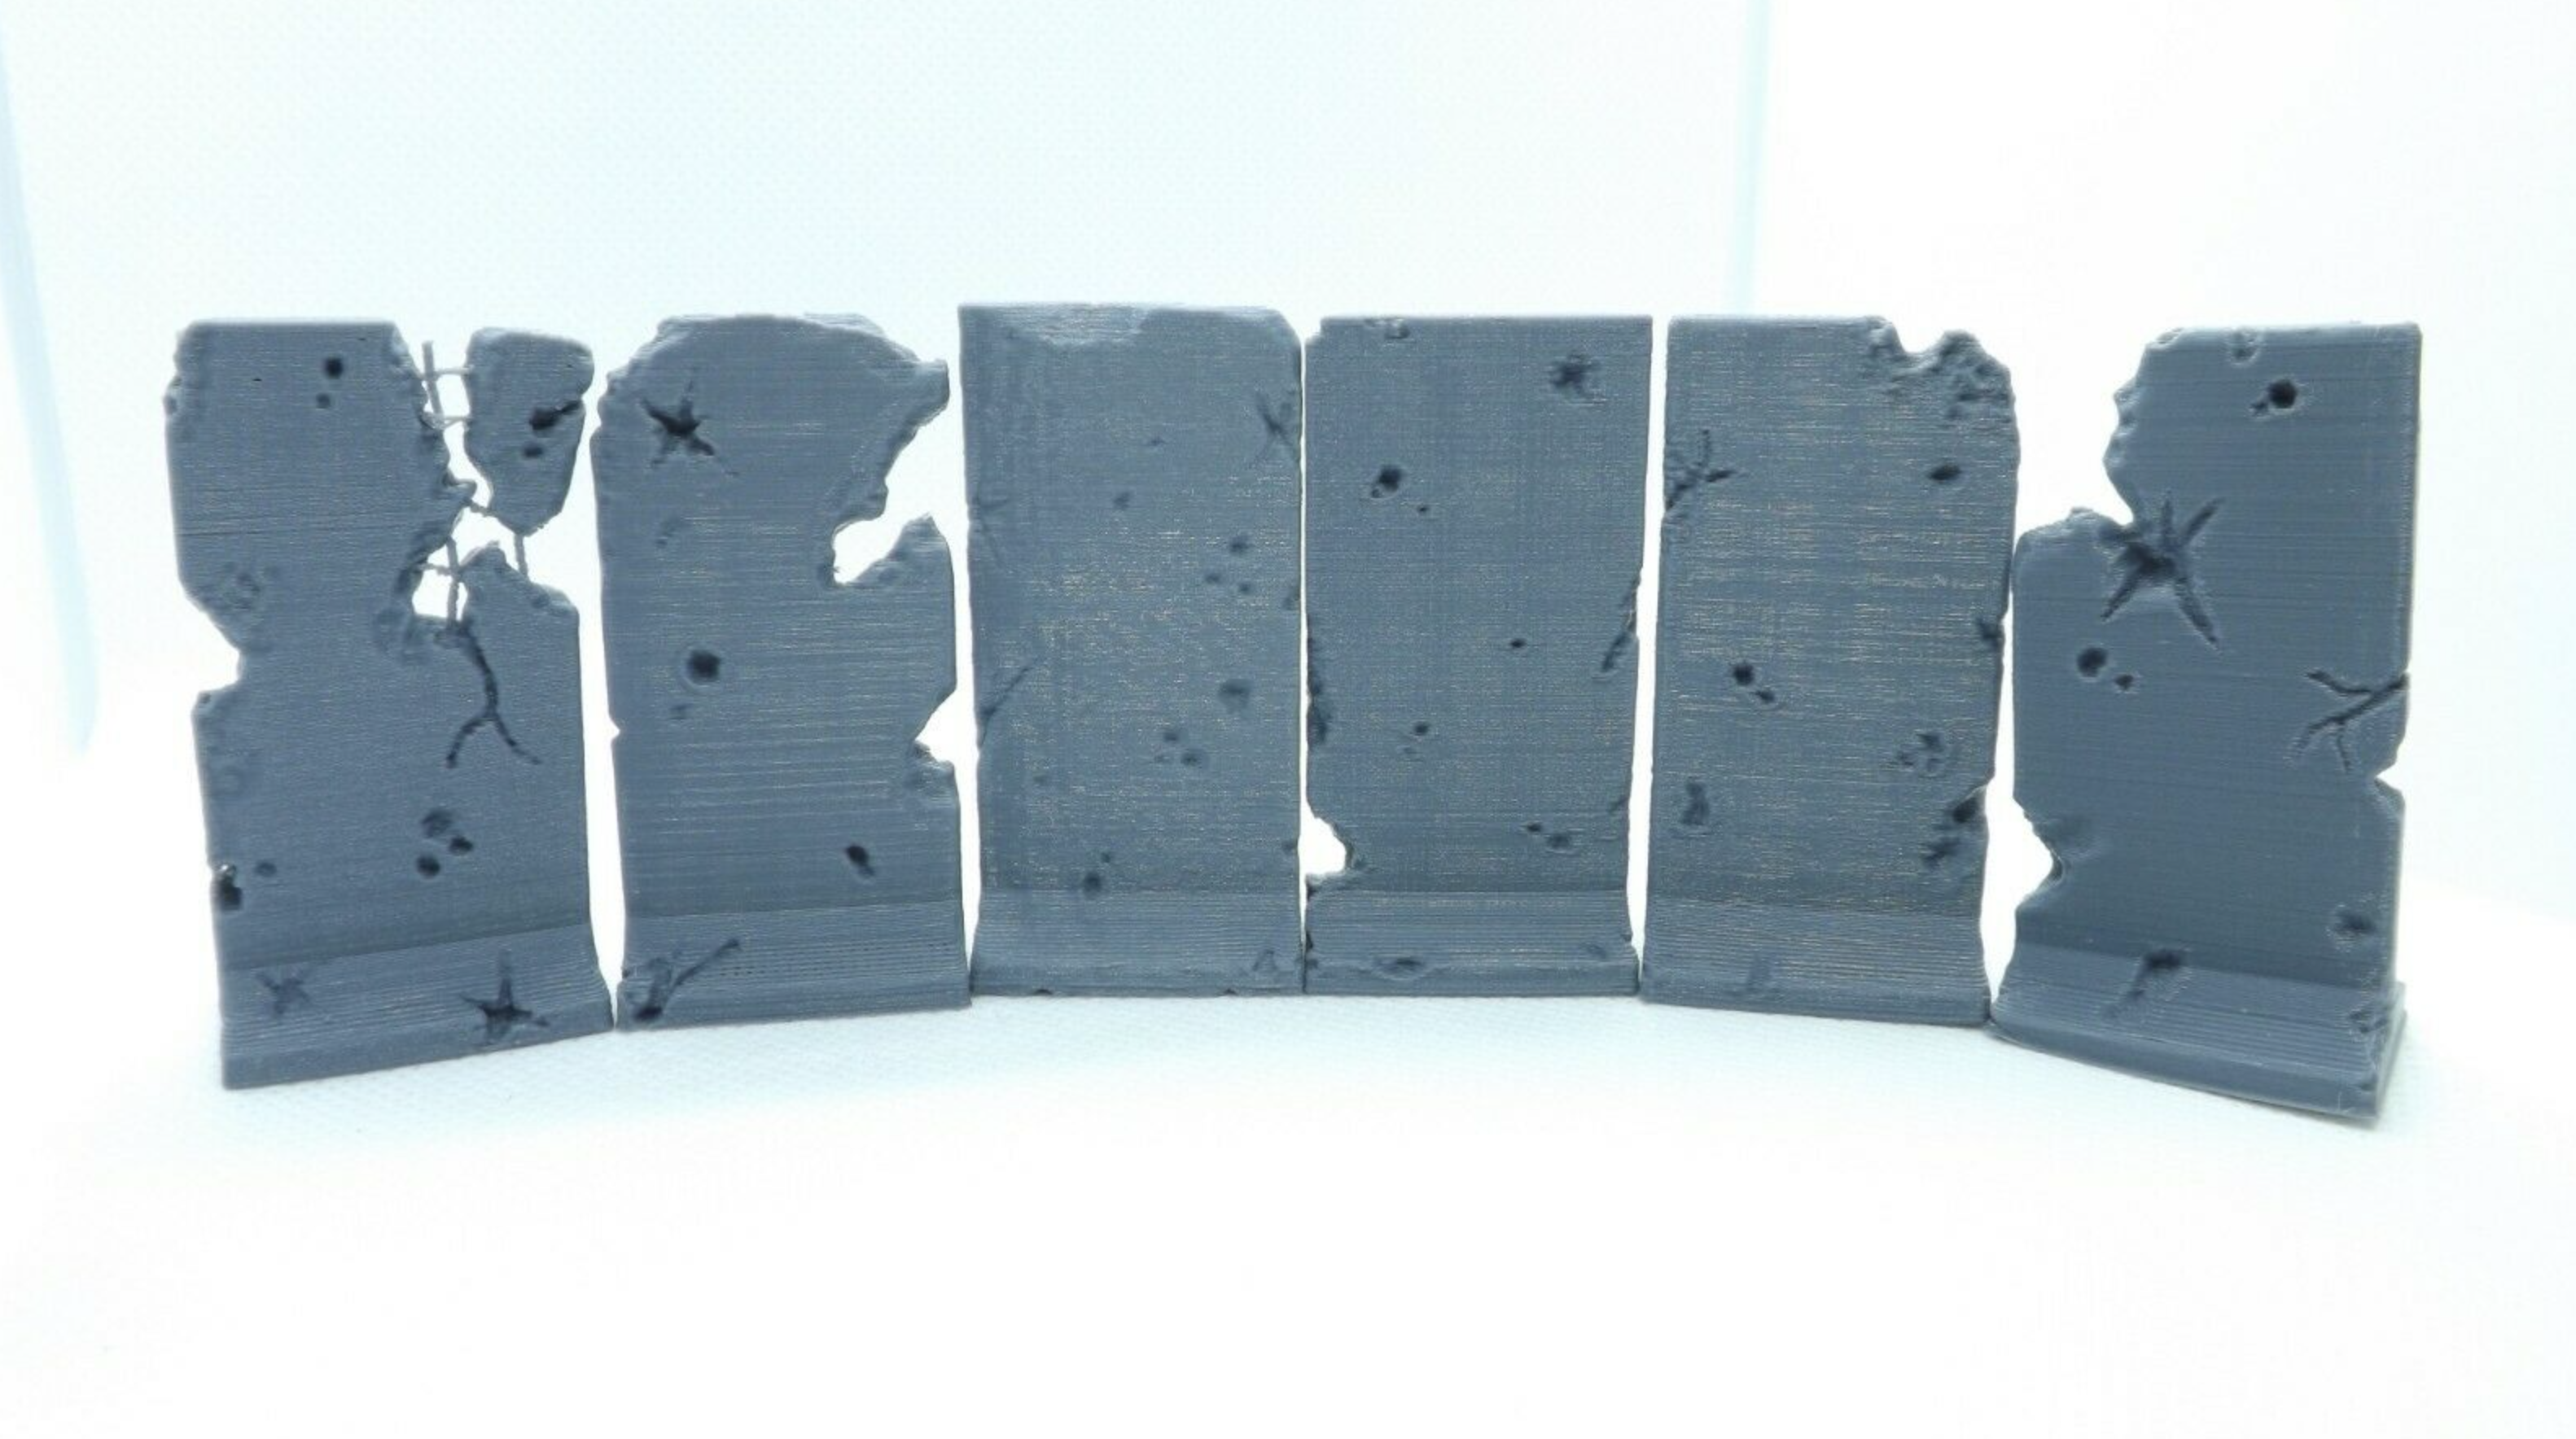
- Jerry Barricade Set

-

- T-wall Barricade Set
-
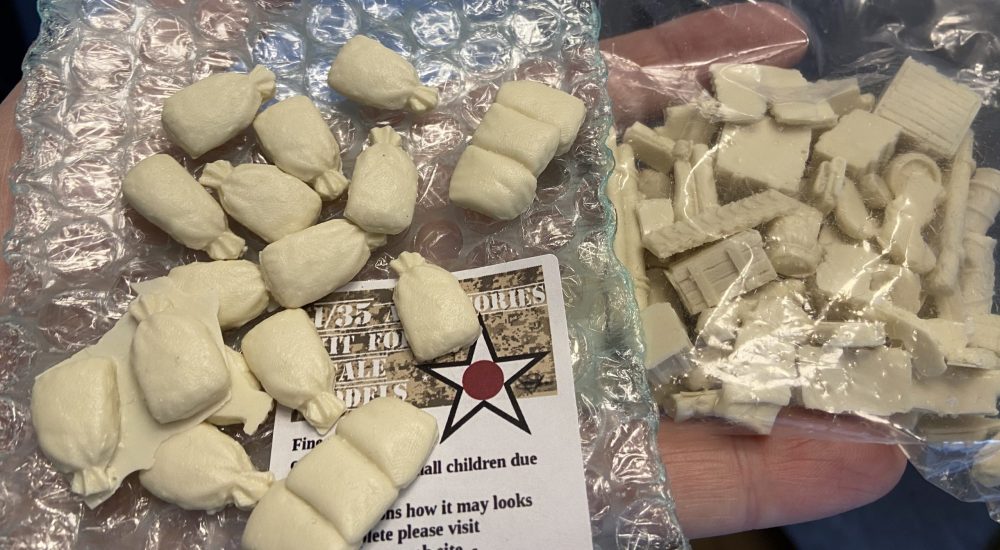

- Redog Sandbags and misc stuff

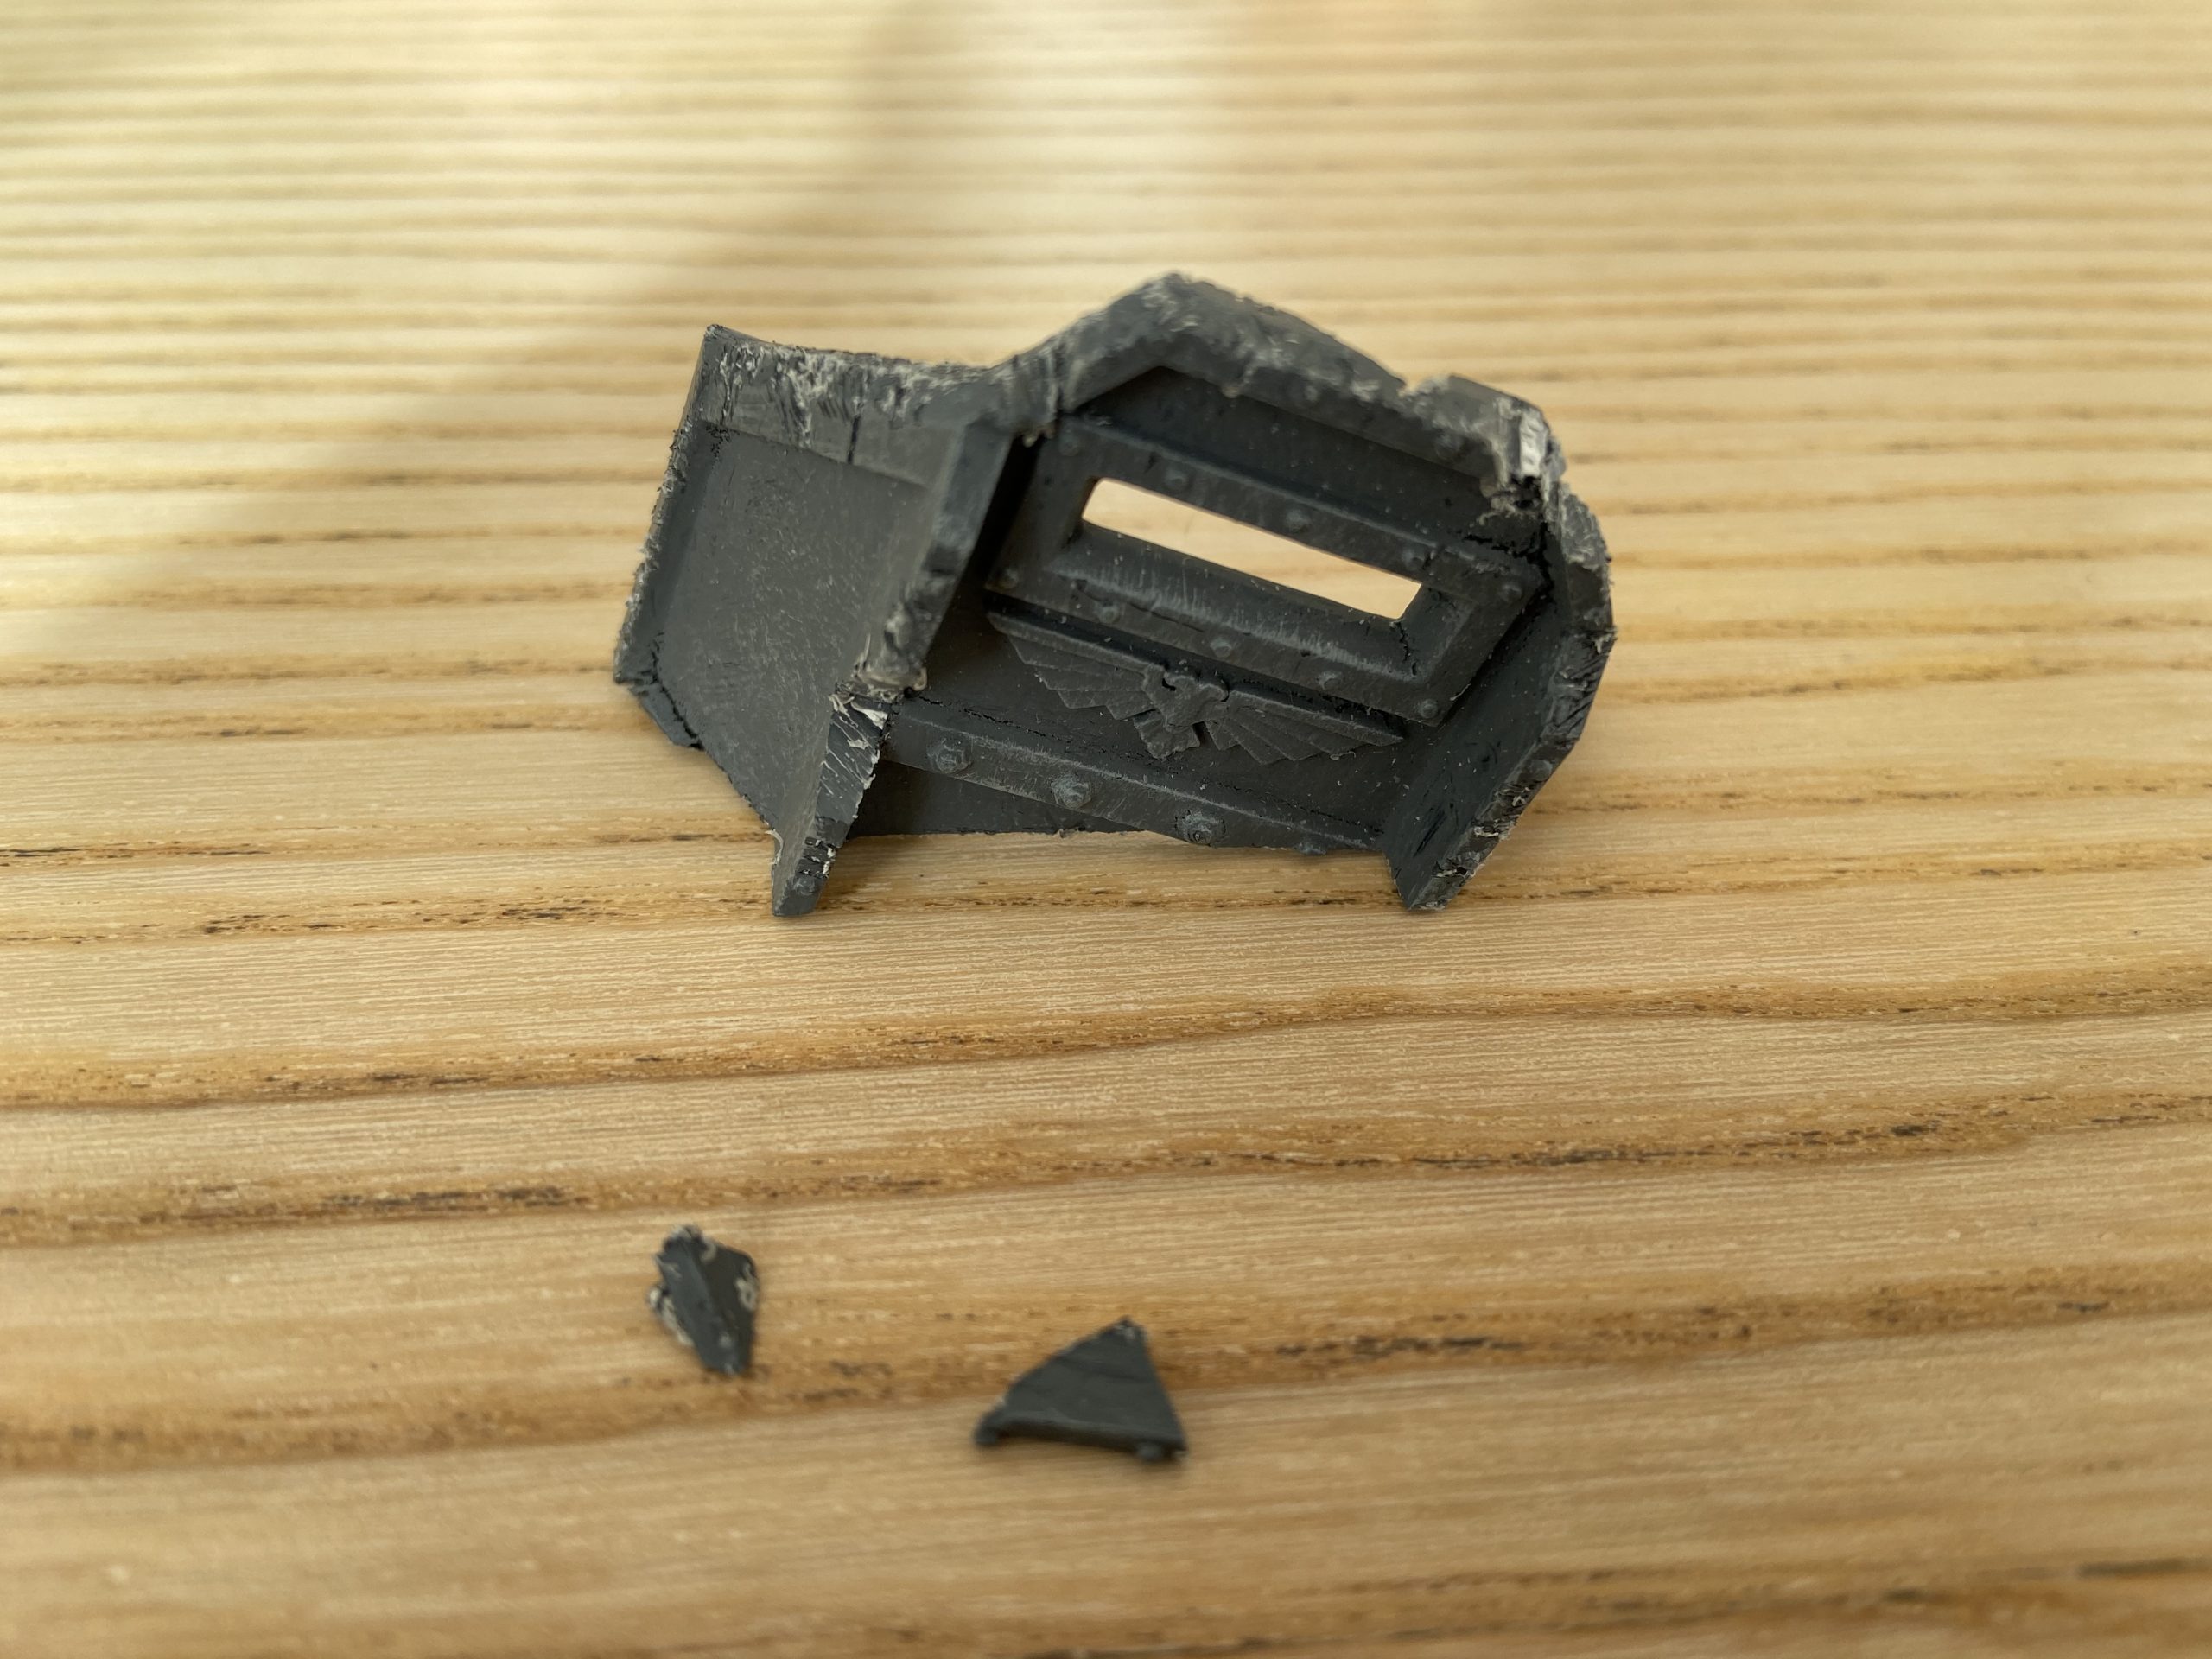
Cutting the Hades Breaching Drill
Yes, you heard that, right!
This is the most insane thing I have ever done when it comes to the Warhammer 40,000 hobby. Insane!
Cutting this thing was very scary. I have never cut a model like this before, and the chance of it going wrong or it just not working was high. But with high risk comes high reward? Maybe.
I was mainly worried about getting a wobbly cut with the saw and not having a straight cut. But I think I got away with it. Cutting it while glued together was perhaps a mistake because one of the hull pieces fell off while cutting it. The Drill was easily glued back on, but it would have been easier to do each piece on its own – rather than trying to saw through the whole thing in one swoop. My hobby saw is no Chainsword, this is for sure.
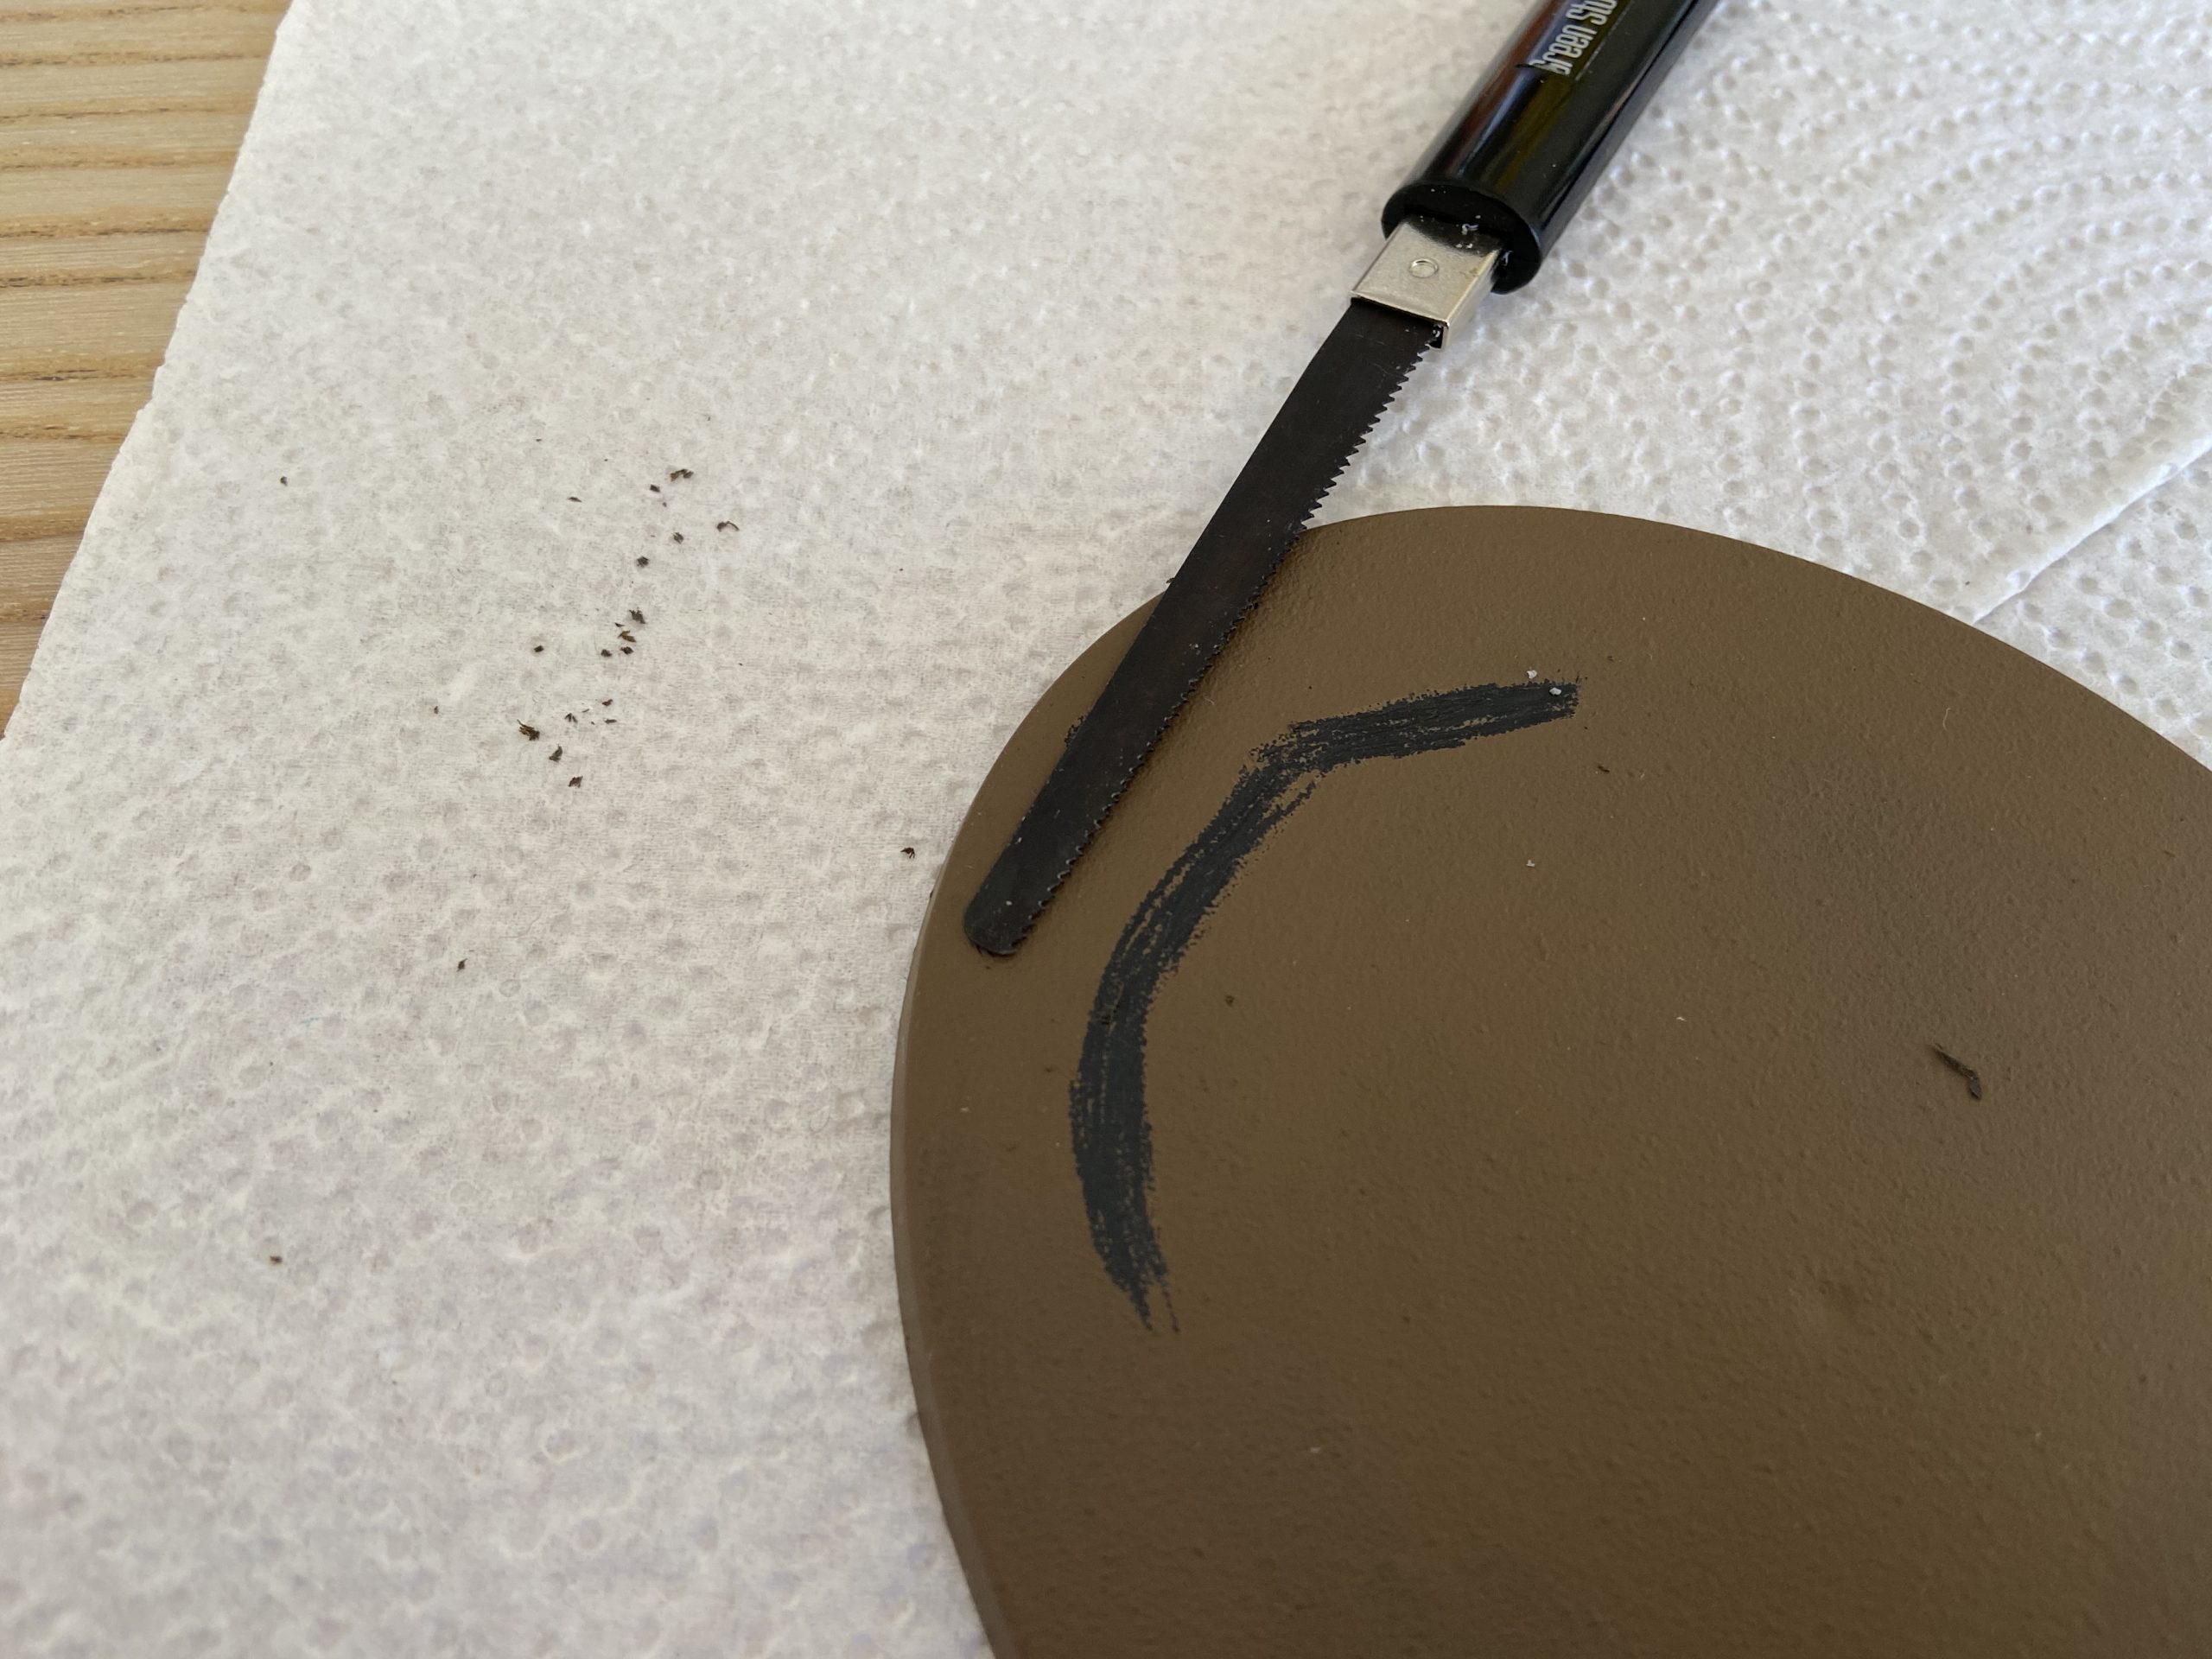
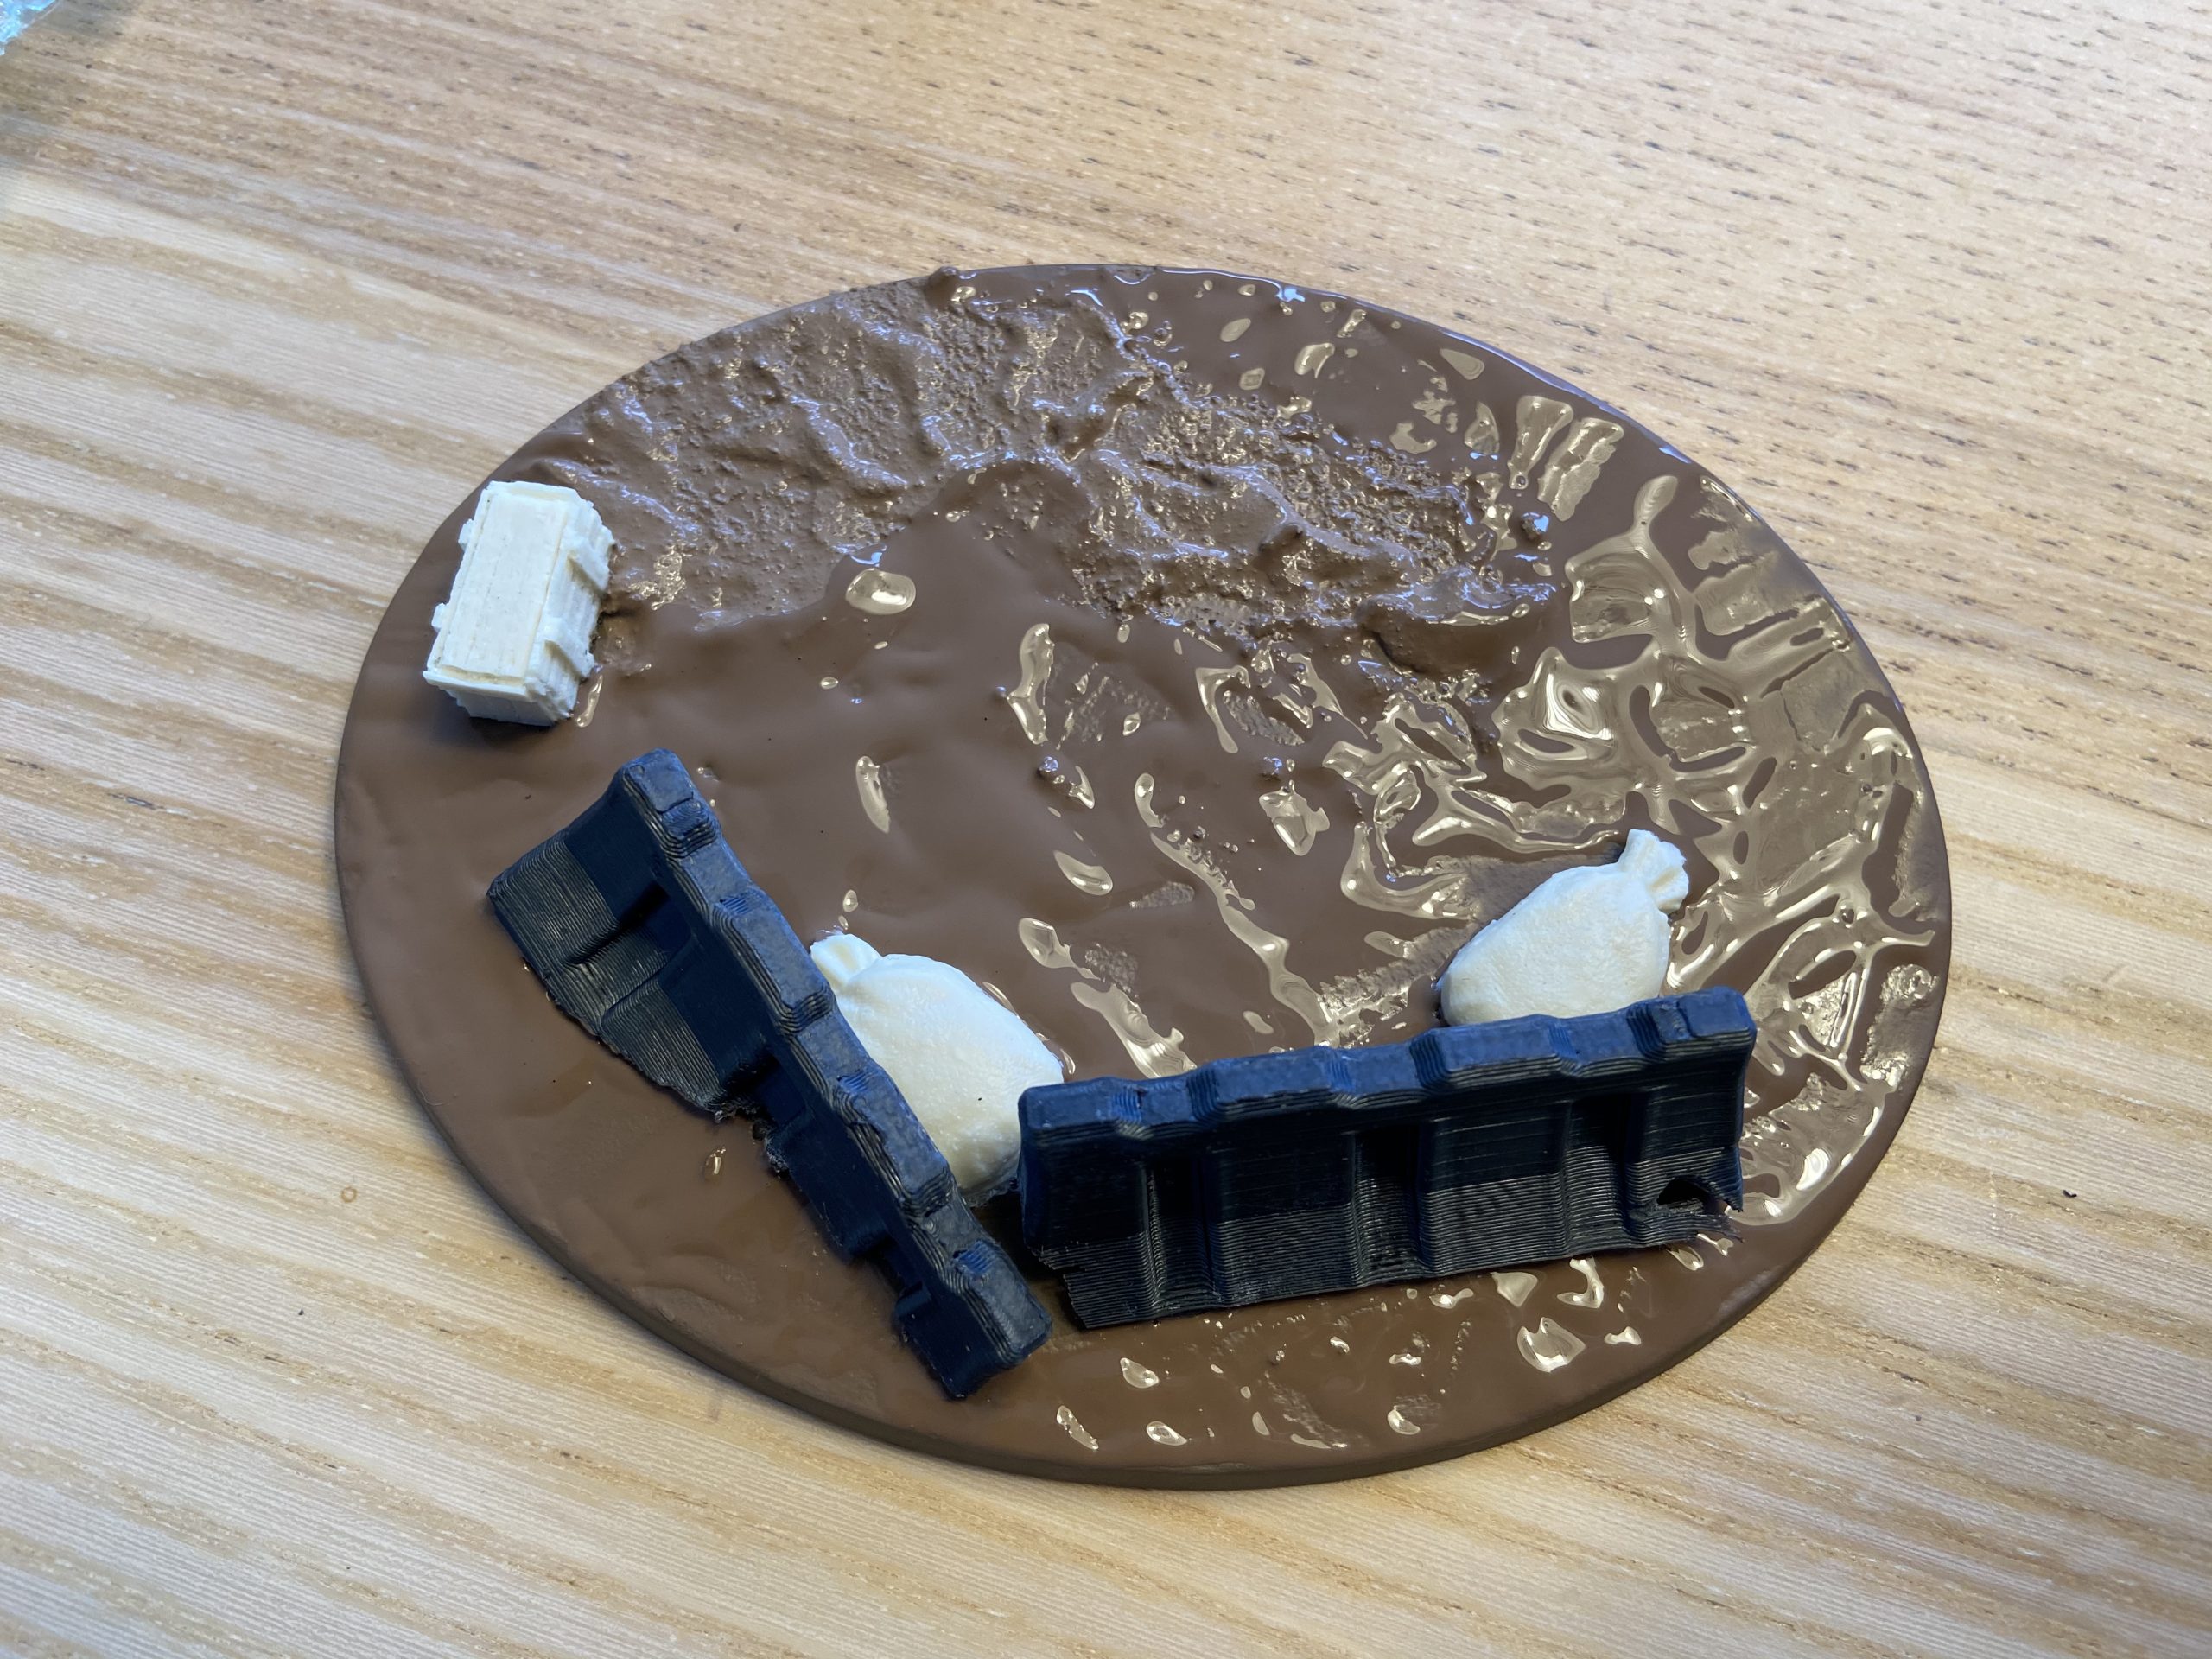
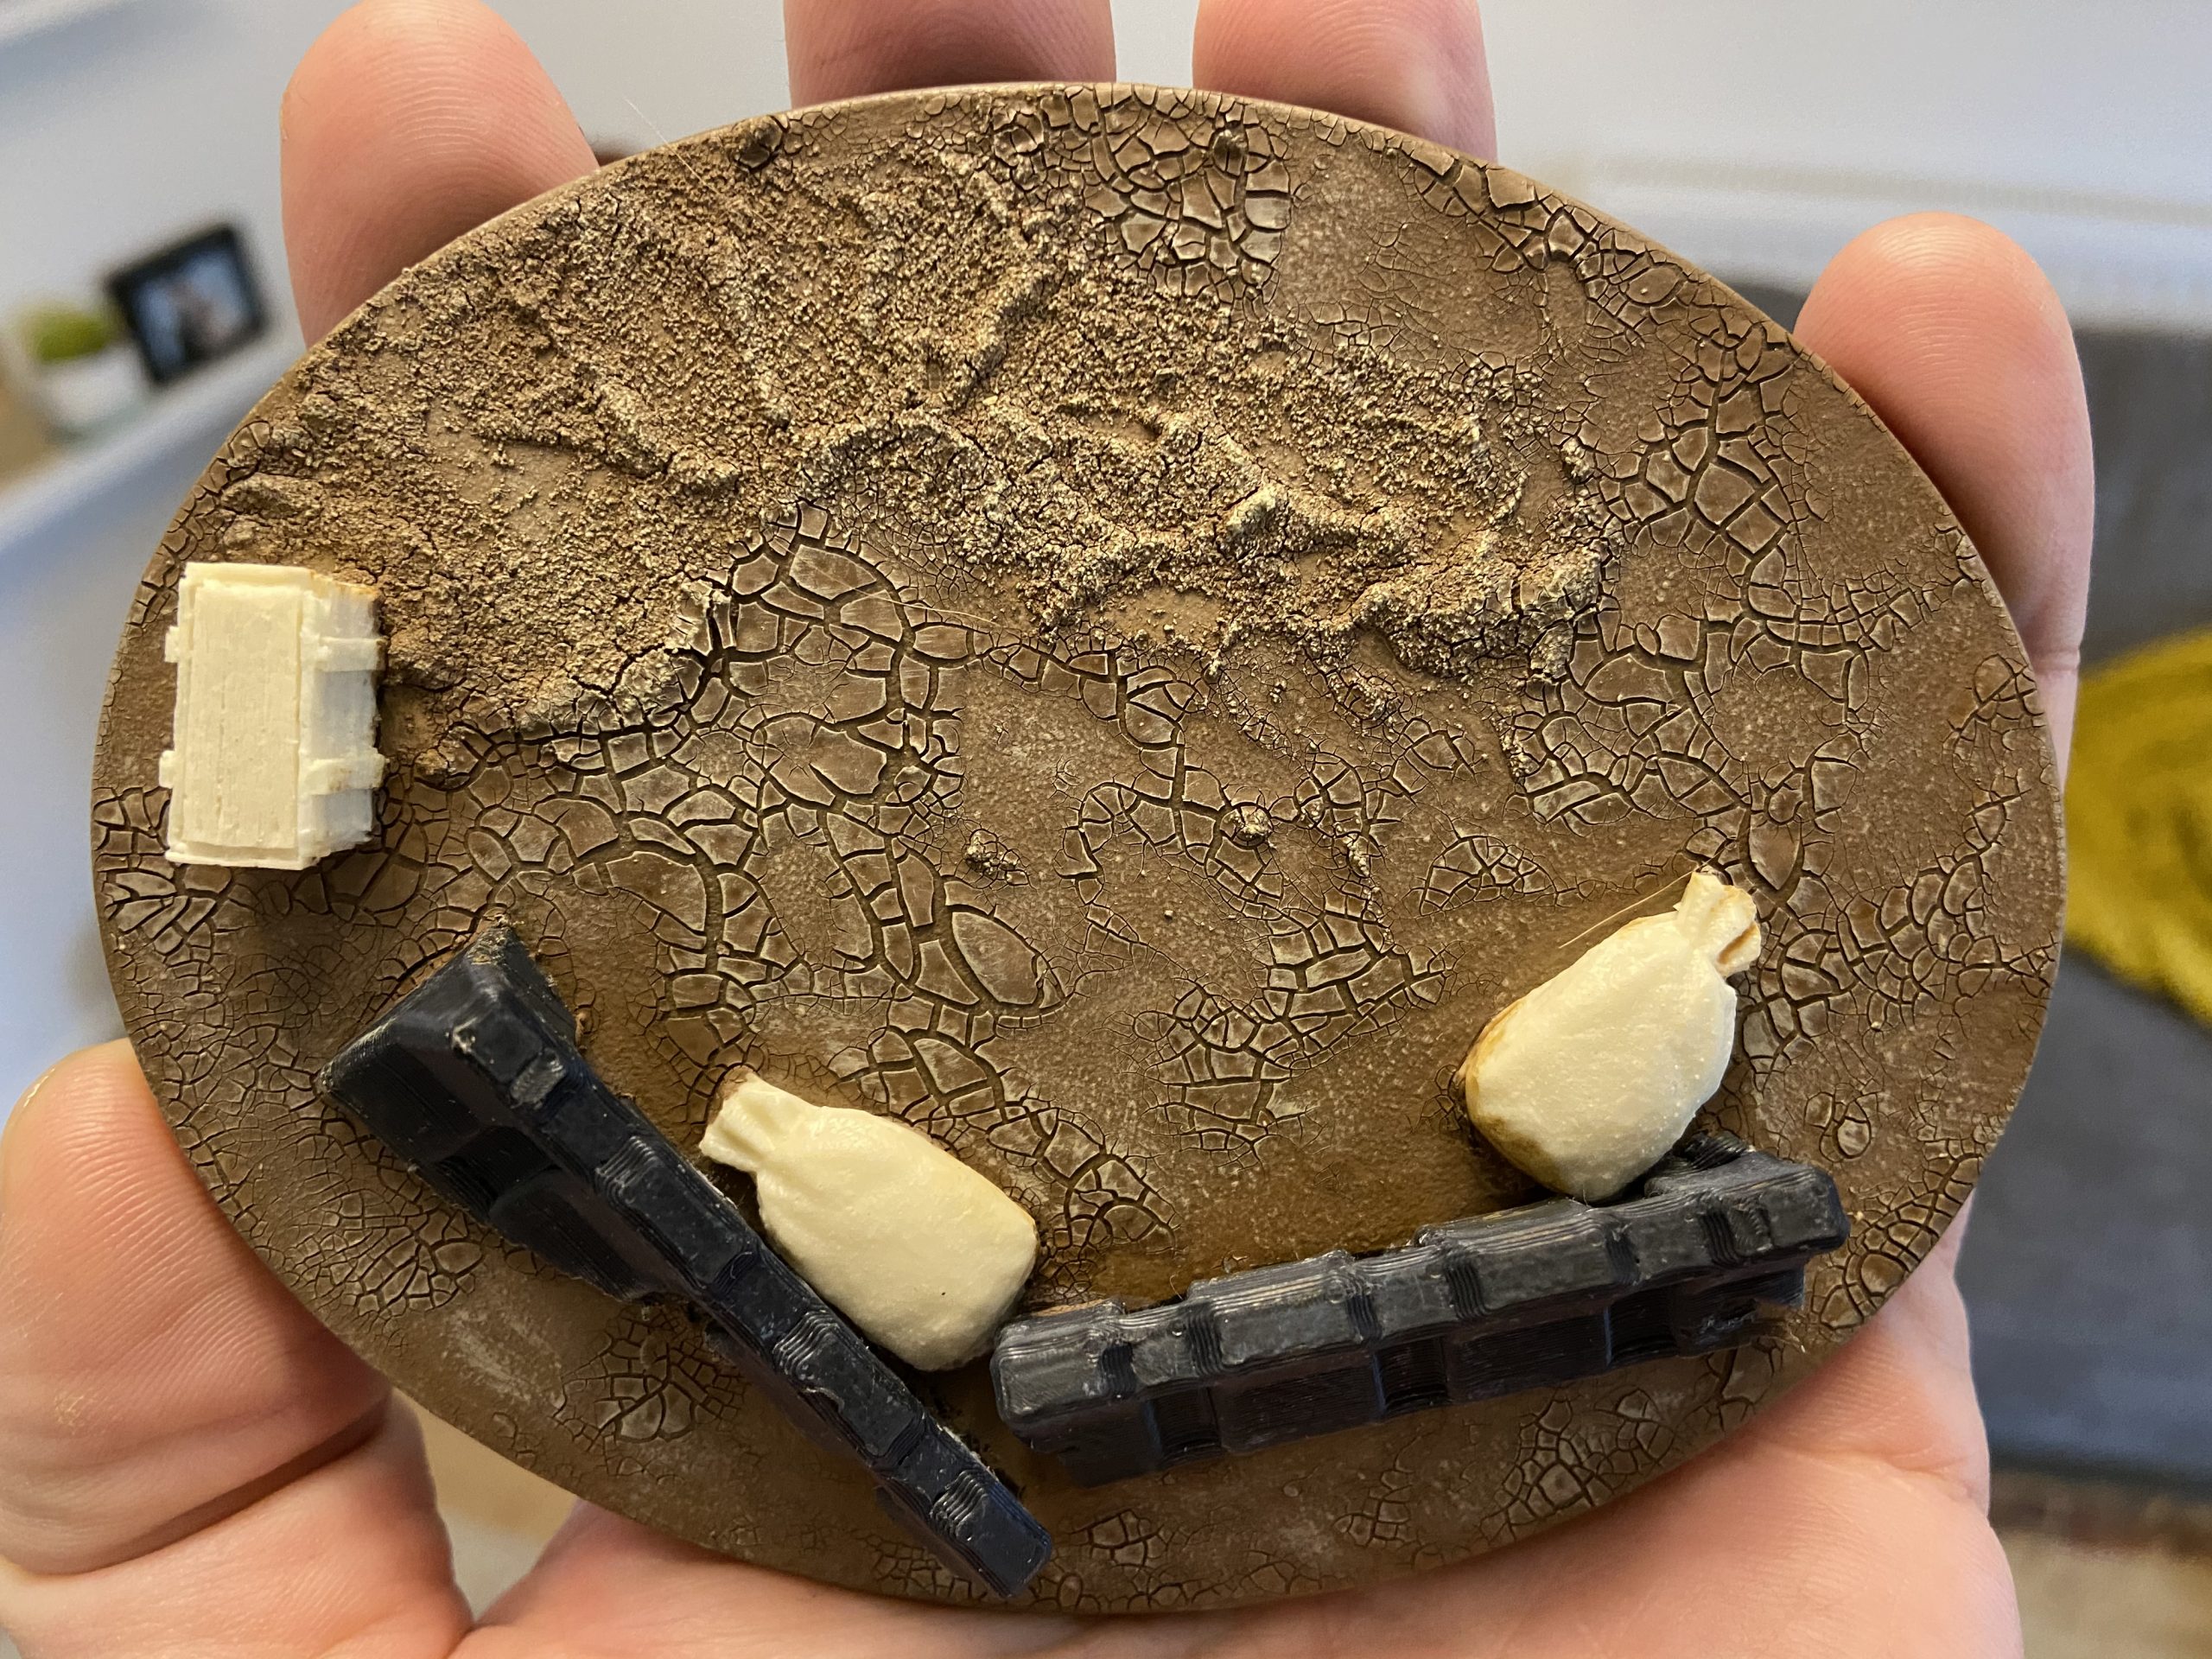
Basing The Base Again
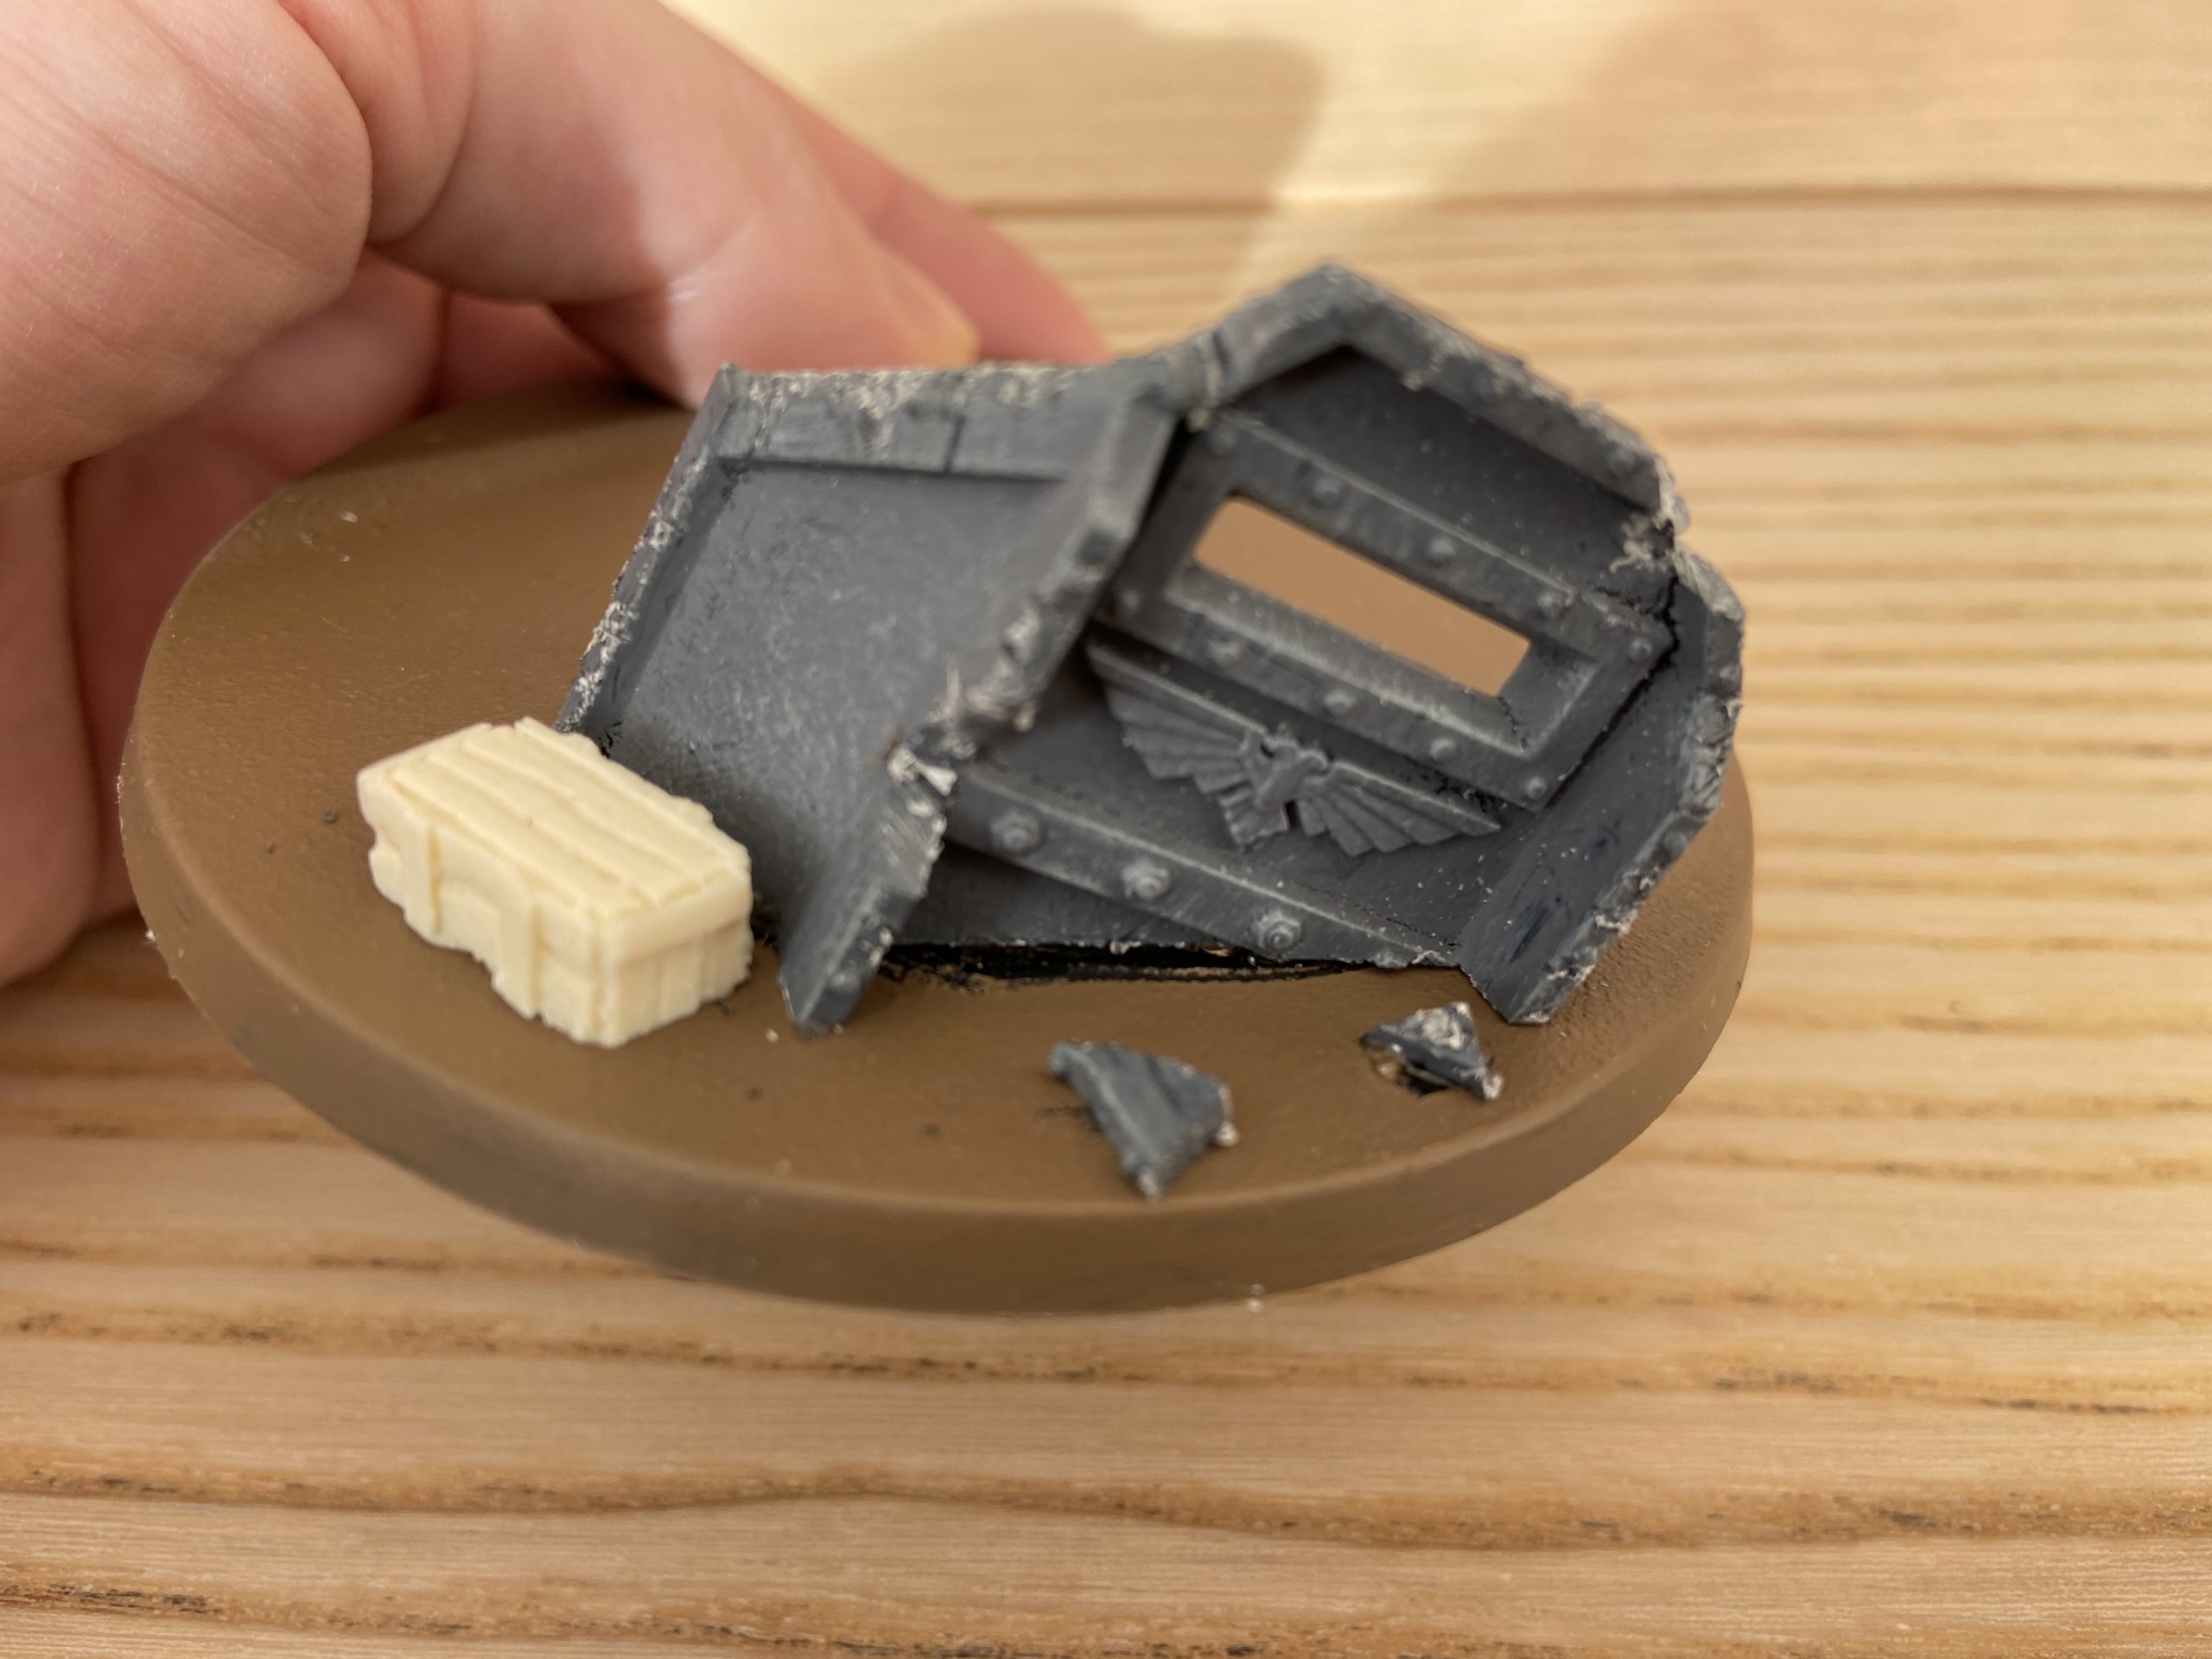
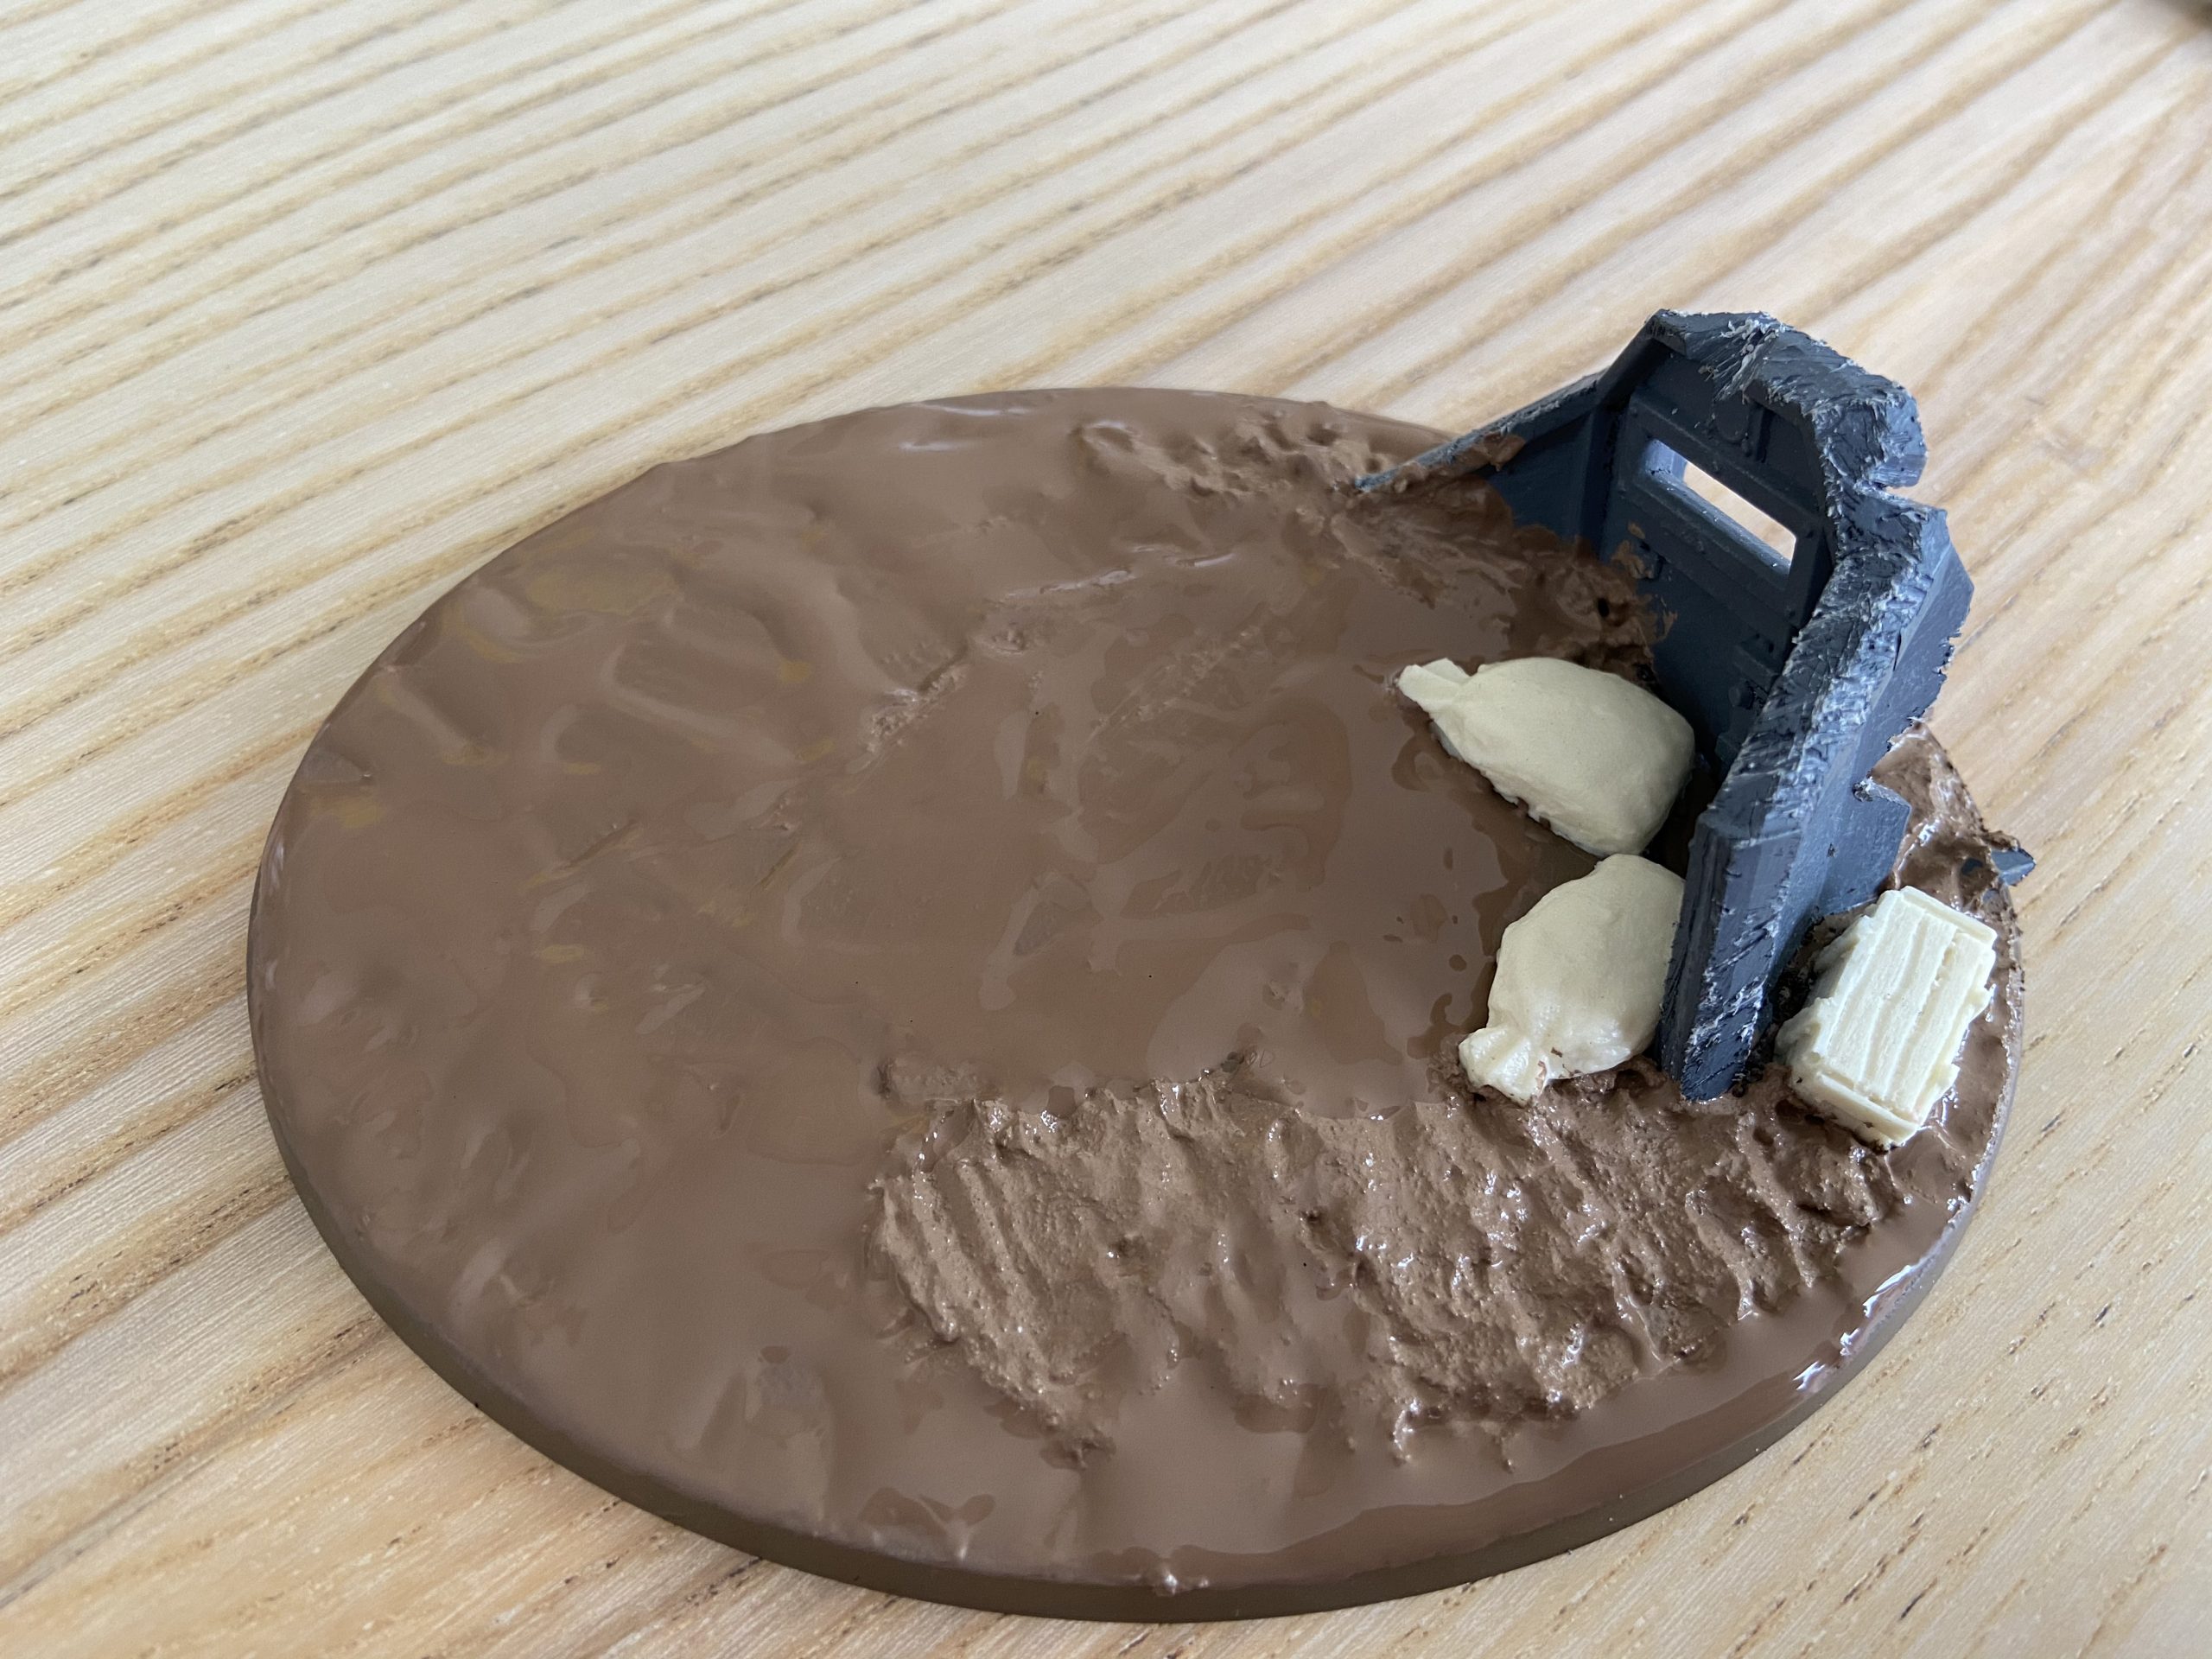
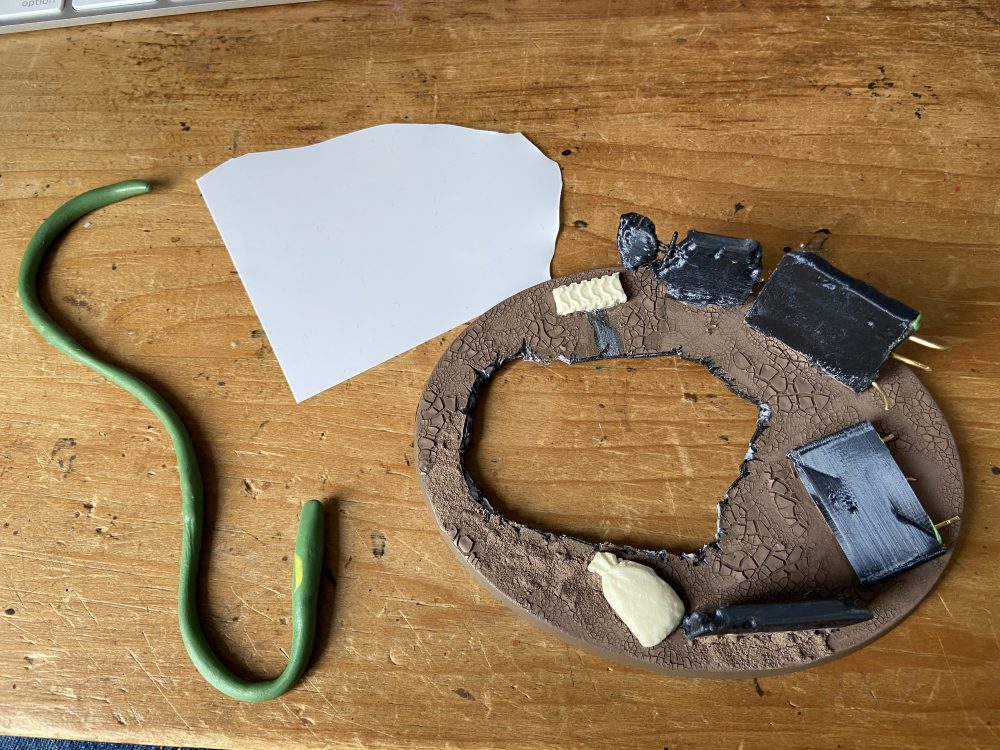
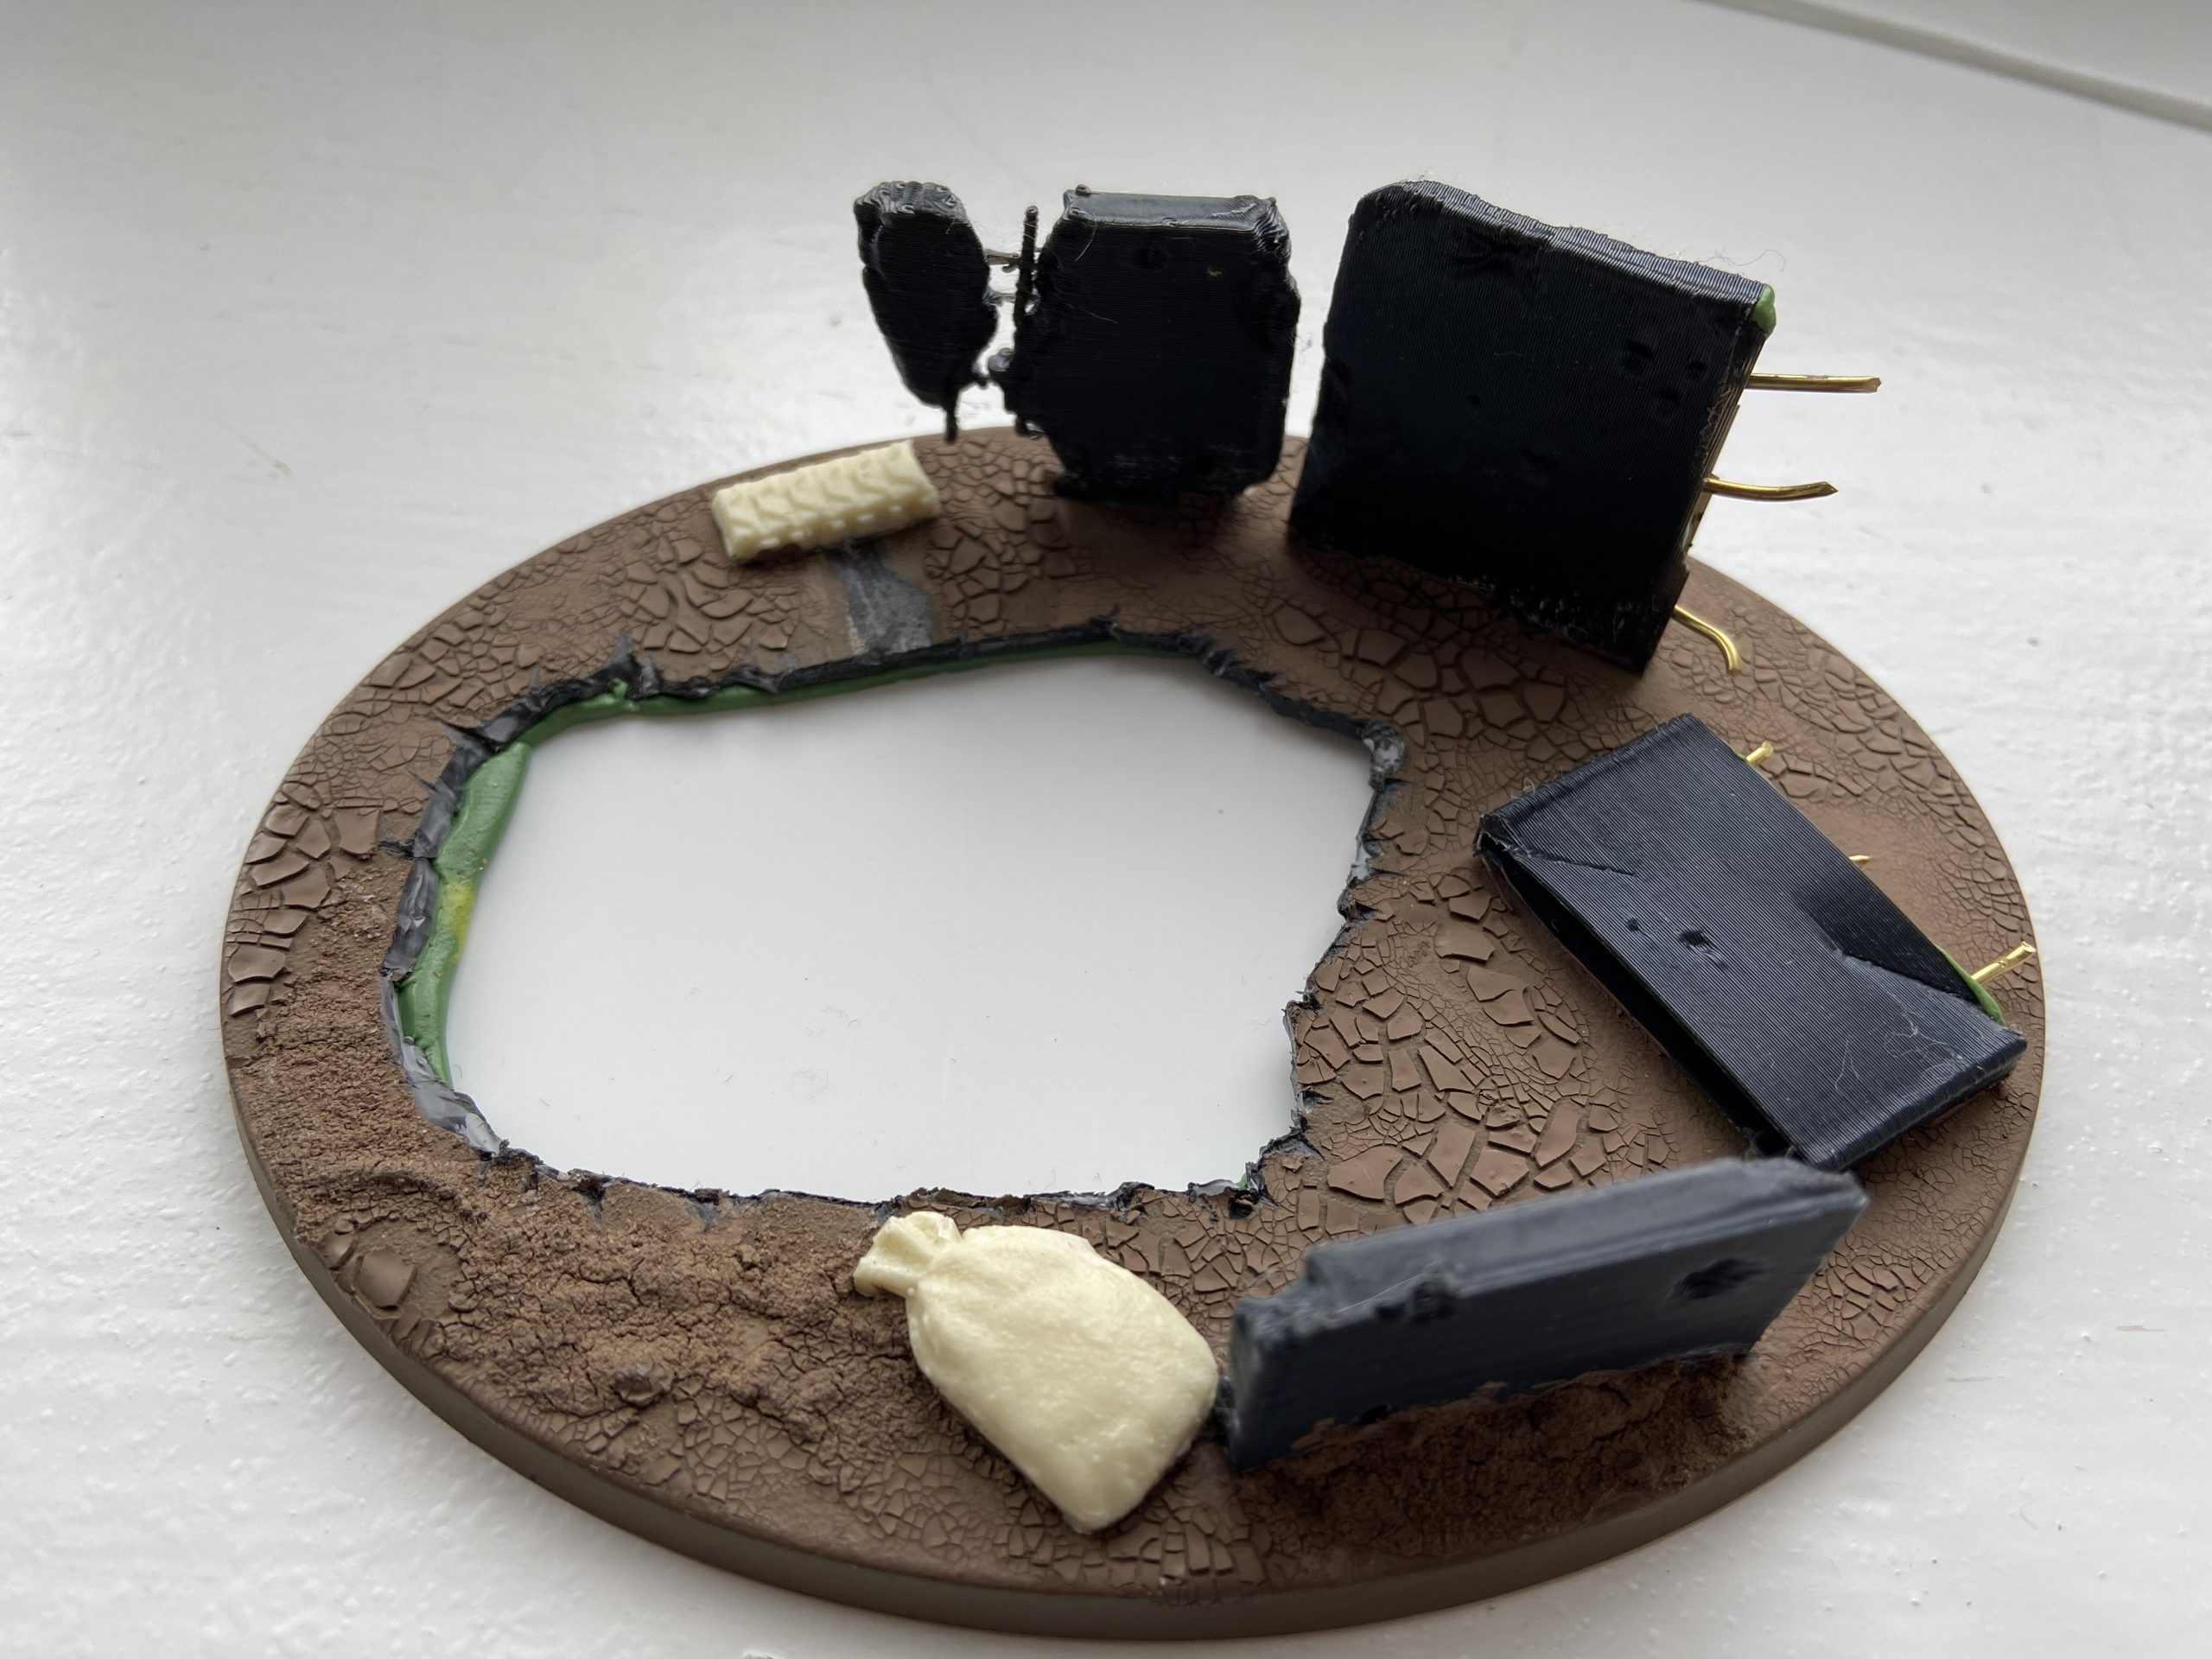
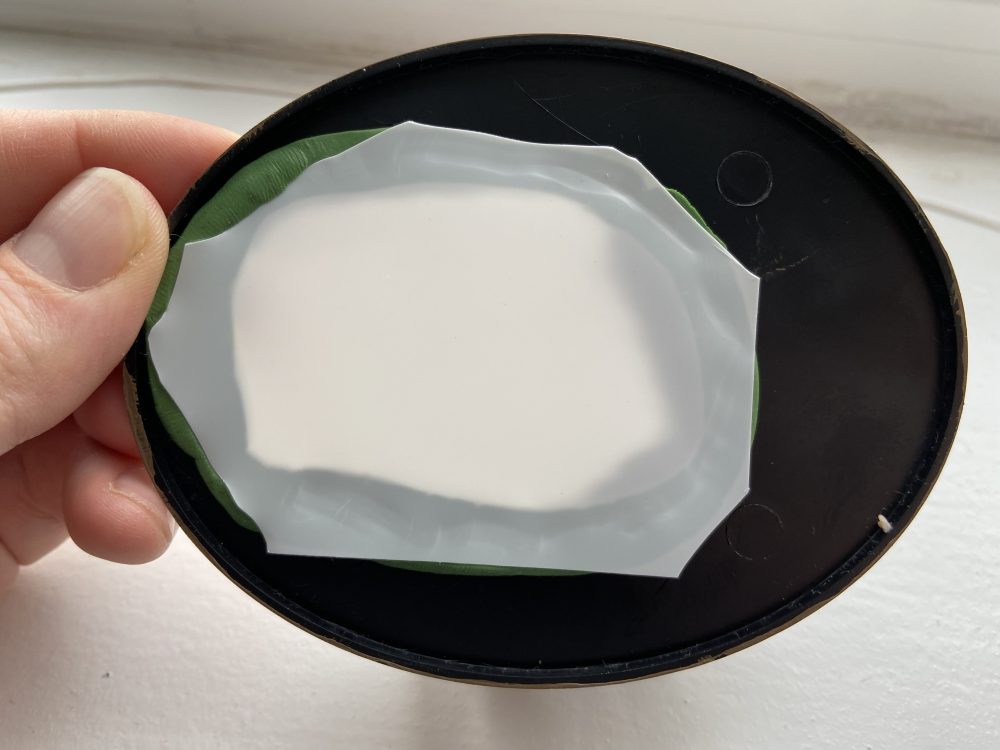
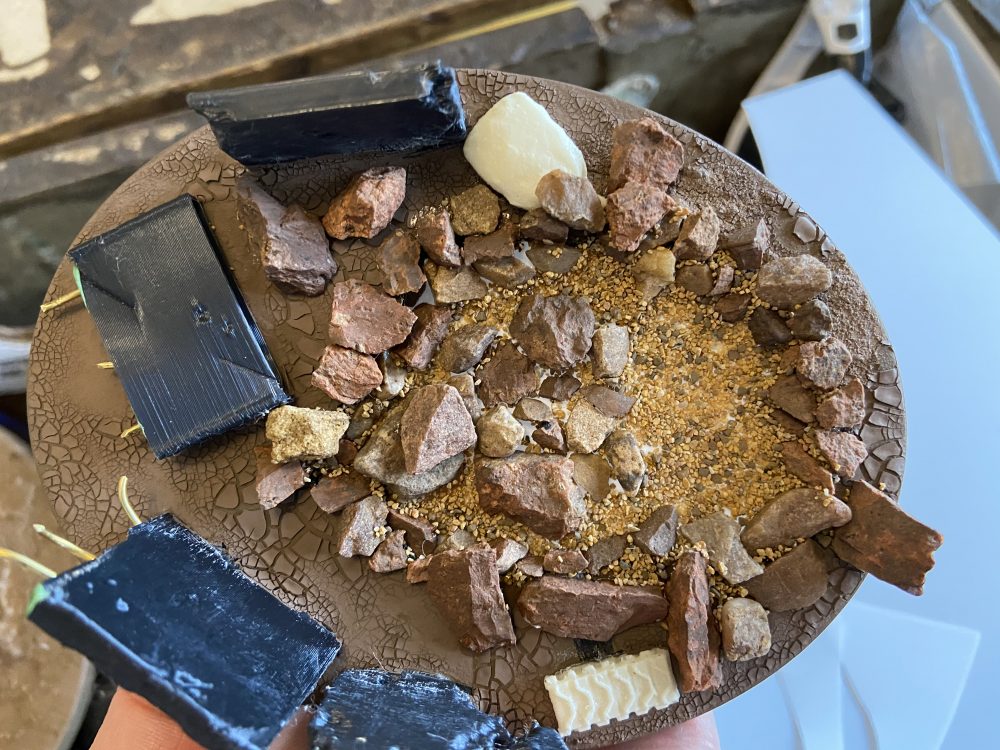
Once I had cut the Drill, I set about hacking at the base I have previously based. Why was it based? Well, I had the idea of doing this but was not 100% committed to doing it until I had the saw in my hand and hate in my eyes. So my newly based base was hacked up to make a hole.
This hole I then blocked up again using plasticard and Greenstuff. The plasticard made the new base bottom but lower than the original, and the Greenstuff held it in place. I used a similar method on the puddle of my Forgeworld Heavy Mortars.
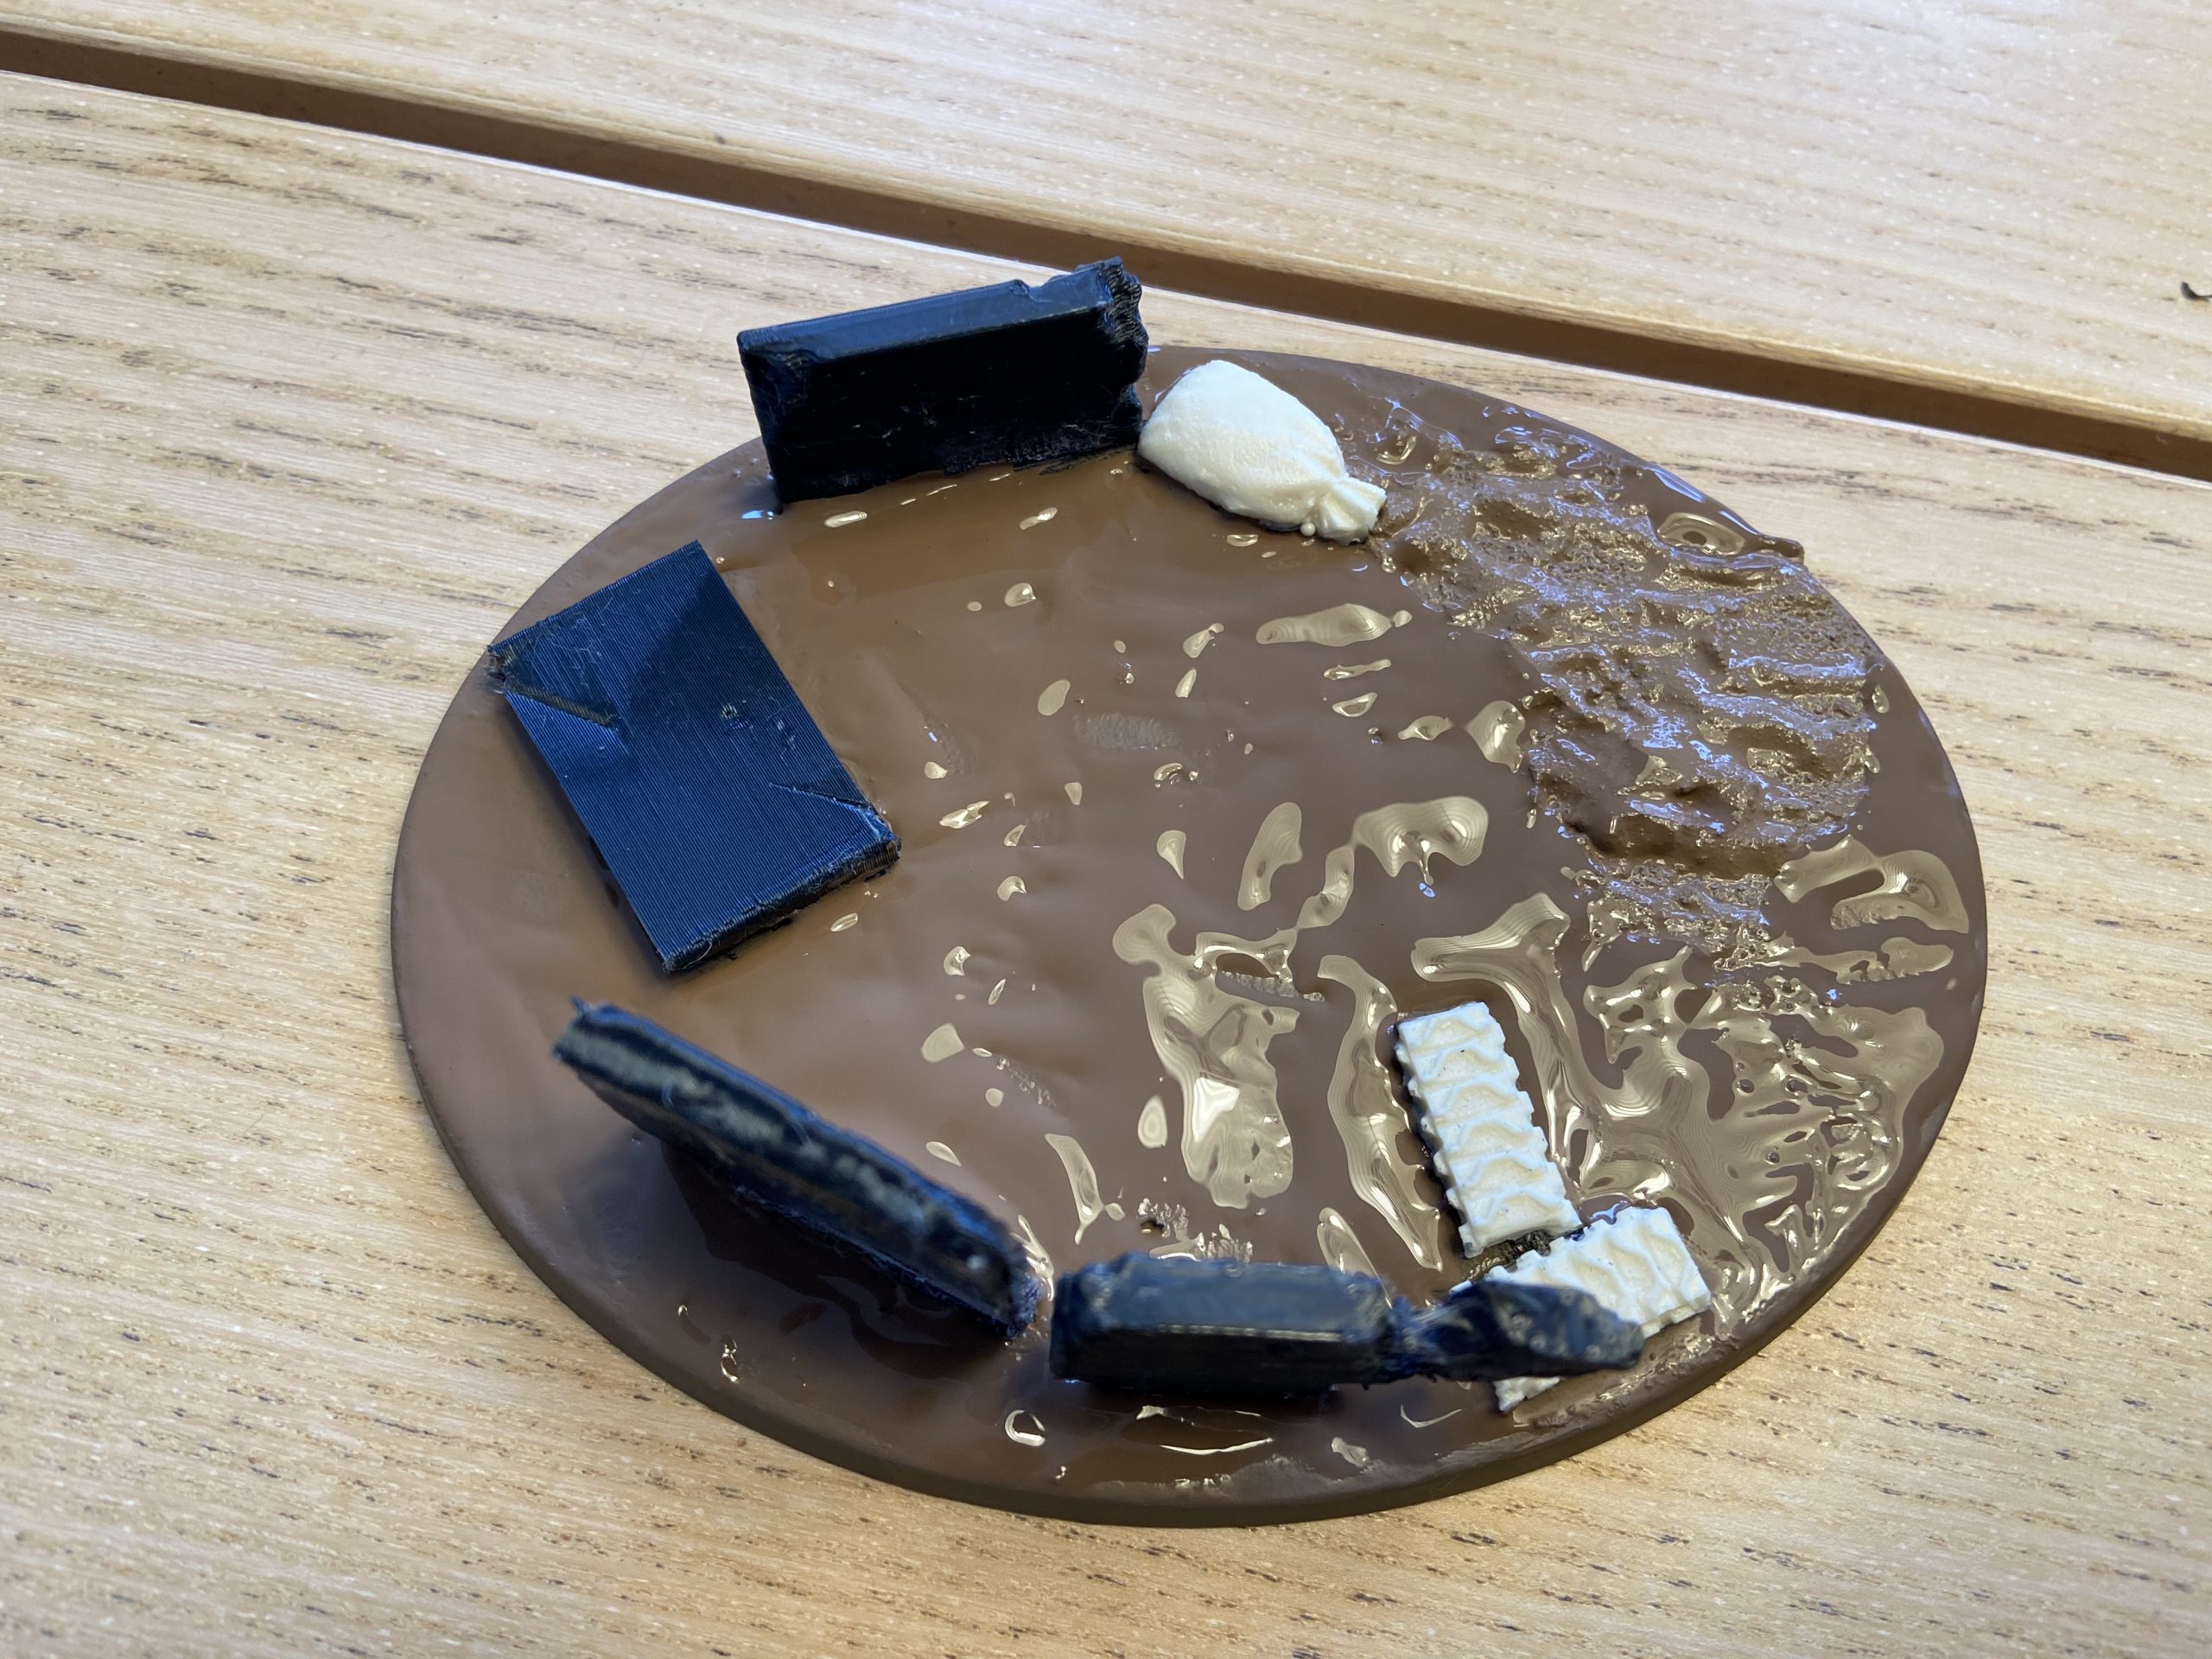
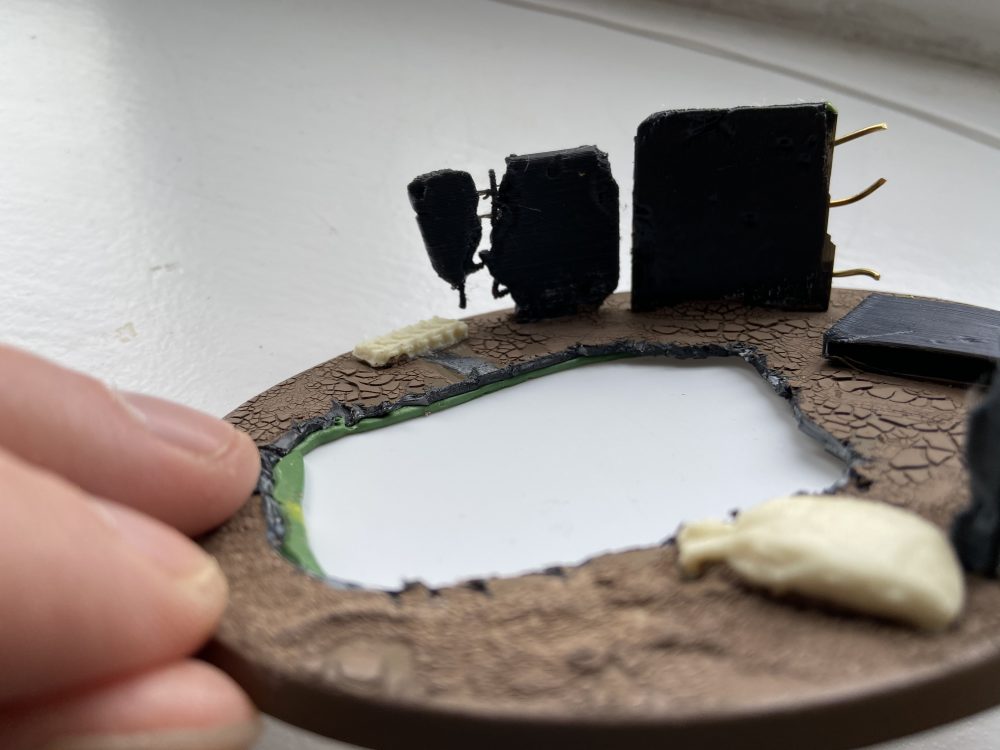
I then primed the Hades Breaching Drill with my new base in place, ready to set it in place. I also finished off the basing materials for the new hole and primed that with Steel Legion Drab. I now had my base and Drill primed.
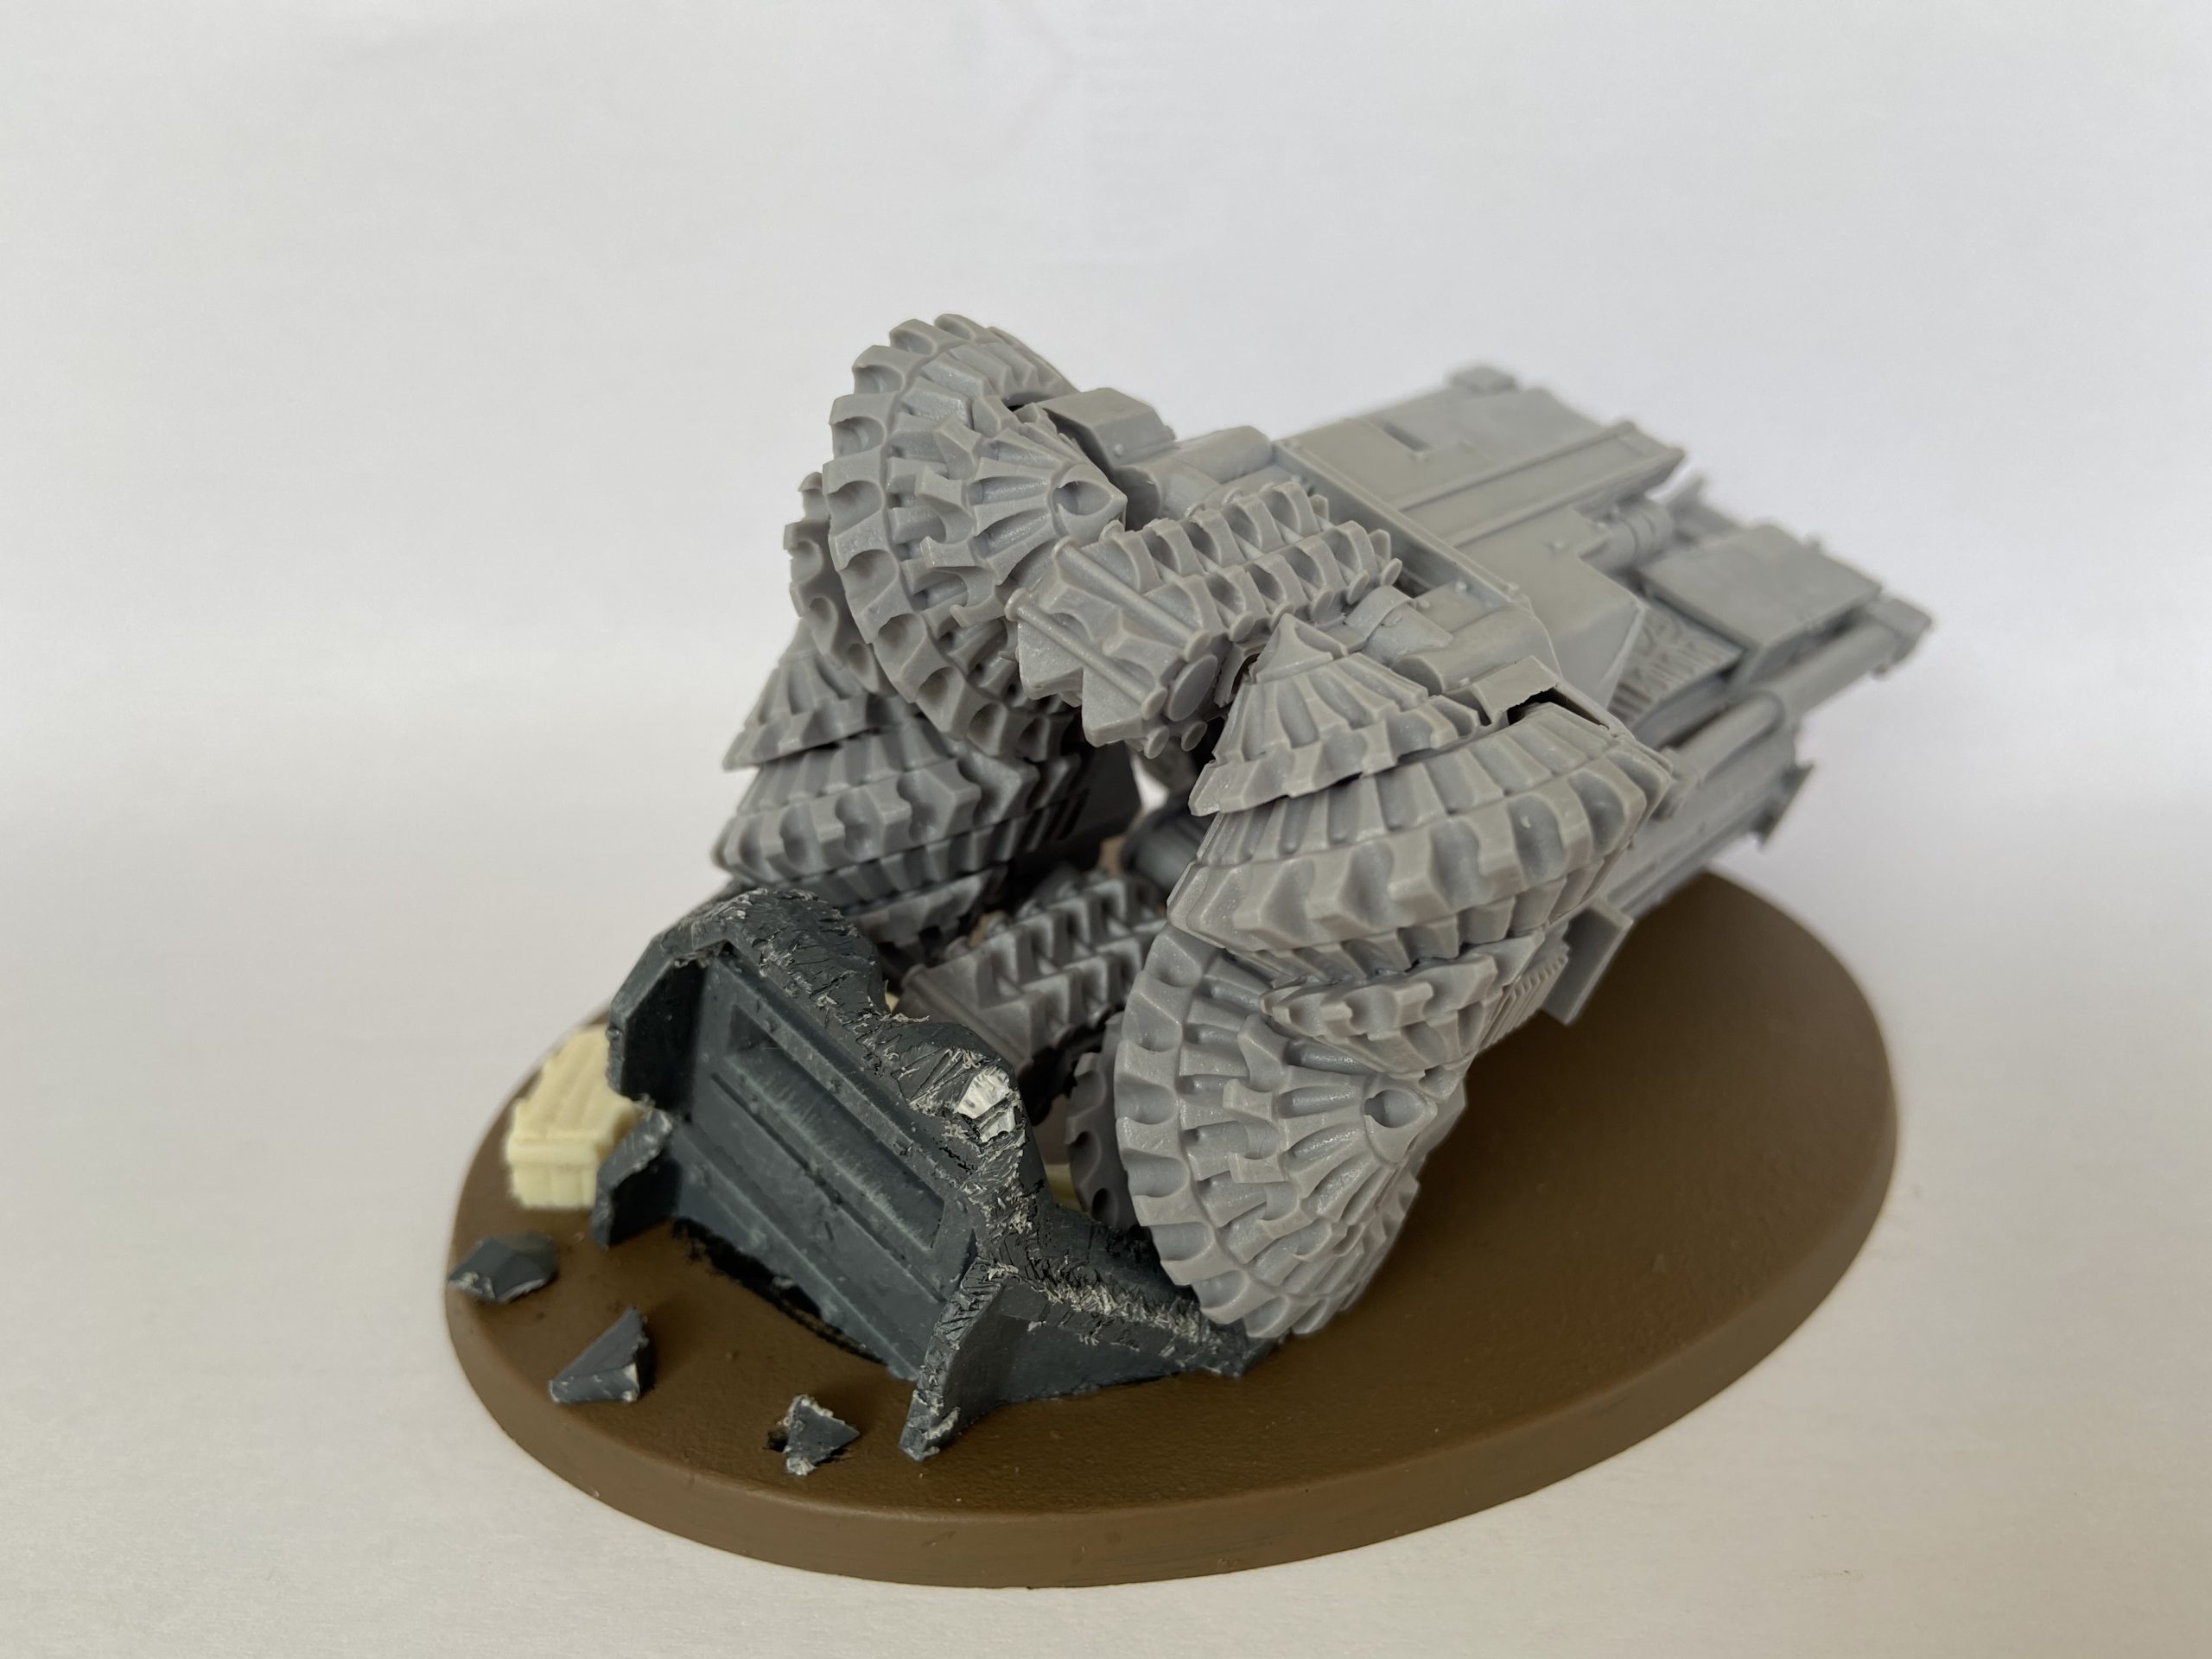
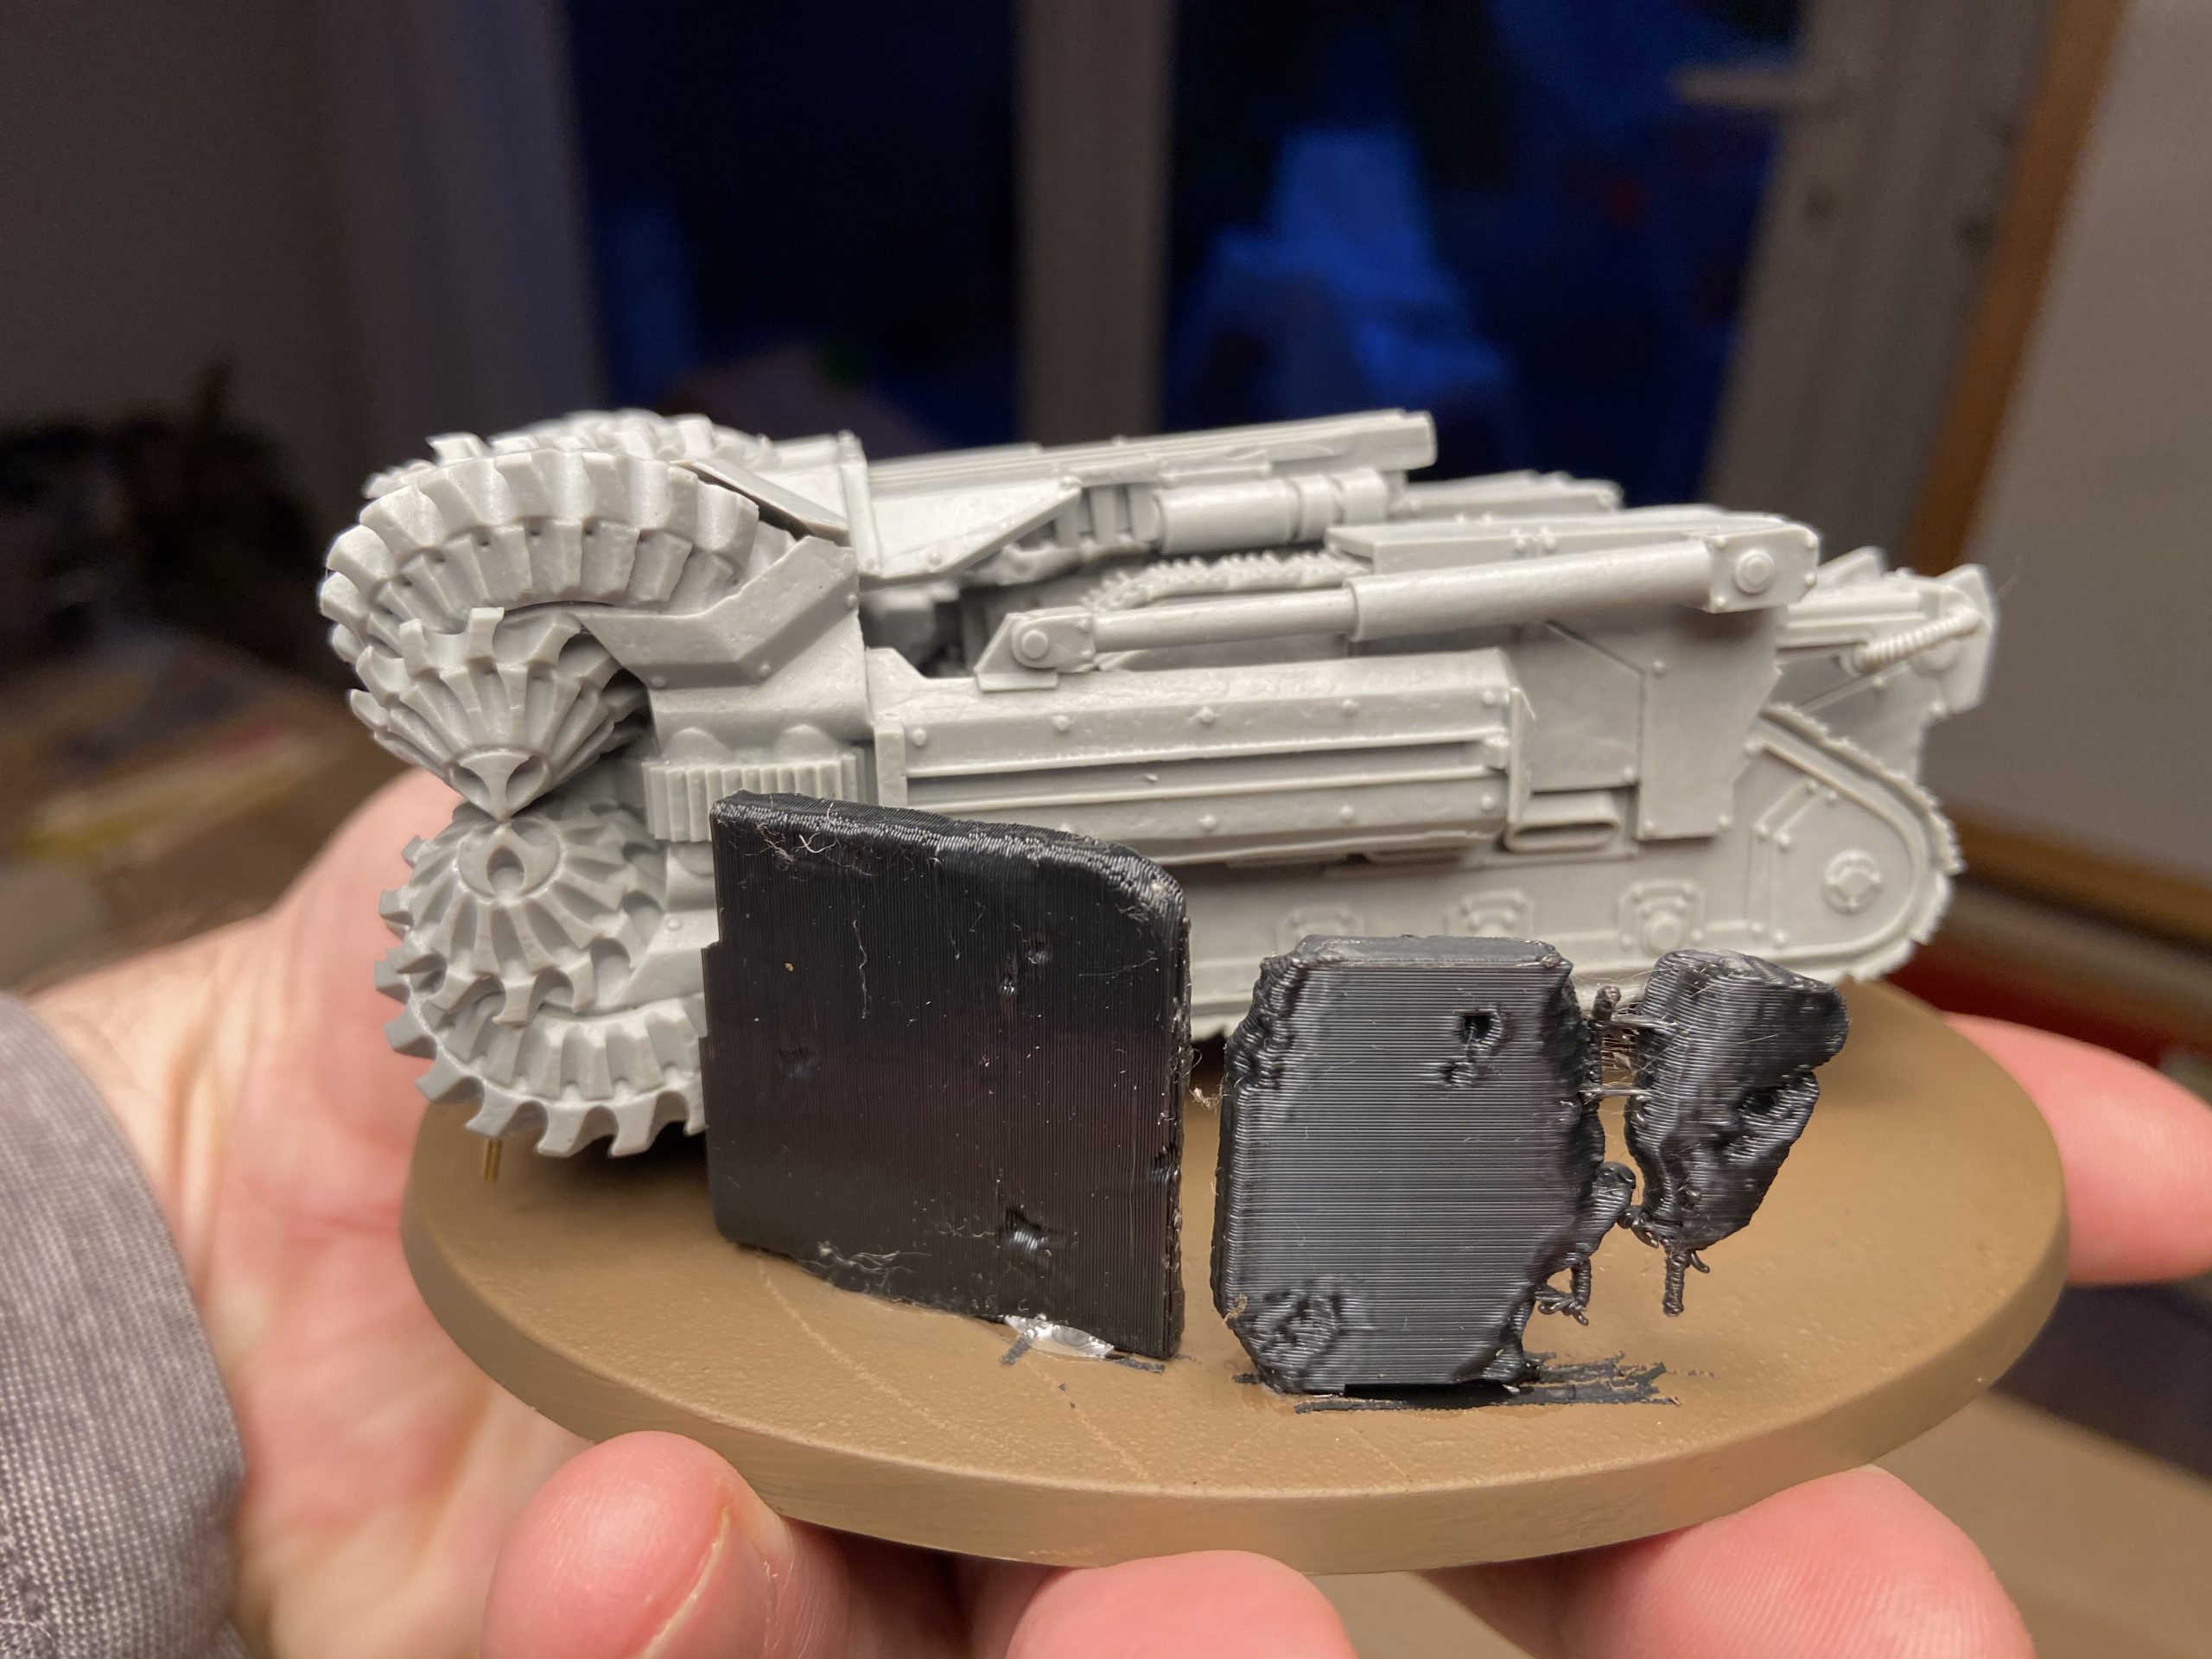
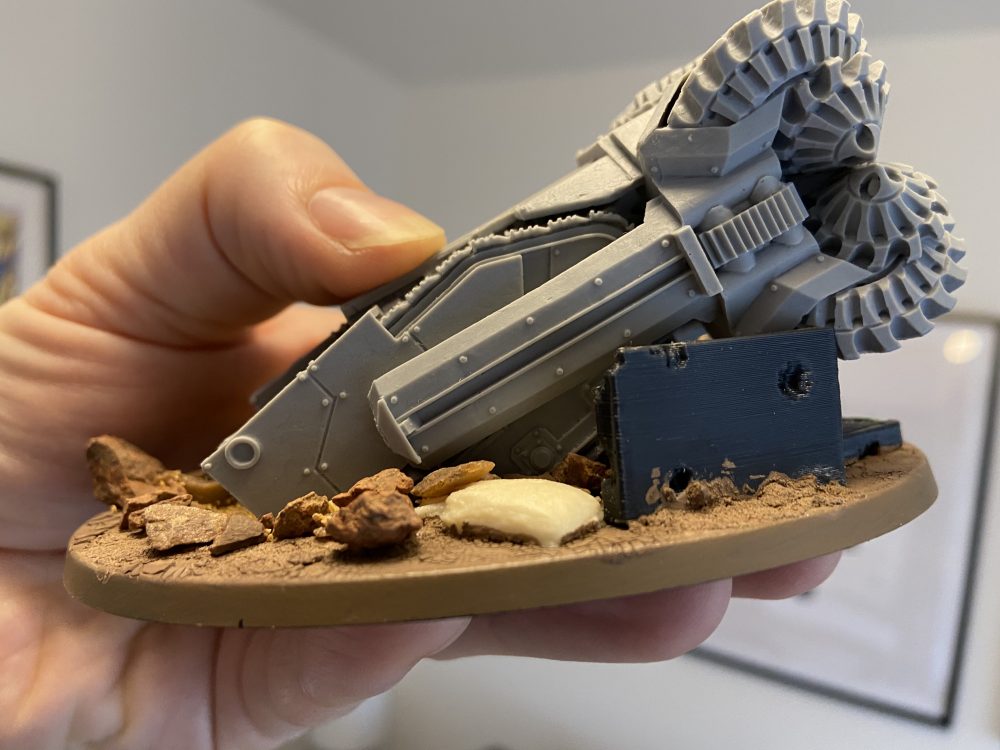
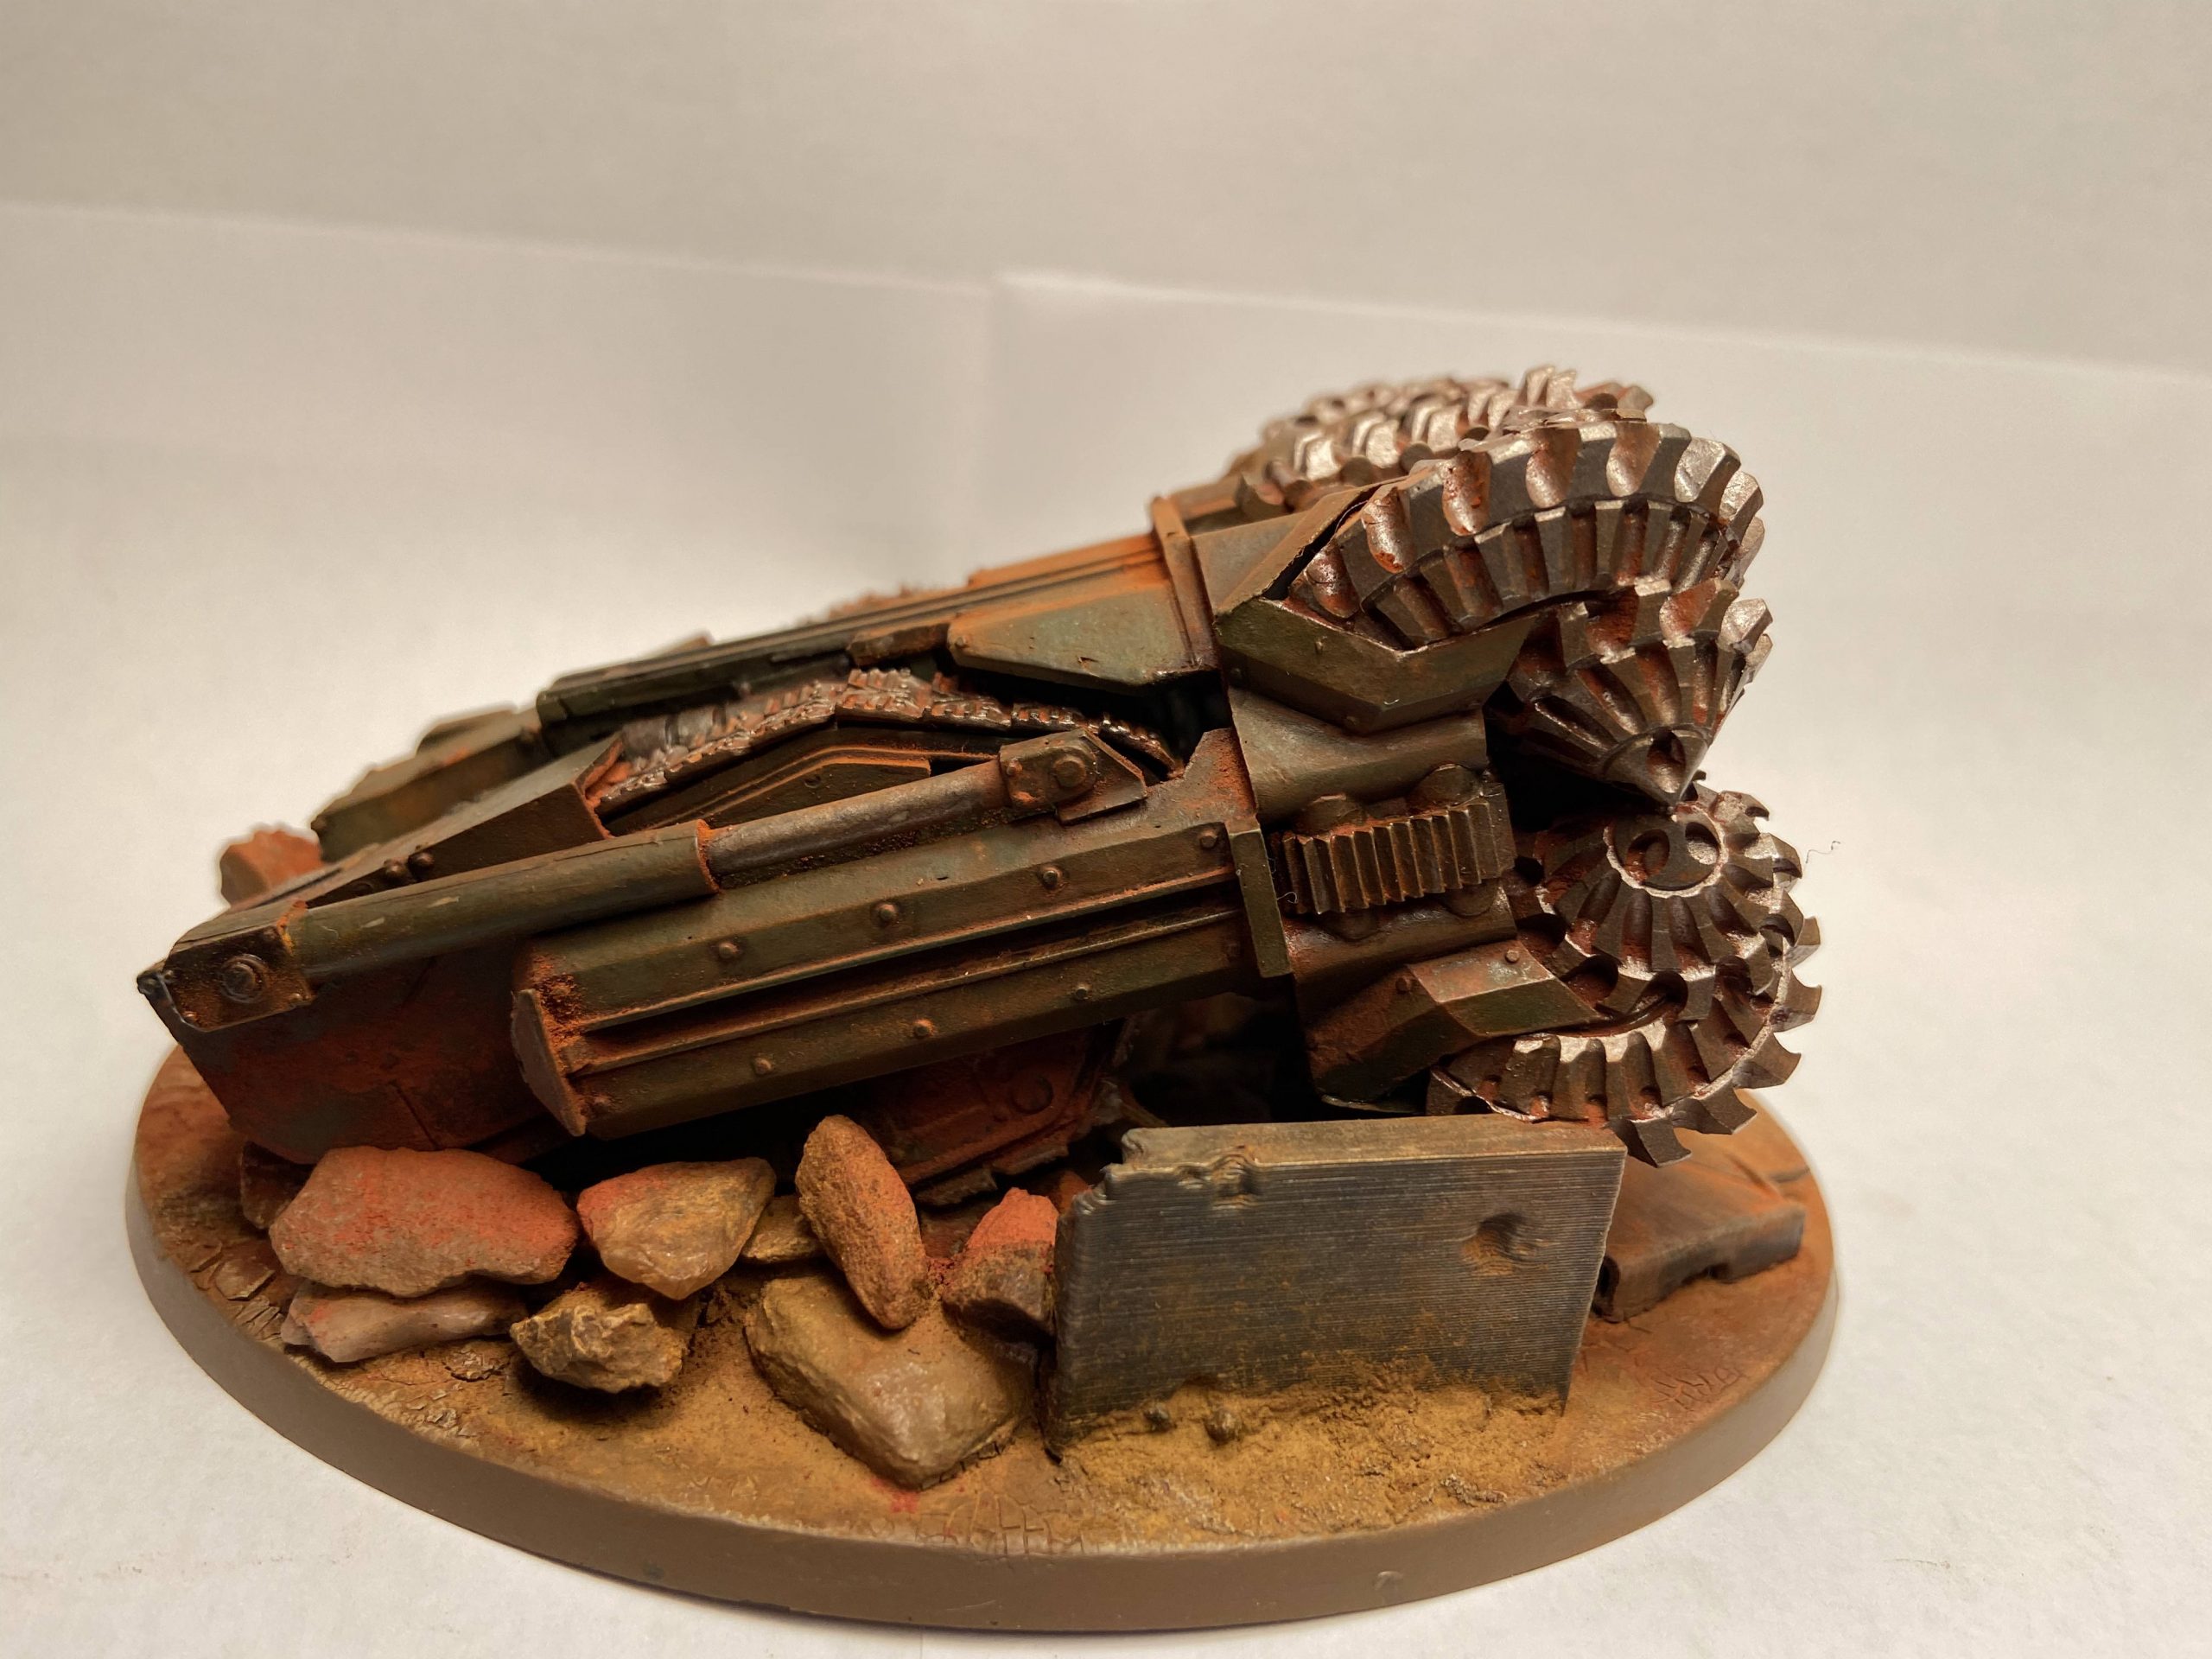
Glueing the drill and holding it in place was the next issue. I did this using pins (brass rod) and super glue. It has worked so far. I used pins because I wanted the Drill at a higher angle than it would naturally fall.
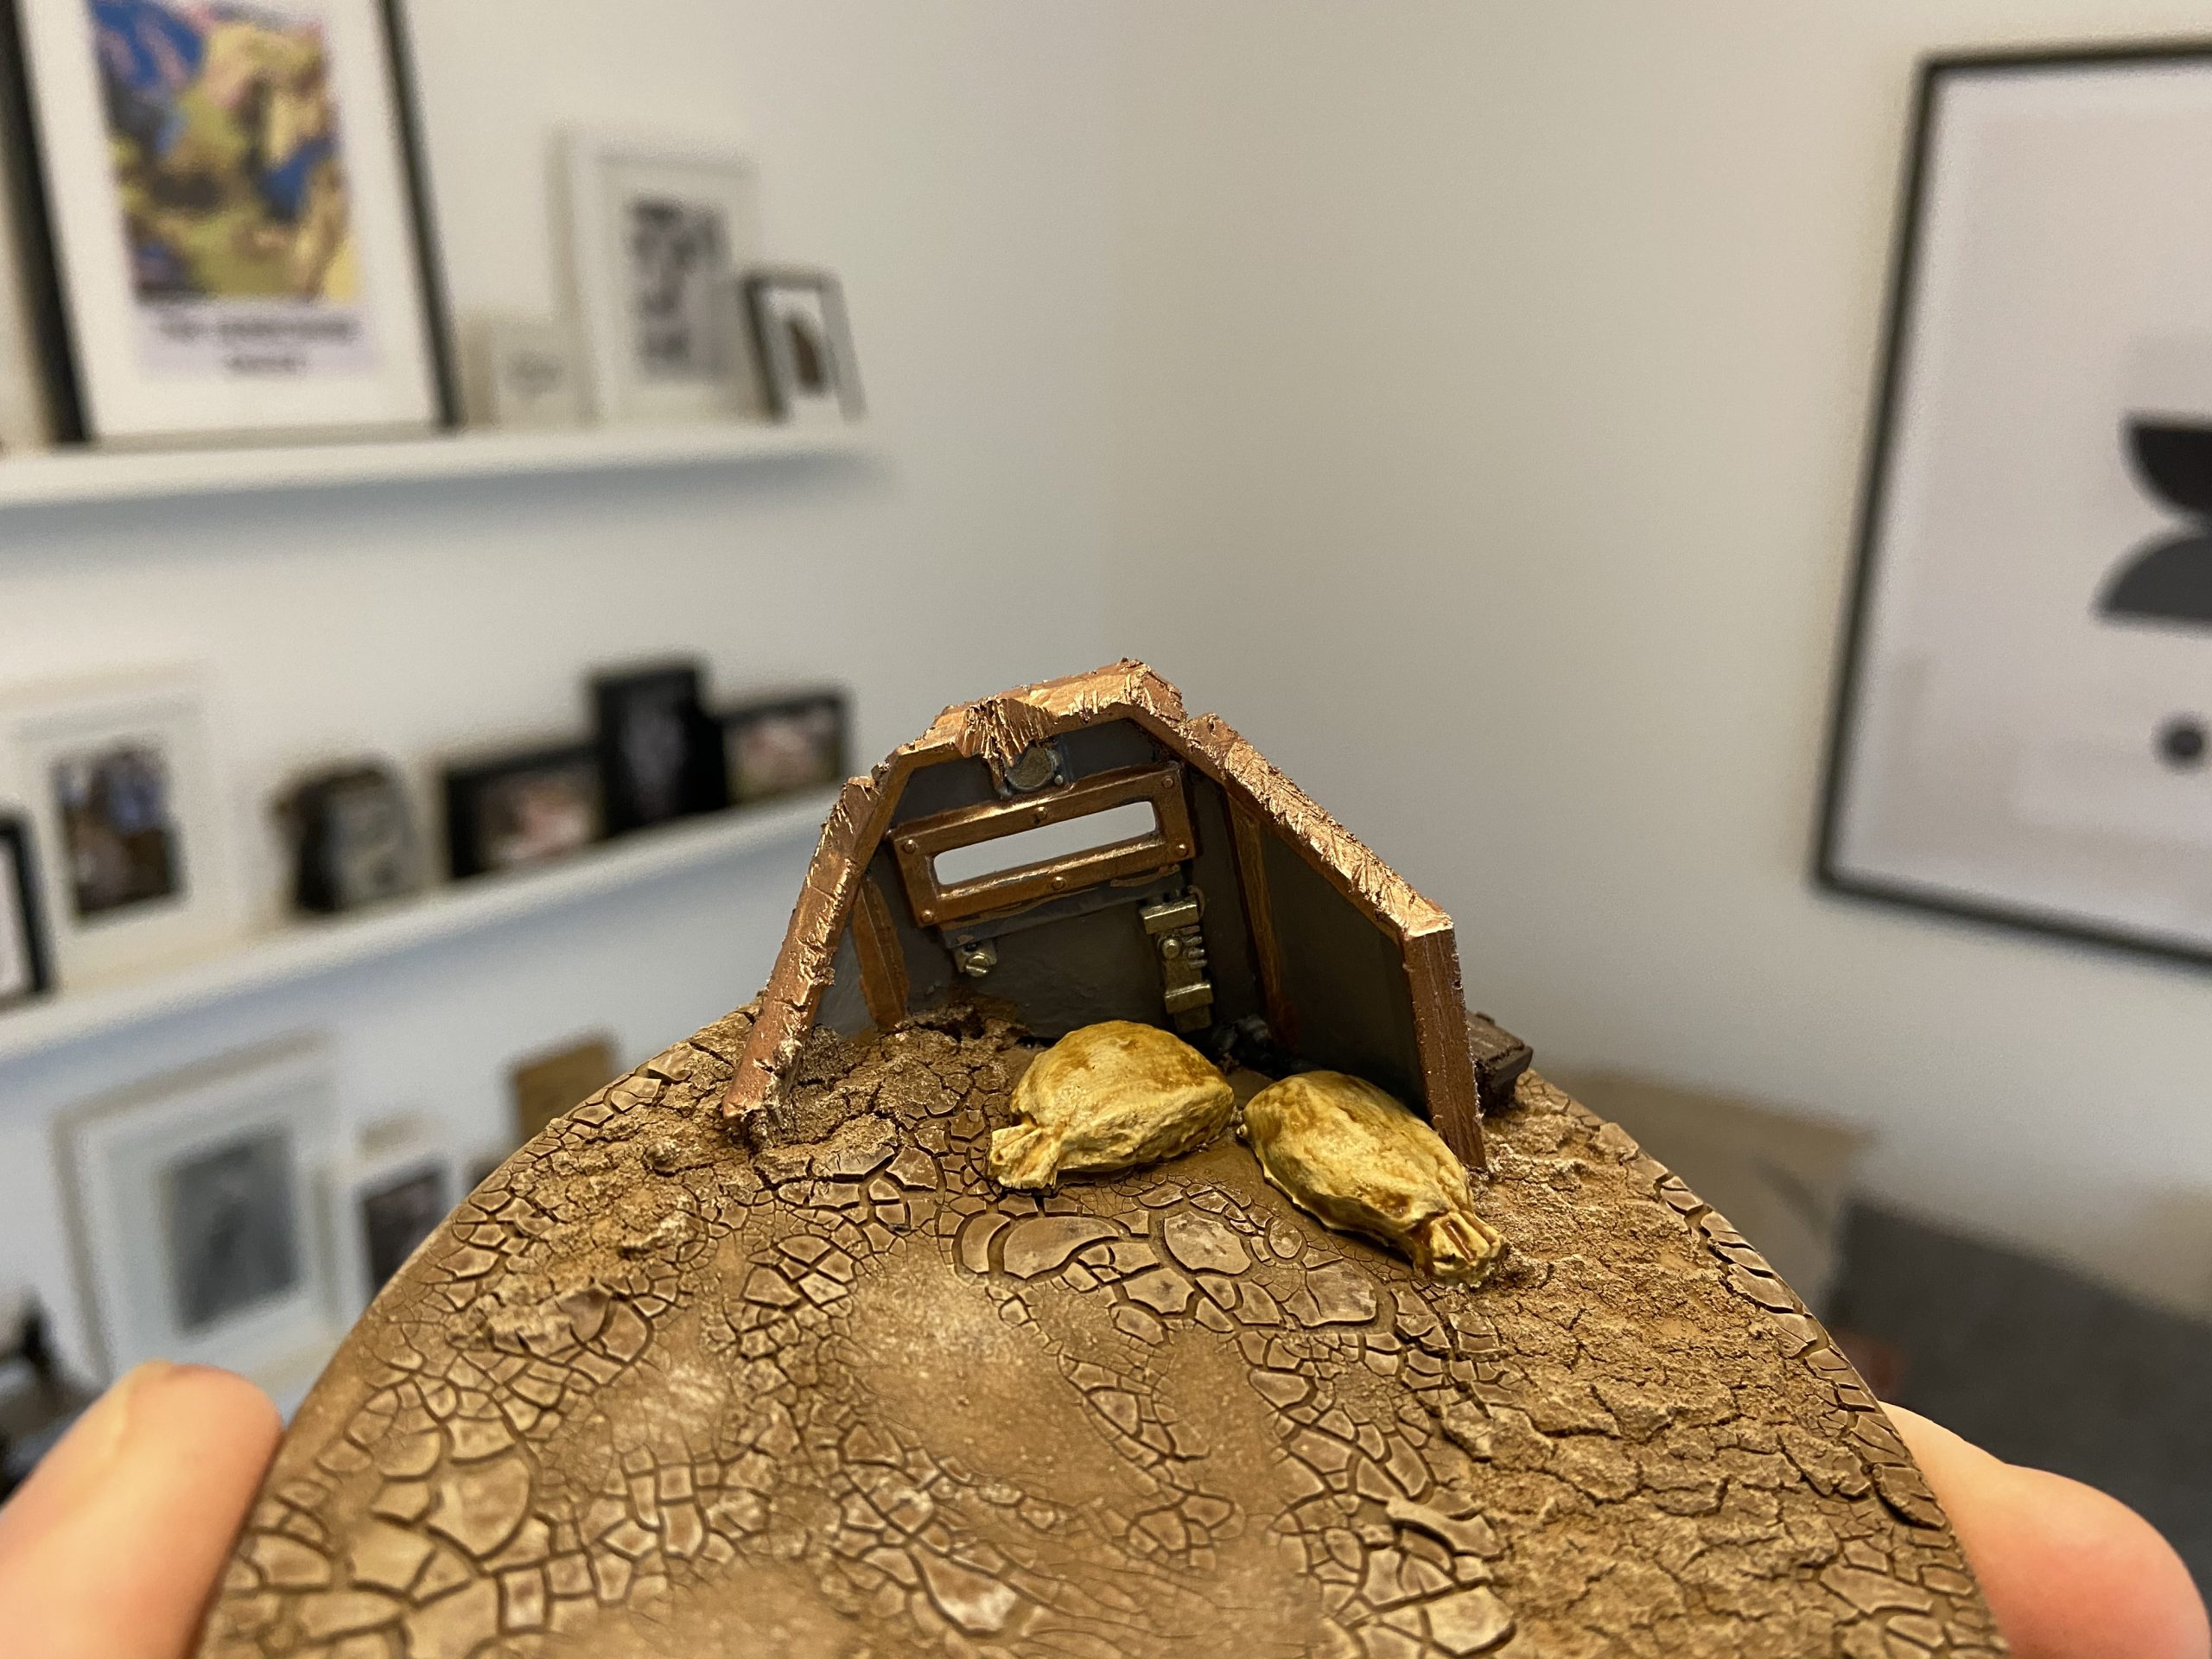
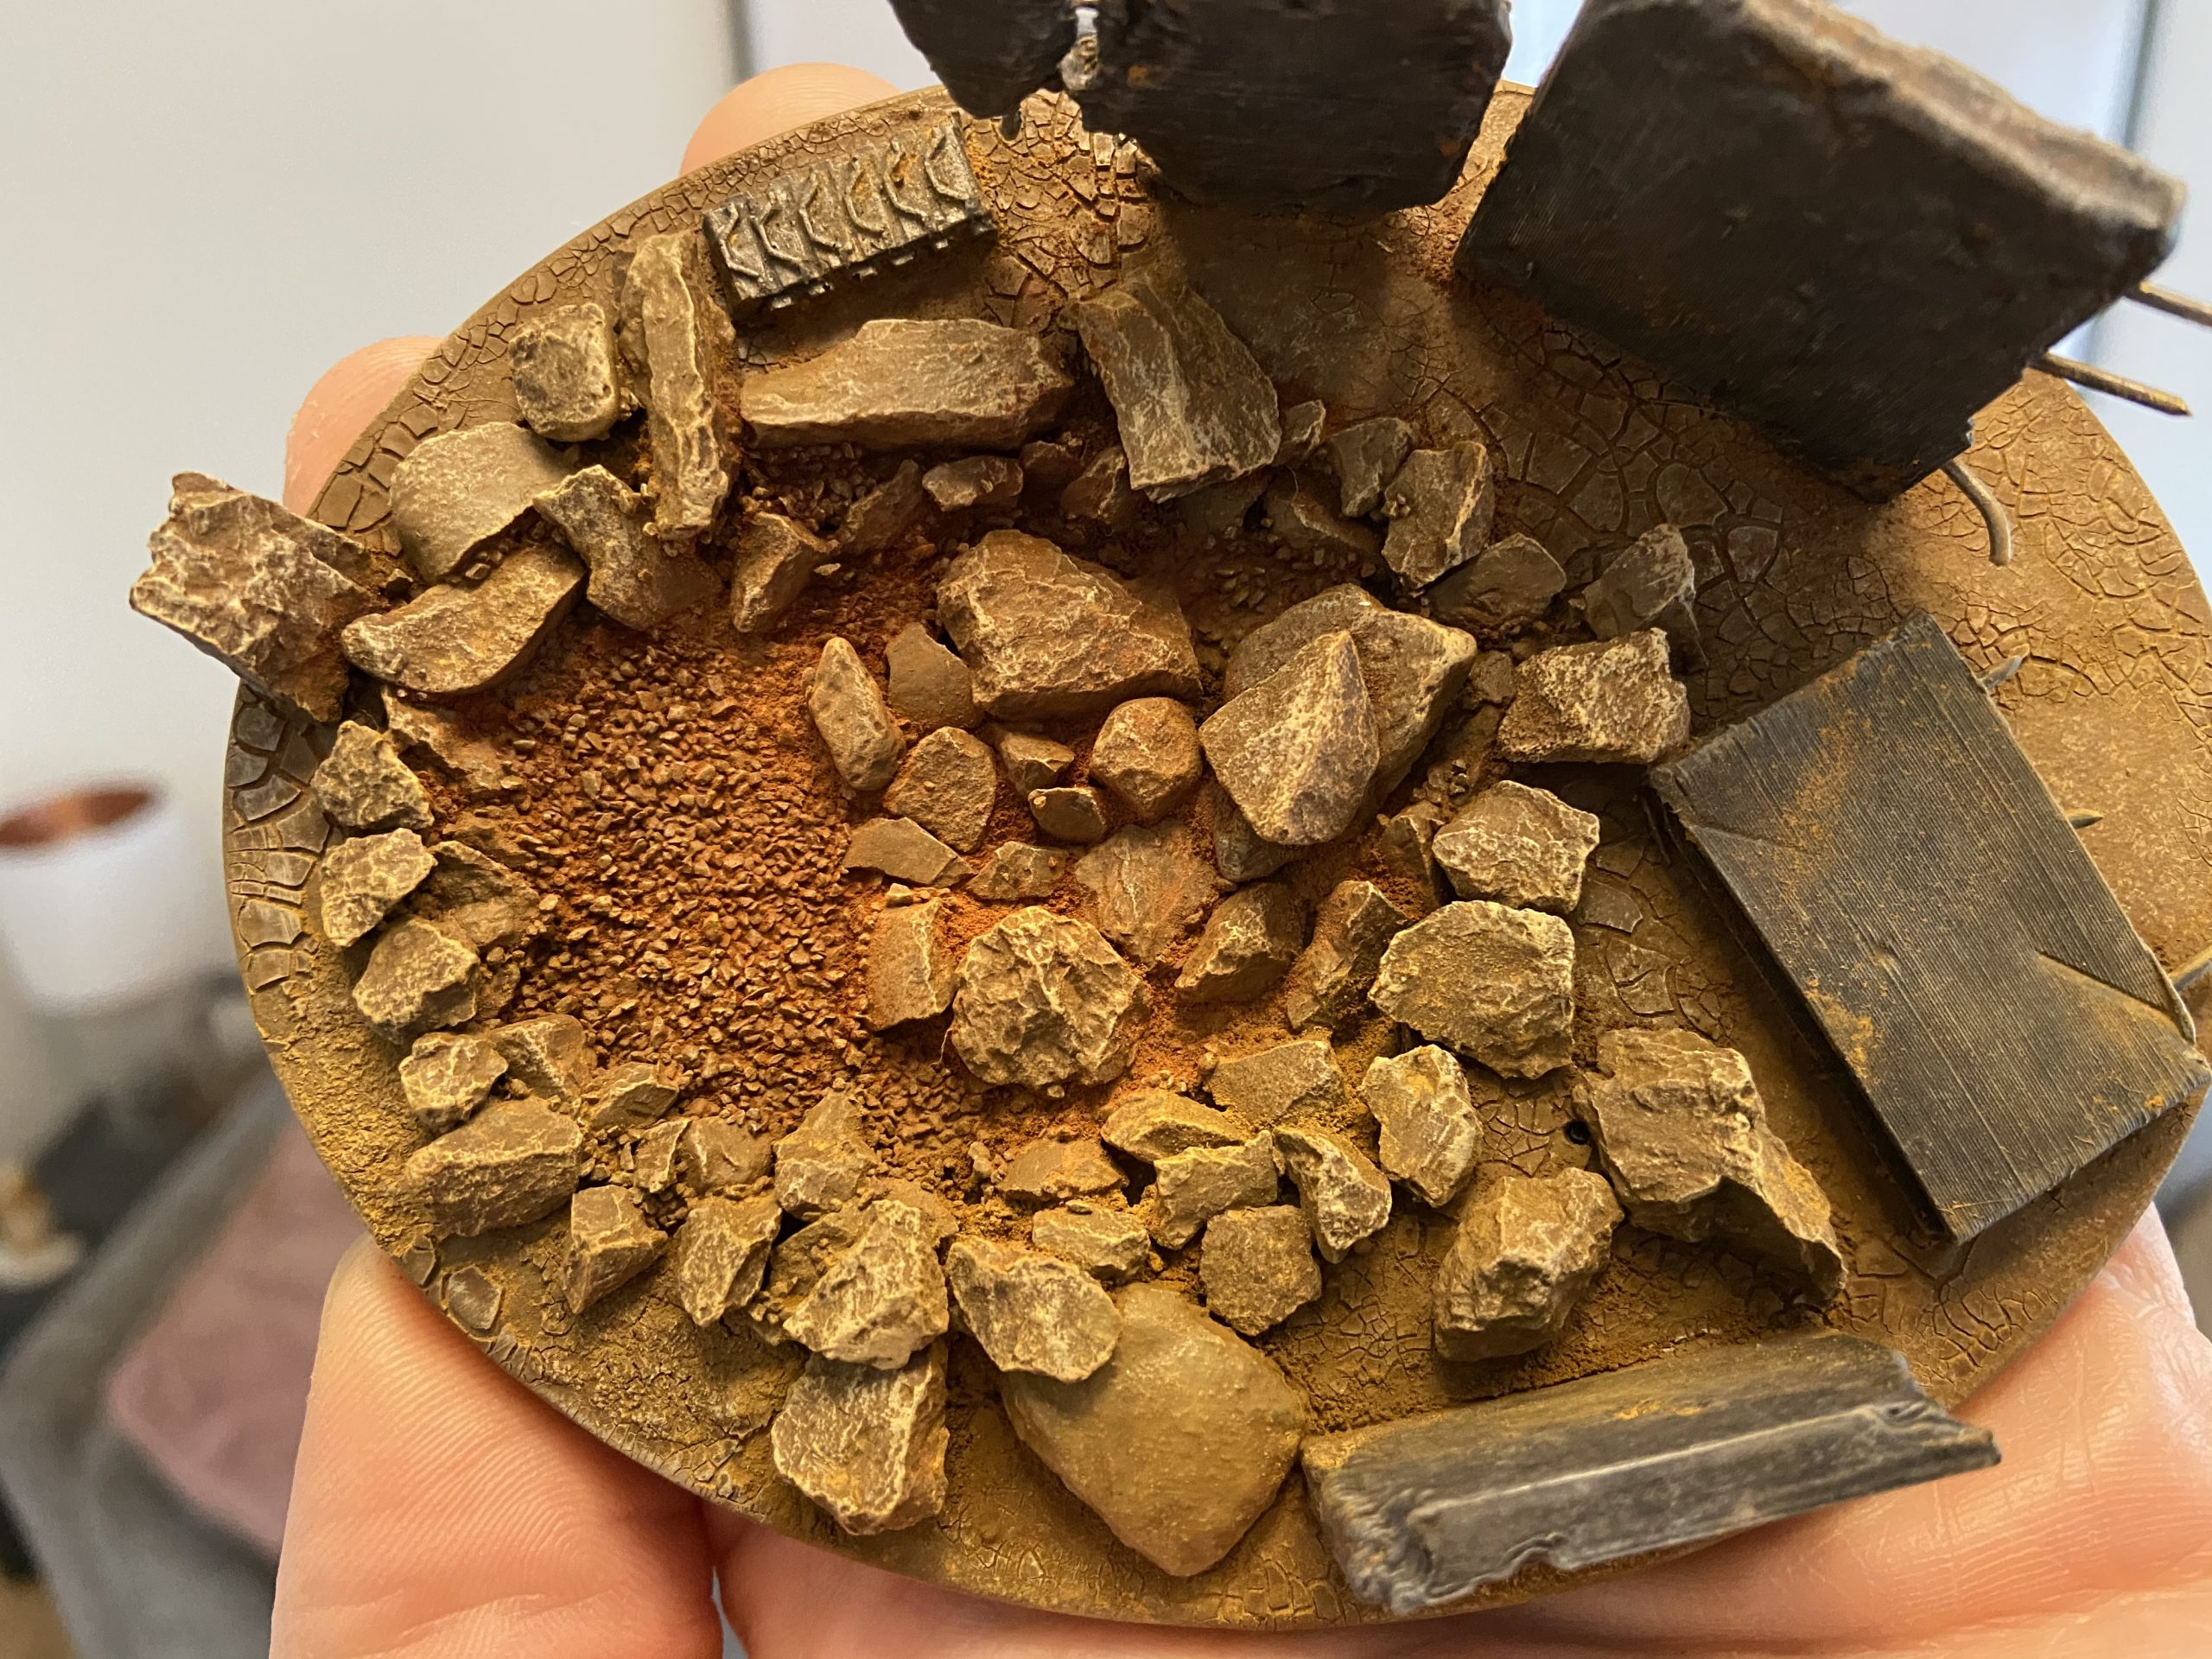
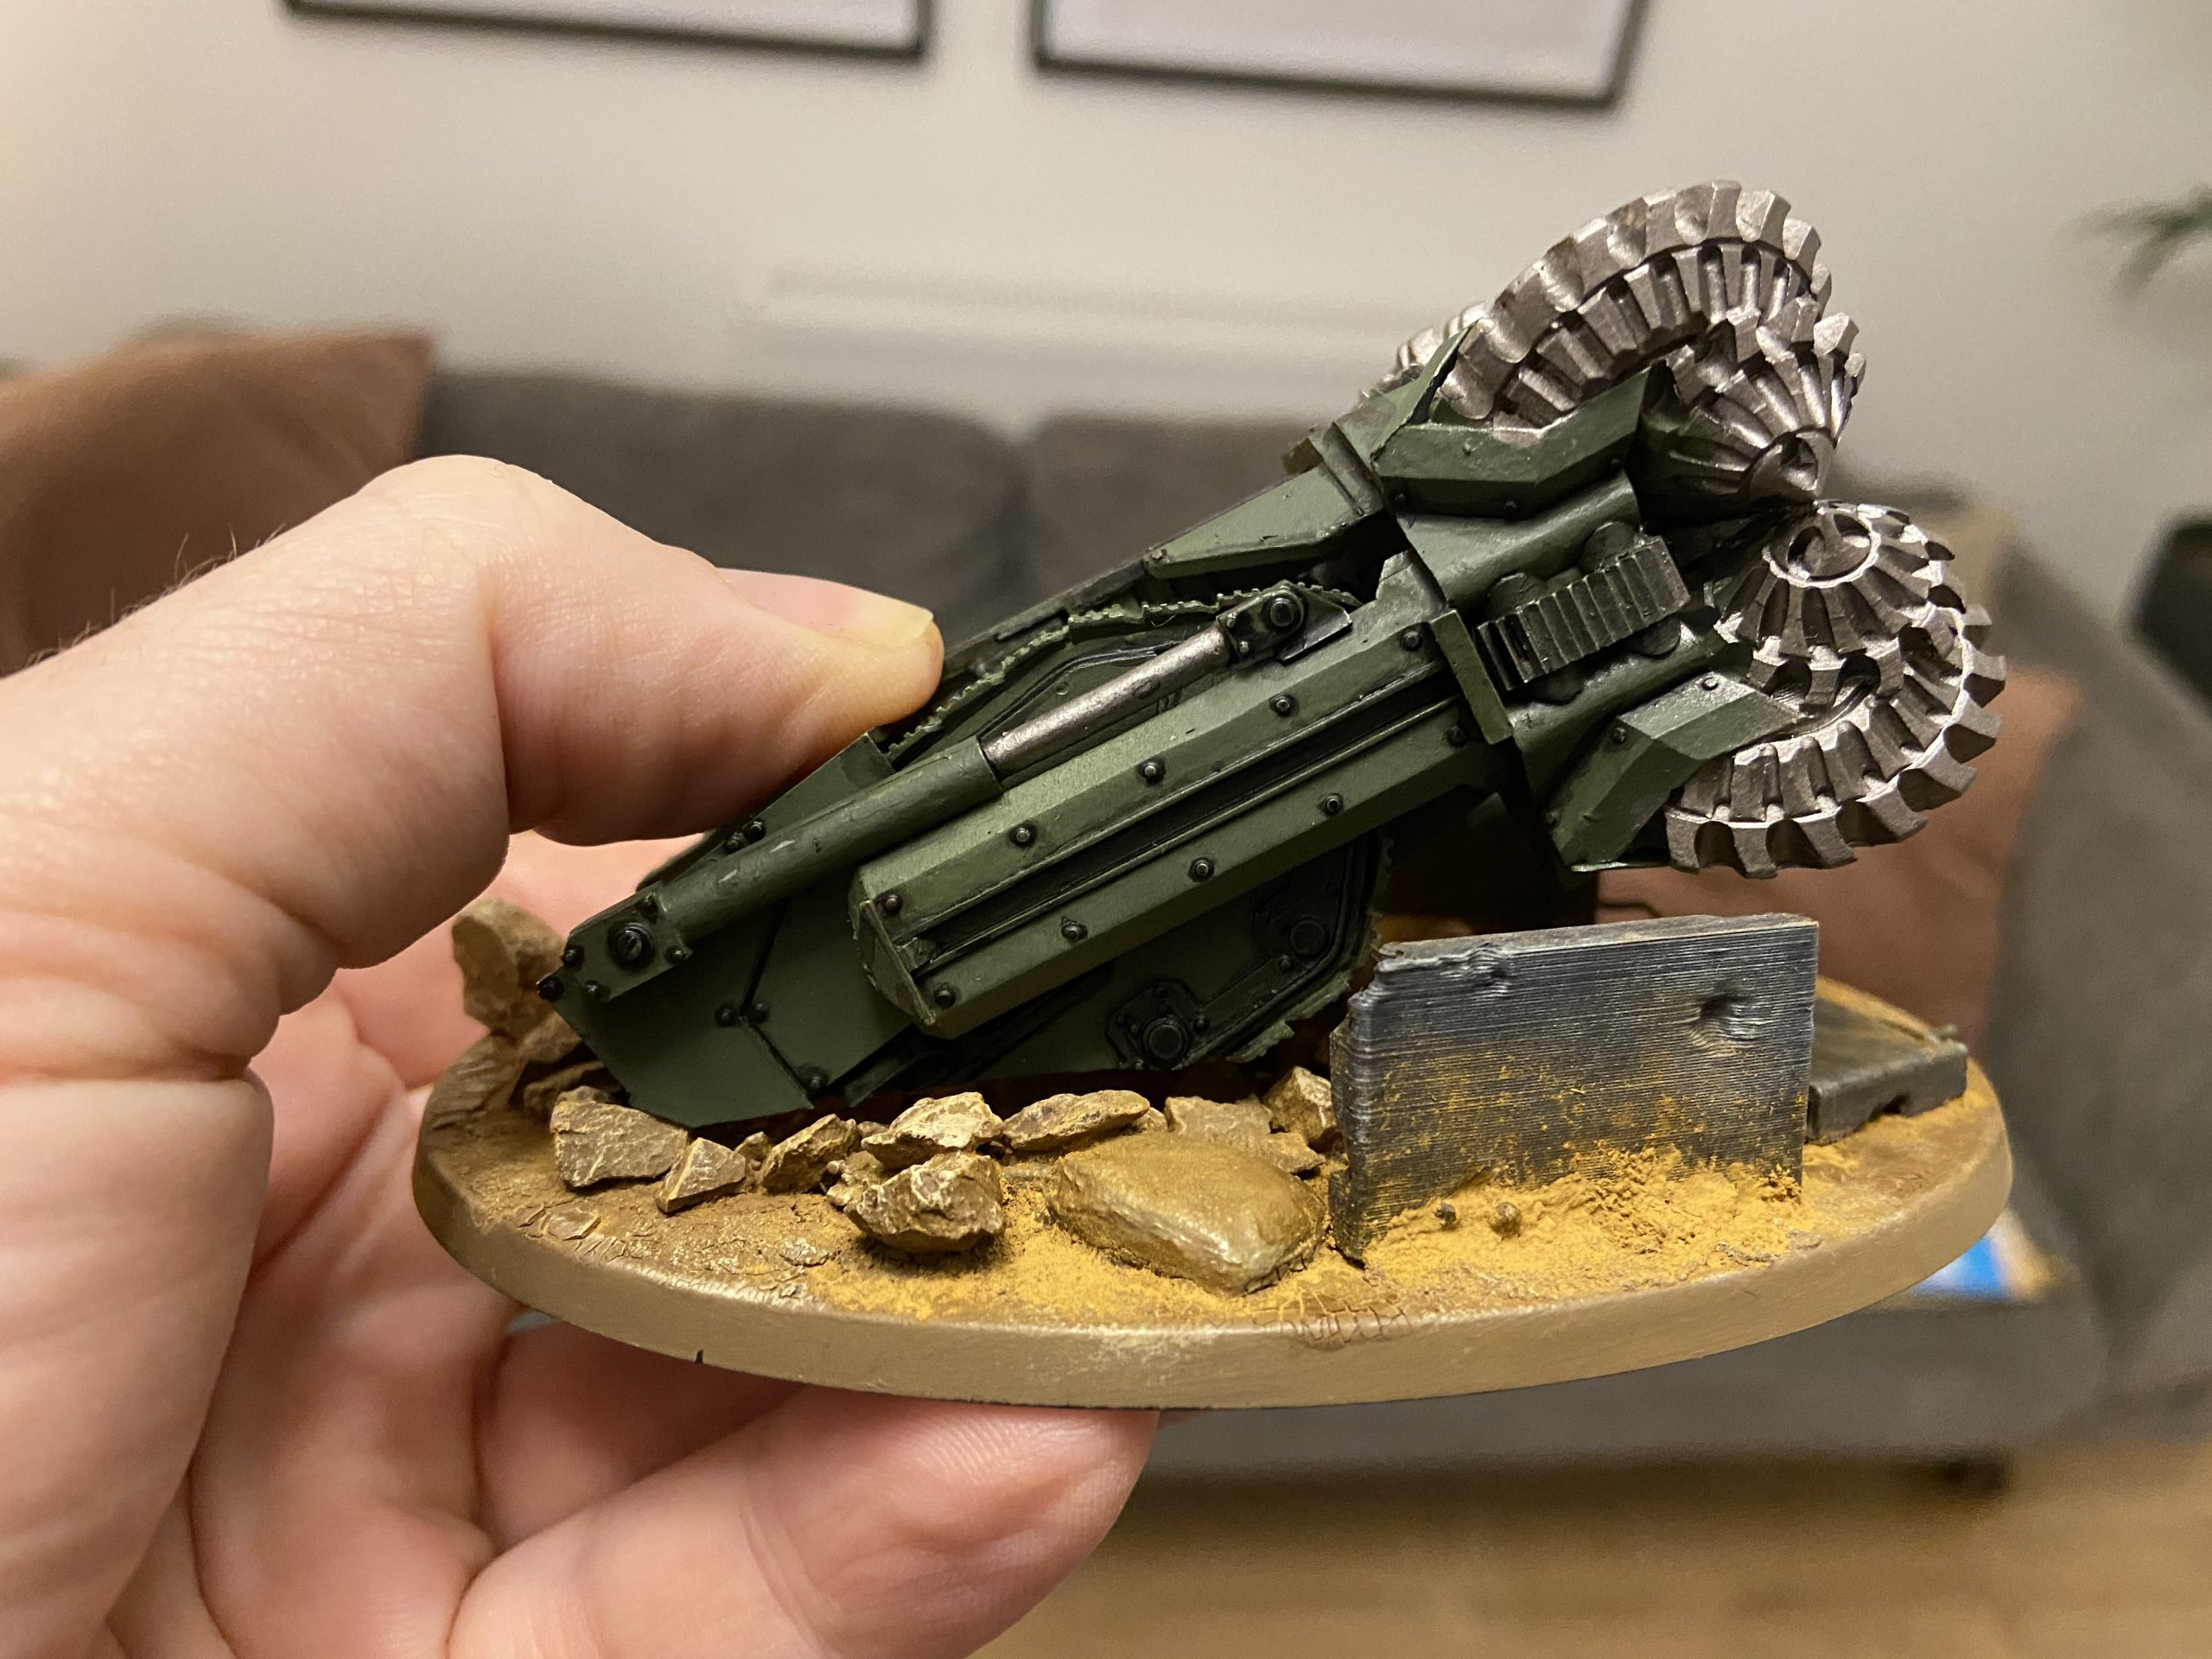
Completing The Base
All was now set for me to paint the Drill and complete the base with stones, gravel, sand, paint and pigments. Having hacked at the base once, I did not want to have to do it again after putting more time into it. So I made sure to prep the Drill with pins and painted it before committing to completing the base. I was then sure where the Drill would sit on the base and how the Drill would be held in place. No more drilling, cutting or sawing at this point.
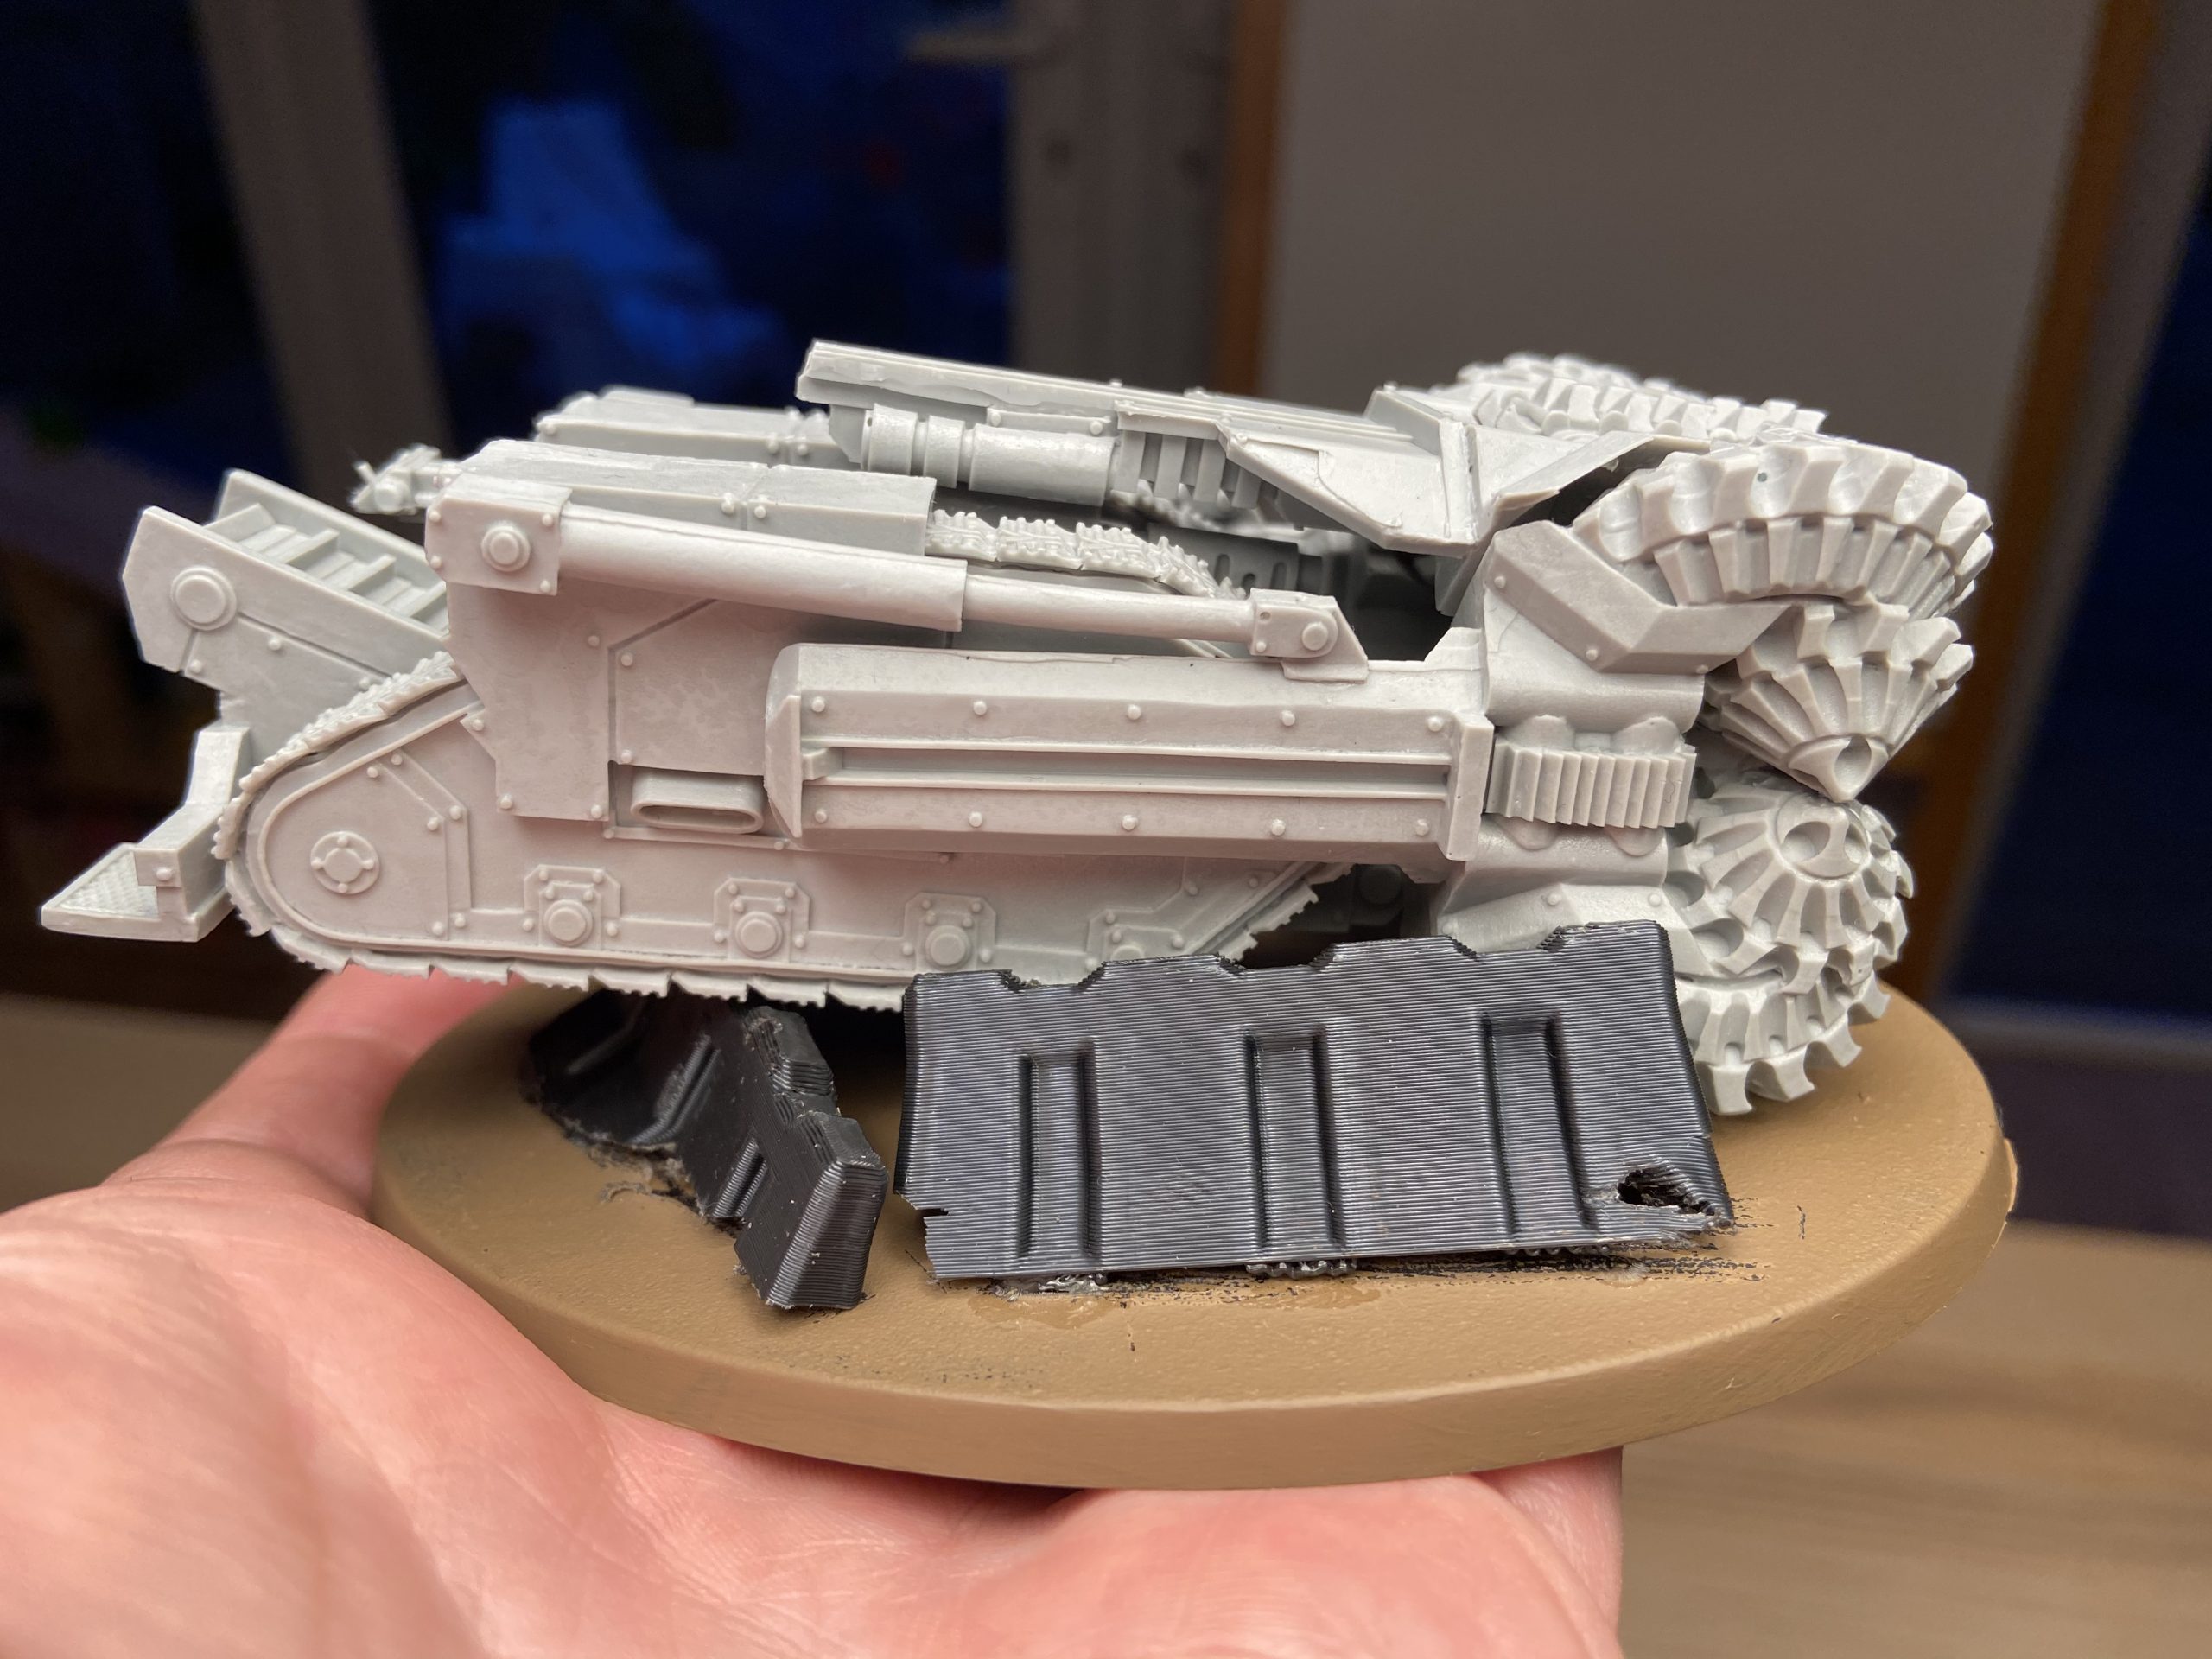
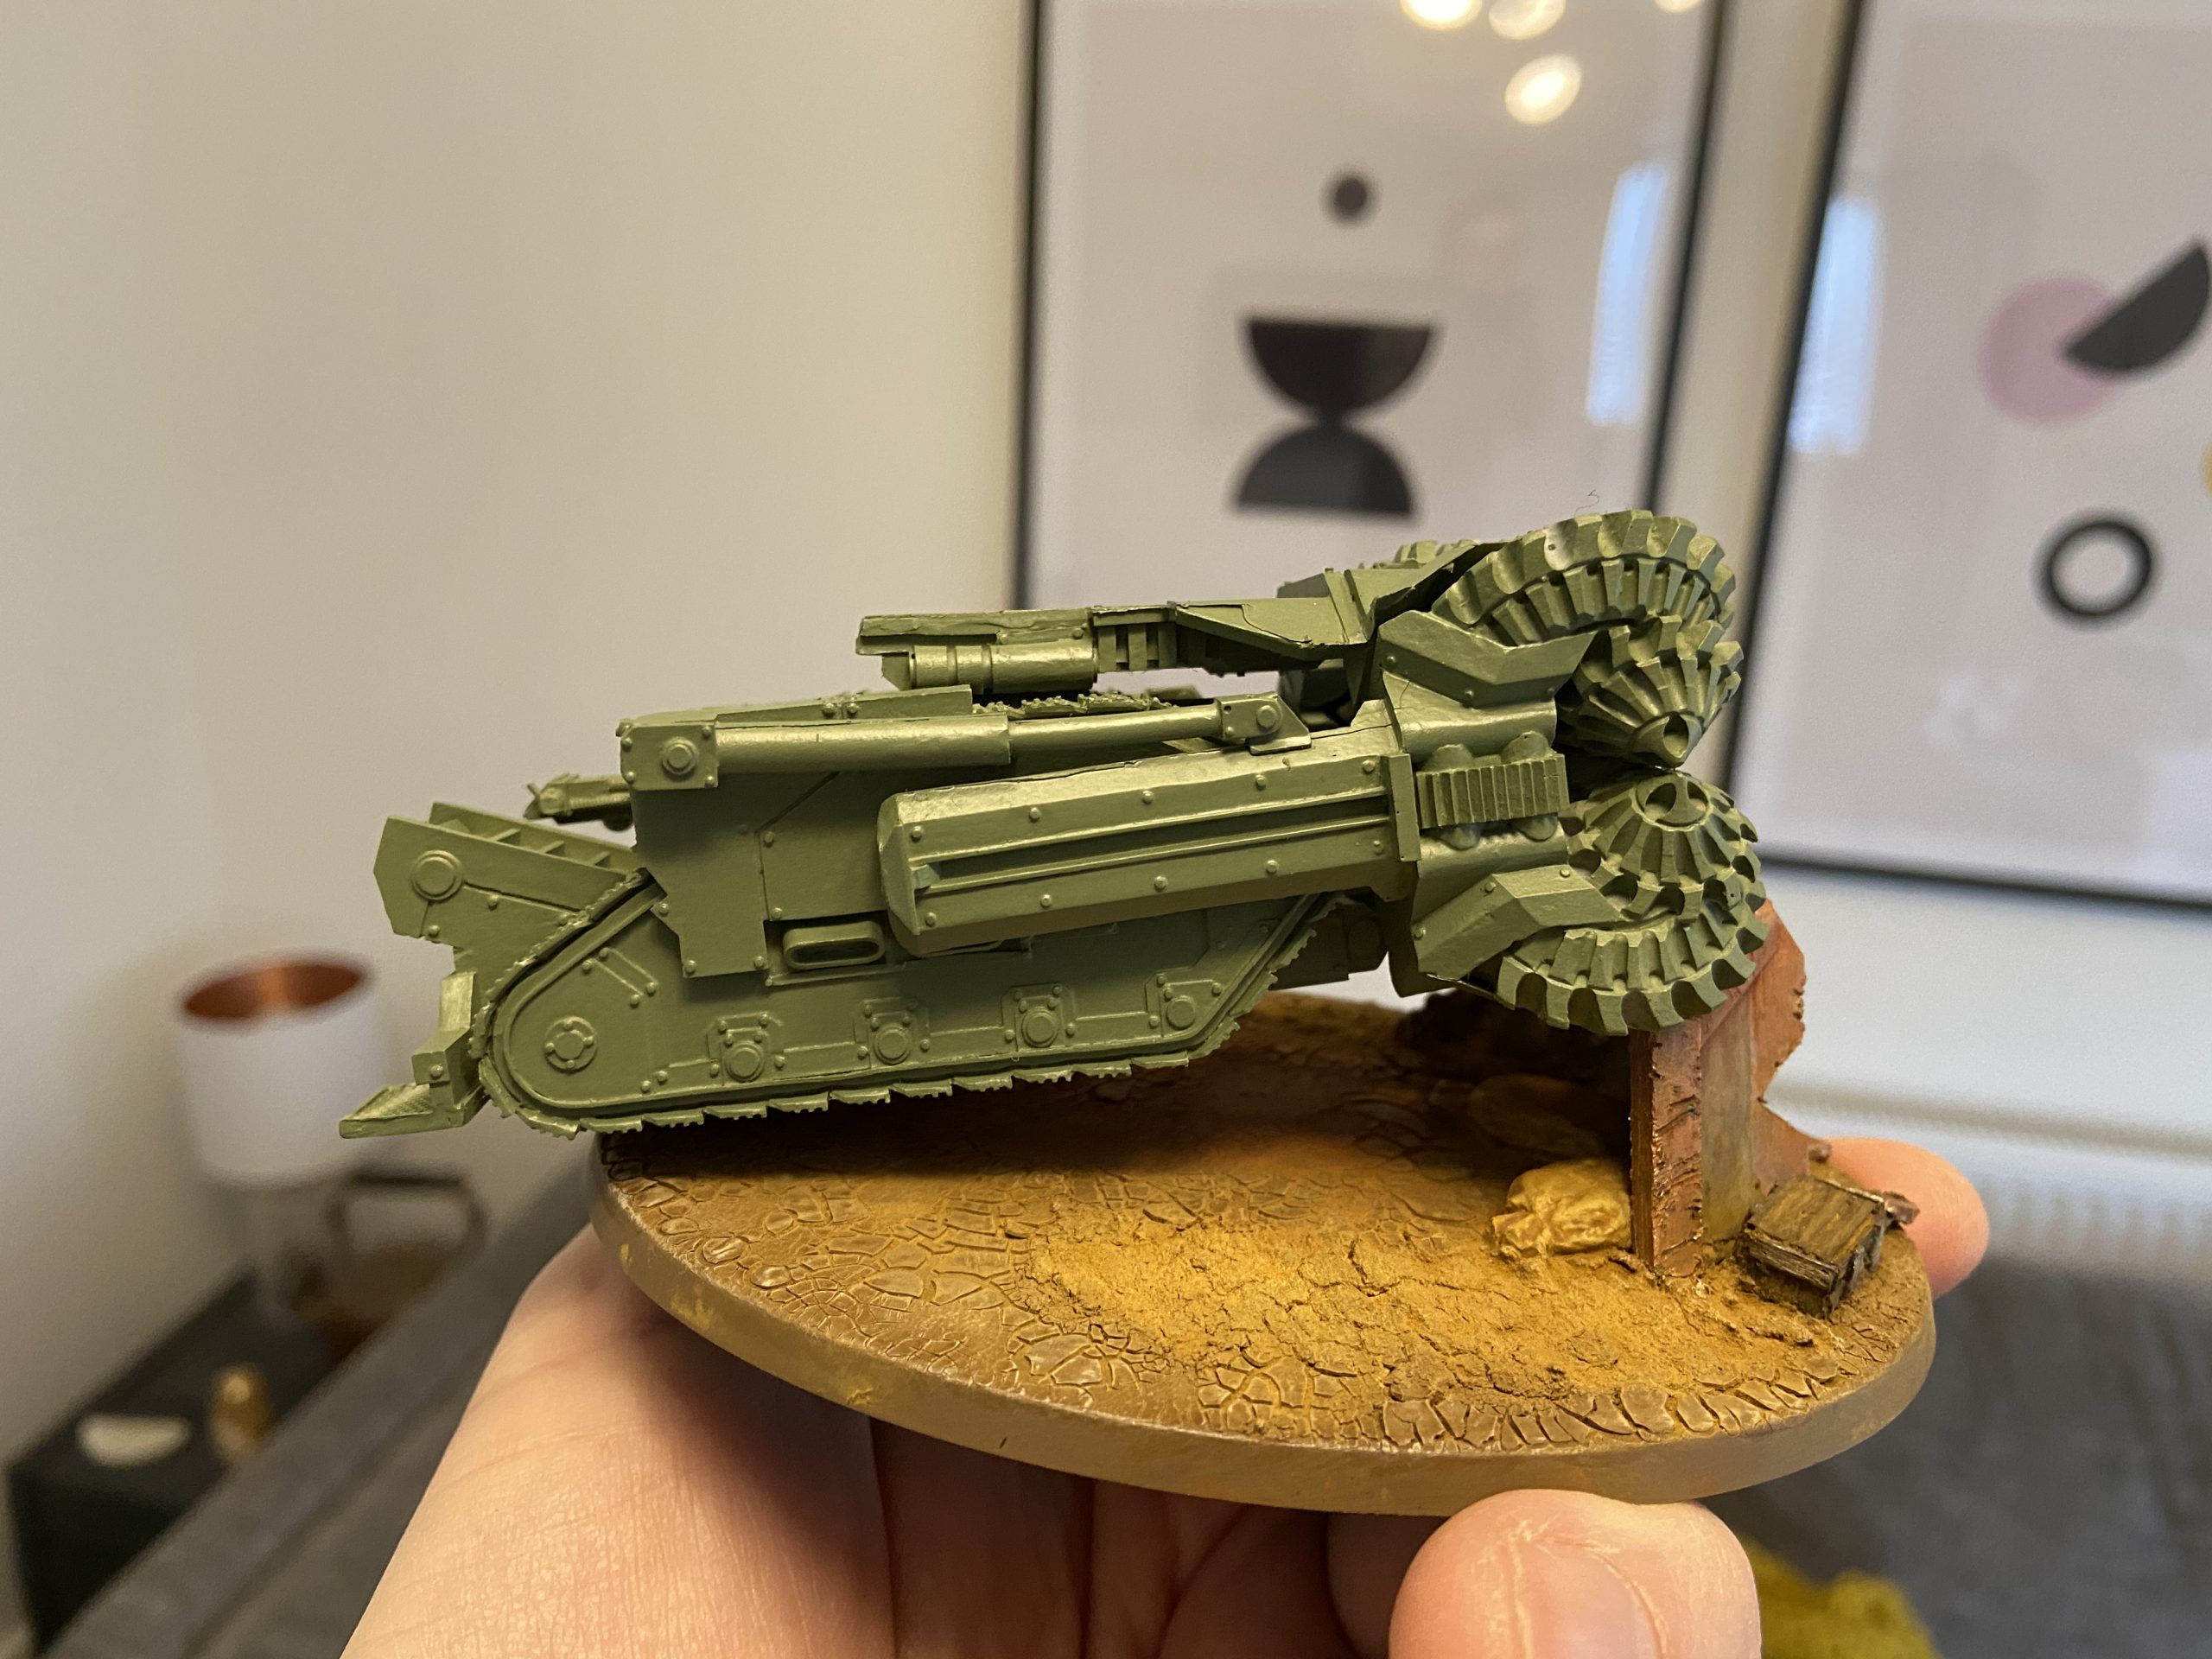
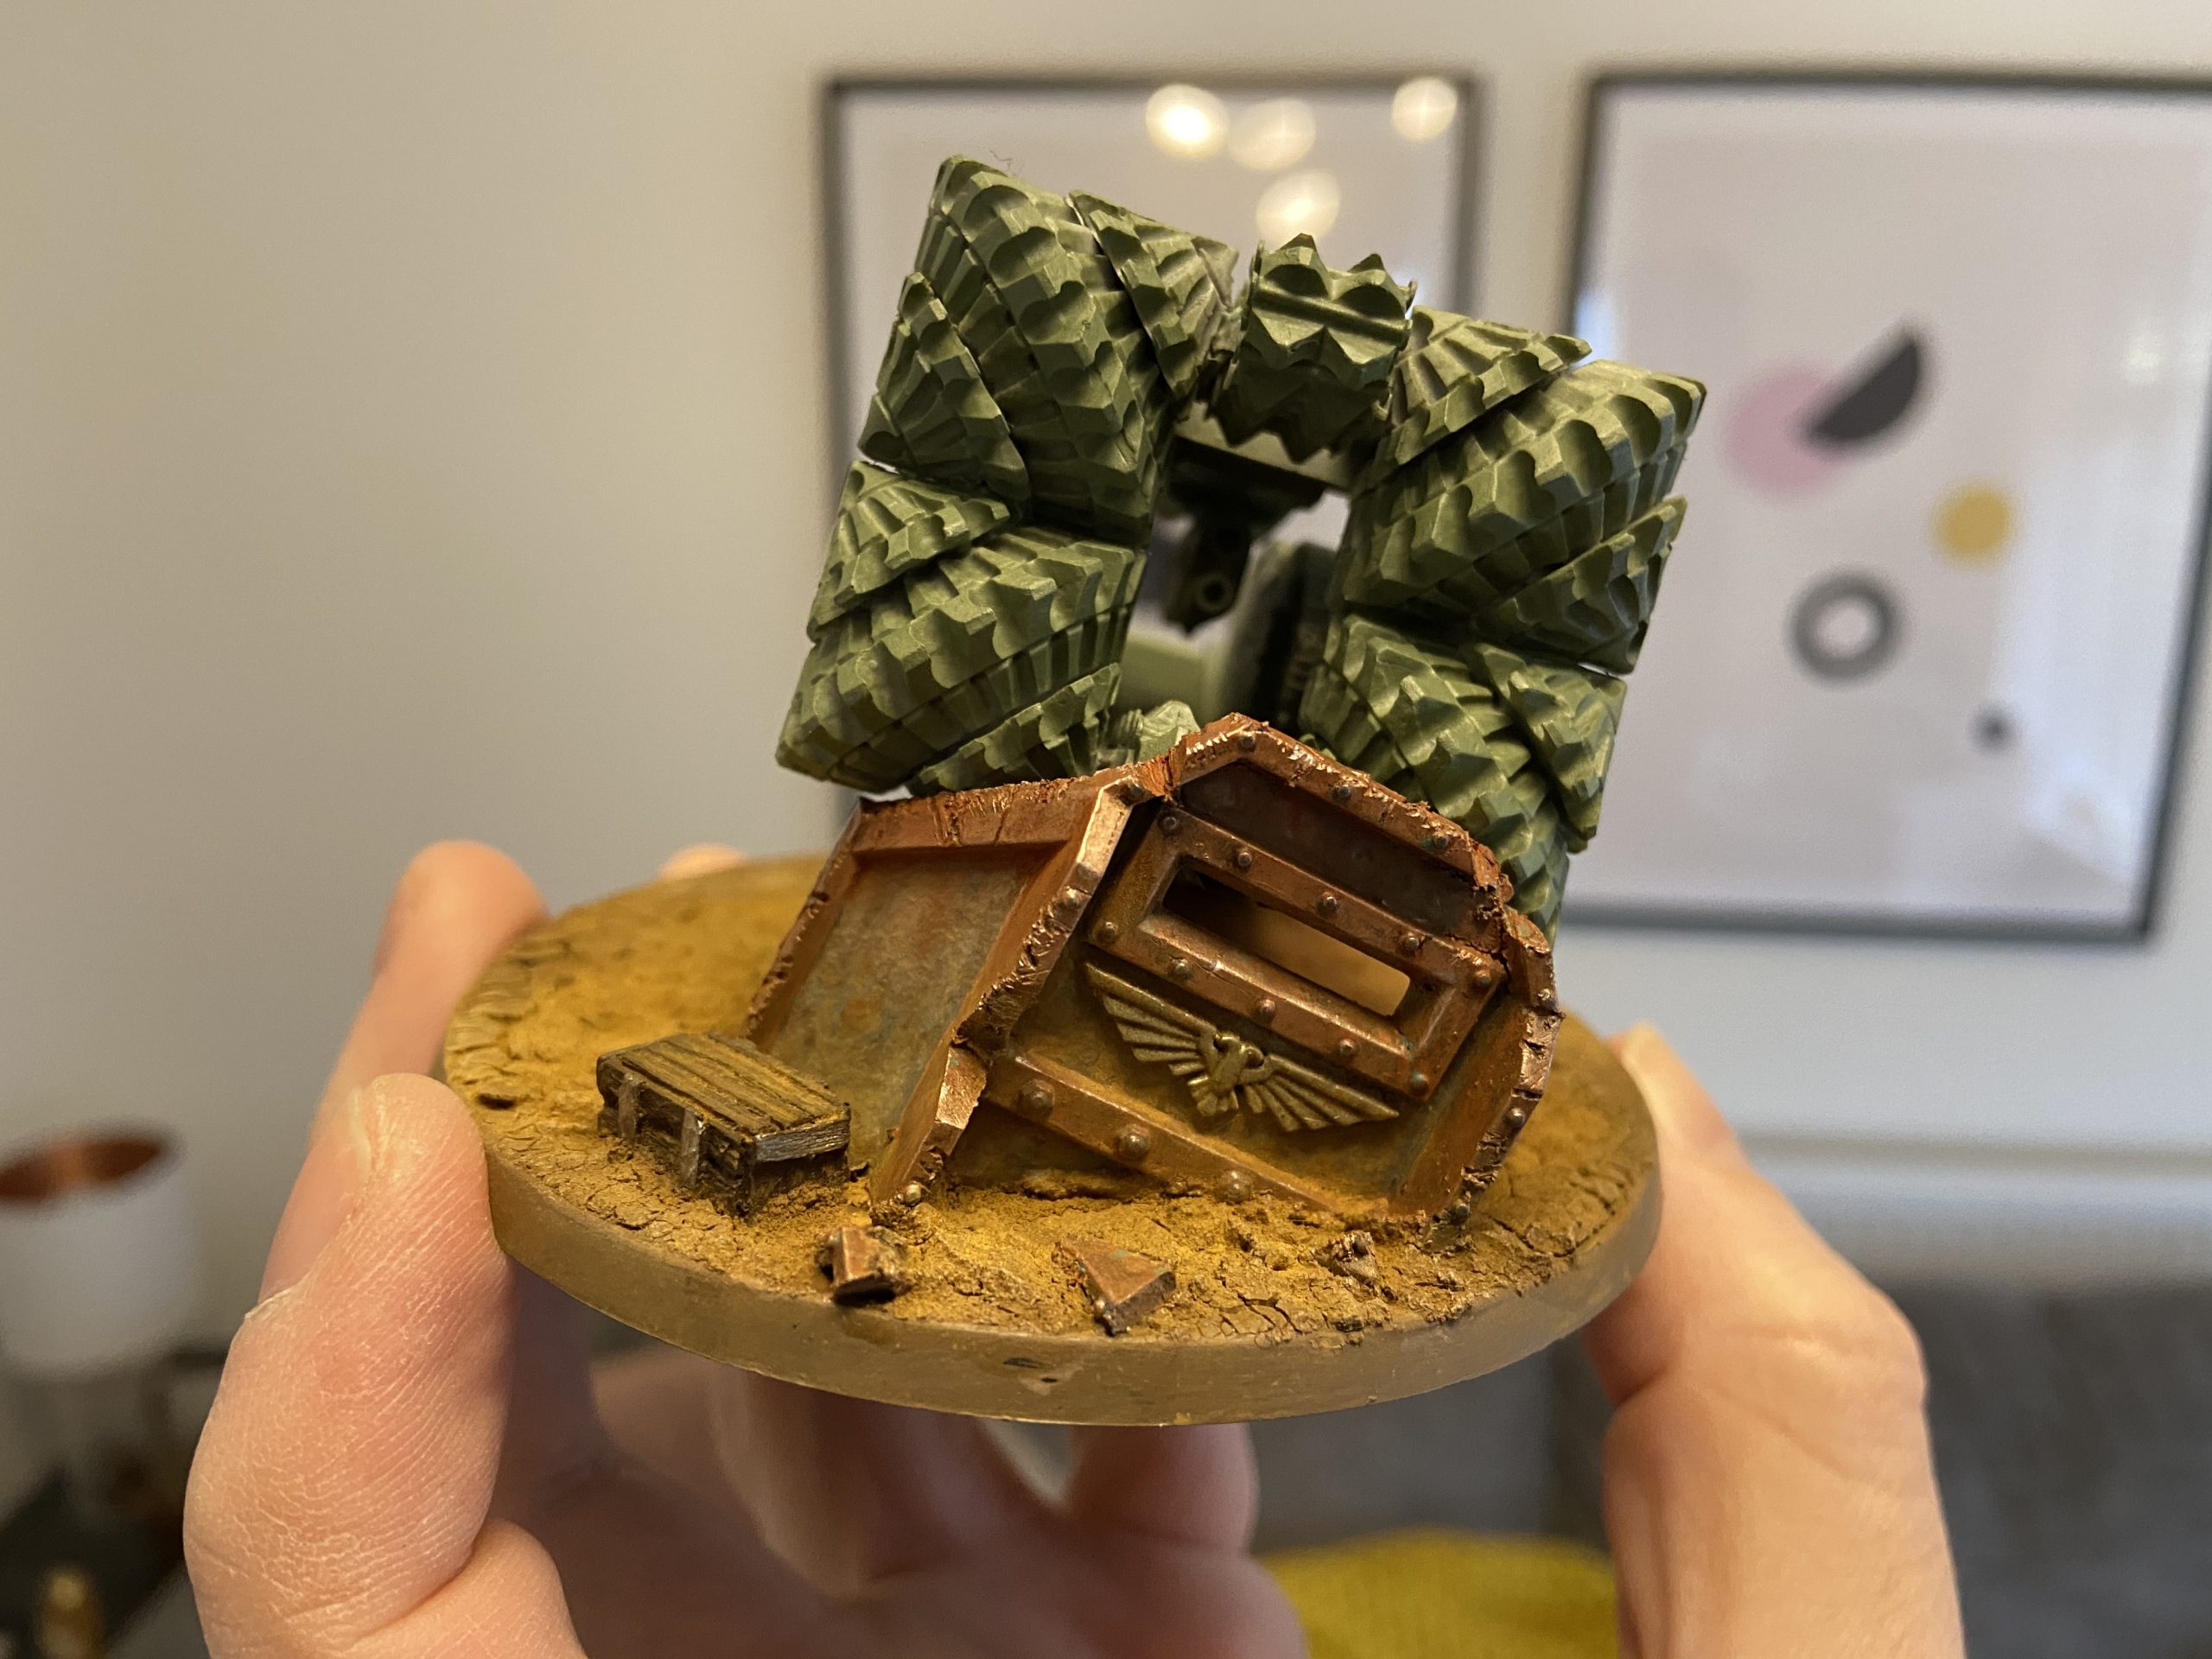
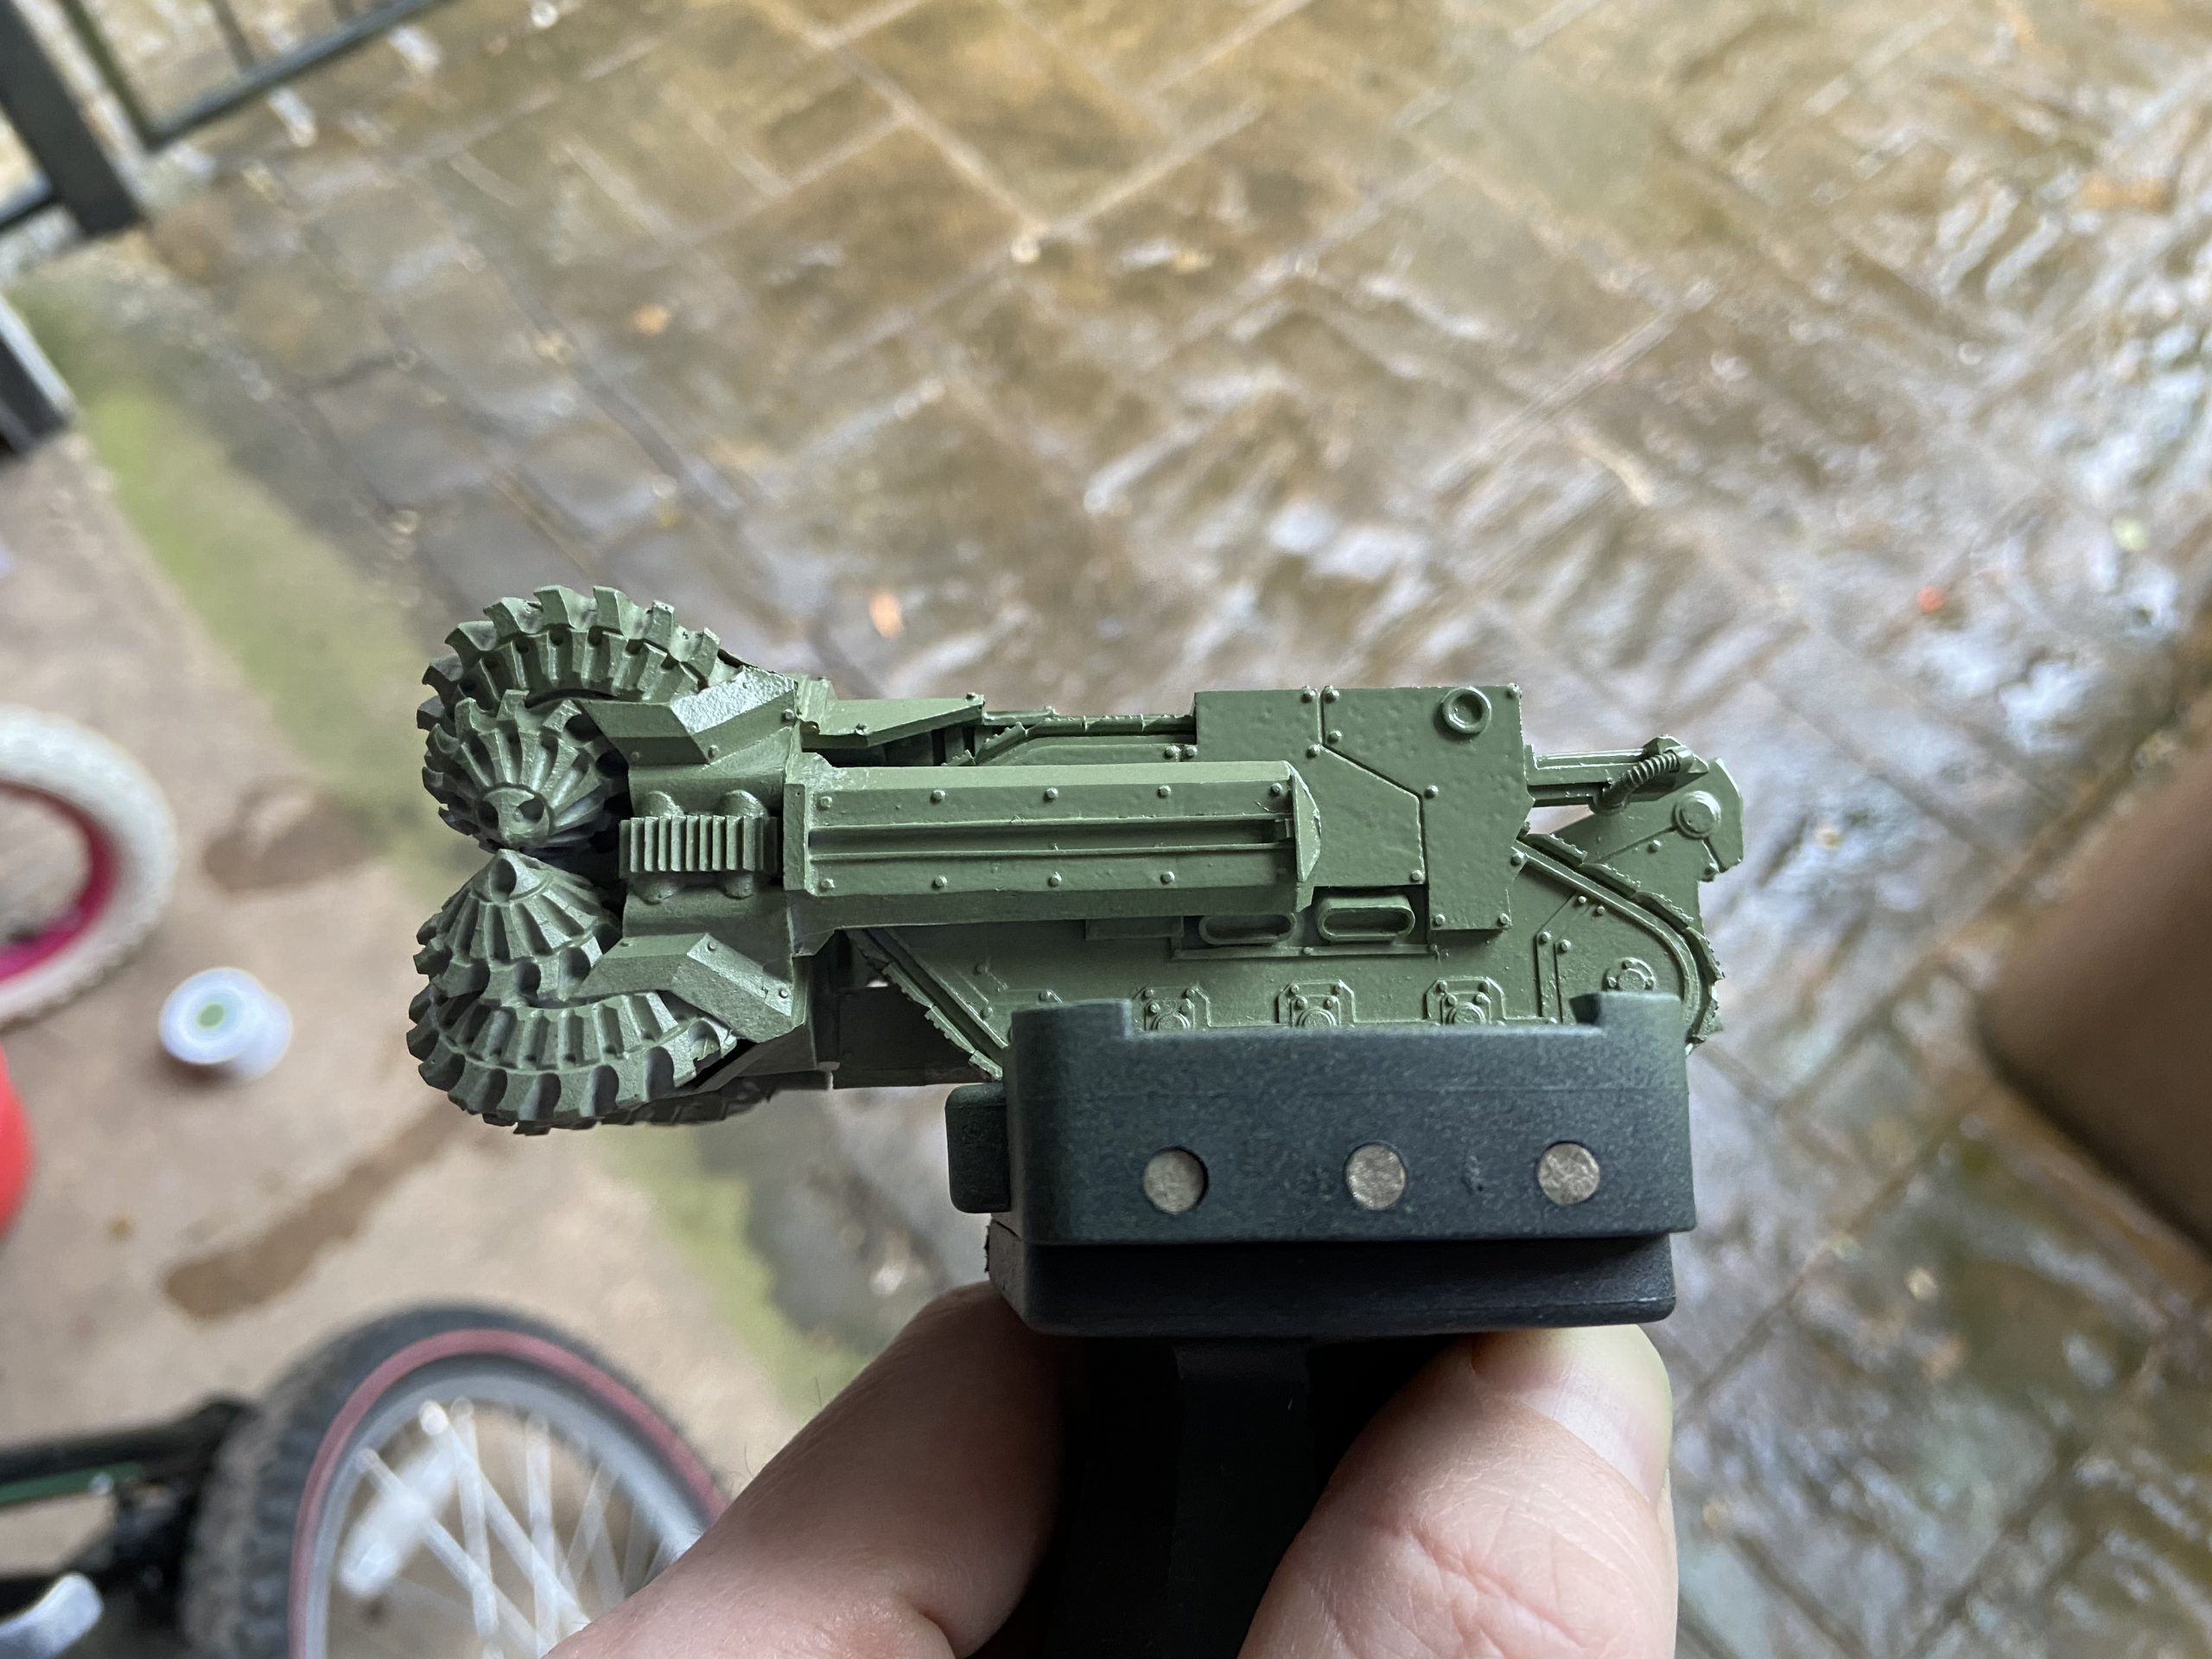
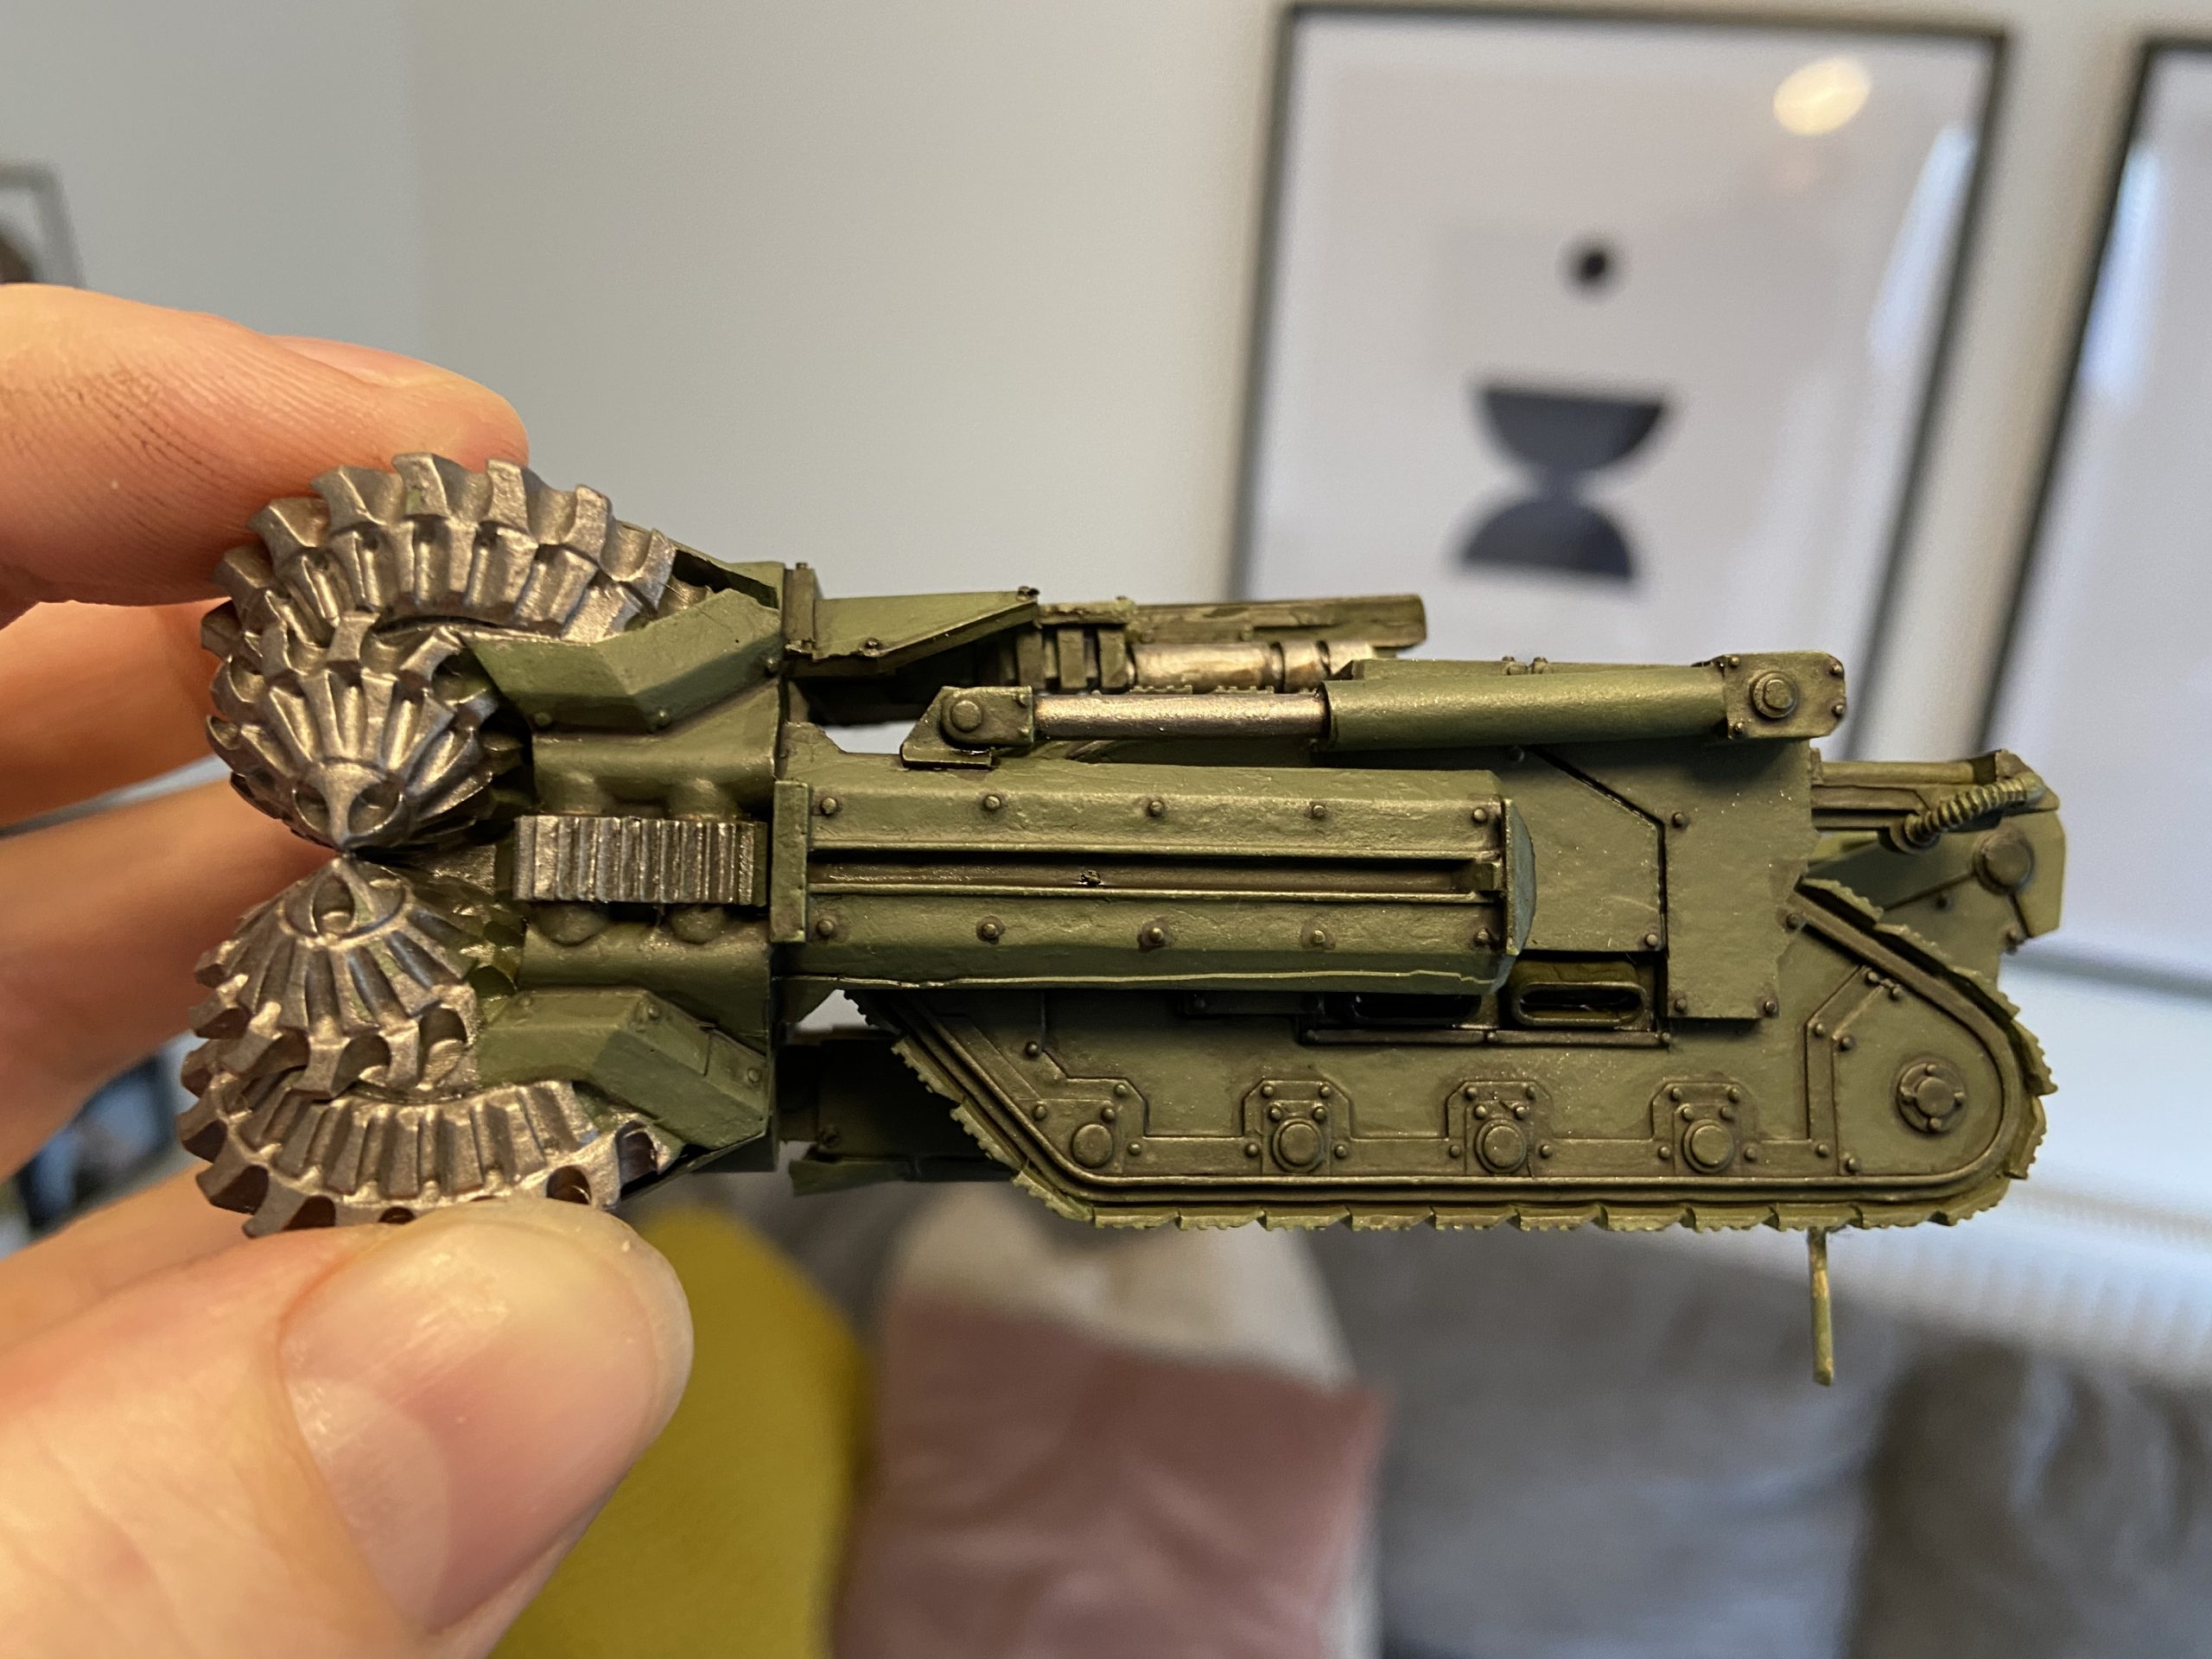
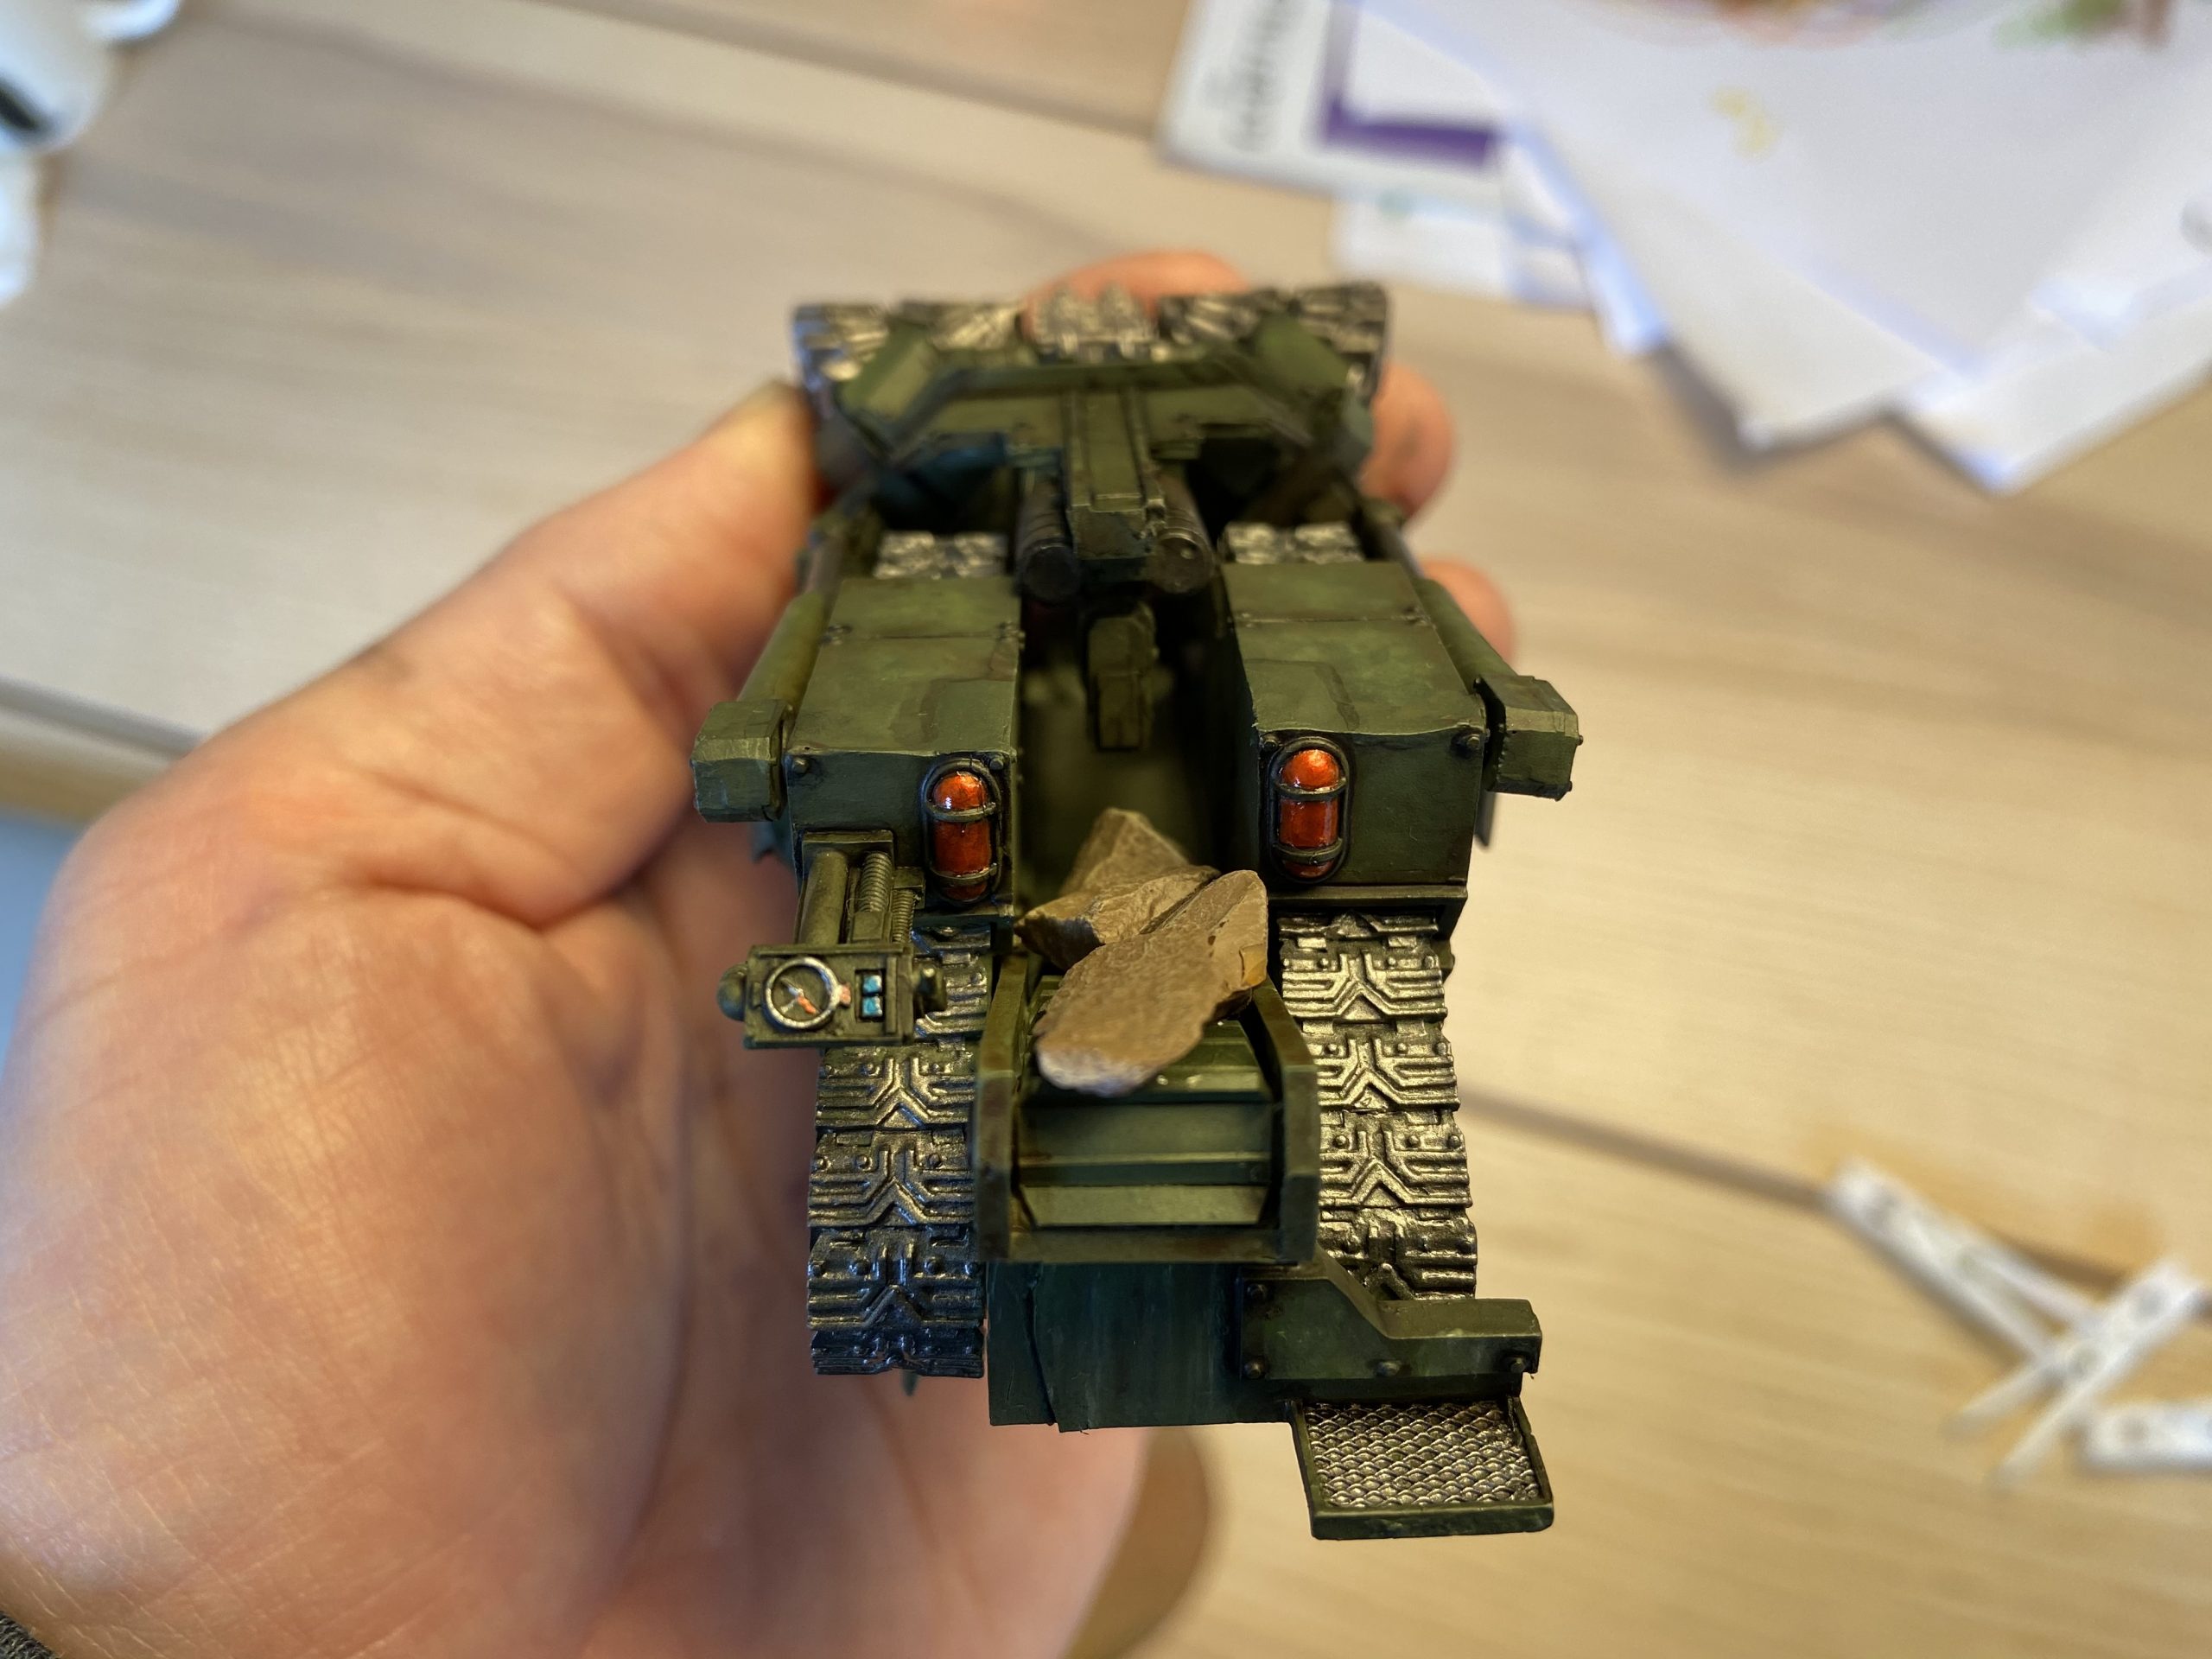
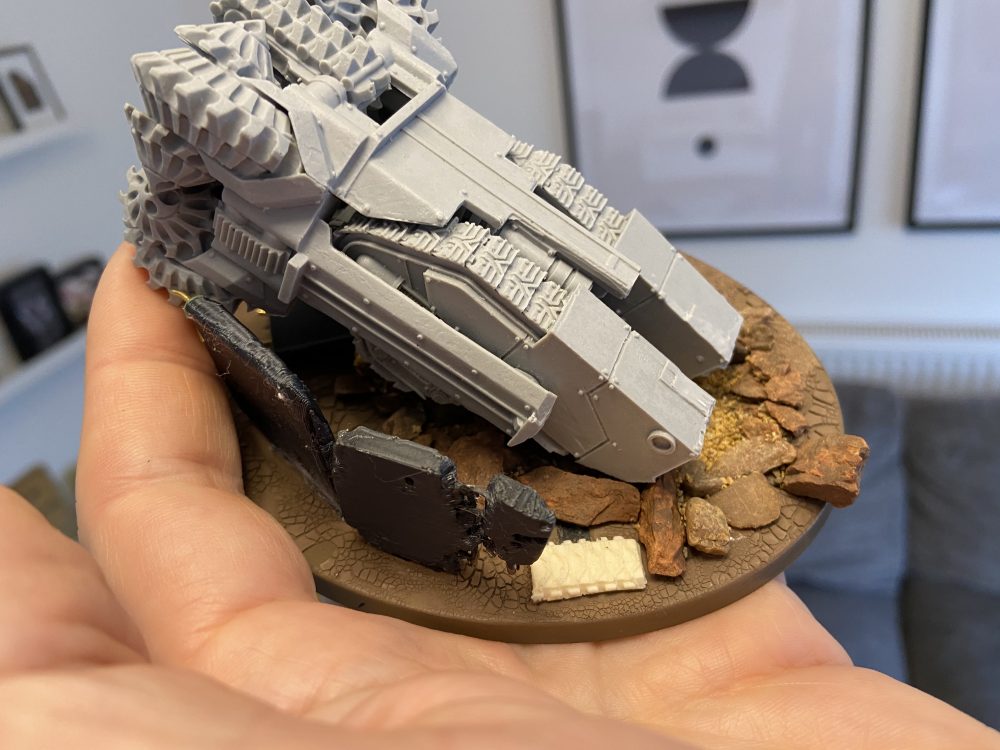
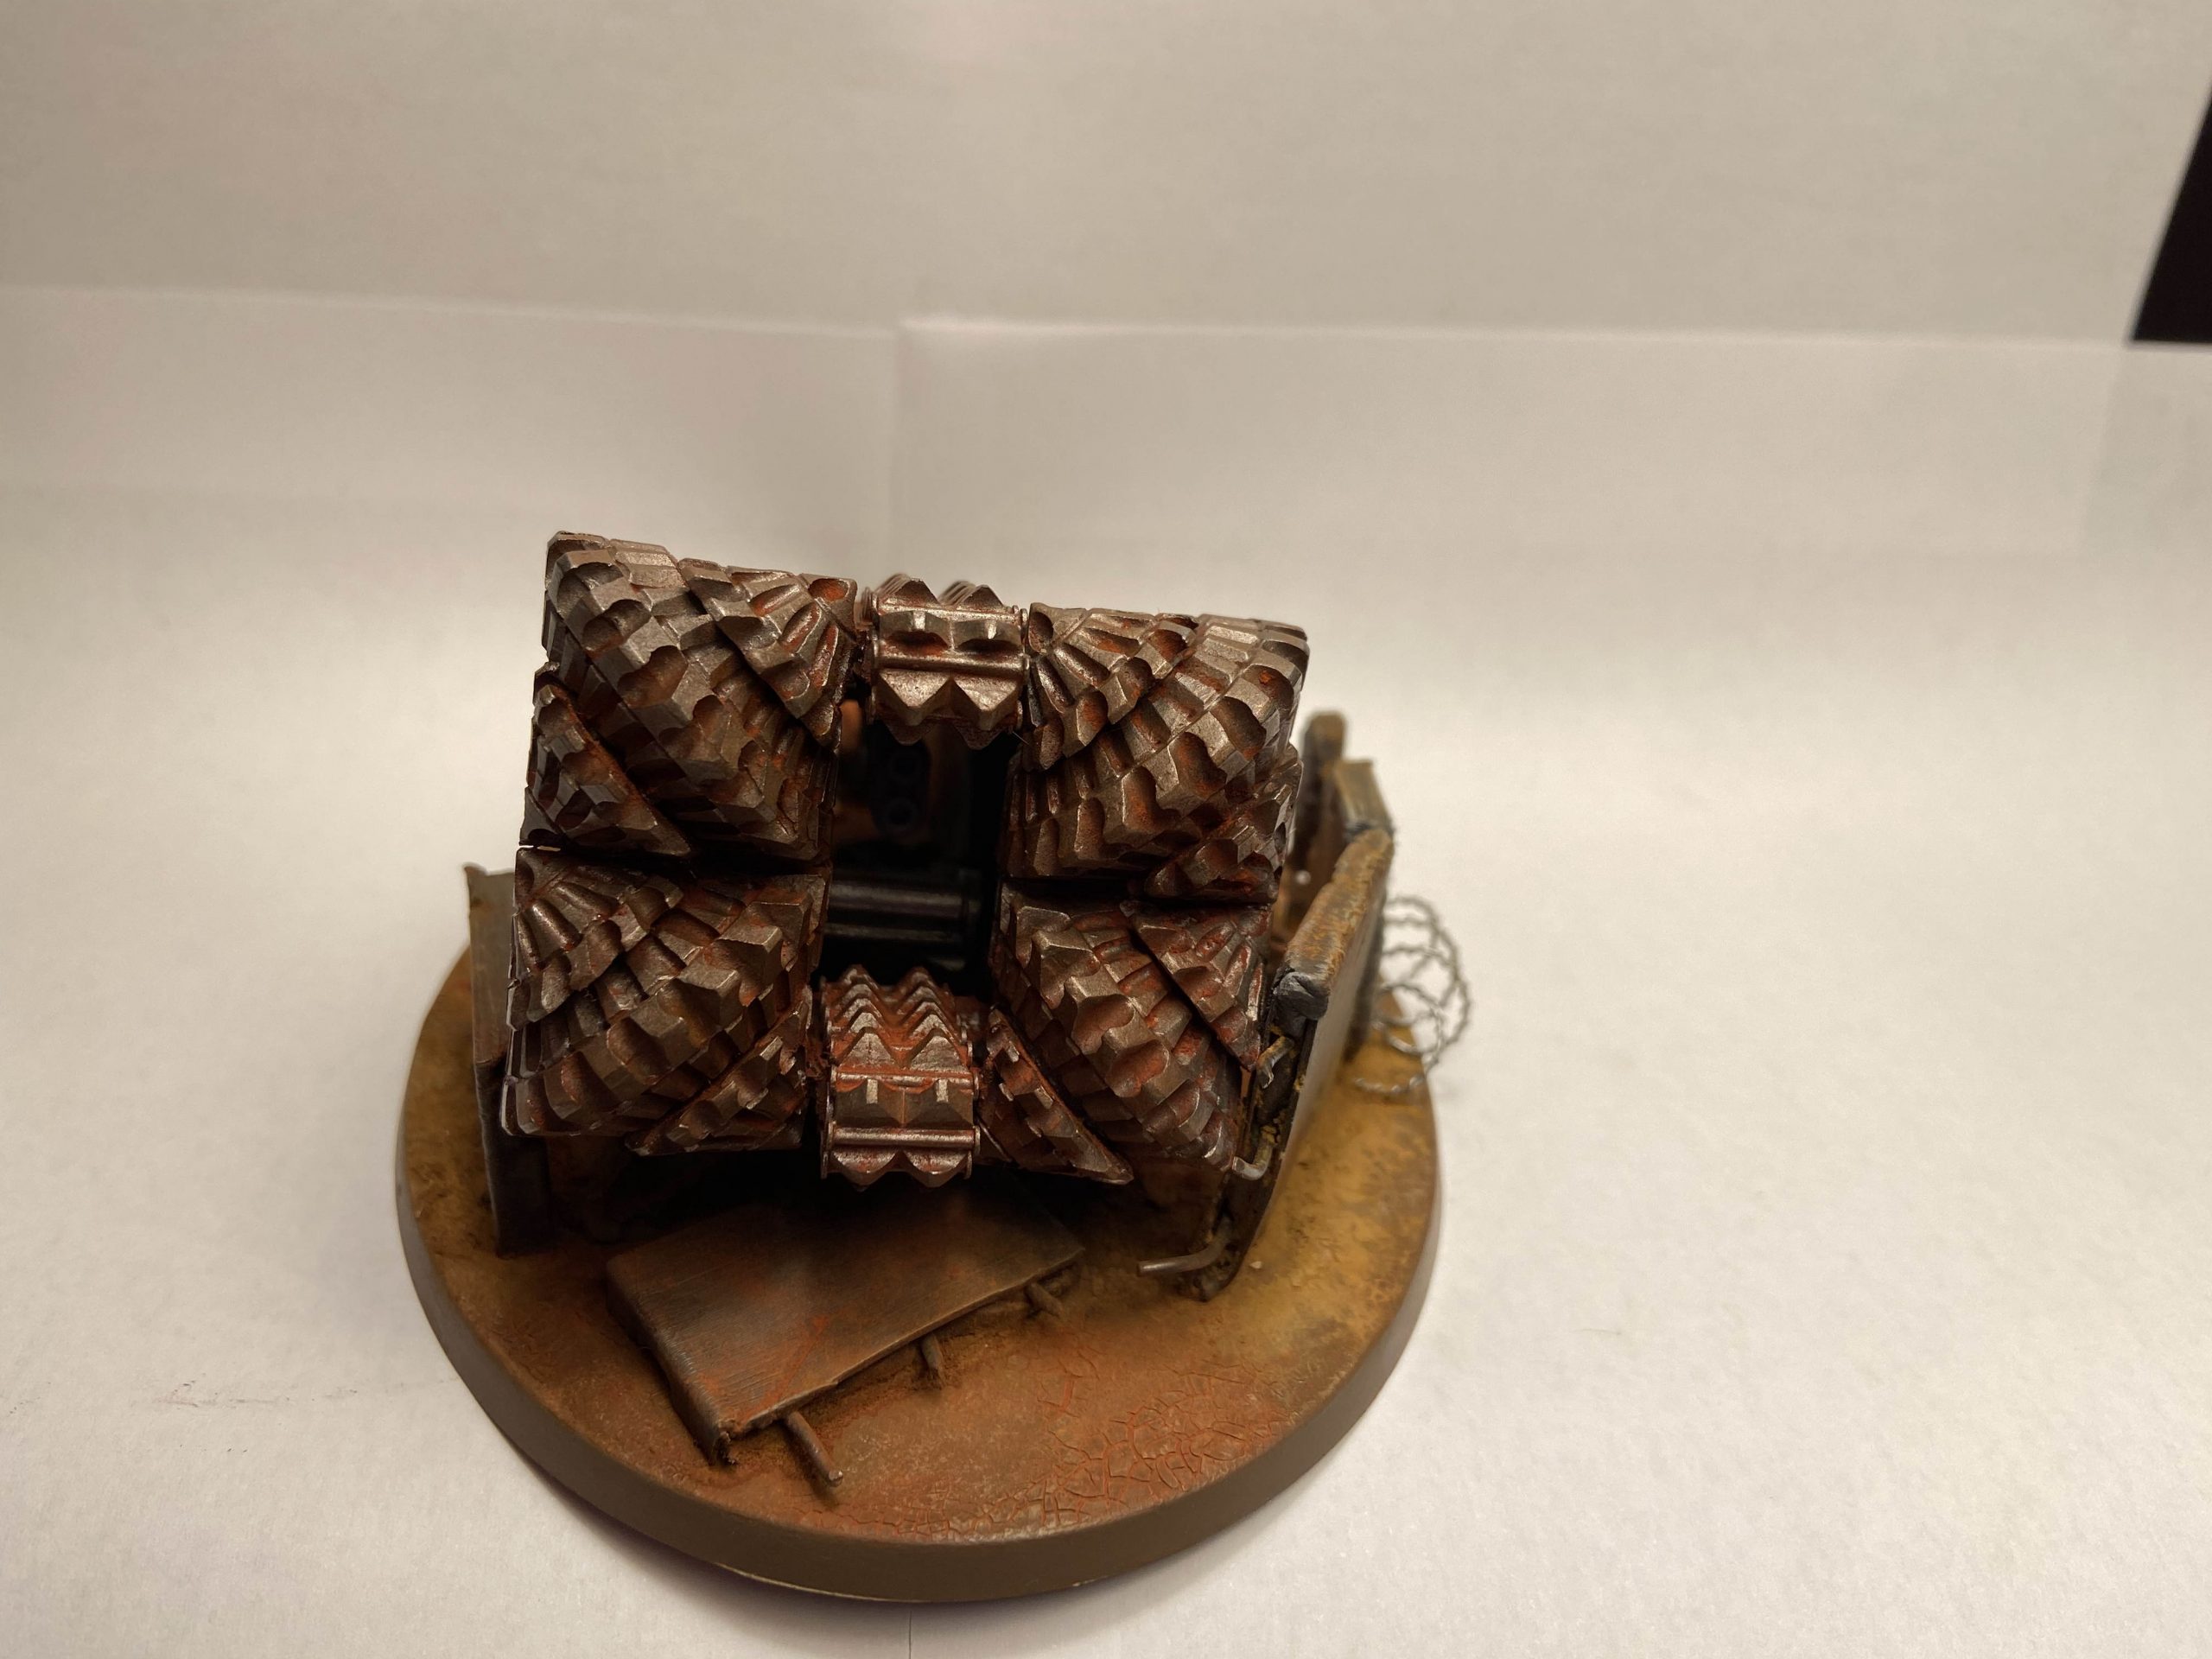
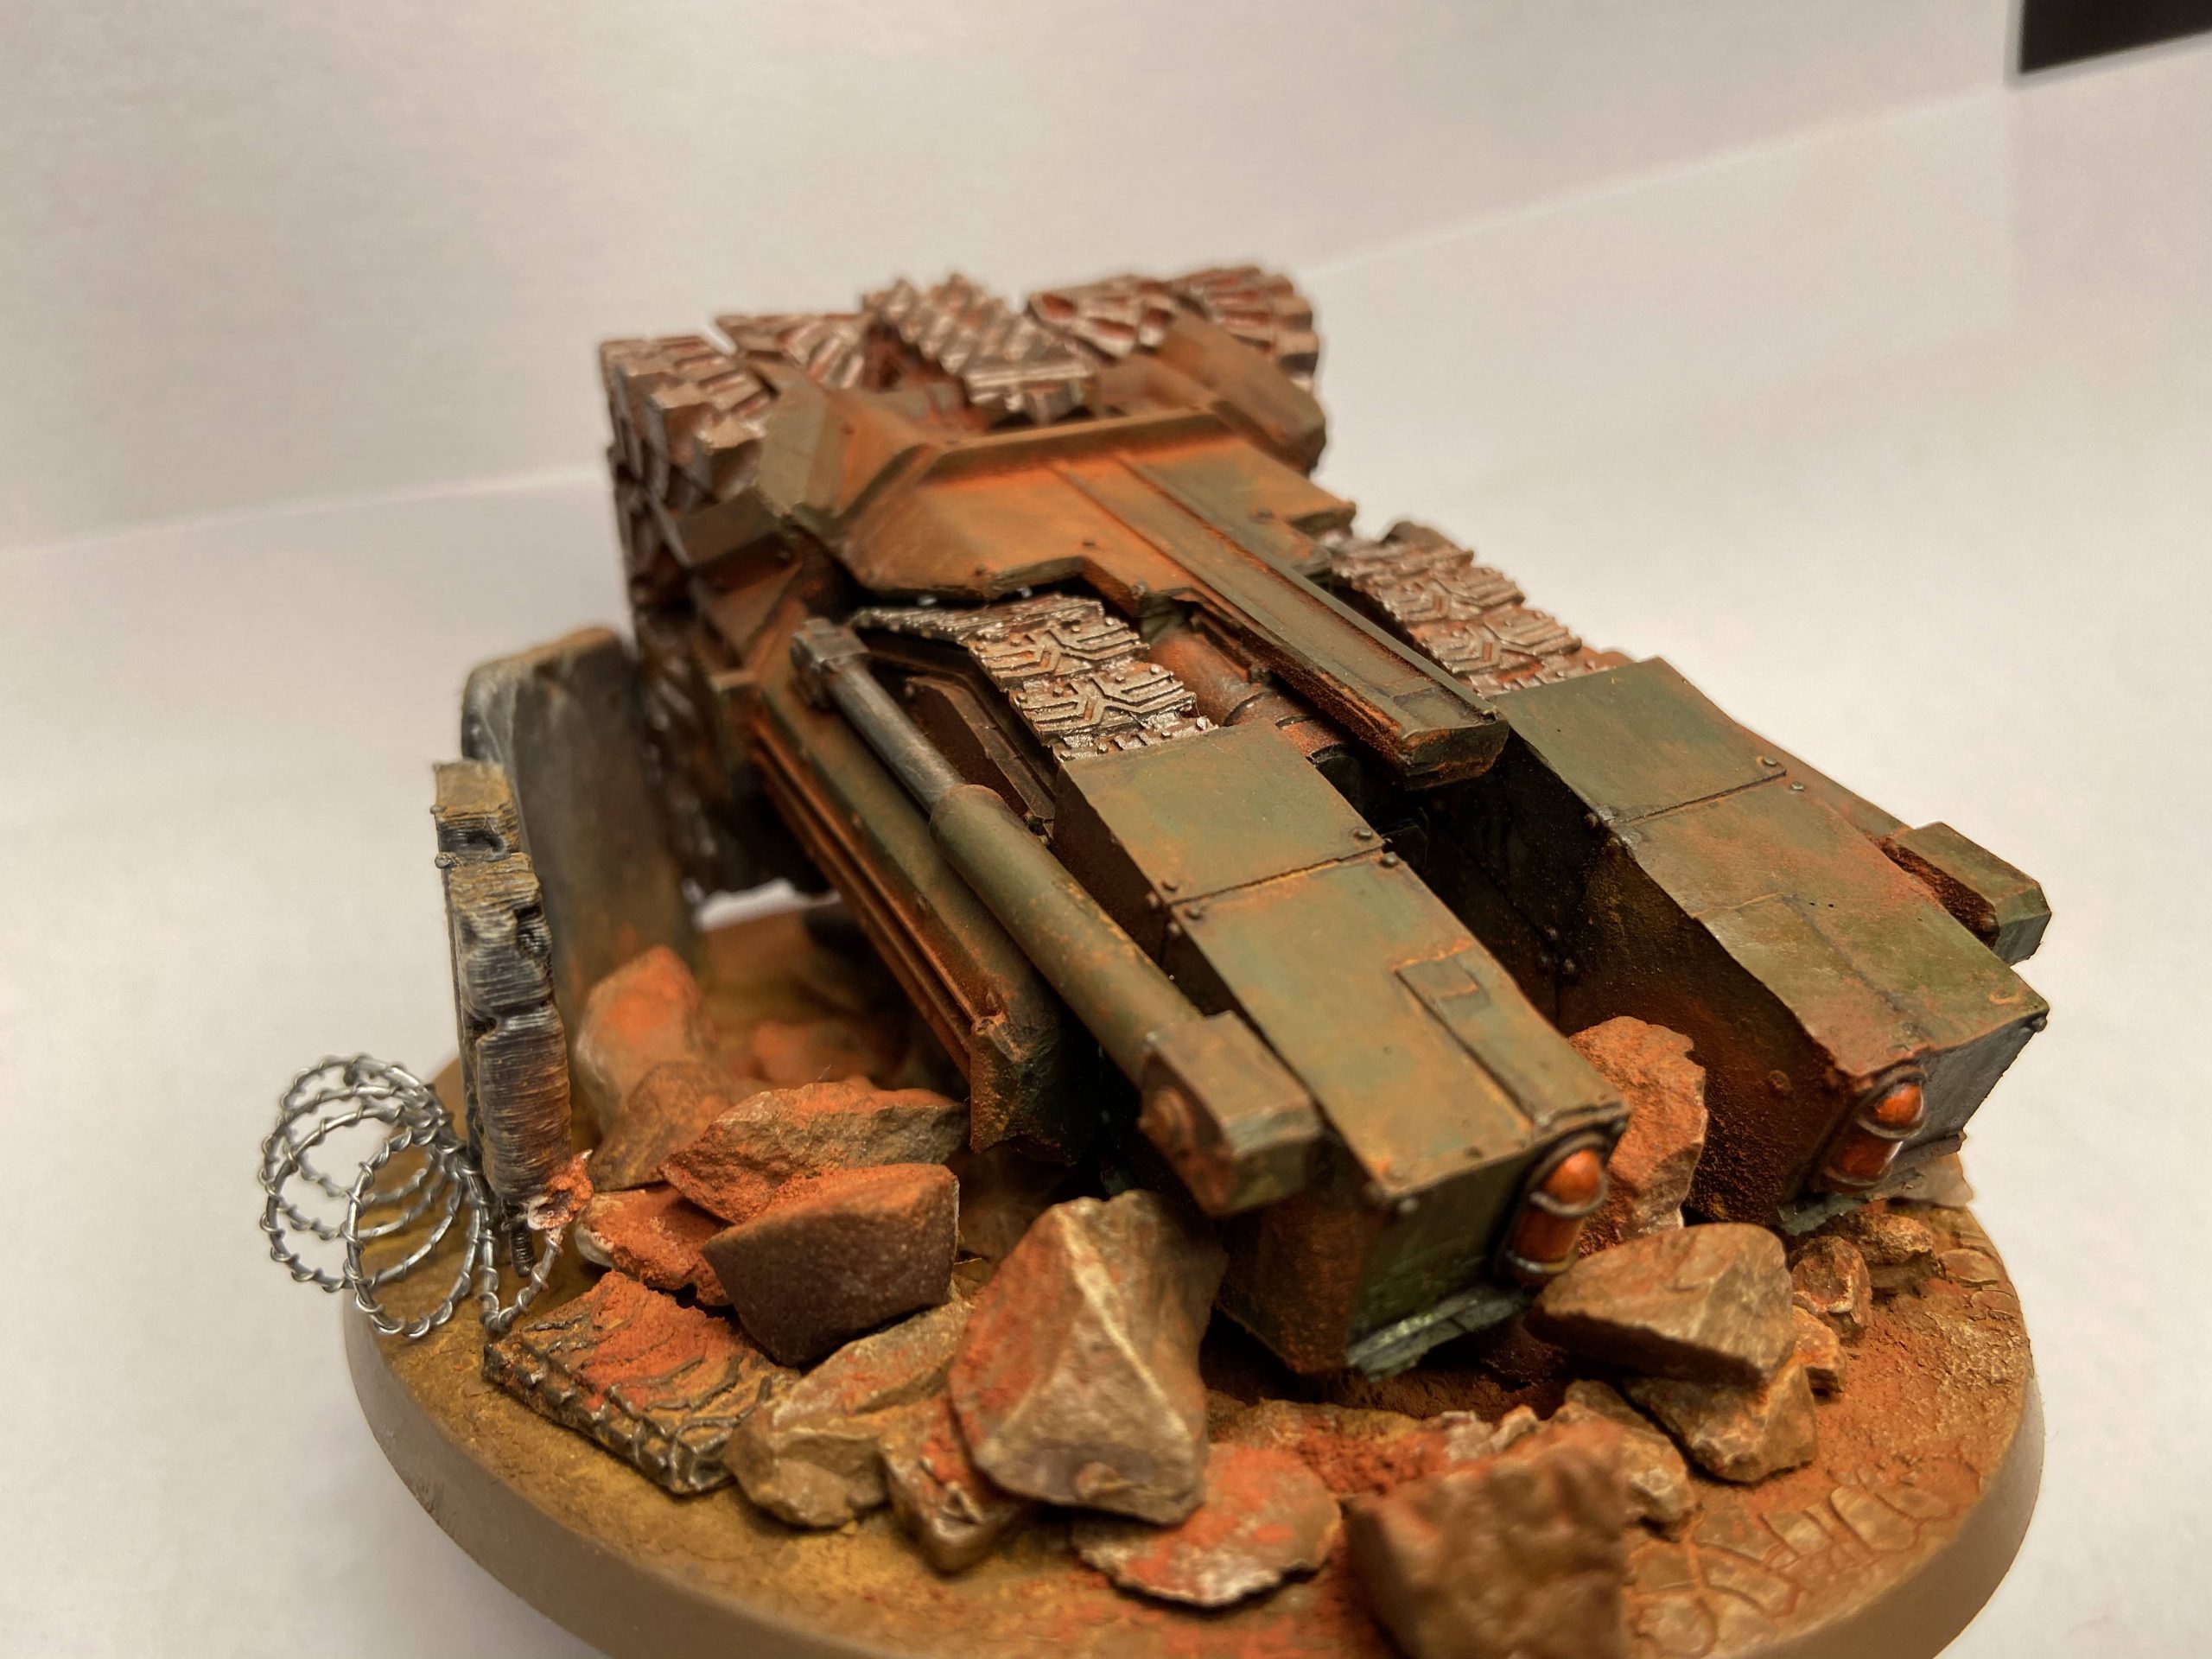
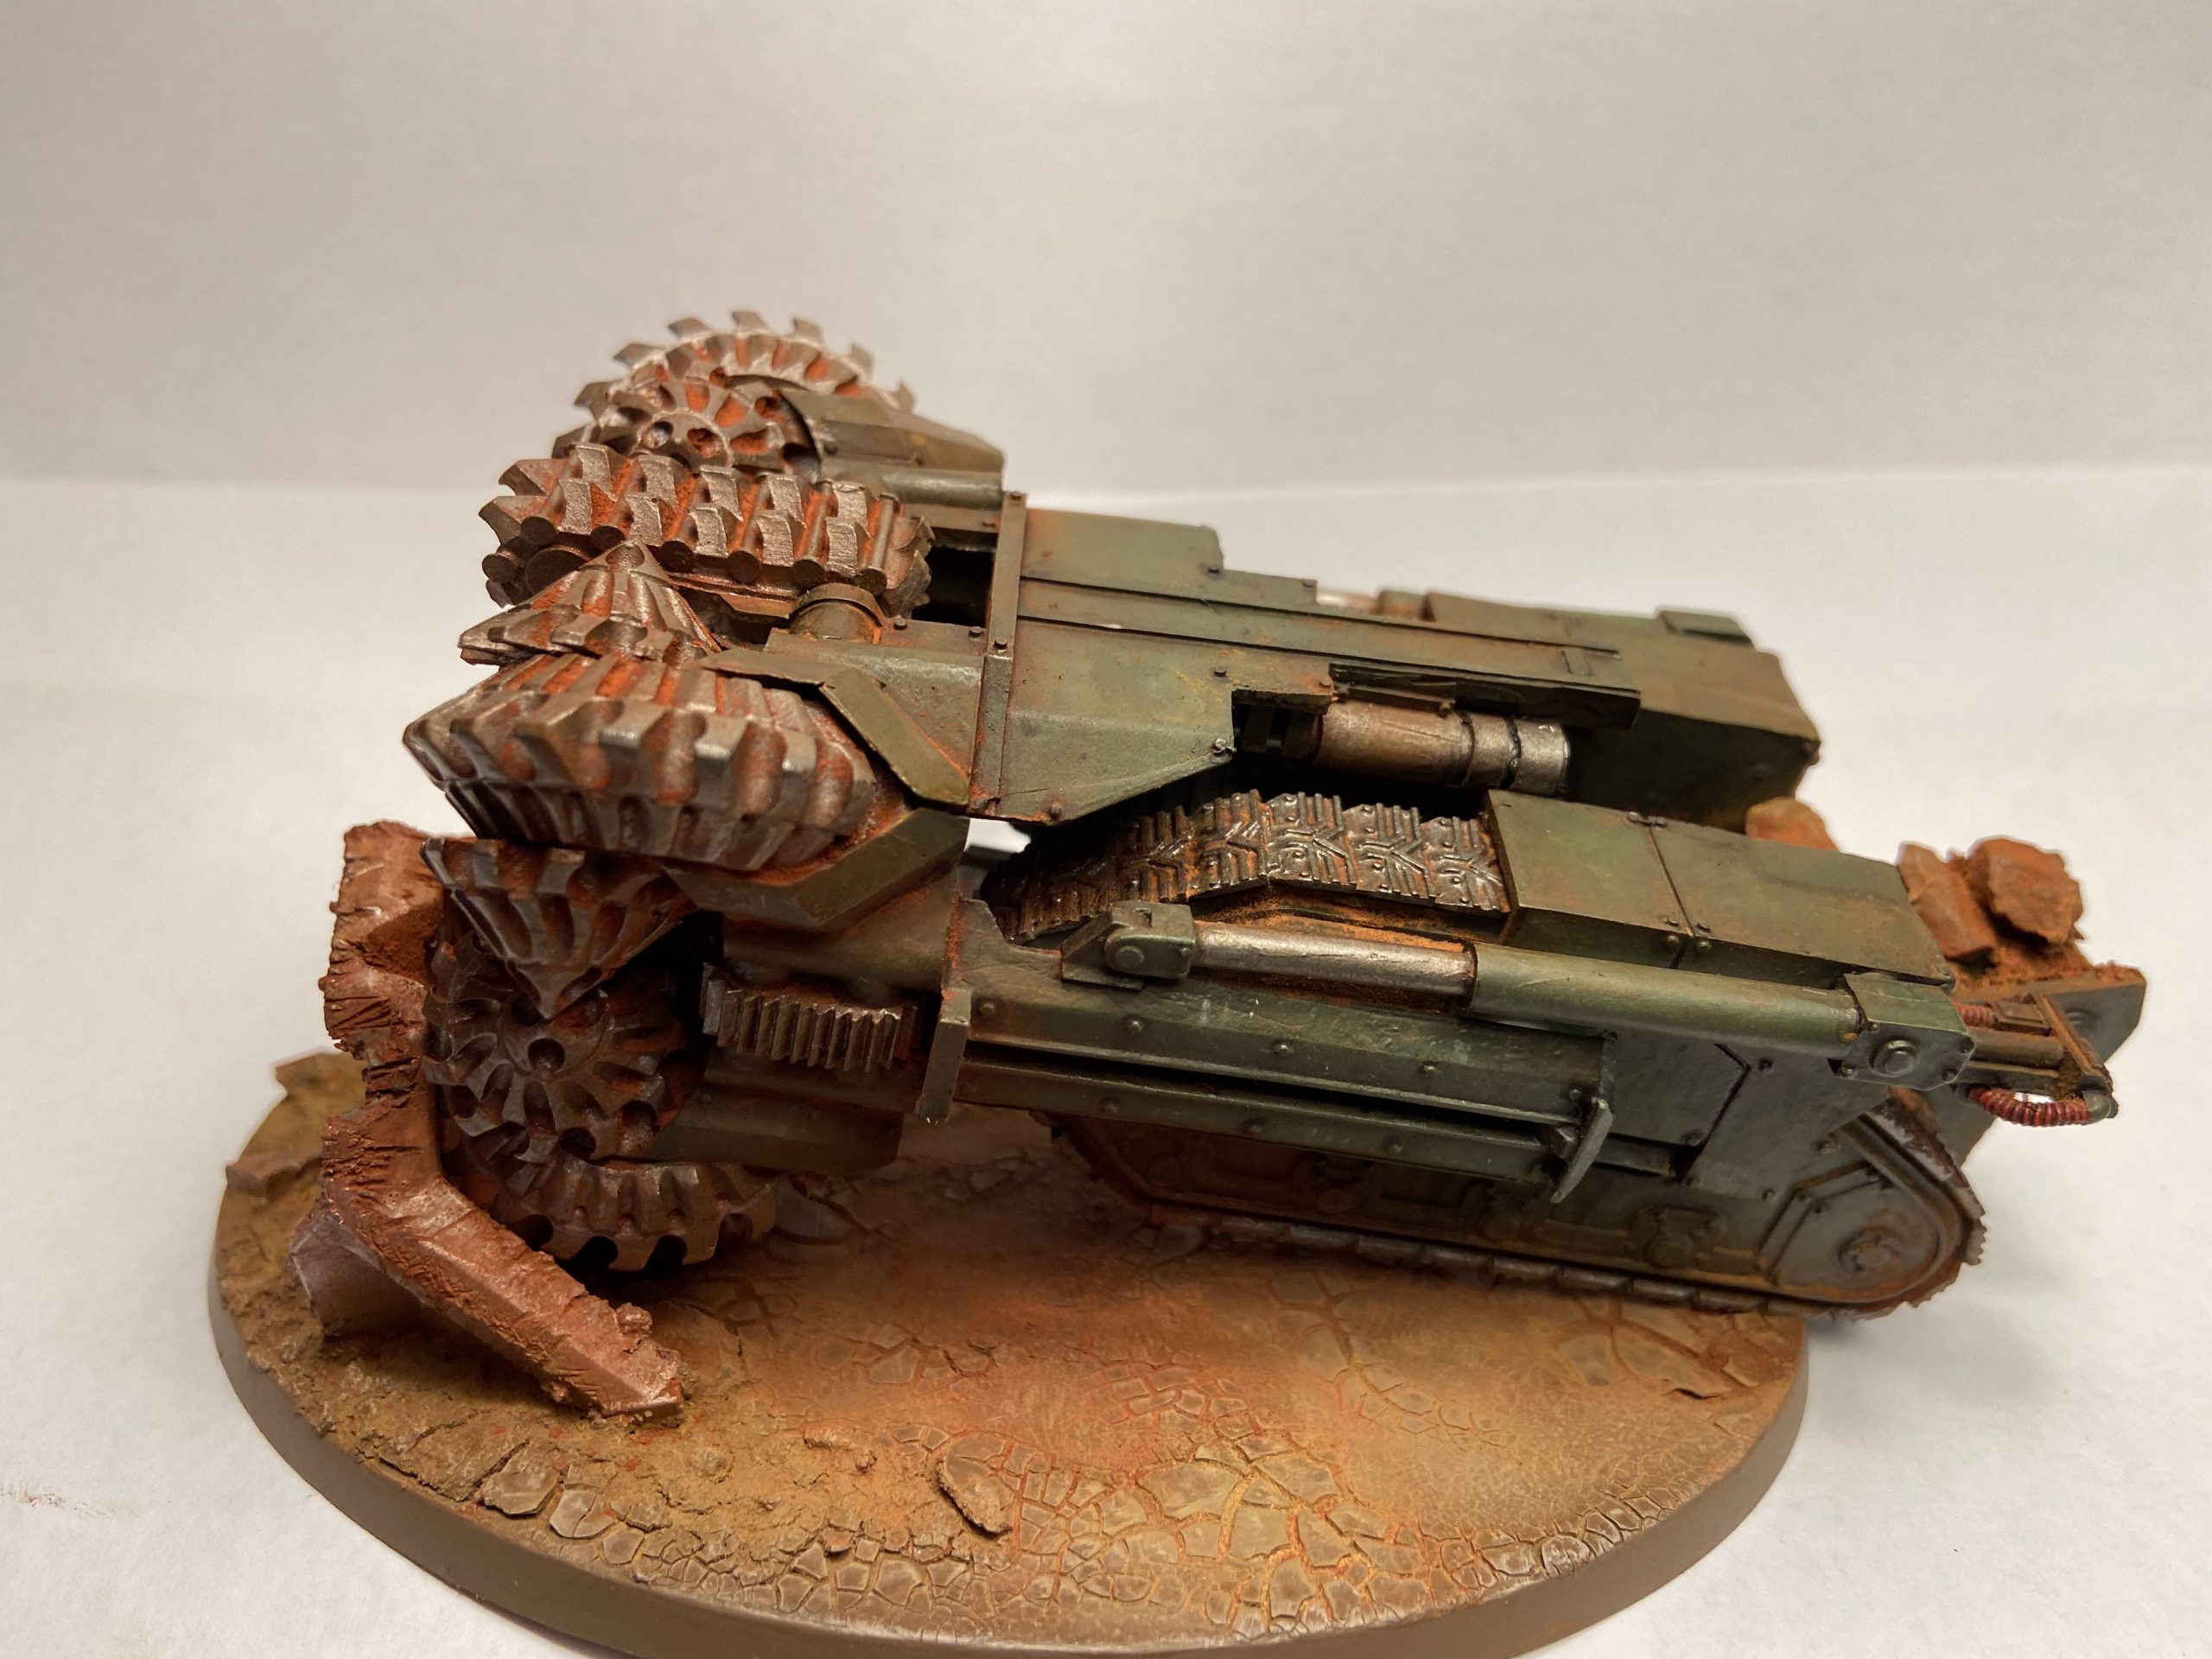
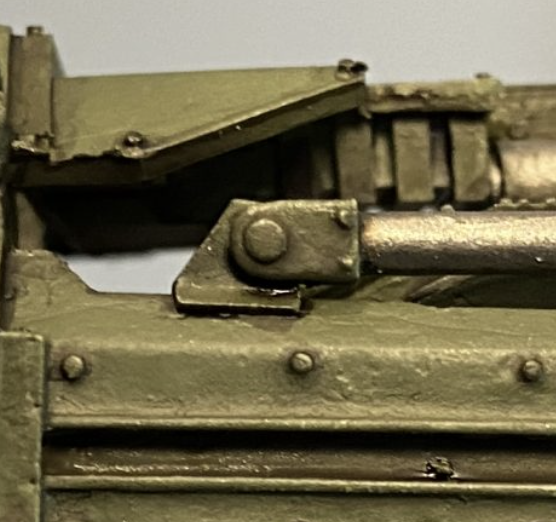
One happy accident was that the Drill’s front section pivots at the point where it is glued and attaches to the main tracked chassis. Where the two arms touch the body around the mid-section. I glued it so that it was as down as far as it would go. So that it looked like the Drill has come up, out and now the front section has dropped of its own accord. Maybe it does?
I did have to remove the little control panel from the rear of this Hades Breaching Drill to make it work. It extends the model’s length by only a little bit, but it was enough to make it very hard to get it to fit onto the base realistically. A small price to pay for a unique project.
-


- The tools

-
- WTF am I doing!?

-
- The base is now partially removed now

-
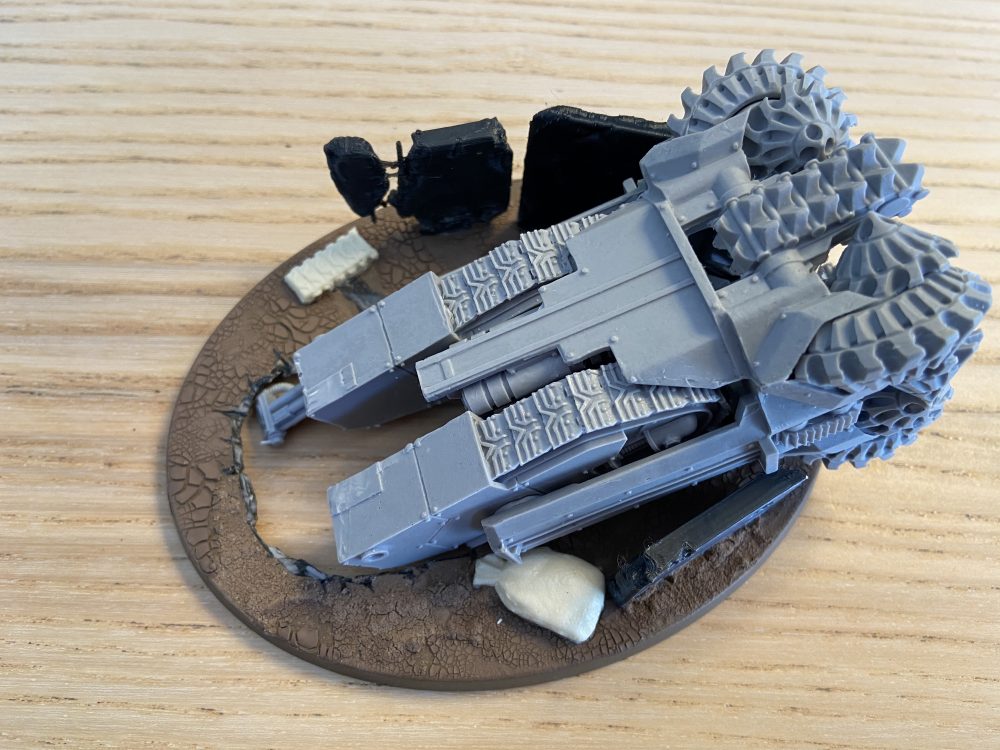
- The first glimpse at the result

-
- A lot more work required at this stage still…

-
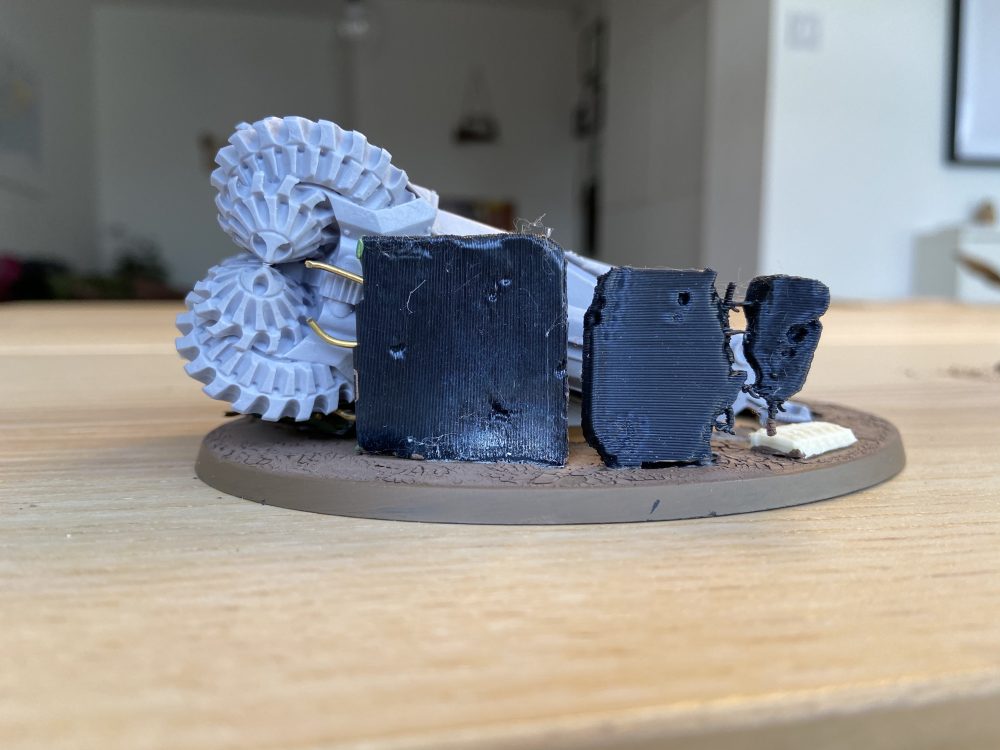
- Preparing to fill the new base

-

- All done
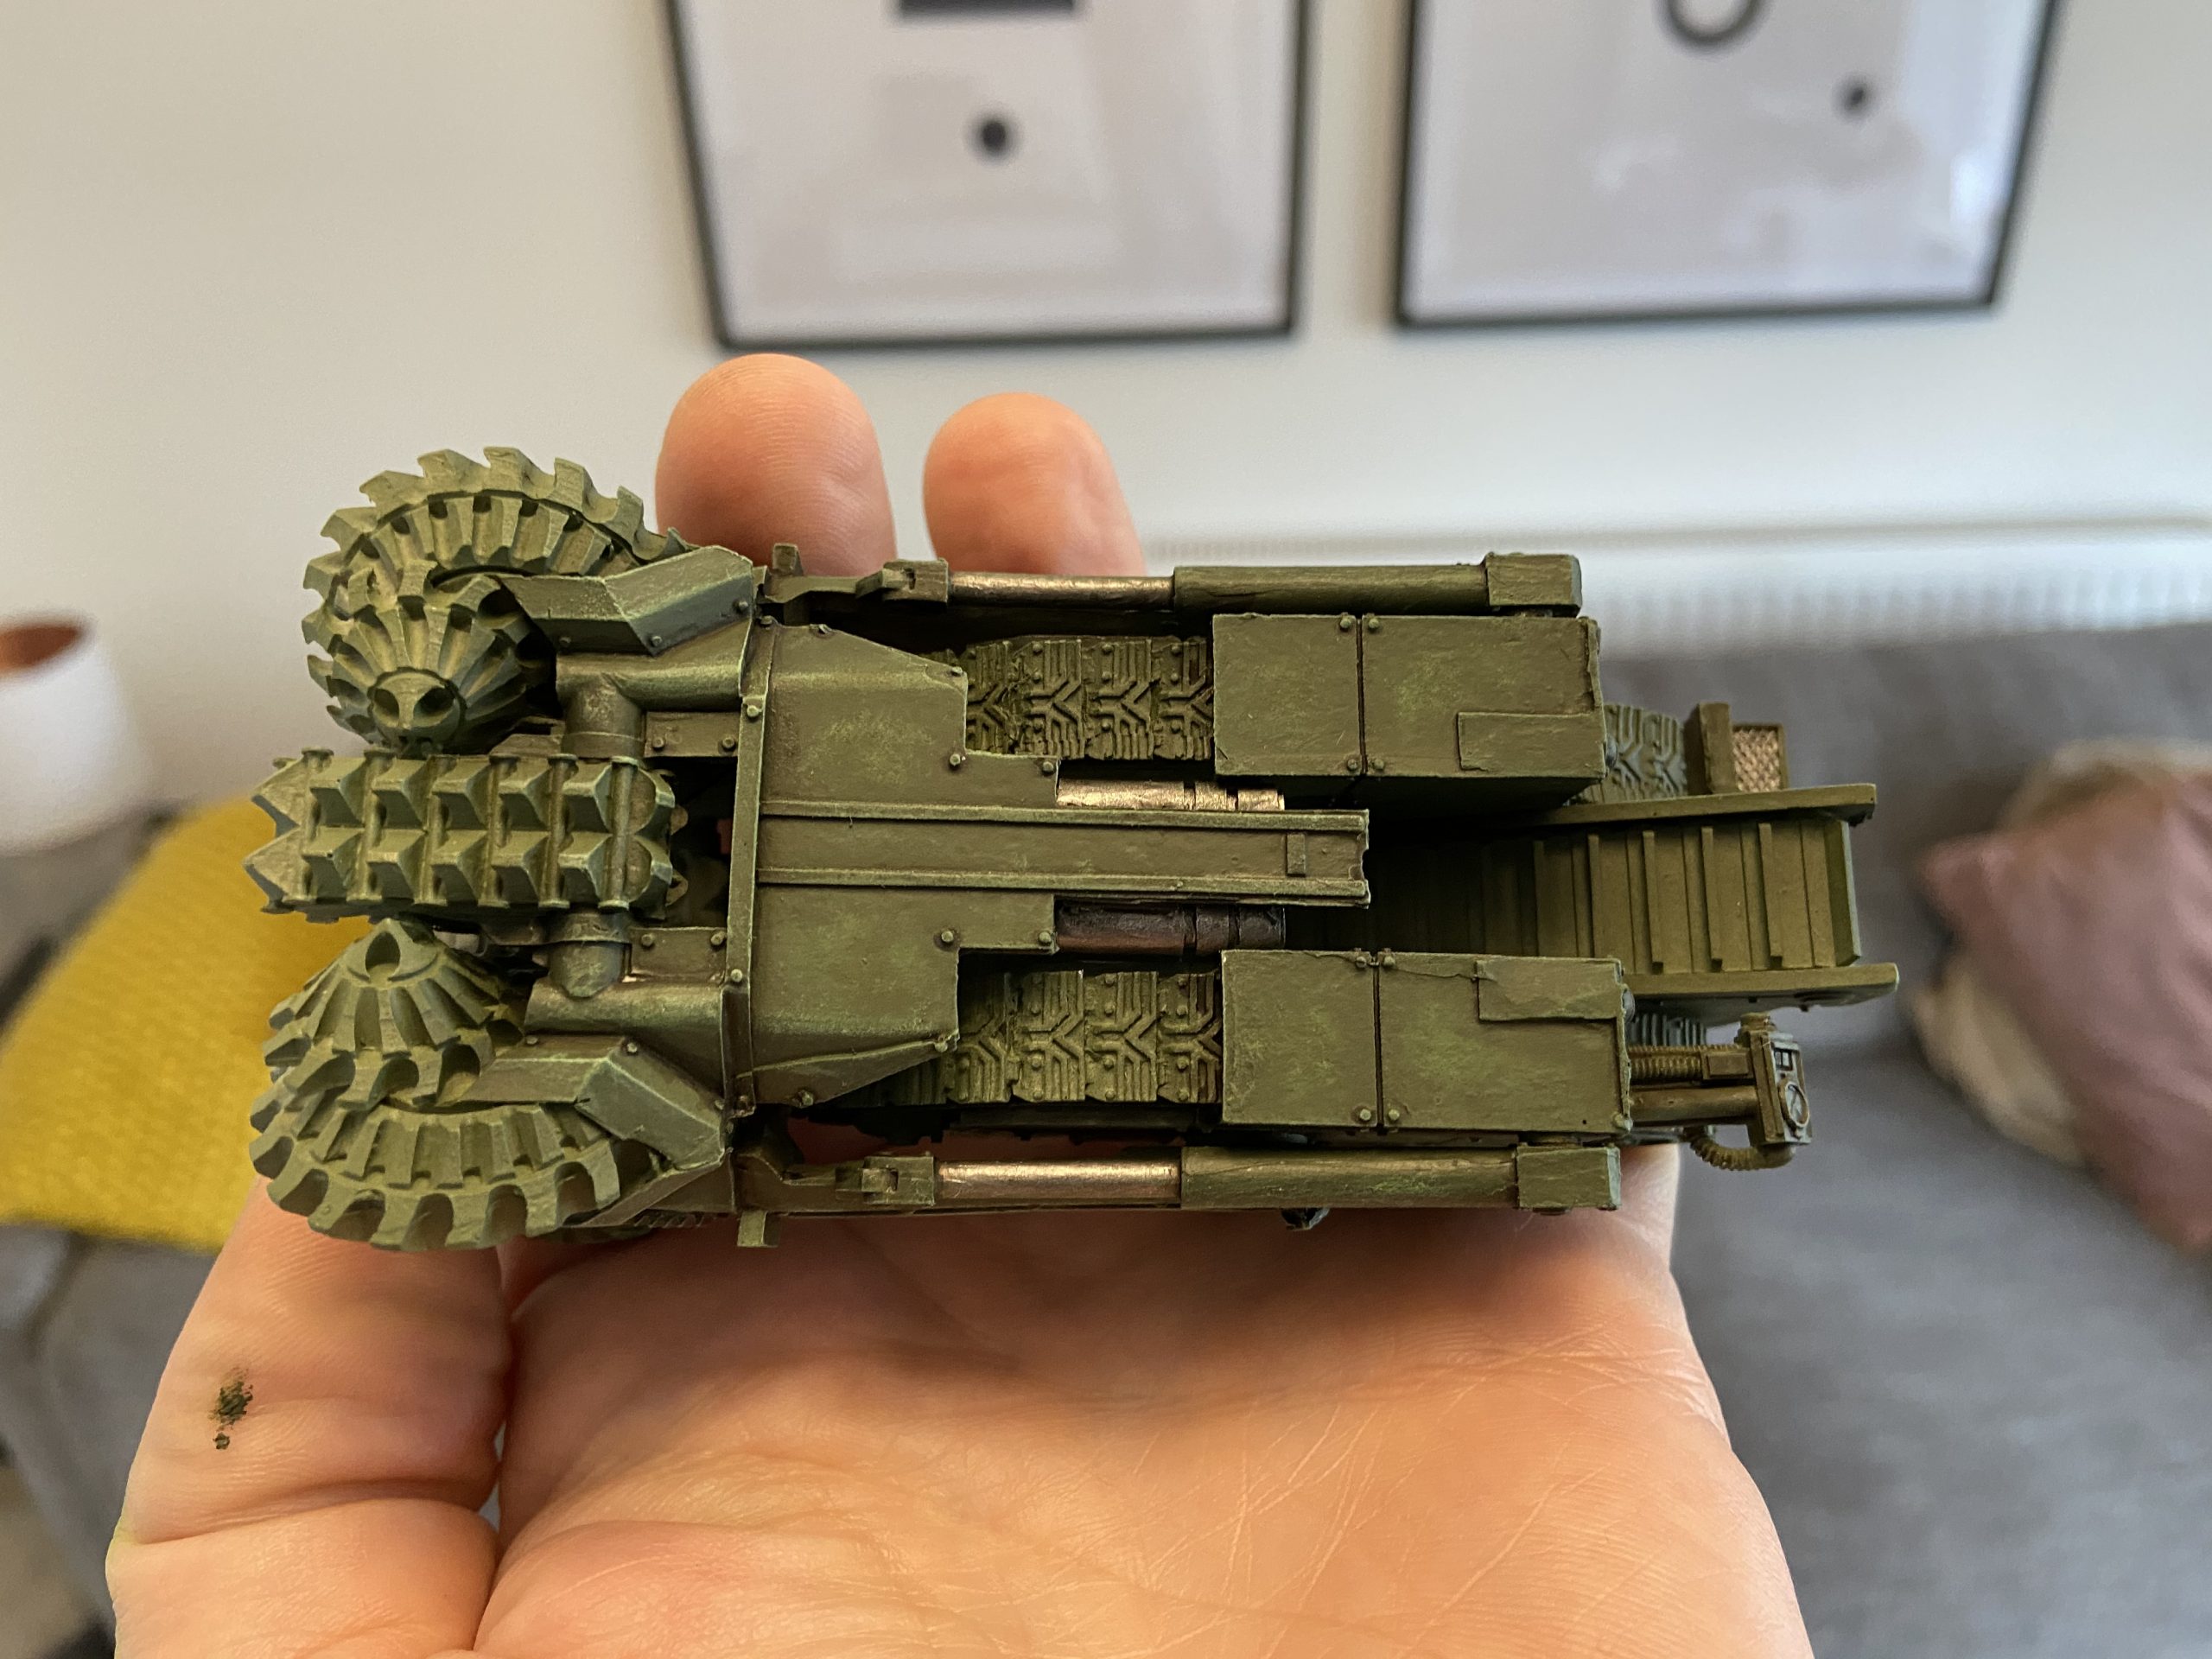
-
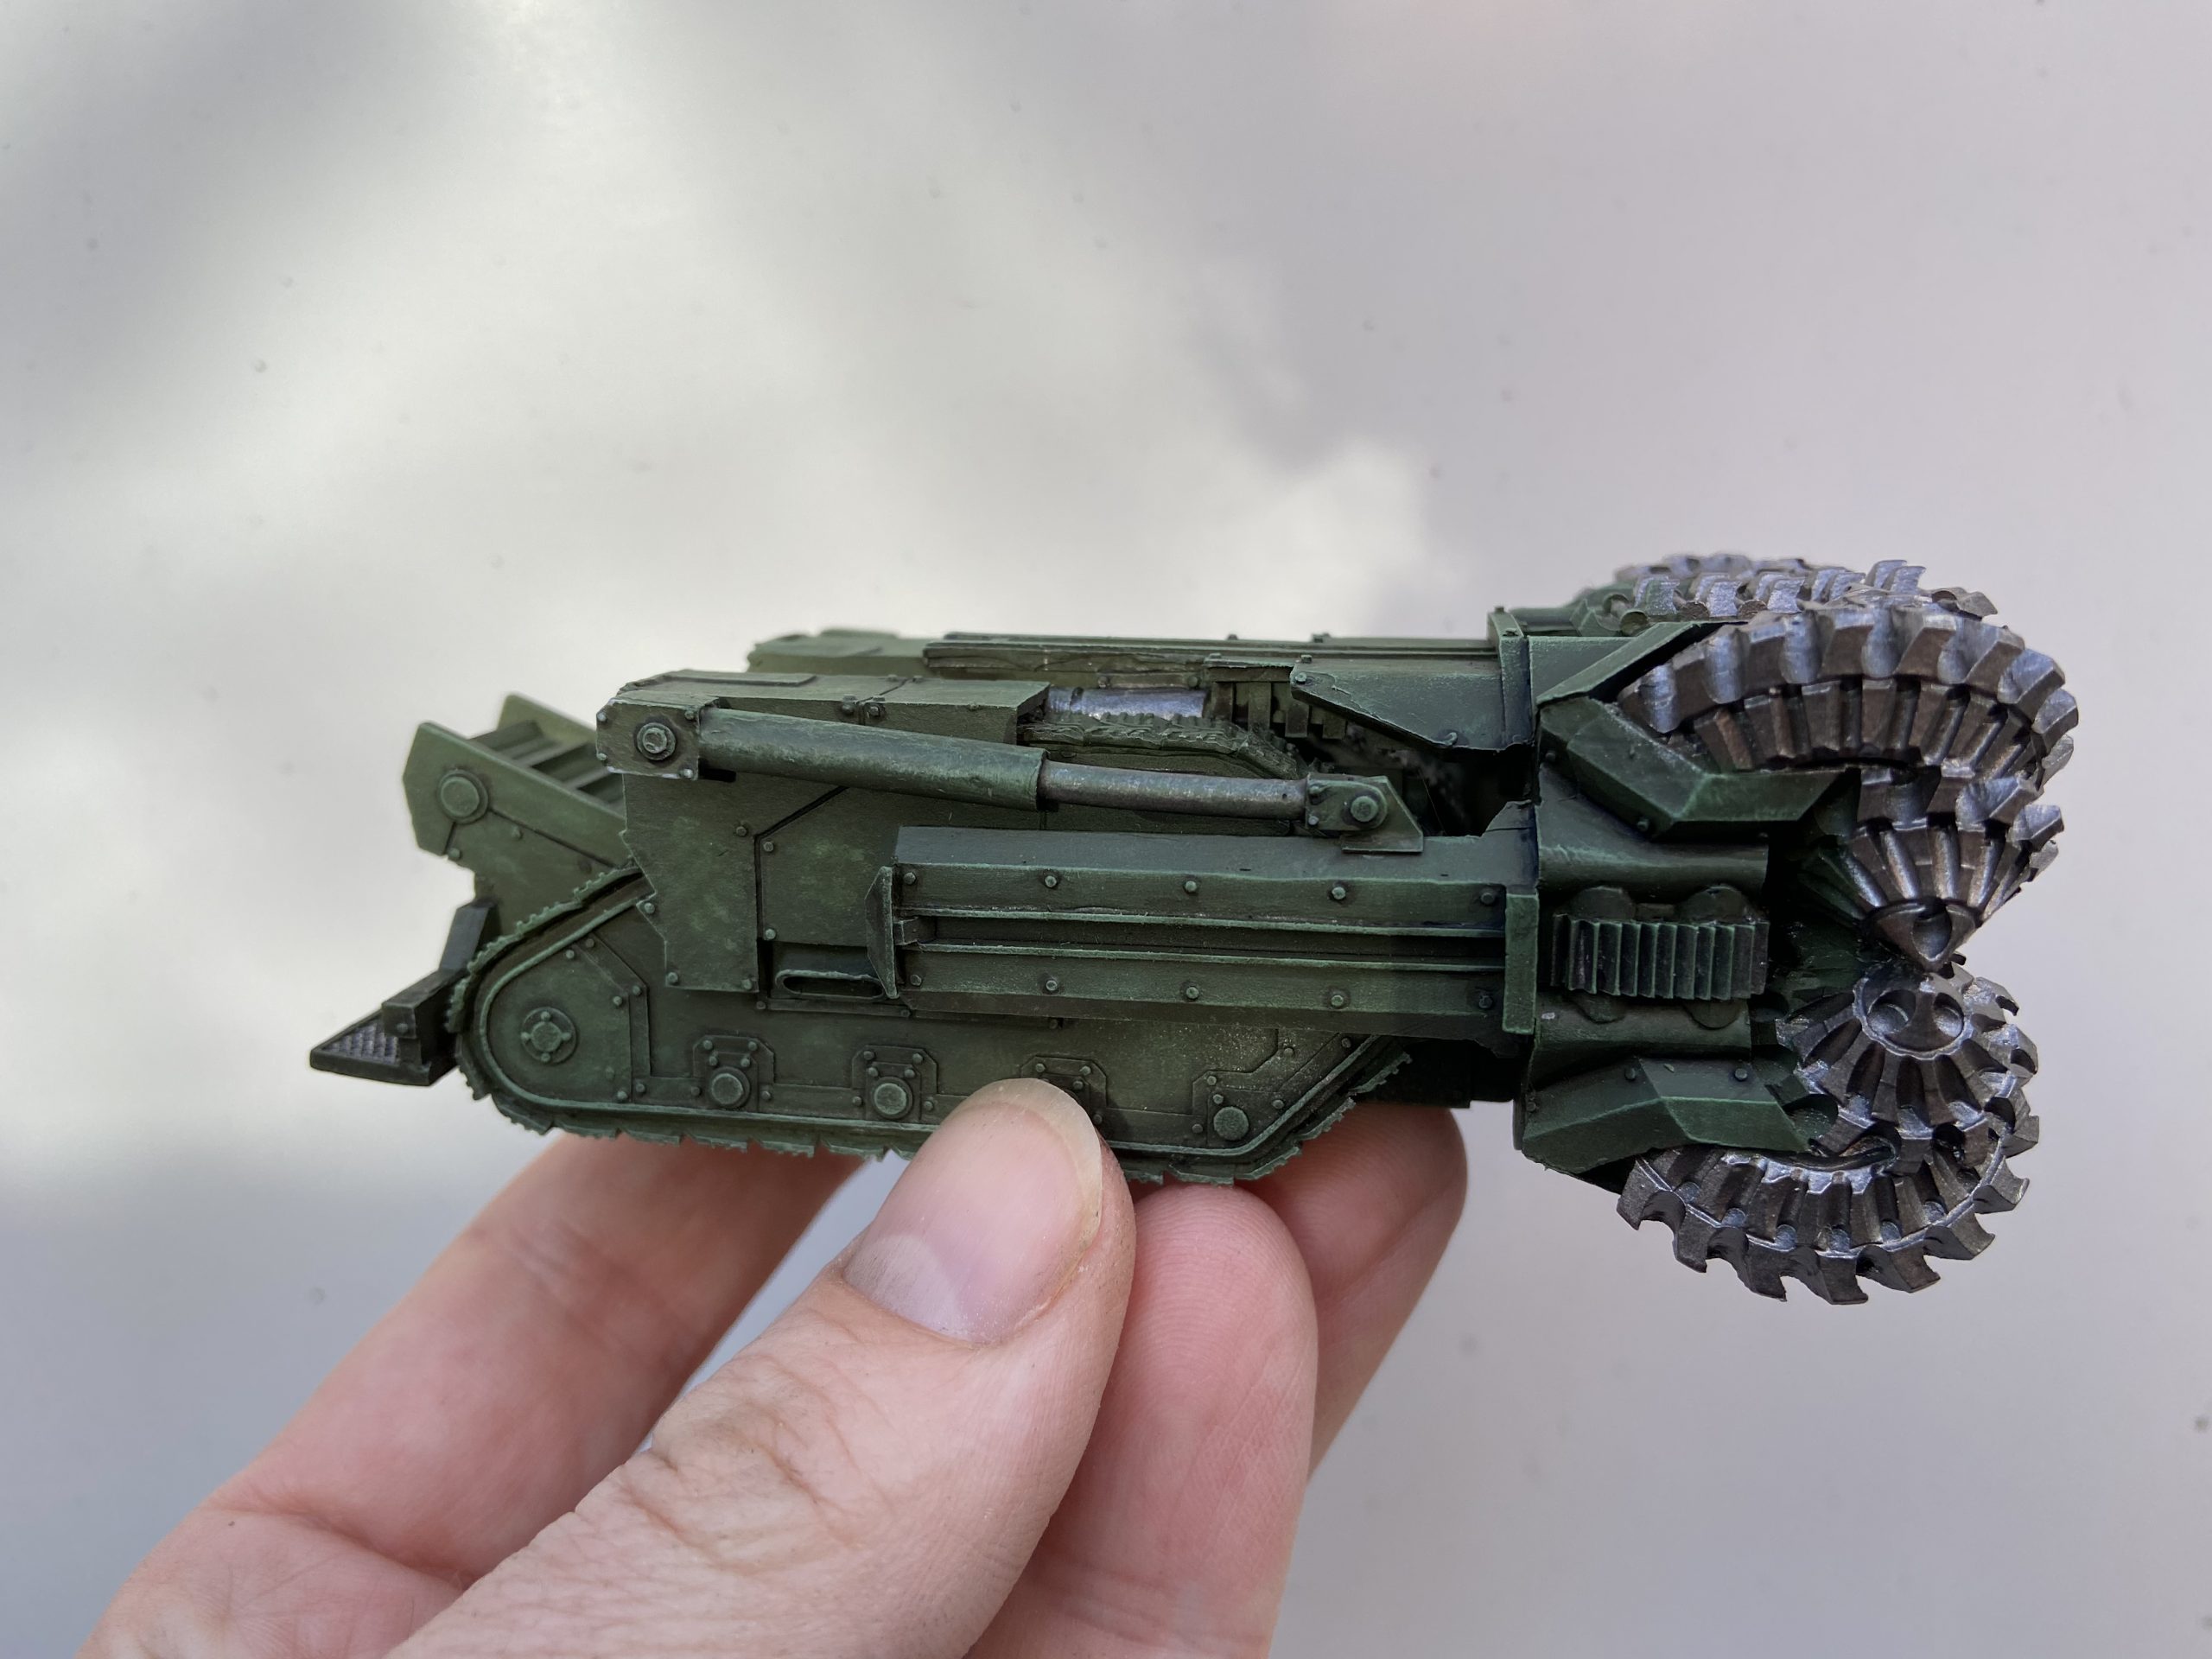
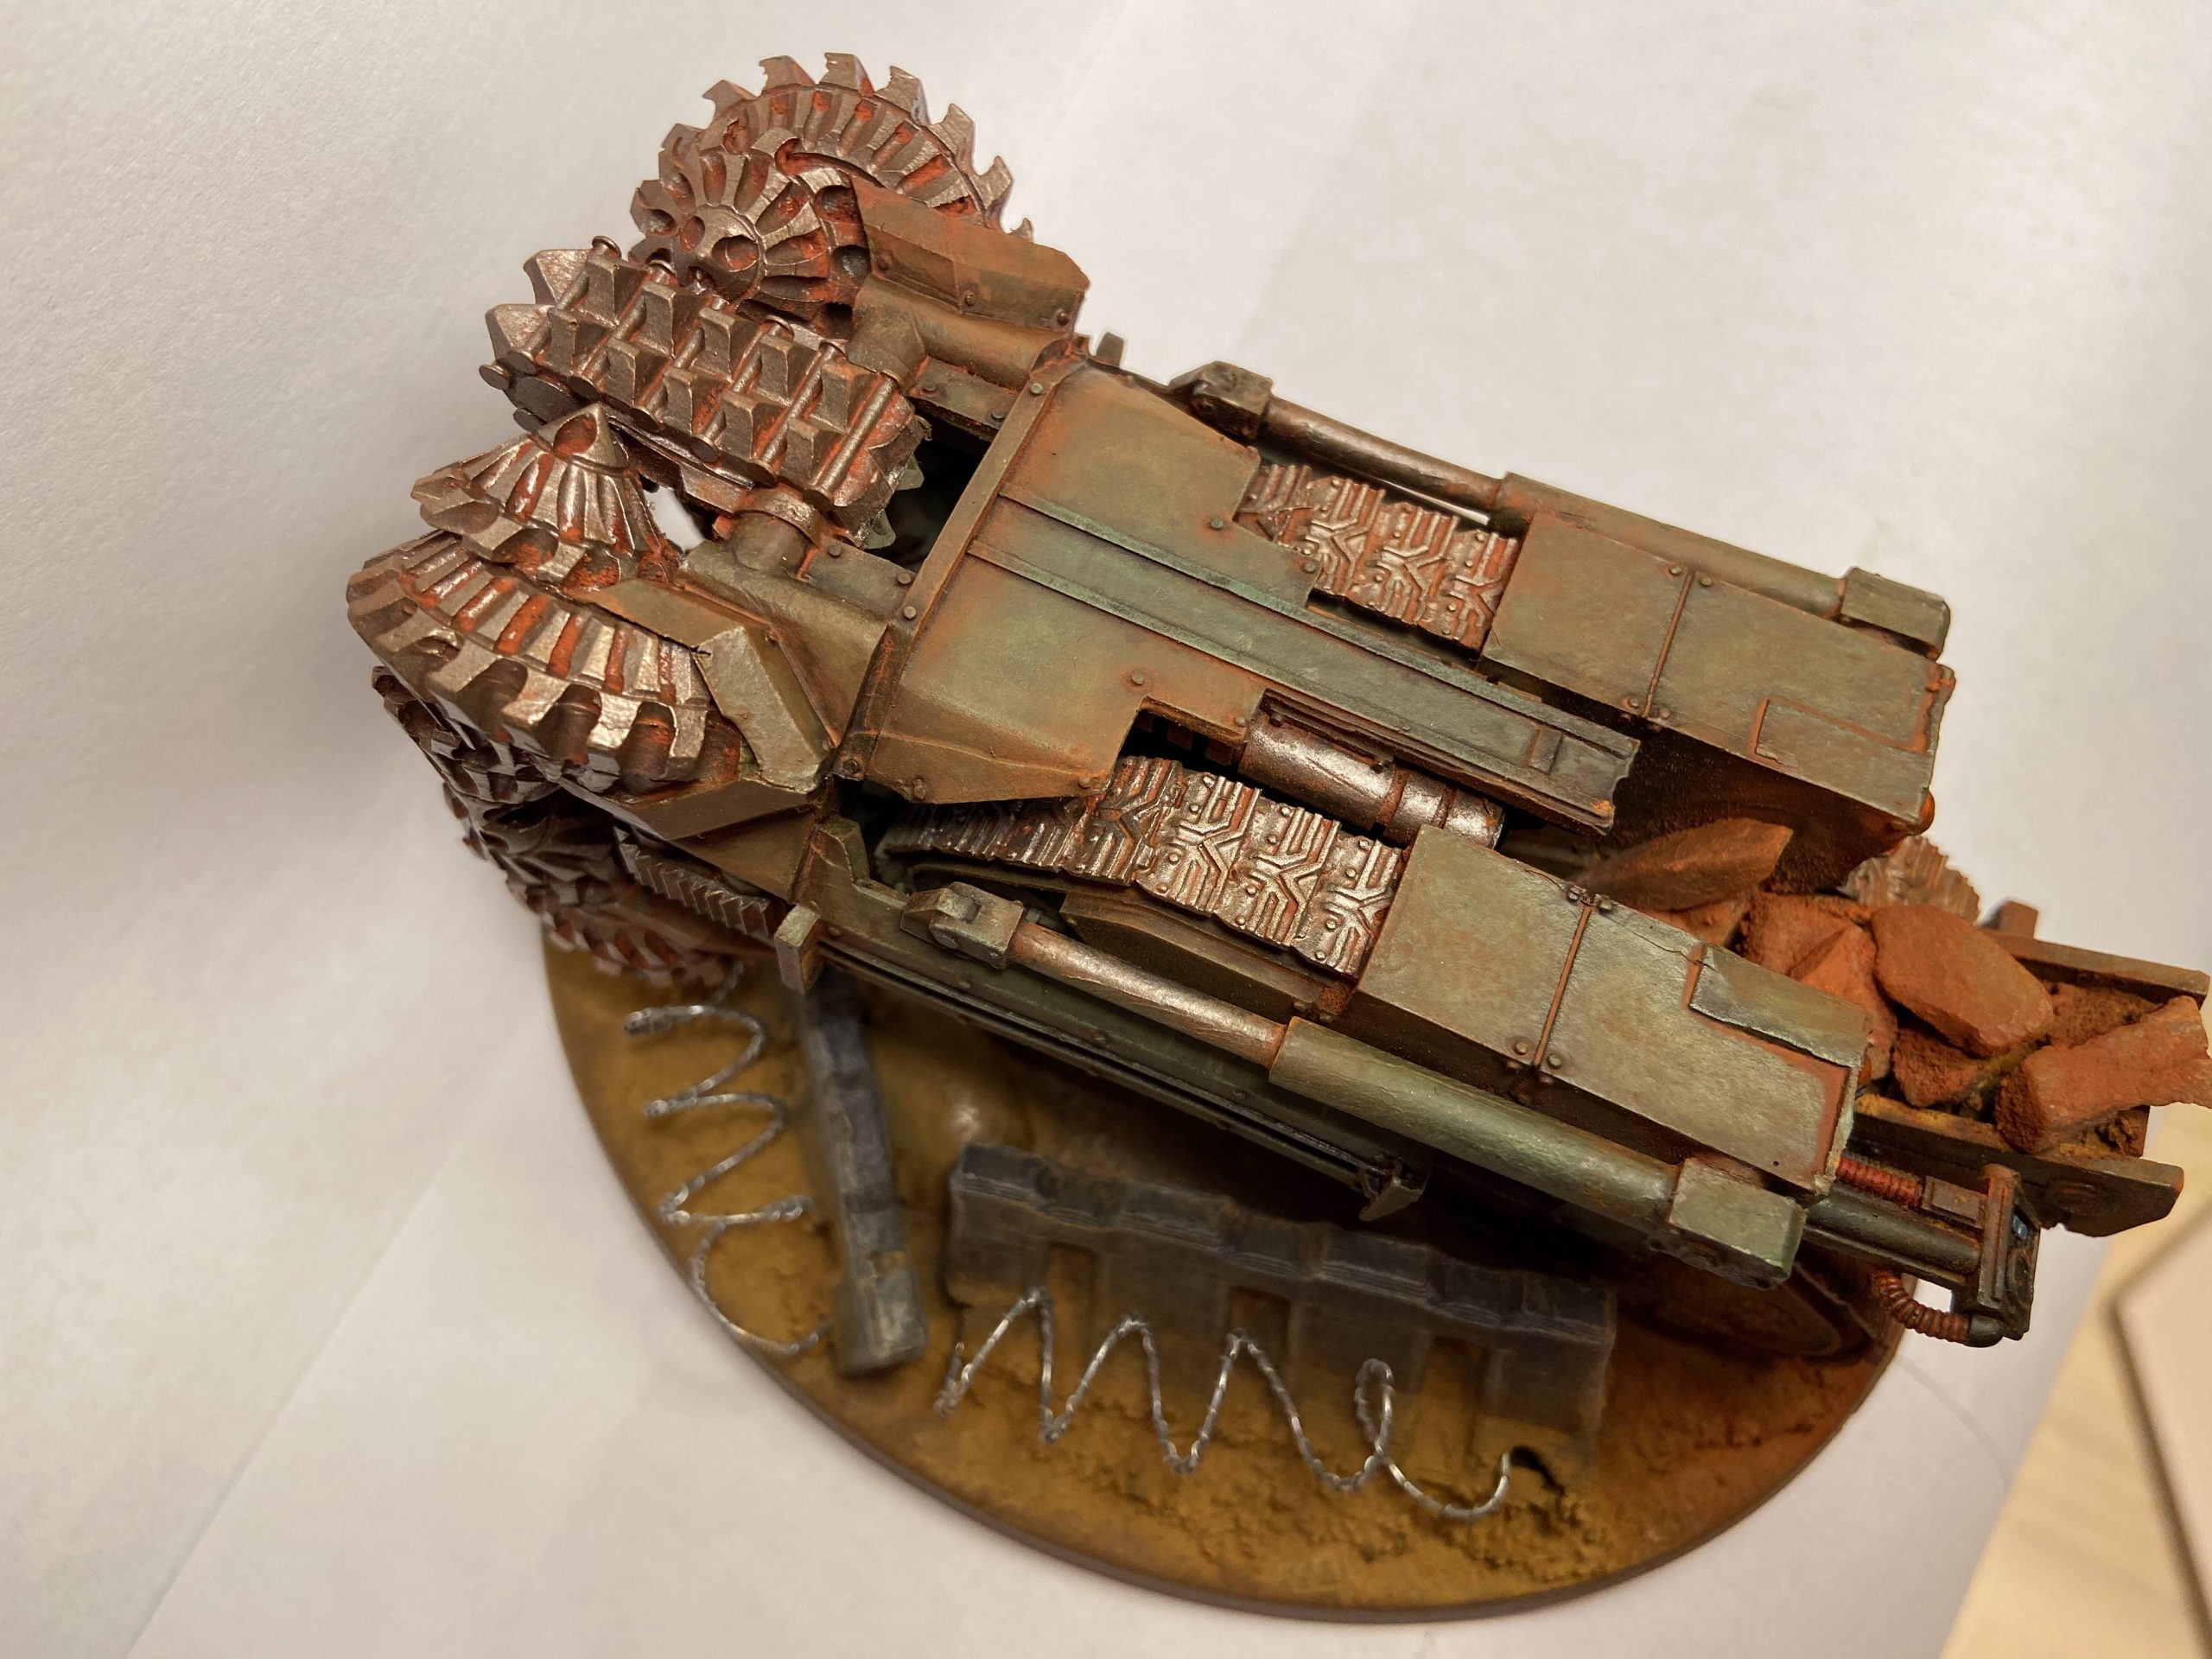
- The underside

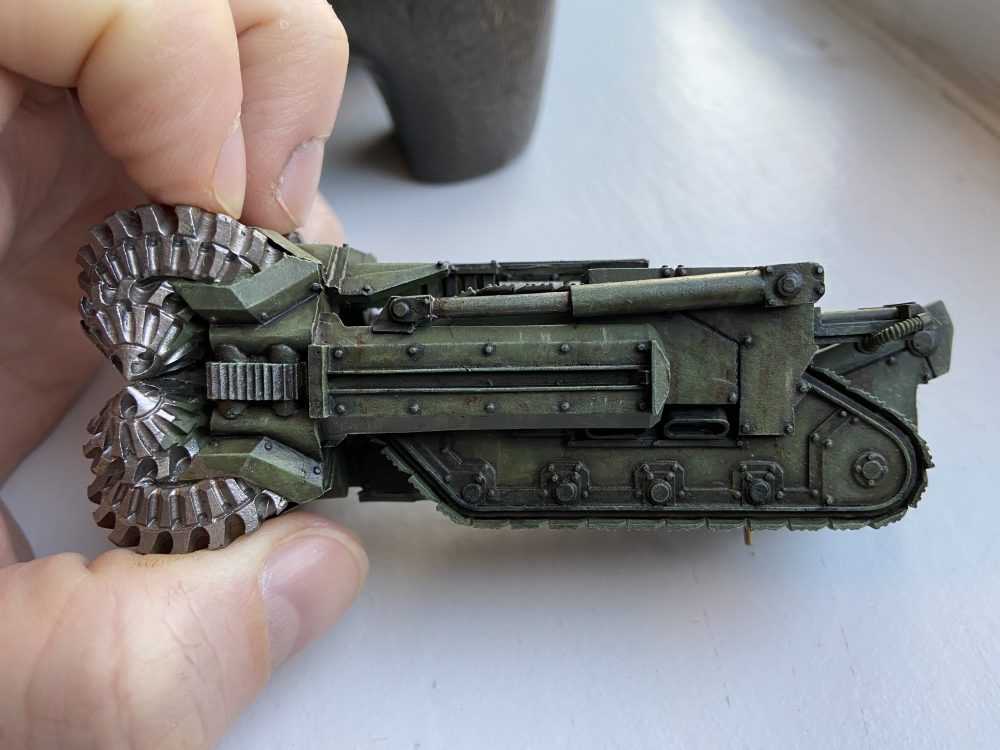
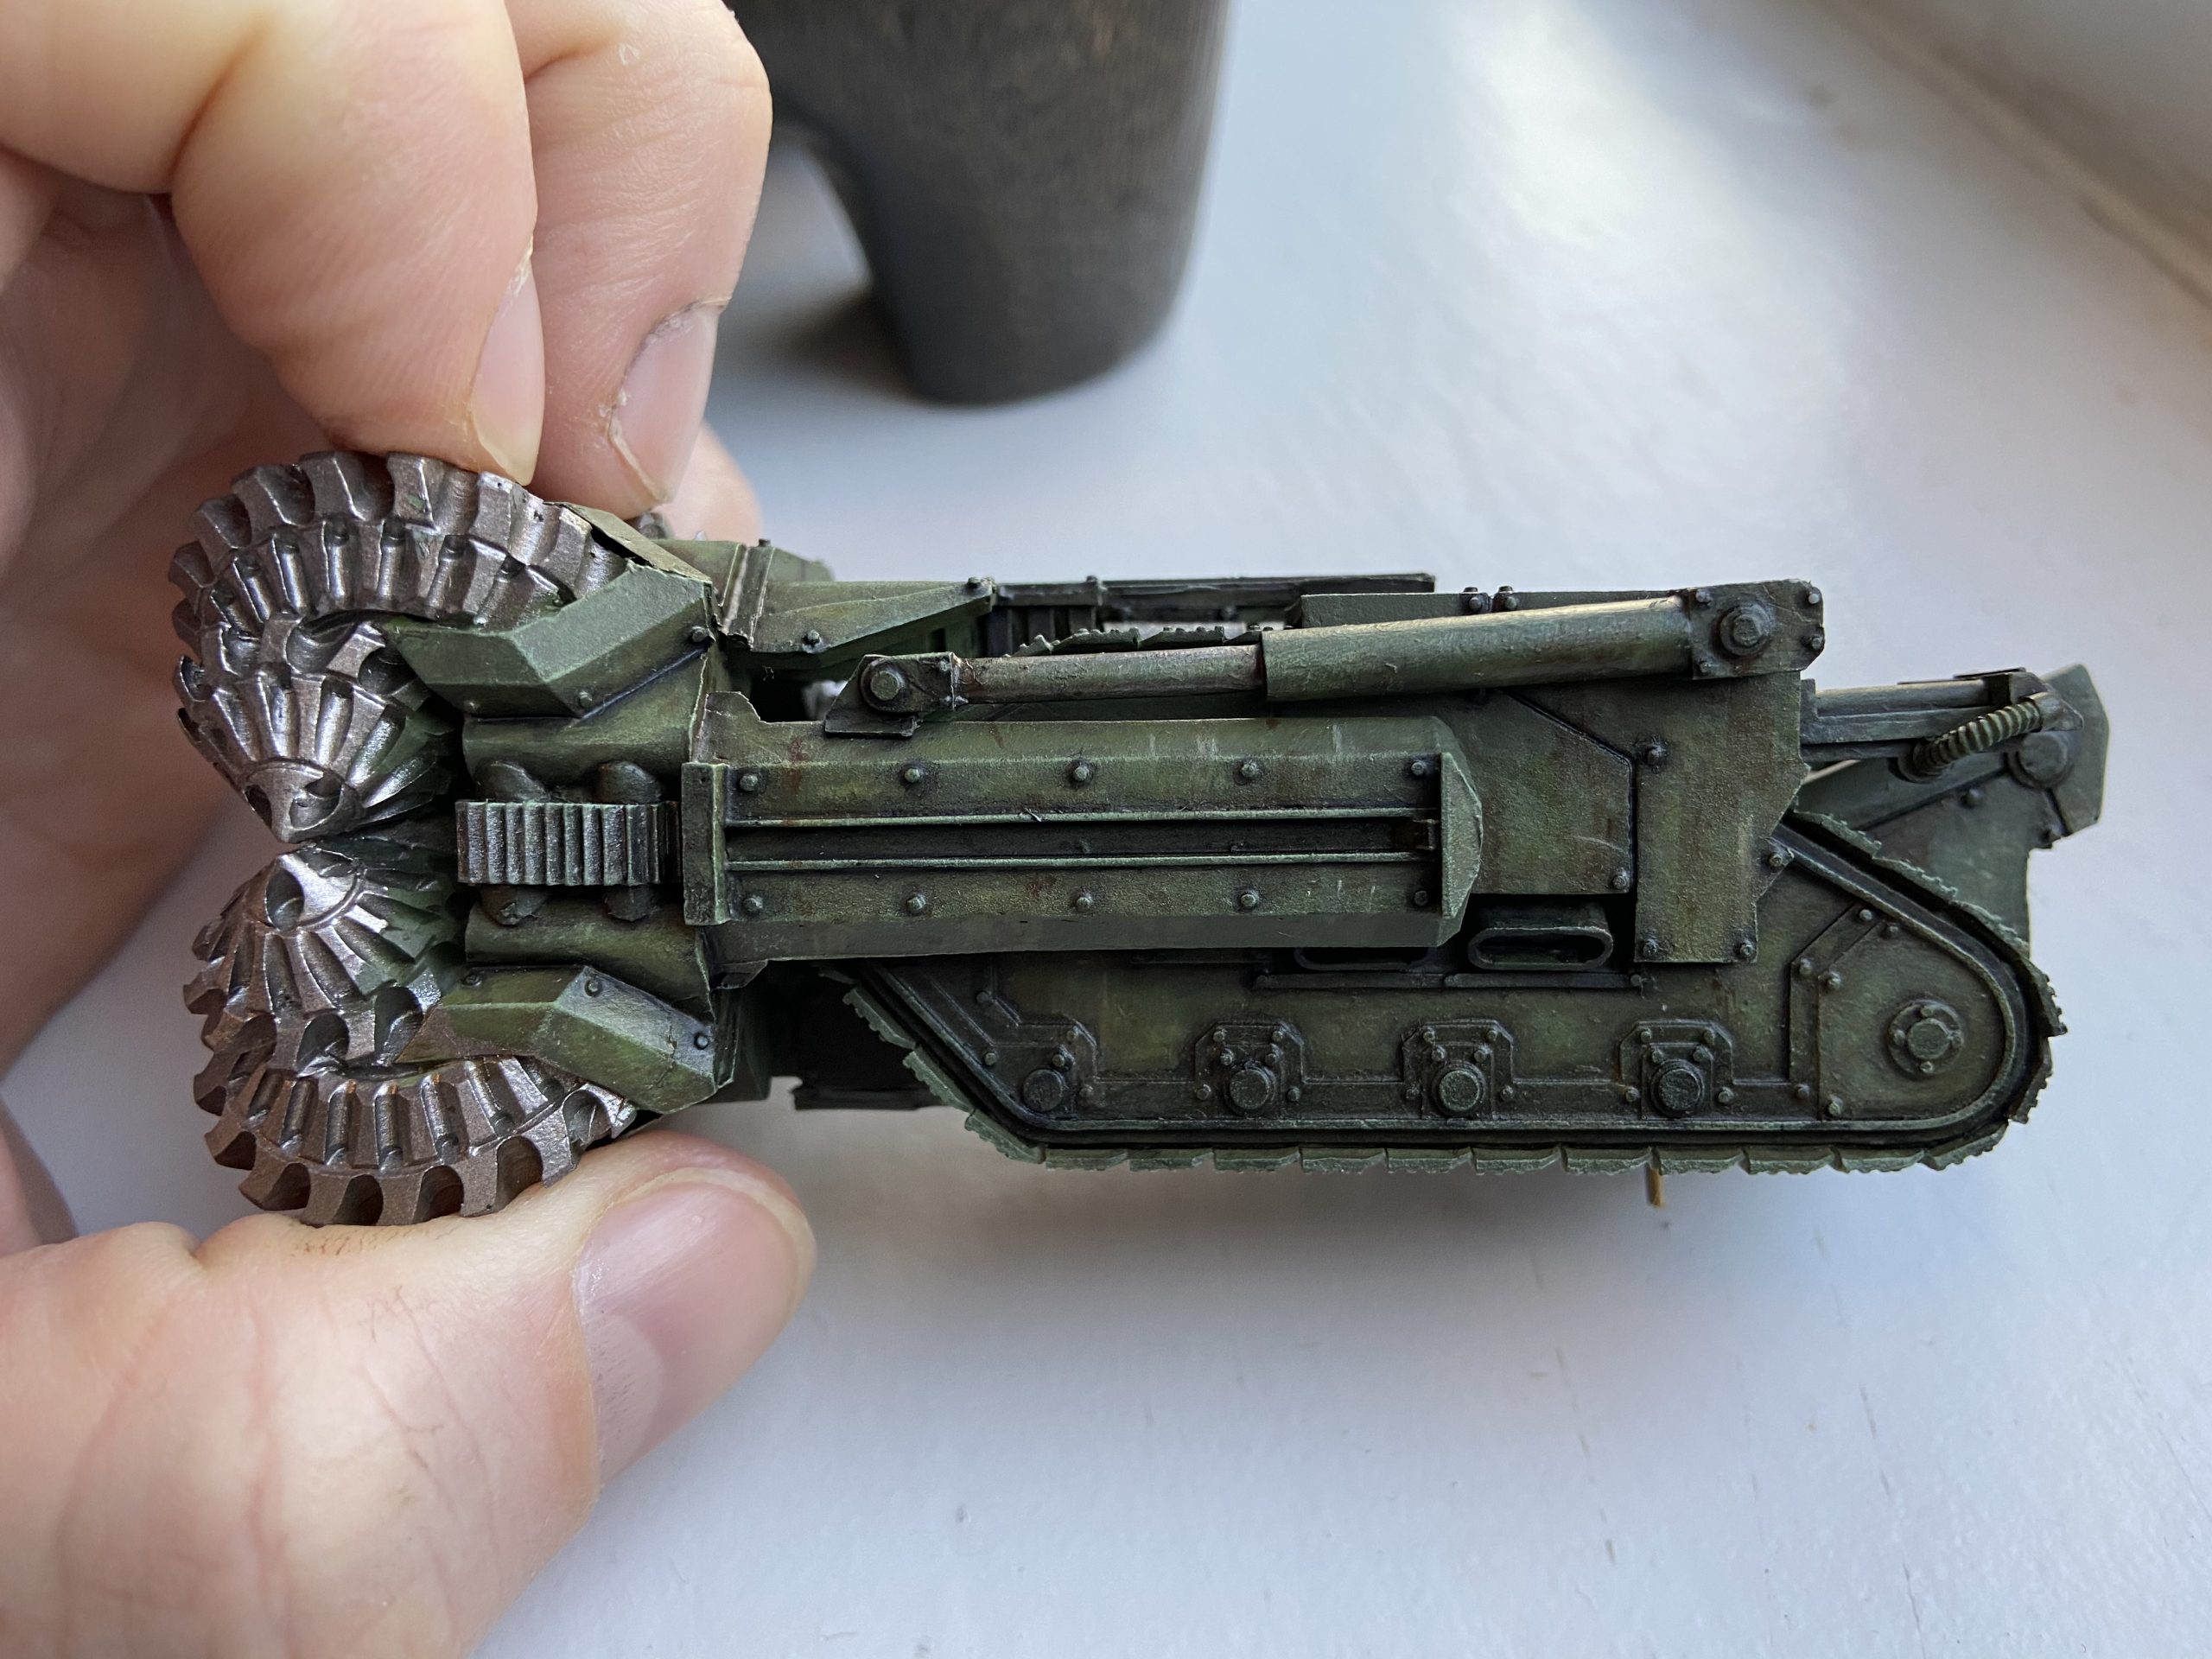
-
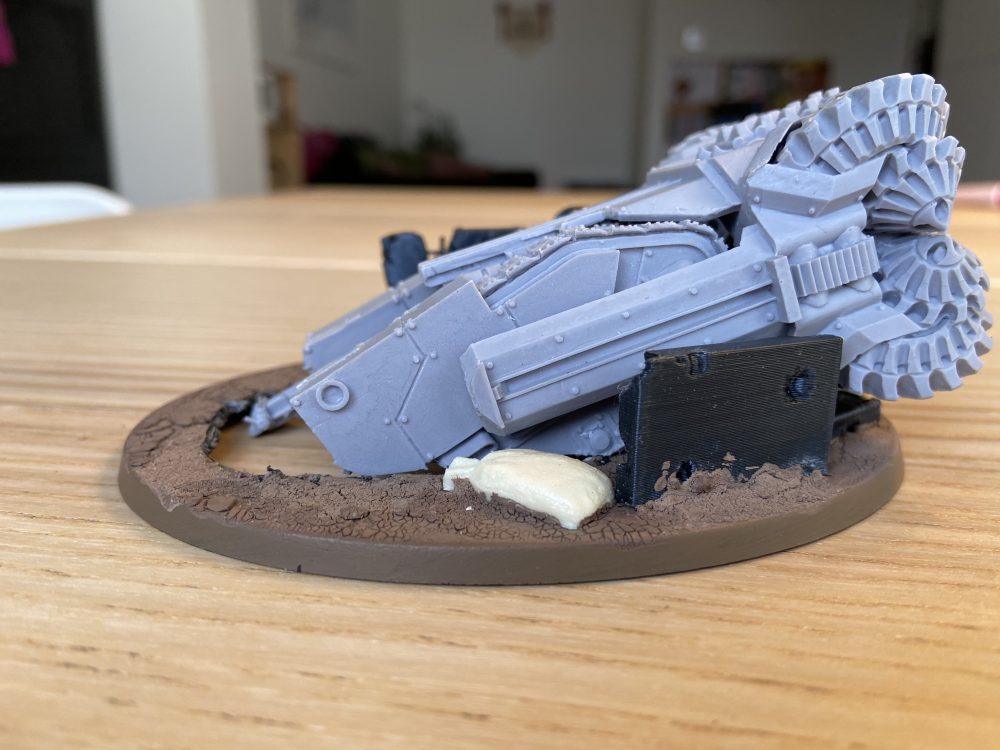
- Side angle

-
- With the Drill held in place – I think this will work?

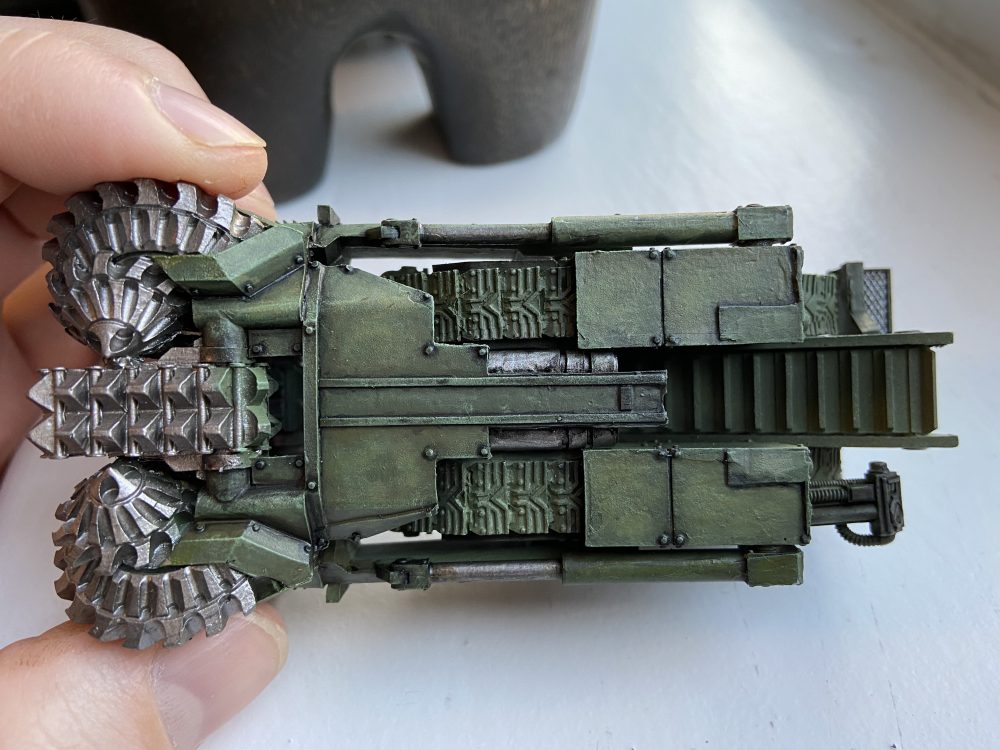
-
- Top-side side

-
- No drill

-
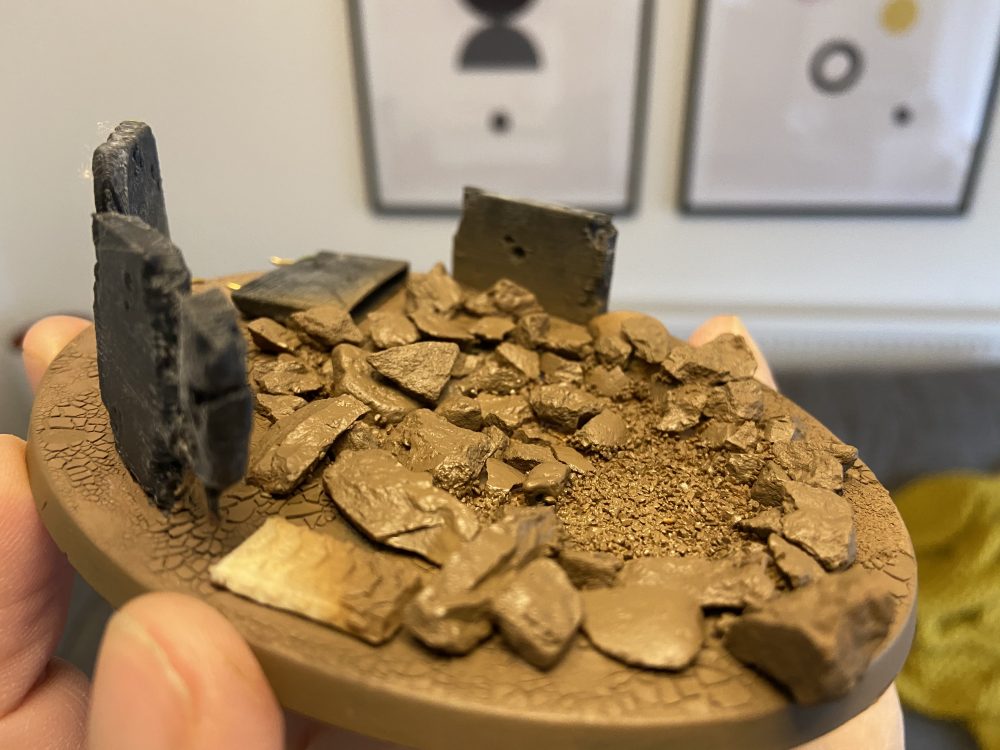
- Airbrushed Steel Legion Drab

-
- Army Painter Army Green

-

- It is starting to come together now
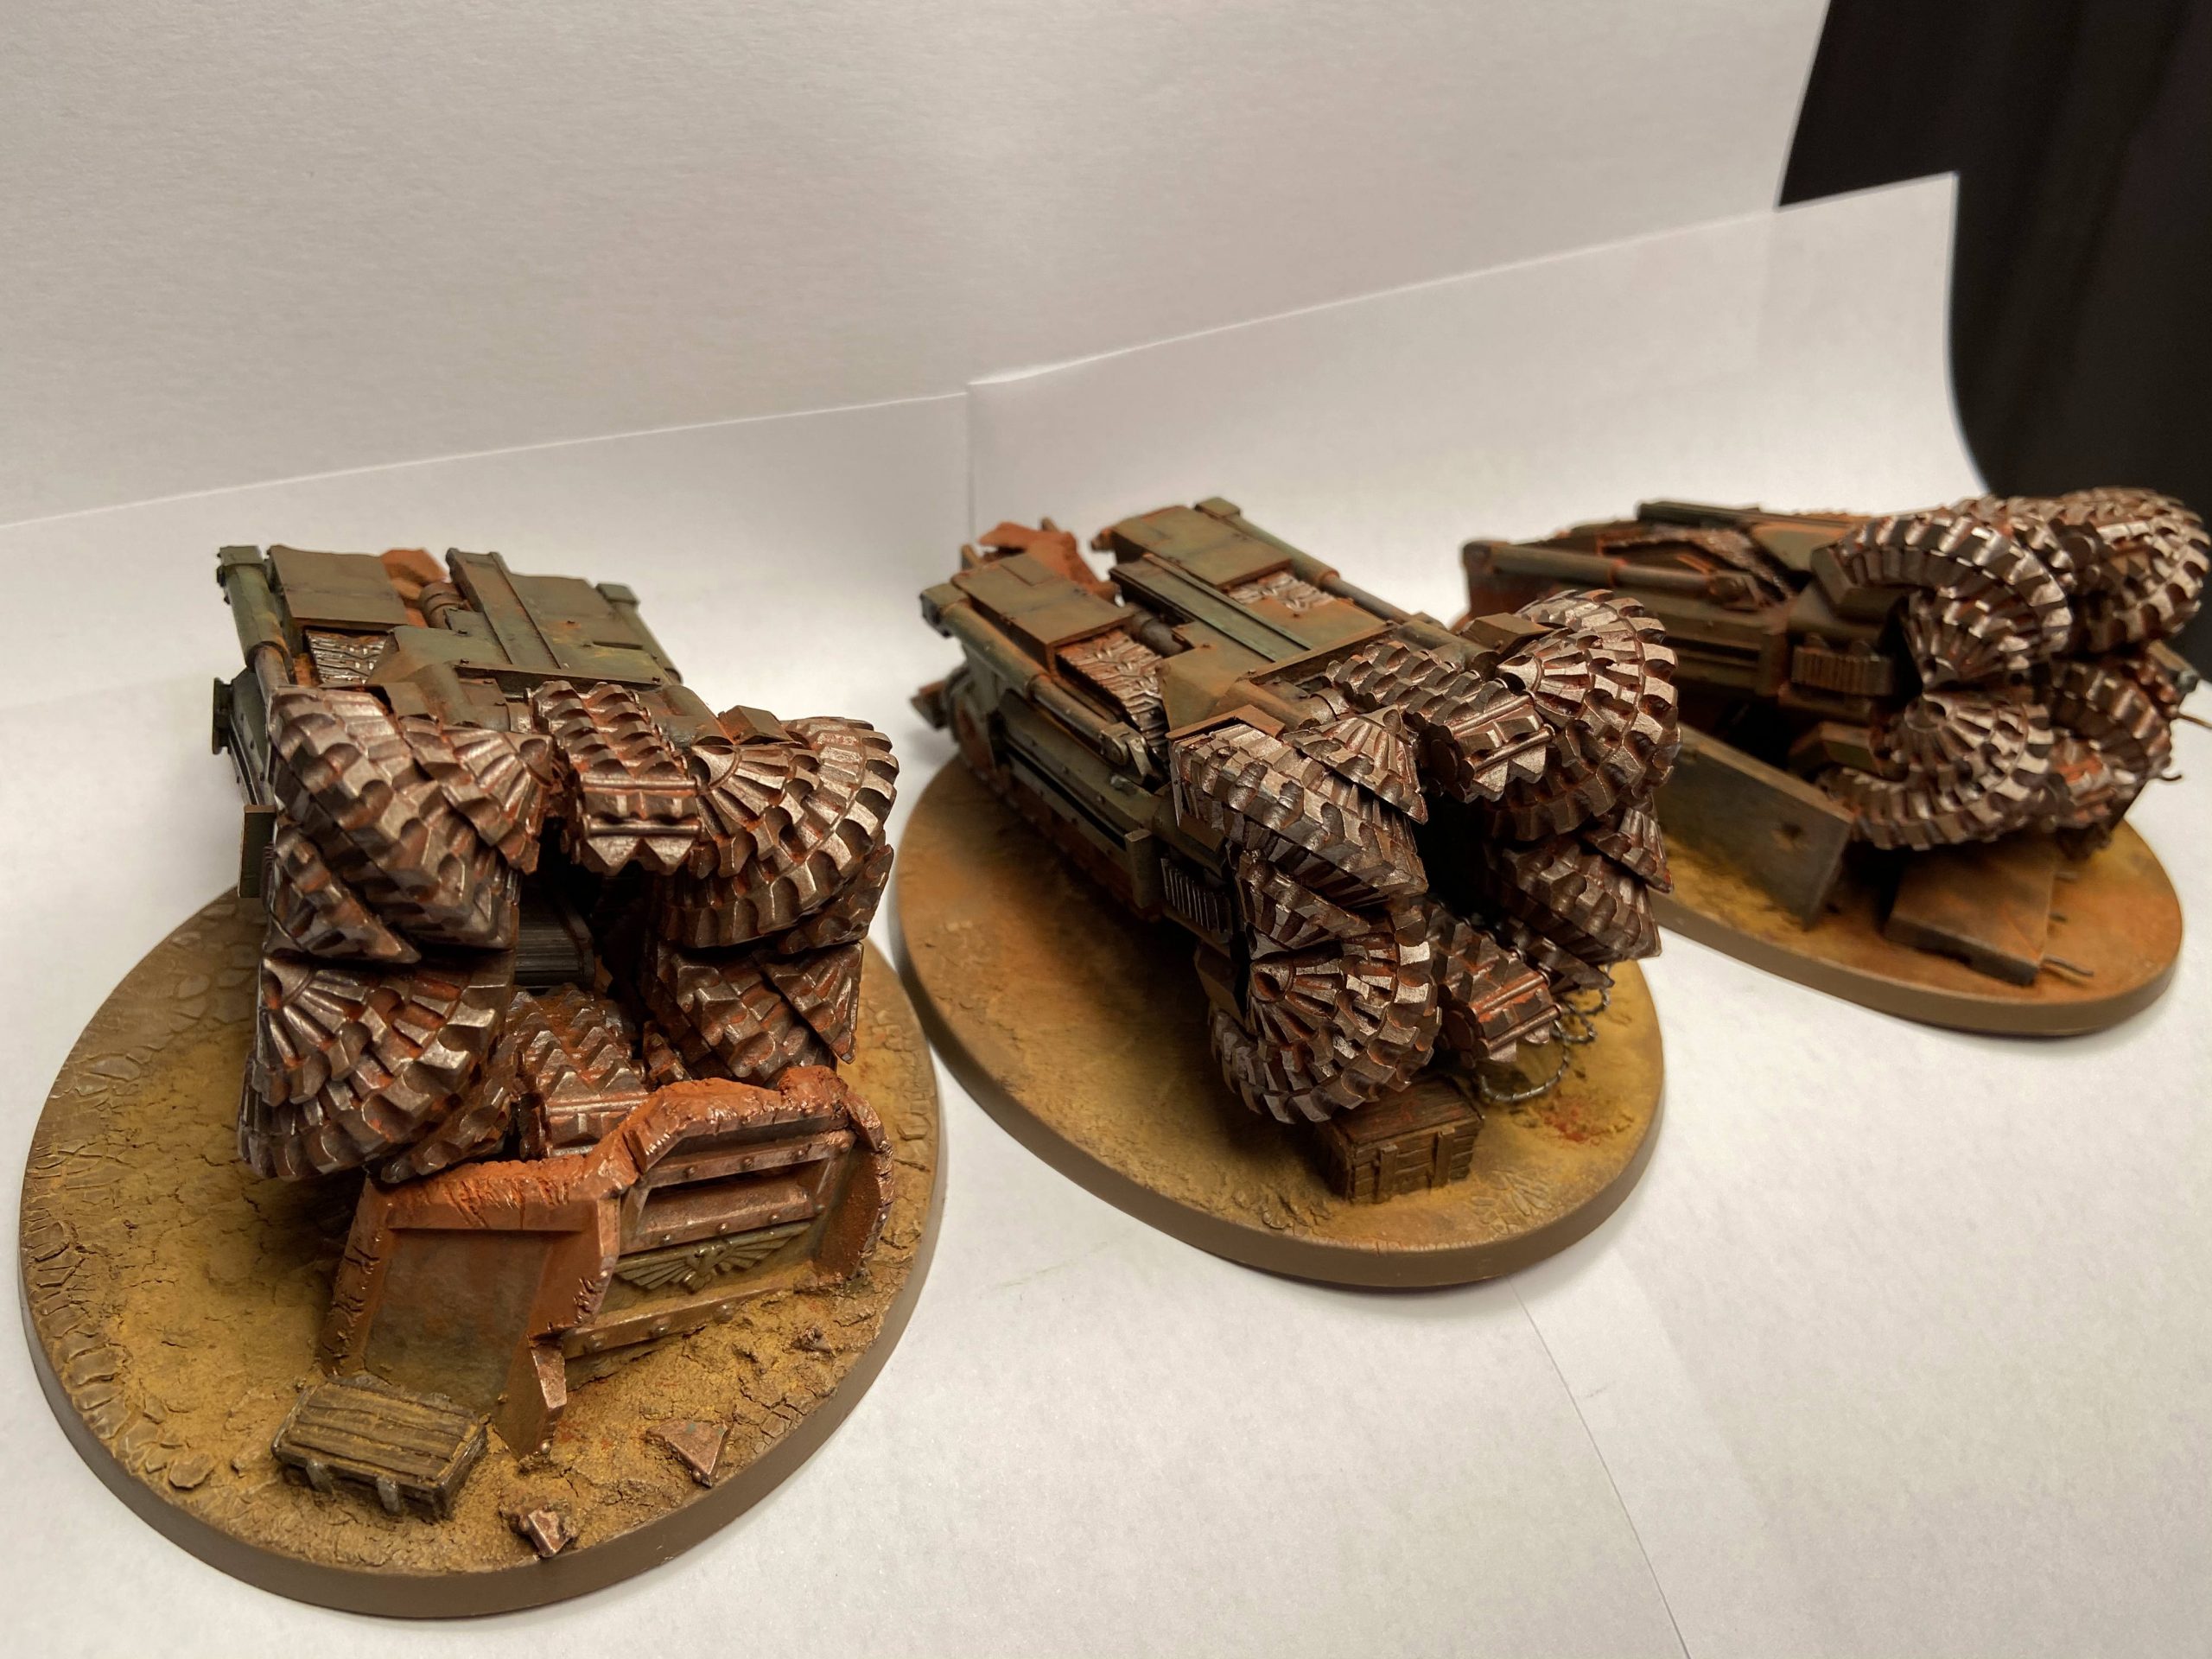
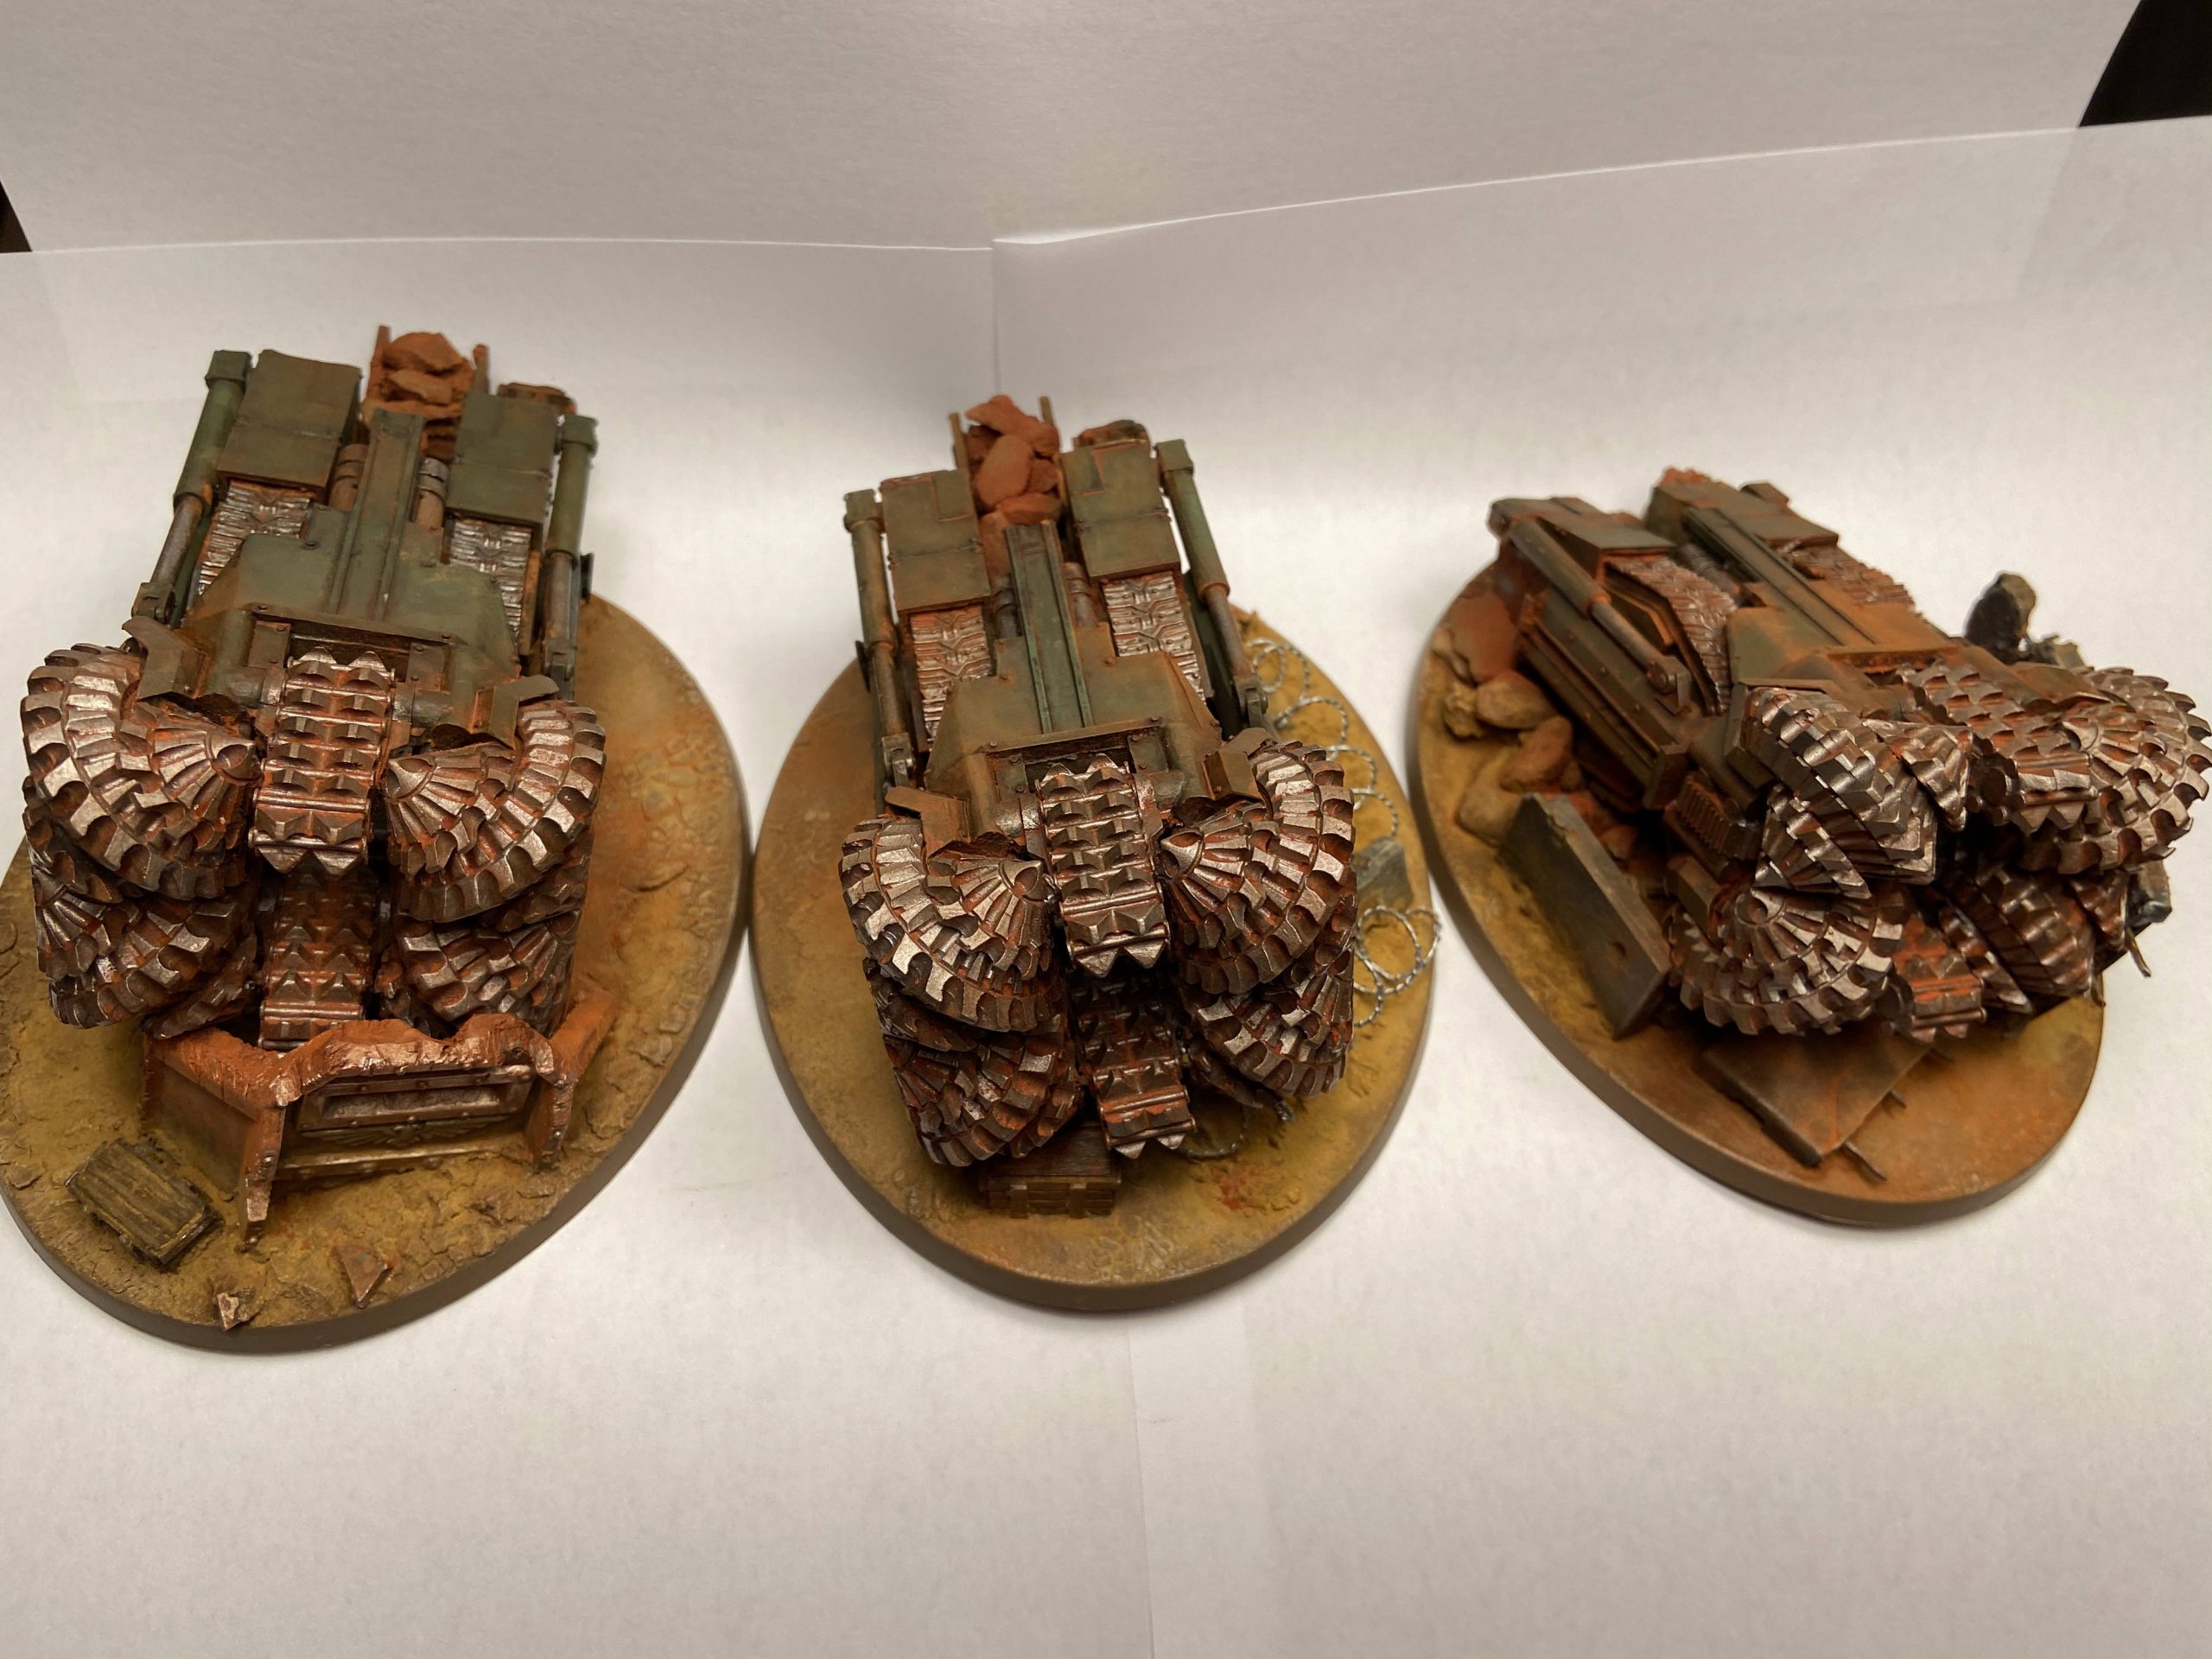
Completed Gallery
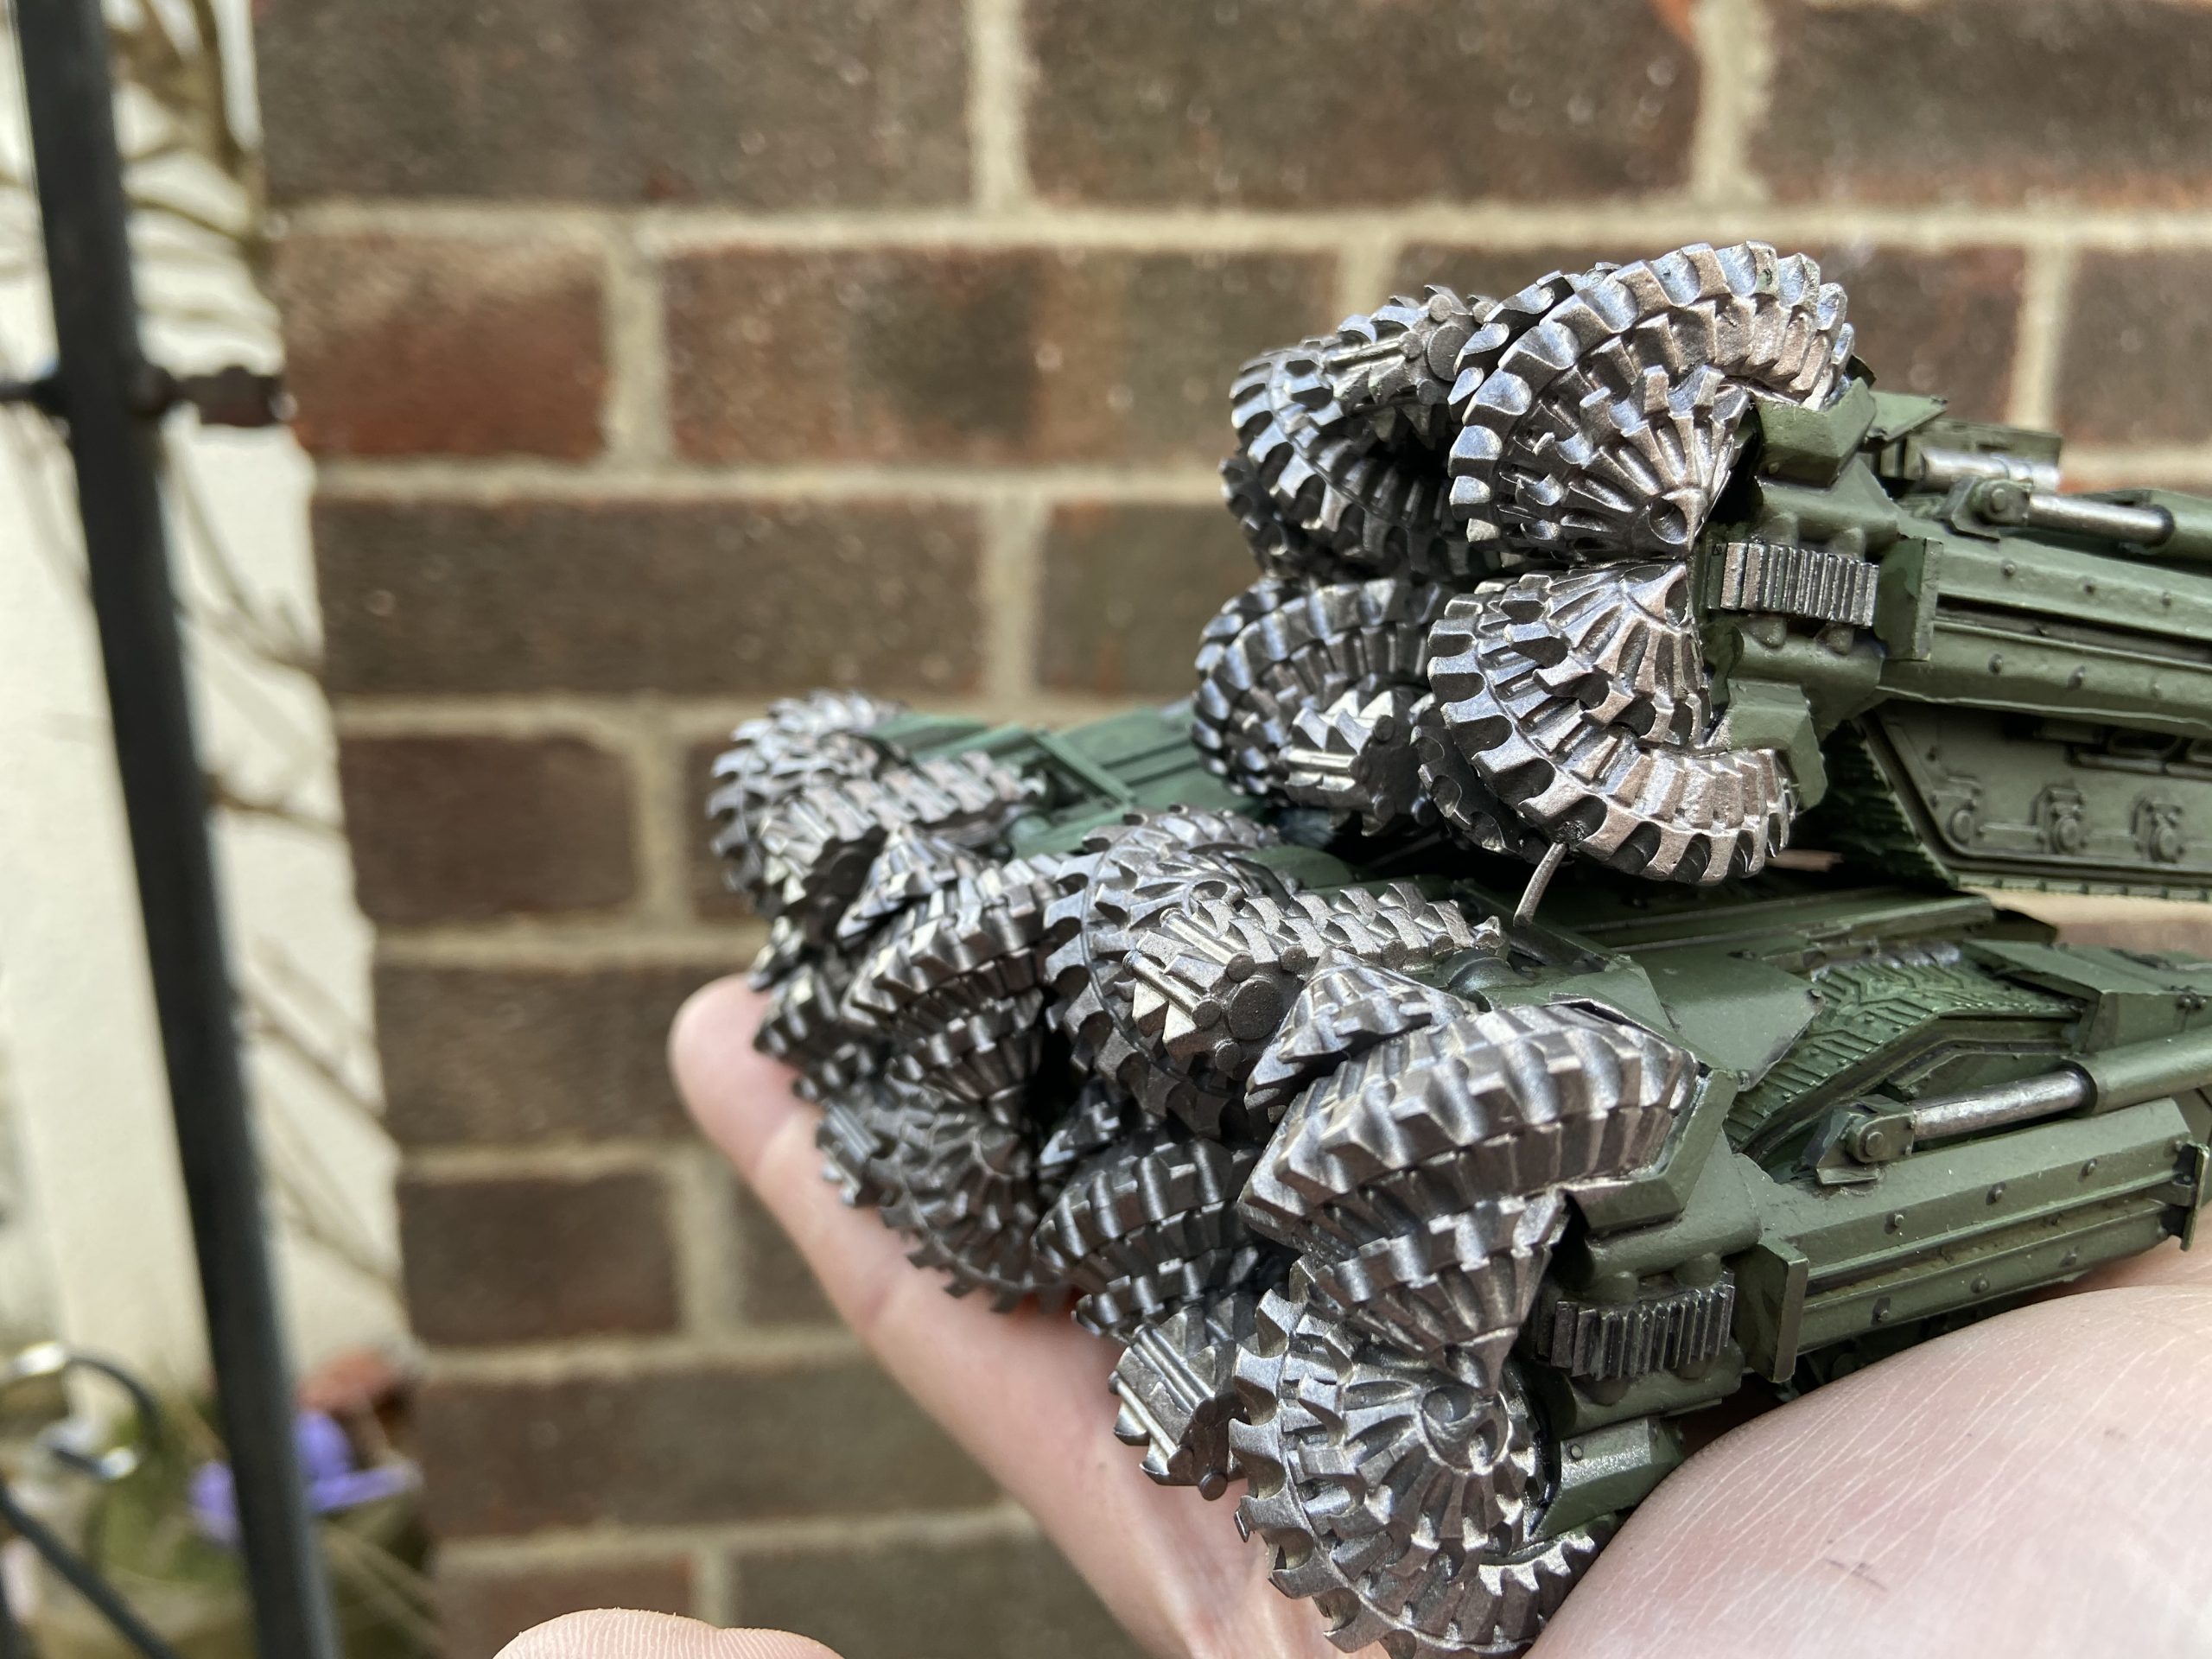
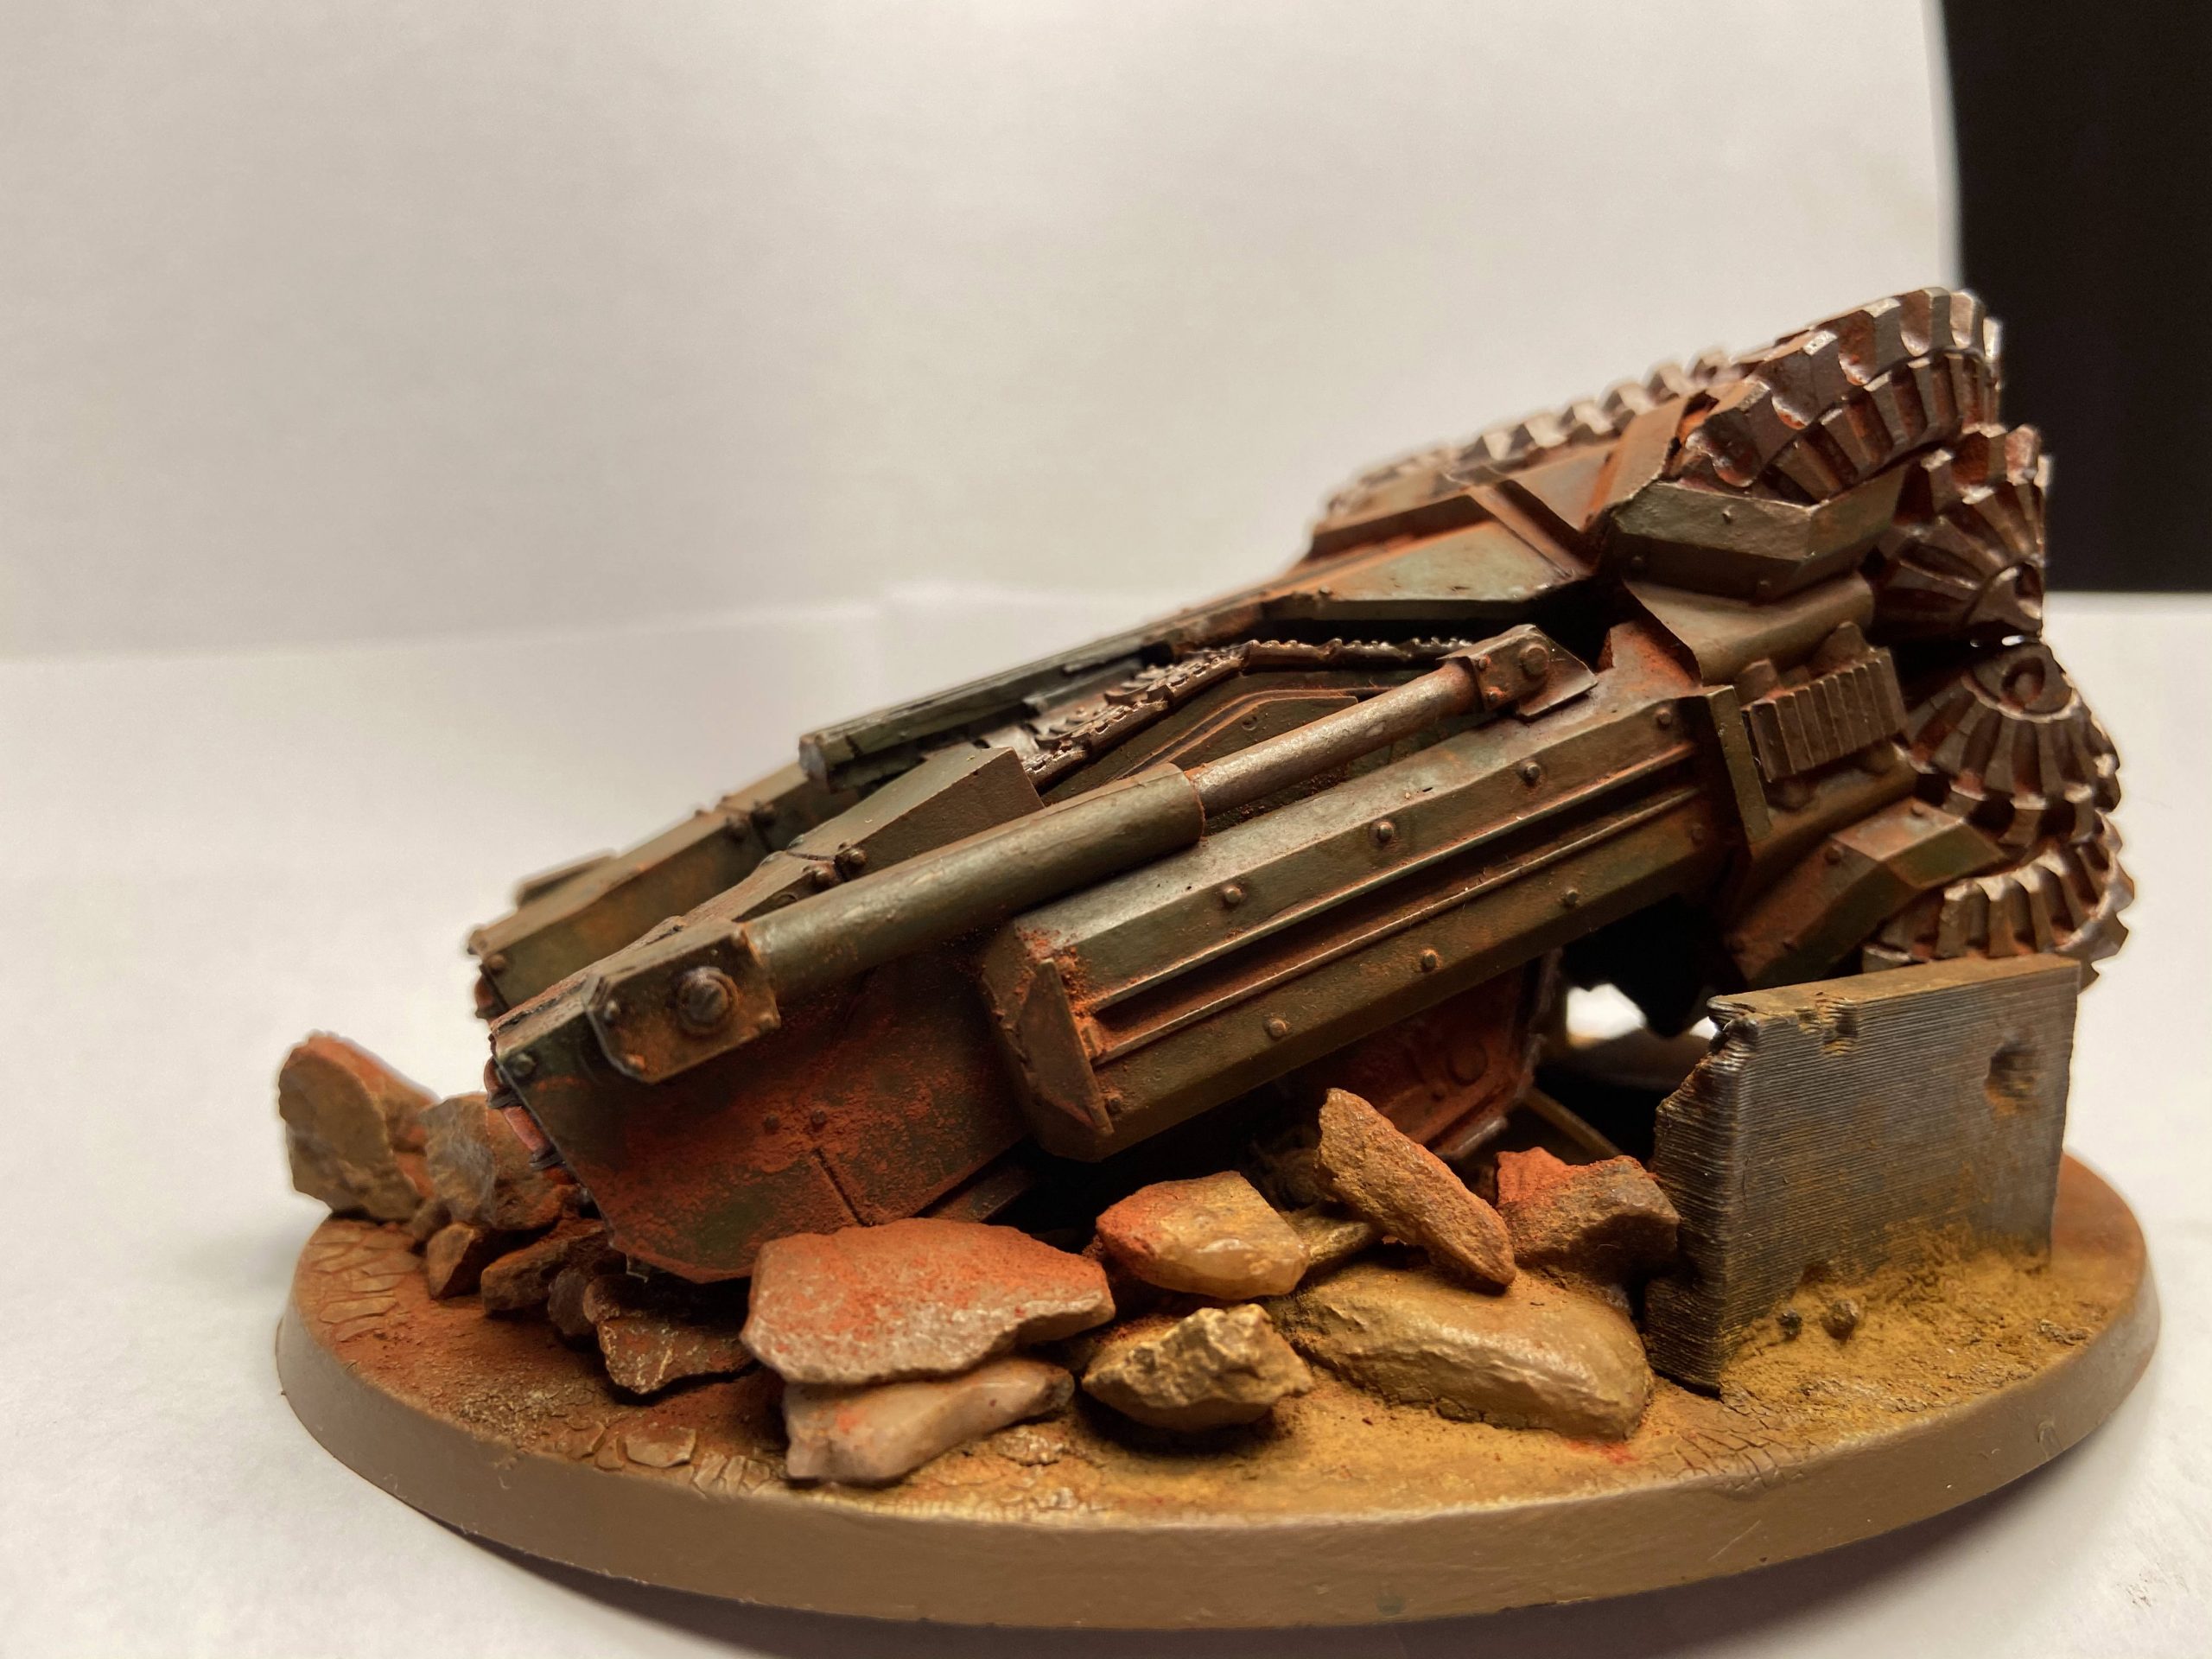
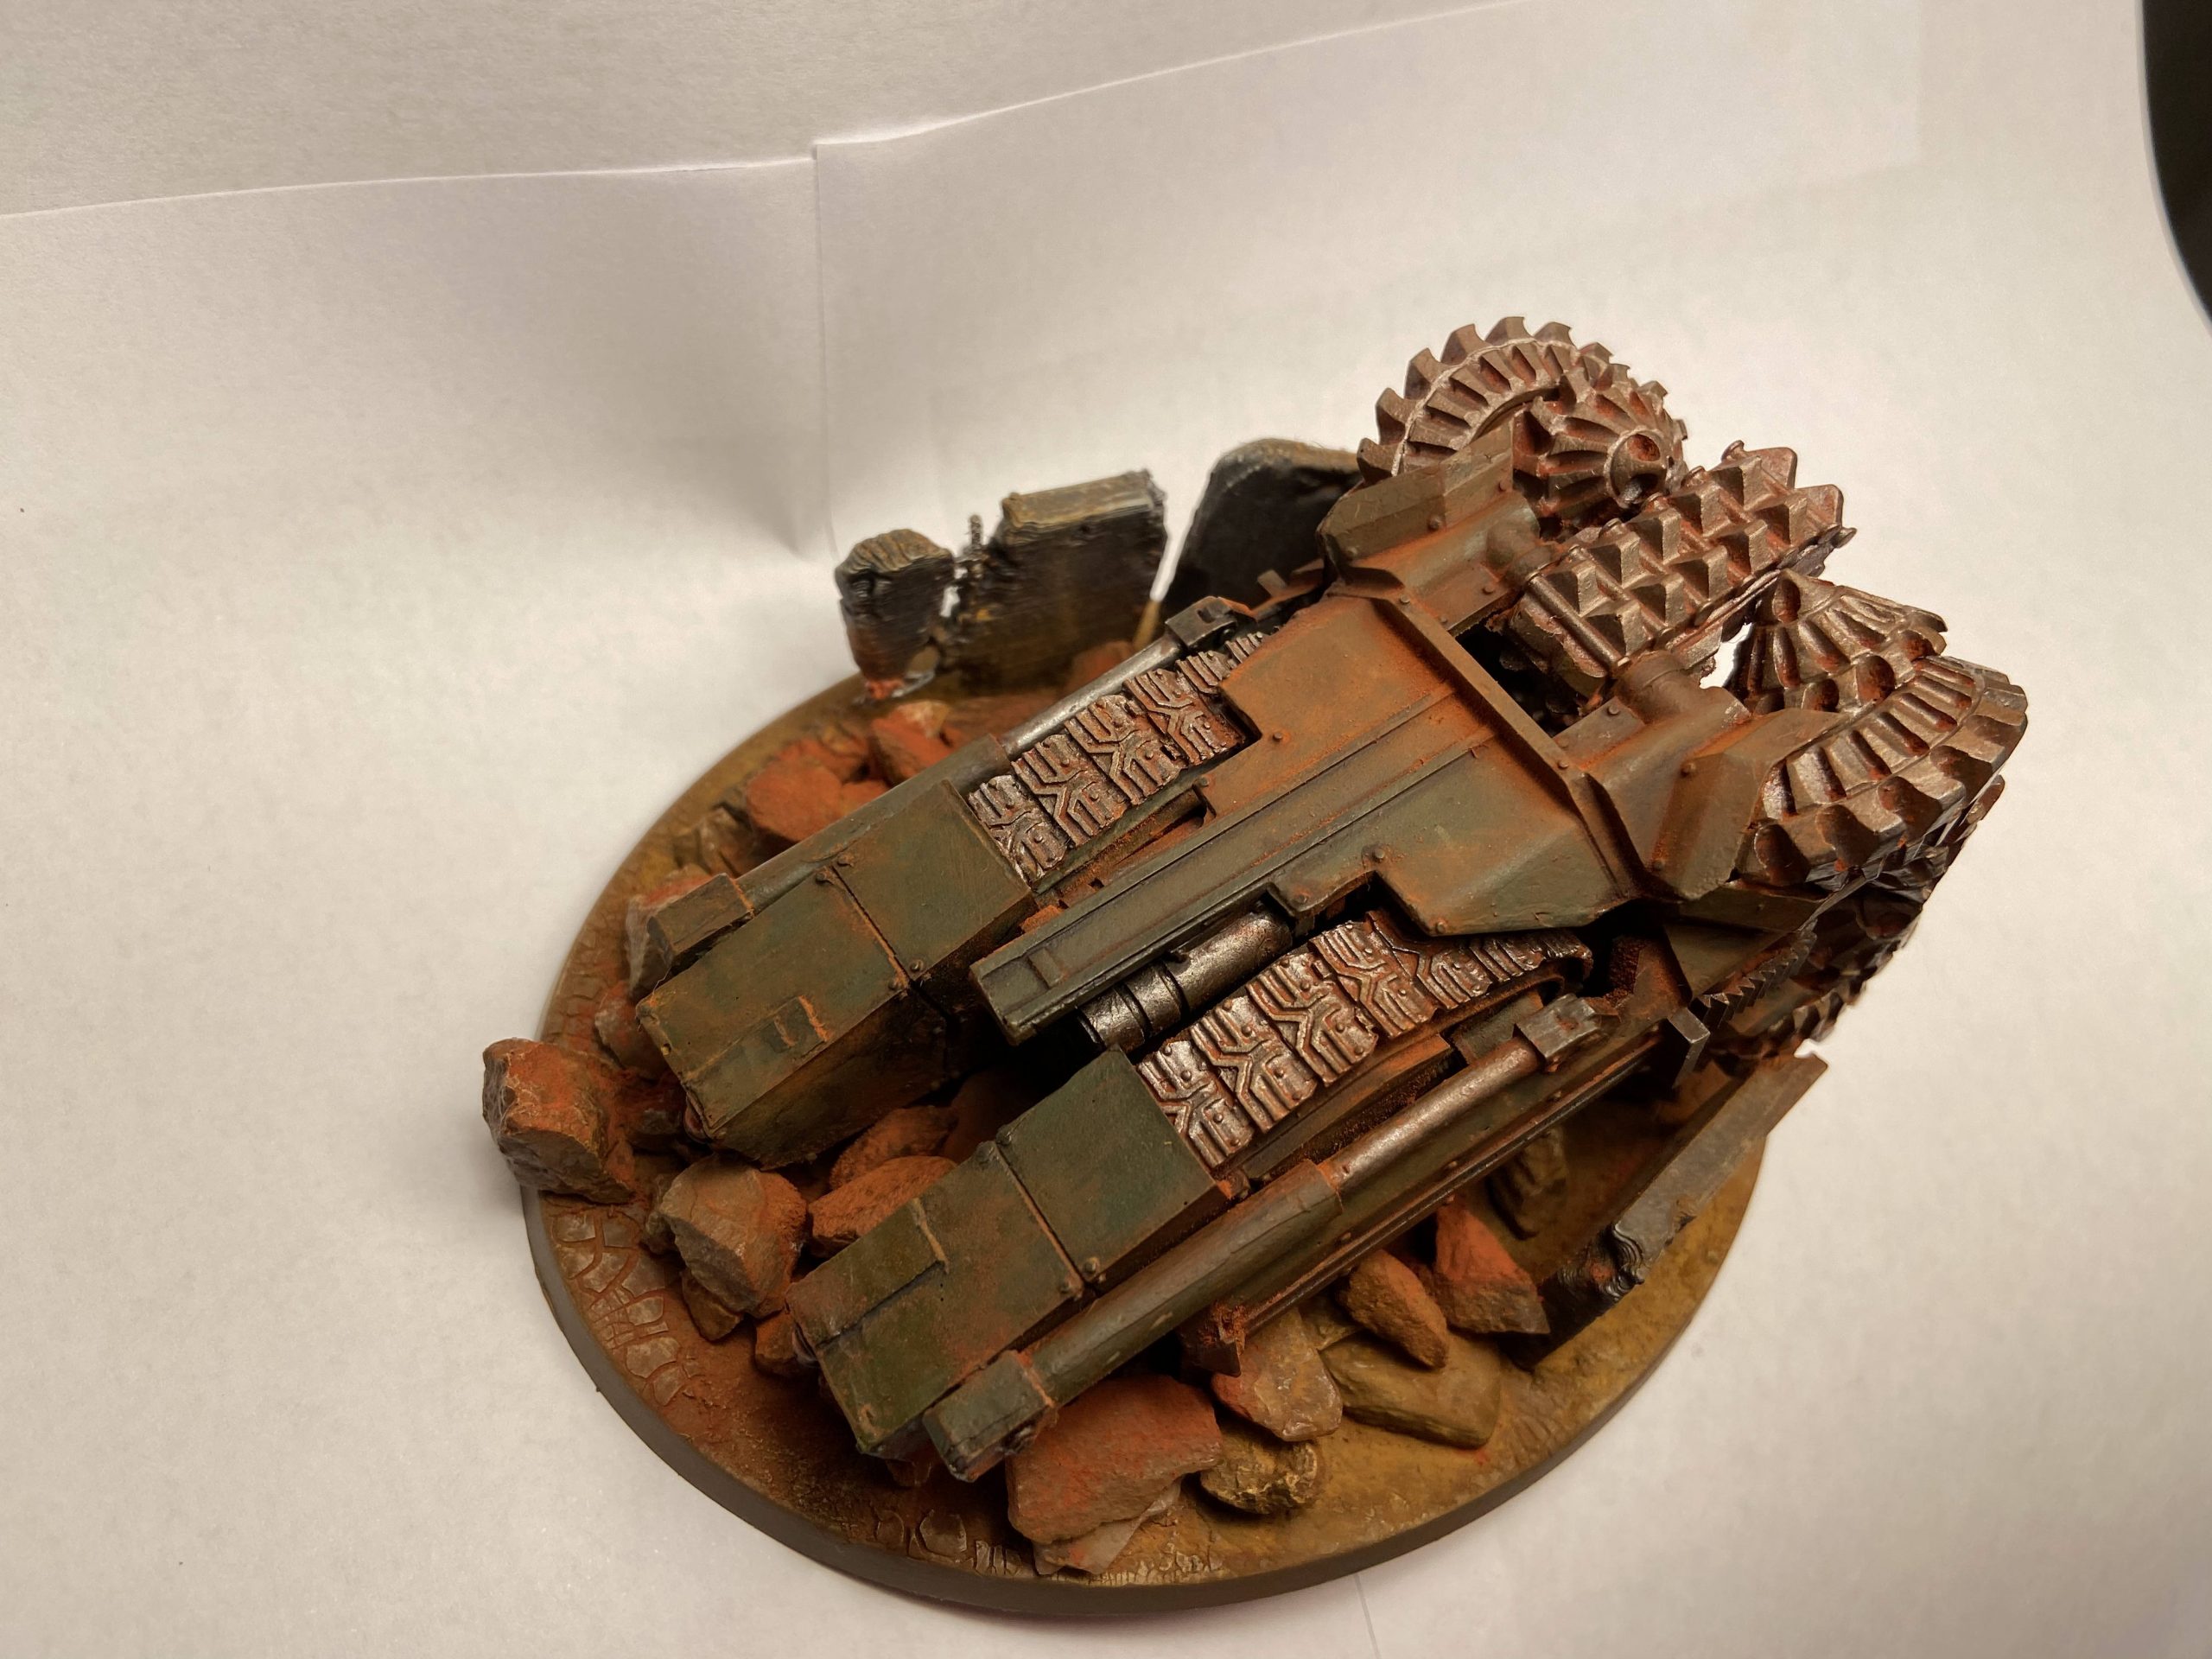
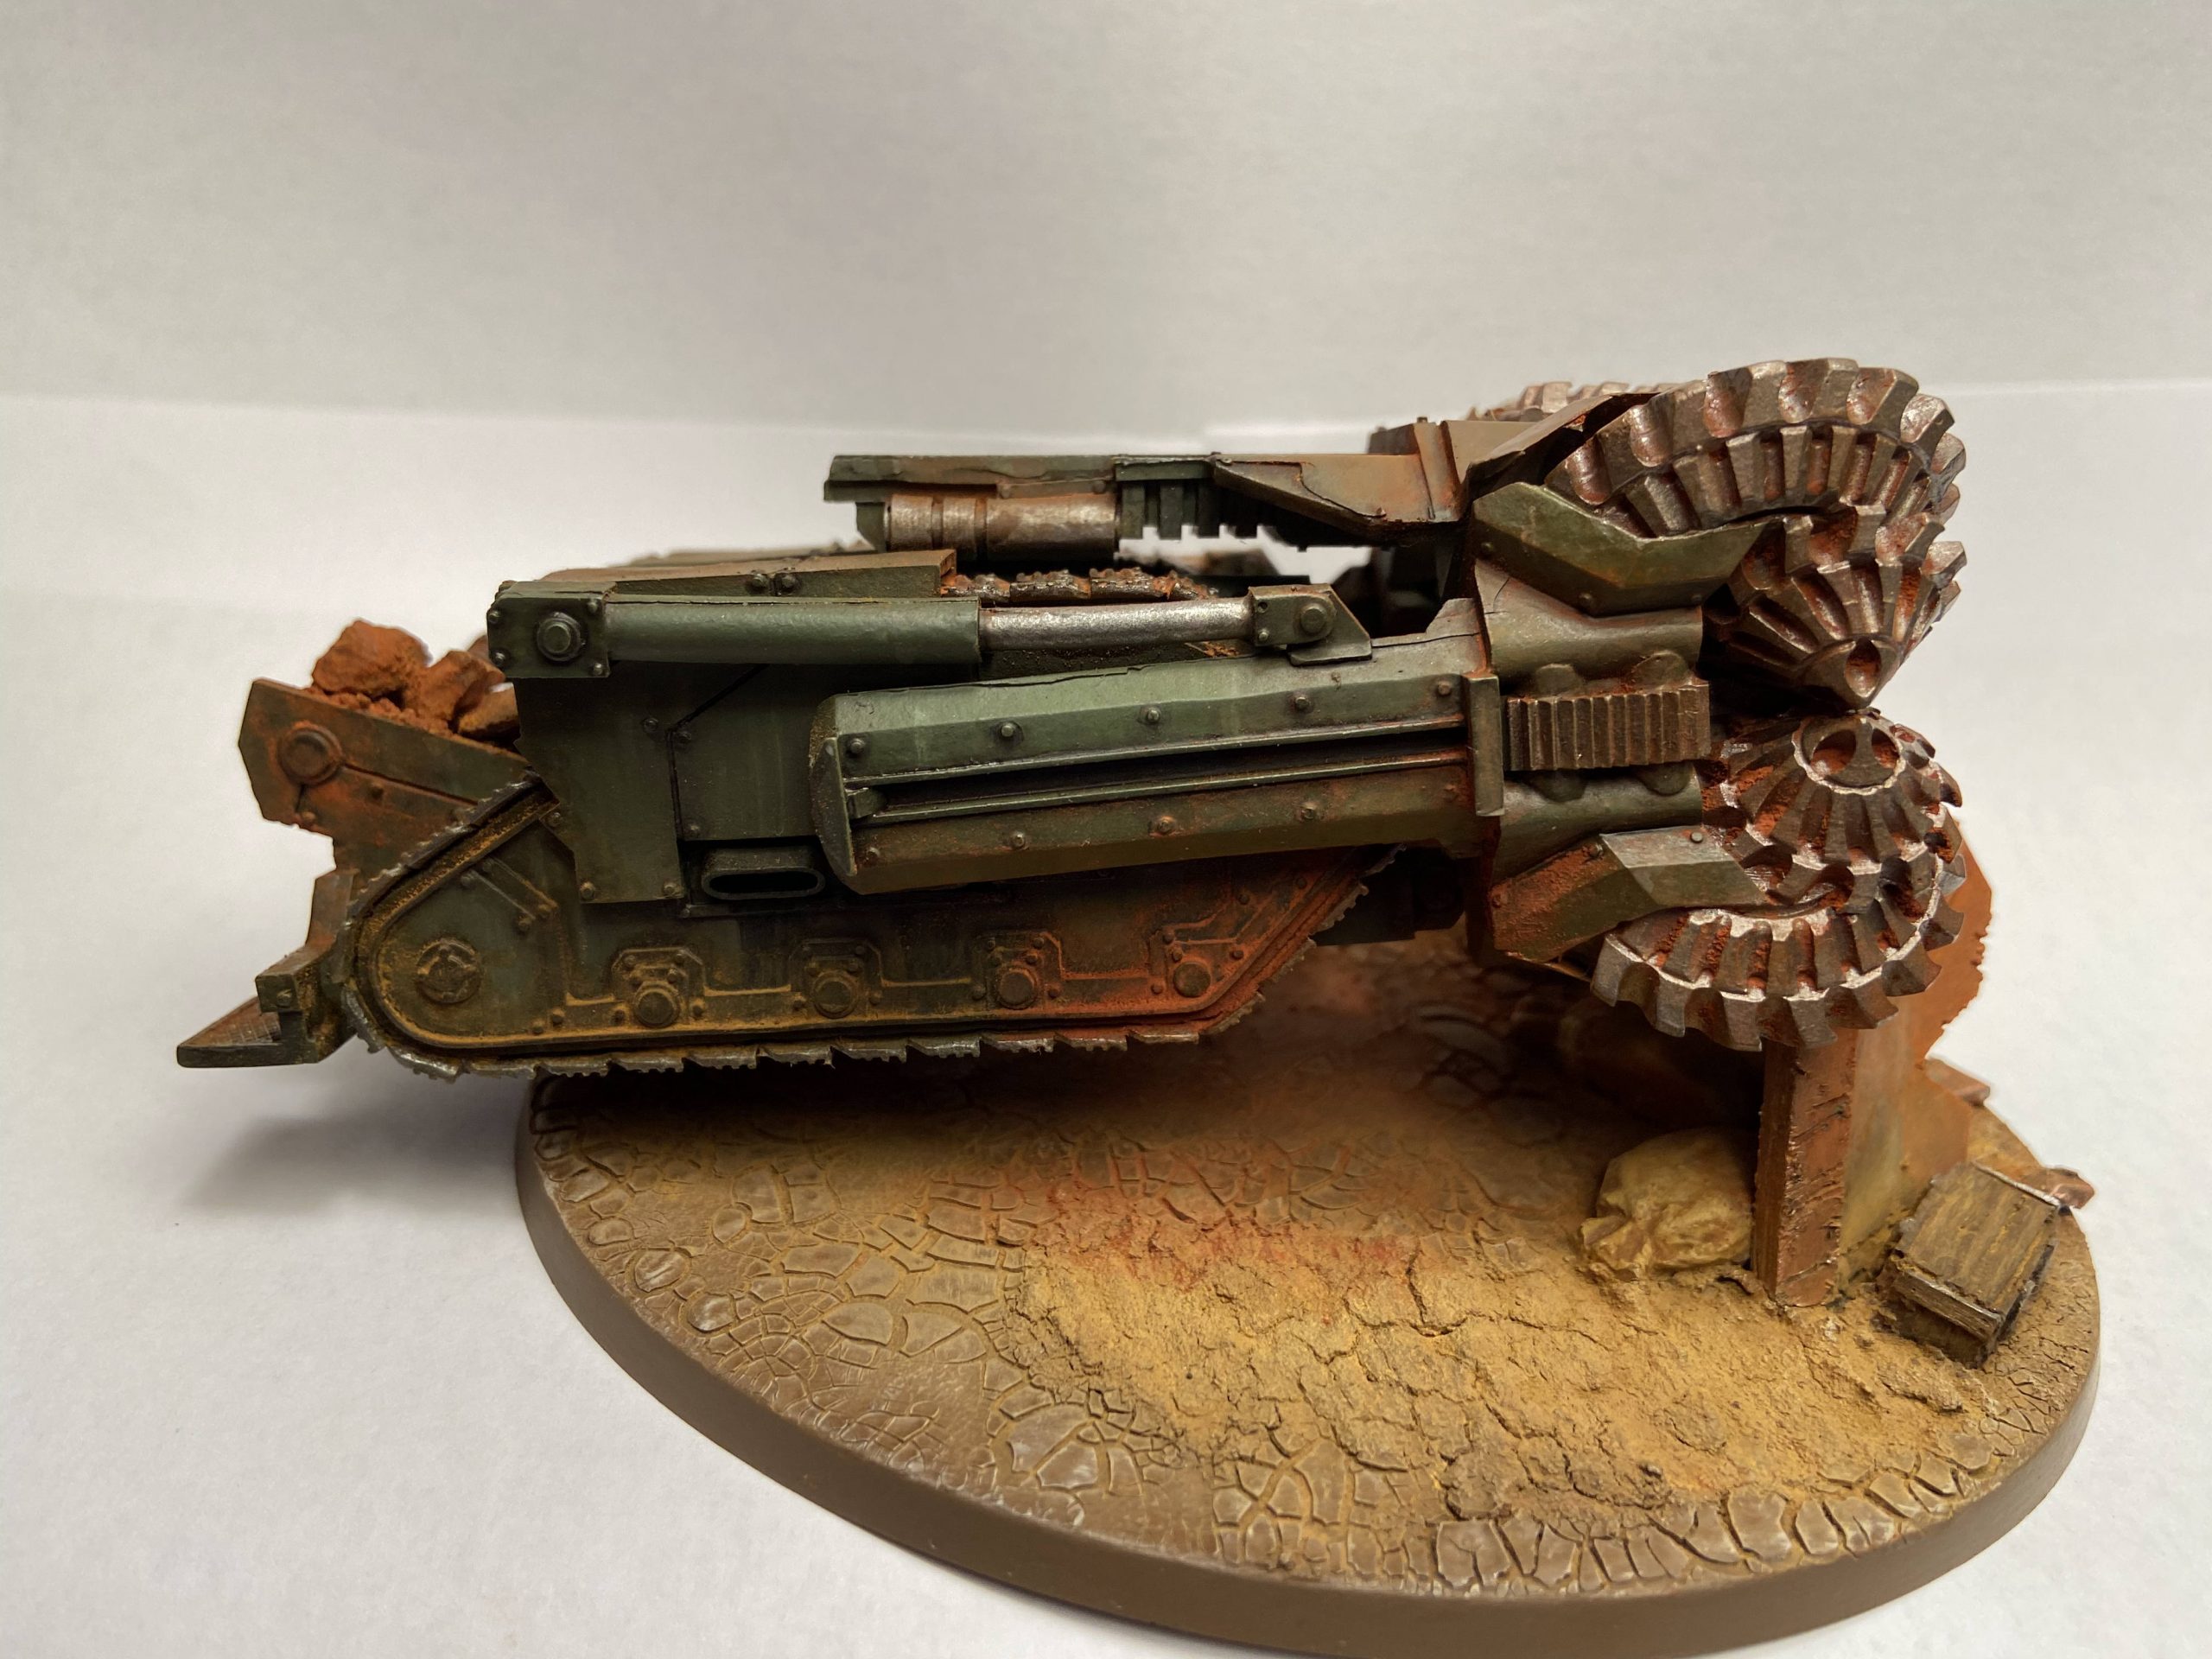
And here they are, three Hades Breaching Drills!


Oil Paints
I want to add something here about oil paints, as I’ve been trying to use them more and more. Their main use, for me, is weathering effects; muck, dirt, grime, rust and the general effects of water and weather on metal.
I tried a stippling effect using Castellan Green, Loren Forest, Warboss Green and Straken Green. This involved jabbing the end of a brush and a sponge onto the model’s flat areas to create colour modulation on the Drill’s panels.
It’s actually pretty hard to do this. I found it hard to blend the colours, and the stippling effect was obvious. E.g. you can see evidence of a brush being used. With practice, it’s feasible, I’m sure. I think the top one would be OK at a distance, especially once the details are in place and pigments have been added. But I wanted to try oil paint to try and accomplish a better result.
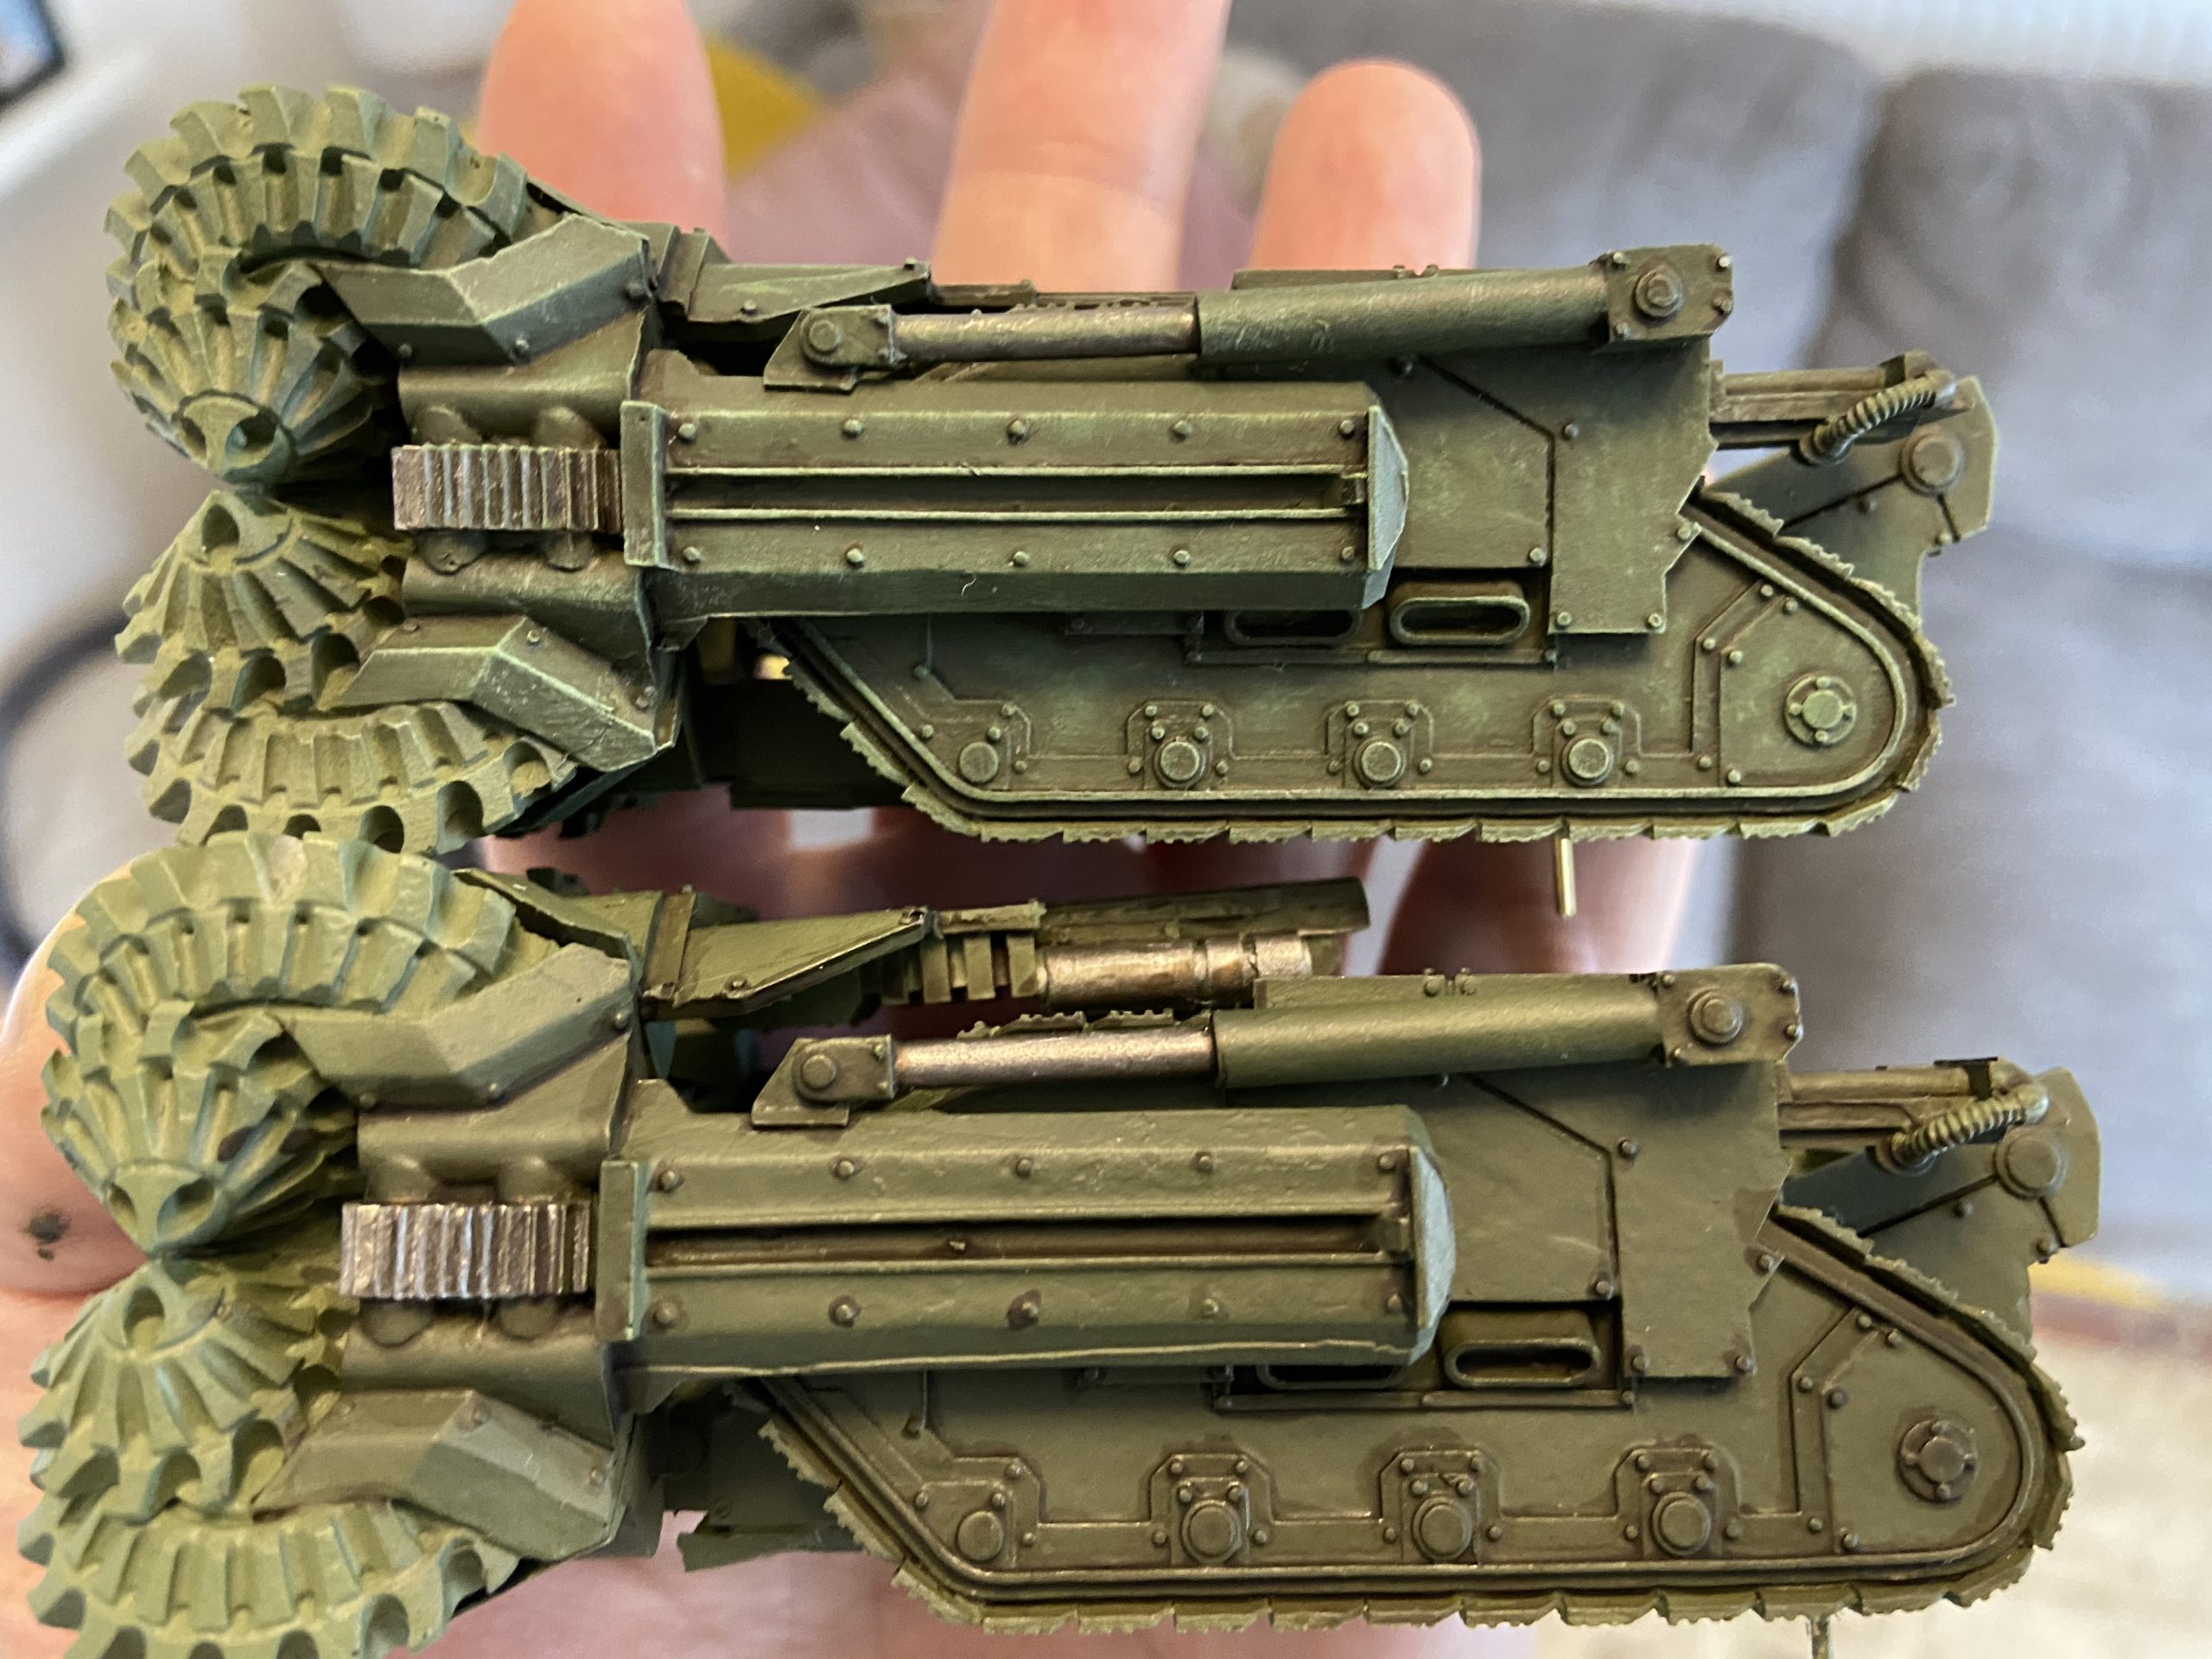
The top Drill has been stippled.
Another, and possibly easy method, for lightening the panel centres is by using an airbrush. But that isn’t always the easiest option depending on your tools to hand, time available and the area of the model you want to paint.
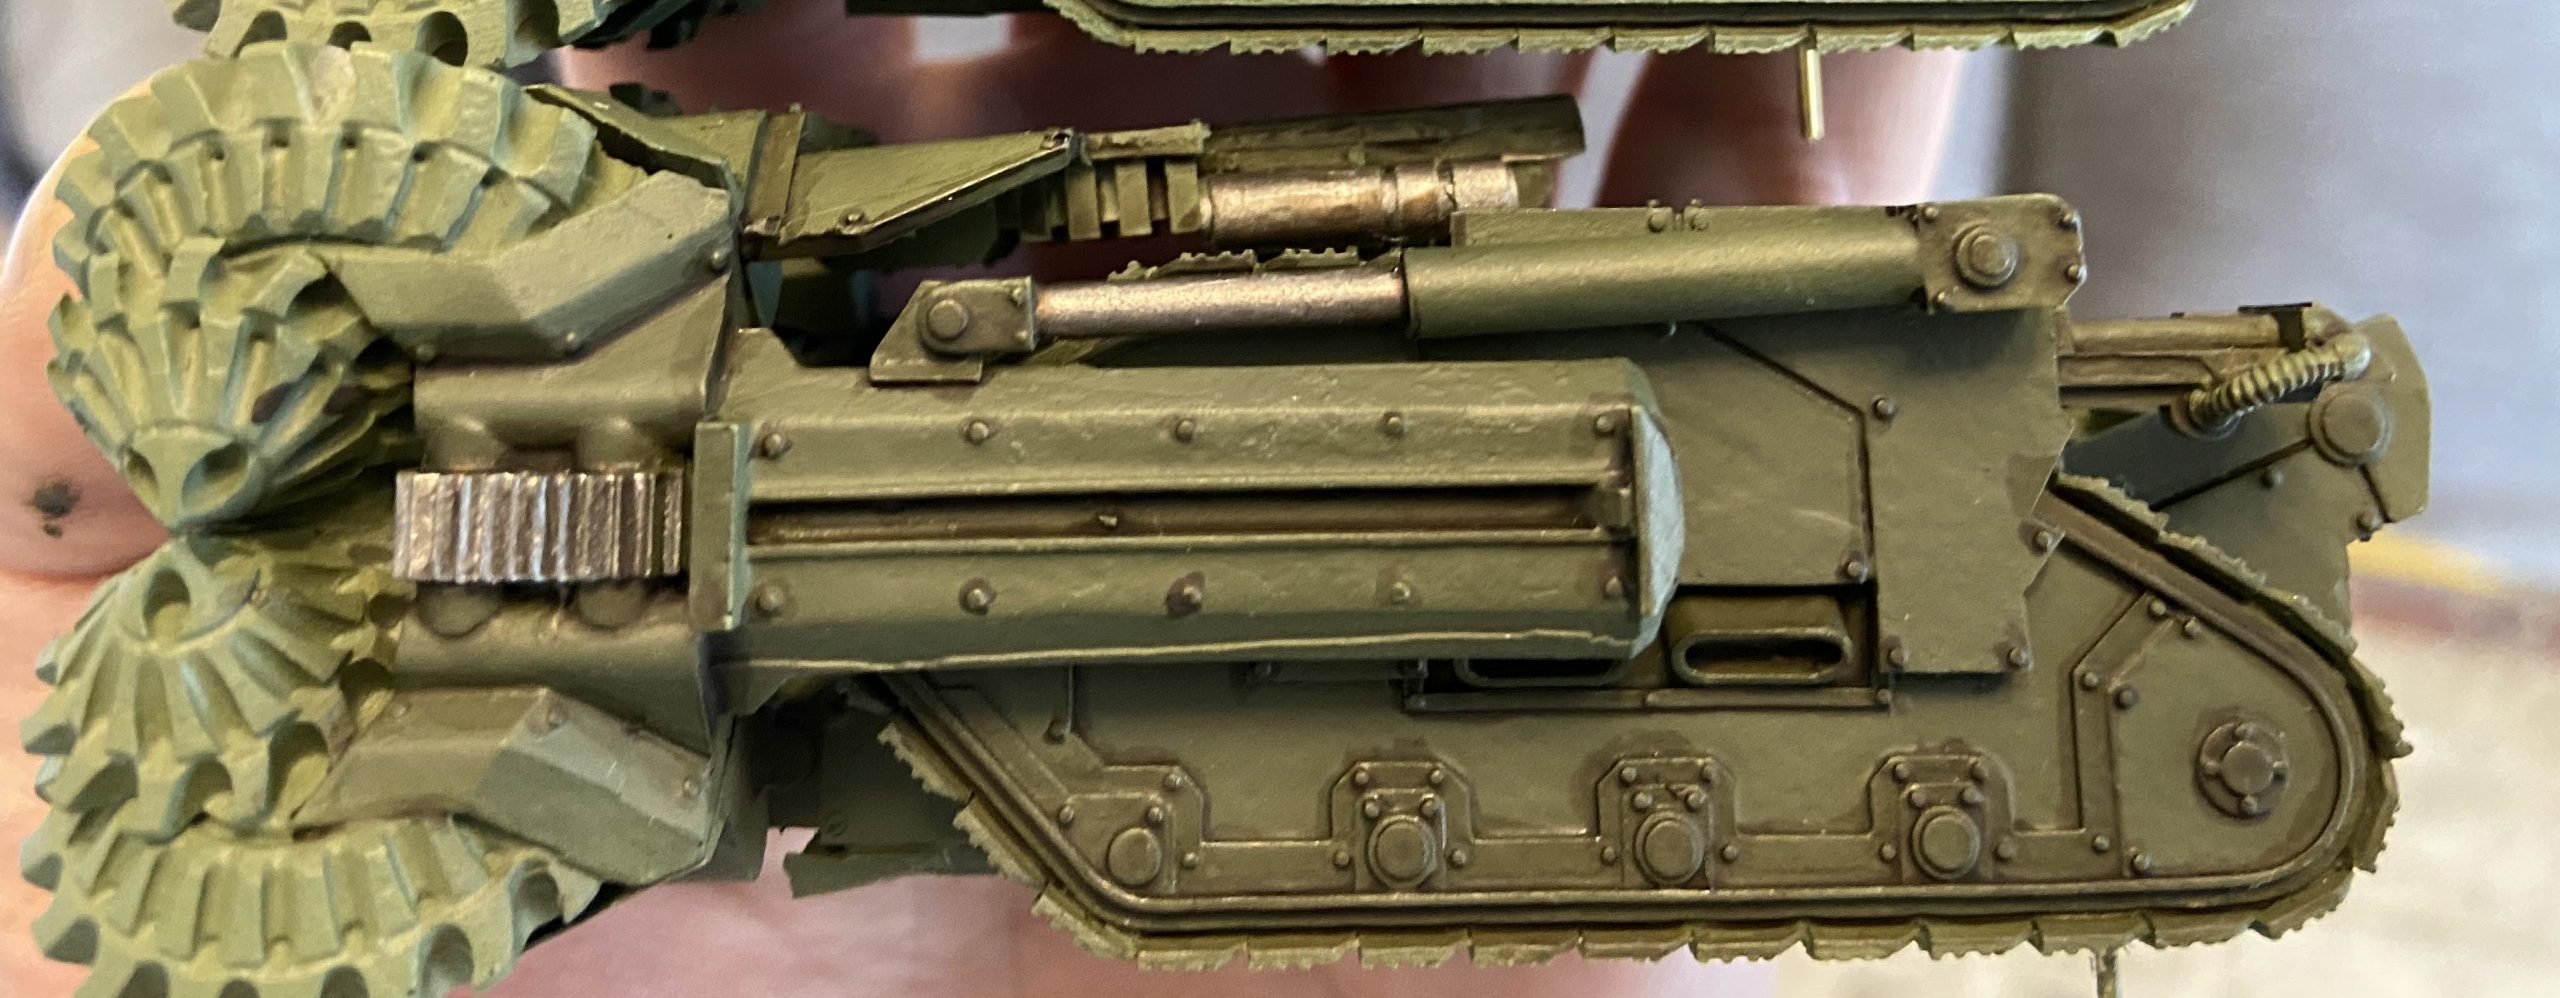
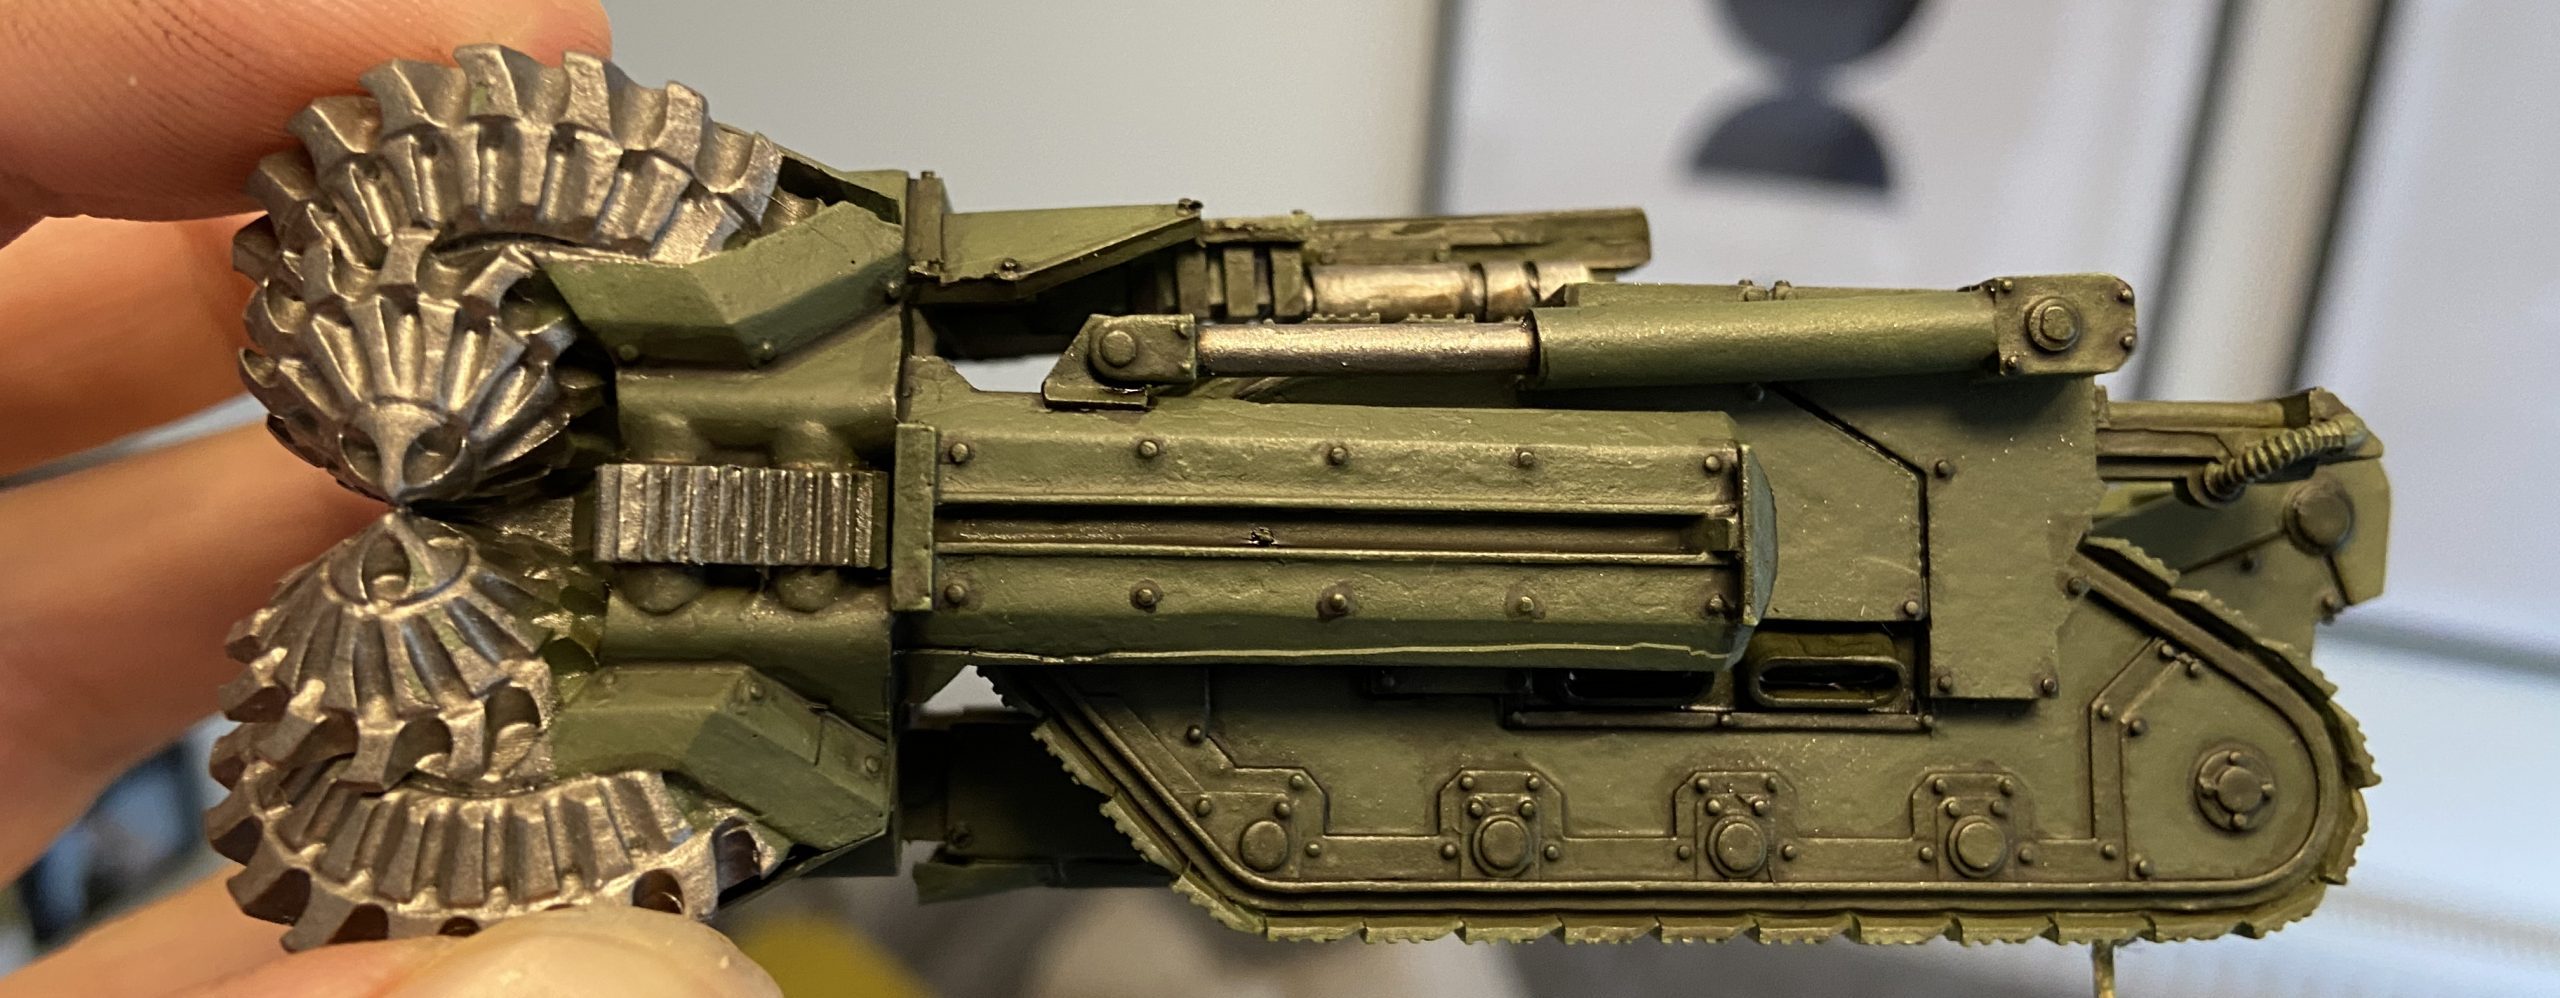
Therefore I resorted to trying oil paints for this effect. I wanted to lighten the centre of the panels while leaving the edges darker, and also add more variations of green throughout the model. This is more easily achieved before you start the model by pre-shading the panel edges a darker colour, keeping the centres light and then going over your model with your base colour.
Anyway, I didn’t do that, I want to one day, but this time I didn’t. So I went for Olive Green from Abteilung 502. Maybe it will work? This colour was a complete guess. I also have white and black to lighten or darken the Olive Green in case it’s an incorrect match for Castellan Green.
Oil Paint Pin Wash
The other thing I tried to do with oil paint was a pin wash, black. This involves thinning the oil paint and then using it as a wash on all the cracks, grooves and recesses. This worked well, but the photos do not seem to do it justice. From the images below you can see that the pin wash has had a good effect on the mode, all be it subtle. Applying the Agrax Earthshade wash from Games Workshop first and then the oil pin wash has resulted in a (slightly) greater depth of colours.
The oil paint tends to seep out from where it is applied. It is so thin that it travels quickly along the recesses really well and makes pin washing the model very easy. The seeping might not be desirable in some instances, but I like it here. It has mixed with the Agrax Earthshade and created a nice effect – with slight variations in the darker wash areas.
-


- This Drill has had Agrax Earthshade wash
-

- And this is the same Drill, after the pin wash
Pin Wash Gallery
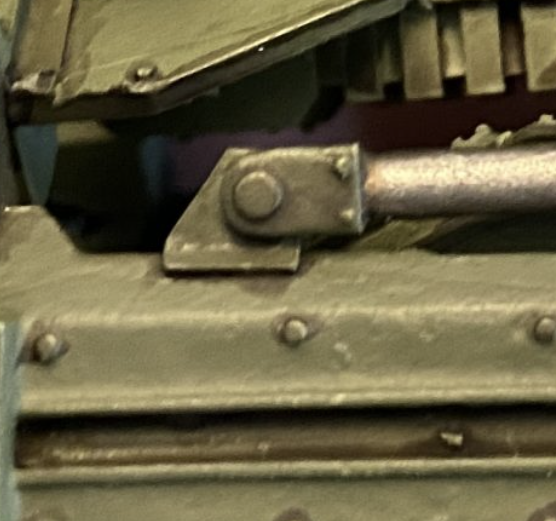
This is so subtle I have had to zoom in to levels only the Adeptus Mechanicus is capable of. After the pin wash, the dark areas are darker and the lighter area of wash are still present, but next to the dark areas they now look – just better? I think so anyway.
It is worth noting that this pin wash stage of the process took maybe 10 to 15 minutes per model. Not long to get a nice change of colour throughout the model. Low effort, high reward.
-

- Before the pin wash
-

- After the pin wash
-

- Before the pin wash
-

- After the pin wash
Oil Paint Summary
And here we have the final results, next to each other for you, and me, to review. I like it. The variations in colour are much better than my usual method of;
- Paint Castellan Green
- Wash Agrax Earthshade
- Drybrush Loren Forest
- Drybrush Terminus Stone
There are now many different greens and browns, plus some streaking and the general dirtiness is looking pretty good. I also used the Abteilung 502 colour called Buff, it is like a cream and was good for creating a lighter green. You will see it below as faint white/scream streaks.
One issue I have with it at this stage is that it is not tied together very well. In the past when I have tried wet blending after I am done I use a very thin wash (a glaze some people call this) over the whole area. It ties the whole area together nicely after you have used so many variations of the colour.
I feel like this model needs something similar, but I really do not want to wash it now I have come this far with it. A thin wash may not sit well on the flat areas and using a thin oil wash over the whole model feels scary at this late stage.
I am hoping that the pigments at the end of the process will correct this issue for me. I want them to tie the whole model together and soften the harsher colour changes. And if not soften, at least distract from! The pigments will also tie the model into the base.
Finally, this video by Panzermeister36 best shows the process I am using to achieve the oil effects.
-

- Sideview after stippling only
-

- Top view after stippling only
-
- Sideview after oil paints
-
- Top view after oil paints

Pigments – Quick Note
I use pigments a lot now, and I have a how-to for pigments, too, on this blog. Here is a quick video of their effects on one of the bases.
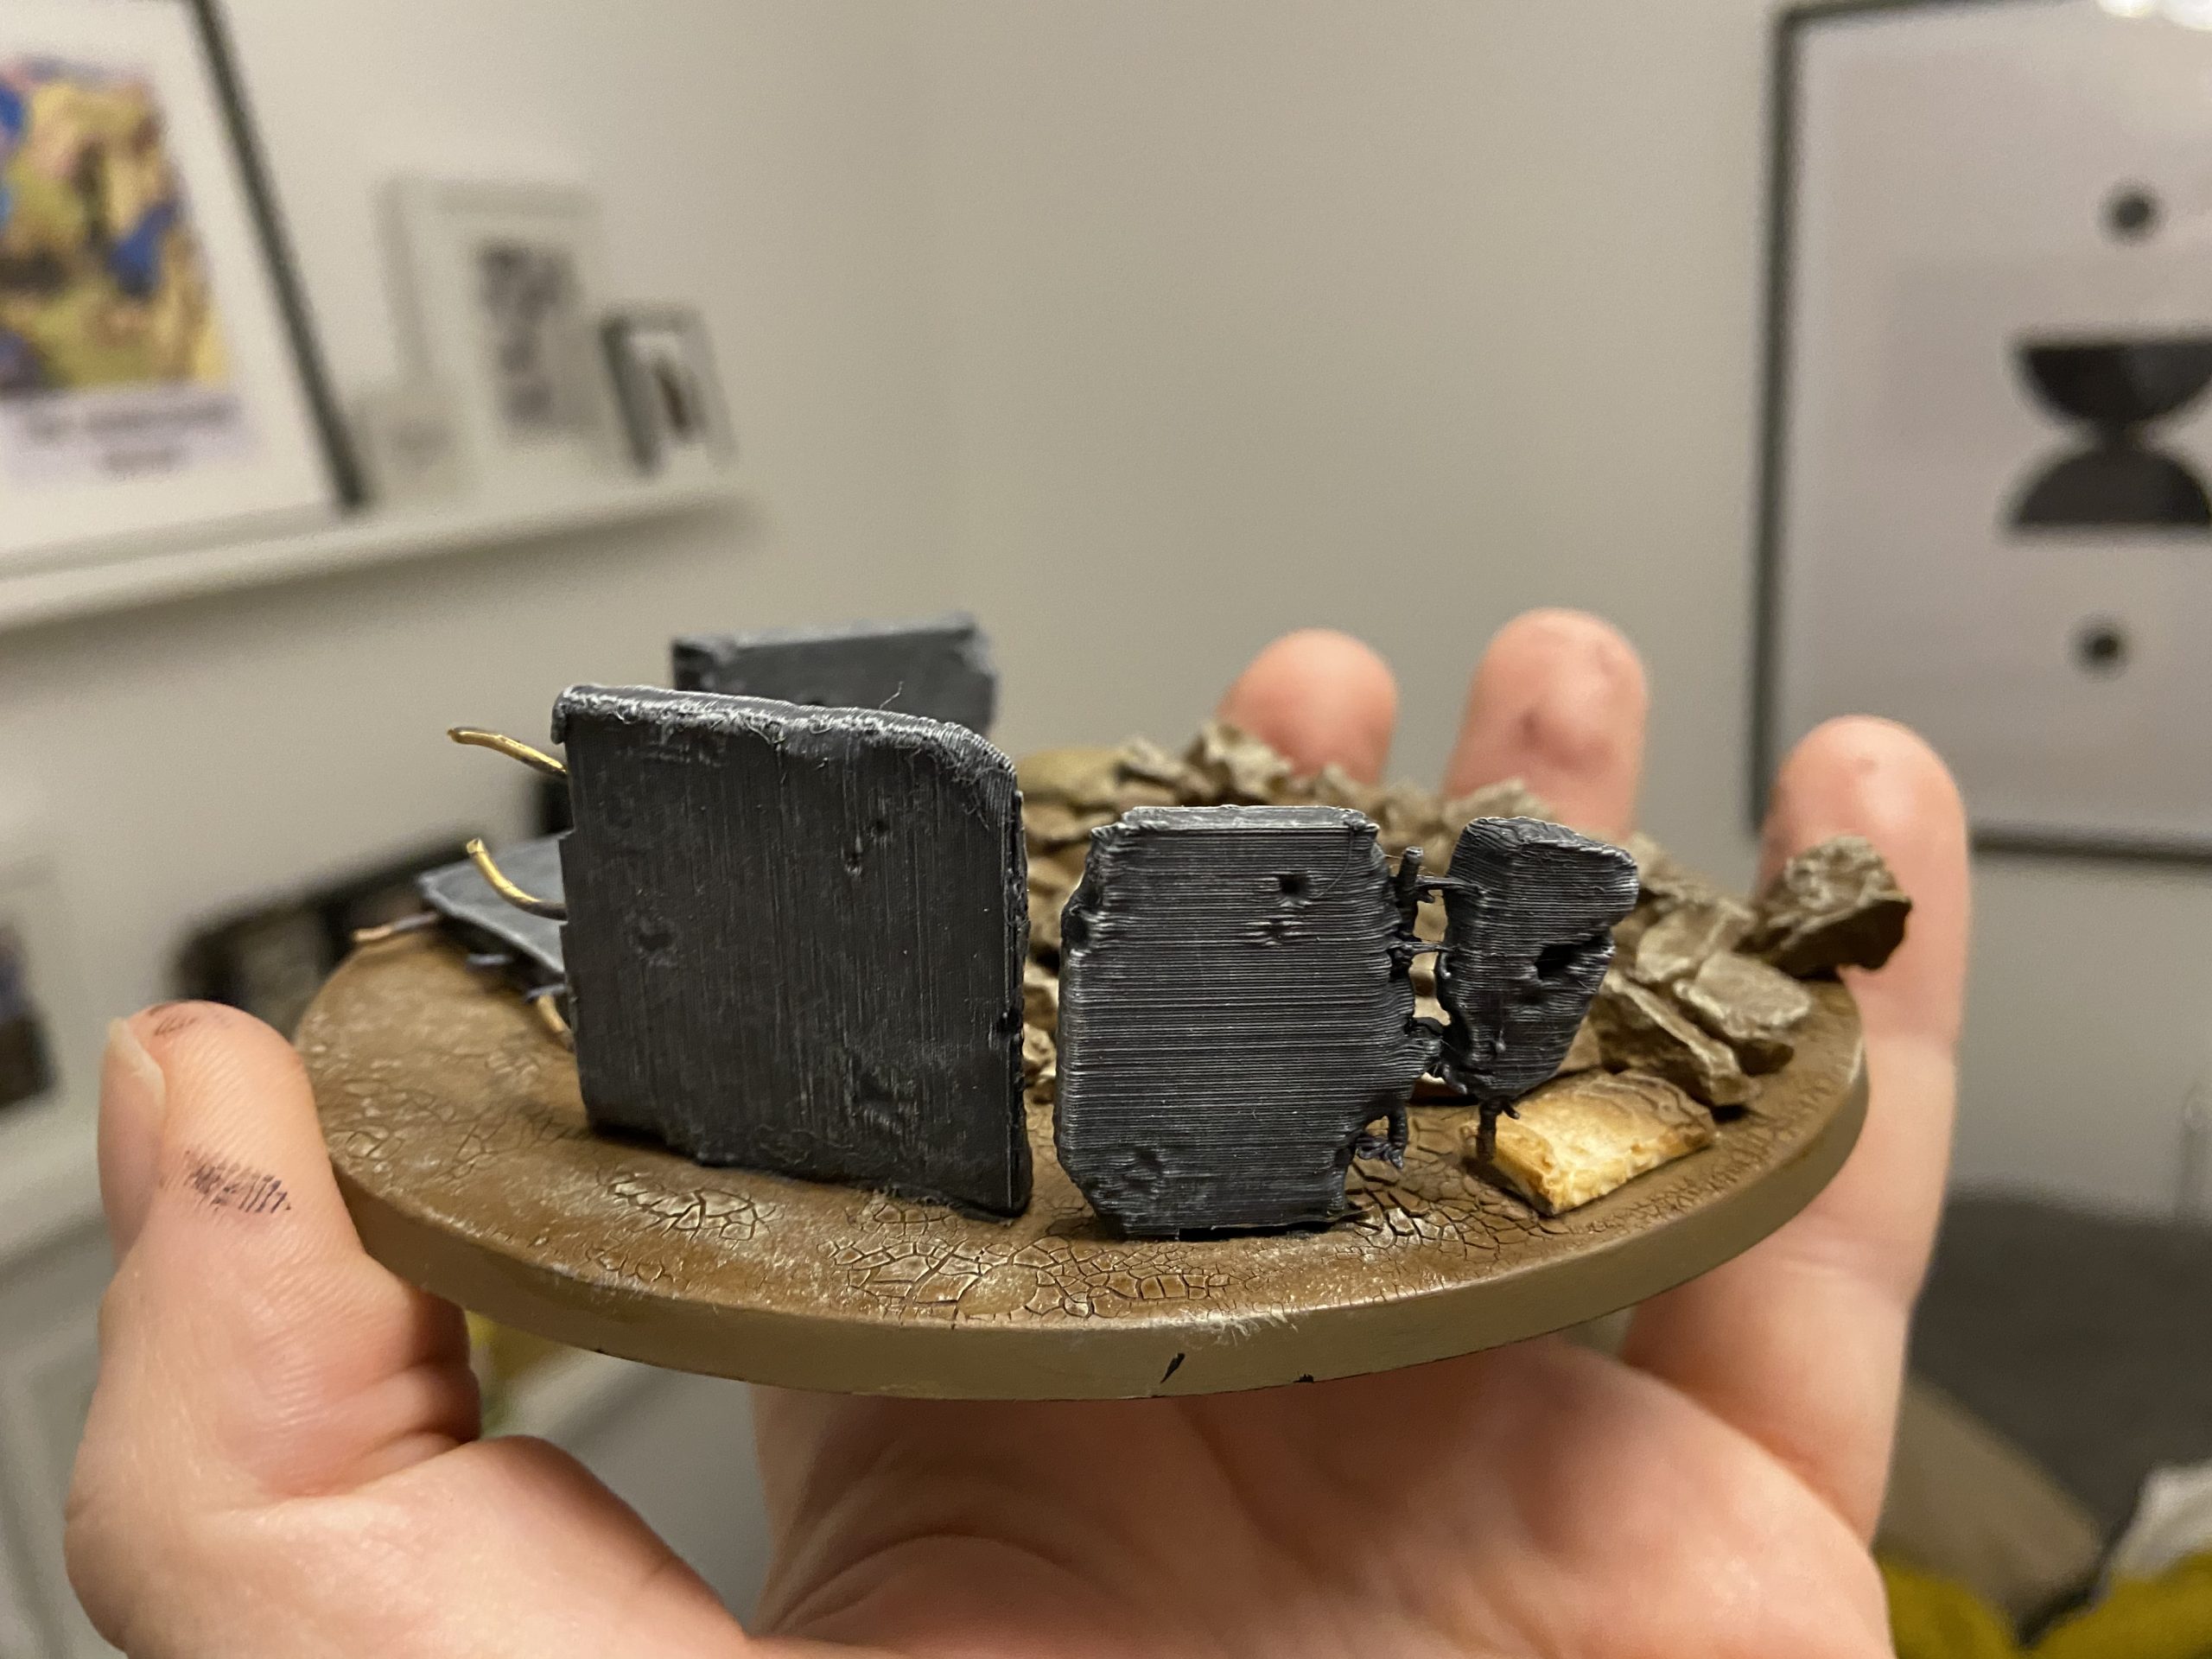
Something interesting about this base is that on my post on Reddit about this base, people seemed torn between whether or not the base was better before or after the pigments. The pigments were meant to subtly bring the piece together as one.
The Aegies Defence Line, the box, the rubble and the desert surface should not be separate pieces of the base. They are all one piece. They are all part of the base and the surrounding area of the model – so I use the pigments to bring them all together.
Hade Breaching Drill – WIP Gallery
And finally, my WIP images. It does seem extreme to have a gallery like this and to have so many photos of basically the same model – but I think it helps you guys fill in the missing pieces?
All the process is laid out there for you to glean whatever you can from it. And if it is not there, then there is enough detail for you to ask me a question about the process. I am always happy to help!
Anyway, I hope it helps someone out there… maybe skip cutting your models though?!