
Mini Airbrush Compressor Review
Testing out a Mini Airbrush Compressor...
I first saw an ad for a Mini Airbrush Compressor on Instagram, or it could’ve been eBay. It intrigued me so I went a sourced one on eBay, rather than using the inflated price that appeared on the ad – which was £54.
Never miss an article? Subscribe!
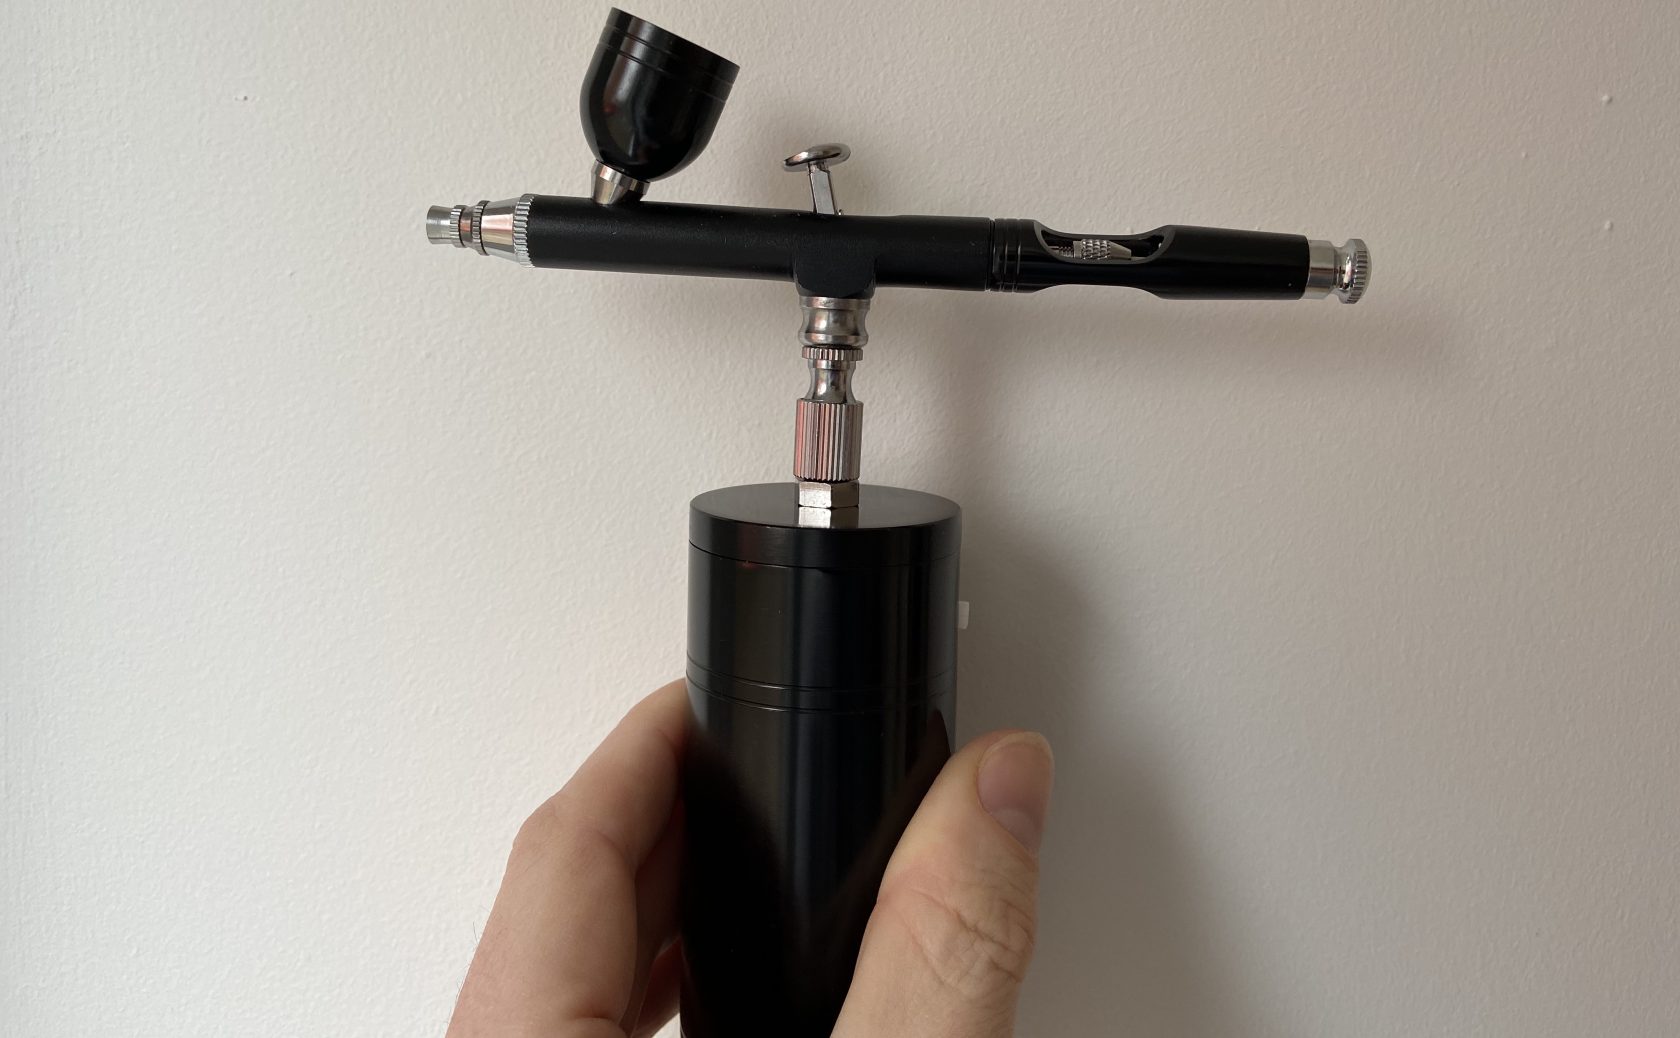
The product I got was from eBay and looked like this… there are a few types, but this is the one I went with. It was £36.35 including postage. There might be other options further that you might discover too.
Mini Airbrush Compressor
Mini Airbrush Compressor
I’m no airbrush pro and there might be ten reasons not to try and use one of these if you an airbrushing pro. But for me, the idea of being able to spray any colour quickly – appeals greatly. Rather than relying on spray cans from Games Workshop or Army Painter.
Also, not having to get out the compressor and set everything up is of great appeal too. I don’t have a dedicated hobby area so I can’t leave things like an airbrush and compressor set up to simply grab when the feeling takes me.
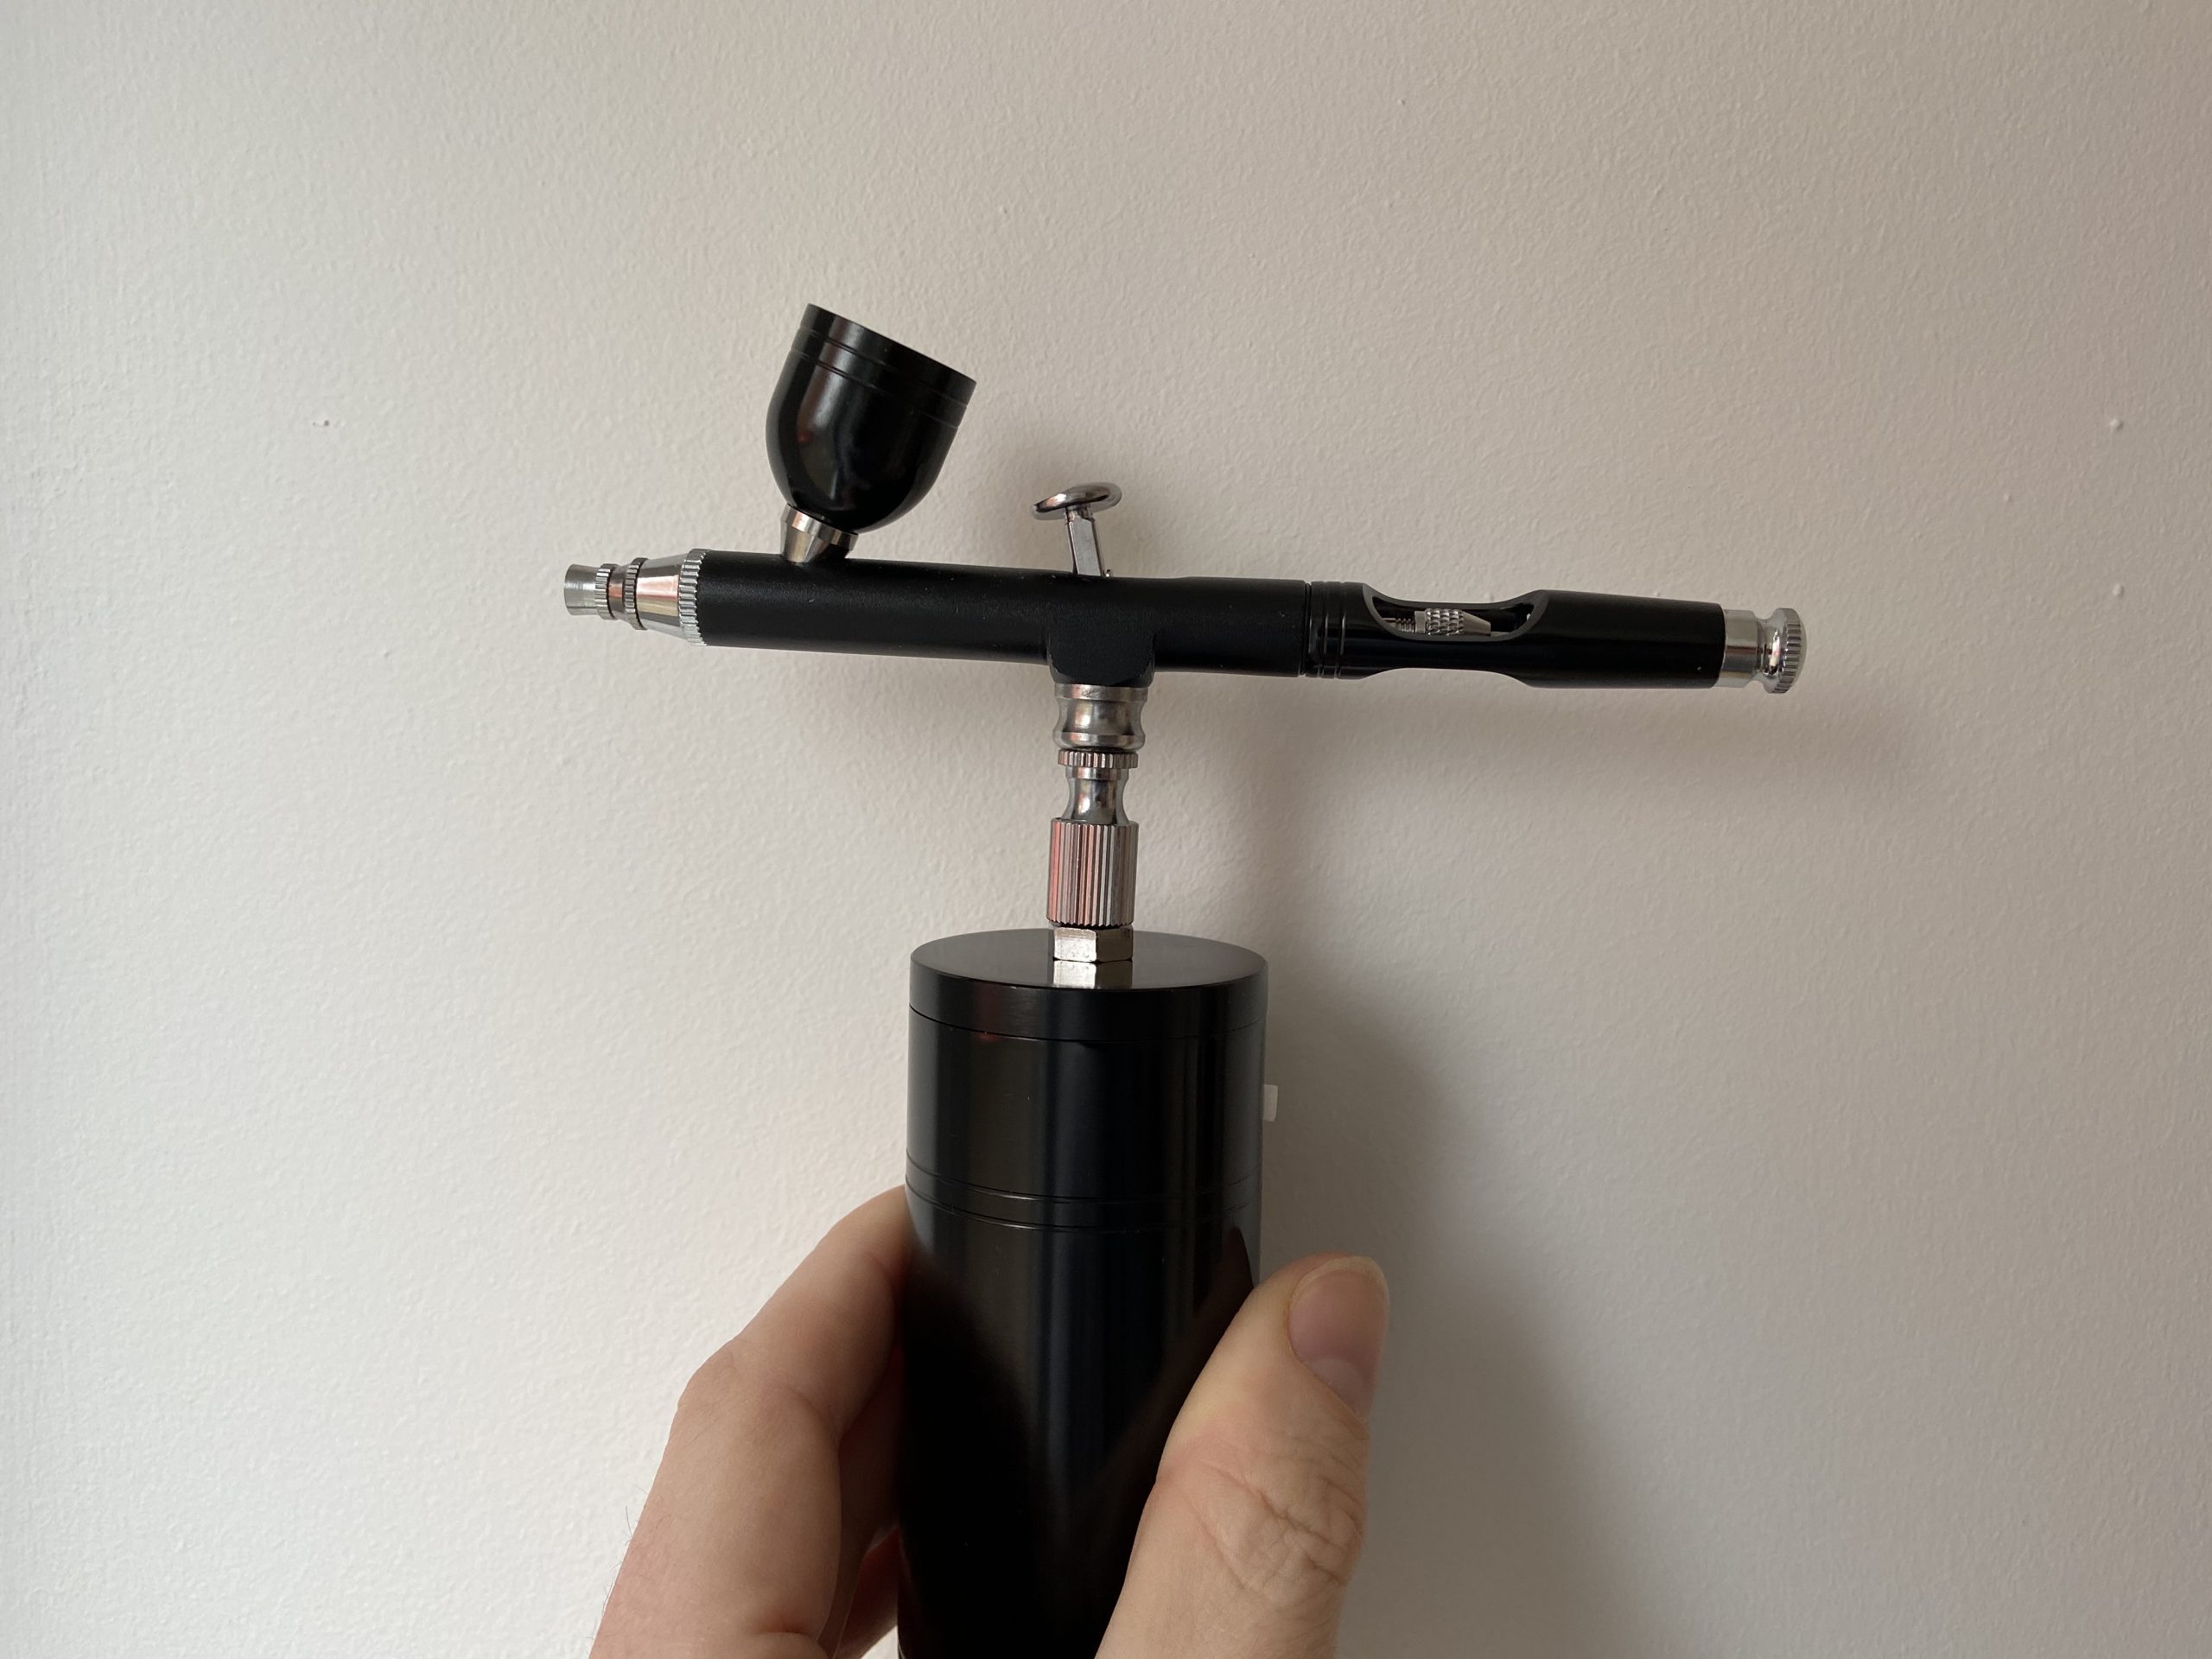
The Mini Airbrush Compressor from eBay with the Airbrush that it came with
Mini Airbrush Compressor Results
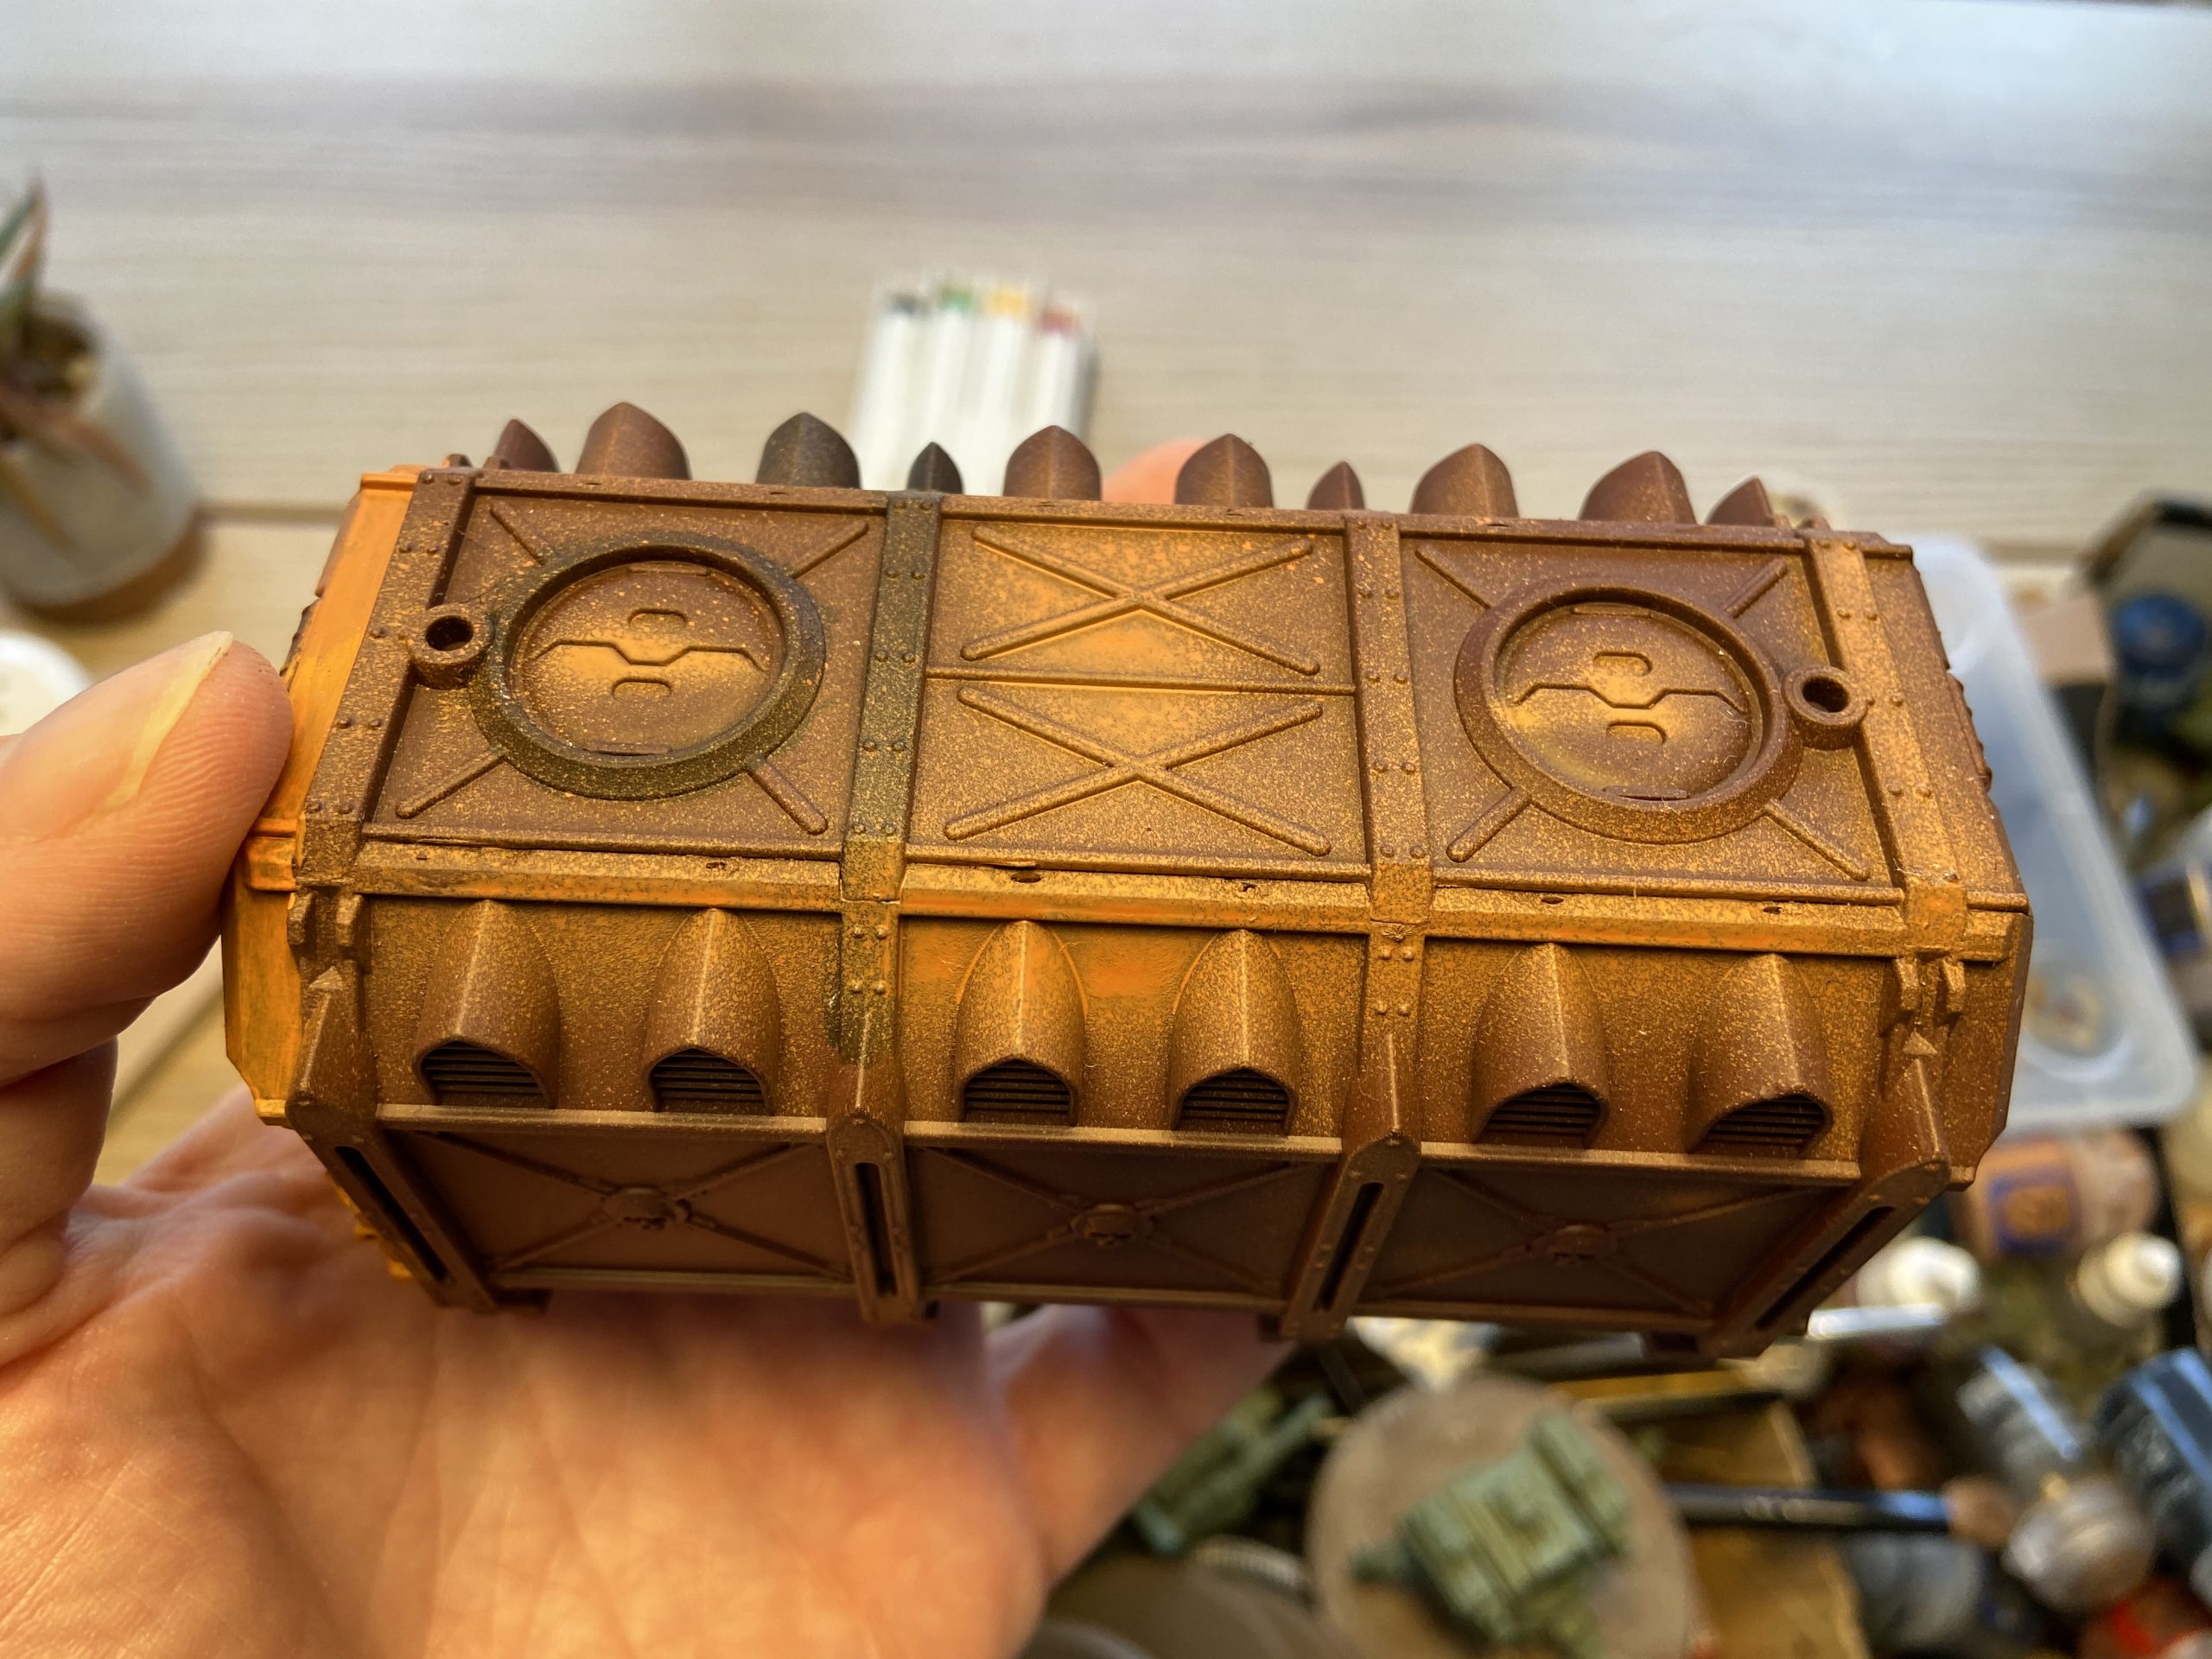
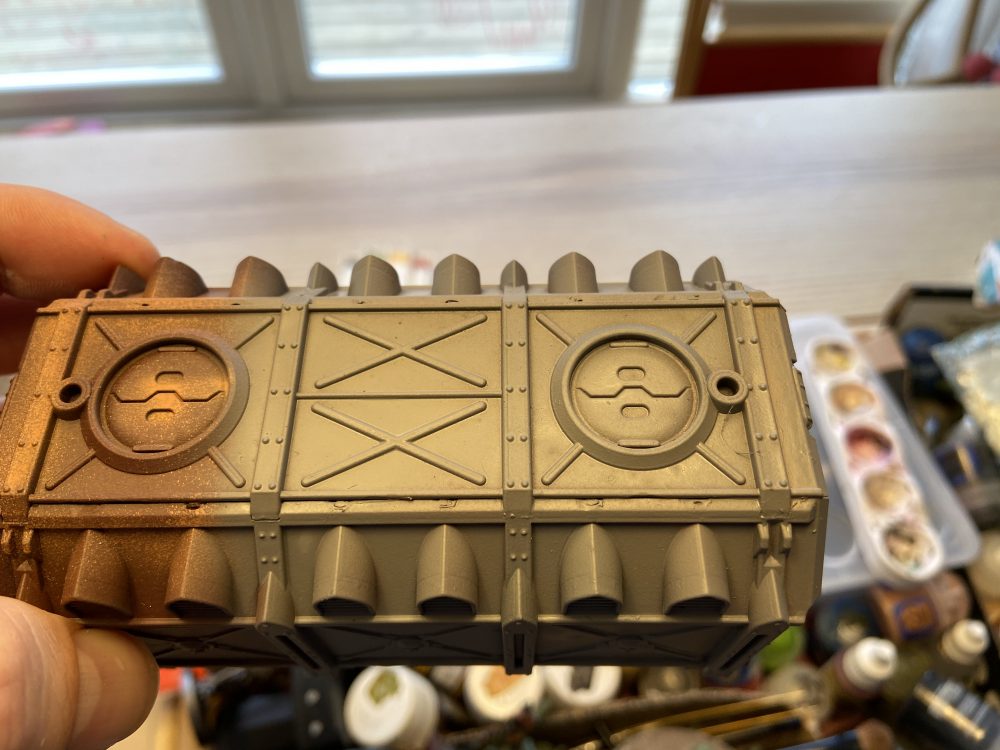
Munitorum Armoured Containers
My first quick test was to grab a previously primed and sprayed Munitorum Armoured Container and put a layer of Dawnstone Grey over it.
It was primed with Army Painter Chaotic Red and then sprayed (months and months ago) with my other airbrush, orange. This is for chipping at a later date, which doesn’t matter here in this article and doesn’t affect what I am doing with the Dawnstone Grey. The point is, you can see the before photo.
And now it was time to test the new Mini Airbrush Compressor with Dawnstone Grey. And it worked! I then mixed in some Pallid Wych Flesh with the Dawnstone Grey to make it lighter and went back to the Munitorum Armoured Container to lighten some of the larger panel areas. This worked too!
There is some pooling of the light grey that you can see in some of these photos. This is my fault and not the airbrush. I was a bit out of practice and made the consistency of the paint too thin. Which made it like water and then made it pool more than usual from the airflow. Lesson learnt.
-


- Before using the Mini Airbrush Compressor
-

- Dawnstone grey, then very slight light grey has now been applied

-
- Top view

-

- Side view – you can see the slight pooling on the right-most panel here

The above photos show my first quick go on one end, while I held the other end. This probably took 20 minutes to do in total. I then went back to finish the grey on the end I was holding. It’s worth noting at this point that I have three of these Munitorum Armoured Containers which I’m using as practice pieces for me Gorgon Armoured Transport. Hence why this container has all the rust splatters on it. Having successfully tried it on the Munitorum Armoured Containers, it was time to try it on something more precious…
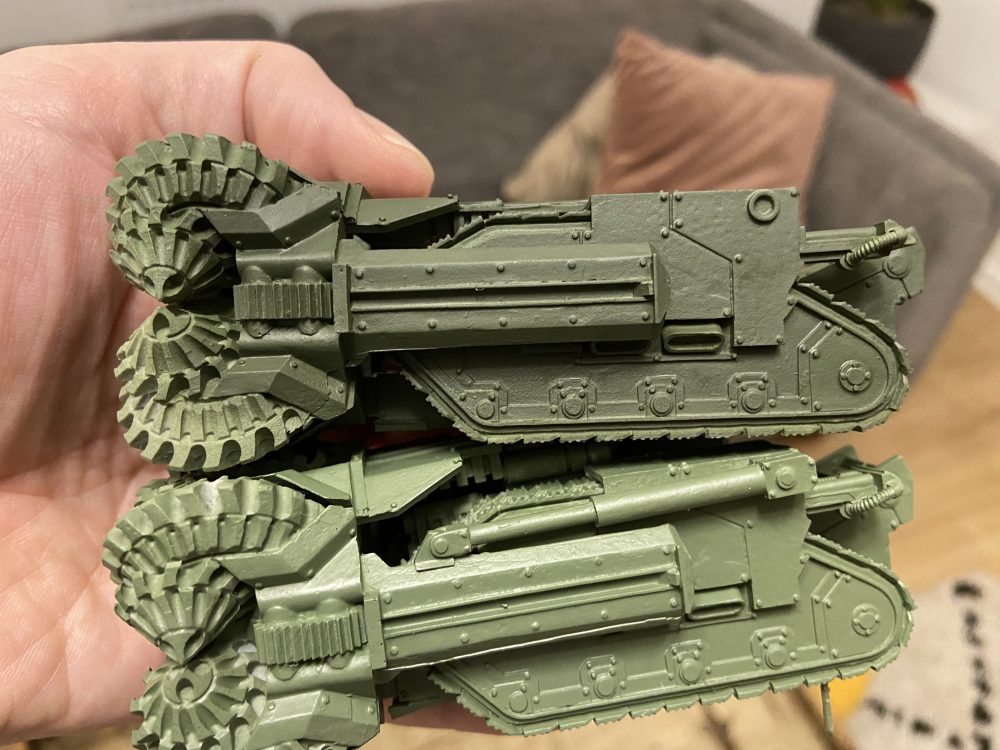
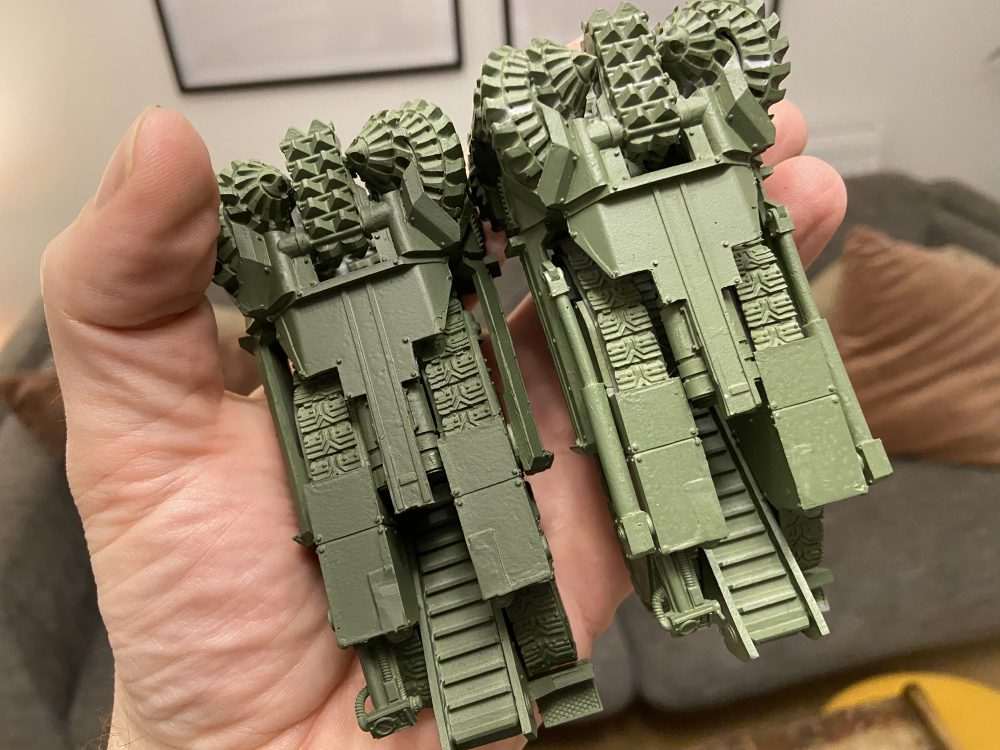
Hades Breaching Drills
The second test was on a Hades Breaching Drill which was previously primed with Army Painter Army Green. Which is lighter than I’d like. So I then applied Castellan Green over it using the Mini Airbrush Compressor. Castellan Green from Games Workshop is my go-to green for my Cadians and Catachans.
And it worked! This Mini Airbrush Compressor is perfect for putting down a base coat of any colour. The change in green here is slight and you would be forgiven for thinking that the move from Army Green to Castellan Green was unnecessary. But, once the green goes next to my existing models with Castellan Green, I think the difference in colours would be much more pronounced. So, I solider on making all my greens the same!
And having done it on one, and then placed them next to each other, the difference is more noticeable. Doing the model Army Green first actually turned out pretty well because it meant that I was not trying to airbrush onto resin or black – which I usually prime in. Having the green meant I have some (very) slightly colour changed on the model between the lighter Army Green and the darker Castellan Green. Win!
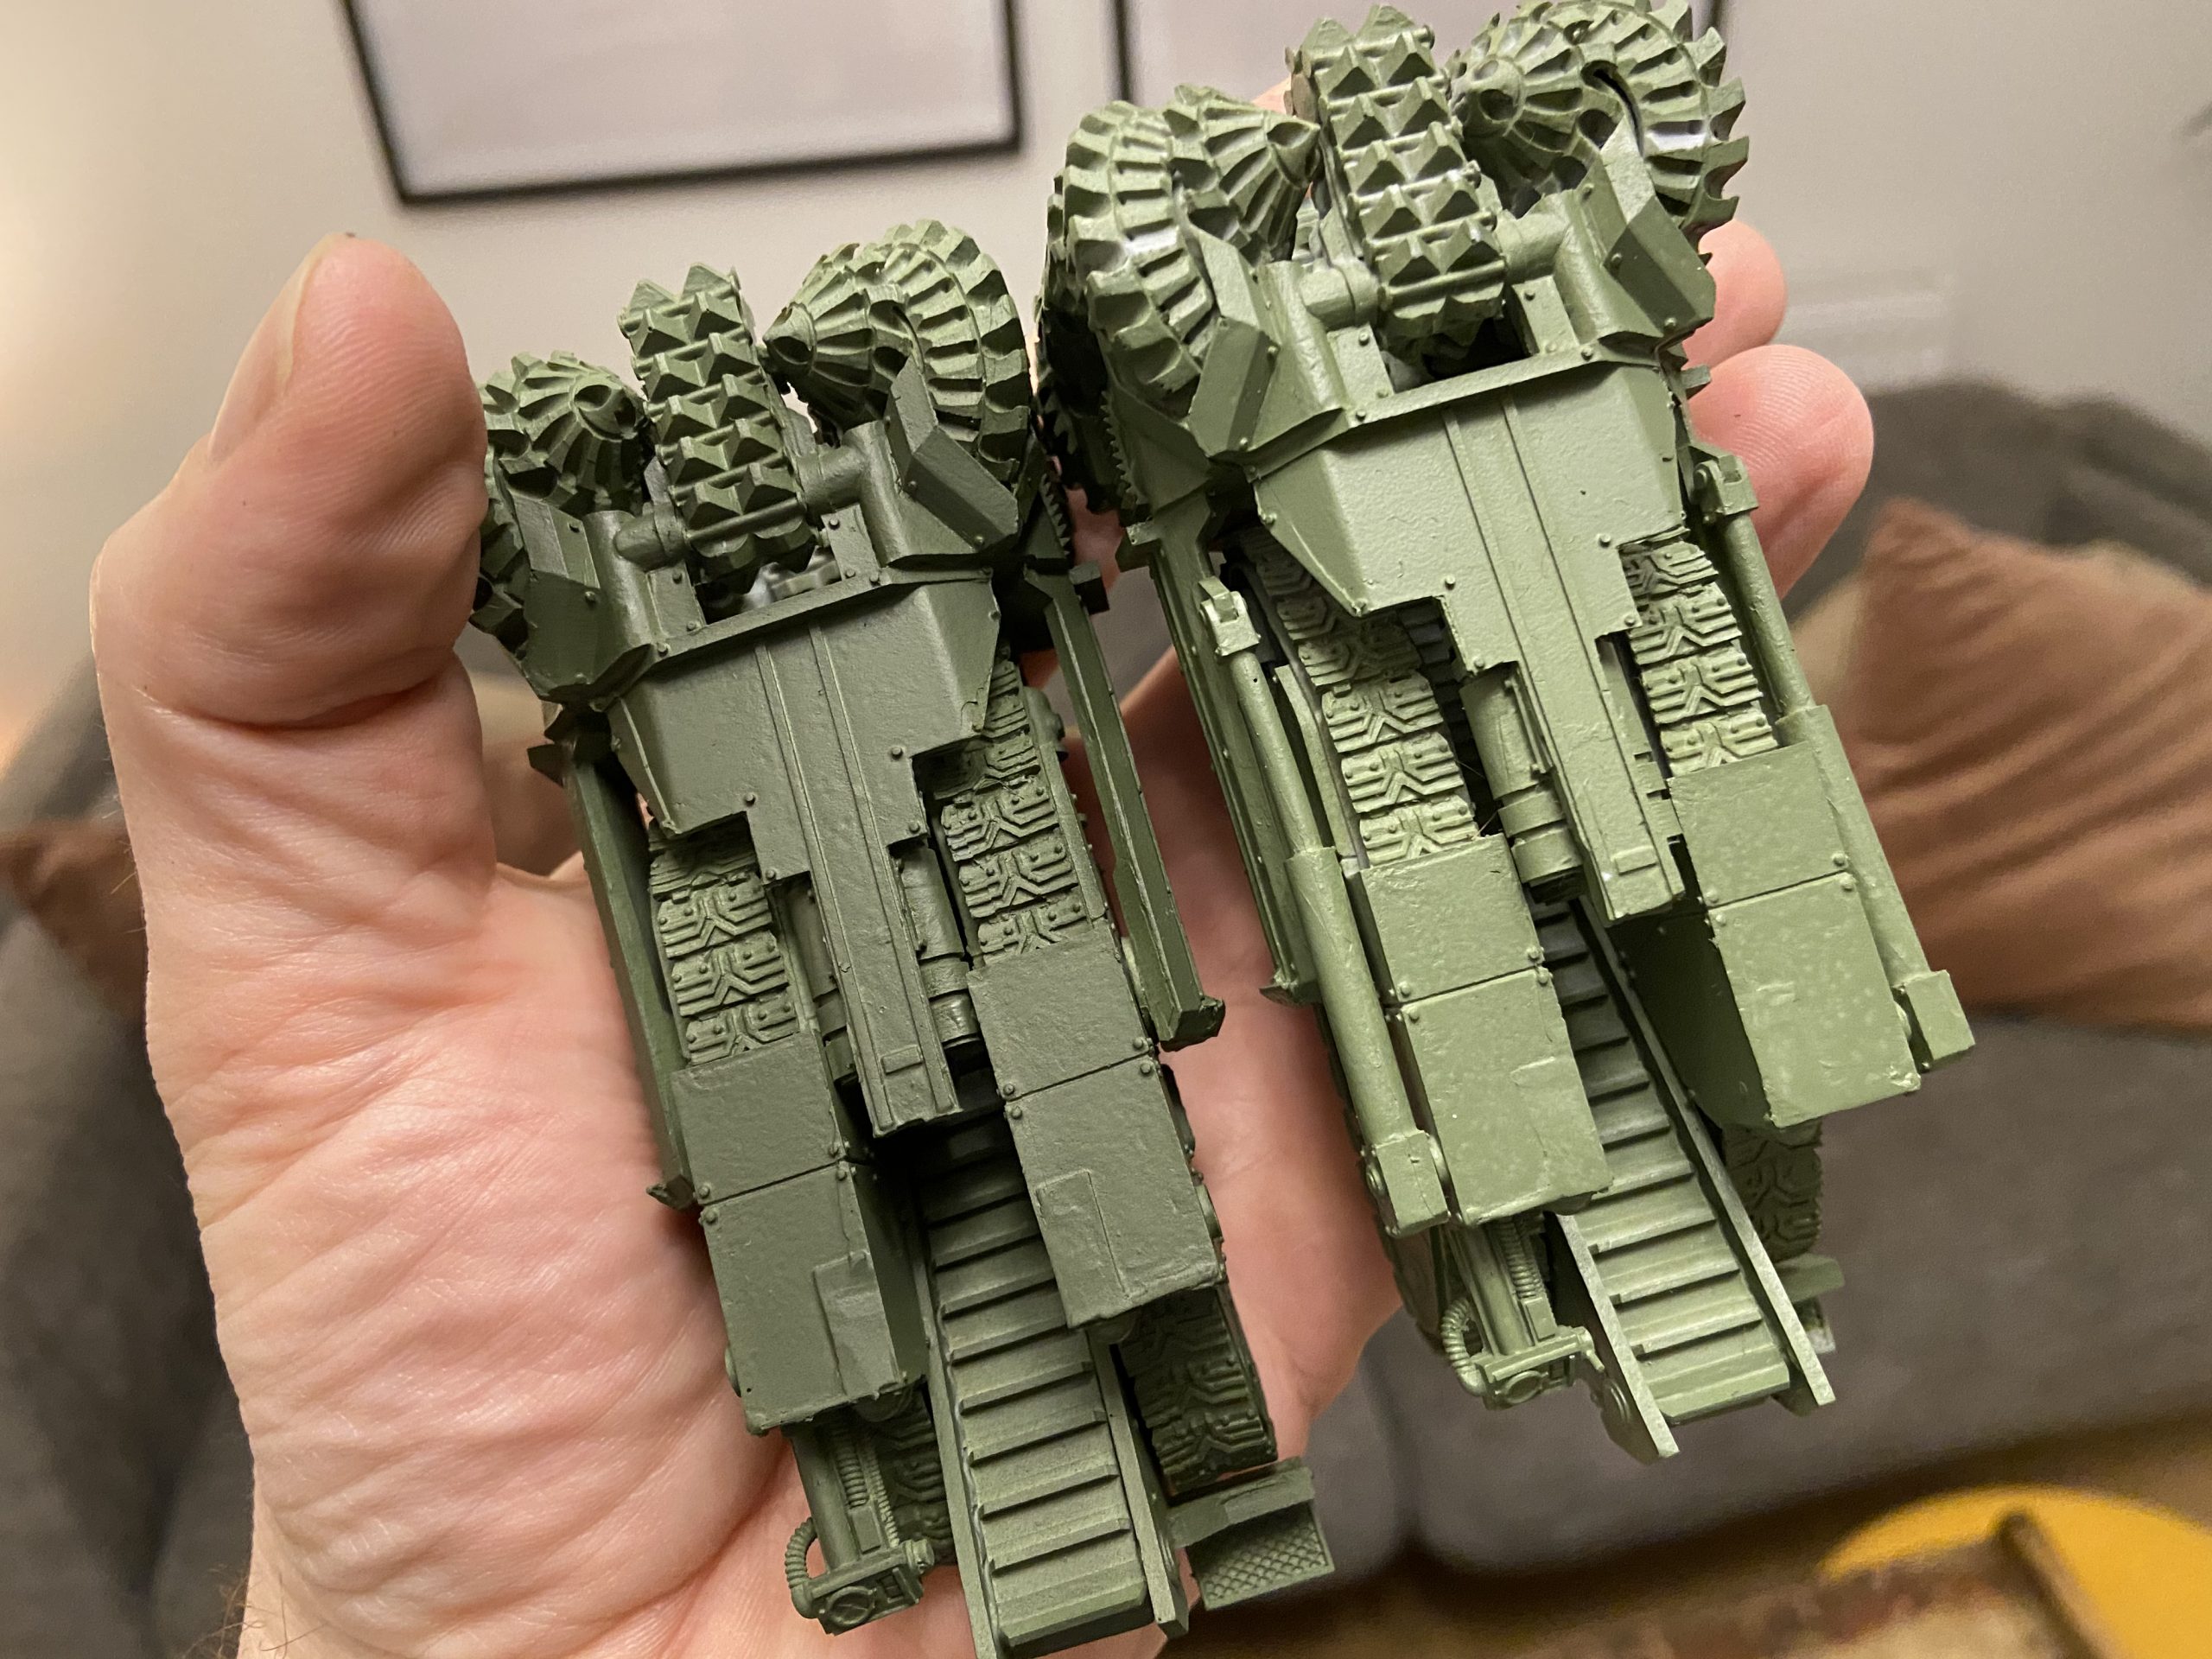
-
- Army Painter Army Green from a rattle can is on the bottom here

-

- The Castellan Green was airbrushed using the mini airbrush compressor

-
- Castellan Green is the darker one
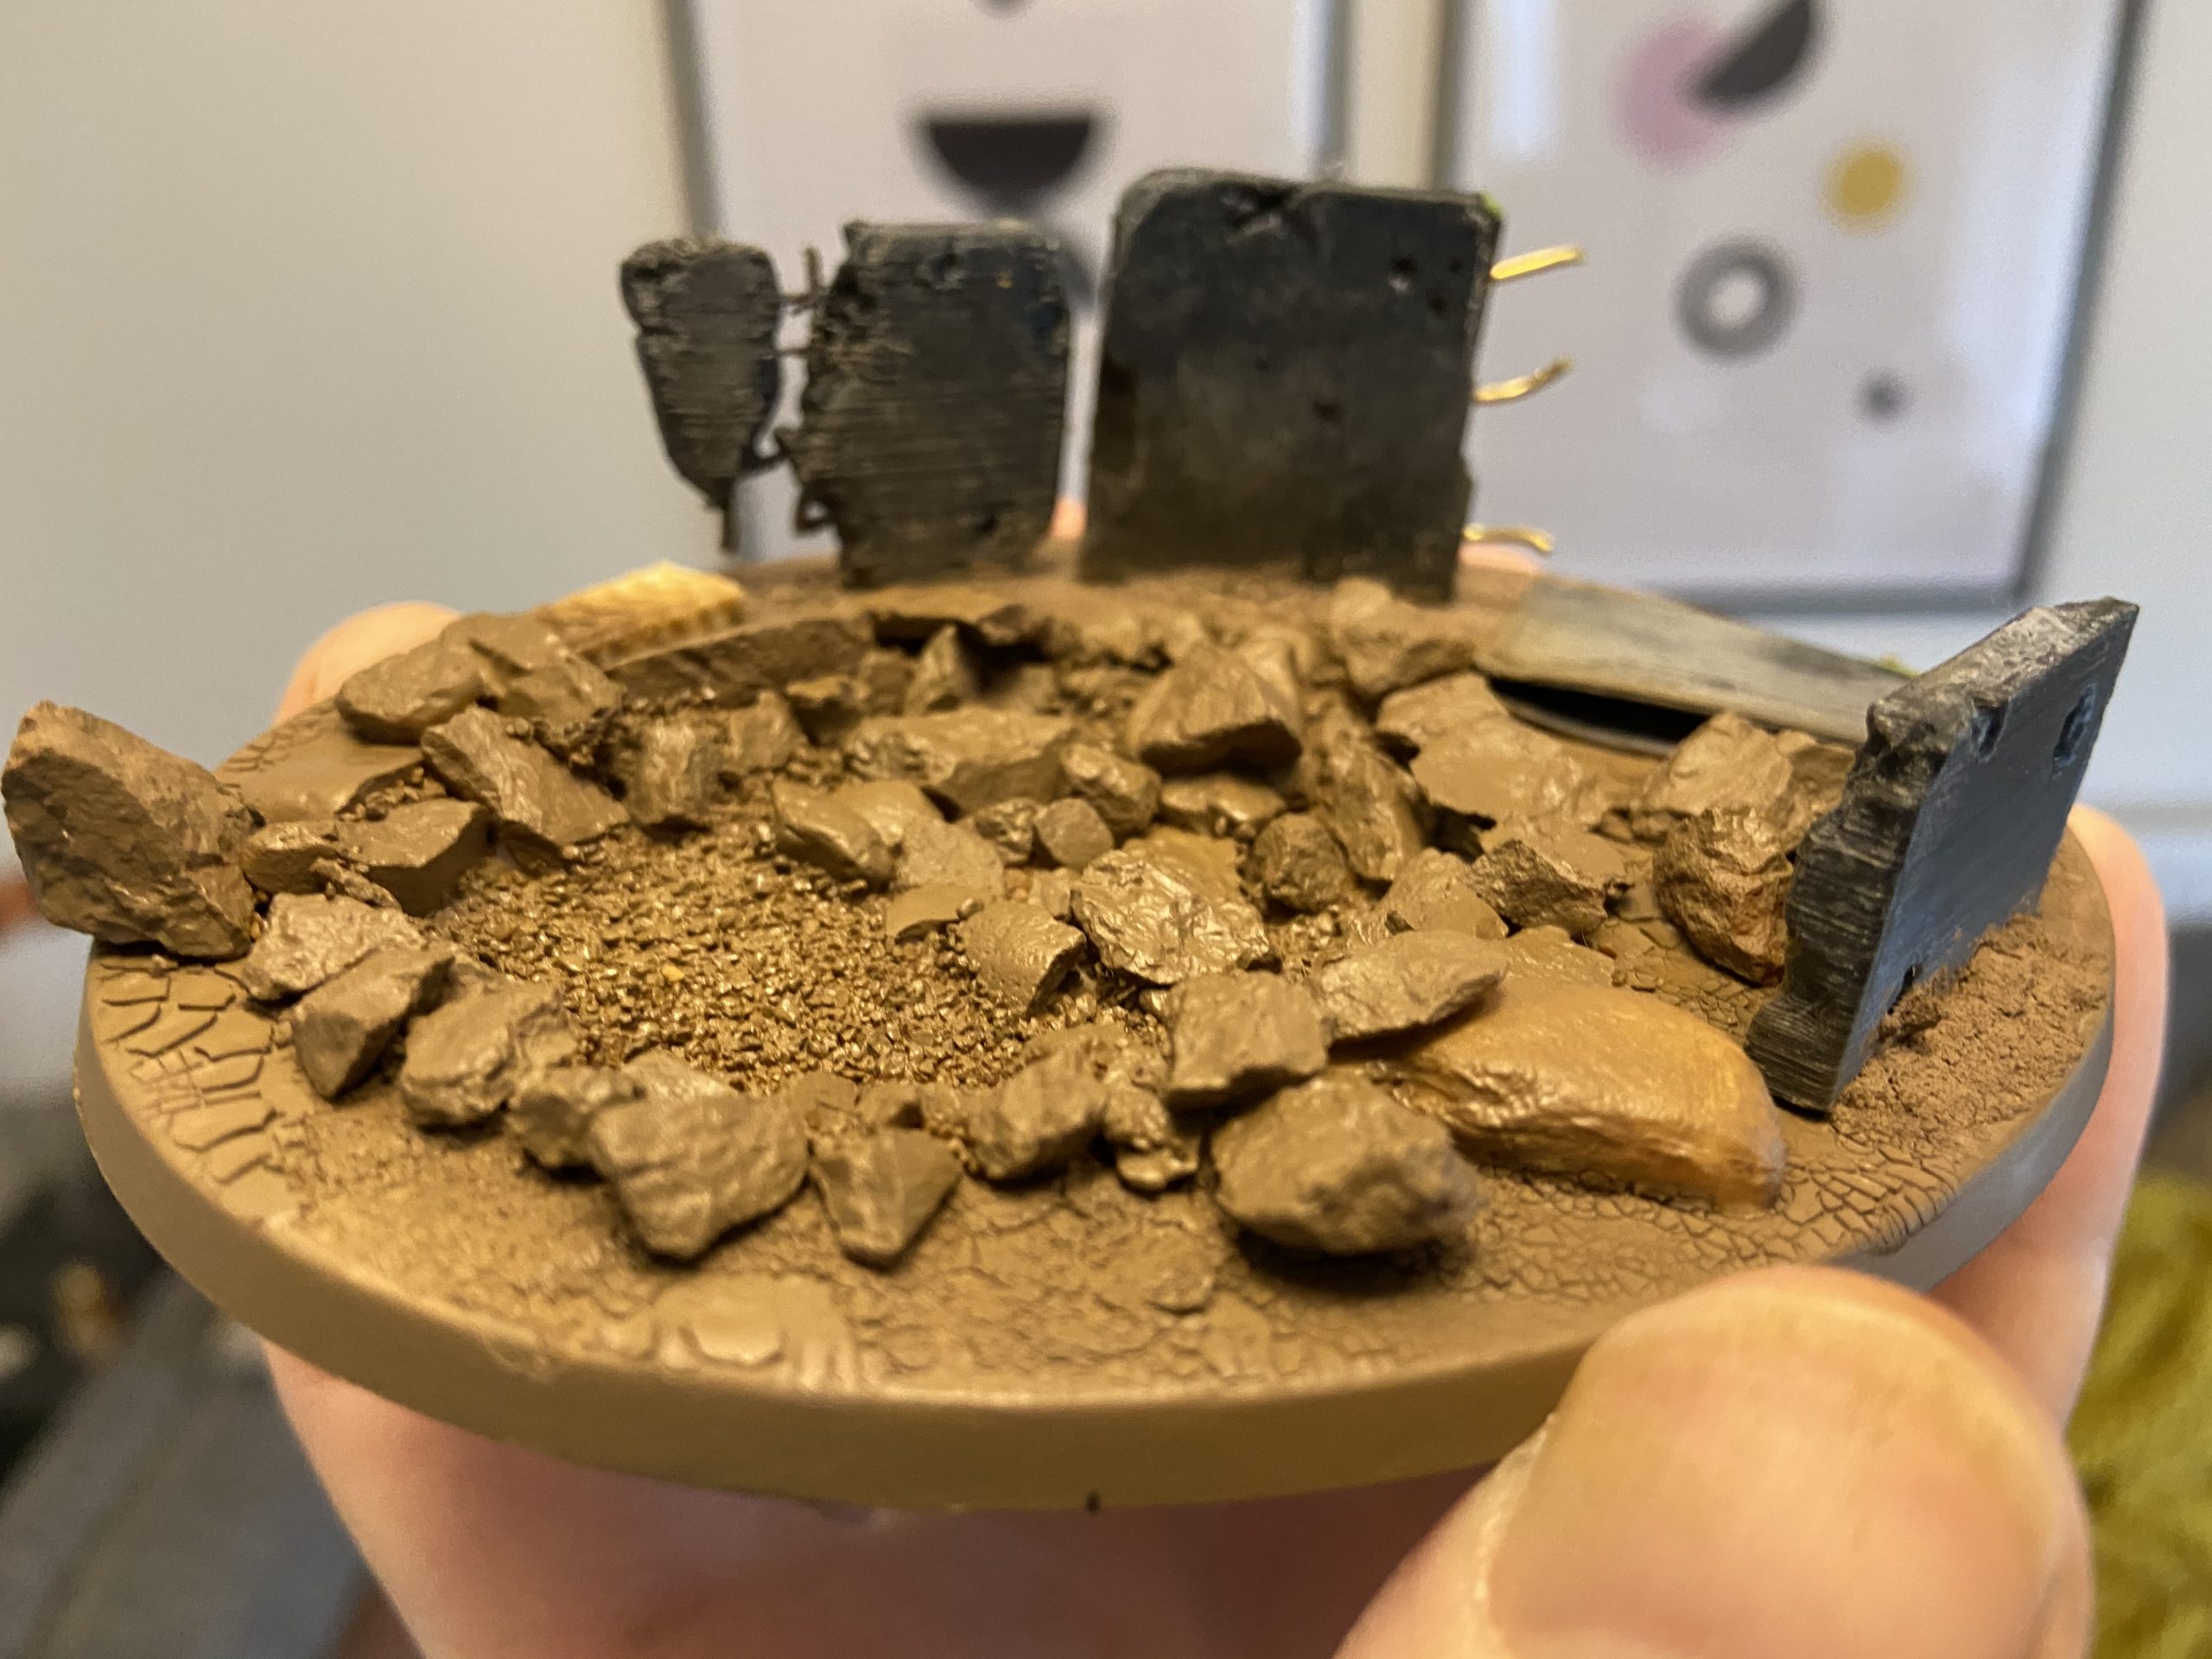
Hades Breaching Drill Base
I also used it to cover the stone and rocks on one of the Drill bases. Trying to paint these with a brush would have resulted in a pretty ruined brush from all the jabbing and stabbing required. But with the airbrush, no problem, all done perfectly in 10 minutes – even in the very hard to reach places.
-
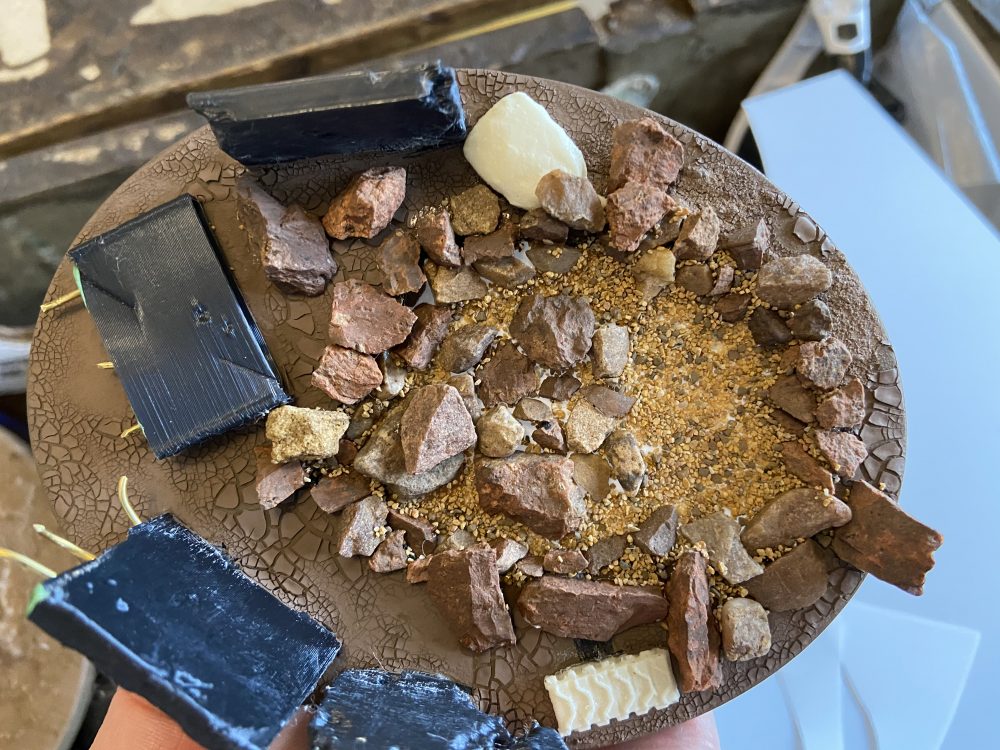
- Before

-
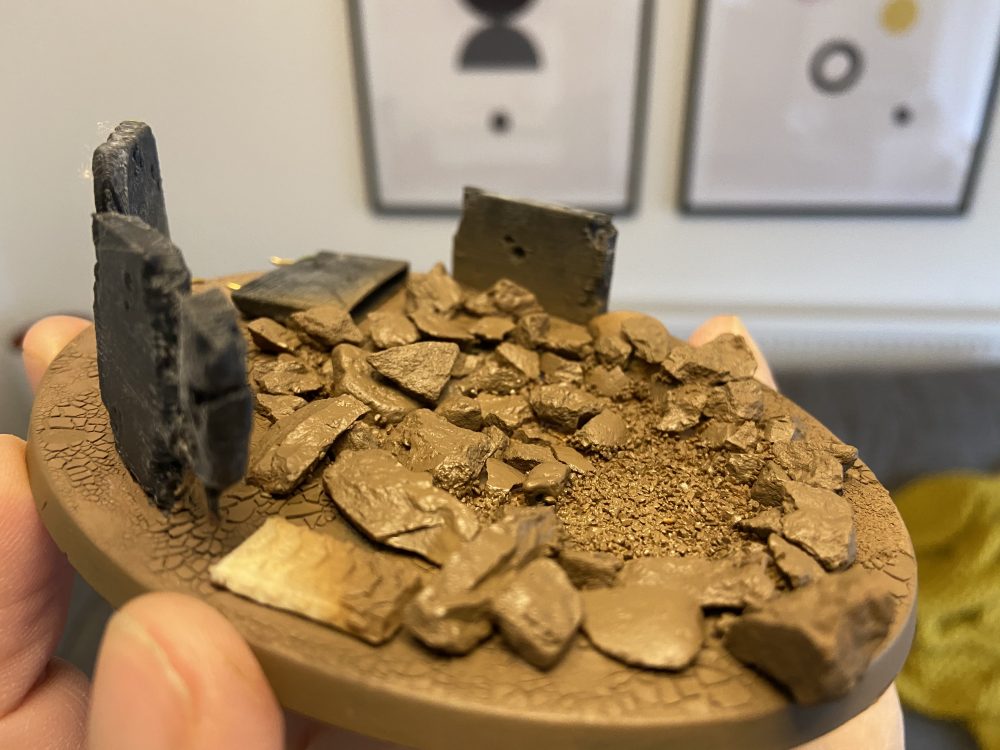
- After being airbrushed with the Mini Airbrush Compressor

-

- After – reverse angle
Mini Airbrush Compressor – Summary
It even fits my Iwata Airbrush too, so when this cheap generic airbrush that came with it packs up or isn’t fit for purpose – I can switch to my Iwata with ease!
The packaging claims it works for 30 minutes off of a 60-minute charge. This would be its only downside I think. So far during my time with it, this claim of charge time and use time holds true. It uses a USB charger so is easily plugged into anything, anywhere. Hotel TV – sure!
If you are serious about airbrushing then this won’t cut it, you’ll run out of battery as you’re right into the swing of things. For me, it’s fine. The regular compressor I have will rise again I am sure.
If you have no dedicated hobby area or are short on space in general then the Mini Airbrush Compressor that uses a battery might be perfect for you!
I wonder if there is some massive downside to this thing, as I cannot really believe how well it works. E.g. is the on/off button made from shards of the planet Cadia?
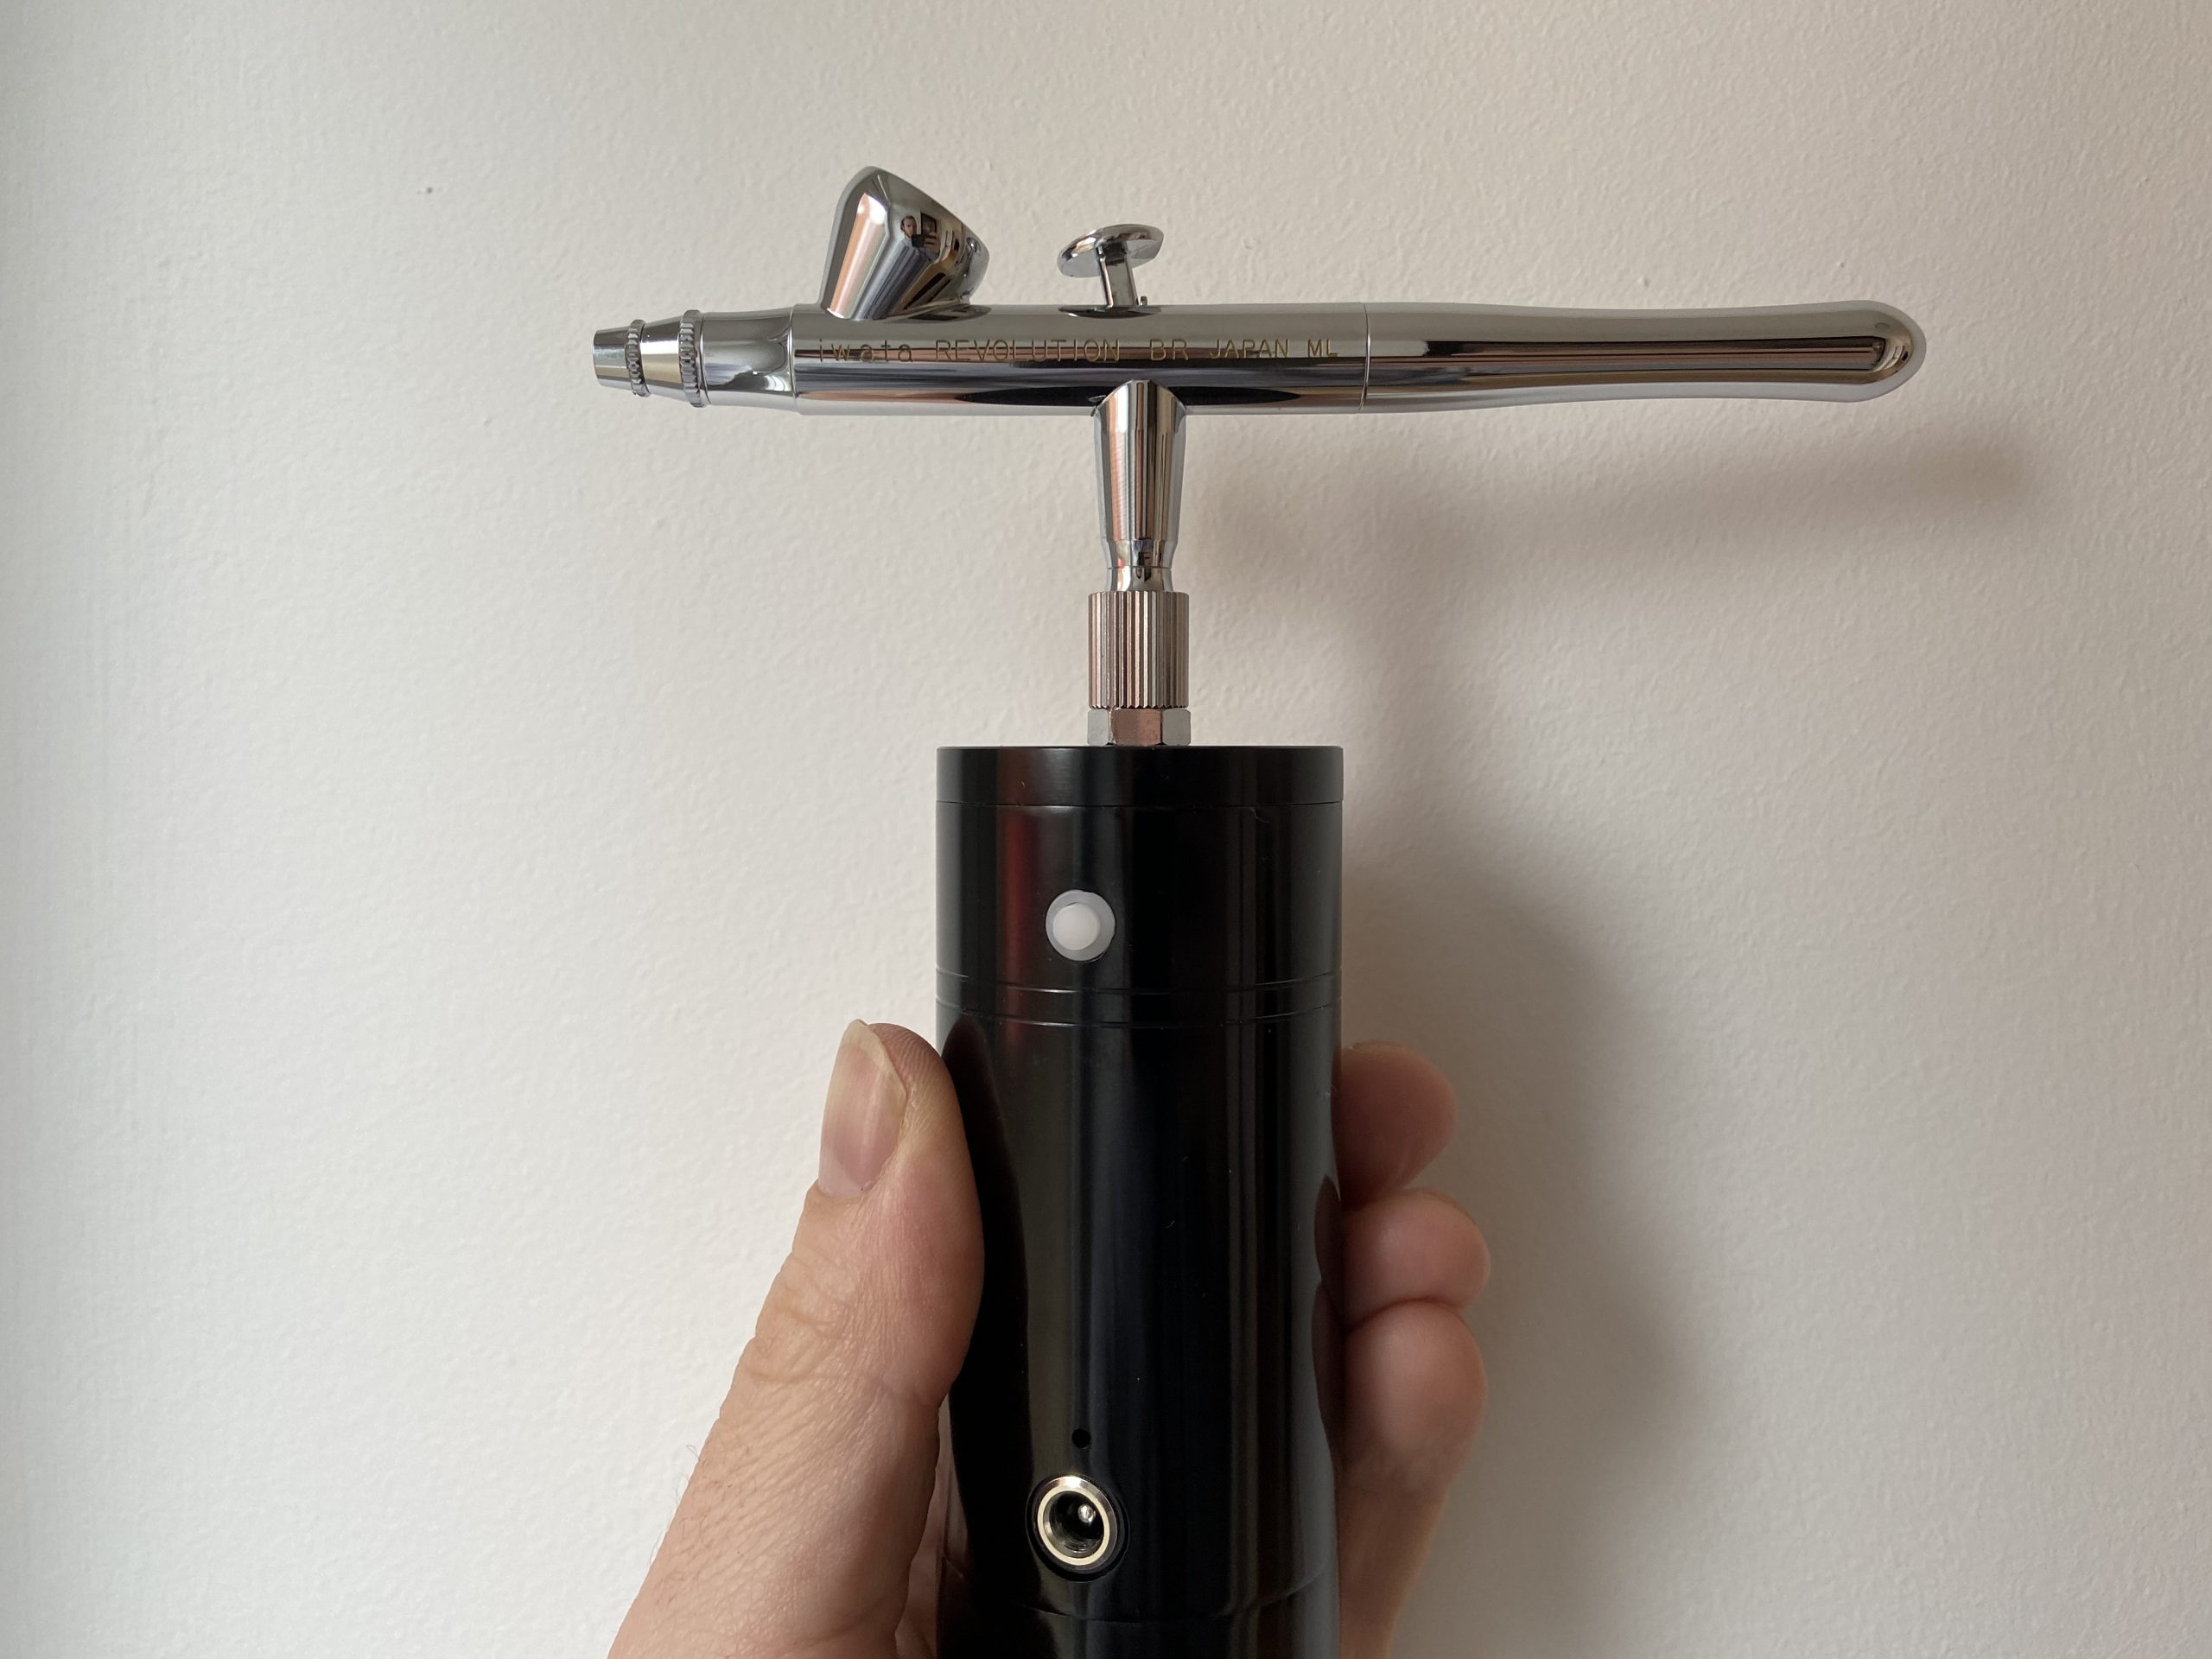
The Mini Airbrush Compressor – with my Iwata Revolution HP-BR Airbrush