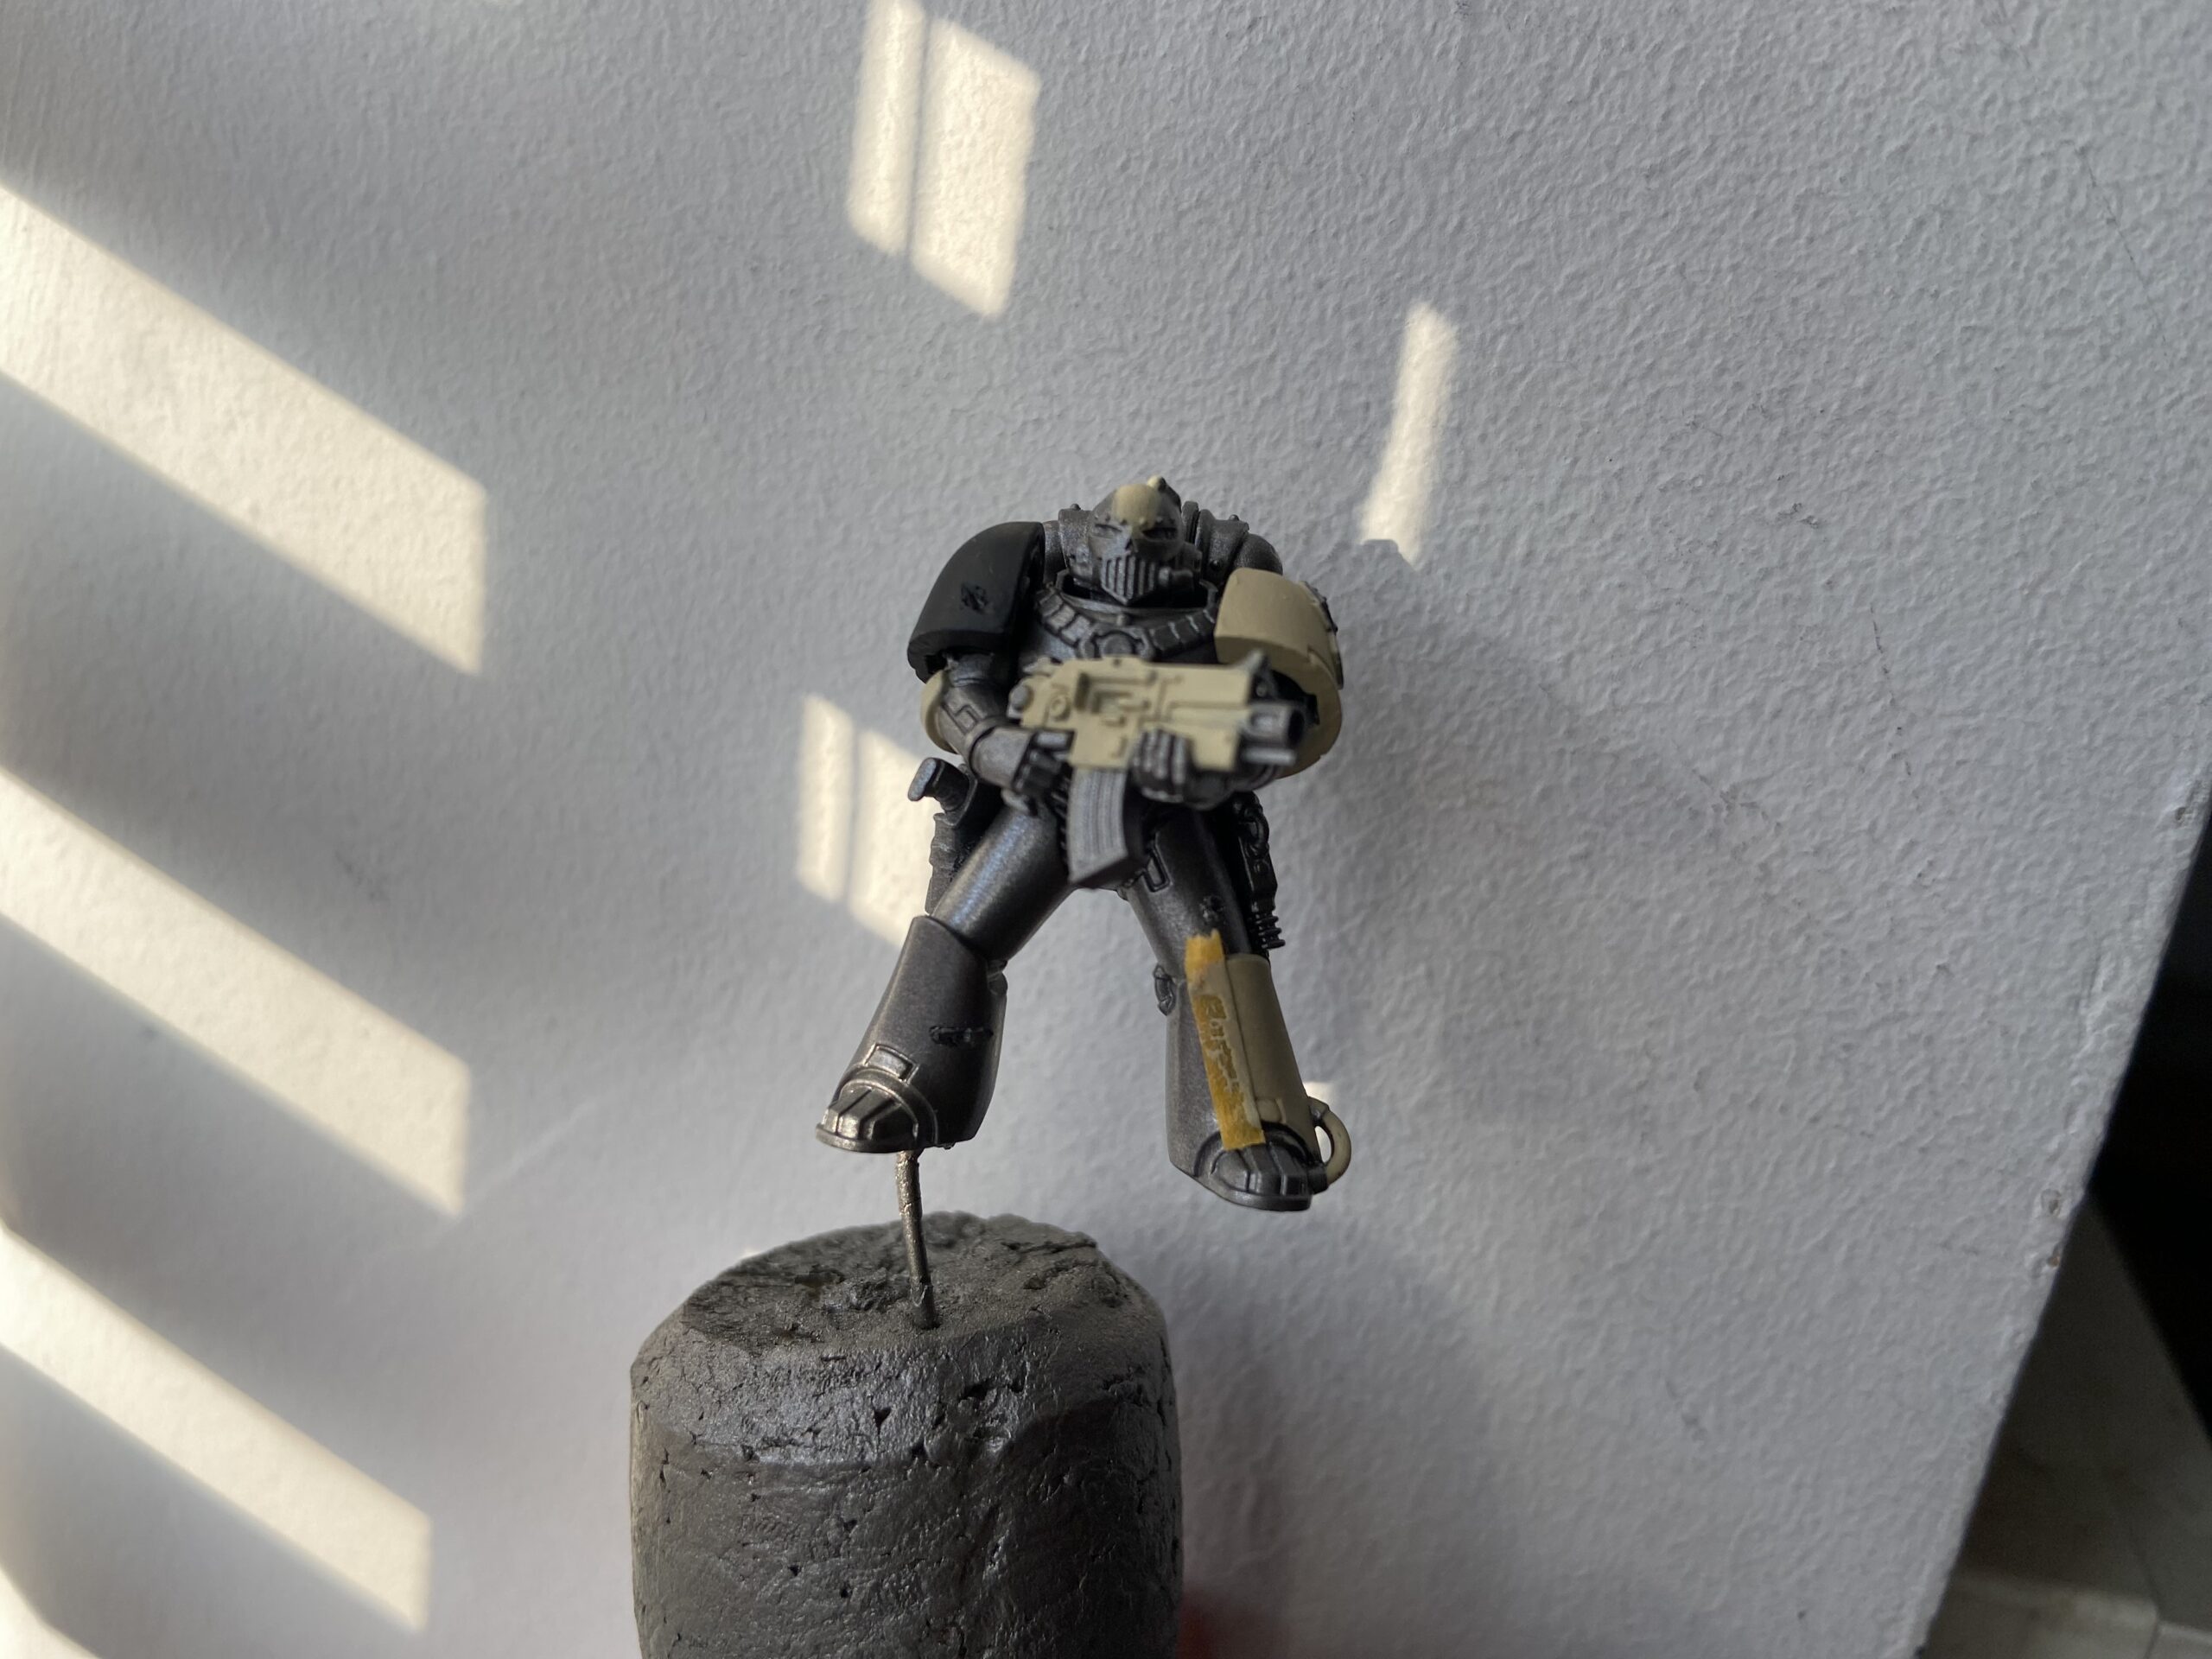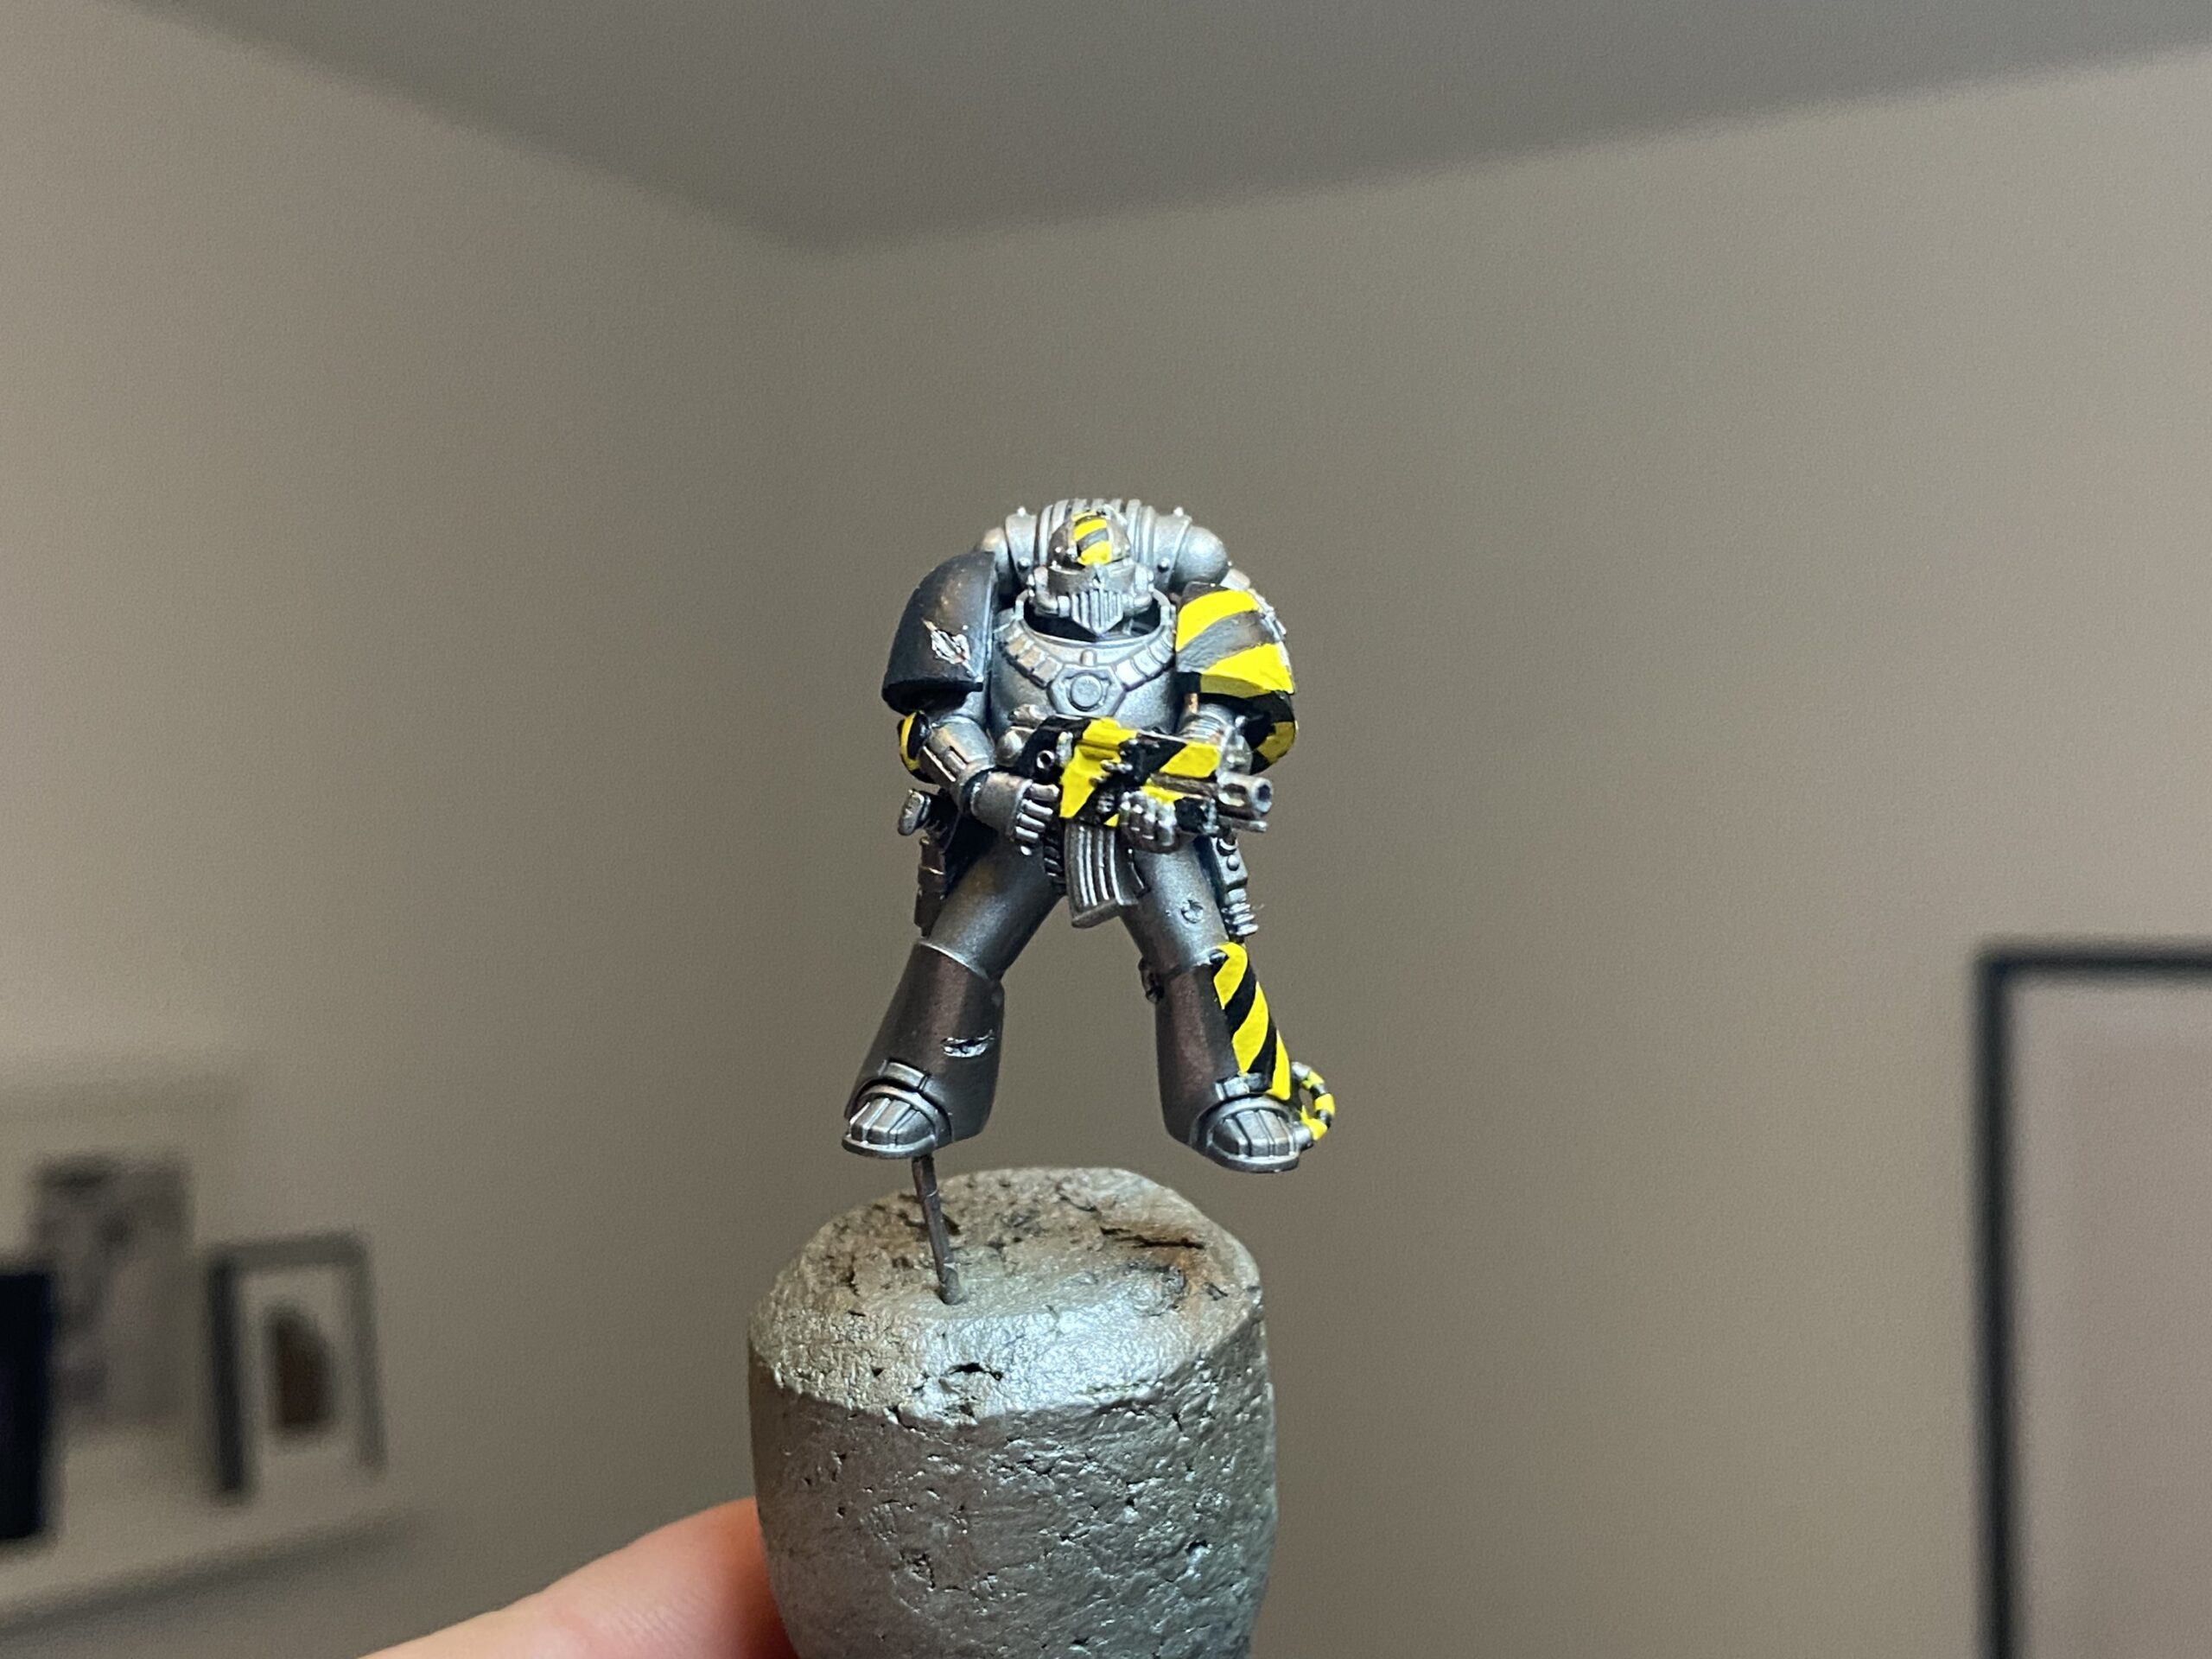

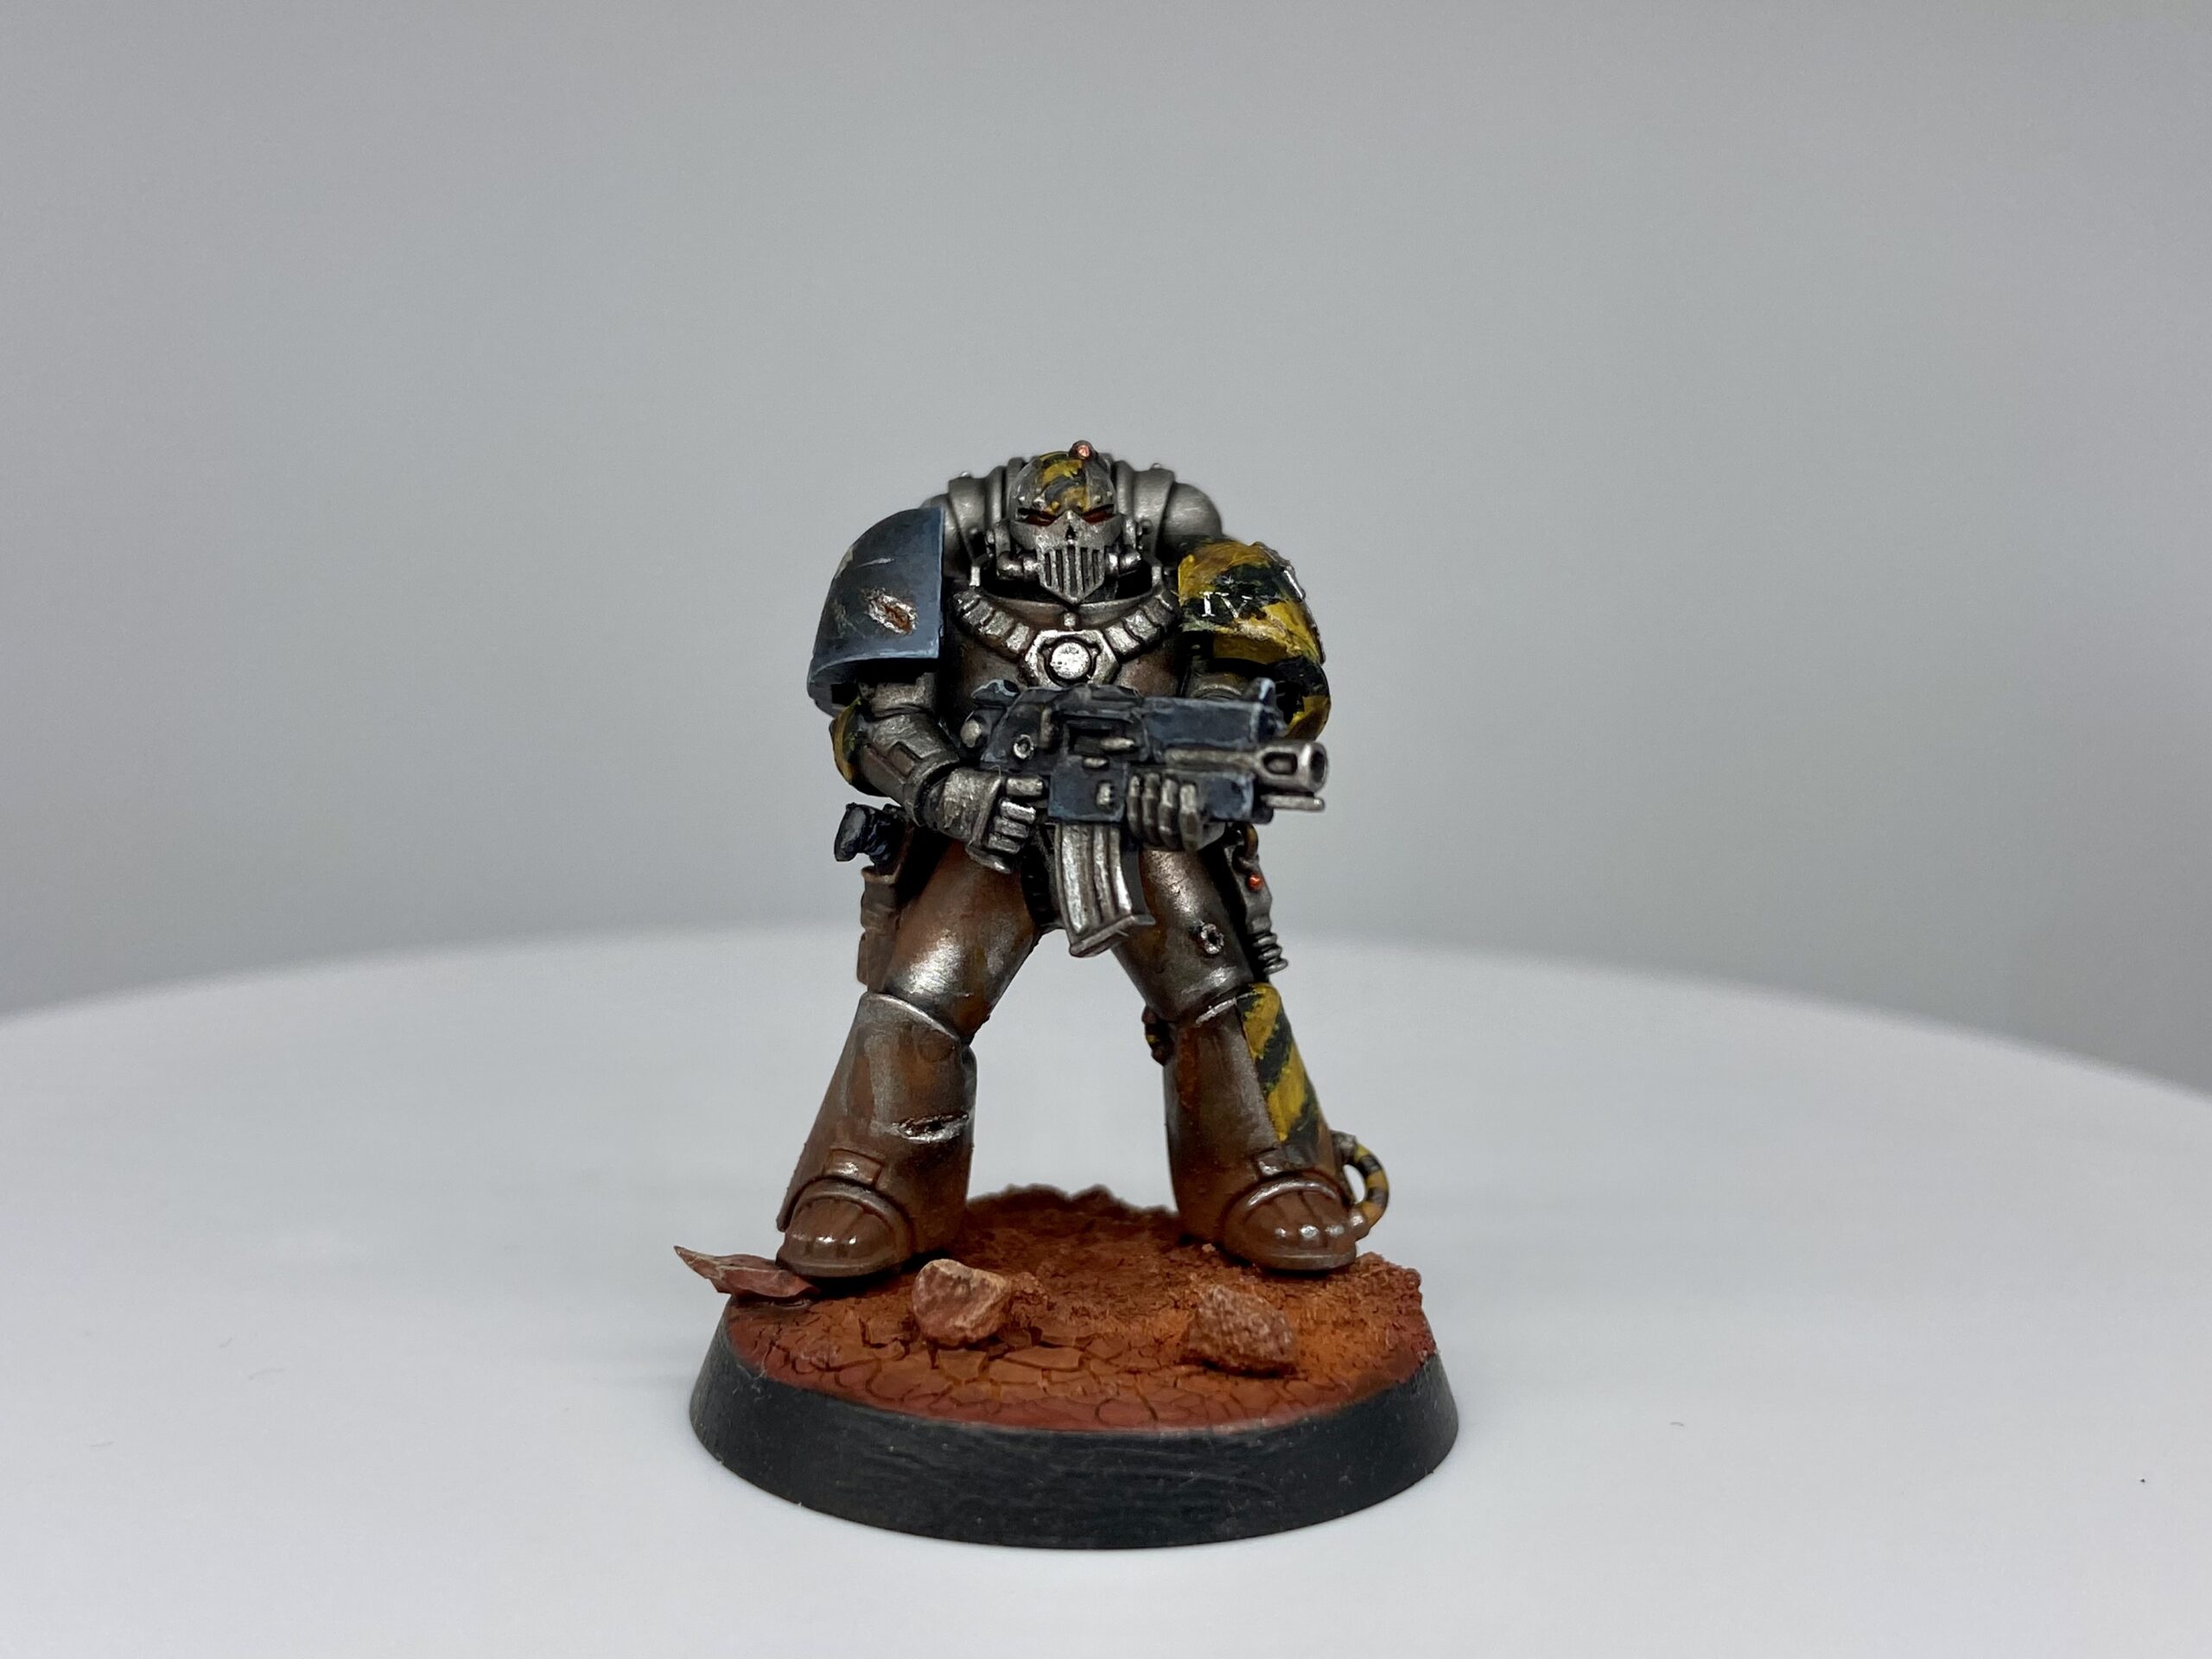
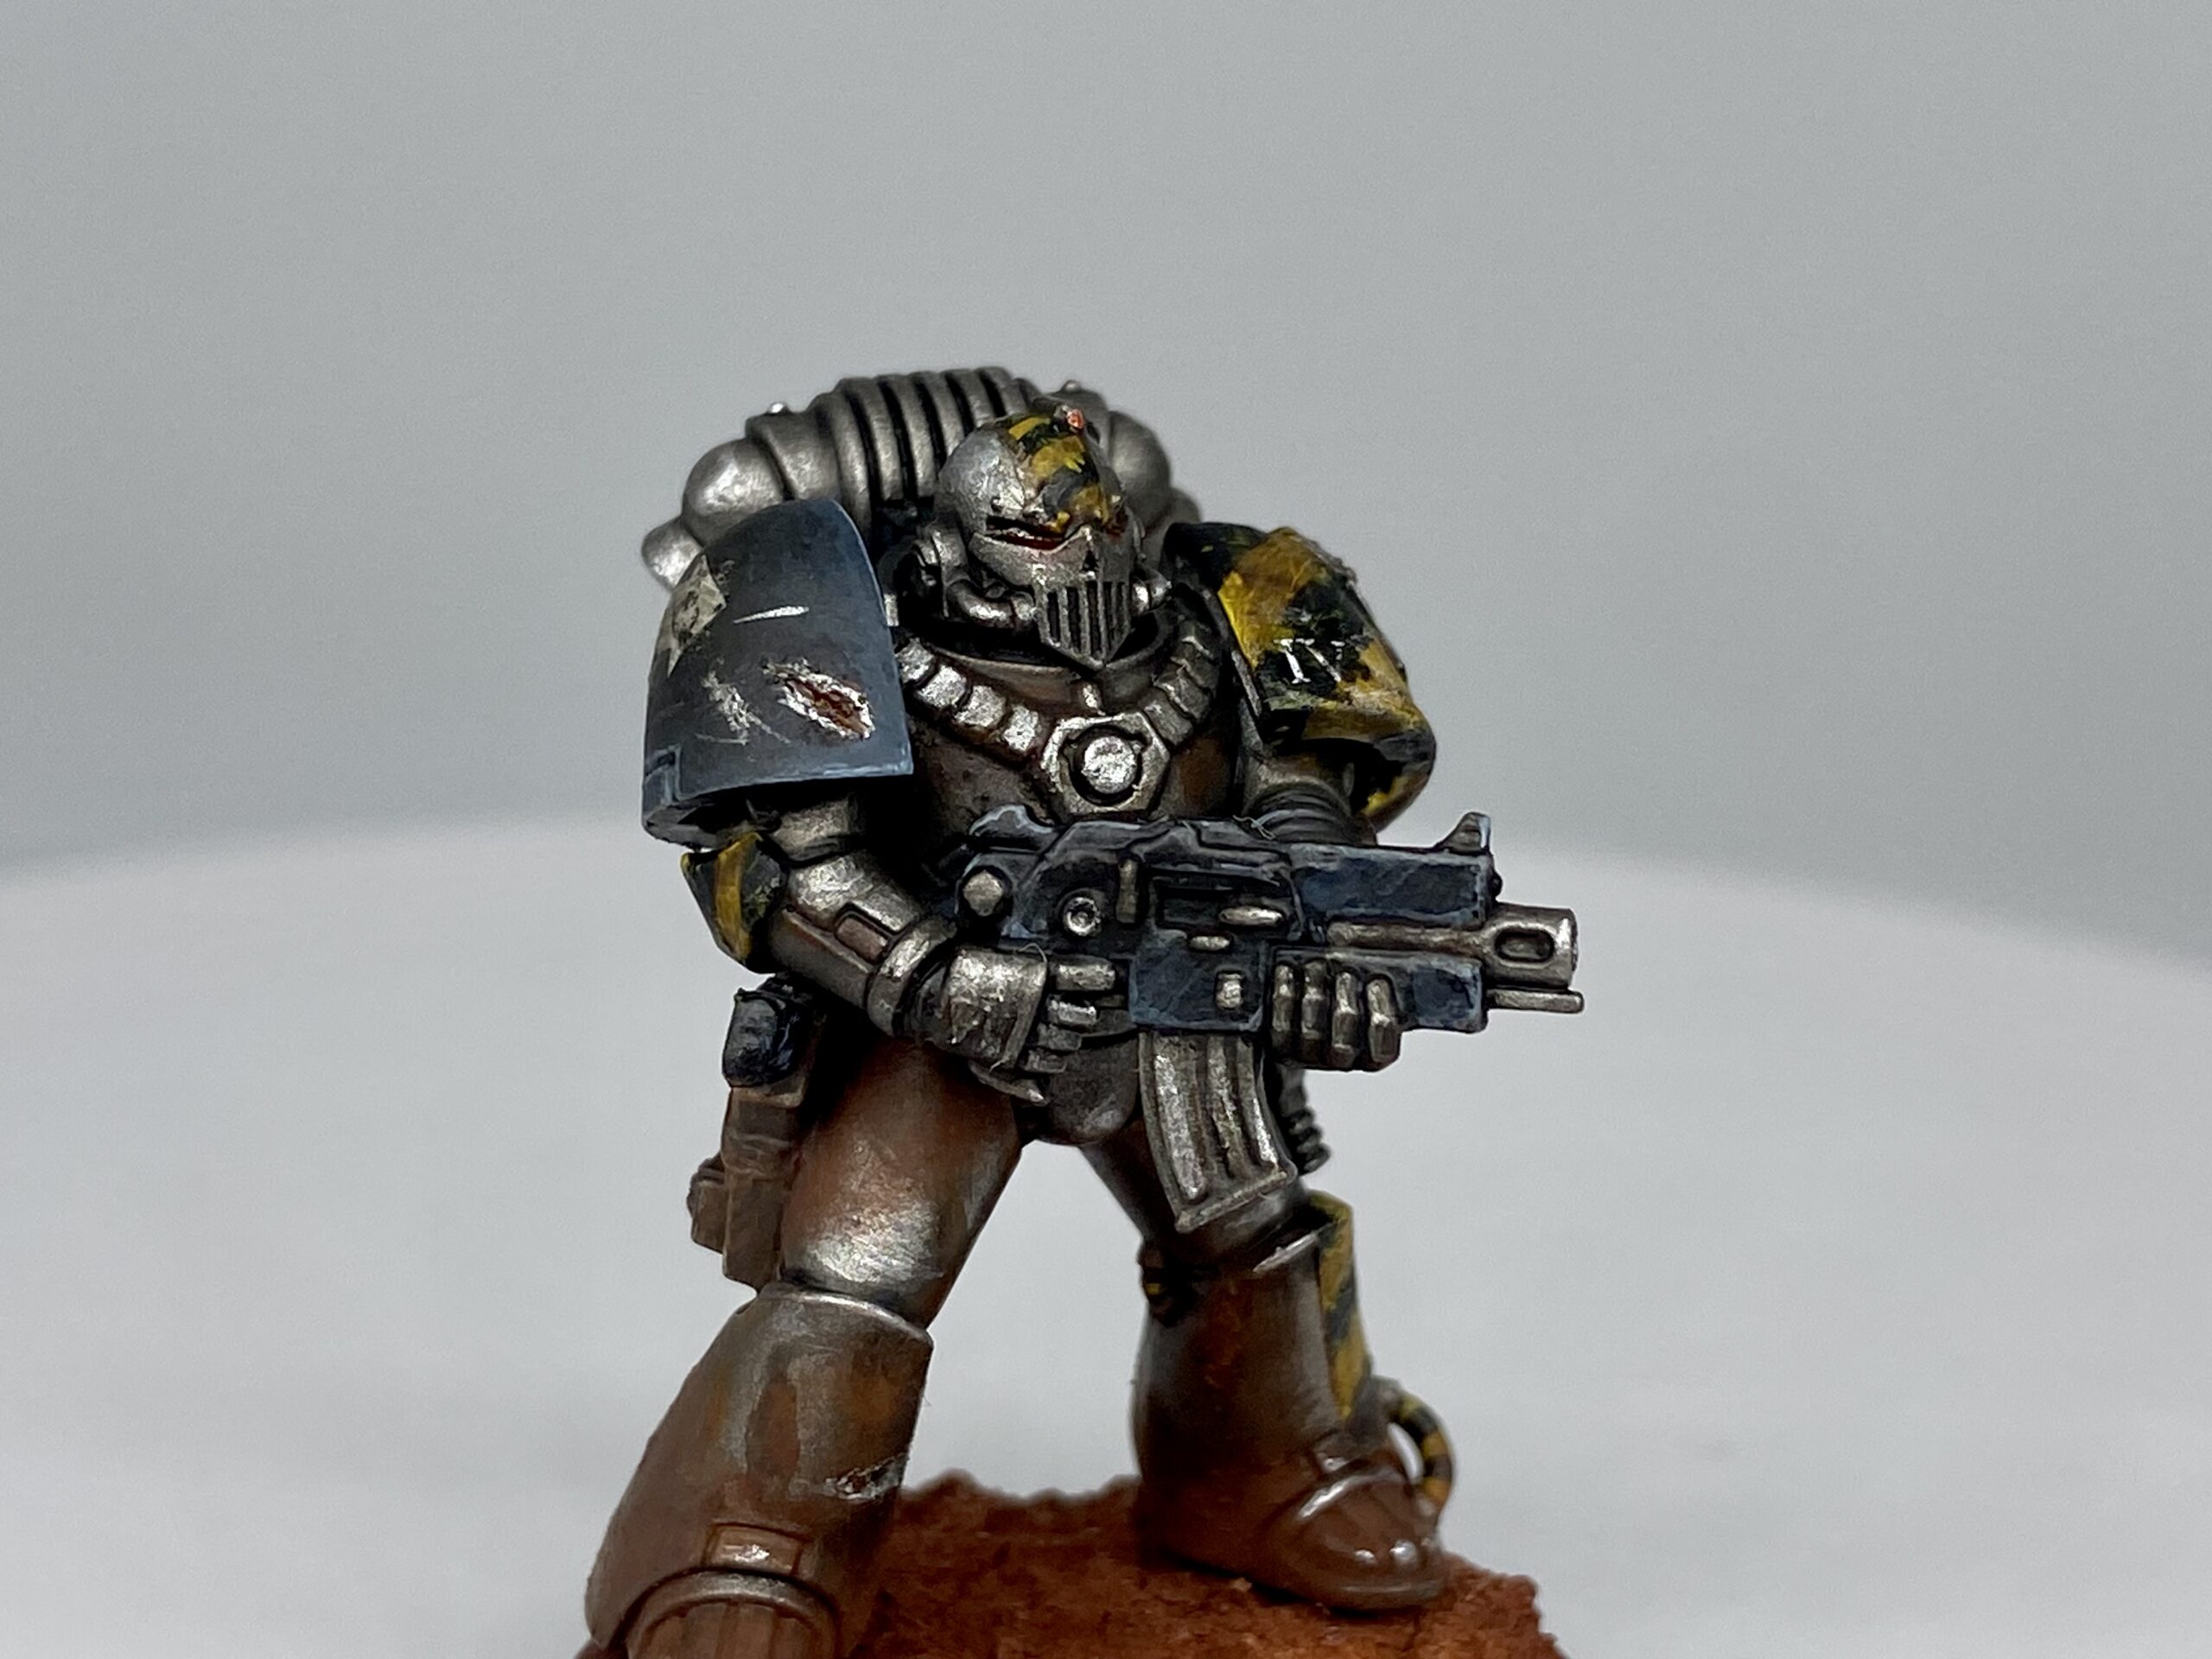
First Iron Warrior Tactical Marine Completed
The first of many!
Well, I am now on a path of heresy, alongside my Cadians, of course – this is my first Iron Warrior of many to start me playing Horus Heresy.
Never miss an article? Subscribe!
I started with this force before we knew anything of Warhammer 40K 10th Edition; now, I knew one thing: that the Astra Militarum Codex was not on the first year of Roadmap. This was enough for me to go nope, not happy with that and move to another system.
Having just got a new Codex after five years, I did not feel great about waiting another year to become relevant again. But now the Indexes are here, I am more optimistic about the Guard in this new edition.
But less of that and more about these Irons Warriors…
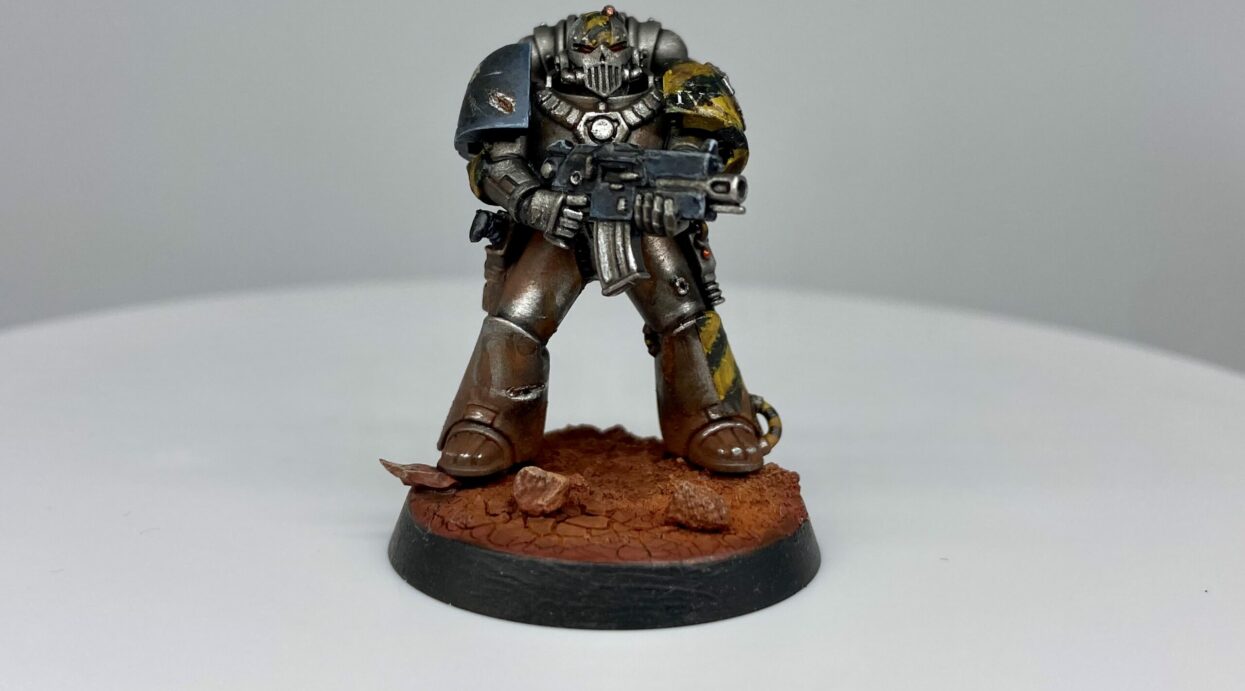
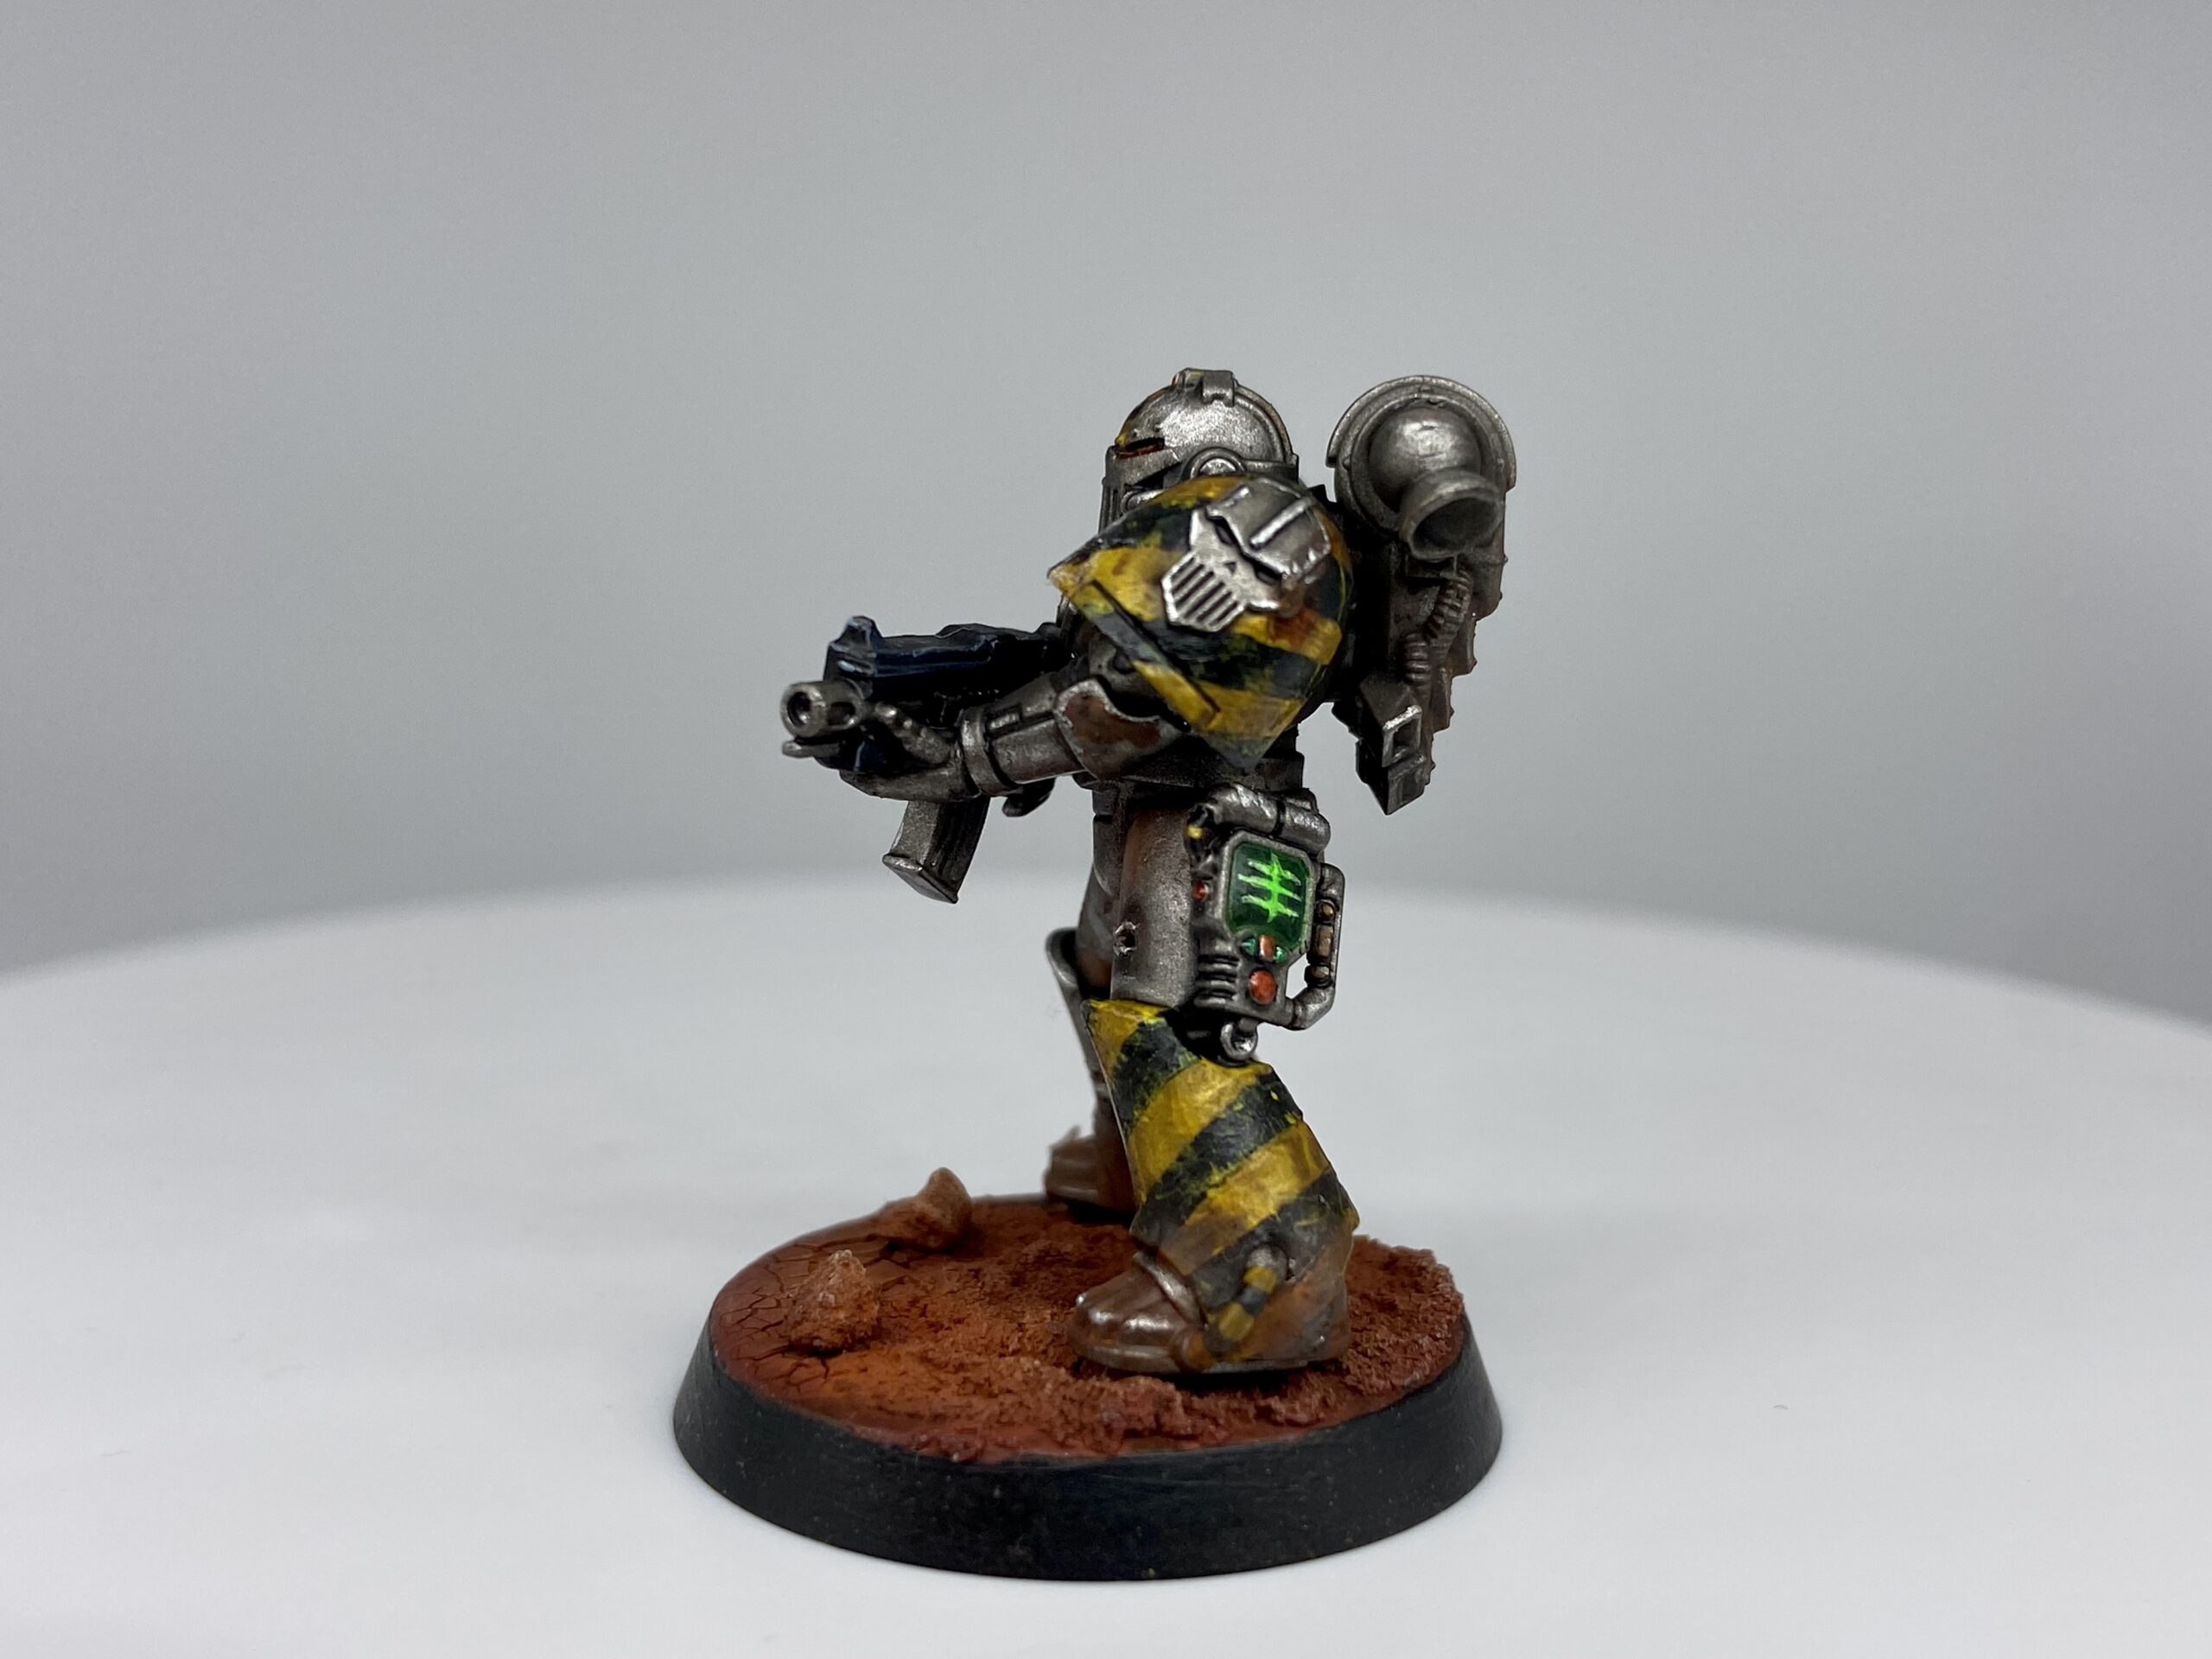
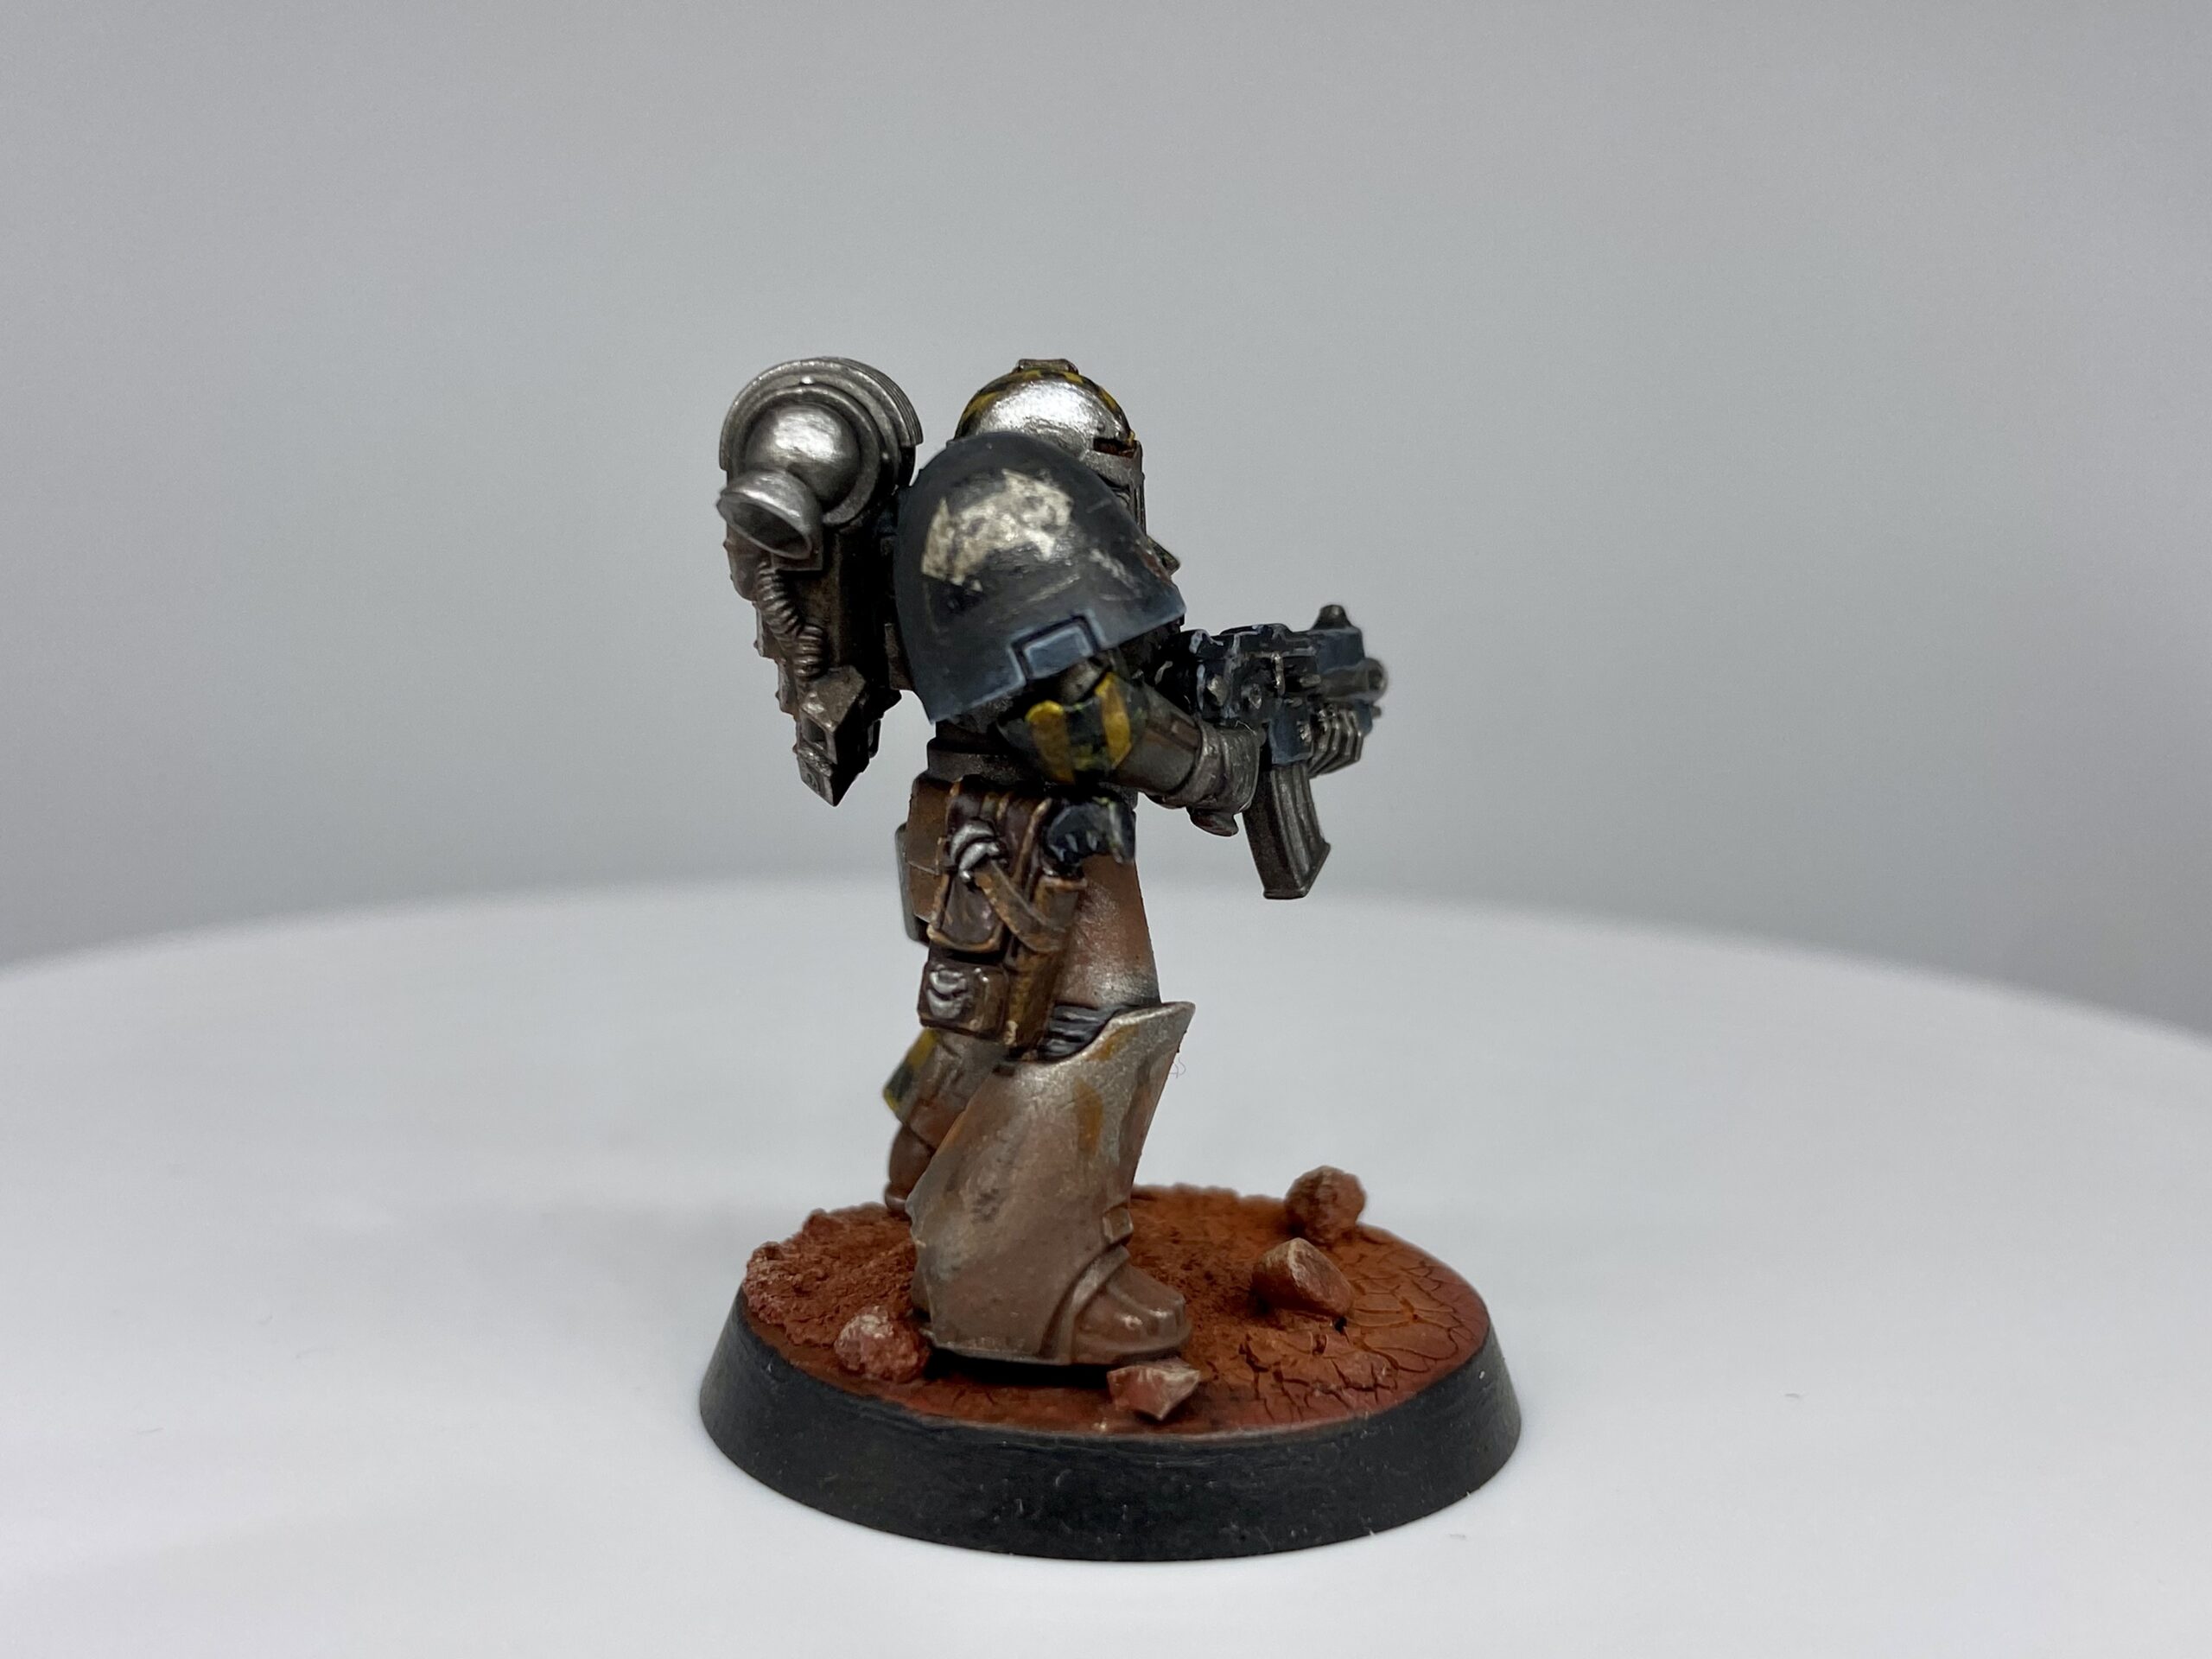
Iron Warrior 360°
Grime & Wear
This process I am pretty happy with. I give it 8/10 for what I want the other models to be at their best.
The process went like this for the weathered and rusty armour;
- Base Leadbelcher.
- An all-over Nuln Oil wash and let it dry.
- More Nuln Oil wash in the joints and recesses and let it dry.
- Typhus Corrosion in the joints and recesses and let it dry.
- 2/1 Mix of Agrax Earthshade and Gryph-Hound Orange wash in some joints and recesses and let it dry.
- Gryph-Hound Orange in even fewer places for some brighter rust.
- Apply two types of pigment for the final matt effect, and I used regular rust and dark rust pigment.
- Use Runefang Silver or another bright silver paint for some of the corners, edges of the armour, etc.
- I also used Runefang Silver on the exposed upper larger areas like his thigh, lower arm and helmet.
- Finally, I used a black pigment in places that were too bright, or I just needed it dulled down more, like behind his power pack.
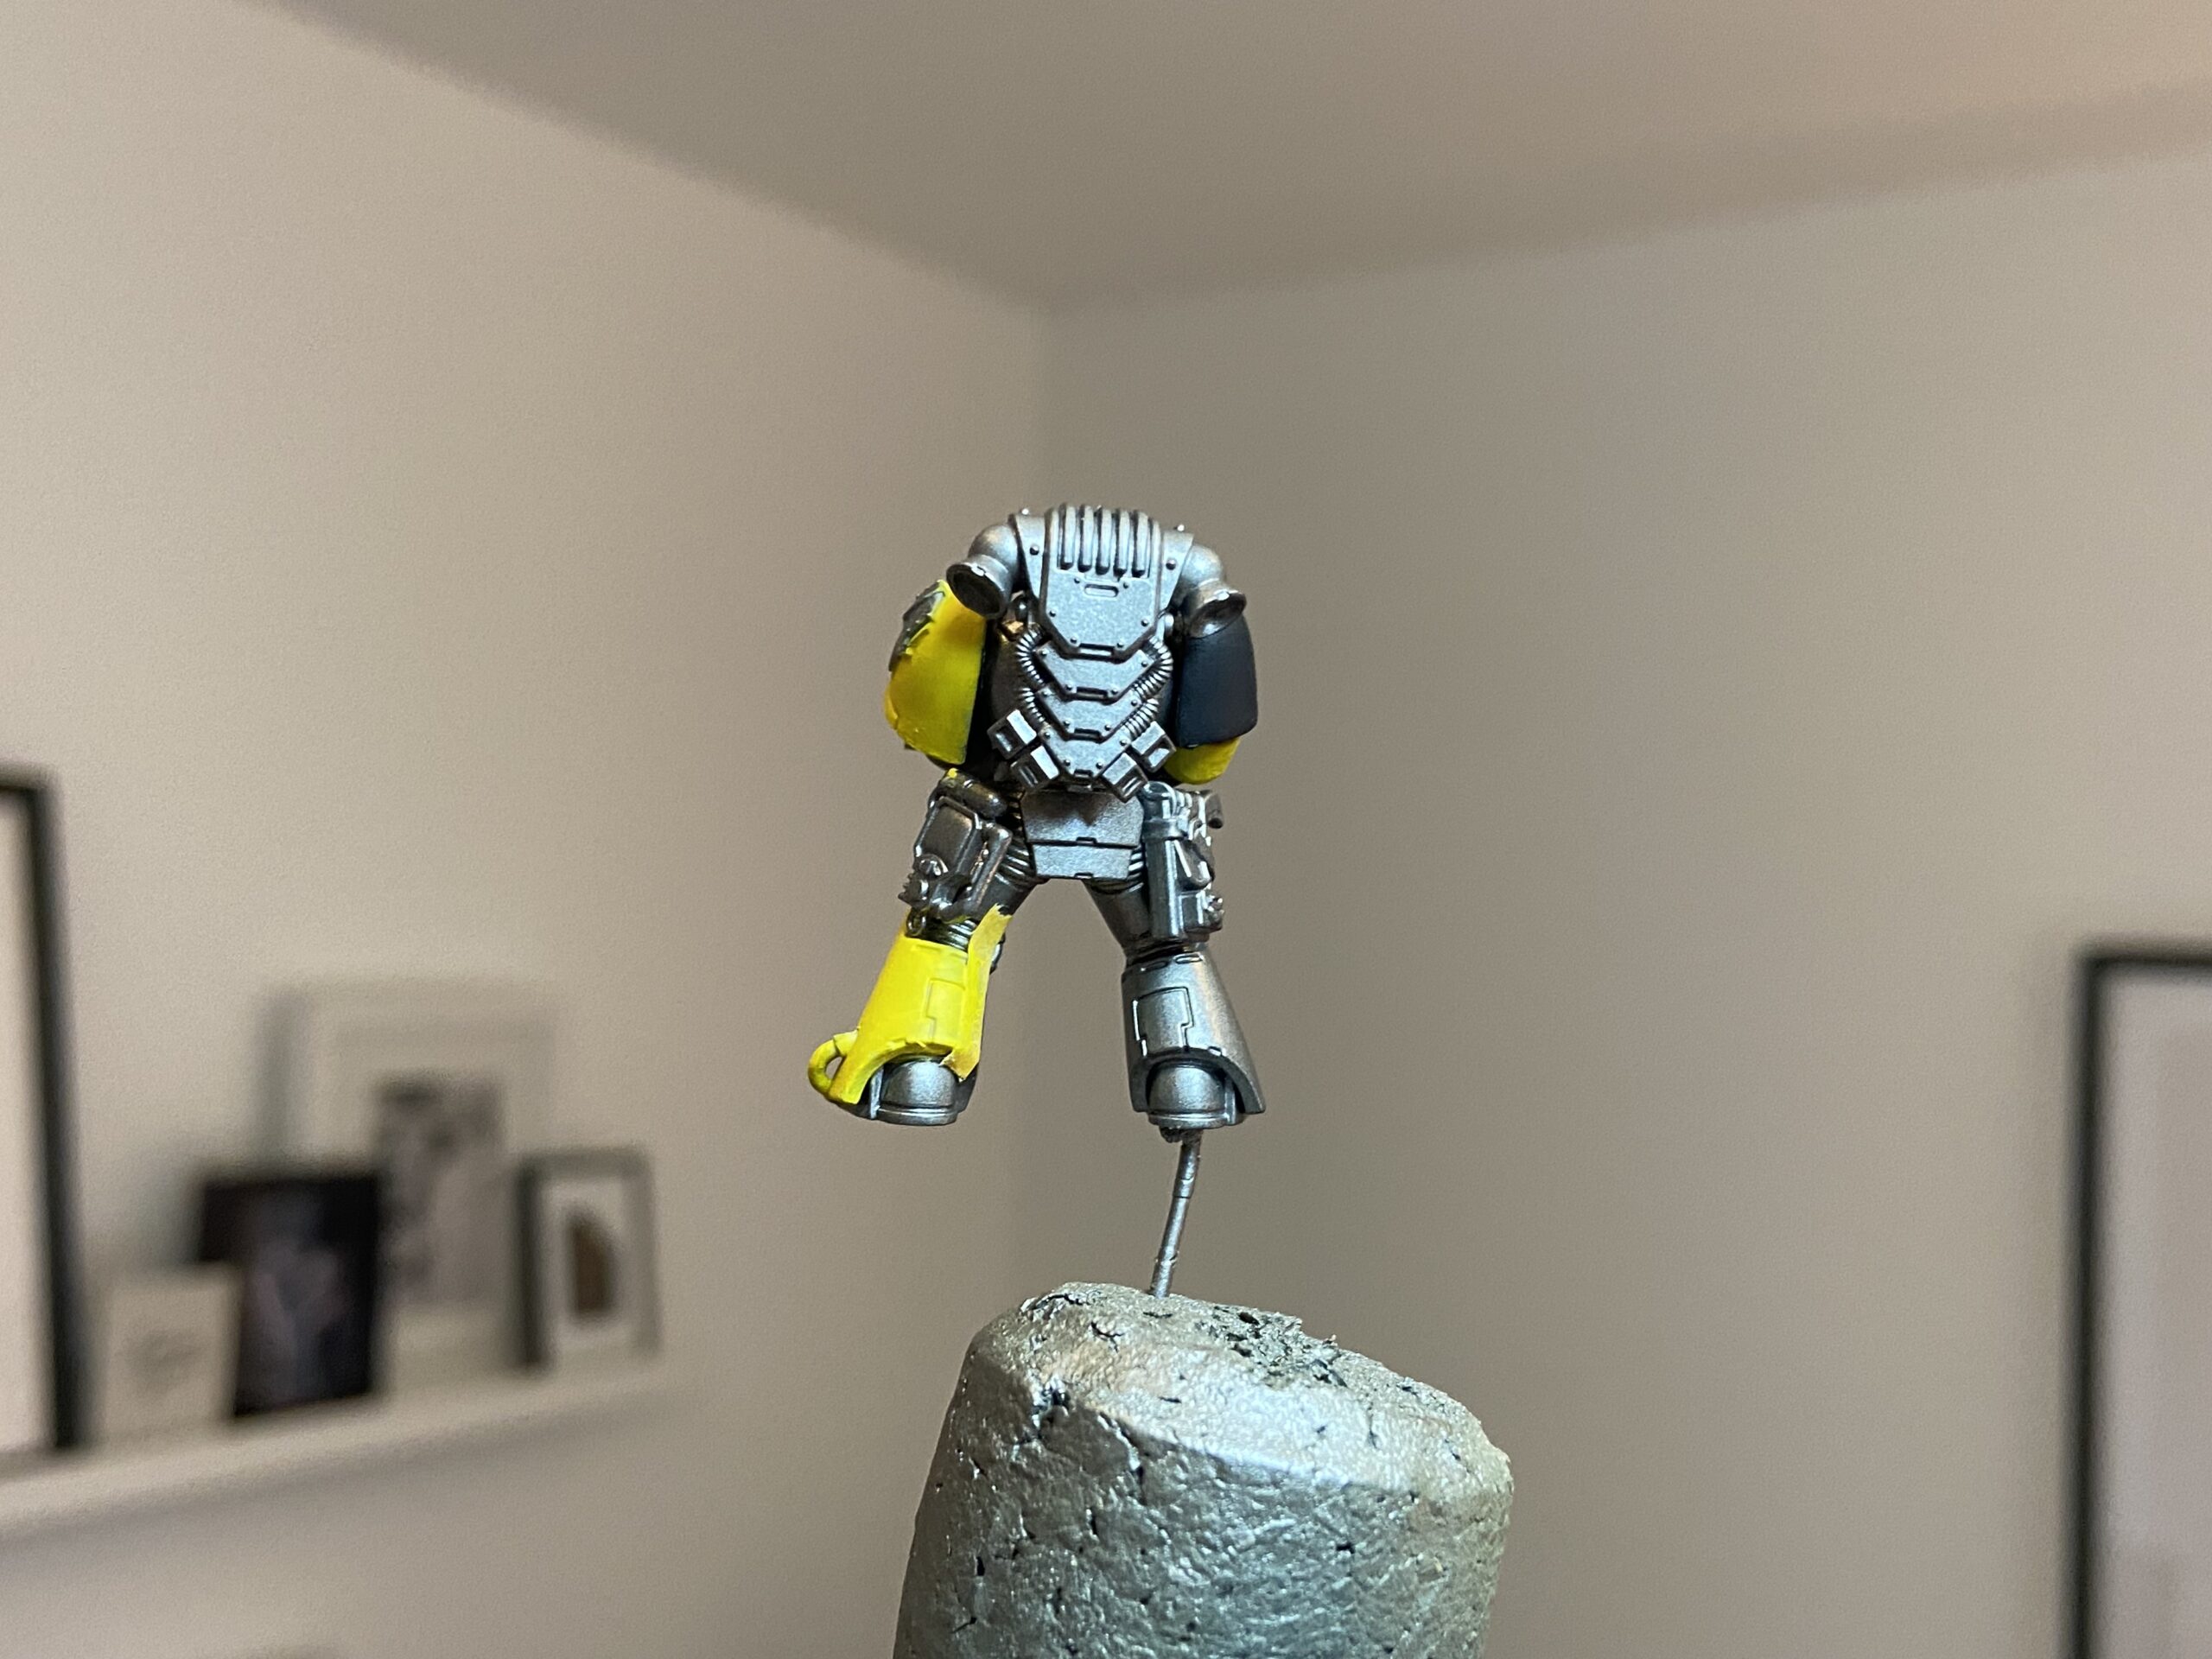
Black Shoulder
Not super happy with this shoulder as it was a last-minute addition to the process, 6/10 for the black shoulder.
I painted it black first, then did some slight scratches and added the Tactical Marine transfer, but it was too plain.
So I set about upgrading it using the following method;
- After the Leadbelcher spray, I painted it Abaddon Black.
- A glaze of Dark Reaper on the flat area towards the edges, pulling the glaze towards the edges and then glazing in more black towards the middle to blend it.
- I also used Fenrisian Grey wet at the edges to blend it from light grey to Dark Reaper (dark grey) and then back to black in the centre – all done wet.
- Then doing an edge highlight and a little glaze of Fenrisian Grey.
It needs some more work and to be done before any transfers.
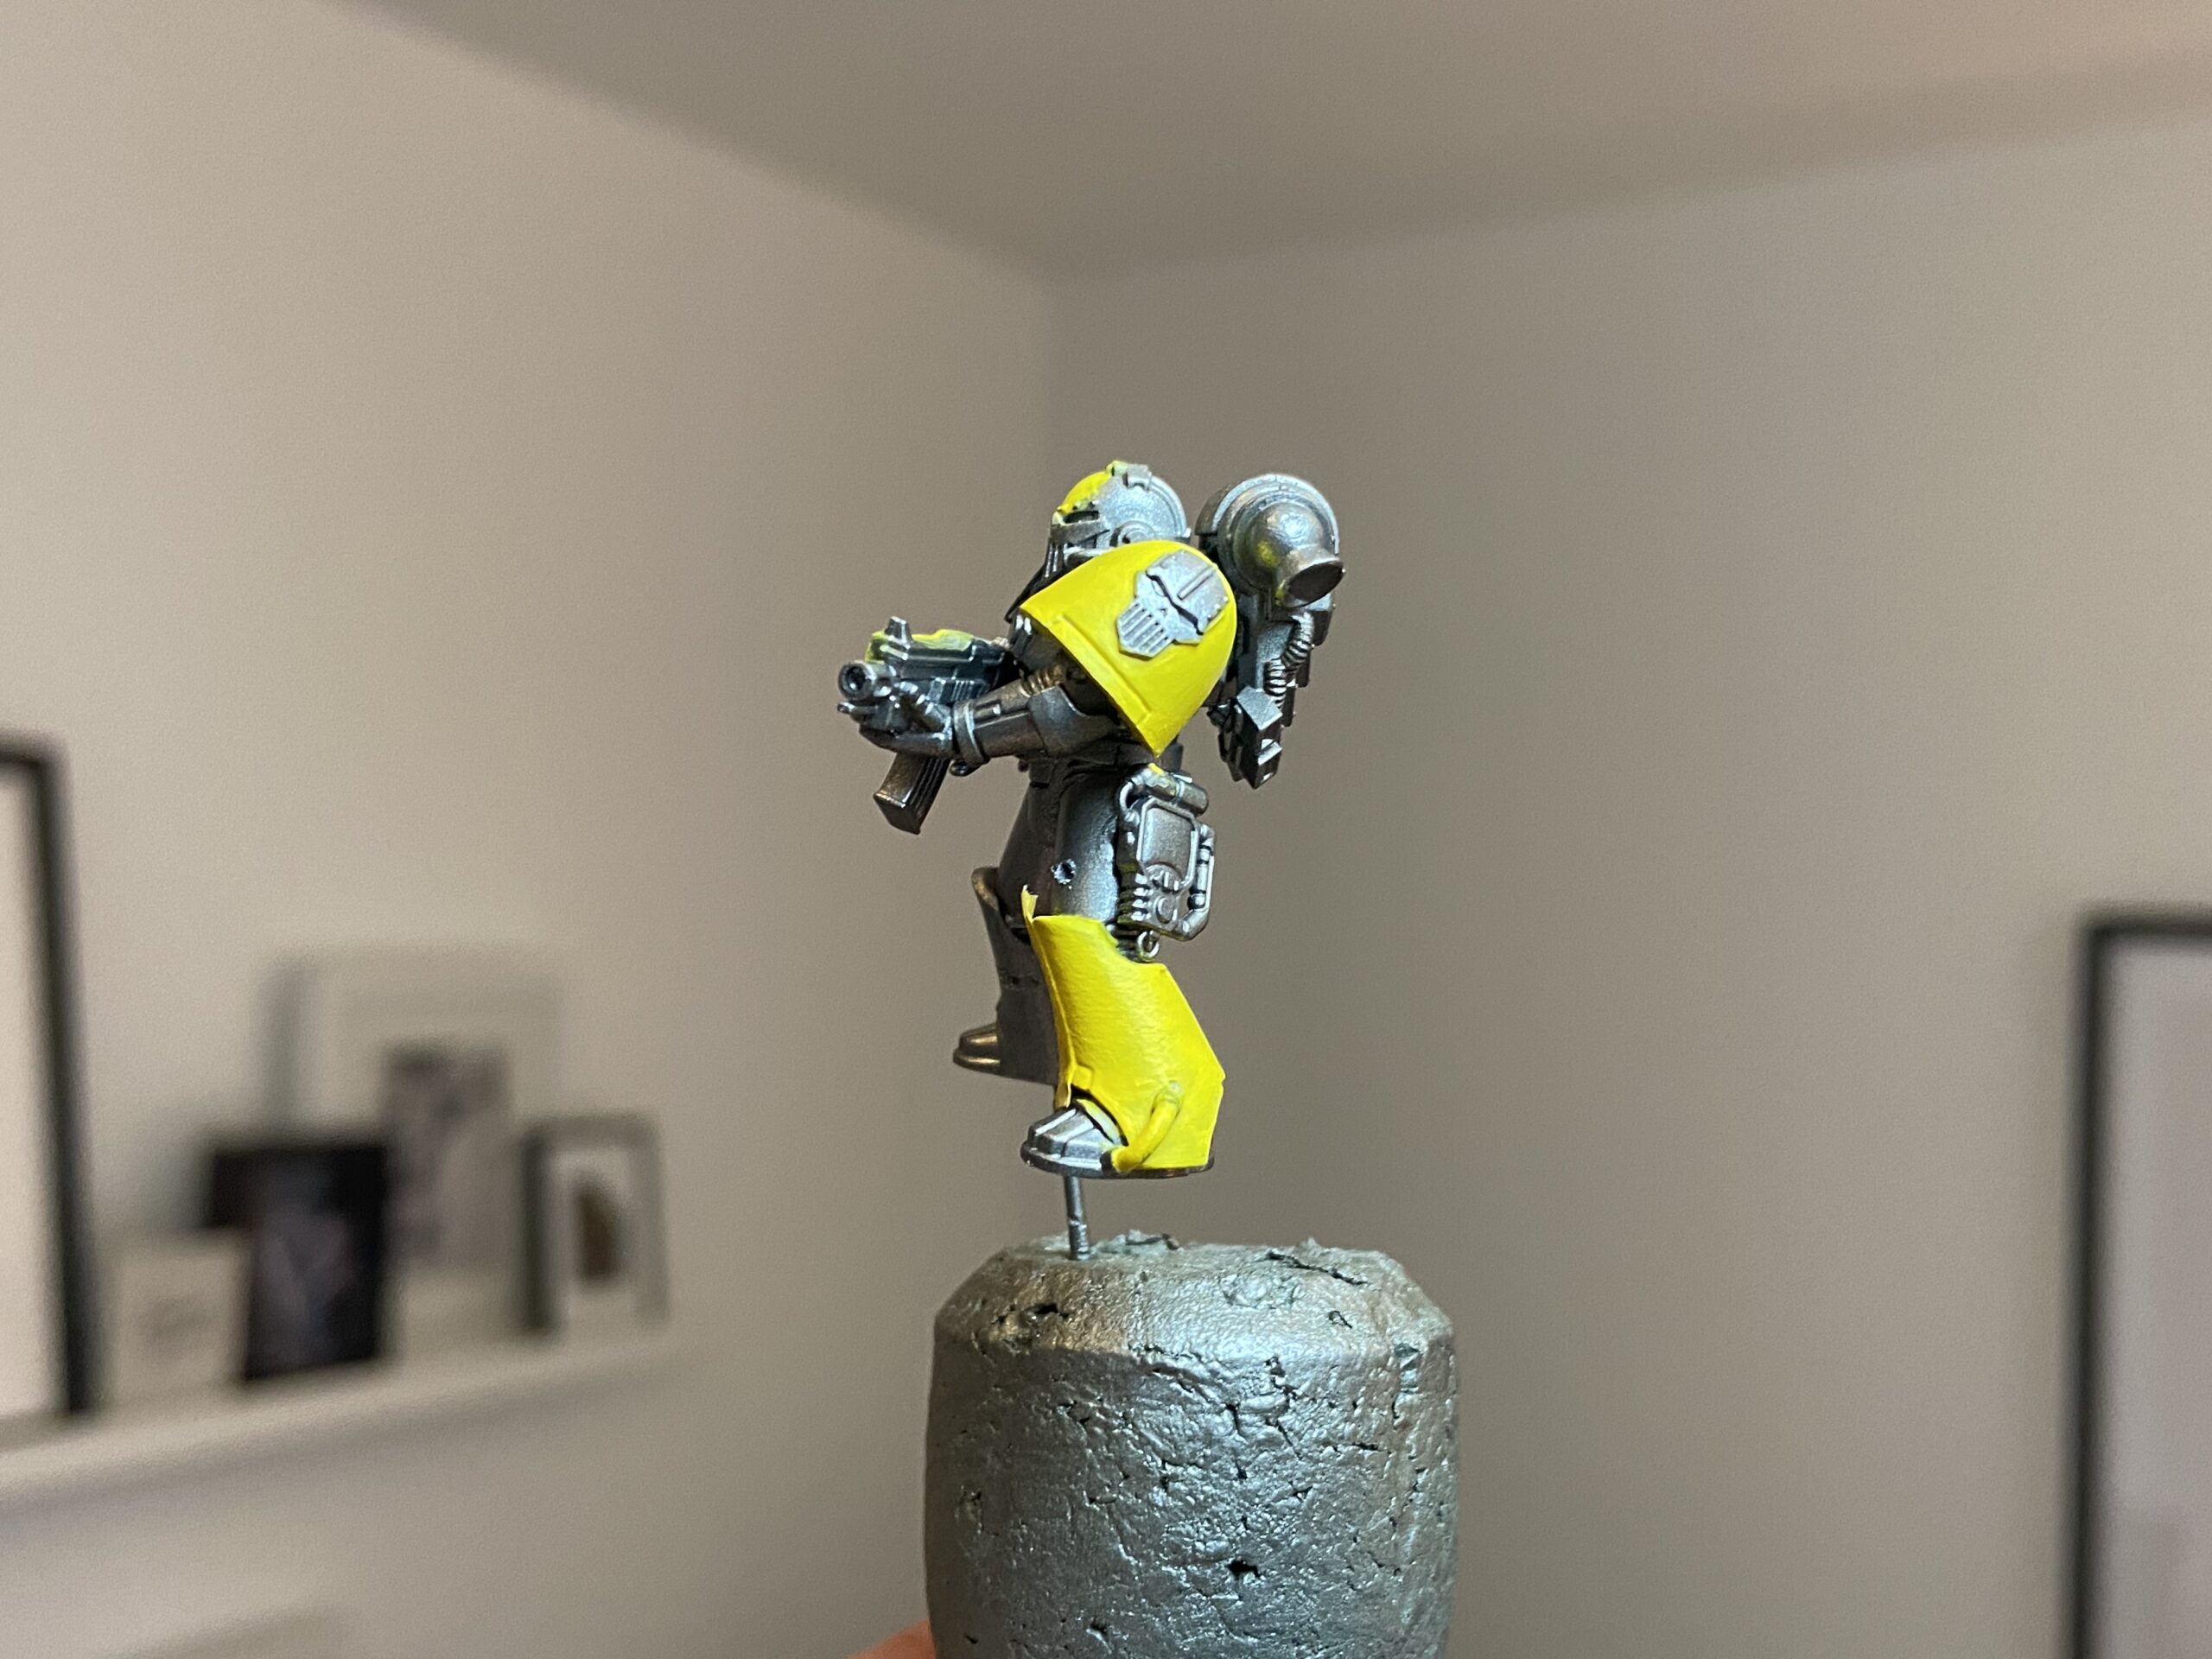
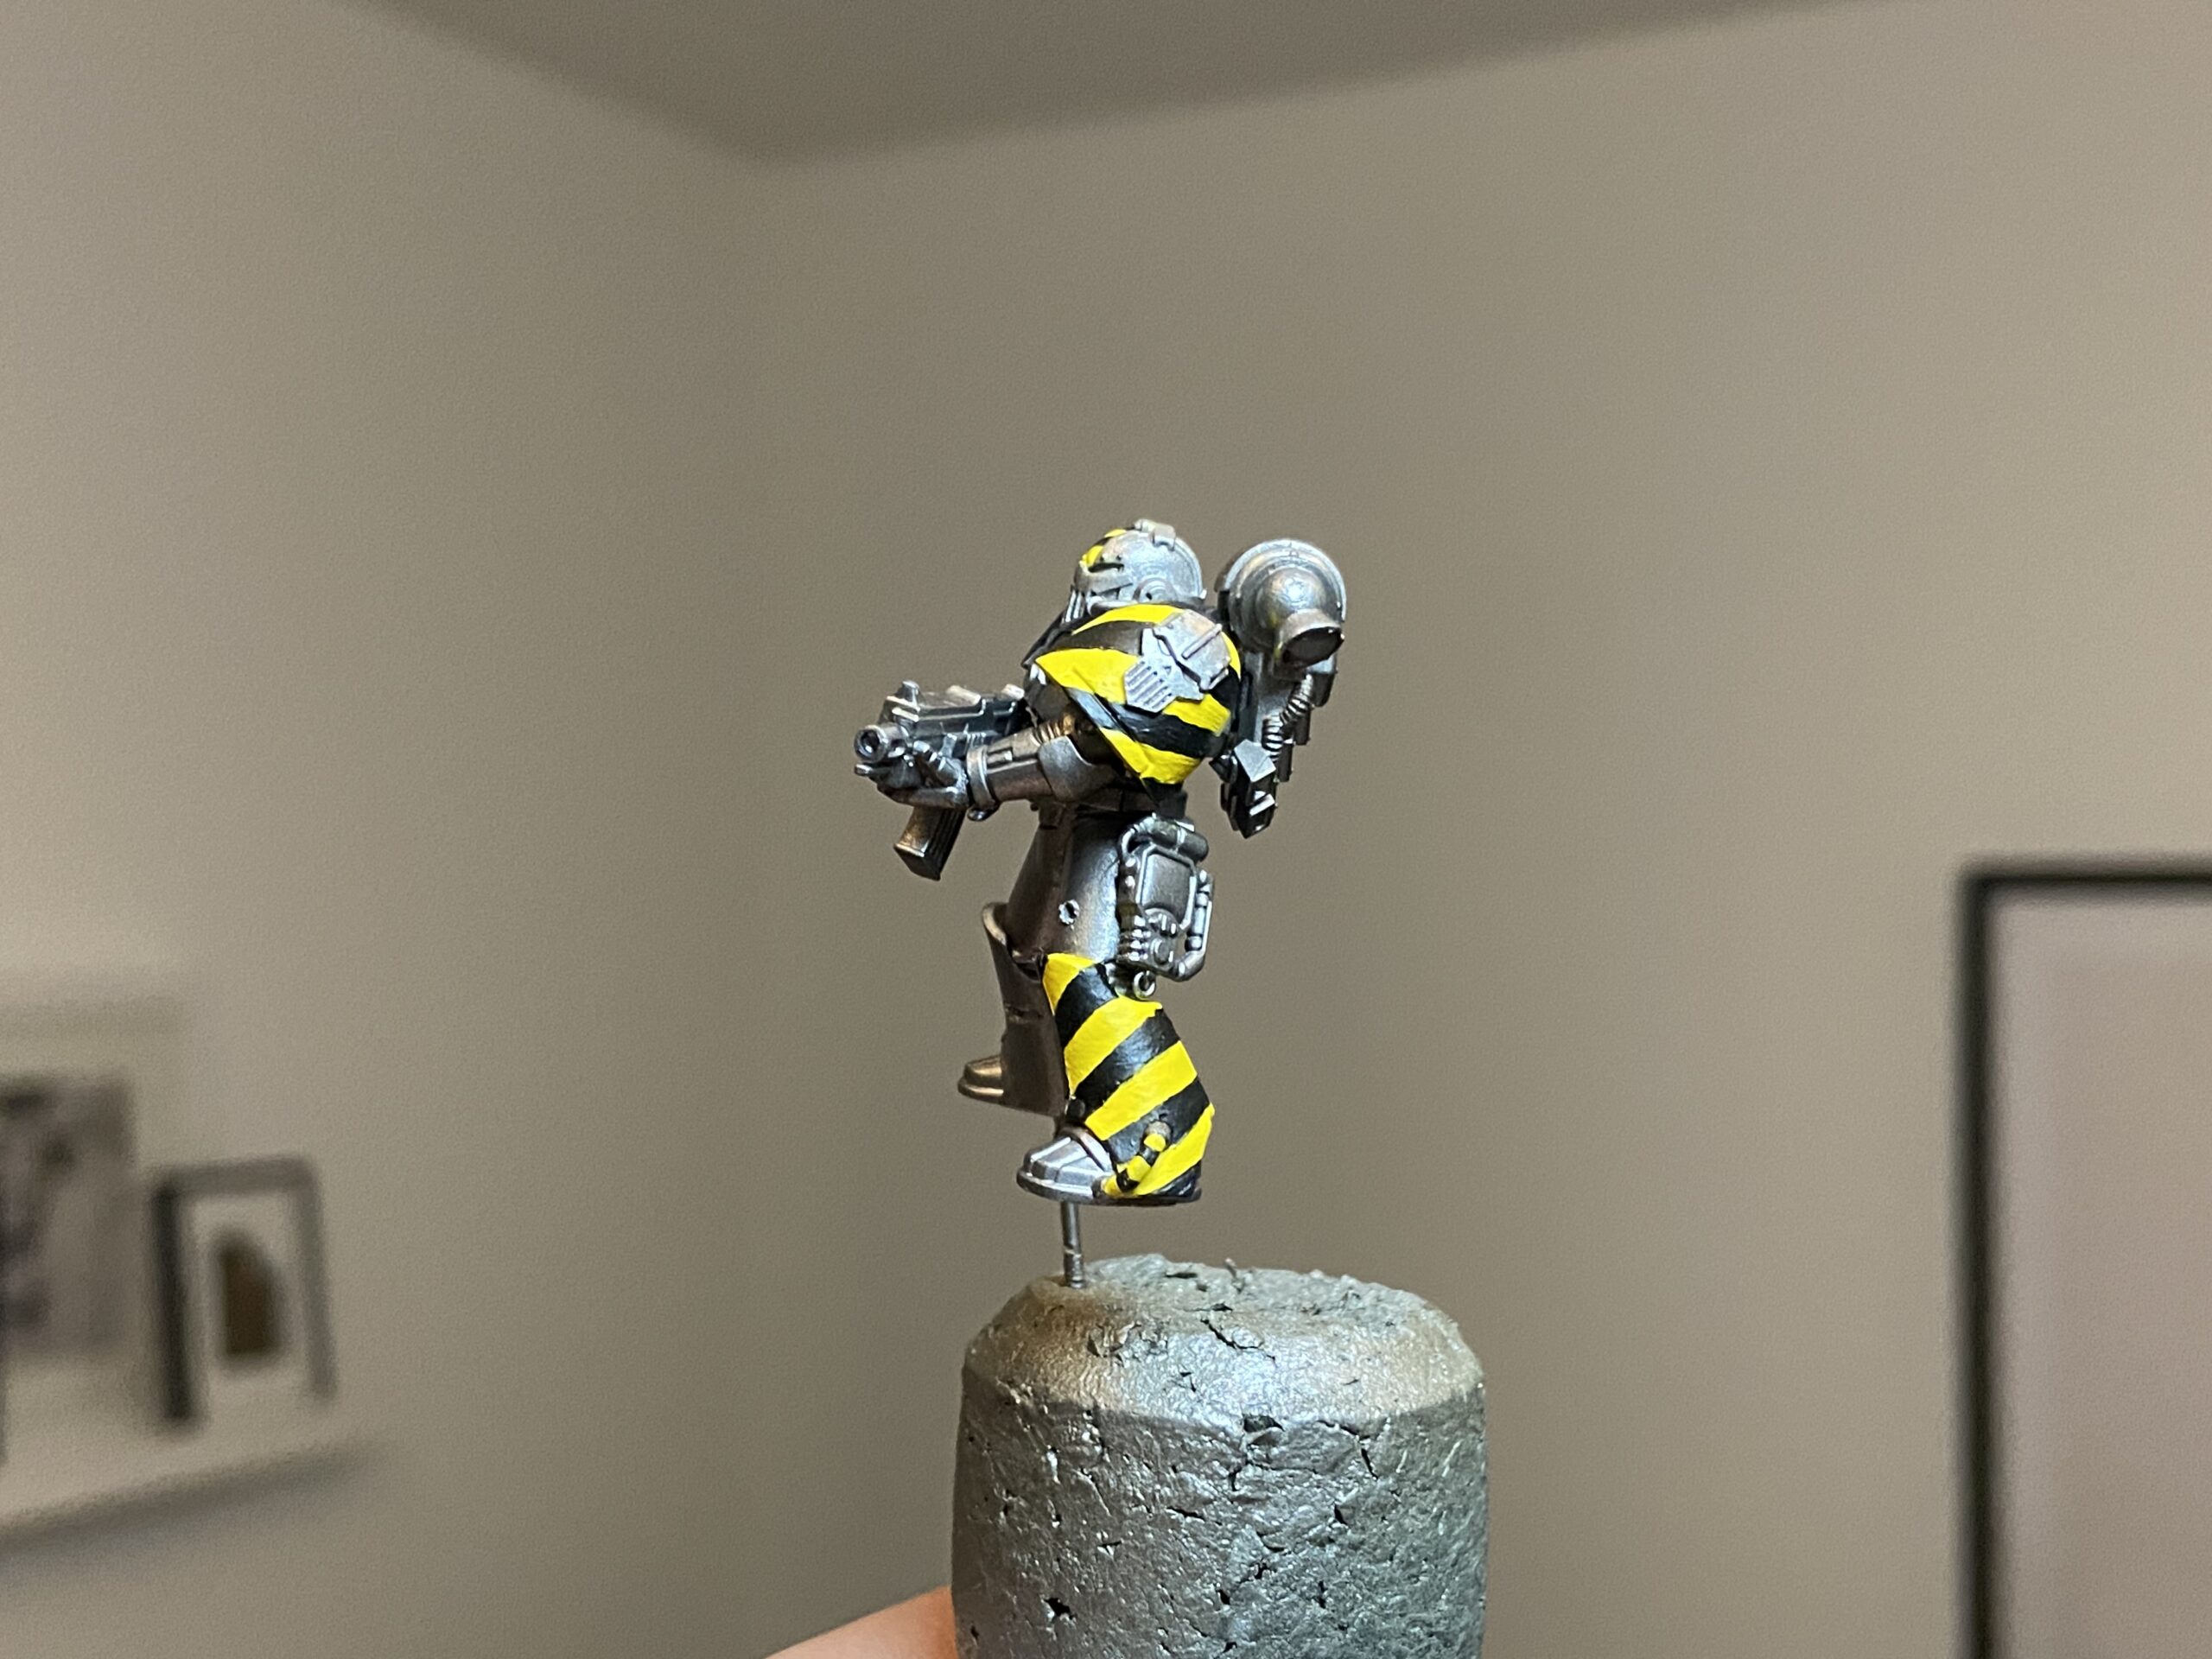
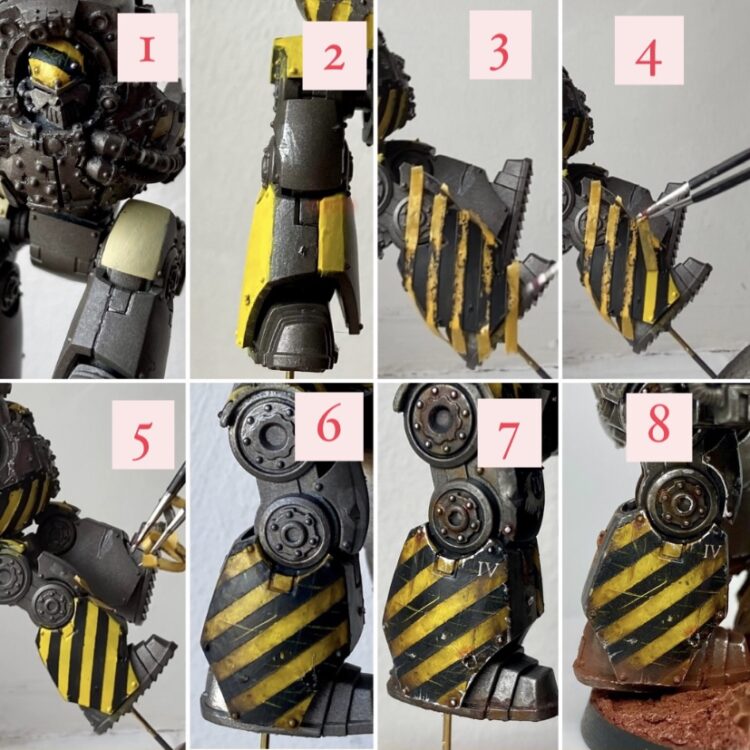
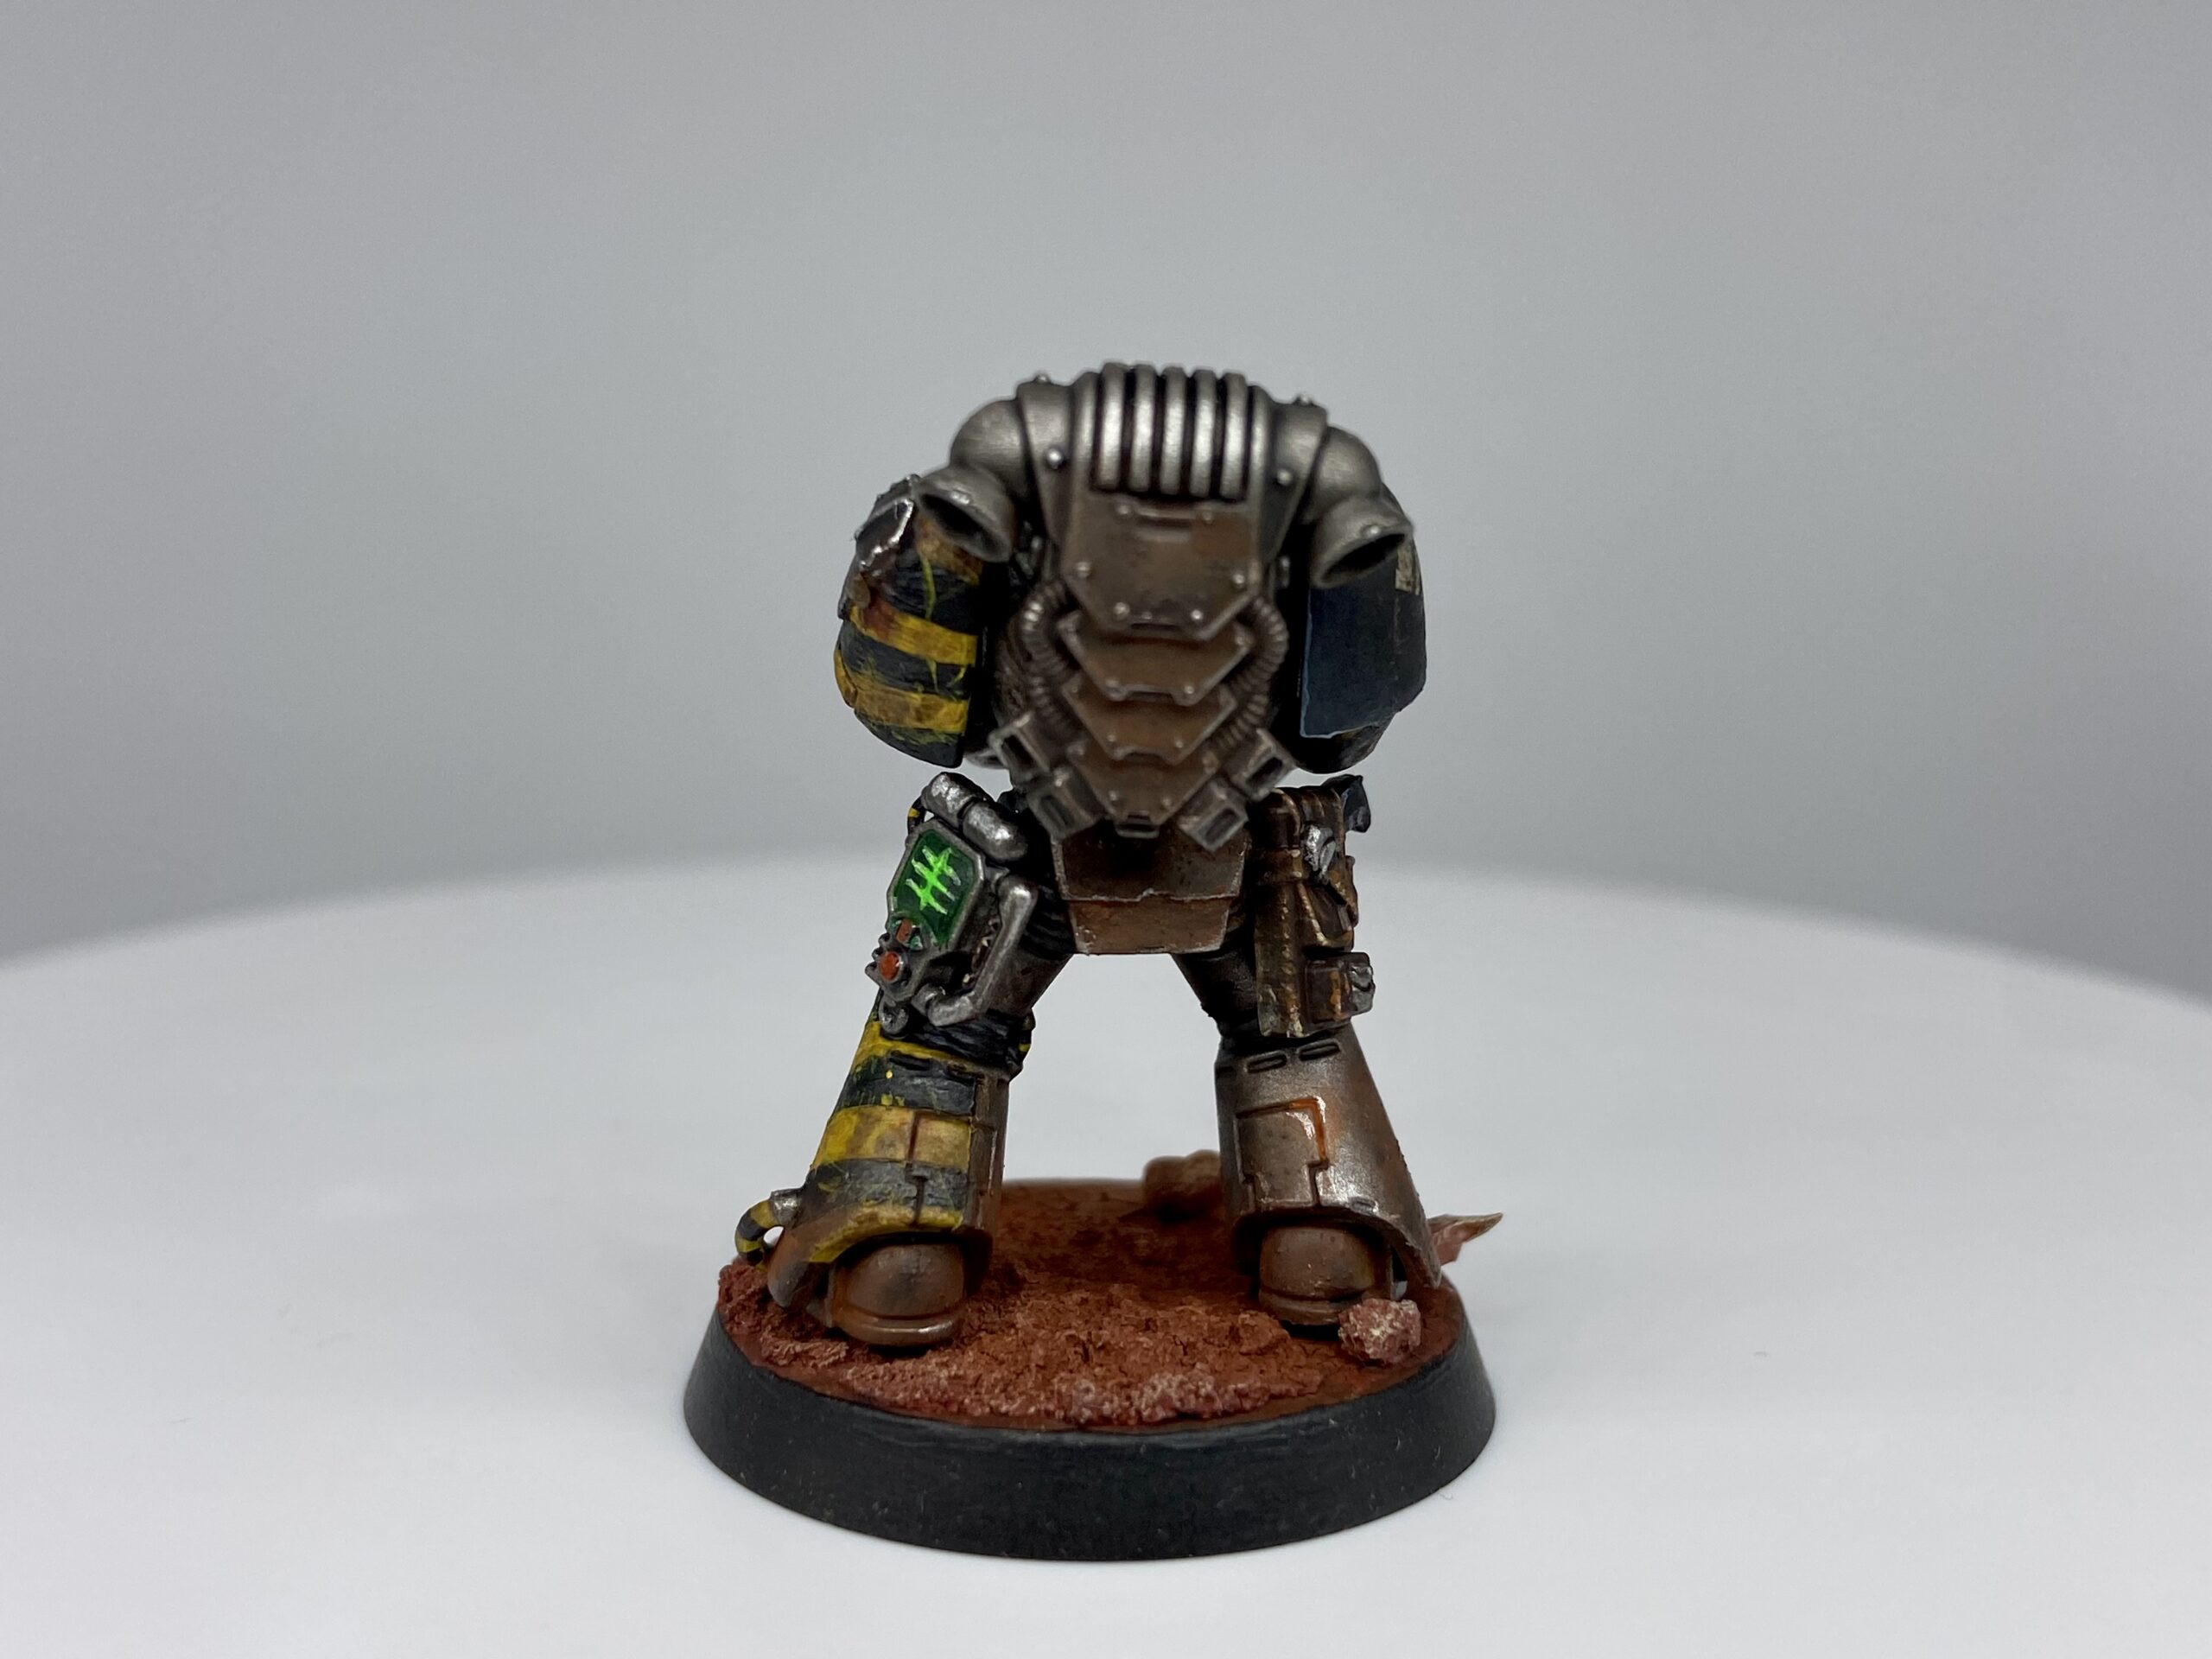
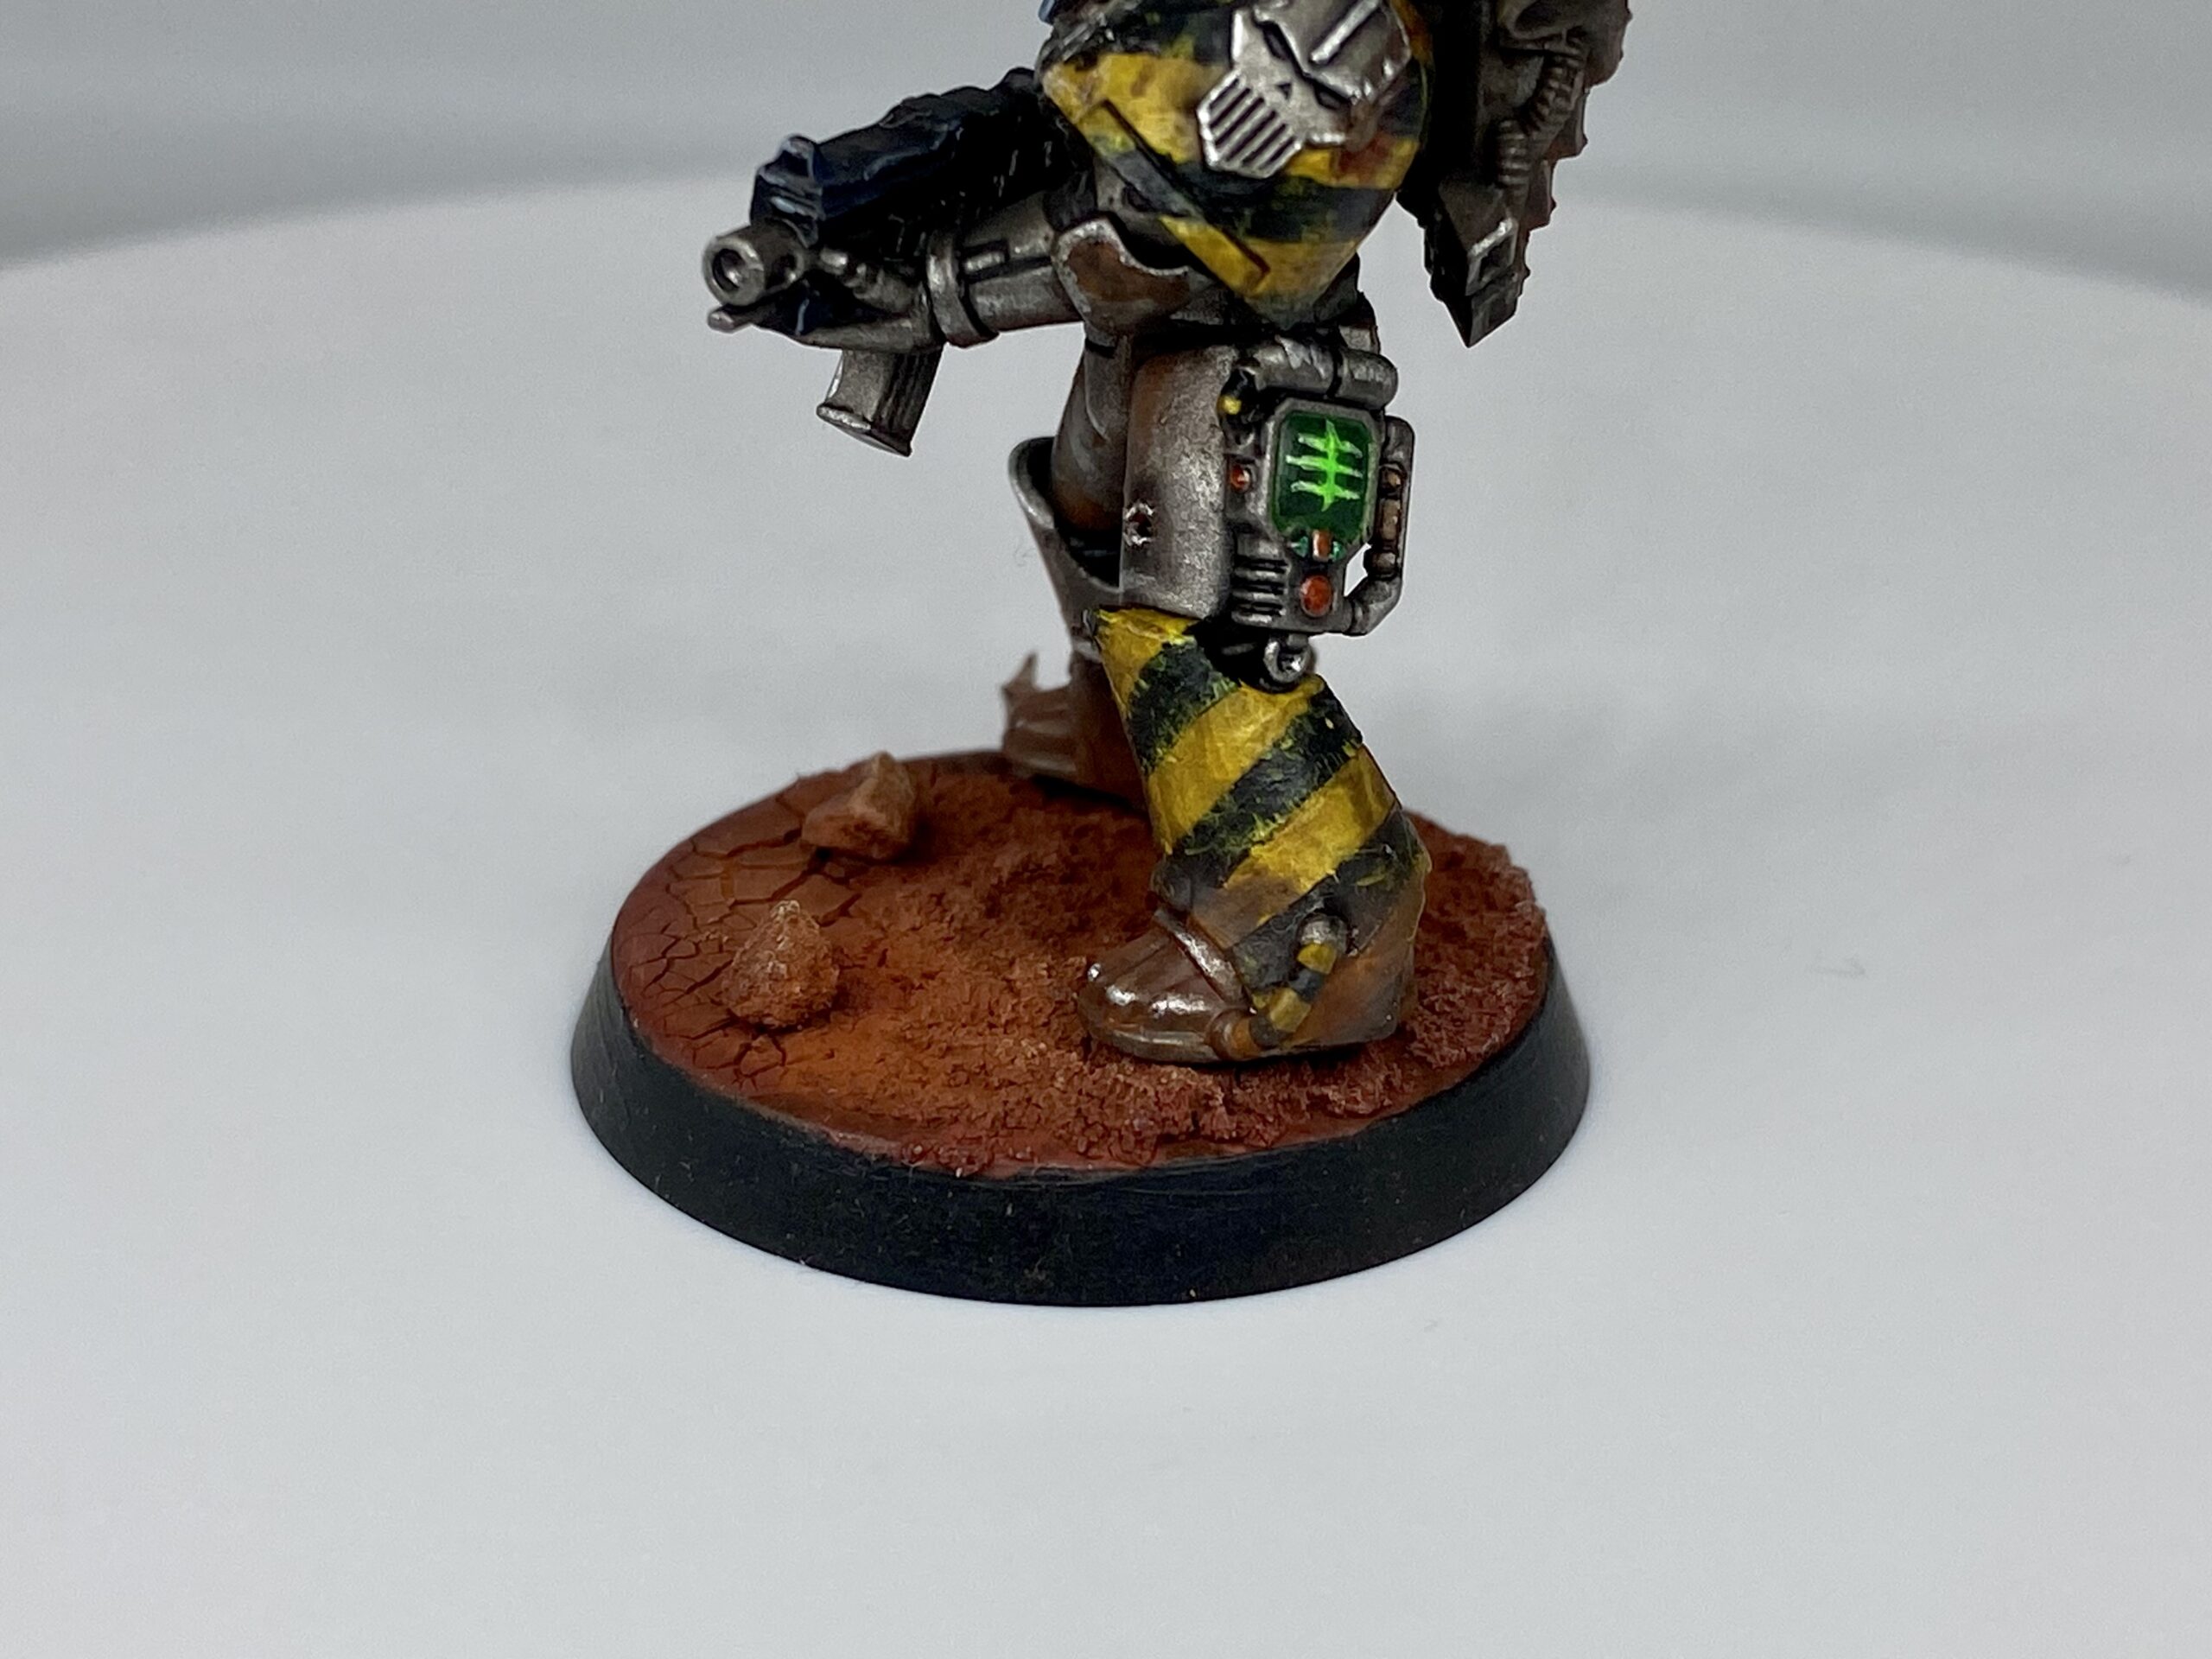
Hazard Stripes
This example is from a Contemptor of mine, but the idea is the same on all my Iron Warriors.
- Base in Leadbelcher spray.
- Image 1: Paint on Ushabti Bone where the hazard stripes will go.
- Image 2: Then paint over Ushabti Bone with Flash Gitz Yellow (or any bright yellow), the Ushabti Bone makes painting on the yellow a lot easier.
- Mask off the yellow with 3mm (or similar) Tamiya Precision Tape. I place them on directly next to each other, then remove every other one.
- Image 3: Paint on the black, I used Abaddon Black in a couple of coats.
- Image 4 & 5: Remove the tape
- Image 6: Apply scratches of yellow using a very thin brush with a little water to thin it, I used a 0000 brush for this. Do no revisit a scratch, it will end up too thick or wonky. Better to black it out again. Or just leave it.
- Image 6: Wash the whole area with Agrax Earthashade. Pull the wash away from the centre, using a slightly damp brush, while it is still wet to make the centre brighter. I do this 3 or 4 times, allowing it to dry each time. This builds up that dirty effect slowly. Ensure it is dry after each application to avoid “tearing up” the previous layer.
- Image 7: I used Stormhost Silver (or any bright silver) on the very edges using a small brush. Tapping I found key here, do not edge highlight in lines, tap the brush over and over again, get more paint, tap again. This gives a scratches and fethered effect, not a simple line.
- Image 8: I used pigment powder on the left once it was on the base to blend it in with my Martian base.
Green Scanner
Again a decent effort, but not as crisp or small as I would have liked 7/10. I have used this method on my Field Ordnance Batteries to good effect.
- Base in Abaddon Black.
- Then use Vallejo Arctic White to map in the scanner’s design; this helps the green pop.
- Use a thin layer of Fluorescent Green Vallejo over the white, and repeat until it is bright.
- Glaze the whole screen in green to give an overall dark green effect over the whole screen.
Bullet Holes & Glances
I give this one 5/10. There are other Iron Warriors I have built, which I did a much better job on with the battle damage from bullet hits and glances. Garbage in, garbage out, as they say.
I would recommend Night Shift’s video for this method. It has to be seen.
The key point is creating the hole, filling it with putty, letting it go off a bit and then moulding it out from the hole to give it the right look.
Update – October 2nd 2023
It is probably not worth using putty on the bullet holes, on these small models. After finishing all these Iron Warrior Tactical Marines – it was not wroth using the putty. On tanks, yes! but on smaller Marines I am not sure it was worth the effort. The holes and scratches alone work well.
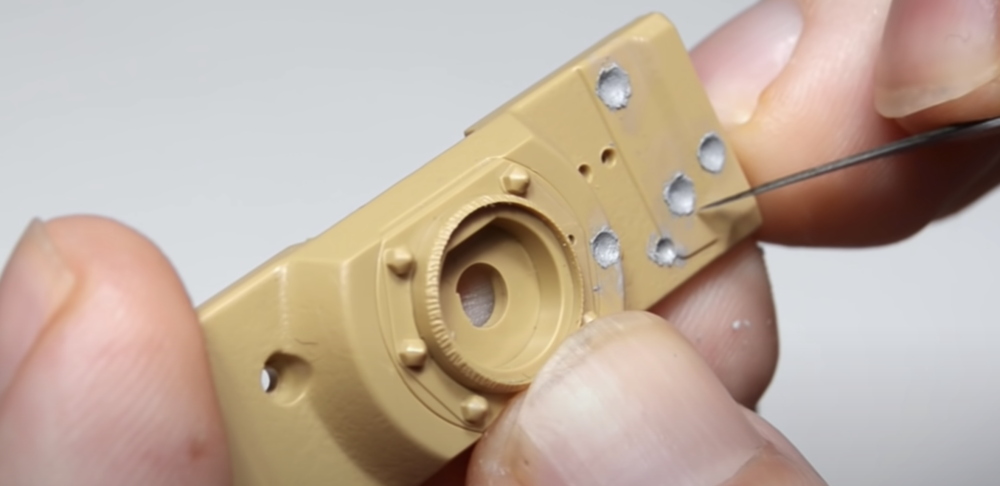
Image from video
Leather
I would recommend this video on YouTube by RobPaintsModels. This is a lot better than any previous leather I have done. I need to work on it more, but I would give myself an 8/10 here.
The technique needs to be seen, but the overview is;
- Base in Rhinox Hide.
- Apply Skrag Brown for the weathering on the edges.
- Apply Ushabti Bone on the edges.
- Wash in Rhinox Hide.
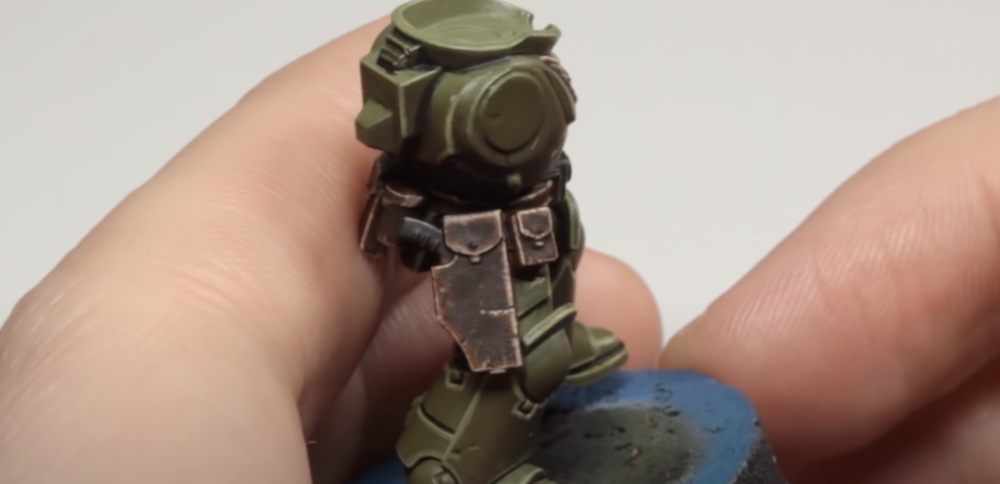
Image from video
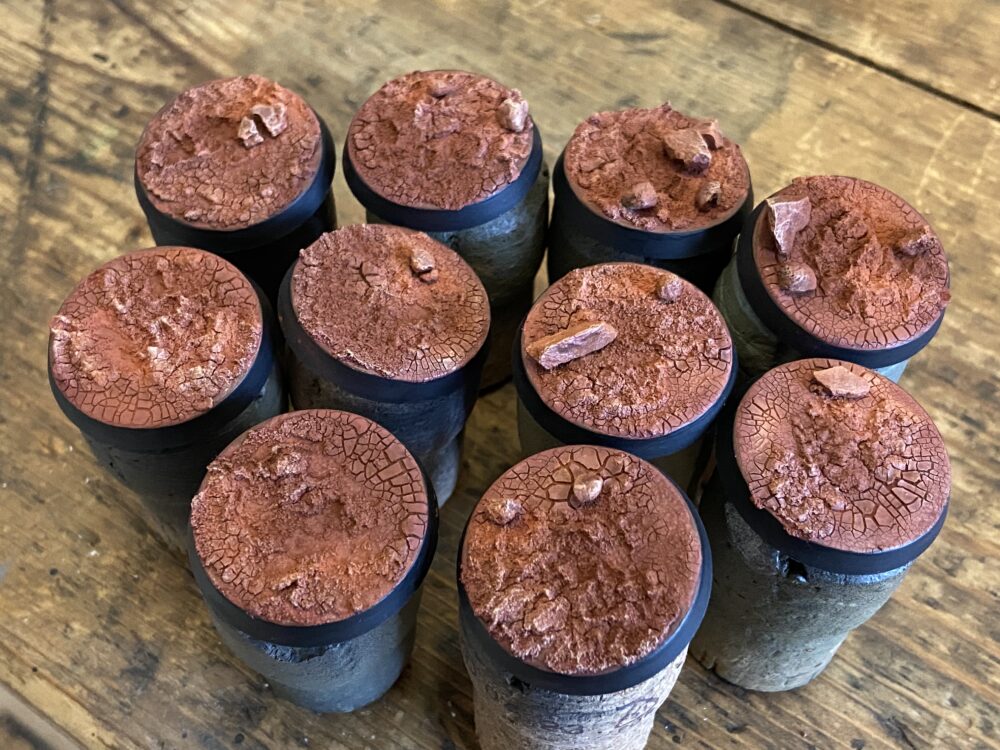
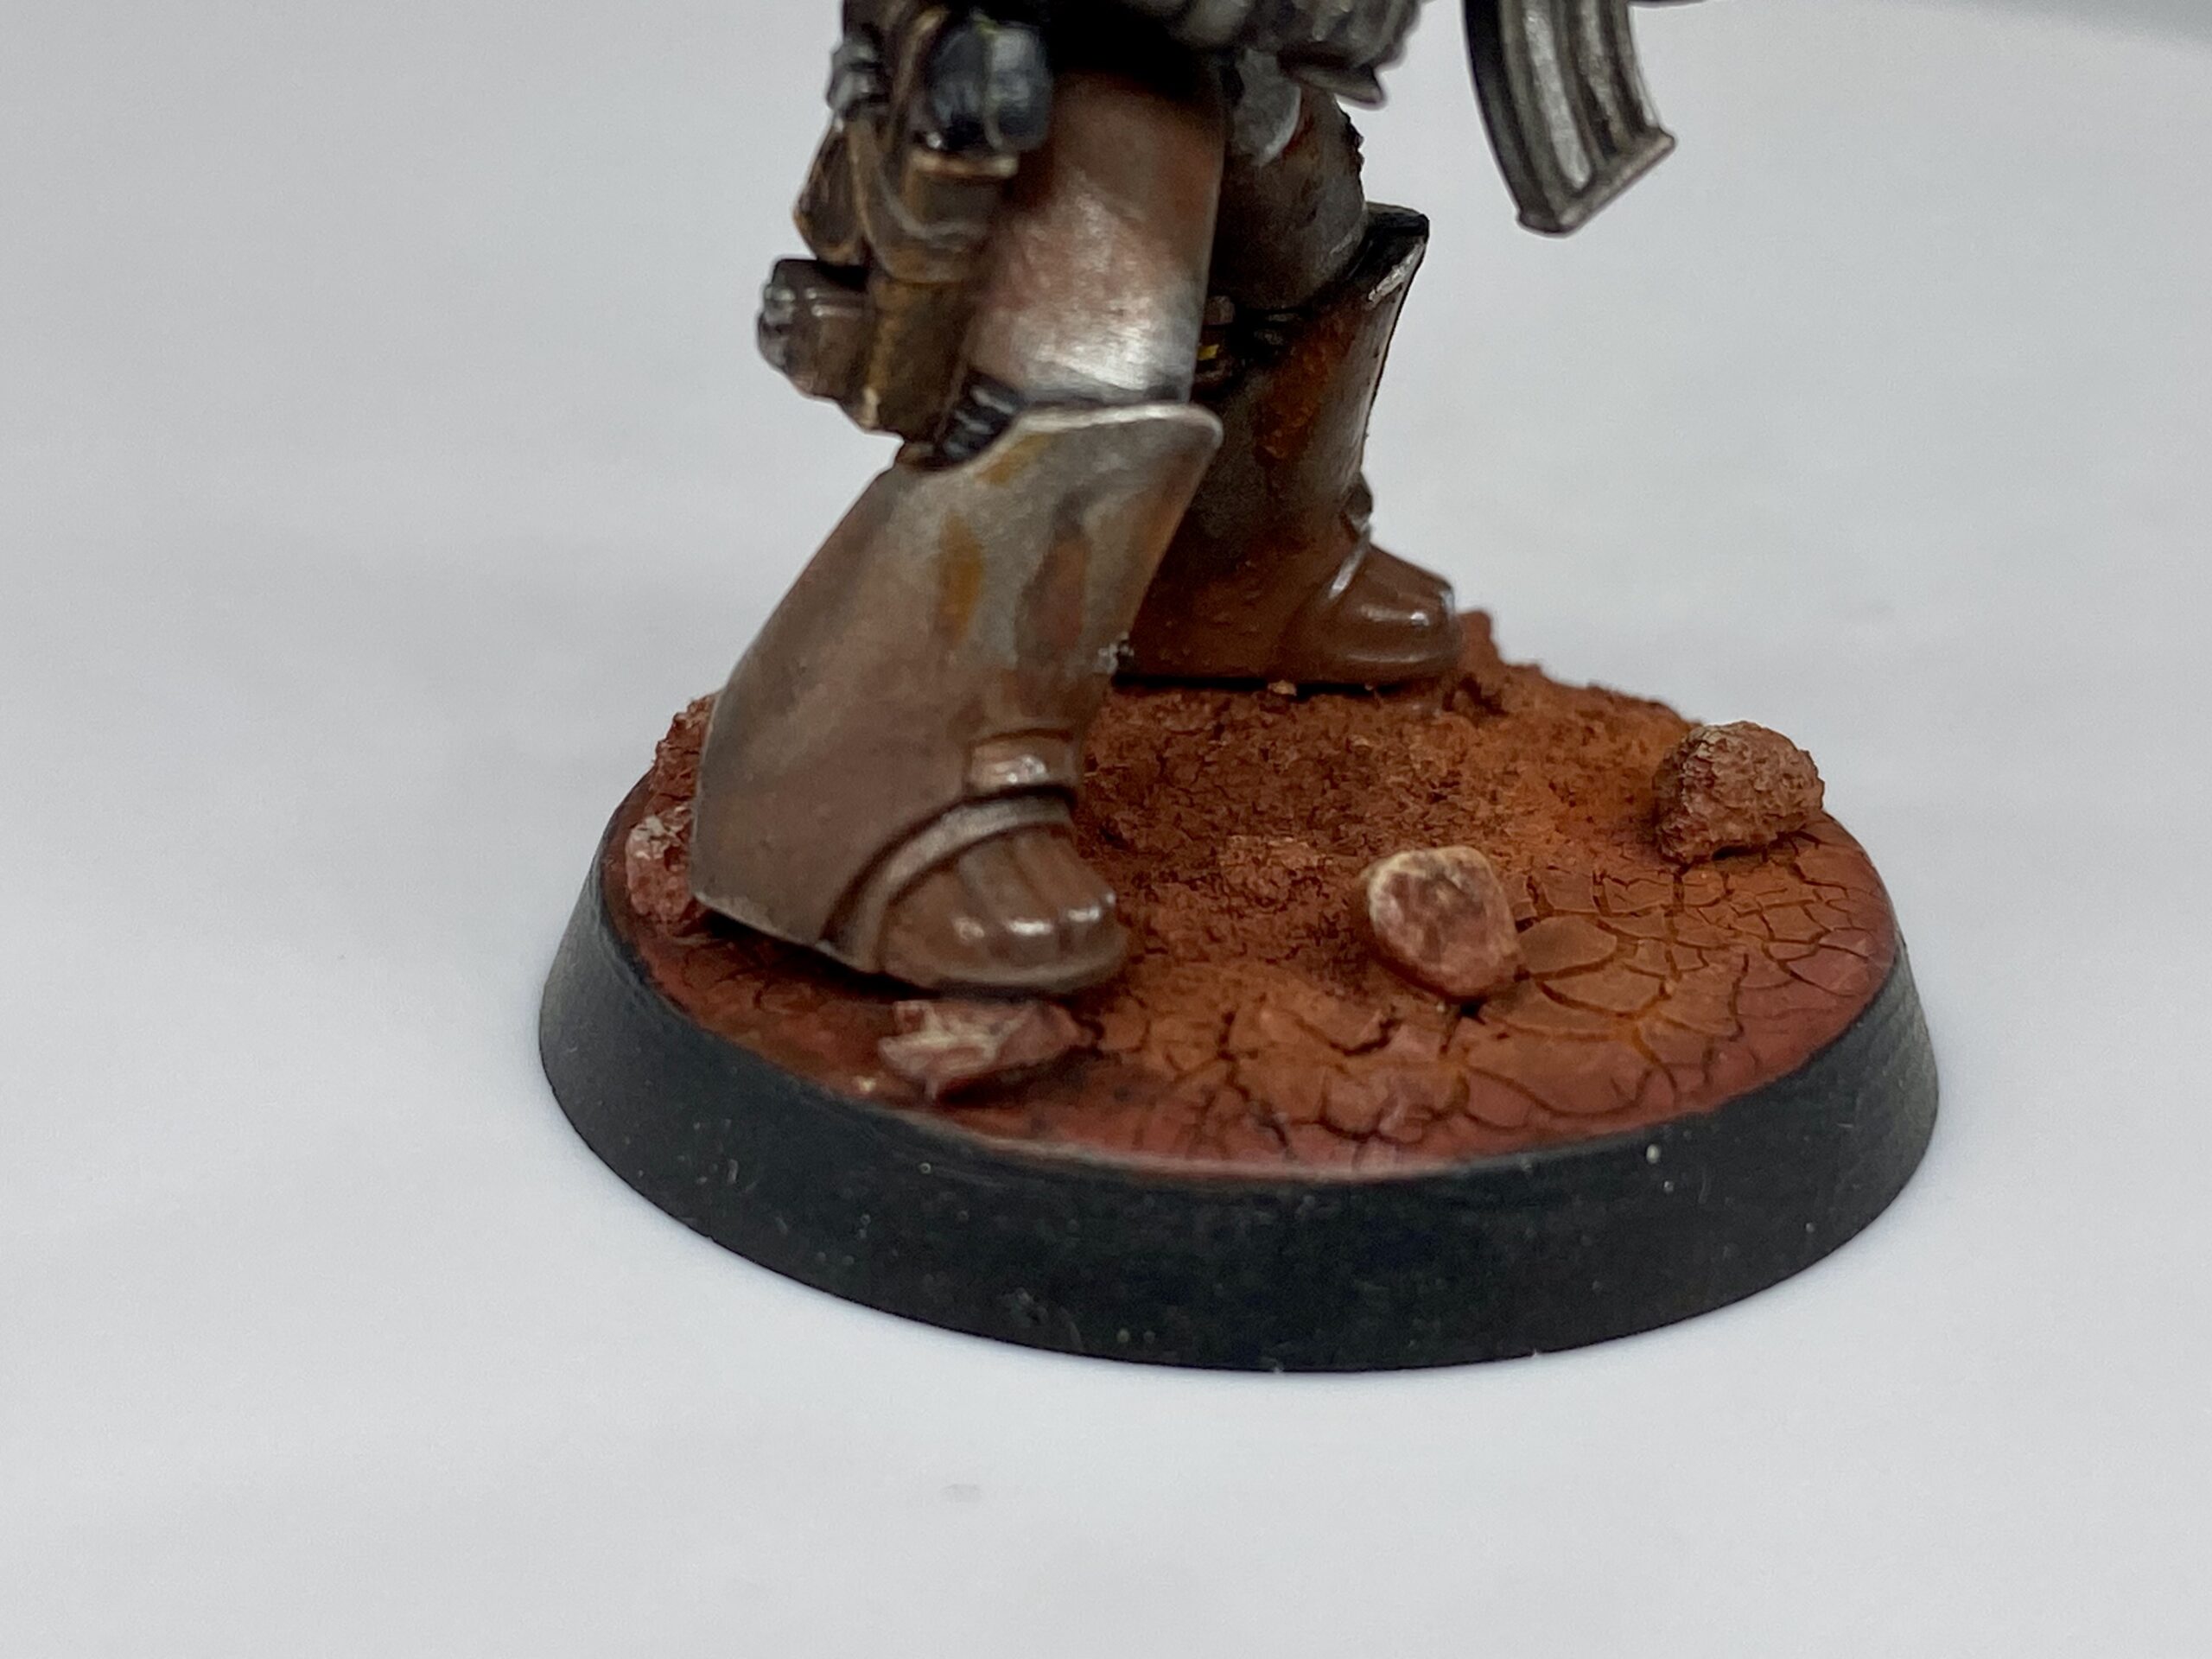
Iron Warriors Basing
The basing got an article of its own, Iron Warriors Martian Bases. I was really happy with these, especially on the model with the pigments on his legs. This photo below does not do them justice at all. I give myself a 9/10 here.
Iron Warriors – Completed Gallery
These were taken with my Samtian Lightbox.

Iron Warriors – WIP Gallery
Some WIP photos of this first Iron Warrior…