Painting Hellhounds – Catachan – Completed
My Hellhounds are done! All three, no less! As for painting Hellhounds, this is how it went… I am no pro, but I hope that this process helps or inspires someone else to slap some paint onto their tanks! Don’t forget to check out my Hellhound Variants and Tactics.
Never miss an article? Subscribe!
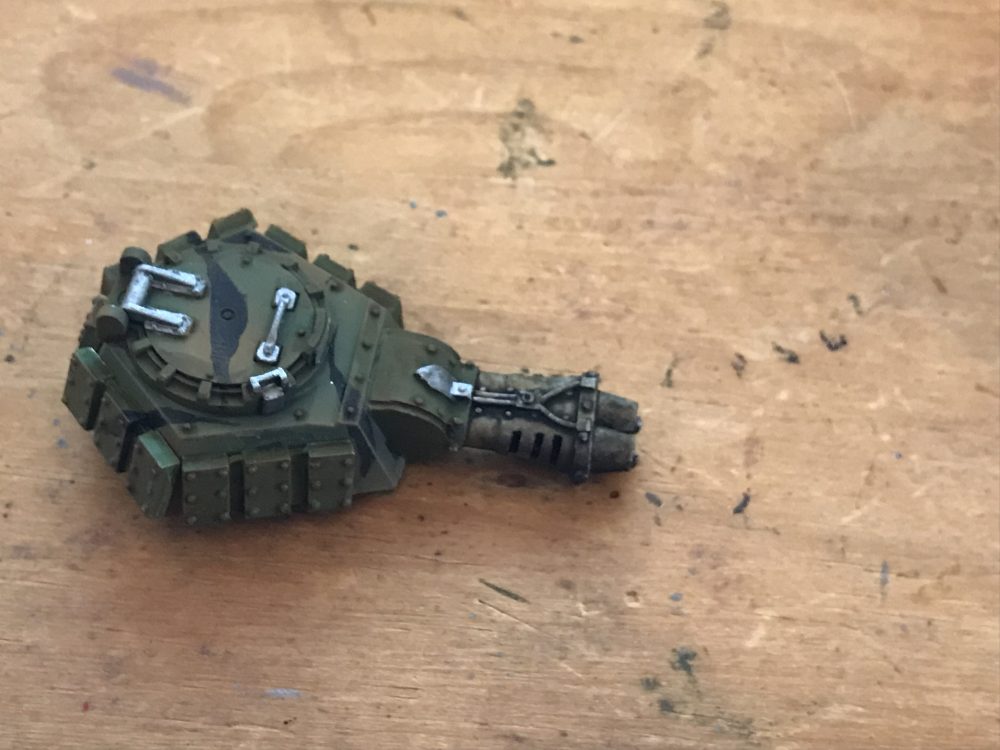
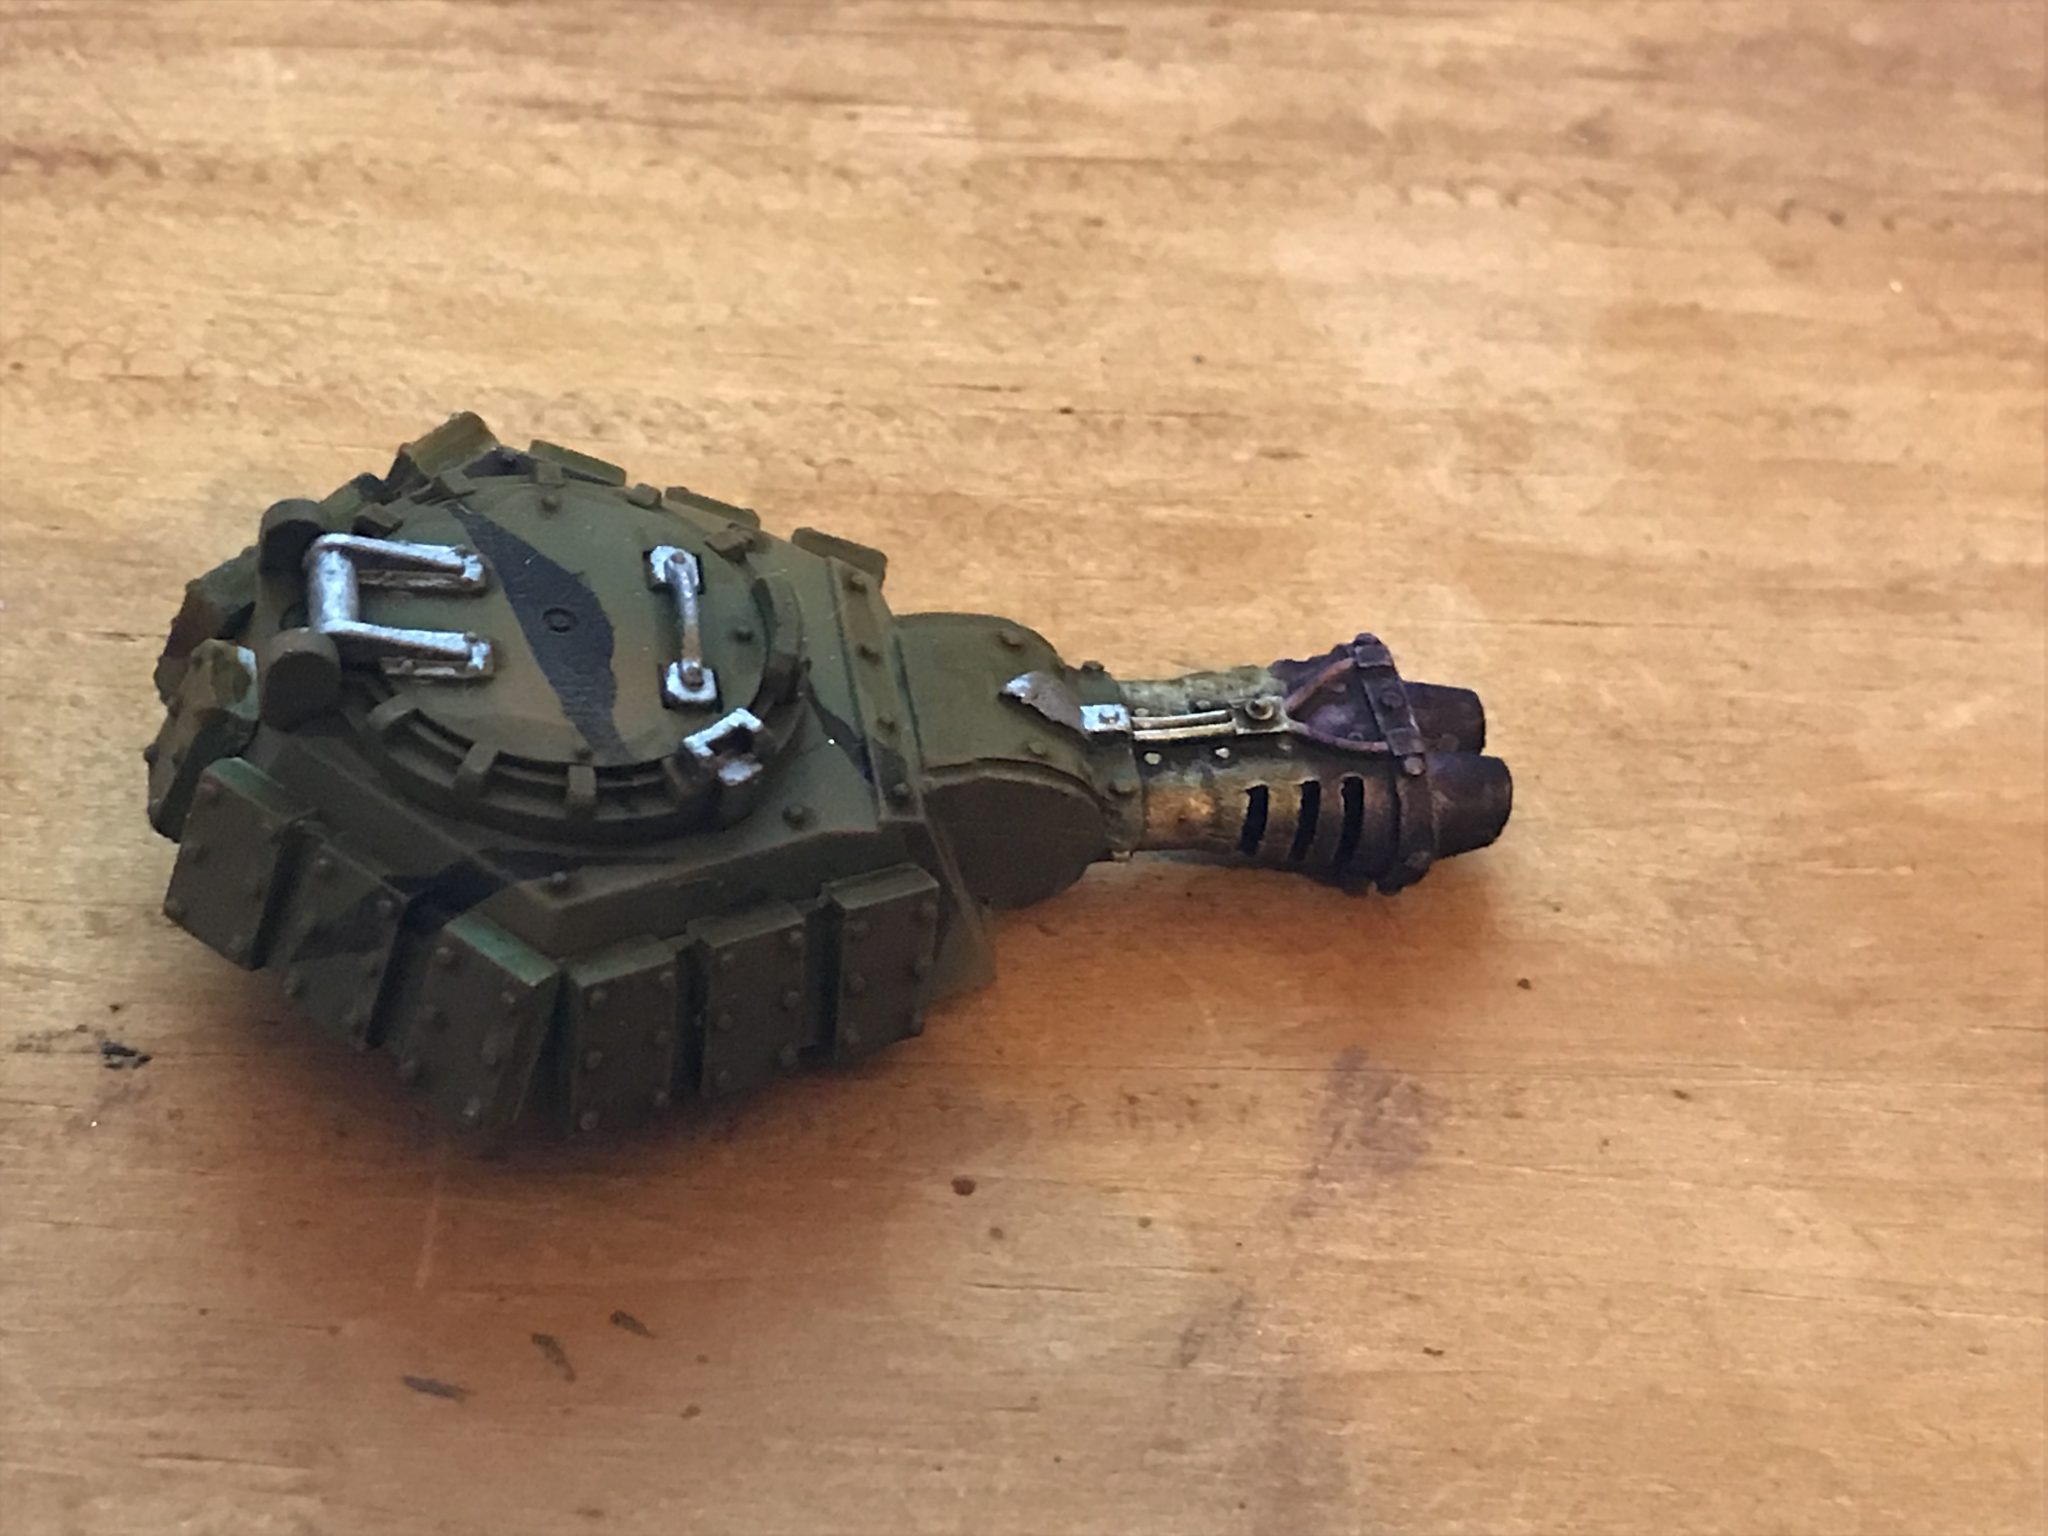
Base Camouflage – Painting Hellhounds
I already have my Cadia Camo down to a T with the airbrush. I wanted something different for my Catachans to set them apart.
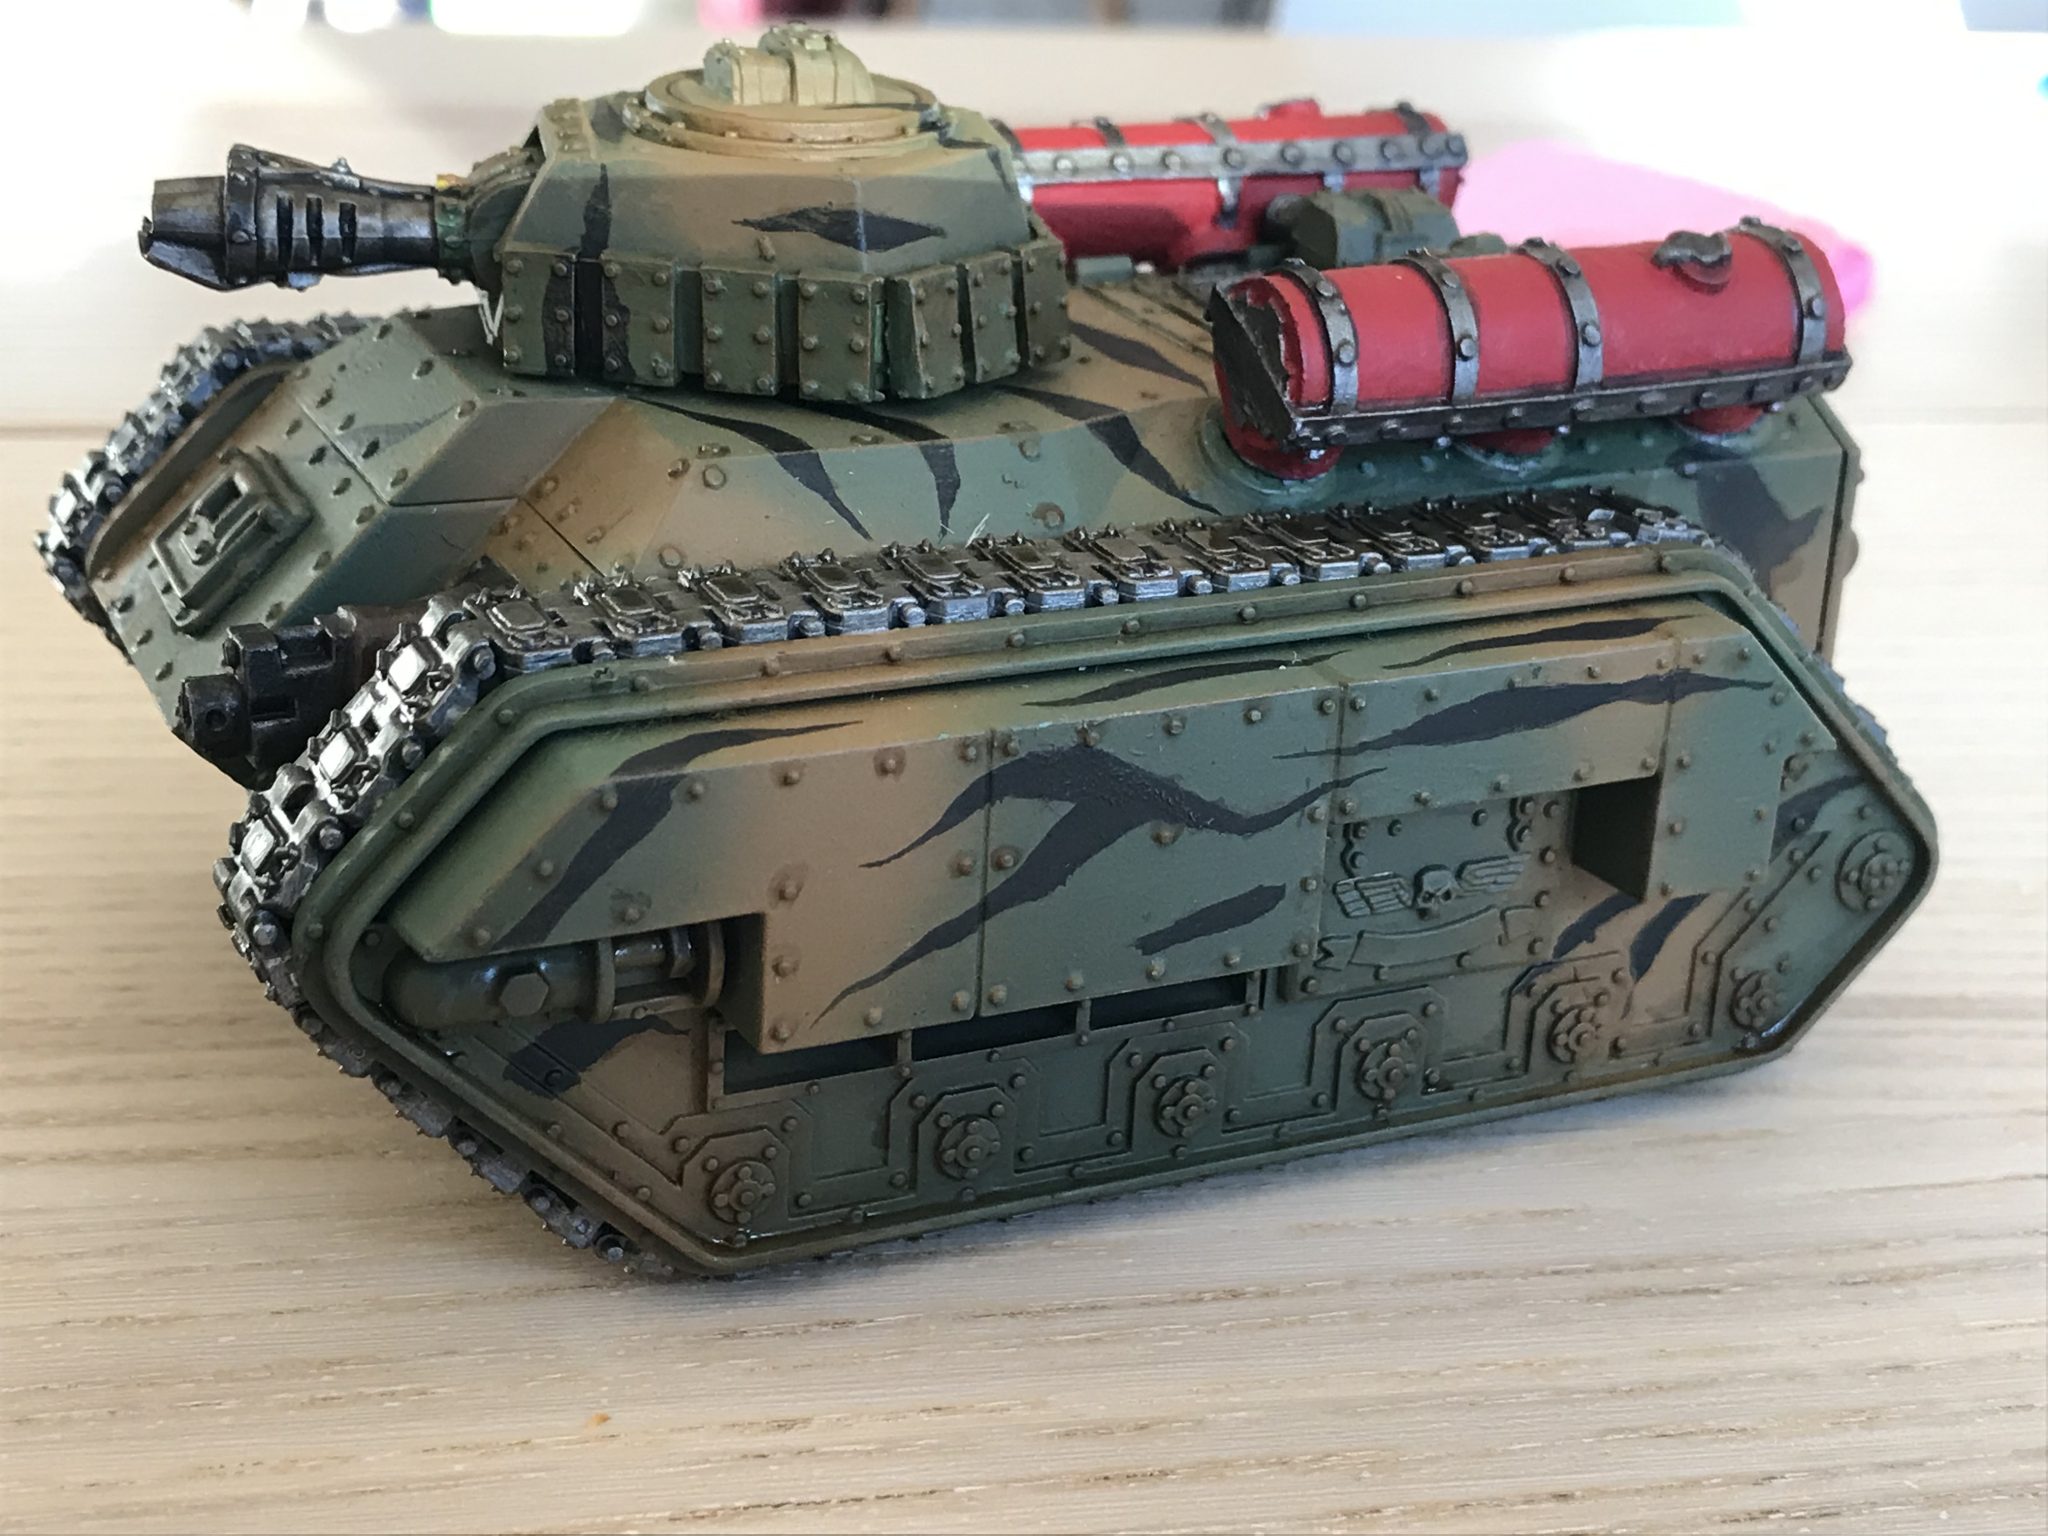
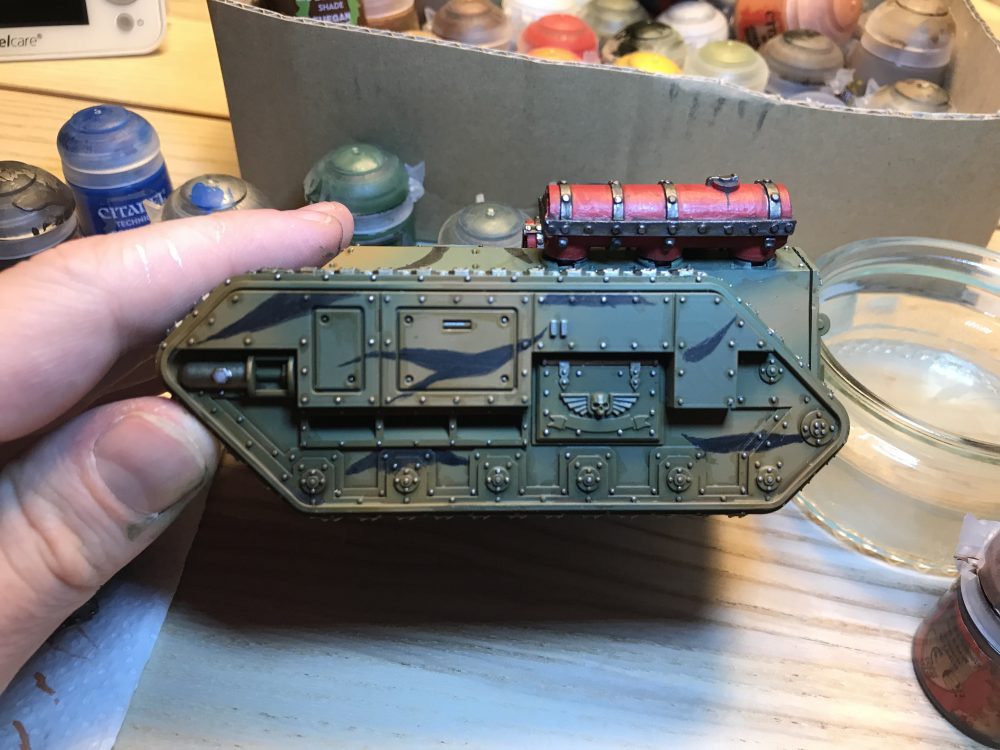
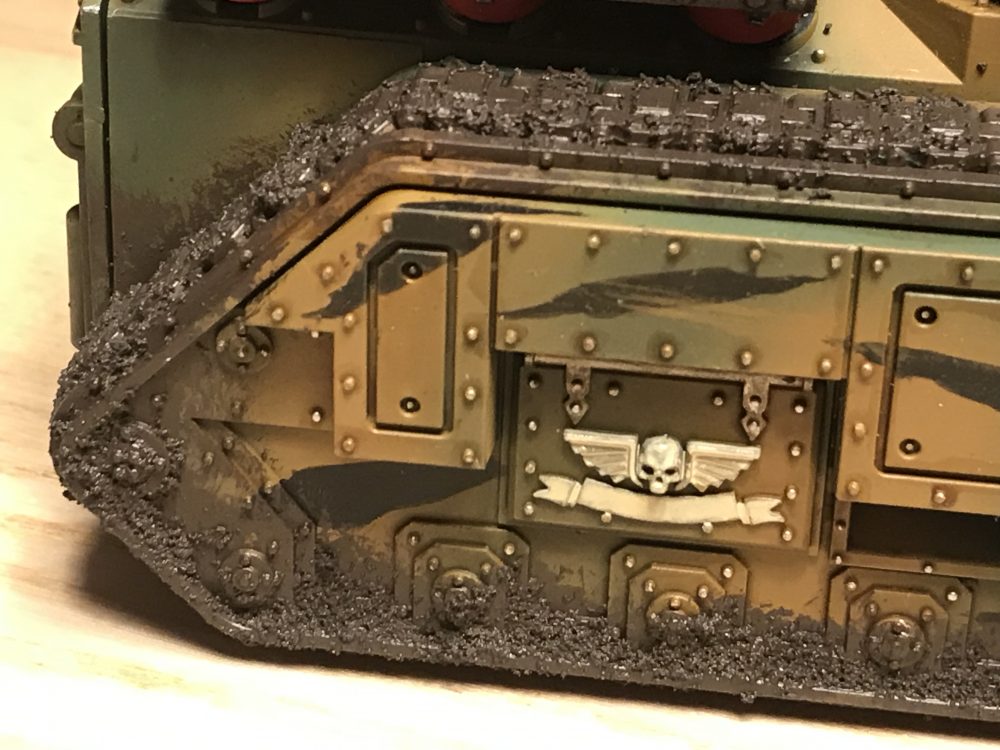
I went for Castallen Green, then Loren Forest with XV-88 areas/stripes. My Cadians are Castallen Green and Zandri Dust.
The Loren Forest is lighter and the XV-88 is a more orange tan colour. I didn’t make the XV-88 into crisp stripes like on my Cadians. I left them as they are from the airbrush with a broken/feathered edge.
-
- Painting Hellhounds

-

- Painting Hellhounds

-

- Painting Hellhounds
Black
The black stripes I was un unsure about. But I wanted something to break up the colours. As they still sort of looked like my Cadians. They worked well I feel and I’m happy with the result.
I did these with a brush, as I wanted them crisp.
With Black Stripes
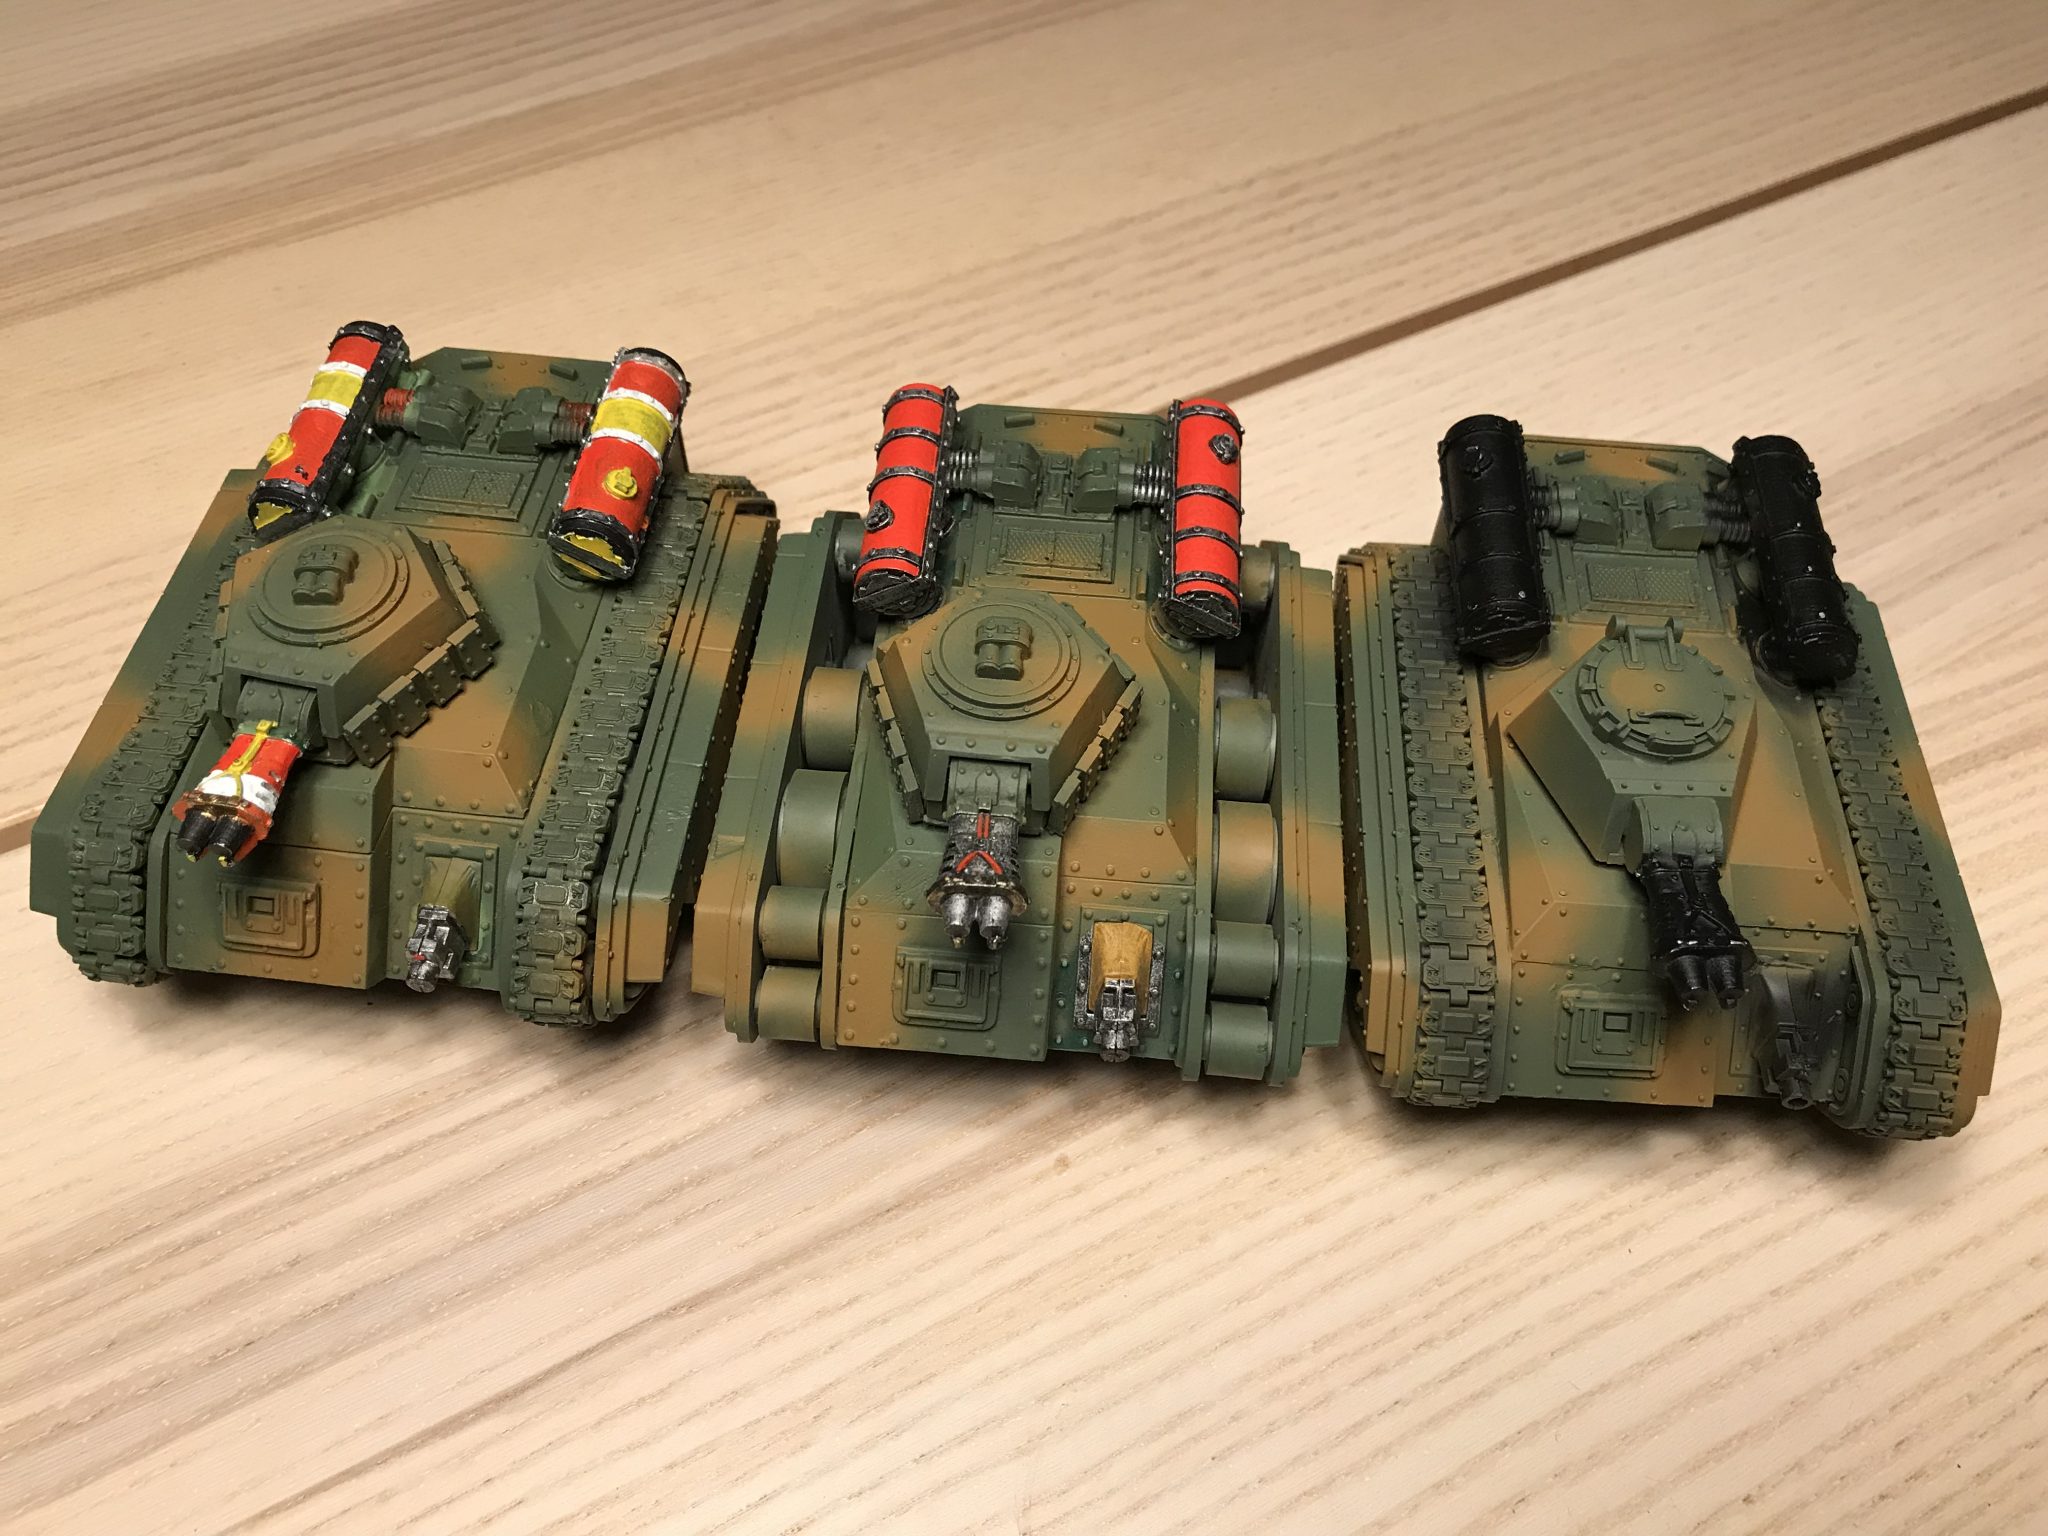
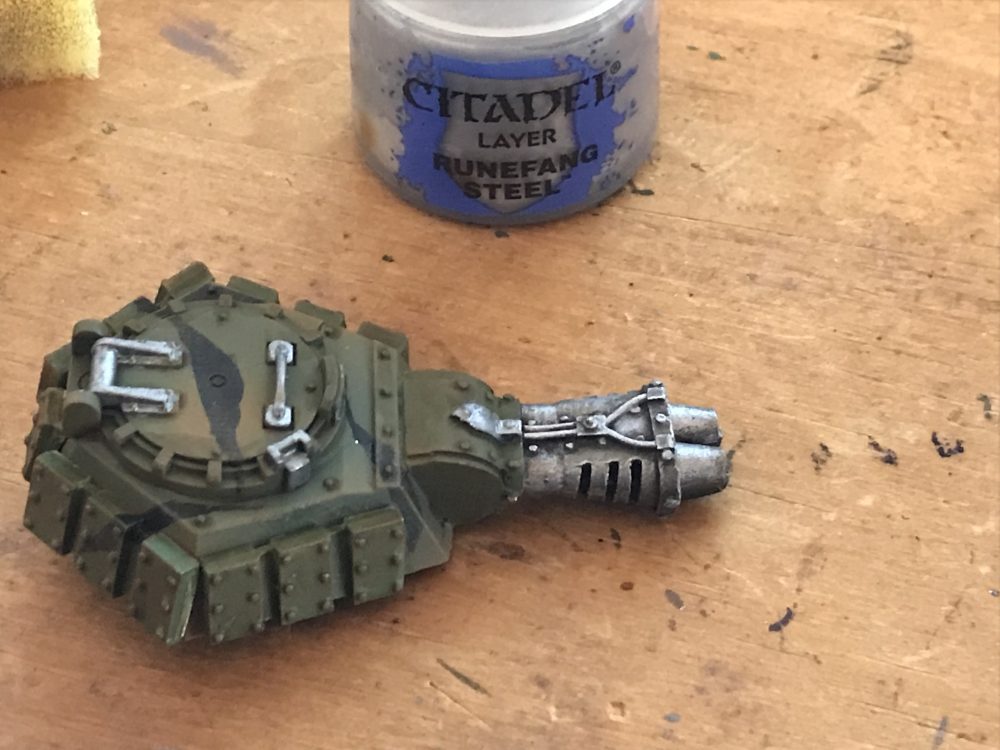
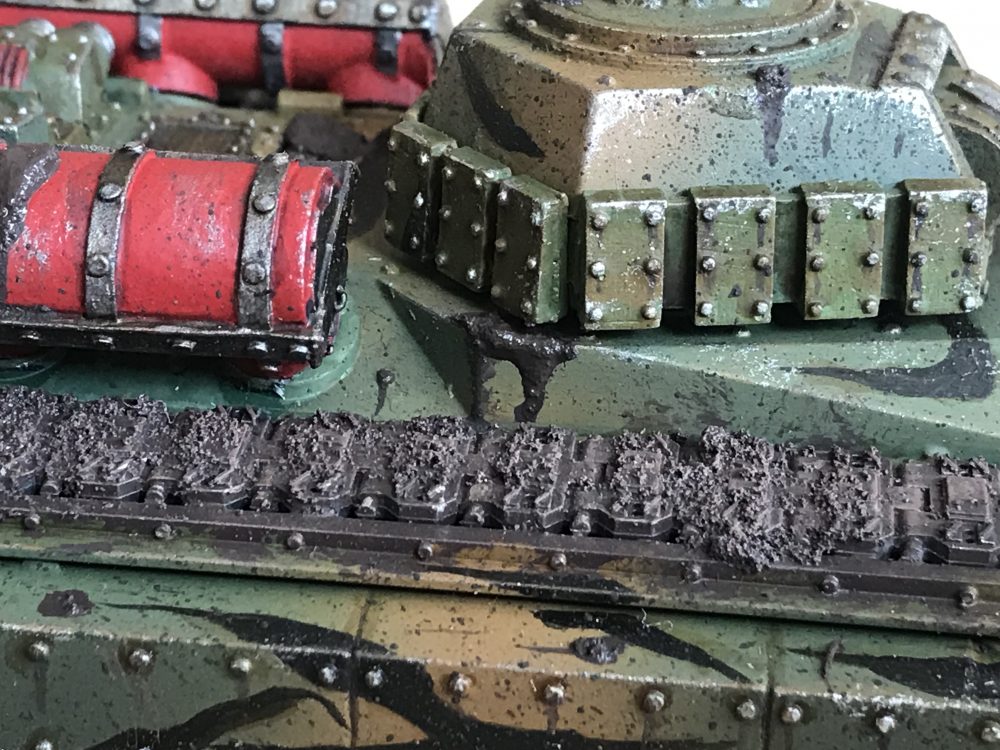
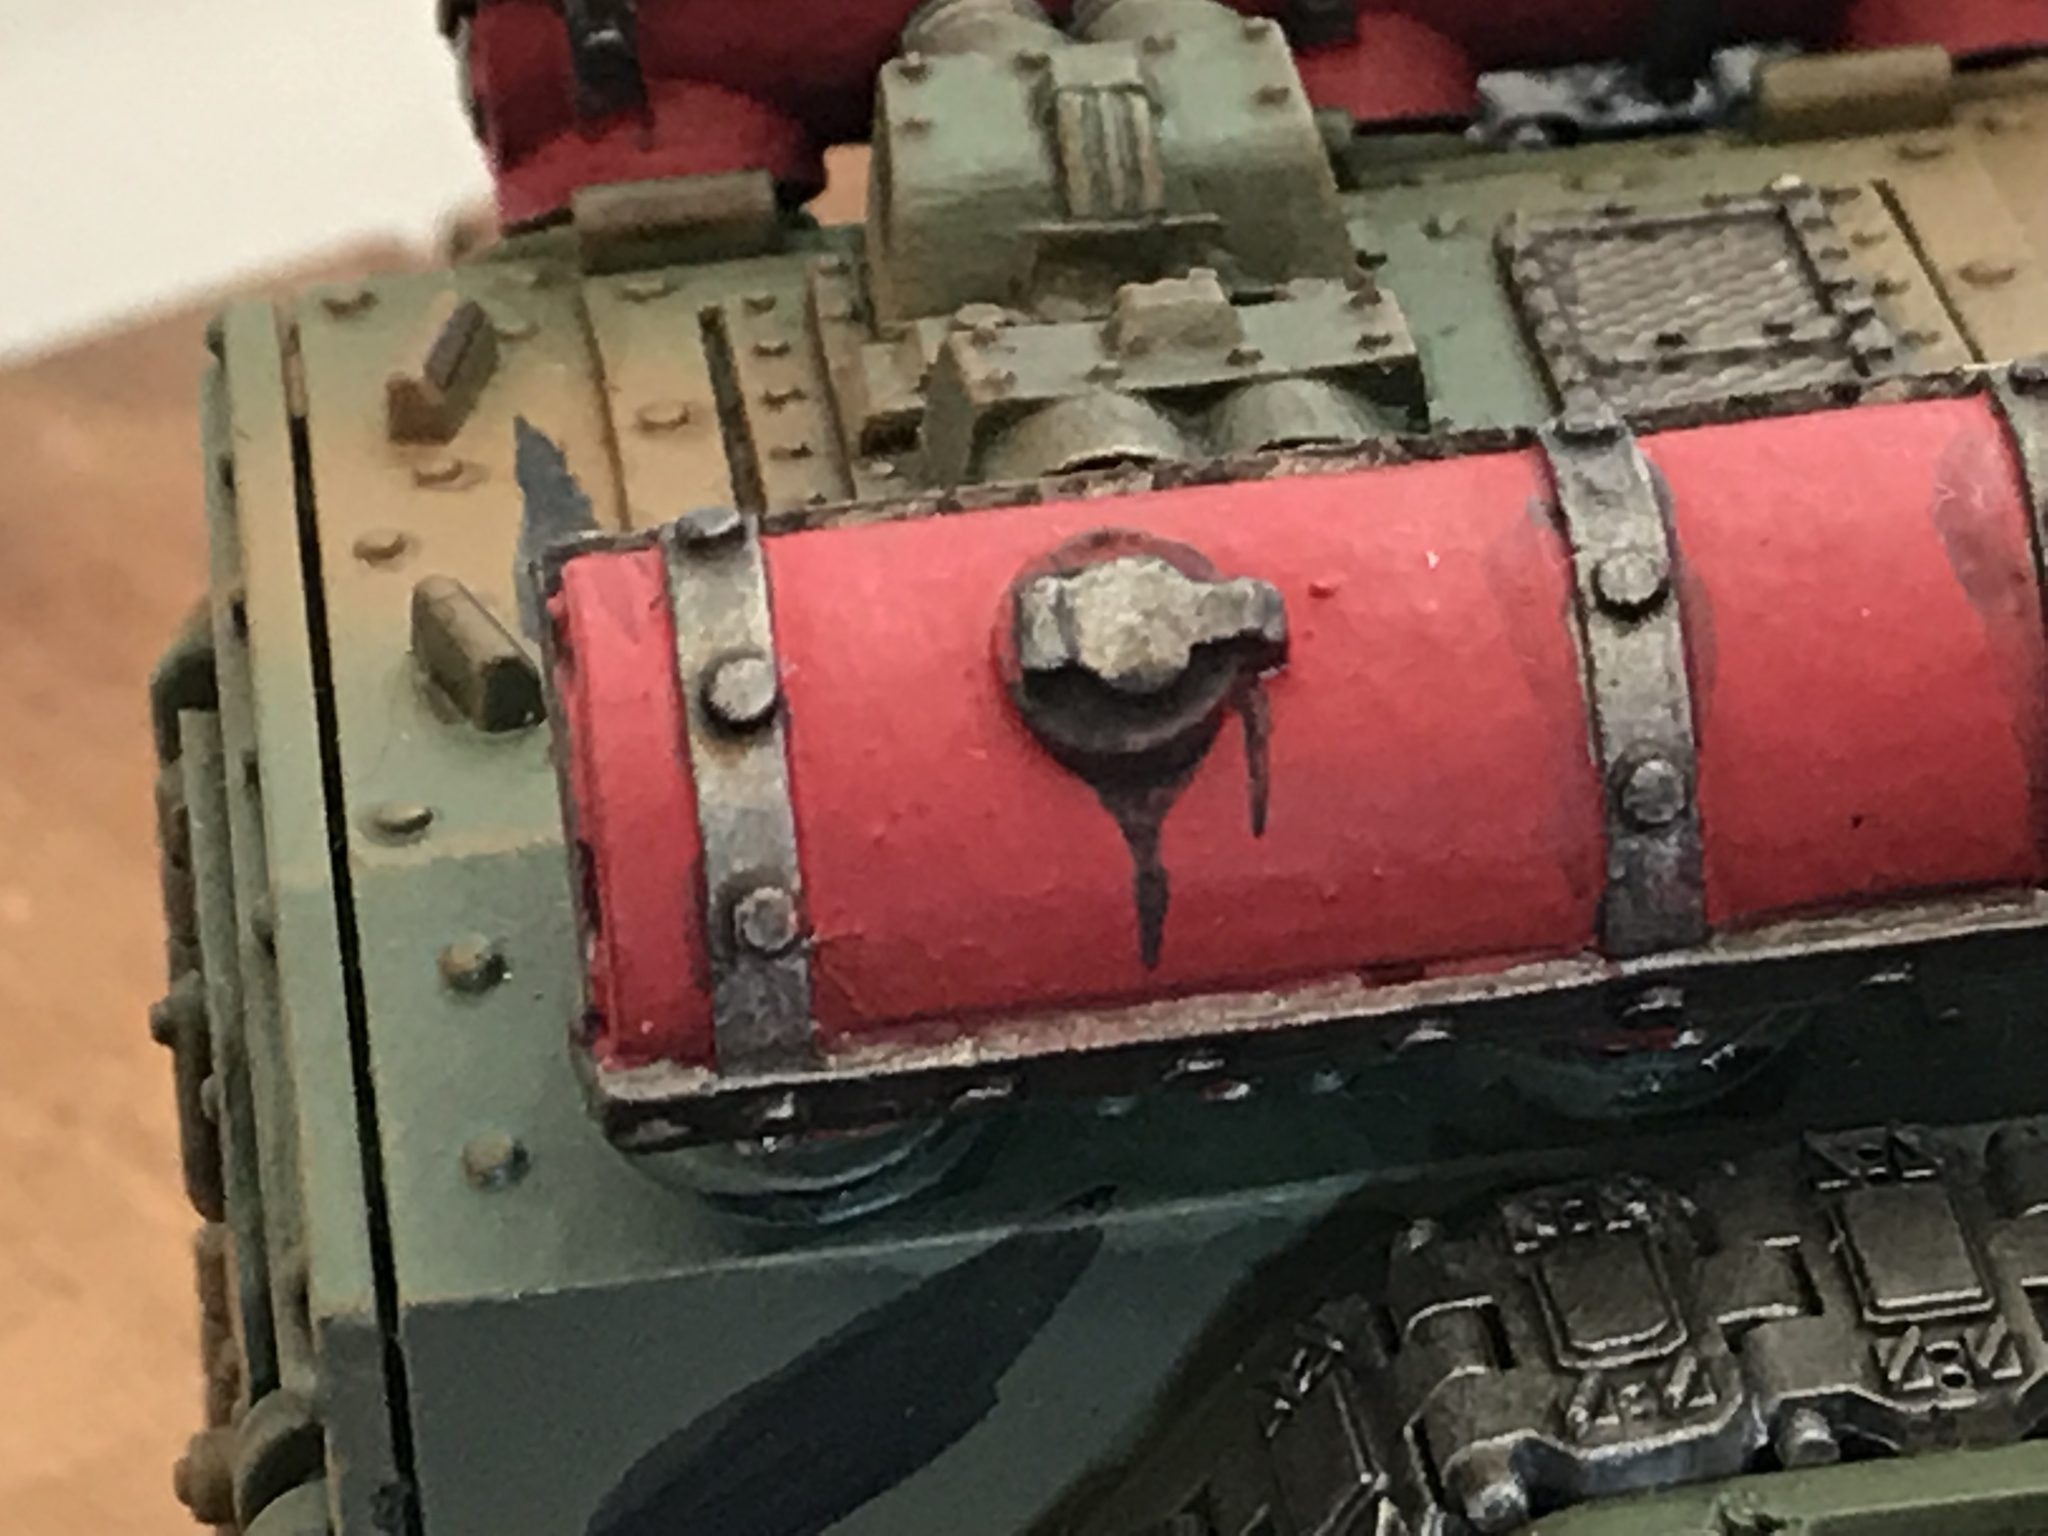
Metal Work
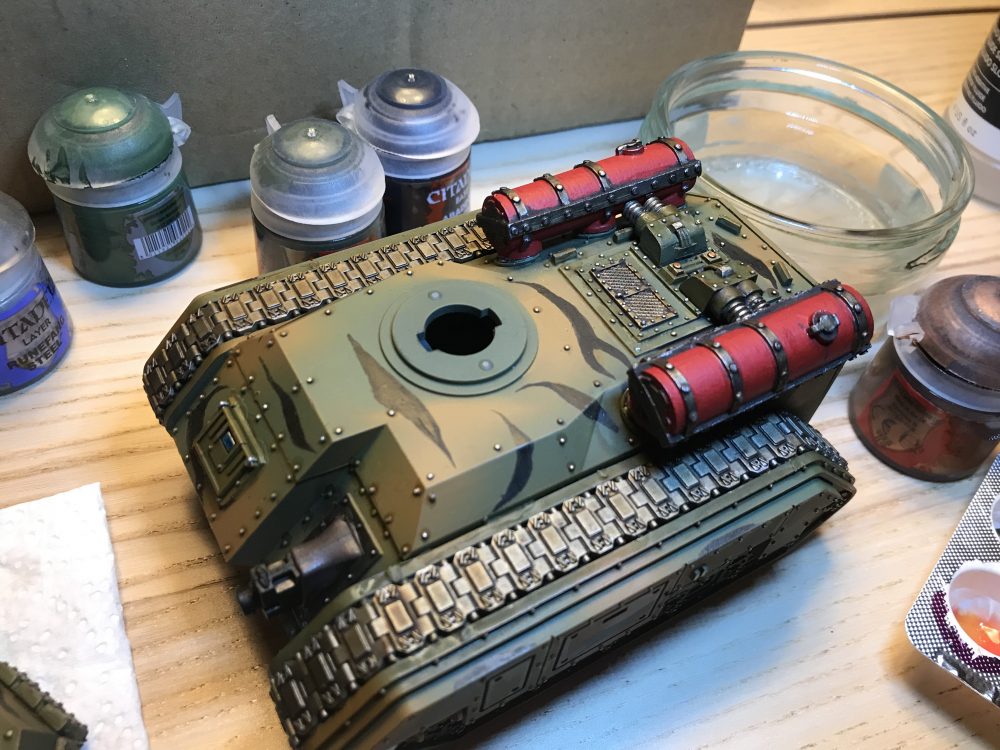
Once the camo was done I moved onto the metal work on the Hellhound. For this, I used Leadbelcher and then Runefang Steel. Some metal parts I did in Brass Scorpion, just for a change. I made it up as I went along but made all the three same when it came to these details.
Chipping
My chipping effect is very rudimentary. It’s just Runefang Steel and Leadbelcher on a sponge. It’s then lightly applied to edges and panels.
Sometimes you can get too much on. Which looks weird. Sorting those parts out later with mud helps hide them. You’ll get a little silver showing through the mud – which is actually a pretty nice effect.
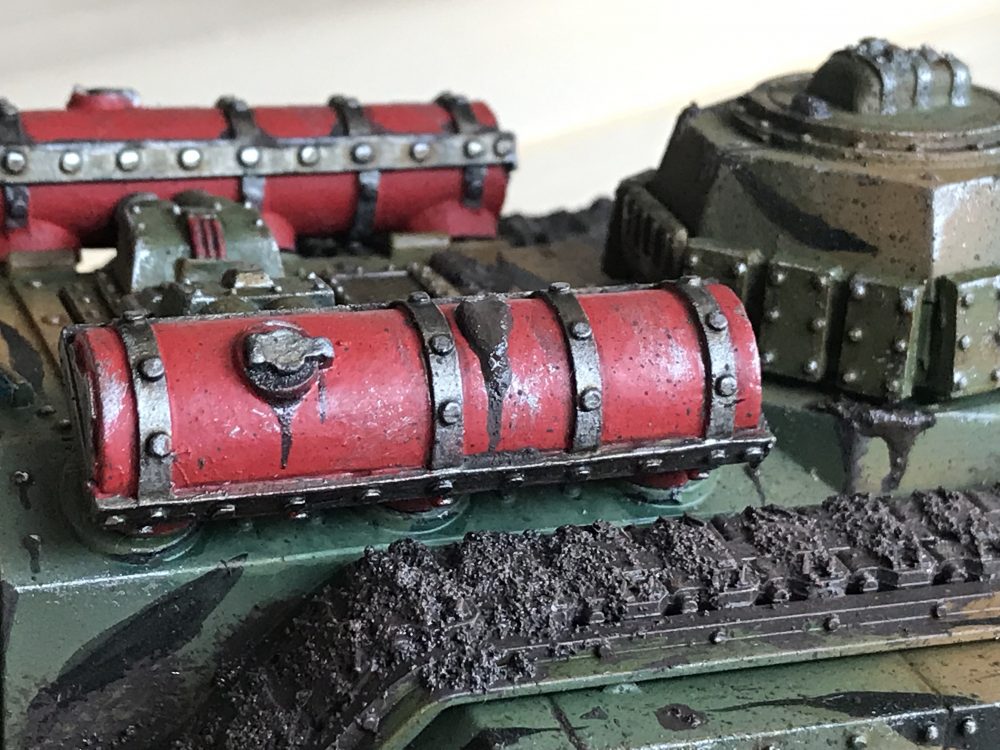
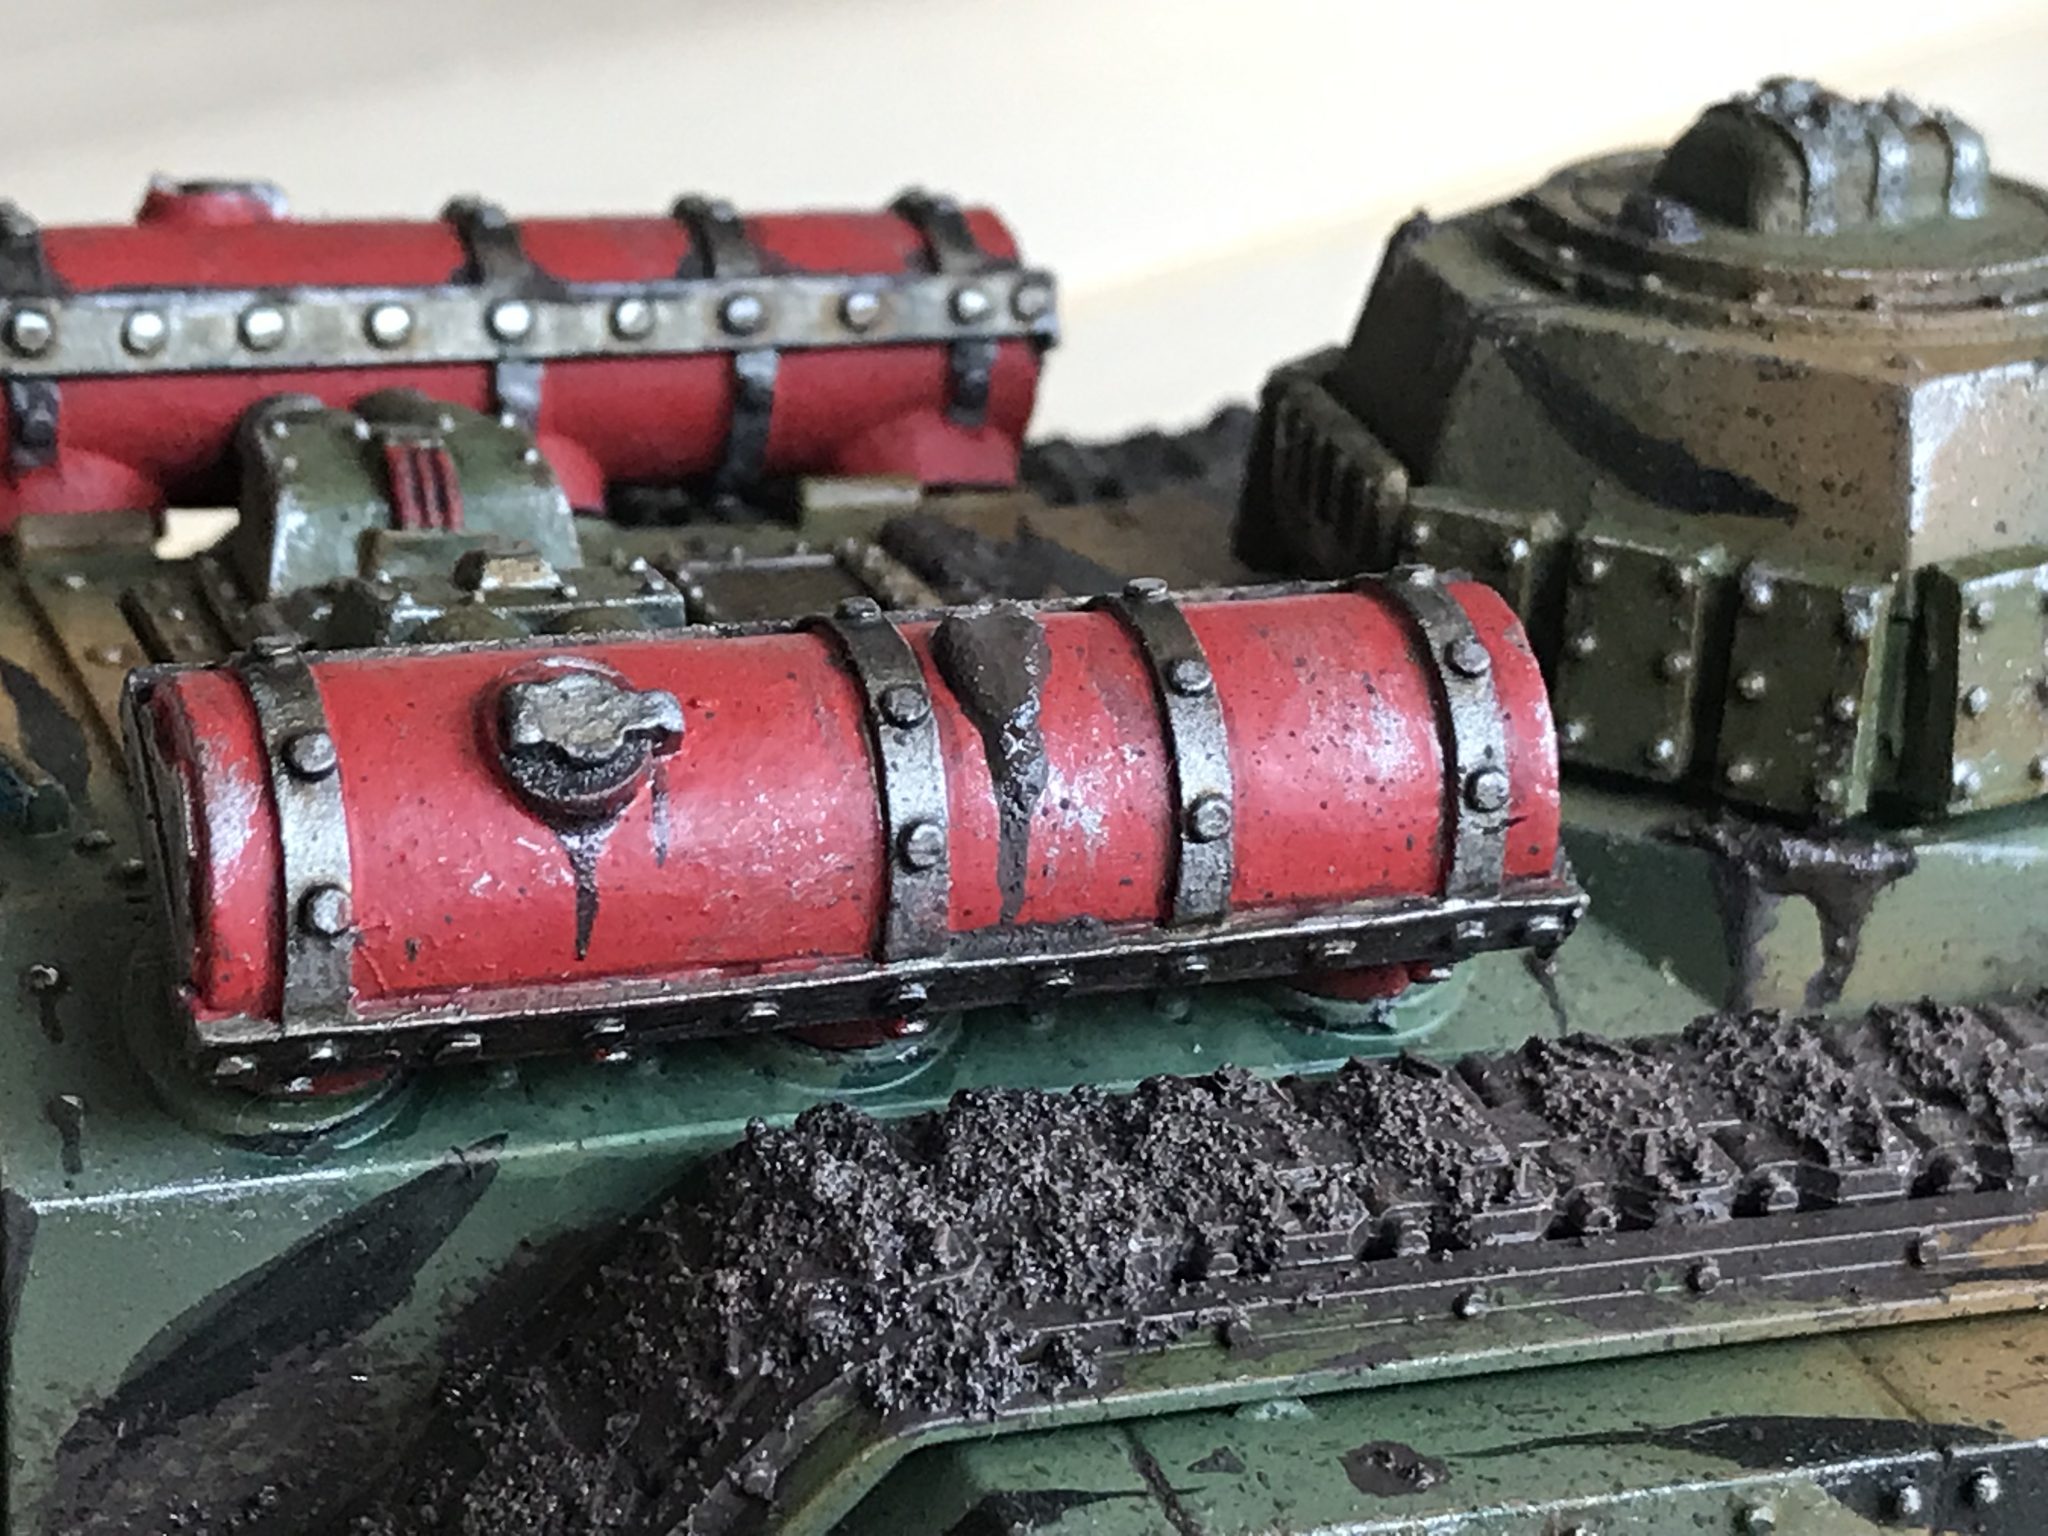
Rivets
I painted every single rivet on each of the Hellhounds using Runefang Steel. I wasn’t sure at the time if this was a good idea. And once I’d started I thought I may as well carry on and make them all the same.
I find that a lot when painting multiples of the same model. It happens a lot for us Guard players. You do one thing to the first batch of models, and then have to carry on that process to every single other model. To ensure they are all the same. Maybe it just me?
Many of these rivets ended up being covered in thick mud, mud splatter, Typhus Corrosion or all three. So it seemed like lost time. But for those few rivets that are not completely covered there is still a glimmer of metal. The lightness of the silver shows through some of the mud and this looks decent.
The slight glimmer would be hard to add later, over the detritus added to the chassis.
-
- Rivets

-
- Rivets

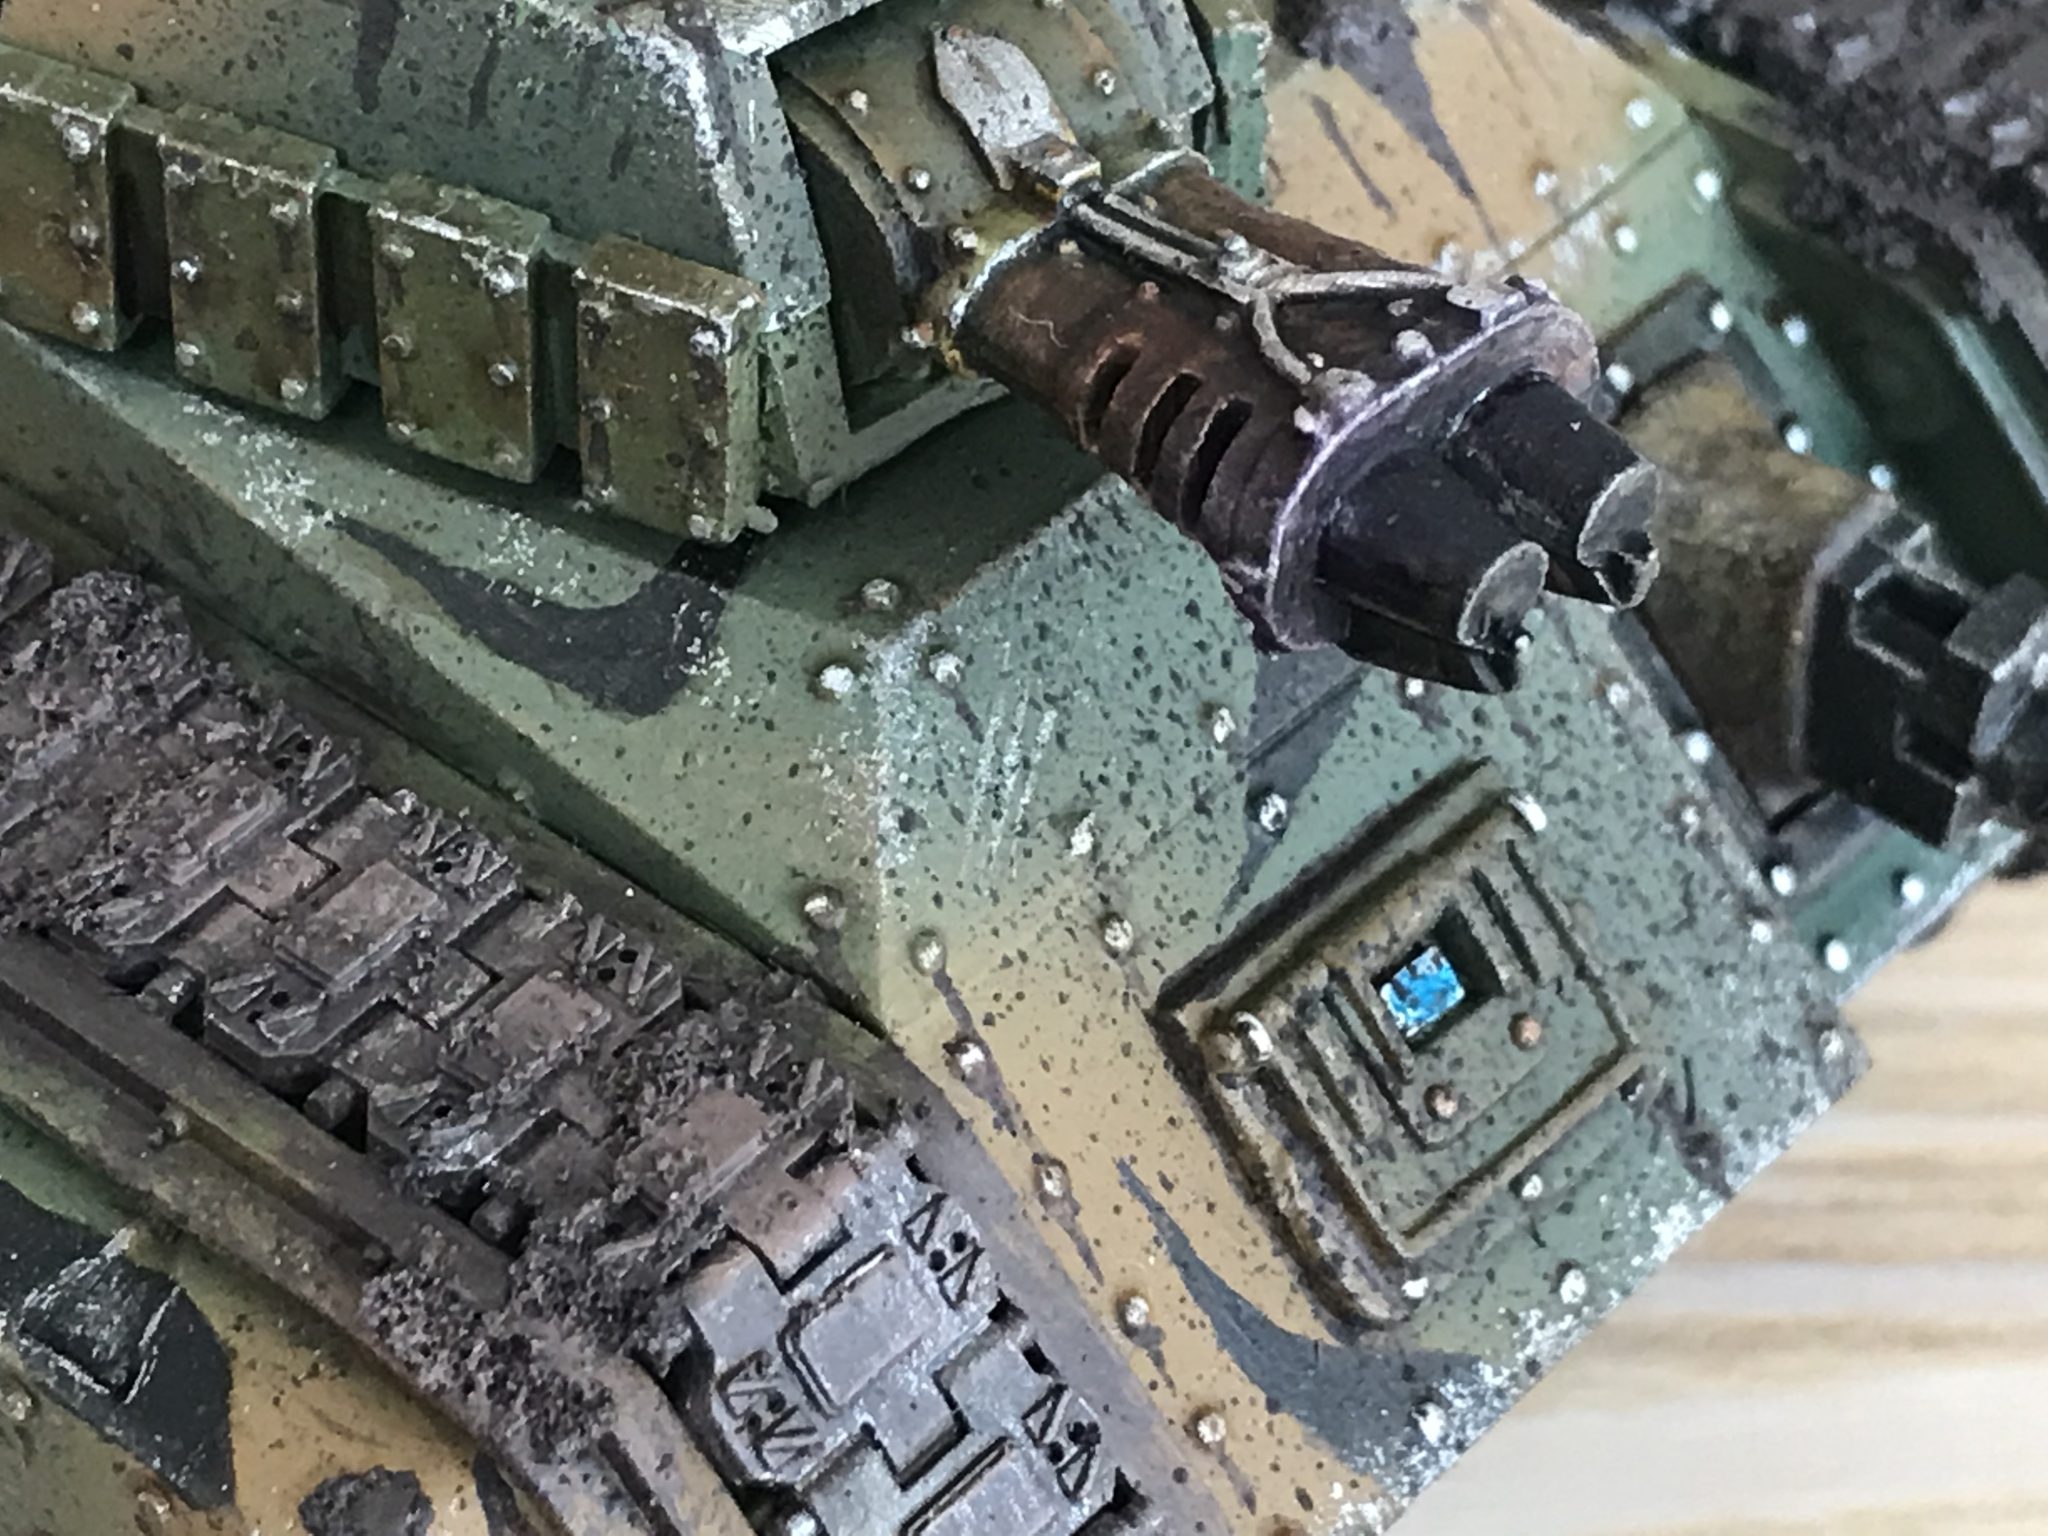
Vision Ports
The vision ports I did by painting them Runefang Steel and then the blue technical paint (Soulstone Blue) from Games Workshop that’s for gems and vision ports.
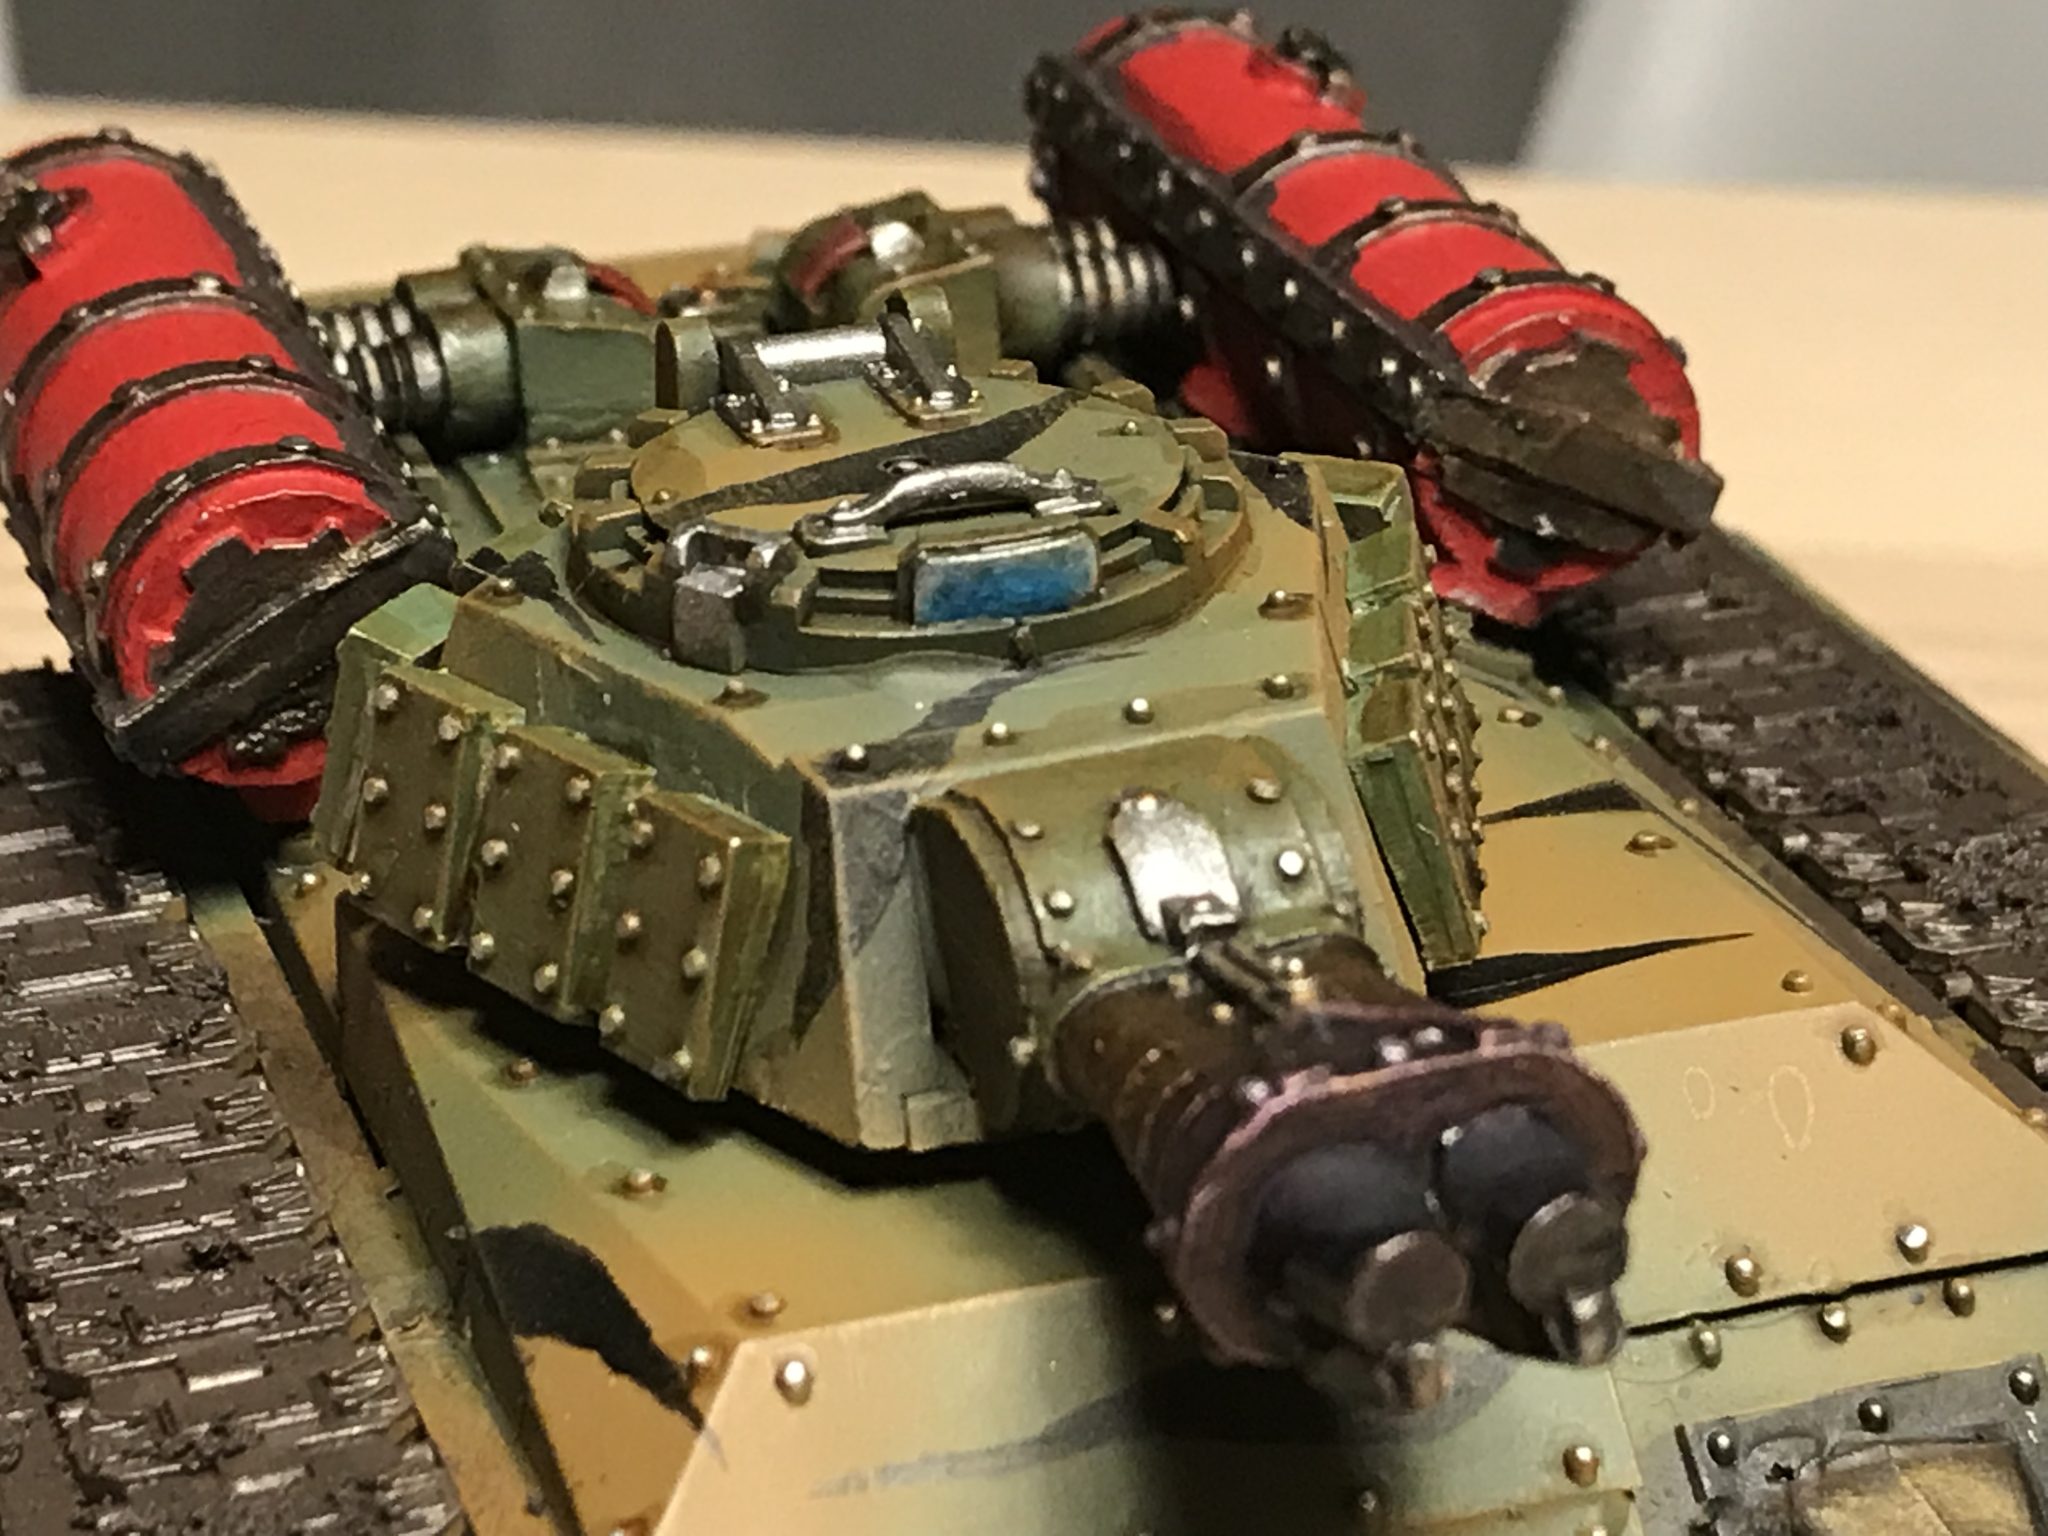
Vision Port
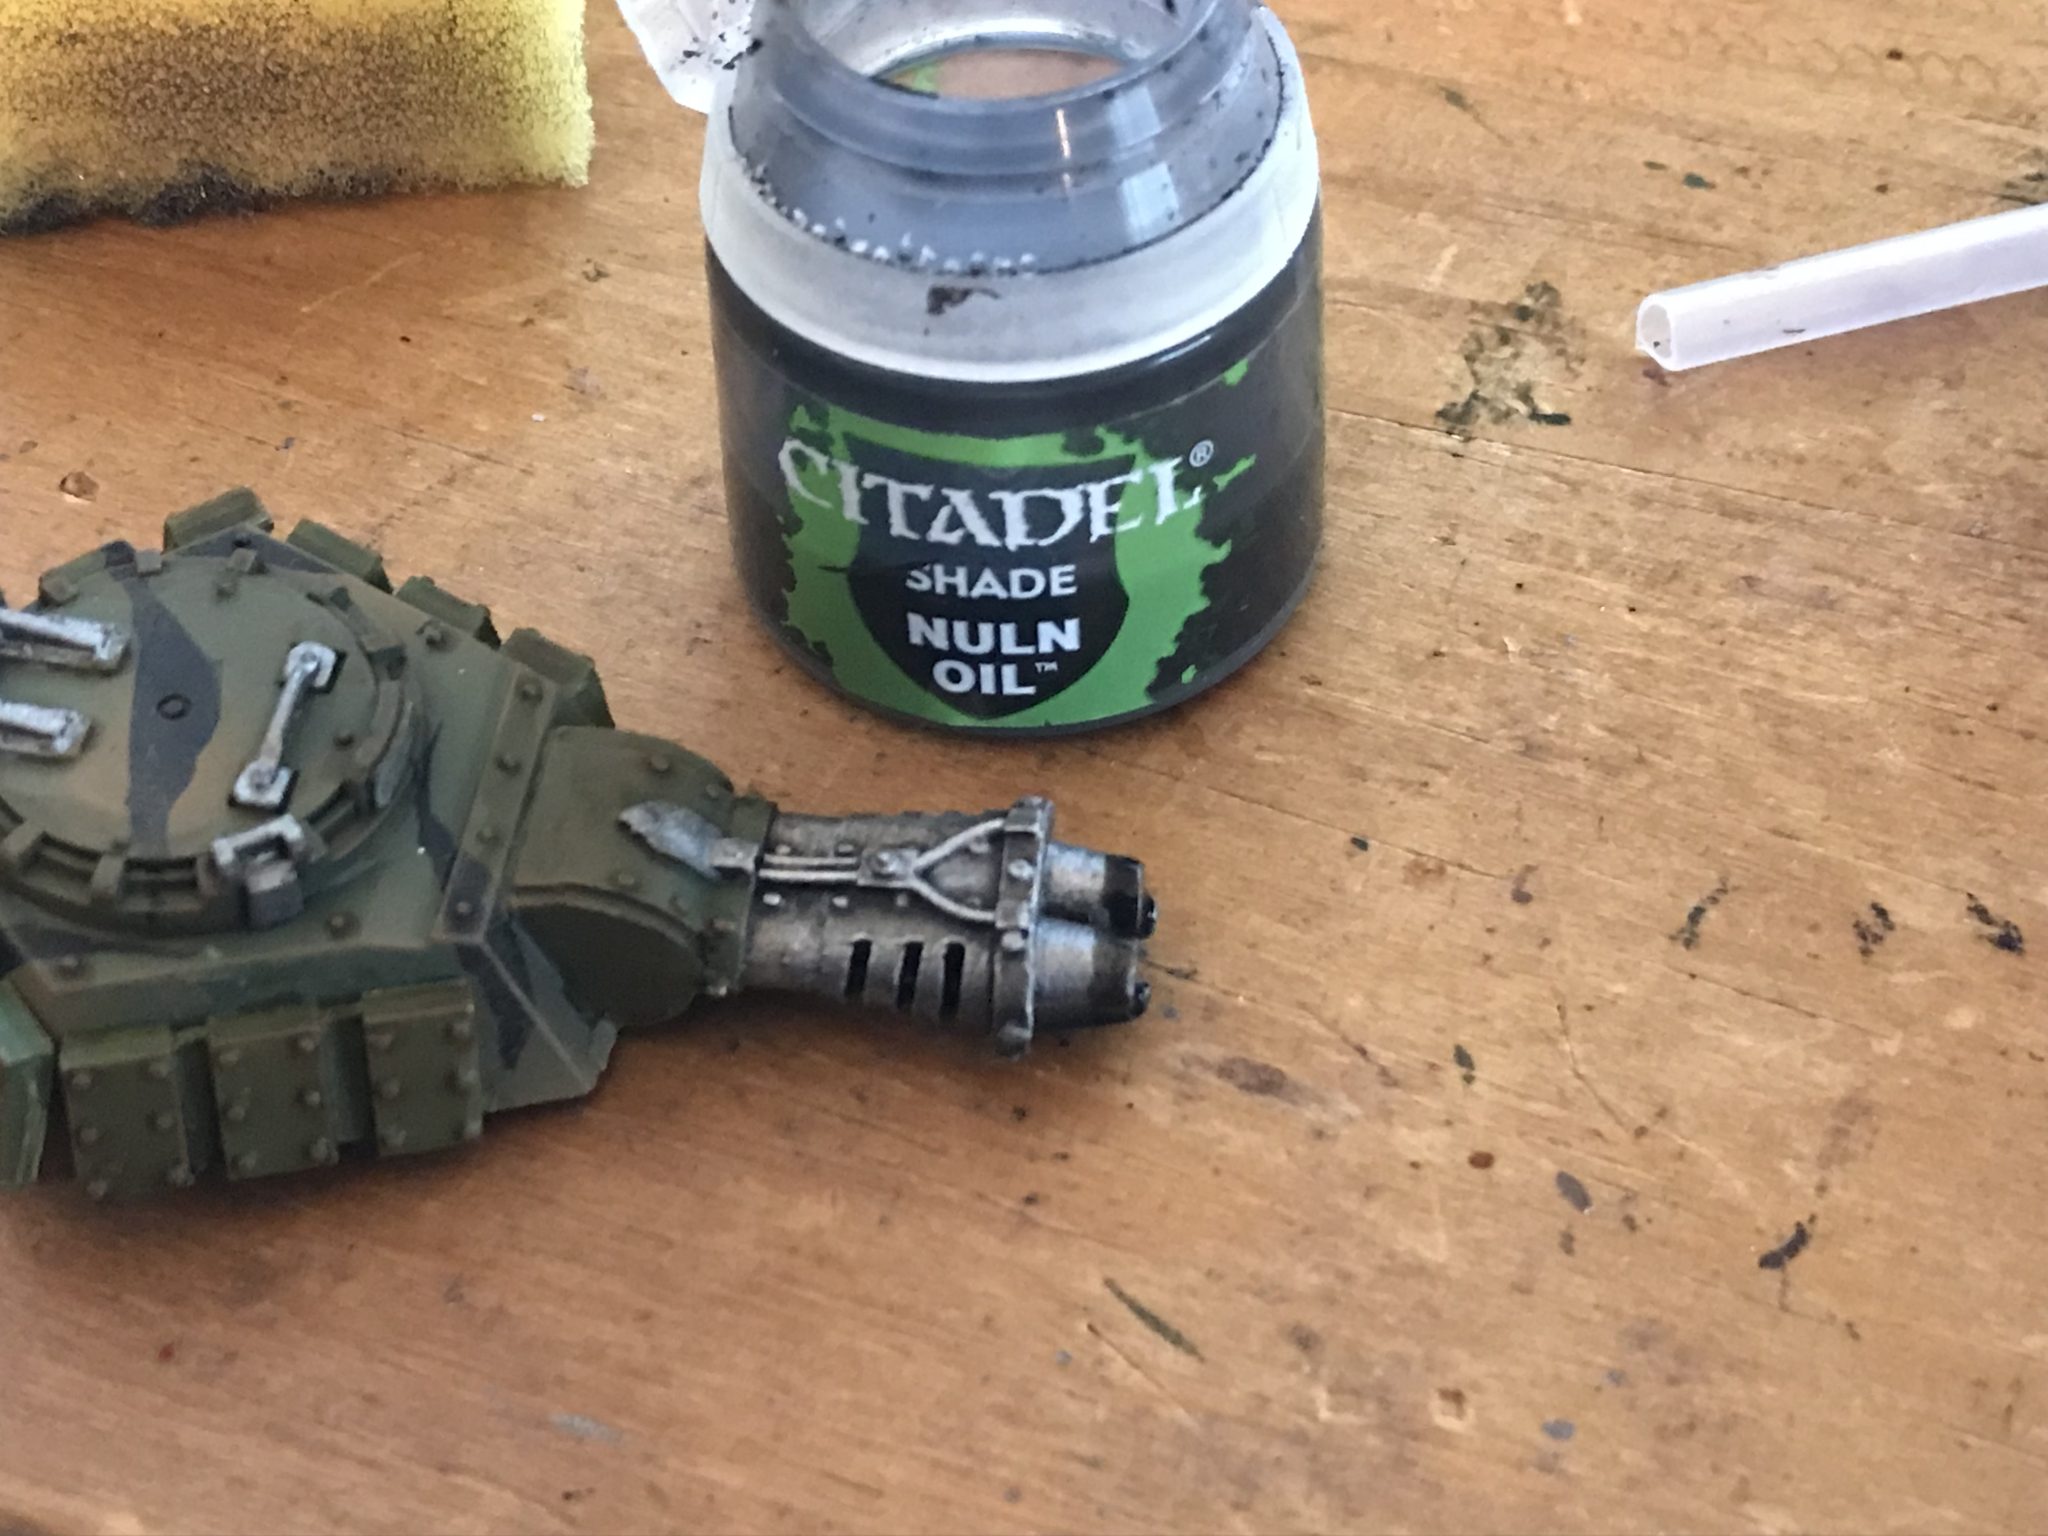
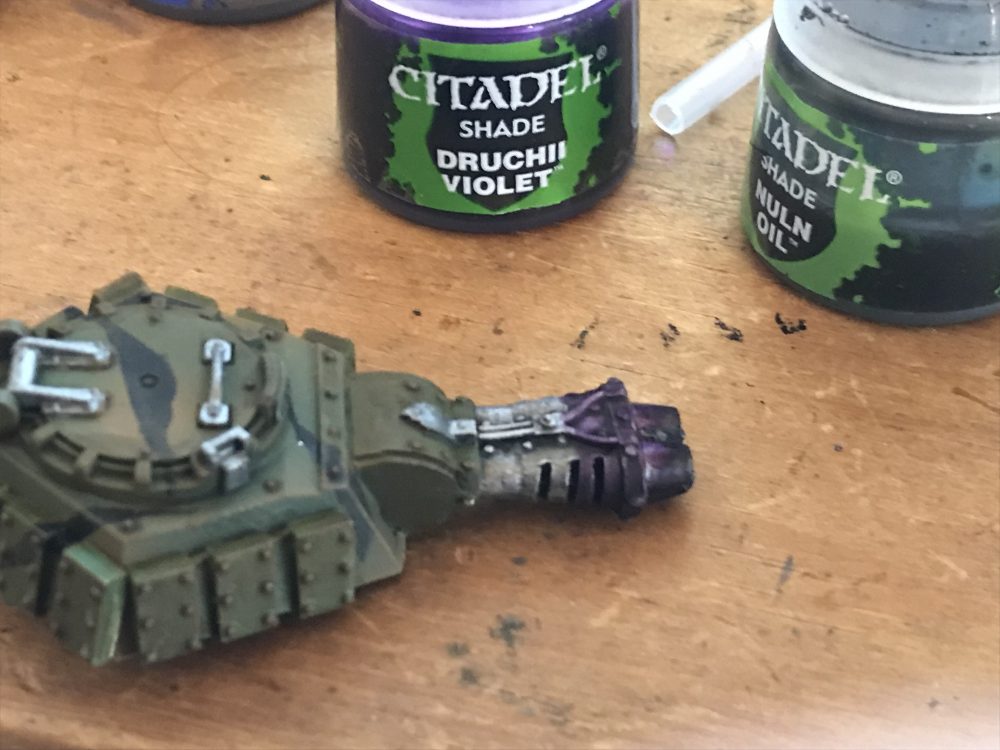
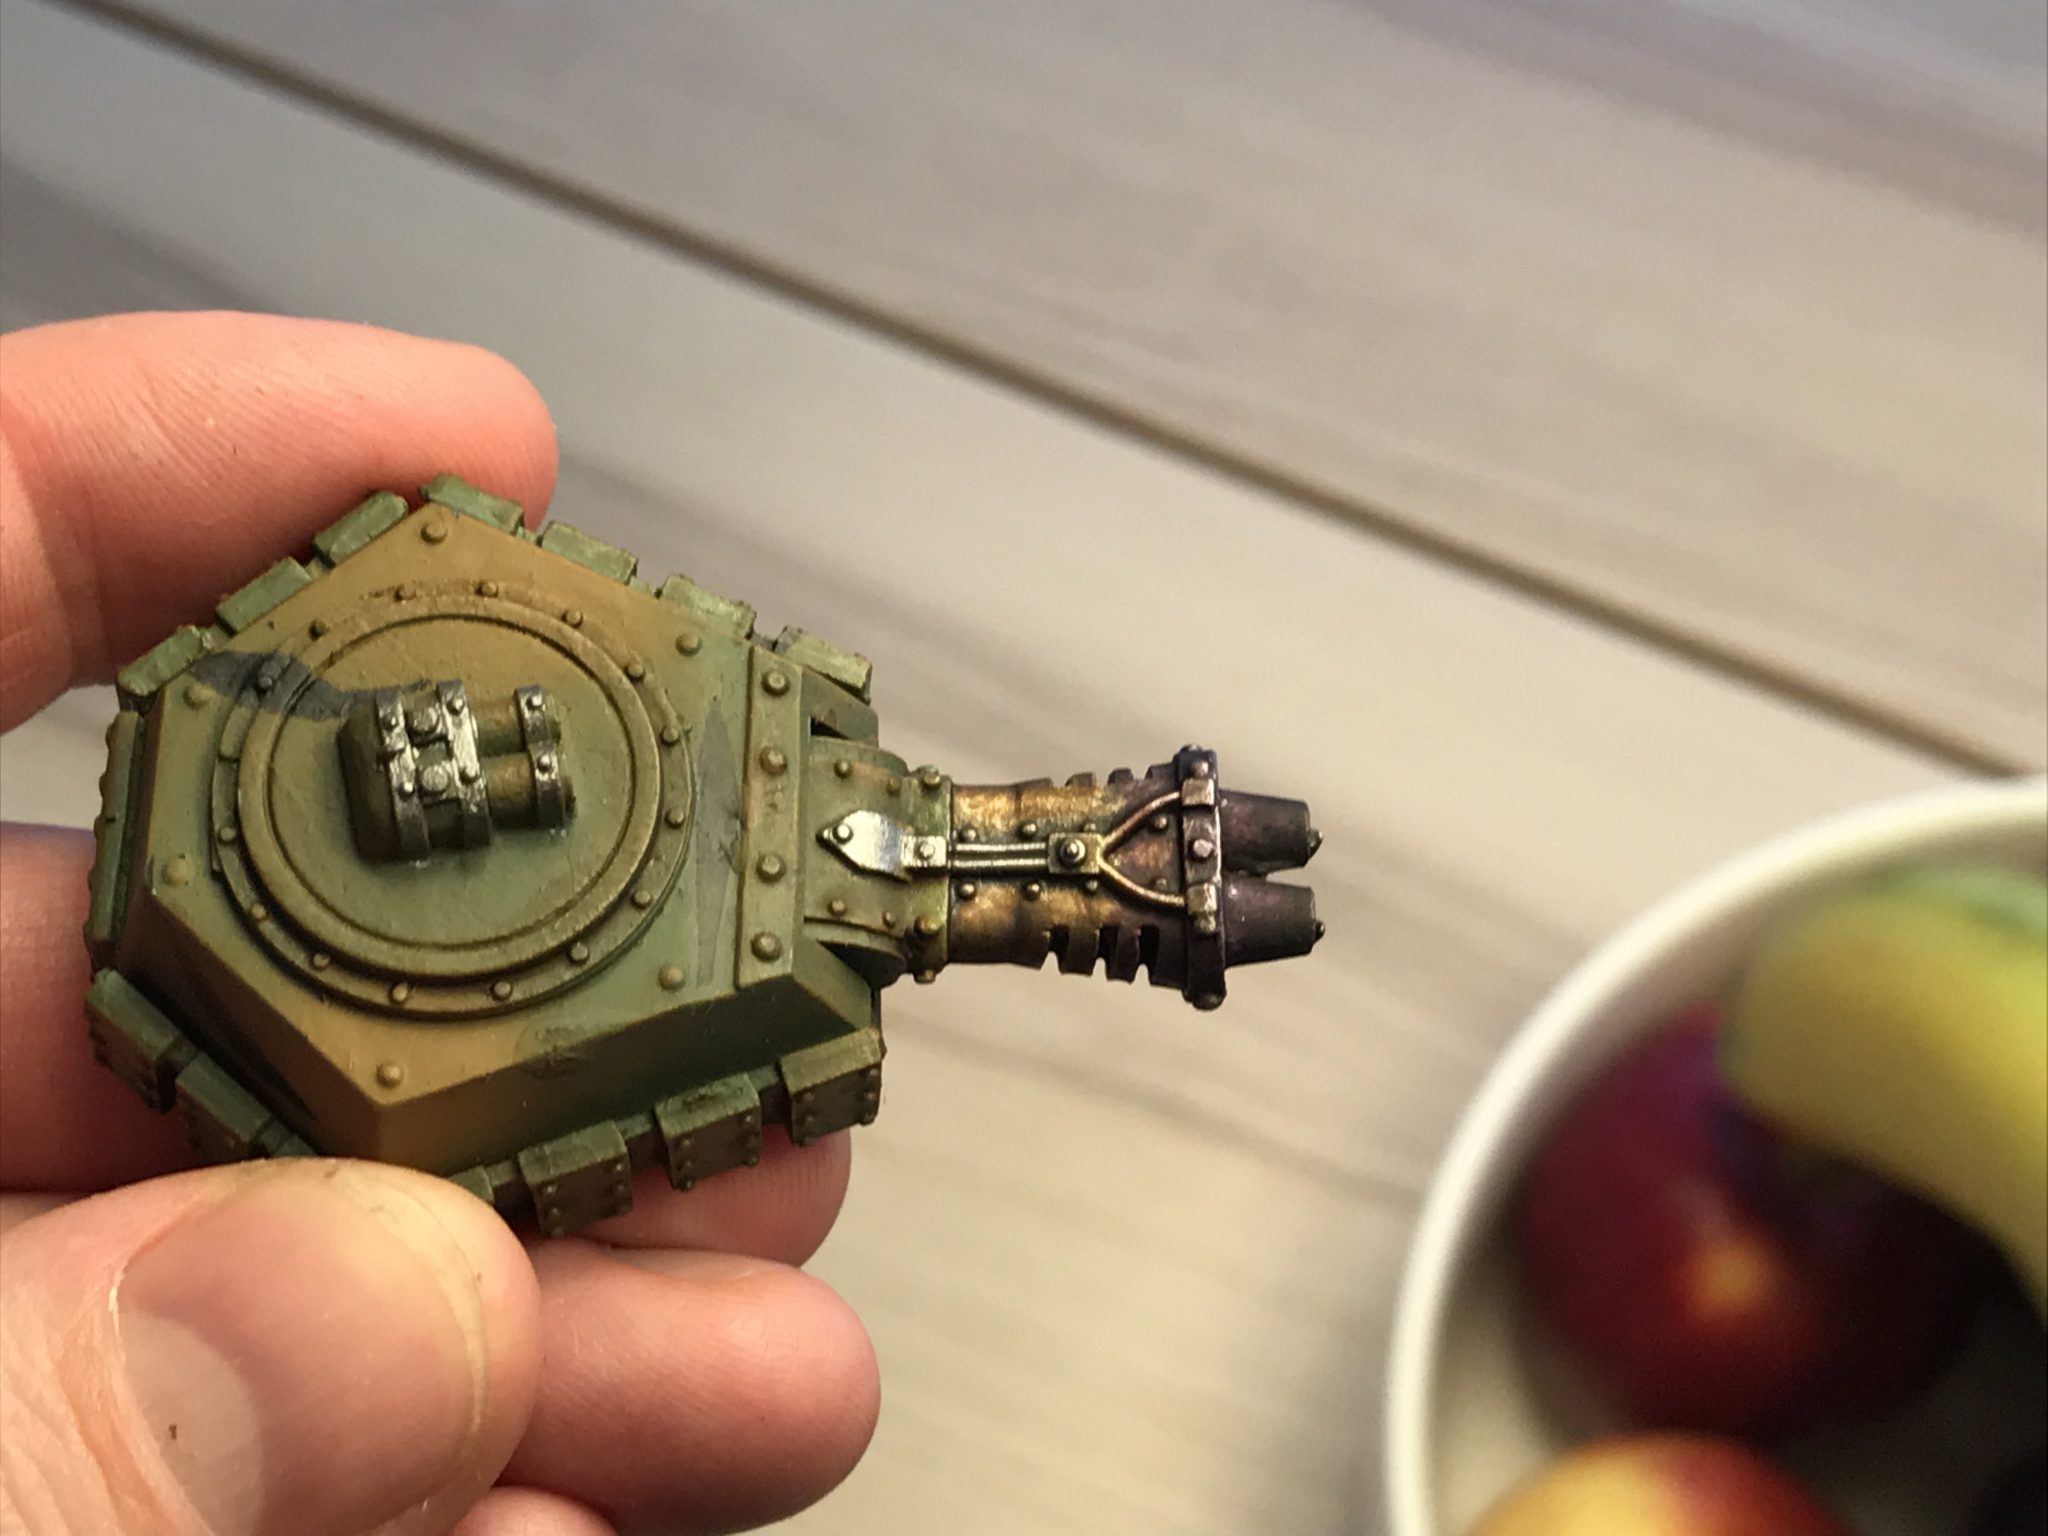
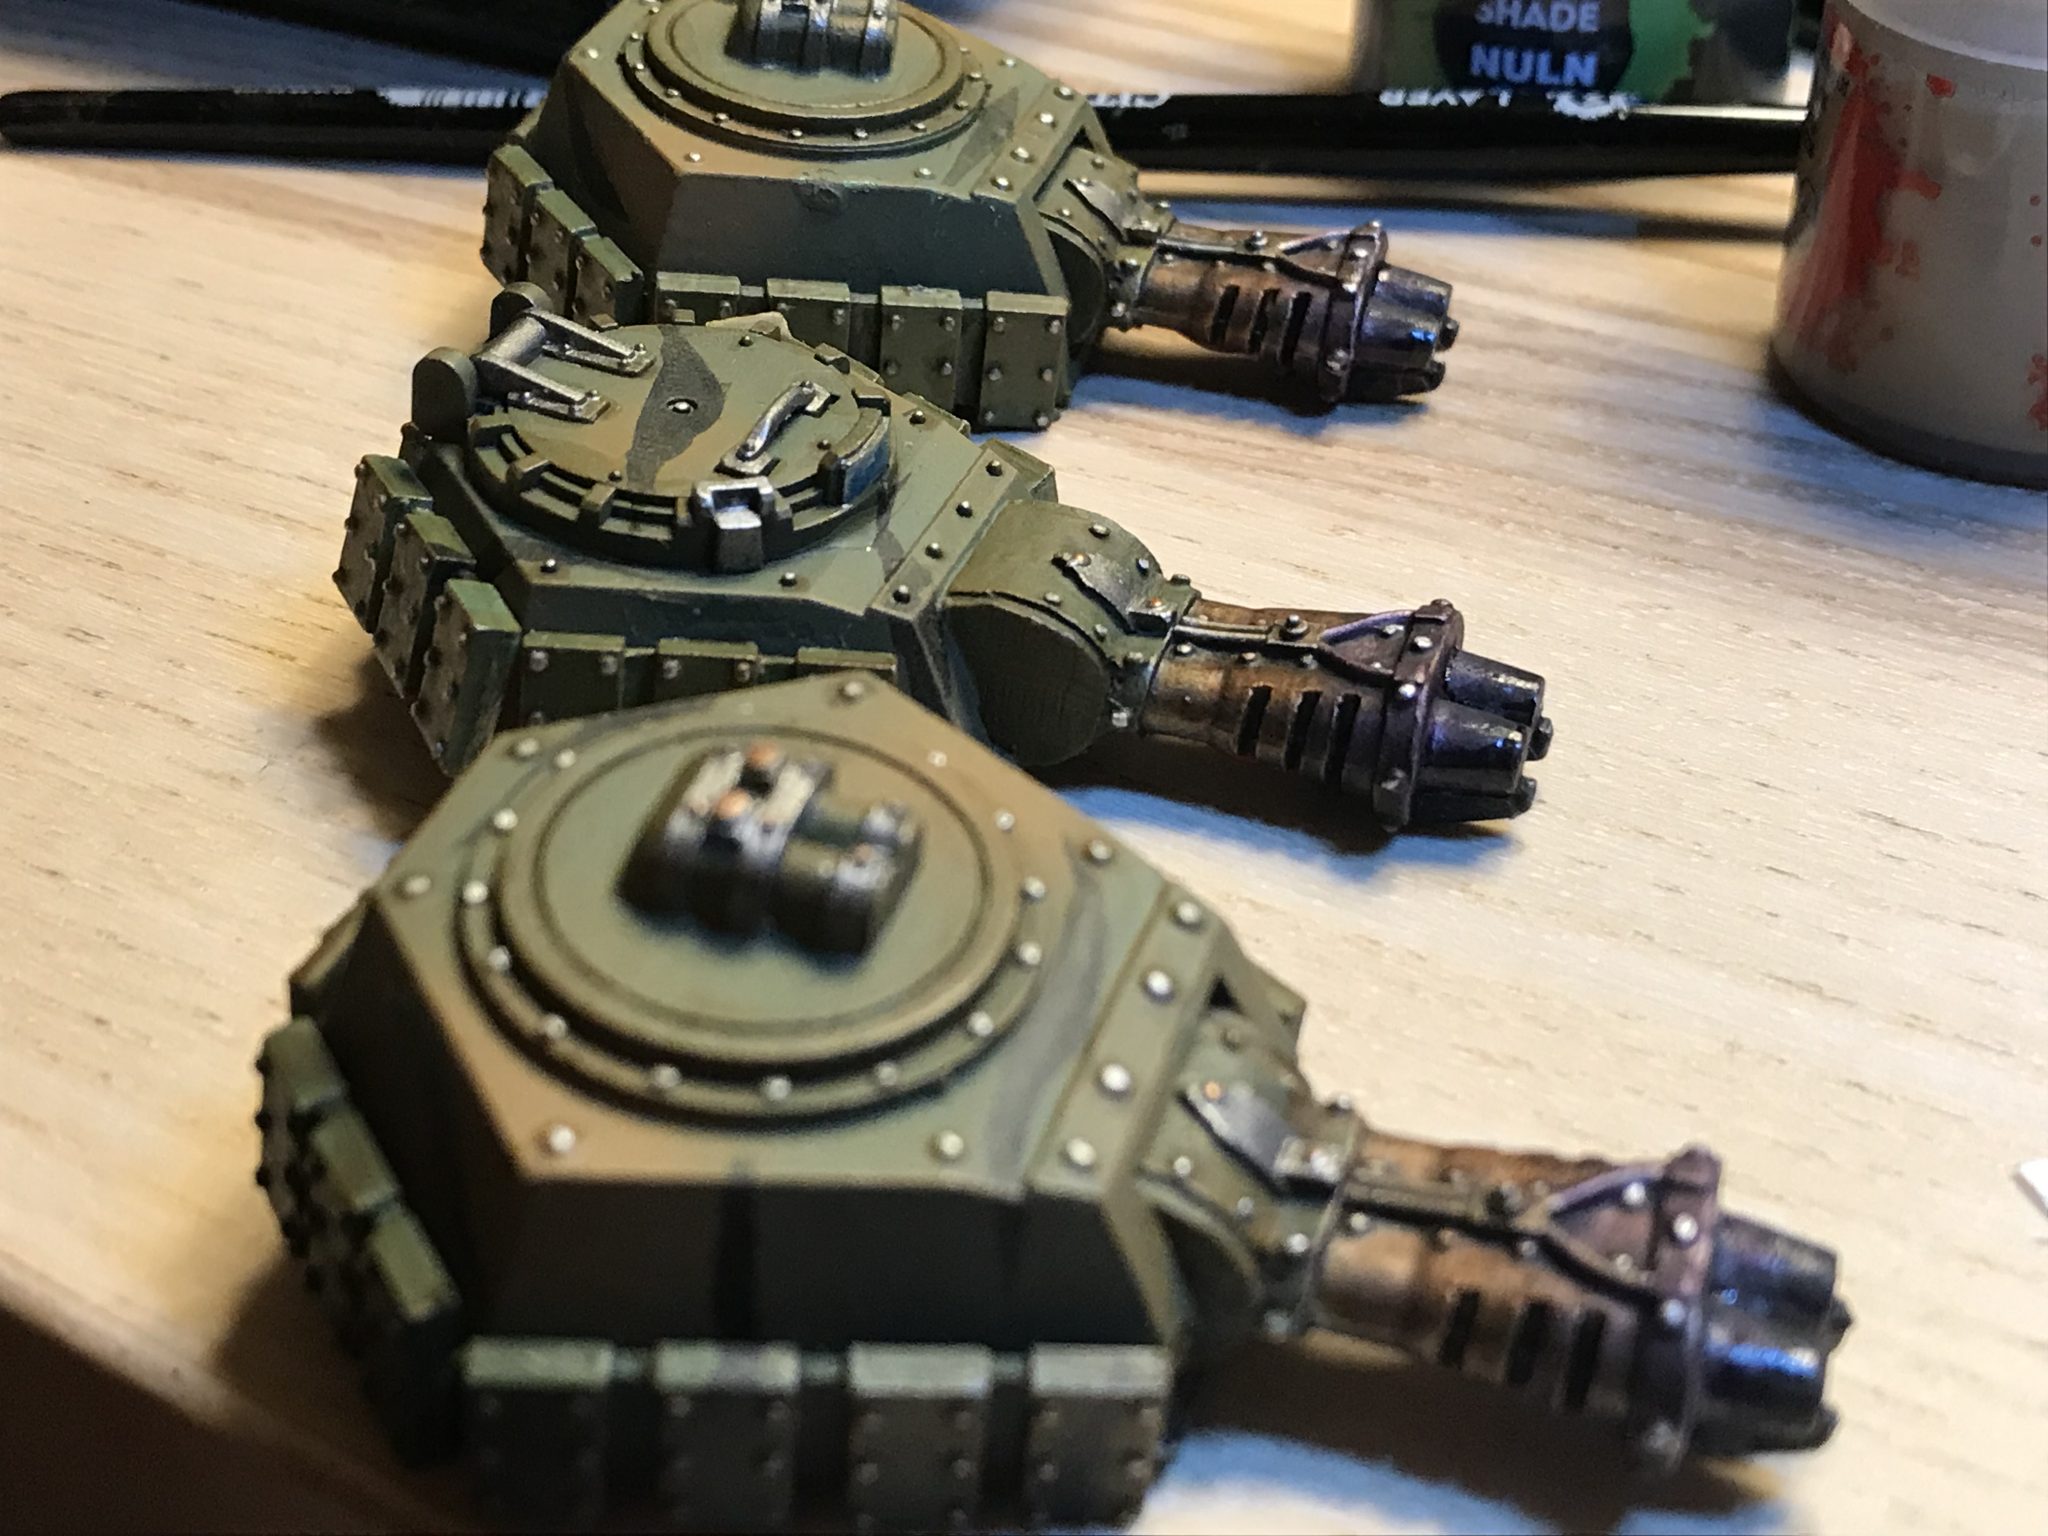
Burnt Metal Flamer – Painting Hellhounds
This was a first for me, and I’m really happy with how the turrets turned out. Especially since I just made it up as I went along using the washes I had to hand.
The Flamers started off black, then Leadbelcher, then Nuln Oil and finally dry brushed Runefang Steel.
I then set about using the following washes to try and achieve a burnt metal look. And for the most part, I think it’s worked pretty well.
- Casandora Yellow (yellow)
- Druchii Violet (purple)
- Nuln Oil (black)
- Carroburg Crimson (red)
- Seraphim Sepia (dirty yellow)
-
- Start

-
- Dry brushed silver

-

- Nuln oil on tip
-
- Purple started

-

- Yellow started
-

- Heat burn
Done! Painting Catachan Hellhounds
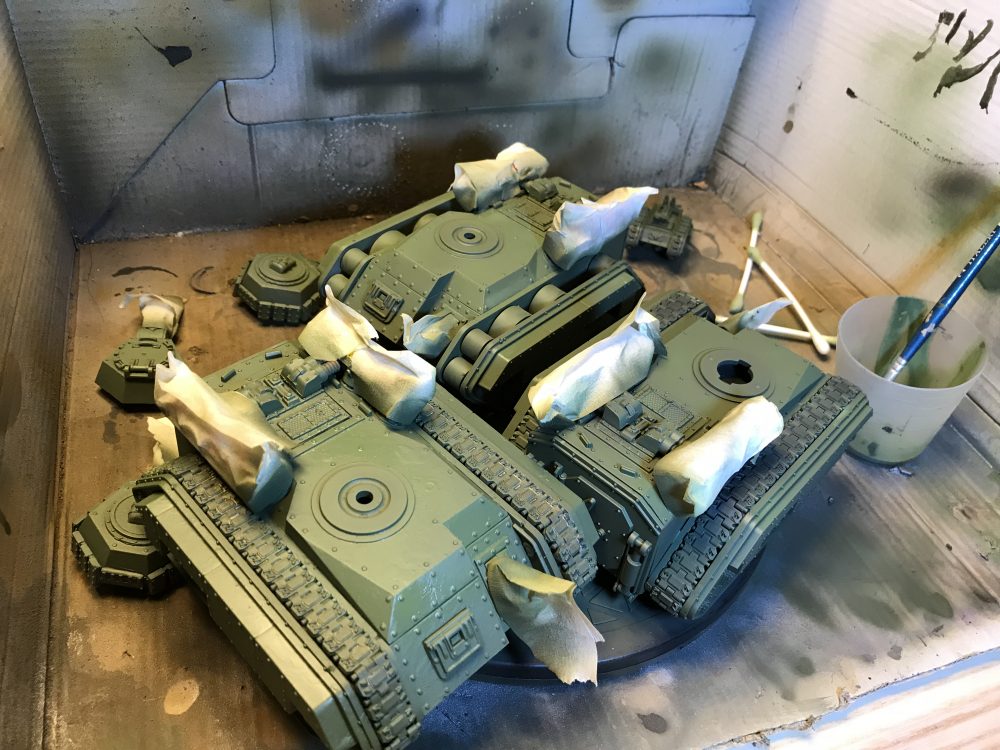
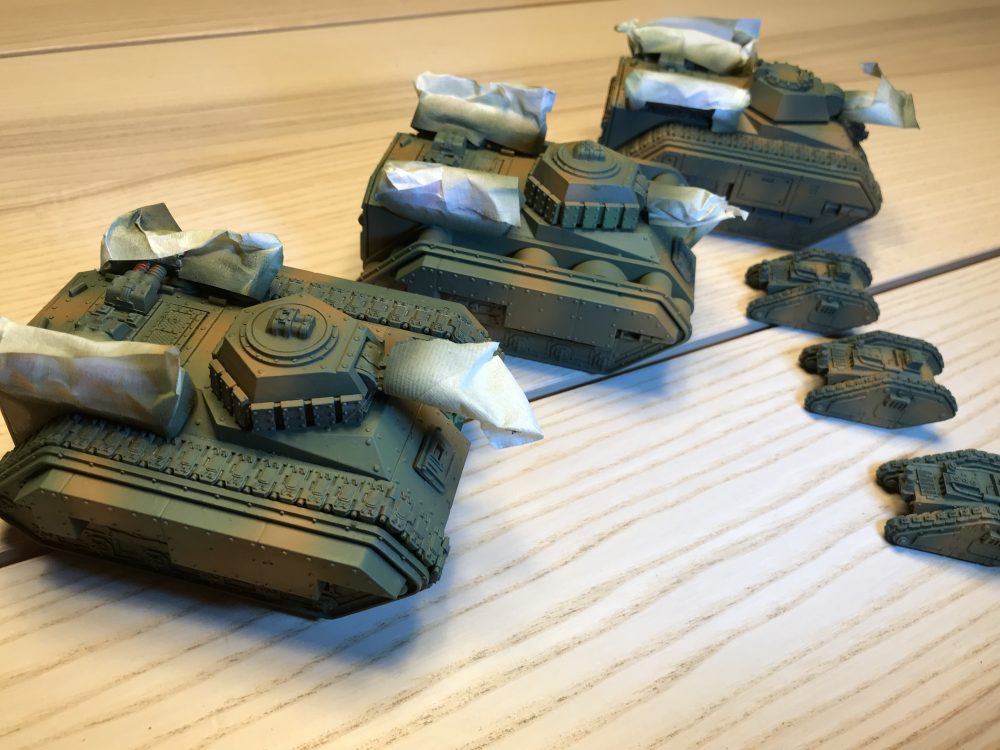
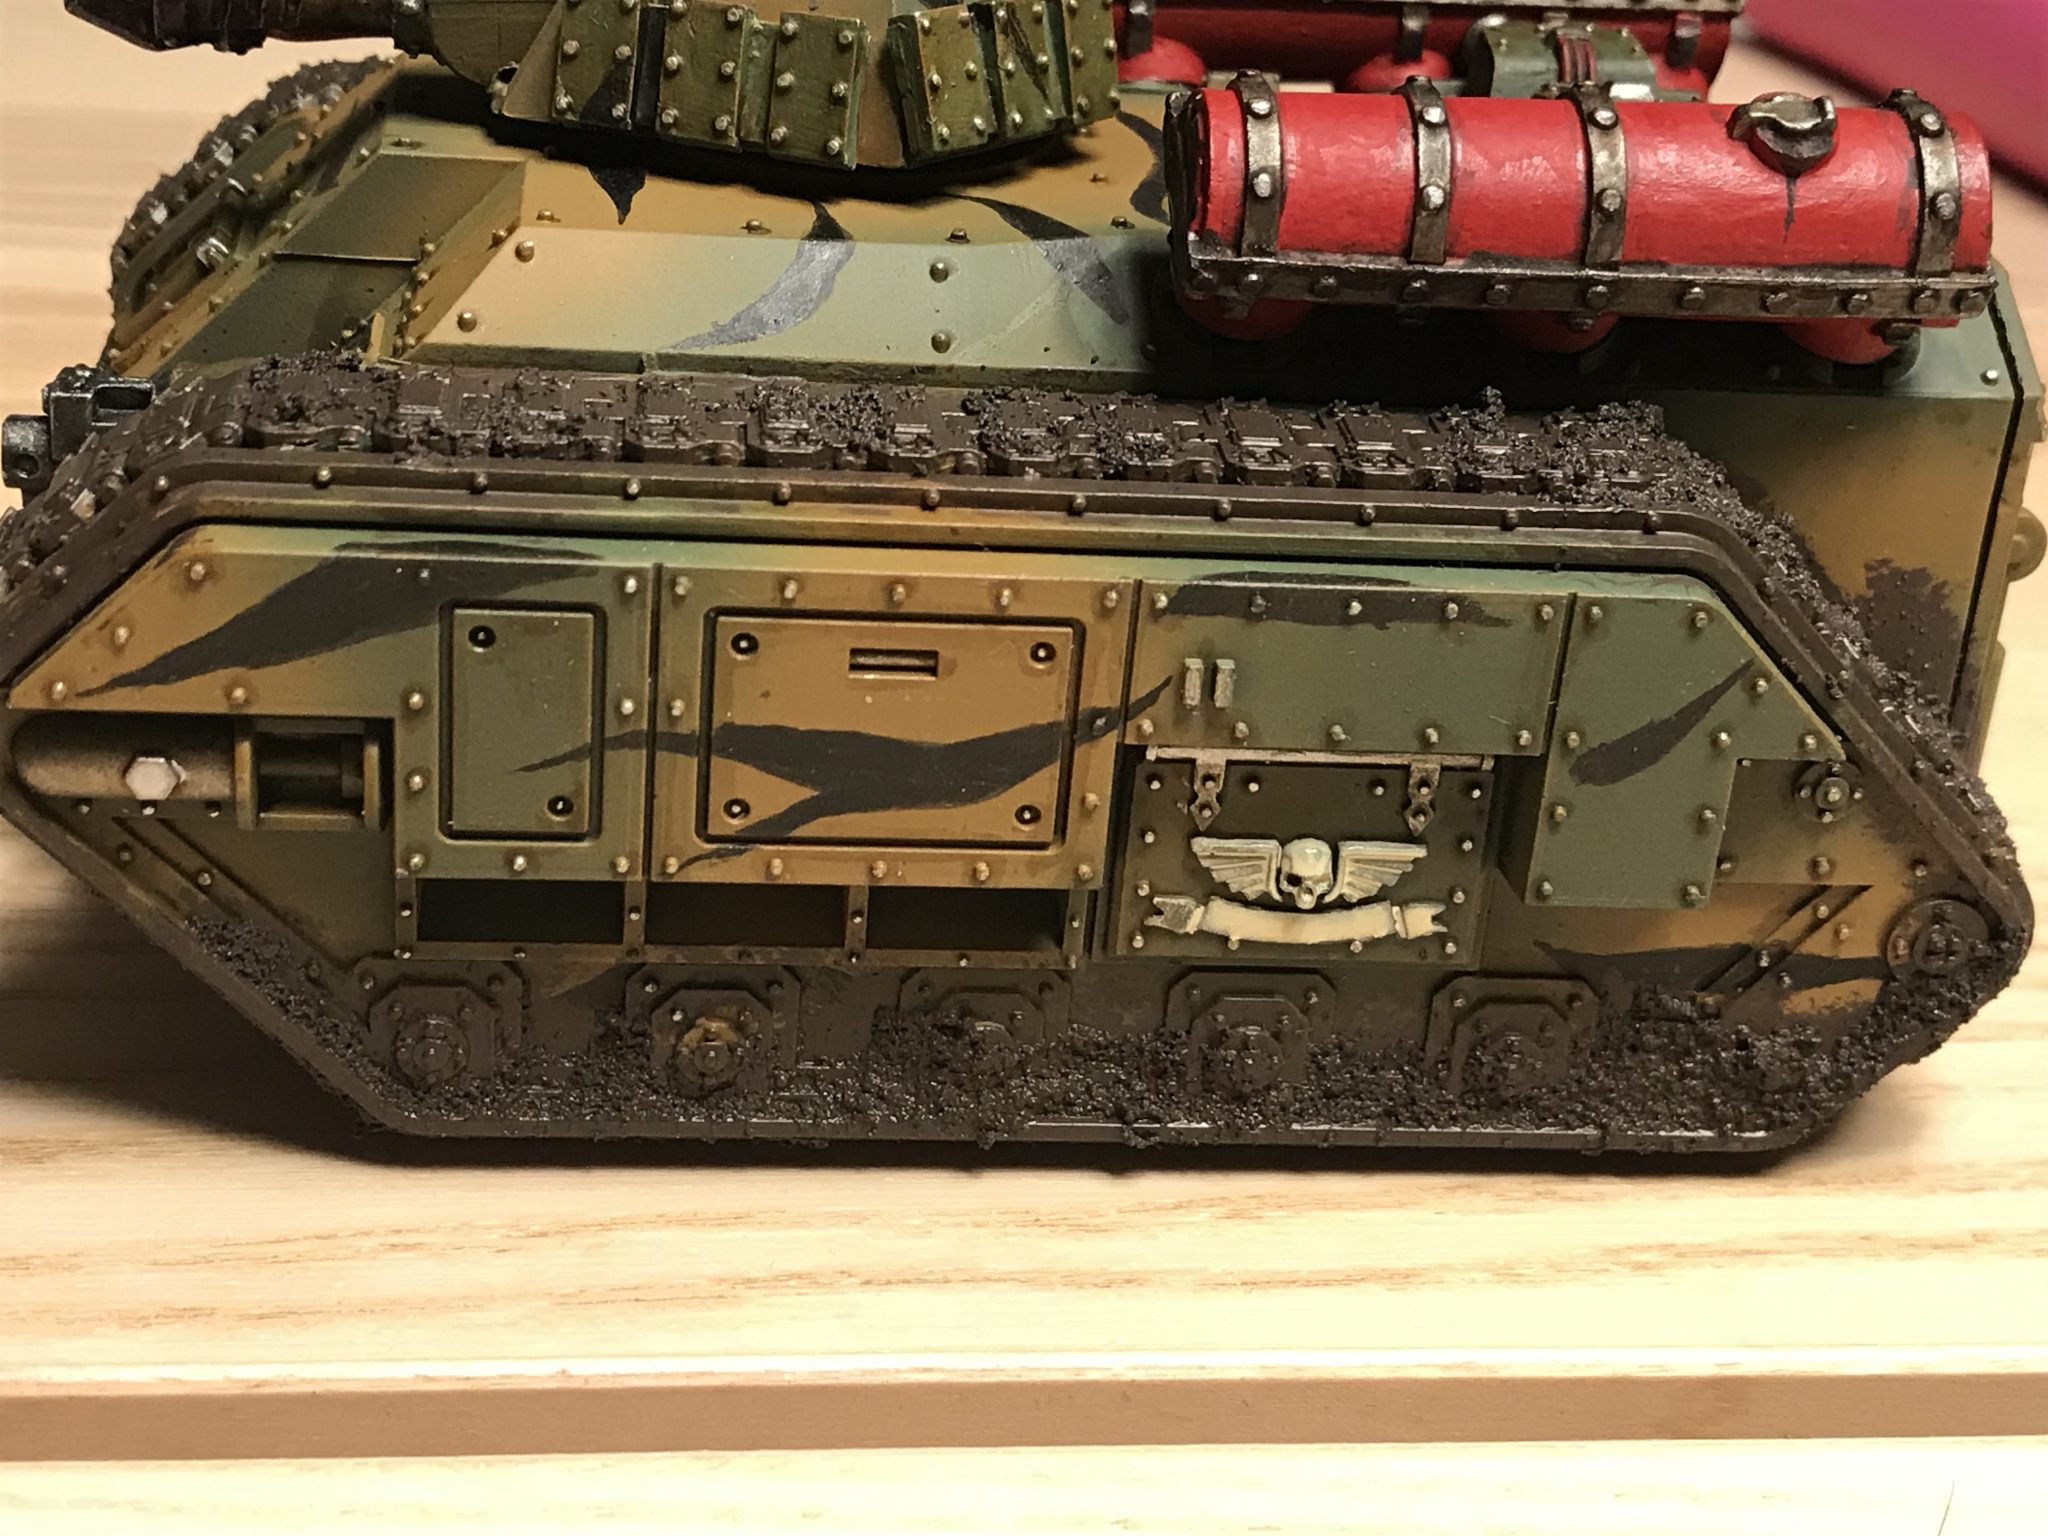
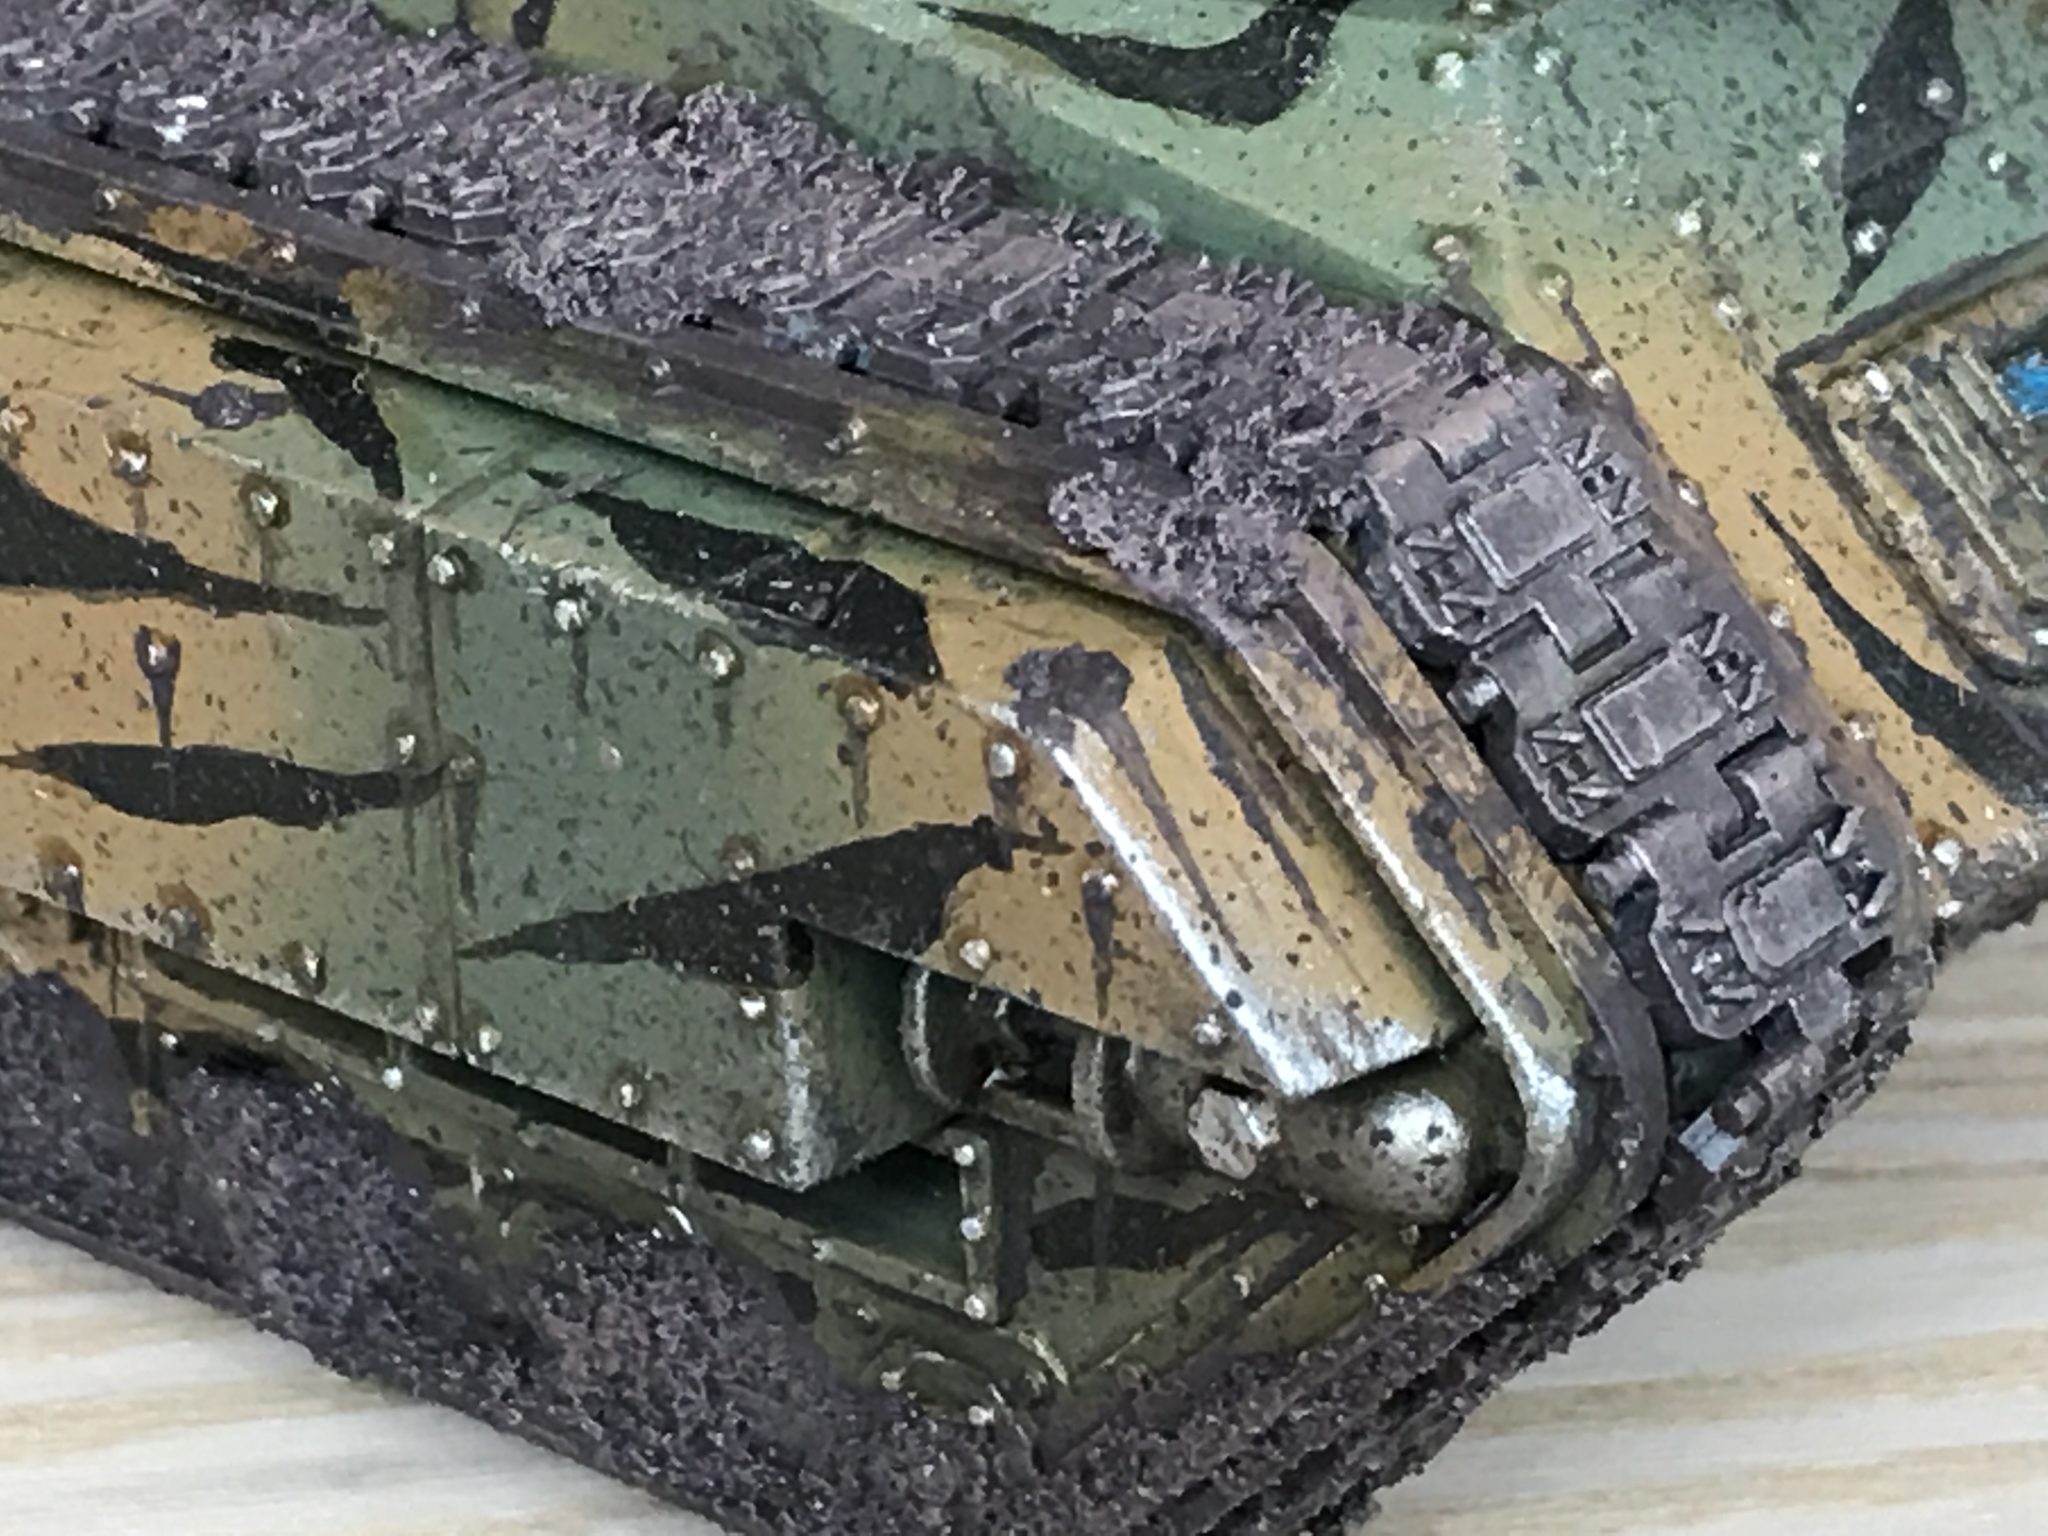
Mud – Painting Hellhounds
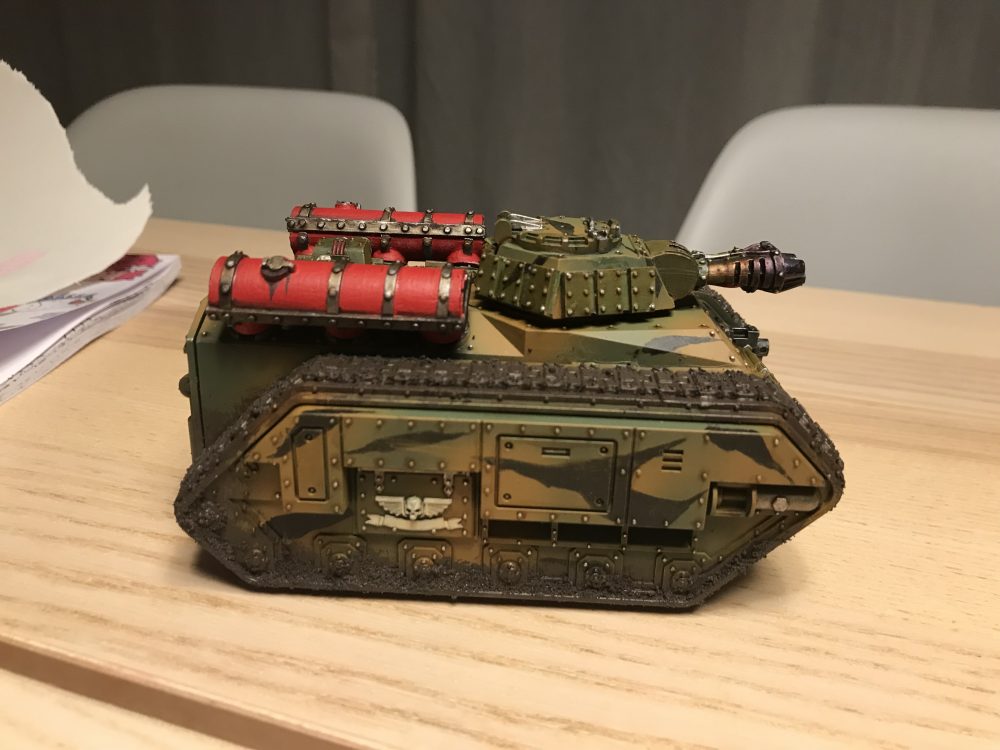
Another first for me. My Cadian vehicles are very clean with almost no damage or weathering. With the Catachan being jungle fighters it made sense to make their vehicles muddy! I also just wanted to, it would also set them apart from my Cadians. And it’s a new skill to learn.
I started by messily placing Stirland Battlemire over the tracks. I placed more of the thick, gritty stuff at the bottom and rear of the tracks. I also smothered it from front to back around all the rivets and raised areas at the bottom of the chassis. To give the impression of mud travelling back down the tracks.
Some mud finally went on the front and rear of the chassis, where the ground would be caught and mud would be flicked up.
A few final globs were added to the top of the vehicle.
-

- Mud started
-
- Mud detail

-
- Overview

Splatter
I then splattered the whole tank with Typhus Corrosion. I used an old toothbrush to do this. Most of the splatter was concentrated around the lower parts of the chassis. As well as the front of the hull and the rear door.
Some were done on top of the chassis and the turret.
Once this was done, everything came together pretty well. This is probably because I’ve gone from having distinct areas of camo vs mud, to having everything a bit muddy from splatter. It all ties together with the splatter in place.
-
- Splatter
-

- Sponge Weathering
-
- Splatter

-

- Splatter
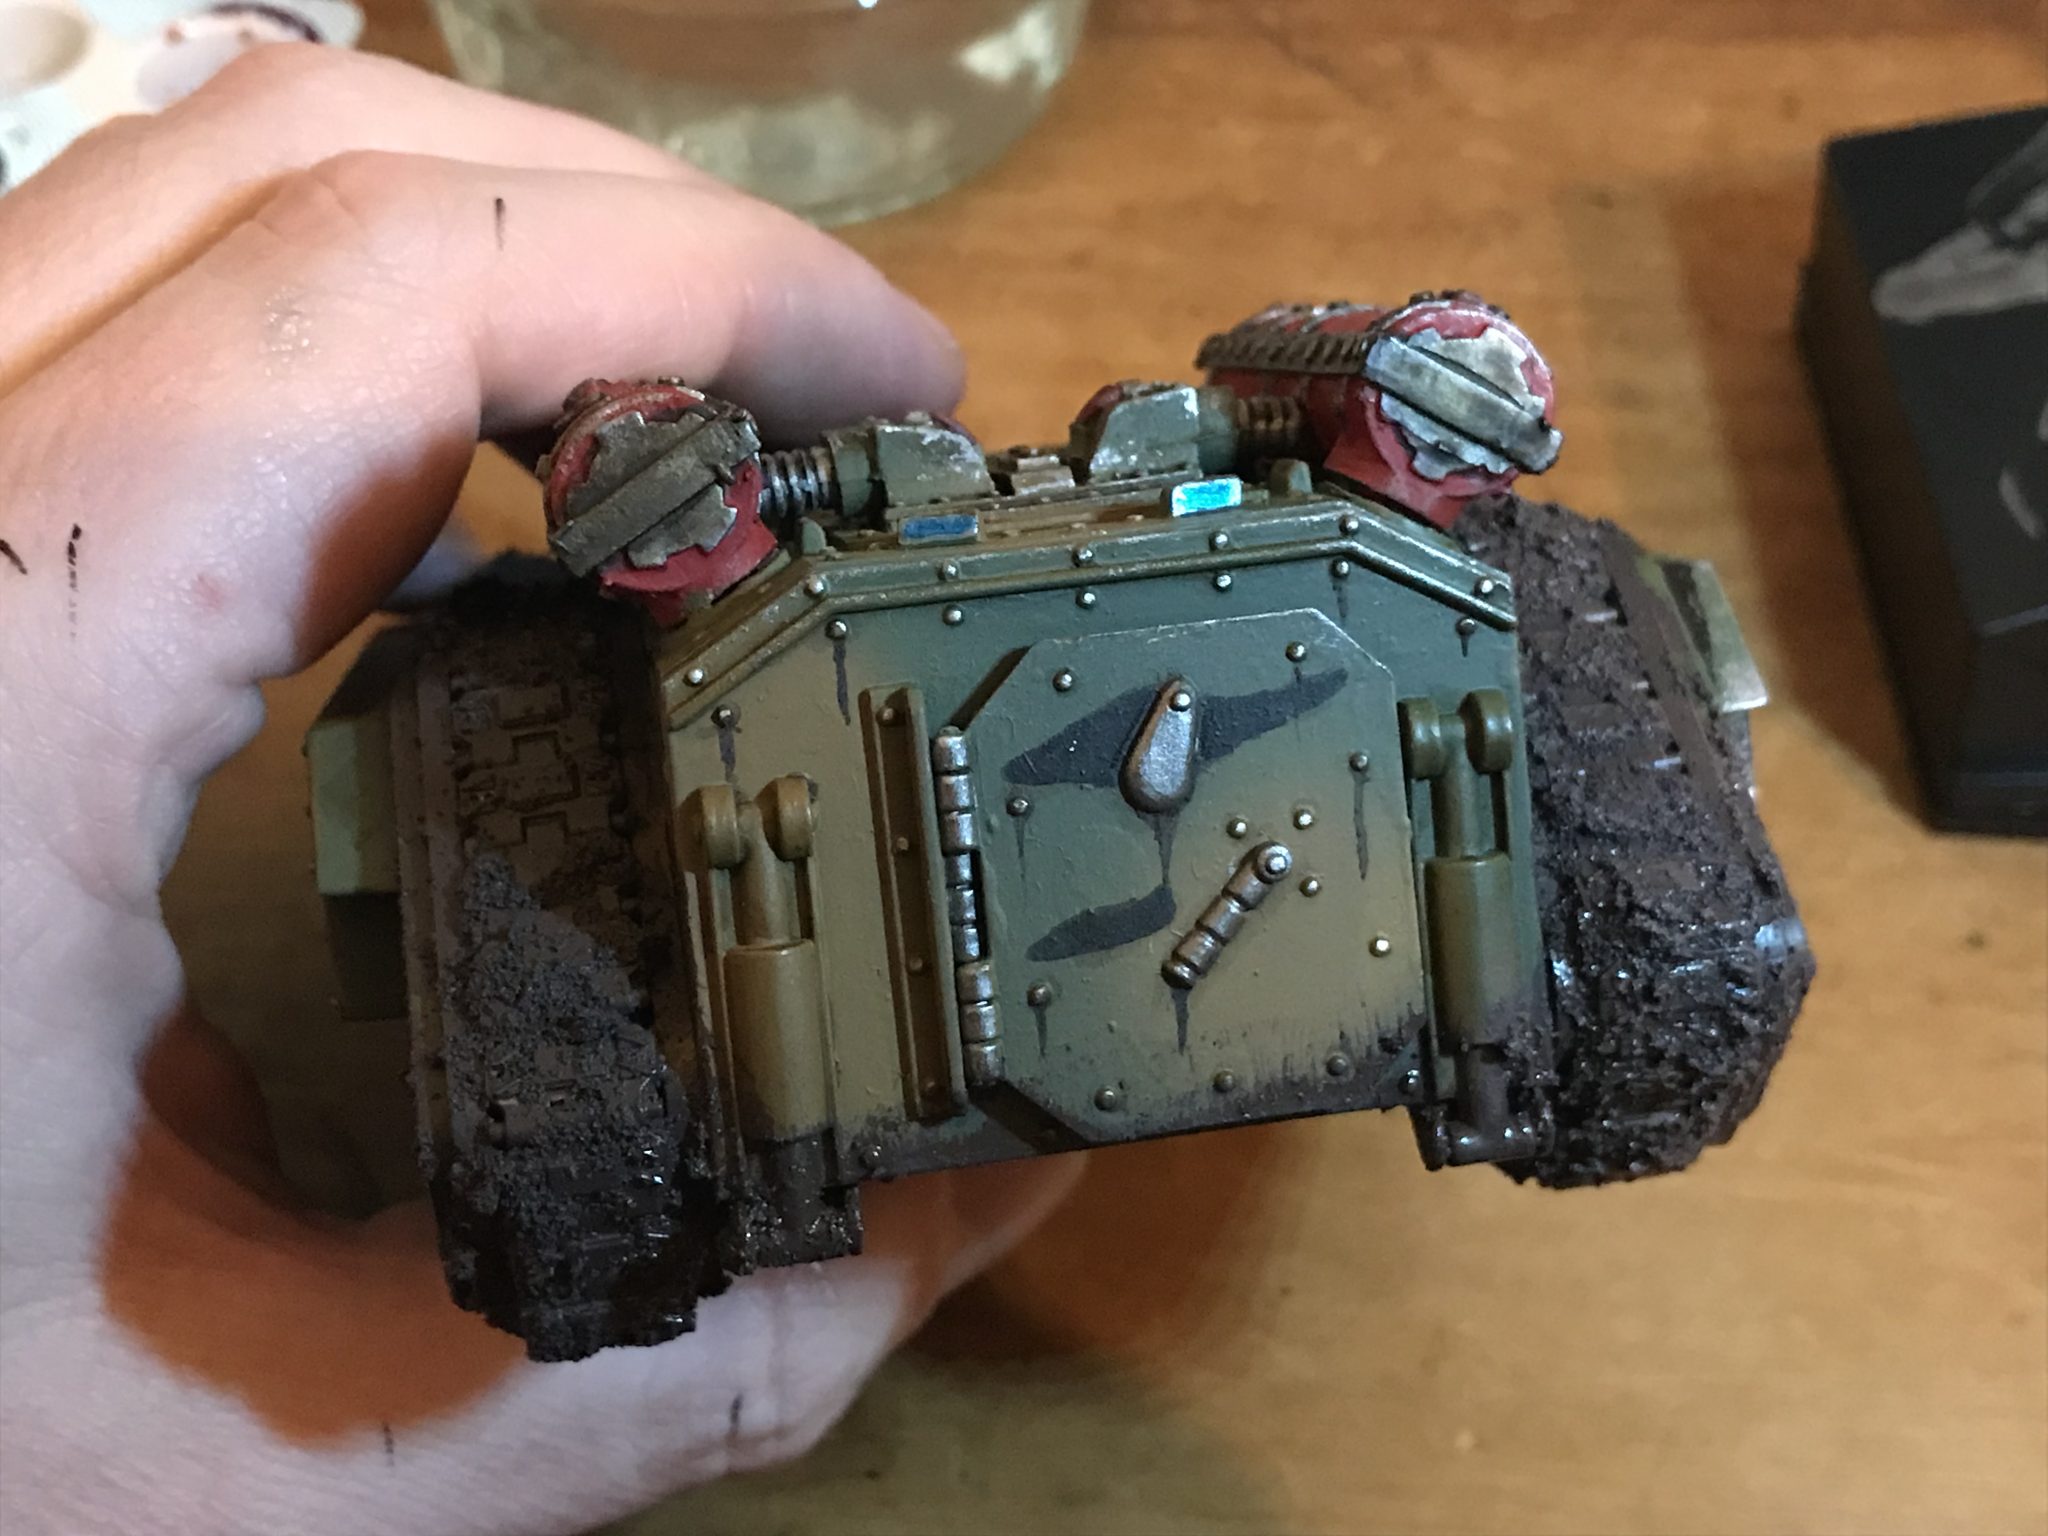
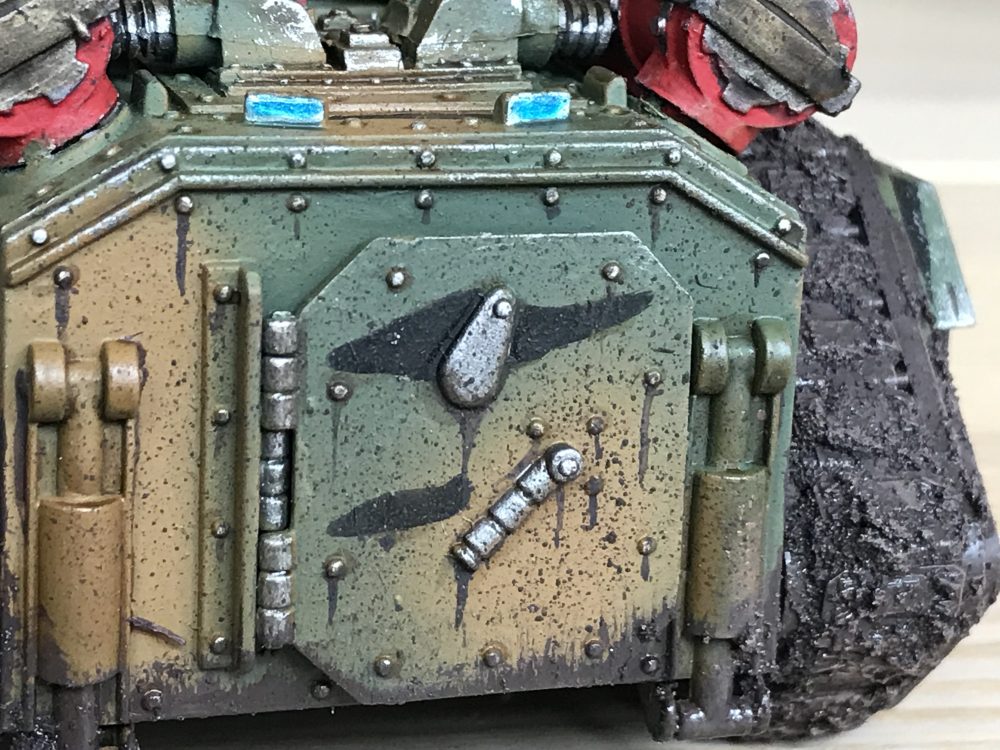
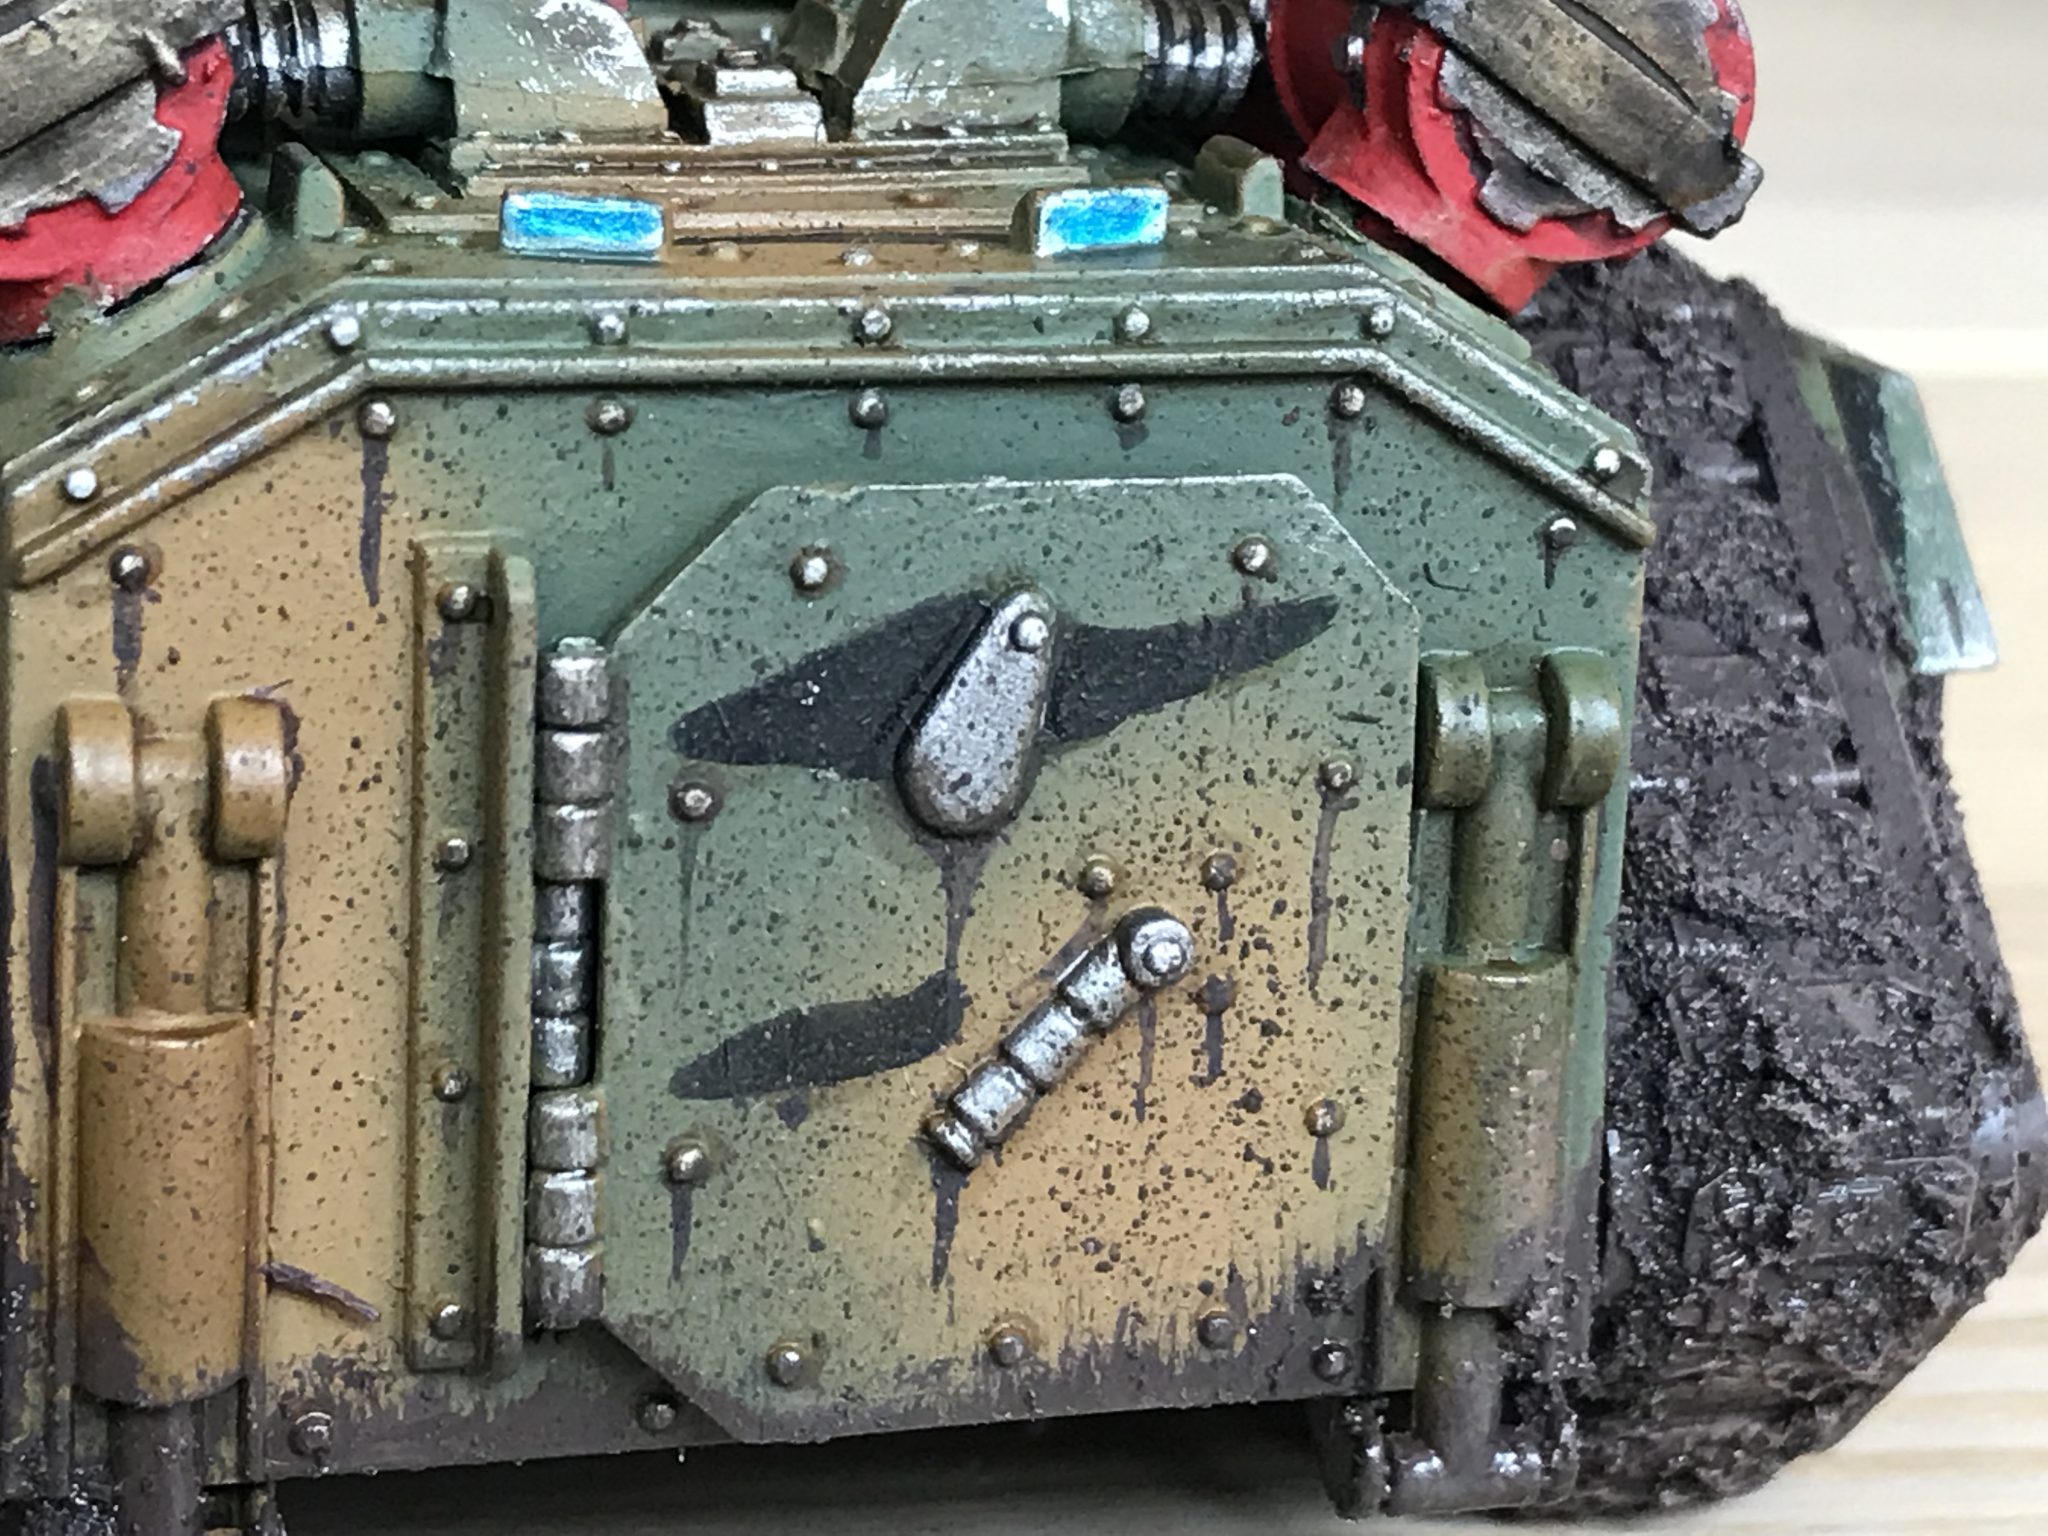
Streaks
The streaks I did to every rivet, grove and edge on the sides, front hull and rear door. I used Typhus Corrosion for this. Some went on the top and on the turret to run down slightly.
This technical paint from Games Workshop is superb for this type of work. It’s essentially just a muddy brown paint with some grit in it.
I place a little drop on or near the rivet, wipe any excess off the brush and get a good point. Then use this fine point to draw the paint down from the droplet into a teardrop shape. Thick to thin, it works every time, very well. Don’t be tempted to do this the other way, it’ll ruin it. Been there and done it!
-

- Streaks
-
- Streaks
-

- Streaks