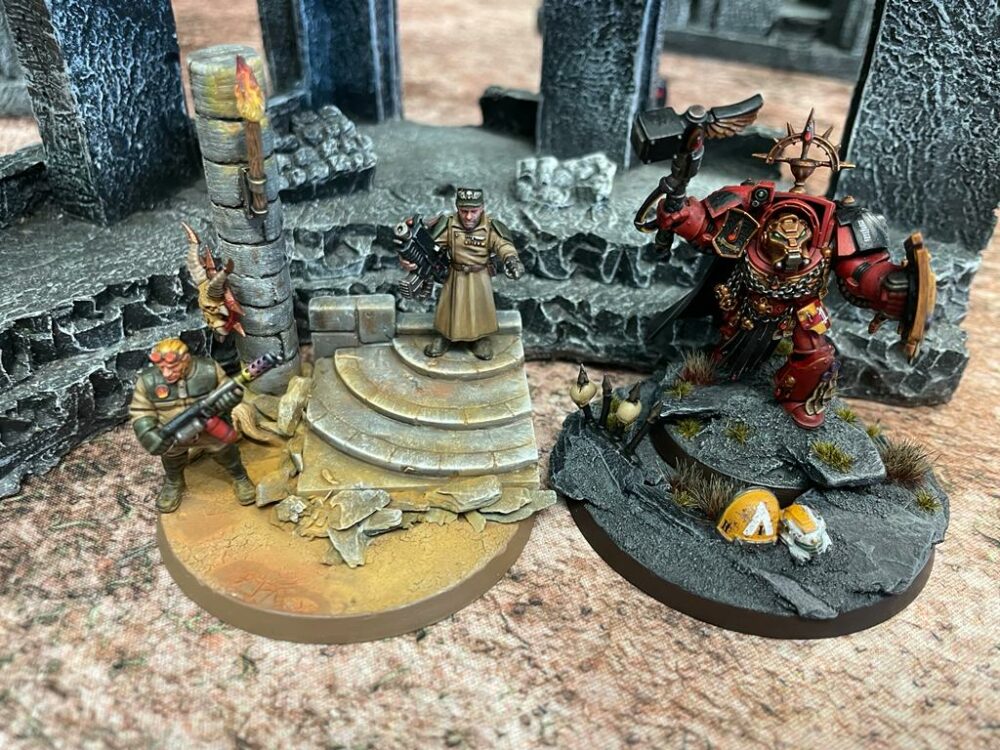

Cadians Vs Blood Angels – 2022 League – 2,000 pts
The second full game of the 2022 League...
My second game of the 2022 League is underway, this is 2,000 points of Cadians Vs Blood Angels! This is my first league after the Hammer of the Emperor rules appeared and Armour of Contempt.
The full details and results of the 2022 League can be found here.
Never miss an article? Subscribe!
This game was played at Boards and Swords.
Cadian List

My list can be seen here on my 2,000pts Cadian page for the League.
I get one additional Warlord Trait and Relic as normal on top of my special League List. For this game I took;
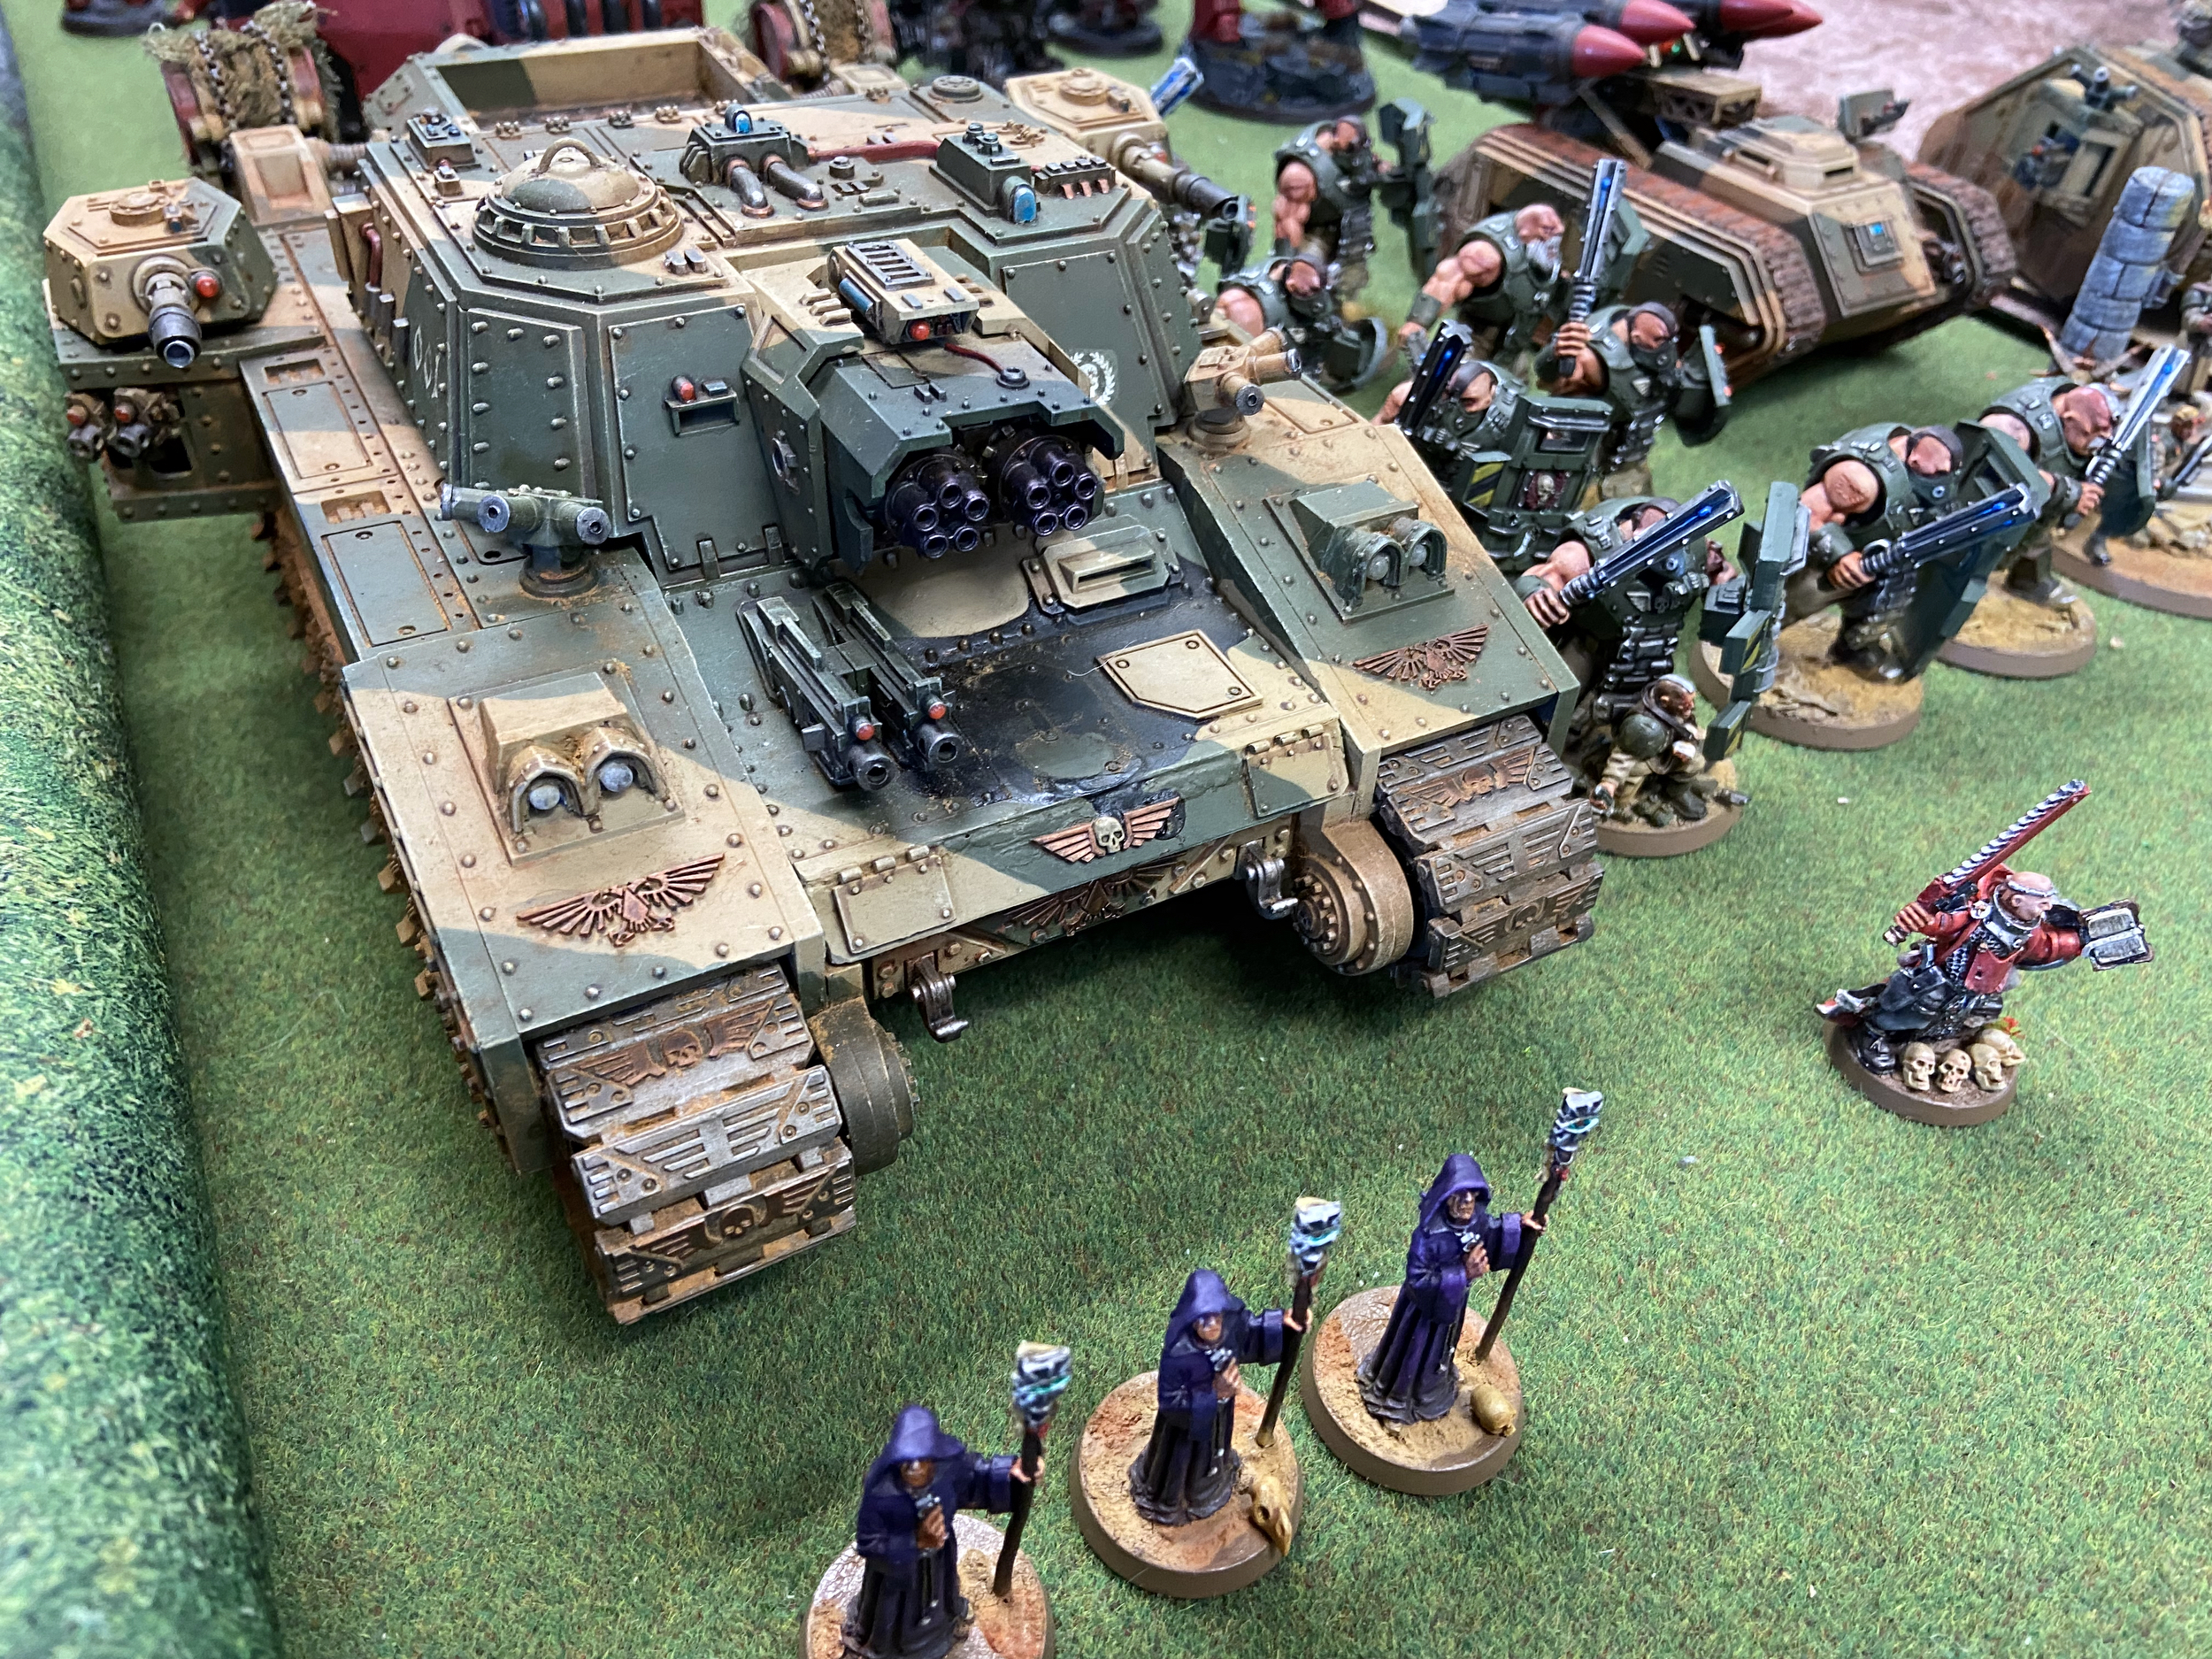
- Steel Discipline on my Demolisher Tank Commander – this allows units within 6″ to shoot while doing an action.
- Relic of Lost Cadia also on the Demolisher Tank Commander – I know I am not against Chaos. But it will give me a 12″ bubble of re-rolling ones to Hit if I move and re-rolling ones to Wound.
The inclusion of the Relic of Lost Cadia is an interesting one because I am not against Chaos so its use is rather limited. But I am sort of limited in what I can do because of the models I have that have not got a Relic or a Warlord Trait already. Bad planning on my part.
Where I think it will be useful is on turn 1, using it in conjunction with my Manticore which is Strength 10. If I fire it at his unit of Eradicators which are Toughness 5 then with re-rolling ones to Wound – that will be a lot of Wounds. He could Transhuman them, but I should try and bait that out earlier with my other shooting.
That Re-Roll of ones to Hit and Wound will also work on my Stormlord if it survives long enough. That is interesting as it does not get the Cadian Re-Roll ones to Hit as its in a Super Heavy Auxillary Detachment.
Cadian Secondaries
- For the Emperor
- To The Last (Stormlord, Bullgryns and Gatekeeper Tank Commander)
- Raise the Banners High
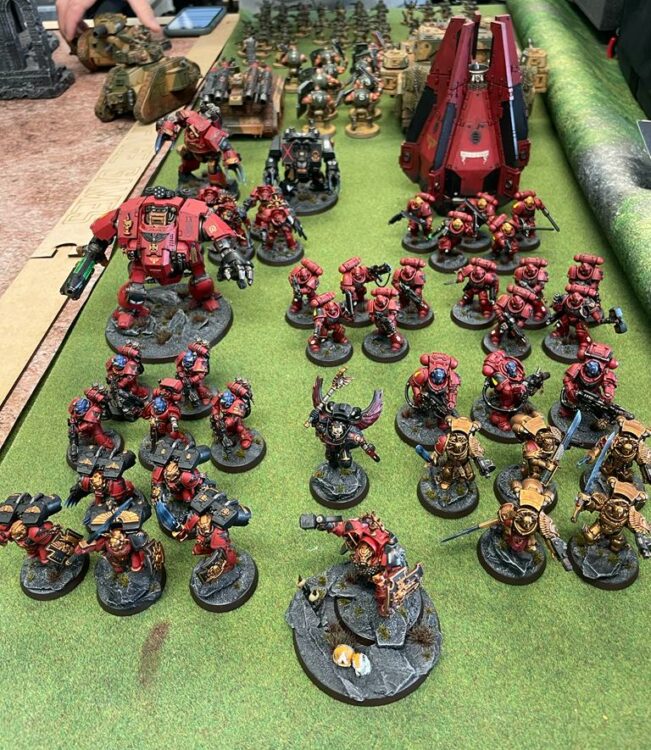
Blood Angels List
And Lance’s Blood Angels here.
Blood Angels Secondaries
- Oaths of Moment
- Assassination
- Investigate Signals
The Mission – Tear Down Their Icons
Score 4VP for each other the following;
- Control 1 or more Objectives
- Control 2 or more Objectives
- Control more Objectives than the enemy
The other Primary involves completing an action in your opponent’s half of the battlefield to plant explosives. The enemy can remove them via an action. At the end of the game each one remaining that you planted in the opponent’s half scores you 4VP to a maximum of 15VP.
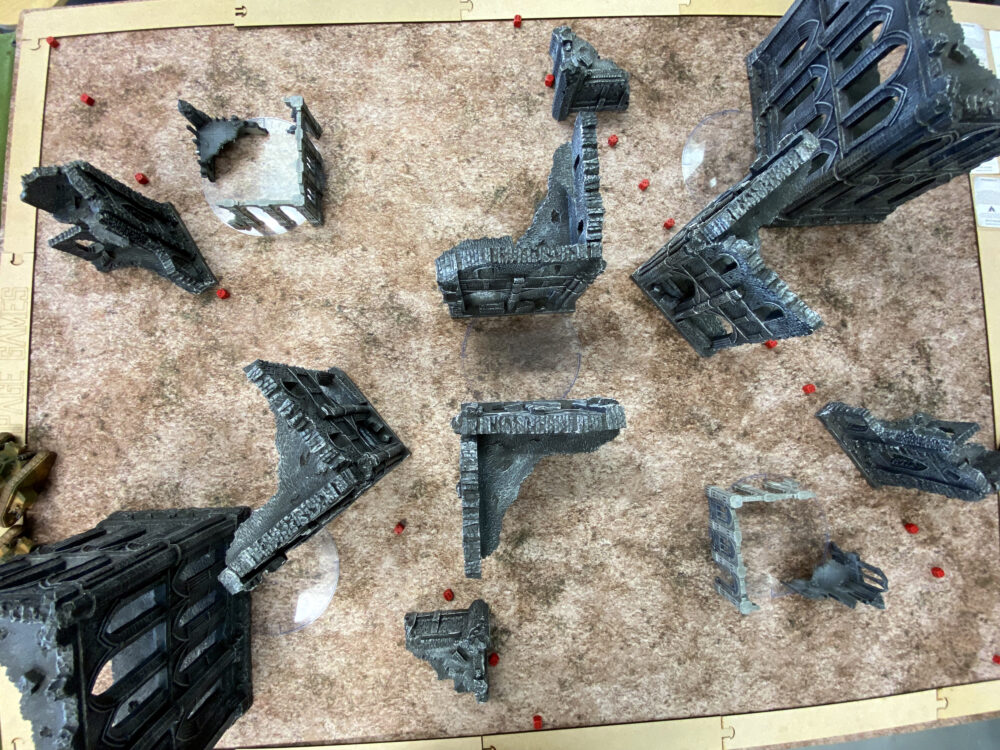
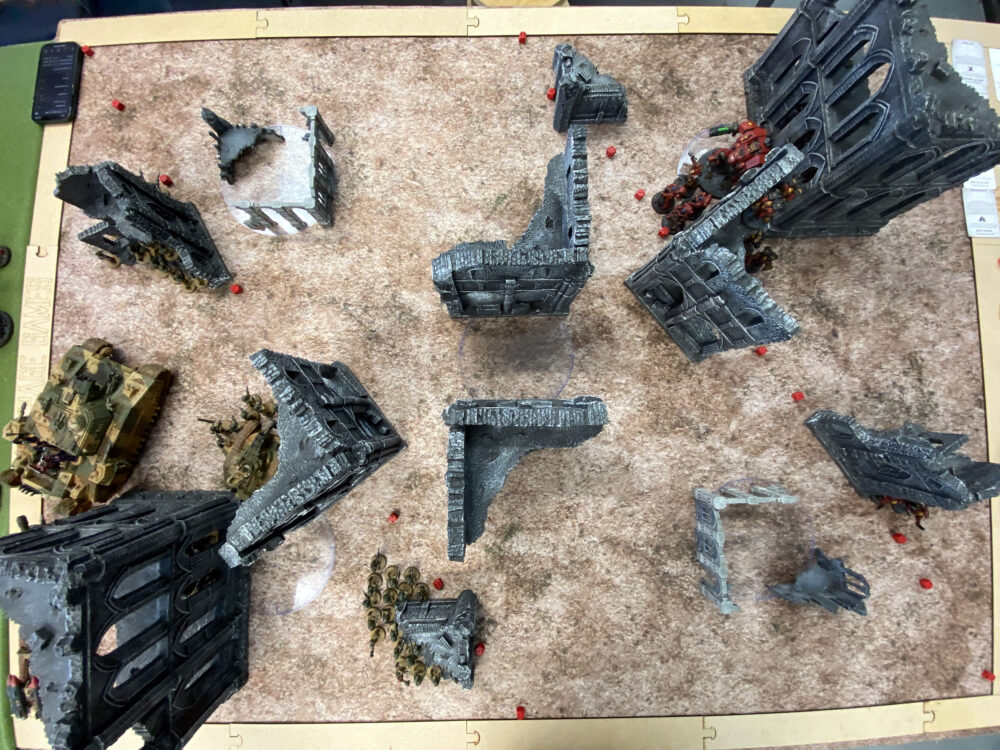
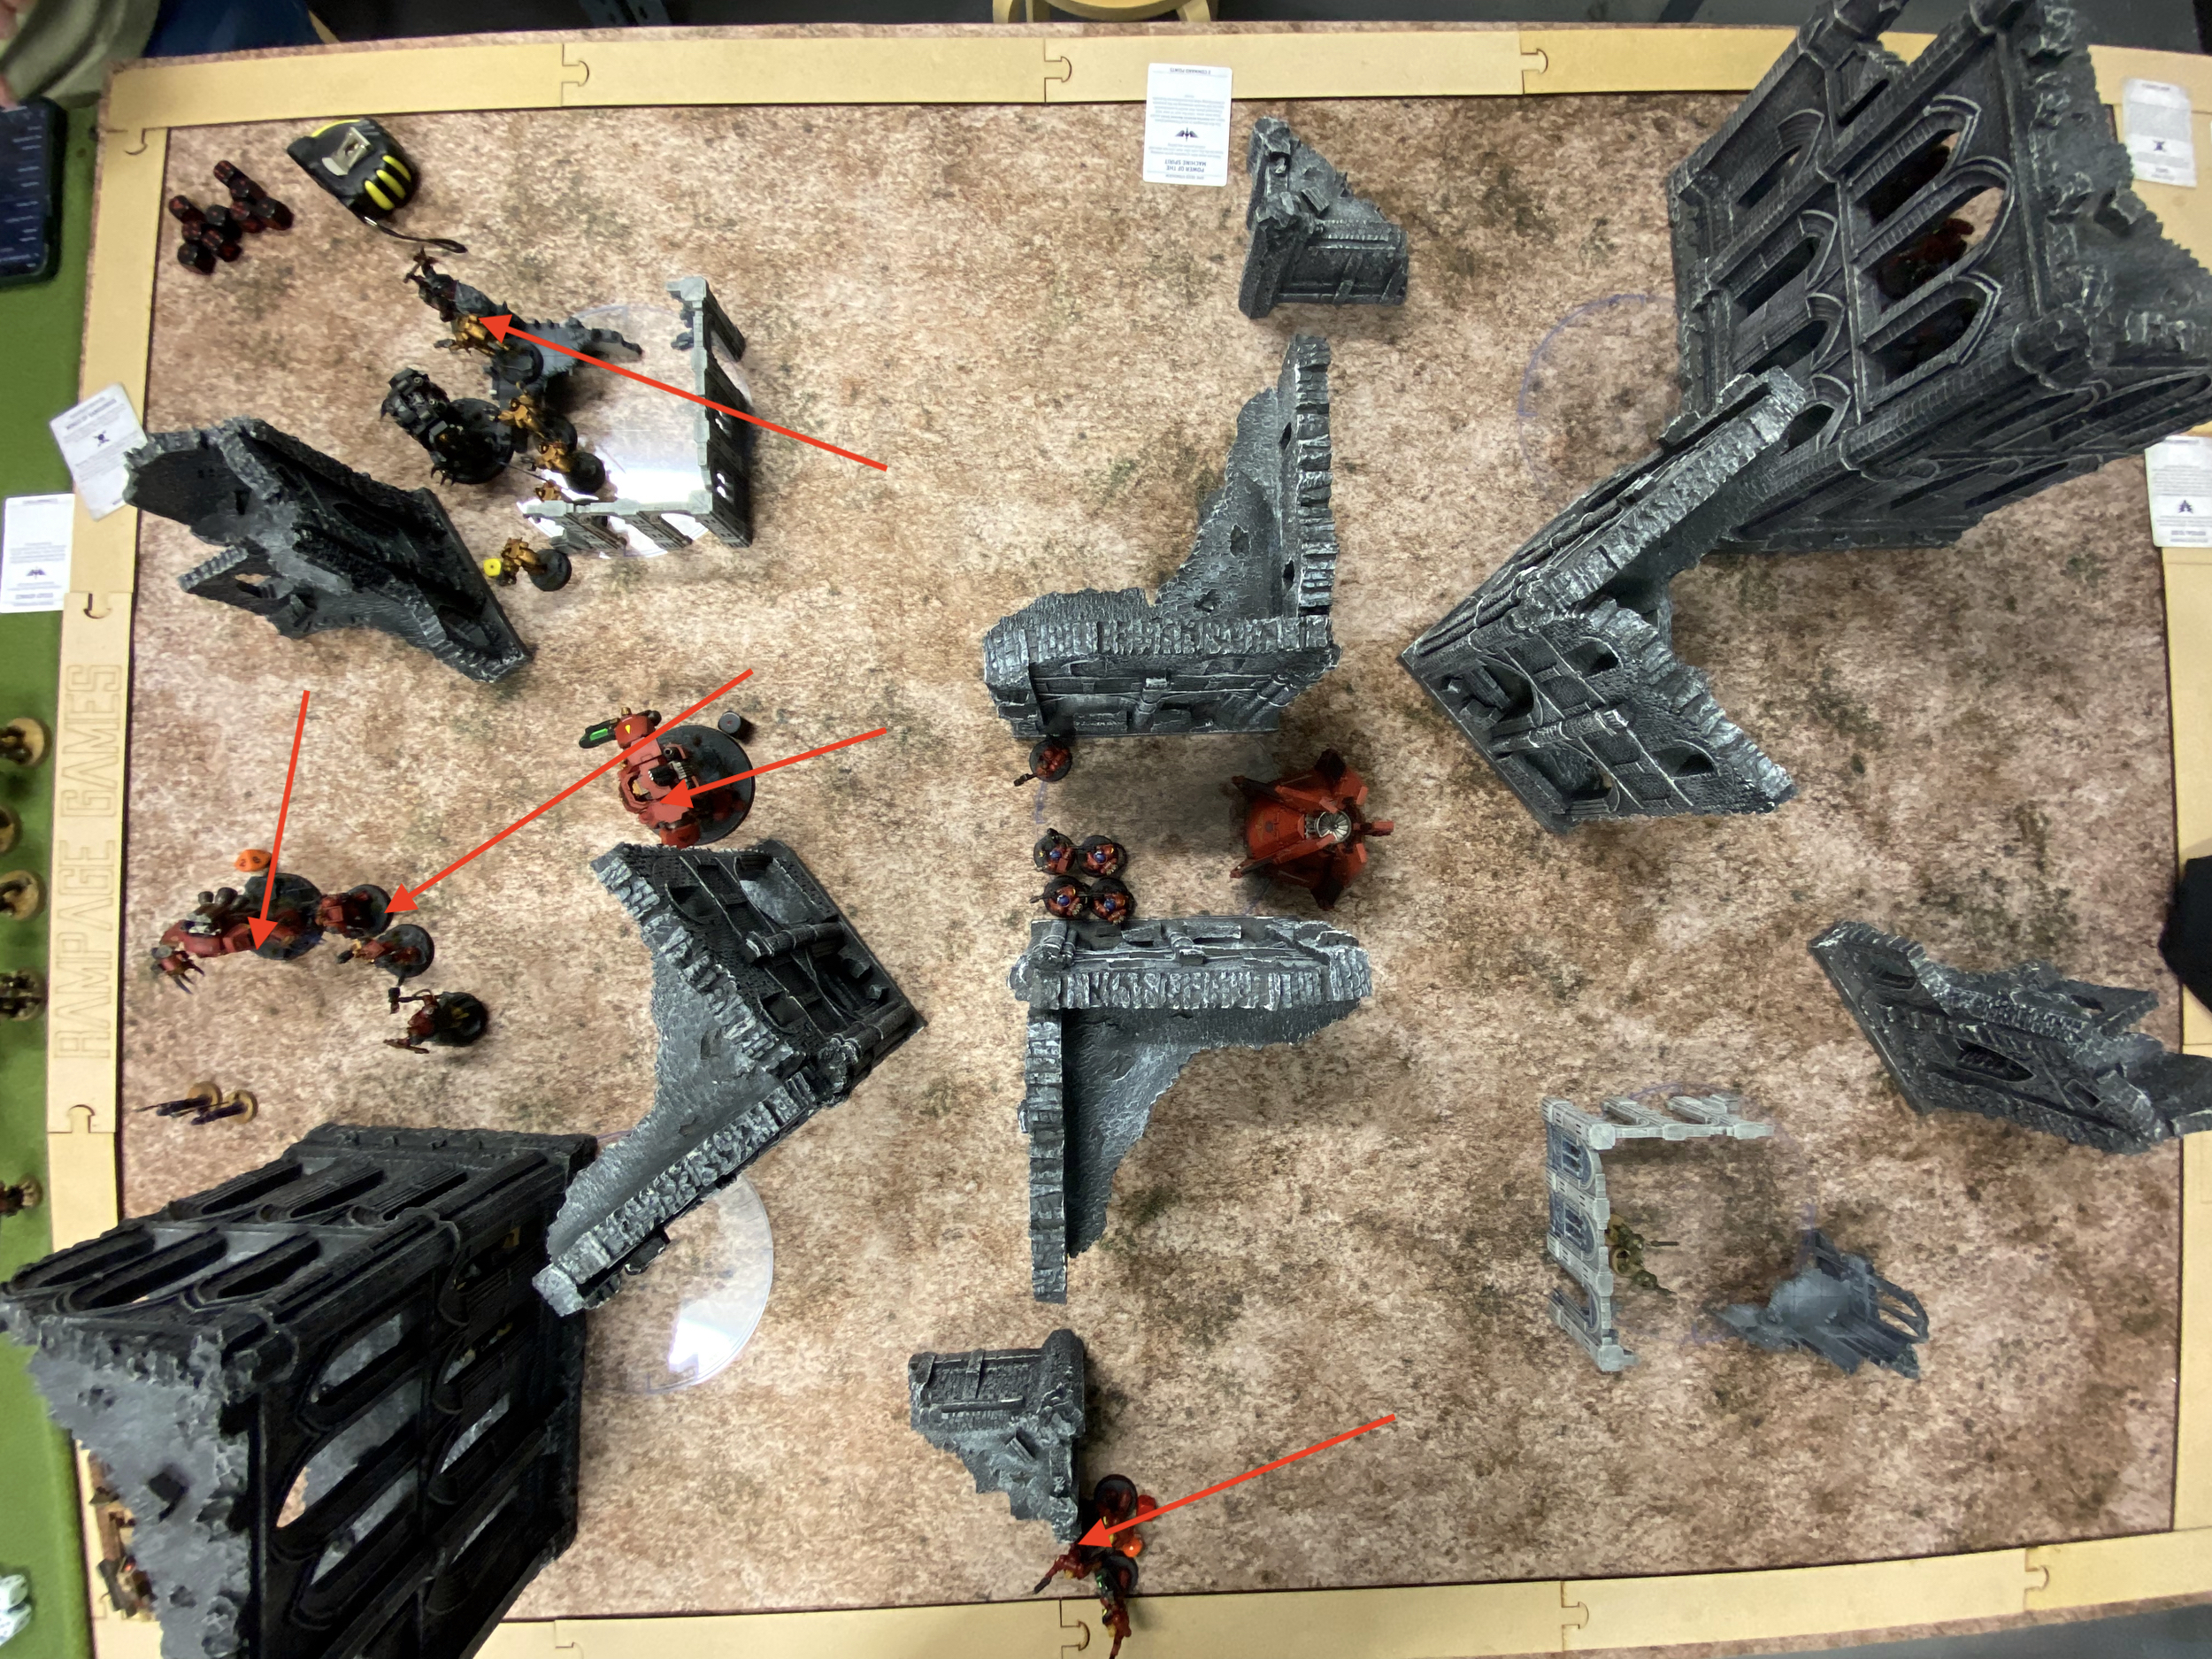
The Battlefield
When you’re playing a 9th Edition Codex that now also has Armour of Contempt you should make no apologies for breaking out an Open Source paint tool and using it to come up with a perfect plan of action.
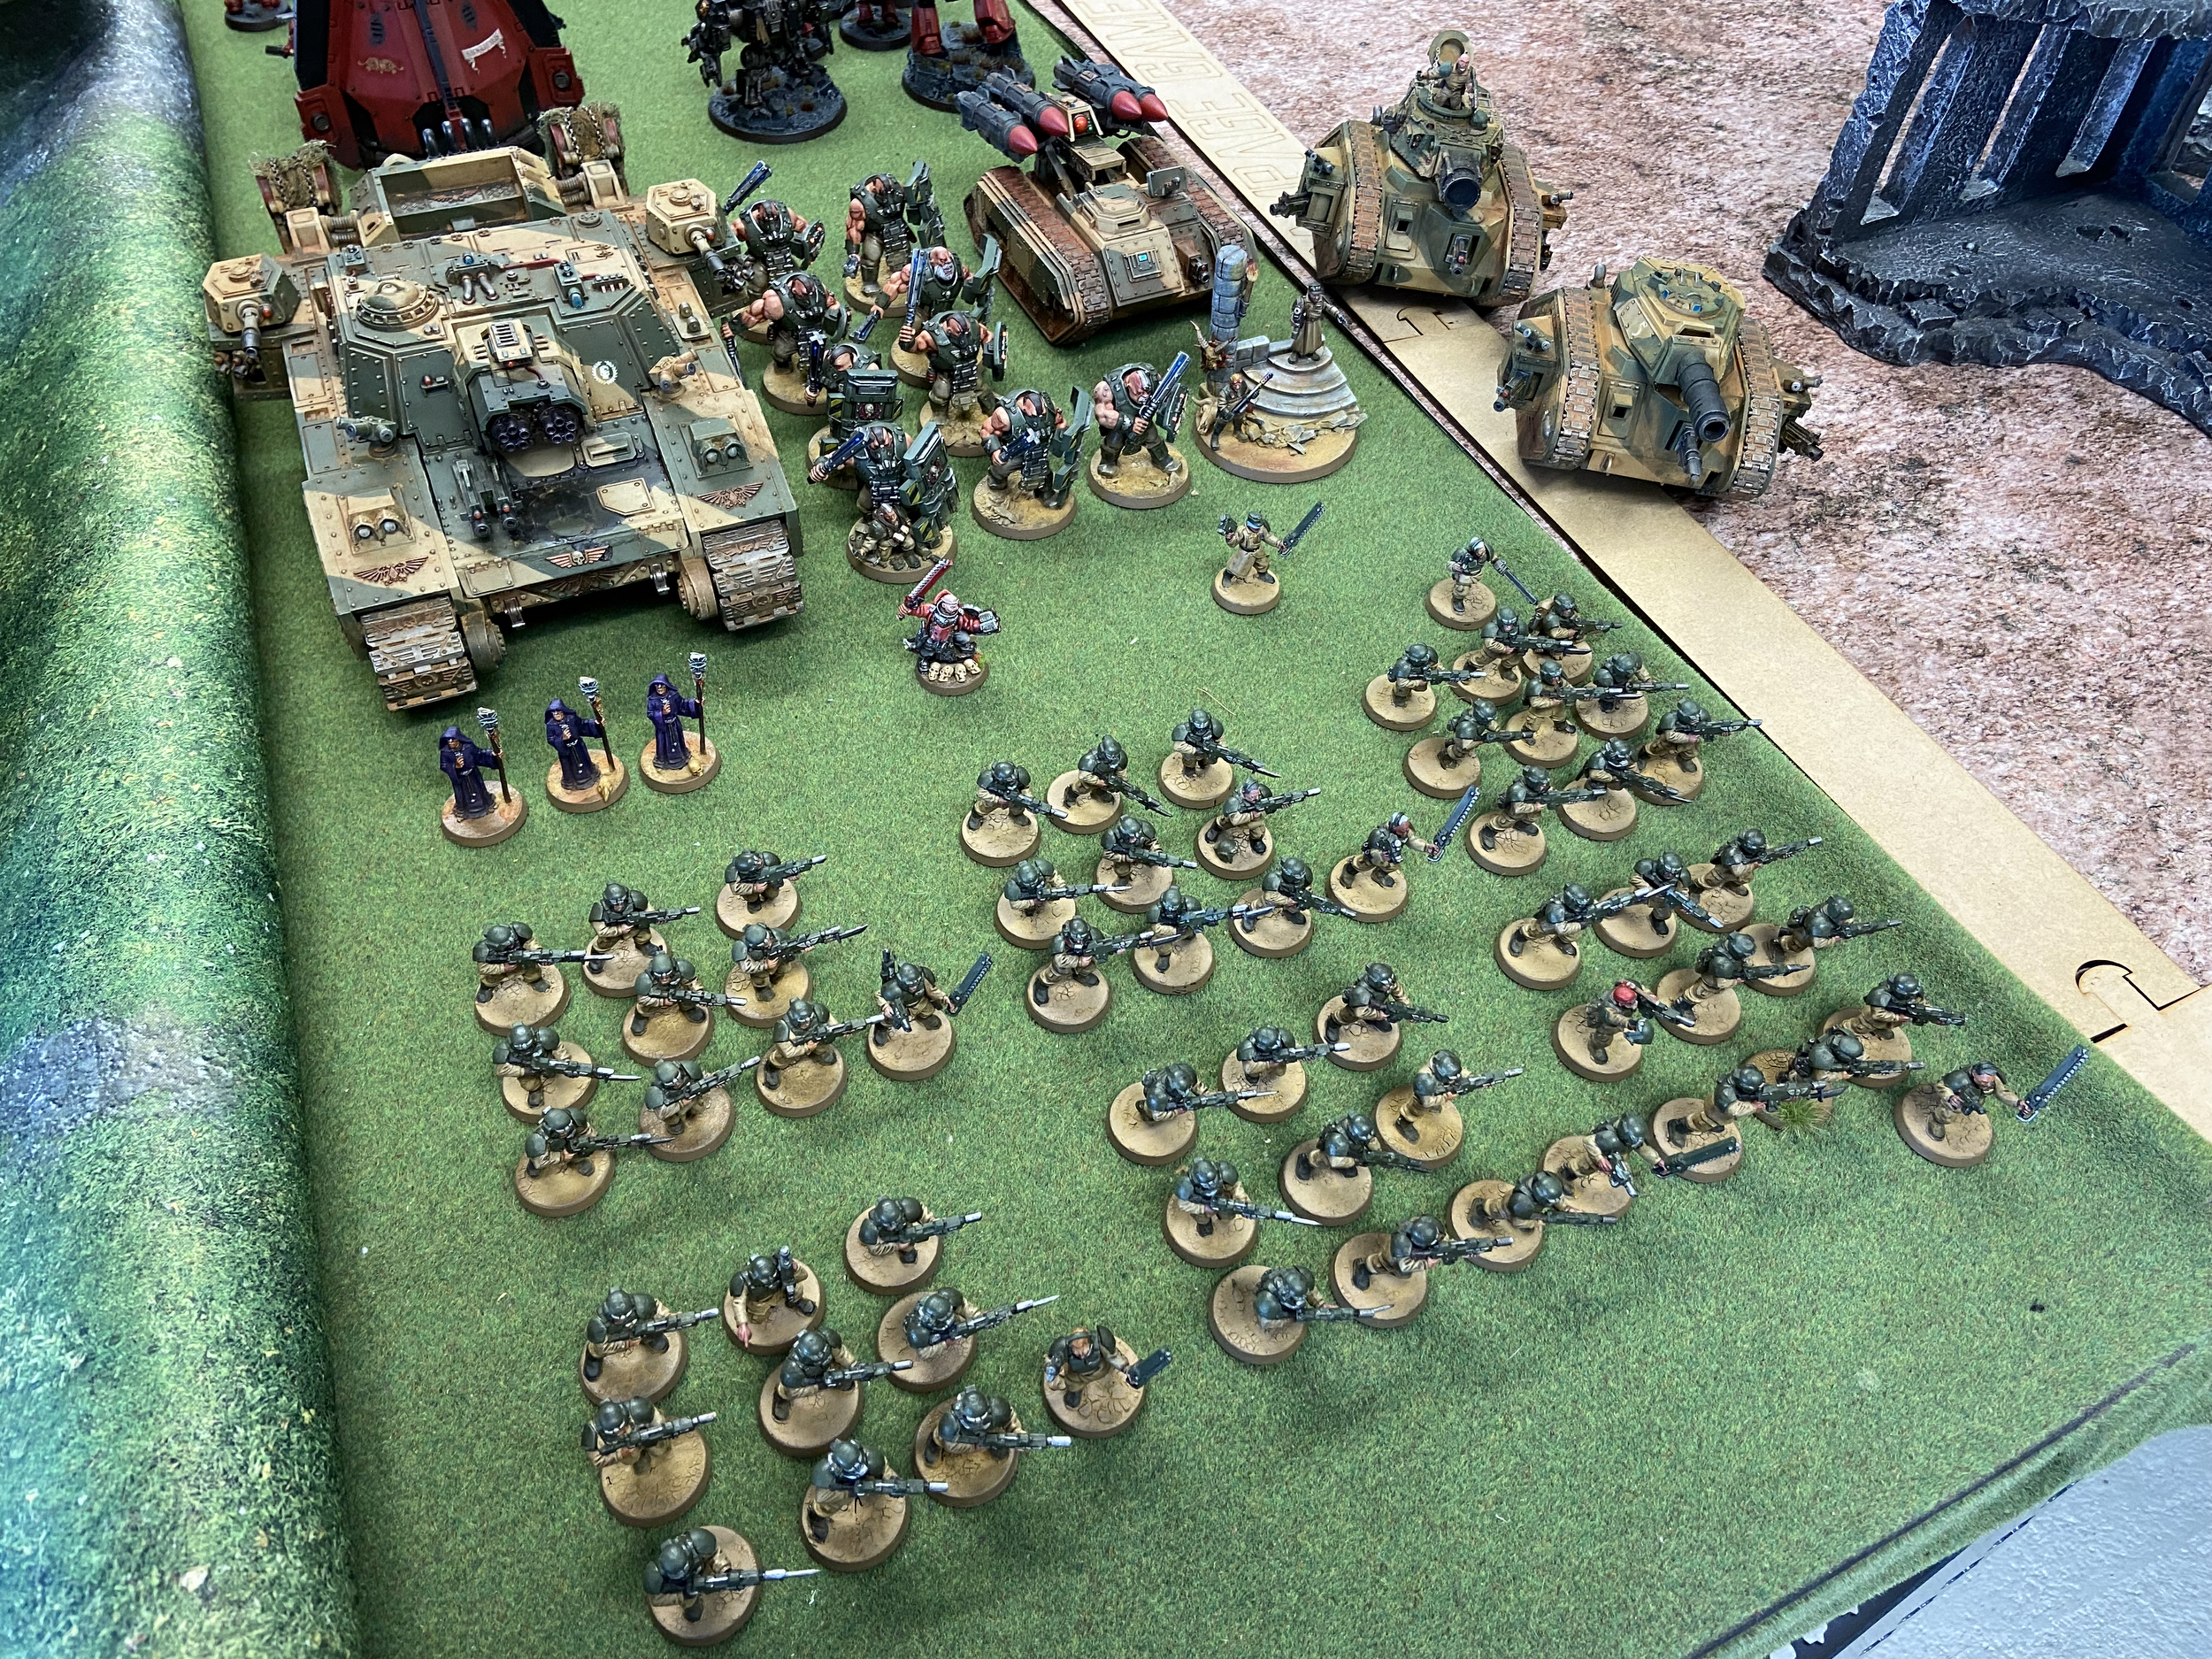
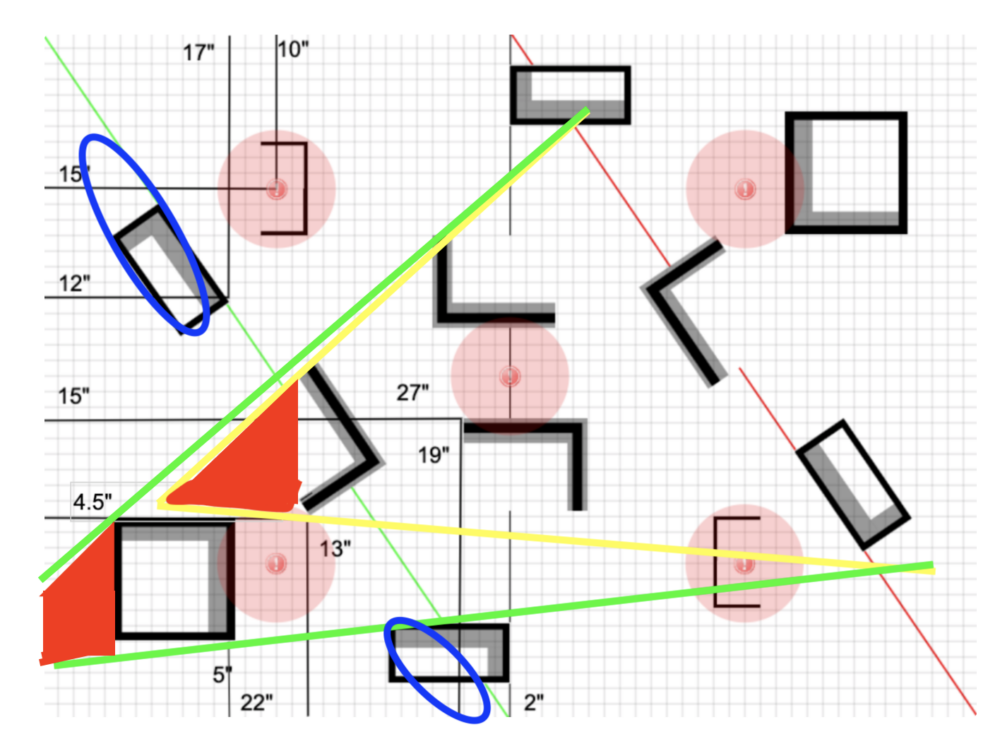
Assume I am deploying in the left corner, behind the green line.
This is what I came up with for the battlefield we will be playing on;
- There is very little line-of-sight blocking, just the large Ls and the big box buildings.
- The U shapes provide Dense Cover but are off to the side limiting their usage at the deployment stage of the game.
- The red areas are the safe zones if I account for the enemy not deploying their longest range weapons right into their deployment corners.
- The blue areas provide the benefit of Cover for my infantry and also the possibility of a -1 to Hit from the Dense Cover on turn 1
- Finally, a move up into No Man’s Land in turn 1 from the blue areas increases the chances of that Dense Cover coming into effect.
Cadians Vs Blood Angels – The Battle Plan
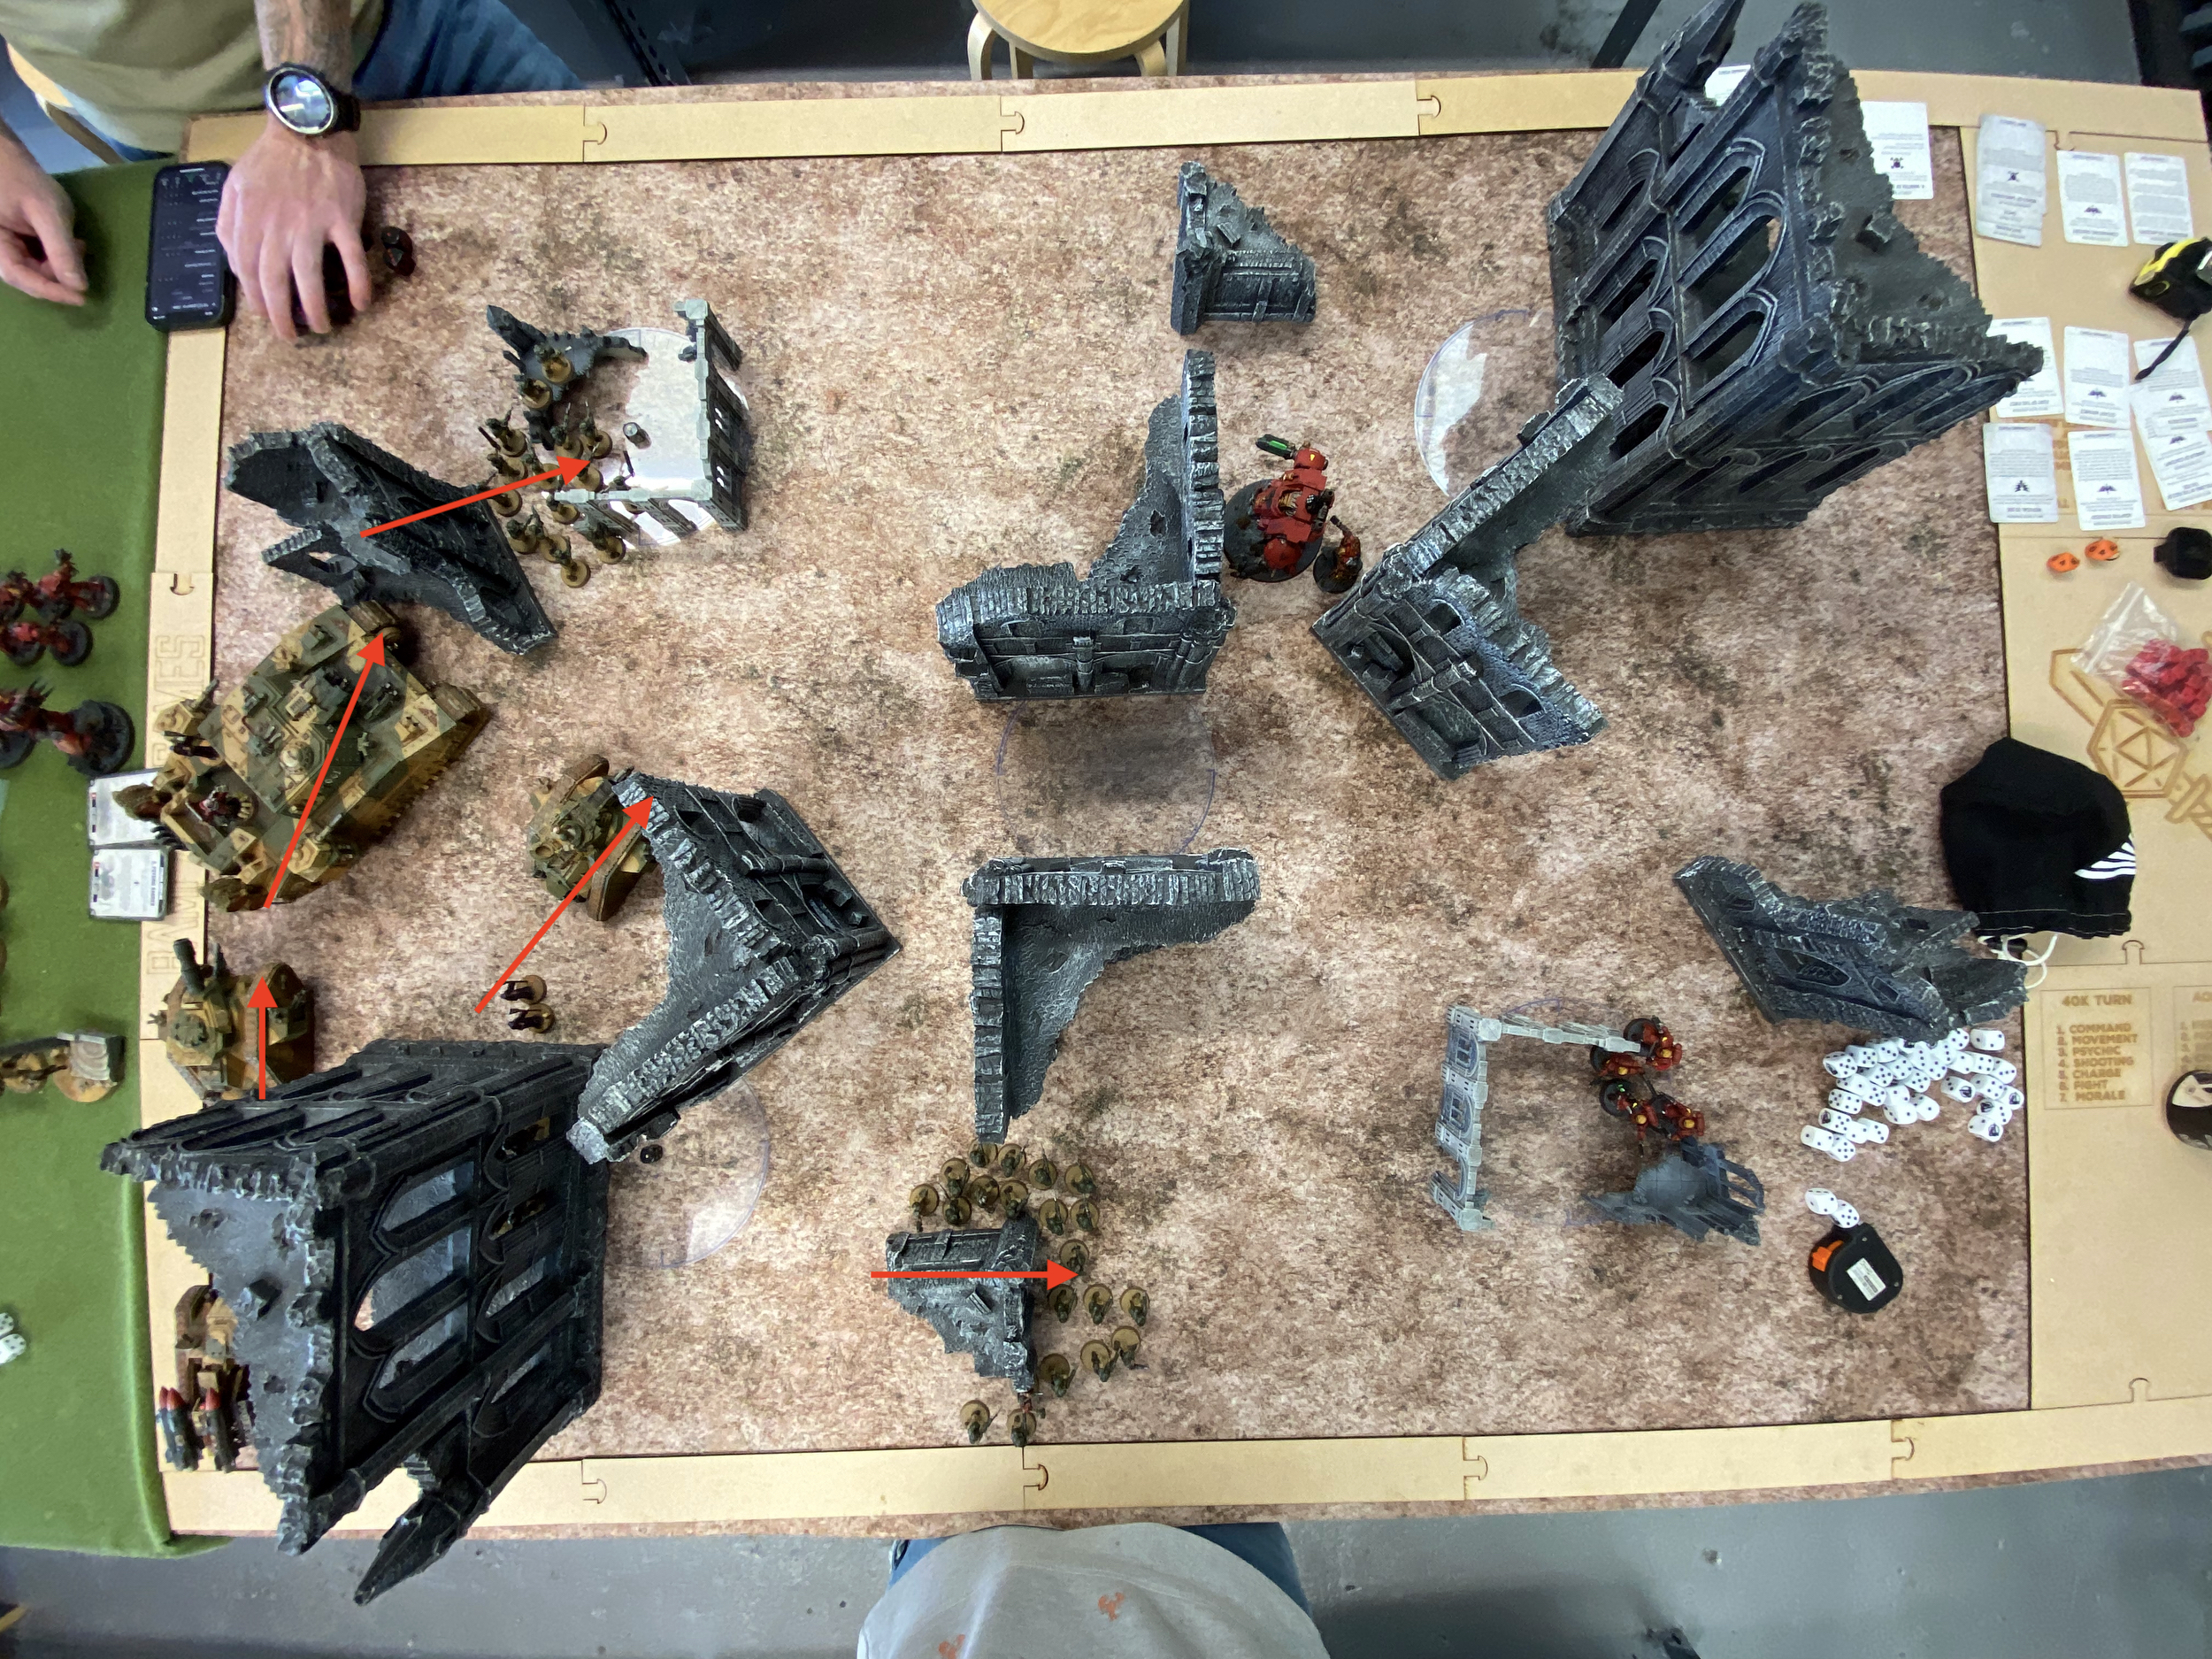
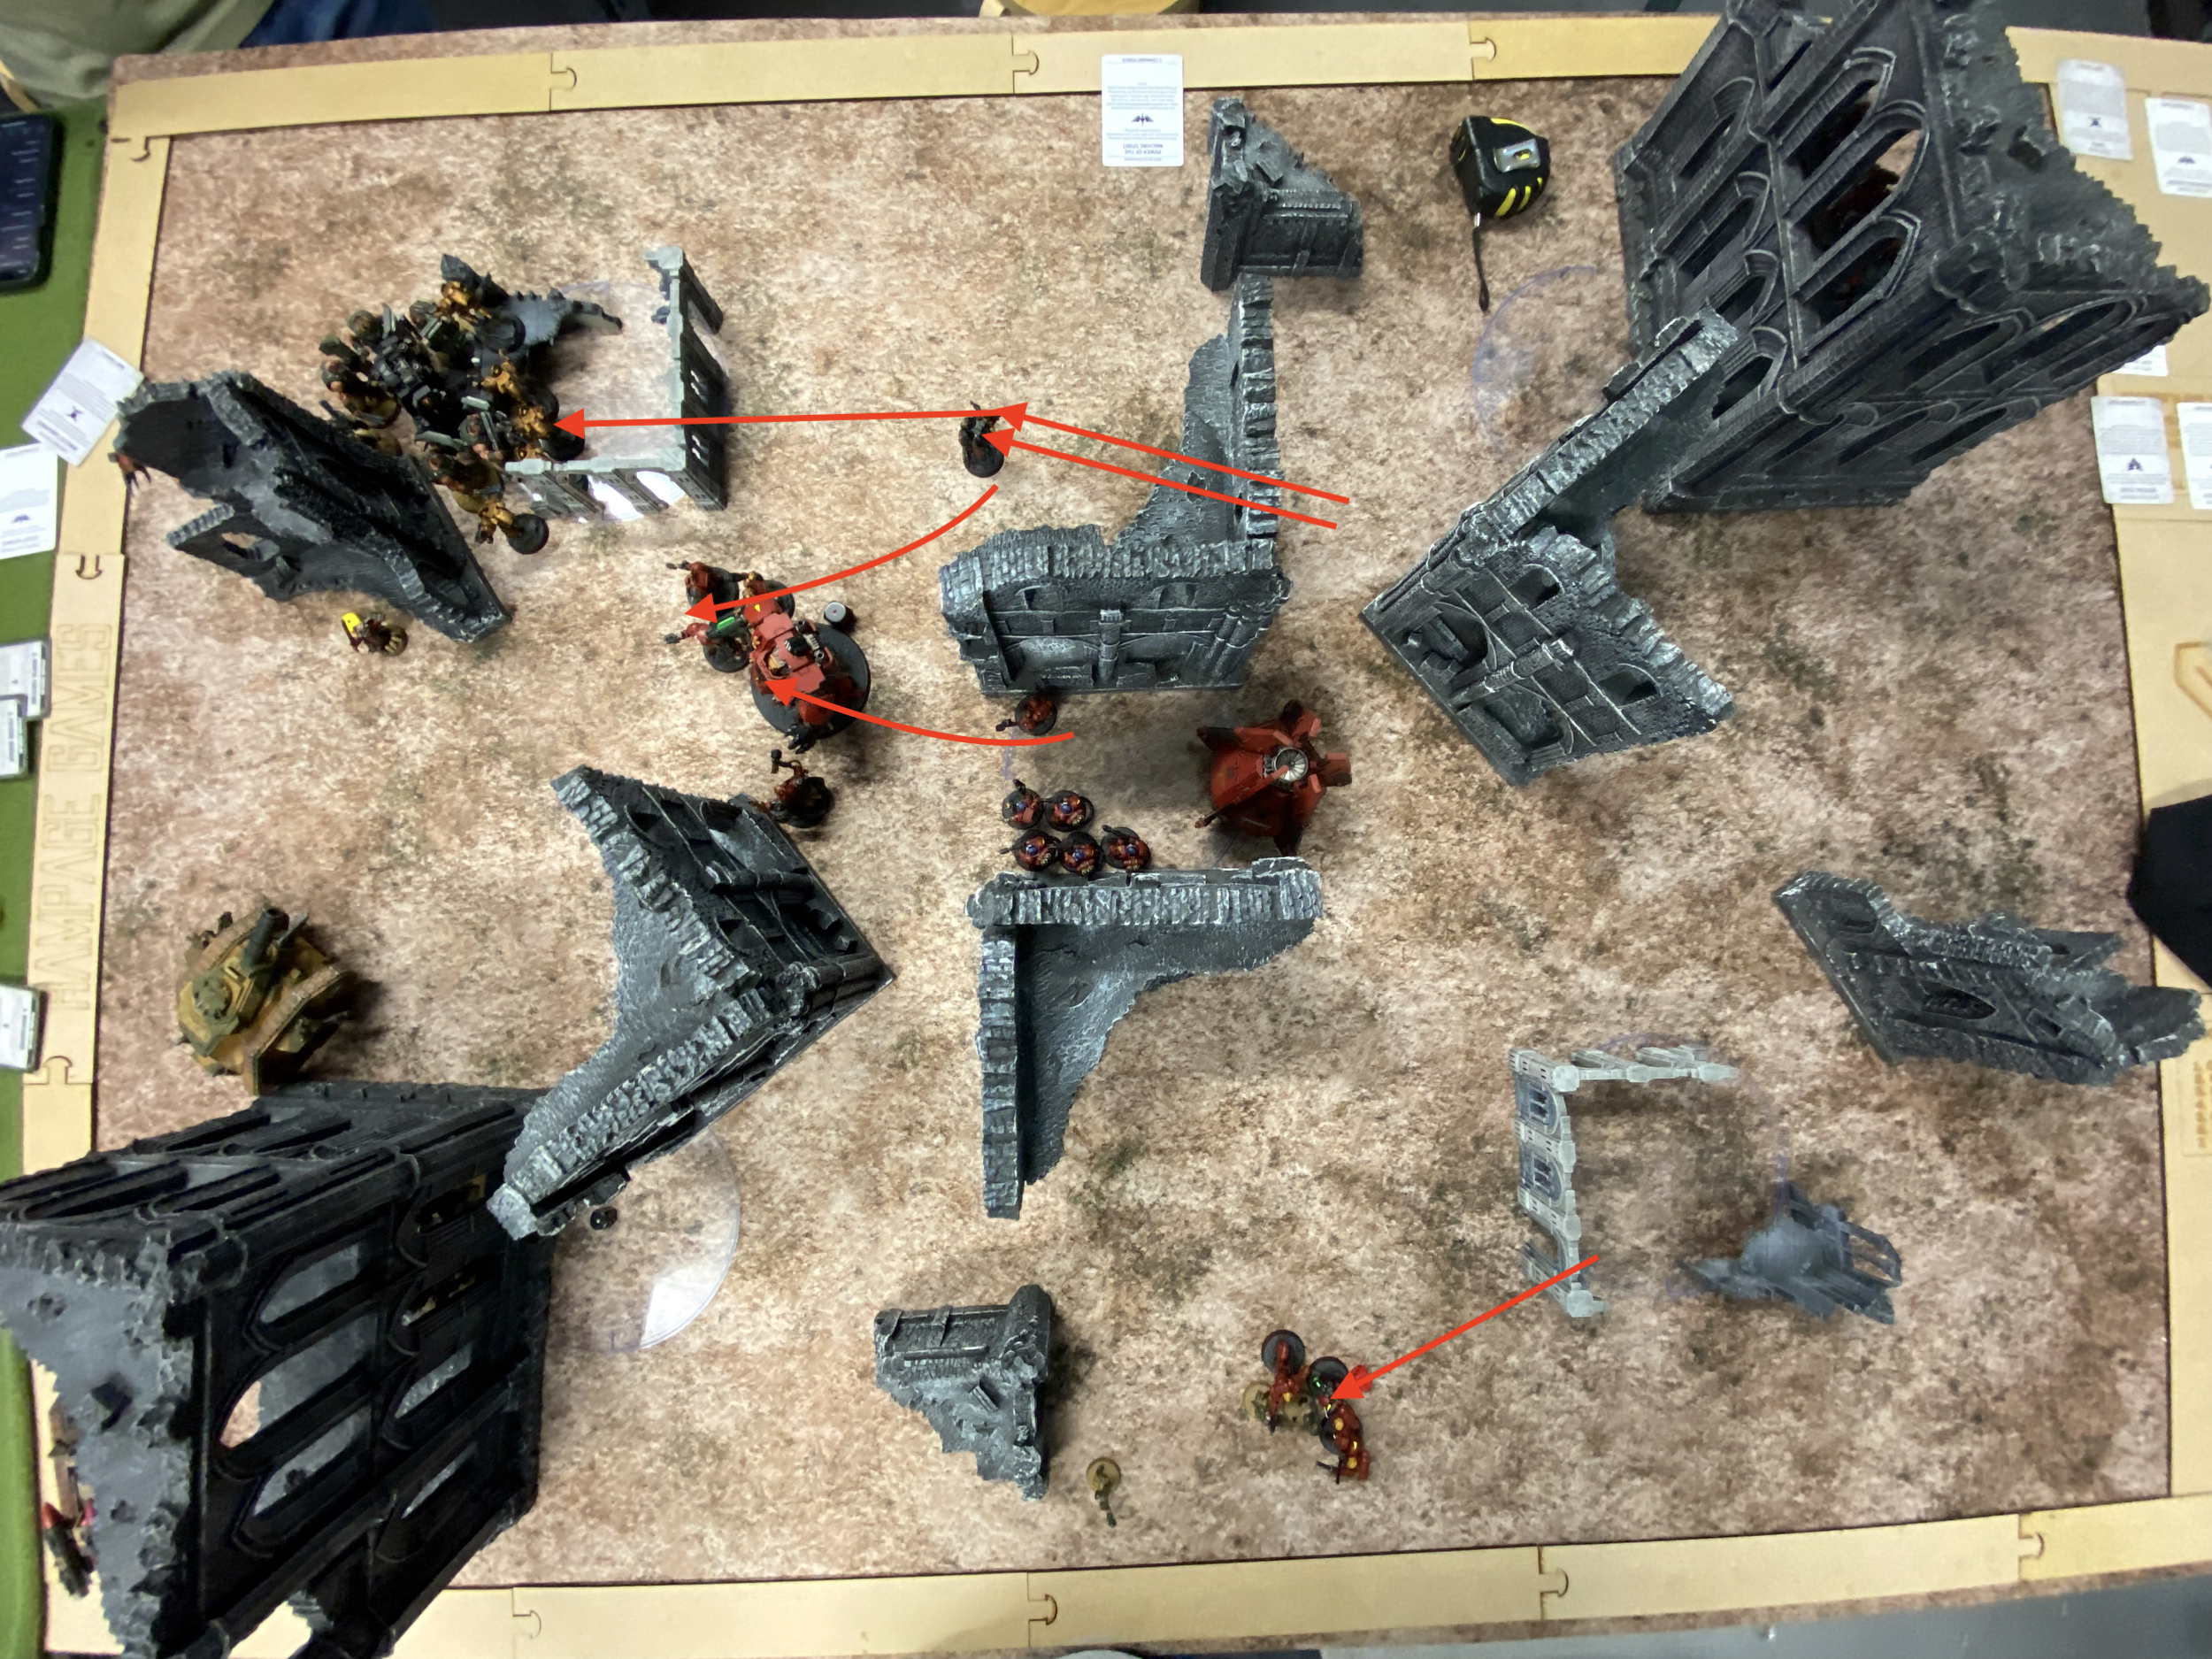
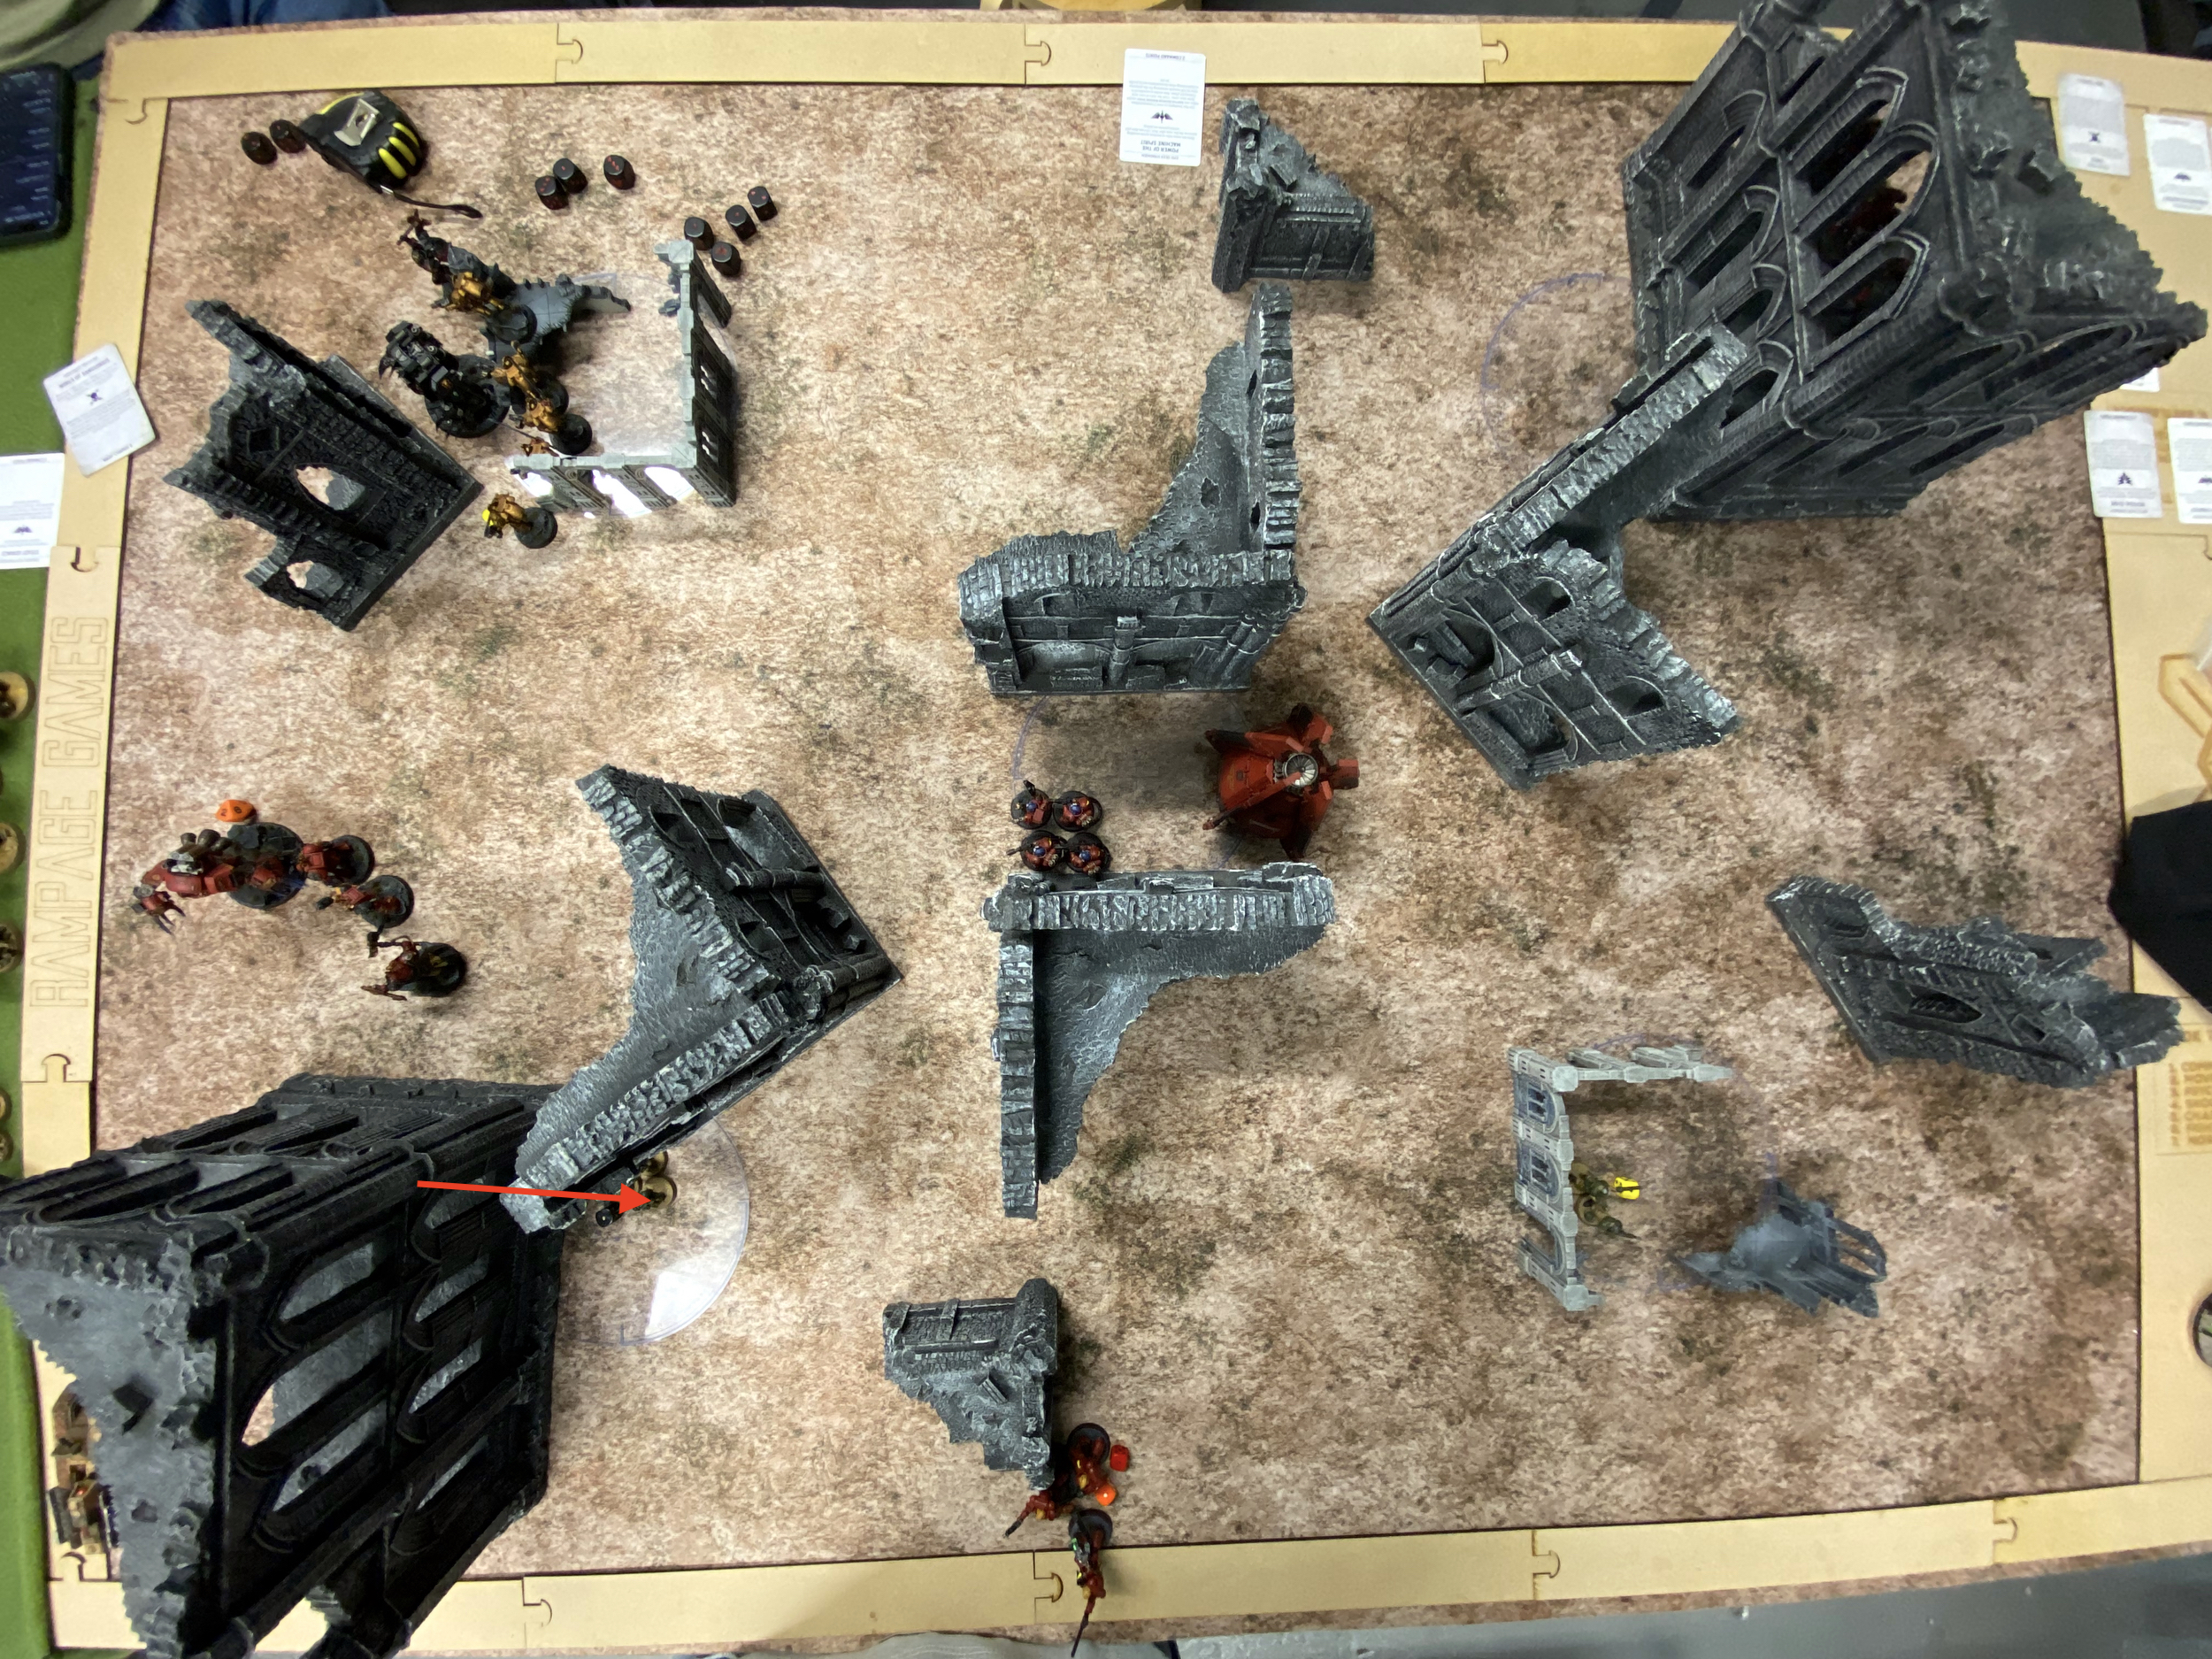
With the above map done I had an idea of what the battlefield will play like. I then went about thinking about my deployment and an overall plan of action to take on the Blood Angels.
And so the plan, as best as I can make it. The purple lines show my proposed first turn movements.
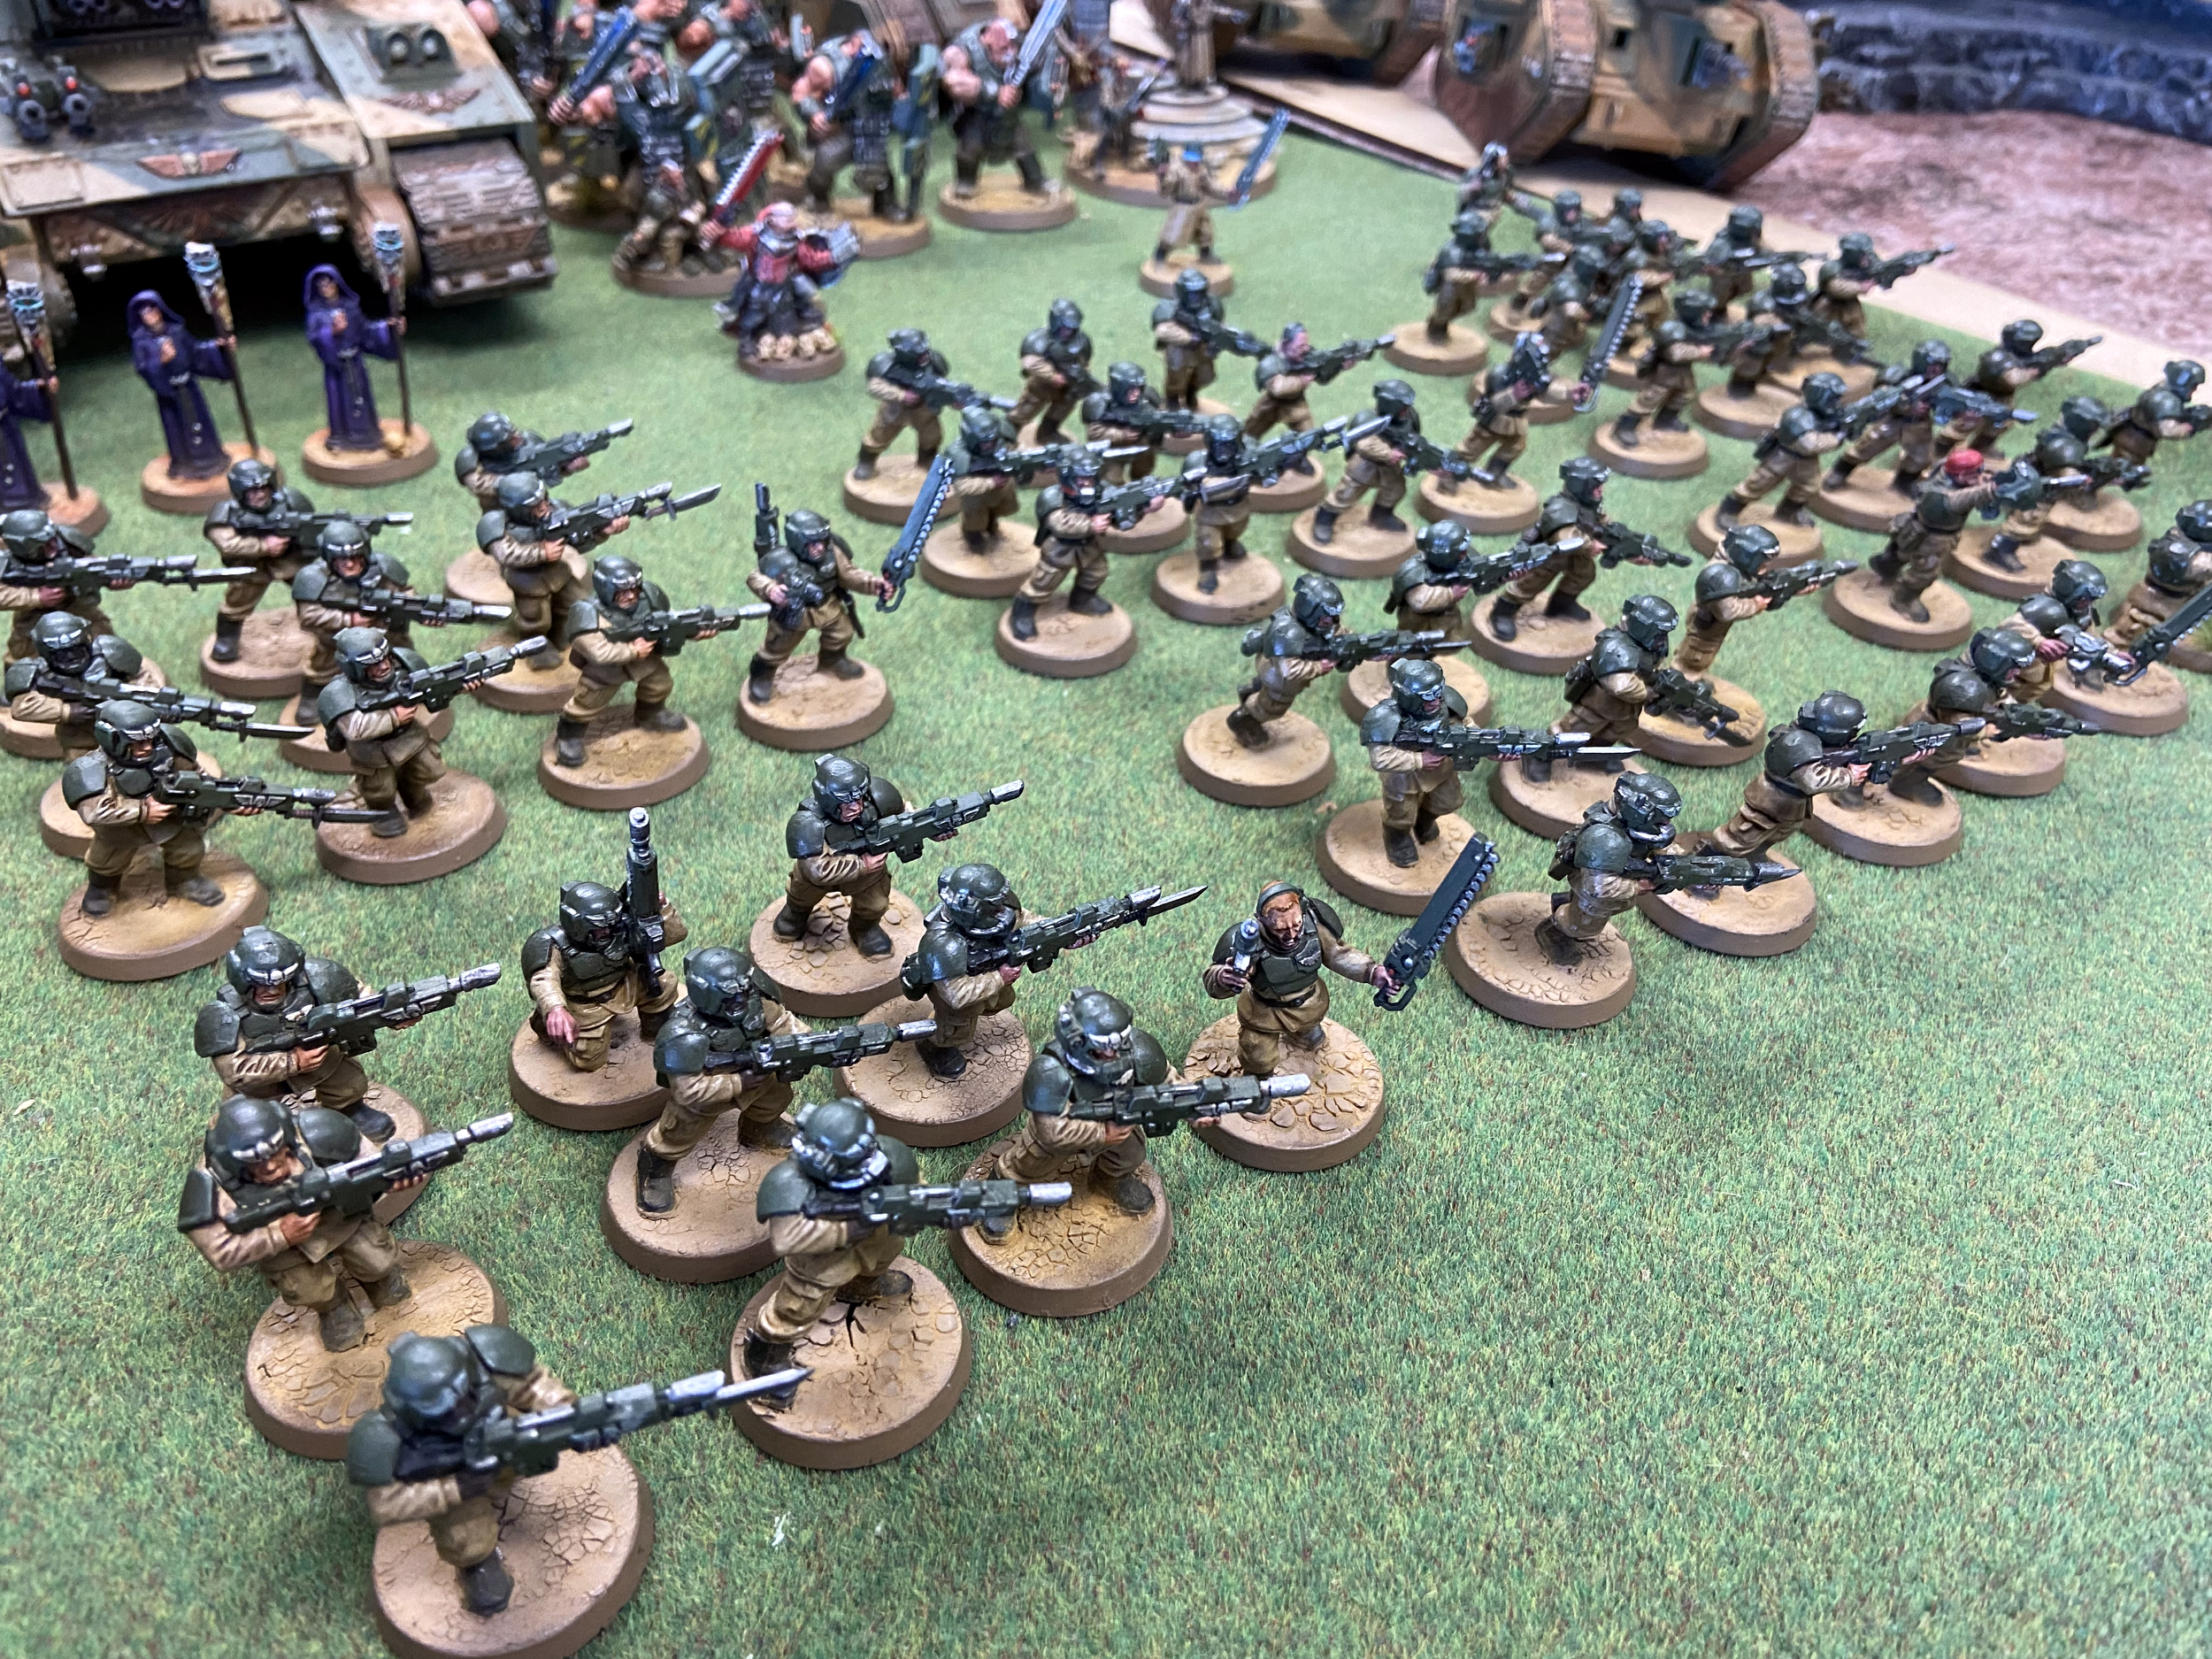
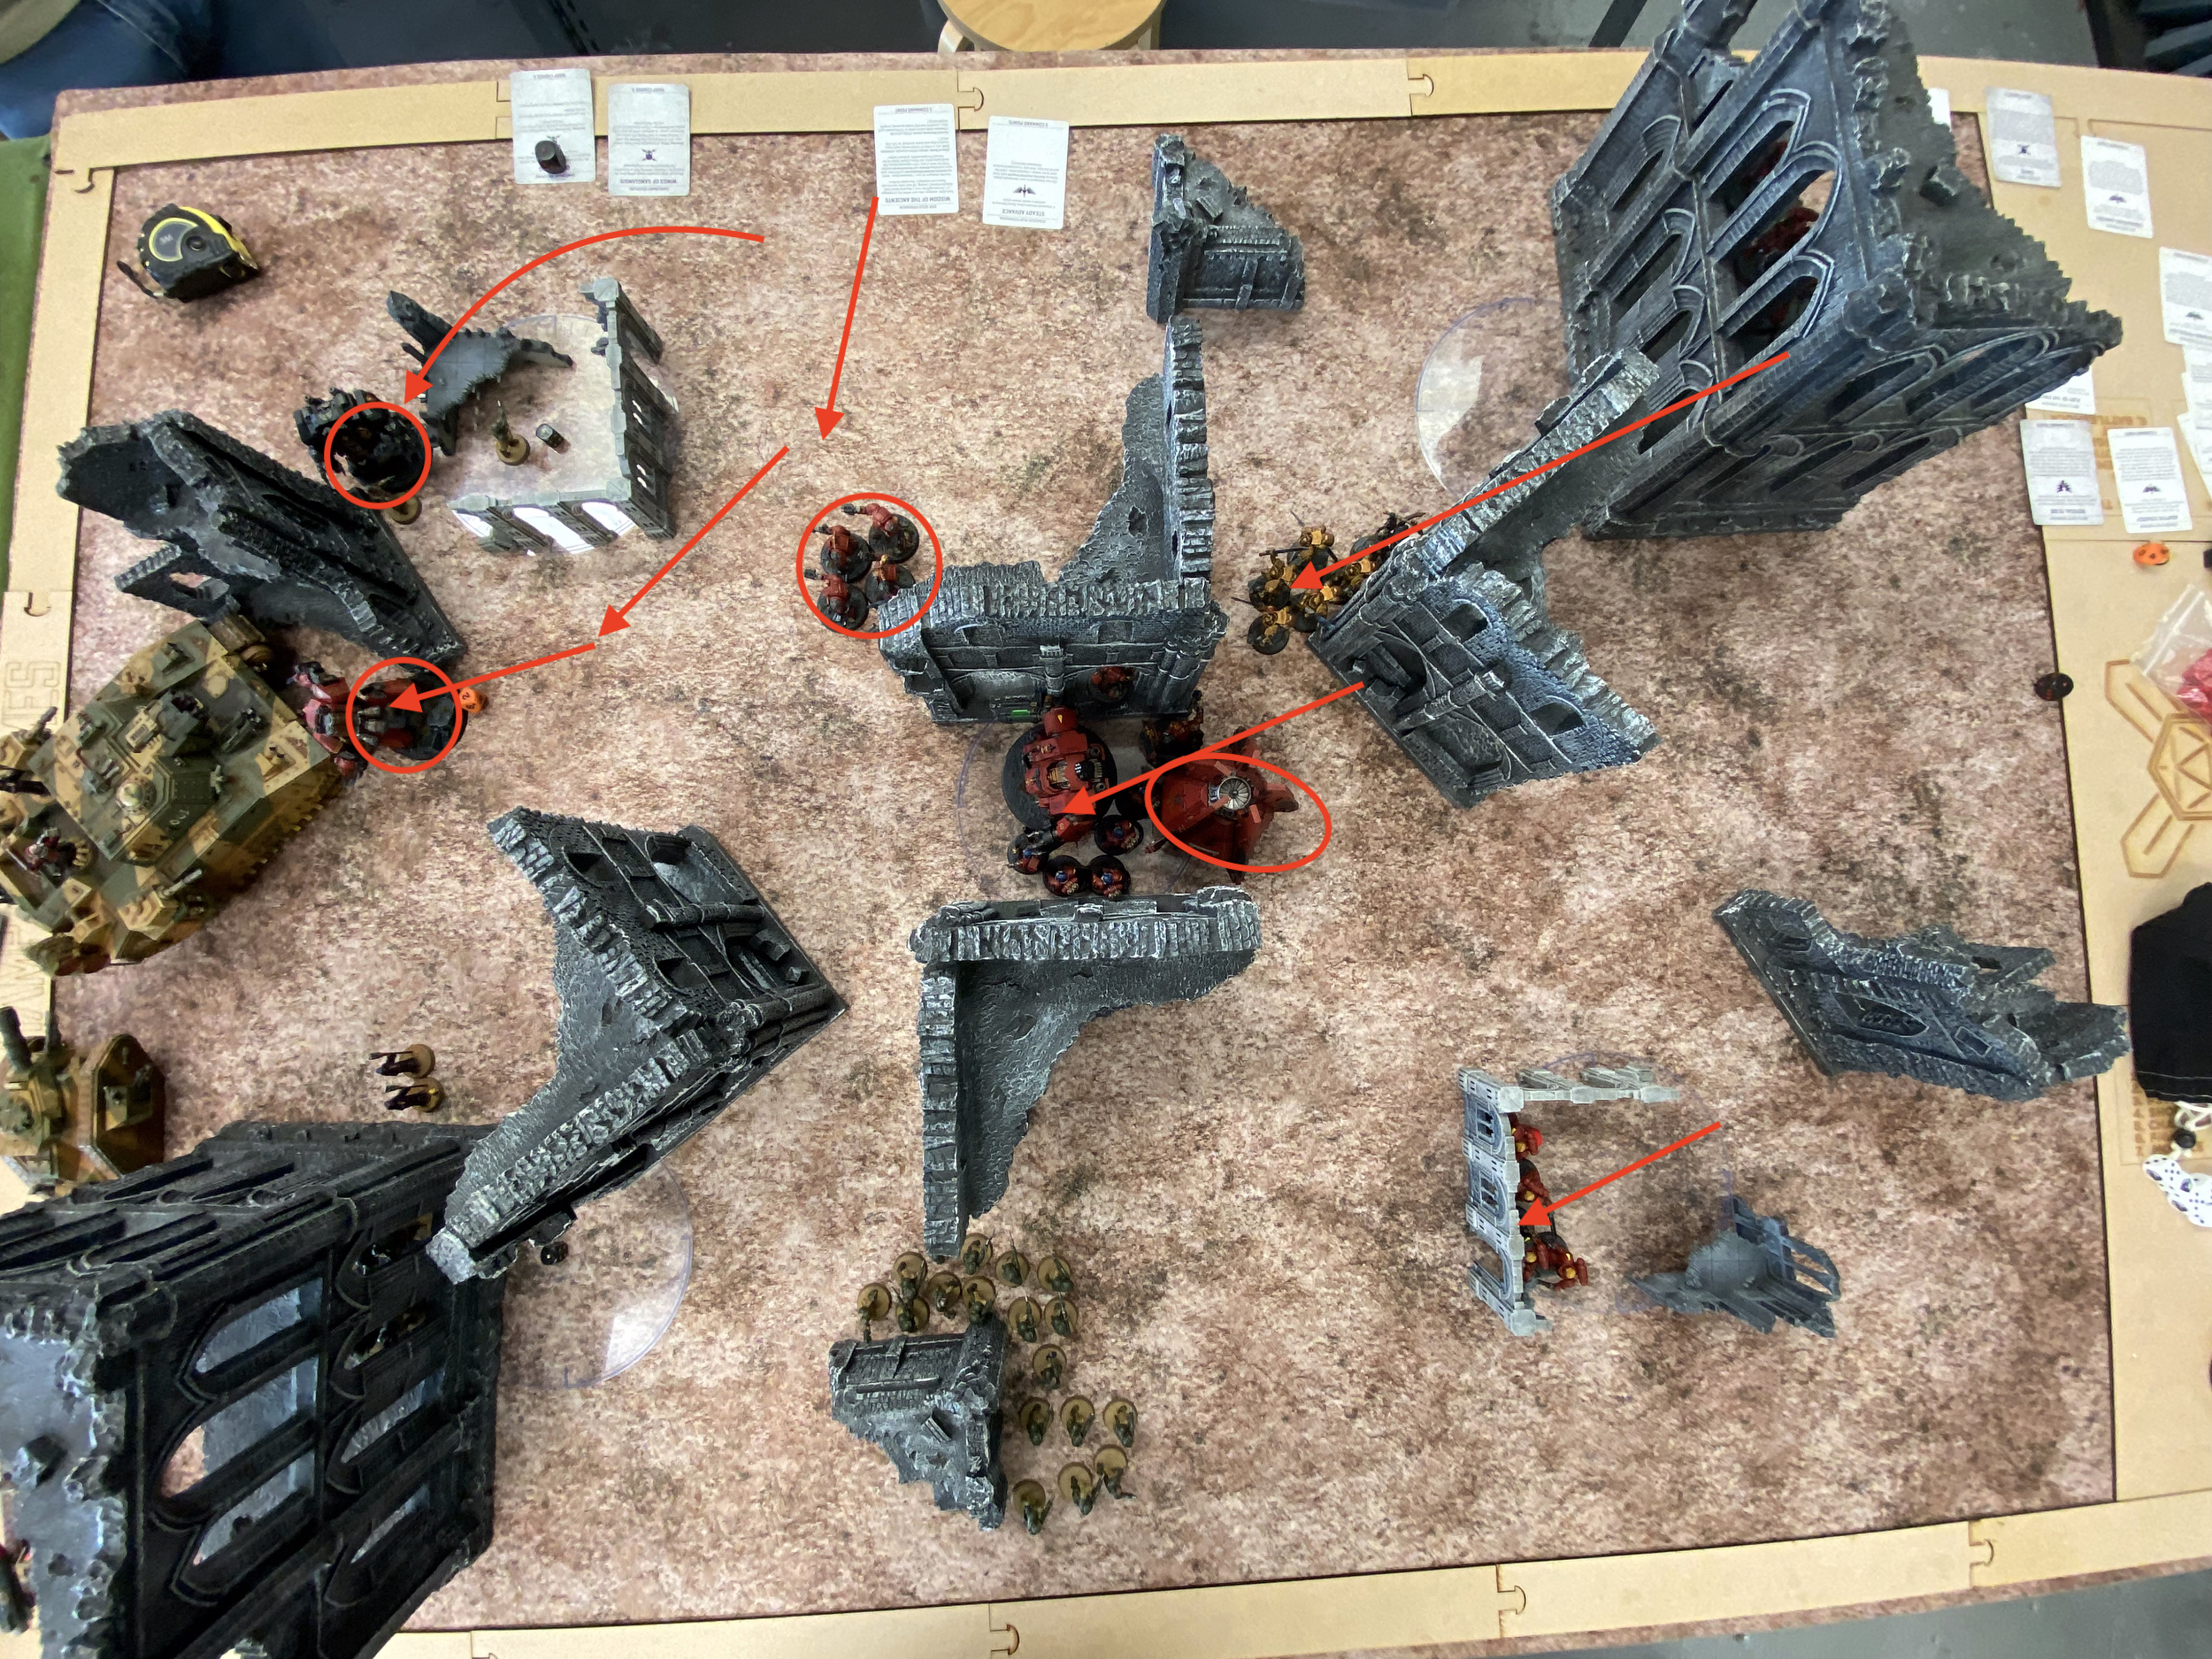
Right Flank
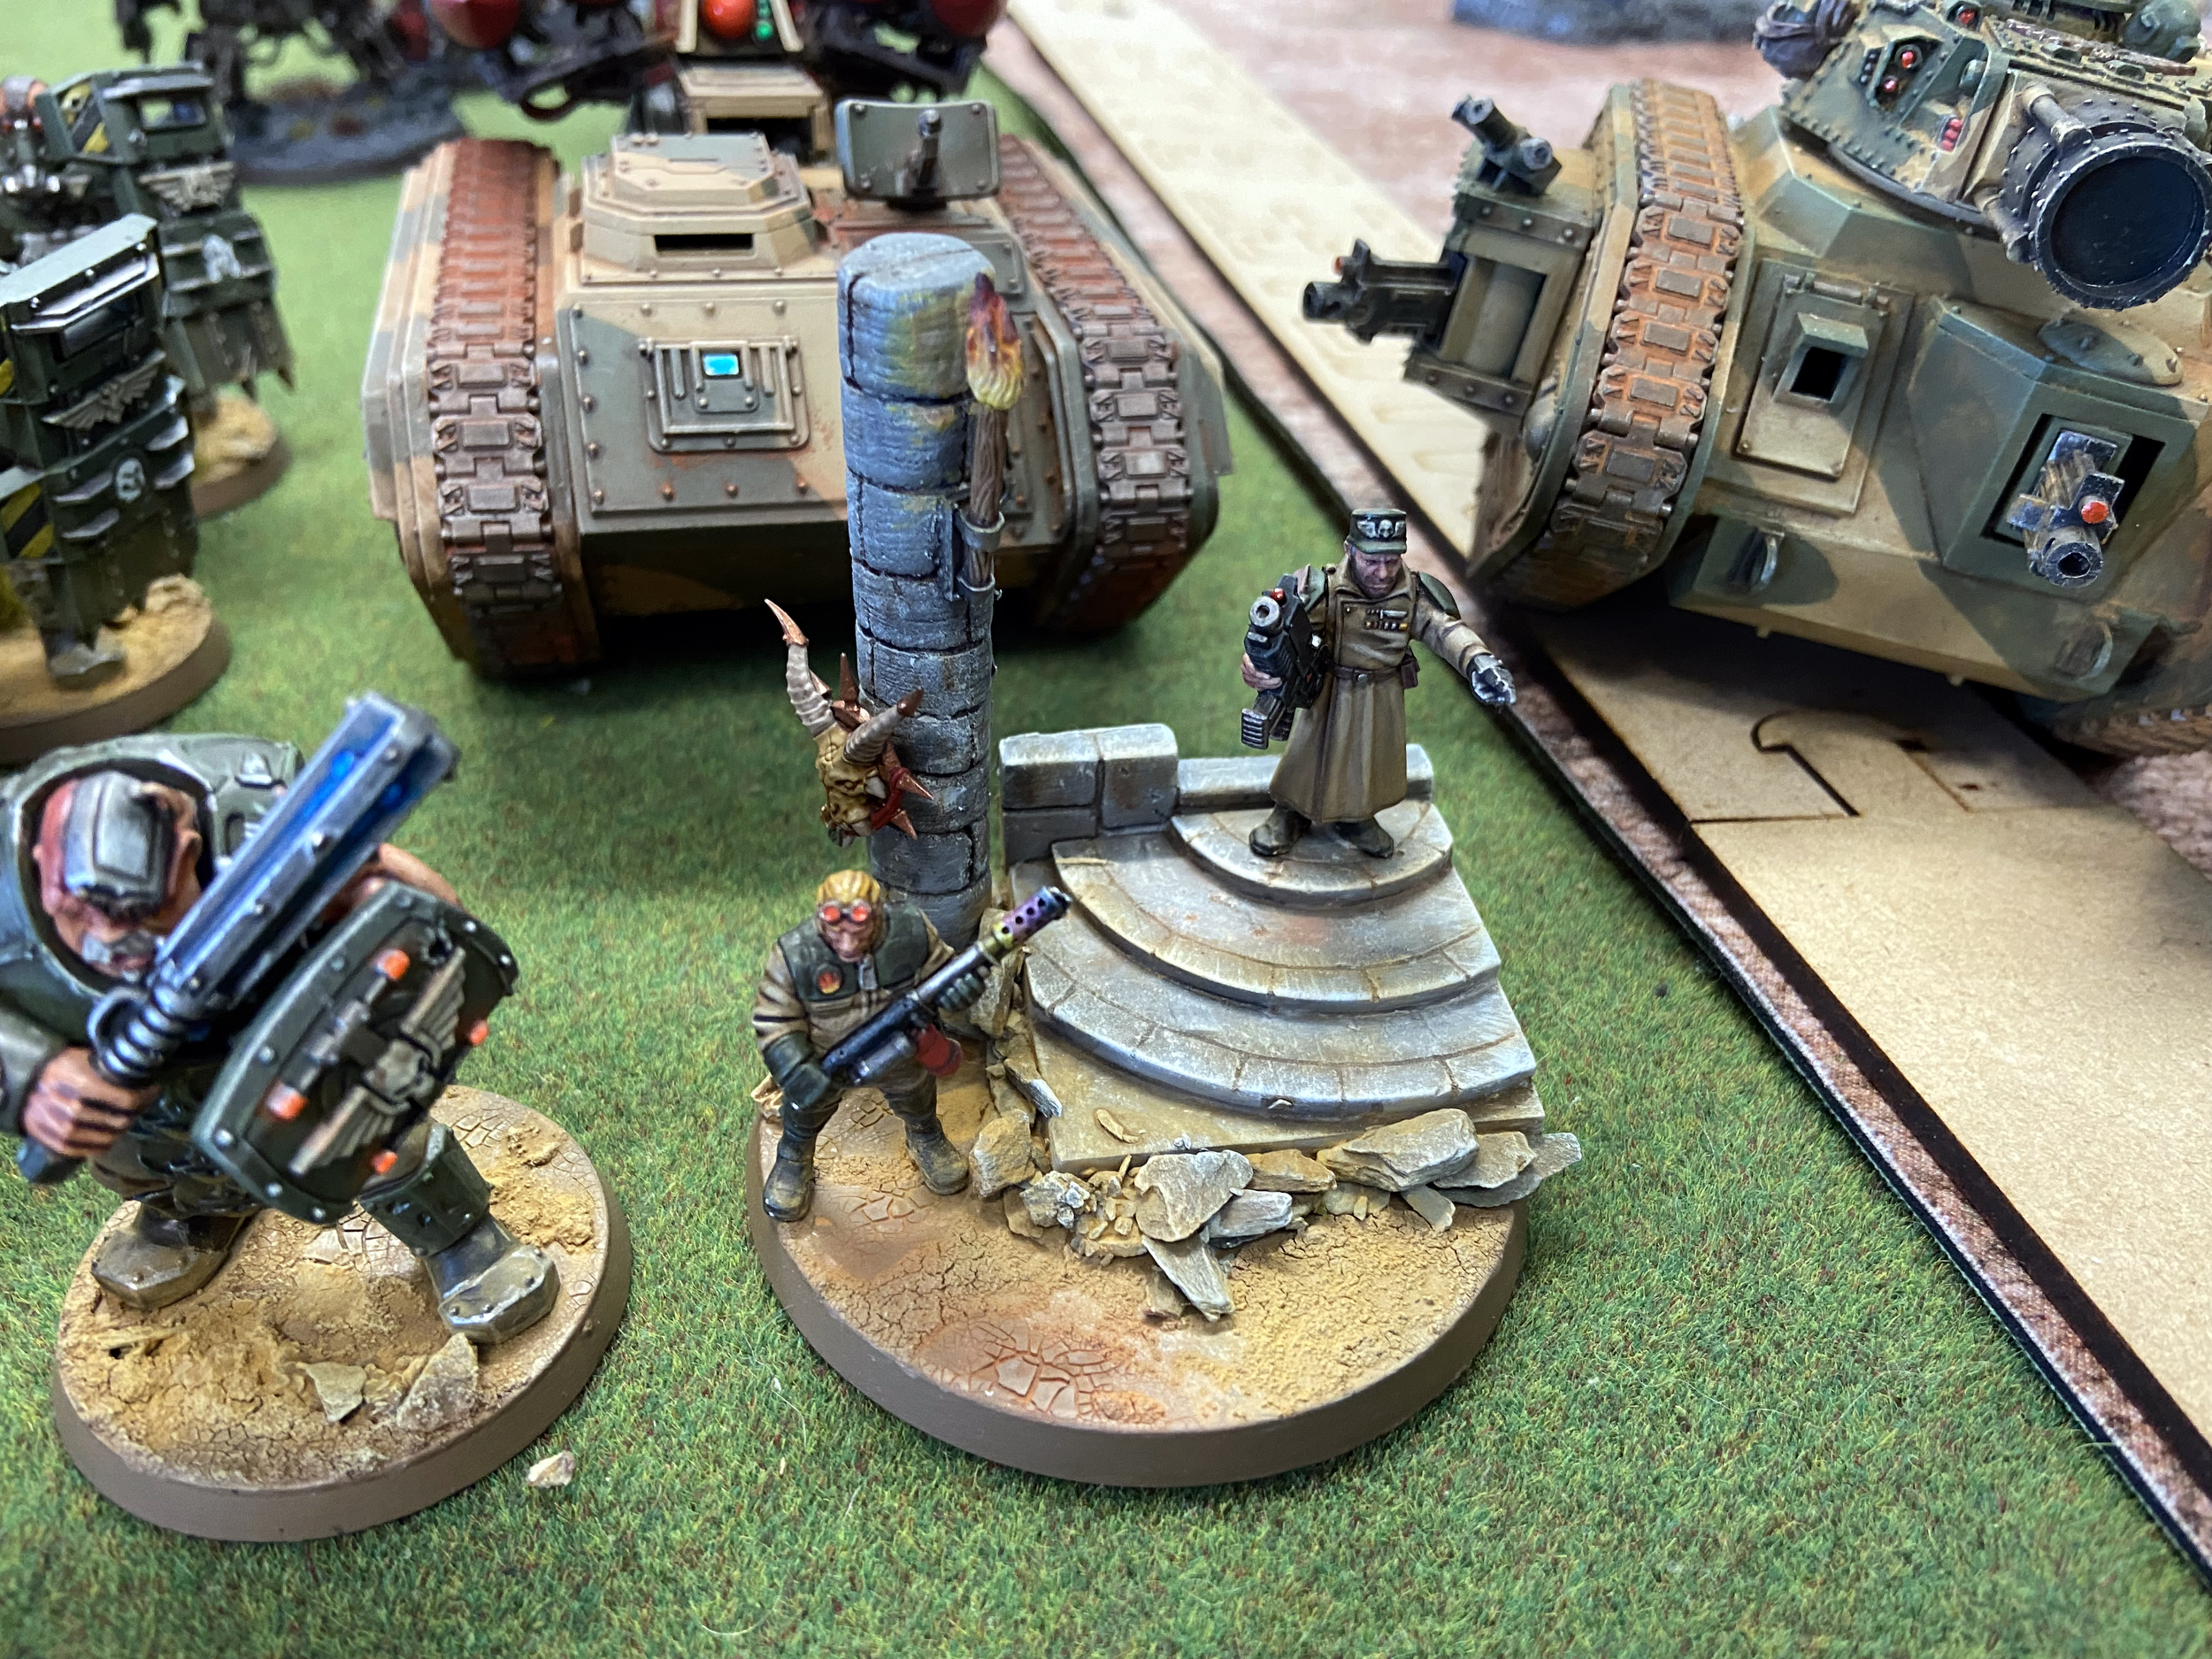
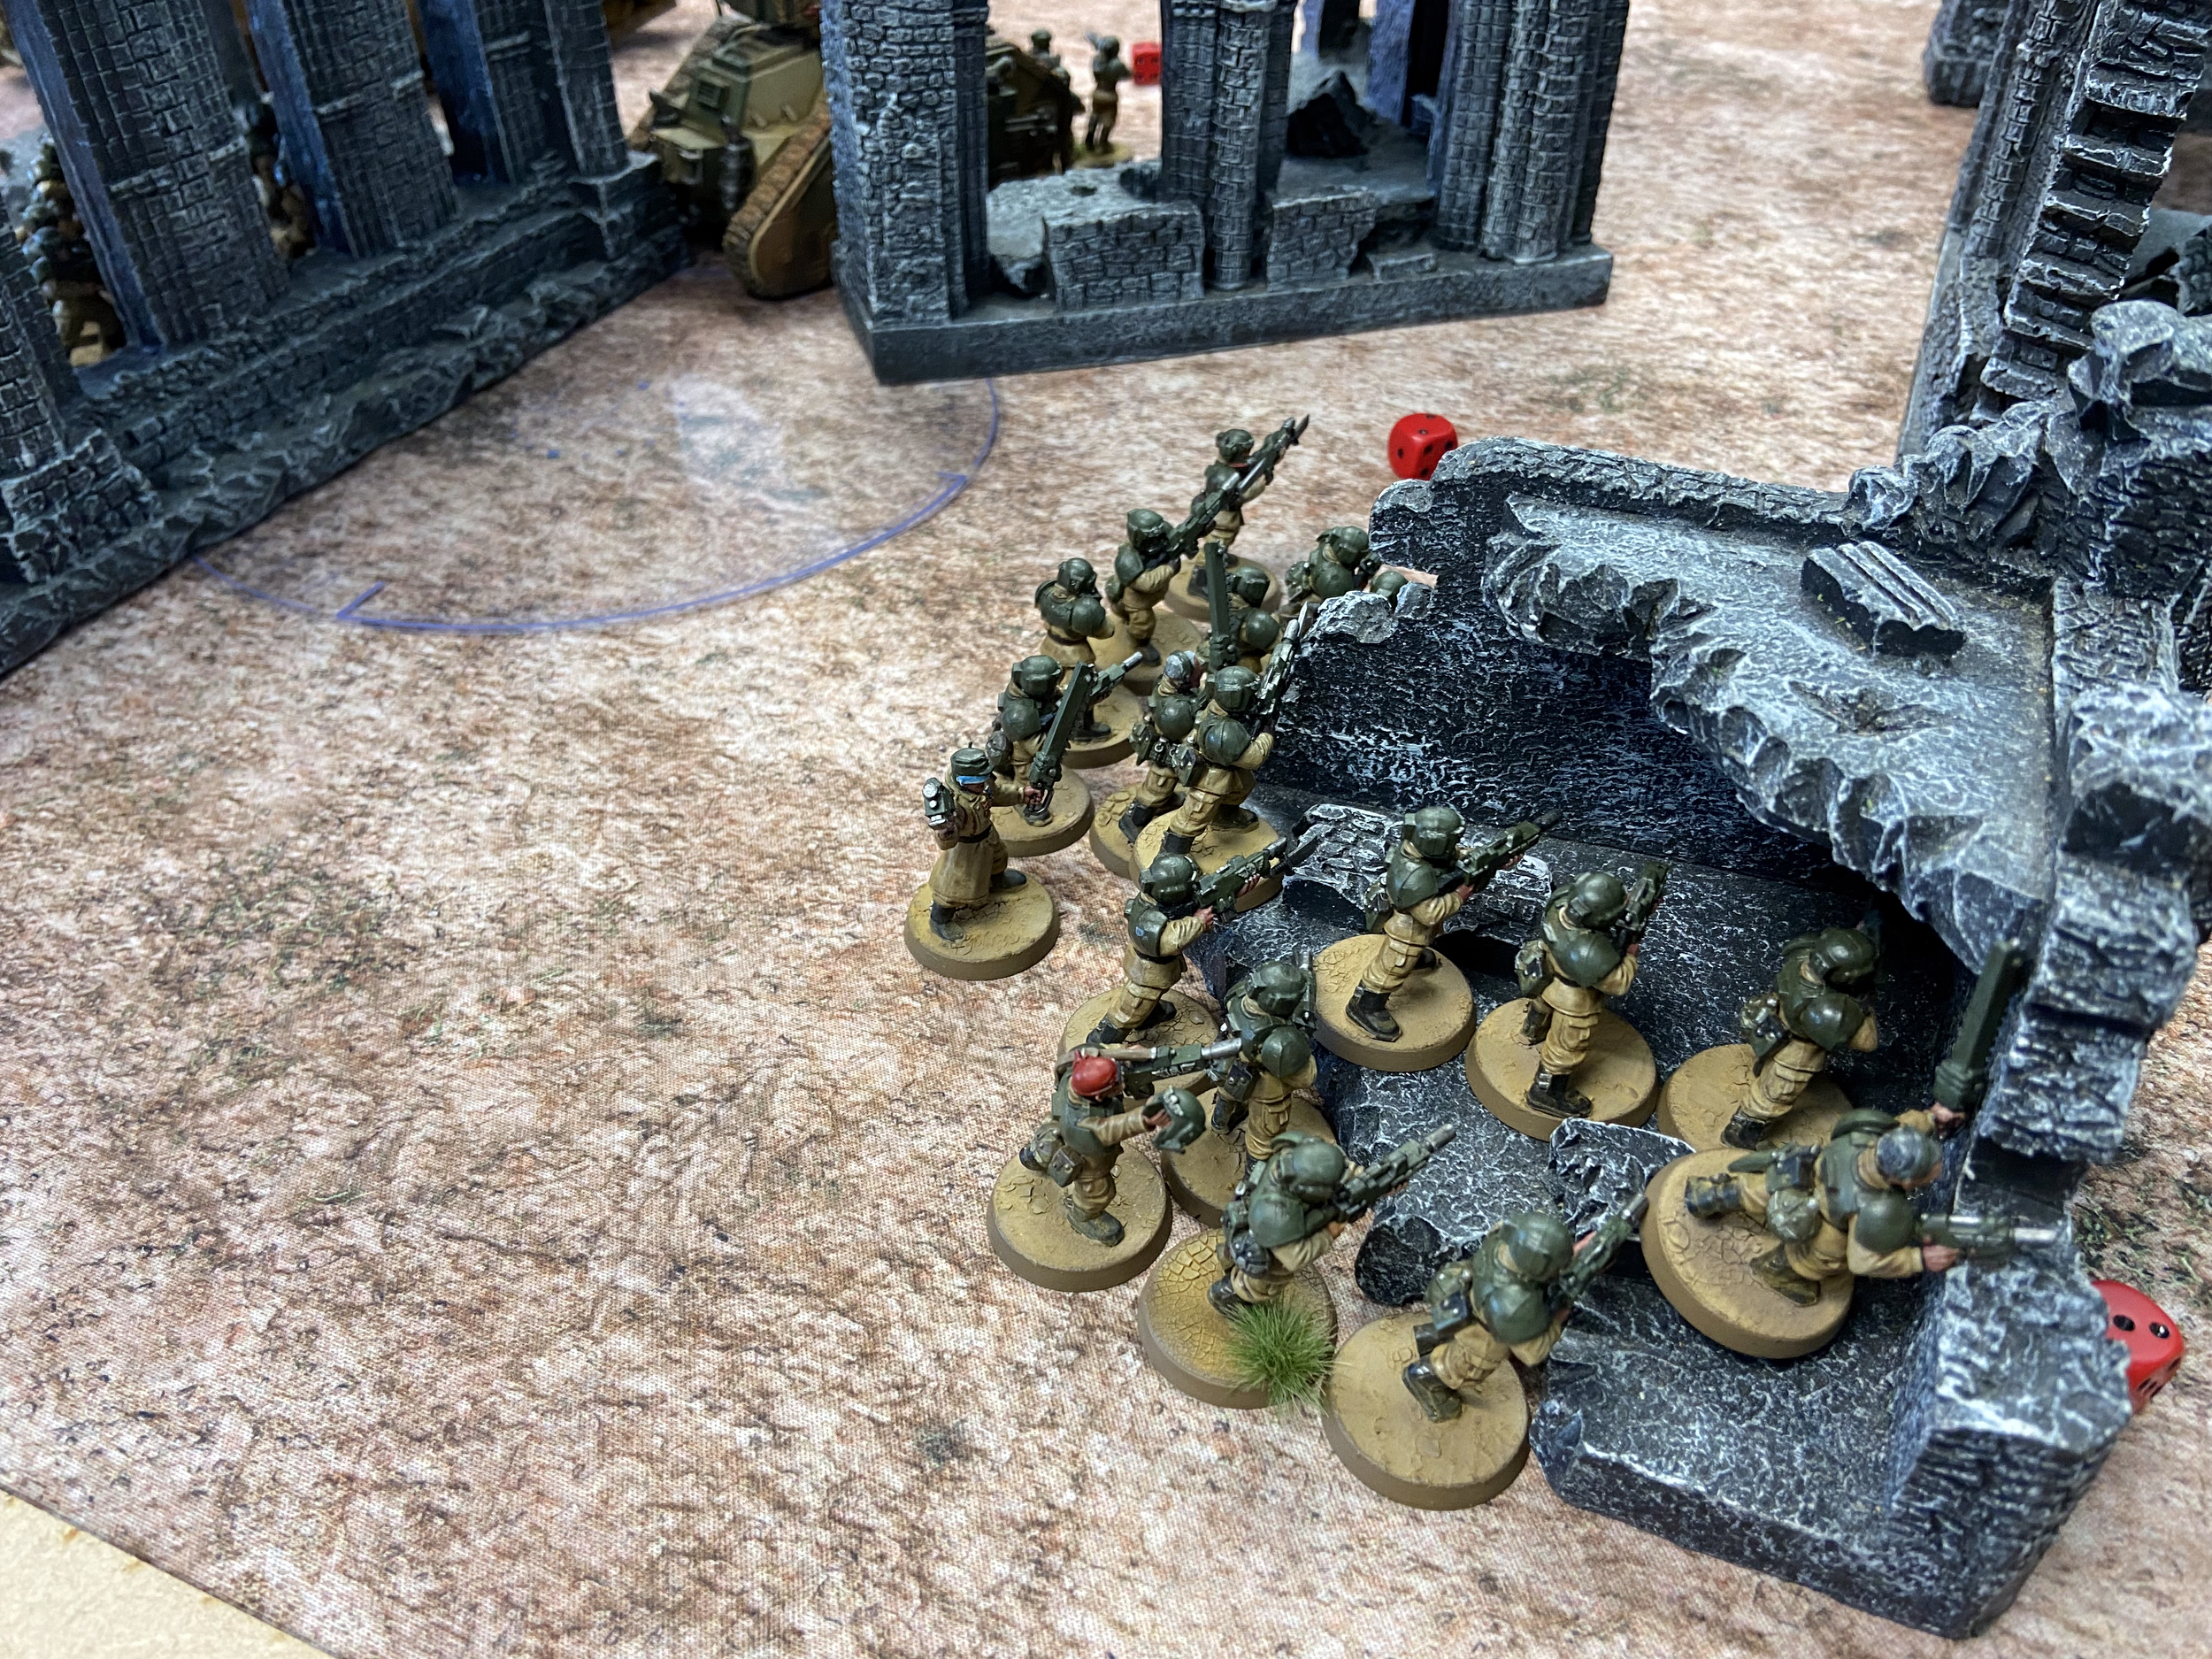
Two Infantry Squads are ripe for consolidating and the Platoon Commander will start here in a ruined building, in the hope of getting that -1 to hit from the ruined wall in the centre of No-Man’s Land. The Platoon Commander’s Draconian Disclipne will allow them to re-roll Morale Checks and his Tactica Pax Cadia relic will help me save on CP while buffing the Infantry Squad’s ability to attack and survive.
Turn 1 will see these guys move forward to either grab the middle Objective or plant the first explosive. Or both, hopefully. This is high risk as they may be in the open, but will be able to benefit from that Dense Cover in the middle. That is not the issue though. The issue is being charged and killed instantly – or having a Drop Pod come down turn 1 and just be in the way.
Their support for such issues; such as a Drop Pod for rampaging units wanting to get into melee – will have to come from afar via the Gatekeeper Tank Commander or the Manticore. The Demolisher Tank Commander could swing right around the middle building to support too, instead of left.
Left Flank
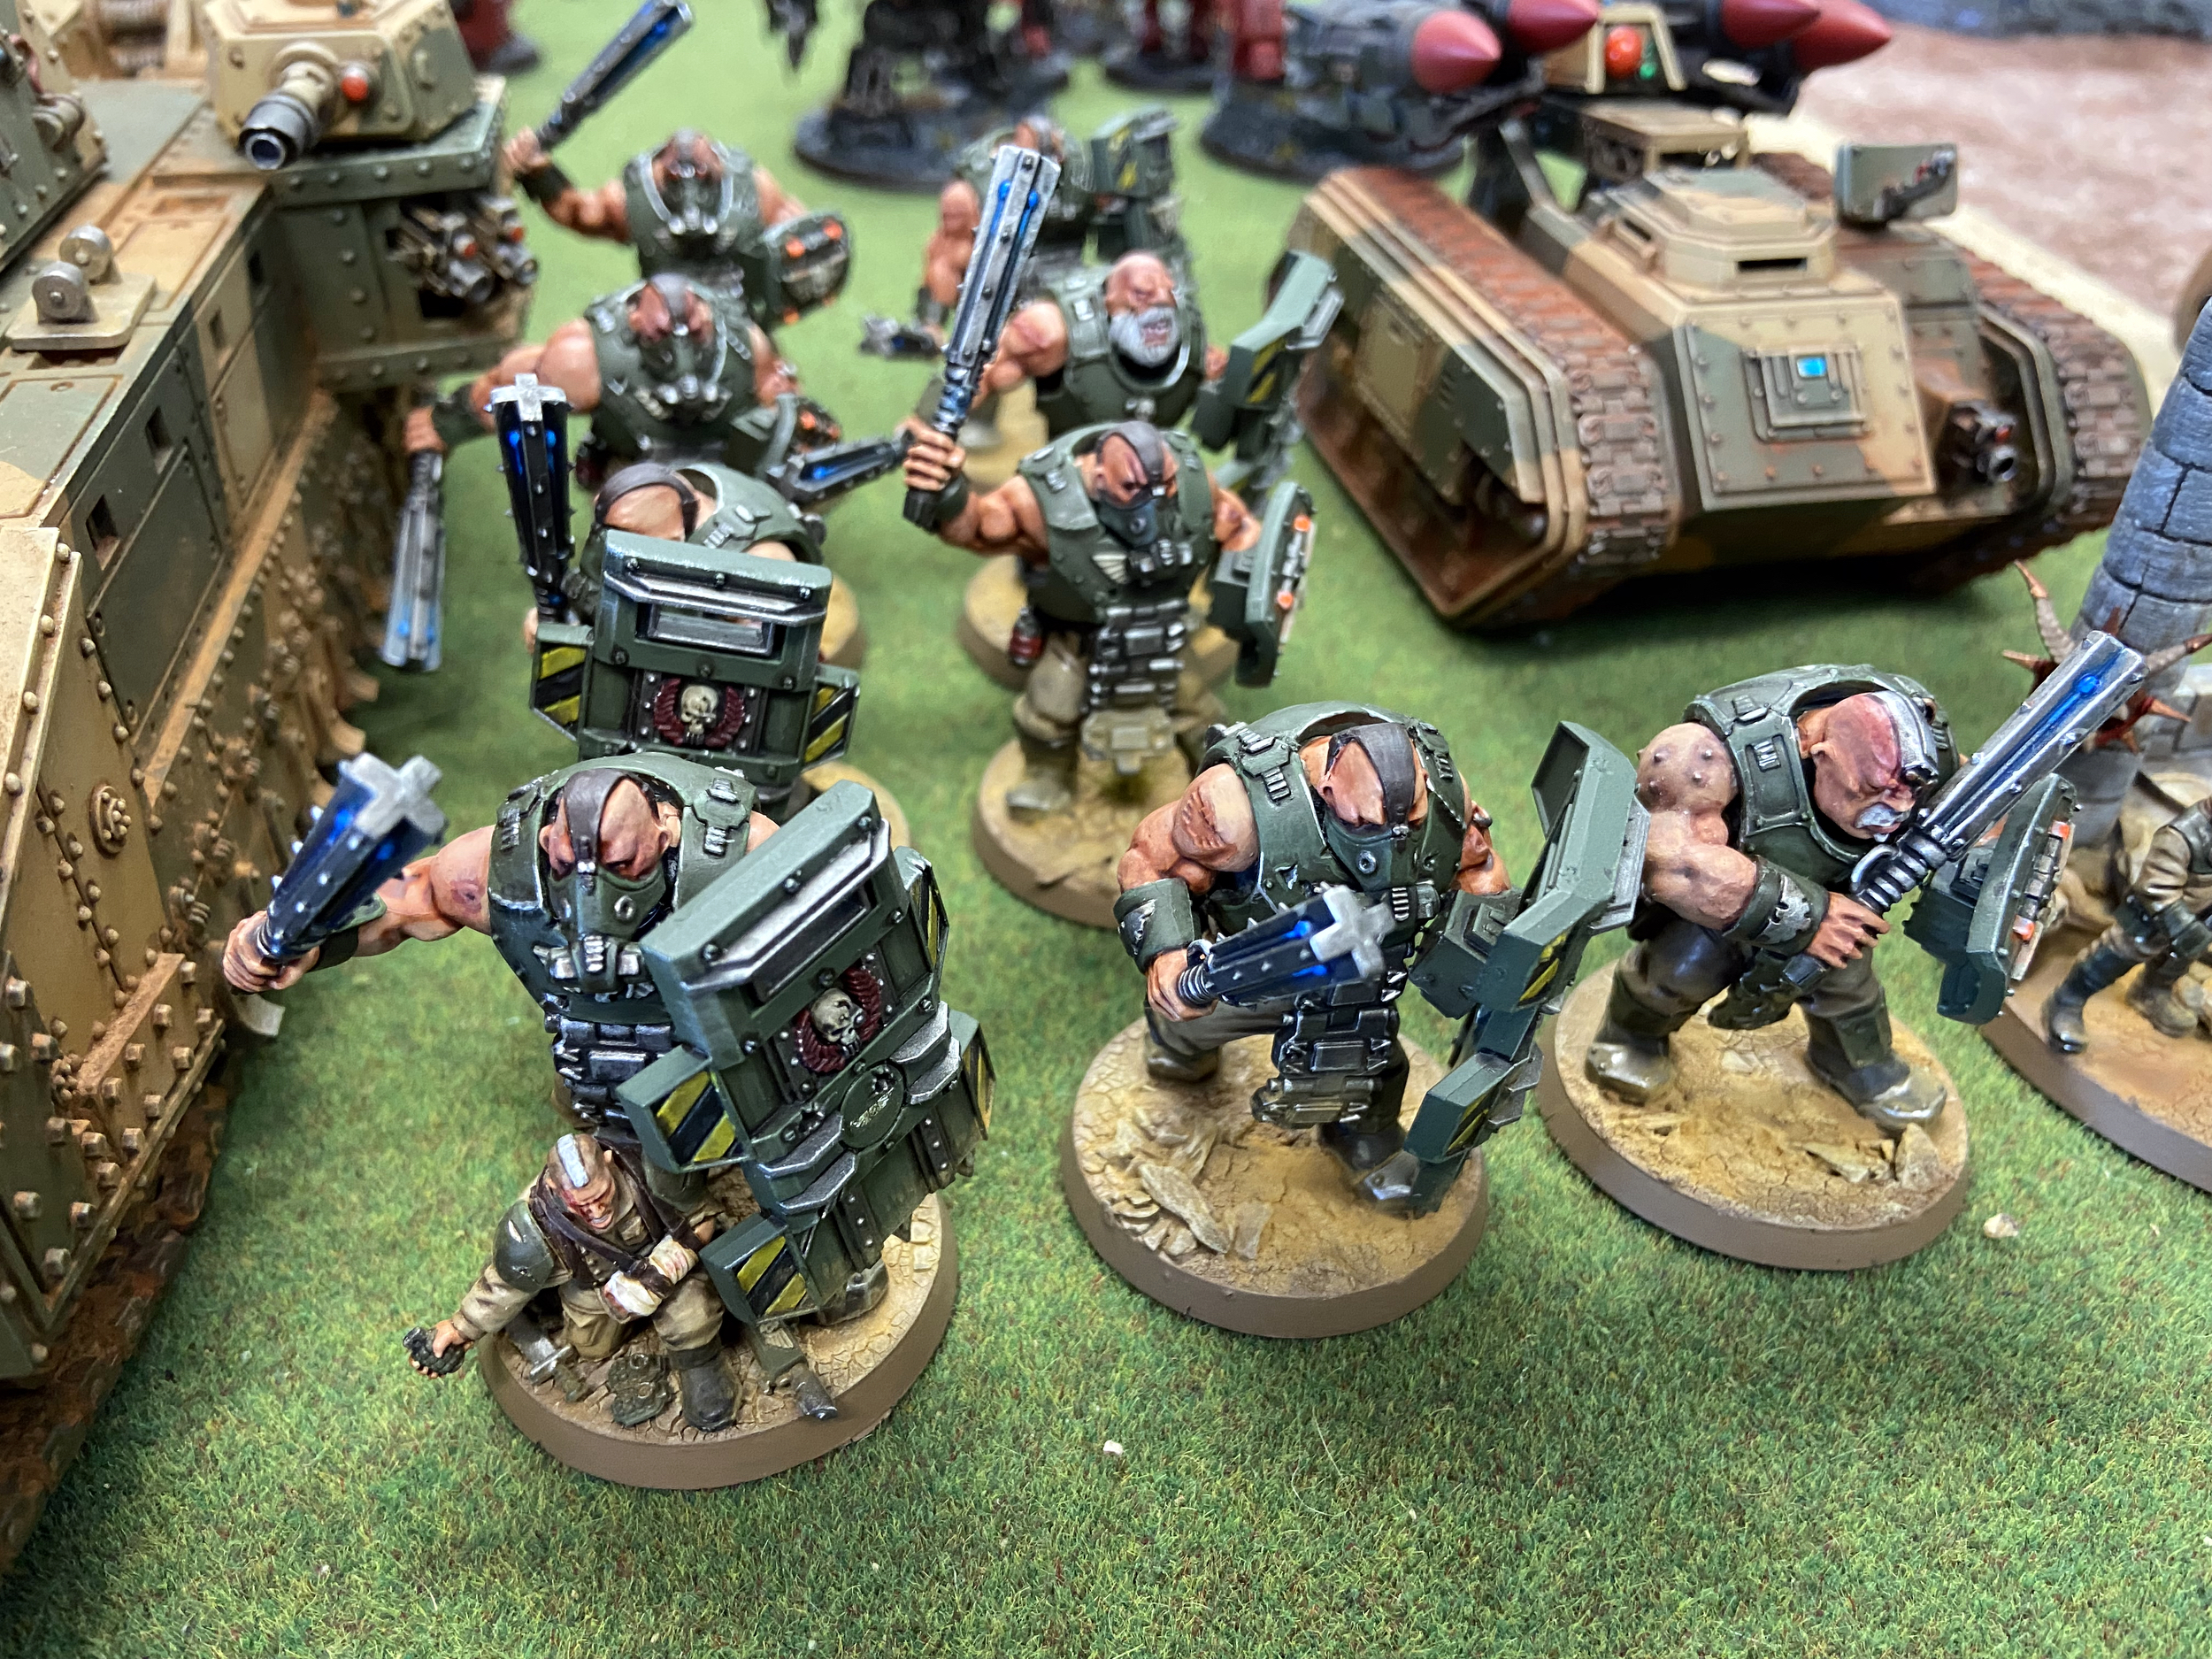
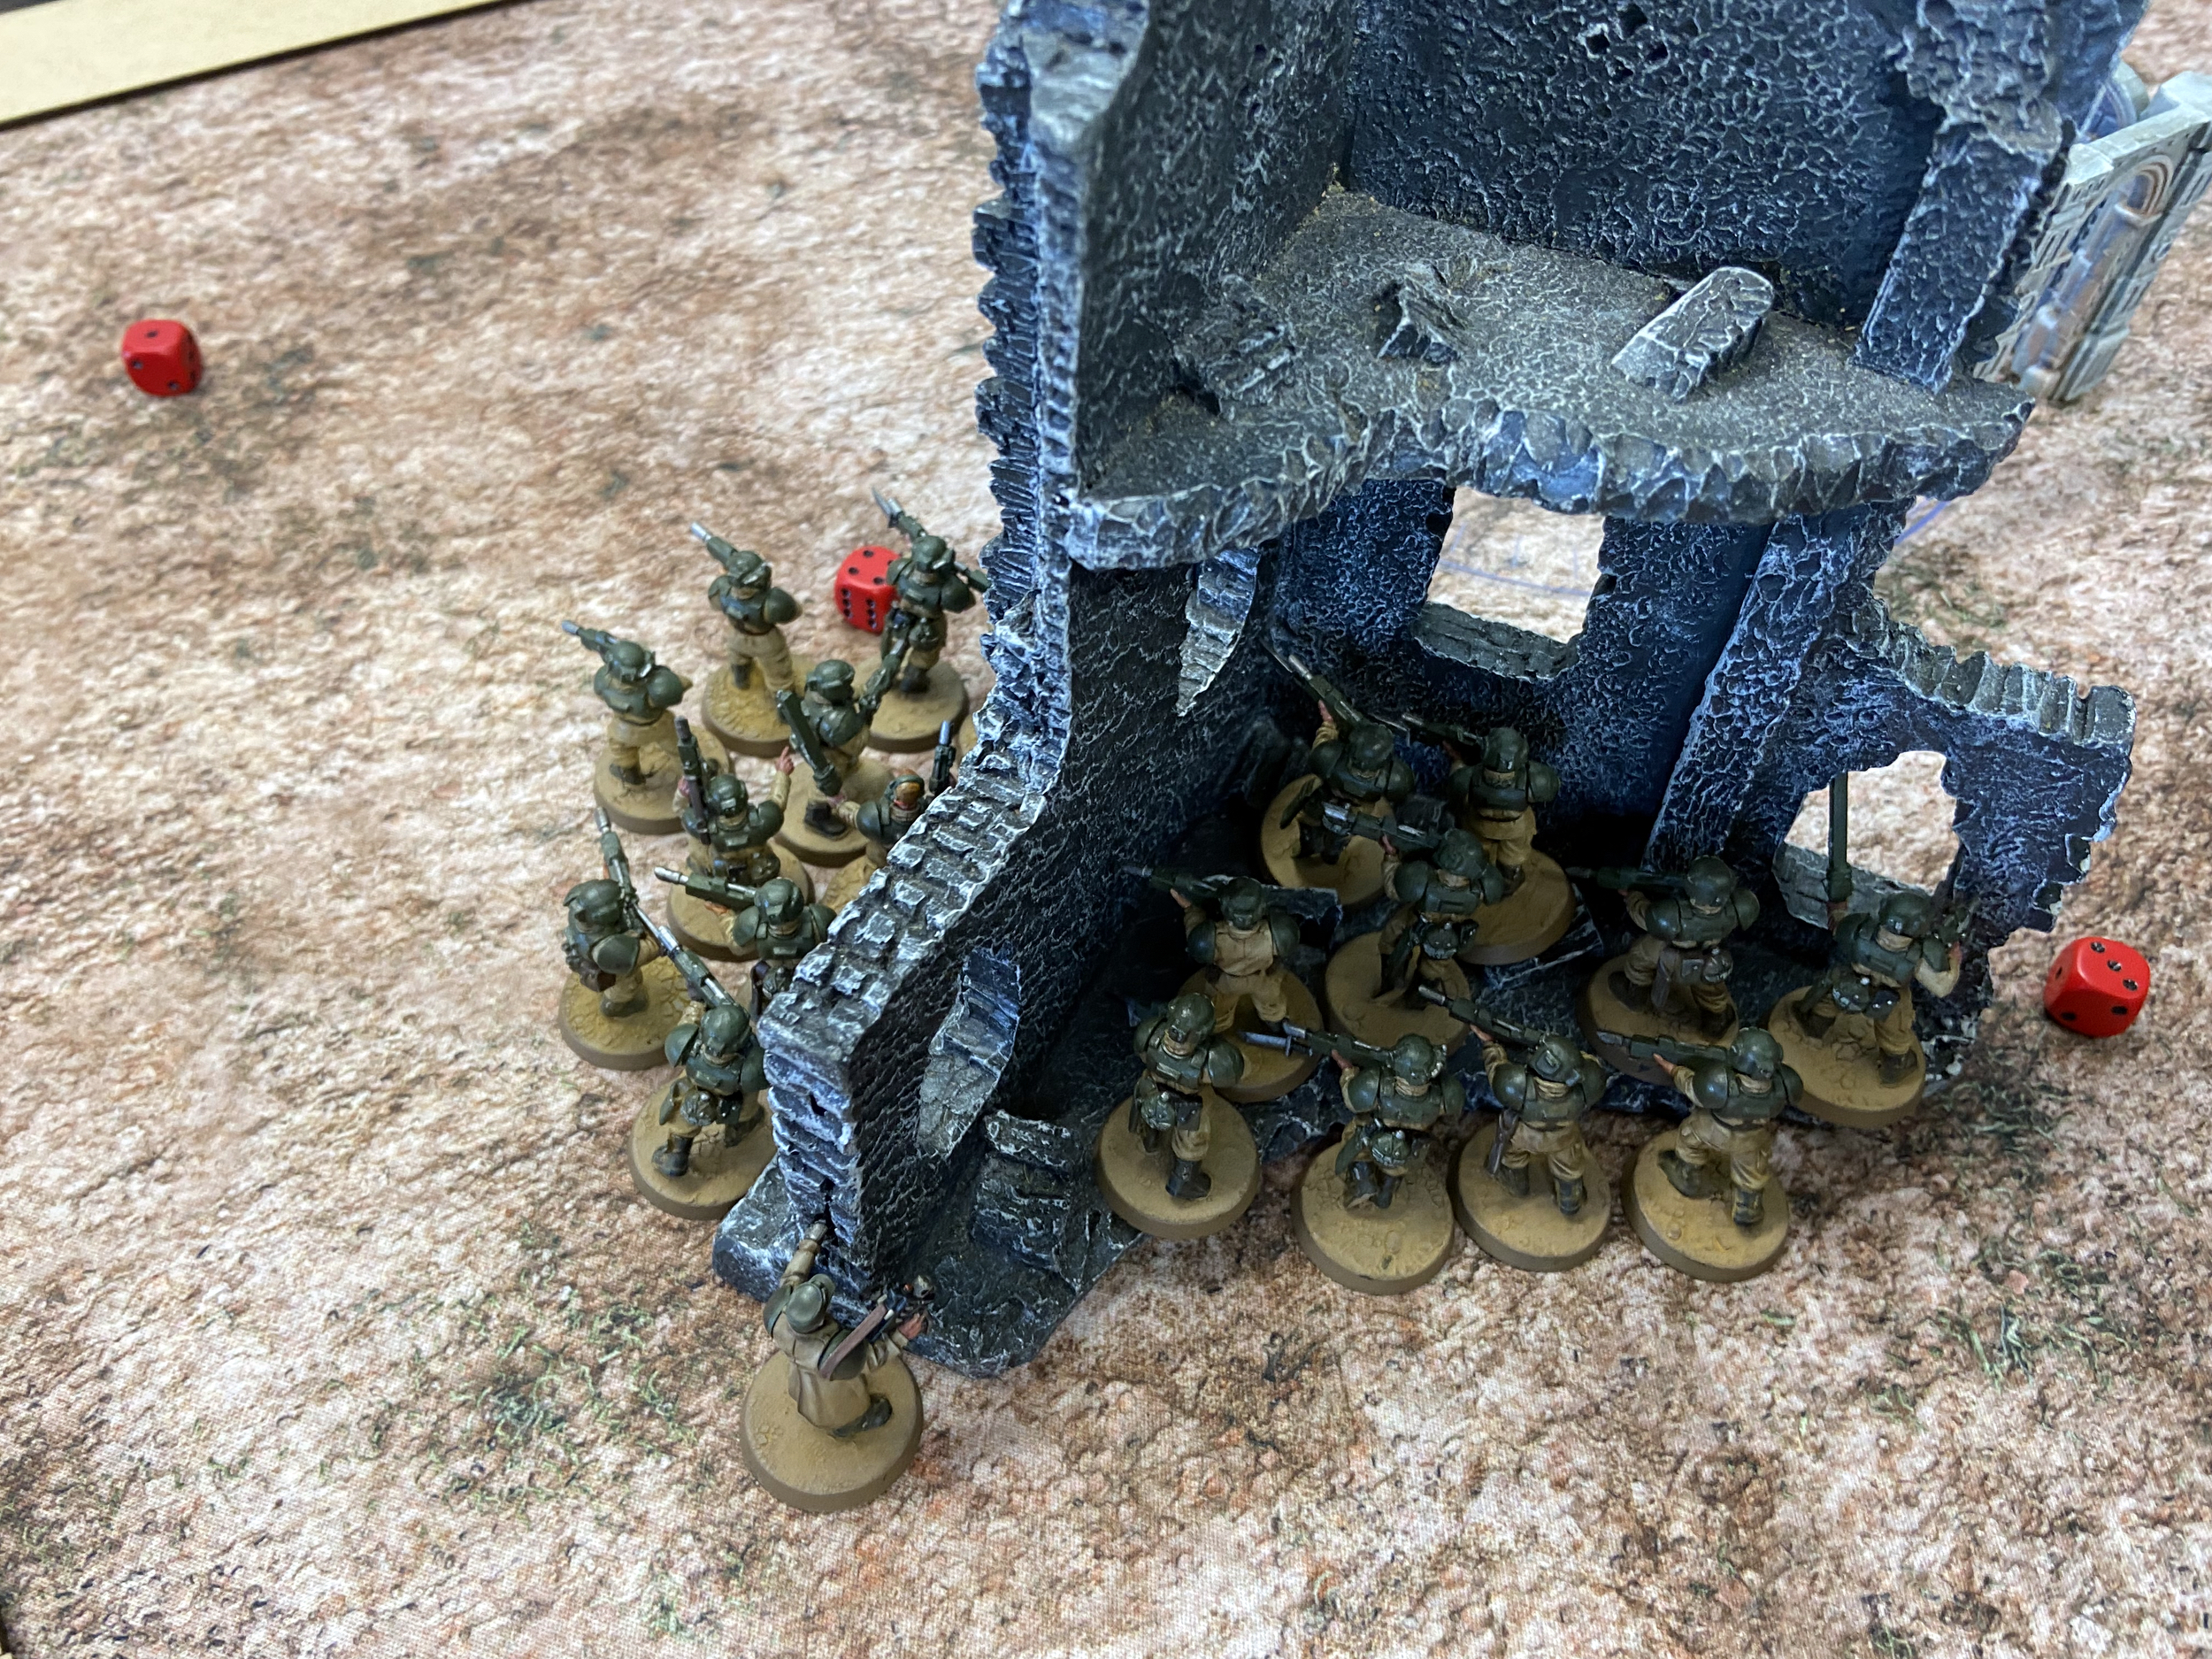
The Blood Angel’s right flank will be their best route to get into my half of the battlefield to plant explosives. Just like my best route is my right flank. With this in mind, this is where my Stormlord and Bullgryns will head. My Warlord and two other Infantry Squads will also head this way to defuse any explosives planted. I will try and consolidate these two squads as well, and get the Laurels of Command to work on that pesky 4+.
They will be able to get the Objective and also make use of that Dense Cover.
The Demolisher Tank Commander should head this way too, to activate his 12″ Lost Relic of Cadia ability on himself, the Stormlord and the Infantry Squads with my Warlord. But if that right flank needs some support it may have to divert and head that way.
I think that area where the Stormlord is pushing into will be key to the game. It is where the Blood Angels will come to play their explosives. Awaiting their arrival and then hitting them hard with the Stormlord and Bullgryns might break them enough to swing the game.
I might place the Stormlord further back, not on the front line. If the deployment distance is 24″ and I set it back 6″ then it will be impossible for the Eradicators to hit the Stormlord turn one…
Centre
The front-most Infantry Squad will shuffle up a bit, that centre is going to get bloody with very aggressive Blood Angels very fast.
The Gatekeeper Tank Commander will shift forward to try and get his line of sight onto that right flank. But keep far enough back to ensure his Old Grudges Warlord Trait is able to affect the Manticore. It is a narrow corridor for him to spy enemy units I think, with a Lascannon and the Gatekeeper Battle Cannon though he will have the range.
Finally, the Infantry Squad in the ruin in front of the Manticore will shuffle forward to deny any Deep Strikers coming into that area behind my two Infantry Squads and Platoon Commander on the front flank.

The Execution
Everything before this point was written pre-game. I often write out my lists before the game in a draft blog article. But this time I went a step further with the map and a plan – because I knew the mission. Everything from this point onwards was written after the game…
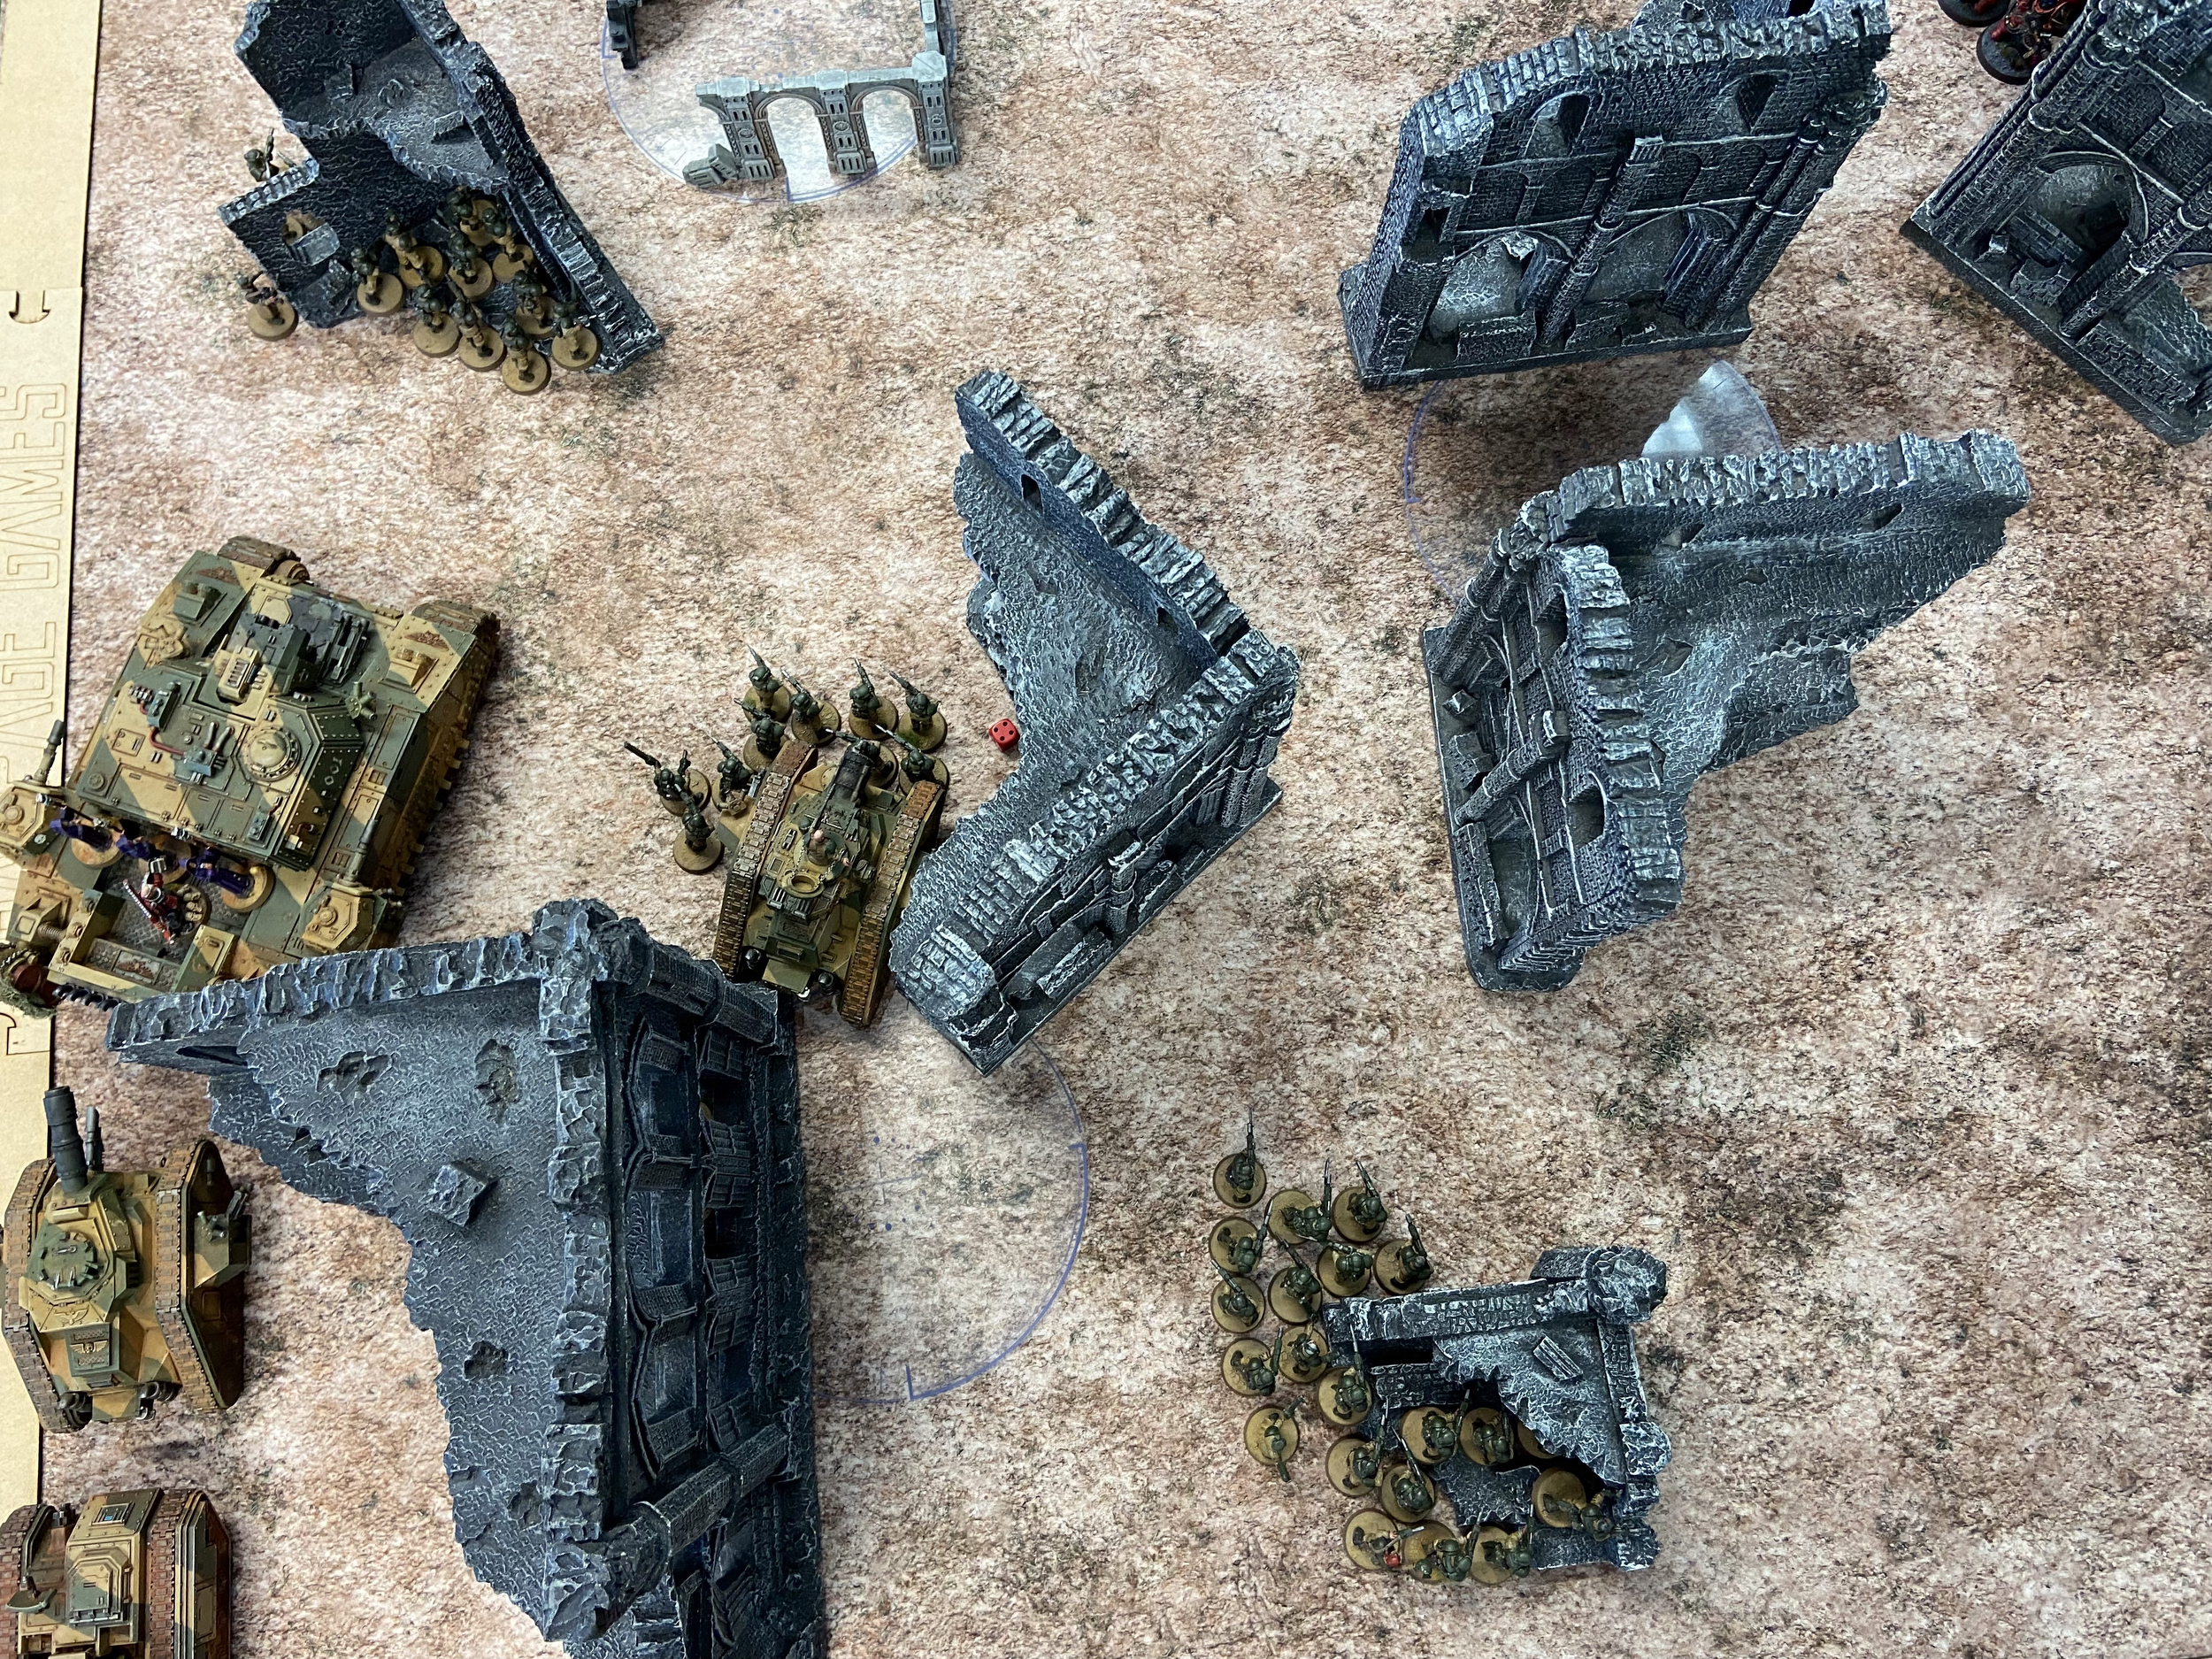
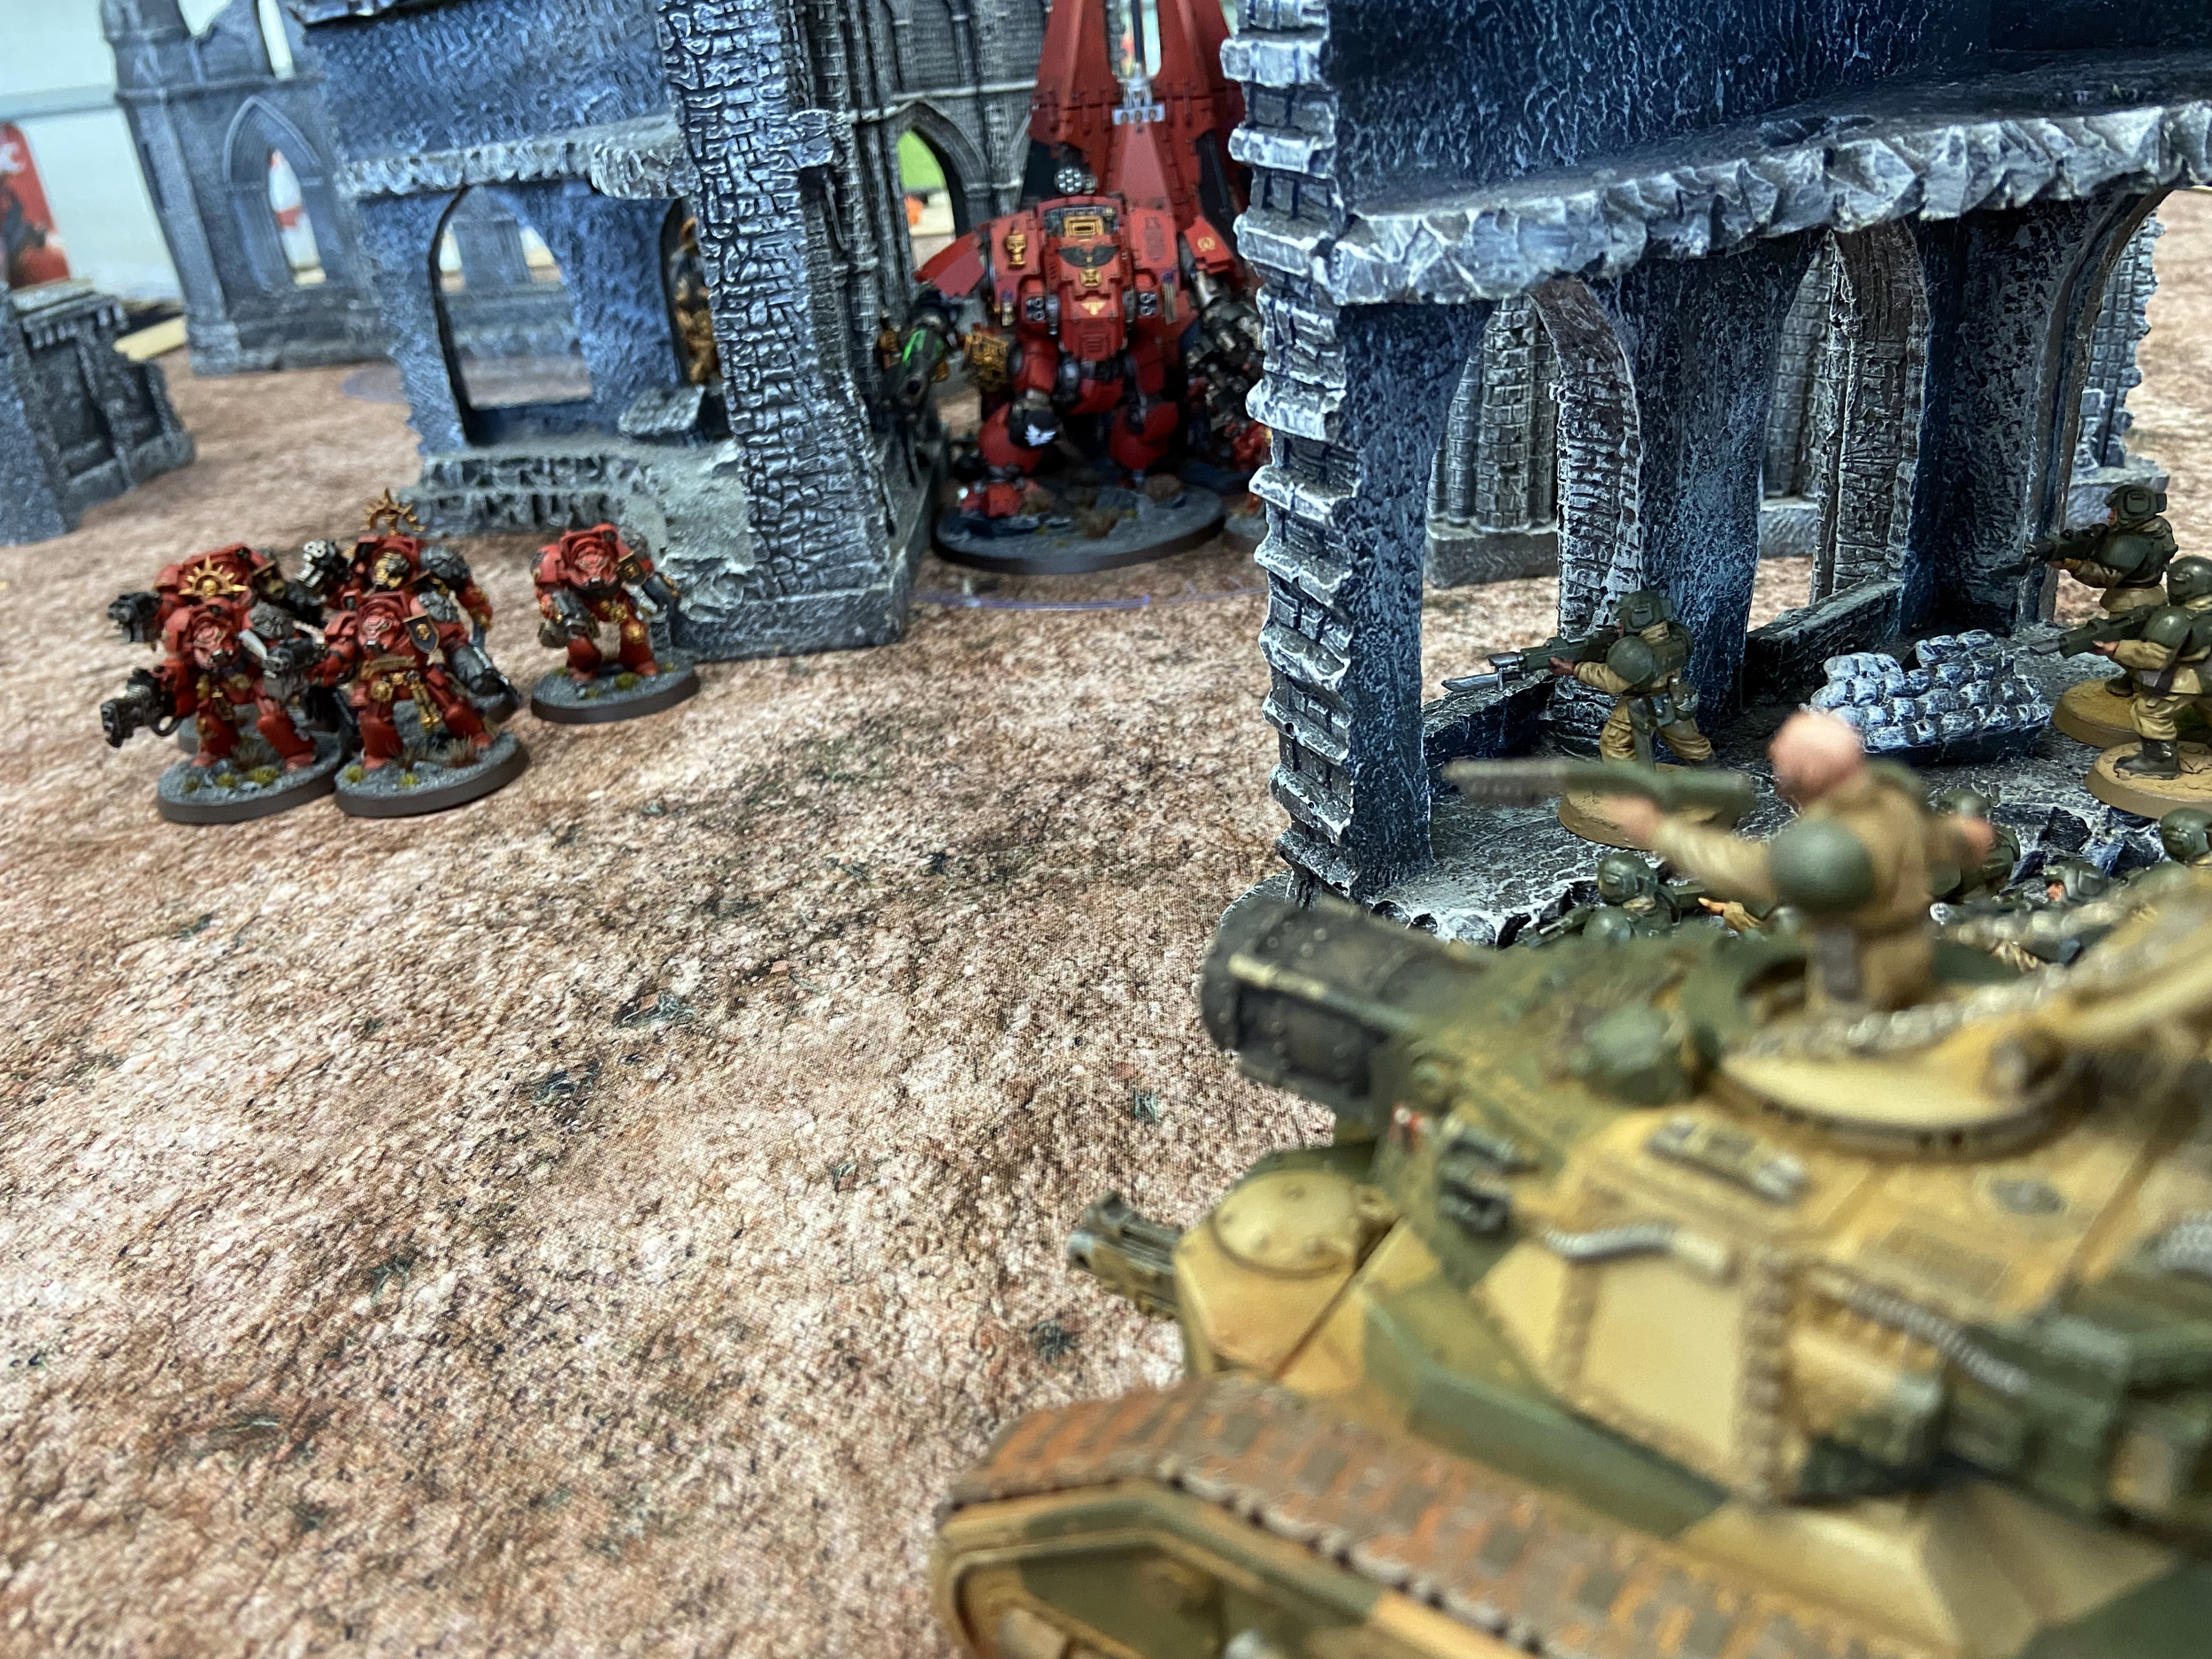
I think I got the deployment pretty bang on my plan. Everything went where it was meant to and it fit too. The Stormlord I did pull back because there were Eradicators right on the enemy frontline and bringing it back those 8 or 9″ would make all the difference here.


Turn 1
Blood Angels
With the first turn, the Blood Angels inched forward. Exposing themselves too much at this point wouldn’t be wise, the Cadians had a lot of shooting on the table.
Objectives are obtained but the shooting was almost nil thanks to the range and line of sight issues.
No Drop Pod arrived.
Phew.
Astra Militarum
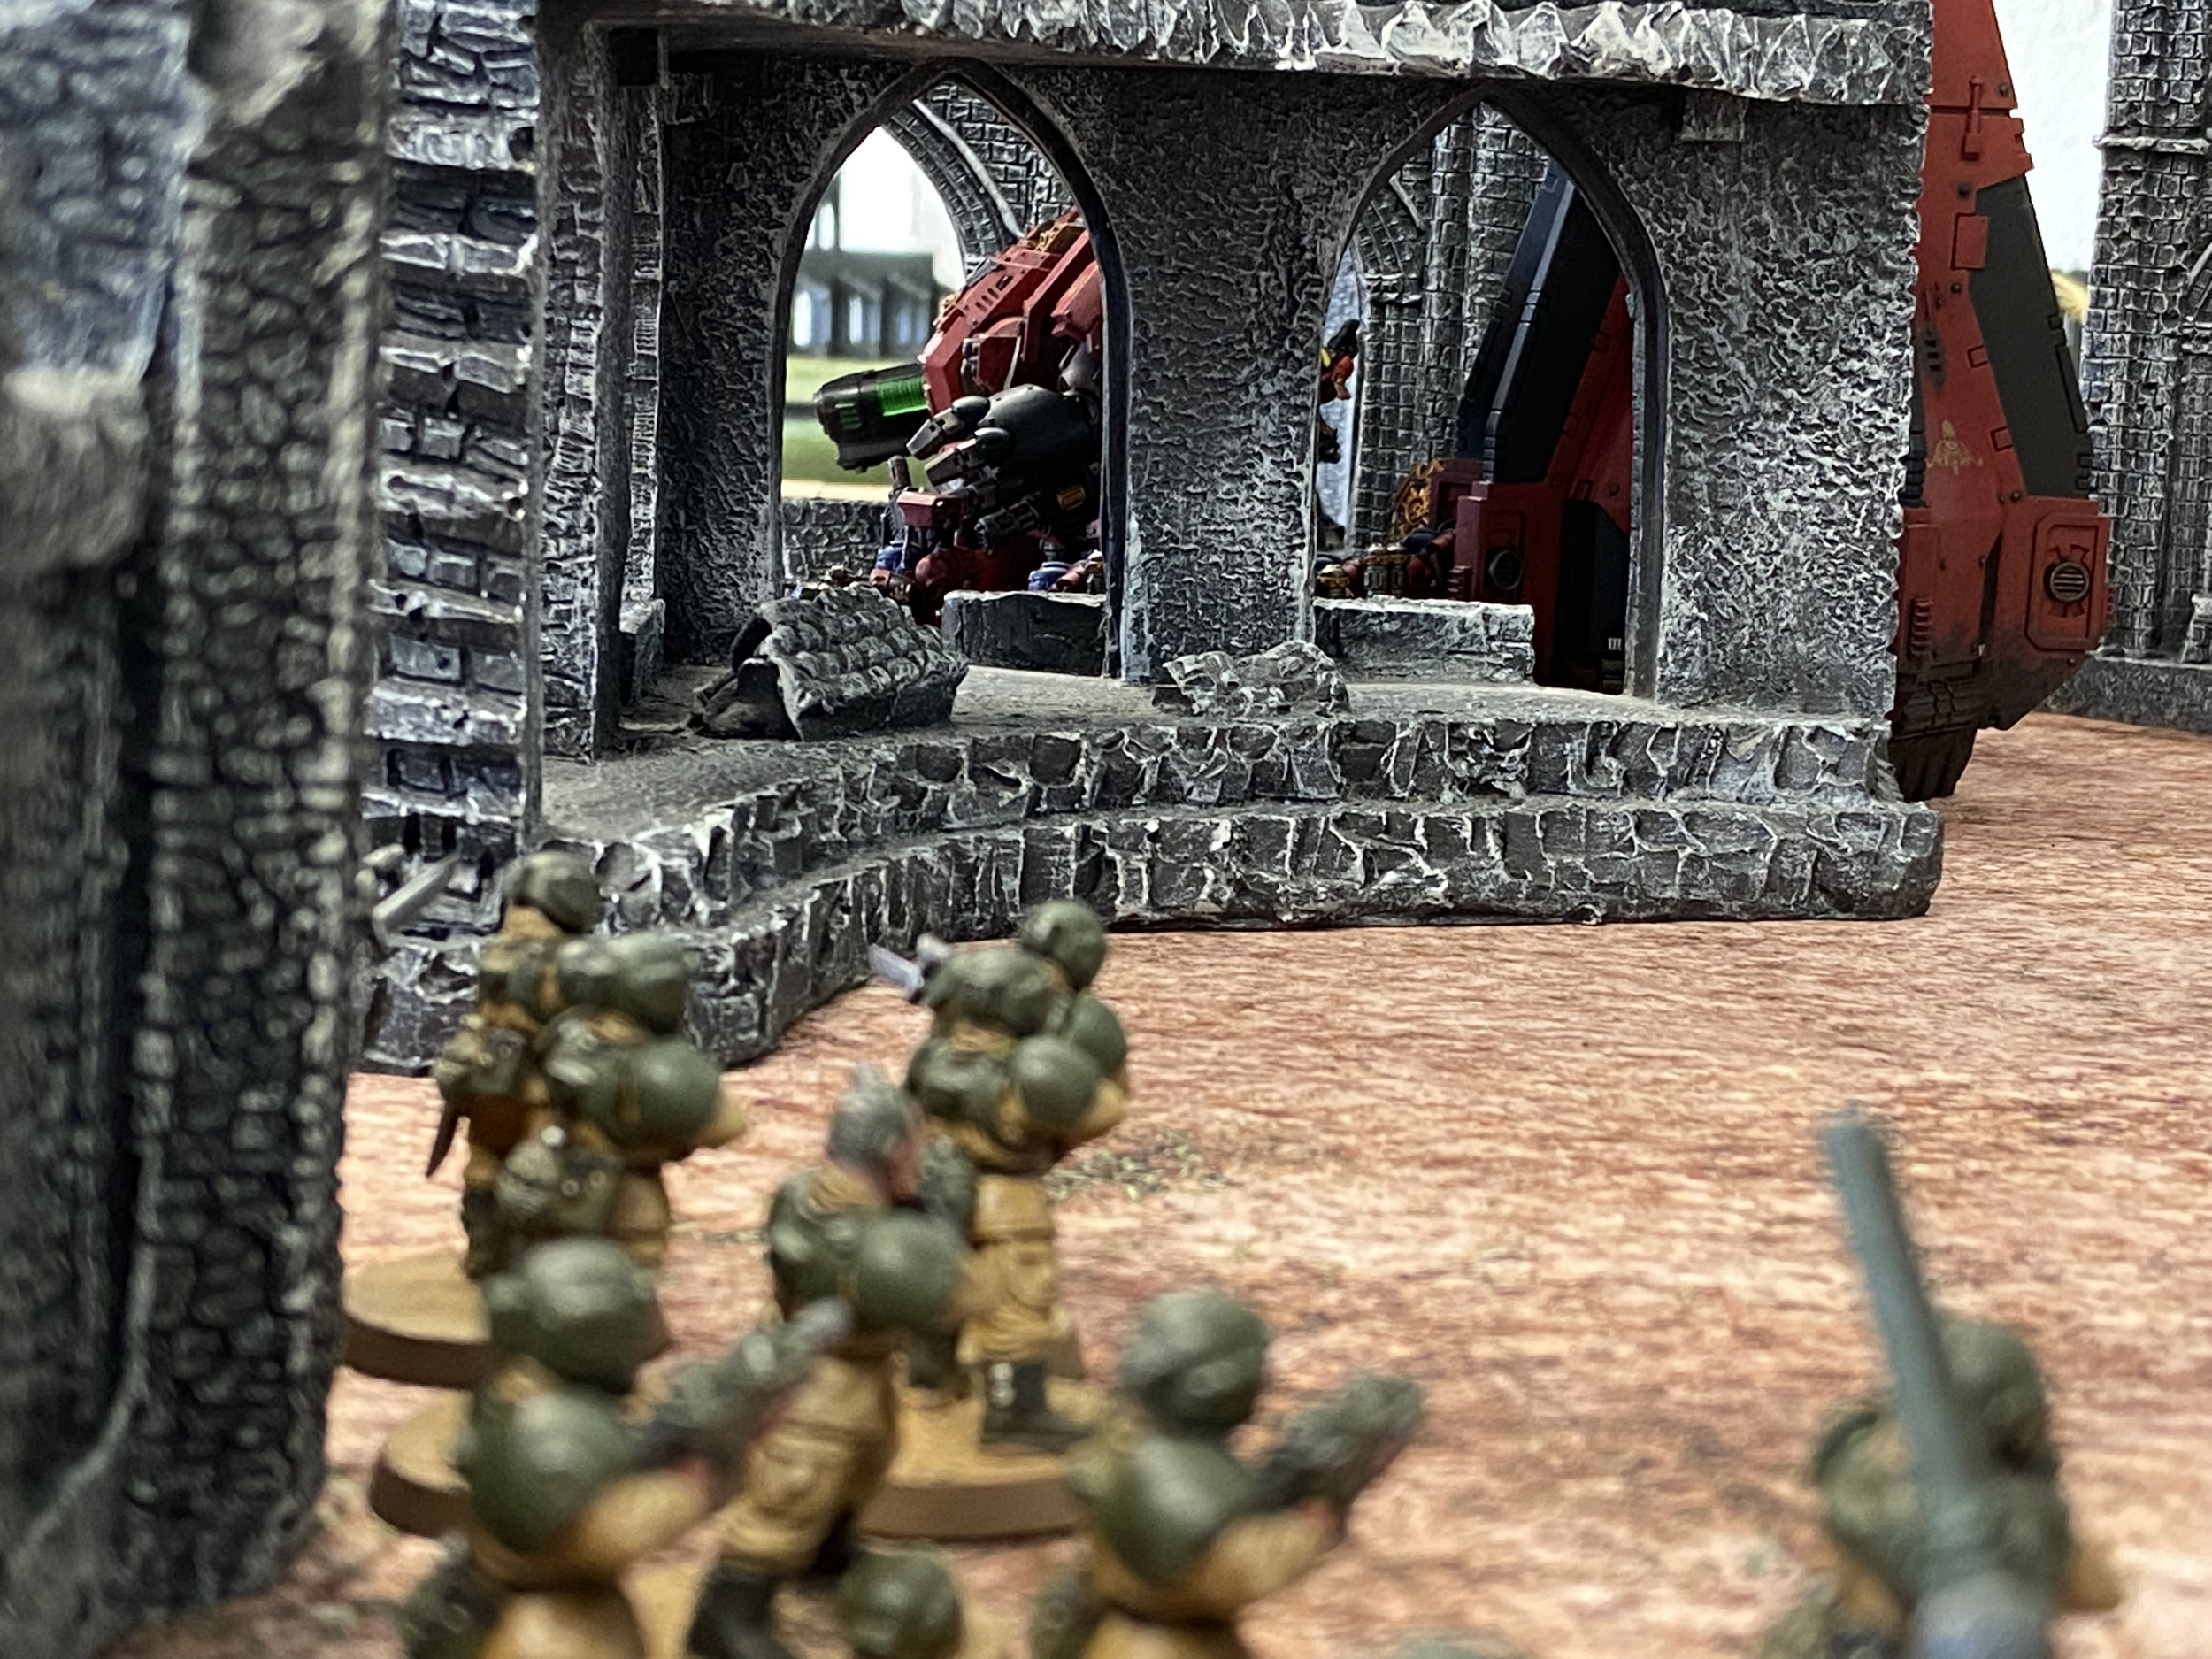
I too inched forward too, to get range and line of sight without exposing myself to turn two charges from the central Blood Angels force.
I consolidated the infantry squads on the bottom of my side into one unit.
The Bullgryns stayed out but I did disembark two Astropaths to get Nightshroud and Psychic Barrier onto the Stormlord.
I managed to cause a lowly single Wound to the Assault Intercessors on the bottom side of the battlefield from my large unit of infantry. This was partly due to the -1 to Hit I was suffering from the Dense Cover.
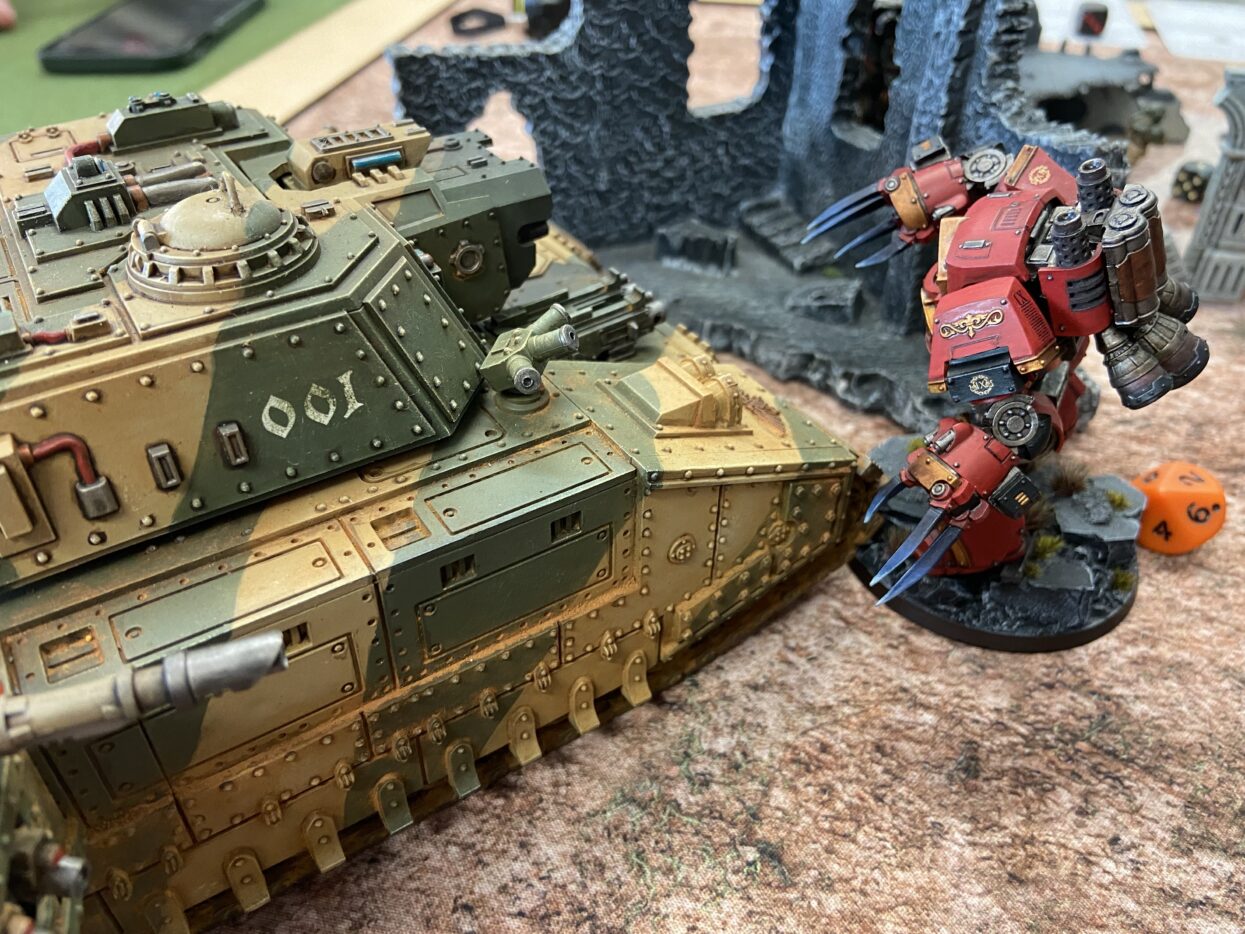
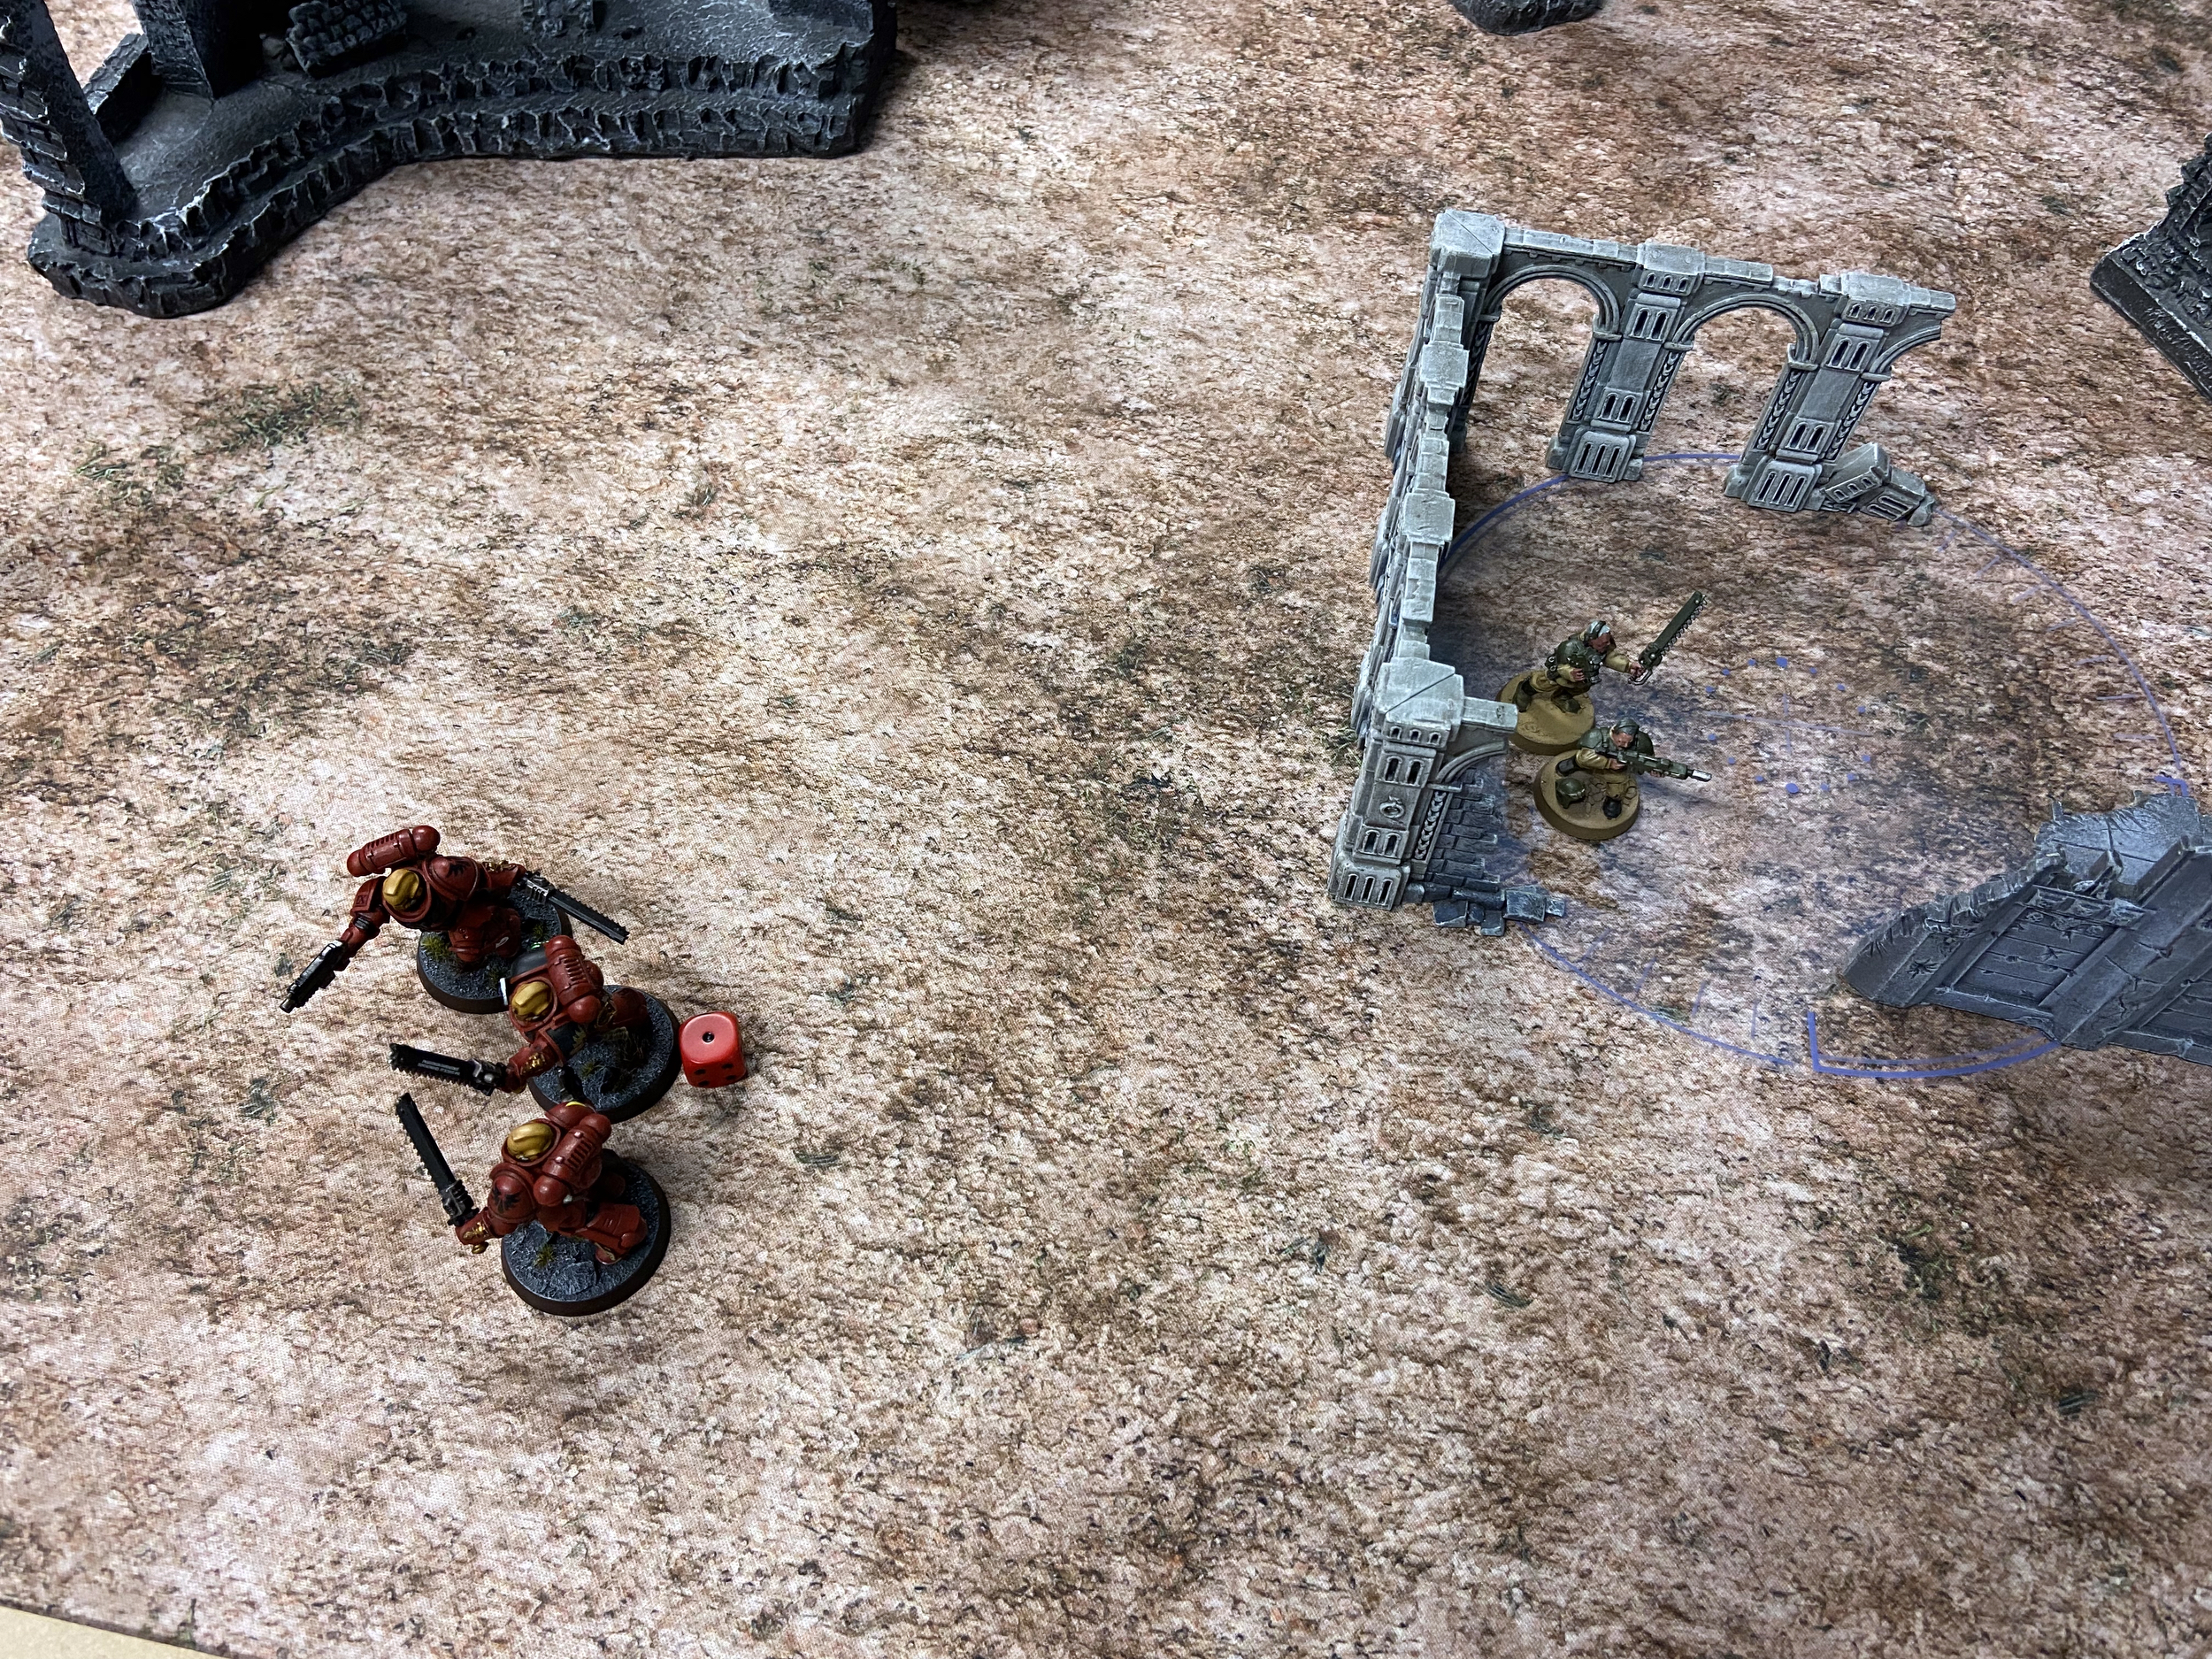
Elsewhere things went better. The Demolisher did very poorly vs the Vanguard Veterans causing a single Wound I think, because of Transhuman. The Stormlord chimed in and finished them off though. My Tank Commander with the Gatekeeper Battle Cannon killed all but one Intercessor skulking in the central ruins.
With Transhuman baited out, the Manticore used Fire Reload Fire to shoot the Eradicators occupying the middle of the table. They all died to the man.

Turn 2
Blood Angels
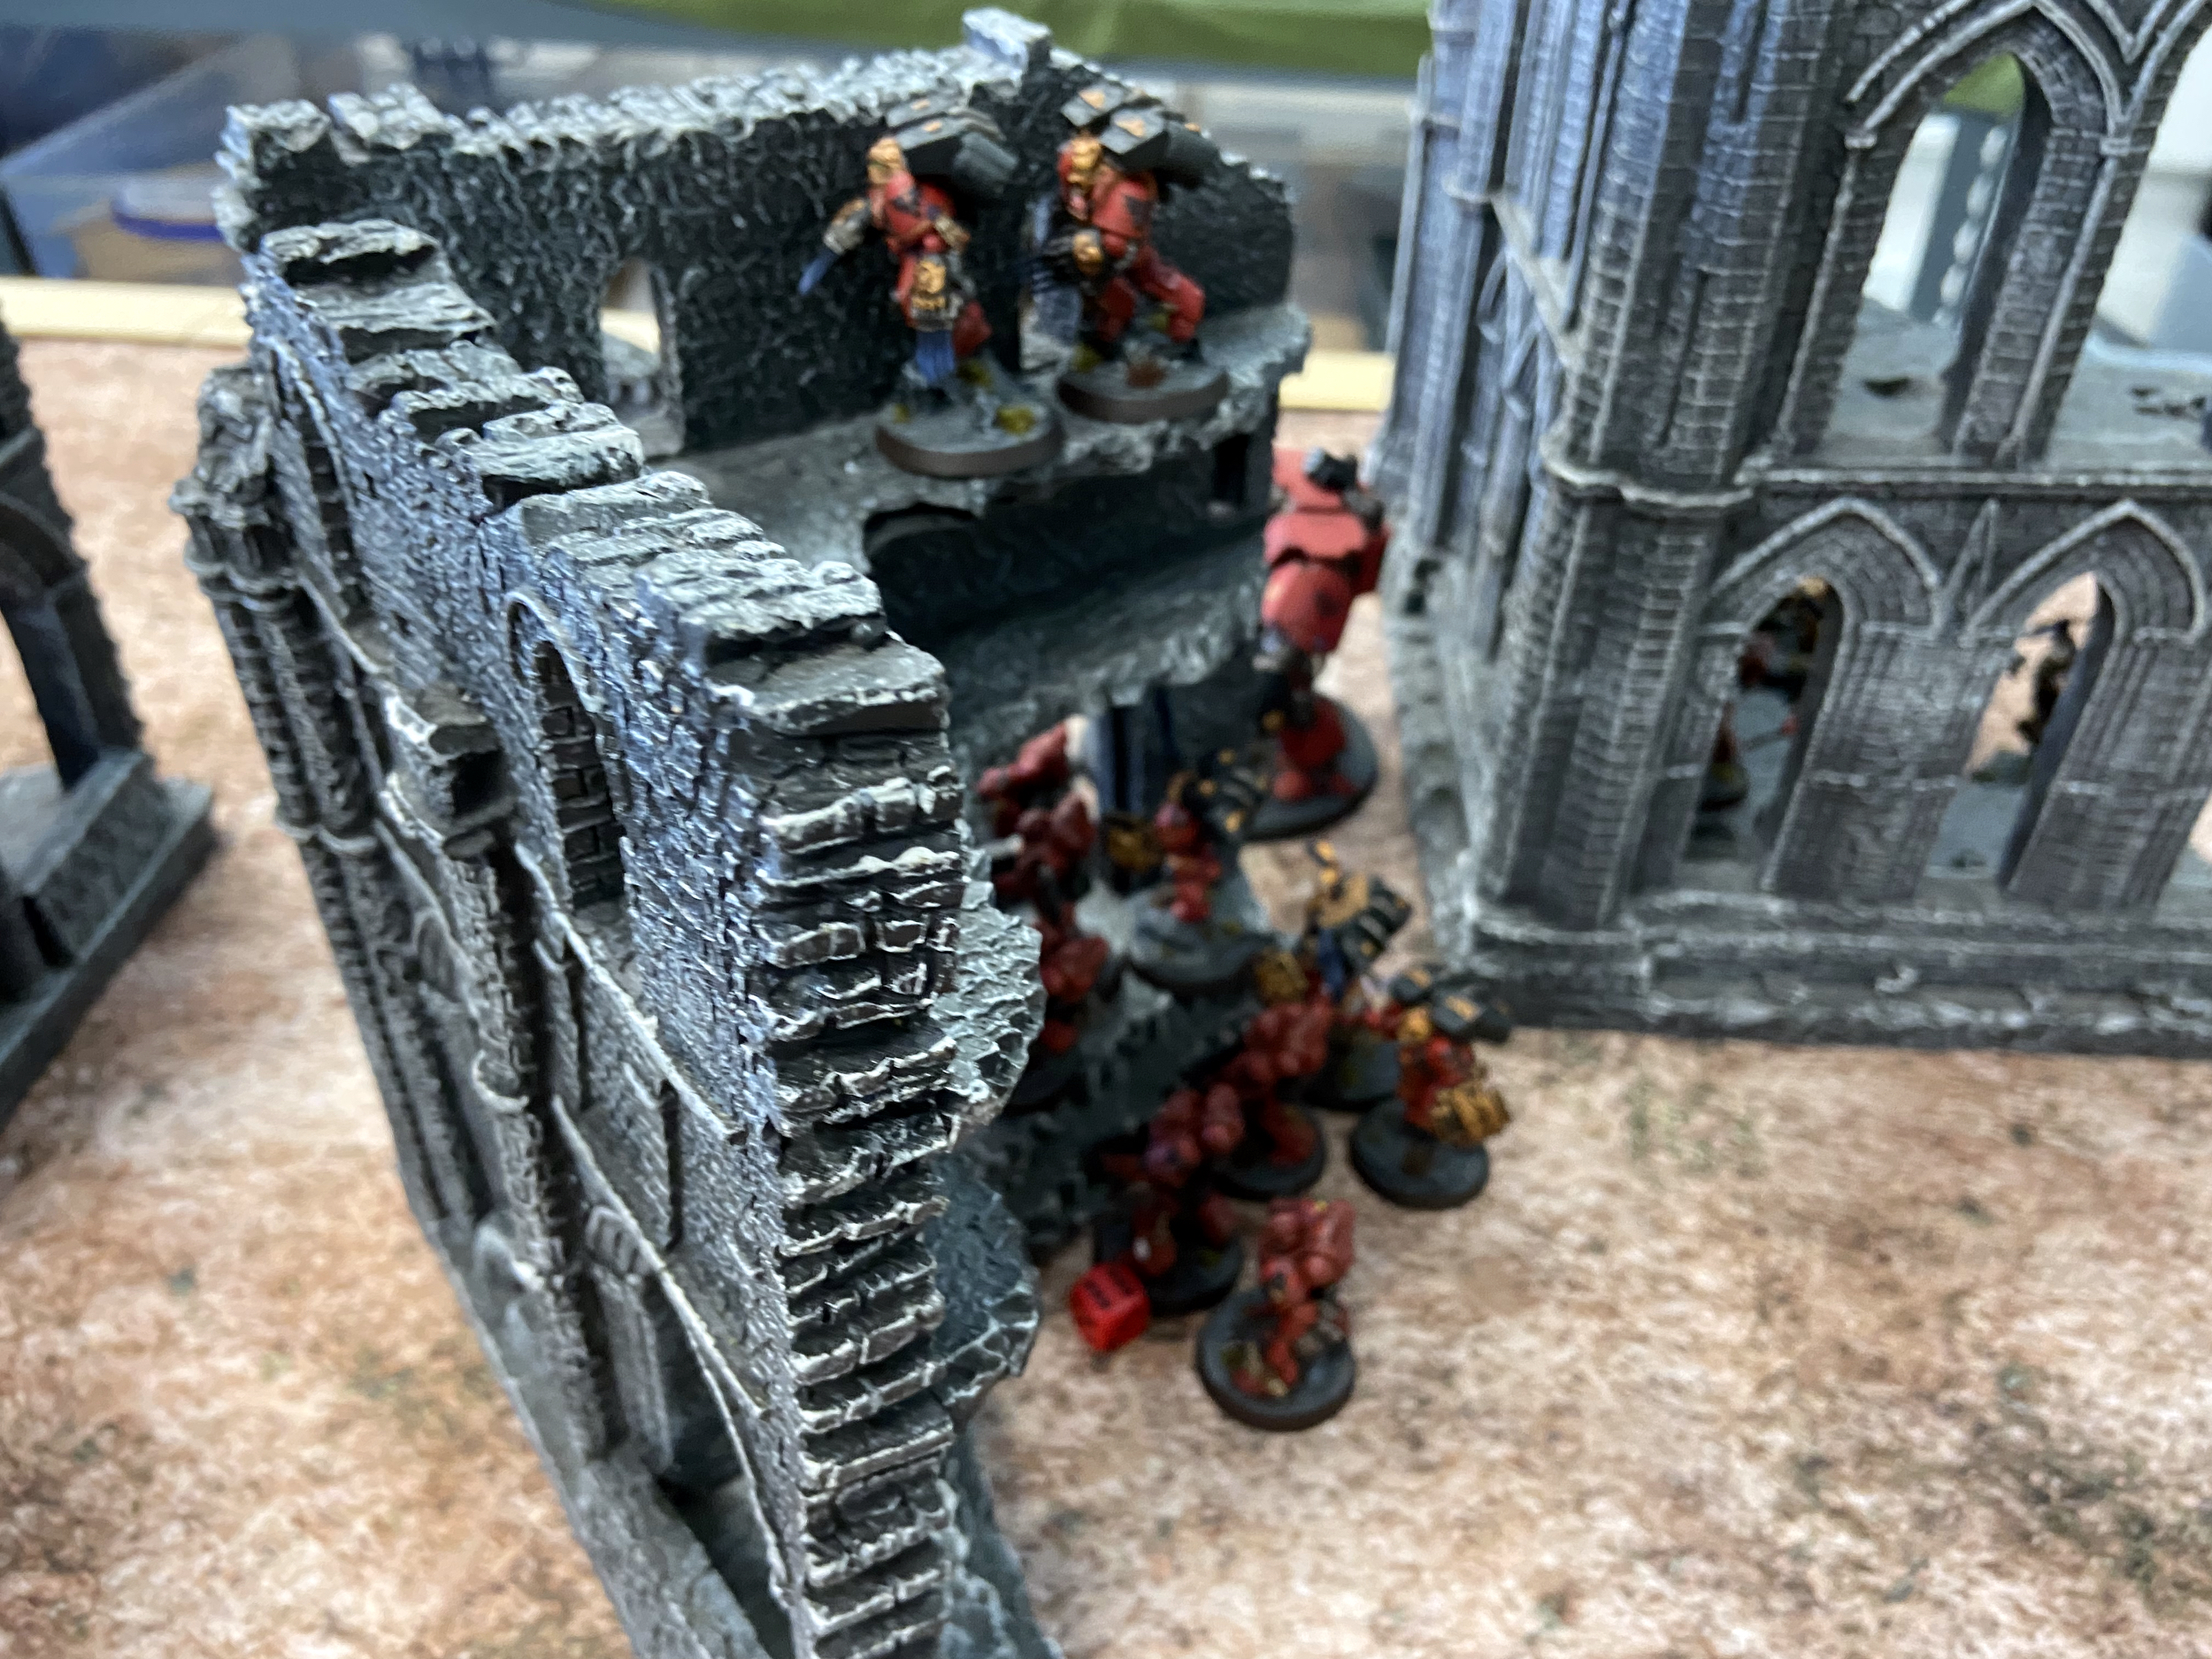
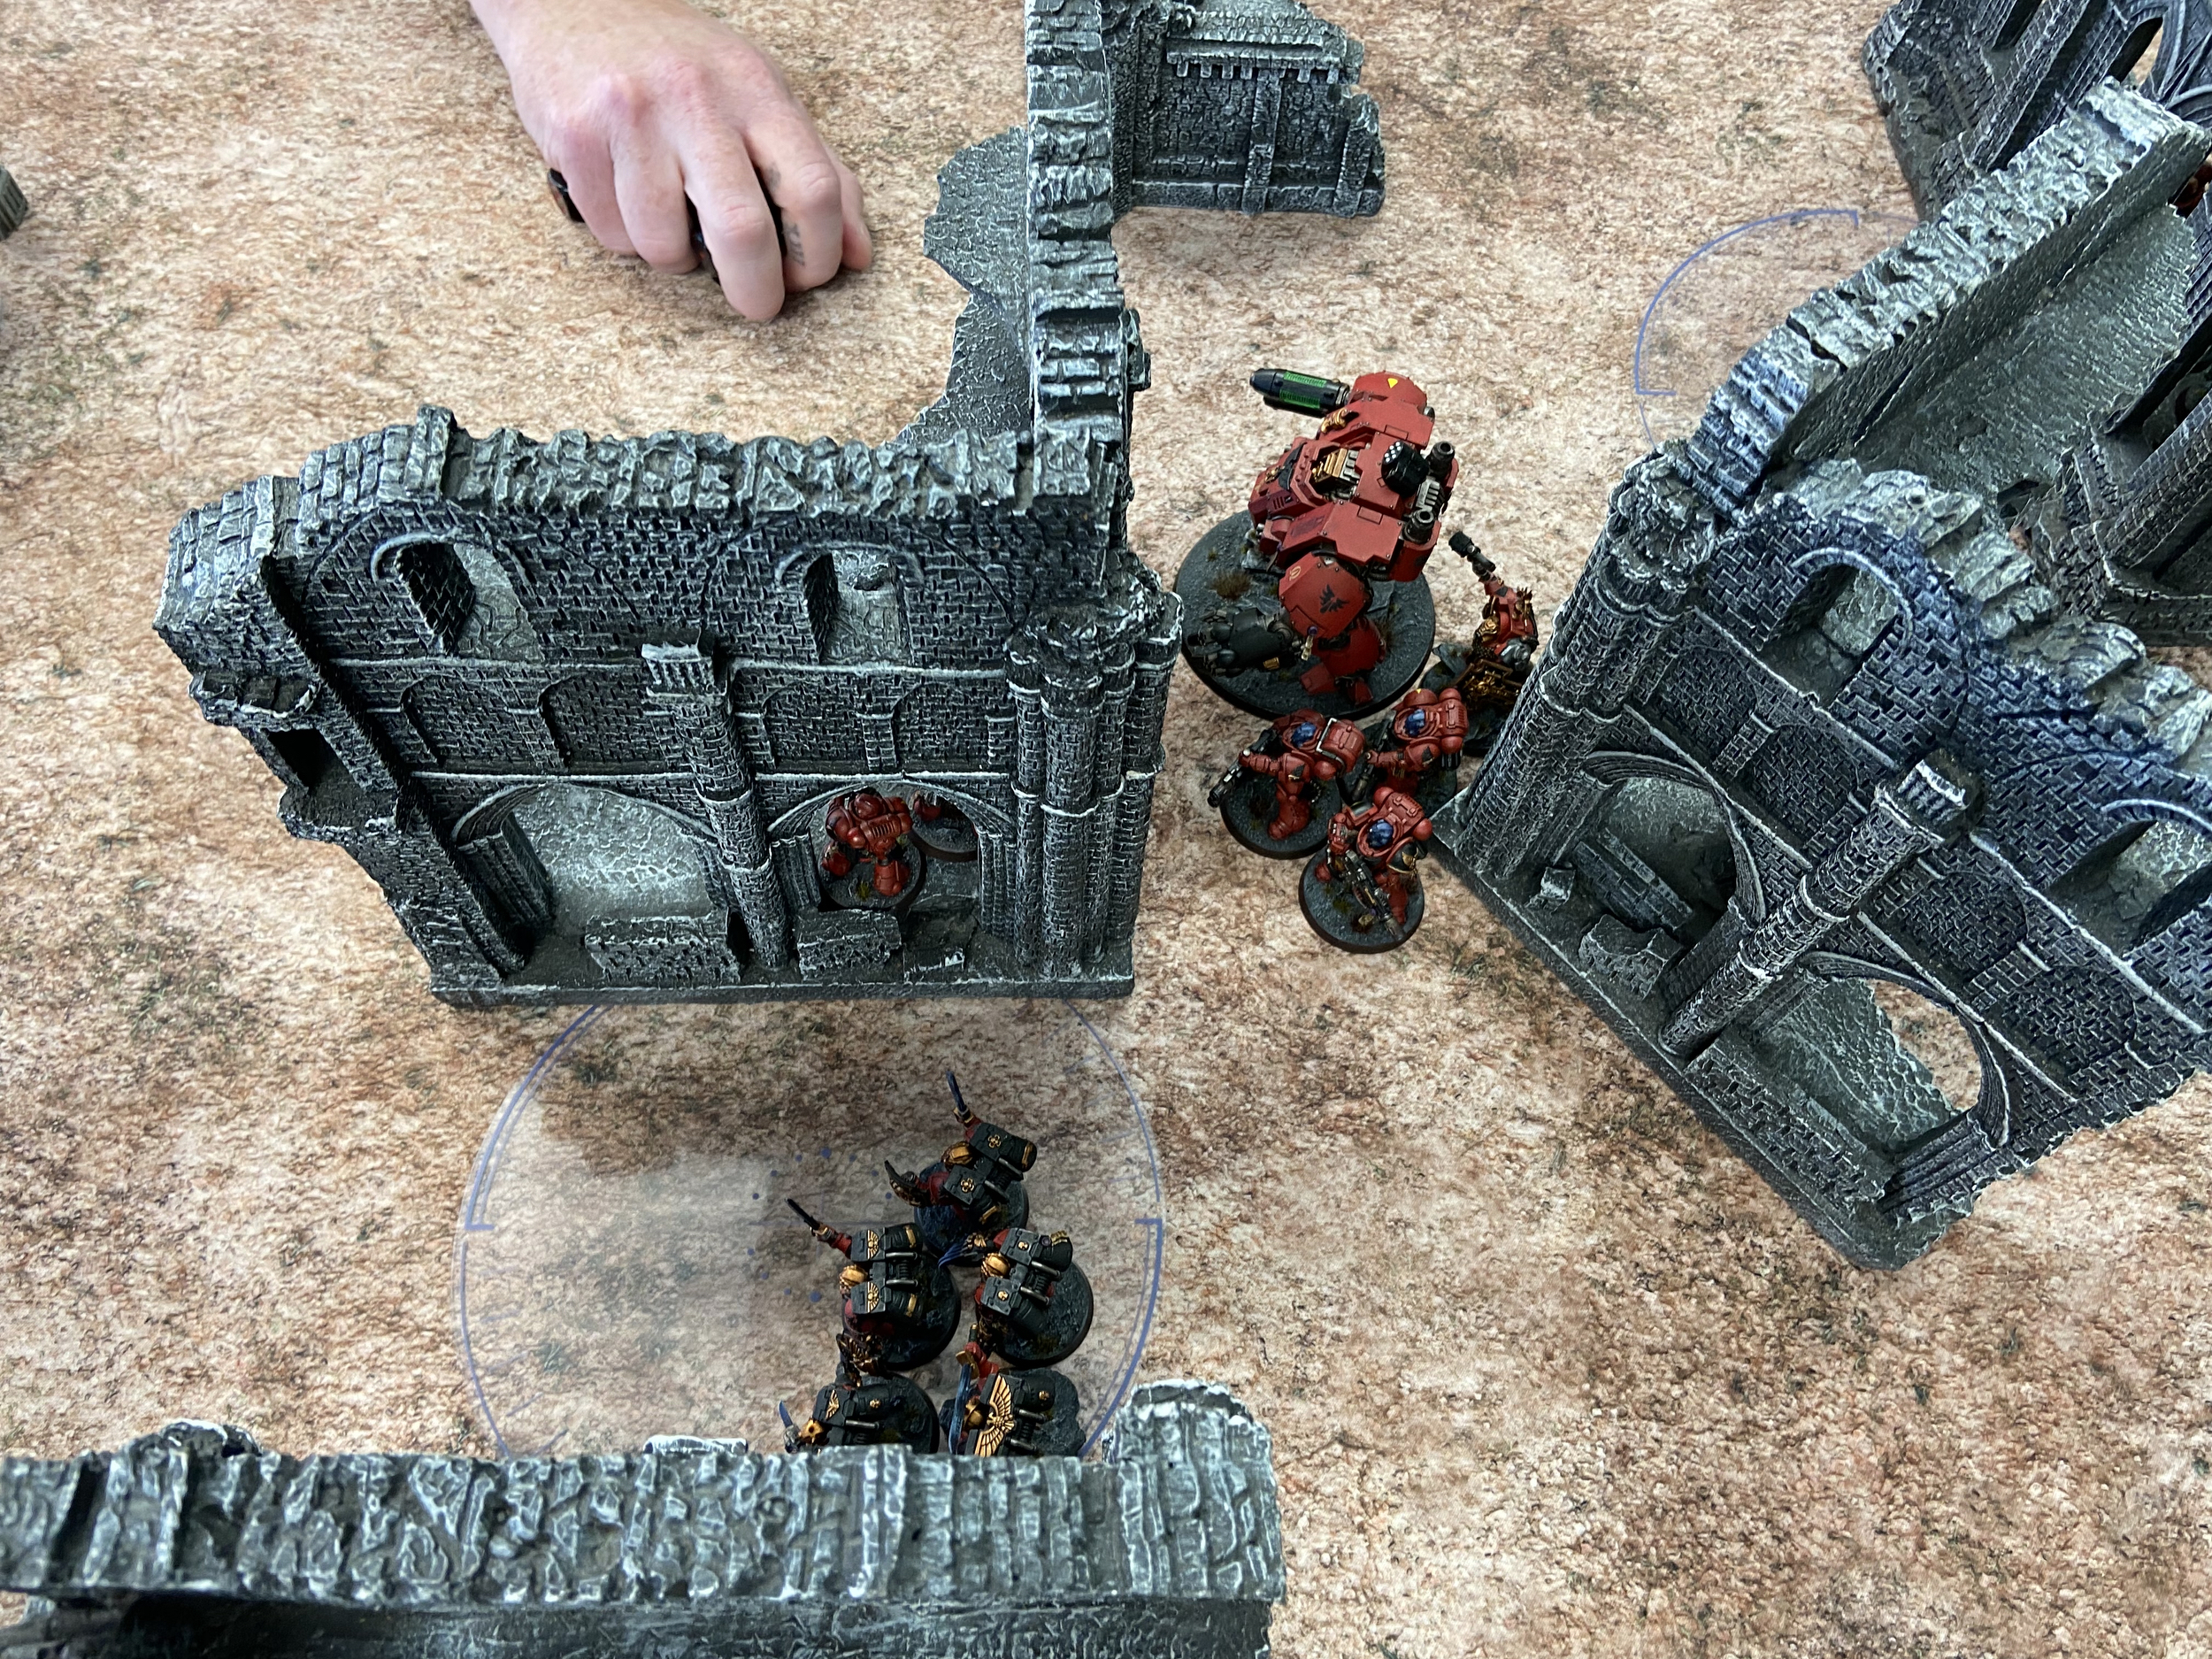
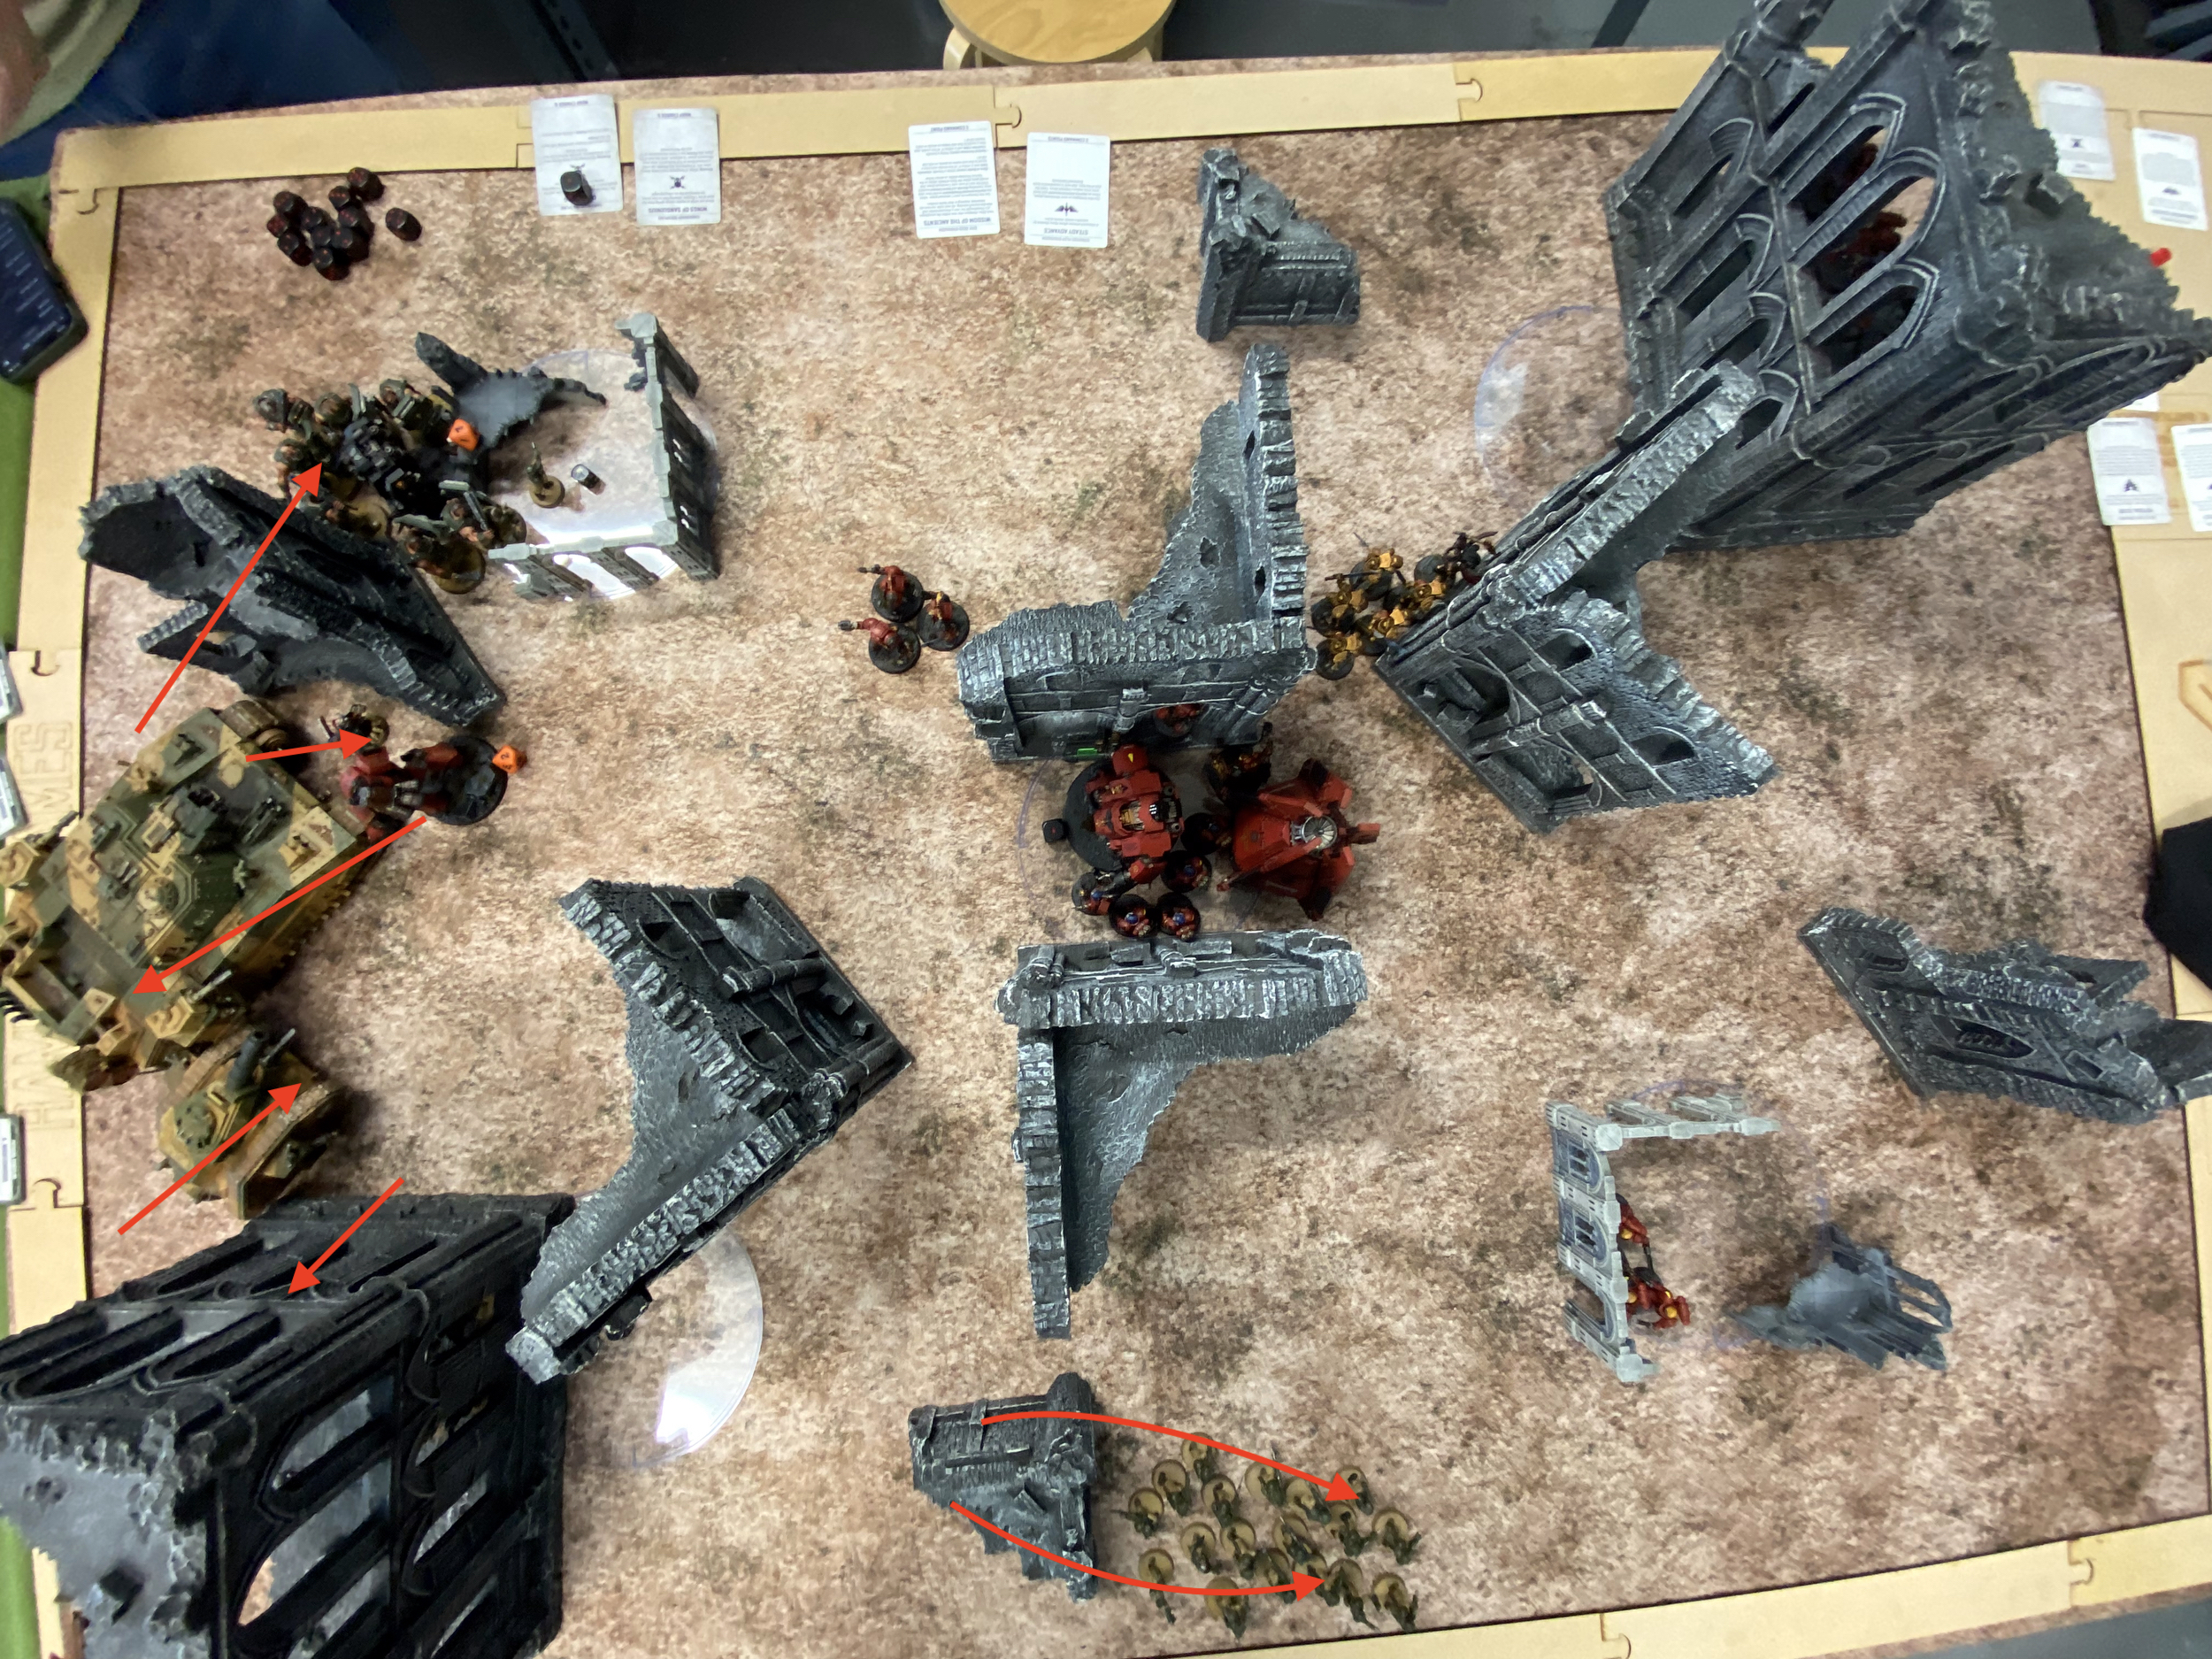
The main Blood Angels force moved up. The Drop Pod arrived in the middle too.
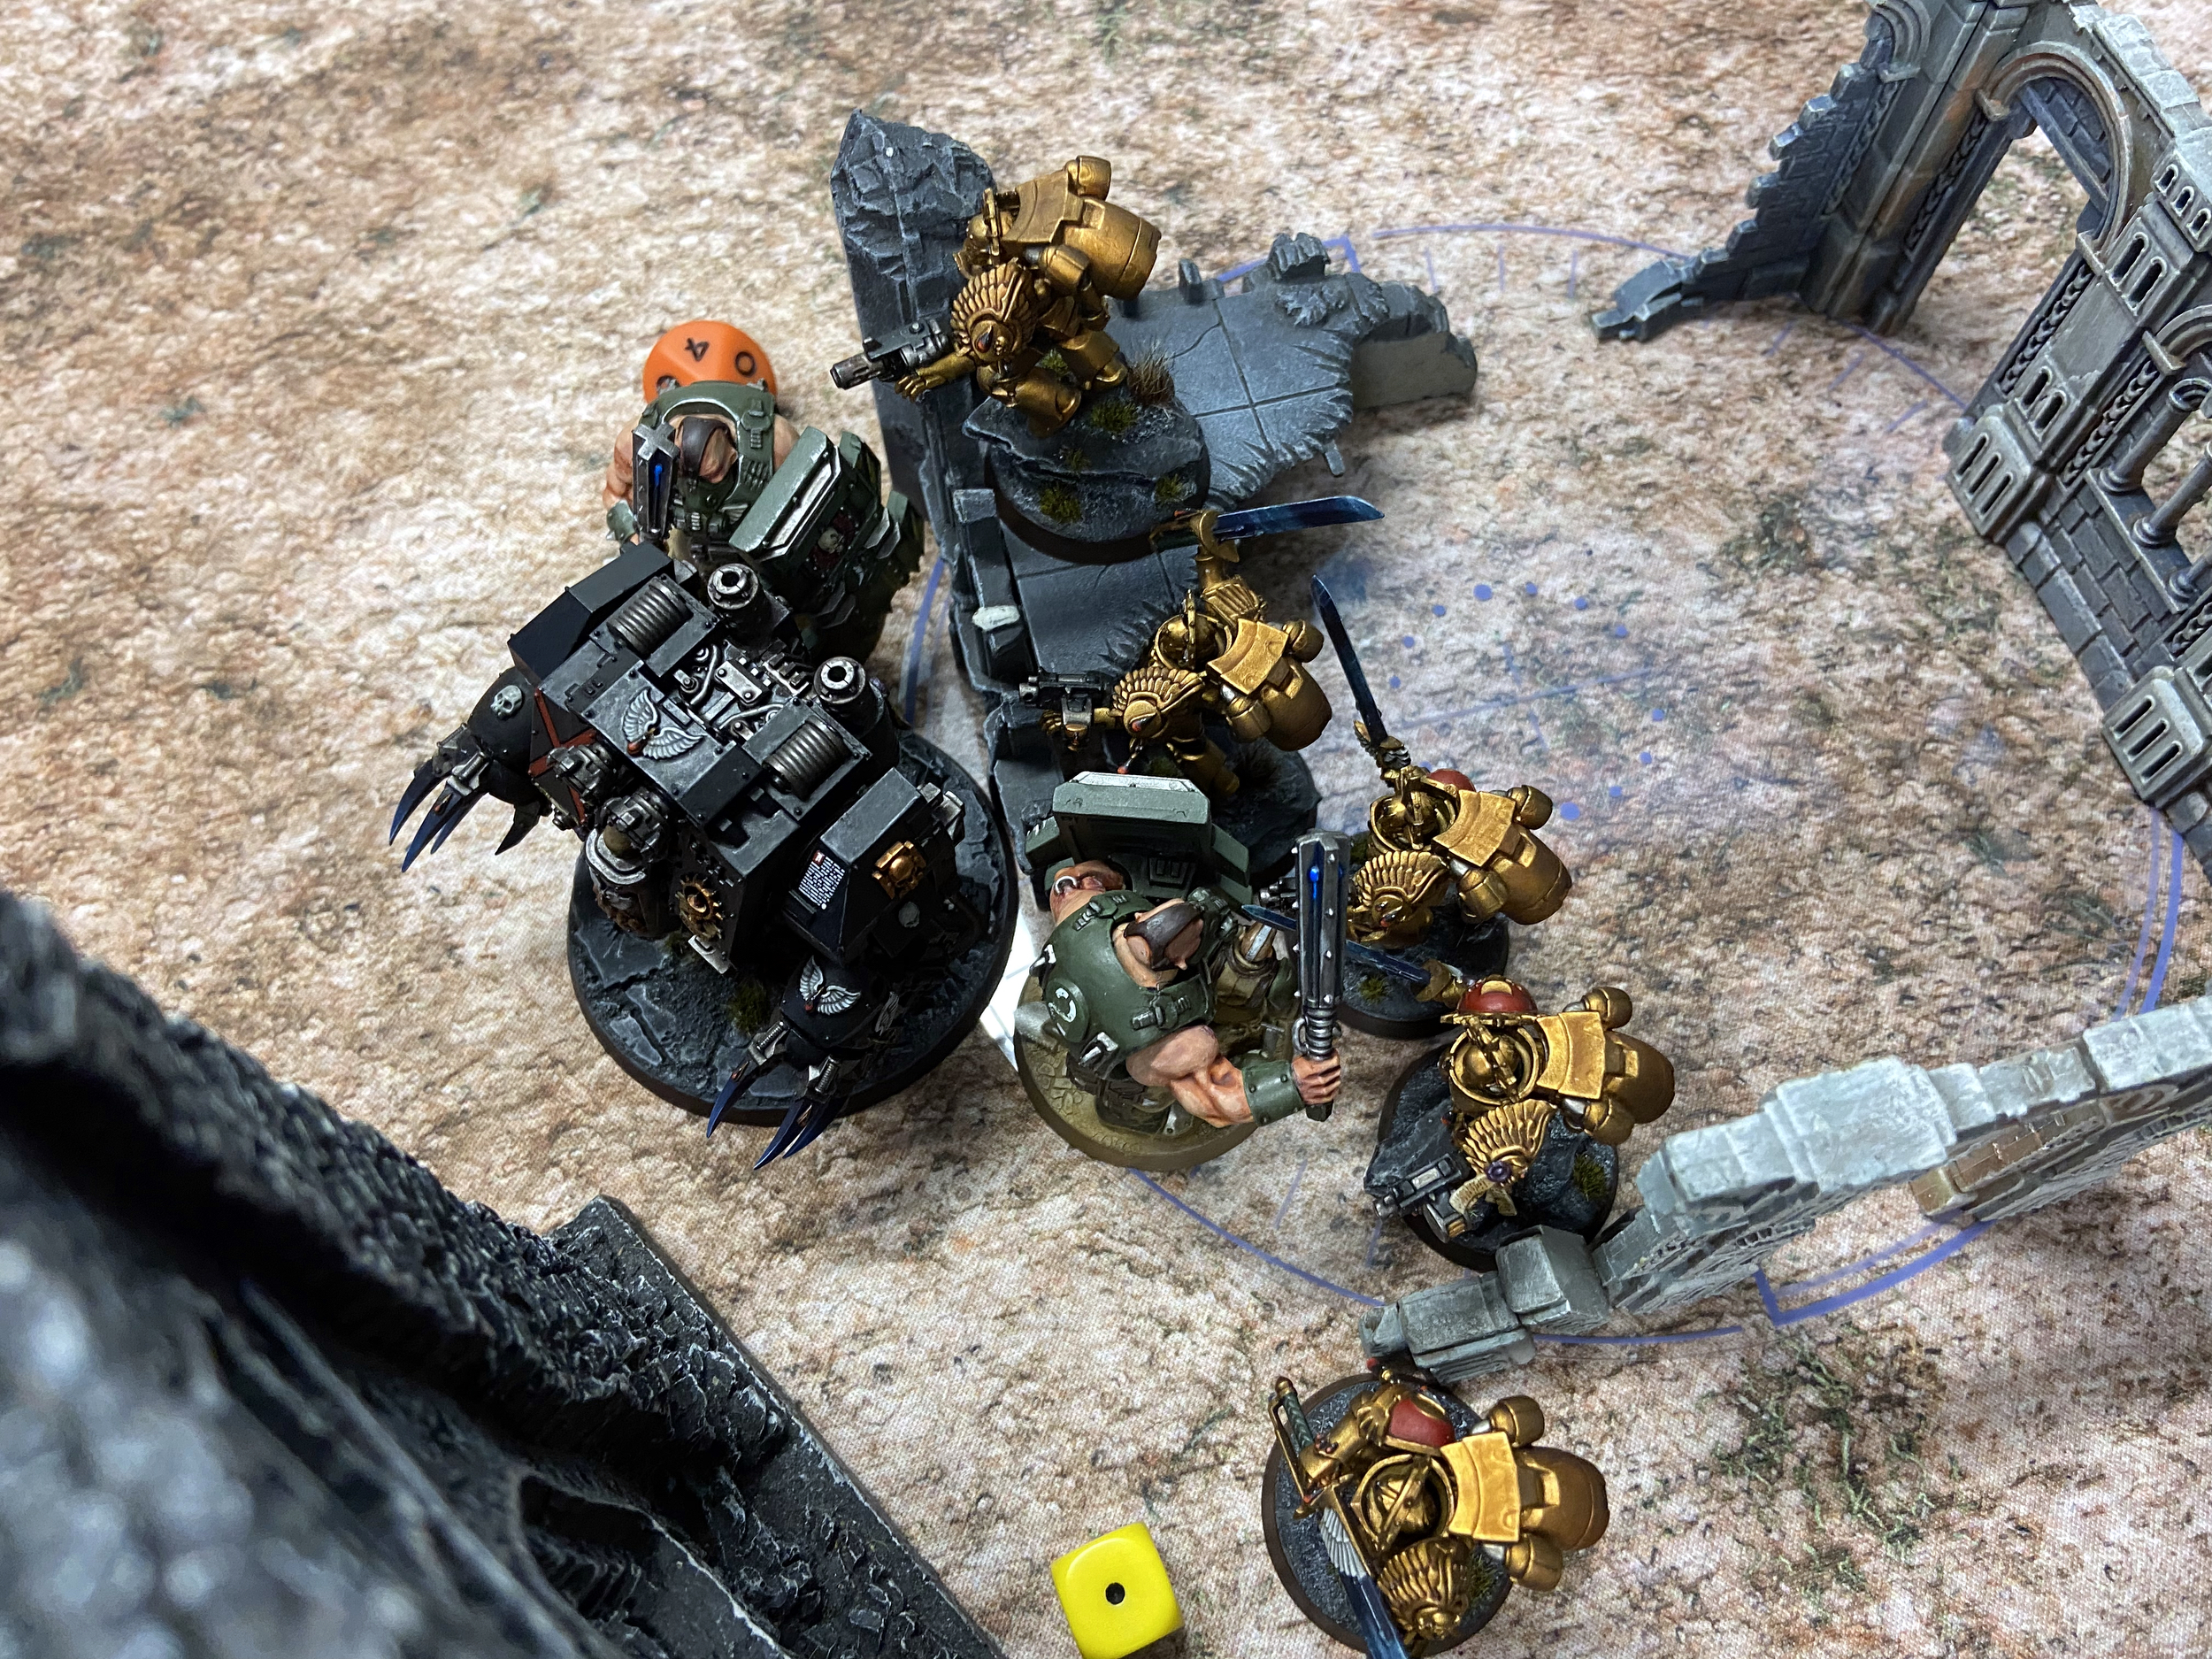
The two Dreadnoughts came in on the far side of the battlefield, charging the Infantry Squads there and the Stormlord. The Stormlord charge was insane using Wings of Sanguinius to move 12” after coming in from Deep Strike.
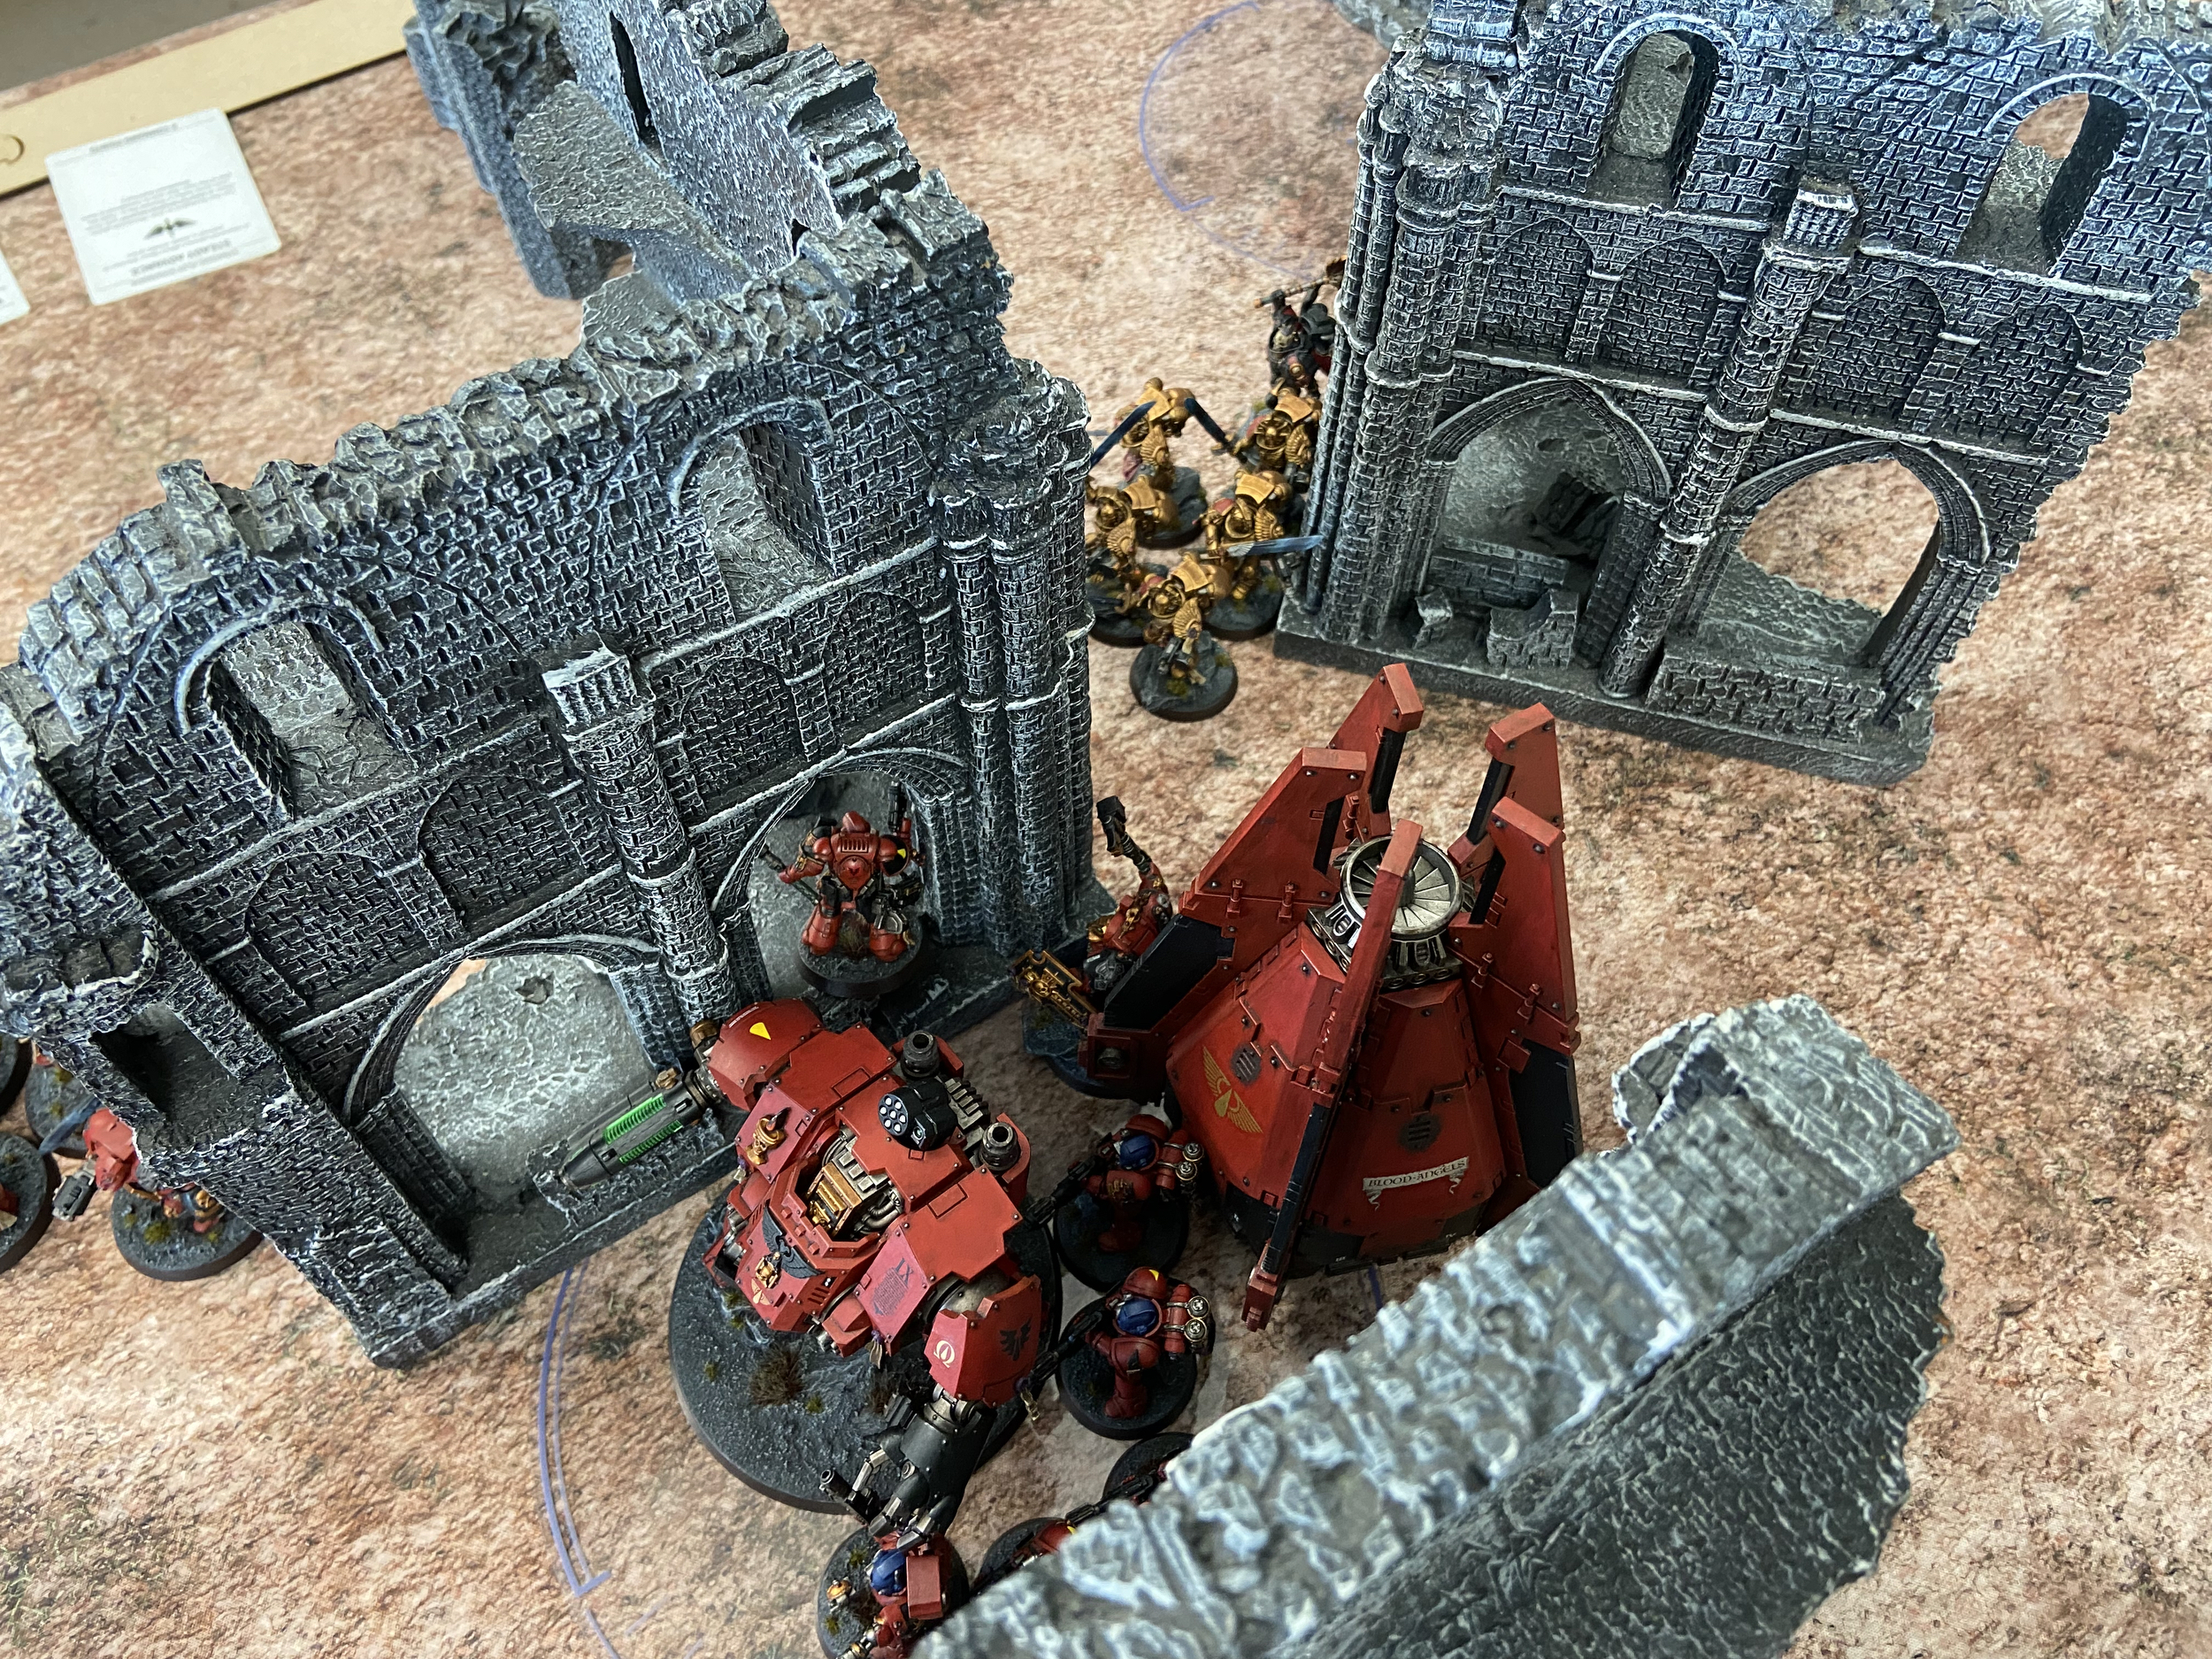
The Terminators came in over that side too.
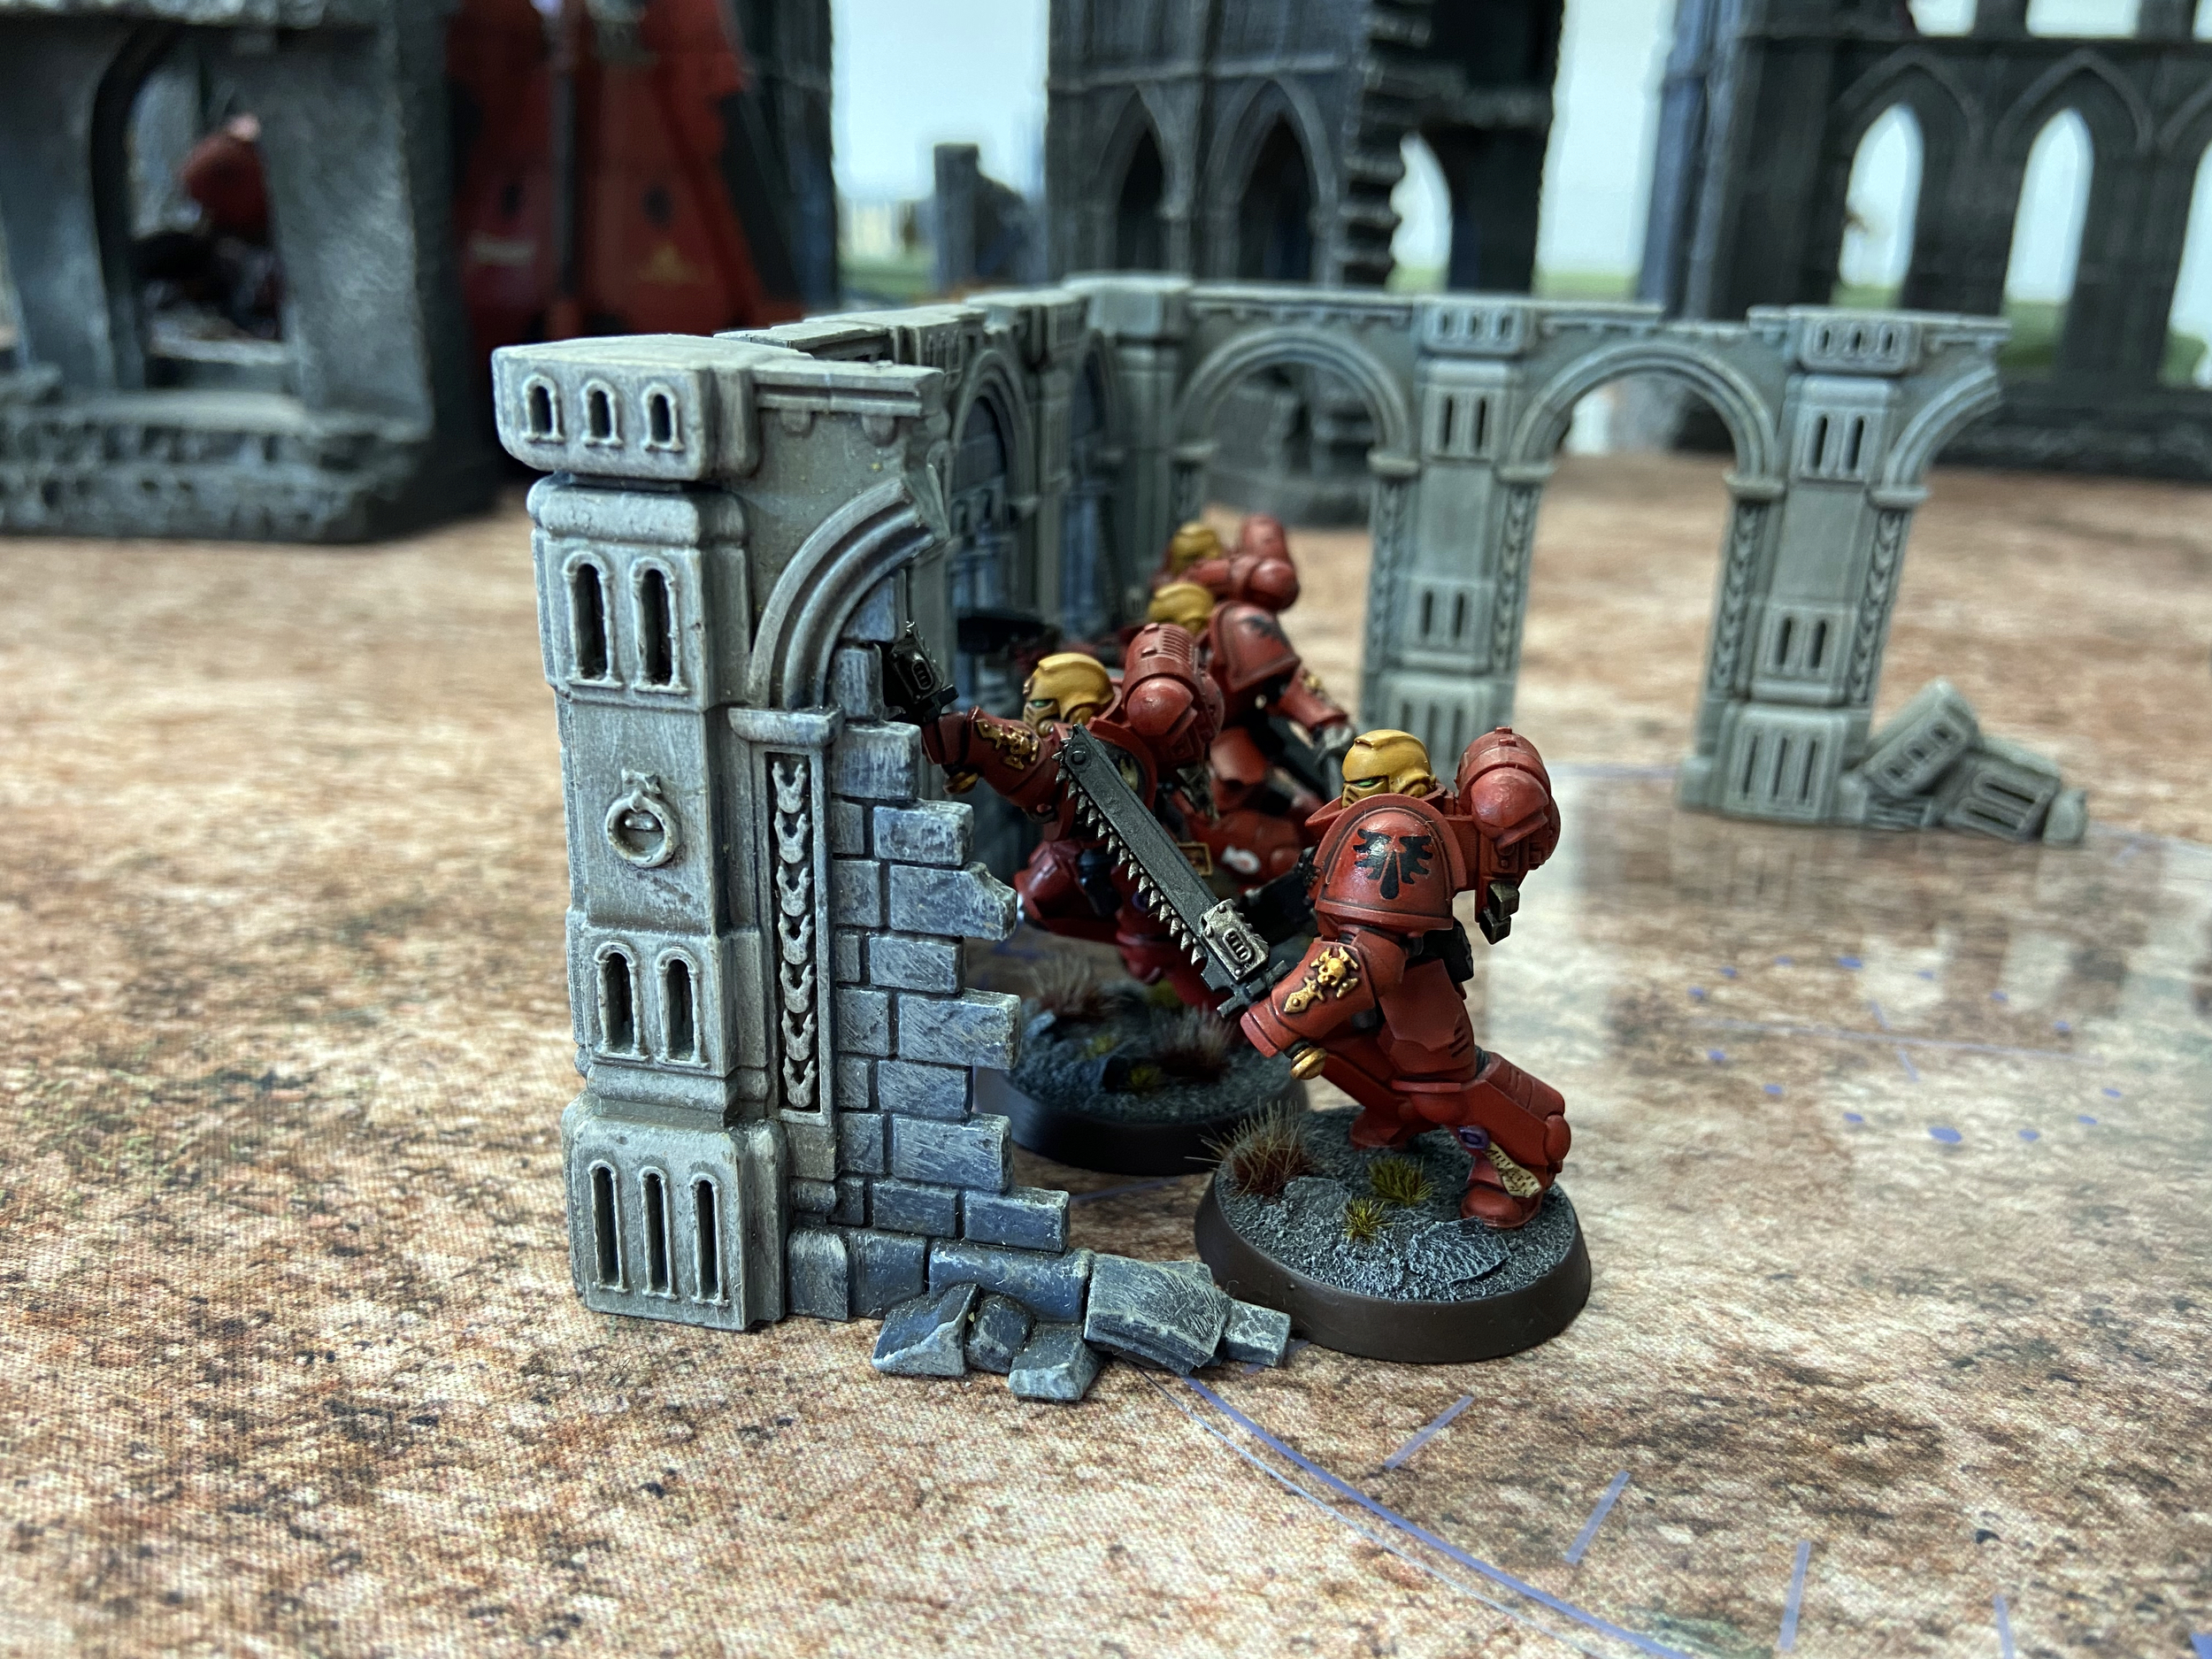
The Assault Intercessors got into the Dense Cover.
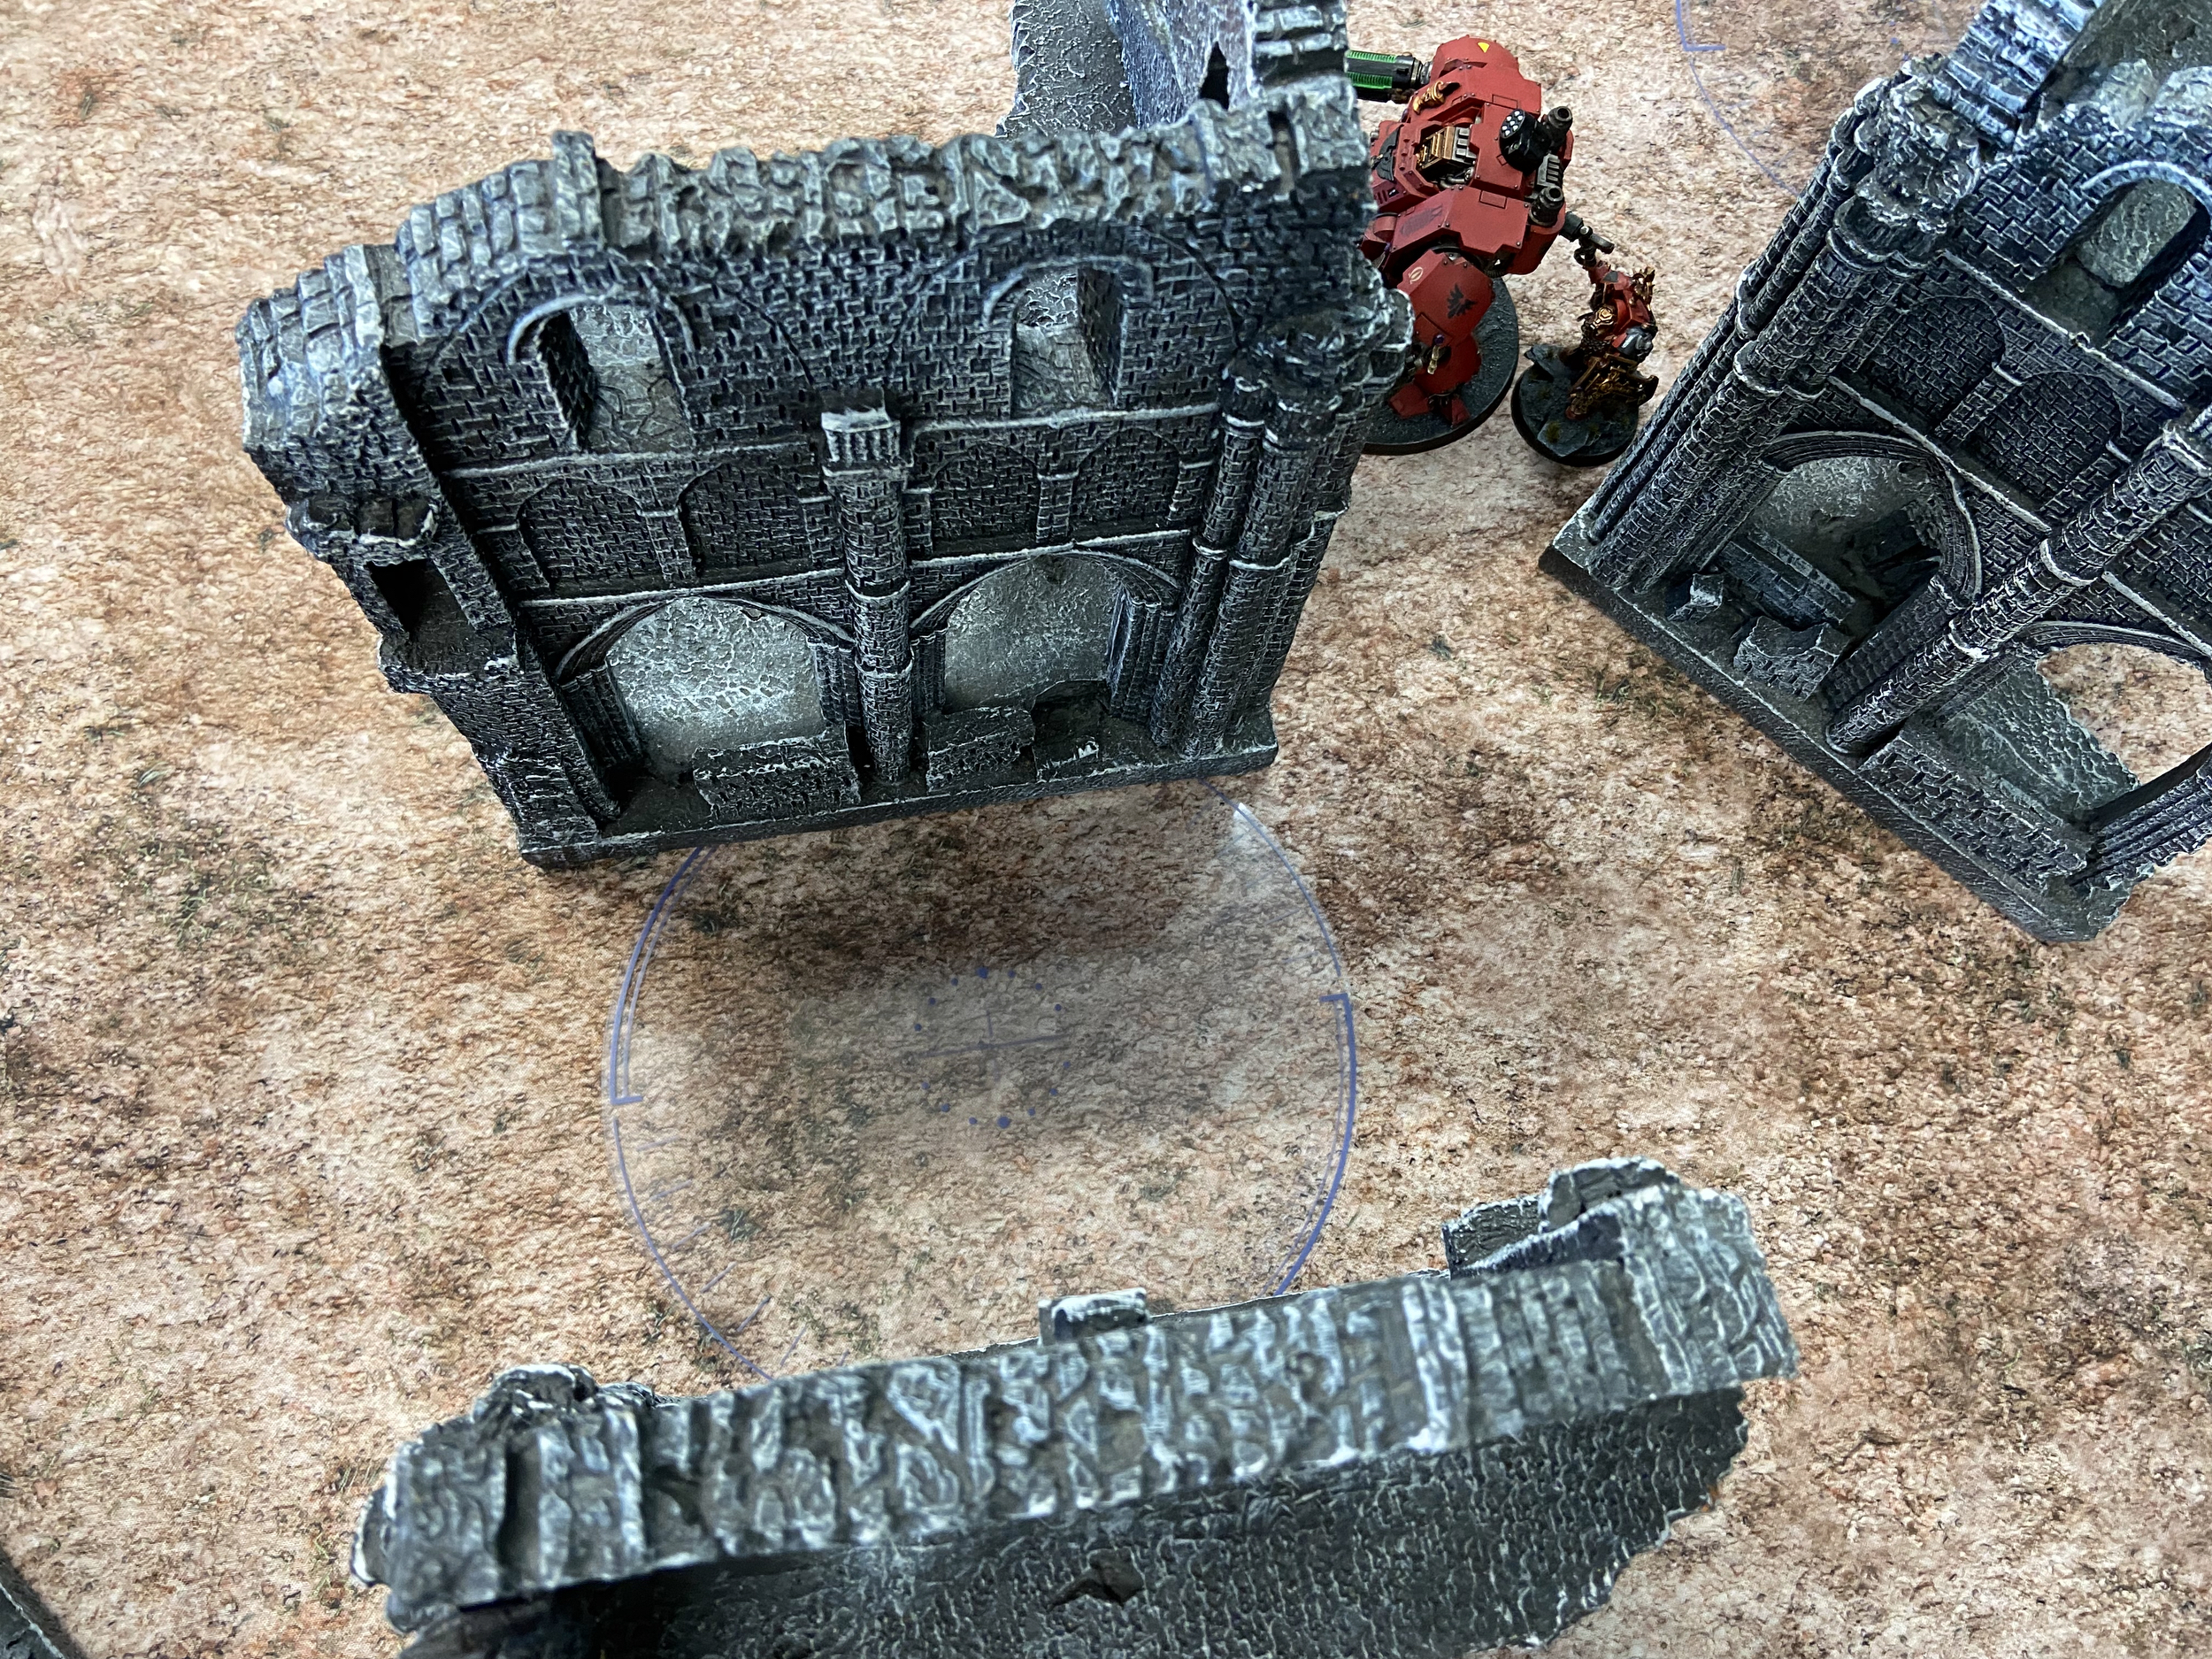
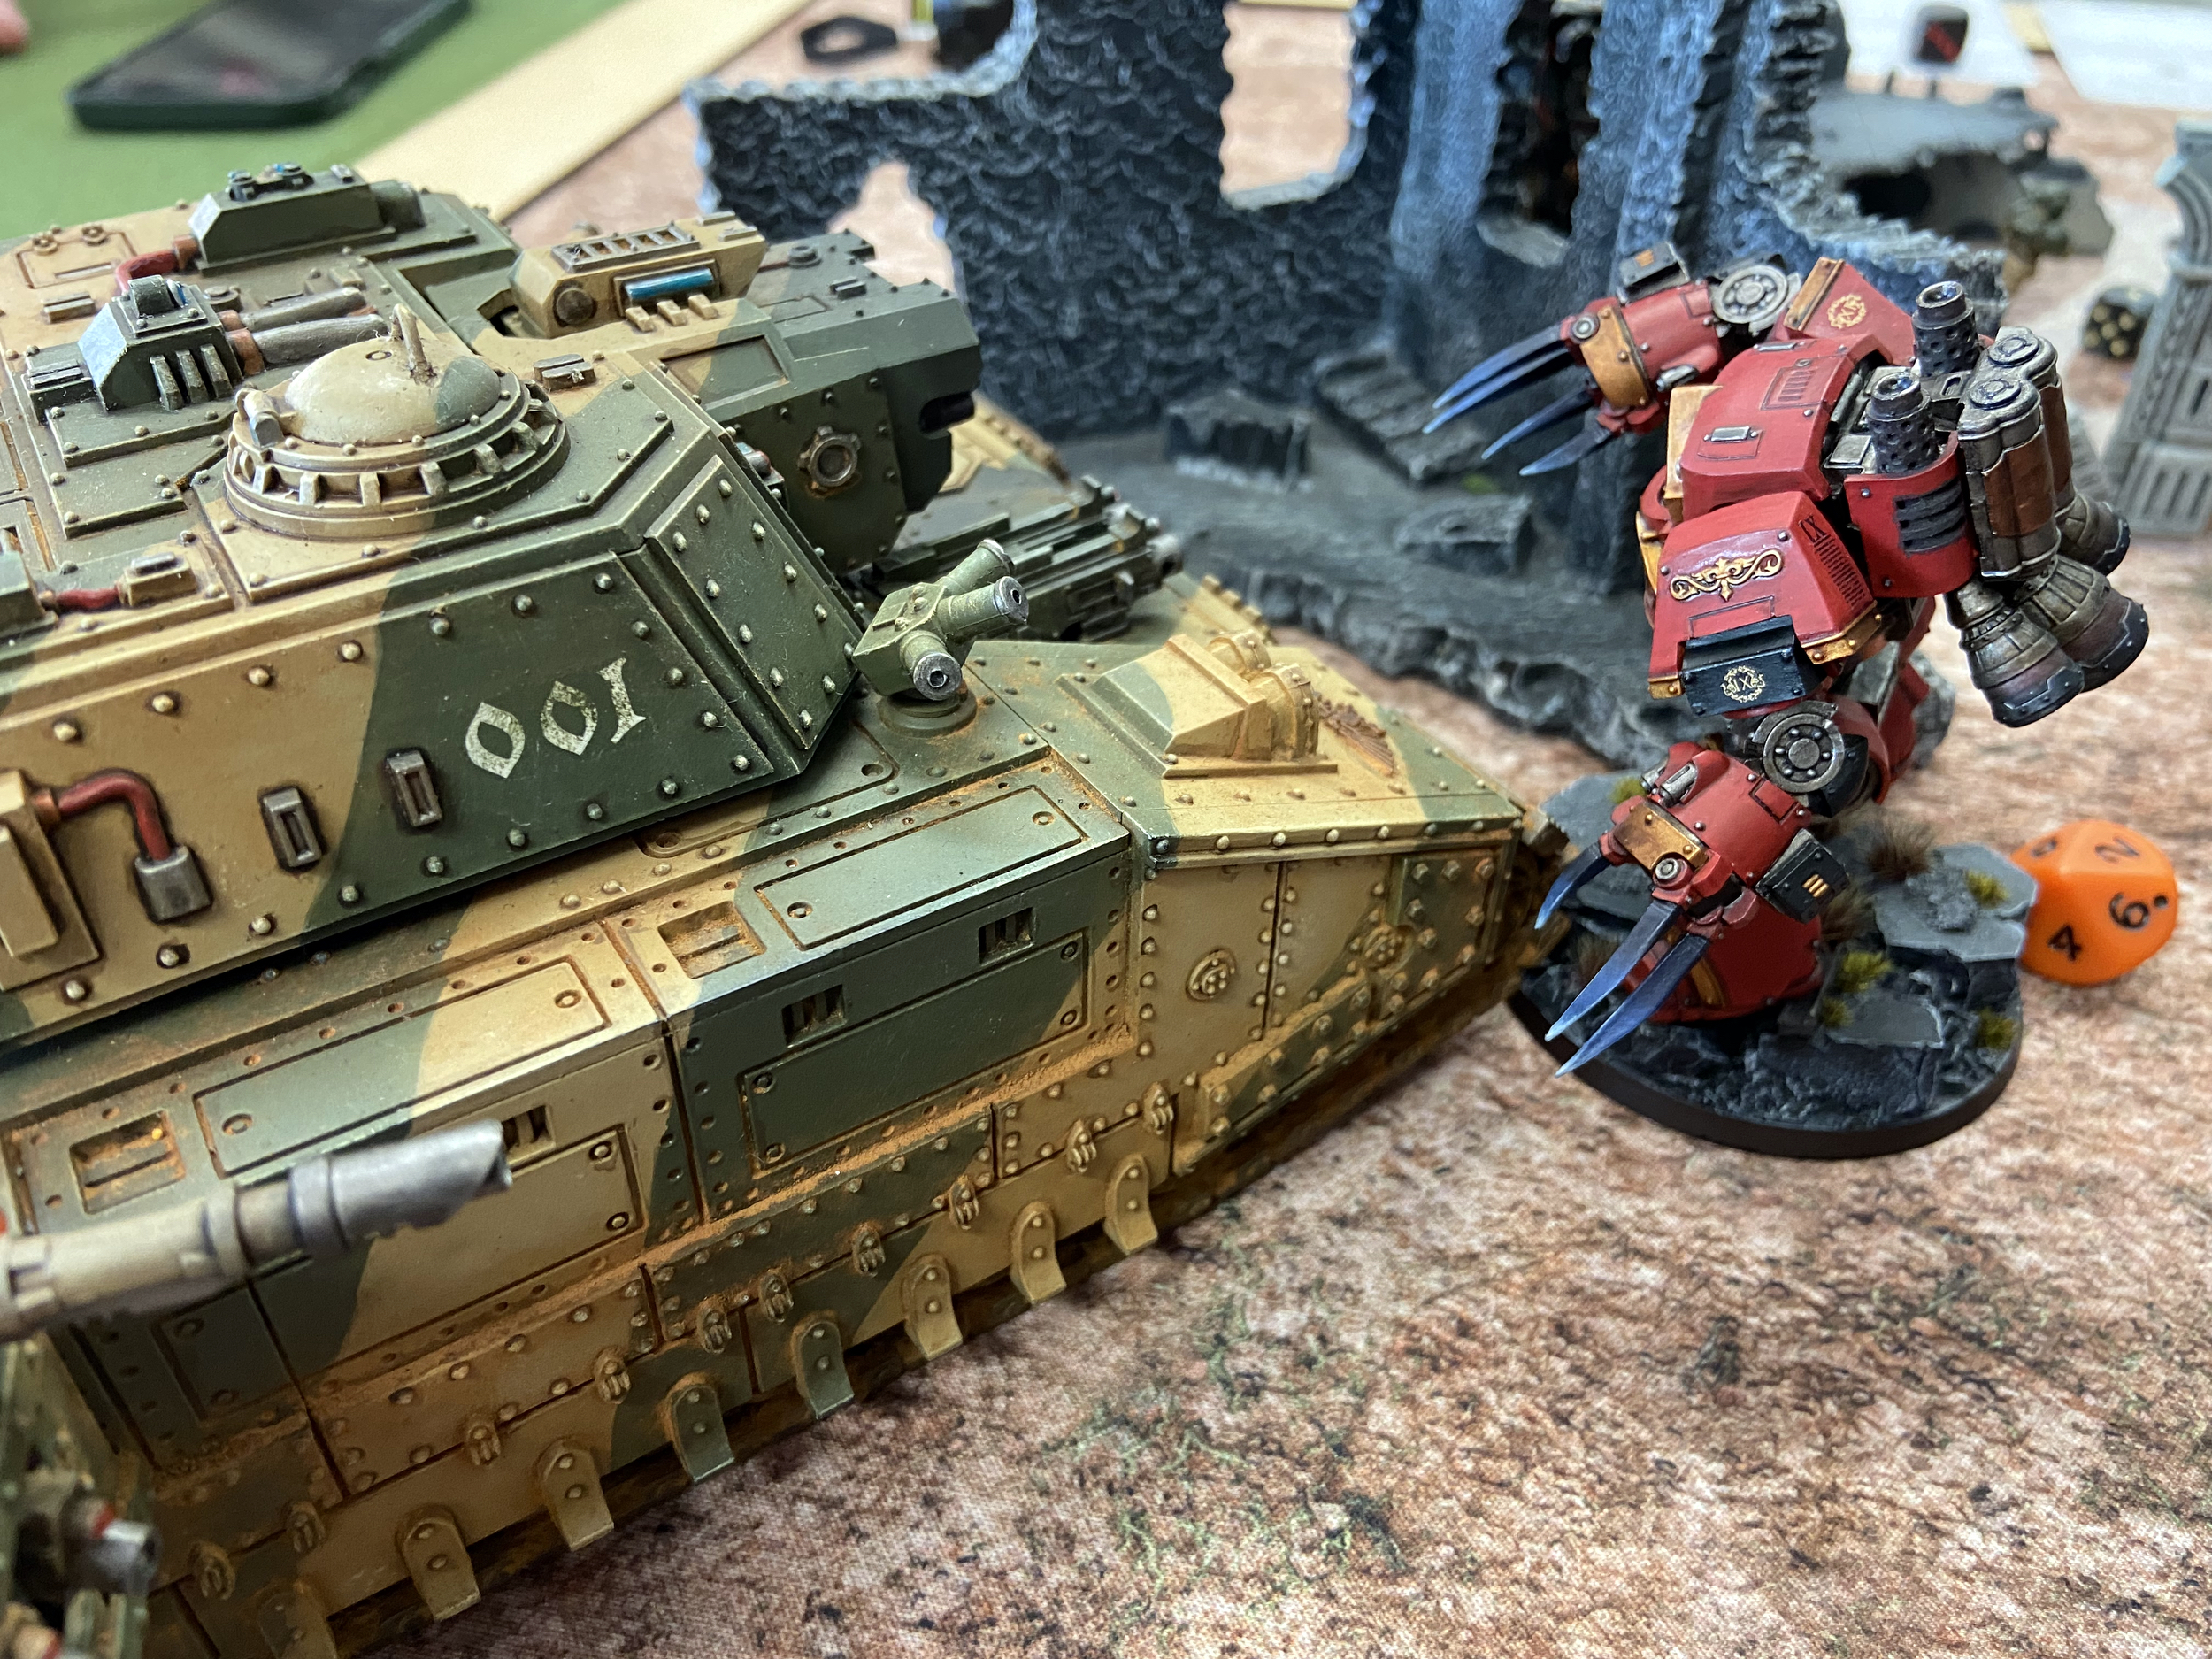
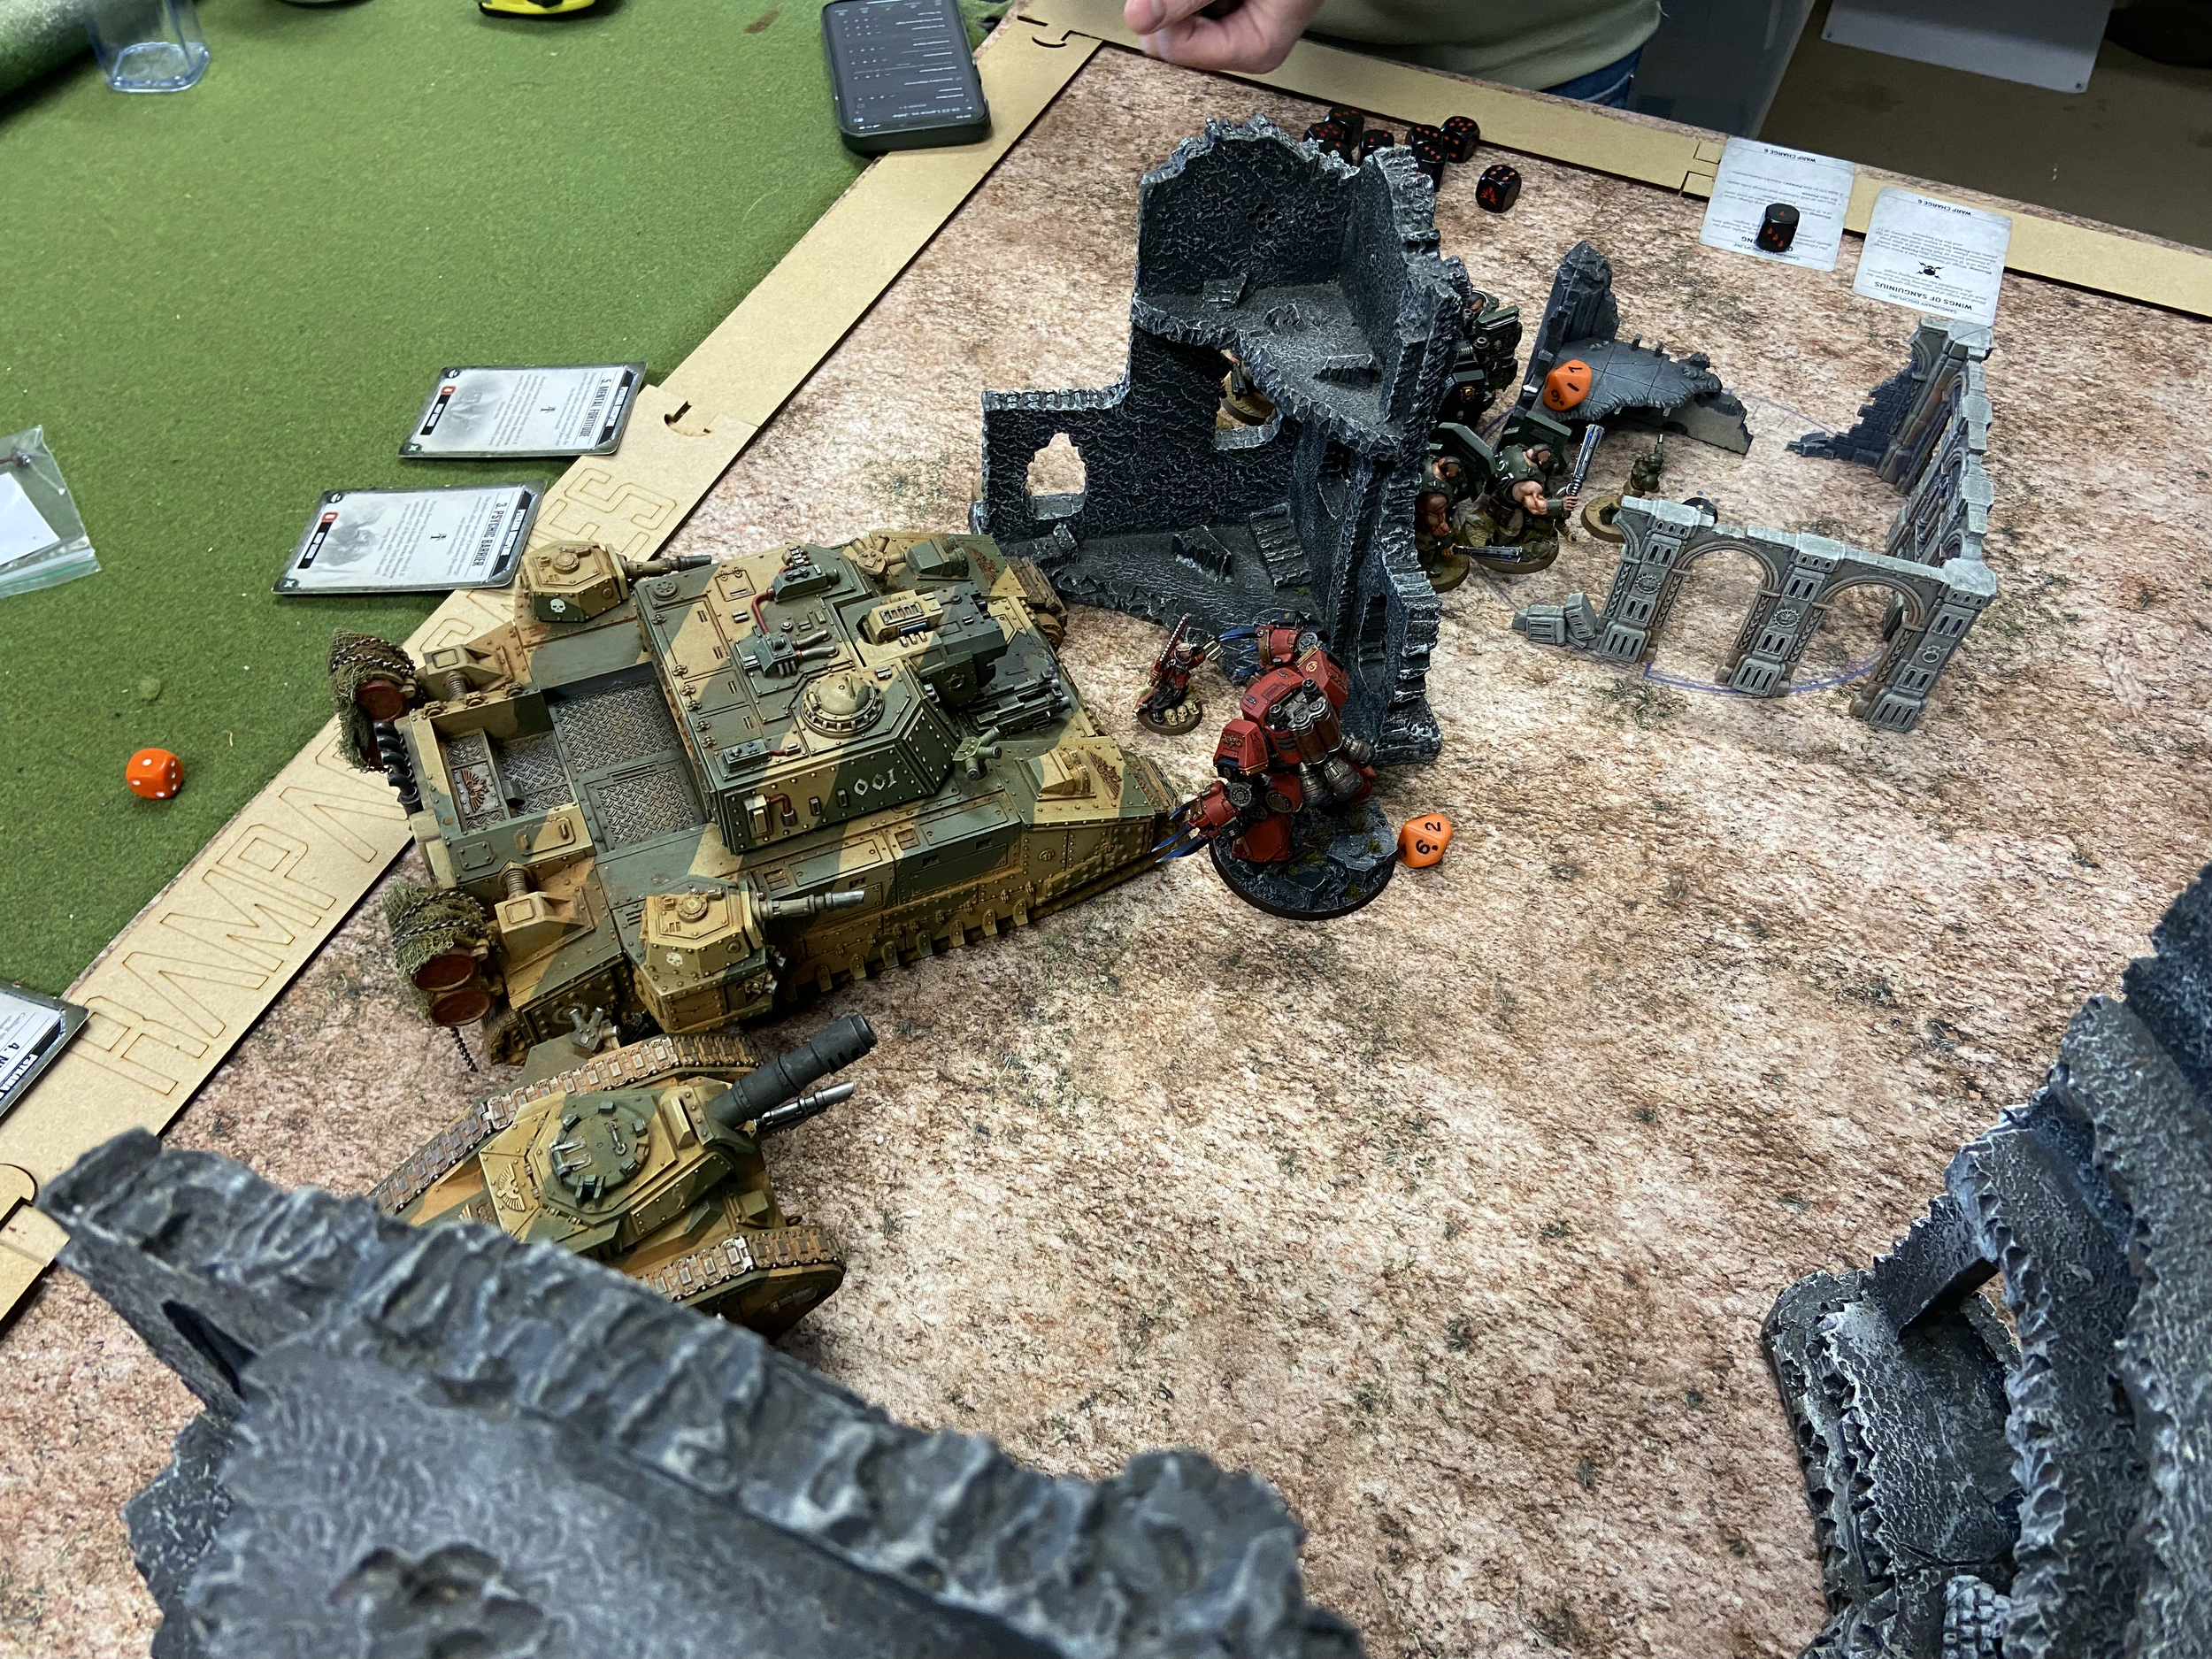
My Demolisher Tank Commander was destroyed with ease, by the disembarked Devastators.
I lost all but one infantry model on the far side. Luckily the Stormlord survived and got the Contemptor down to 2 Wounds from Overwatch using Defensive Gunners and then Crush ‘Em in the Fight Phase.
Astra Militarum
The Dreadnoughts were now knocking at my door and things were looking bad for my forces. I have been here before, once the melee starts, there is no way to stop it.
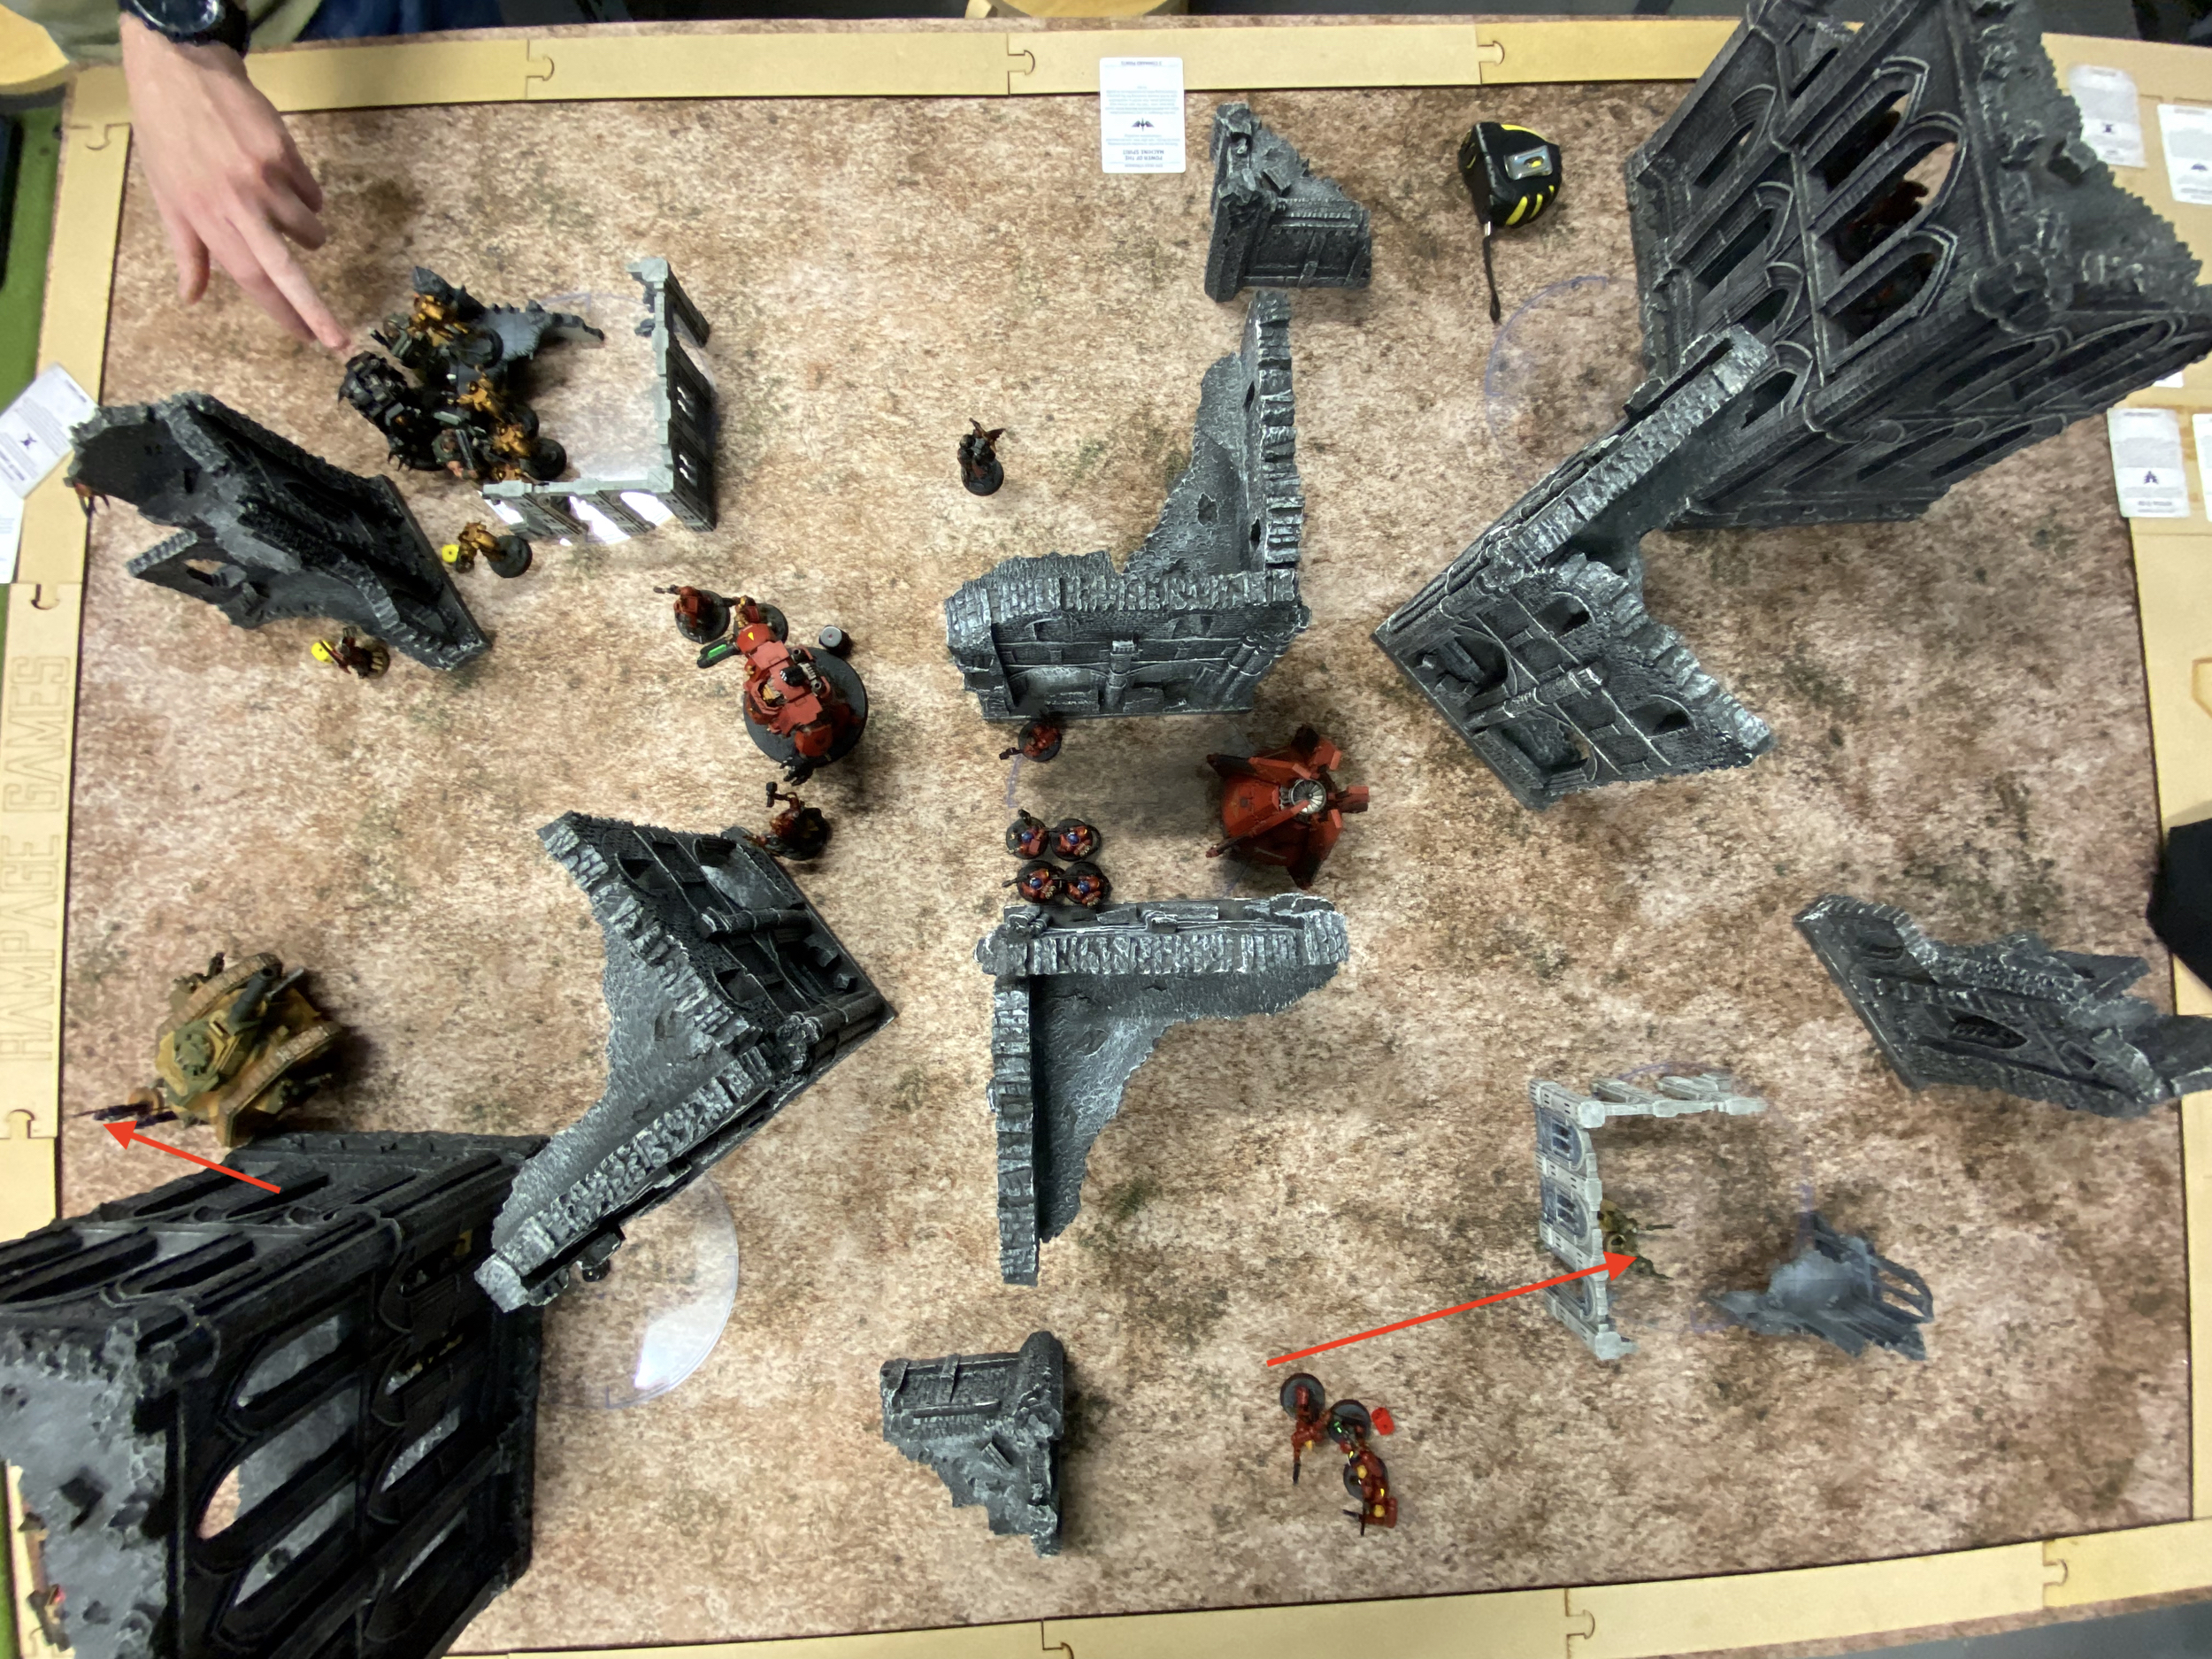
The Stormlord fell back and the Bullgryns got out to charge something. Anything. I shuffled the Astropaths around to protect them and moved the remaining Tank Commander forward.
I said at the start of this turn that is now or never, failure to deliver with my shooting in this turn would seal the deal for me or for my opponent…
With that in mind my Manticore whiffed and killed nothing, the Gatekeeper followed up with nothing, as did the Stormlord. The game was now lost, I called it a loss of ~40VP for the Guard and ~80VP for the Blood Angels. A poor show and negative move on my part I will agree, having been here so many times before it was hard to see it going any other way.
I had done no damage at all to the enemy forces and the reason was the same old reason I have been time and time again and that is why outside of this league I am taking Punishers – random shots. I rolled 4 shots for the Manticore and re-rolled it into 4 shots. The Gatekeeper did something similar. The Redemptor Dreadnought was not touched, nor were the Devastators. The 2 Wound Contemptors, you guessed it – remained on 2 Wounds.
I killed two Terminators and one Intercessor.
The Bullgryns then piled into the Death Company Dreadnought and failed to remove it. This list is terrible in some aspects. The Bullgryns are just straight up useless vs anything that is Space Marine and -1 Damage. They are now basically S7 Bullgryns with no AP and 1 Damage.

Turn 3
Blood Angels
Everything gets tighter now and closes in on me. I lose 19 Guardsmen on the bottom of the table and the Stormlord and a few Bullgryns.
Astra Militarum
My ability to fight has now gone.
Turn 4 & 5The last 2 Wounds on the Contemptor are lost to Lasgun fire of all things.
We are now just moving models quickly and seeing what survives or dies.

Cadians Vs Blood Angels – SummaryUnfortunately, it was back to normal for the Cadians today, a dreadful loss.
This in hindsight is a bloody awful list. I took the Bullgryns in the League because they are fun to play, and they are very much less fun to play with against Space Marines. Two games now they have been wasted on -1 Damage Dreadnoughts, the same happened vs the Alpha Legion.
The random shots on the Gatekeeper Battle Cannon, the Demolisher and the Manticore are just too much. Roll badly and its curtains on turn 2.
If that turn 2 had gone better I would have stood a much better chance, removing something, anything that turn would have made a difference. If I had removed the Devastators and their Melta weapons then the Stormlord or Tank Commander would have lived longer. The same if I had killed the Redemptor.
I think in some aspects I played badly as the game wore on and it was clear I was going to lose significantly. I was grasping as things, splitting the two Lascannons on the Stormlord into two different Dreadnoughts in the weak hope of killing the one on 2 Wounds and damaging another. The same story with the Lascannon and turret weapons on the Tank Commanders.