

Astra Militarum Screening – Astra Militarum Tactics
An overview of Screening with the Astra Militarum and in General...
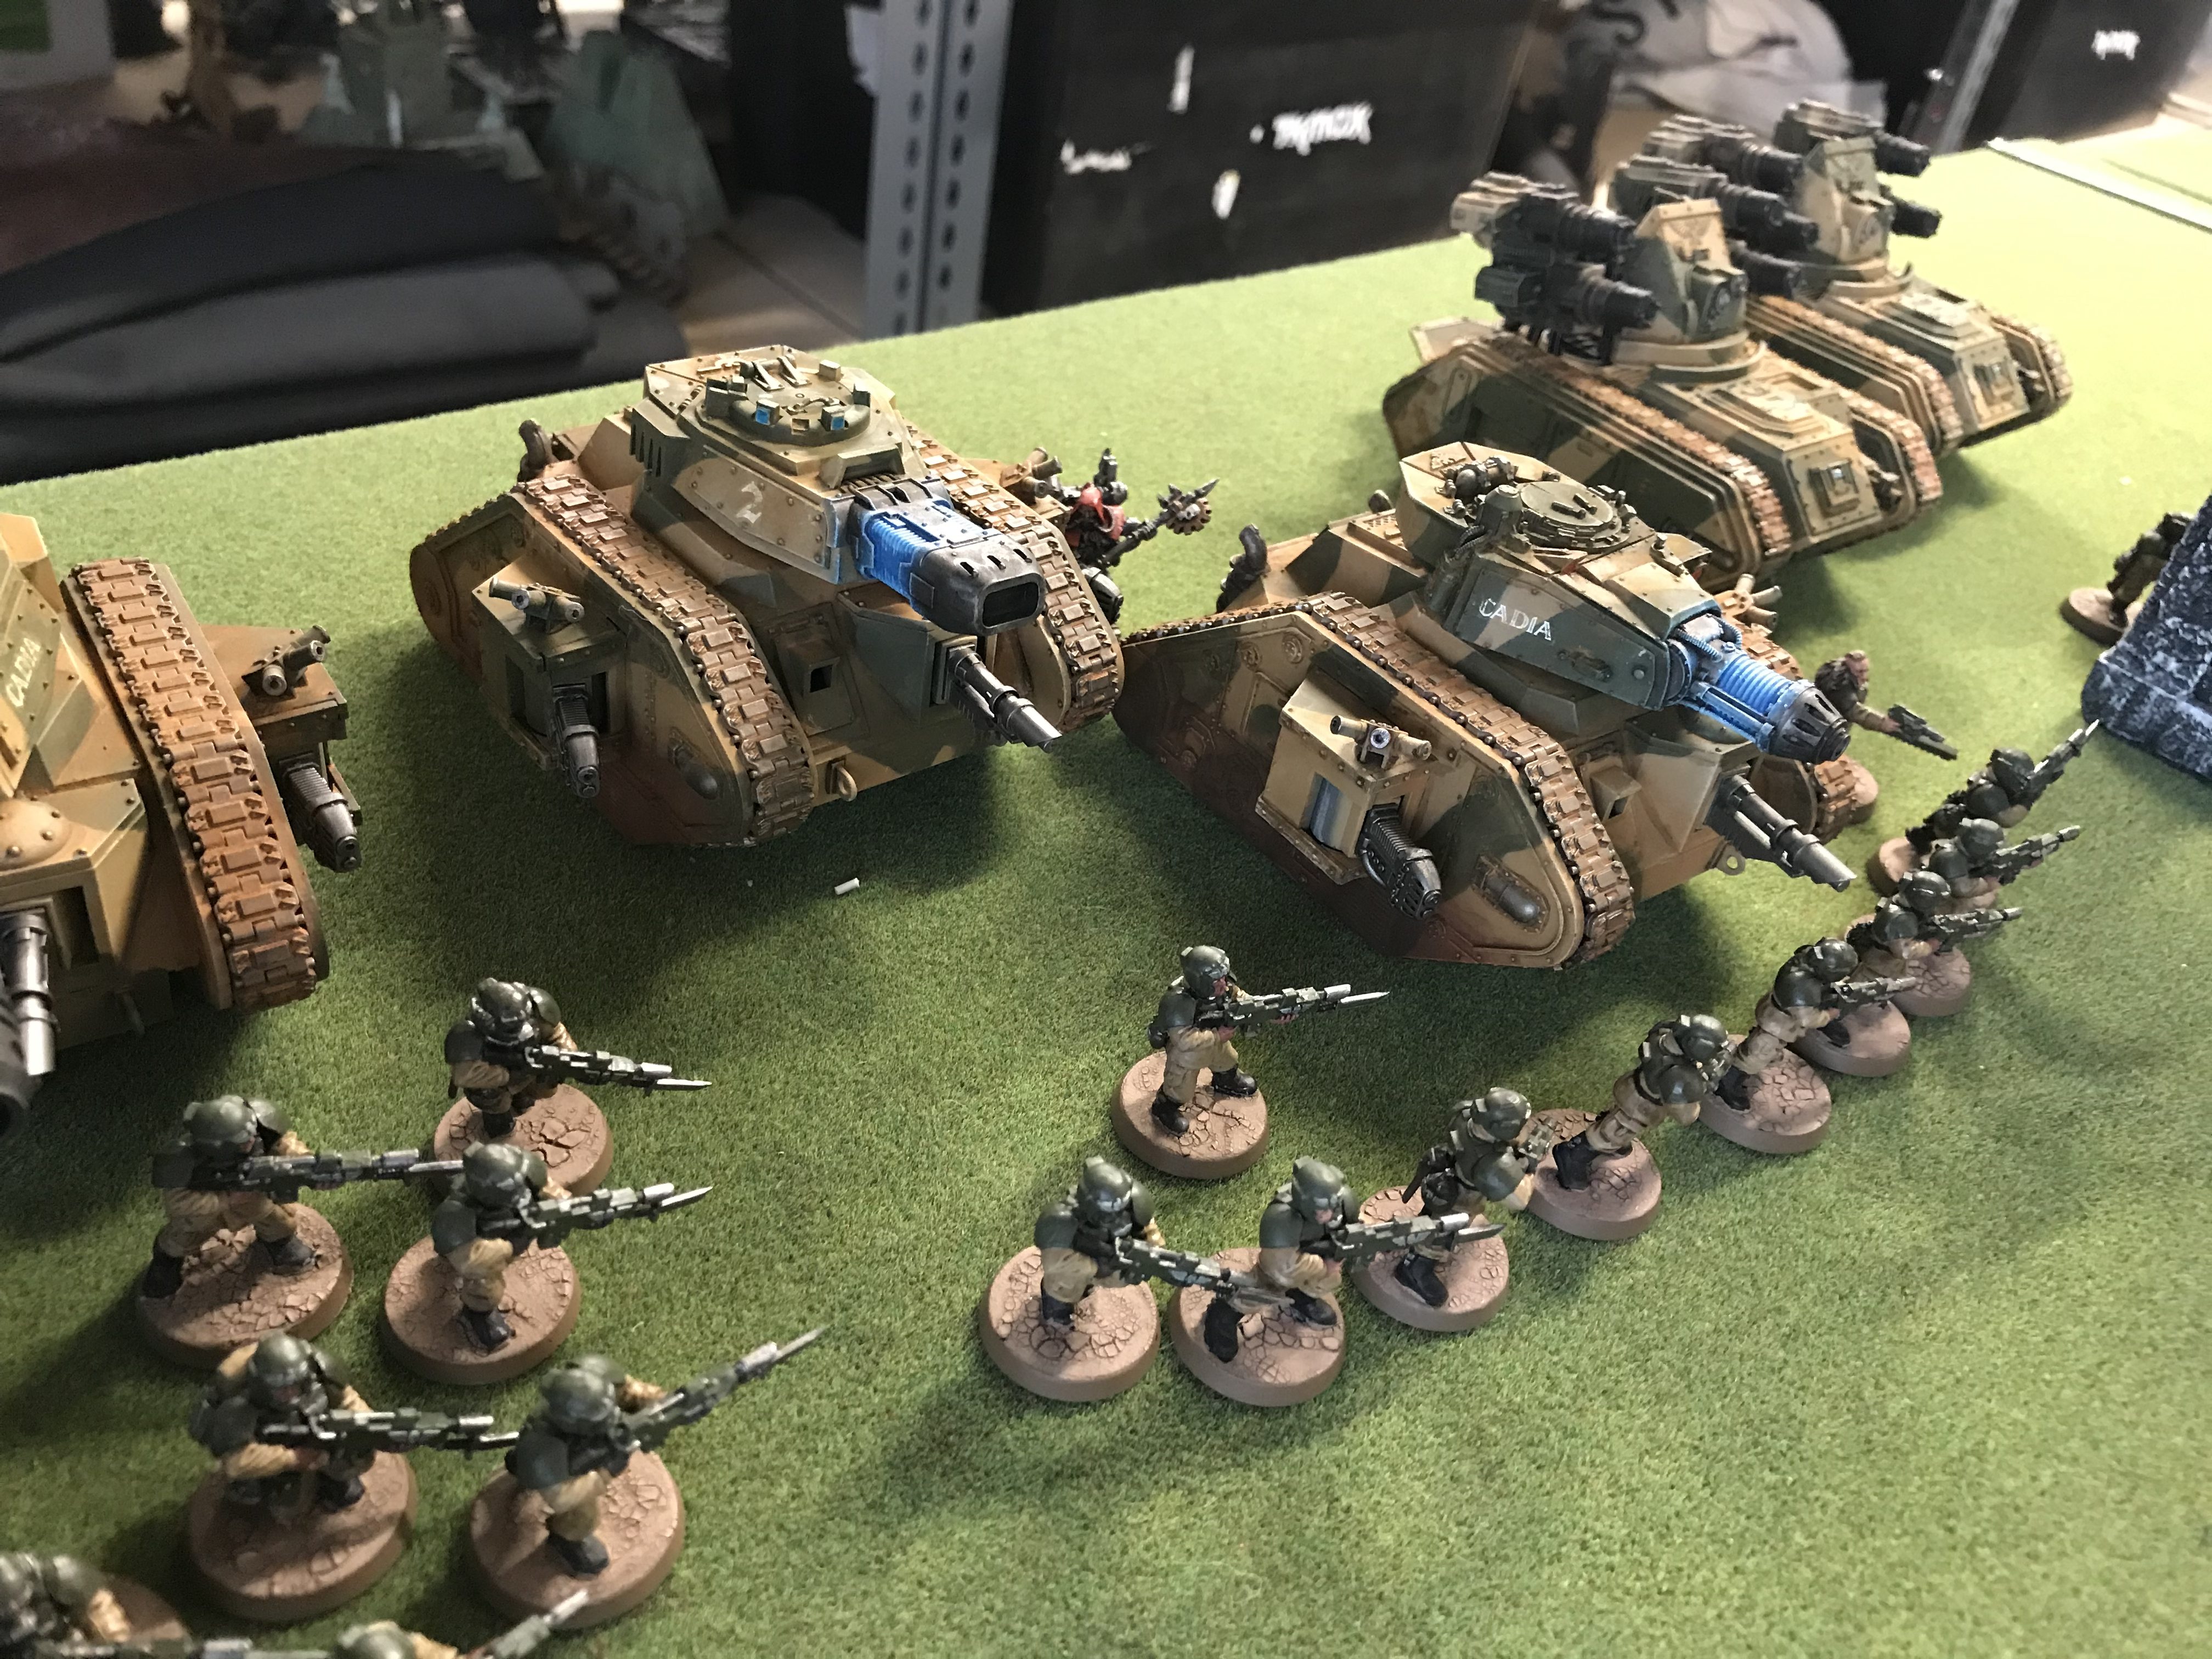
Astra Militarum Screening comes up every now and again in various places online. For my own benefit, and yours, I thought I would try and cover the topic as fully as possible. After painting 7 Leman Russ myself – I am going to need this tactic more than ever. I have already used to good effect recently, against the Ad Mech, Death Guard and Eldar all at Boards & Swords in Derby.
Never miss an article? Subscribe!
Astra Militarum Screening
It is a simple concept on the face of it. For me, Screening can be summarised as;
Using your infantry to stop the enemy getting to where they want to be.
Where They Want To Be could mean a few different things depending on the Army you’re facing and the style of play your opponent has adopted. The enemy may be positioning to accomplish one or more of the following;
- Charge a valuable unit – to destroy it. Eg charging your artillery with Terminators to destroy them.
- Charge a valuable unit – to shut it down. Eg charging a Leman Russ with a low-cost unit to stop the tank from shooting in the following turn.
- Achieve optimal range for a specific weapon. Eg Rapid Fire on a Plasma Gun.
- Snipe a character. Eg unloading Hurricane Bolters into your 4 Wound, Toughness 3, 5+ Invulnerable Save Warlord
- Take an objective. No example required.
As always, let me know if I missed anything I will happily add it…
Guardsmen – Astra Militarum Screening
Rules of Engagement
In short, you will be placing your infantry between where the enemy is (or will be) and where they want to be.
There are several rules within 8th Edition that you should be aware of and take into account every time you are attempting to screen out an enemy using Astra Militarum screening.
I’m no Creed when it comes to this during a game because it’s hard to remember in the heat of battle. But the theory is solid.
Remembering the following will help you a lot;
- A unit is considered in combat with another unit if they’re within 1″ of each other
- Units usually have to Deep Strike 9″+ away from enemy models
- Units charge up to 12″
- Units can charge multiple units but only need to reach one to be successful
- Units Pile In 3″
- Units Consolidate 3″
- Units can Consolidate into other units, even if the unit wasn’t a target for a charge
- Units Consolidate towards the nearest enemy model
- Units with Fly can move and charge over enemy models
- Only models that can see the charging unit can Overwatch
That’s a lot to take on board.
Extra Rules of Engagement
Thanks to Alexis and Mark in the comments for these extra bits about charging, piling in and consolidating. This shows how specific and subtle things can get in melee in Warhammer 40,000.
- When consolidating and piling in each model wishing to move must move closer to the nearest enemy model. This is on a model by model basis and may mean that different models in the same unit must move towards different enemy units.
- You have to end your Pile In/Consolidation closer to the nearest enemy model, but you don’t have to move directly toward it. It’s perfectly legit to, say, start 1/2″ in front of a given enemy Model, and then end 1/4″ behind it. That can give the attacker a lot more movement through your screen if you’re not careful, and particularly around the edges.
- You cannot get any closer than base-to-base contact. If a model is in base-to-base contact with an enemy model it may not make any pile in or consolidate movement not even to circle around the model it is in base to base contact with.
- Units can pile into other units, even if the unit wasn’t a target for a charge.
- In the fight phase, a unit that charged can only fight units that it declared as the target of the charge. This means, for example, that it cannot fight characters that heroically intervened into the fight unless that character was also the target of a charge.
- Units that with the “Fly” keyword cannot move over models with the “Building” keyword and must include the vertical distance moved (up and down added together, not diagonally) when making a charge.
- One of the particularly dangerous things they can often do that way is to “tri-point” one of the Models in your screen, putting at least three Models around one of yours so it can’t Fall Back and leave the attacker open to your shooting. Then they finish off the Unit in your Assault Phase and are ready to move up and Charge again in their Turn.
- Most Factions have a sub-Faction that can Fall Back and Charge in the same Turn and/or a Stratagem that will let a Unit do it. For some (Kraken in Tyranids) this sub-Faction is good enough that it’s pretty much the default, and for competitive purposes, it might as well be considered a Faction ability. For others (Only White Scars can do it off the Codex Chapters), it’s not as common, and you won’t have to worry about it when going up against, say, Salamanders or Ultramarines.
- Screening isn’t always done with Infantry to protect Vehicles. Long-range Vehicles like Basilisks are excellent for securing back areas (especially back corners) of your Deployment Zone against Deep Strikers, since they have a large footprint, and can still do the rest of their job perfectly well without moving from there. Sometimes it may be necessary to interpose something like a Chimera or Hellhound to save an ObSec Infantry Unit on an Objective or whatever.
- The April 2019 Big FAQ cut down on the ability to screen with Flyers, but it’s still not impossible. Even with the Aircraft update, Models can’t end a move on top of the base of a Flyer, so if you can get one in close enough that there isn’t room for the attackers’ bases in between it and whatever they want to Charge, they’re going to have to go around, which may buy you an extra turn.
To maximise your screening potential this all comes down to where you place your models in relation to each other.
Where the enemy is (or will be) matters too, but less so than where your models are in relation to your other models.
Also, where the enemy models are is something you cannot always control. If you’re going second then there is little you can do about a first turn move and charge from Jump Pack Marines. It’ll happen and it’ll happen how the enemy wants. What you can control is how well (or badly) their second engagement will be by positioning your units away from each other.
This was fairly awful screening – the Hellhounds are very open
Astra Militarum Screening – Examples
I considered a few ways of showcasing these examples;
- Tabletop Simulator – which I don’t own
- Battle Chronicler – which I do own but only works on Windows and is slow/clunky
- Pencil and paper – I’m terrible at drawing and handwriting
- Real models – probably the most time consuming but it’s the most accurate
Real models it is. It’ll take a little longer to set up, position, photo and put away than an app – but it’ll give you the most accurate and real examples.
Small Scale Astra Militarum Screening
Let us start small, this might be from a 500 point game.
- 3 Infantry Squads
- 2 Leman Russ
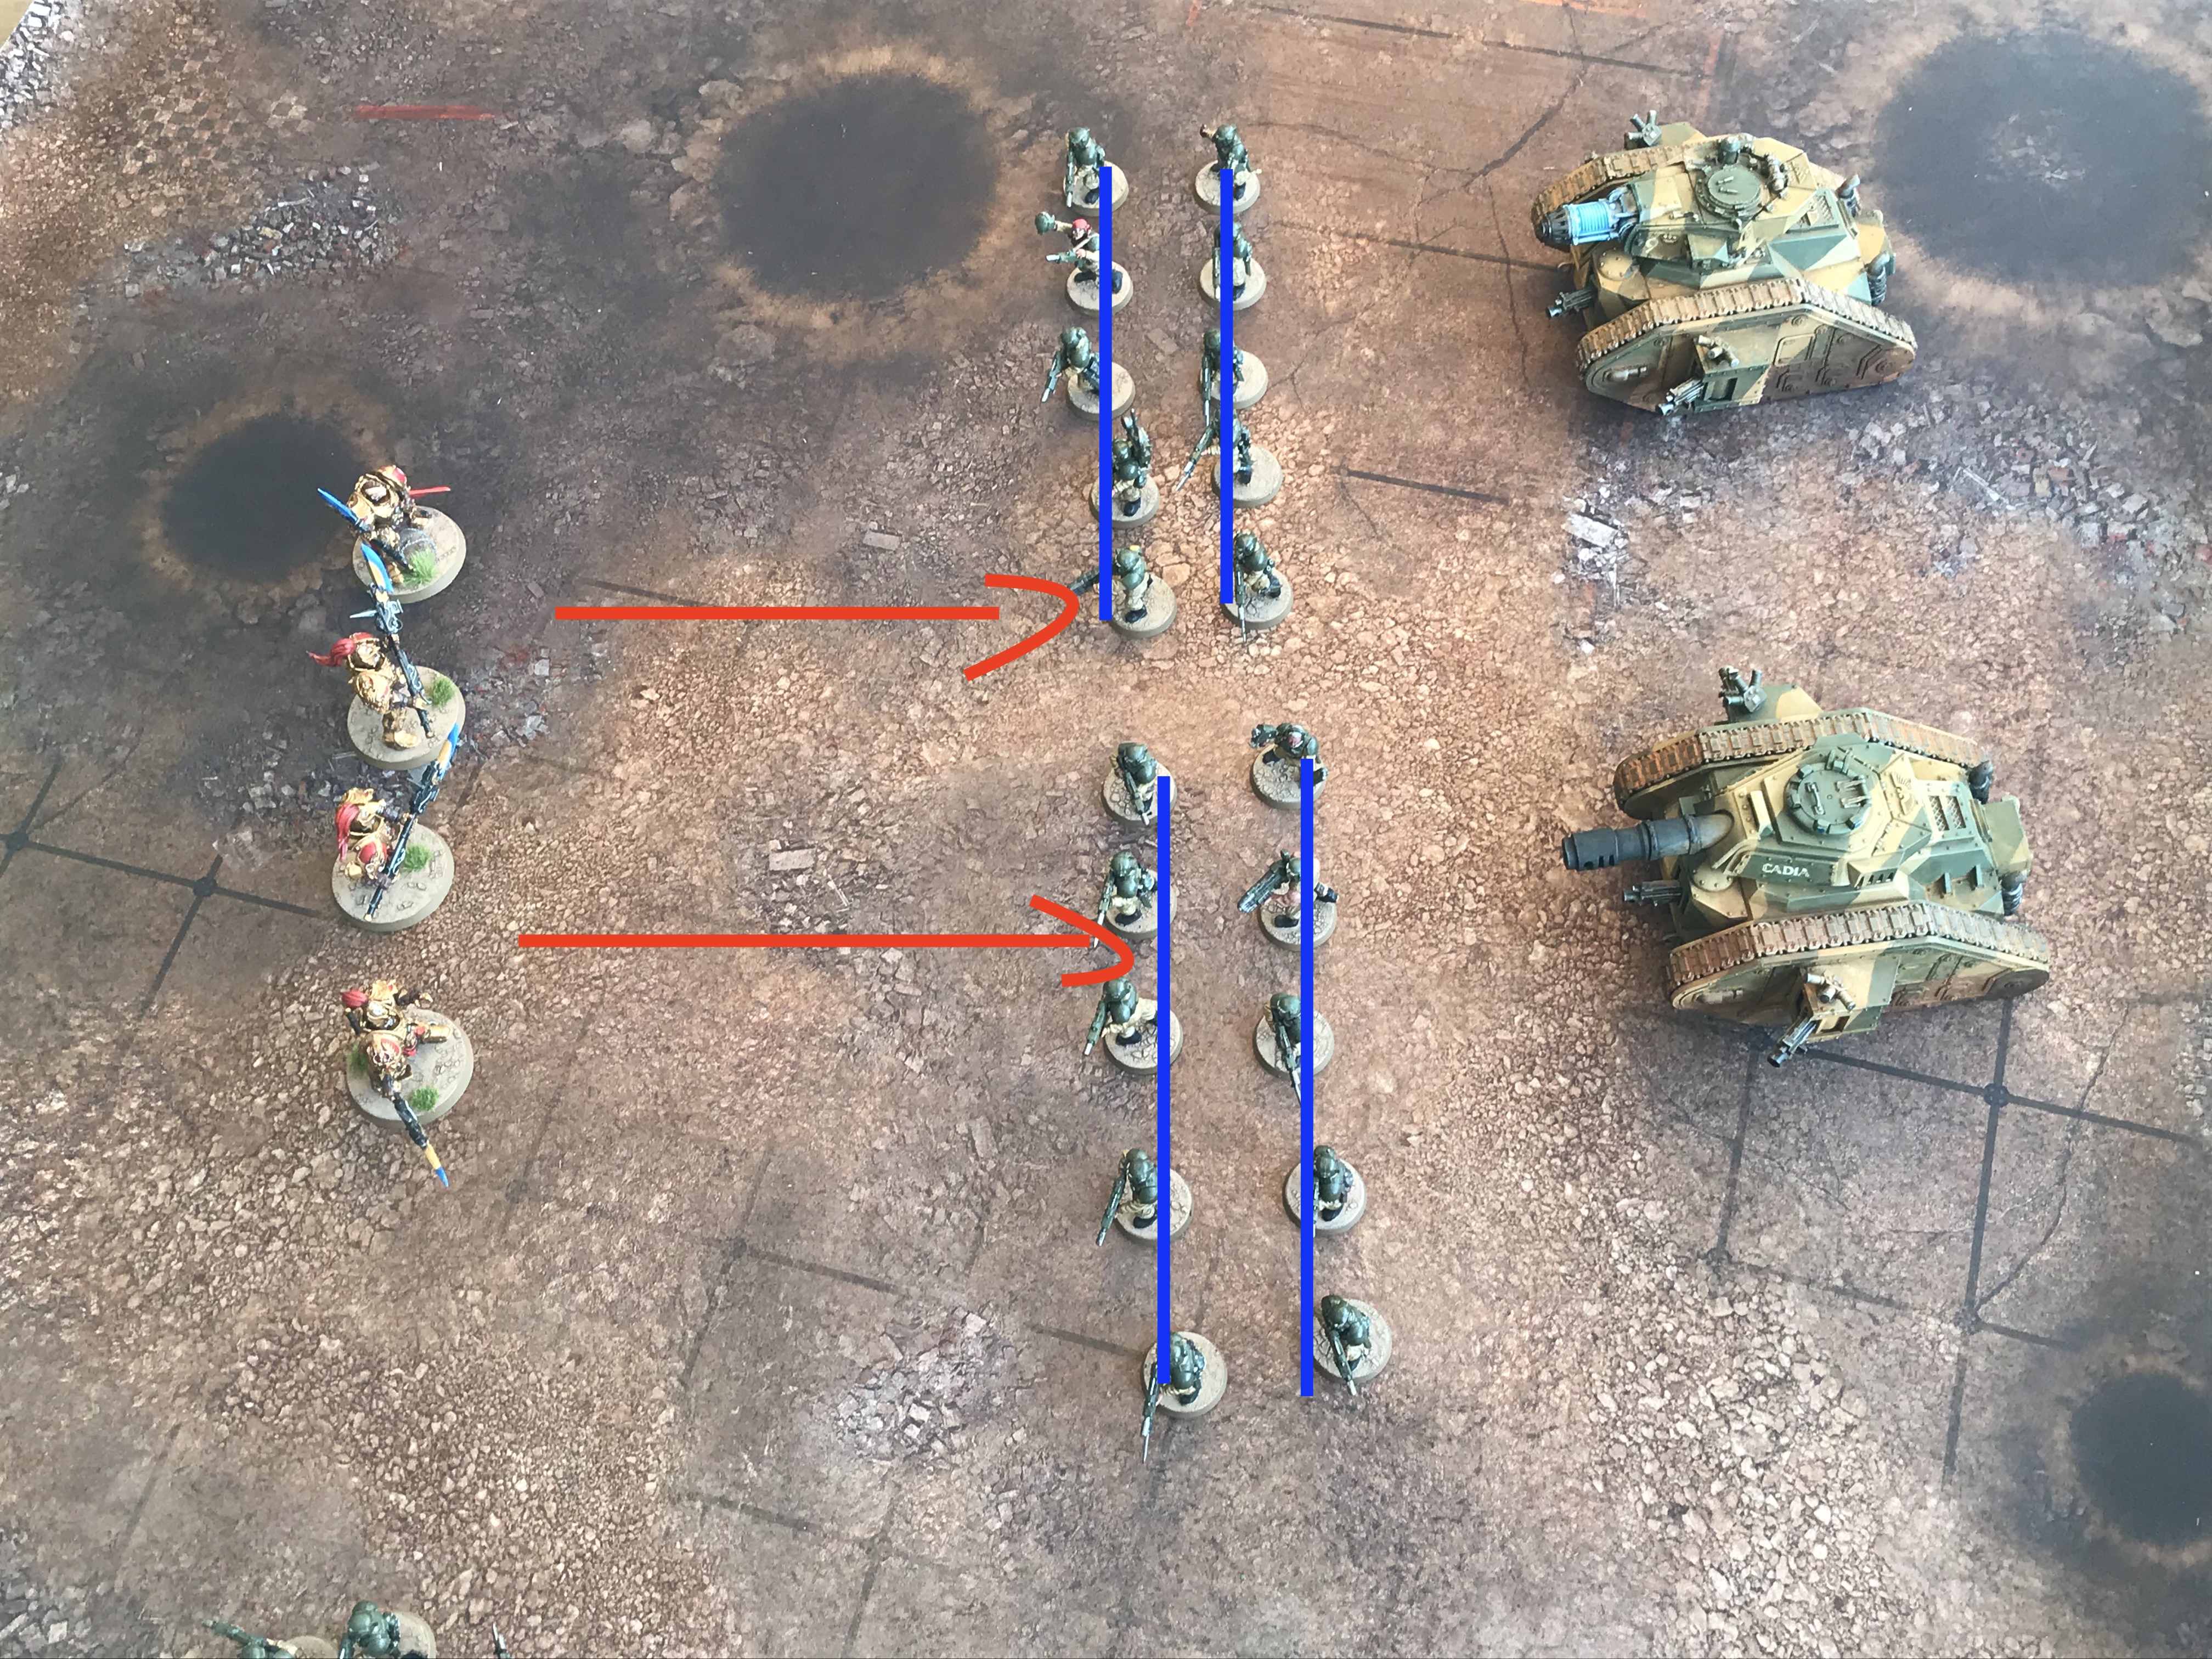
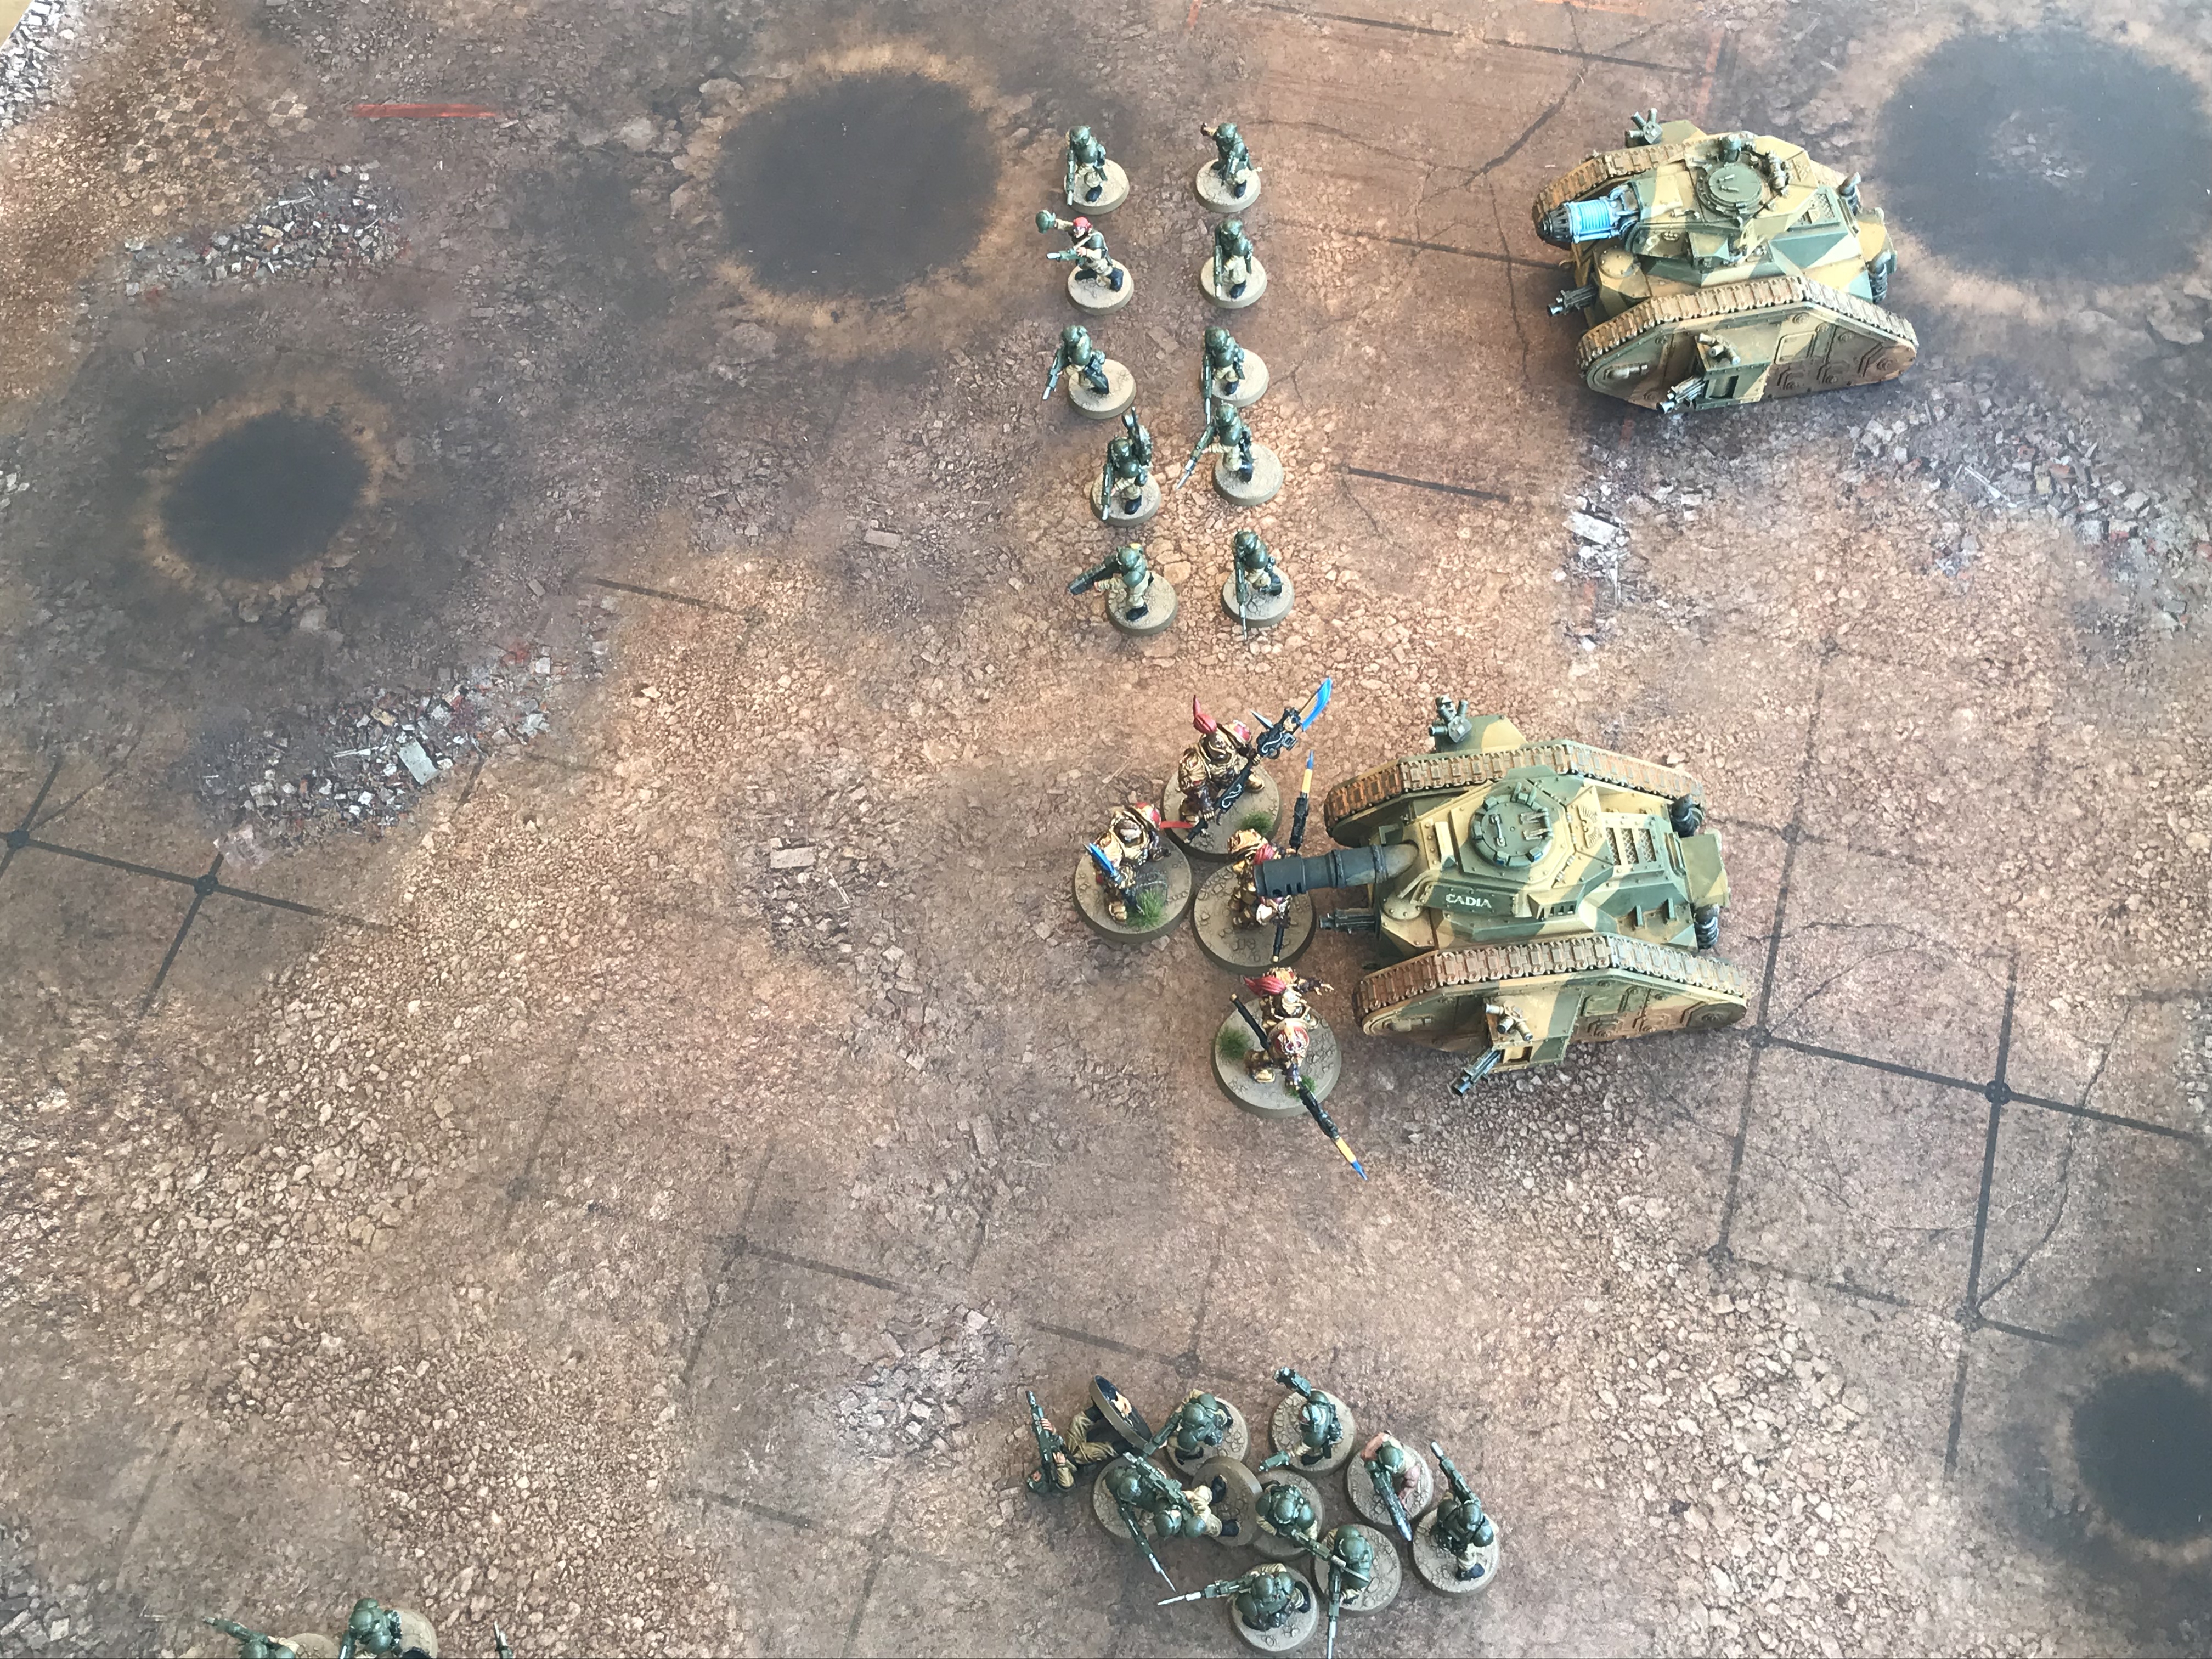
This simplified example shows the basics of screening enemy melee units from your precious Leman Russ. The enemy are some Custodians in this example. This is a basic screening example and should give beginners a good understanding of the tactic.
- This is a bad example of screening, the units are not spread out and are not taking advantage of their maximum spacing. There are clear lines into the Leman Russ from the enemy units.
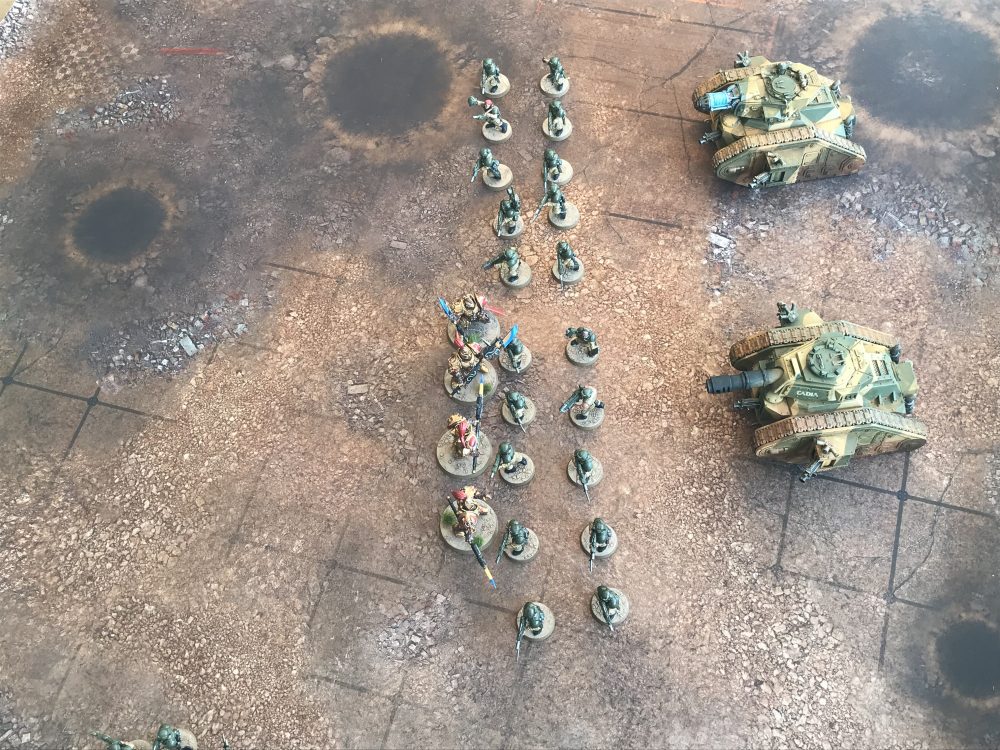
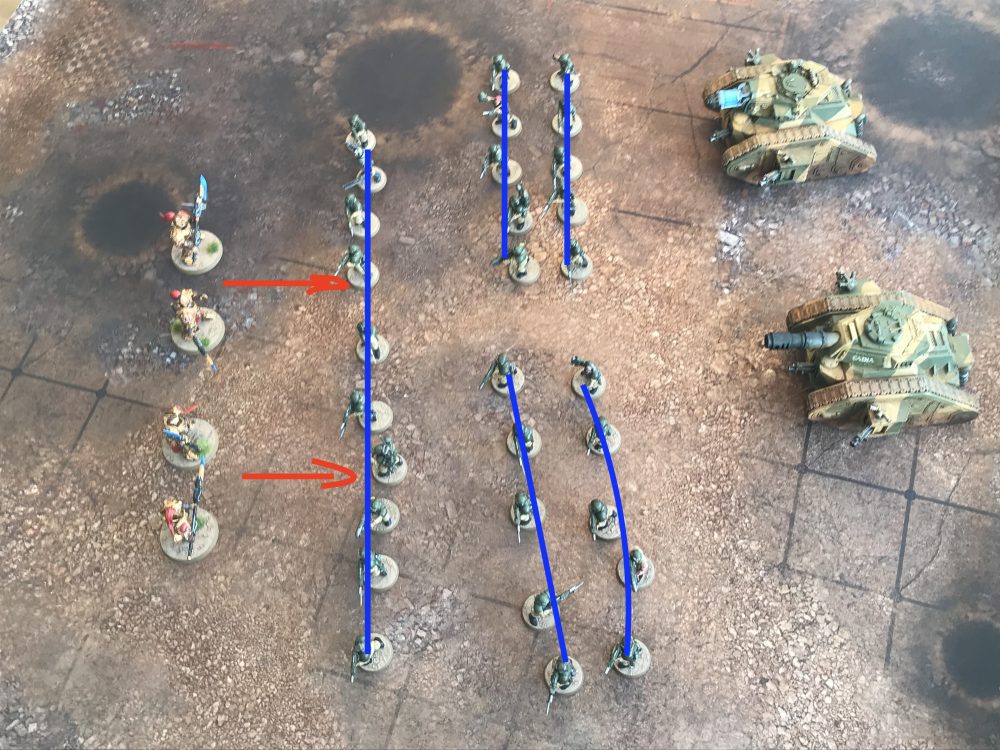
- The models now spread out we can close the gap with just two units and the third can be used elsewhere.
- Now the Custodians are stopped in their tracks on the charge.
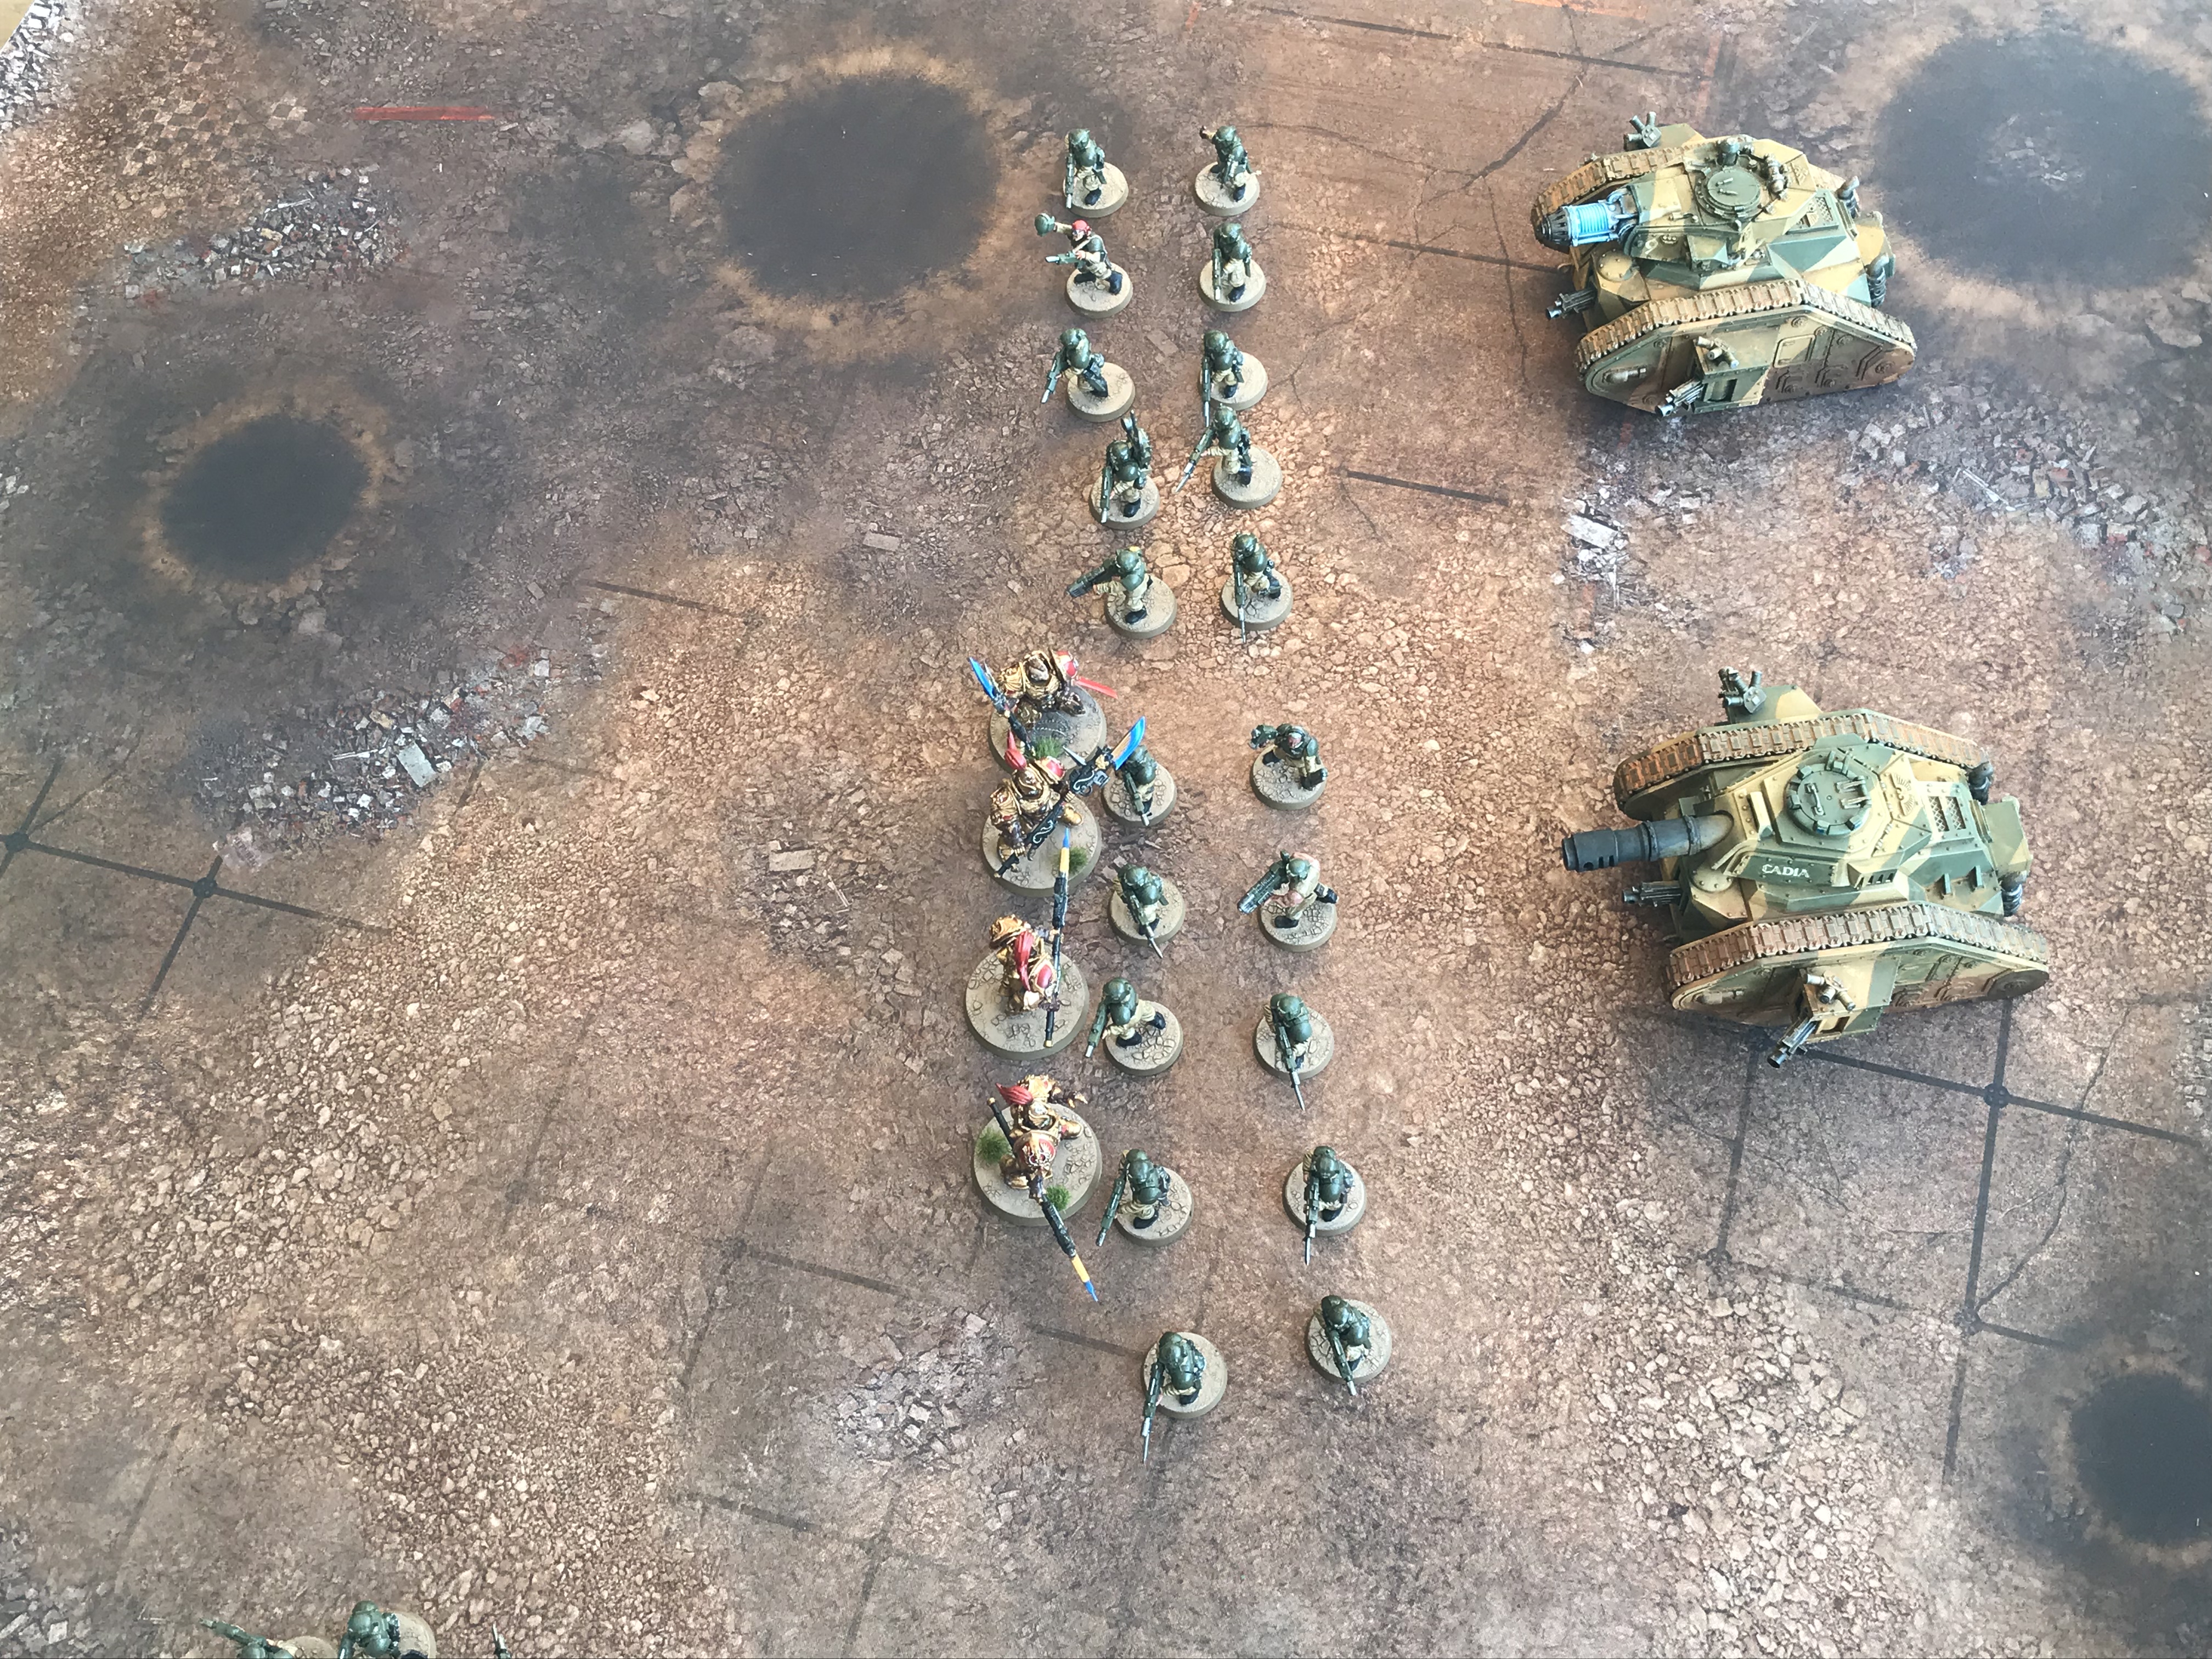
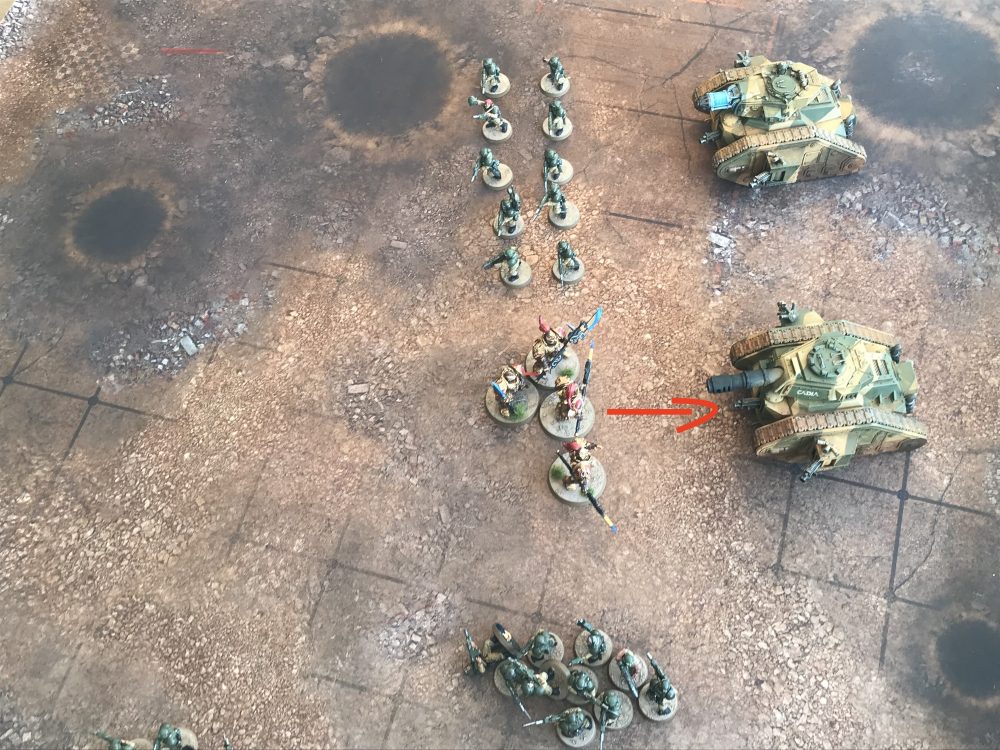
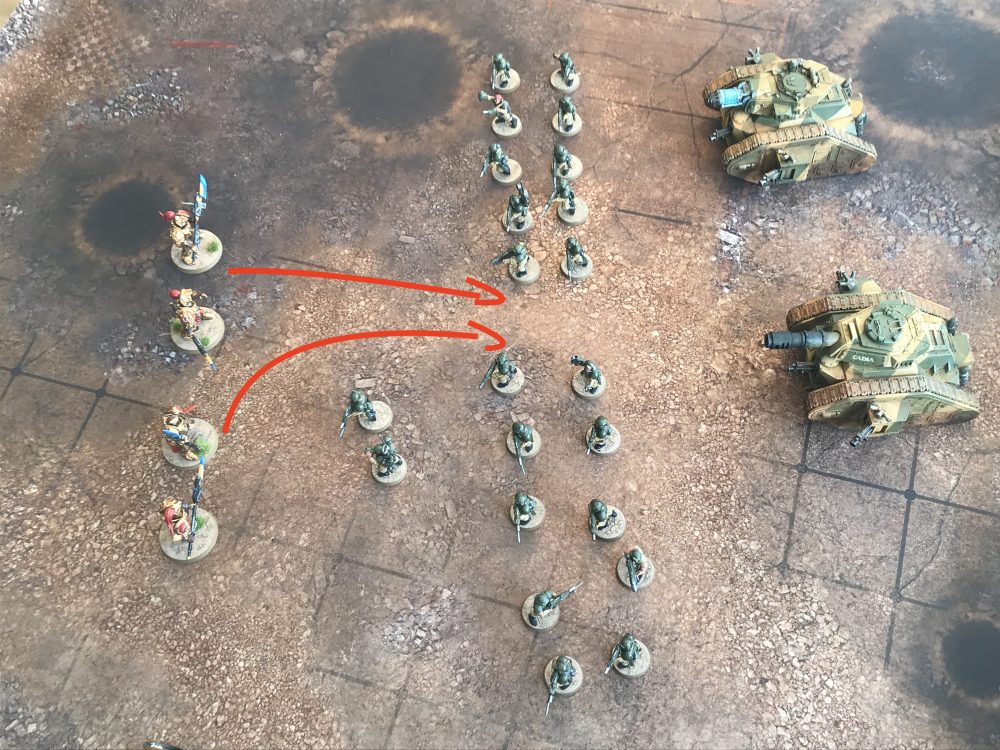
- However, if the Guardsman unit is destroyed the Custodians could, with some clever positioning, consolidate into the closest Leman Russ.
- This consolidation move is something you need to plan for by keeping your precious units away from your screening units. Here the Leman Russ is too close and the Custodians can consolidate into it. Thus disabling it in the following turn.
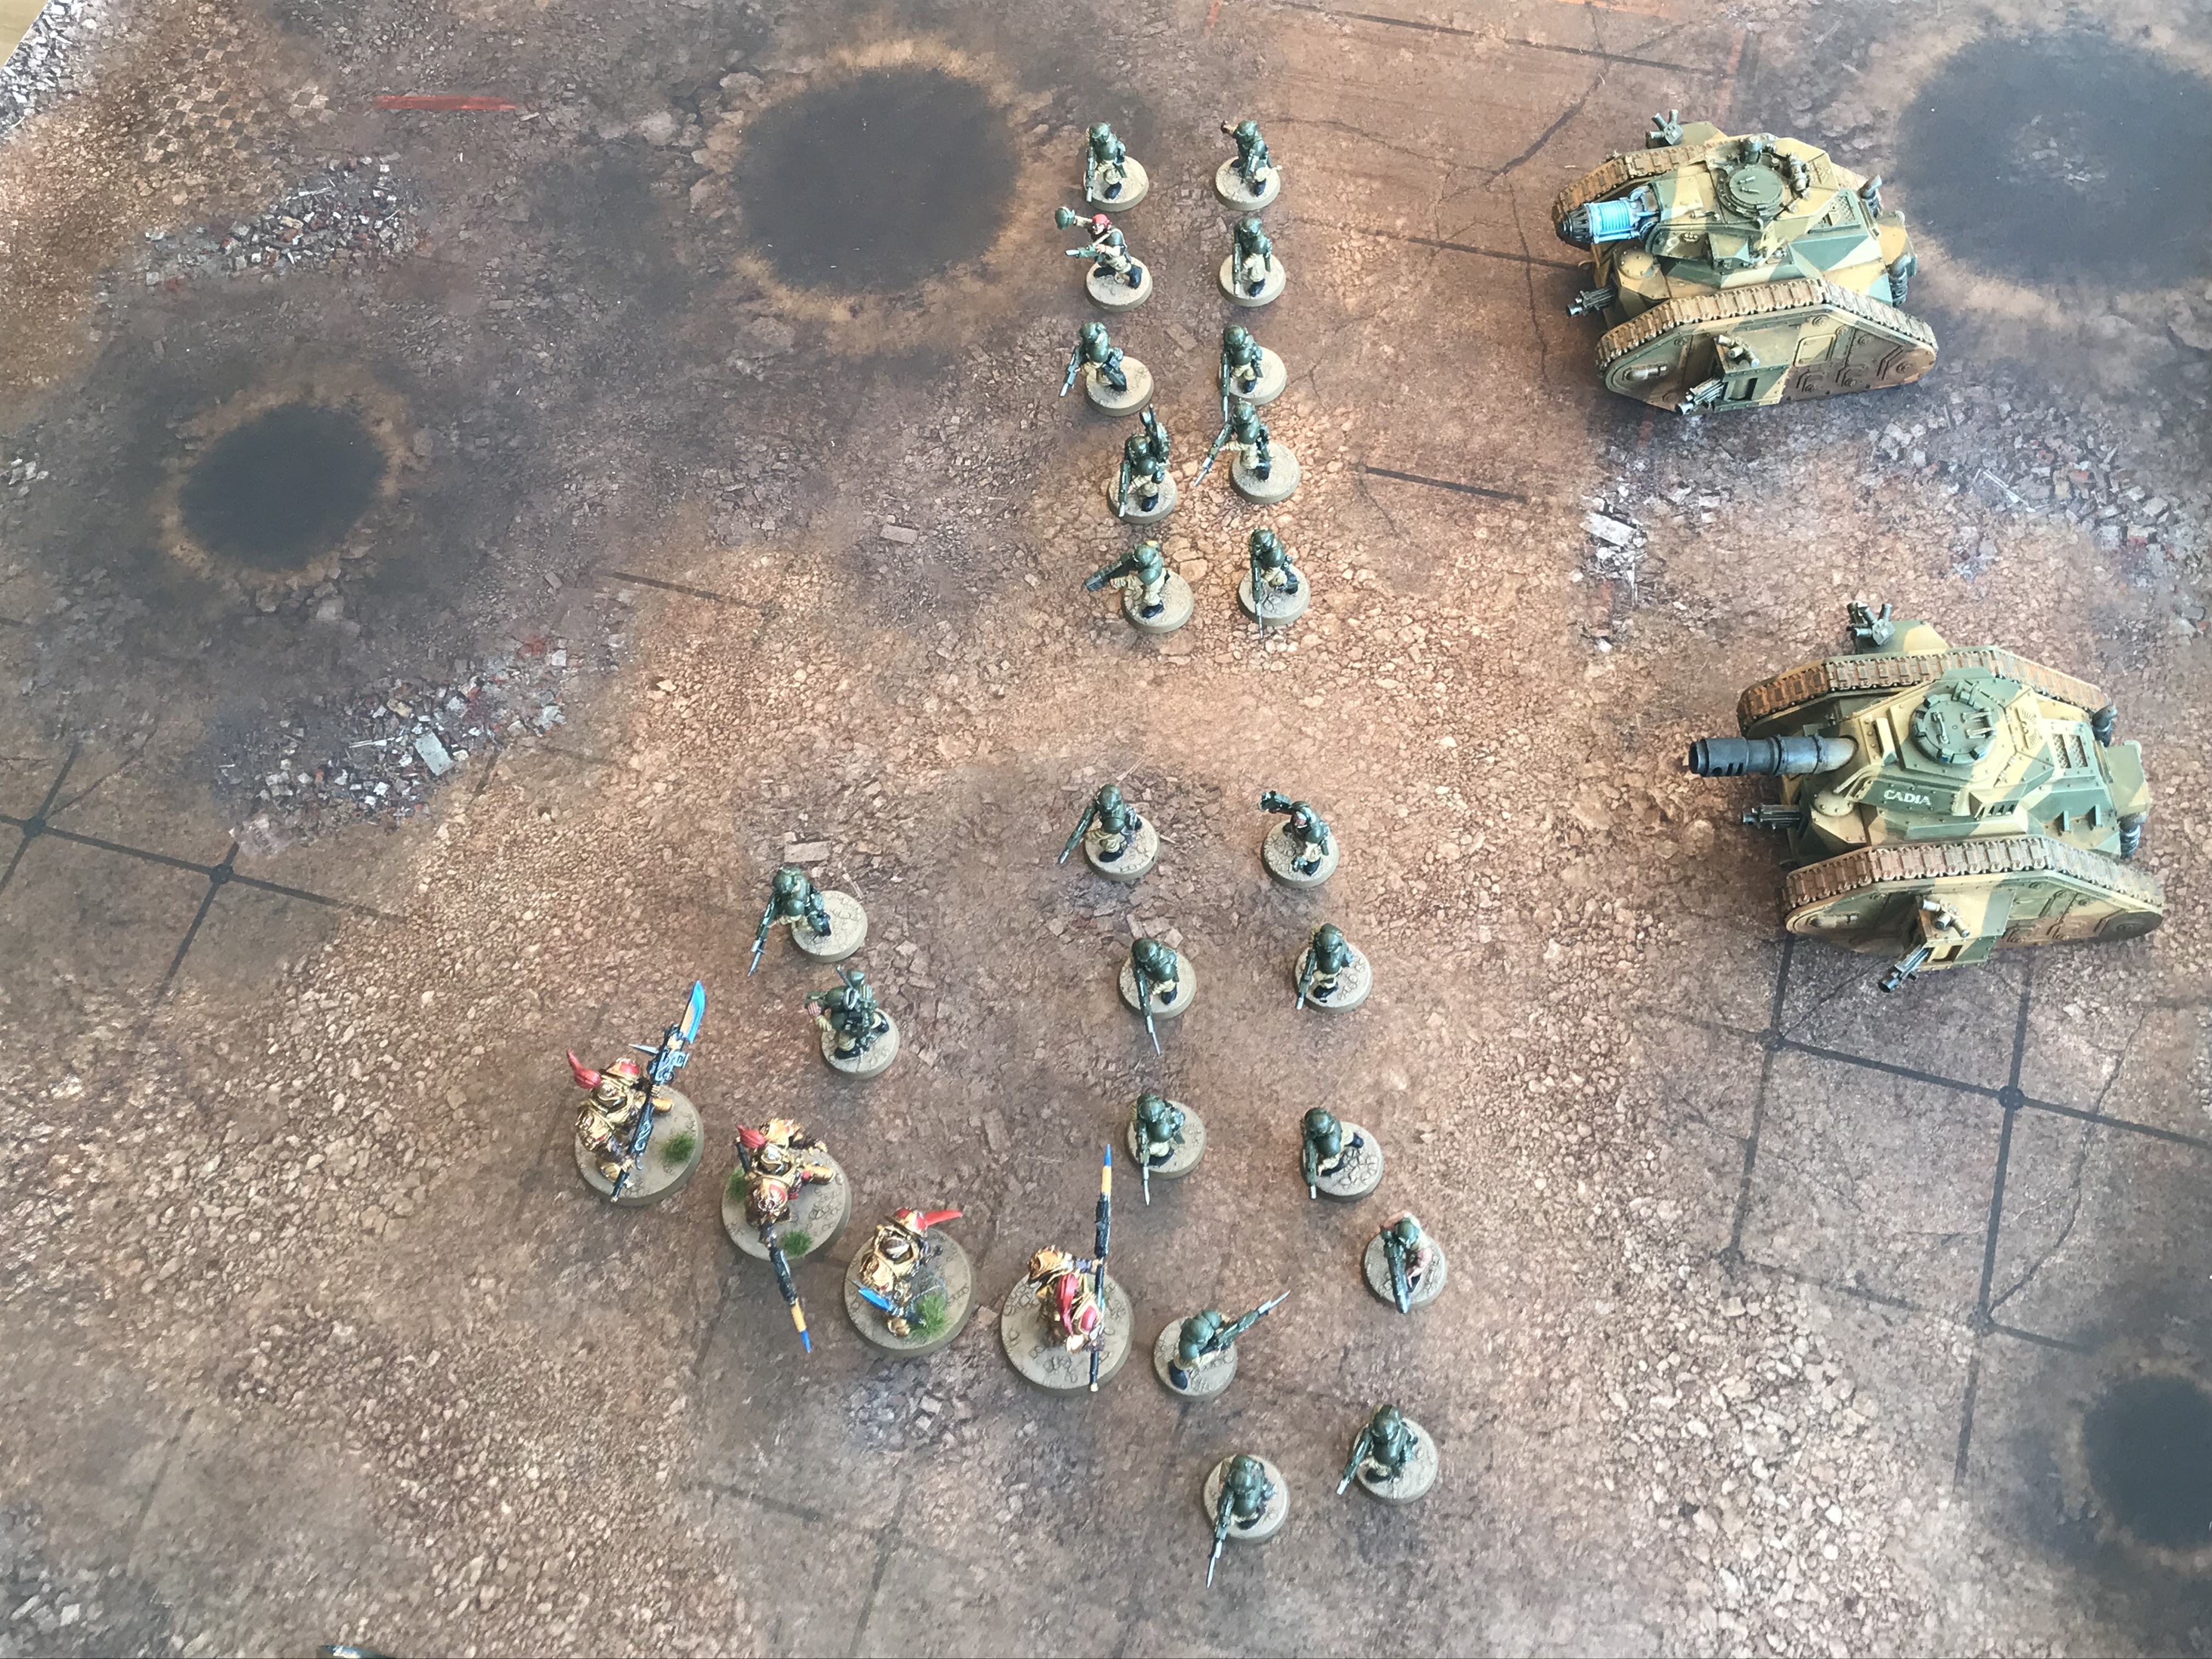
- A secondary line of screening using the third unit of Guardsmen can help.
- Even if most are destroyed in the shooting phase with clever removal of moels you can still force the enemy into a longer charge.
- It is now harder for all the Custodians to make the charge into the final line of screening Guardsmen.
-
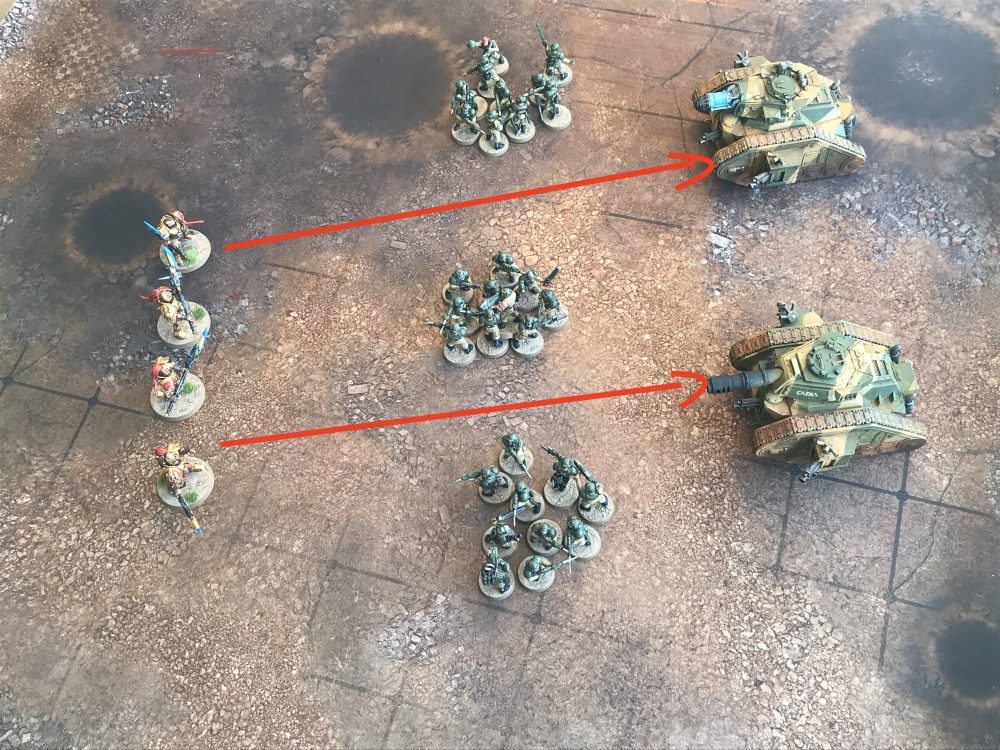

- #1 Bad Screening

-
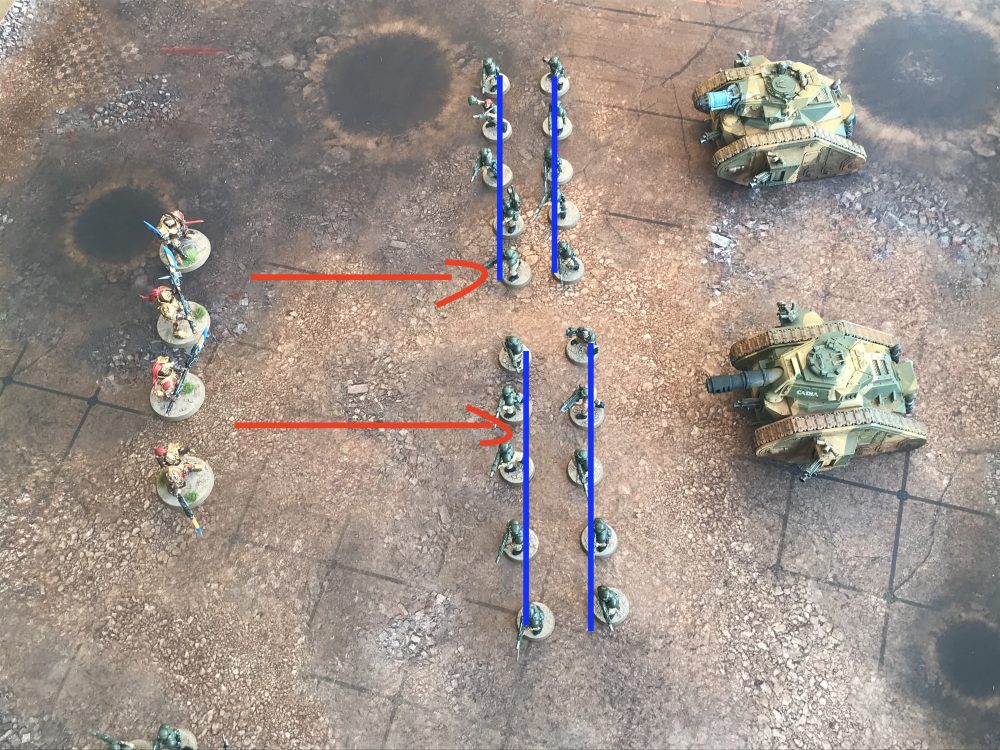
- #2 Improved Screening
-
- #3 Engagement
-
- #4 Unit Wiped Out

-

- #5 Consolidation
-
- #6 Secondary Screen

-
- #7 Blocked

-

- #8 Successful Secondary Screen
This video I made may also be of use…
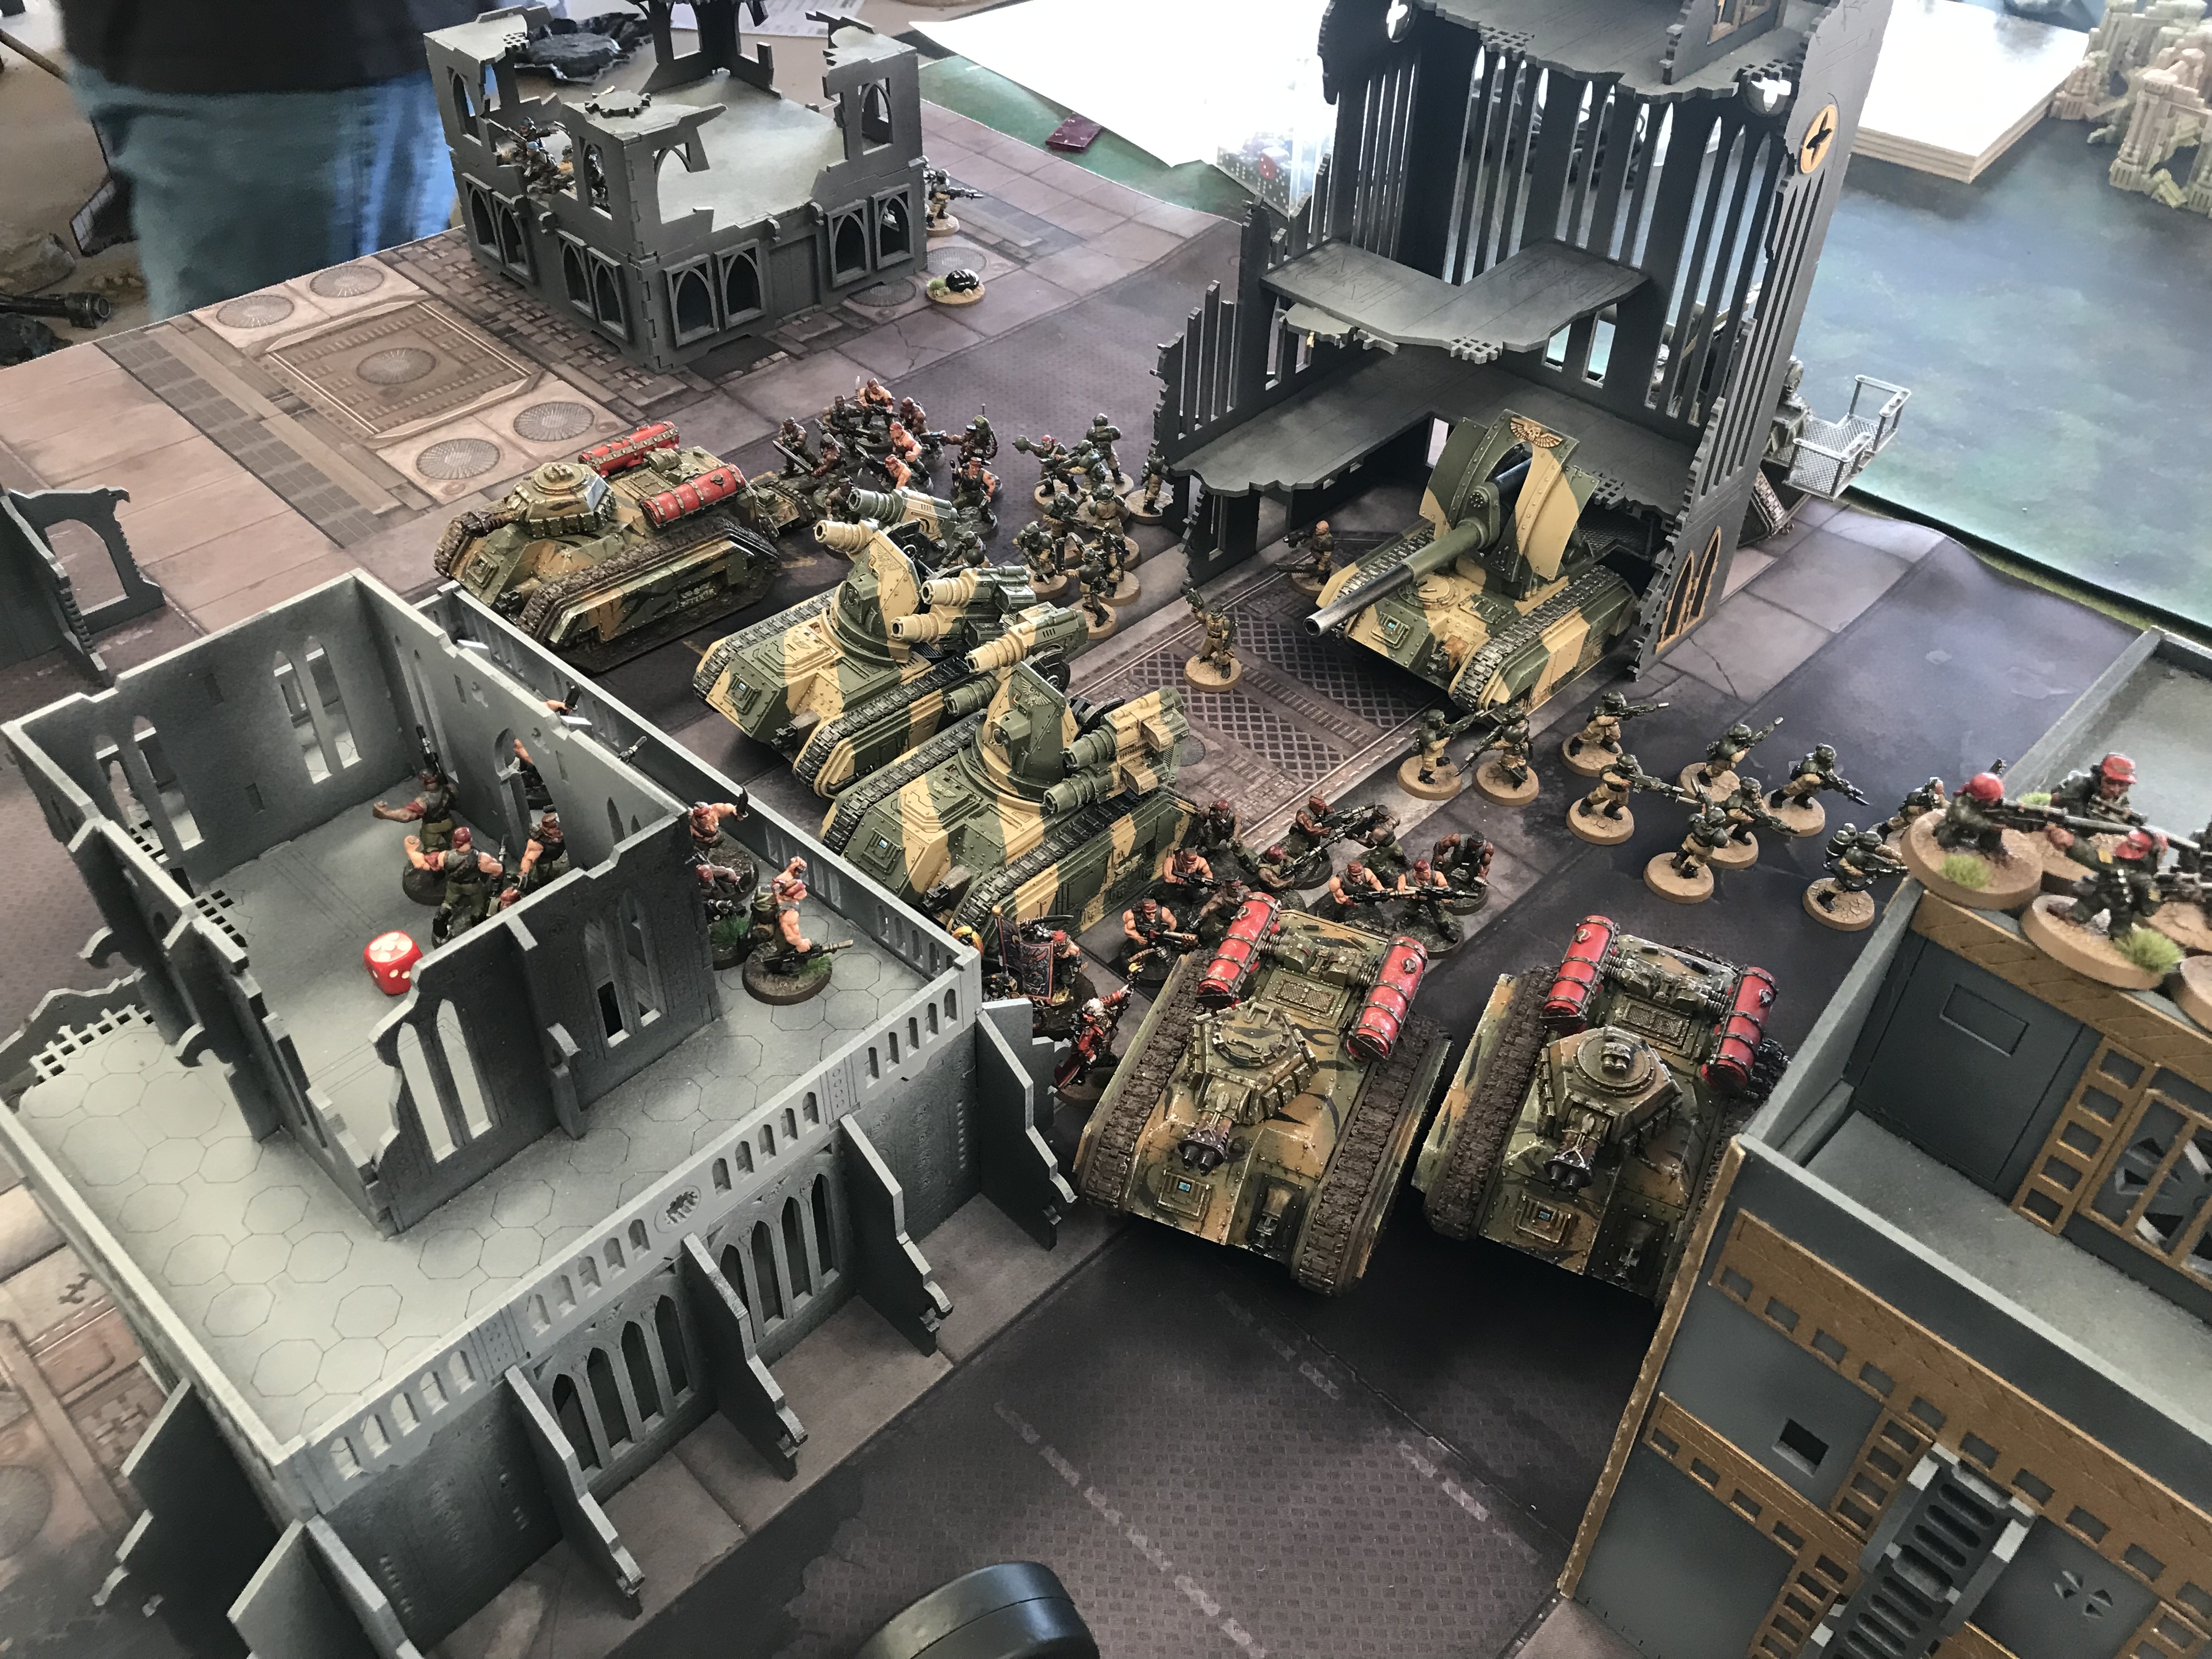
Larger Scale Astra Militarum Screening
Now let us consider a larger game perhaps at 2,000 points.
- 6 Infantry Squads
- 7 Leman Russ
As your games become bigger the enemy firepower increases. At 500 points your enemy can probably wipe out a squad of Guardsmen if he focuses fire and you’re not in cover. If you’re in cover and some of the enemy units are out of range then the squad may well survive the first turn.
At 2,000 points though the enemy will have enough firepower to guarantee that one or two squads are wiped out on the first turn.
Therefore we need to think about building in some redundancy into our screen – in the form of layers.
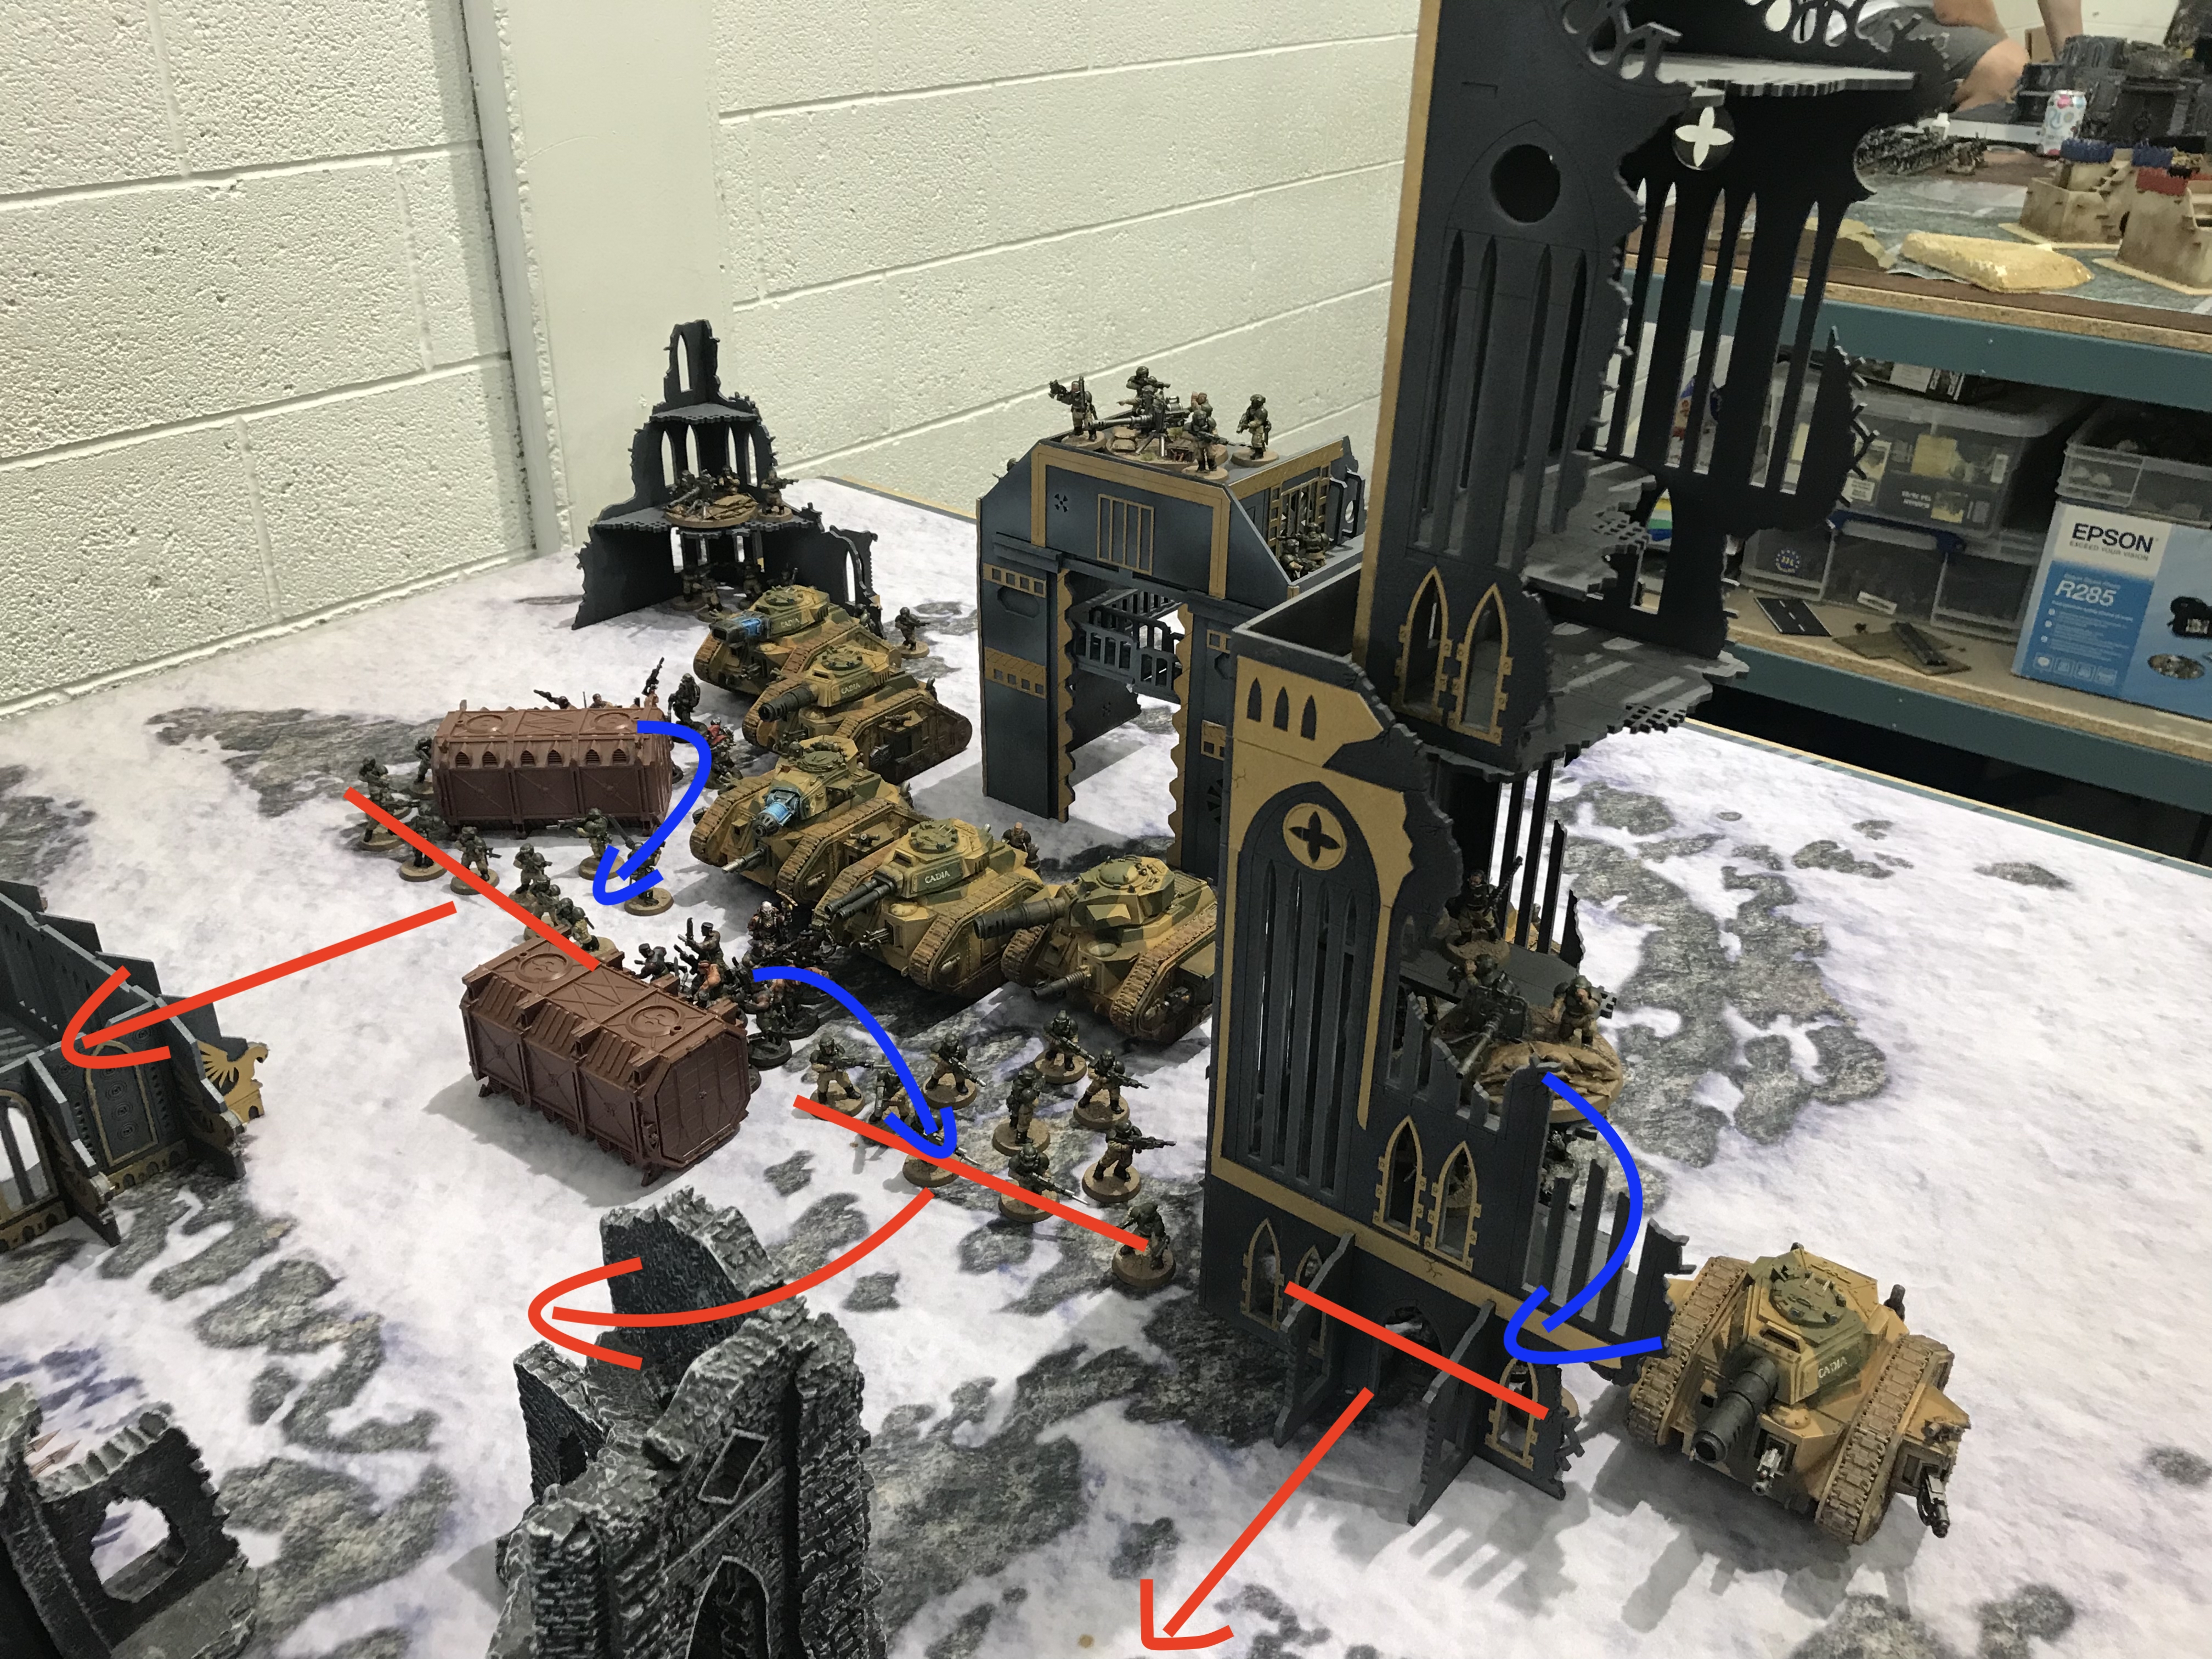
Below is the best example I have of this, the units marked in red were my Cadians and were my primary screen used to move up and forward to act as a speed bump against the incoming enemy. The blue units were my Catachans and were used to move into the spaces created by the Advancing Cadians.
The enemy now had 30 Cadians to chew through and 30 Catachans to get through before getting into combat with my 7 Leman Russ.
This was against Death Guard.
Screening Overview vs Death Guard – No Deep Strikers
Anti Deep Strike
Removing the effectiveness of an enemy Deep Striking force with Astra Militarum screening can have a huge negative effect on the enemy force’s performance. A Deep Striking unit has already lost at least the first turn because it wasn’t on the battlefield – so it needs to be effective as soon as it arrives.
If you can then ensure it has to land in a sub-optimal location then it’ll lose another turn of being effective. That’s two turns lost – which could be a third of the game.
Deep Strike is 9″ for the vast majority of units. Some units break this, like the Callidus Assassin. But let’s work with 9″. This means 9″ charge too.
The 9″ Deep Strike range also rules out Flamers from the enemy and removes the most devastating effects of Meltaguns. But we still need to think about mitigating the effectiveness of Rapid Fire Weapons – like Plasma Guns.
You want to employ a screen as above to stop the enemy charging once they arrive and also deny them from even getting close. You have the first turn to move units up and out of your deployment zone to really maximise the area you can deny to the enemy. In the above example against Death Guard, there were no Deep Striking enemy units, so those massive blank areas behind me were not an issue. But if there were I would have moved the tanks back during deployment to fill those areas.
The secondary layer of screening can be very handy to remove the effects of Rapid Fire. Many units Rapid Fire at 12″ (half of 24″) – but some Rapid Fire at 18″. You can use a layered screen to ensure enemy units cannot Deep Strike to within this 12″ or 18″ range this removing 50% of their firepower immediately.
- If you are going first leave your Deep Strike denial manoeuvres until your turn two. You will then shoot, charge, etc and end your turn. The enemy then has their turn and the first thing they do at the end of their Movement Phase is to bring on their reinforcements. They get no chance to remove your area denial units before their units come on.
- And if you are going second then do your area denial movements in your turn one movement phase in preparation for their turn two and their reinforcements arriving in their turn two.
Doing this ensures the enemy cannot respond to your efforts to deny them large areas of the battlefield for Deep Striking units.
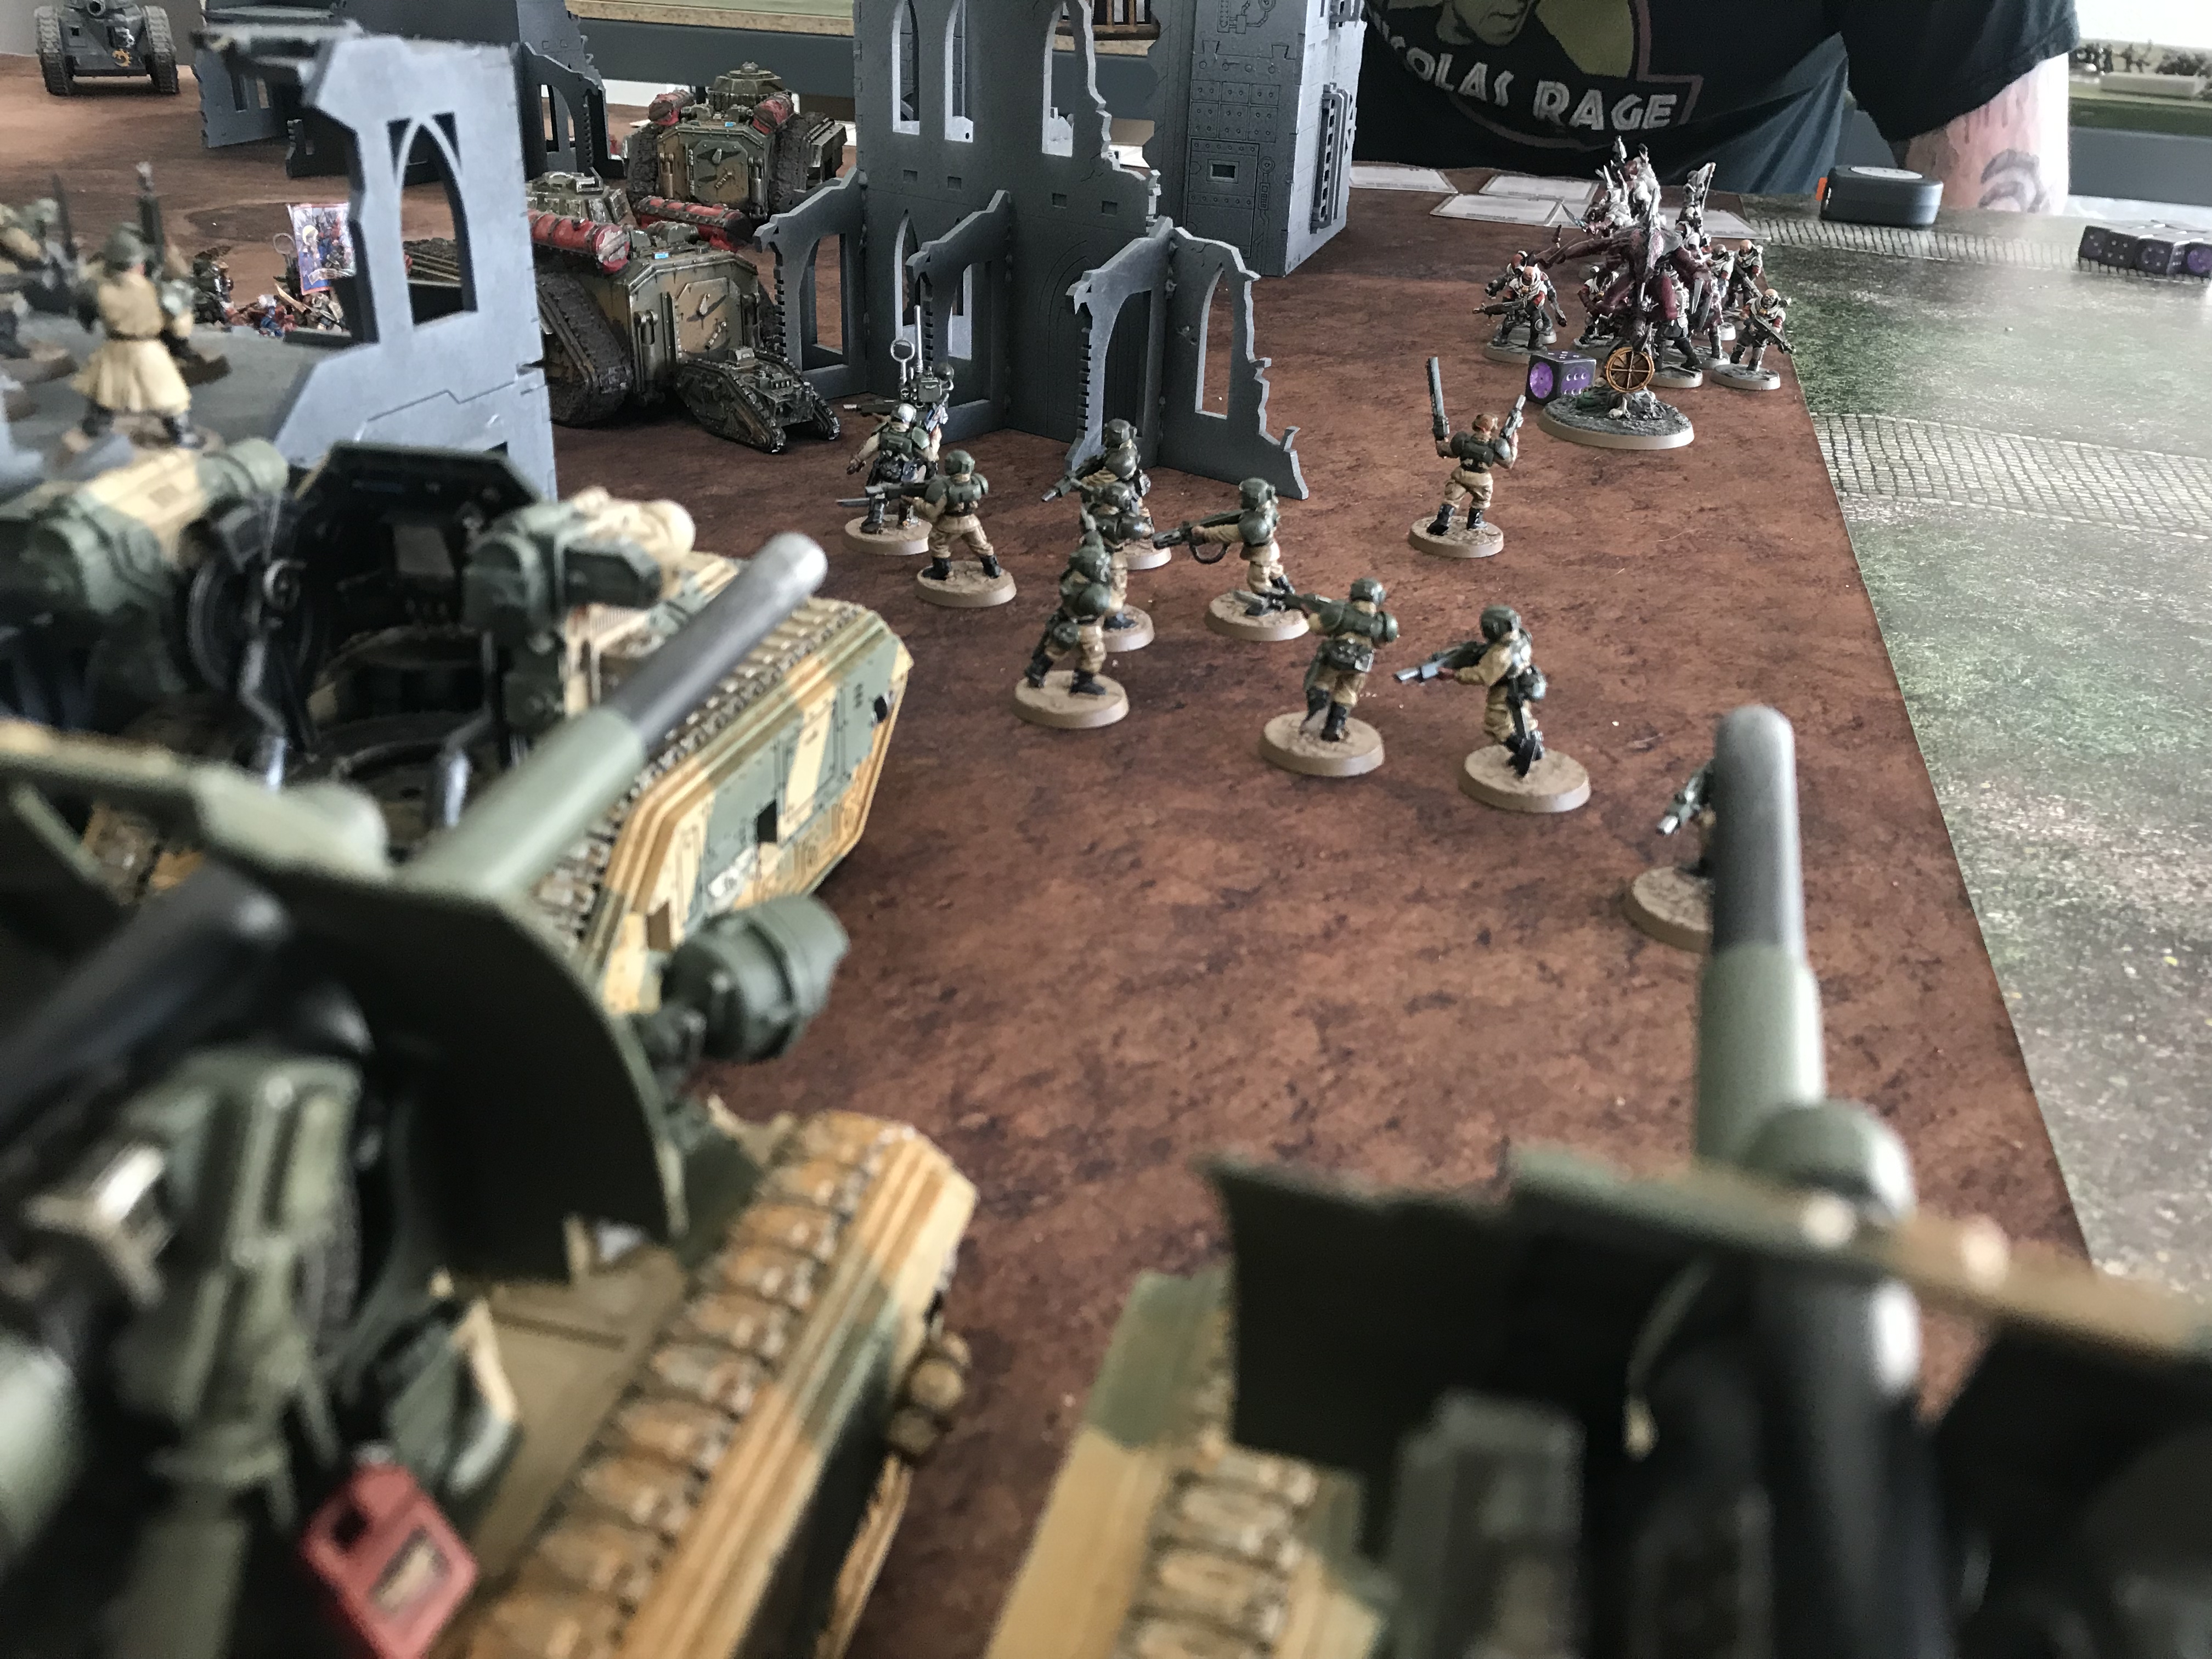
Here my units are spread out to give maximum coverage against enemy Genestealer Cult Deep Striking tactics – Astra Militarum Screening
Scout Sentinels & Ratlings
When it comes to Astra Militarum Screening, Scout Sentinels and Ratlings are special when it comes to screening. The Scout Sentinel can move 9″ before the game begins and Ratlings can deploy outside your deployment zone but must be 18″ away from the enemy deployment zone and enemy models.
Effective placement and concealment of these units can break your enemy’s Deep Striking units. You can make 200 points of Terminators do next to nothing on the turn they arrive.
You can hide these units completely from the enemy to ensure they survive the first engagements with the enemy although they may well try every trick in the book to get rid of them. The 9″ move from Scout Sentinels means they are up and out of your Deployment Zone before the battle begins. Place them in cover during this movement and out of the line of sight of the enemy – to help them survive. You then have this big bubble up and away from your initial Deployment Zone that the enemy cannot get into.
The same for Ratlings as the can deploy further forward than normal. Place them well into cover and out of the enemy’s line of sight. Again this will deny the enemy a large area of the battlefield.
Never have such tactics been more valuable now that Drop Pods can arrive on turn one from the new Space Marine Codex!
Here is a good (accidental) example of Ratlings and Scout Sentinels denying Deep Strikers from another game vs the Death Guard.
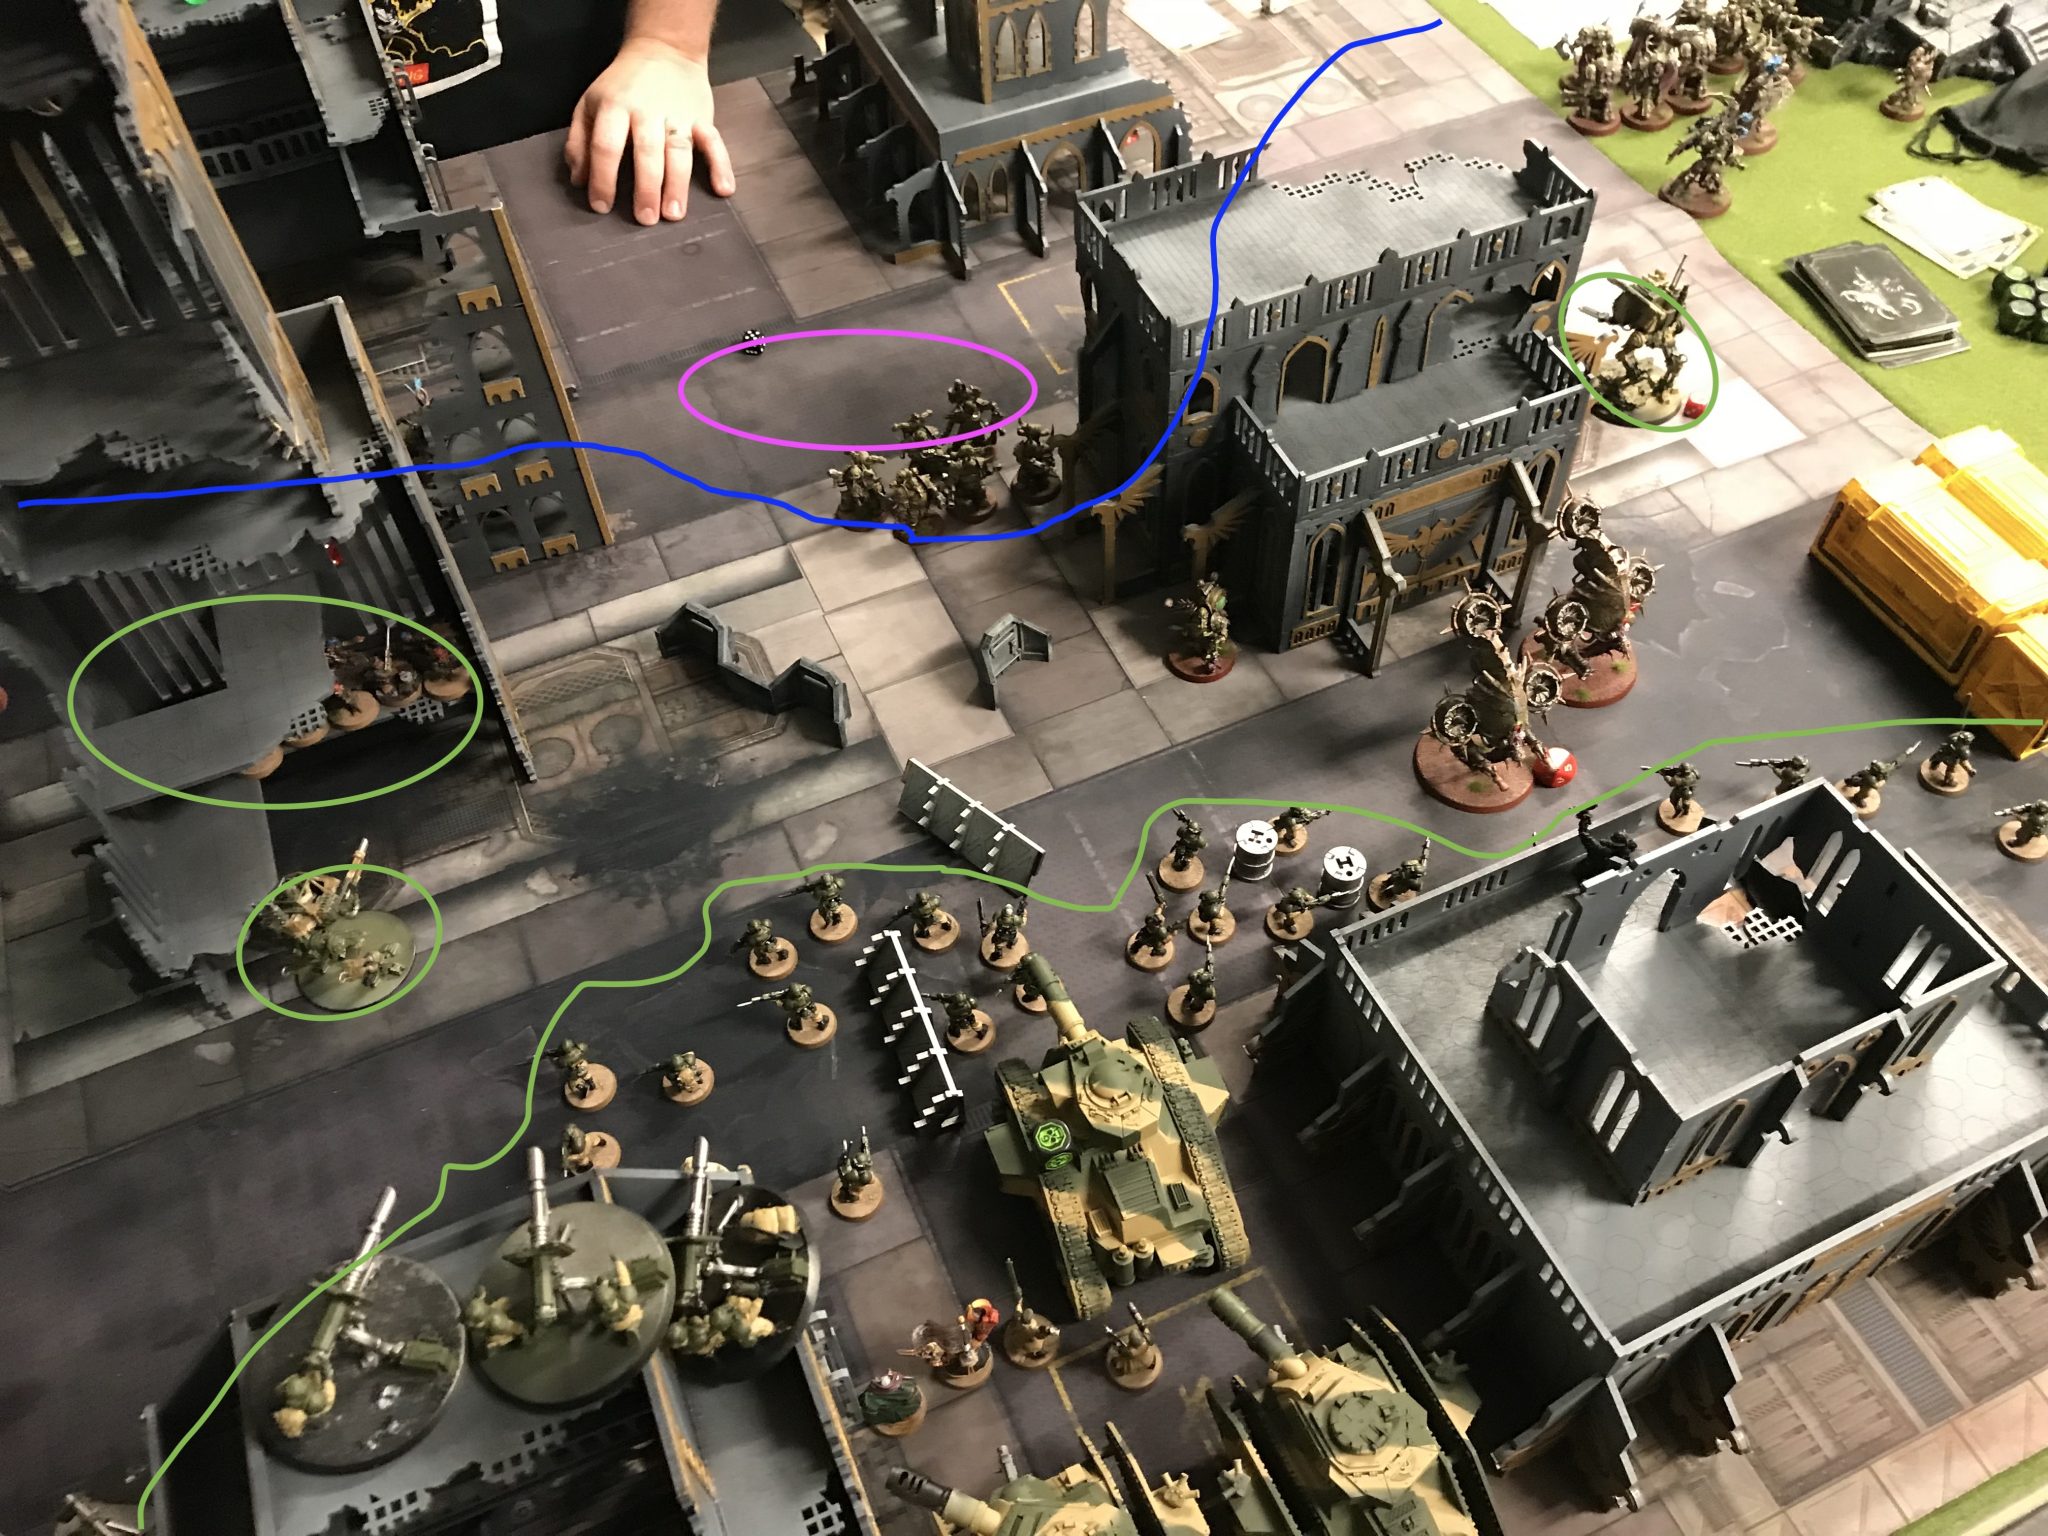
The green areas are Astra Militarum units. Blue is where the Death Guard could deploy. Pink is where the Terminators did eventually deploy.
Flying Units
When you’re against units with the Fly keyword then Astra Militarum screening becomes slightly different. Foot slogging units have to go around your screen or chop their way through it.
Units with Fly, however, can move right over your screen when they move or charge. In order to counter this, we need to ensure that the units with Fly cannot physically fit inside your lines of infantry and vehicles.
As a quick example let us use the Custodians from earlier. If we assume the Custodians are in fact on Dawneagle Jetbikes then they can easily move or charge over yhr Guardsmen and get into combat with the Leman Russ by landing in the purple areas.
This is where things get tricky and you have to make some difficult tactical decisions on the fly;
- Do you place another unit inbetween the Leman Russ and the existing screen?
- Do you move the screen back to plug the gap?
Doing one of these two things increases the chances of an enemy unit charging and then consolidating into the Leman Russ because now you have Guardsmen in close proximity to the Leman Russ. Or do you do nothing – and leave the gap so that other units that may charge cannot consolidate into the Leman Russ? Decisions, Decisions.
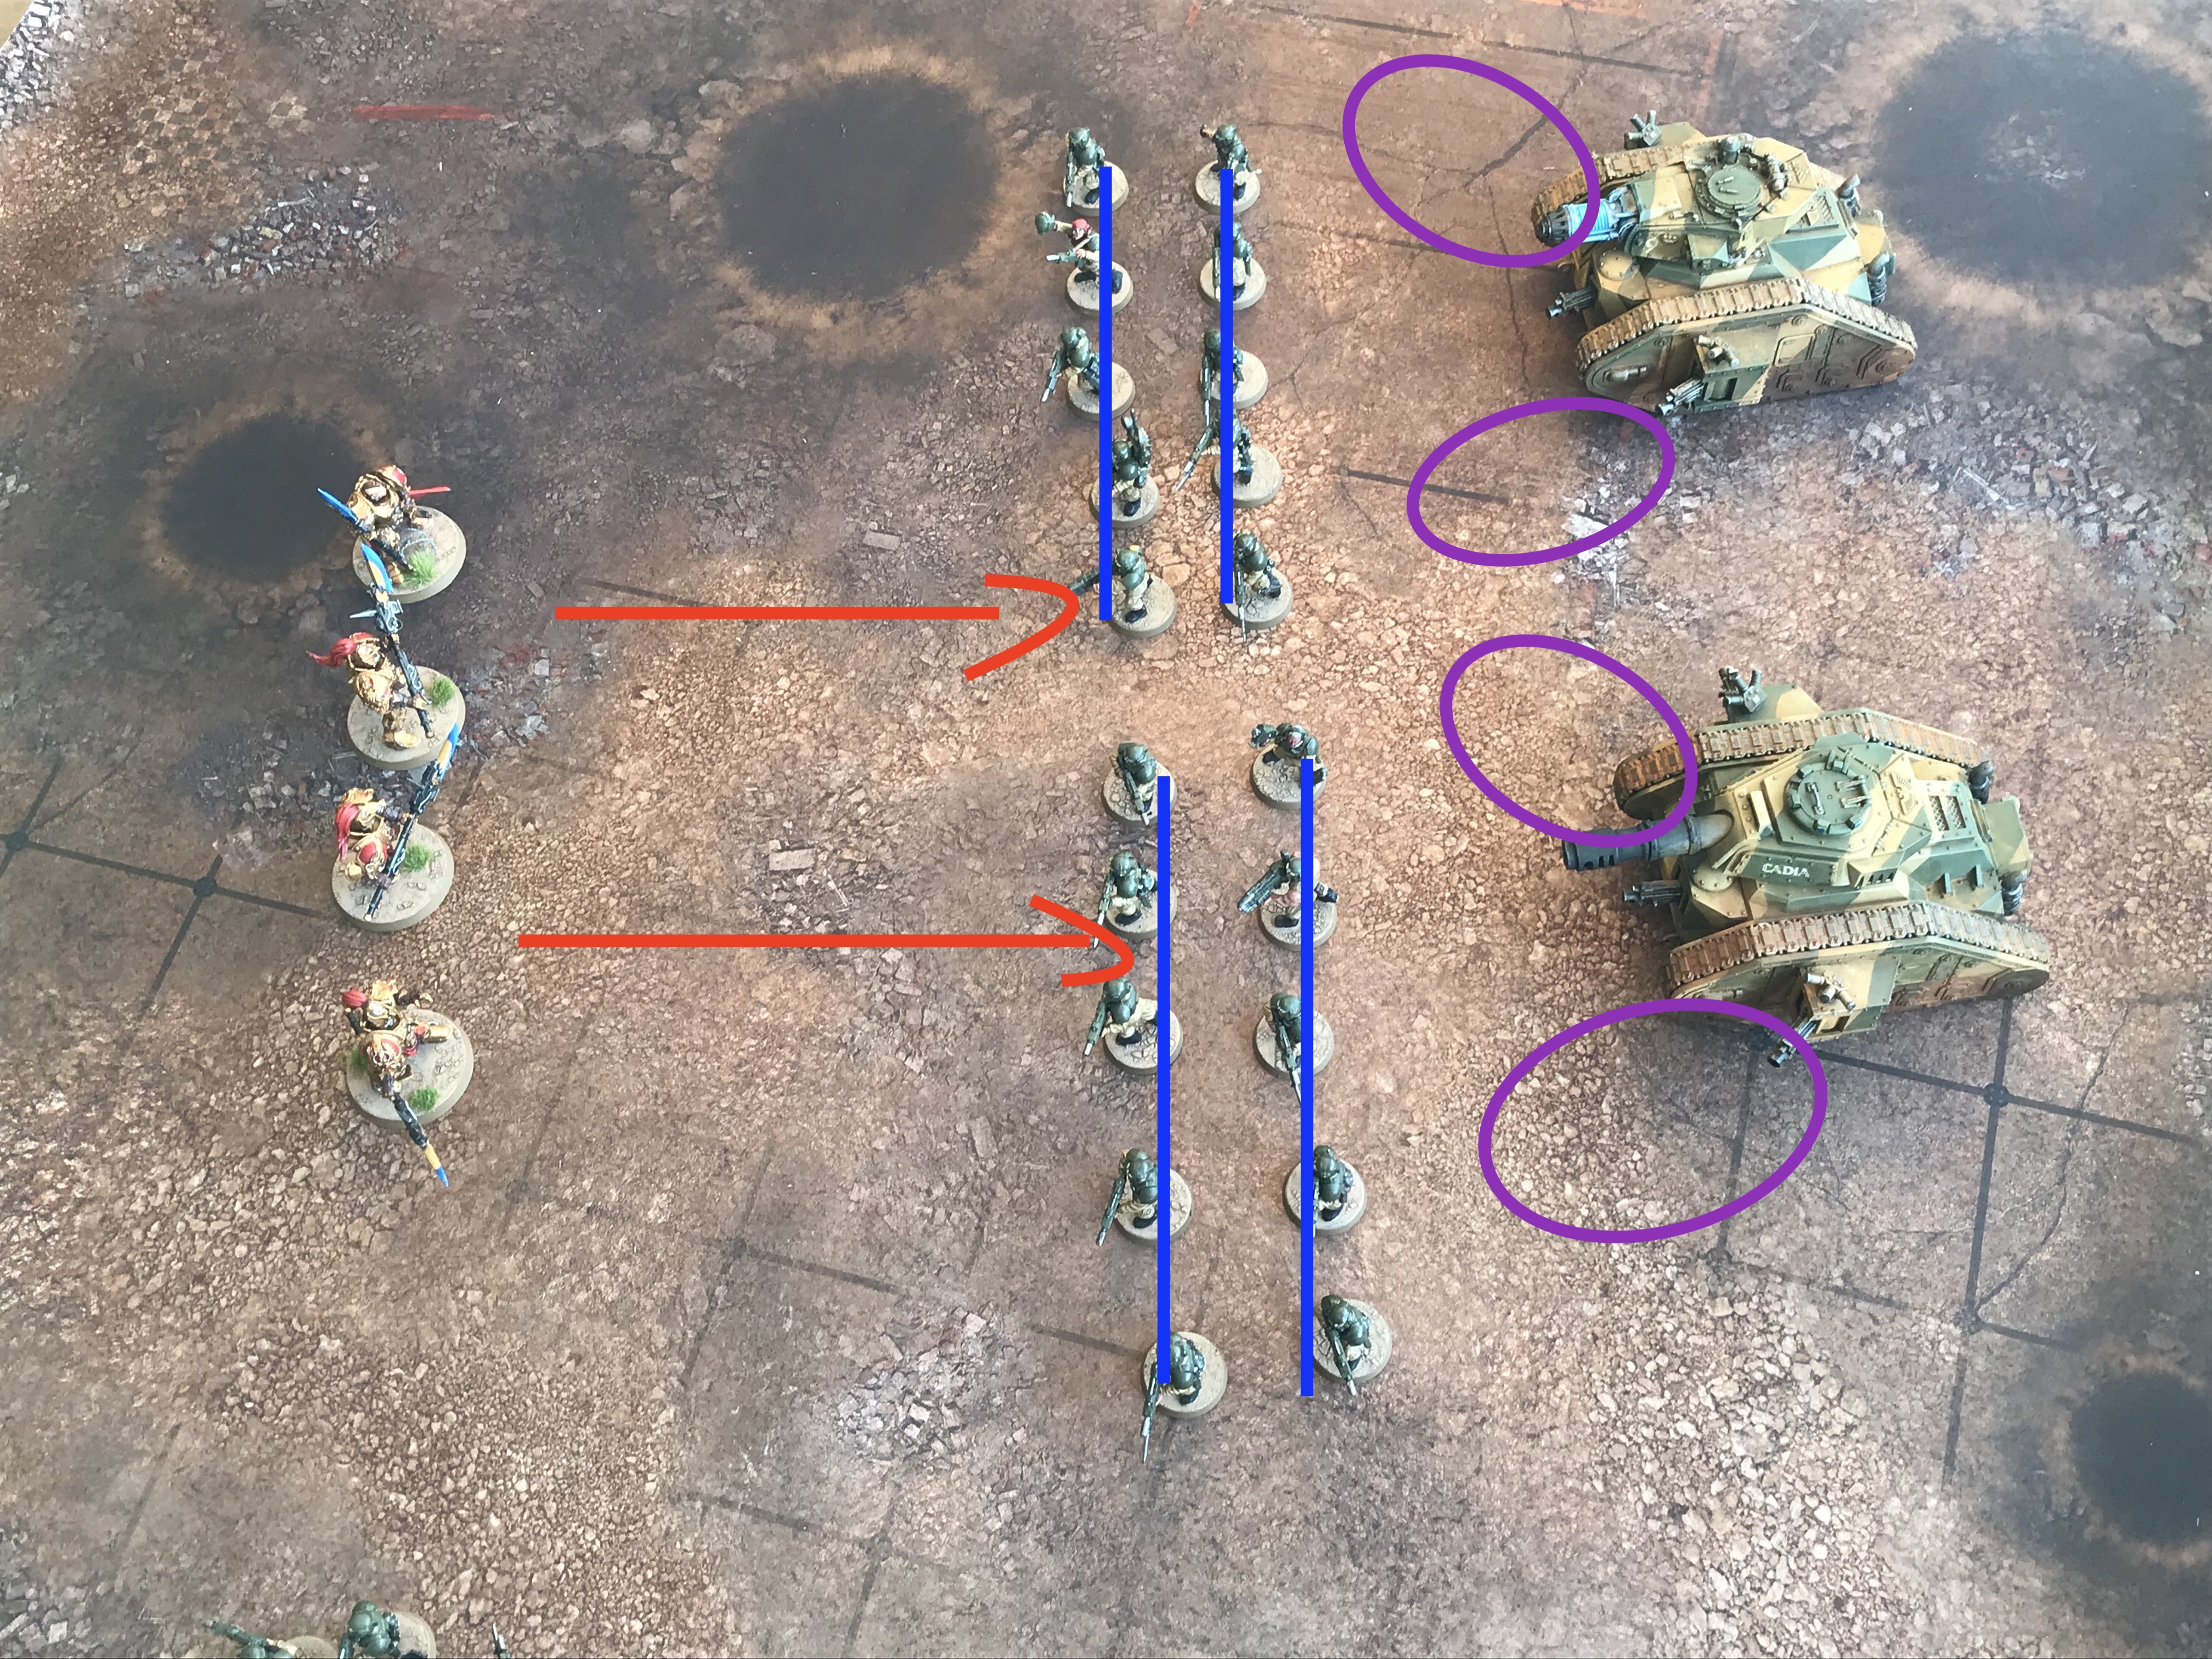
Units with Fly can perfectly fit into the purple areas
Astra Militarum Screening Complications
It’s reasonable to expect that any plan will not survive the deployment phase. The examples above are all well and good, but there are aspects you can’t easily plan for. Such as terrain features, a particular good Alpha Strike and debilitating enemy psychic powers. Units with Fly also bring in an element of free movement that is hard to plan for and counter.
These types of complications can be handled when they occur and practice will improve your ability to adapt to their circumstances.
Building redundancy into your lists and your screens will also help and allow you to adapt to any issues you face. But practising is your best option.
Good luck Commander…