
Wyvern, Hydra and Thudd Gun Tactics
Today we take an in-depth look into the Wyvern, Hydra and Thudd Gun.
Today we welcome back Cadian Sergeant Steel for another guest post. Over to him…. In this Tactica article, once again the focus will be primarily on artillery units for the Astra Militarum that are still available from Games Workshop and Forge World. The goal is to cover what is still available because of personal familiarity for the tactica but also so that you the readers aren’t let down by the possibility of a really amazing or cool unit in the article that you can’t buy (*cough* …. Chimera Twin Heavy Bolter Turret …). So into the Wyvern, Hydra and Thudd Gun.
Never miss an article? Subscribe!
This is the second in a series of articles so stay tuned after this one for another article on the Manticore and Deathstrike! Read the first Astra Militarum Artillery article all about Earthshaker Cannons.
Astra Militarum Artillery – Anti-Infantry & Anti-Air Guns
Today we will be exploring the Wyvern, Hydra, and Heavy Quad Launcher Battery units.
Wyvern
The Wyvern is a ruthless piece of Guard Artillery. Its Quad Stormshard Mortar can annihilate infantry squads from the battlefield. At 103 points with its regular weapon load-out of a hull mounted heavy bolter, it’s a modest cost unit.
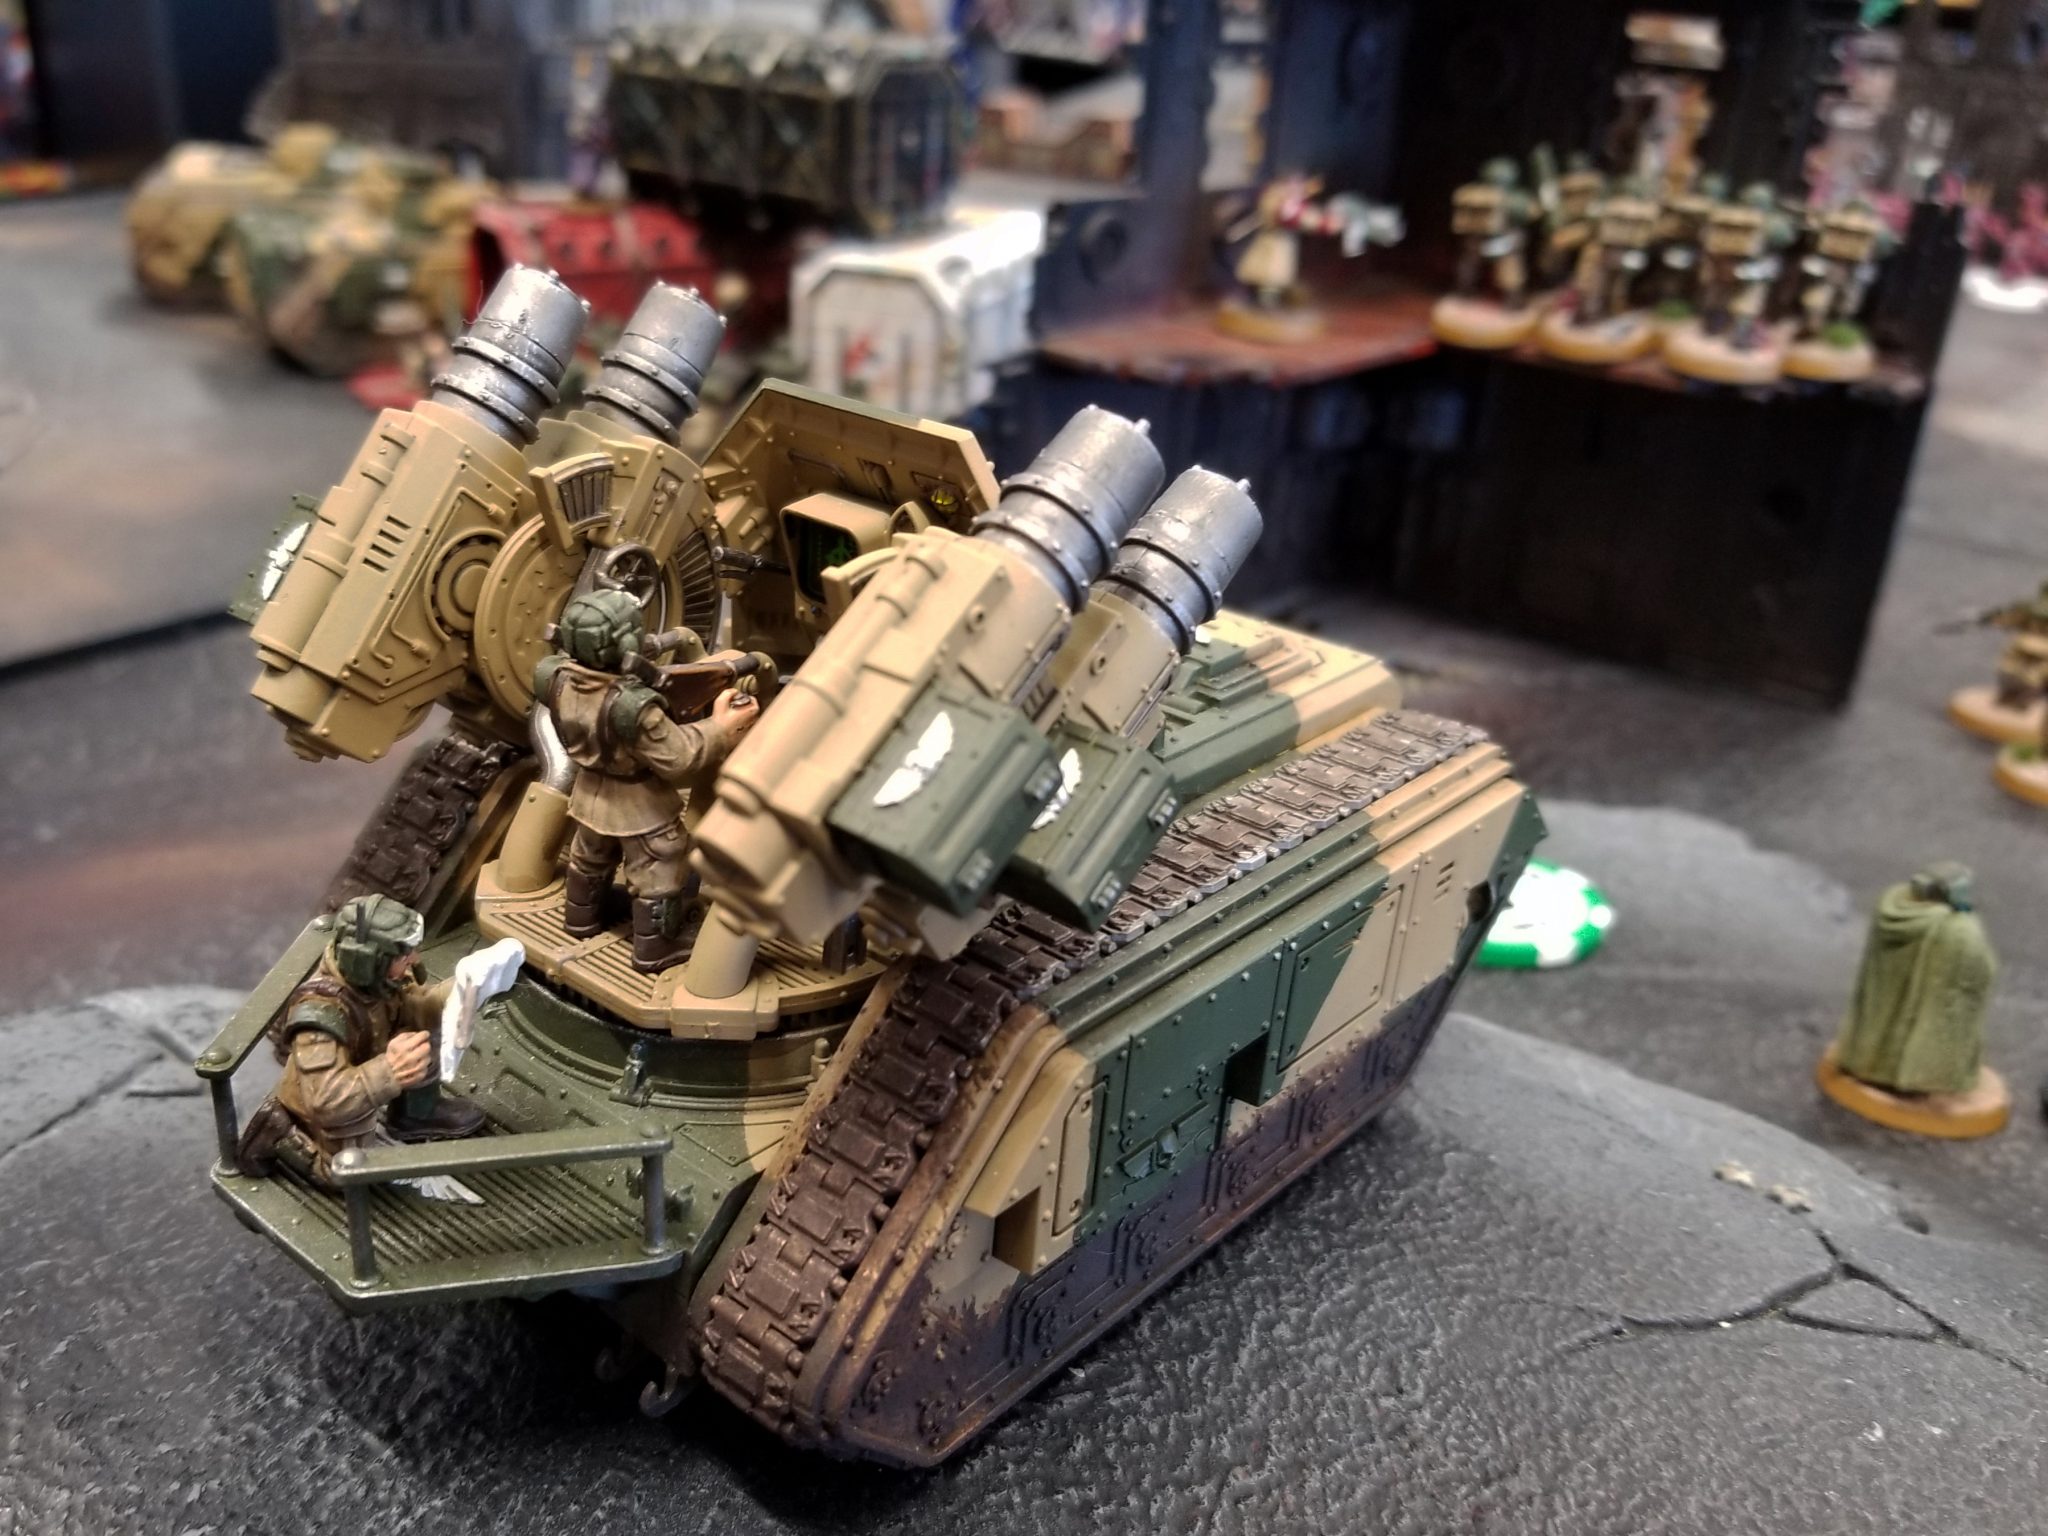
A Cadian Wyvern tucked behind well behind the lines taking aim on the advancing heretics
Stat Line and Weapon
This unit’s stats that matter most are Movement 12″, Ballistic Skill 4, Strength 6, Toughness 6, 11 Wounds, and 3+ Save.
Remember that it is Toughness 6; it’s not as tough as some of the Guard’s many other tanks. Autocannons, Plasma, etc will be wounding the Wyvern on a 3+.
Its main weapon is the Quad Stormshard Mortar. It has a range of 48″. It is Heavy 4D6, Str 4, AP -0, 1 Damage. Like other Astra Militarum artillery units, this main weapon can target enemy units that are not visible to the bearer. Best of all though, you can re-roll failed wound rolls with this weapon!
Wyverns, like all other guard artillery, can be taken in a squadron of up to 3 in which after deployment each model acts and is treated as an independent unit.
A Wyvern comes standard with a hull-mounted Heavy Bolter and can swap it out for a Heavy Flamer.

Wyvern Weapon Range 1
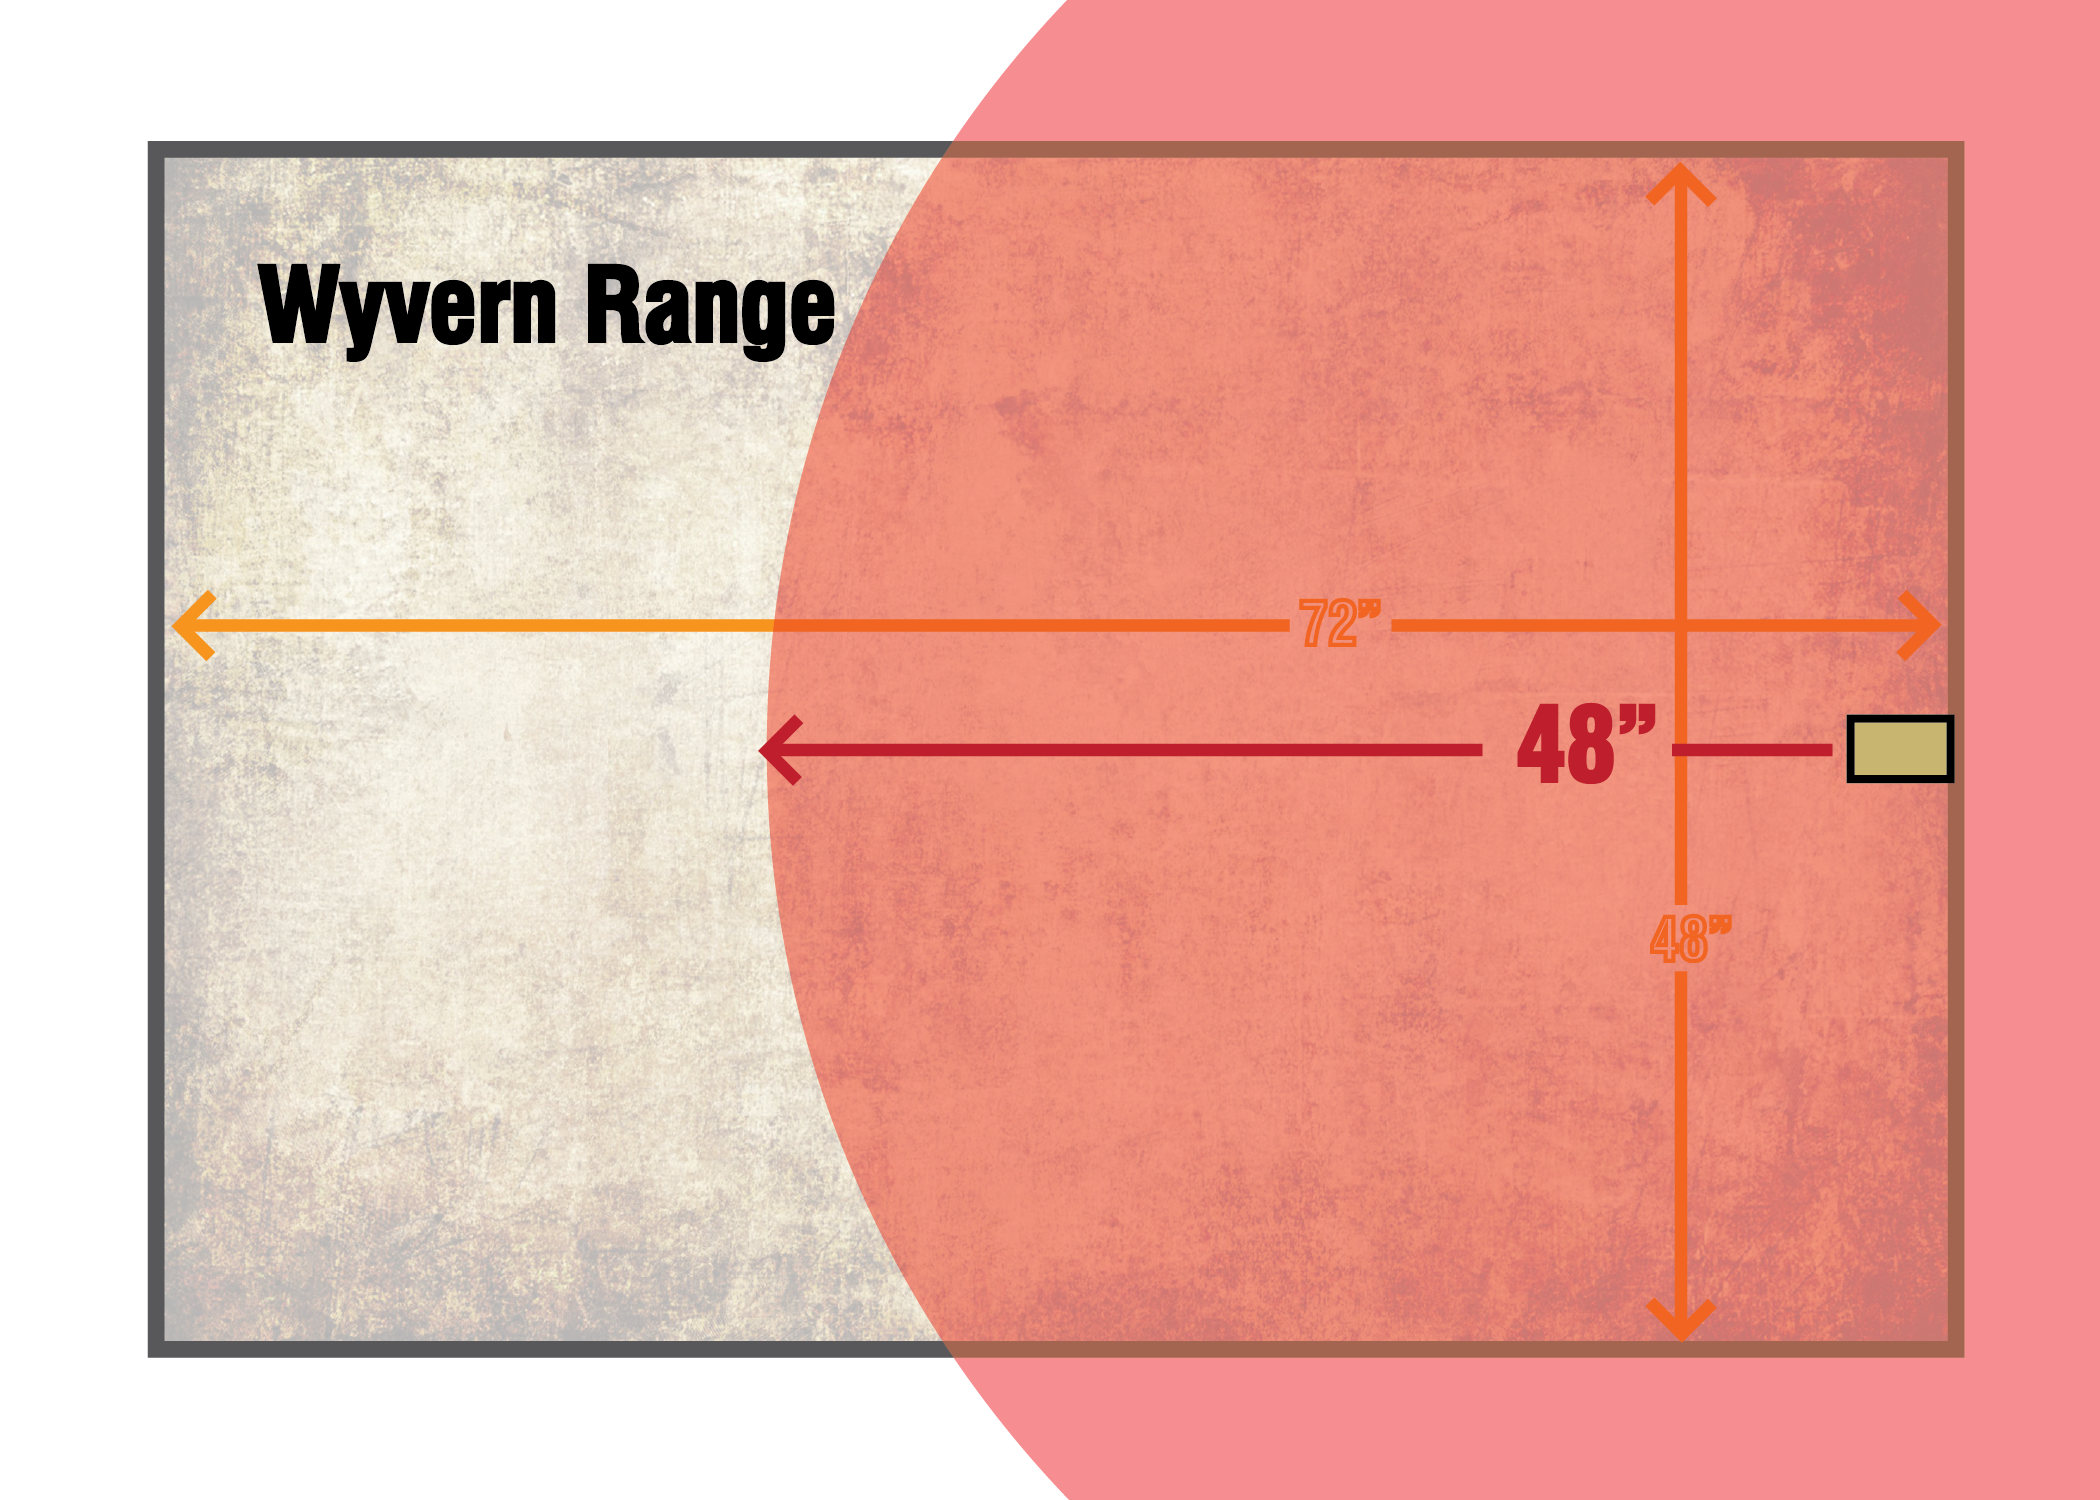
Wyvern Weapon Range 2
How to Use
First, like other guard artillery, you should find somewhere within your deployment zone to put them where the enemy either can’t see them or can barely see them. You should protect your Wyvern with either plenty of infantry bubble wrap or plenty of other units so the enemy cannot Deep Strike or charge into your Artillery.
With its moderate range and mass hitting Quad Stormshard Mortar, after being well placed you will be hitting almost any unit on the table, definitely any unit running into your well-manned gun lines. The Str 4 Quad Stormshard Mortar will mean most regular troops will be wounded on 3’s and the tougher troops on 4’s and sometimes 5’s. And at AP -0 you won’t be punching through any enemy armour. Instead, you’ll be relying on the weight of dice and failed save rolls to knock them down.
The Wyvern works best against light infantry. With its 4D6 shots, you will mostly be targeting multi-model units such as the heretic cultists or meek Eldar and Tau infantry. On average, you will get 14 attacks with Quad Stormshard Mortar.
Although with this plethora of shots, you can also use it to guarantee hits on units you may need to simply do wounds to in order to use the Cadian Stratagem Overlapping Fields of Fire or to eliminate multi-wound, moderately armoured elite units.
After all, Str 4 wounds everything toughness 5, 6, and 7 on 5’s and gets to re-roll all failed wound rolls.
MathHammer
So let’s use Cadian Shock’s MathHammer App and see how this stacks up to a heretical cultist unit with their inferior armour.
Enemy Unit: 10 Models, Toughness 3, 1 Wound each, and Save 6+.
- 14 shots
- 7 hits
- 6.2 wounds
- 5.2 failed saves
- 5.2 damage dealt
I left the single decimal place to show a comparison, later on, so please bear with me once again. Against the inferior heretic cultist, you can eliminate 5 models. If the enemy has taken cover by learning from your own clever tactics, you’ll only average 4 unsaved wounds. Not bad. You’ve successfully eliminated half of the enemy unit who should never have seen it coming with you being out of sight!
Cadian Regiment Wyvern
Cadian’s are the masters of the Wyvern, hands down. If only we have a few more on Cadia :-(
Cadian Regimental Doctrine Born Soldiers & Stratagem Overlapping Fields of Fire
The Cadian Regimental Doctrine Borne Soldiers allows all Cadian regimental units who didn’t move in the previous shooting phase to re-roll ones during their shooting phase. For 2 Command Points, after a unit from your army has inflicted an unsaved wound on an enemy unit, you can add 1 to the hit rolls for all other units that target that enemy unit this phase. Once you’ve gotten a couple Lasgun wounds through, times to lay mass destruction upon your opponent’s unit with a 3+ Ballistic Skill!
MathHammer – Cadian Revisited
With Born Soldier and Overlapping Fields of Fire in place, let’s look at the math again against those heretical cultist needing to be purged.
- 14 shots
- 10.9 hits
- 9.7 wounds
- 8.0 failed saves
- 8.0 damage dealt
With a Cultist’s Leadership being a measly 6, and at least one previous wound being done prior to getting Overlapping Fields of Fire, that’s going to be a lot of dead heretics! Good focus fire, trooper.
Bonus Stratagem
Remember the Aerial Spotter Stratagem too that can be used with Wyverns and Basilisks. For 2CP you can re-roll all misses. Its perhaps not the best to use with Cadians because they already re-roll ones – but if you use it with the above set up you’re killing 9, Toughness 3 enemies with a 6+ save from each Wyvern per turn. Or killing 7 if they have a 5+ save.
Catachan Regiment Wyvern
The Catachan have a couple of tricks up their sleeves (Catachans don’t have sleeves?!) that directly benefit the Wyvern.
Catachan Regimental Doctrine – Brutal Strength
The Catachan Regimental Doctrine allows each vehicle with ranged weapons that make a random number of attacks to re-roll one of the dice used to determine the number of attacks. That means you roll 4D6 and re-roll your worst roll. This will maximize your shots and isn’t limited to the shooting phase. On average you will get 15.93 shots!
Catachan – Sergeant Harker
Sergeant Harker, an elite slot choice, gives all Catachan units within 6″ of him re-roll 1’s in the shooting phase. Now your artillery units basically have the Cadian Born Soldiers Doctrine. Those Catachan Sarges really know how to properly discipline and focus the troops!
So let’s look at it via MathHammer!
MathHammer – Catachan
With the regimental doctrine and Sergeant Harker in place trying to kill a squad of cultists you get:
Enemy Unit: 10 Models, Toughness 3, 1 Wound each, and Save 6+.
- 15.9 shots
- 9.3 hits
- 8.3 wounds
- 6.9 failed saves
- 6.9 damage dealt
This puts the maximized Catachan Wyvern just behind the maximized Cadian Wyvern. Without Harker though, you would have averaged 5 damage per Wyvern which is just under Cadian Wyvern with Born Soldiers but without Overlapping Fields of Fire at 6 damage. If you read my last article on the Basilisk, you can see there is a trend where the Cadians are just a notch above the Catachans with artillery.
With Aerial Spotter this jumps to 8.883 damage or 8 dead models. Nearly bringing the Catachan Wyvern up to Cadian Standards.
Master of Ordnance – Re-rolls for All Regiments
The Master of Ordinance is a 30 point Elite choice that allows re-rolls for fellow regiment Basilisks, Wyverns, Manticores, or Deathstrikes when they target enemy units more than 36″ away as long as the regiment unit is within 6″. For the Wyvern, this would not be a good choice for synergy as there would only be a 12” range in which this would work with the Quad Stormshard Mortars 48” range.
But Why Not Take Heavy Weapon Mortar Teams Instead of a Wyvern?
I’ll be honest, this is more point efficient. For 99 points you can get 3 Heavy Weapon Squads with each containing 3 mortar Heavy Weapons Teams. That’s 9d6 shots of mortar fire! But… I’ll get back to this at the end of the article. Now onto the Hydra!
Hydra
Mortum ad Caelum! Excuse me if my Latin is wrong… never had an actual class. But the Hydra deserves words of greatness. Armed with the anti-aircraft Hydra Quad Autocannon and a heavy bolter or heavy flamer, this is an armoured beast to be dealt with! For only 108 points with the basic weapon loadout, it is very affordable.
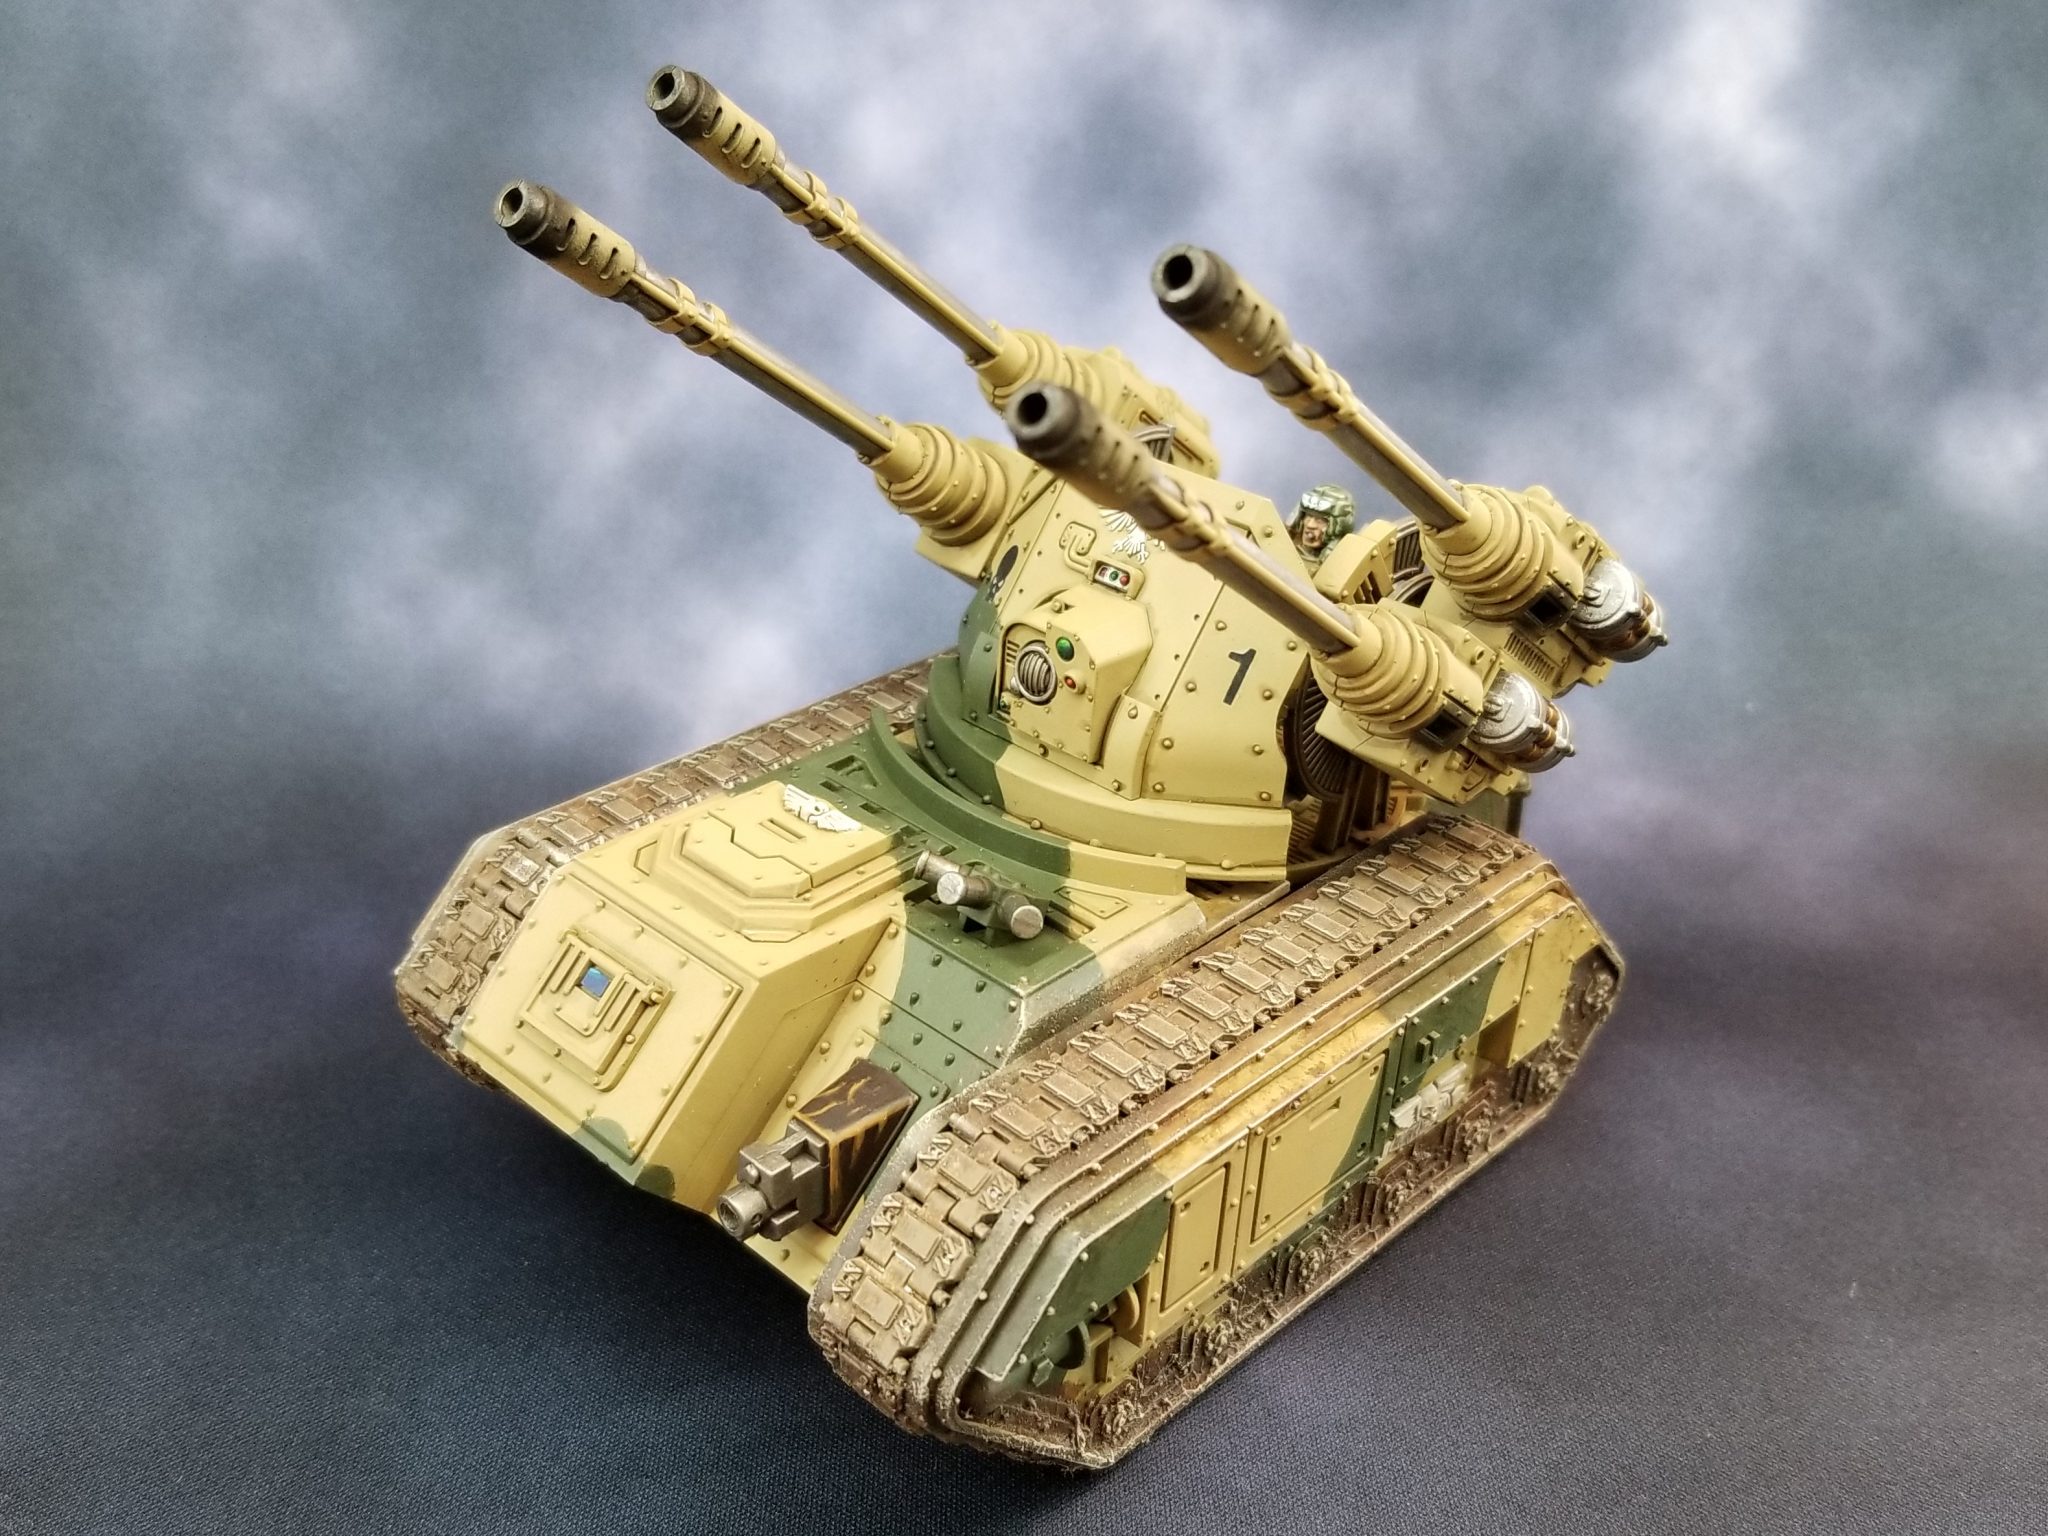
A Cadian Hydra ready to be the Emperor’s Fist in the sky
Stat Line and Weapon
Exactly like its cousins the Basilisk and Wyvern, it has Movement 12”, Ballistic Skill 4, Toughness 6, 11 Wounds, and a 3+ Save. Not bad.
Its main weapon is the Hydra Quad Autocannon. This is a Heavy, 8 Attacks, Strength 7, -1 AP, 2 Damage weapon. Hold up… did you catch that? No random number of attacks! This sets it apart from other Guard artillery, but so does the special rule. With this weapon, you add +1 to the Ballistic Skill when firing at units with the Fly keyword with this weapon and -1 to those that don’t have Fly. So without any buffs, this unit is already firing at 3+ against enemy Fly units. Ouch!
However, it is also the only Guard artillery unit that does need line of sight to hit a target with the main weapon. Another good point to keep in mind.
Last but not least, it has a 72” range! This means a well-placed Hydra has range on nearly every single square inch of a standard 6 x 4 ft battlefield.
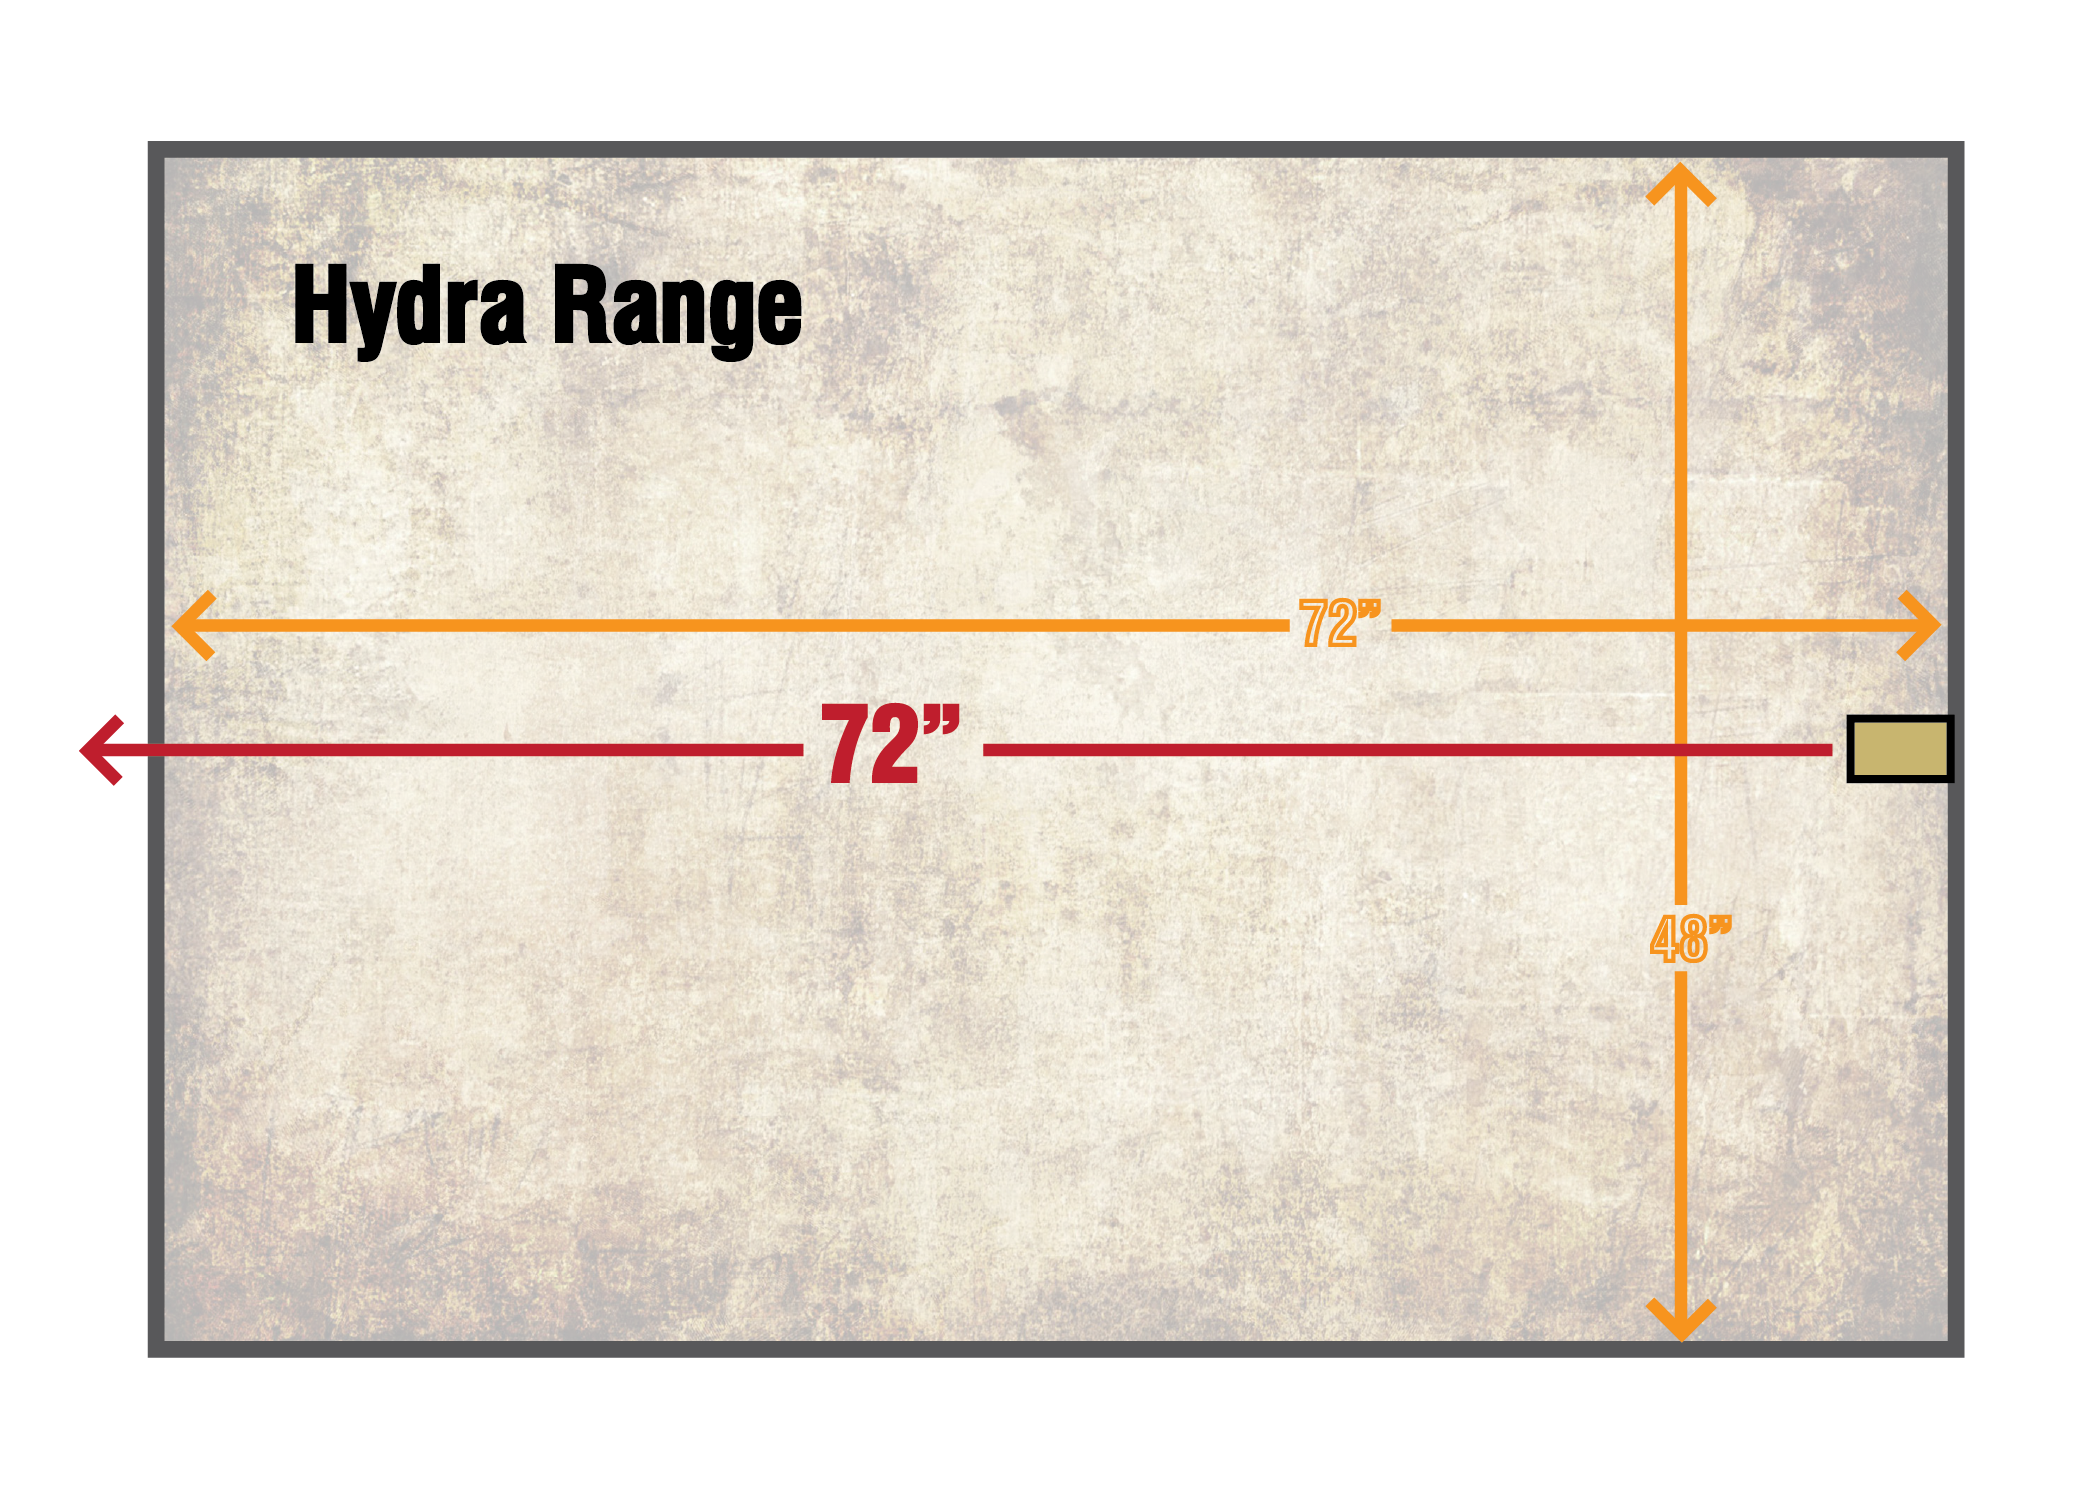
Hydra Weapon Range
How to Use
The Hydra can be taken in a squadron of up to 3 in a single Heavy slot and then each act and are treated as separate units. With the Hydra, I am not sold on taking multiple much the way I would with the Basilisk or Wyvern although I think it is a wonderful unit. This depends on your local meta though.
The Hydra can smack flying units right out of the air. Its nothing the majority of your opponents with flying units should ignore. If the flyer has the Hard to Hit type rule in effect, the Hydra negates the -1 to hit by adding +1 to hit leaving the Hydra still at BS4 to hit it with the main weapon without any other modifiers. If a unit with the Fly keyword doesn’t have -1 to hit at all or active, they’re in trouble.
There are some flyers though that are very difficult to handle still. Raven Guard and the like with their -1 to enemy Ballistic Skill ability if the attacking unit is more than 12” away can make Hard to Hit flyers nearly impossible to shoot down with a total of -2 to hit. For these, stick with your flying melee Imperial support such as Saint Celestine or the new Custodes’ Vertus Praetors.
There is a particular place where the Hydra shines: non “Hard to Hit” type units with the Fly keyword. In the current meta of the game, the Fly keyword for non Hard to Hit units is almost rampant. Some examples are Plague Drones, Mortarian, Magnus, jetpack Space Marines, Primaris Inceptors, Daemon Princes with wings, Saint Celestine, and on and on the list goes. Aside from the two Daemon Primarchs I just mentioned, all of those units are also vulnerable to 8 autocannon shots tearing into them with 3+ Ballistic Skill.
Don’t forget your hull-mounted Heavy Bolter either. Remember, this is your one artillery piece that needs line of sight. Therefore units getting within 36” can get hit with those Heavy Bolter shots unlike your other artillery units being a little more cautious. Still, place the Hydra into cover to try to increase your armour save to 2+!
But… leave it so it can still be bubble wrapped by troop units if you need to.
So let’s see how the Hydra stacks up in MathHammer!
MathHammer
Let’s try to bring down one of the toughest non Hard to Hit and Fly keyword units in the game, the dreaded and disgusting Plague Drones!
Enemy Unit: 3 Models, Toughness 5, 4 Wound each, and Save 6+ with a 5++ Invulnerable Save and then 5+ Disgustingly Resilient against each individual wound suffered. So if an Autocannon has two unsaved wounds dealing 4 damage, these nasty daemons roll 4 Disgustingly Resilient saves.
- 8 shots
- 5.3 hits
- 2.3 wounds
- 1.6 failed saves
- 3 damage dealt
Add on those 3 Heavy Bolter shots and you’ve just killed one of those super tough flies! That’s worthy of a victory celebration if you make it out of the battle alive, Guardsman!
Let’s look at it one more time with maximized firepower.
MathHammer Revisited
The Catachan regimental doctrine, unfortunately, won’t impact the Hydra. However, the Cadian Borne Soldiers doctrine and Sergeant Harker’s re-roll 1’s for attacks still comes in handy and so can the limited Master of Ordinance re-roll ability. That alone bumps the Hydra up to on average kill a Plague Drone a turn. But let’s see how it performs with the Cadian Overlapping Fields of Fire Stratagem too.
- 8 shots
- 7.8 hits
- 3.5 wounds
- 2.3 failed saves
- 4.6 damage dealt
When you add in the Heavy Bolter, you get a total of 5.2 damage. This is assuming everything is average. If you roll well and your opponent falls victim to the dice gods fickleness on their saves (as Chaos players deserve), you could easily remove two Plague Drones a turn the way I did in my test game with the Hydra. This maximized Hydra against 3 Primaris Marine Inceptors will also remove the entire 3 man unit in one shooting phase! That is not something your opponent will forget.
Hydra Conclusion
All of this above reinforces my idea that the Hydra has a place on the table. Maybe not every game, but I feel in the current state of the 40k meta where Fly keyword units are often played and in abundance, the Hydra should be considered in your lineup.
Since it is a situational weapon, I would avoid taking more than 1 in standard sized games. Hitting ground targets on a 5+ with 8 shots isn’t terrible, but that is also not how you should be using a 108 point anti-aircraft artillery unit either. Keep in mind the Hydra always has 8 attacks with its main gun making it a little more predictable and consistent than other artillery.
Heavy Quad Launcher (Forge World)
Also known as the Thudd Gun, this compact artillery carriage packs a punch. At 97 points, it is a cheap artillery option and 6 points less than the Wyvern. A little thing that makes this different from other carriage weapons such as the Earthshaker Carriage covered in my previous artillery tactica is that this one only gets 3 crew members instead of 4.
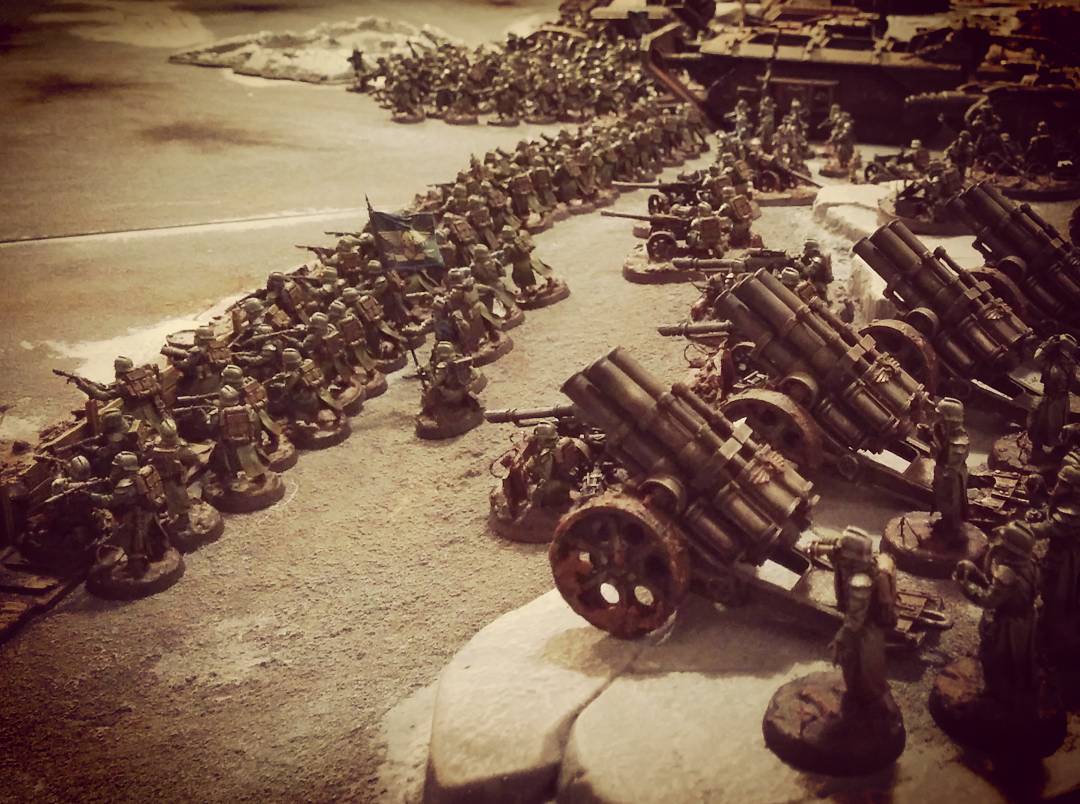
Big thanks to krieger40k on Instragram for letting us use these awesome images!
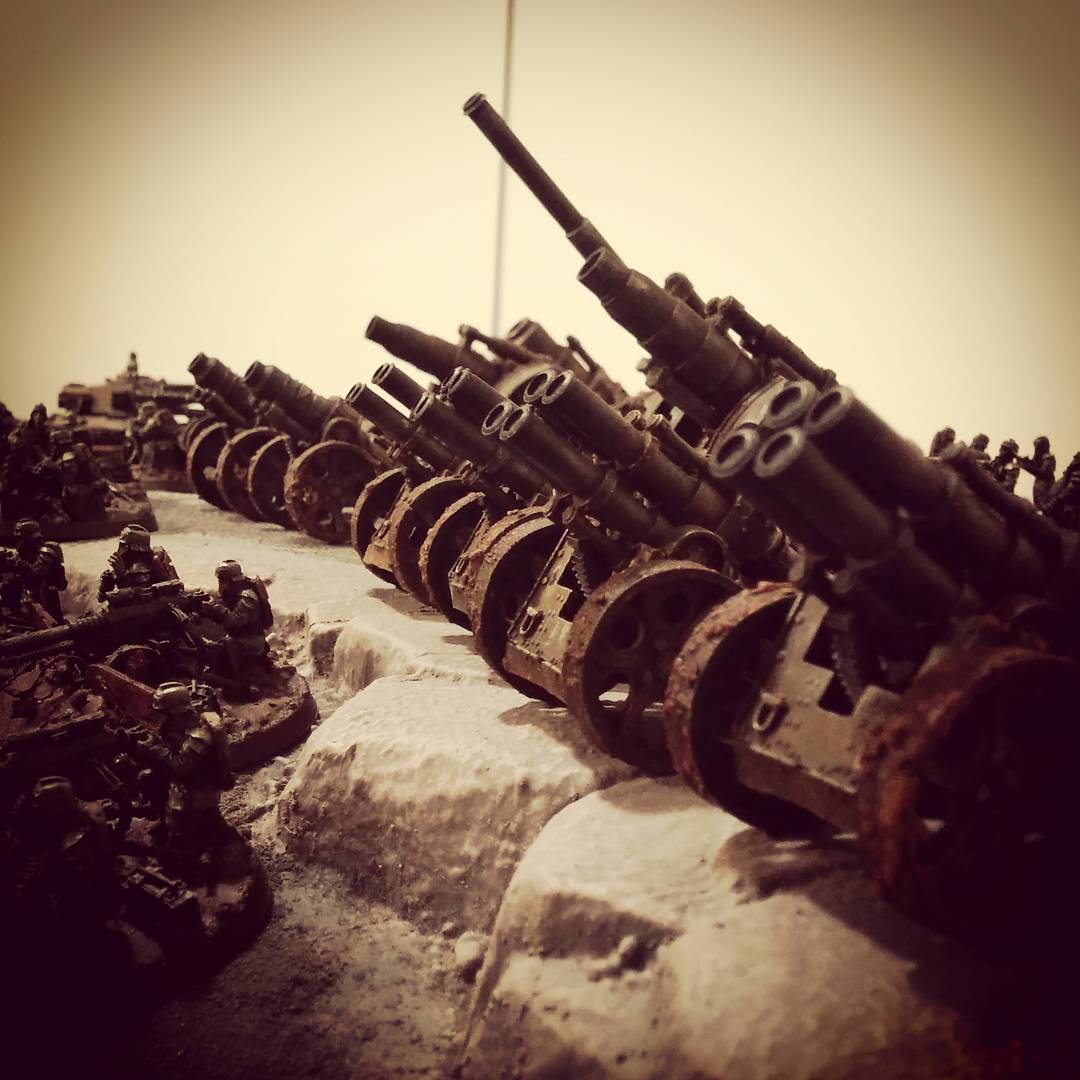
Death Korps of Krieg Thudd Gun by Krieger40k #thuddlife
When deploying, you set the crew and carriage up as one unit within 3″ of one another. From then on, treat the carriage and guardsmen crew as two separate units. If at any point there are no guardsmen crew within 6″ of the carriage then the carriage is removed from play. Additionally, the guardsmen crew can only be chosen as the target in the shooting phase if they are the closest visible unit to the model shooting. That means as long as anything is in front of the crew, including the carriage, they can’t be targeted.
Stat Line and Weapon
This carriage’s stats that matter most are Ballistic Skill 4, Strength 4, Toughness 7, 7 Wounds, and a 3+ Save. The carriage is still a vehicle so you cannot give it orders. It can’t move.
Unlike most artillery vehicles, this unit does not have a degrading profile for taking wounds because it has so few wounds. It has an advantage that offsets this: the footprint and size of the model. It is significantly smaller which can be crucial.
The Heavy Quad Launcher is a 4D6 shots, Strength 5, AP-0, 1 Damage weapon. It is a lot like the Wyvern except it has 1 additional strength and doesn’t reroll all failed wound rolls. It still has the ability to hit targets regardless of line of sight.
How to Use
I started writing this article the week before the Las Vegas Open 2018. I’m glad I didn’t finish it, or I would have eaten my words. I had just messaged CadianShock to express my disappointment that the Heavy Quad Launcher was in the same boat as the Earthshaker Carriage and just not quite worth the extra points. Moments later, Alex Fennell made it to the top 4 with his Space Wolves army which also had a Guard detachment for troop and support units. One of those units was the Heavy Quad Launcher.
Alex, although he lost on a ruling technicality that you can read all about online, took this unit and made it to the top 4 for a reason.
Let’s go ahead and put all of the drawbacks out in the open again. This artillery unit only has 7 wounds but one additional toughness compared to other vehicle artillery units. It is immobile; once it is charged by the enemy and pulled into melee, you might as well consider it out of the game. If the crew gets killed, the carriage dies with them. Last, unlike the Wyvern, it doesn’t re-roll any failed to wound rolls.
This then happened in Alex’s game! Wow!
So if this carriage has so many drawbacks compared to the Wyvern, why take it?
This isn’t quite like the Earthshaker Carriage with its disadvantages and small cheeky advantages with spreading the troops out. The Heavy Quad Launcher is stronger and smaller than its counterpart. Although it can’t move, you can tuck this smaller unit deep into cover where your opponent will either have to work hard to get to it or go the whole game without attacking it.
Being stronger, this can wound the toughest of enemy units on 5’s and most troops on 3’s. This gives the Heavy Quad Launcher a larger effective target selection. Also, the damage this can inflict can vary wildly with 4D6 attacks. One good round of shooting and bad saves from your opponent and they will have wished they had dealt with it sooner.
By tucking it deep into cover and making your opponent want to deal with it, you can also control the opponent’s board movement and force them into spots unfavourable for them and/or favourable for you such as pulling their troop units away from scoring objectives.
Alex saw something in it that many people didn’t and that didn’t fit the math most people look for. He needed a special unit to fill a certain role in his list, and this unit did just that. So no matter how good a unit is or isn’t in terms of math, what you need to remember is the other half of the battle is strategy and tactics. Not every unit, despite having the same battlefield role and nearly the same weapons, will fit your overall strategy or in-game tactics as well.
#thuddlife
So What About Those Heavy Weapon Mortar Teams?
I get a lot of people who ask me questions about Guard artillery locally. Early on in 8th Edition, Guard mortar spam was a thing and a problem for the game. Since then the unit has been changed in the FAQ a bit and received a points increase. Even after this, 3 Heavy Weapons Squads and 3 Heavy Mortar Teams each gives you a total of 9D6 shots over 18 Wounds at Toughness 3 who can receive orders at a total of 99 points.
The points make it seem like a no-brainer.
However, Heavy Weapon Squads are glass. Hit them hard and they’ll shatter to pieces! At Toughness 3 with 5+ Saves and 6 Wounds total, this unit can crumble under the most basic fire.
I said to you last article that I like to plan for things to go wrong.
These Heavy Weapon Squads, unless inside of a Stormlord or equivalent, do not support you if things go wrong. A Wyvern, Basilisk, Manticore, and Hydra all can survive the shooting. Many times multiple turns of it. They can move 12” for a Ballistic Skill penalty of -1 to run away from approaching enemy should your enemy make it through your troops. They stay in the game though.
I’ve moved Basilisks 12” each turn through by backfield while Deathguard Space Marines chased them trying to get a charge. Sometimes they did, other times I got away and kept firing. If those had been Heavy Weapon Squads with Lascannons, they would have been obliterated.
So consider this when list building. This is the stuff the numbers can’t account for and makes some units, although on the surface less lethal, still a better choice.
Astra Militarum Artillery Conclusion
Once again, these Astra Militarum artillery units are the kings of the battlefield. The Wyvern and Heavy Quad Launcher will shred your enemy from beyond their view. The Hydra will reach up with the Wrath of the Emperor and pulls flying units down out of the sky. For the Emperor!
I hope this MathHammer and in-depth rules breakdown helps you decide how to build your lists moving forward. I also hope these end segments discussing going beyond the math helps you build lists you may not have considered.
Until next time, be loyal to the Emperor and most of all have fun!
Finally, expect more on Astra Militarum Artillery in the future to cover the Manticore and Deathstrike!