
Astra Militarum Artillery – Earthshaker Cannons
Today we take an in-depth look at Astra Militarum Artillery - Specifically the Earthshaker Cannon!
I have a guest post today from Cadian Sergeant Steel on Instagram! Firstly big thank to him for doing this, it’s not easy or quick to write an article like this. It is also nerve-wracking – putting yourself out there like this. I’ll hand over to Cadian Sergeant Steel – onwards with Astra Militarum Artillery. You should REALLY go and follow his account, fantastic Astra Militarum painting!
Never miss an article? Subscribe!
In this Tactica article, the focus will be primarily on artillery units for the Astra Militarum that are still available from Games Workshop and Forge World. The goal is to cover what is still available because of personal familiarity for the tactica but also so that you the reader isn’t let down by the possibility of a really amazing or cool unit in the article that you can’t buy (*cough* …. Salamander Scout Vehicles …).
This will be a series of articles so stay tuned after this one for articles on the Wyvern, Hydra, Thud Gun and more! You can Subscribe to email notifications.
Astra Militarum Artillery – The Earthshaker Cannon
Astra Militarum Artillery units are some of the toughest and hardest hitting units in the army. These units smash apart enemy vehicles, turn enemy troop units into dust, and pick out those troublesome units in the backfield and turn them into a memory. Well deployed Astra Militarum Artillery can truly swing the tide of a battle. They are by no means an auto-win but used correctly they can give a commander that extra helping hand.
Today we will be exploring all of the Earthshaker Cannon units. These are the Basilisk, Armageddon Pattern Basilisk, and the Earthshaker Carriage Battery.
Basilisk
The Basilisk is probably the most iconic and infamous unit for Guard Artillery. It’s Earthshaker Cannon can truly reach out and touch anybody on your battlefield. At 108 points with its regular weapon load-out of a hull mounted heavy bolter, it’s a very affordable unit points wise.

Two Basilisks well hidden and protected from the enemy will cause all types of the enemy a headache.
Stat Line and Weapon
This unit’s stats that matter most are Movement 12″, BS 4, S 6, T 6, W 11, Sv 3+.
Remember that it is T 6, it’s not as tough as some of the Guard’s many other tanks. Autocannons, Plasma, etc will be wounding the Basilisk on a 3+.
Its main weapon is the Earthshaker Cannon. It has a range of 240″.
Let me say that again… that is 20 feet!
It is Heavy D6, Str 9, AP -3, D3 damage. When you roll to determine the number of shots with this, you roll 2D6 and discard the lowest result. Most importantly, this weapon can target units that are not visible to the bearer! You will see this visibility rule is a common theme with artillery in the game but especially Astra Militarum Artillery units.
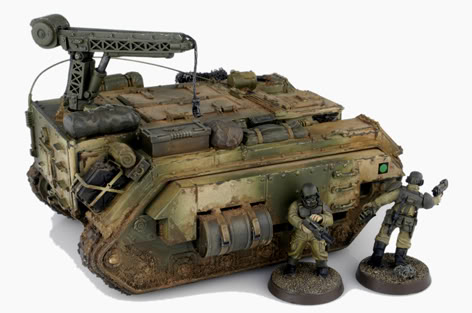
A Basilisk comes standard with a hull-mounted Heavy Bolter and can swap it out for a Heavy Flamer.
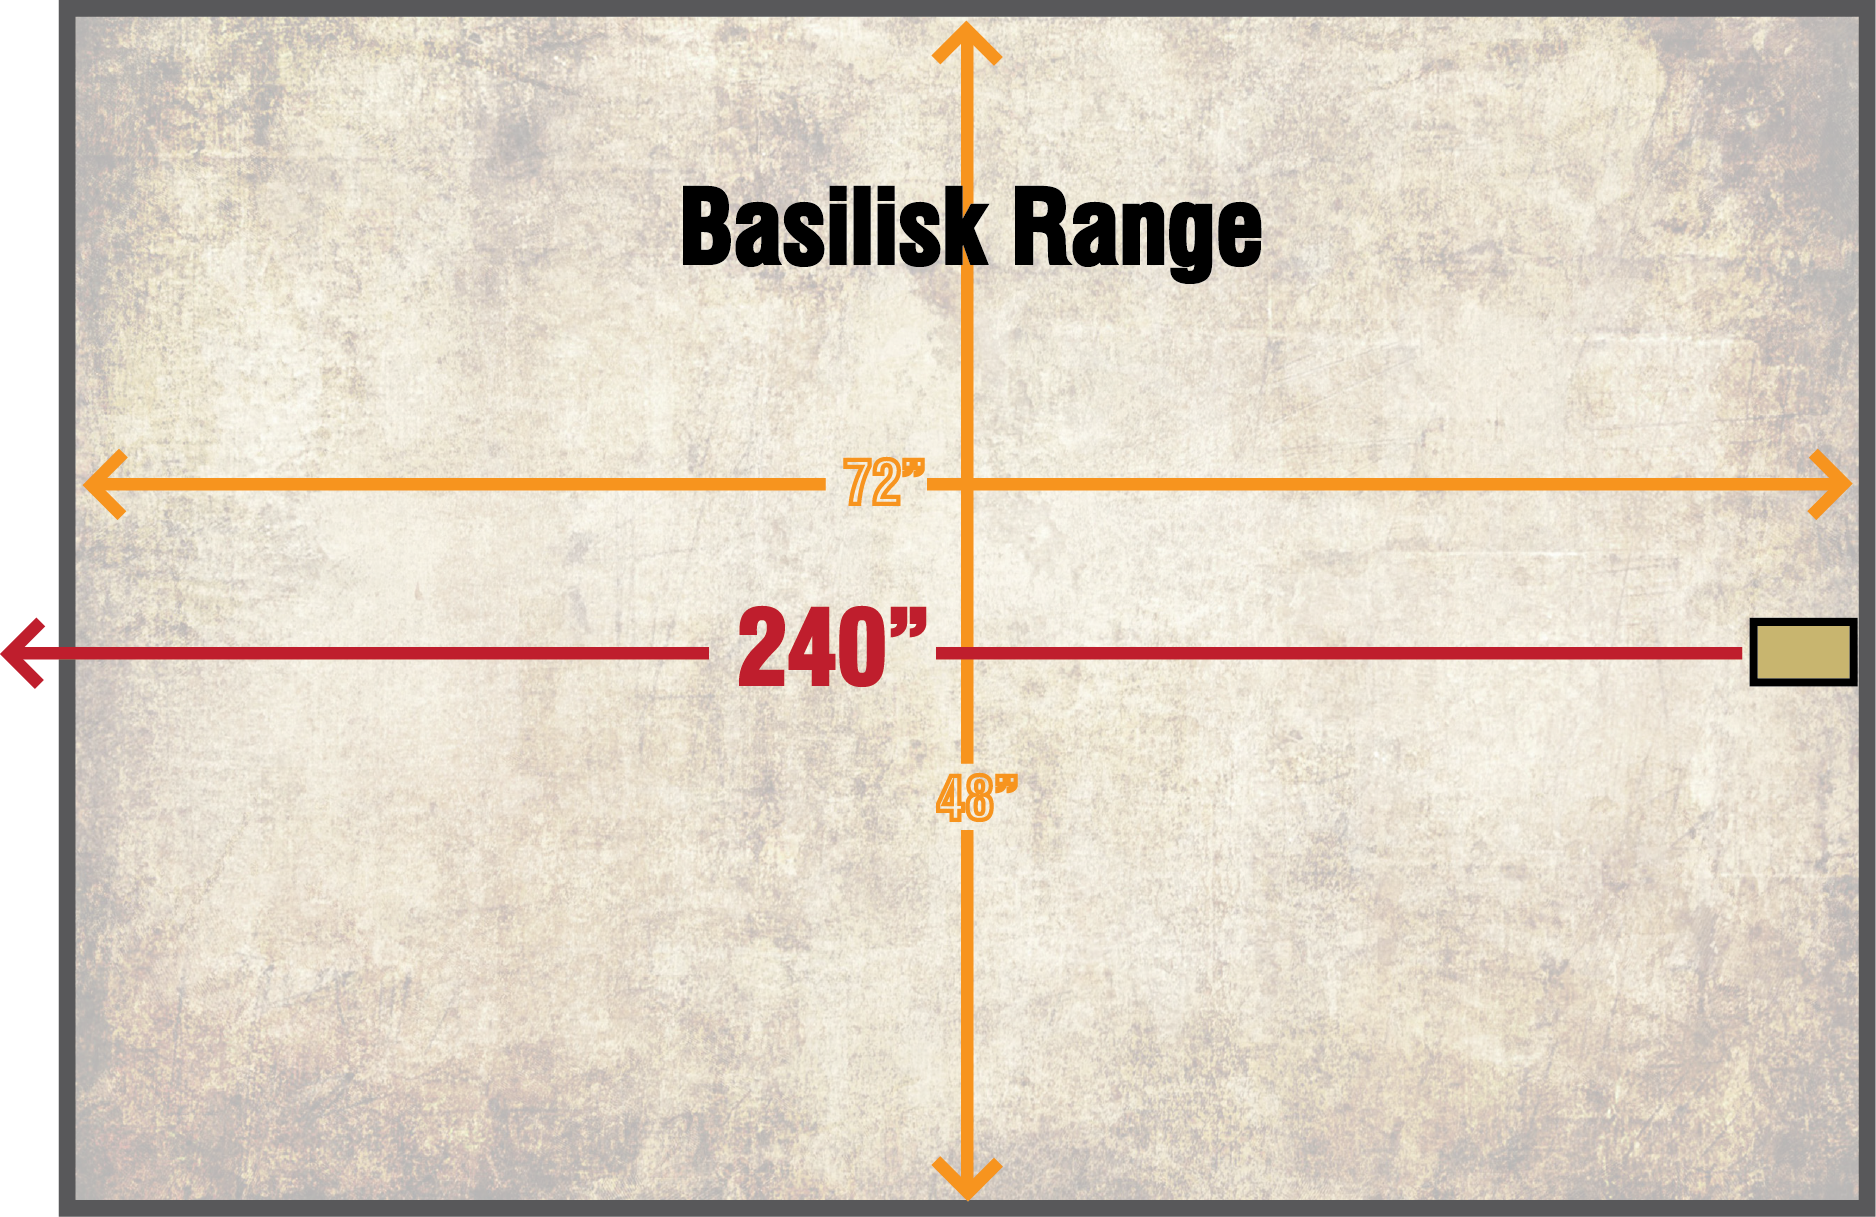
Basilisk Weapon Range
How to Use
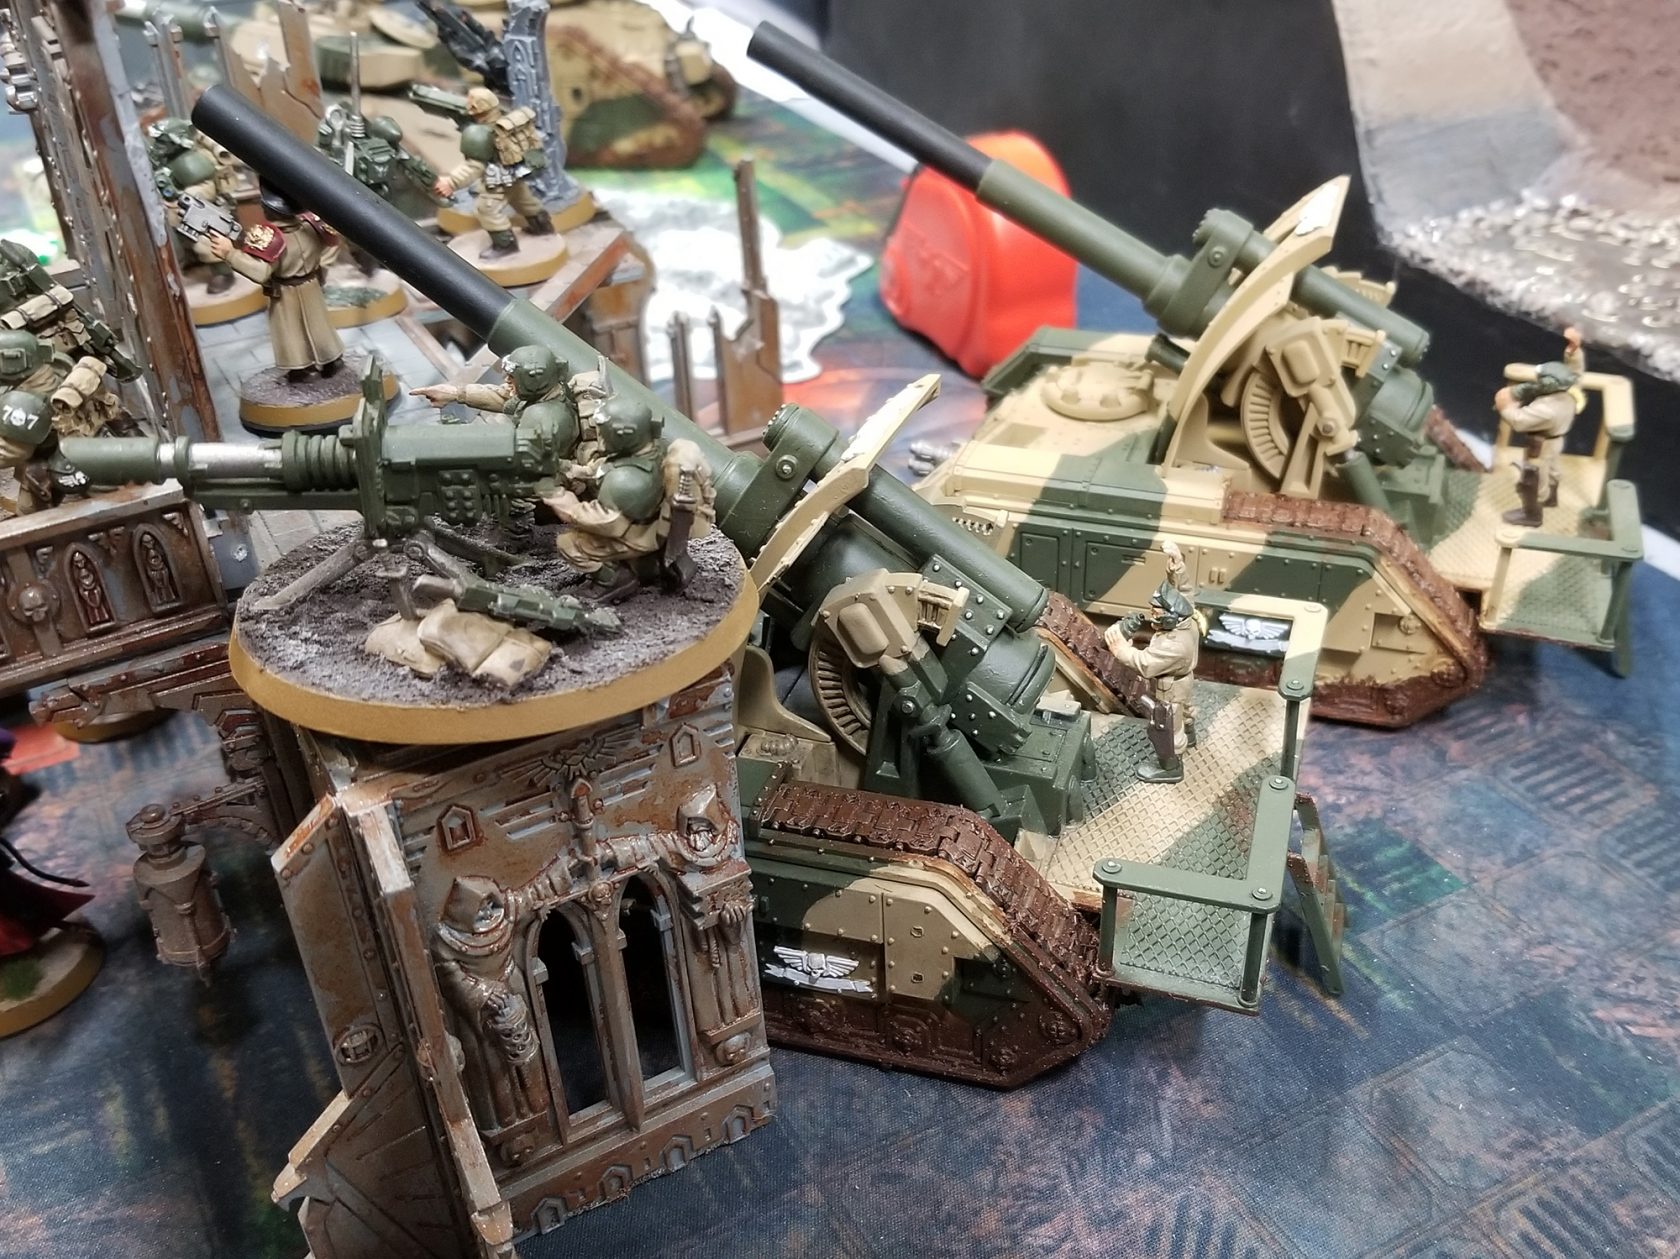
First, like the picture showing the two models above, you should find somewhere within your deployment zone to put them where the enemy either can’t see them or can barely see them. You should protect your Basilisks with either plenty of infantry bubble wrap or plenty of other units so the enemy cannot Deep Strike or charge into your Artillery.
With its ludicrous range and heavy hitting Earthshaker Cannon, you will be hitting almost any unit on the table. With Str 9, all regular vehicles and monsters will be wounded on 3’s and the toughest monsters will be wounded on 4’s. The AP -3 also allows you to punch through most of the armour save for vehicles.
Where the Earthshaker really works best is against vehicles, monsters, or well armoured, multi-wound elite troops. In prior editions, the blast template allowed you to wipe infantry squads off the face of the battlefield with a lucky scatter role. Now, the 2D6 discard the lowest for the number of attacks makes this weapon works best against a single model or small count, multi-wound elites. On average, you will get 4.47 attacks (Roll 2D6, take the highest result math) with an Earthshaker. Not bad!
You will never hit with more than 6 attacks. So you can never kill that 10 man squad of Space Marines with a single Earthshaker, and on average you will only kill 2 models. Let me show you how this works on a well-armoured vehicle though.
MathHammer
So let’s use Cadian Shocks’ MathHammer App and see how this stacks up to a standard vehicle.
Enemy Unit: Toughness 7, Wounds 11, and Save 3+.
· 4.5 shots
· 2.2 hits
· 1.5 wounds
· 1.2 failed saves
· 2.5 damage dealt
I left the single decimal place to show a comparison, later on, bear with me. So at first, 2.5 wounds on average is very mediocre when needing to bring down your opponents toughest vehicle or monster. It’s almost the equivalent of two 4+ BS Lascannons shooting at the same target. Still, keep in mind, you don’t need line of sight and if you’re well placed, no one has the line of sight on you either unlike a Lascannon.
So where is the magic and why is the Basilisk feared?
Cadian Regiment Basilisk
Cadian Regimental Doctrine – Born Soldiers
The Cadian Regimental Doctrine allows all Cadian regimental units who didn’t move in the previous shooting phase to re-roll ones during their shooting phase. This definitely helps raise the number of hits. It doesn’t stop here though for Cadians…
Cadian Stratagem Overlapping Fields of Fire
For 2 Command Points, after a unit from your army has inflicted an unsaved wound on an enemy unit, you can add 1 to the hit rolls for all other units that target that enemy unit this phase. By simply smacking a Daemon Primarch or large vehicle with anything else to wound it, you can now make everything else 3+ BS!
MathHammer – Cadian Revisited
With Born Soldier and Overlapping Fields of Fire in place, let’s look at the math again.
· 4.5 shots
· 3.5 hits
· 2.3 wounds
· 1.9 failed saves
· 3.9 damage dealt
As you can see with a couple of Cadian tricks, you can nearly double the effectiveness of the Basilisk! So 4 wounds won’t kill something like a Space Marine Predator obviously. But, two Basilisks for 216 points will force a Predator to fall 1 tier on its stat line which lowers it’s ballistic skill. Go all out with 3 Basilisks and you’ve destroyed that Predator who never had the line of sight on you.
Catachan Regiment Basilisk
Catachan Regimental Doctrine – Brutal Strength
The Catachan Regimental Doctrine allows each vehicle with ranged weapons that make a random number of attacks to re-roll one of the dice used to determine the number of attacks. That means you roll 2D6, re-roll your worst roll, then still only discard the lowest. This will help you maximise the number of shots you can make each time you fire the weapon. Note that this doctrine isn’t limited to your shooting phase meaning you can also do this during overwatch. If my math is correct, this gives you an average of 4.96 shots!
Catachan – Sergeant Harker
Sergeant Harker, an elite slot choice, gives all Catachan units within 6″ of him re-roll 1’s in the shooting phase. Now your artillery units have the Cadian Born Soldiers Doctrine. Yikes!
So let’s look at it via MathHammer!
MathHammer – Catachan
With just the regimental doctrine in place trying to kill a toughness 7 Predator you get:
Enemy Unit: Toughness 7, Wounds 11, and Save 3+.
· 5.0 shots
· 2.9 hits
· 1.9 wounds
· 1.6 failed saves
· 3.2 damage dealt
This puts the Catachan Basilisk just below the maximized Cadian Basilisk and still a worthy opponent to be feared! Without Harker though, you would have averaged 2.8 damage per Basilisk which is just under Cadian Basilisks with Born Soldiers but without Overlapping Fields of Fire at 2.9 damage.
Master of Ordnance – Re-rolls for All Regiments
The Master of Ordinance is a 30 points Elite choice that allows re-rolls for fellow regiment Basilisks, Wyverns, Manticores, or Deathstrikes when they target enemy units more than 36″ away as long as the regiment unit is within 6″. This model is a good choice for those Regiments that are not Cadian.
One issue with this is “Alpha Strike” armies that Deep Strike and get in your face fast. A second issue is that some the deployment zones don’t allow long distances between armies such as the Dawn of War deployment on the long table edges. You could find the enemy camped out in turn one very, very close.
As soon as the enemy is close, the Master of Ordinance is only good for his one use only artillery barrage attack which isn’t bad at 100″ range, Heavy D6 shots, S 8, AP -2, d3 damage. MathHammering it, with all available Cadian buffs (Born Soldiers, Overlapping Fields of Fire) and line of sight (if you can’t see the target, it is -1 to ballistic skill), you will do 3 wounds to a Predator tank.
Armageddon Pattern Basilisk (Forge World)
The Armageddon Pattern Basilisk is base 123 points with a heavy bolter and Earthshaker Cannon. It has only three differences from a regular Basilisk.
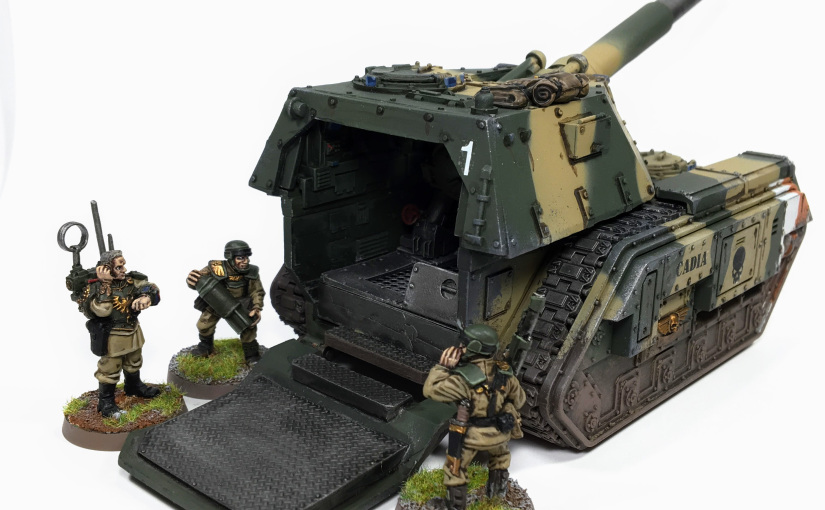
Armageddon Pattern Basilisk with the Master of Ordinance and Crew Models
First, it looks way cooler than the regular Basilisk. This part resin and part plastic kit it truly worthy of the Armageddon name.
Second, it’s Toughness 7 instead of Toughness 6. That’s currently why the Armageddon Pattern Basilisk costs more. To me, Toughness 7 can be worth it depending on what is coming at you. If it is Autocannon strength weapons, they go from wounding on 3’s to 4’s. Every less dice pip counts. However, Toughness 7 makes no difference for Strength 3, 4, 5, and 8+ weapons. So really the extra toughness only makes a difference against Strength 6 and Strength 7 weapons. Is it worth 15 more points? Most of the time, no. If your opponent does get a chance to shoot at your Armageddon Pattern Basilisk, they will most likely be using high strength, high damage weapons such as Lascannons to ensure they get the job done.
Third, you can add more weapons to the Armageddon Pattern Basilisk. You have your choice of including a heavy stubber or storm bolter on a pintle mount. You can also add a hunter-killer missile. Now, sticking with the original tactics for this unit, you should never easily allow your opponent to have the line of sight on your Basilisks, either pattern. That means most of the time you shouldn’t be able to shoot these weapons anyhow. Still, adding a storm bolter for 2 points to help push back charging or deep striking infantry isn’t too much of a points sink.
Earthshaker Carriage Battery
Here is where you can really shake up how your artillery works. The Earthshaker Carriage Battery is an immobile Earthshaker that comes with 4 Guardsmen Crew equipped with lasgun and frag grenades. Altogether they are 121 points (105 for the carriage and 4 for each Guardsmen).
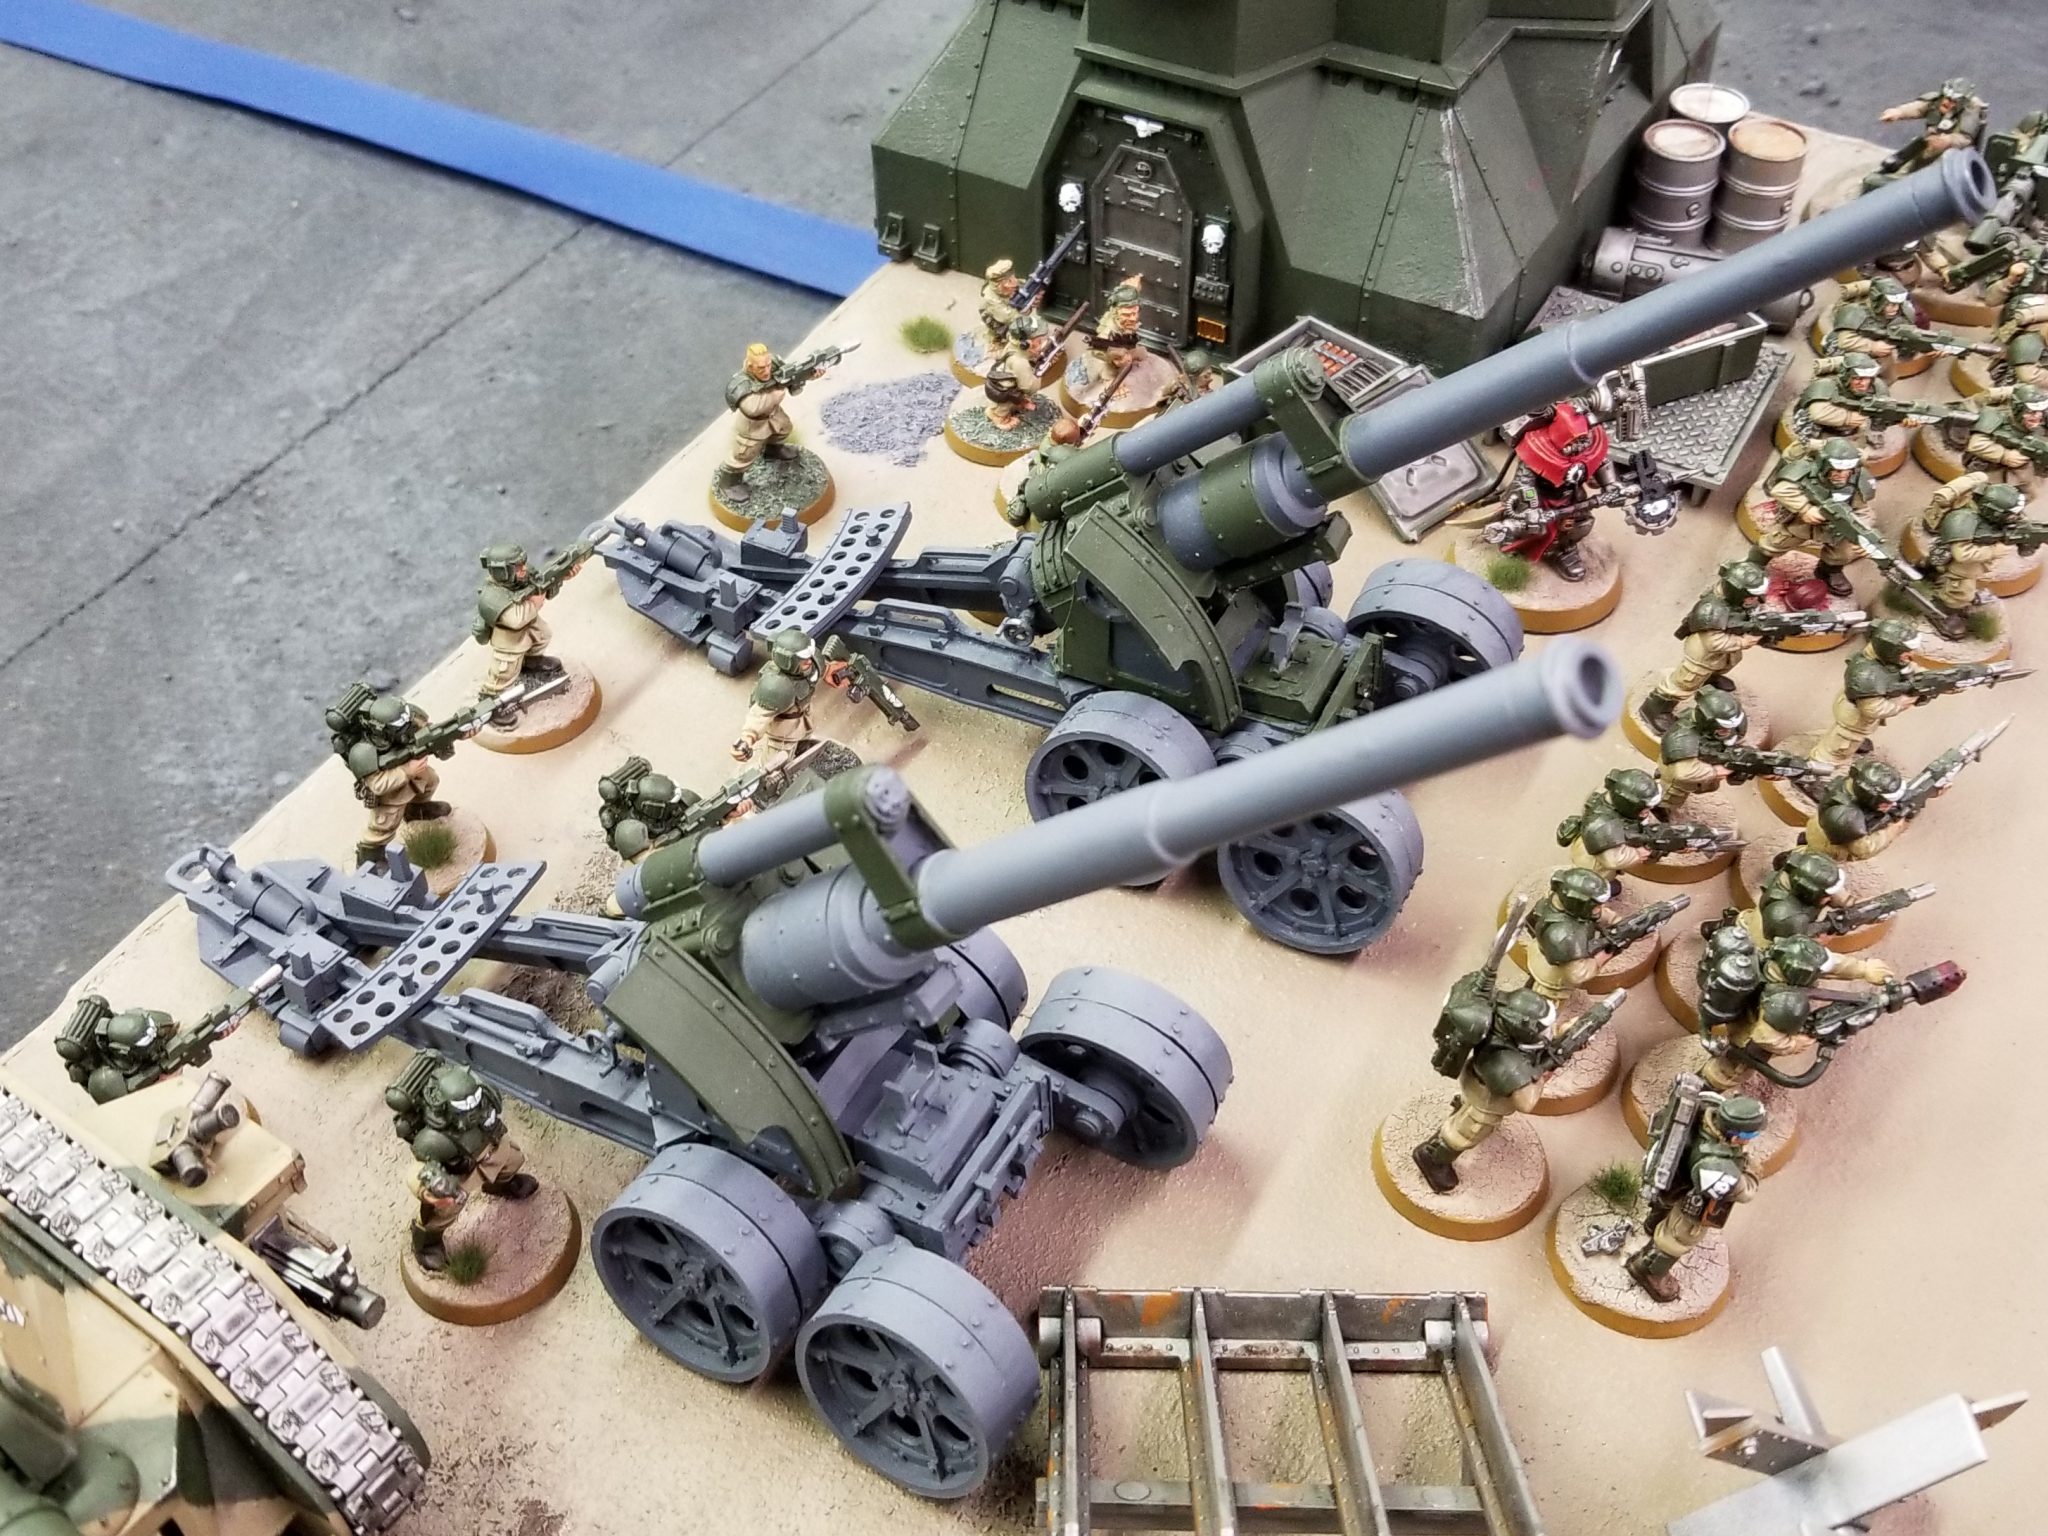
Earthshaker Carriage Batteries at Pittsburgh Inner Circle 2017
When deploying, you set them up as one unit within 3″ of one another. From then on, treat the carriage and guardsmen crew as two separate units. If at any point there are no guardsmen crew within 6″ of the carriage then the carriage is removed from play. Additionally, the guardsmen crew can only be chosen as the target in the shooting phase if they are the closest visible unit to the model shooting. That means as long as anything is in front of the crew, including the carriage, they can’t be targeted.
Stat Line
This carriages stats that matter most are BS 4, S 4, T 7, W 7, Sv 3+. The carriage is still a vehicle so you cannot give it orders. It can’t move.
Unlike the Basilisk and Armageddon Pattern Basilisk, this unit does not have a degrading profile. A small trade-off for having fewer wounds but not worth it in my opinion.
So Why Take It?
In Chapter Approved 2017, the unit point cost was increased by 30 points from 75 for the carriage to 105. Once you add the crew, it is only 2 points cheaper than the Armageddon Pattern Basilisk for 5 fewer wounds.
Now at first, this seems like a no-brainer. But let’s revisit the original tactics. You want to hide your artillery to the best of your ability. If the game goes well your opponent should get very limited shots against your artillery. Most of all, you only need one of the original crew models that deployed with the carriage within 6″ to keep the carriage on the table and one within 3″ to let it fire. This gives you a little flexibility. (thanks to theMerfMerf on Reddit for helping clarify the rules)
Bubble Up
First, you could string your crews out to help with the 9″ no Deep Strike bubble.
Simple Infantry
Second, you could string the Guardsmen Crew out to not only prevent Deep Striking. You could use them to hold objectives. This gets kind of cheeky. Essentially, these infantry models are treated like characters and can only be targeted if they are the closest unit. This means your opponent will have to shoot your well-hidden carriage off the table before he/she can blast the Guardsmen Crew off the table in order to take you off the objective. The downside is, the troops do not have the Defenders of Humanity rulemaking the objective vulnerable to be lost simply because your opponent gets more models or a unit with Defenders of Humanity or a similar rule within 3″.
The Guardsmen Crew and Carriages should be in your deep back line. So if the enemy does get in and a single front line Guardsman is alive, have the Commissar execute him/her for the obvious heresy of not dying gloriously in the service to the Emperor and letting the heretic live and succeed past his/her designated defensive position.
Additionally, if your carriage is blasted off the table and your troops are still alive, this just gave you an infantry unit that can take orders from your regimental leadership with Voice of Command. This gives you 4 models that can do all of the shenanigans that other infantry units can. Need that objective 18″ away this turn? No problem. Move, Move, Move! Somehow survived melee combat and need to repel the enemy back off your carriages? Fix Bayonets! The list goes on obviously.
Earthshaker Carriage Battery Conclusion
Does this make the Earthshaker Carriage Battery worth it compared to the Basilisk? Depends on your generalship, strategy, and employed tactics during the game honestly. If you want to frustrate your opponent to no end with some crafty tricks that will be situational, go for it! Personally, I’ll be taking mobile vehicles with better resiliency as I always plan for things to go wrong despite how well I hide my Astra Militarum Artillery.
Extra: Narrative Style Play
Trojan Support Vehicle (Forge World)
Another great unit you can add to support your Astra Militarum Artillery is the Trojan Support Vehicle. At 98 points with a basic loadout, you get a 6 capacity transport that can give one fellow regimental vehicle within 6″ re-roll all to hit rolls. Normally I would reserve this for massive gun vehicles such as the Shadowsword, Baneblade, Mecharius Vulcan, or something as small as a Manticore. However, it is just so lore driven to have one of these in your artillery line. Plus it can be a great way to ensure you get those initial wounds to use the Overlapping Fields of Fire stratagem.
With the transport capacity, you can add in a few neat units. The initial response is to sit your Tech-Priest Enginseer inside so he can’t be sniped by the enemy. This can be key to keeping your vehicles in the game. Another cool strategy is putting in a flamer specials weapons team to disembark when needed to help repel the enemy want to melee your Astra Militarum Artillery or Astra Militarum Tanks out of the game. Make them pay for their heresy!
Trojan Support Vehicle – Credit to Ash on Librarium Online
Apocalypse Games
All of the Astra Militarum Artillery units discussed in this article are fantastic for Apocalypse games! With that 240″ (20′) range, almost no one will be safe from your destructive power.
During the last game I played, my opponents focused all of their deep strikers on removing my Astra Militarum Artillery units. Luckily I was well protected by troops units and a Mecharius Vulcan that can erase one unit a turn. Also, in the picture below, don’t be scared for my army. The Tyranids were my allies. You get desperate when you want to eradicate Chaos.
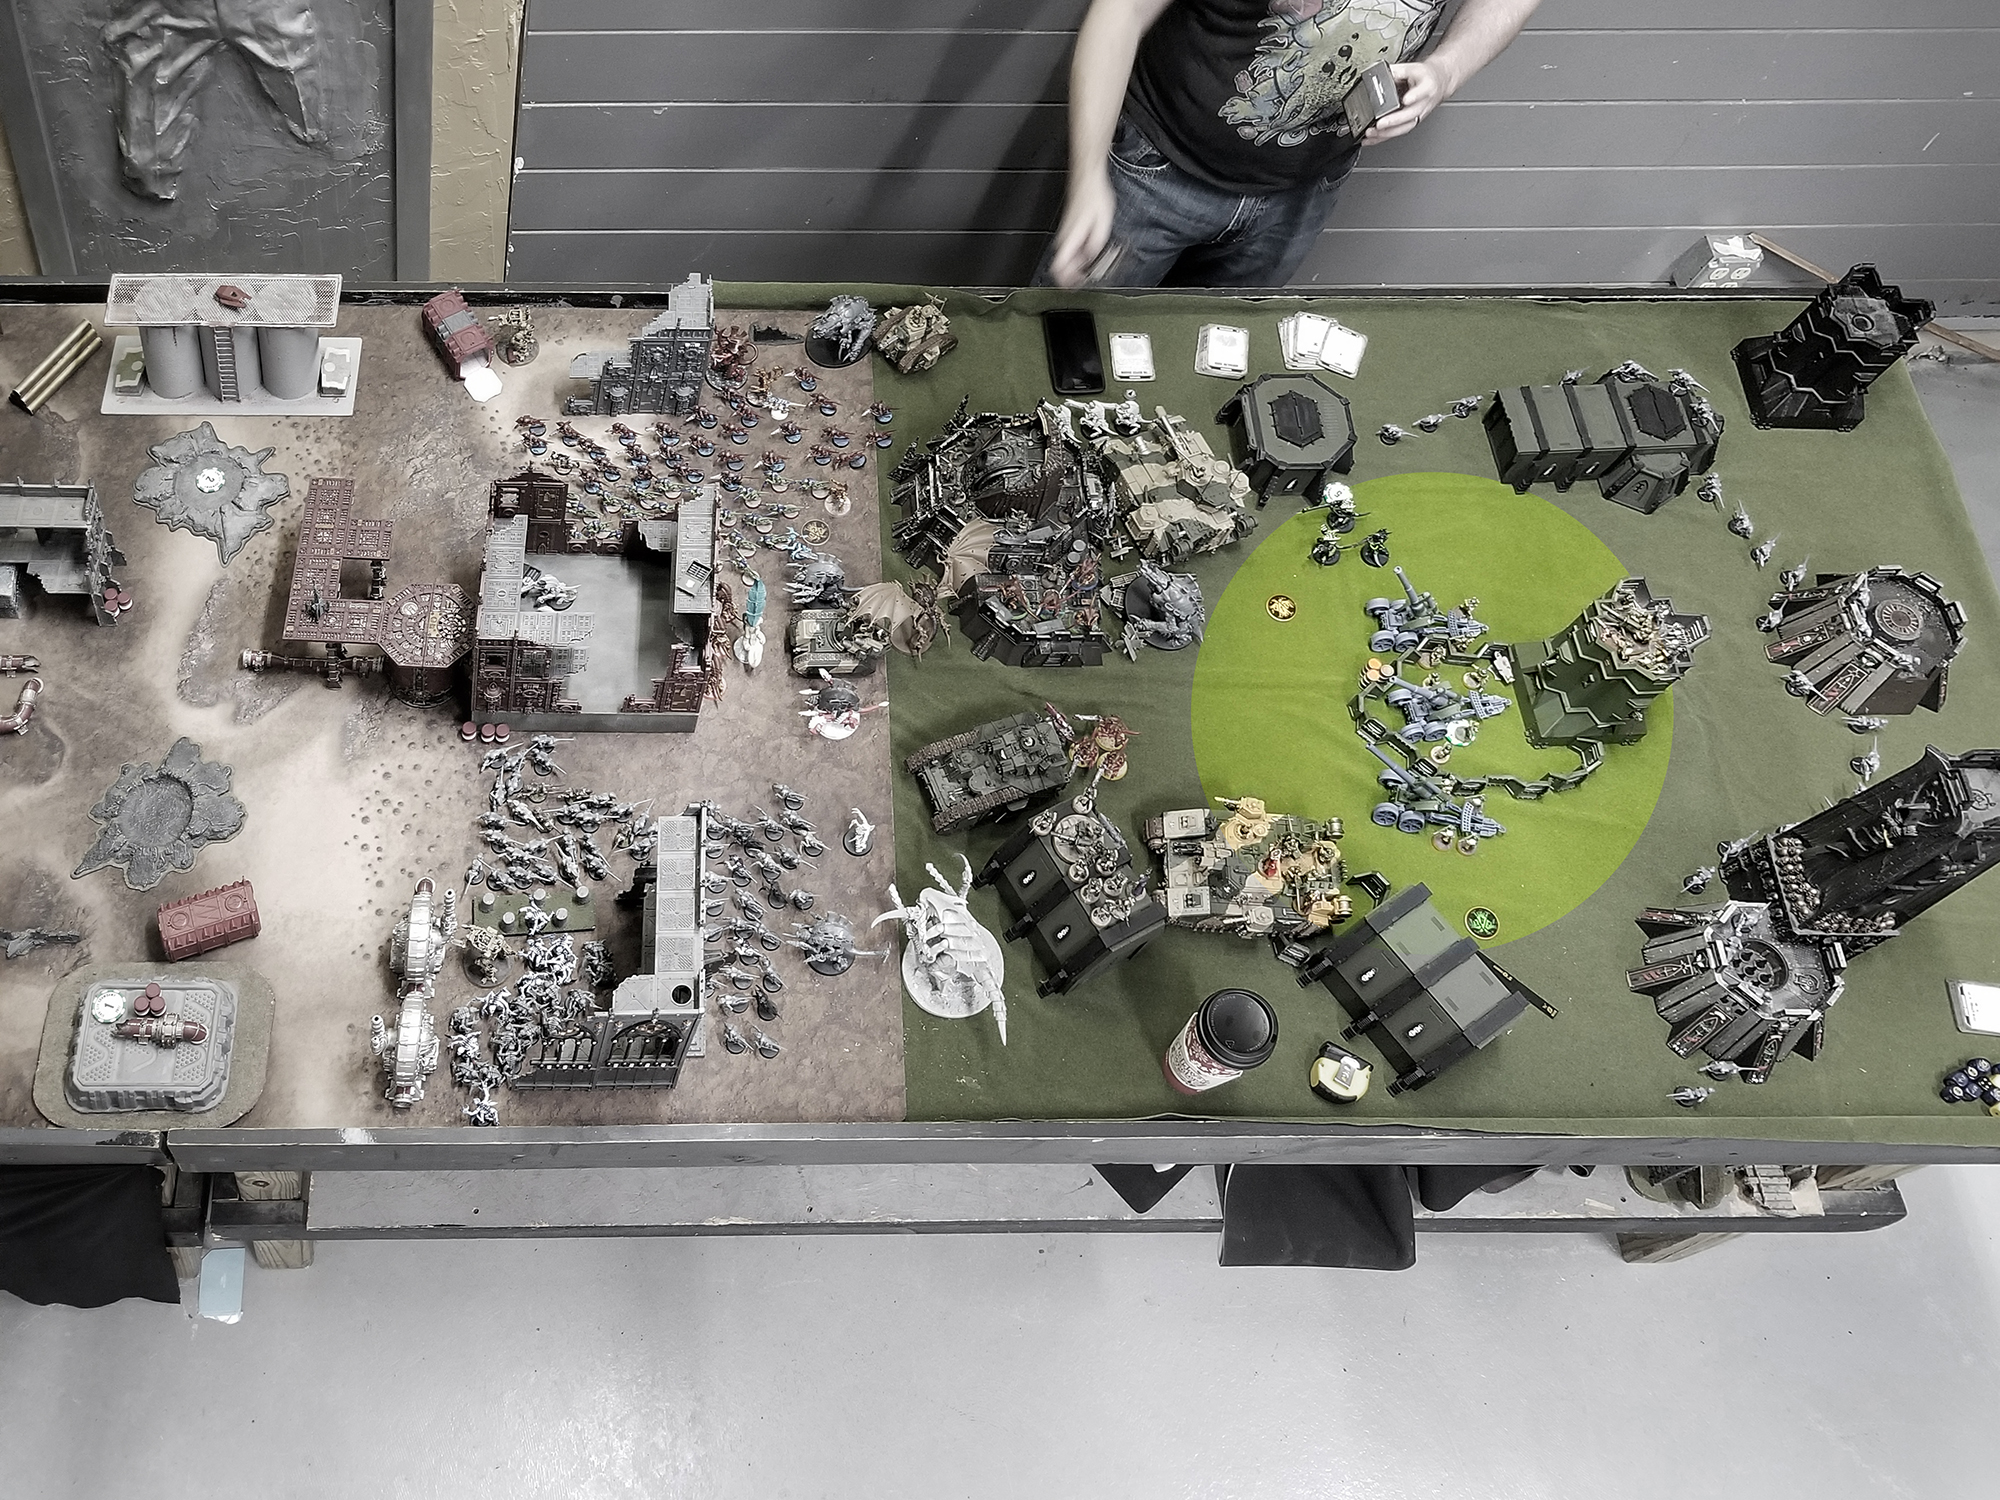
My Earthshaker Carriages on a 16′ long Apocalypse Table
Astra Militarum Artillery Conclusion
With the no line of sight needed, Astra Militarum Artillery units are the kings of the battlefield. I will usually be taking a mix of Basilisks and Lascannons in my competitive lists to beat down strong enemy units, but they are almost a must include for narrative events.
I hope this MathHammer and in-depth rules breakdown helps you decide how to build your lists moving forward. Until next time, be loyal to the Emperor and most of all have fun!
Finally expect more on Astra Militarum Artillery in the future to cover Wyverns, Hydras, Thud Guns and more!