
Krieg Kill Team (Veteran Guardsmen Kill Team) Completed
My first Kill Team is done!
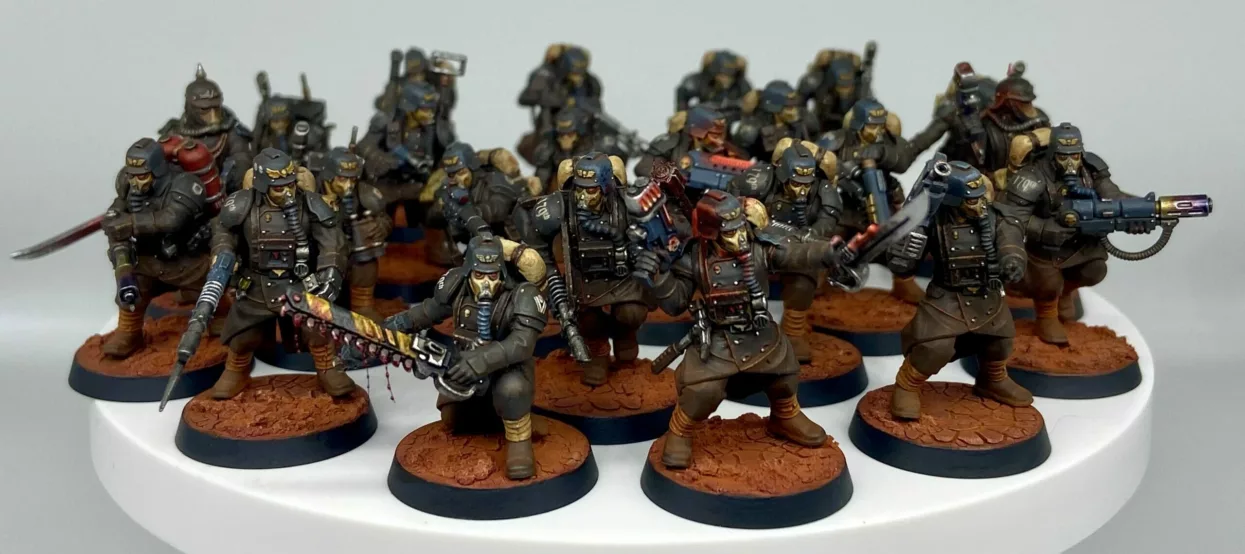
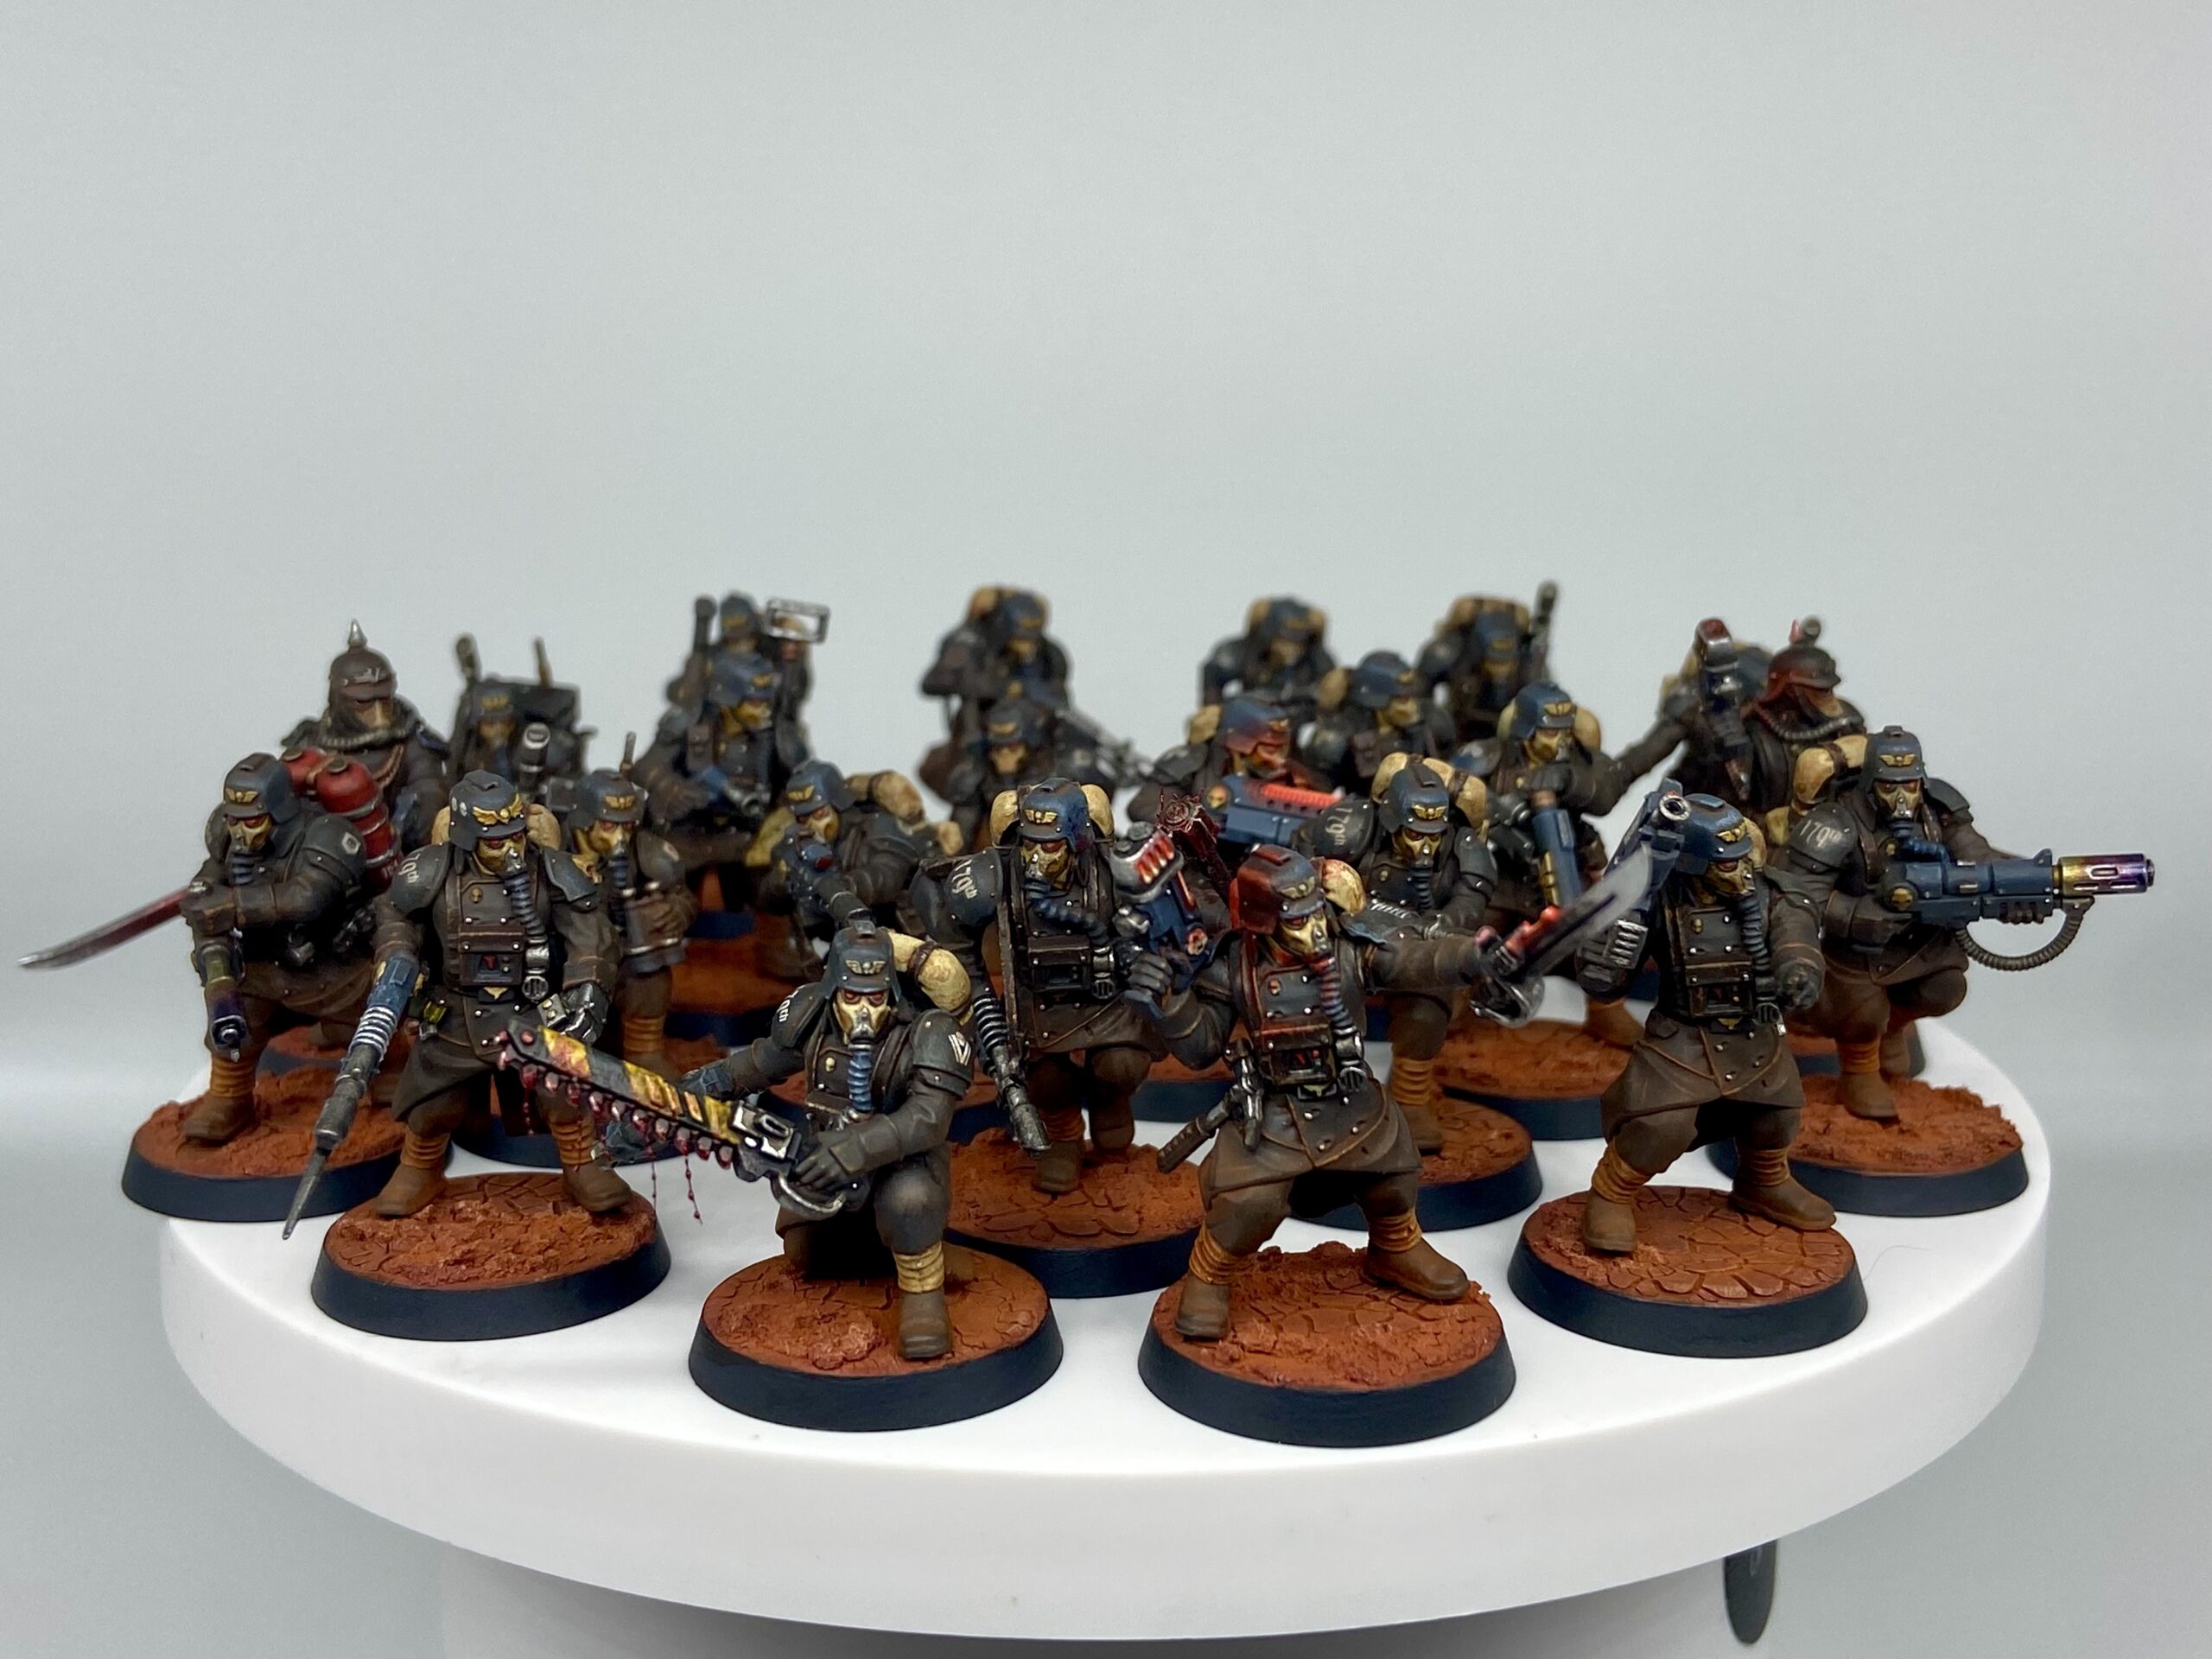
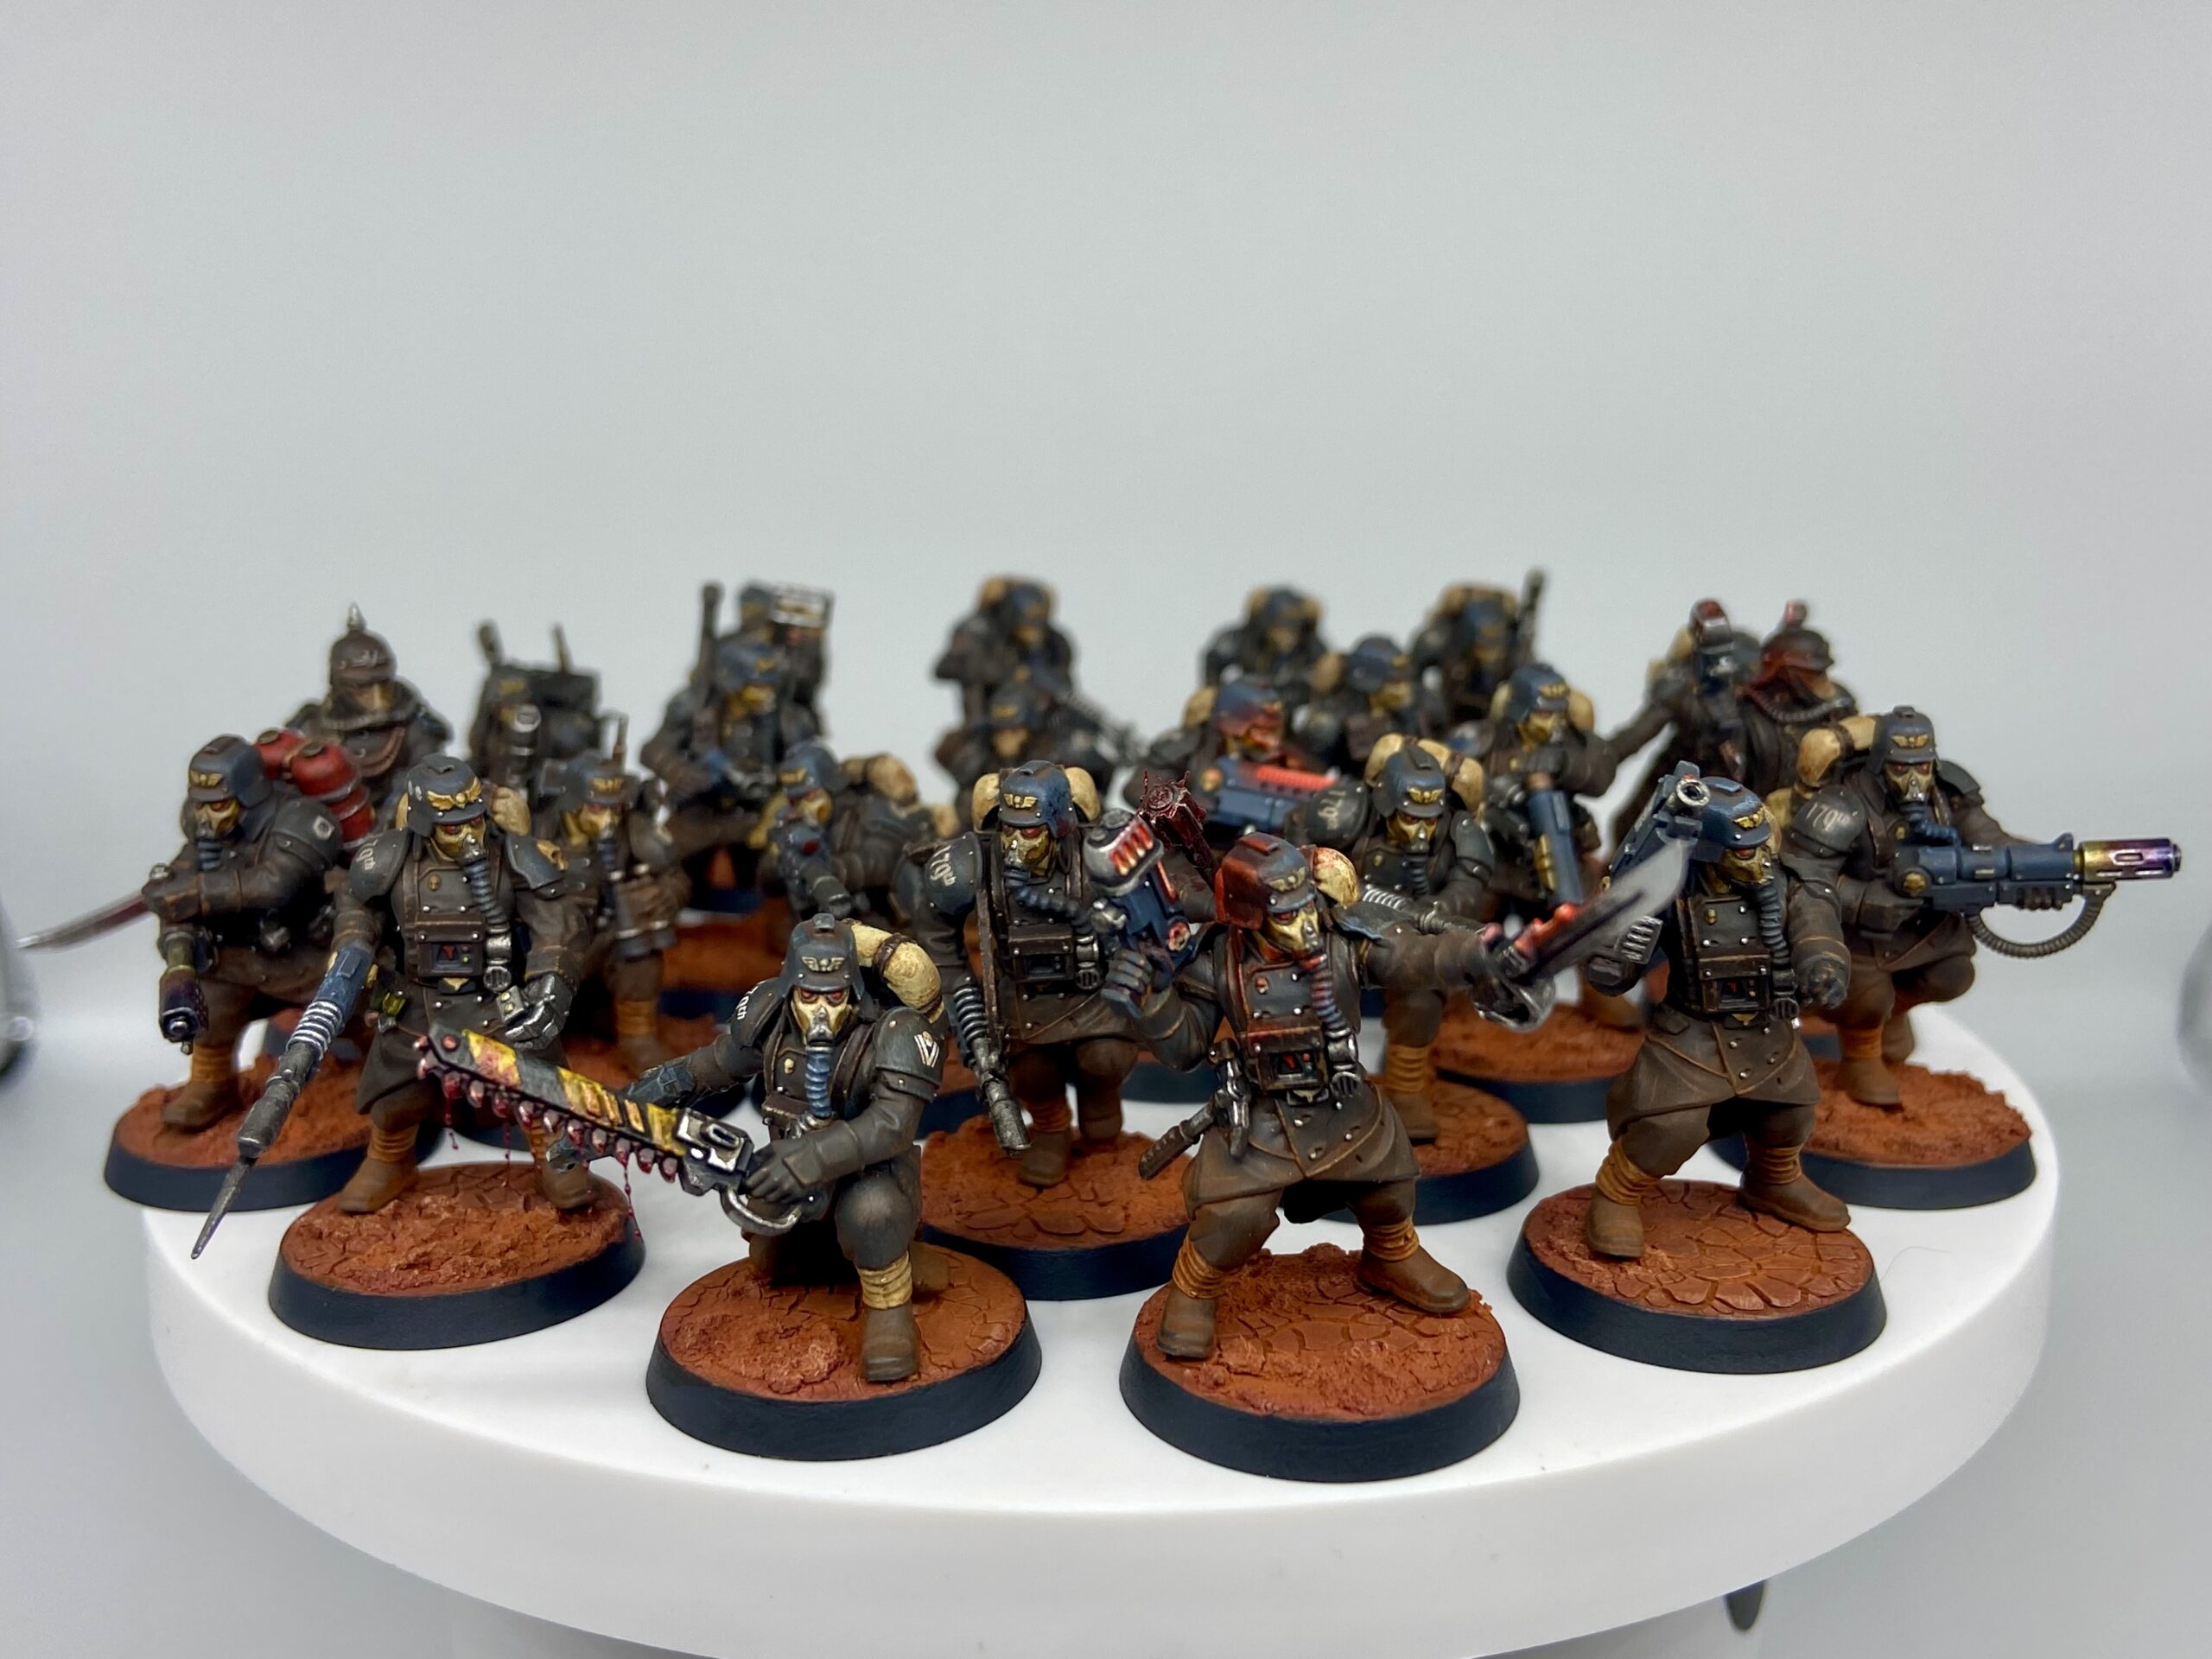
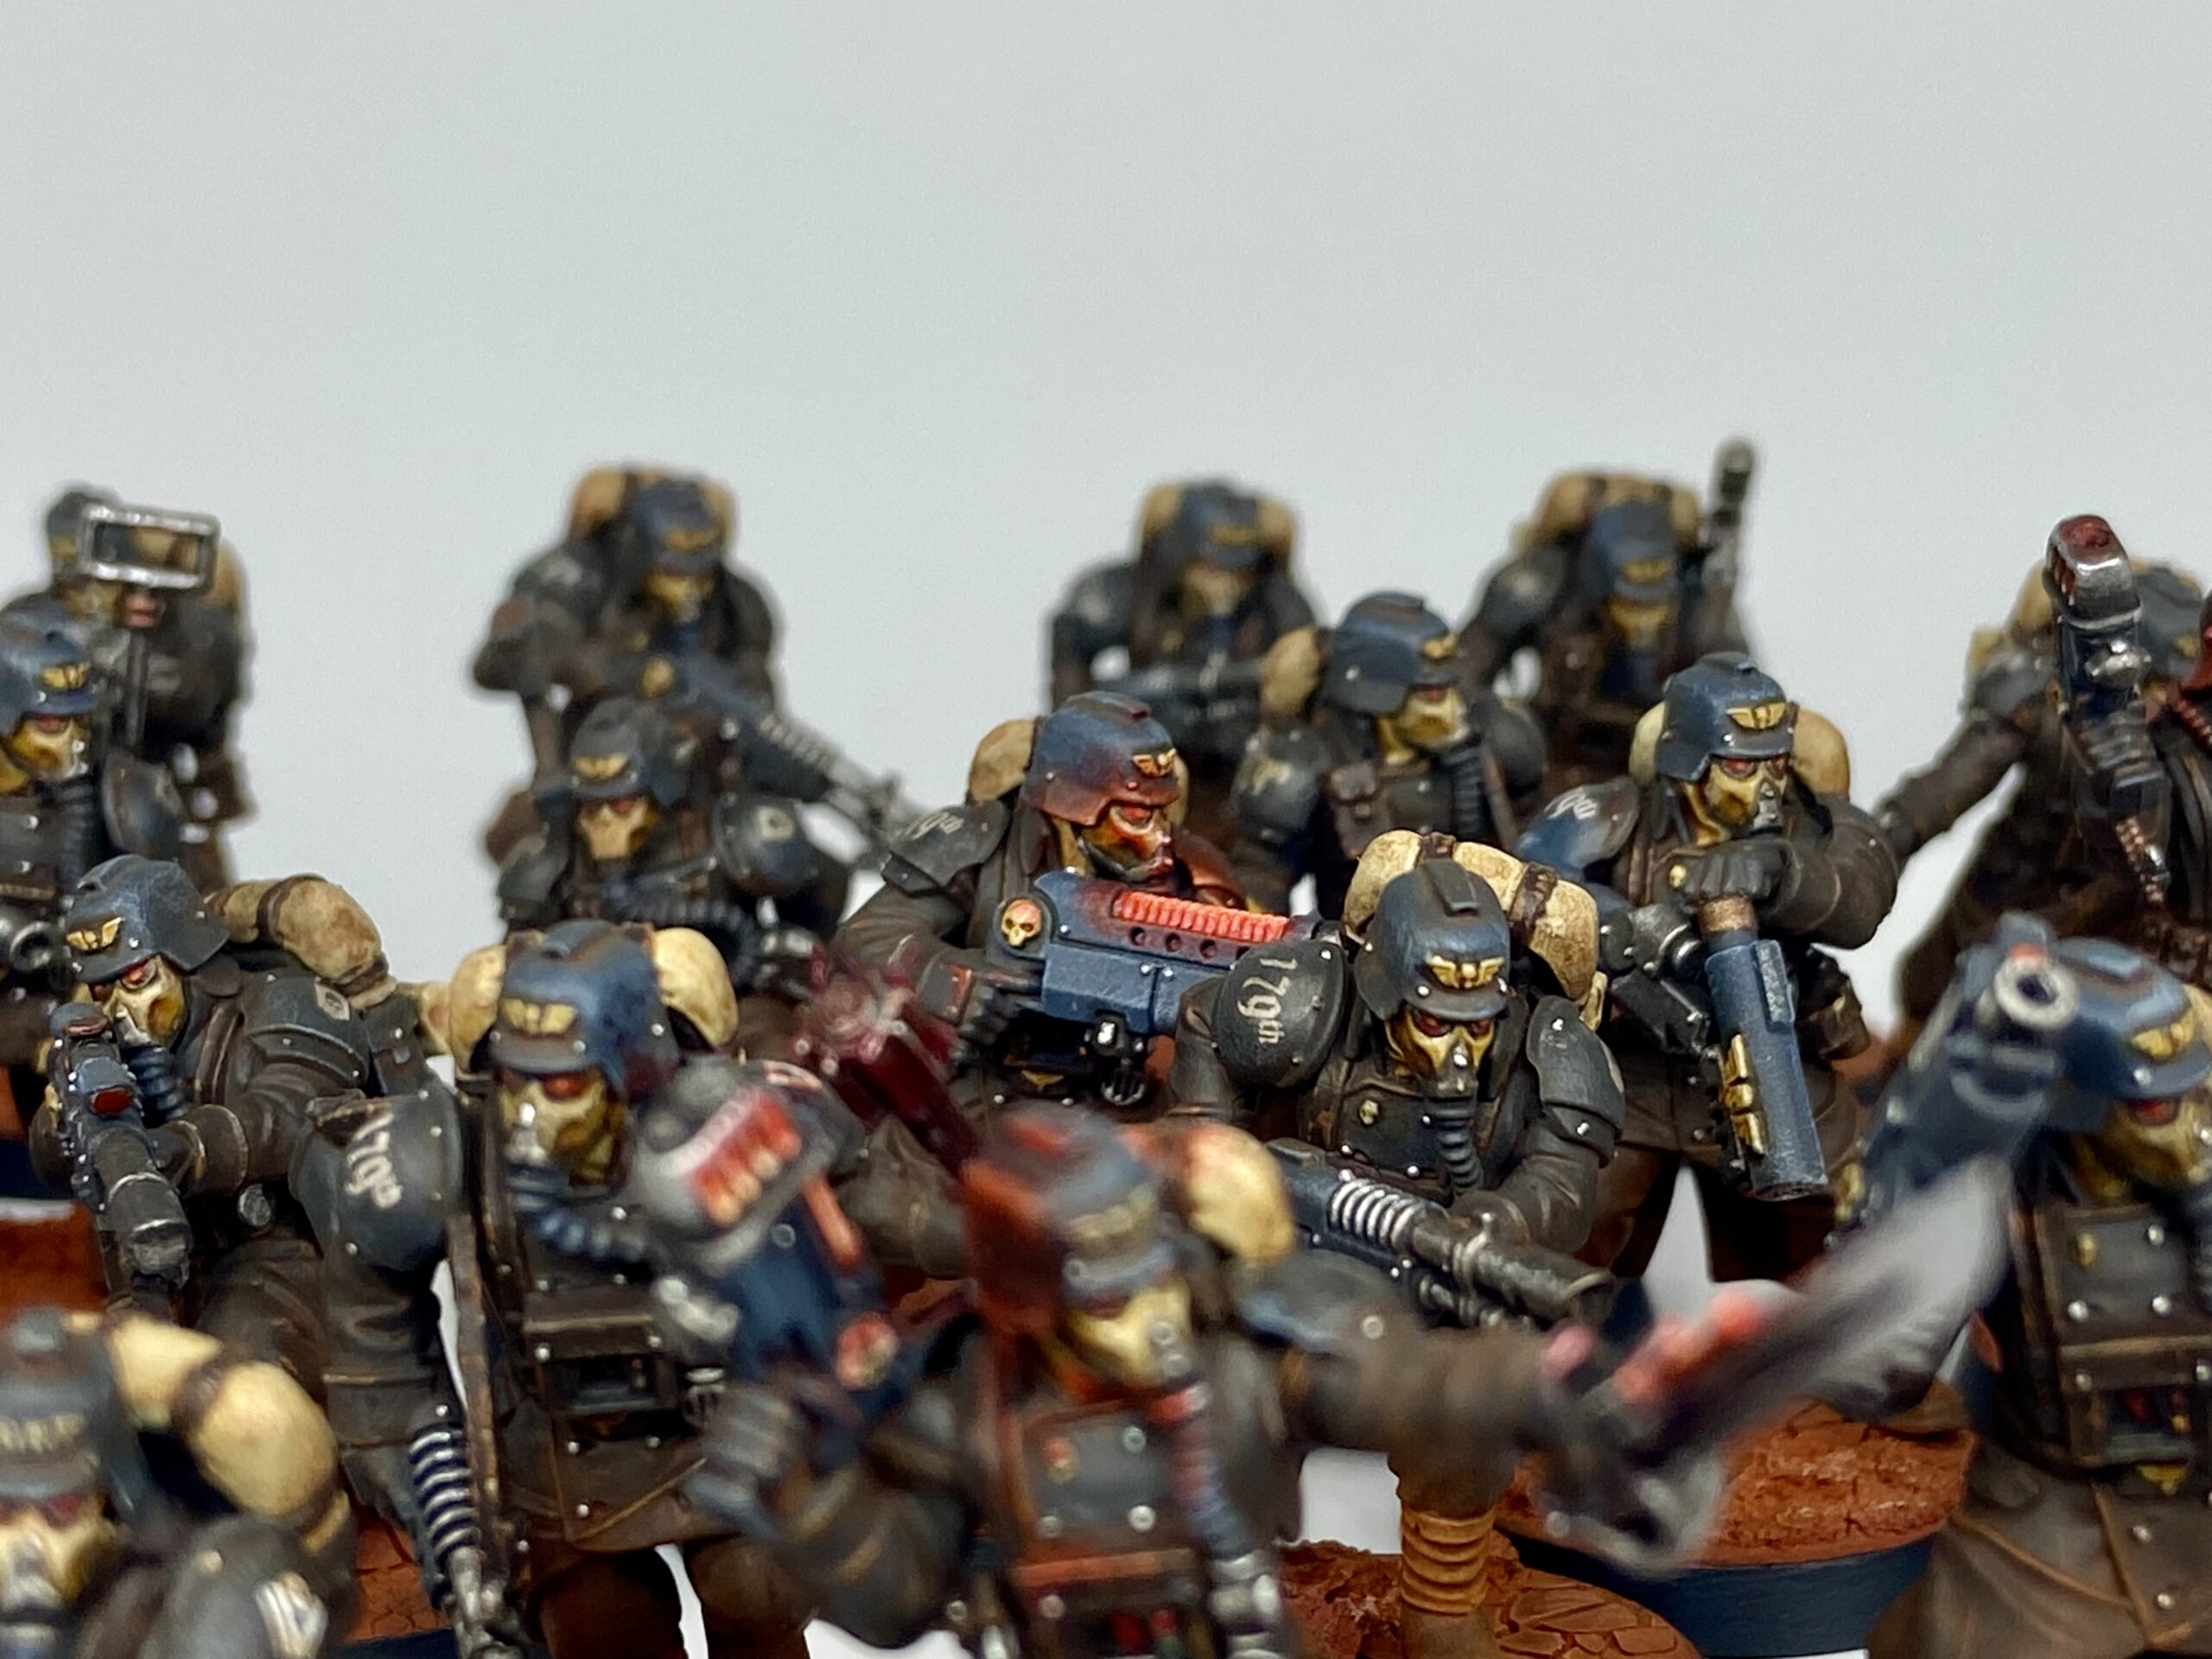
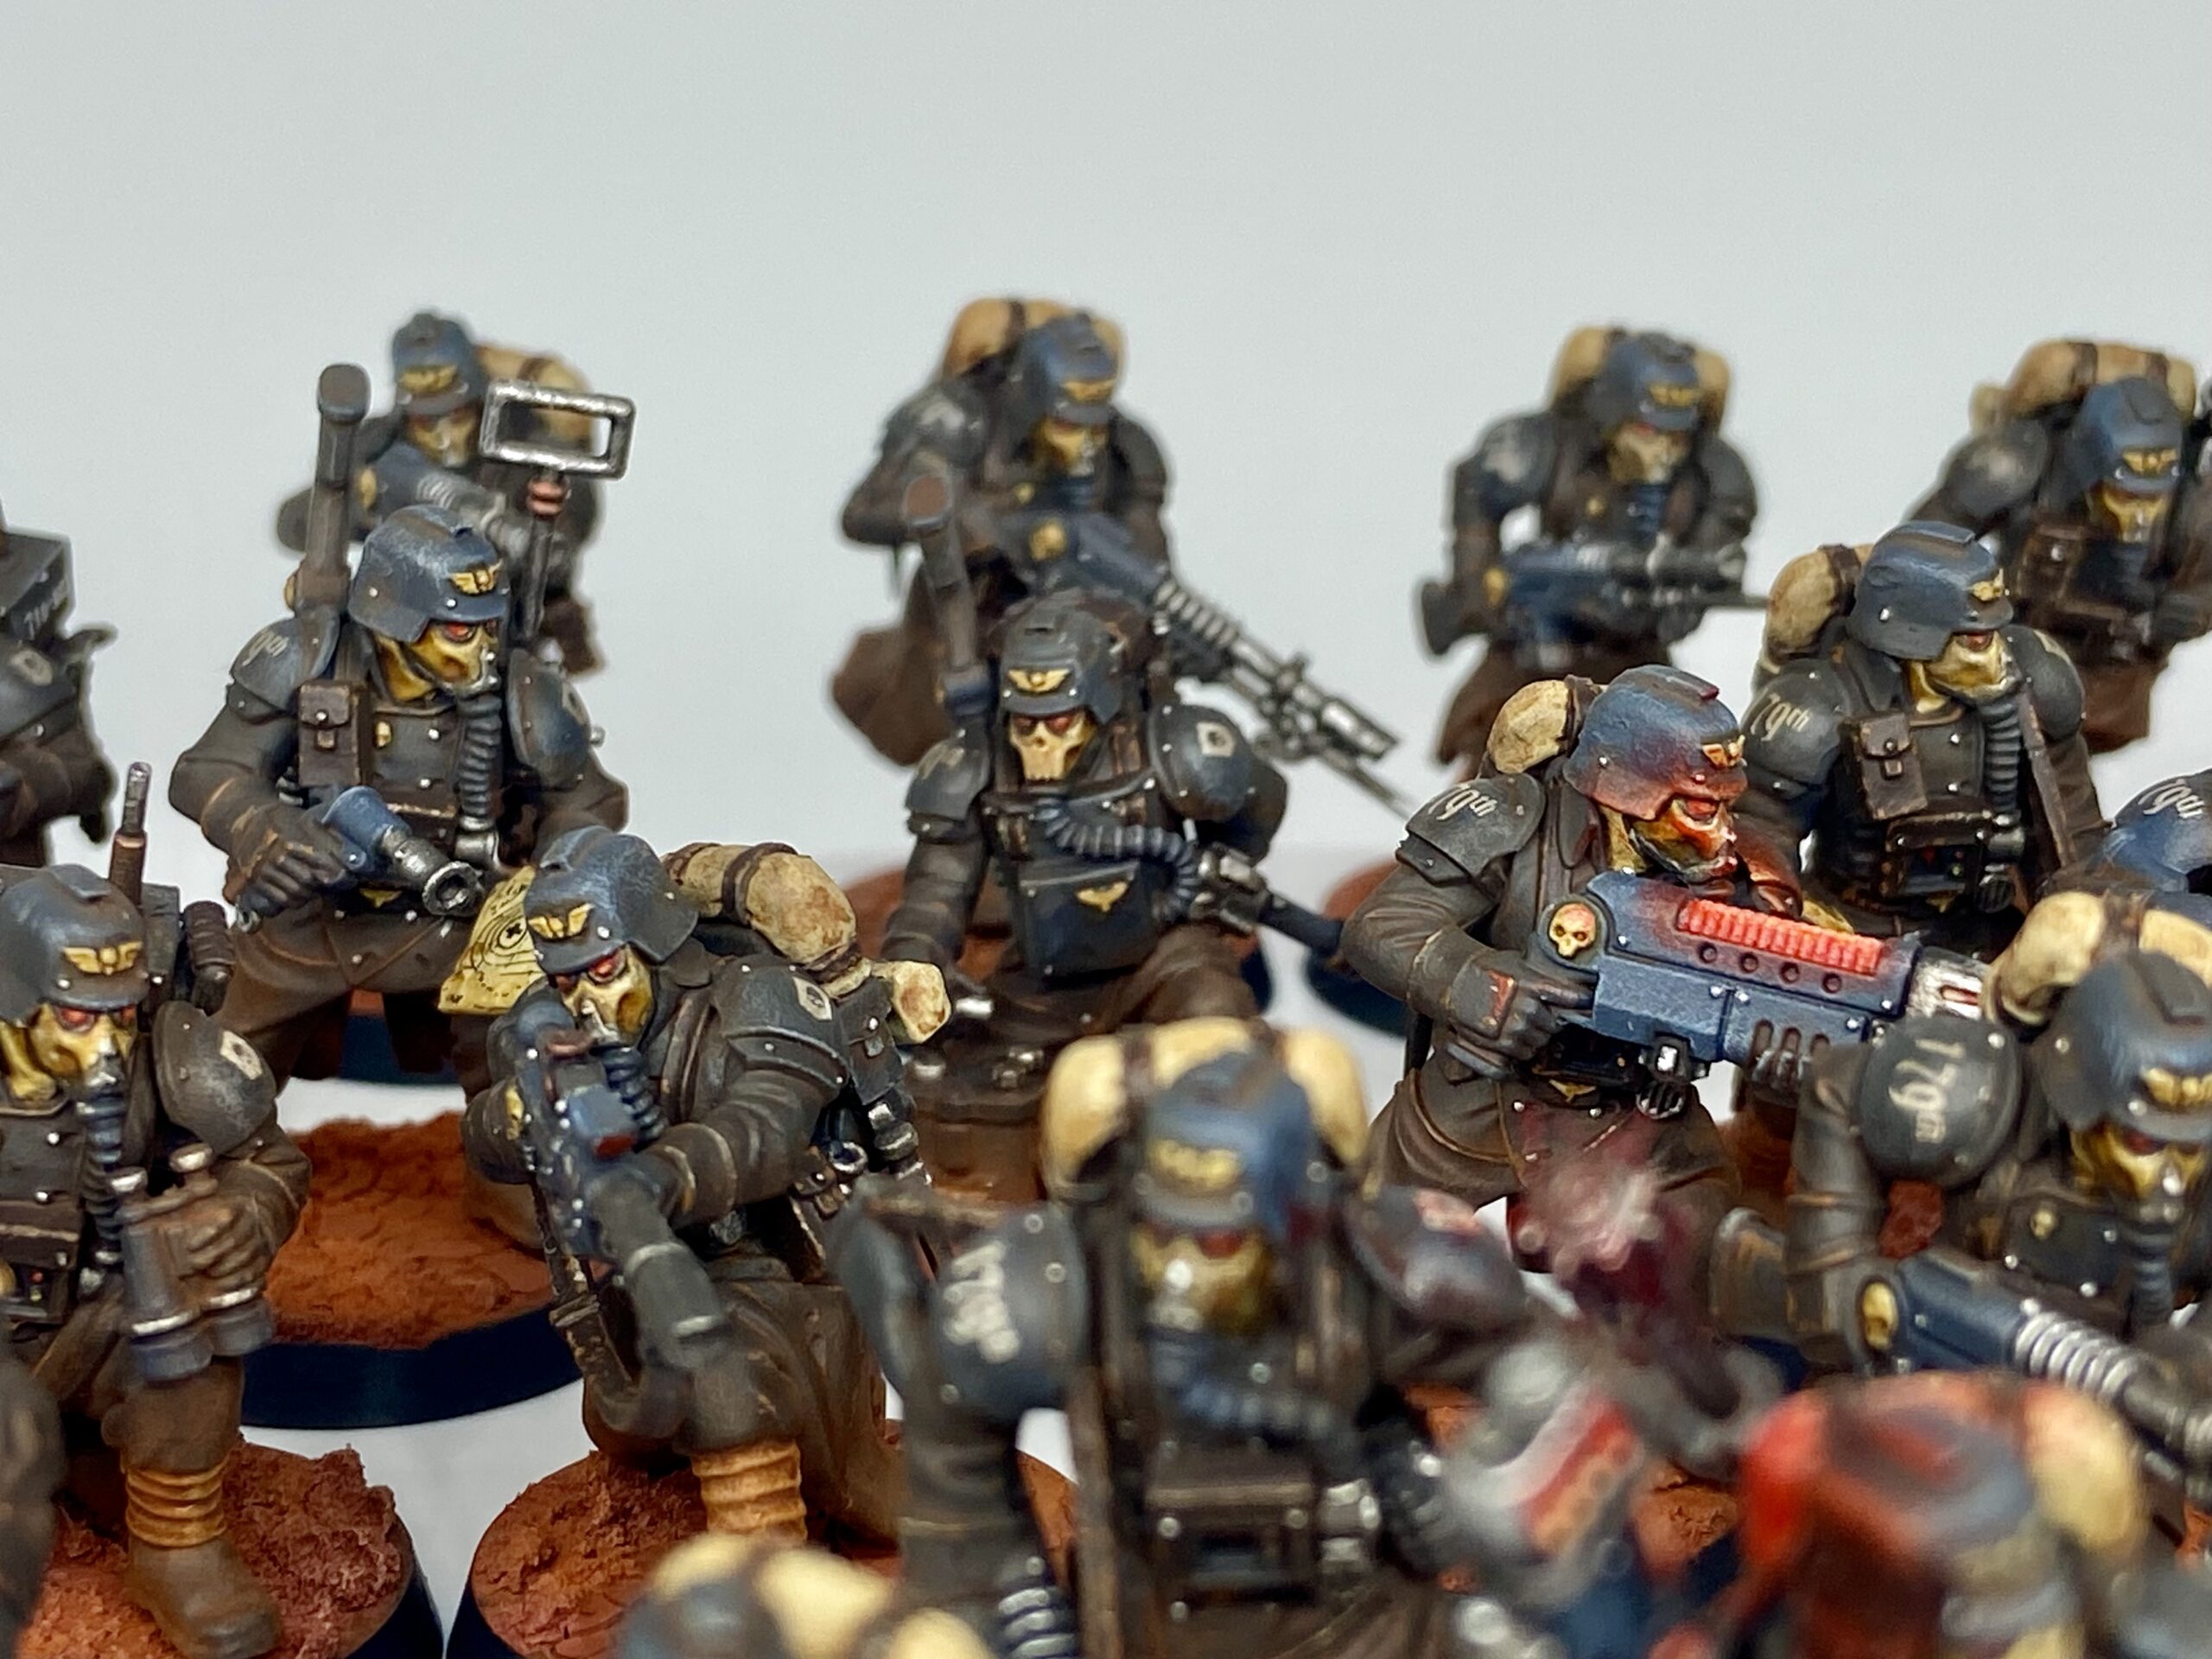
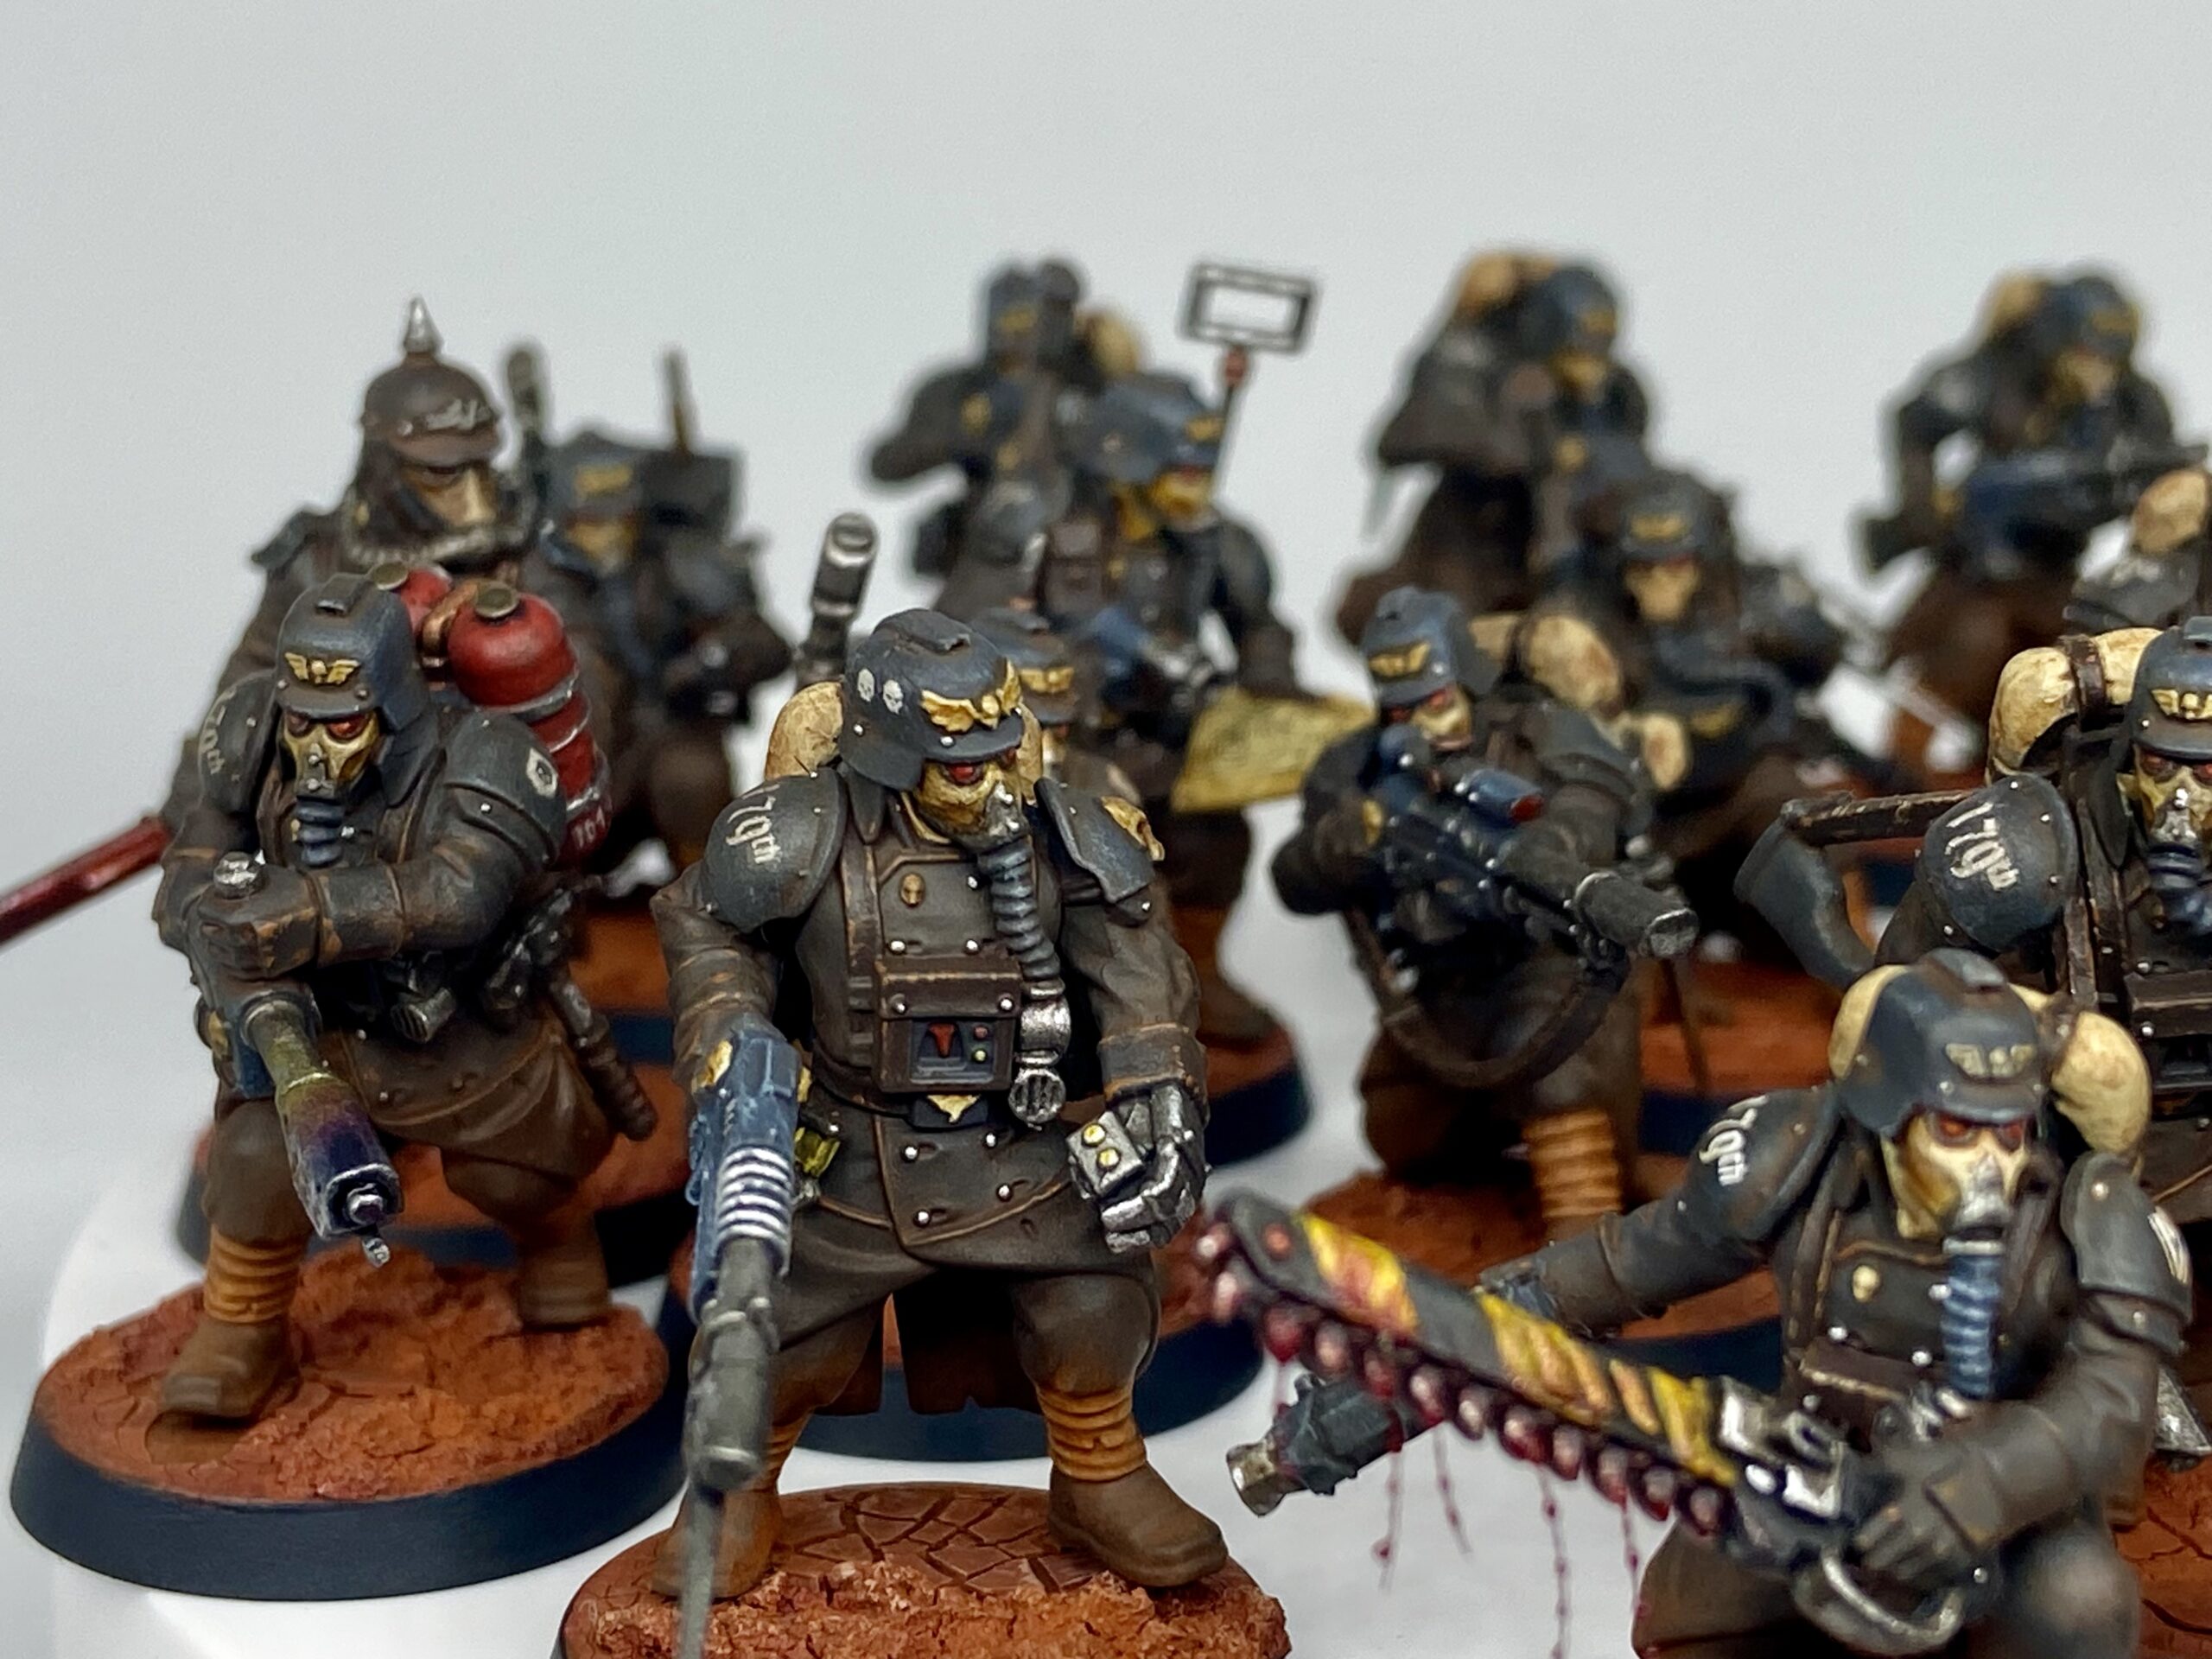
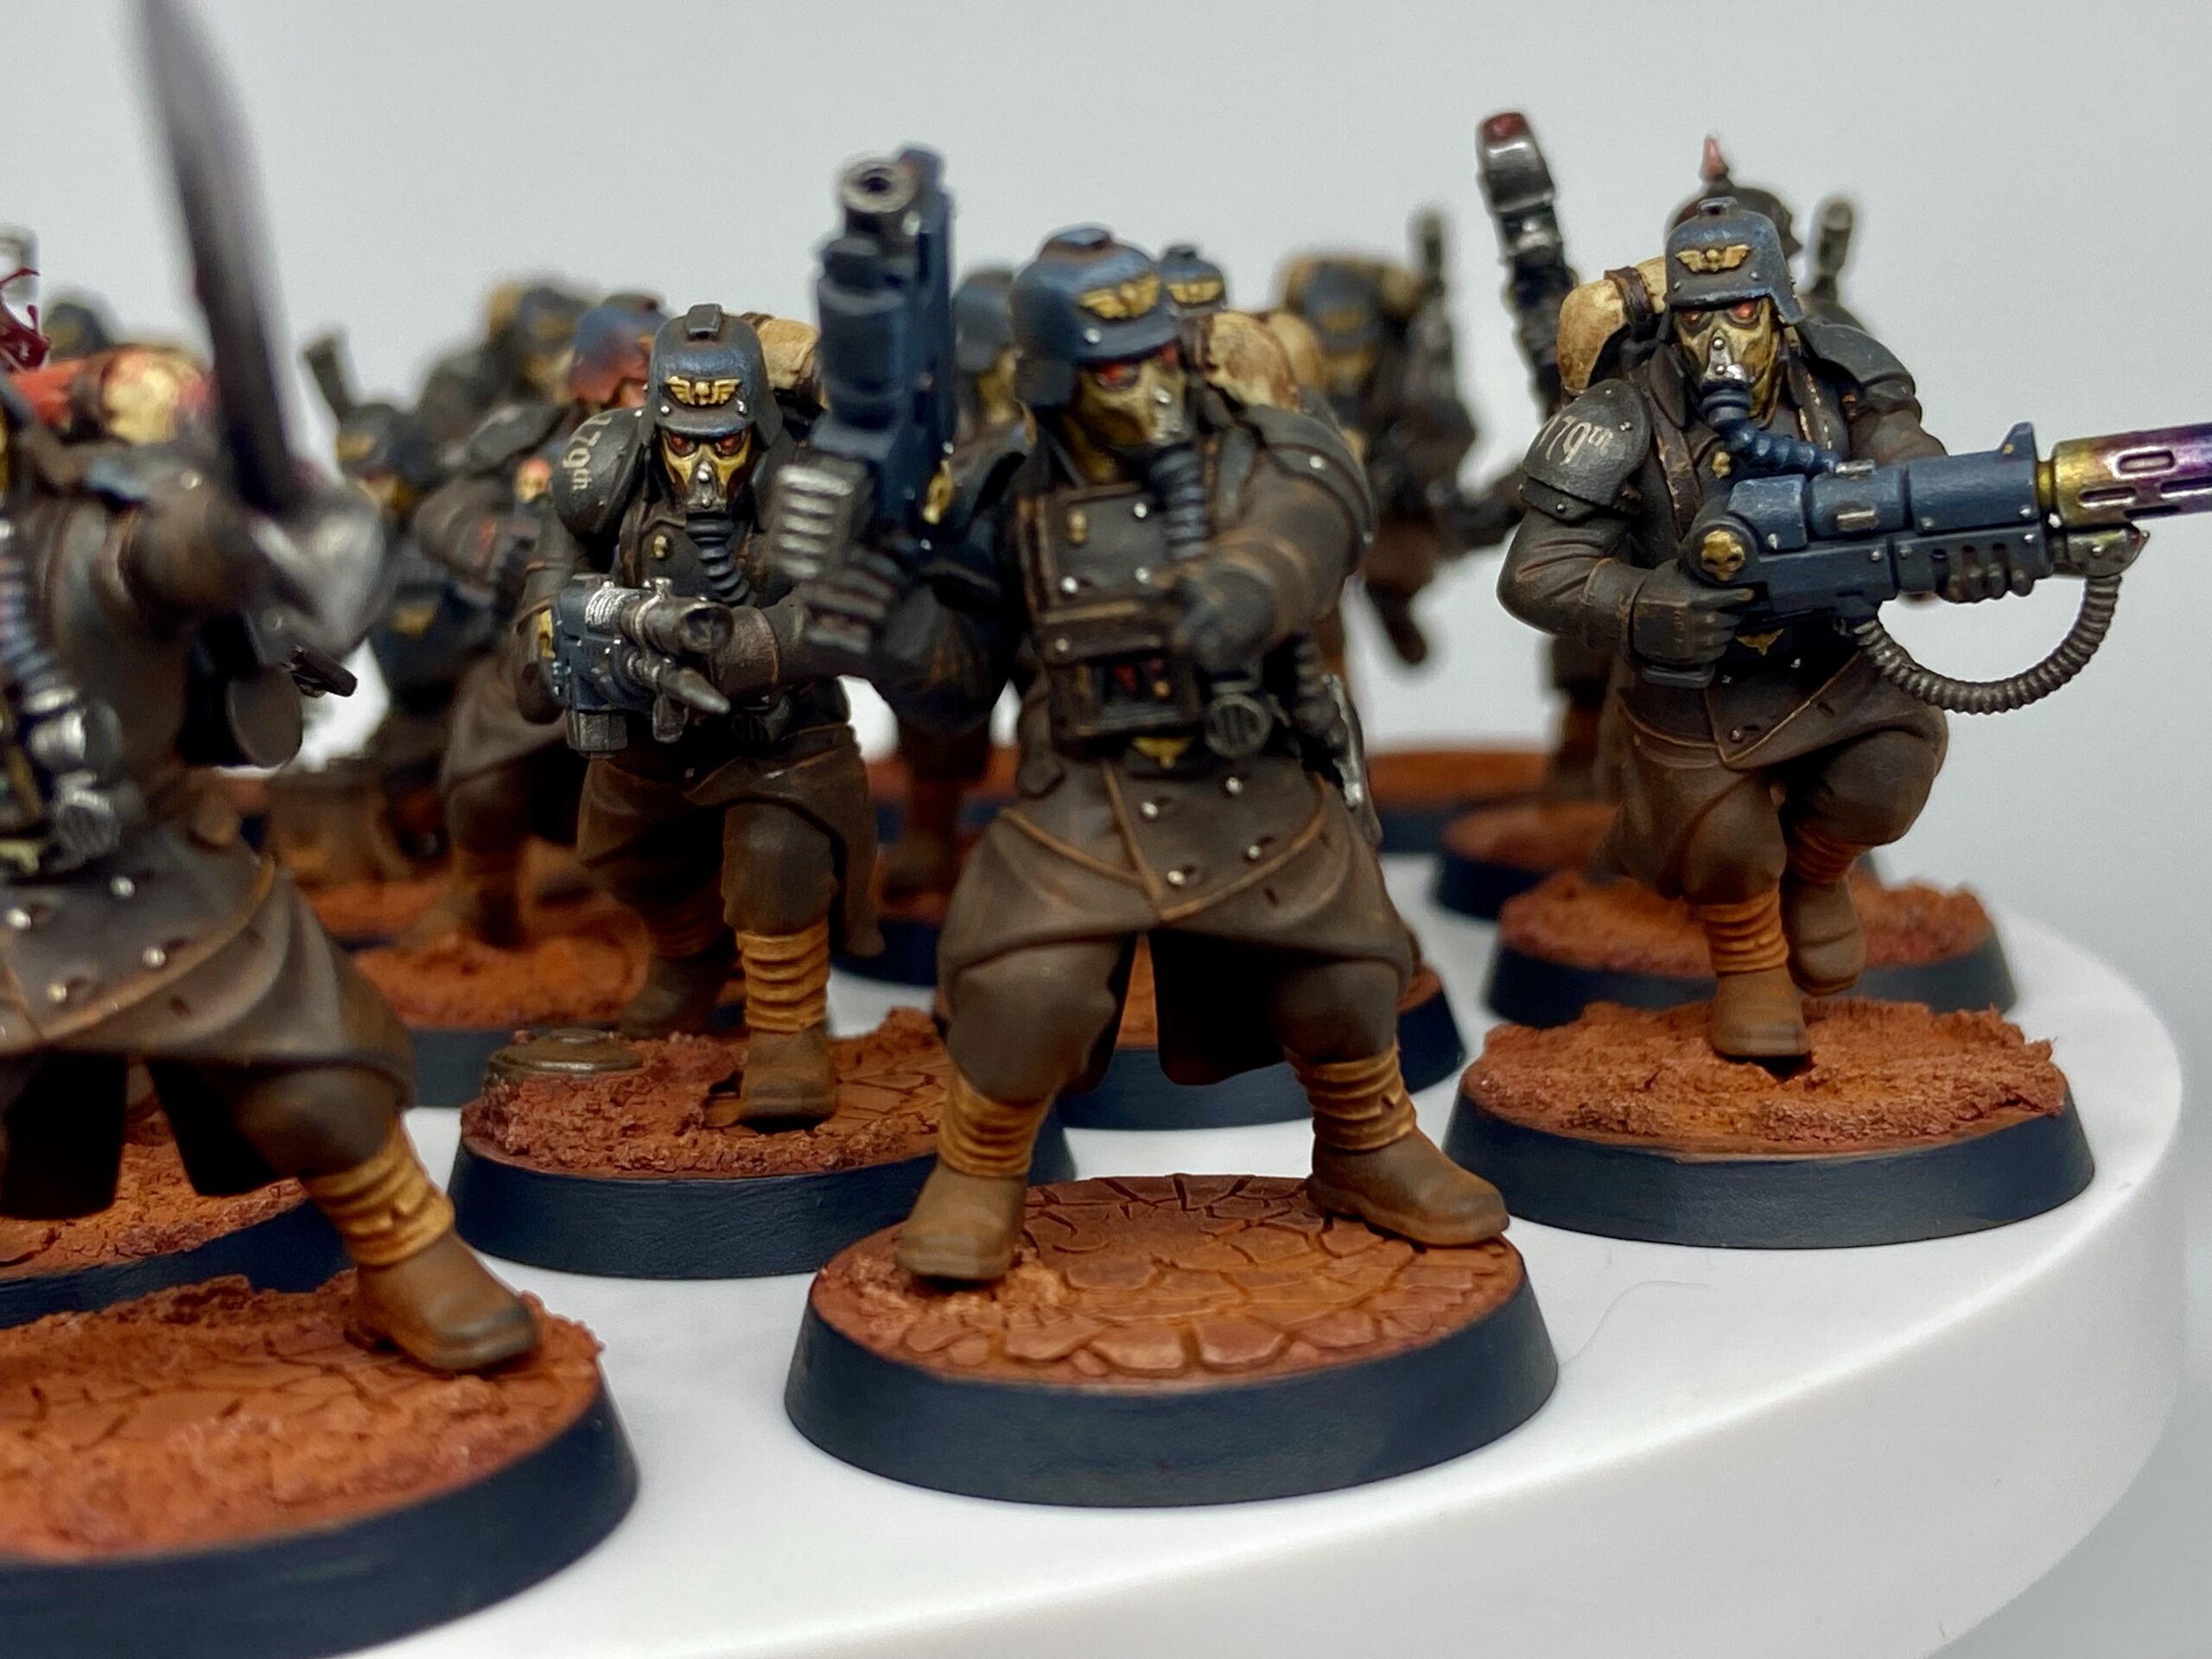
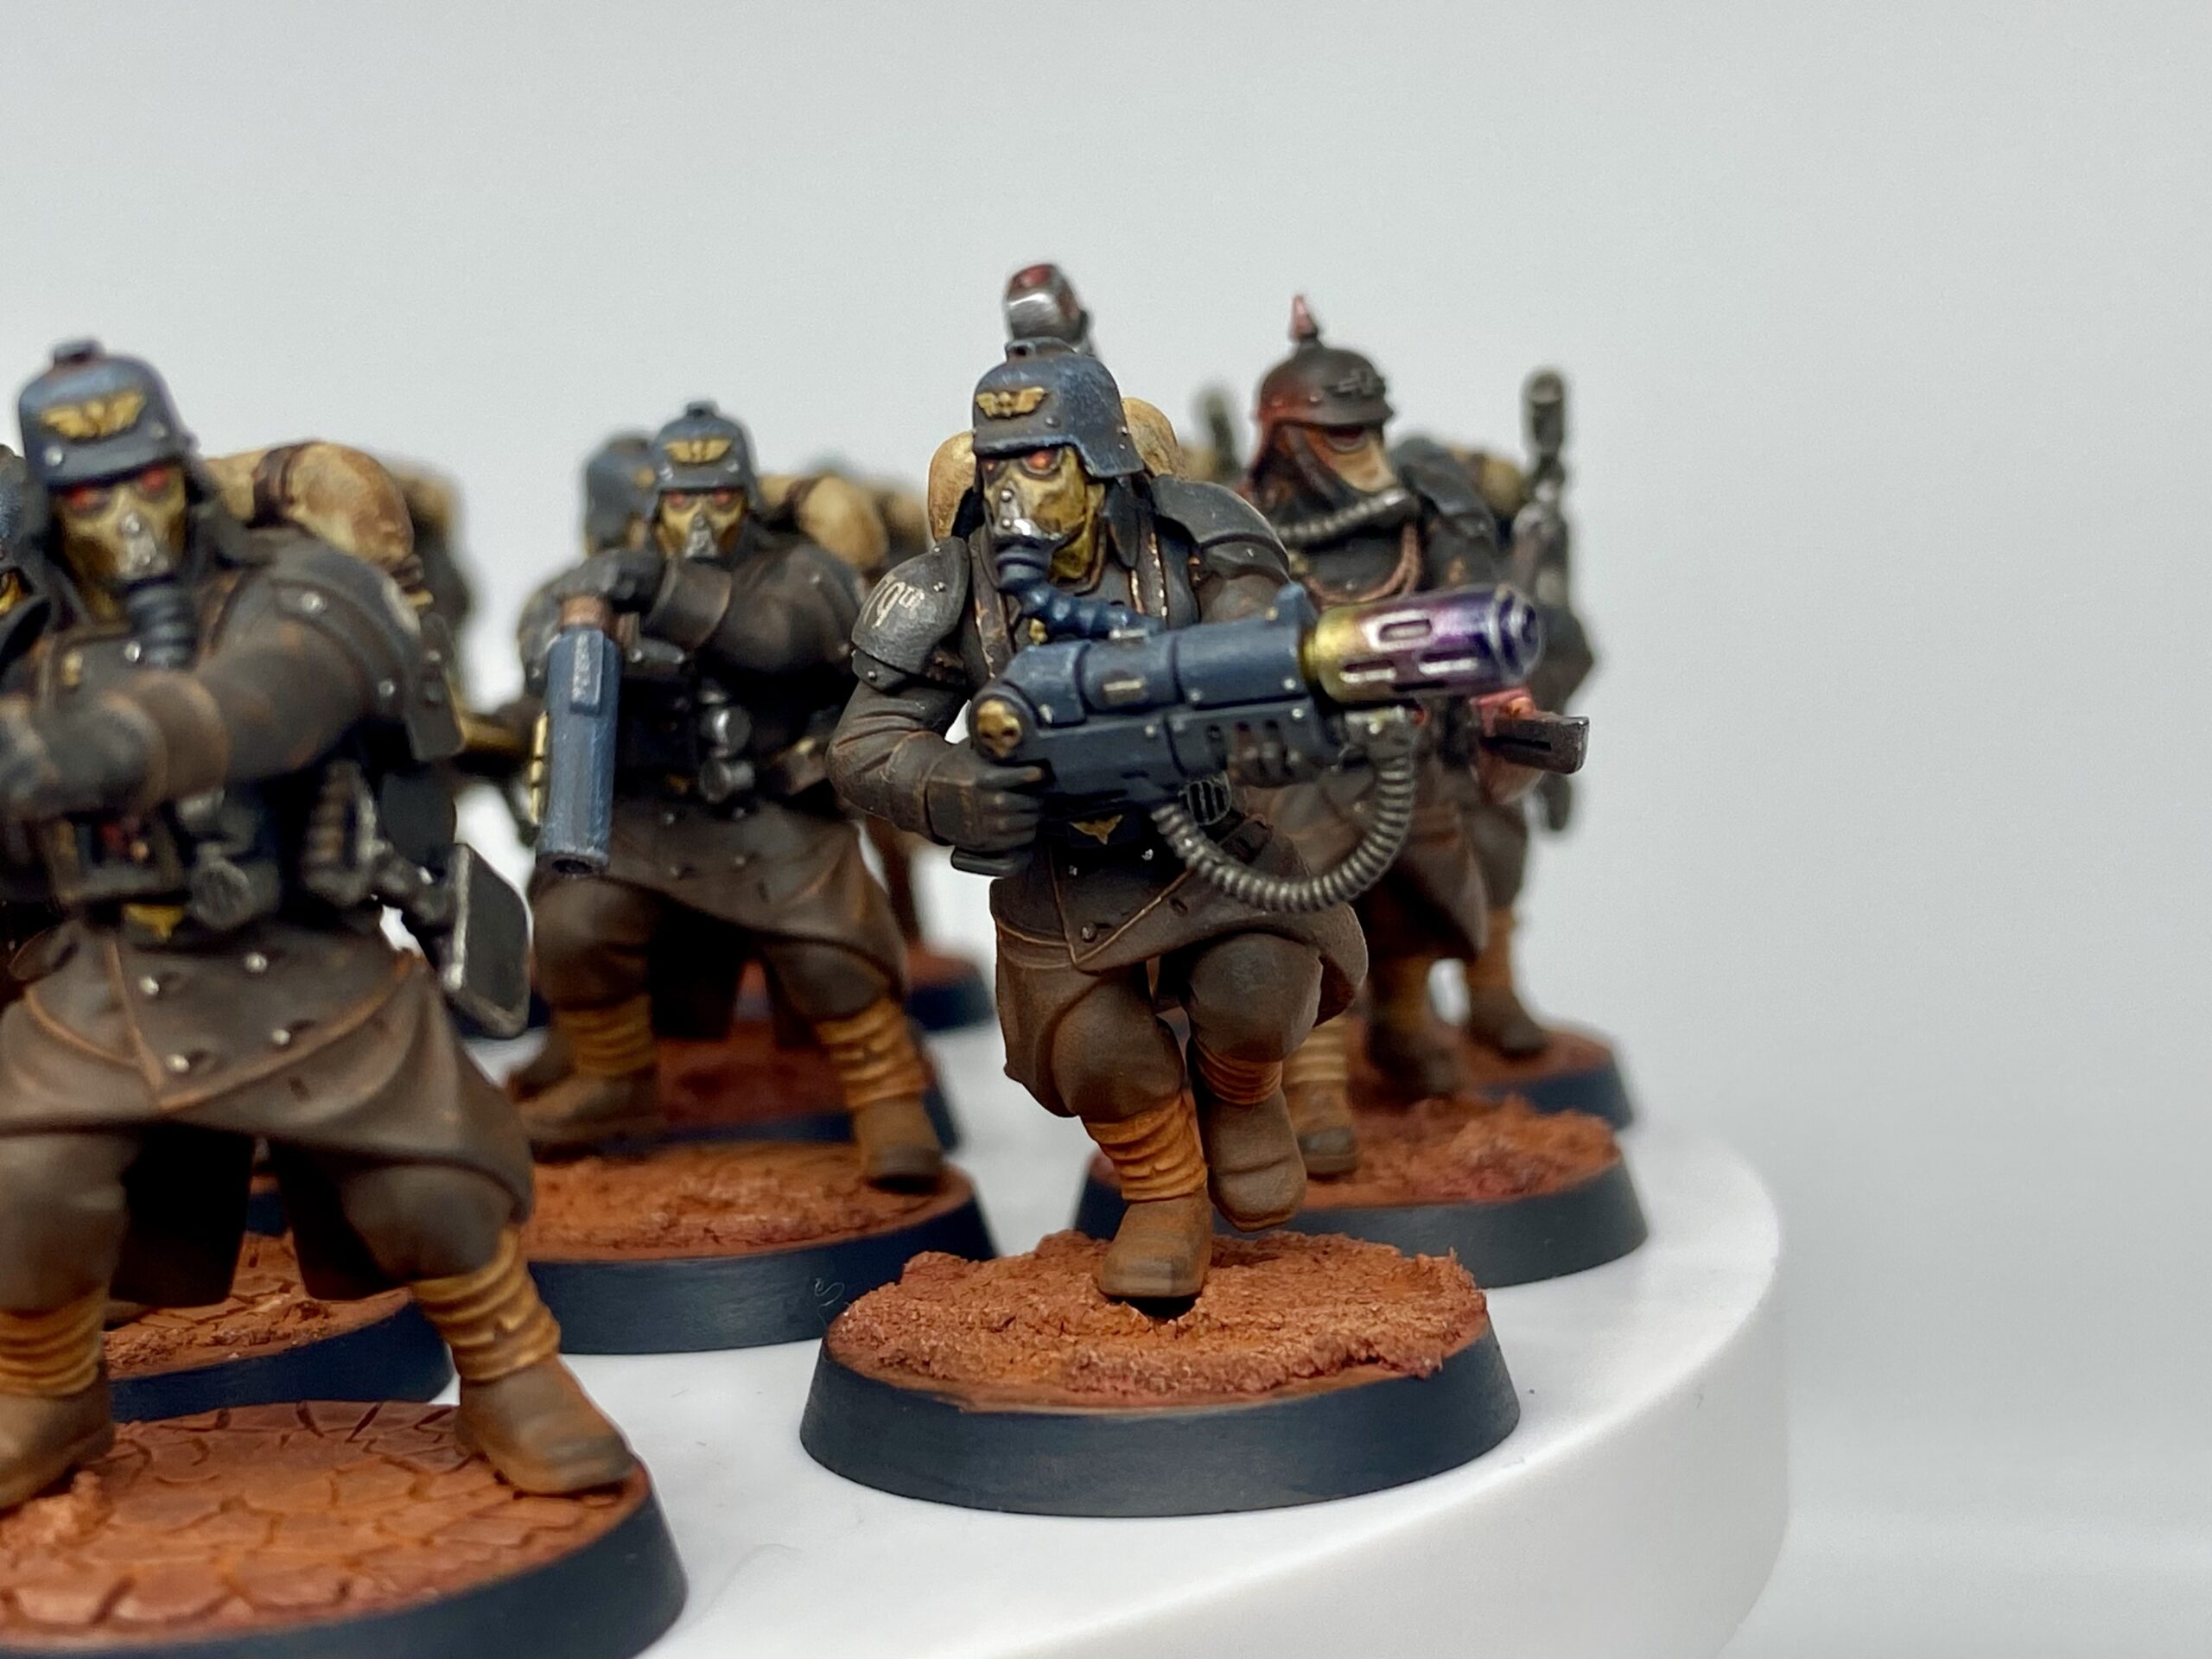
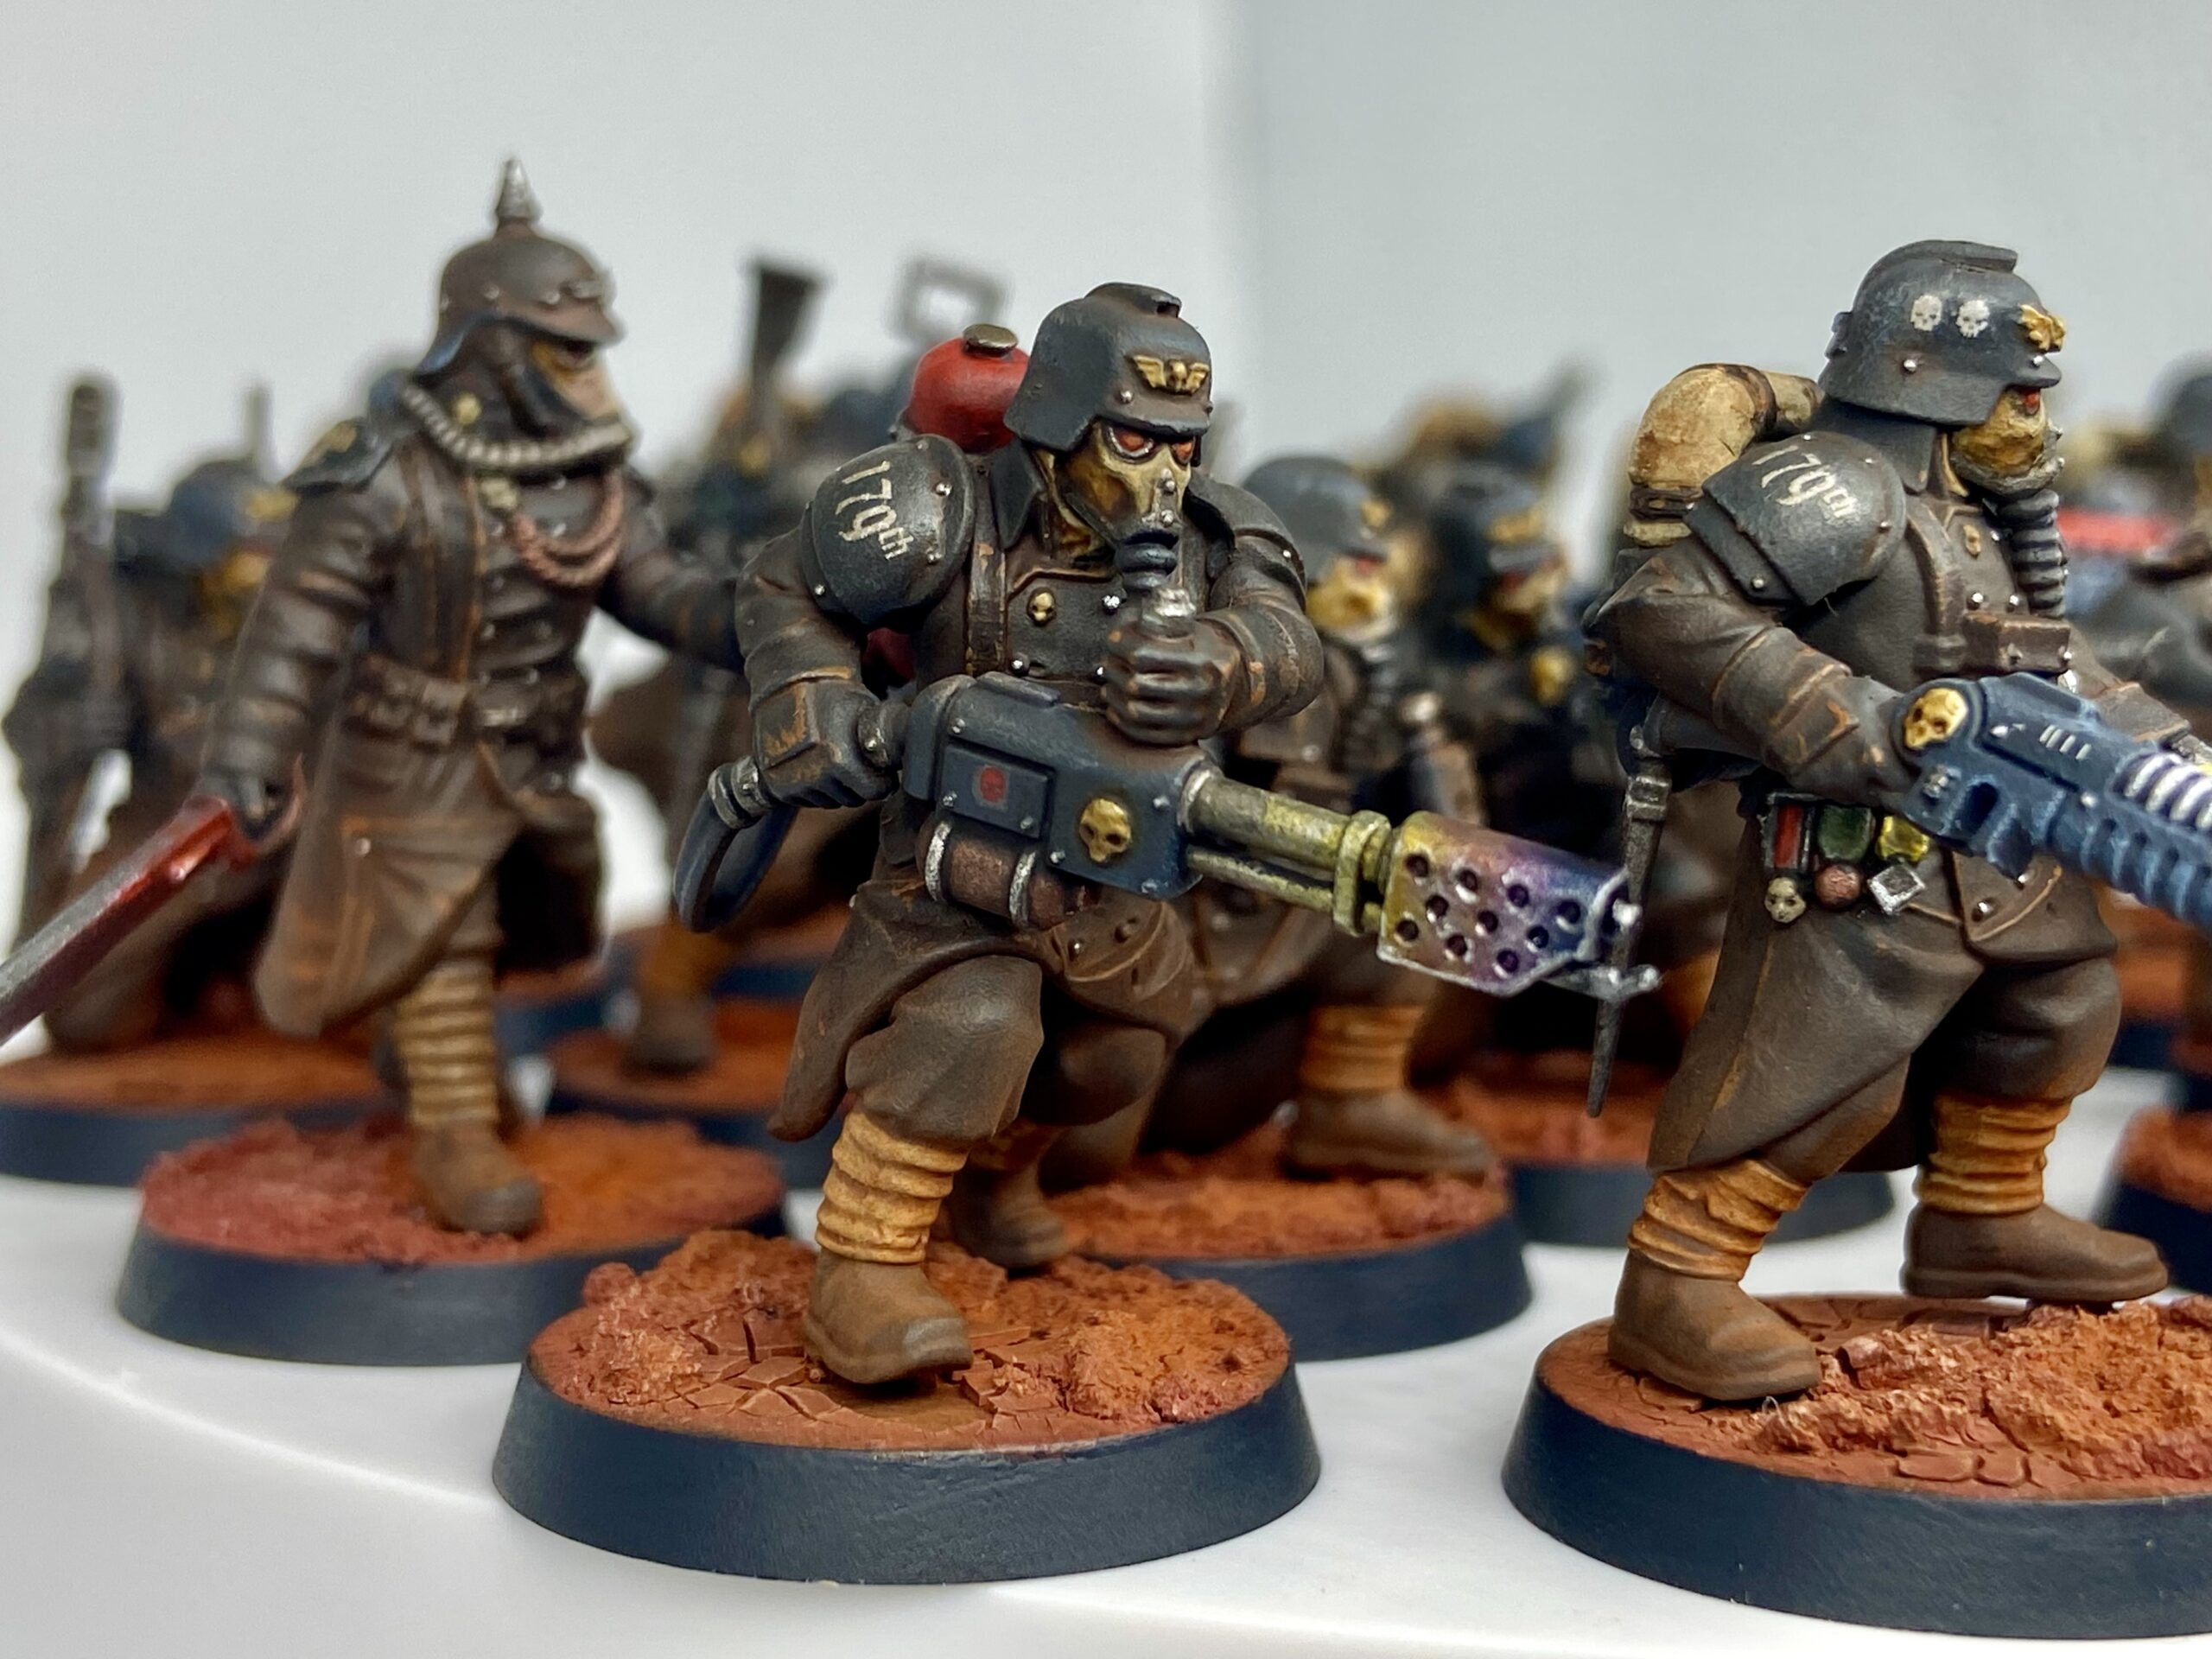
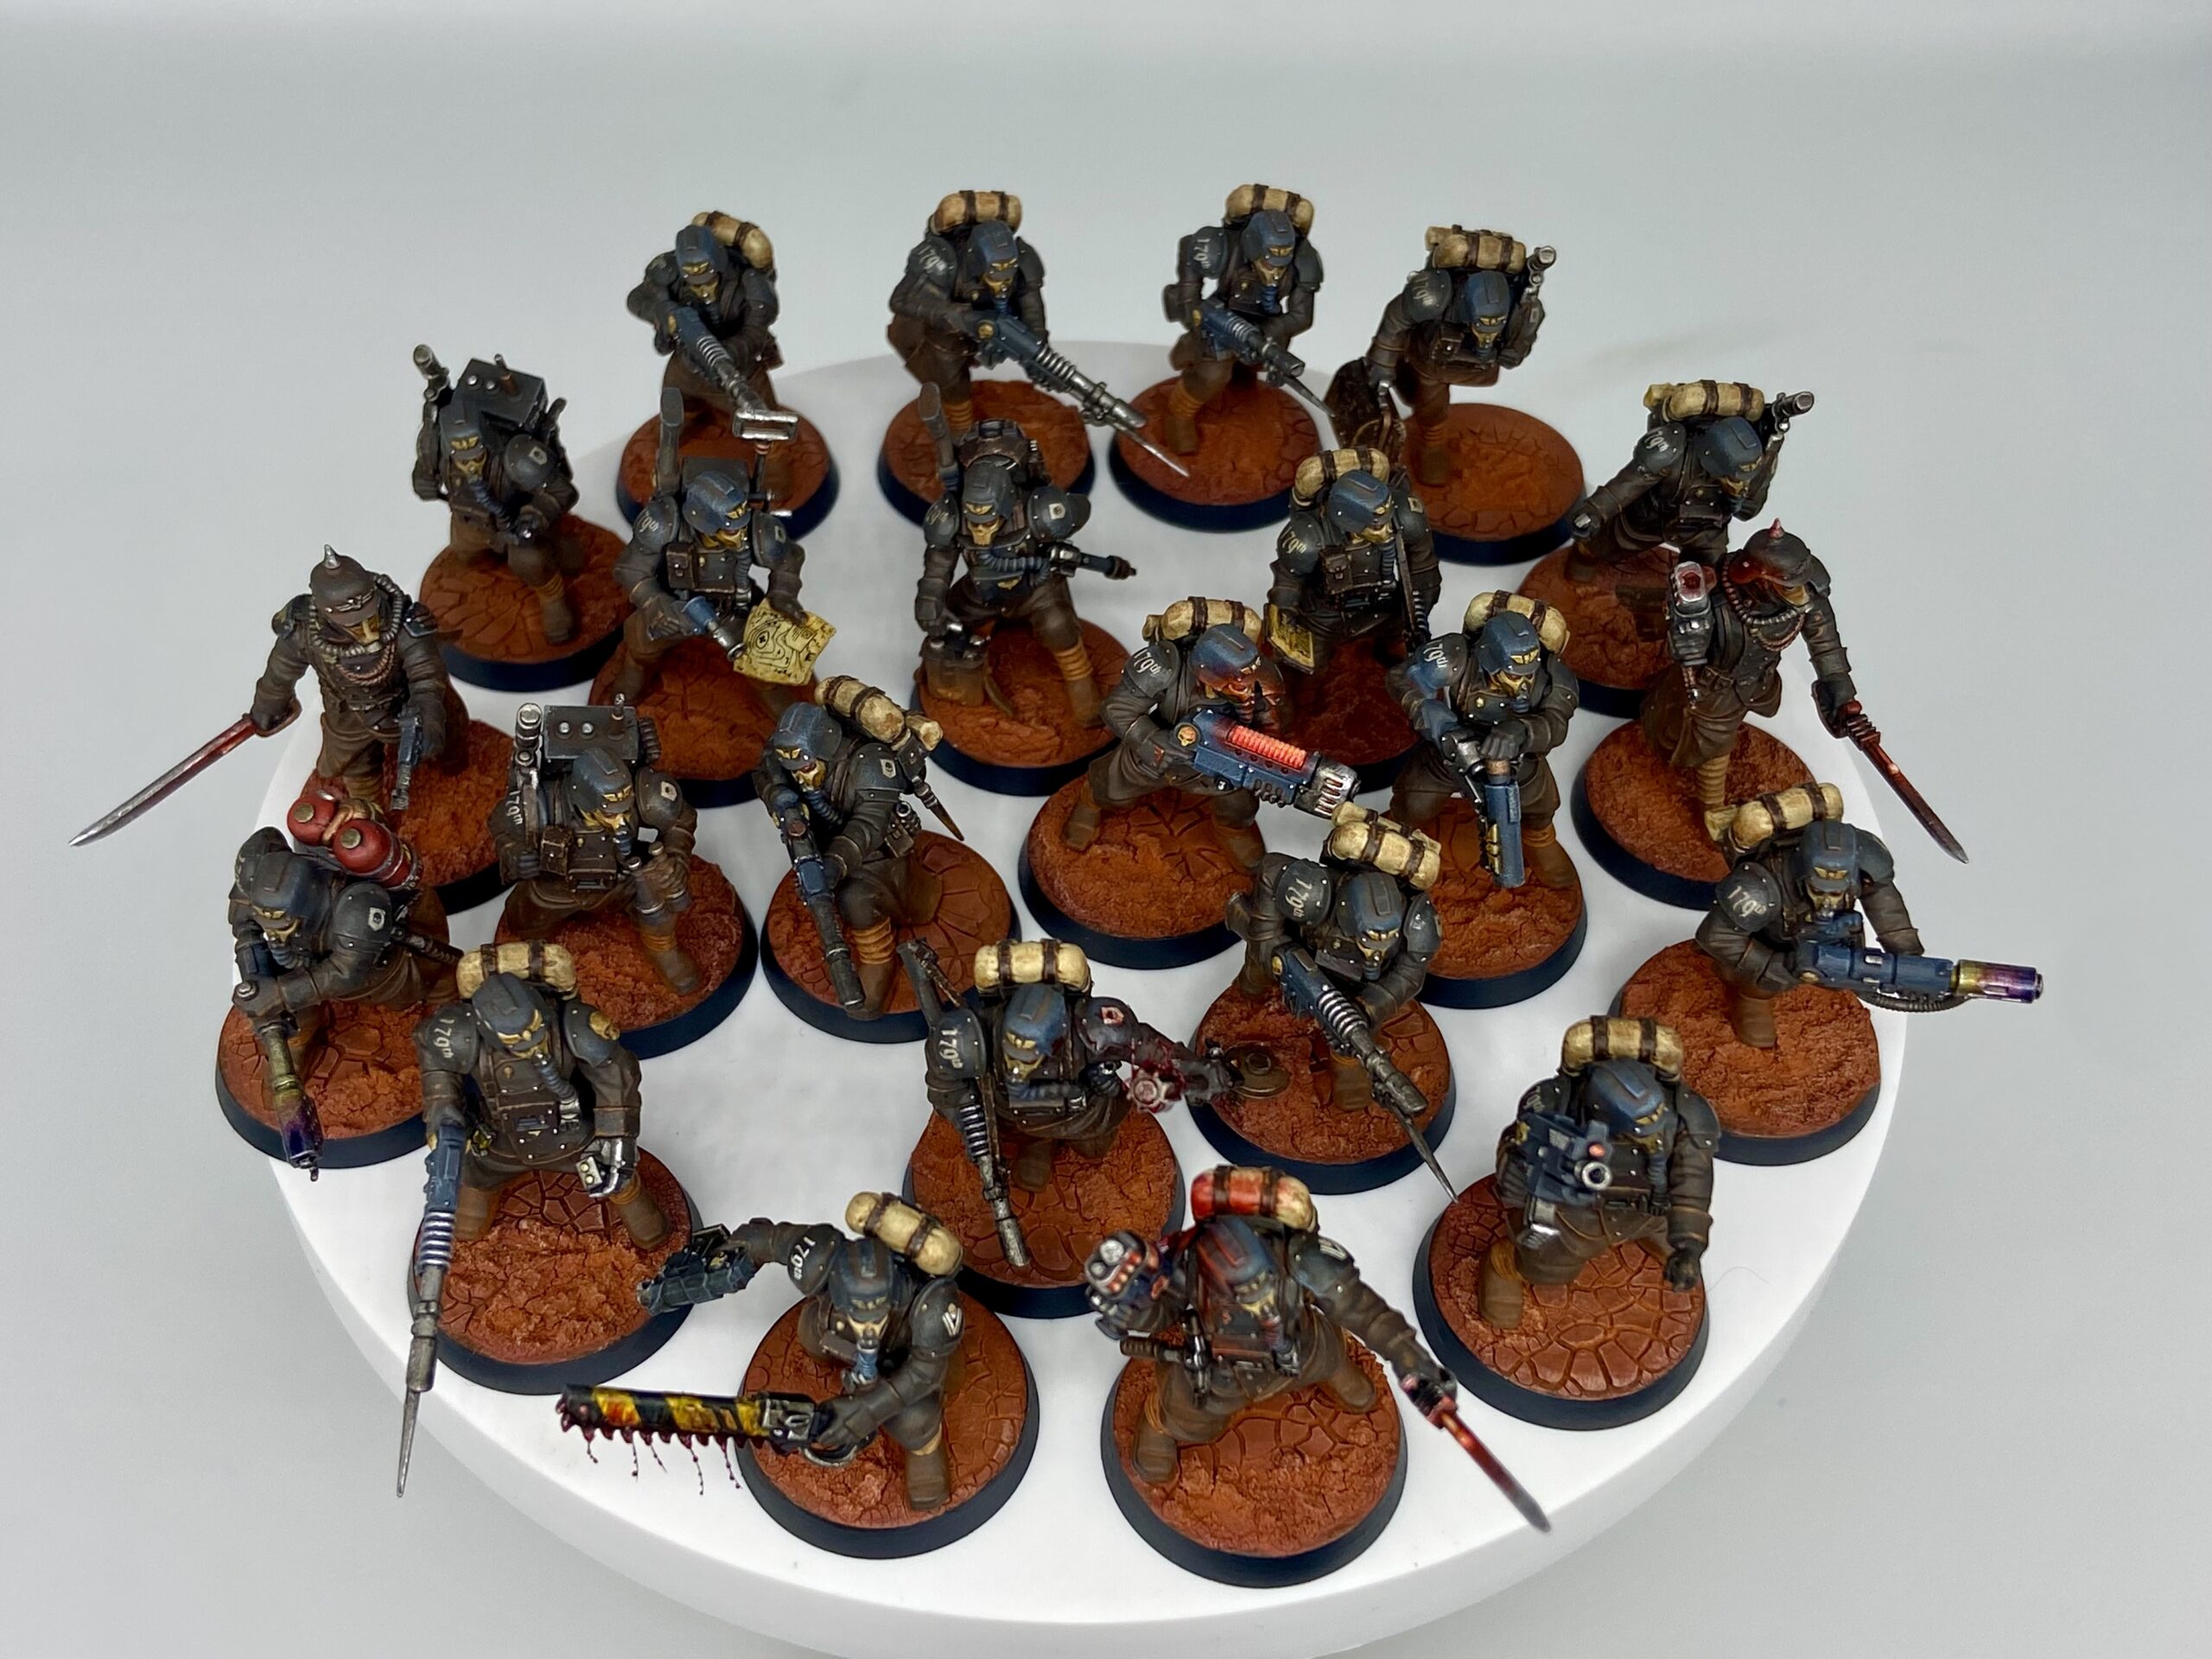
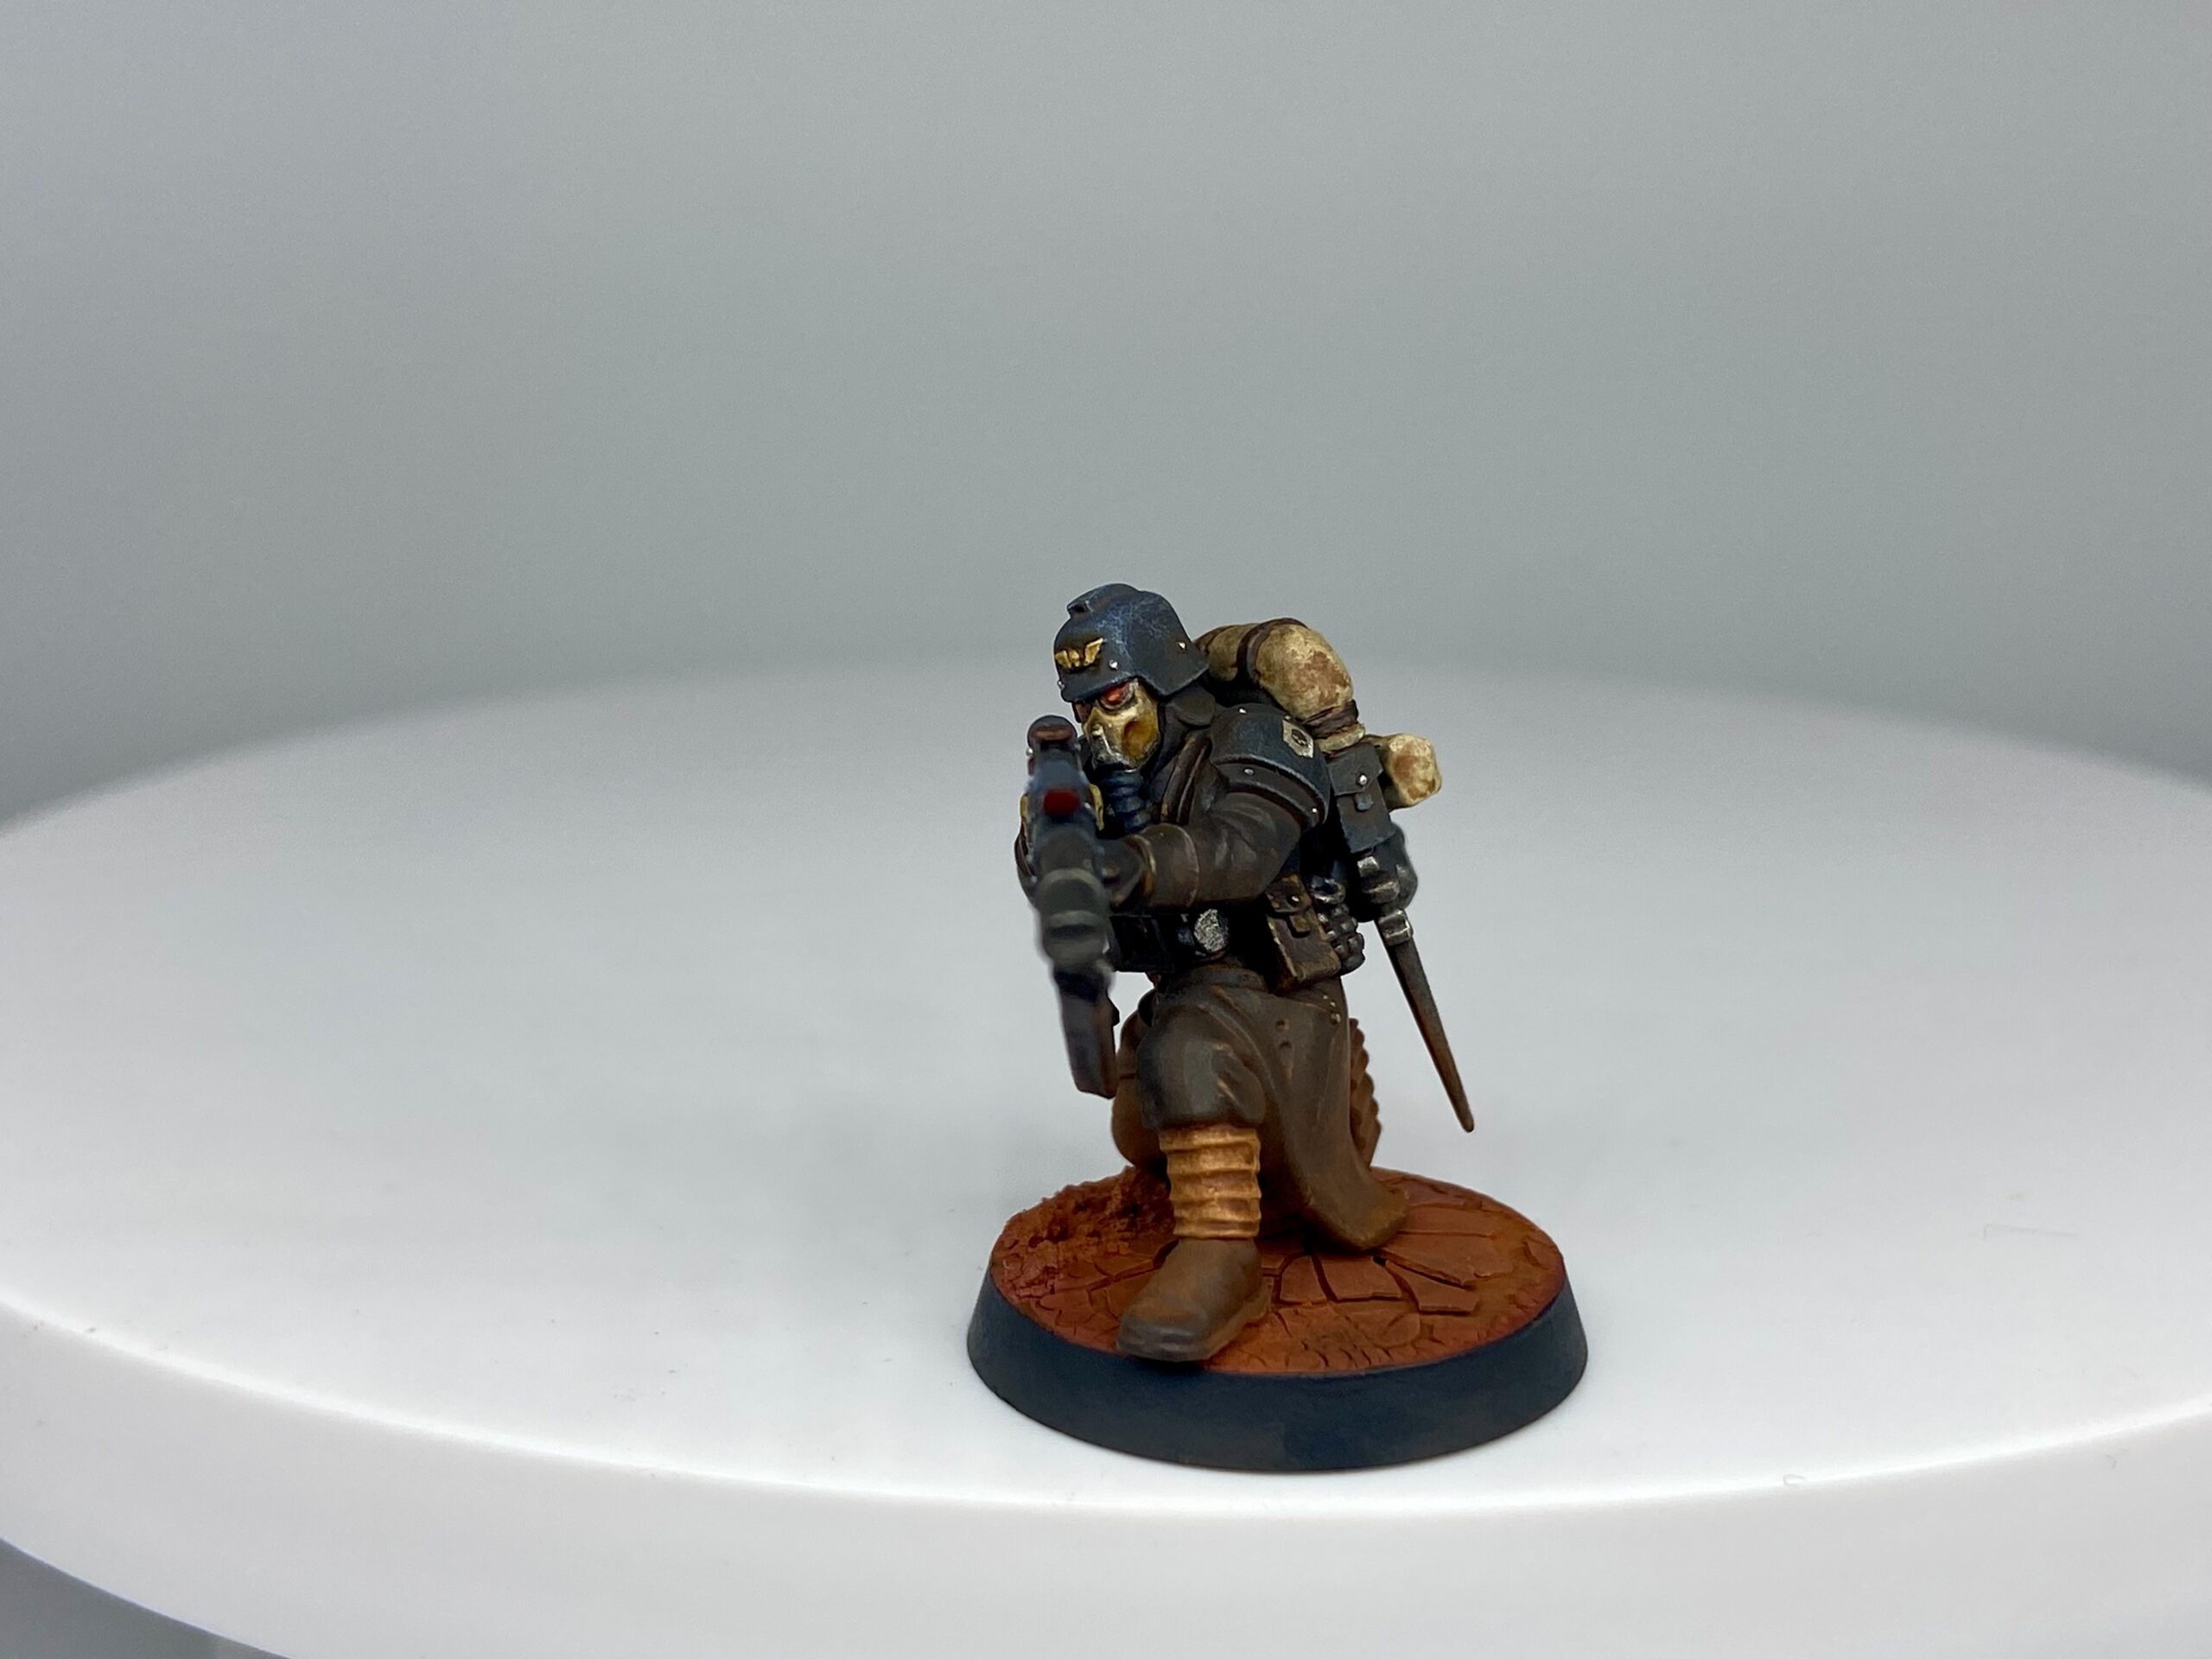
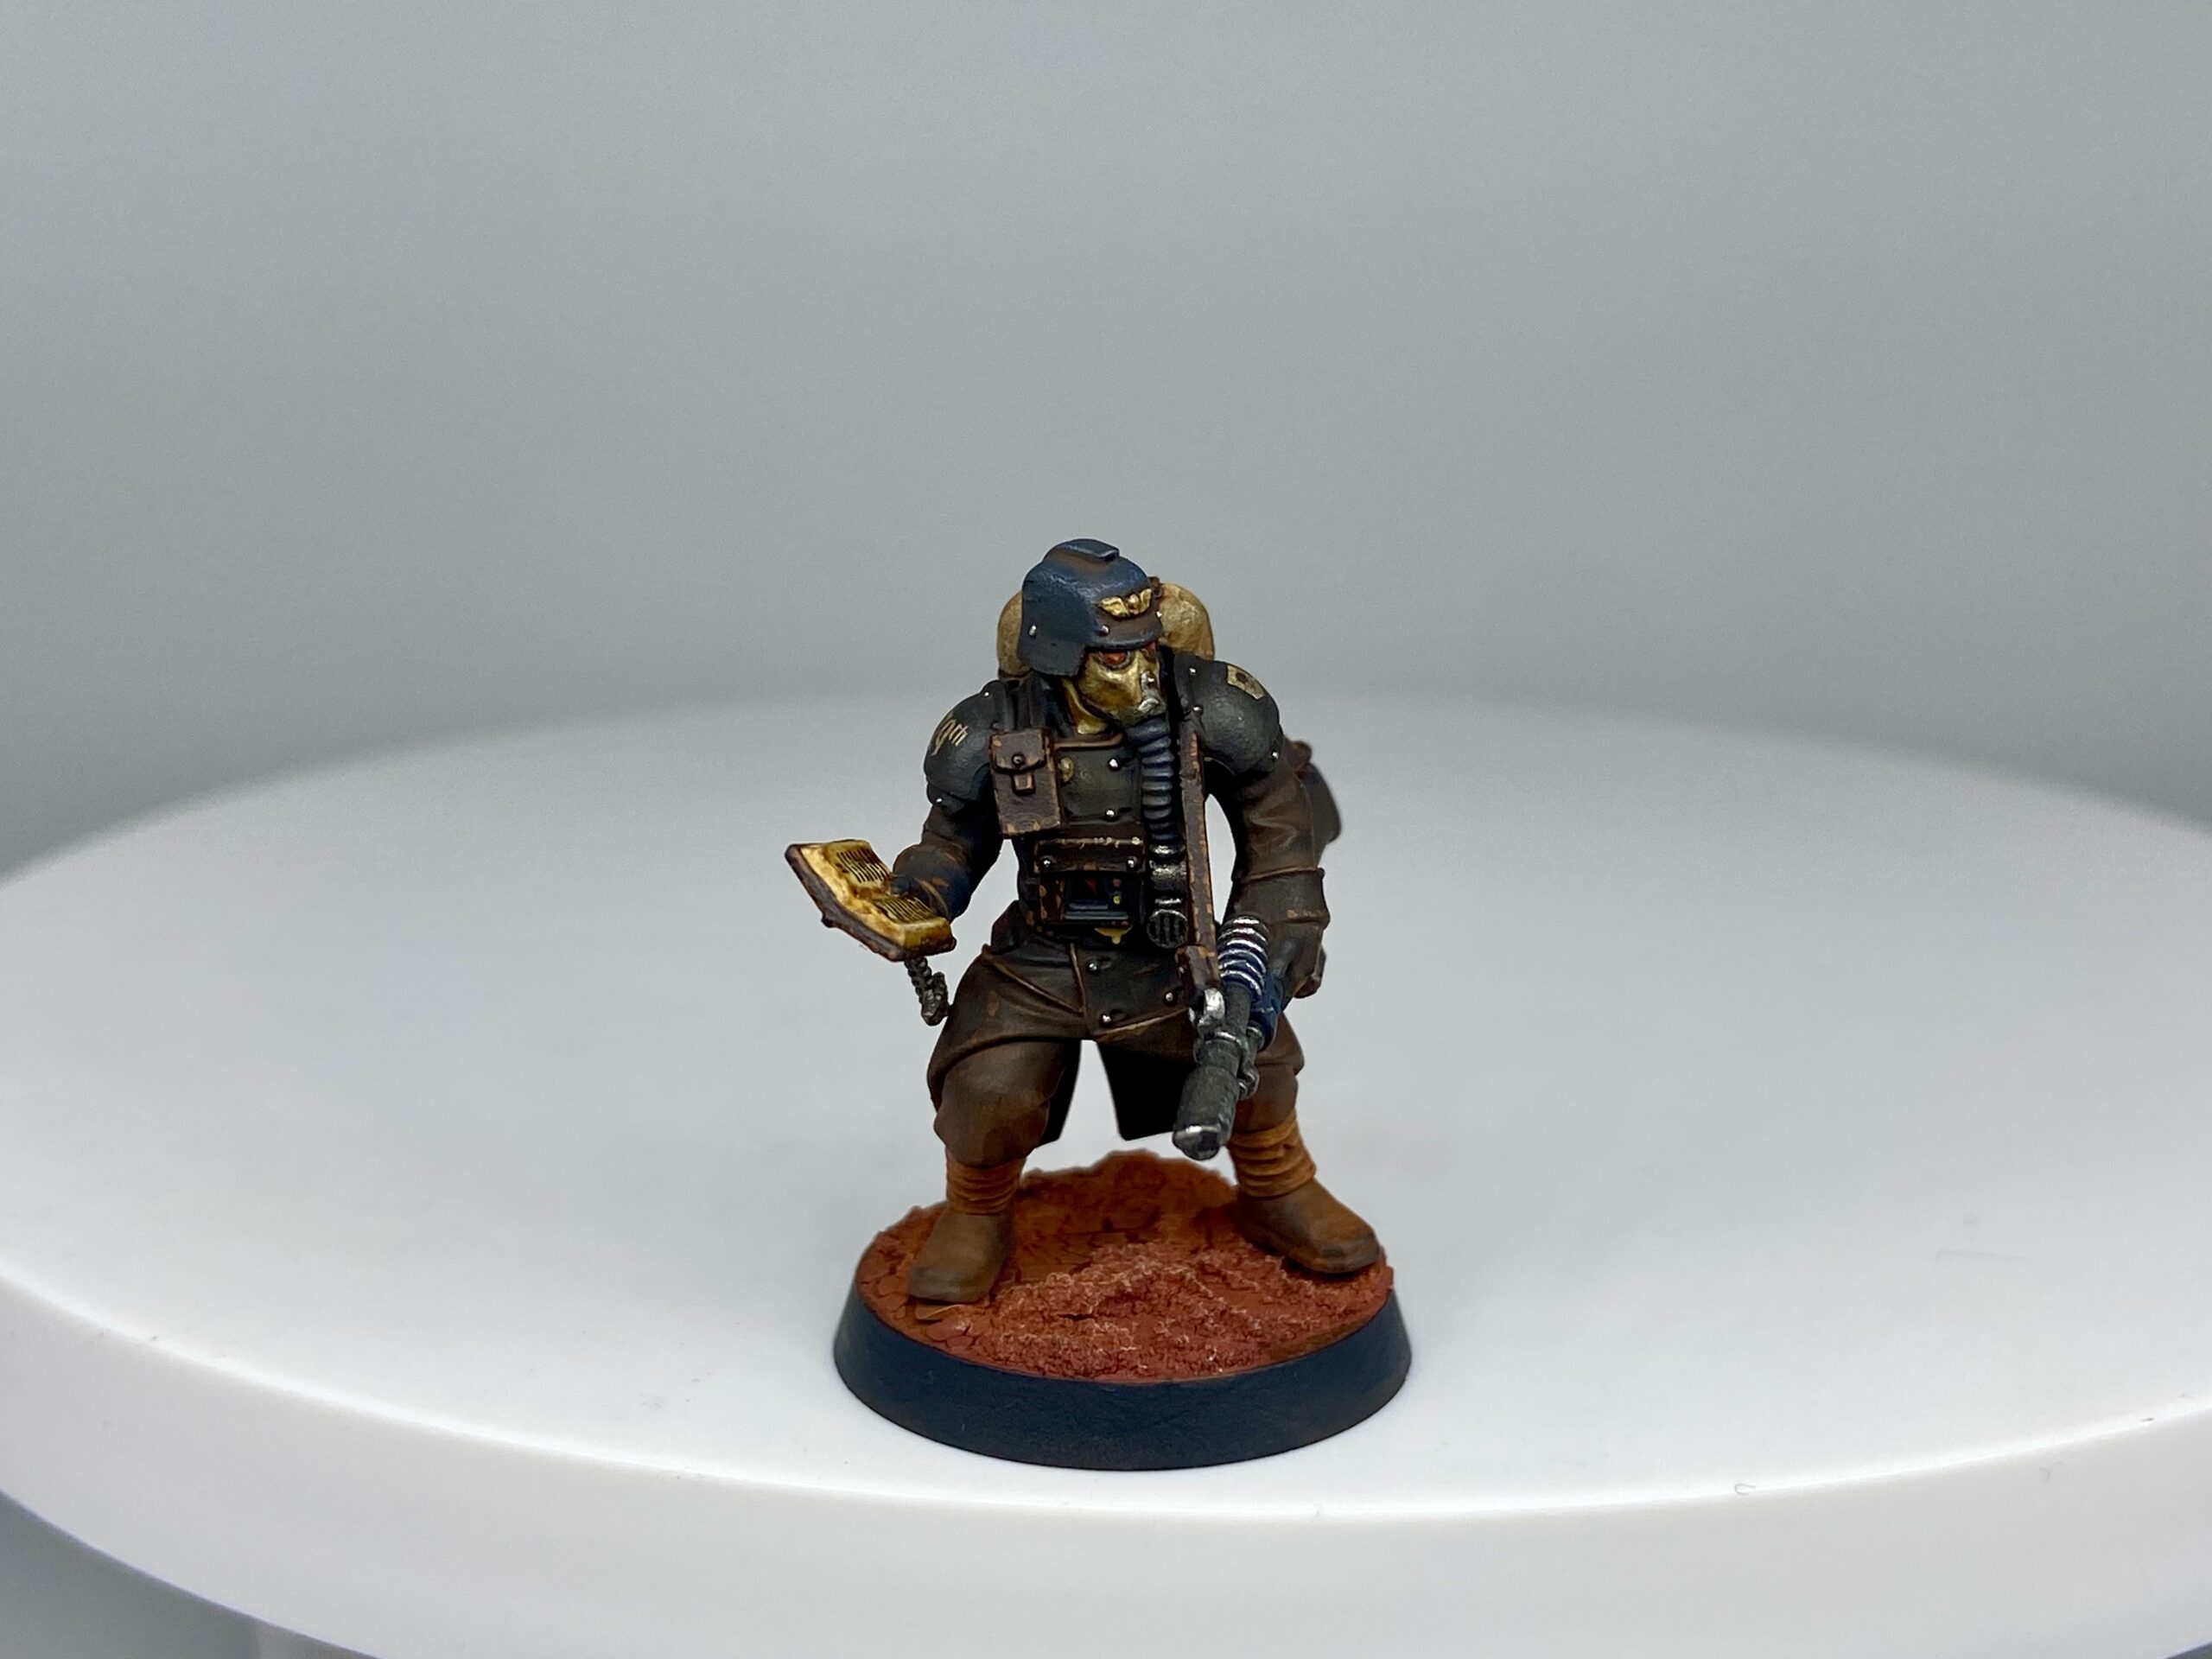
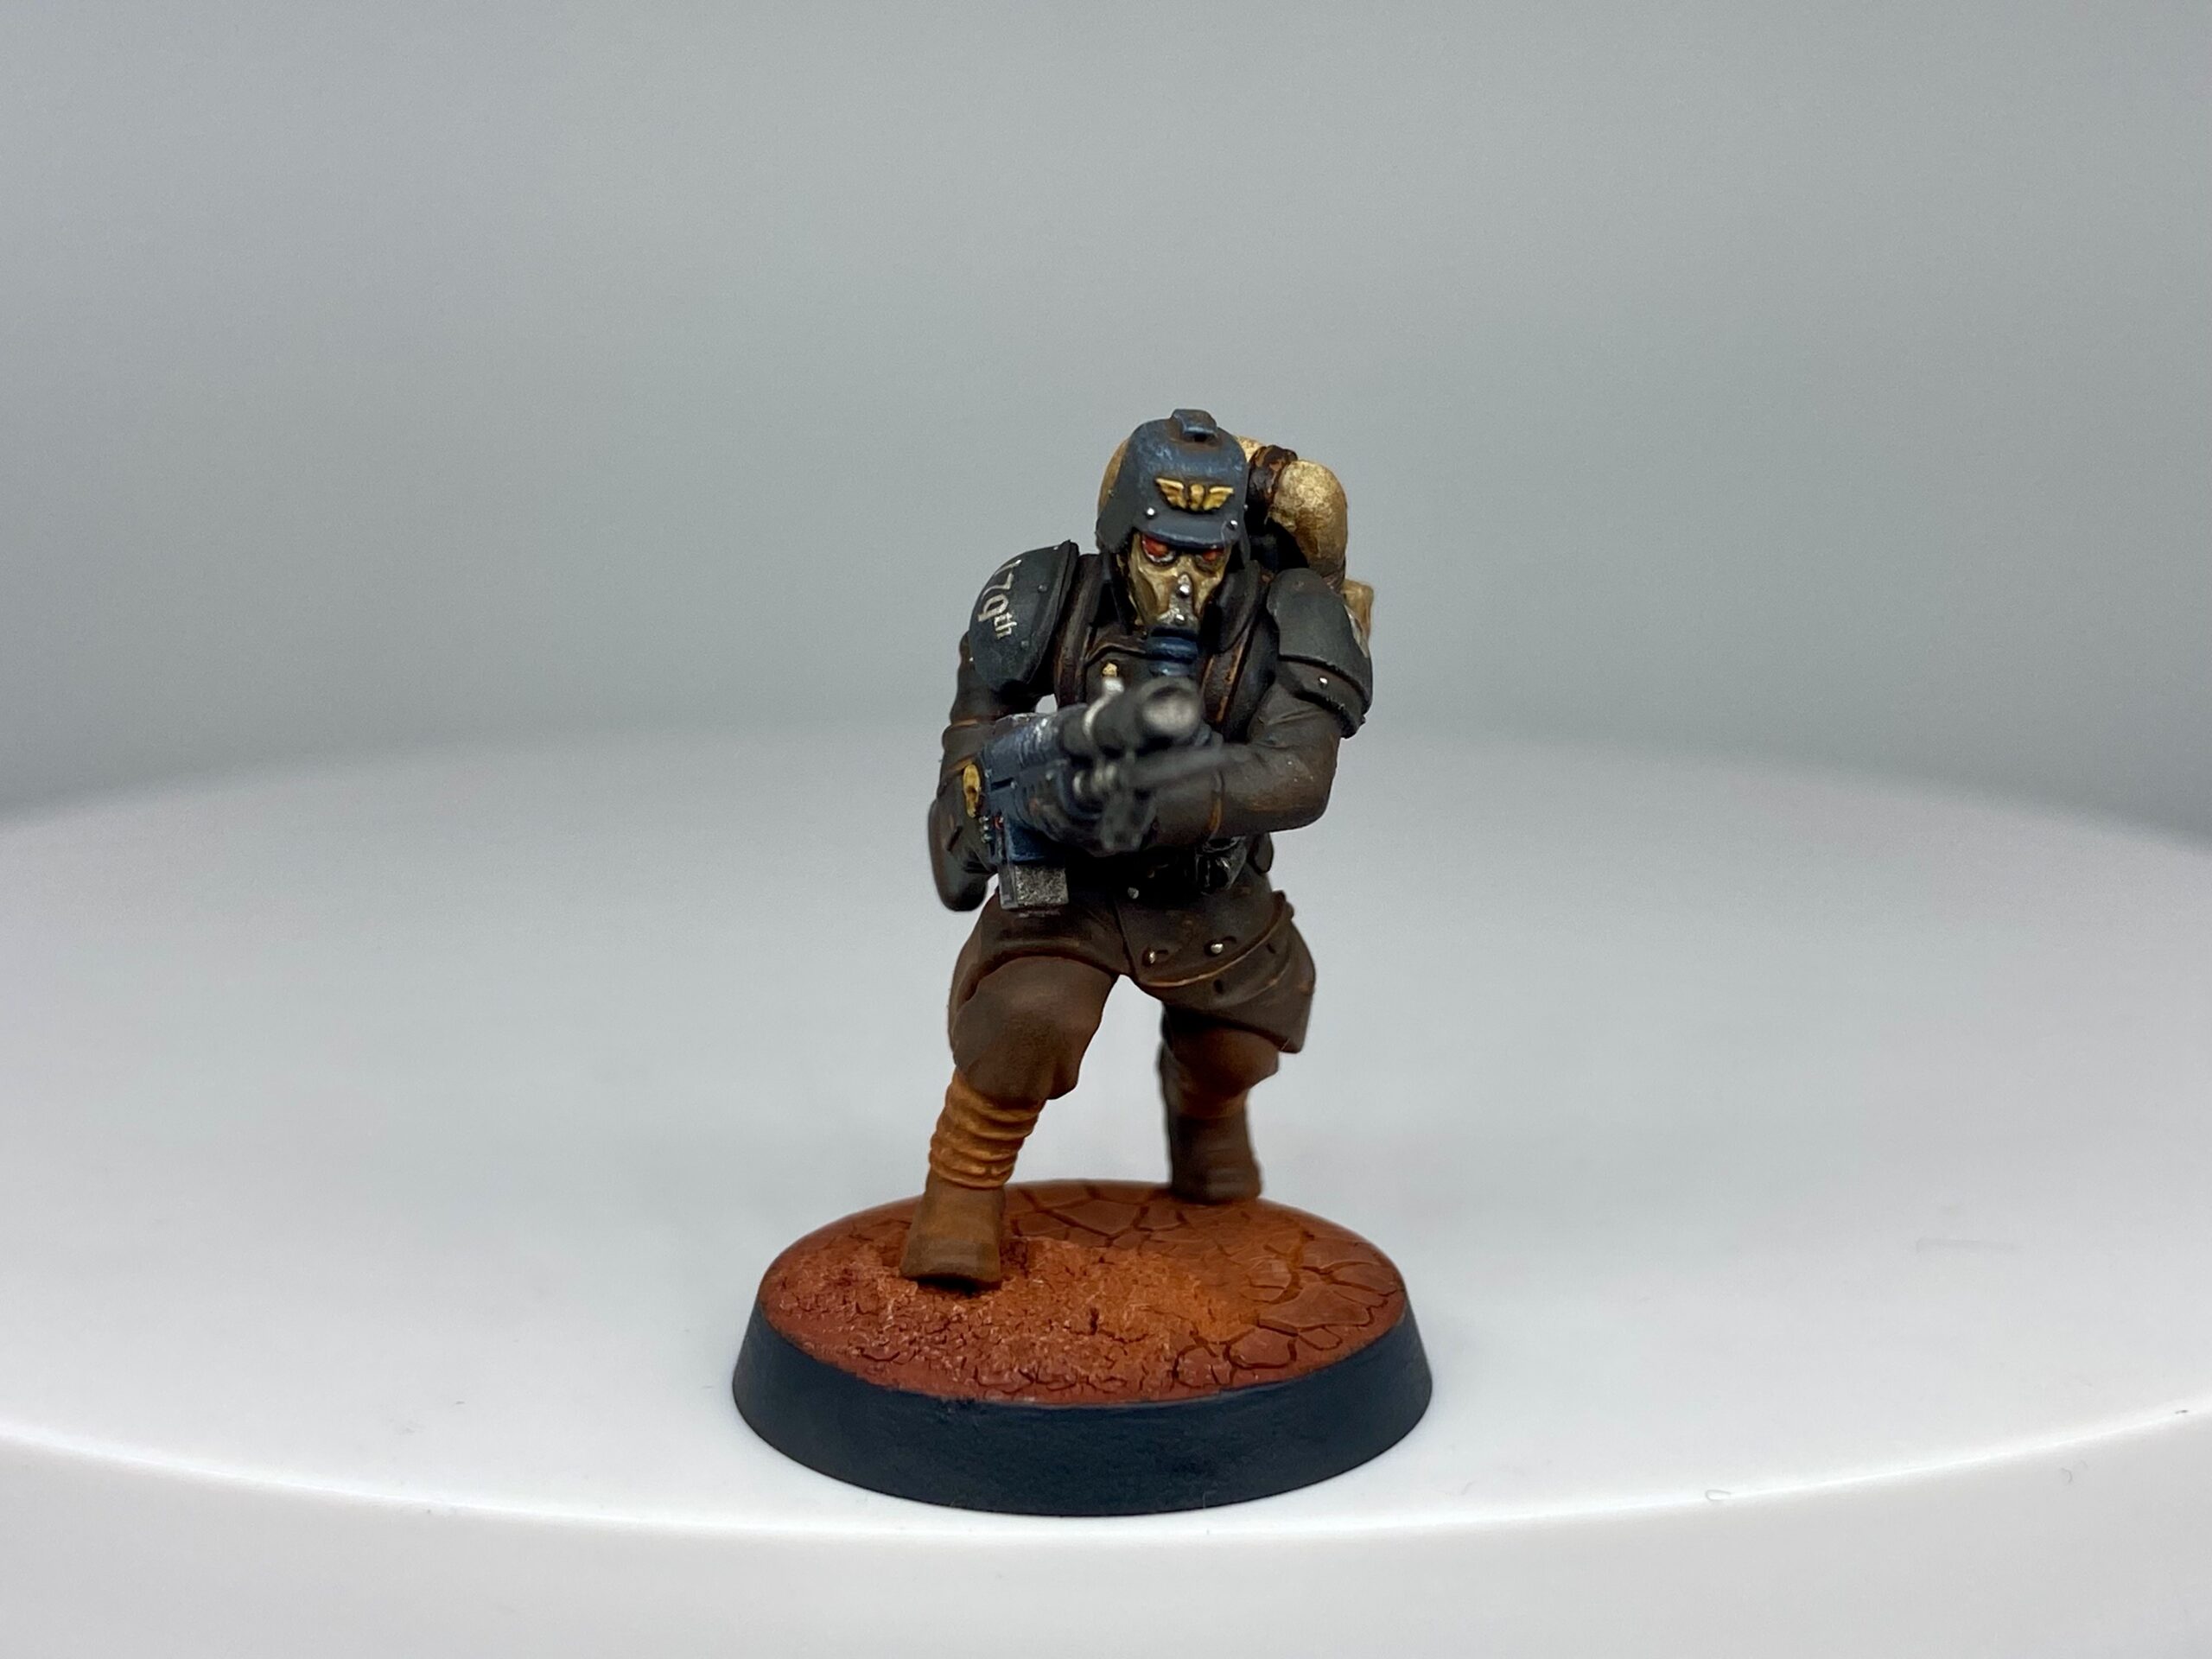
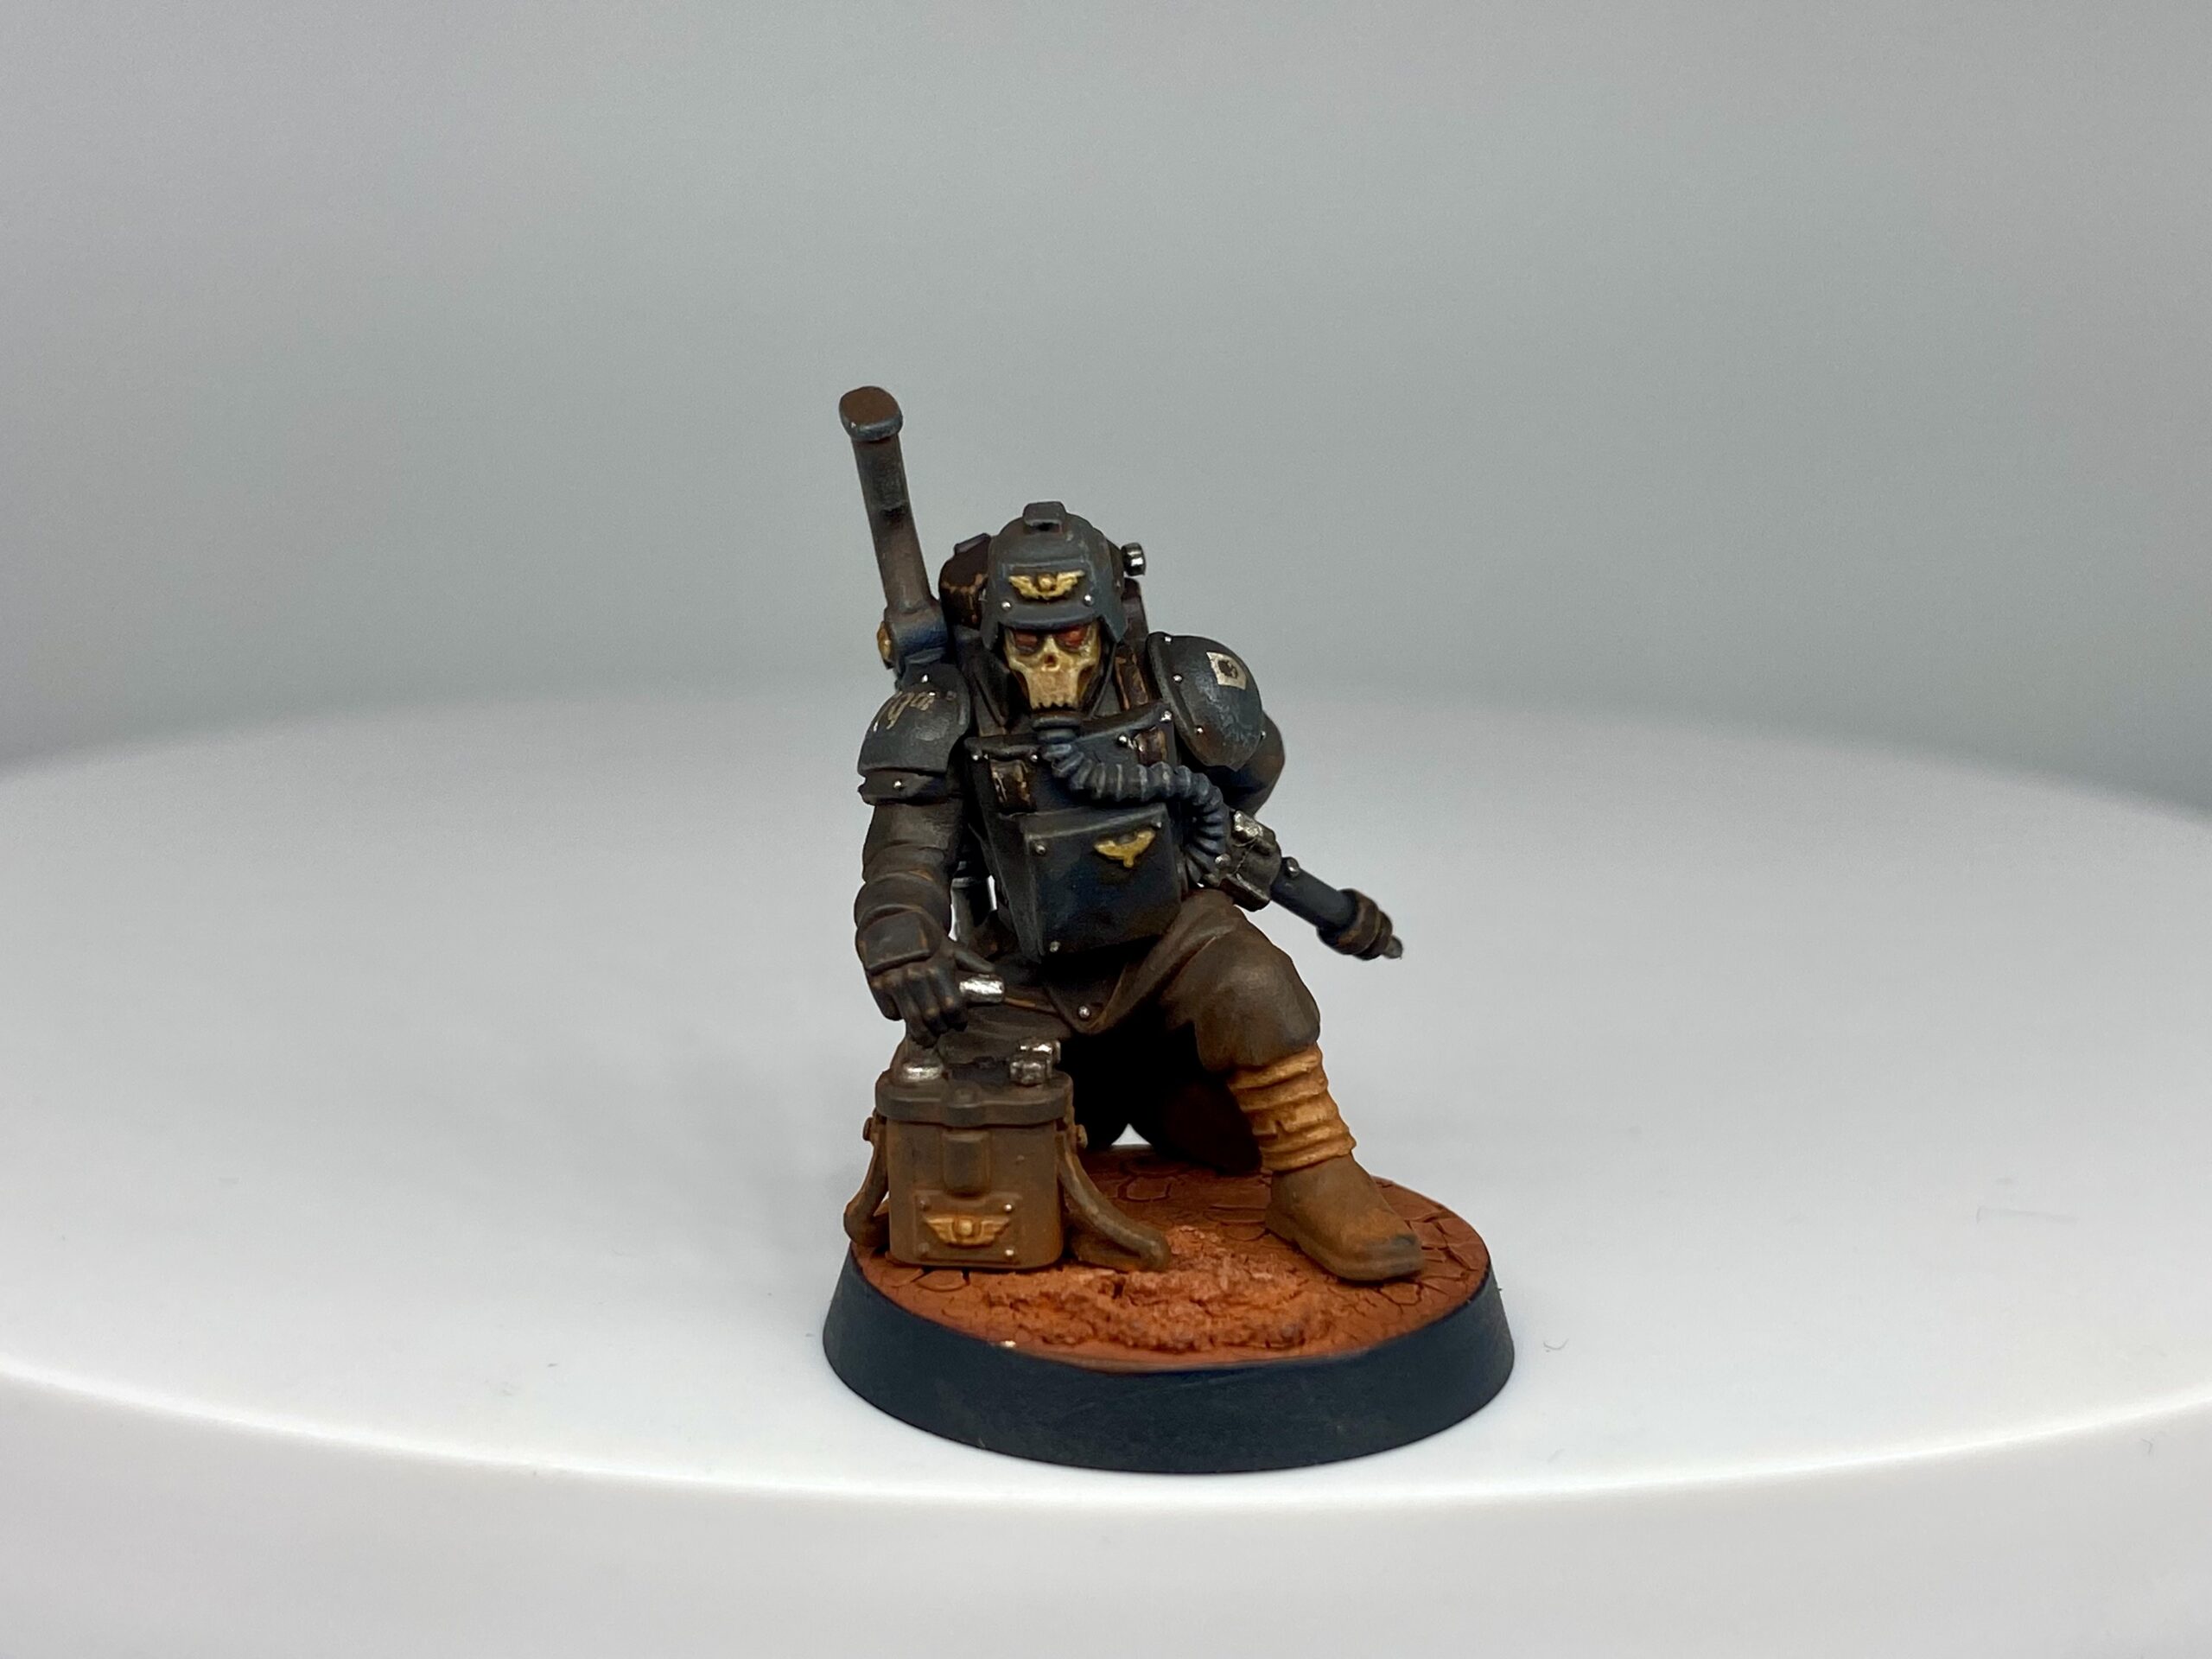
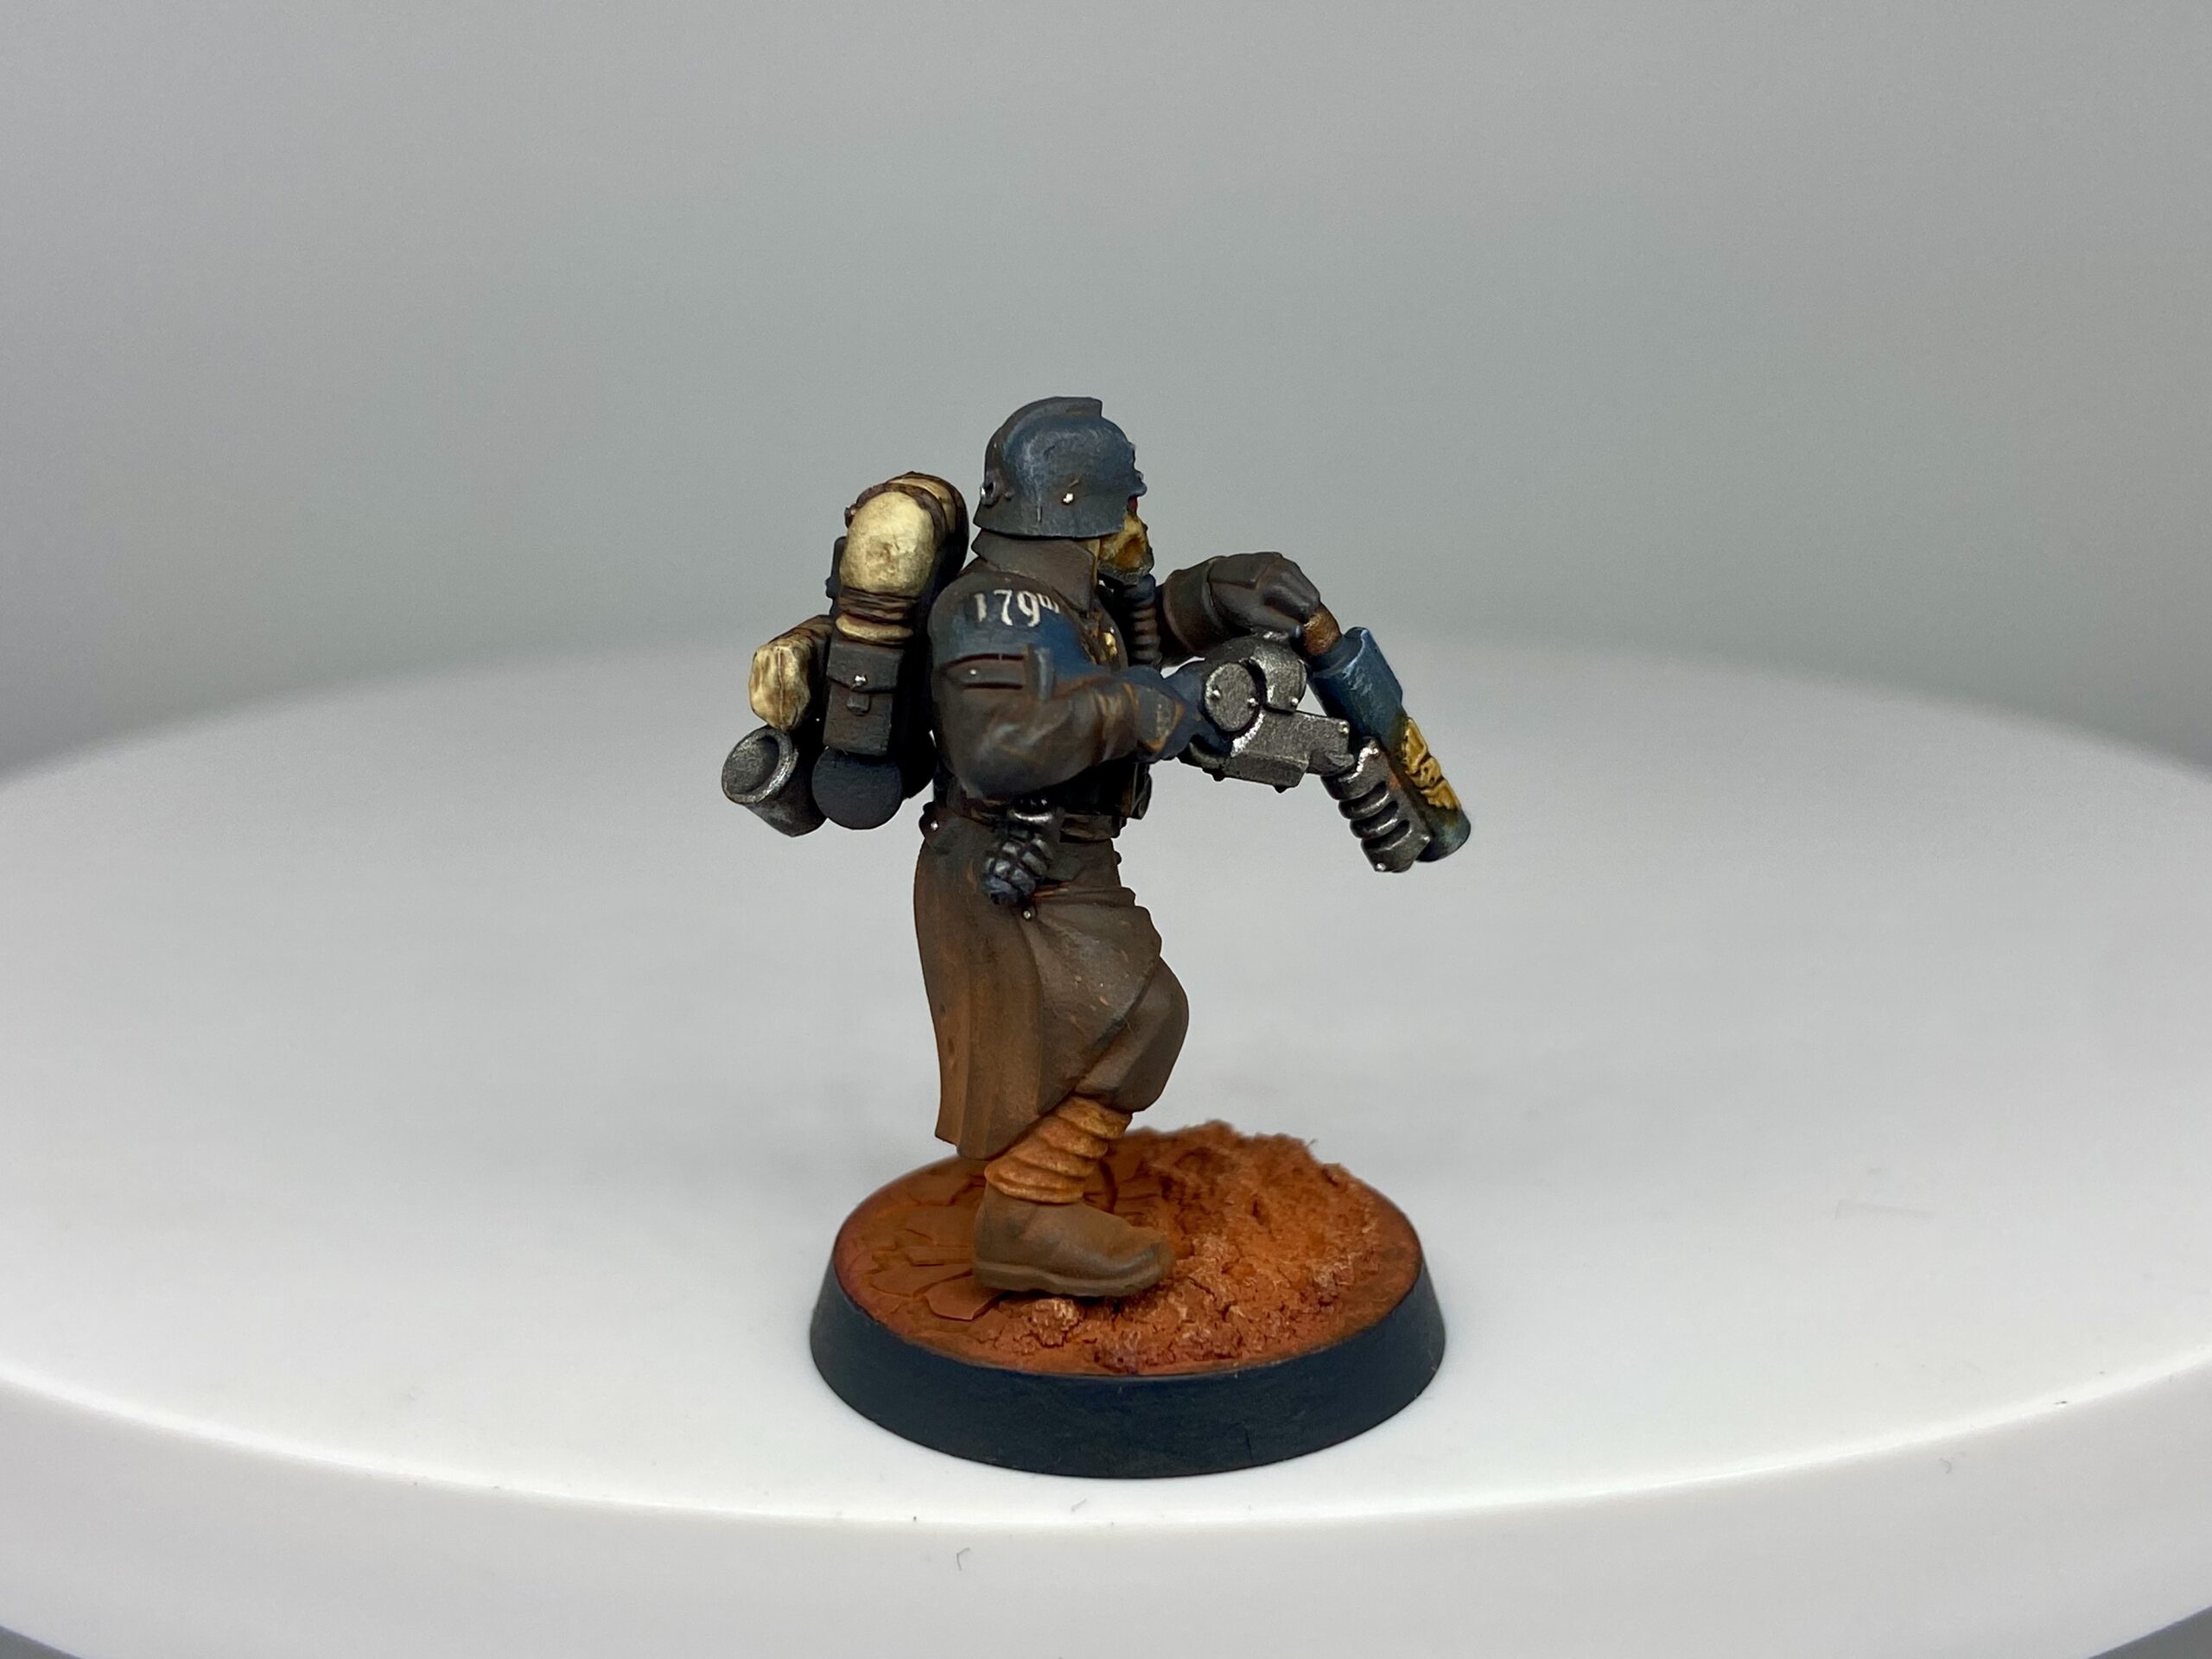
My first Krieg is now completed, a Krieg Kill Team, which can also double up as Krieg in my 40K games. I did 23 in the end.
Completed Gallery
These were taken with my Samtian Lightbox.

Individual Krieg Models Gallery
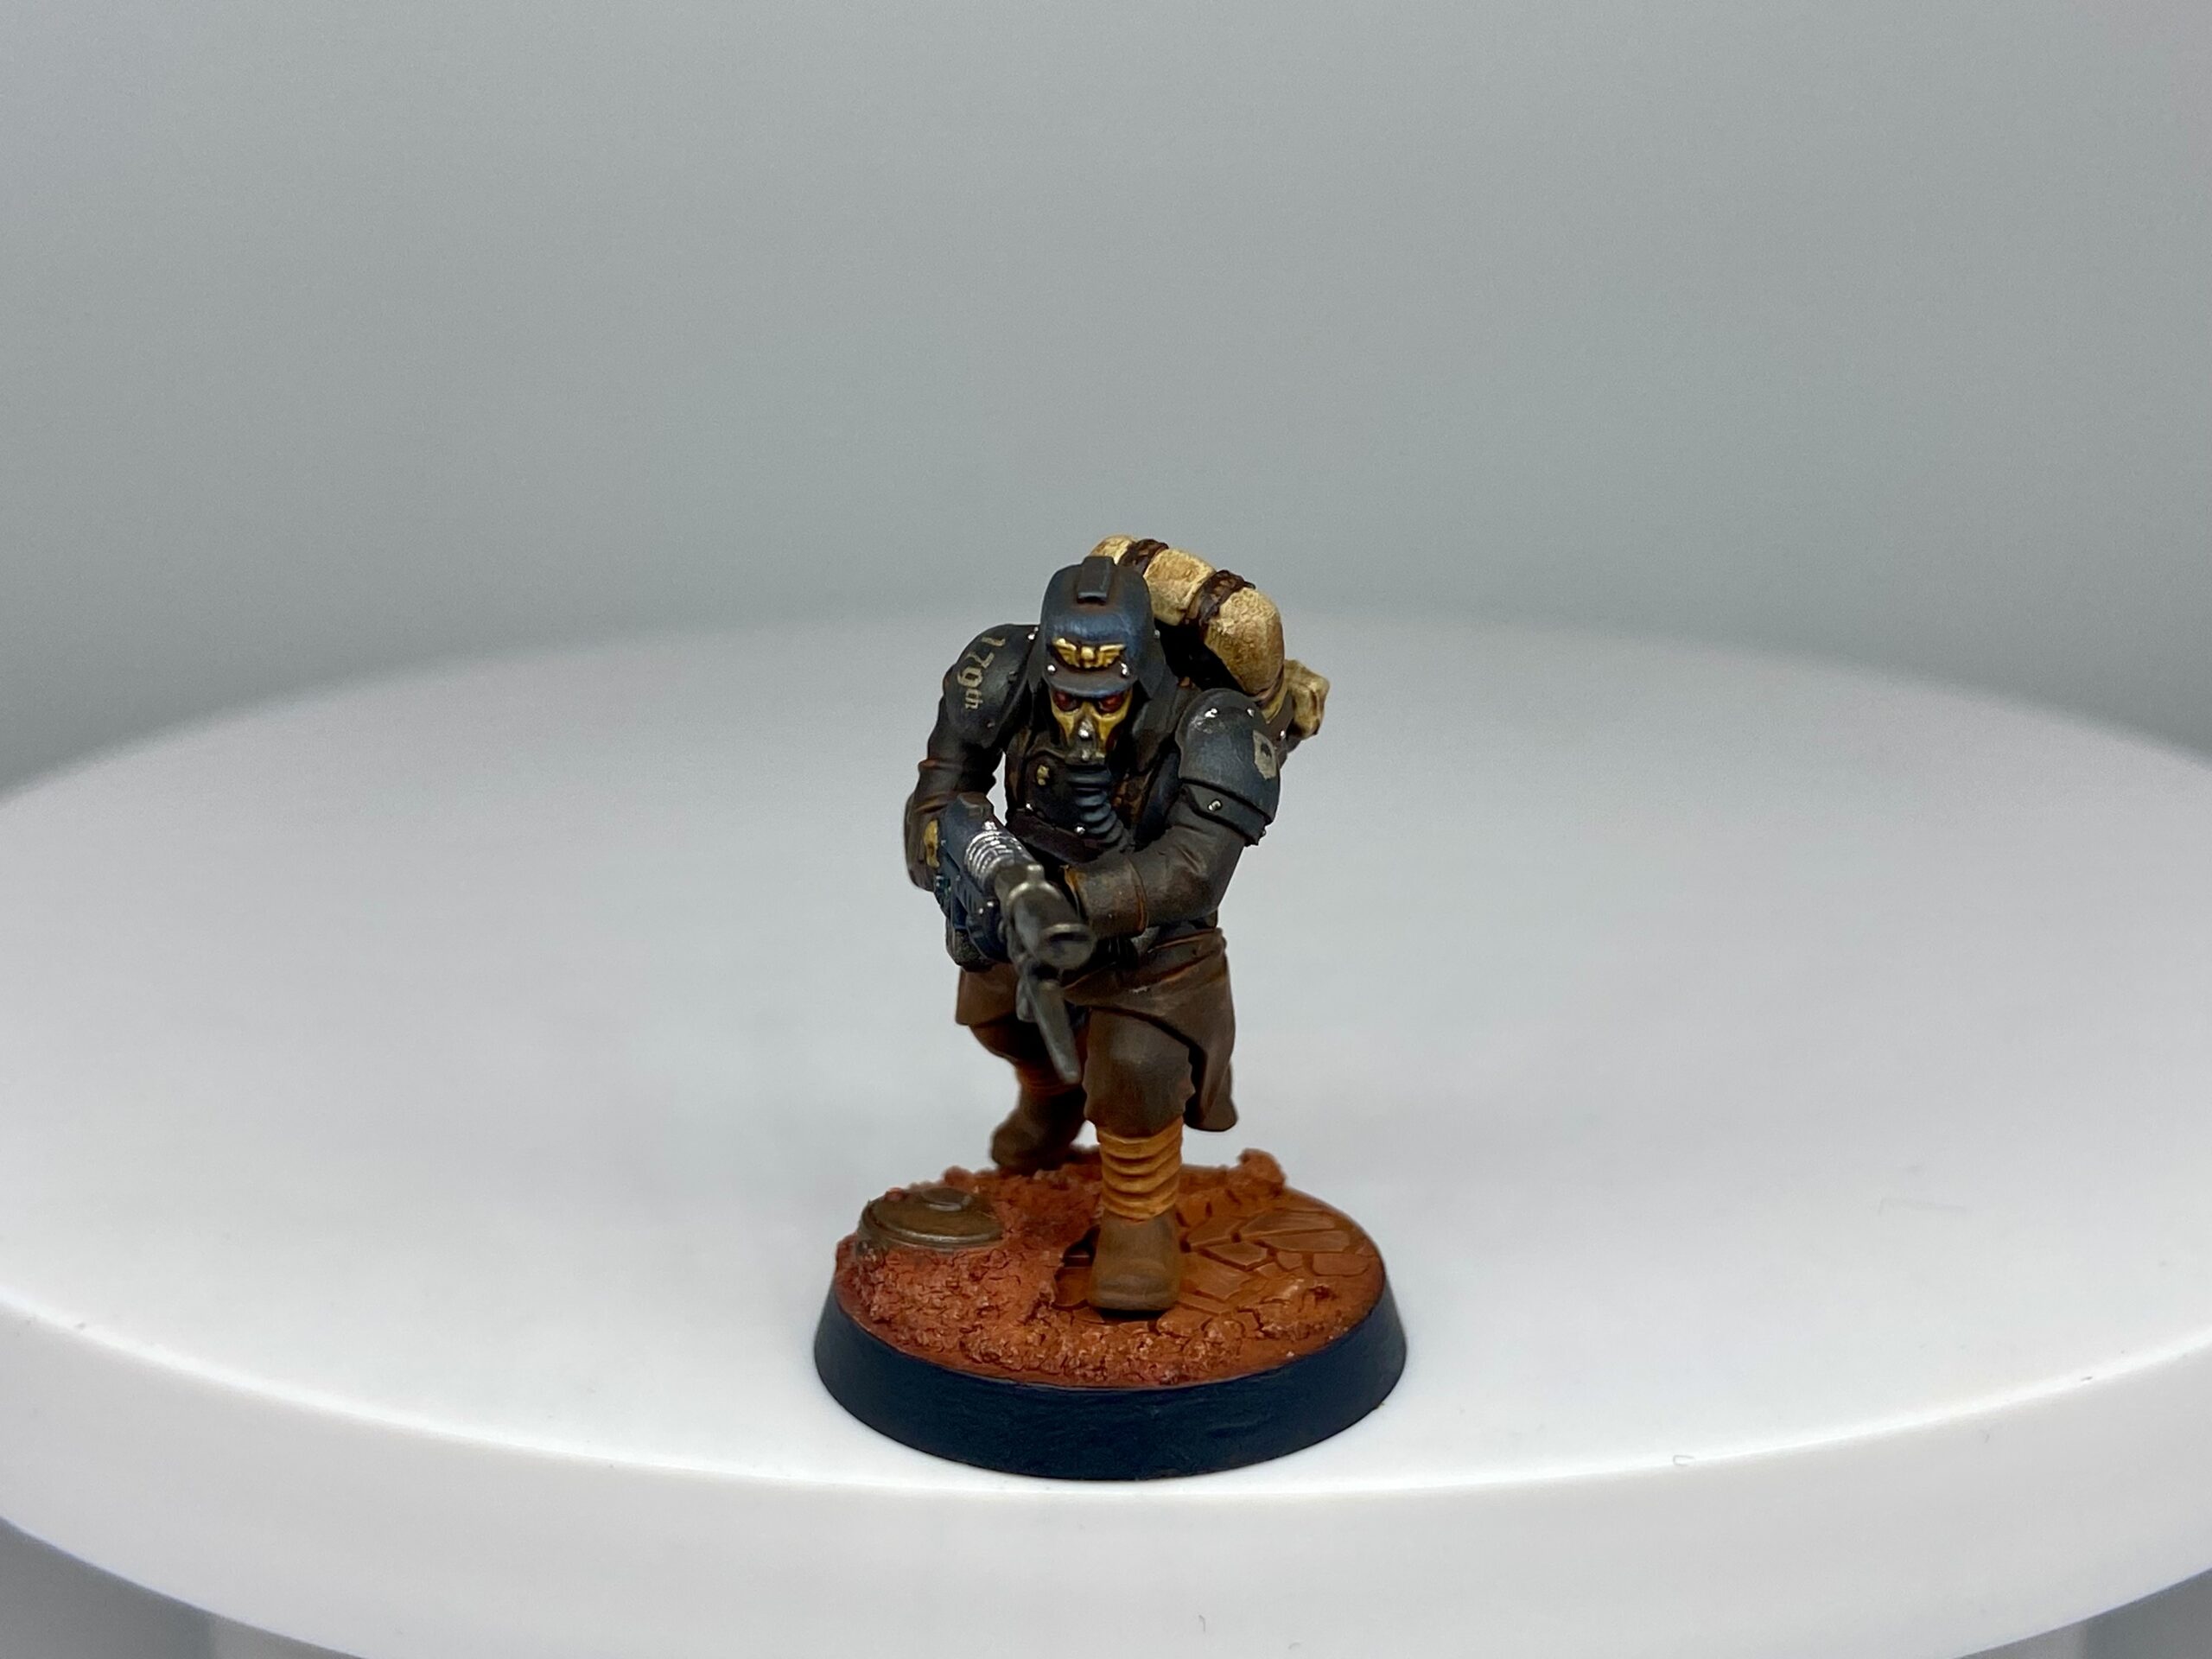
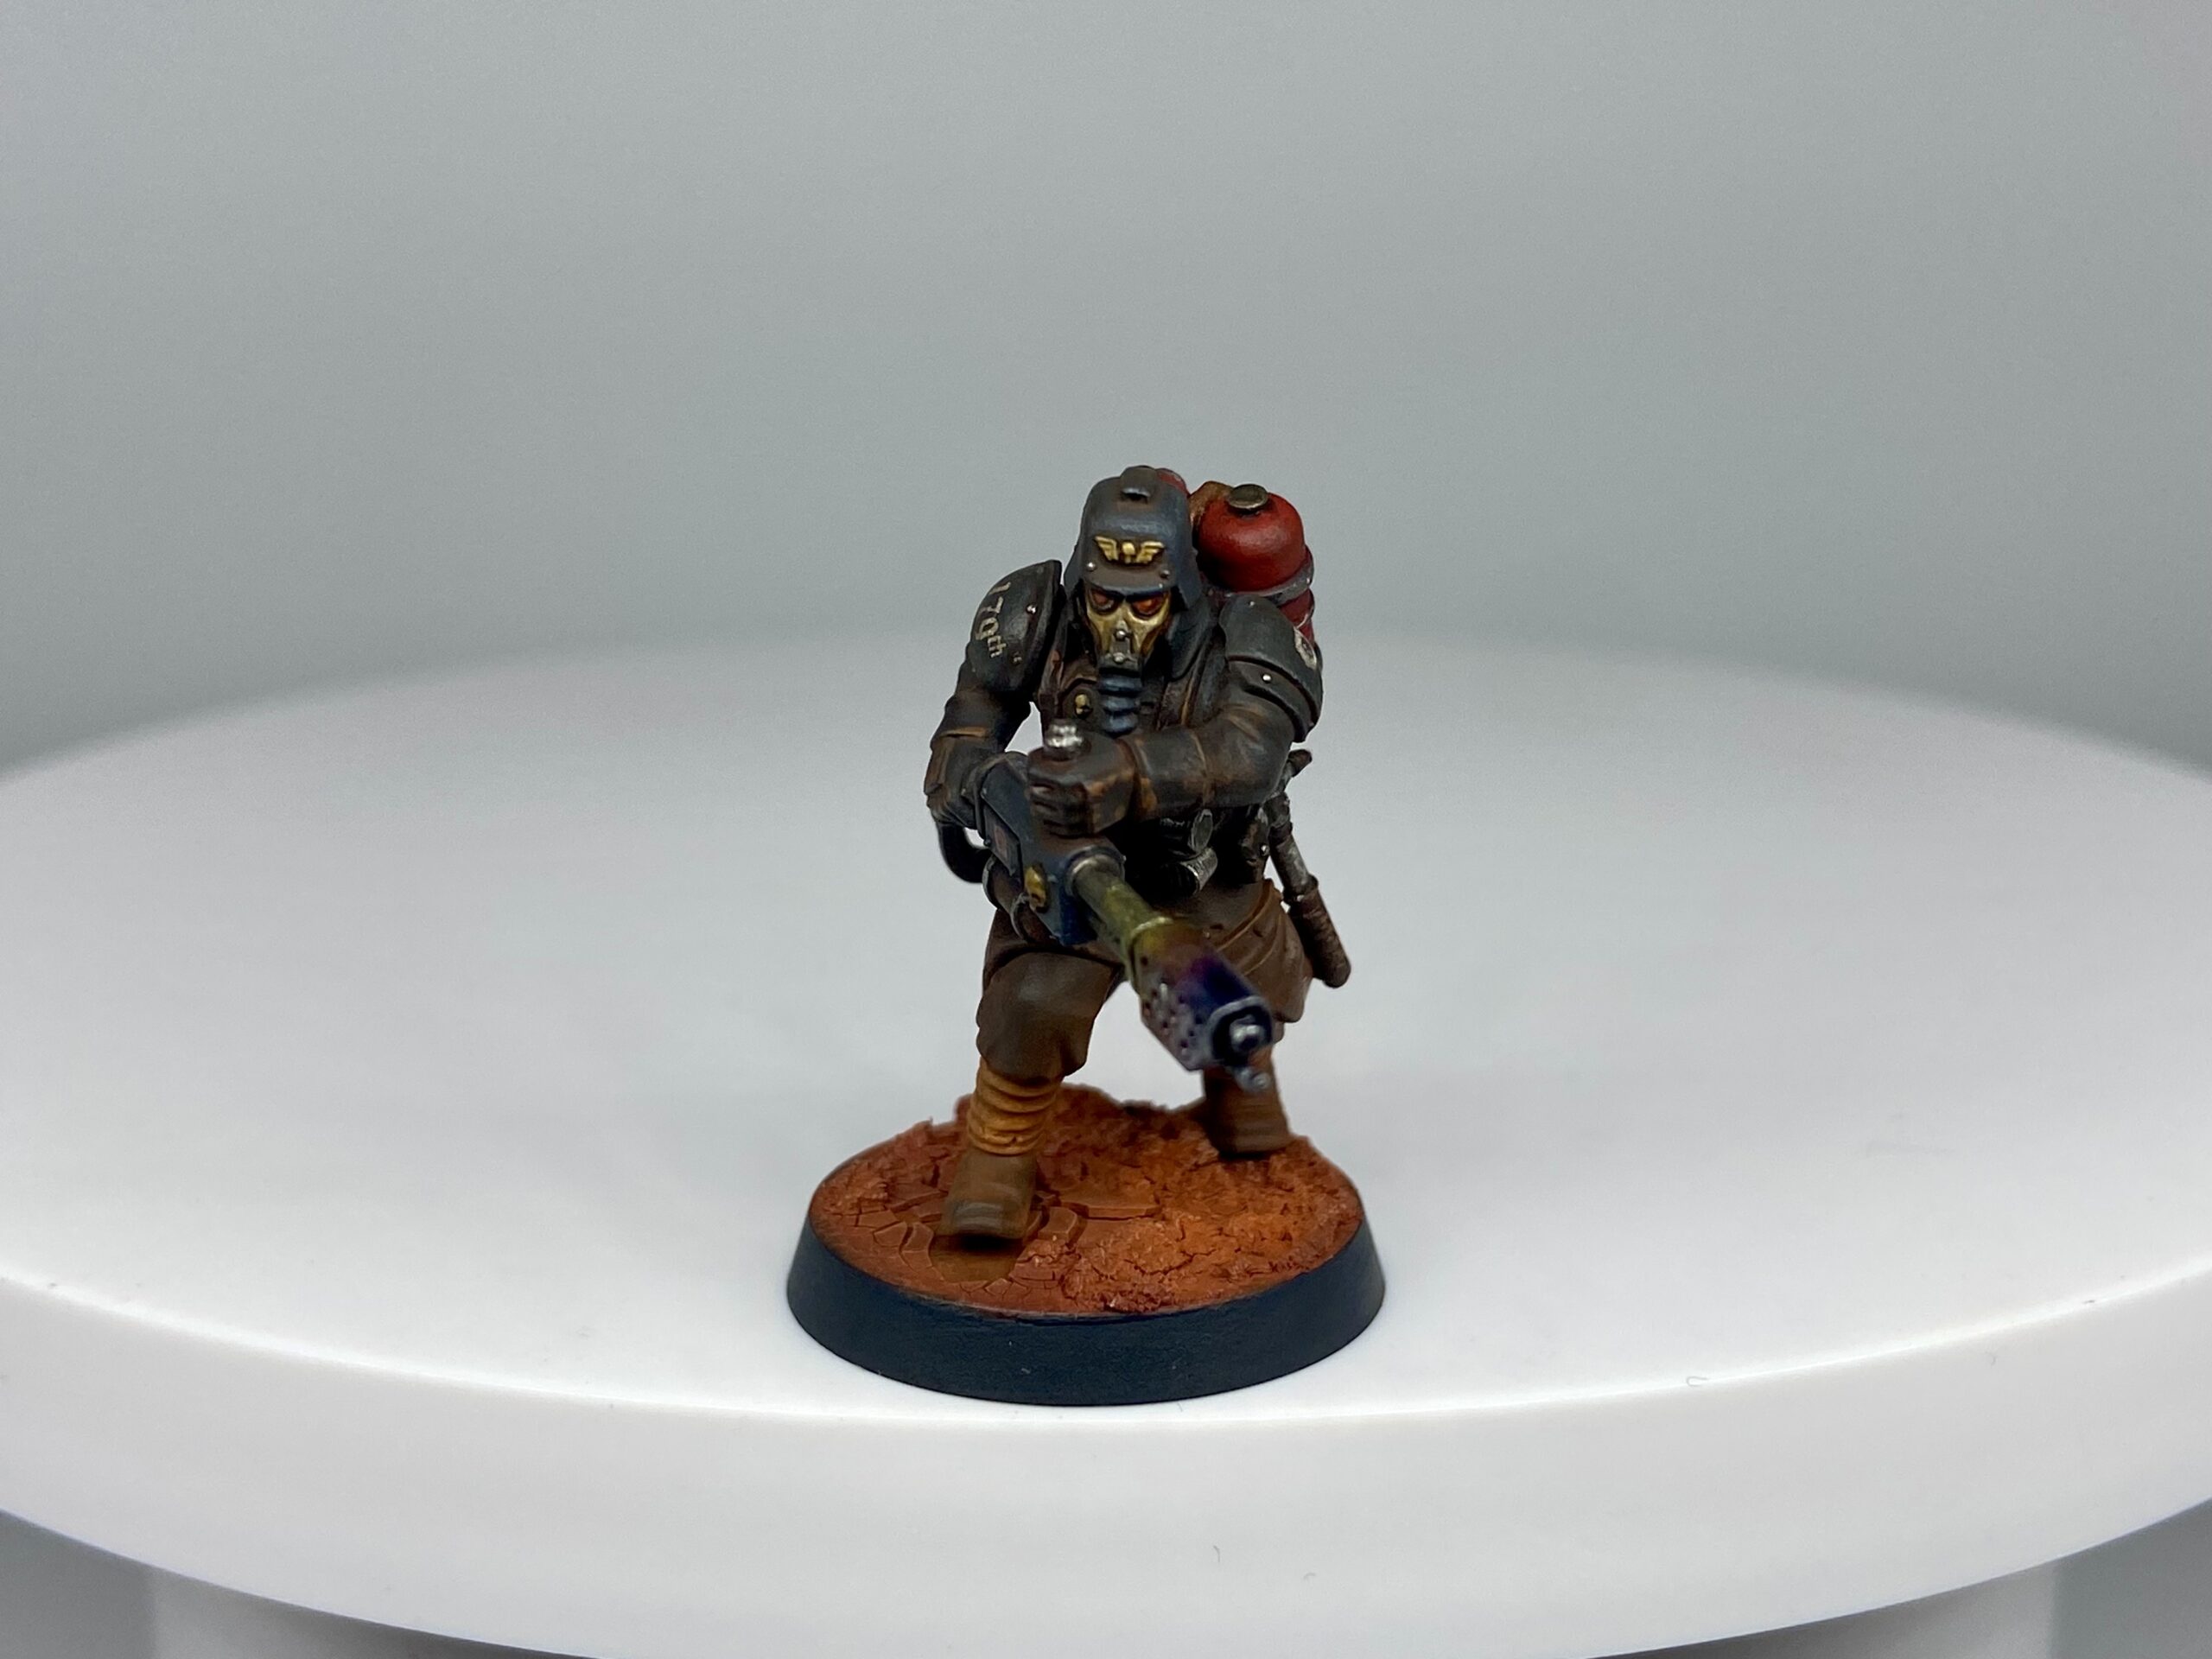


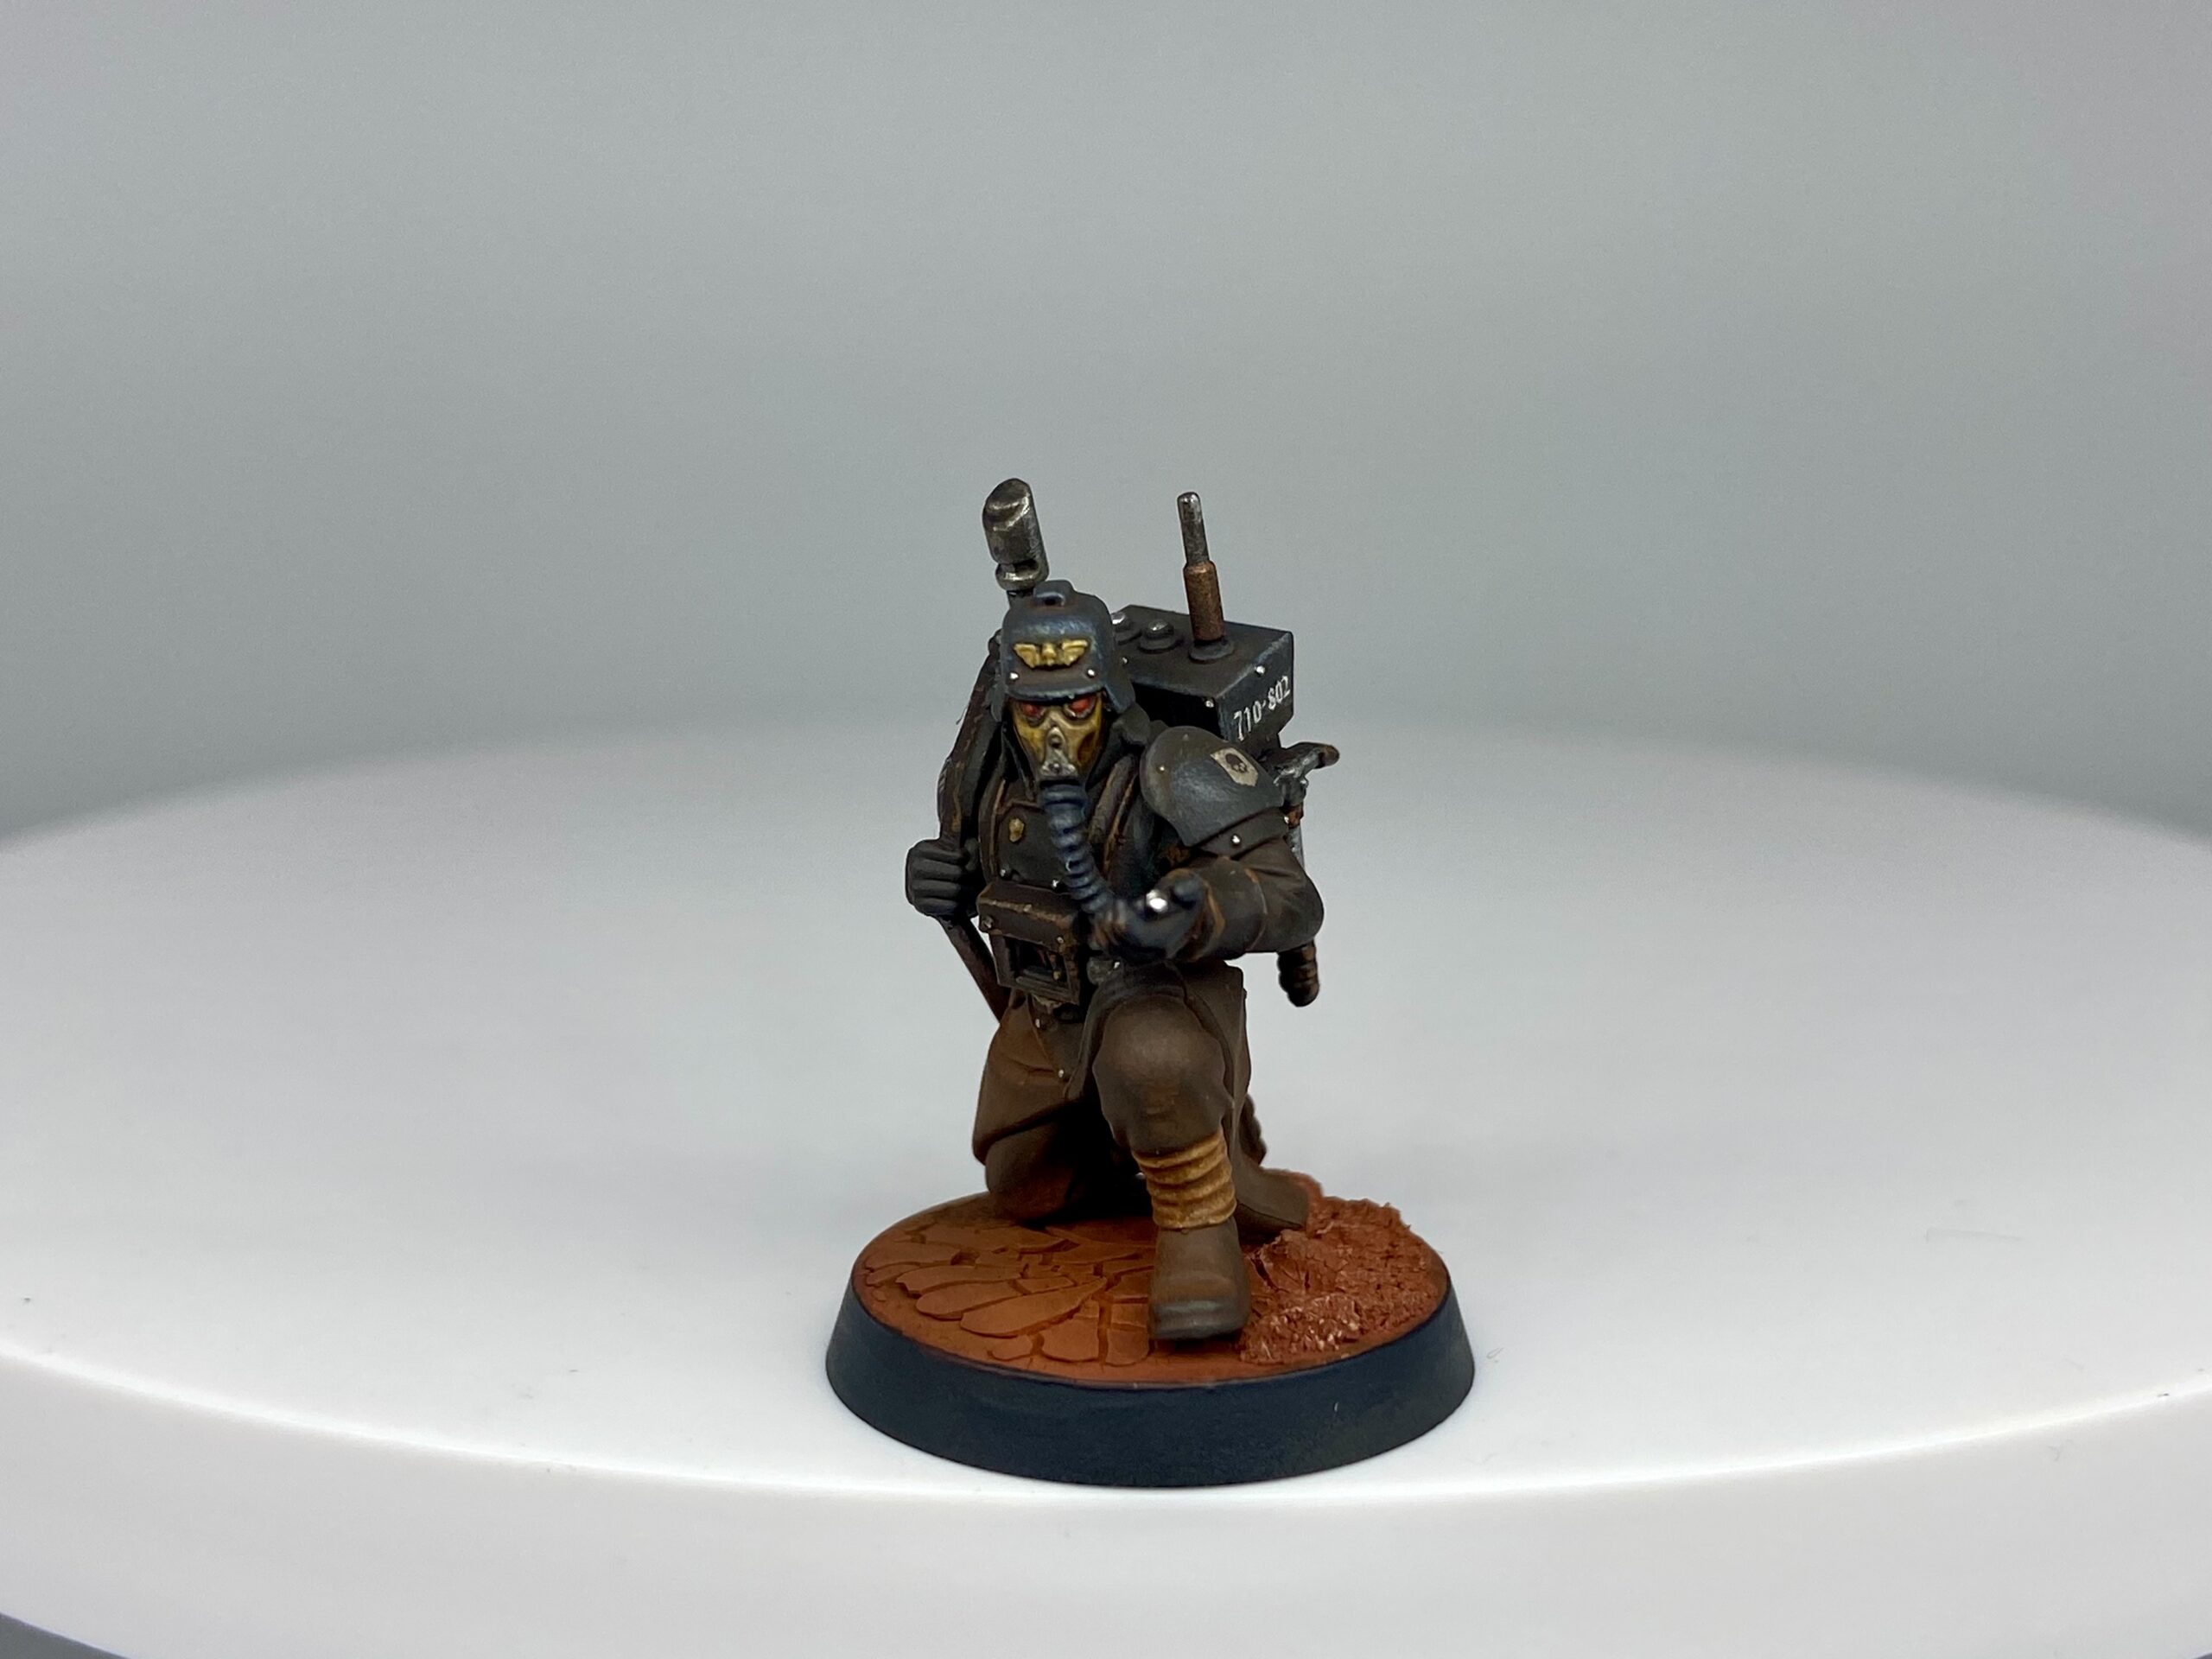
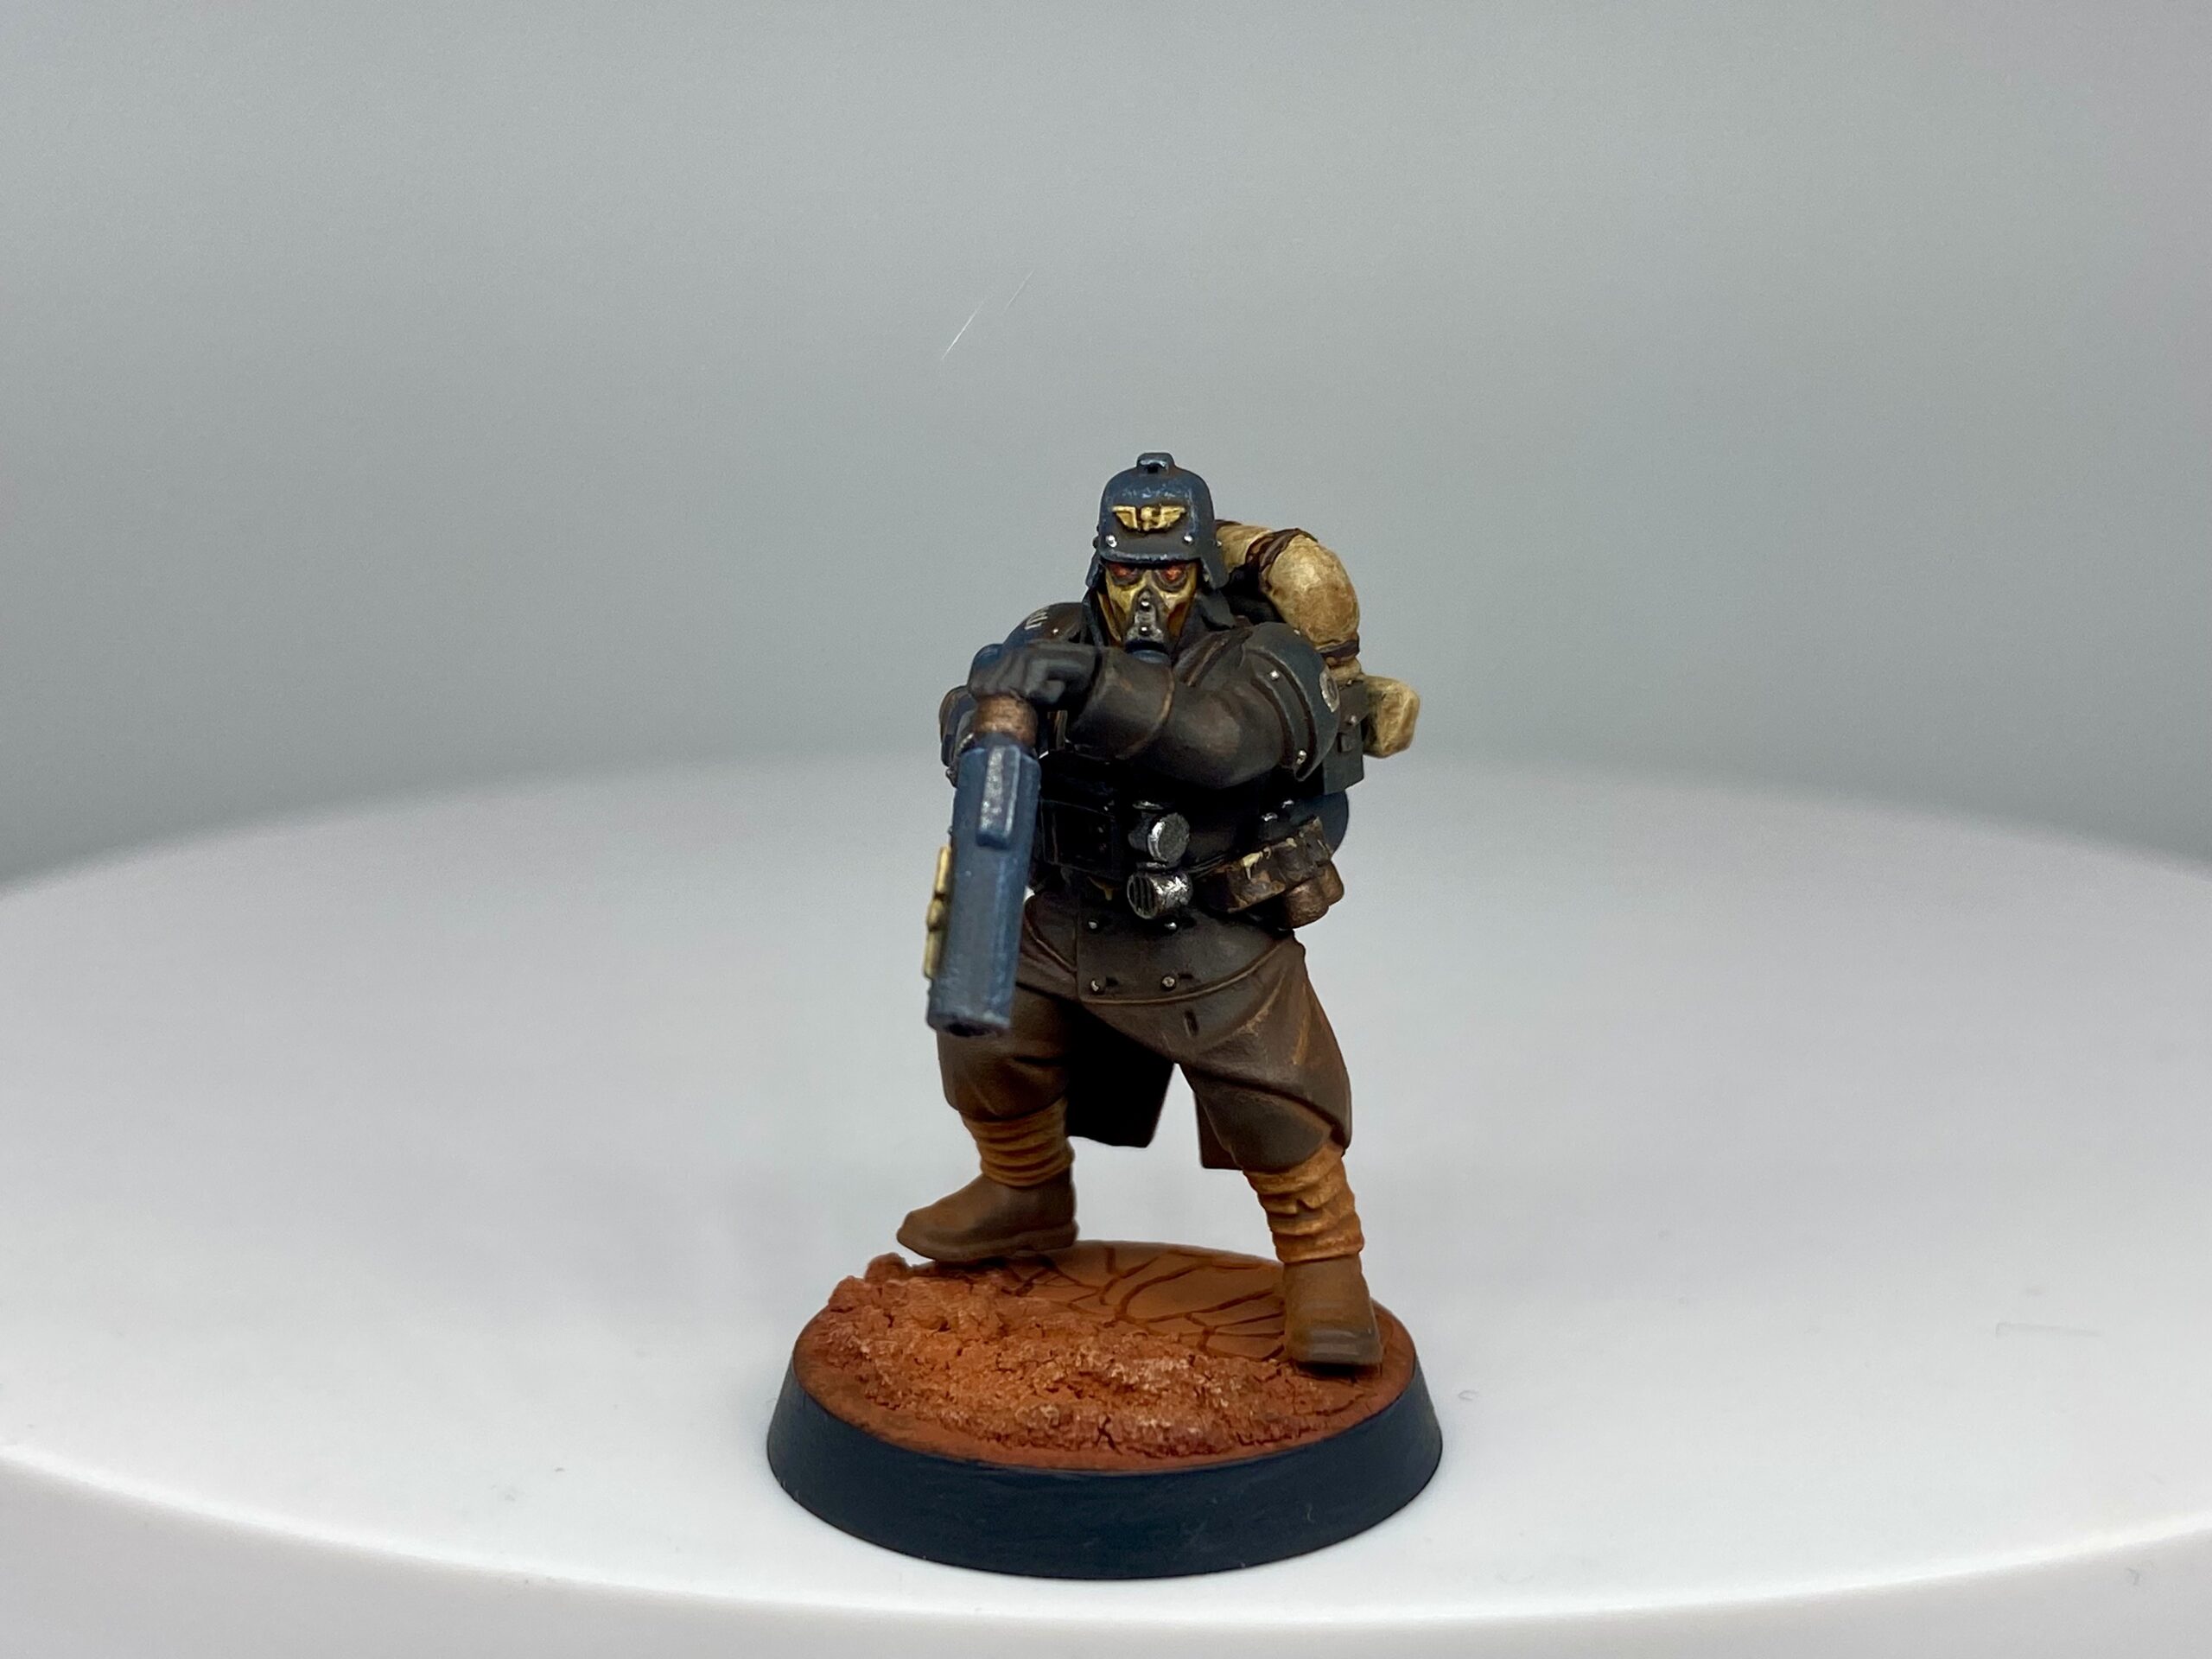
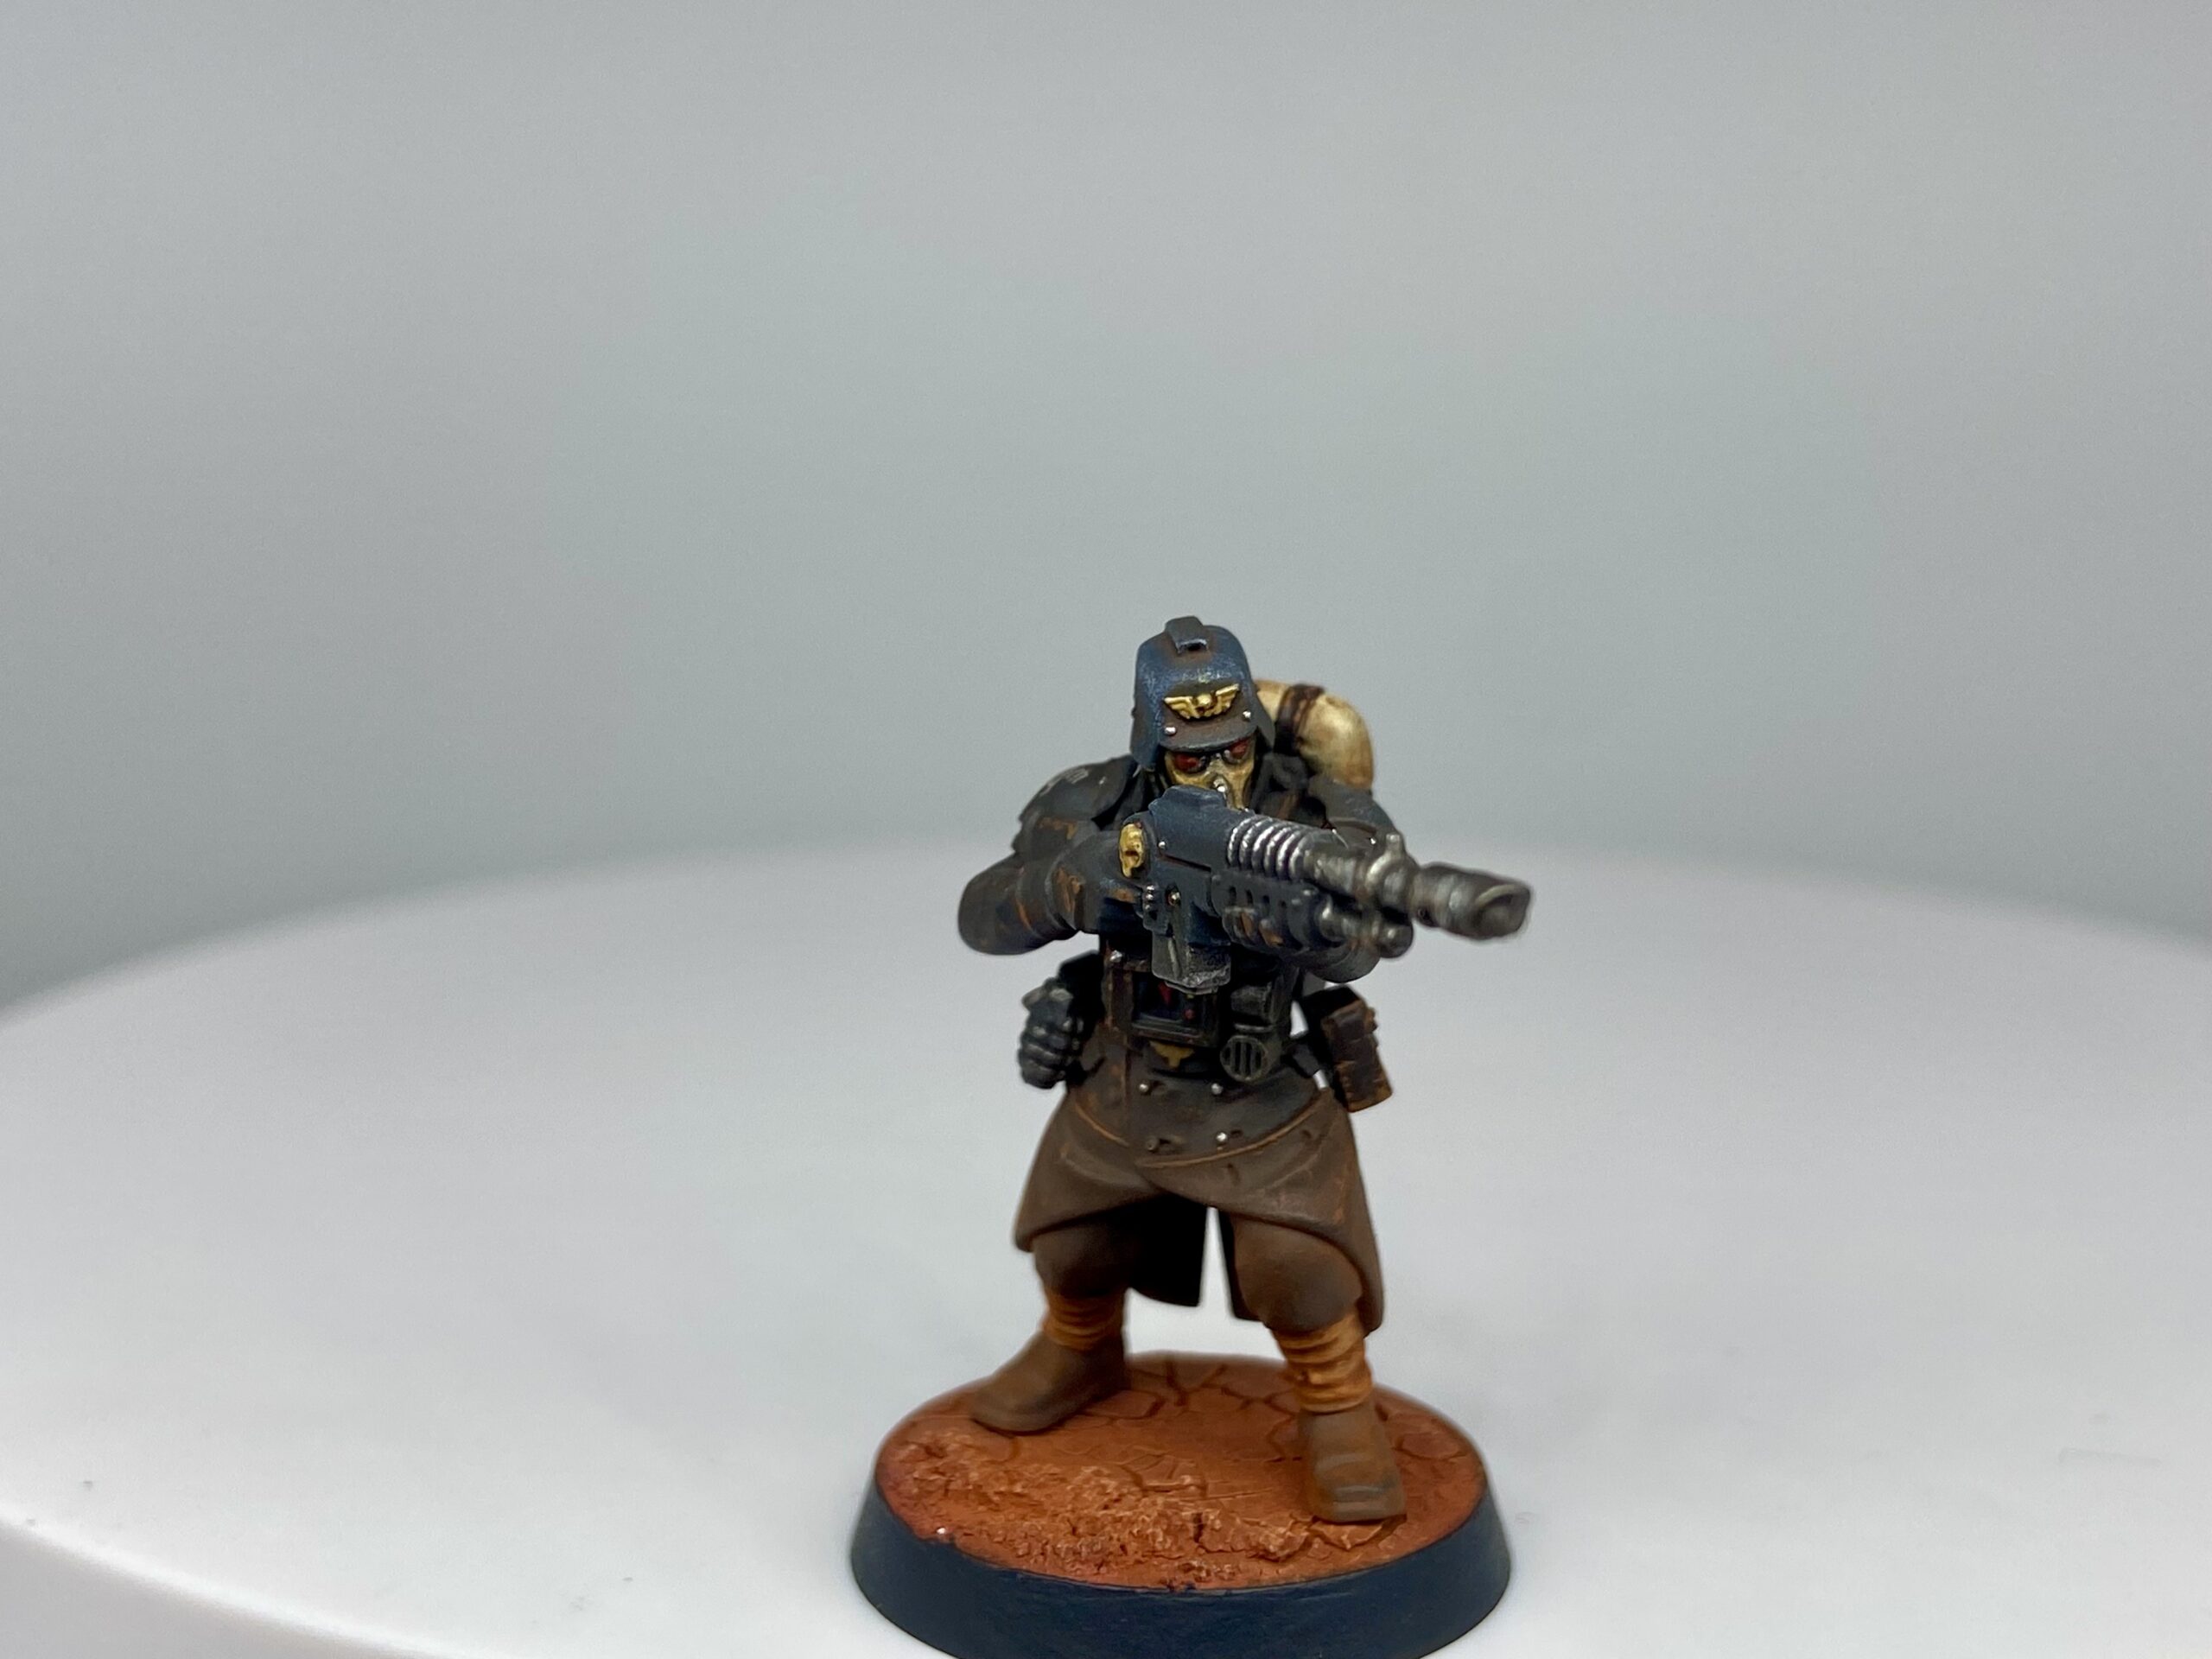

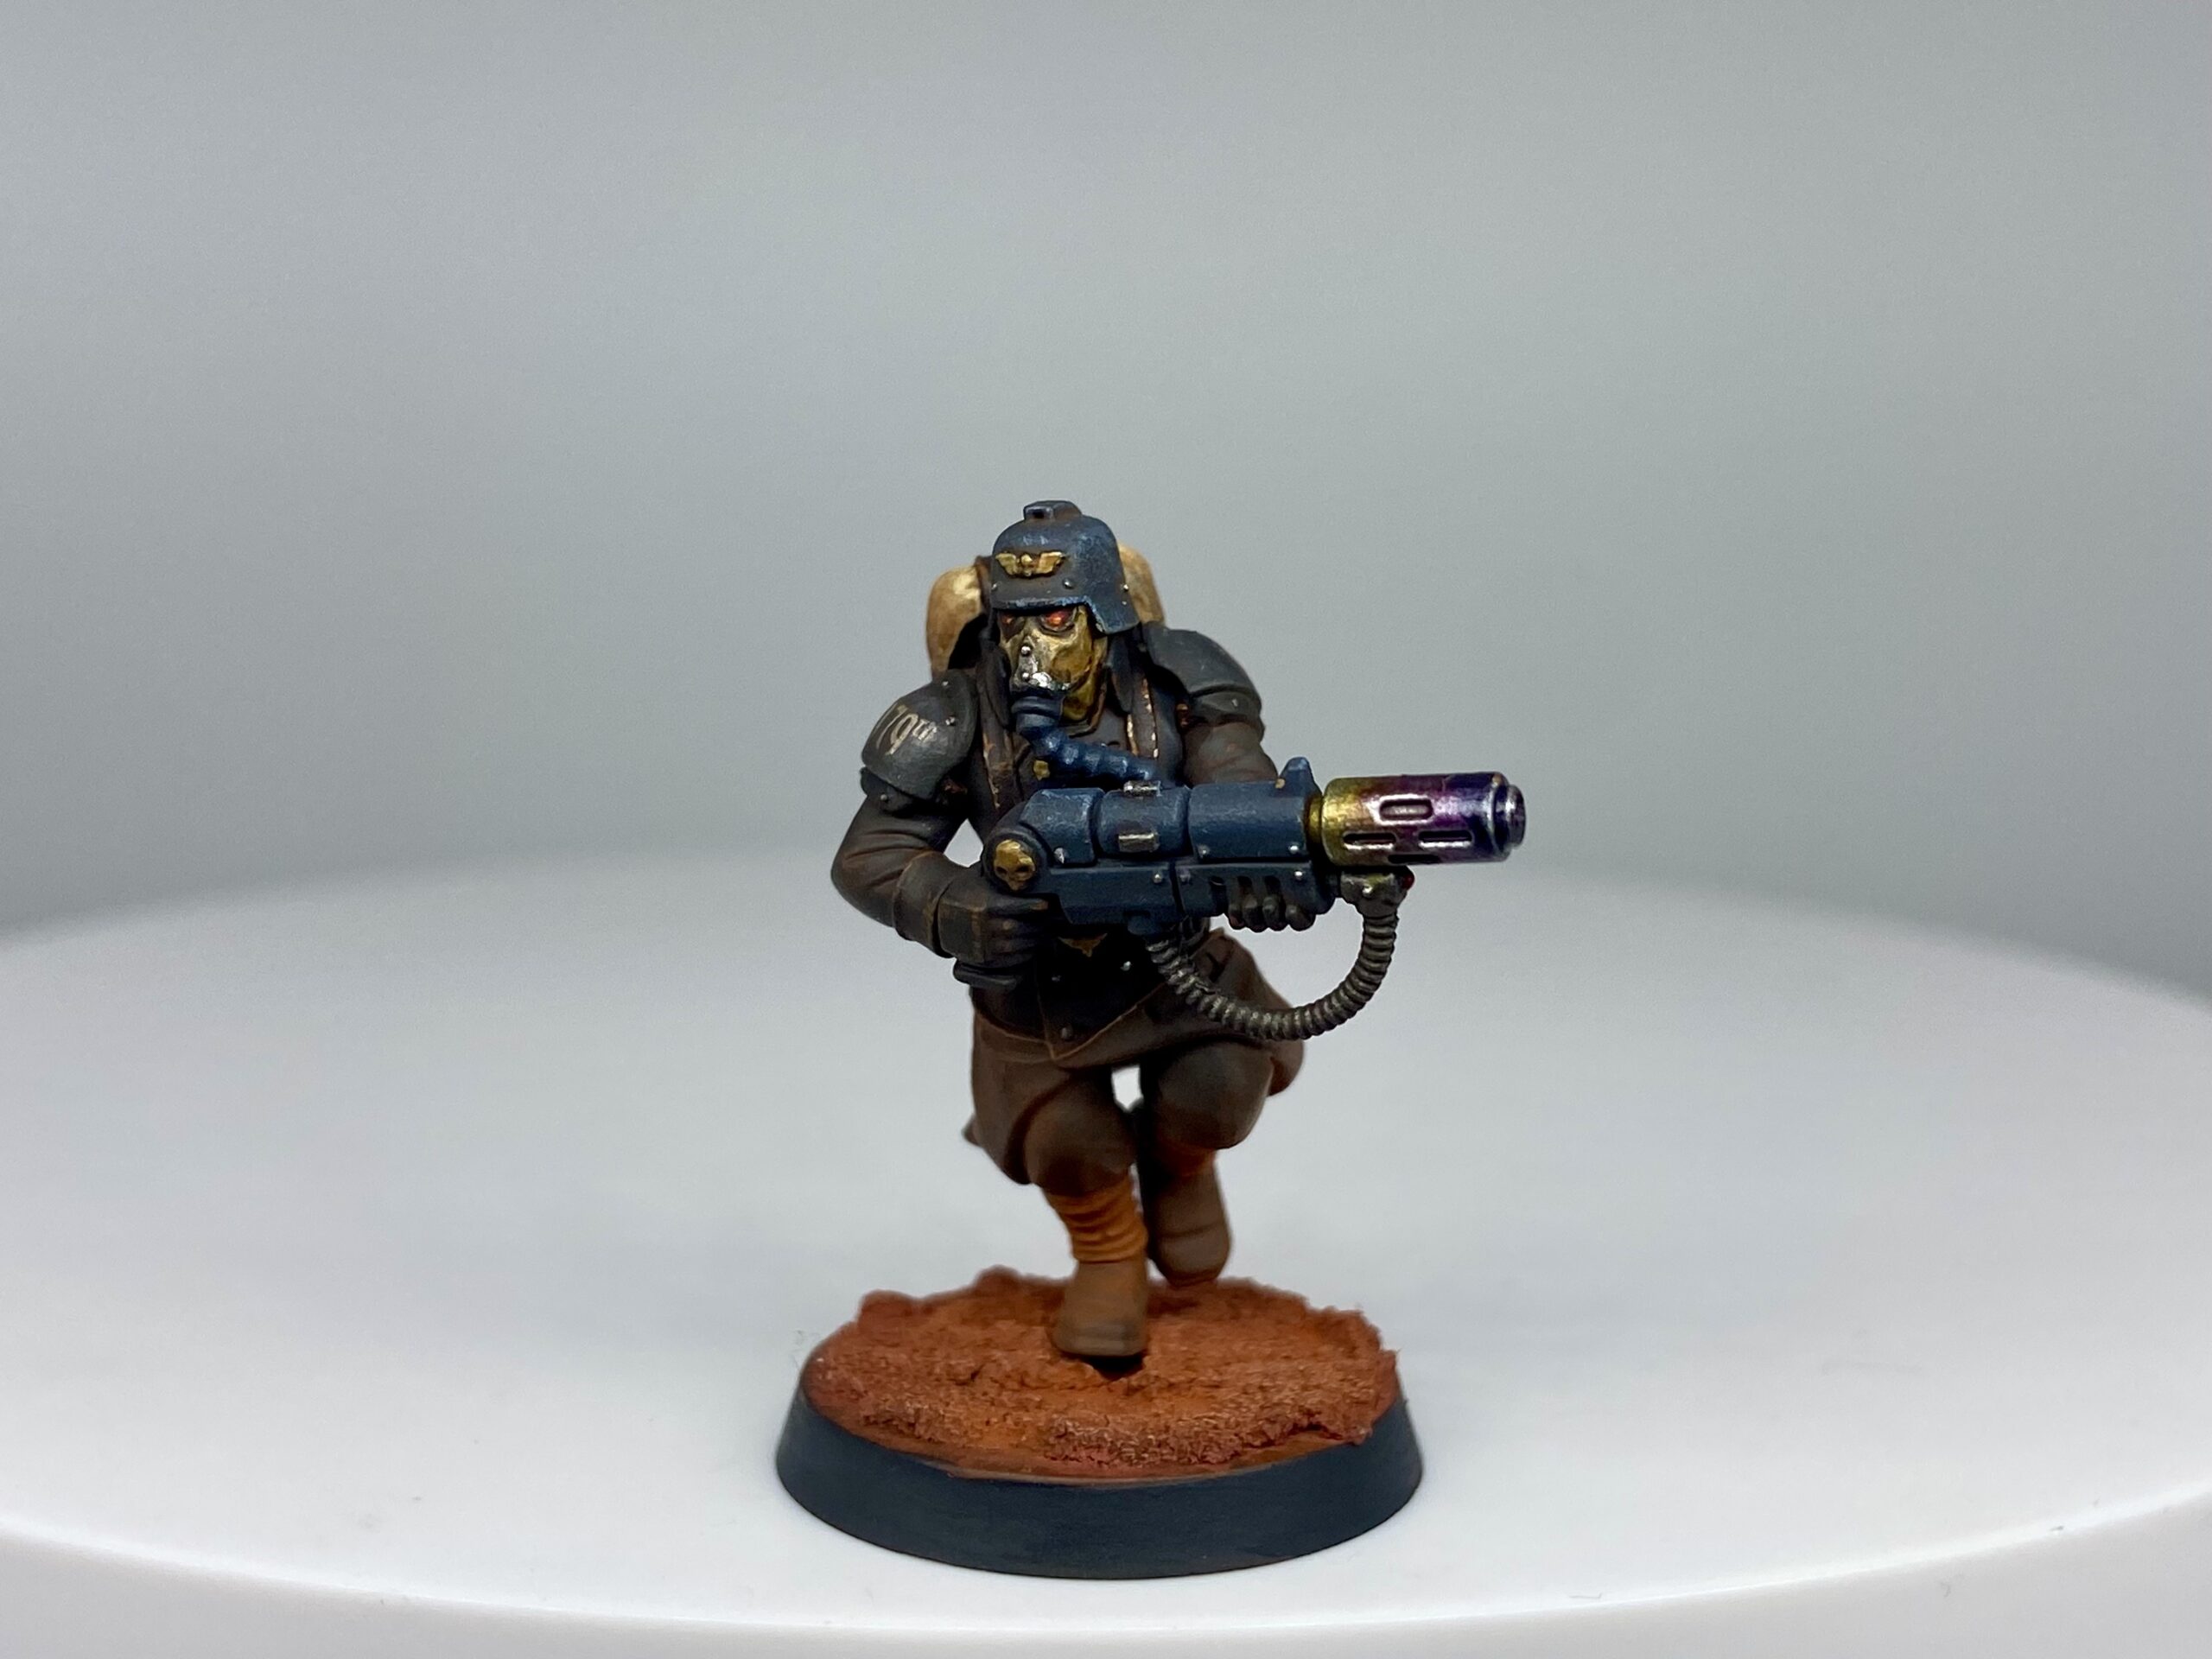
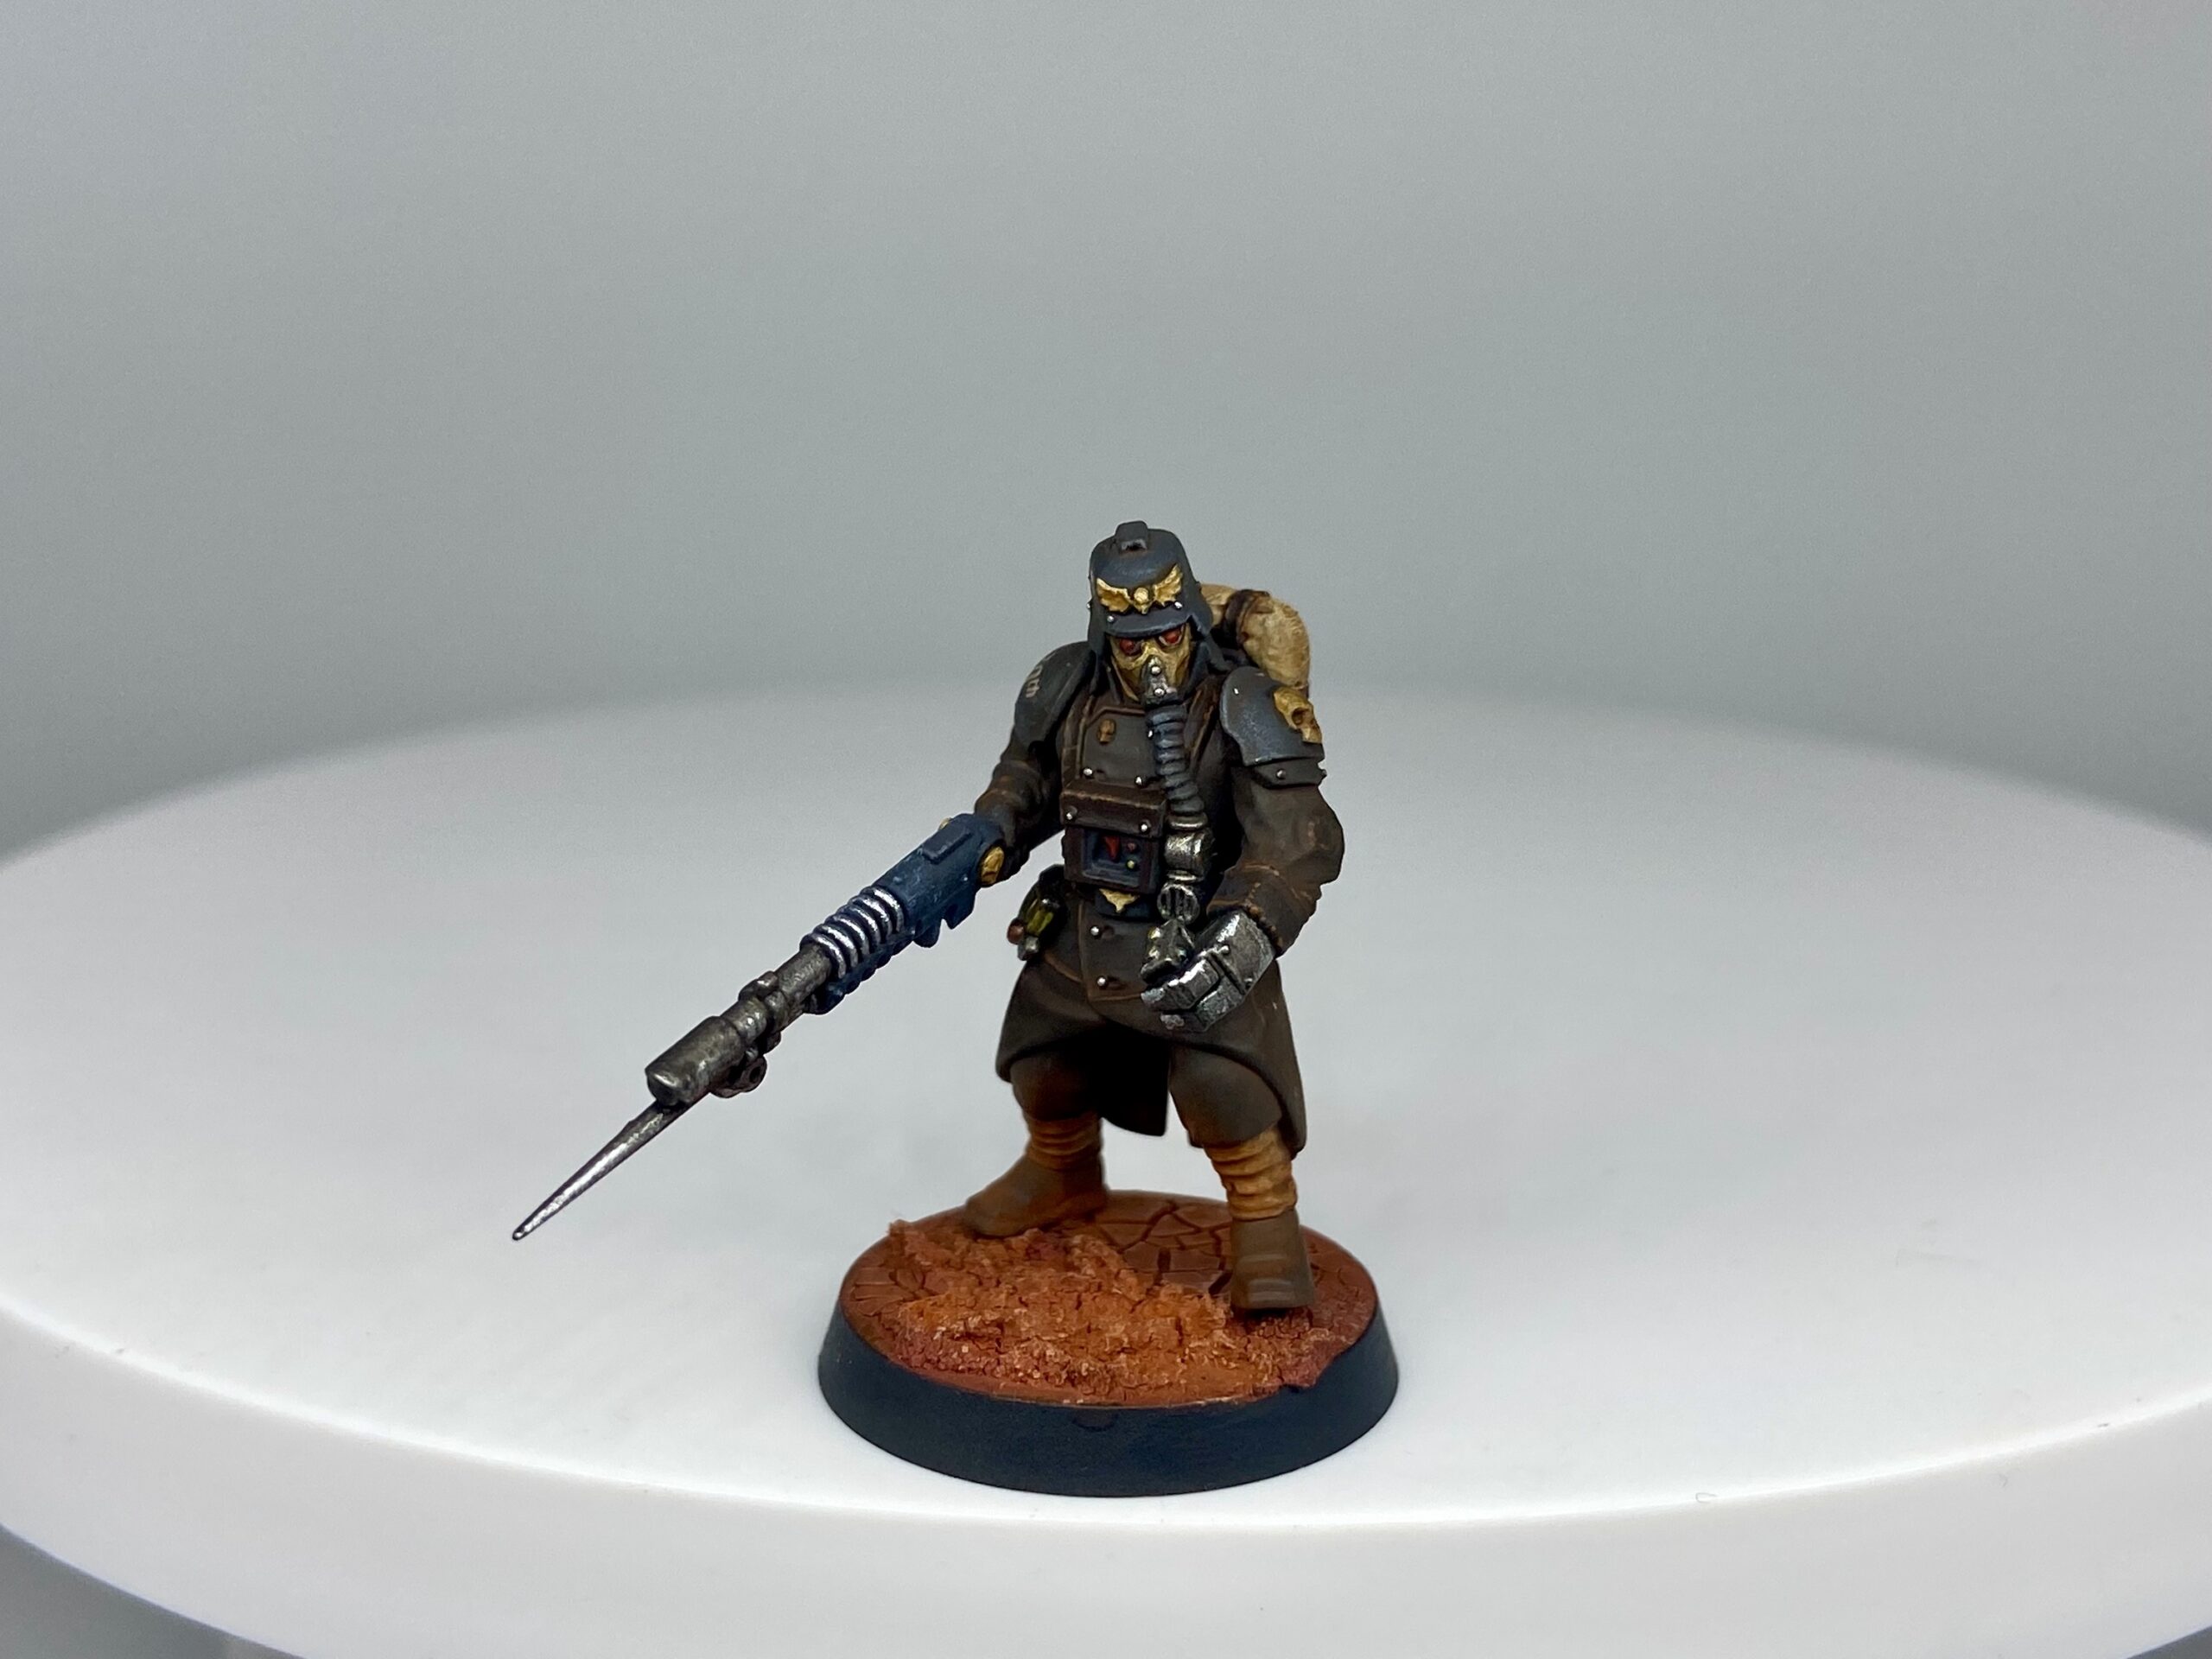
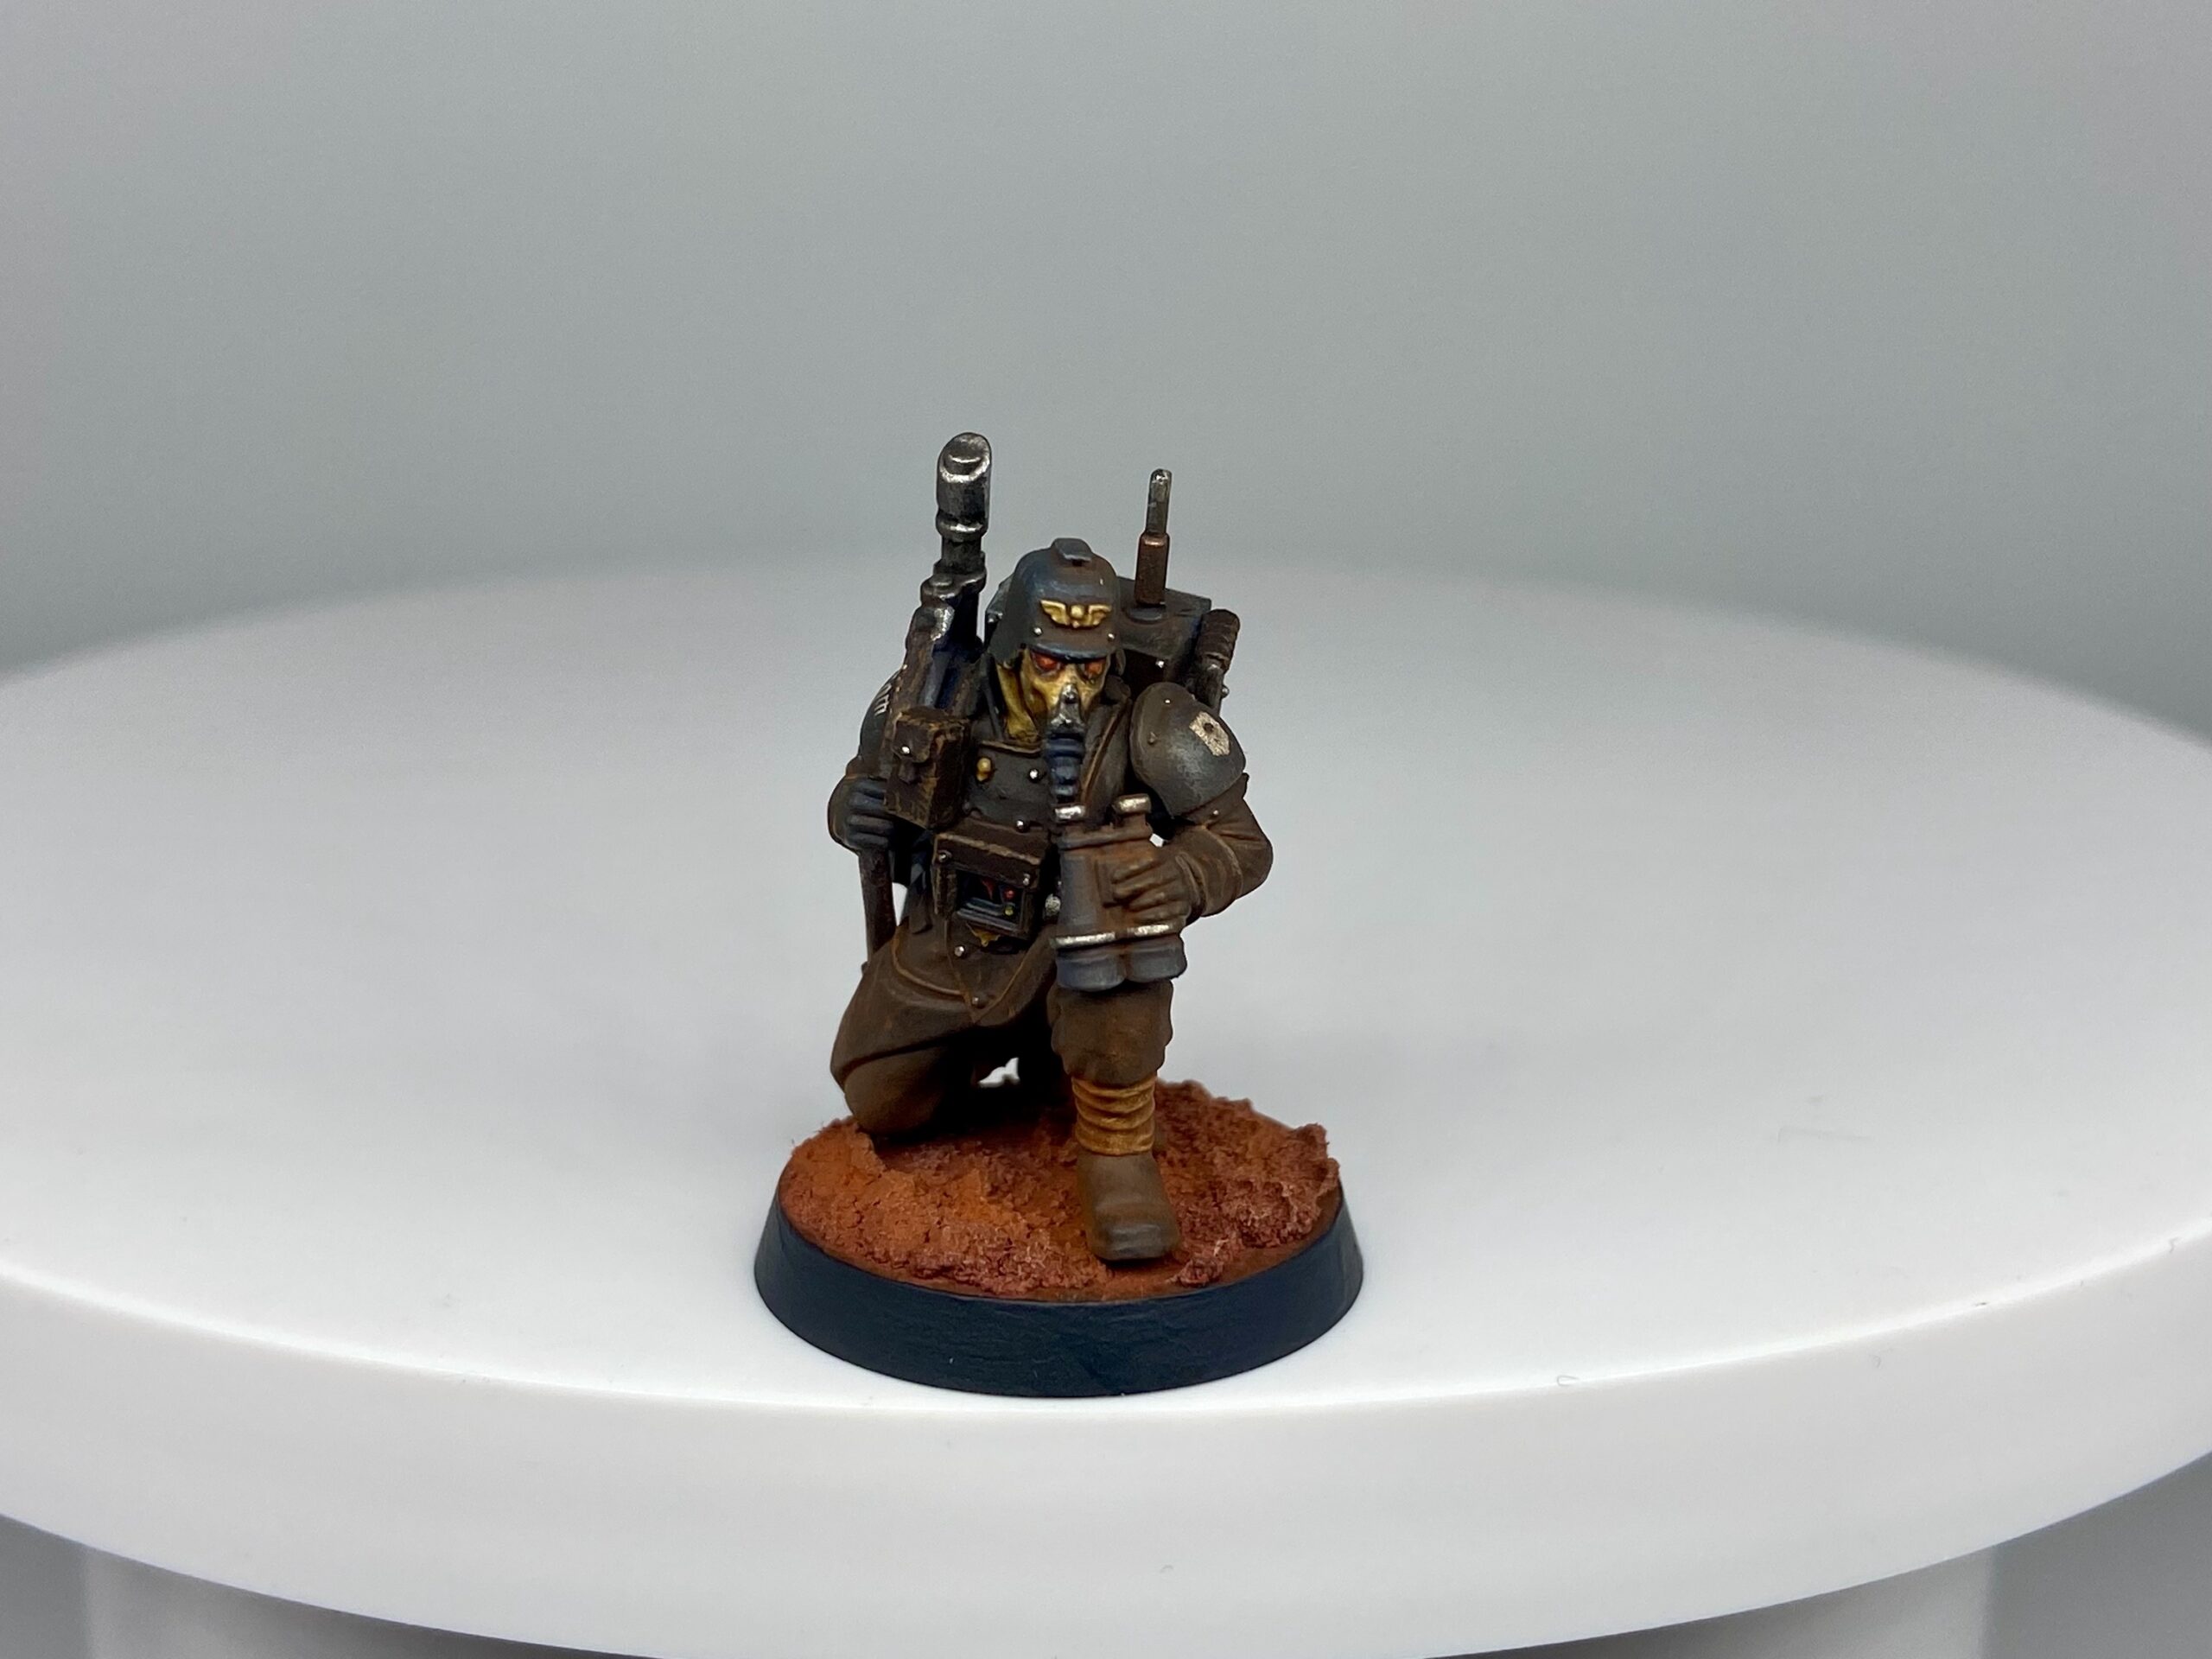
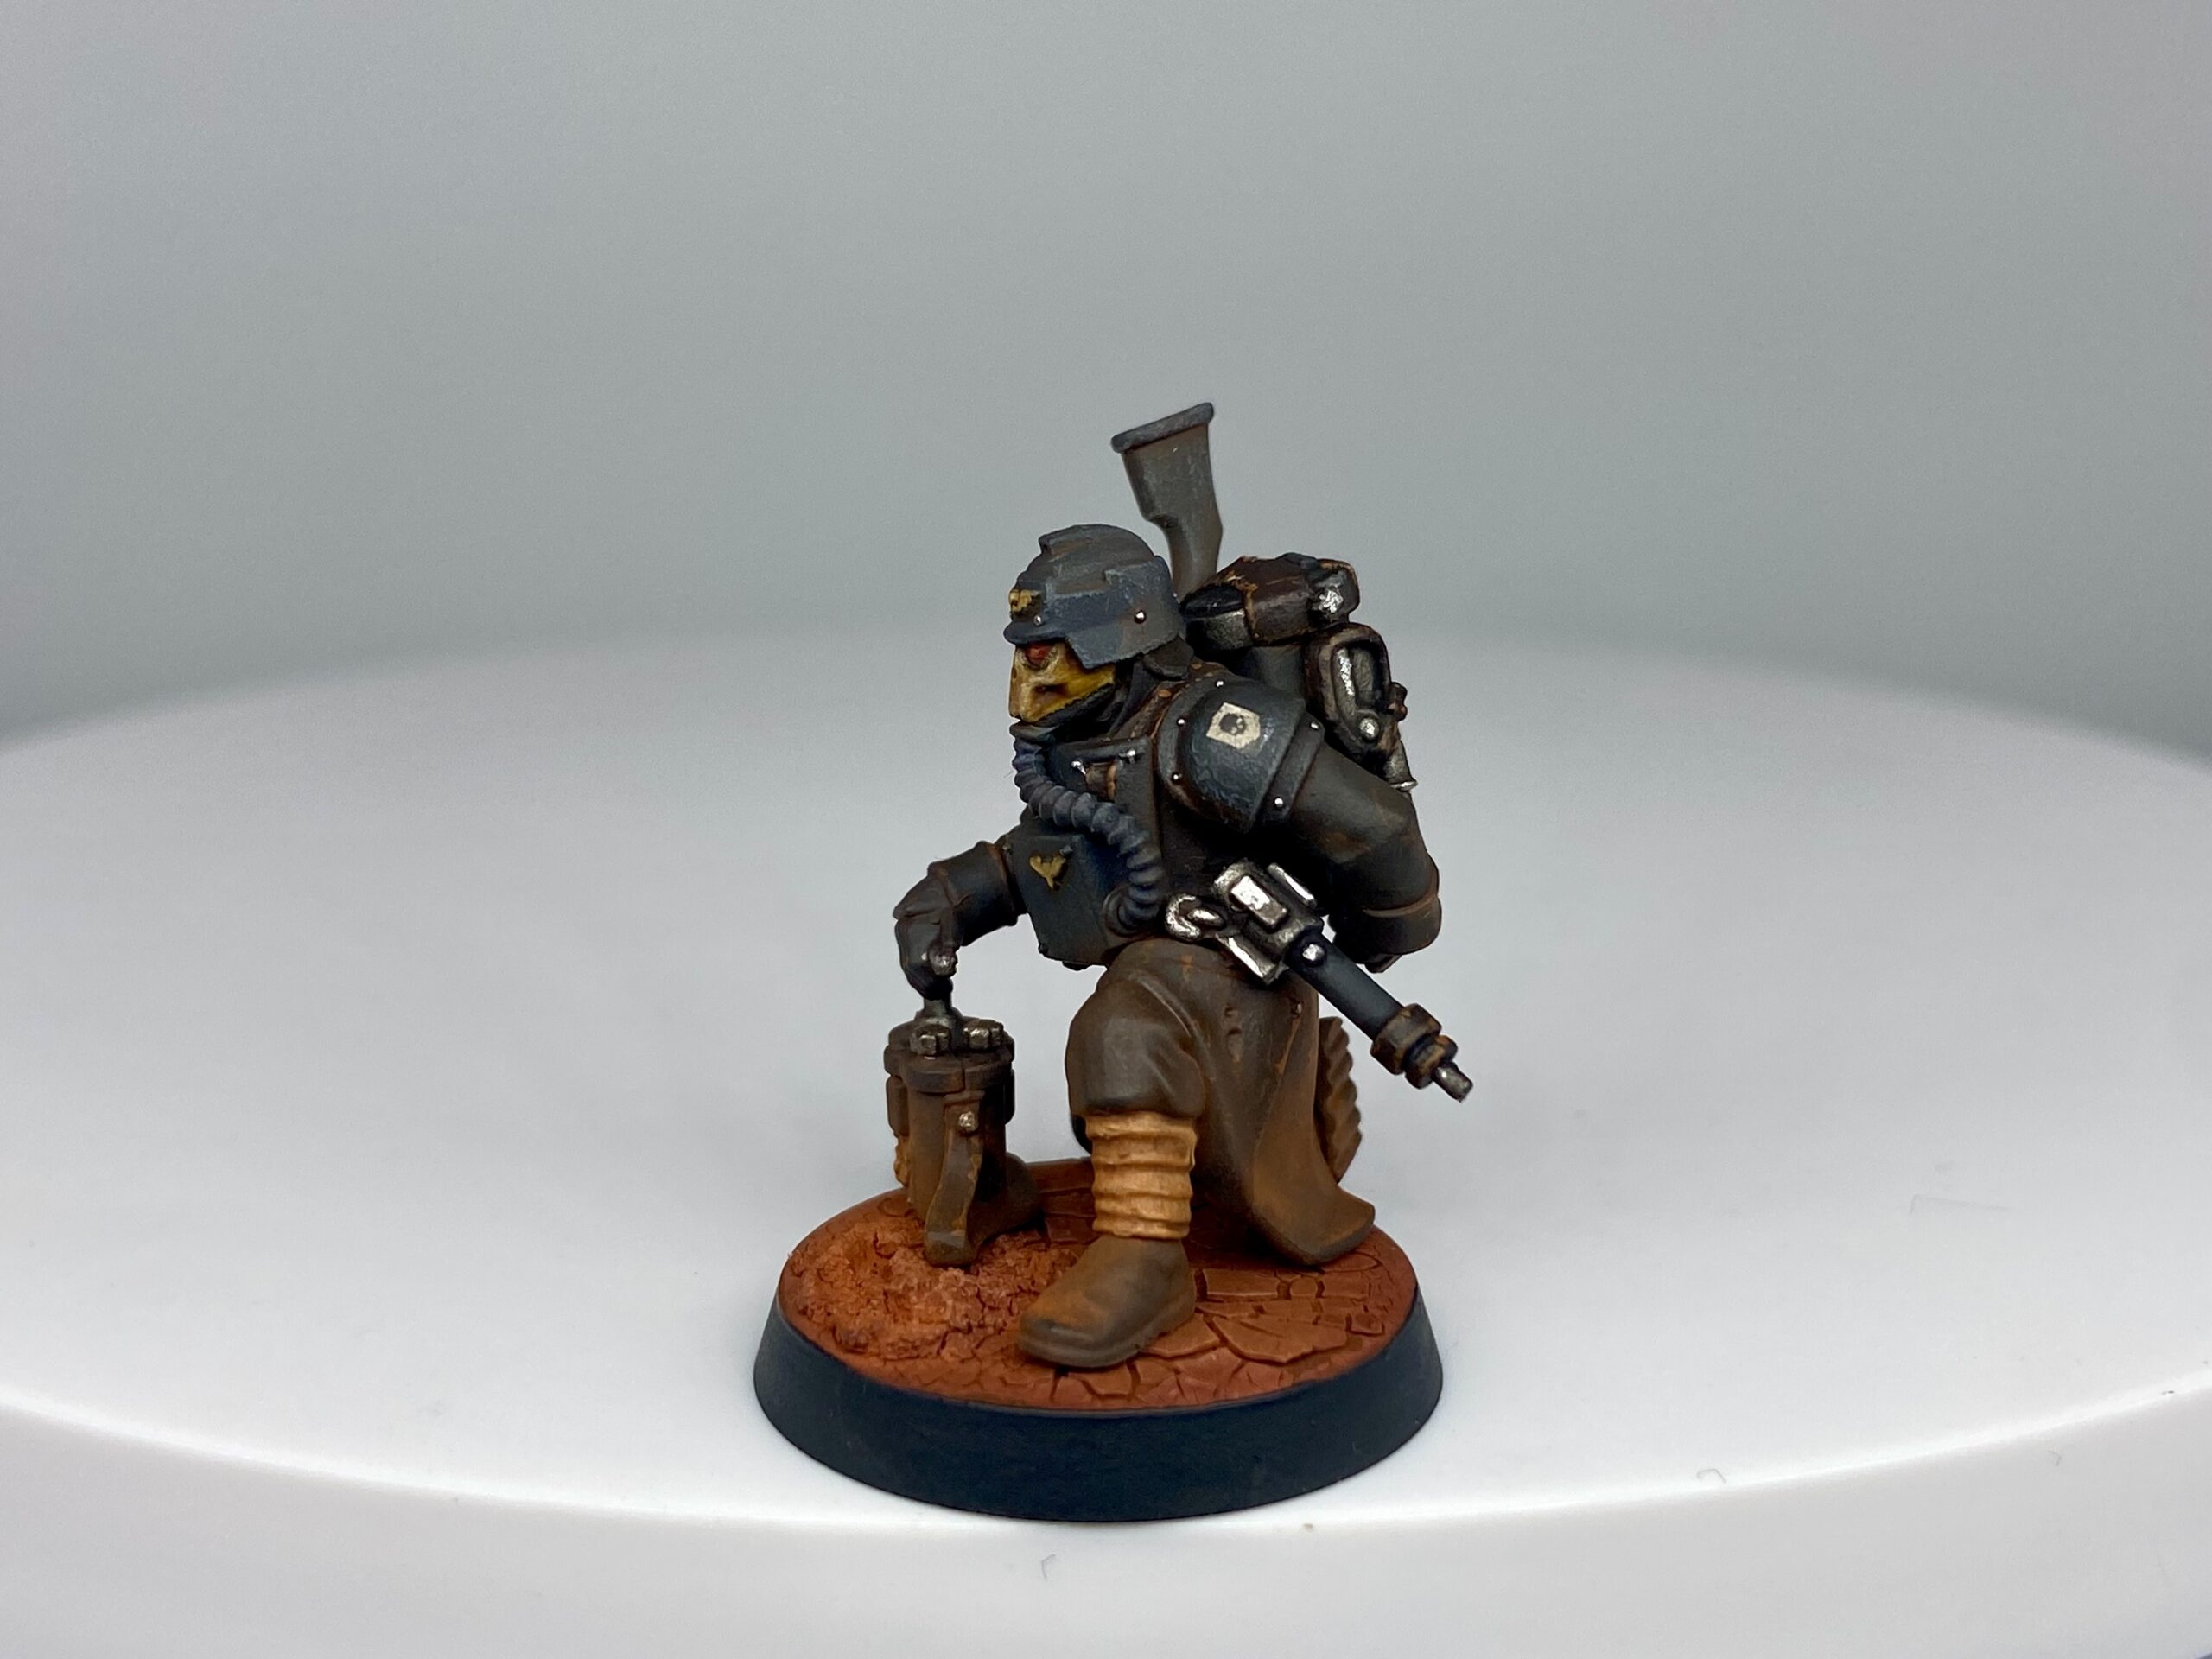
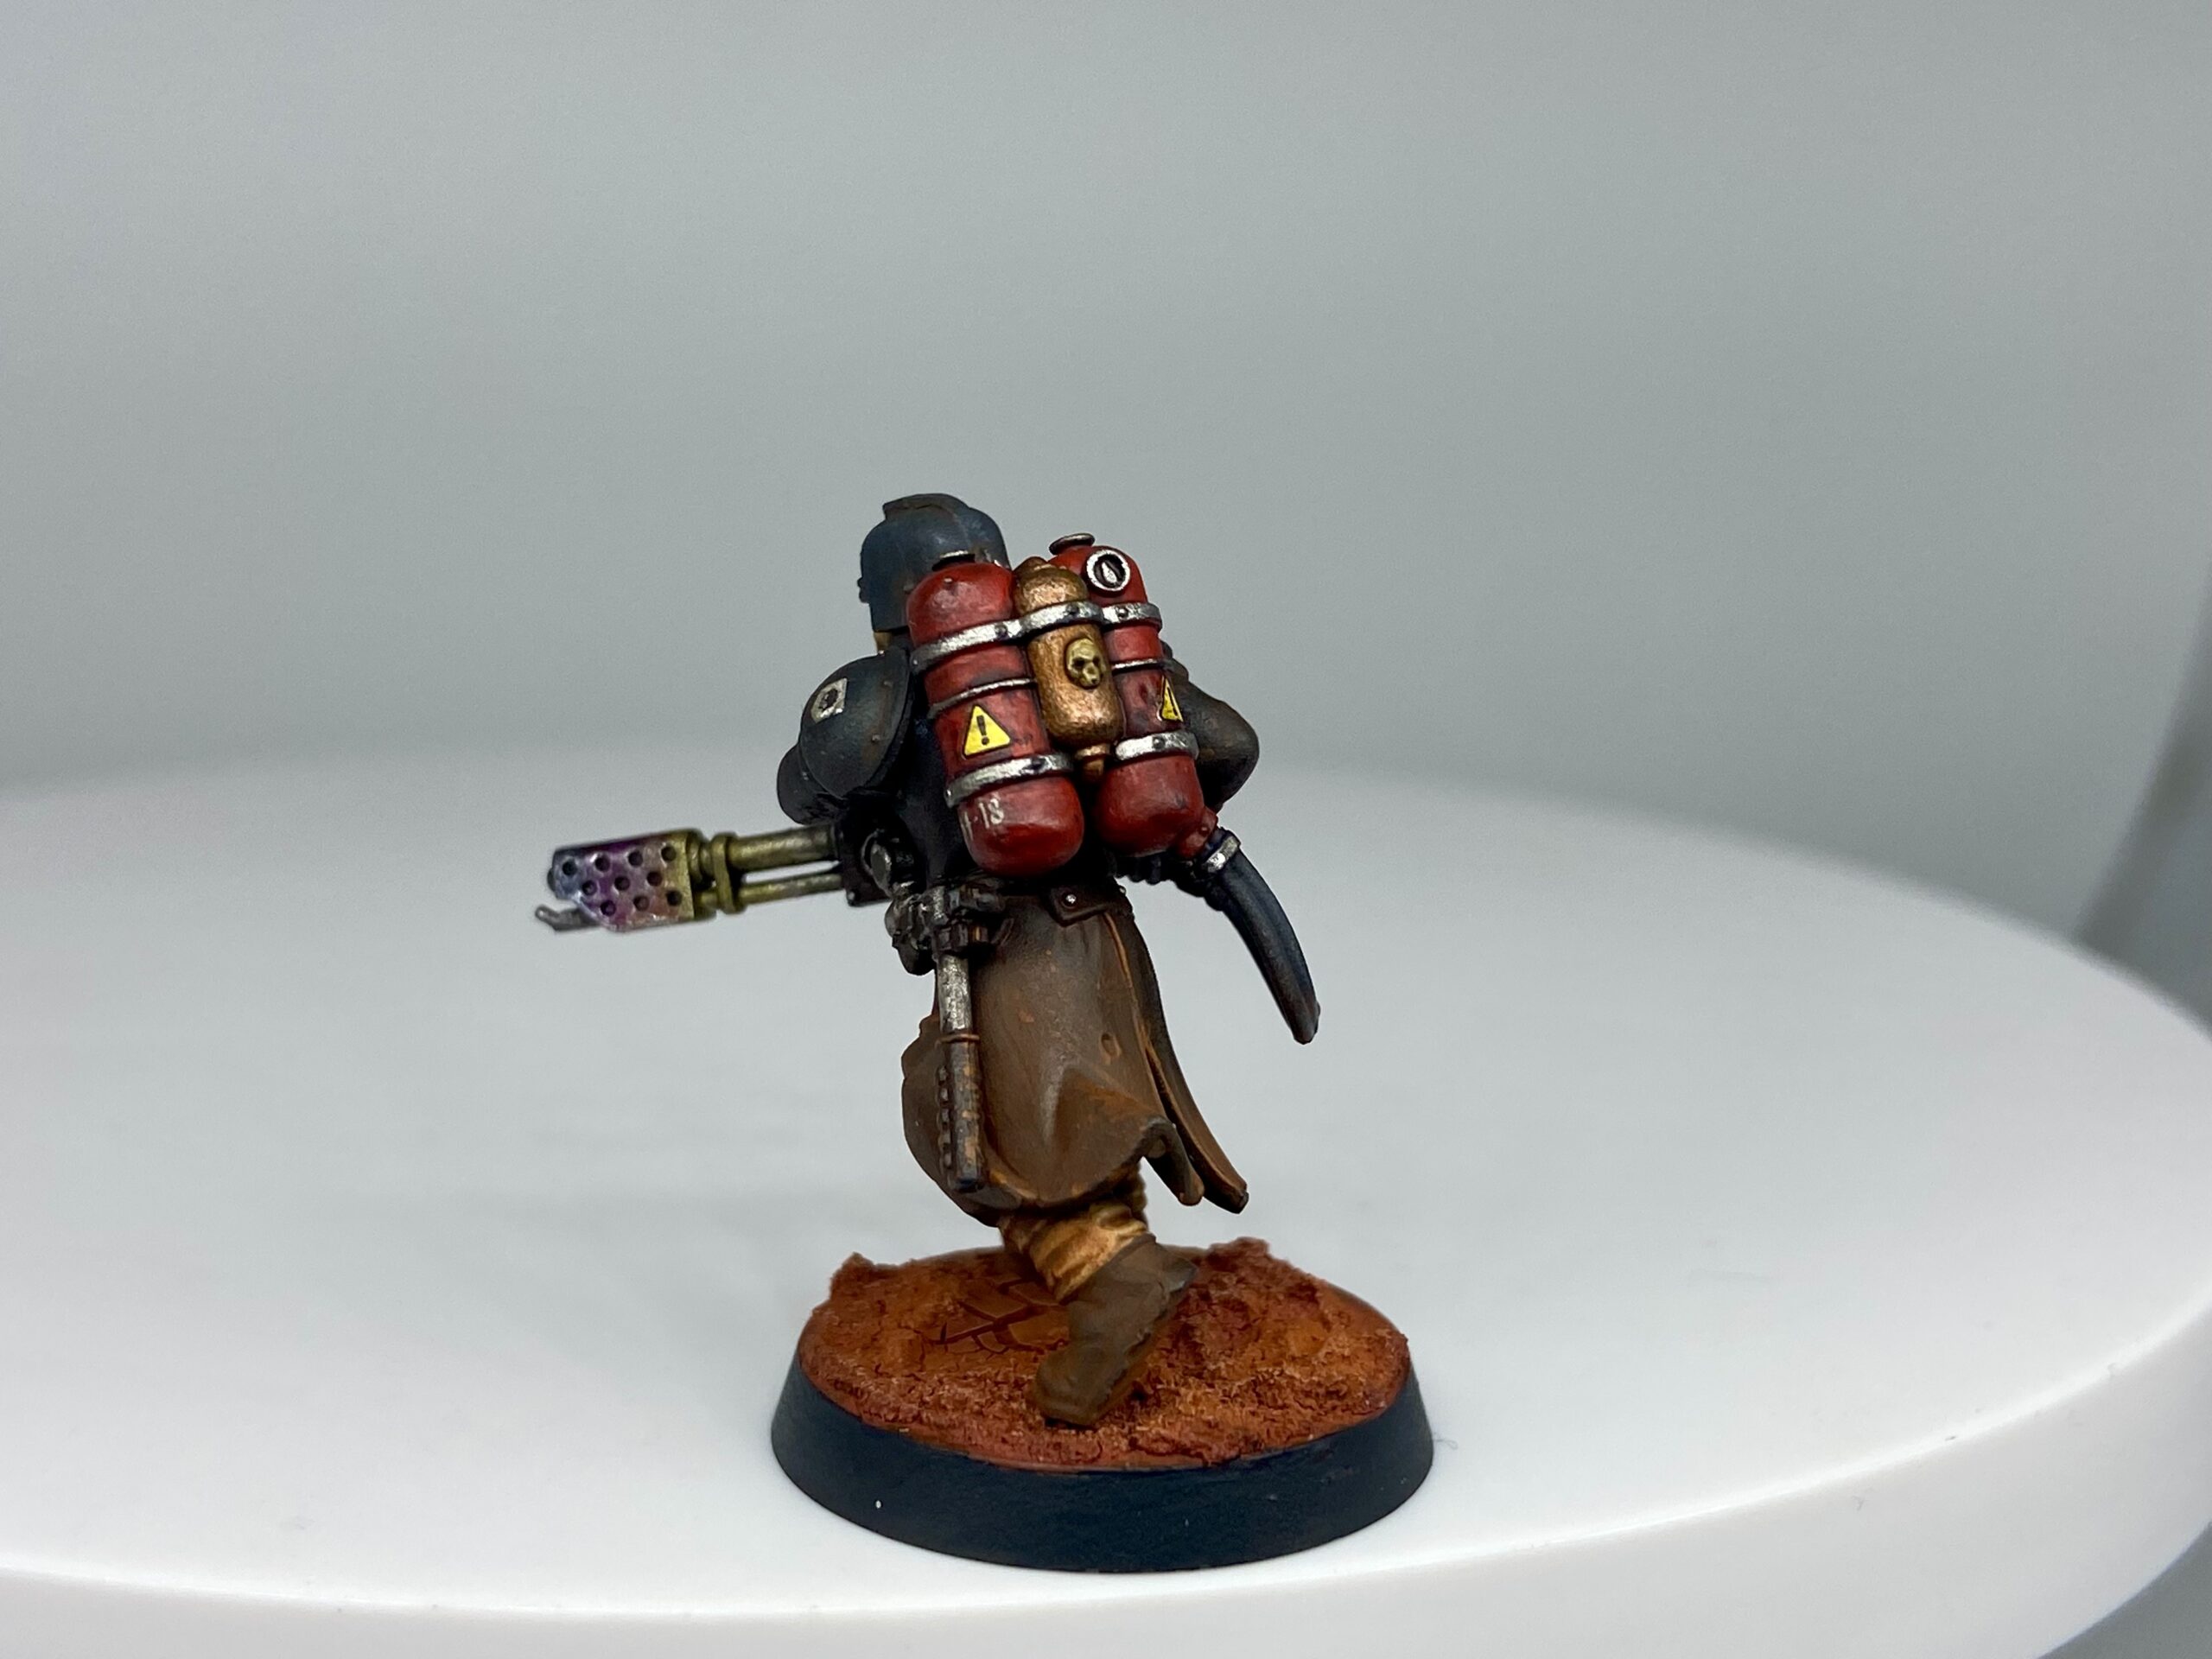
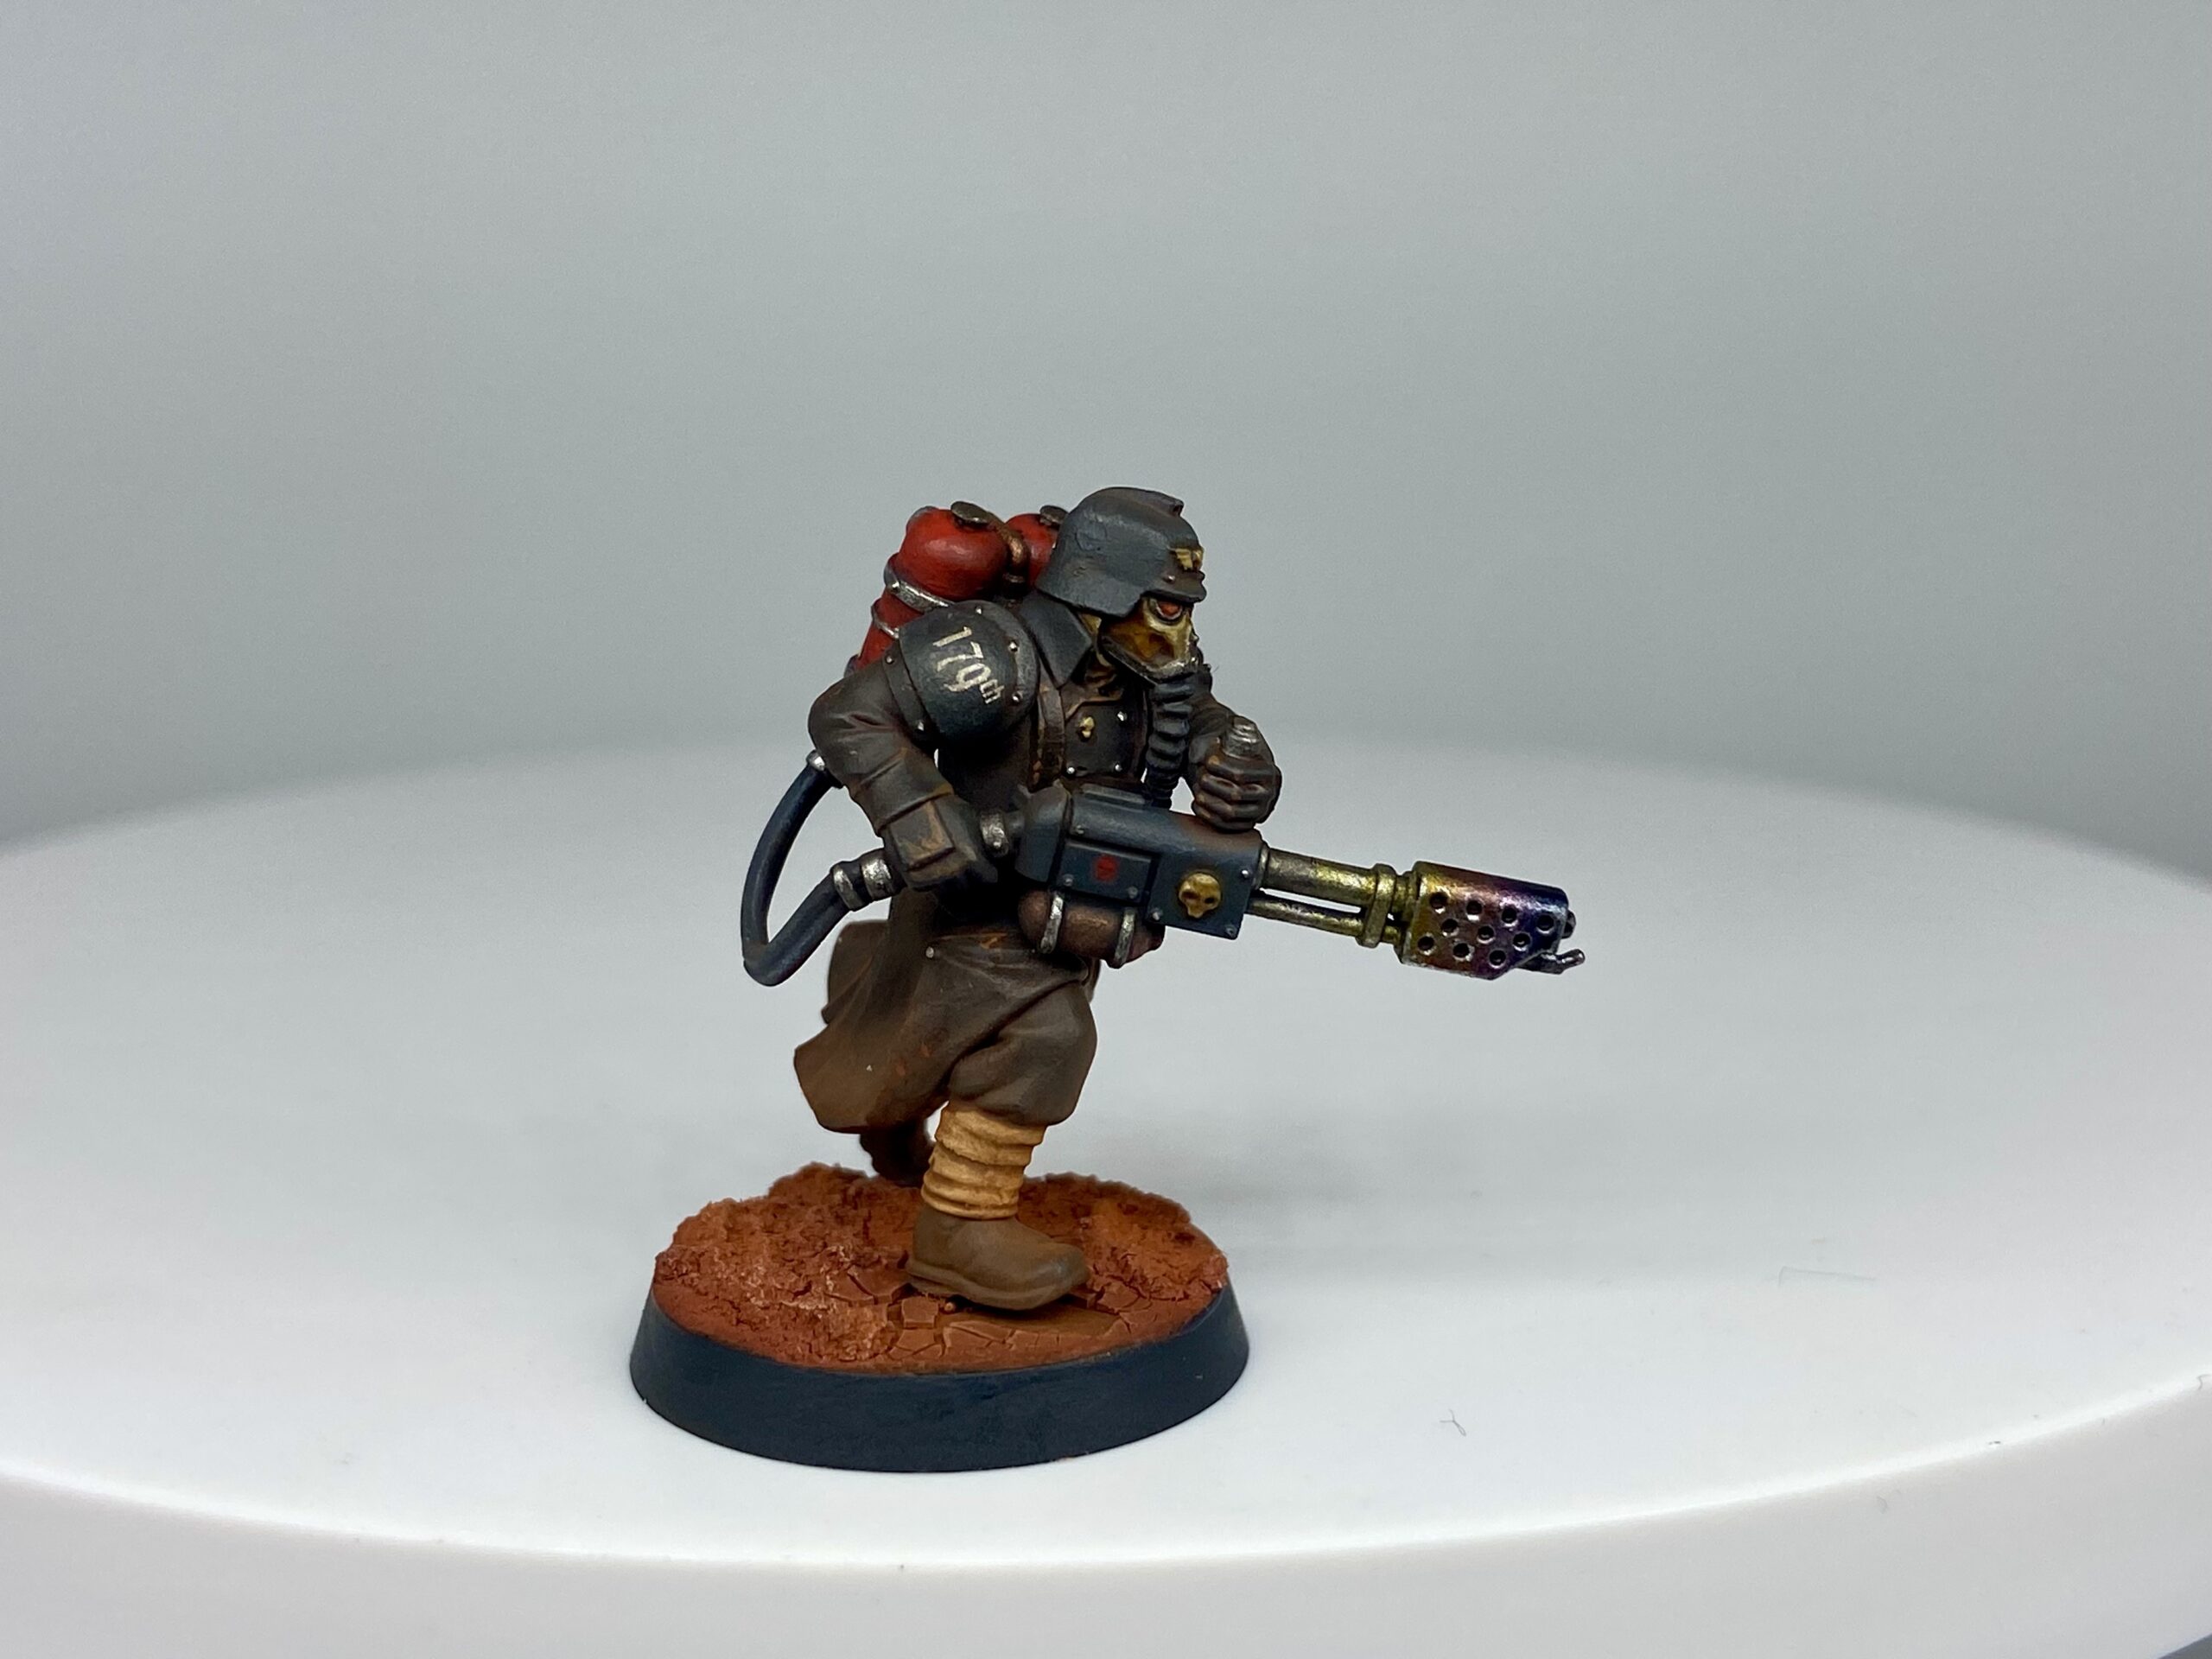
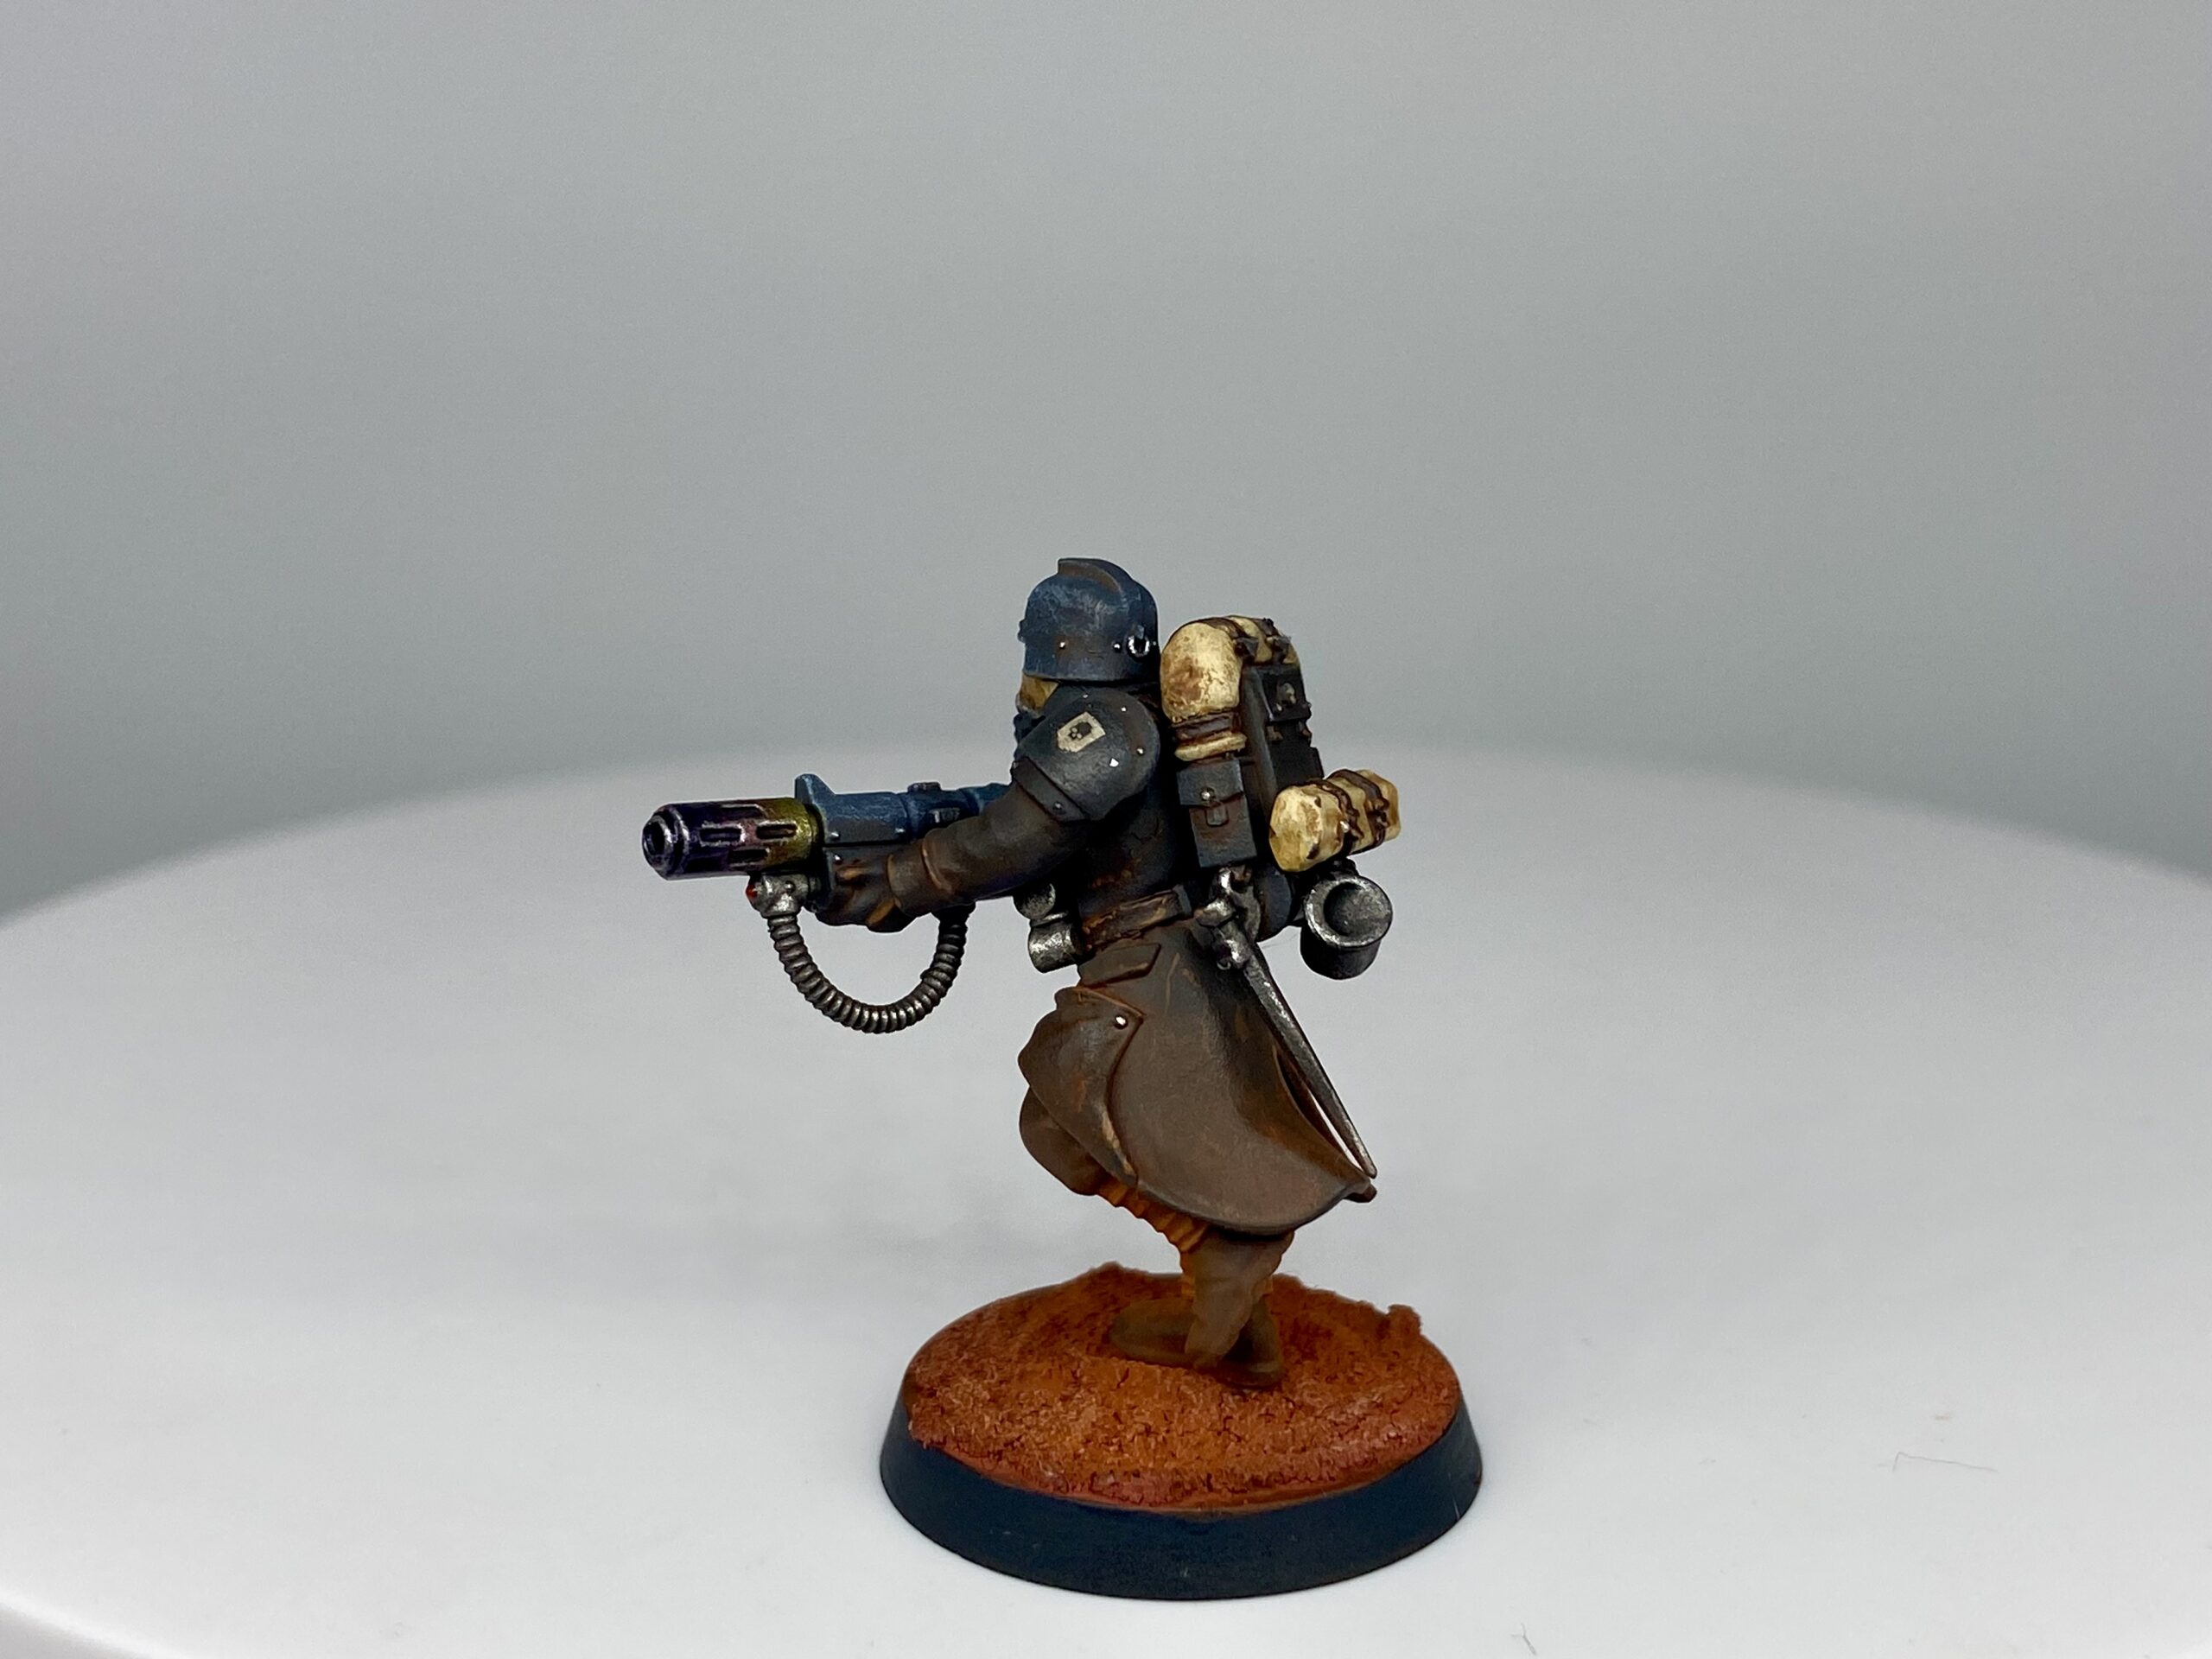
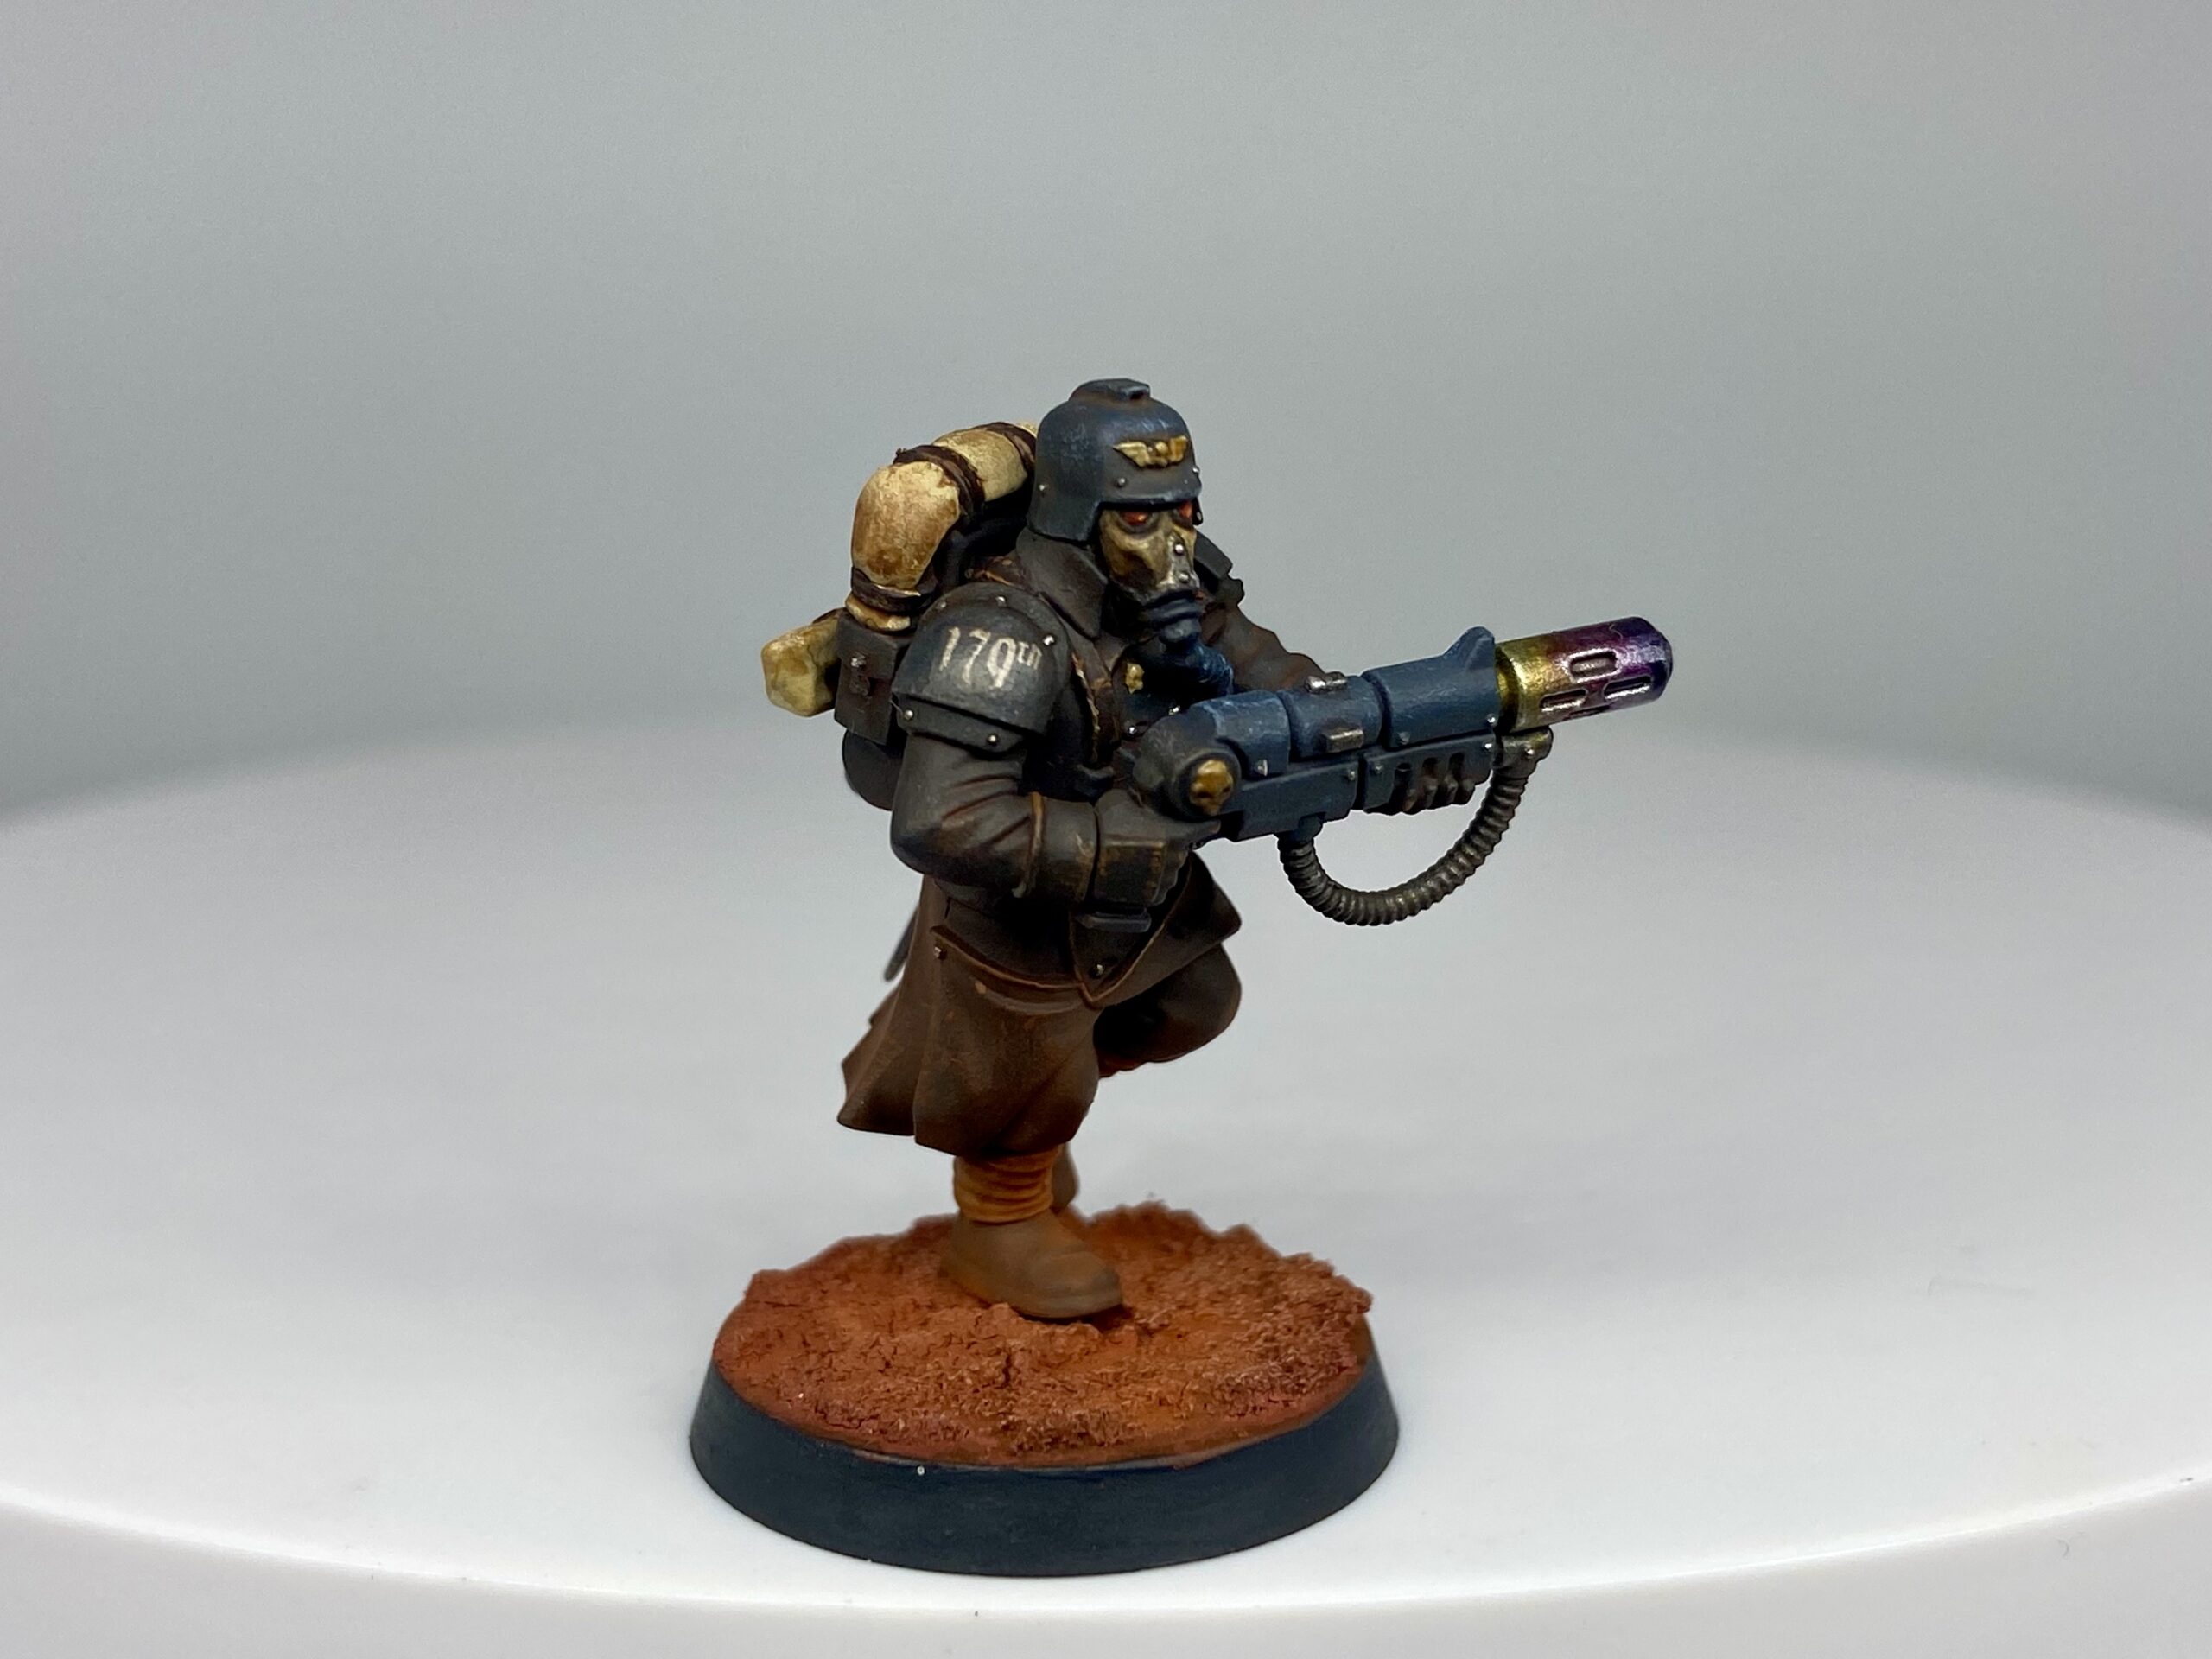
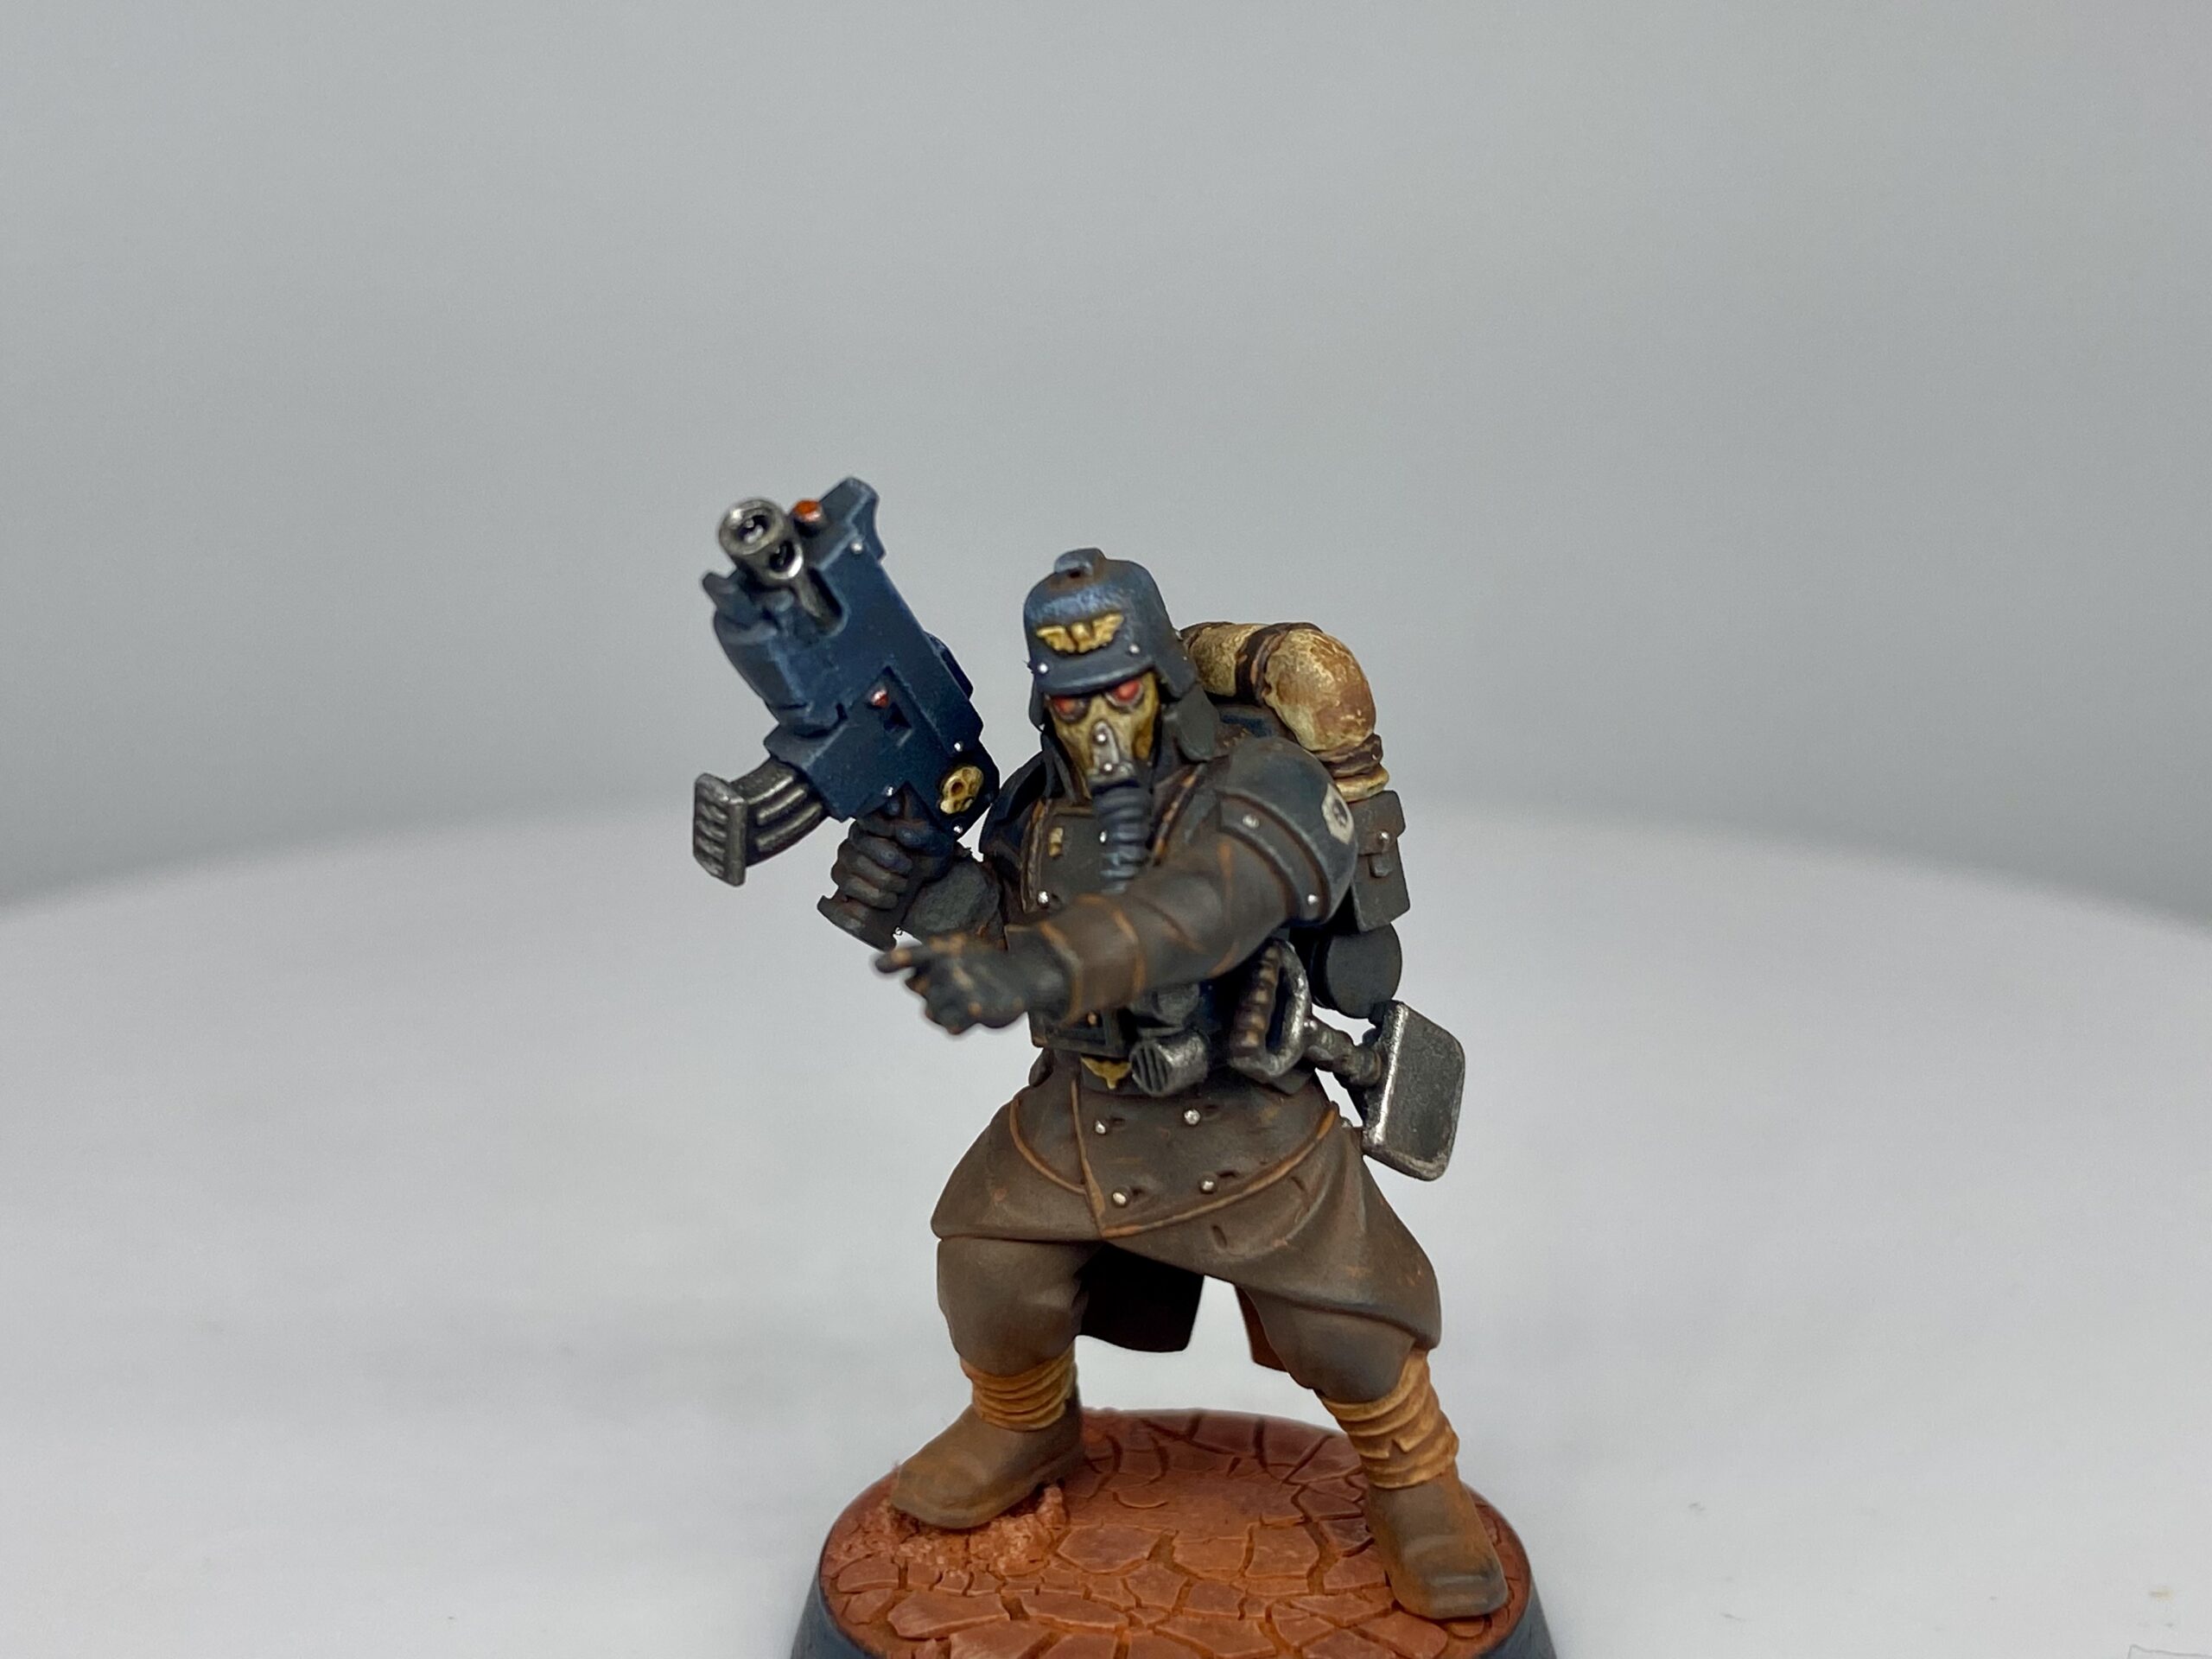
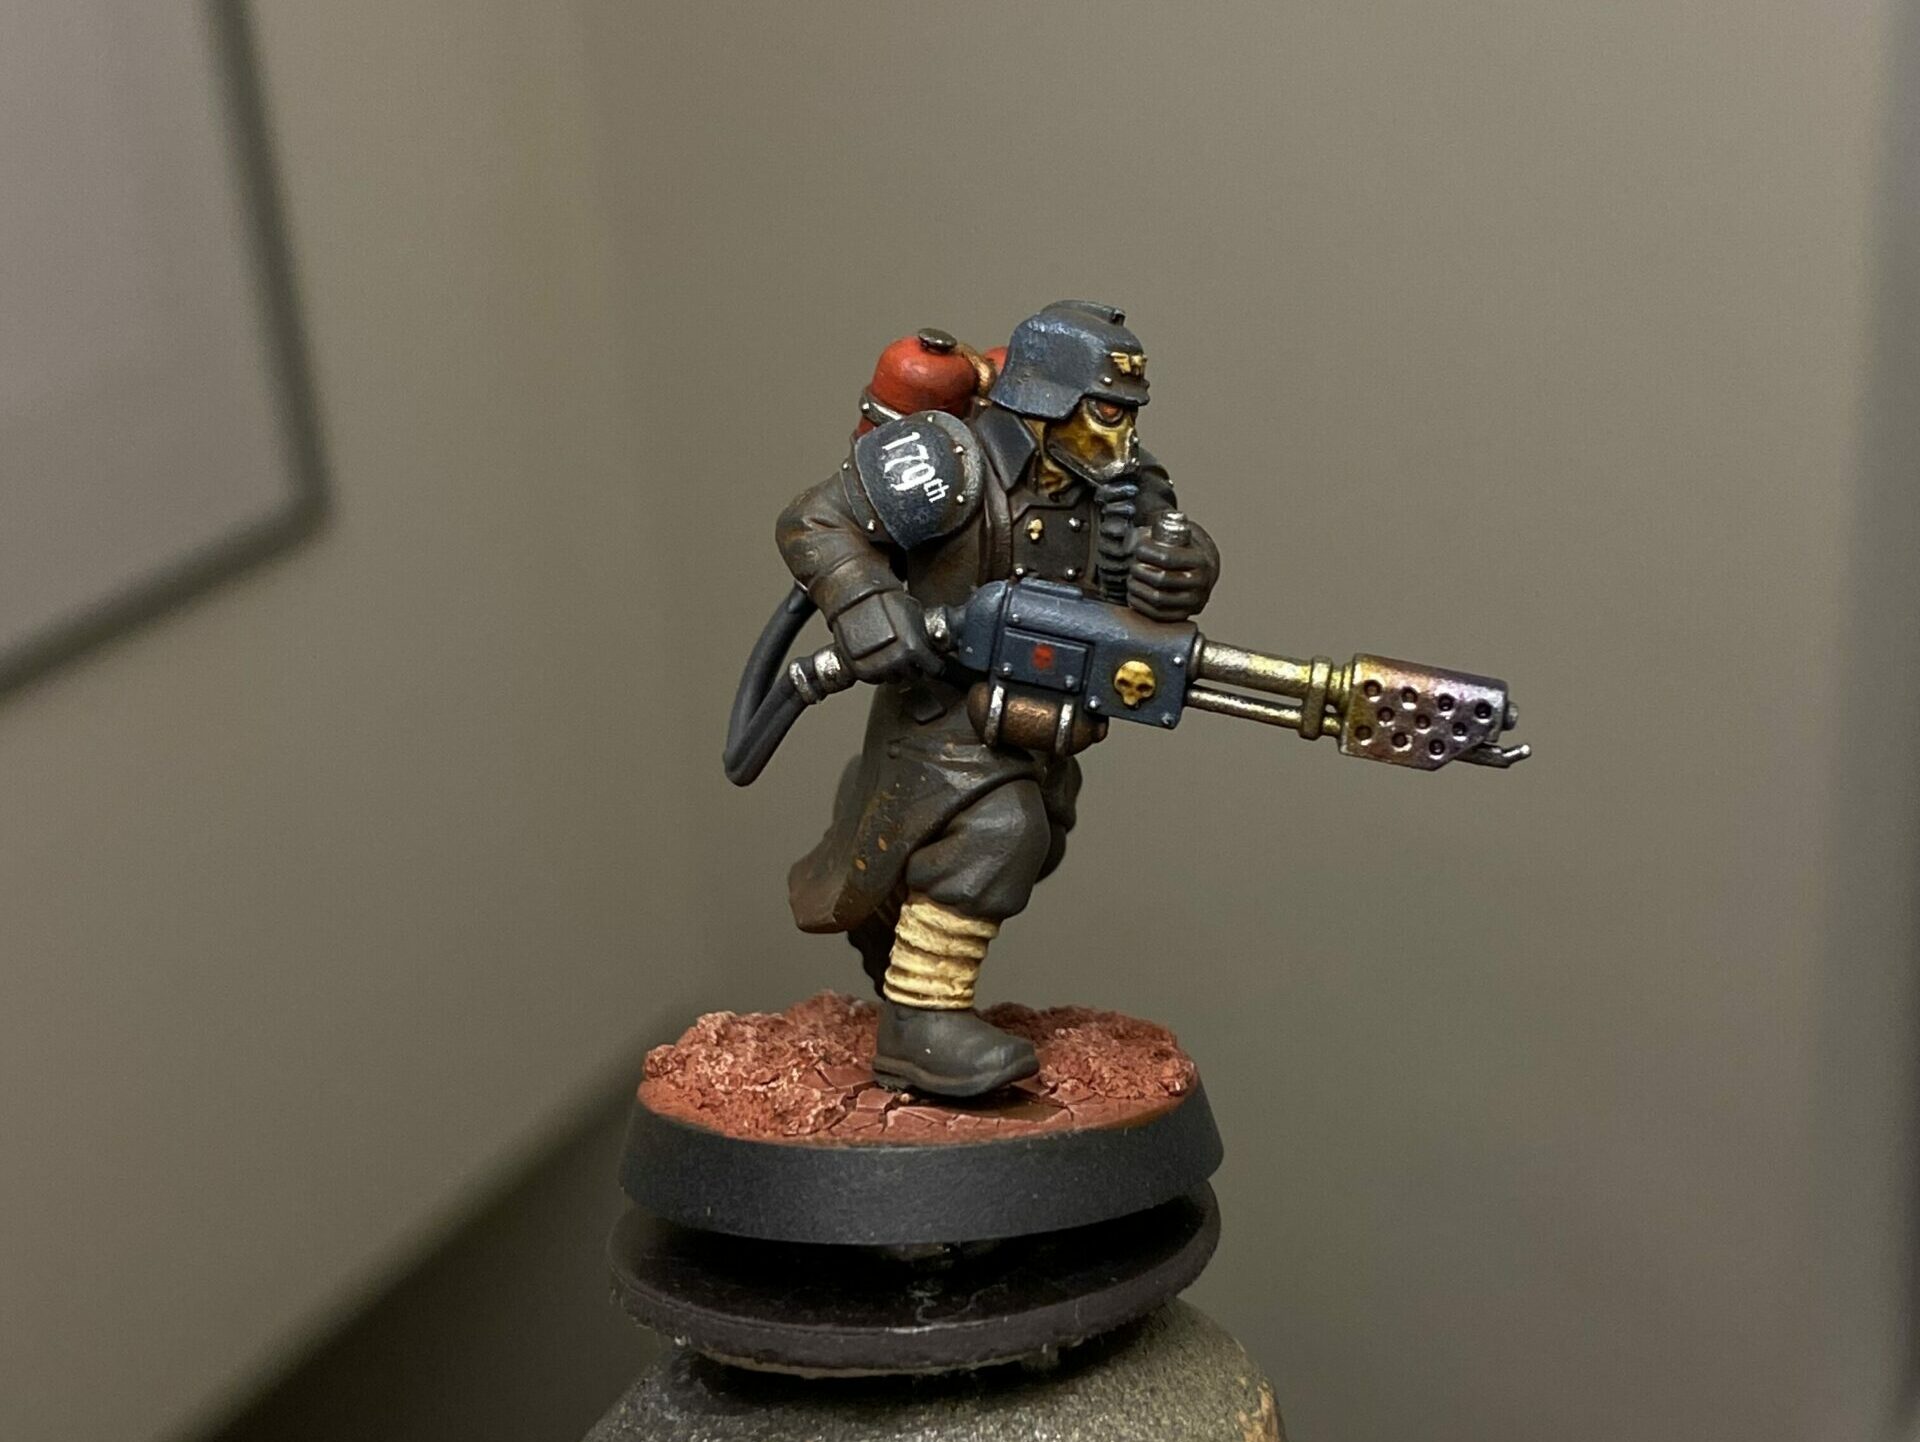
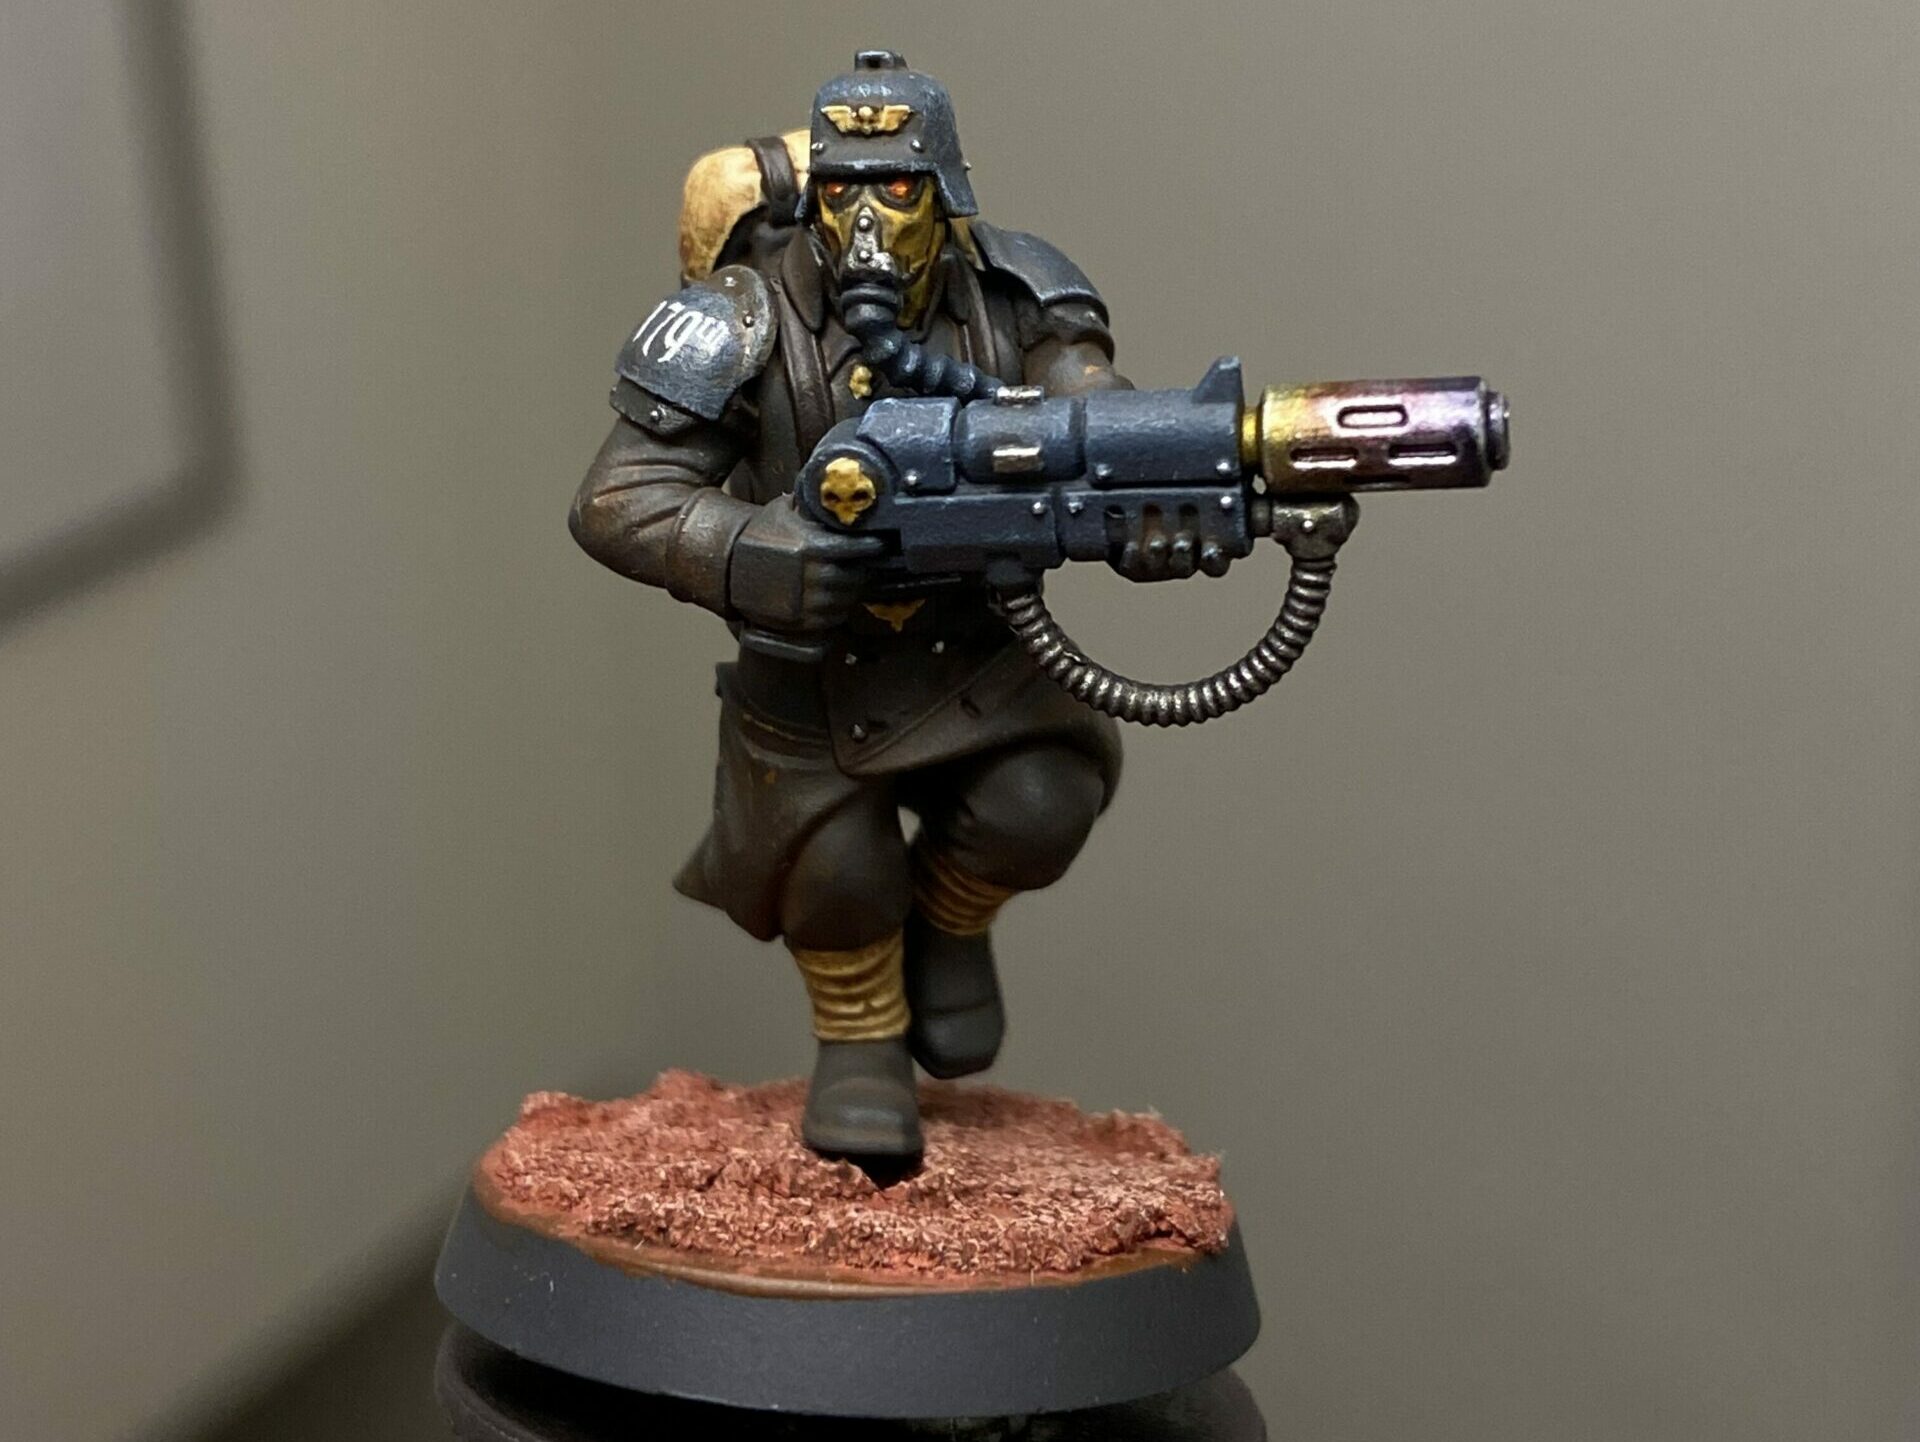
Krieg Models Completed
The following models give me a Kill Team with all options and the four extra Auxiliary models the Veteran Guardsmen can take. It also gives me enough special weapon options, Sergeants and Lasguns, to run two 10-man or one 20-man Krieg unit in regular 40K games. The Marshals are for 40K only to lead my Krieg units.
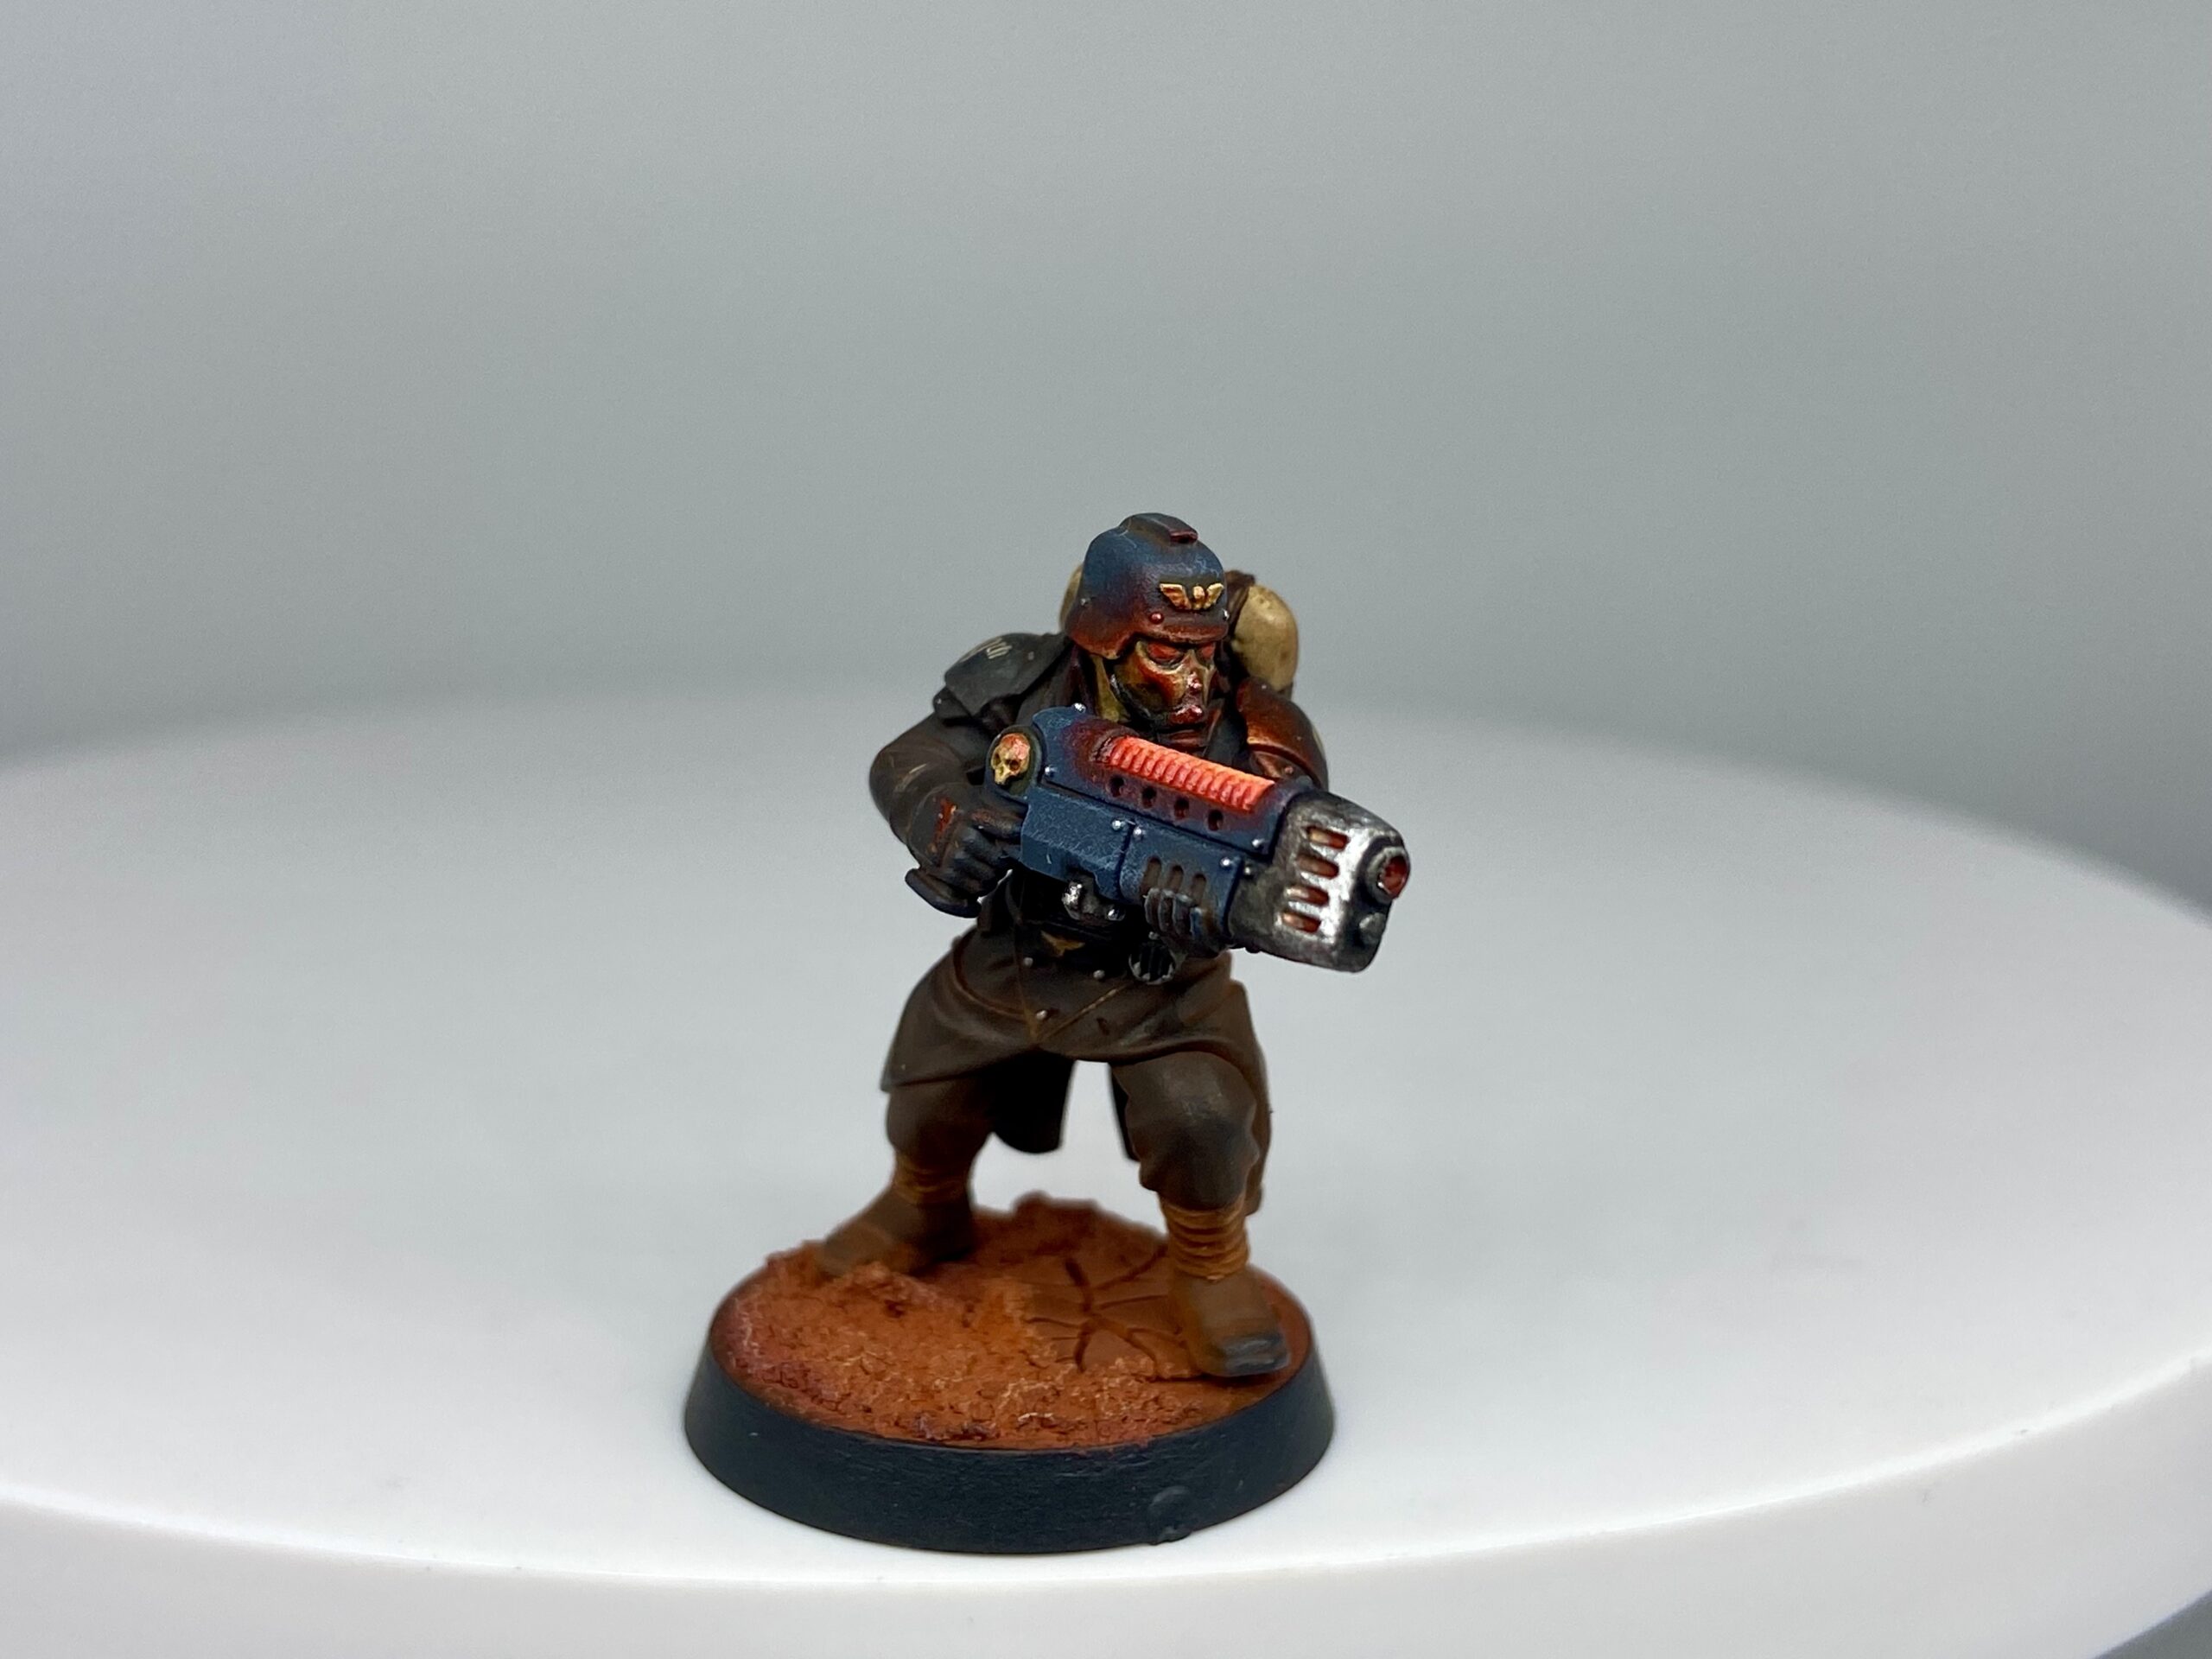
- 2x Krieg Marshals
- 2x Sergeants
- 1x Grenade Launcher
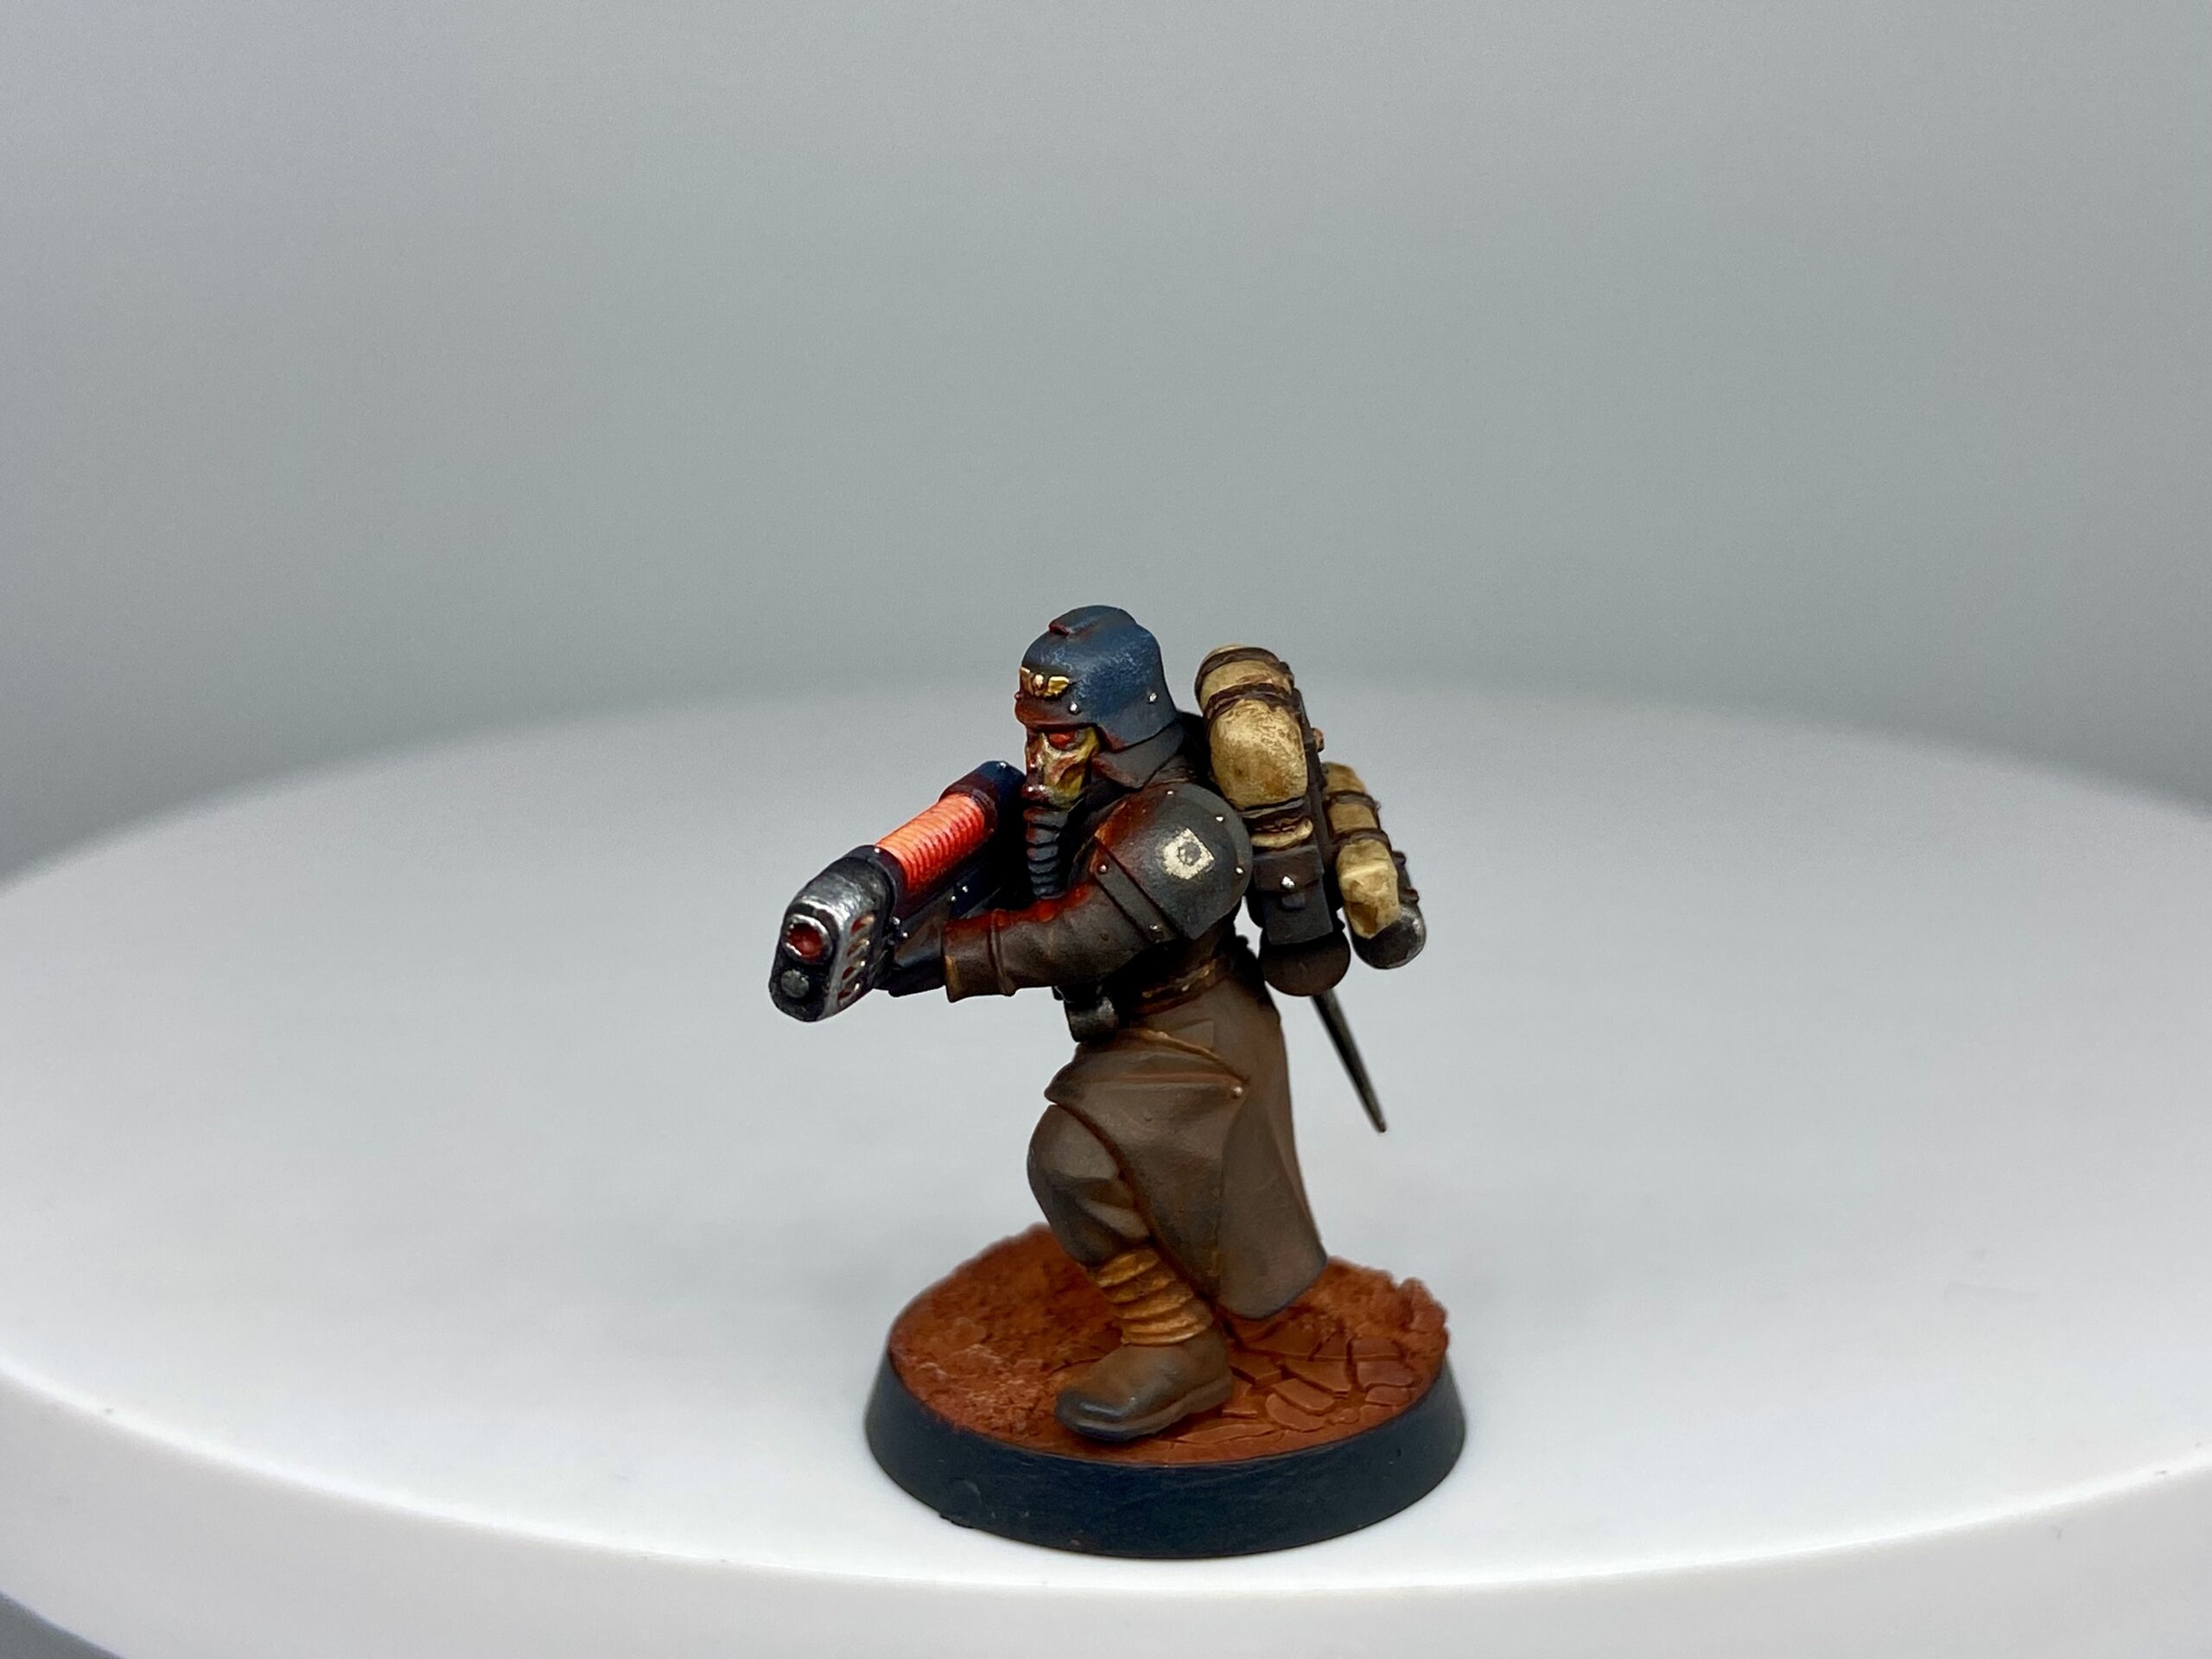
- 1x Plasma Gunner
- 1x Flamer
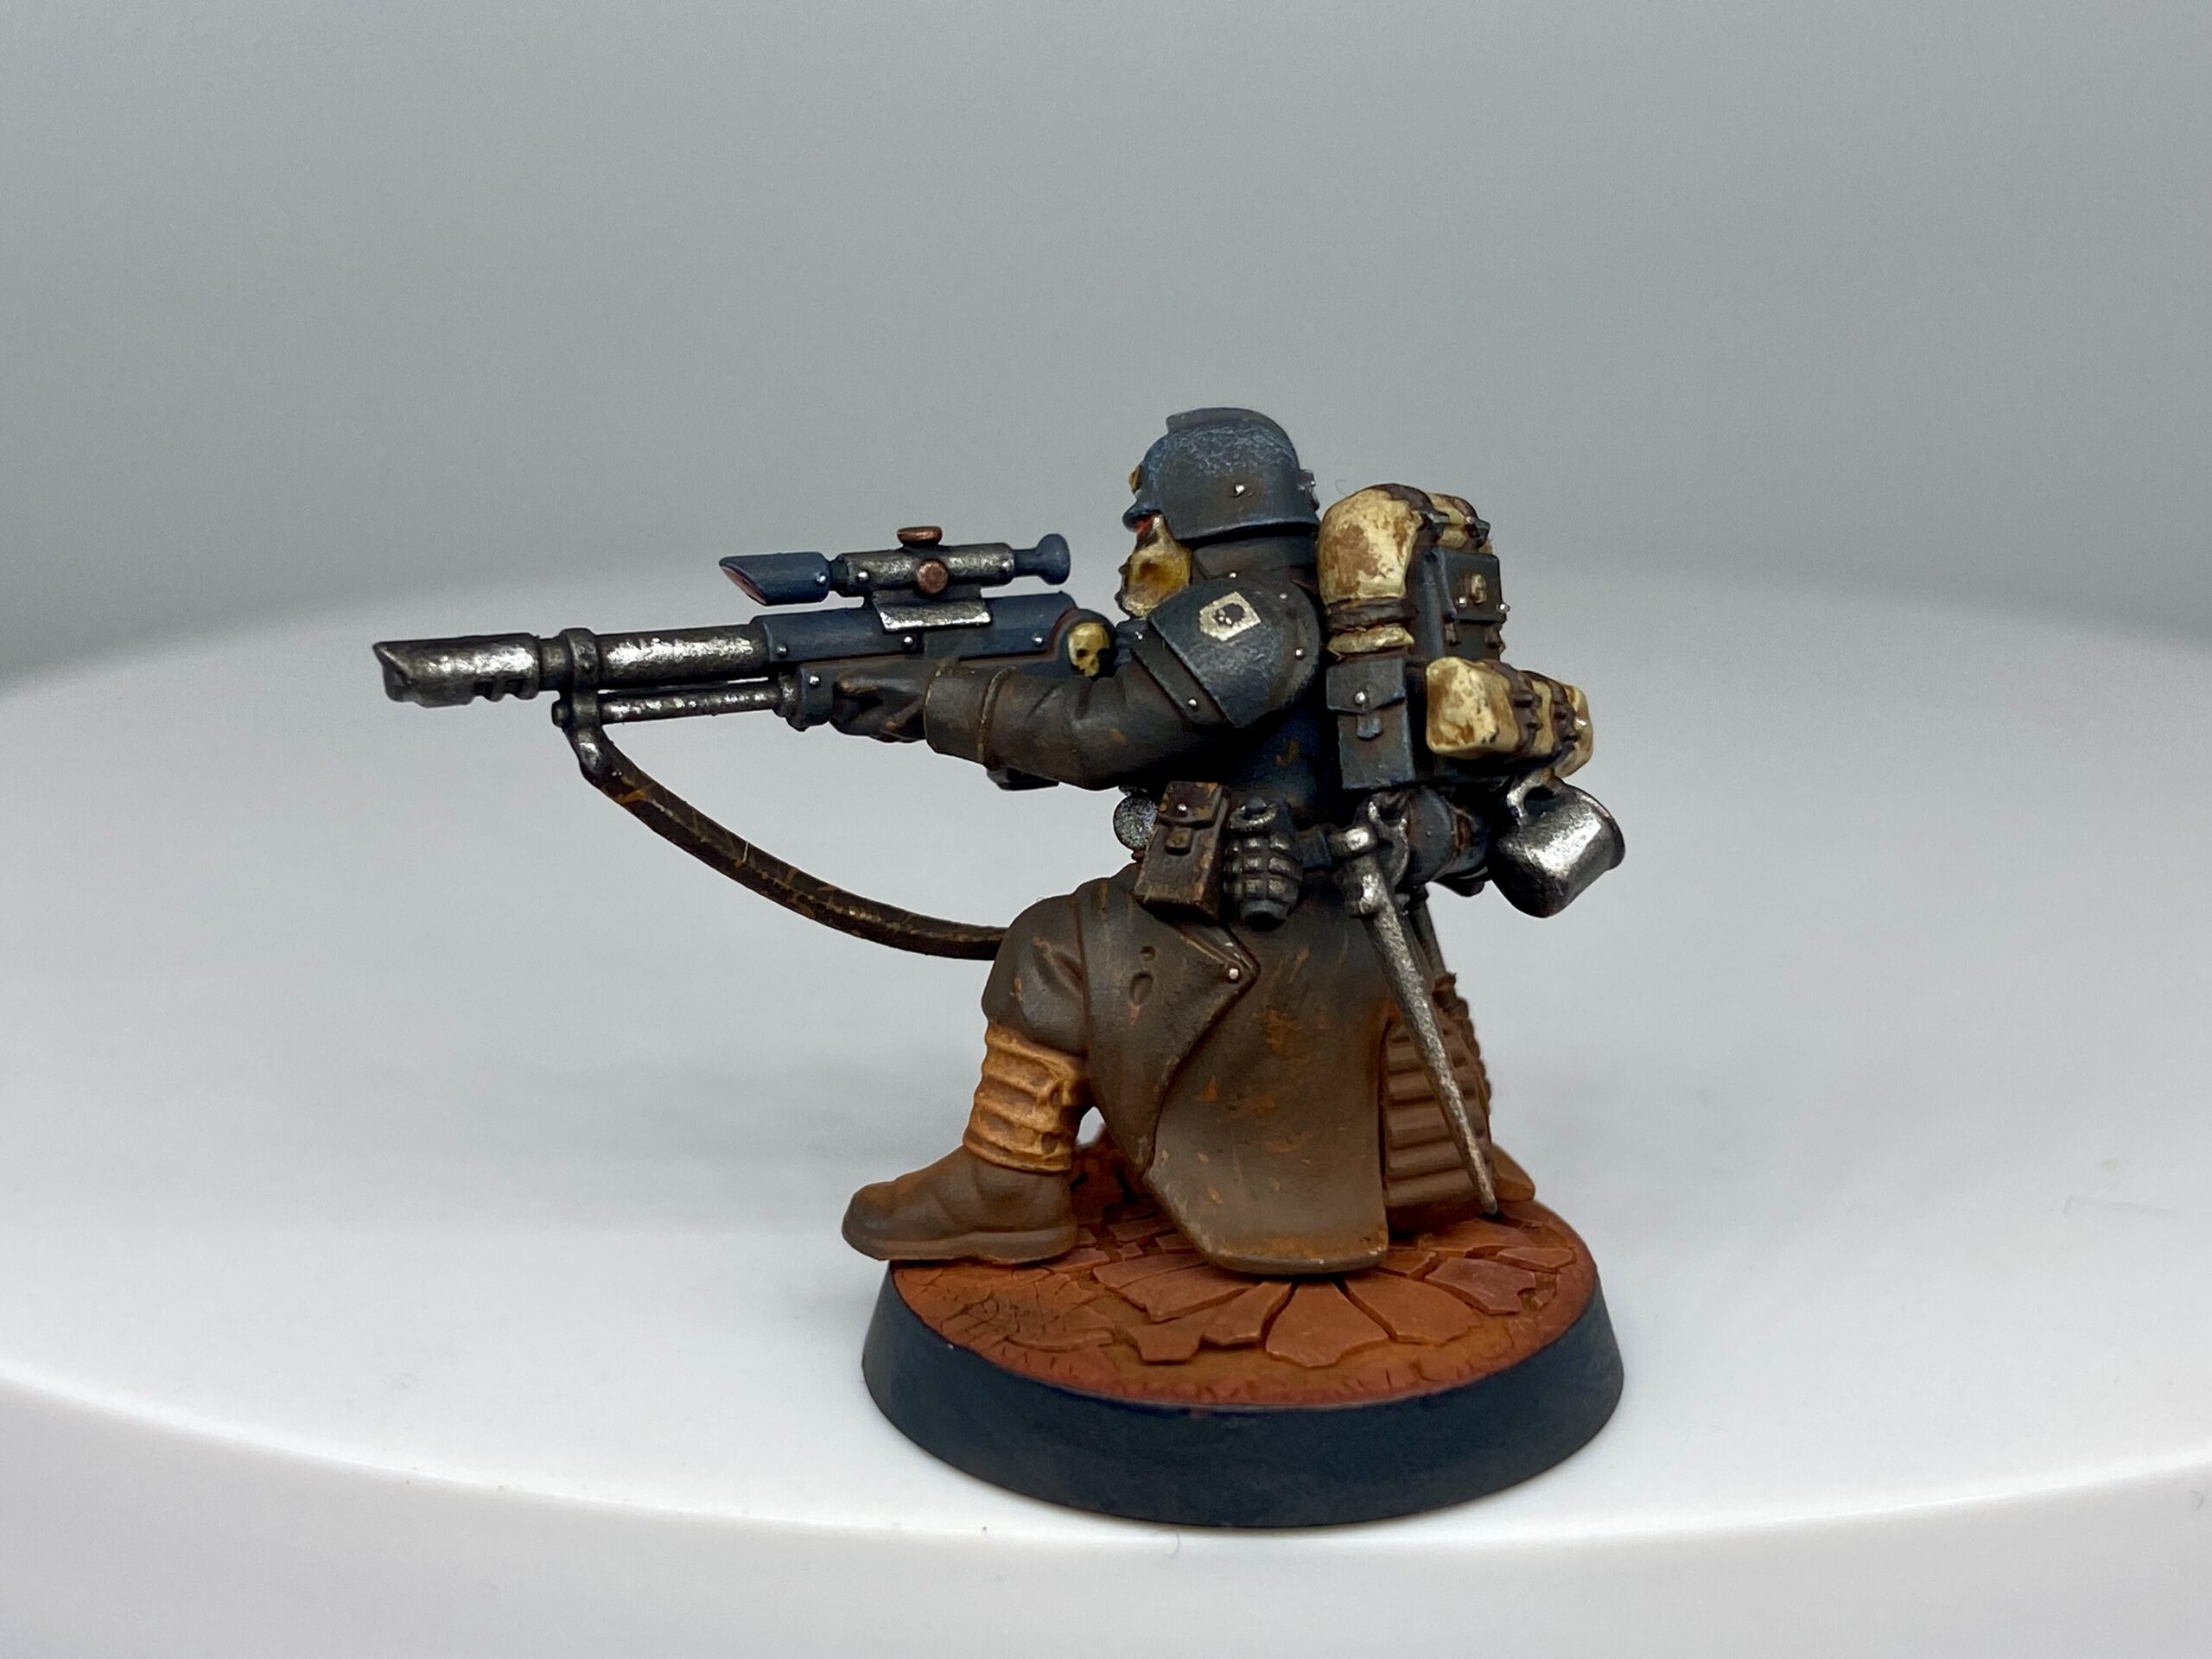
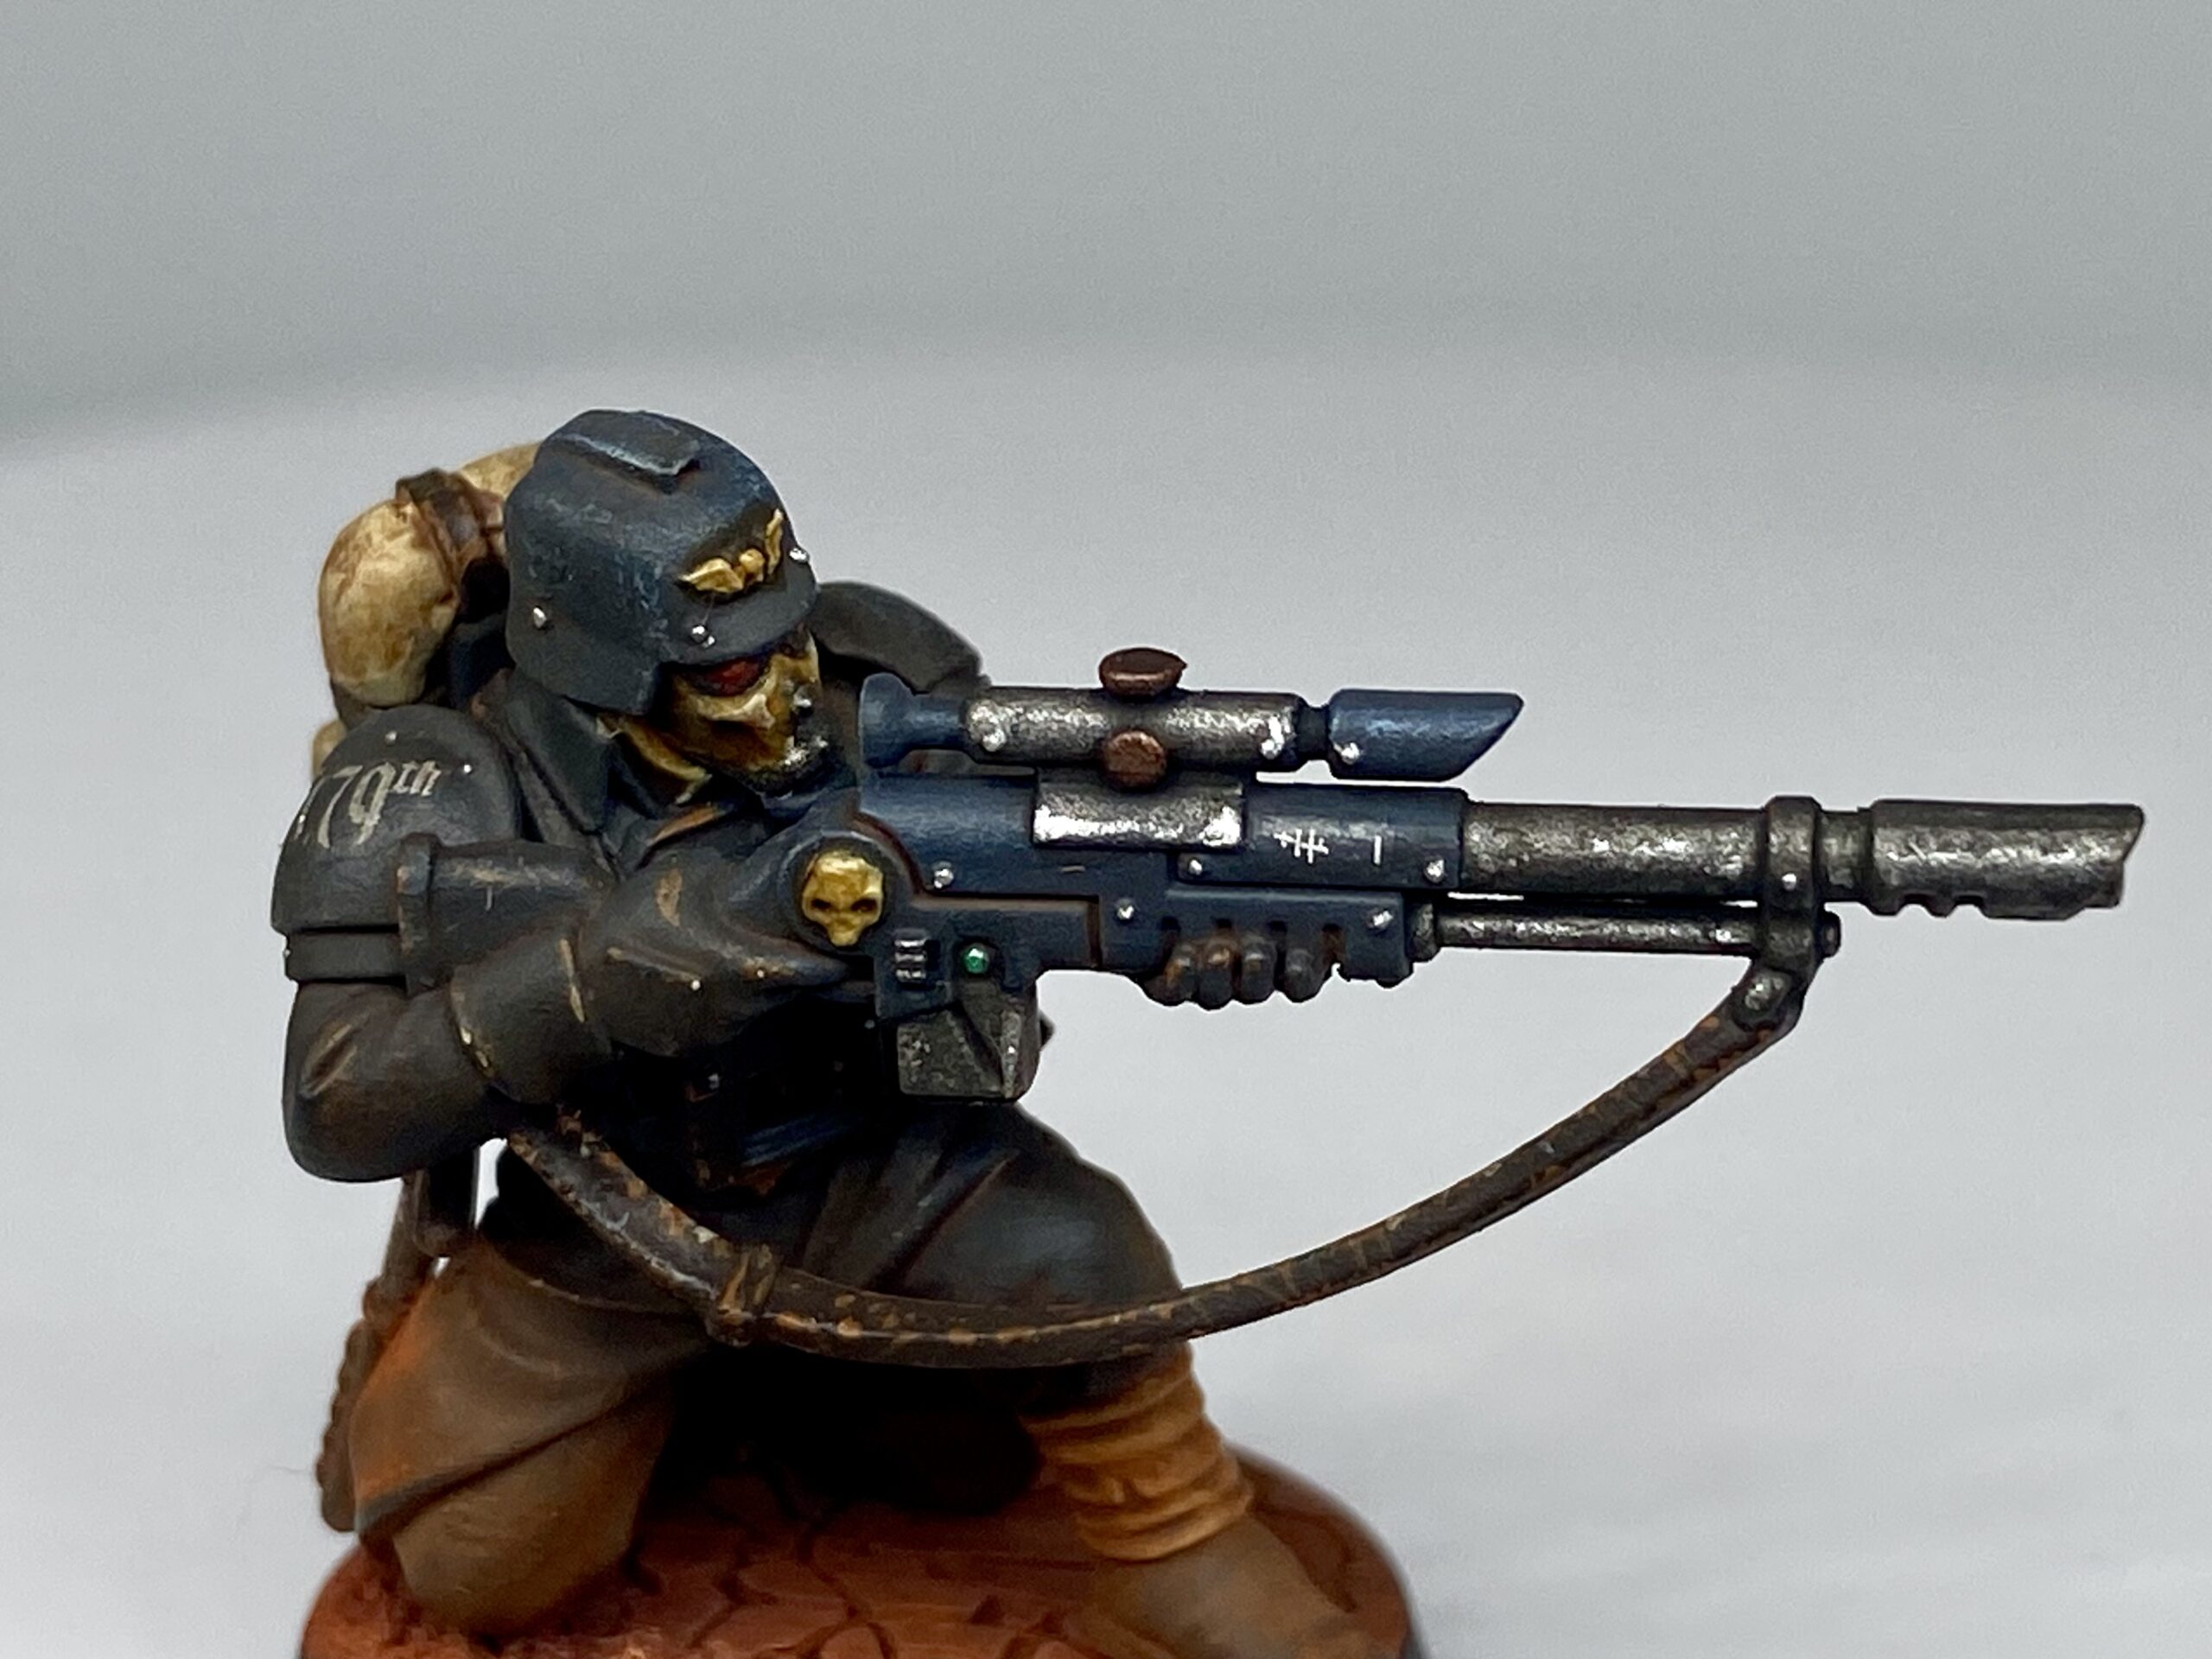
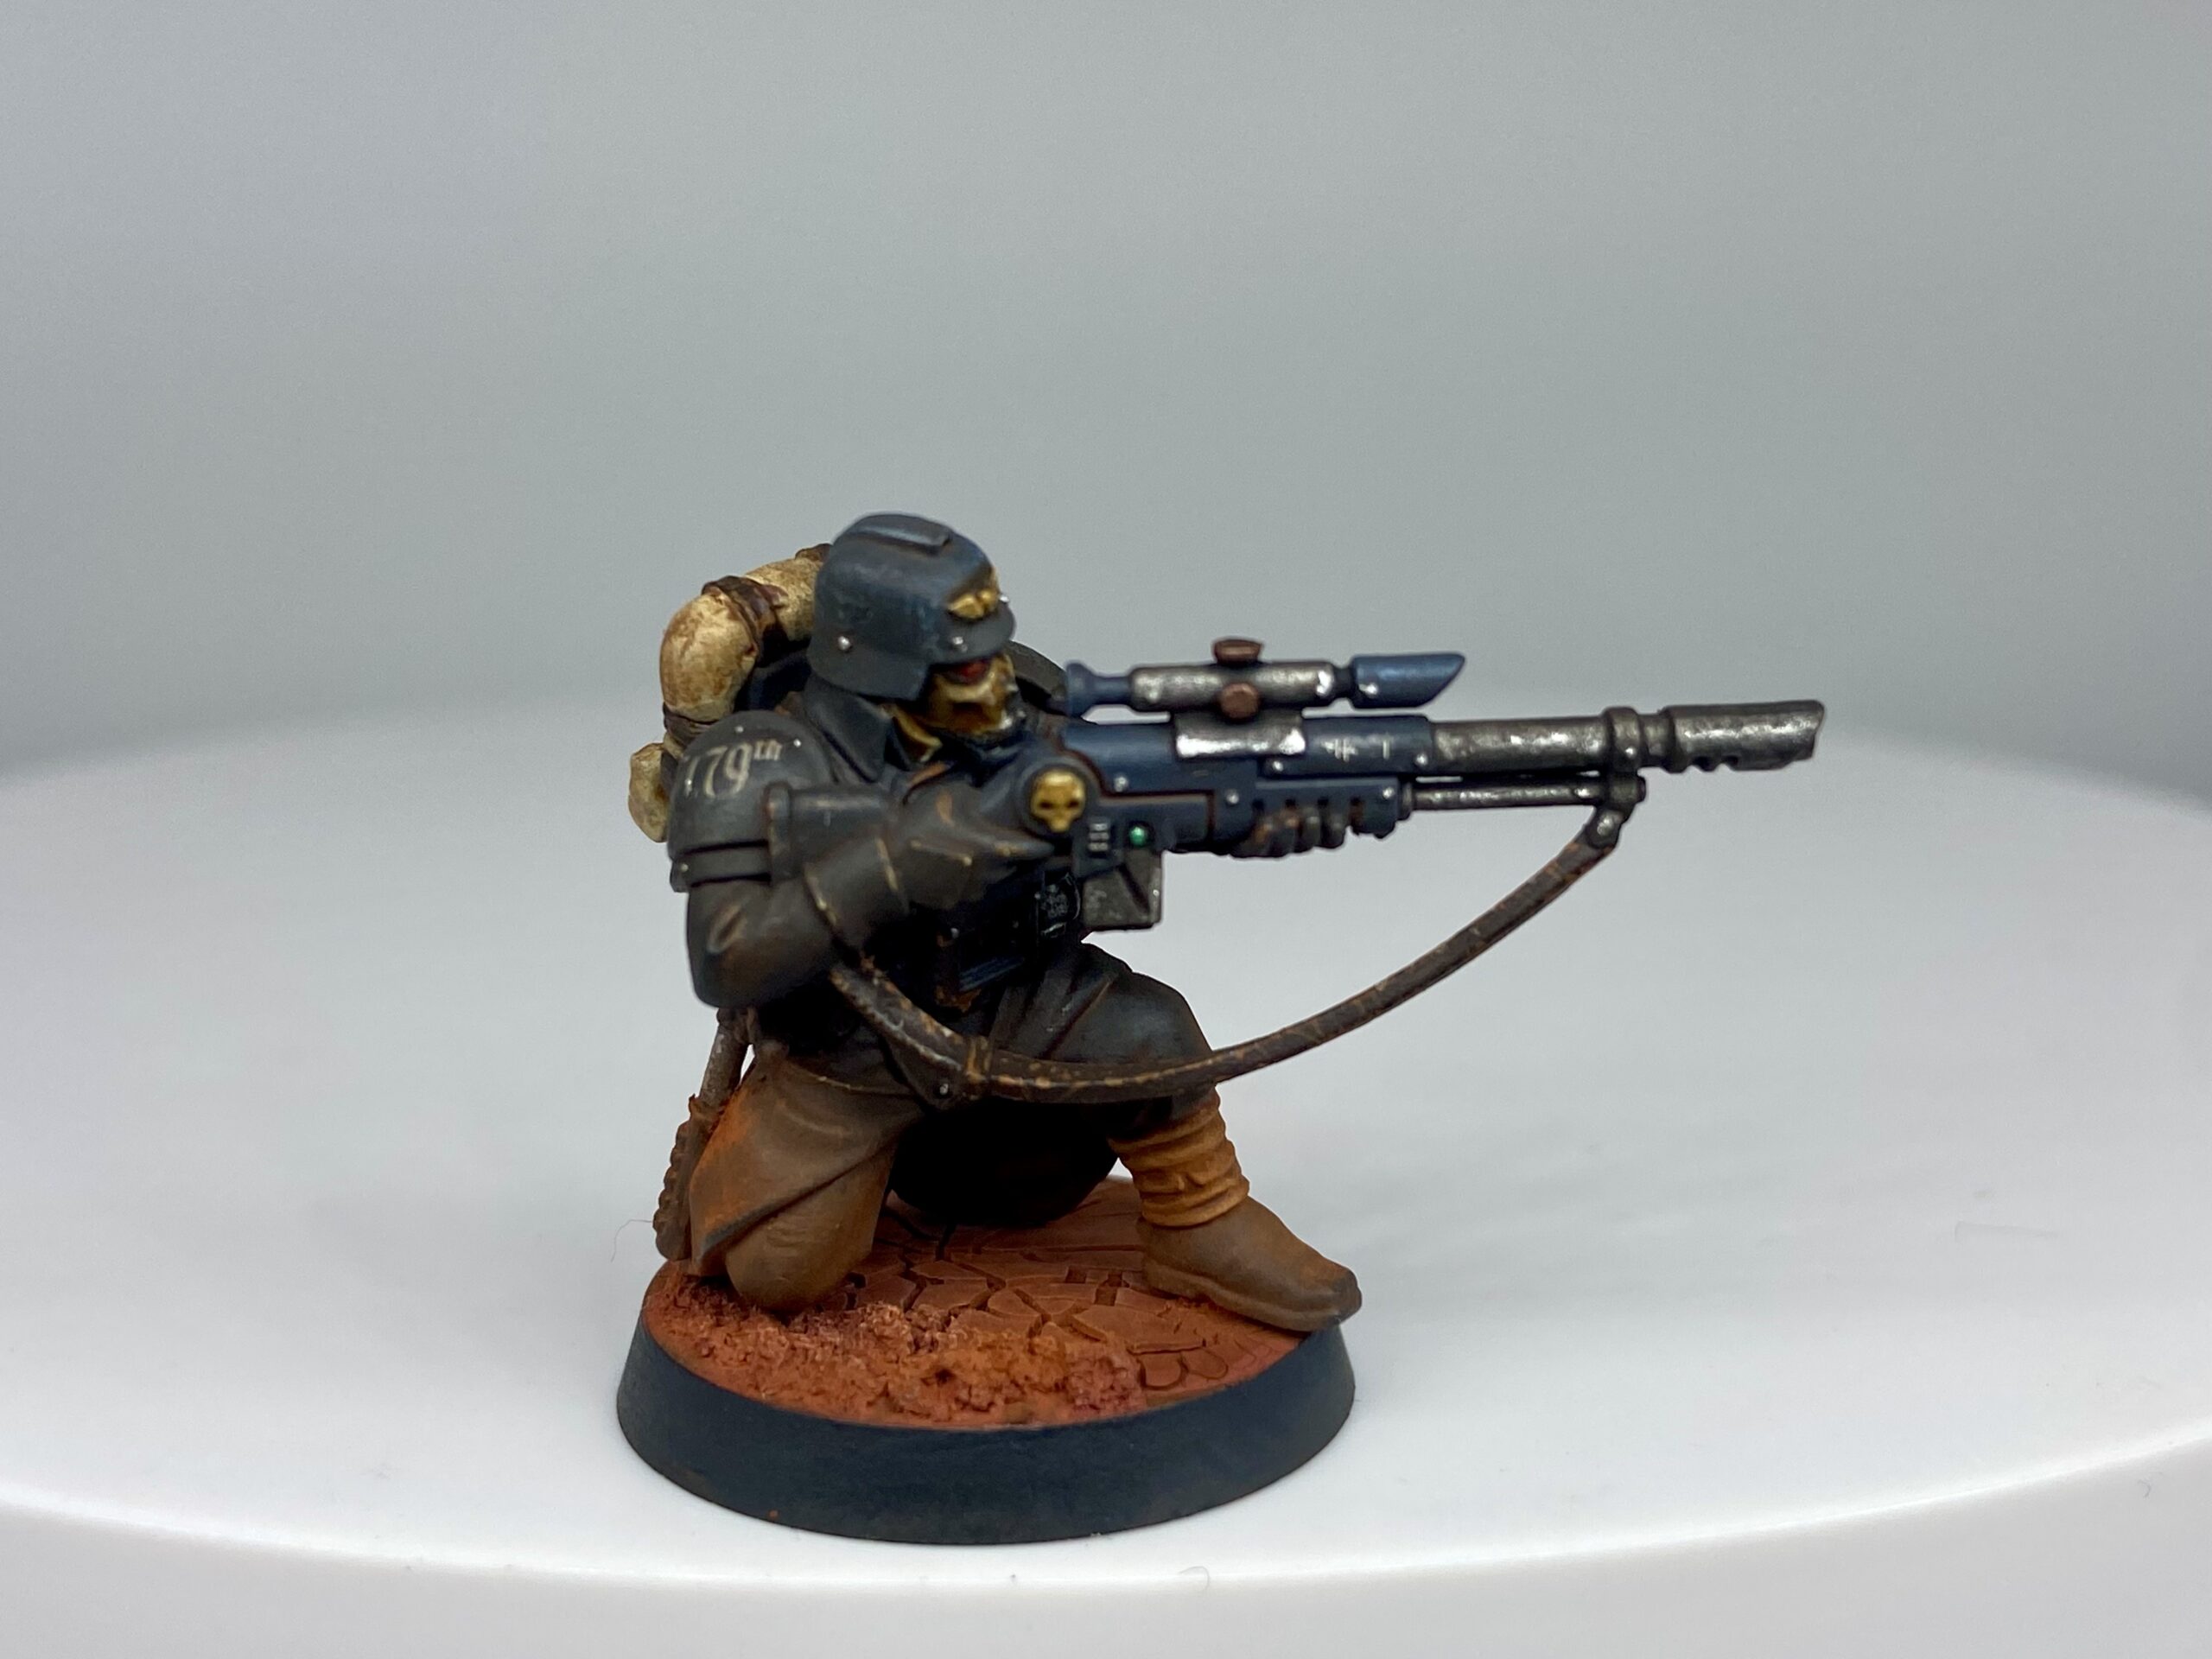
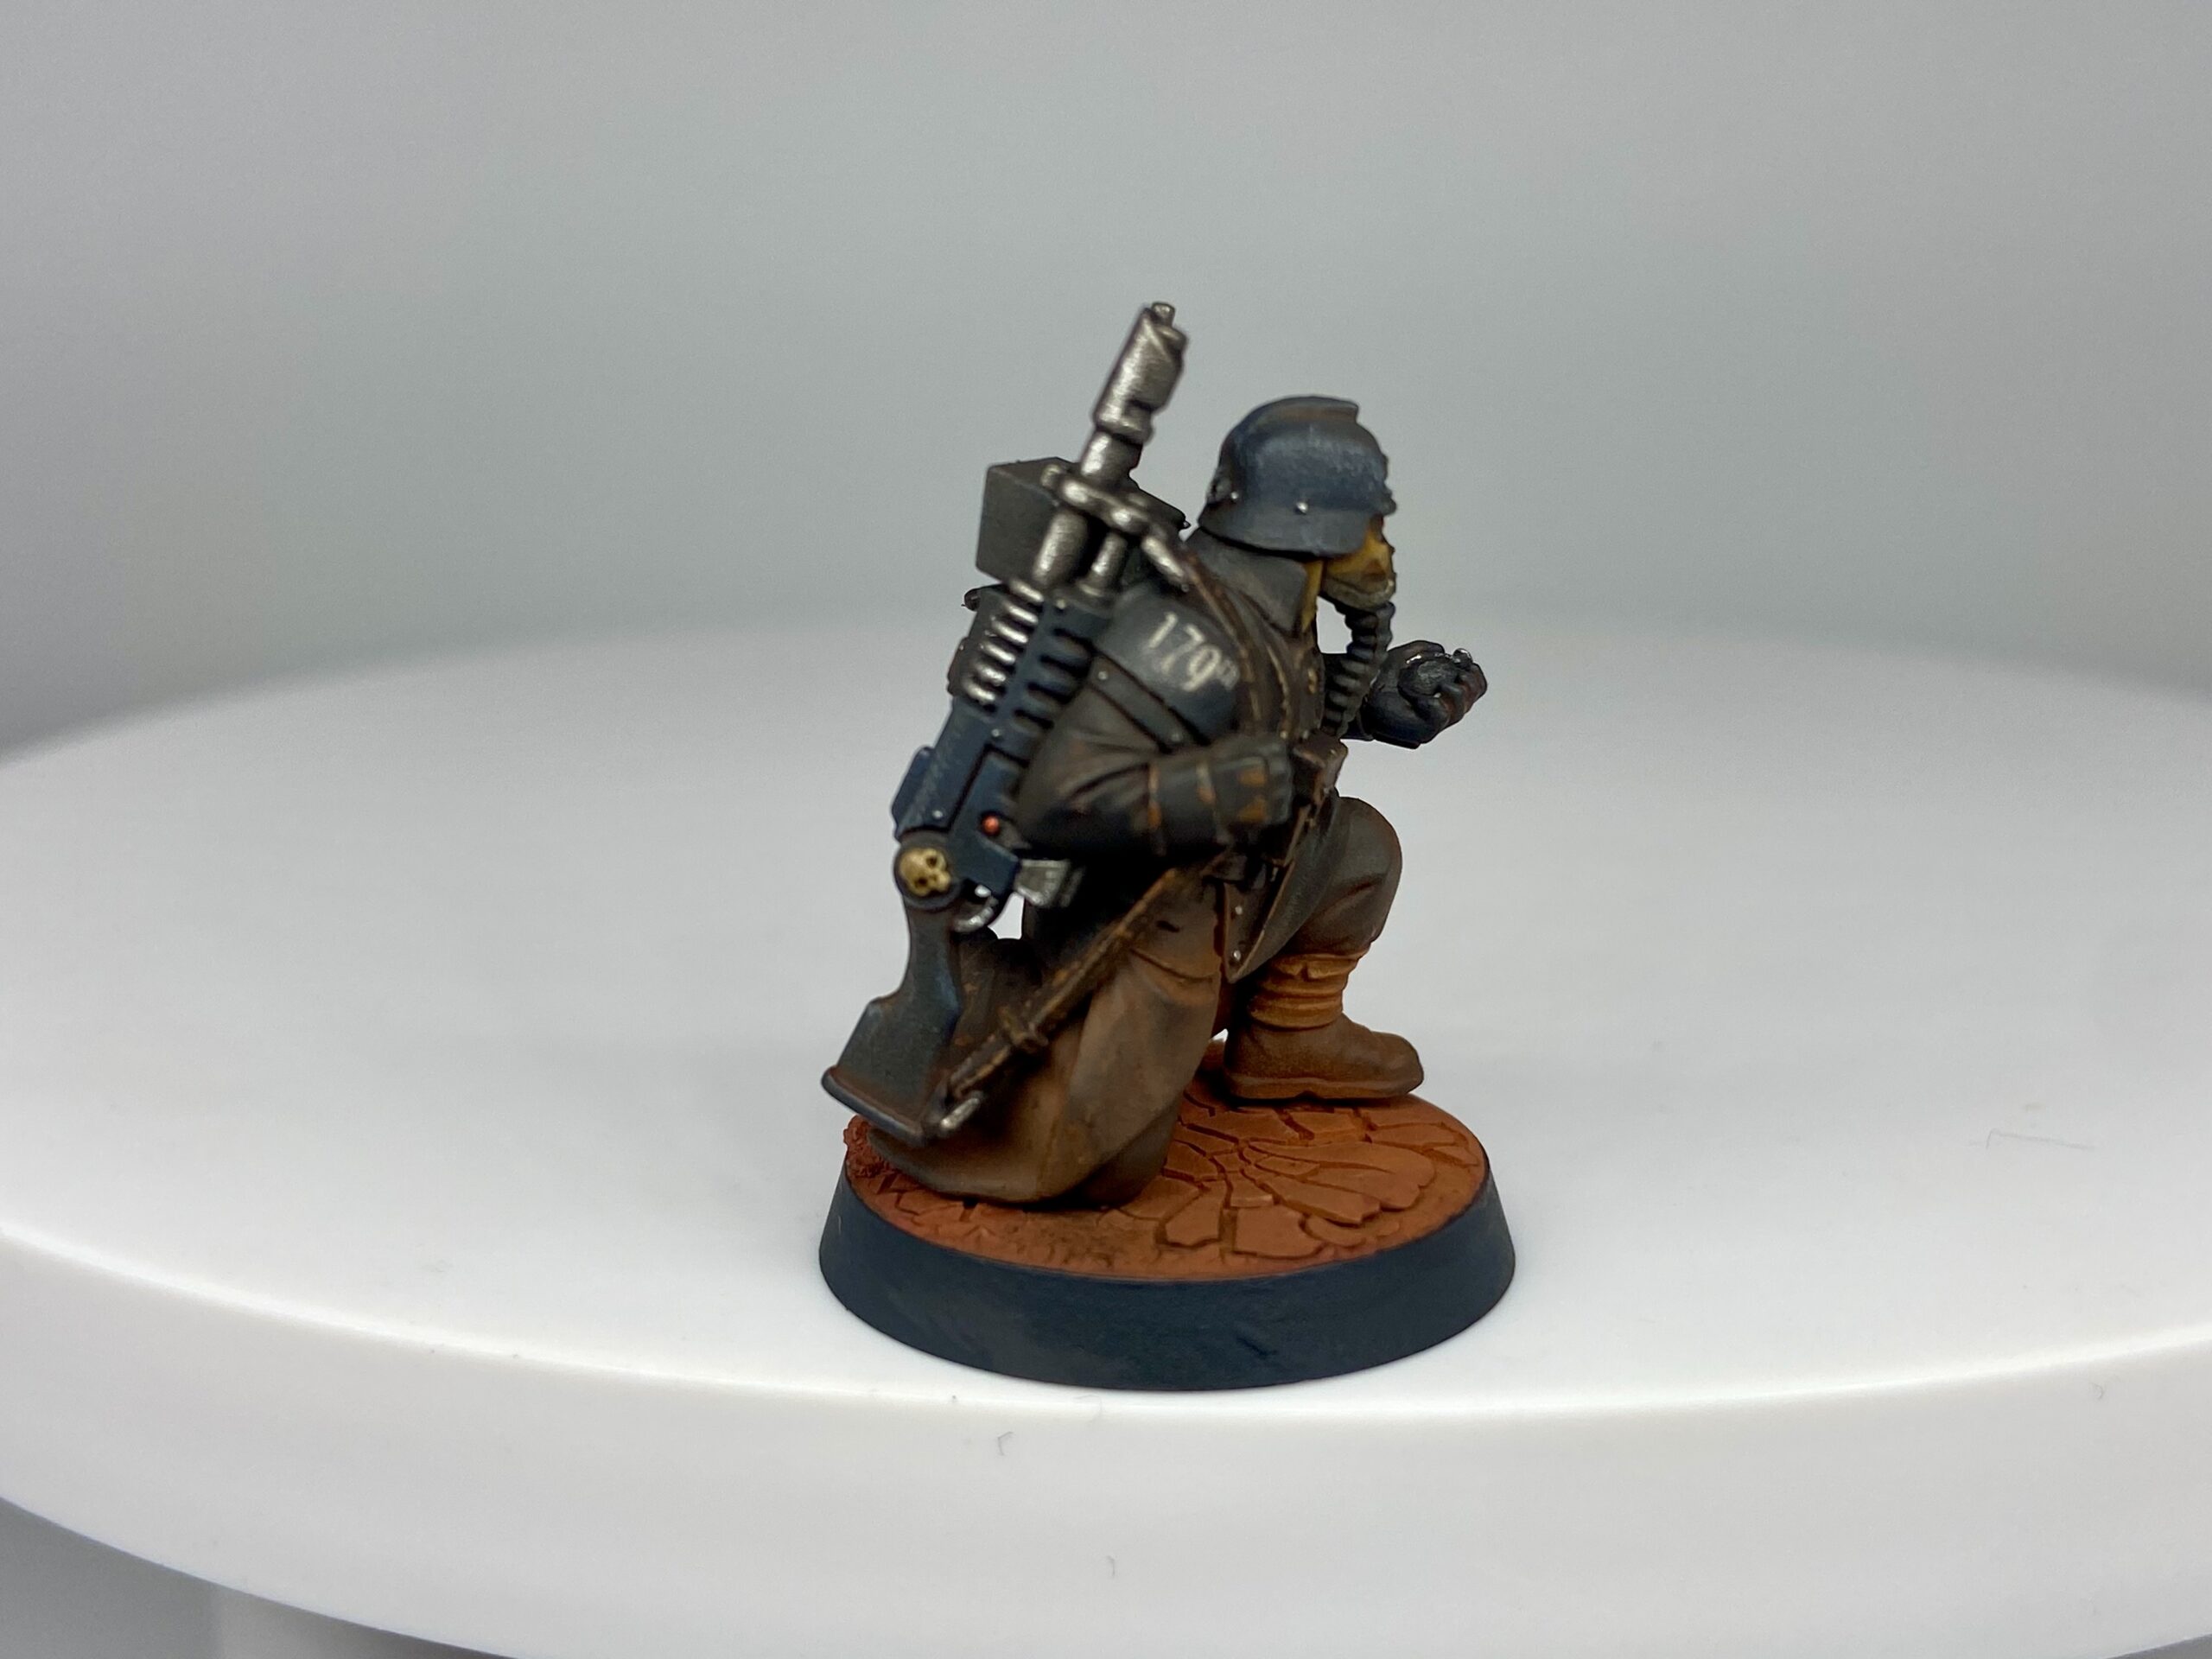
- 1x Sniper
- 1x Melta Gunner
- 2x Spotter
- 1x Hardened
- 1x Confident
- 1x Demolitions
- 1x Zealot
- 1x Mauler
- 1x Comms
- 1x Medic
- 5x Lasgun
- Total 23
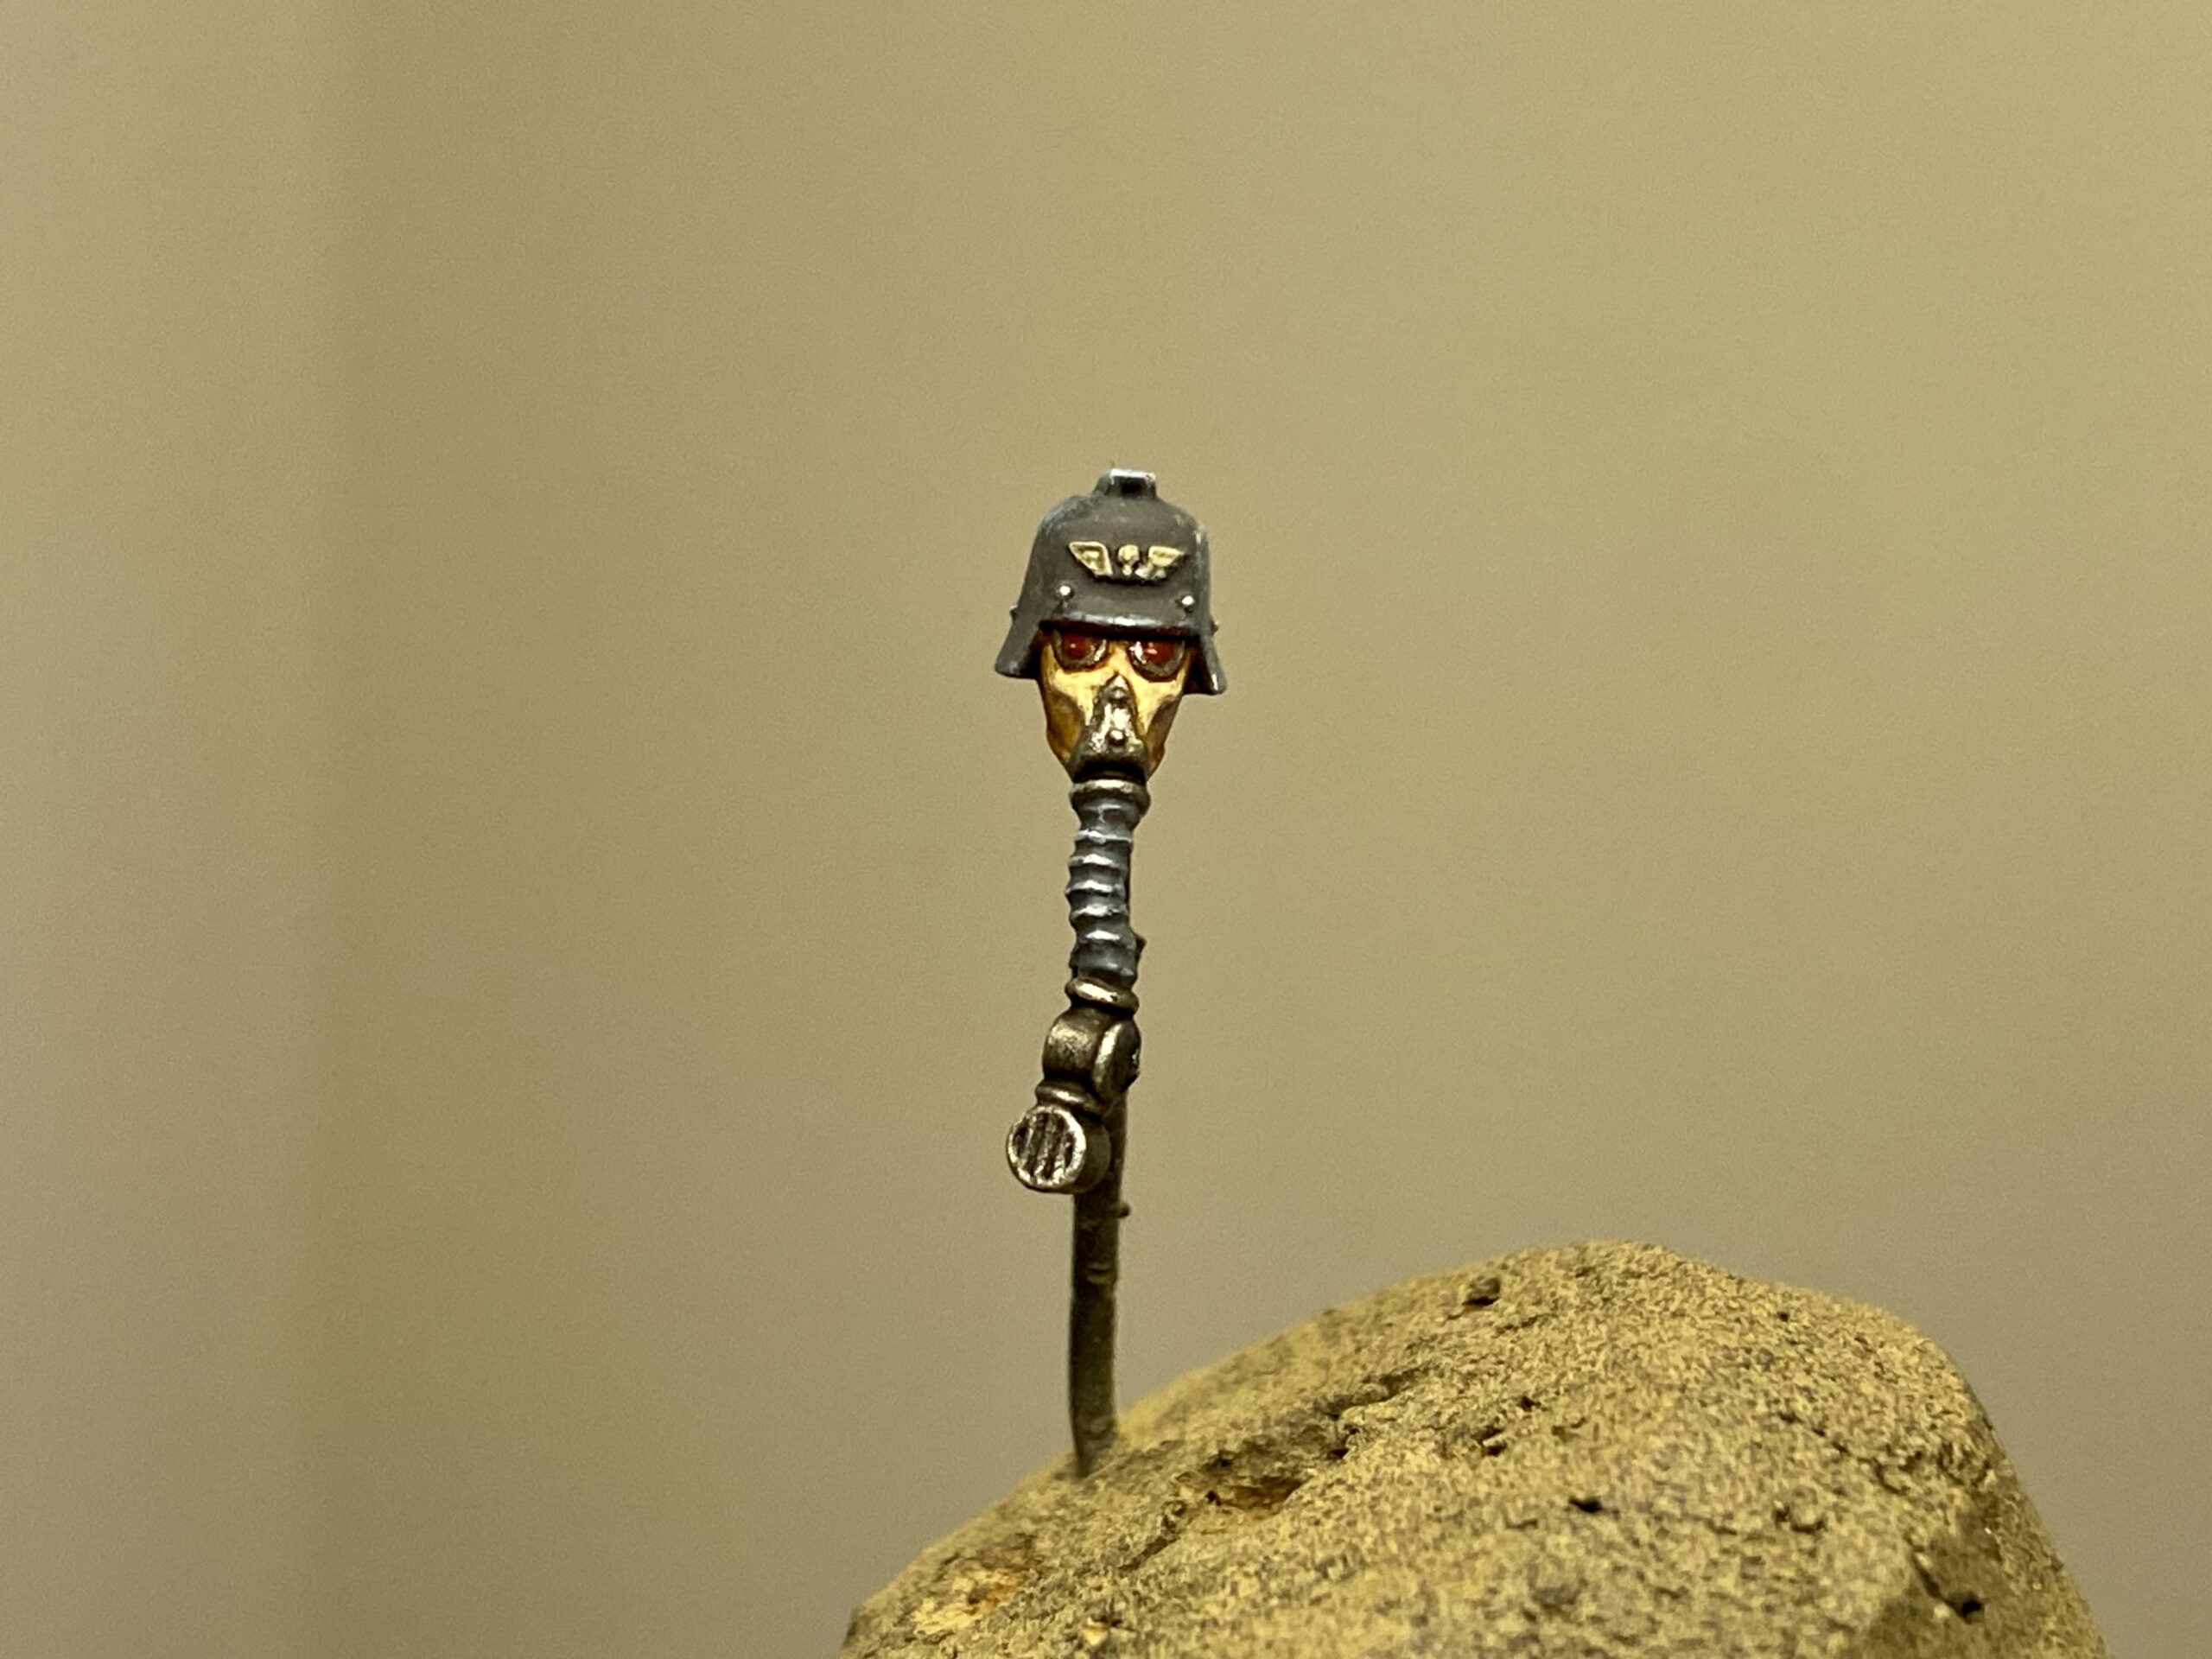
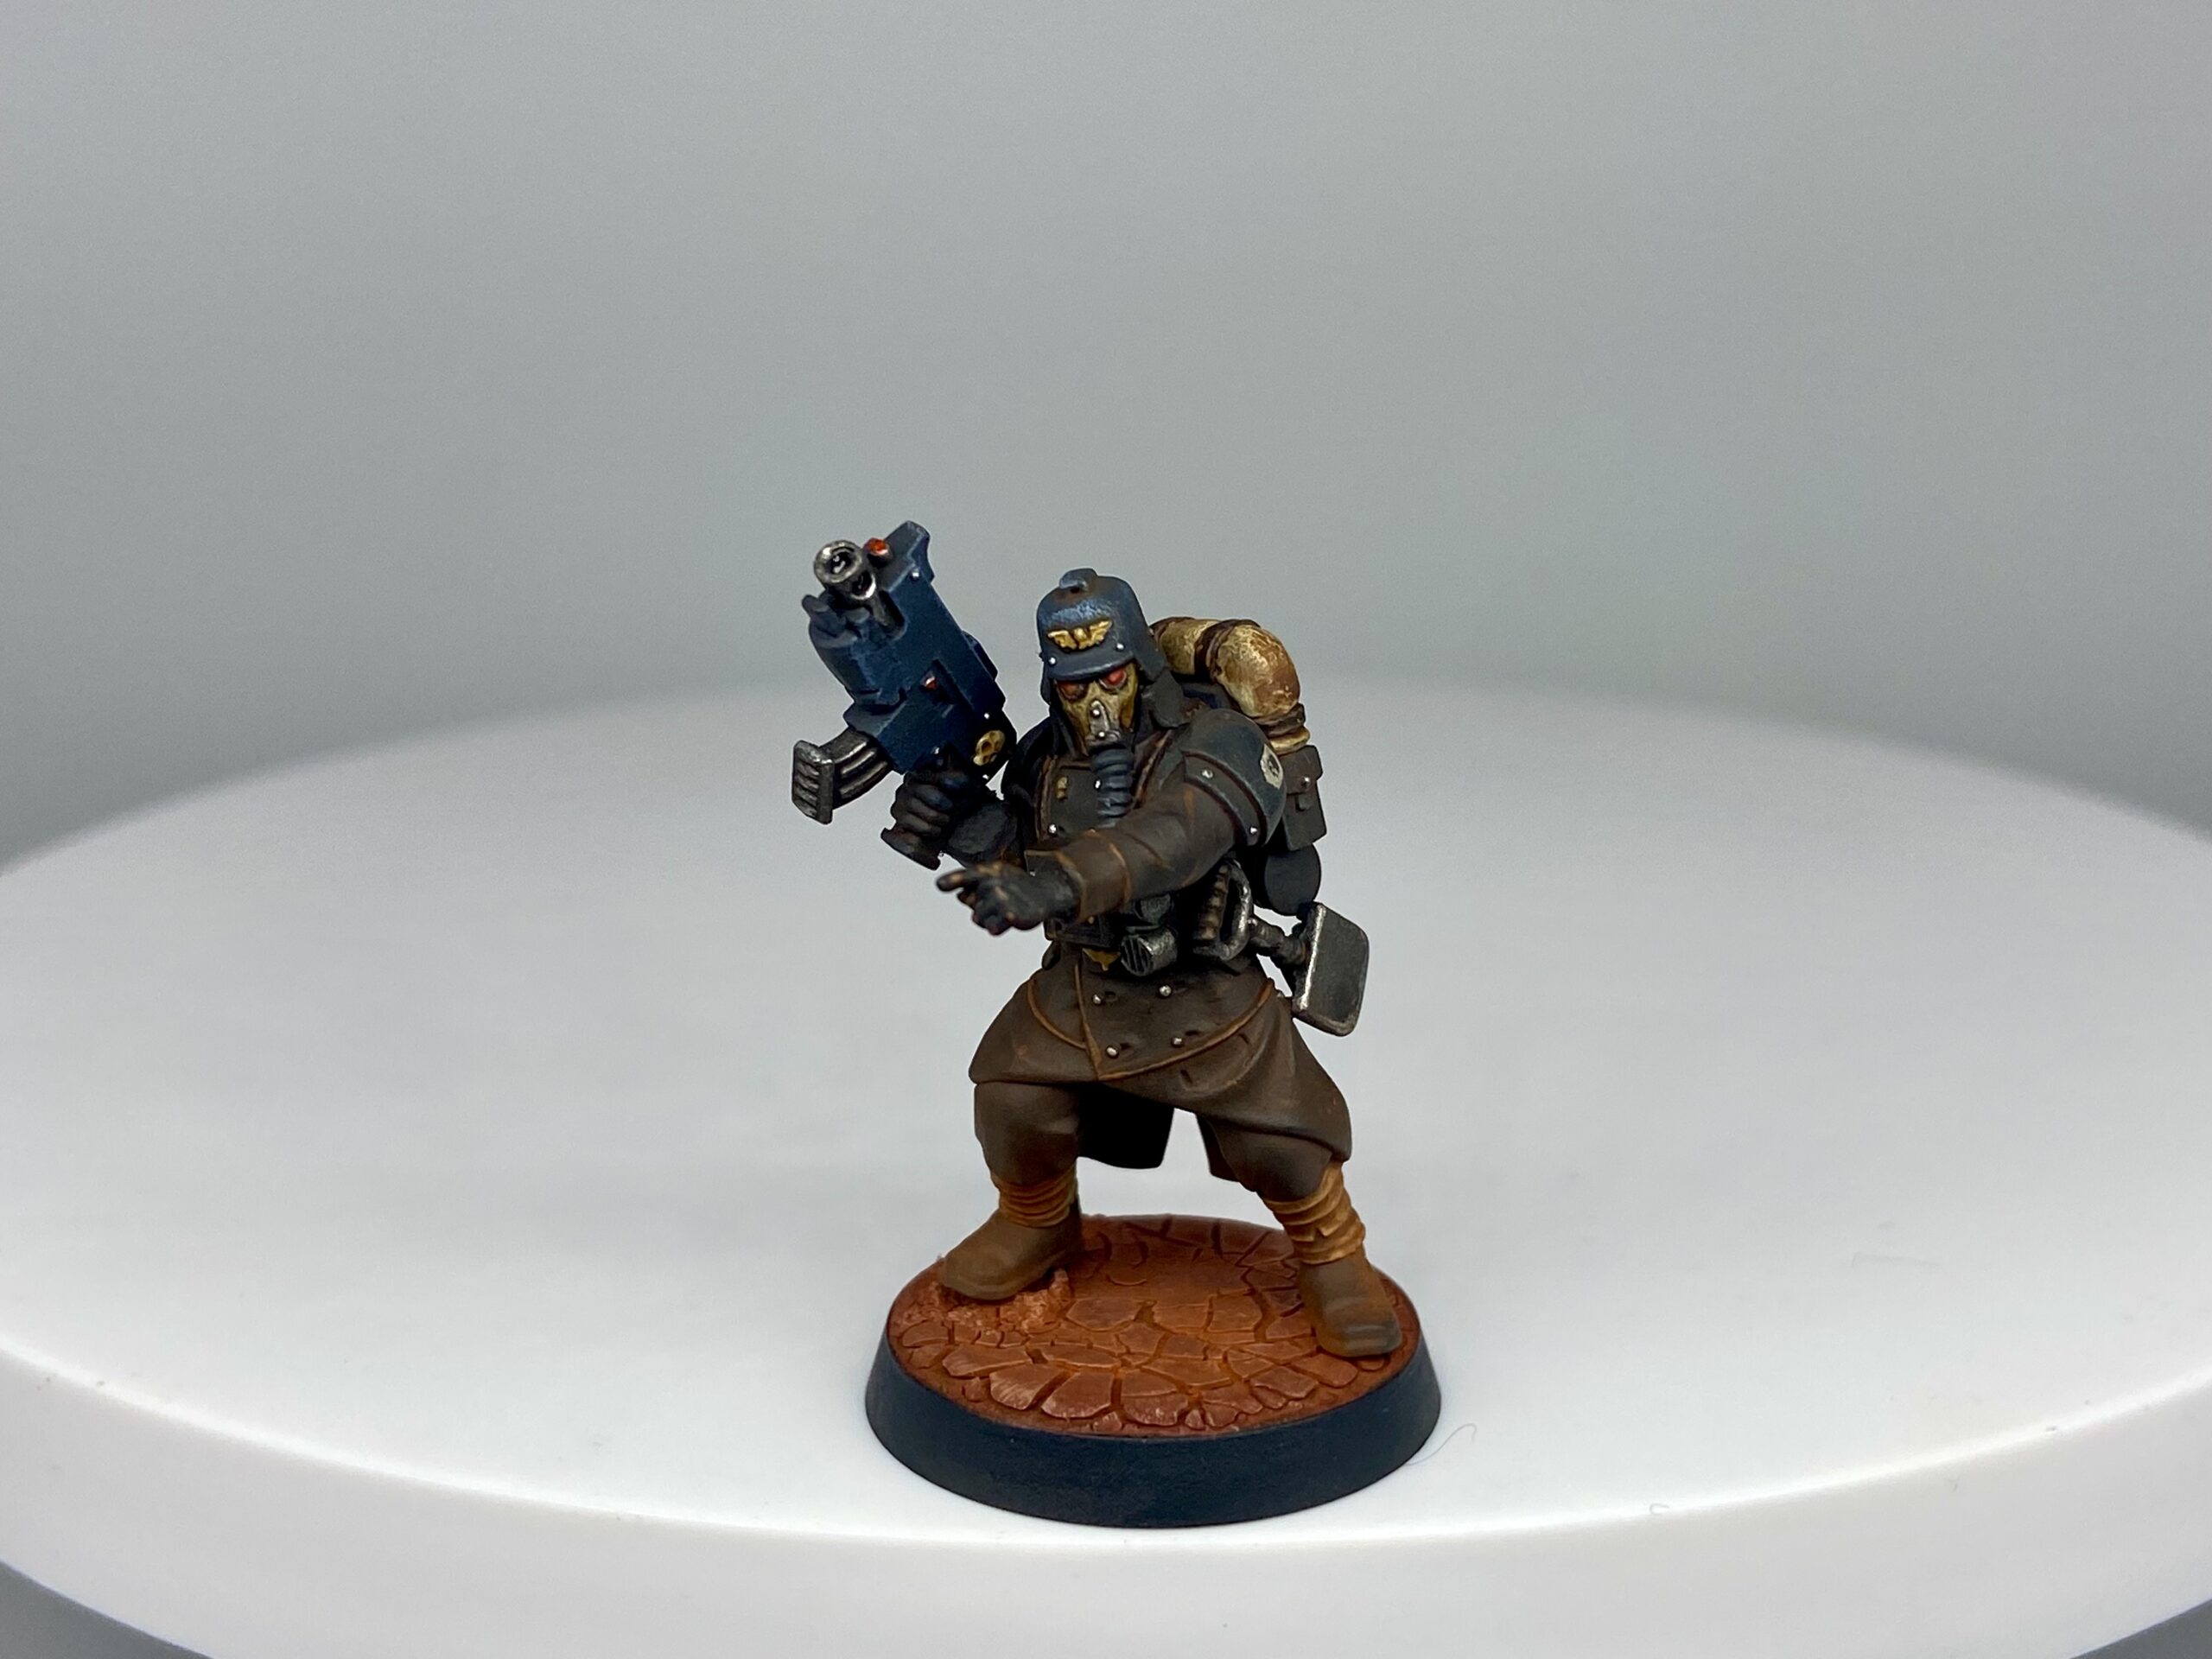
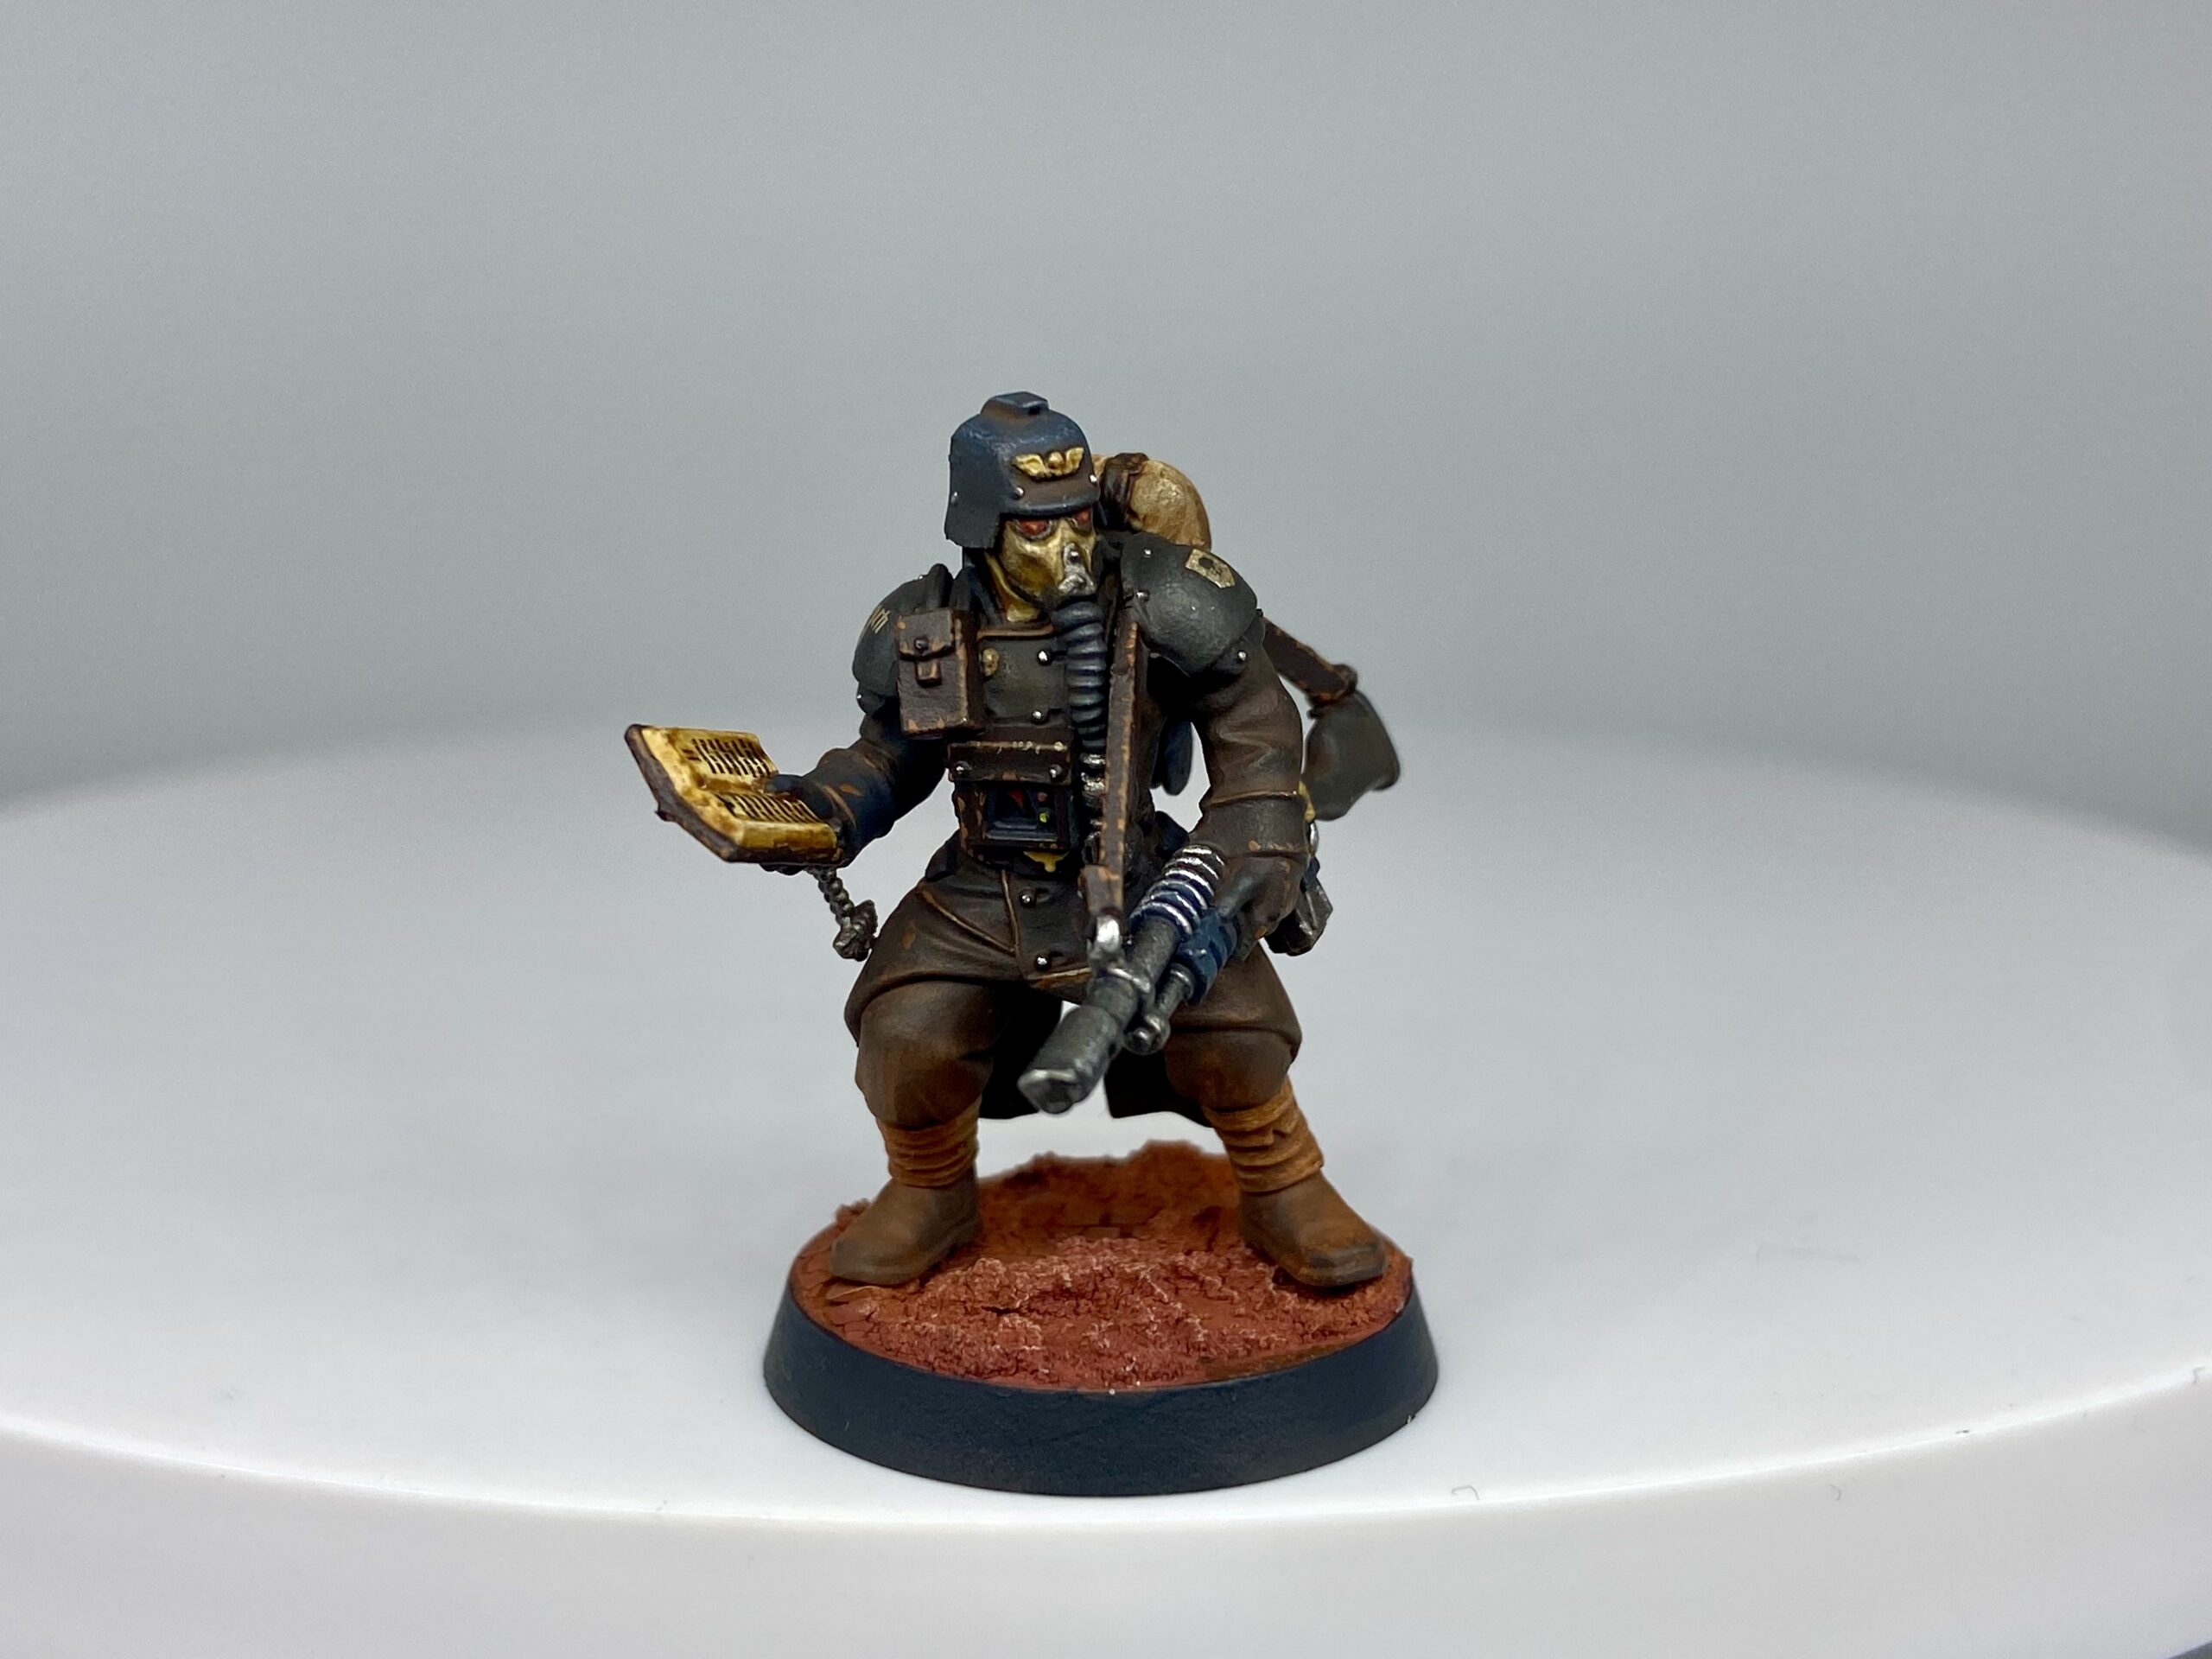
Krieg Paint Scheme Process
For myself, in the future, and for others who may want to learn from these models, here is my full process for this Krieg Killteam.
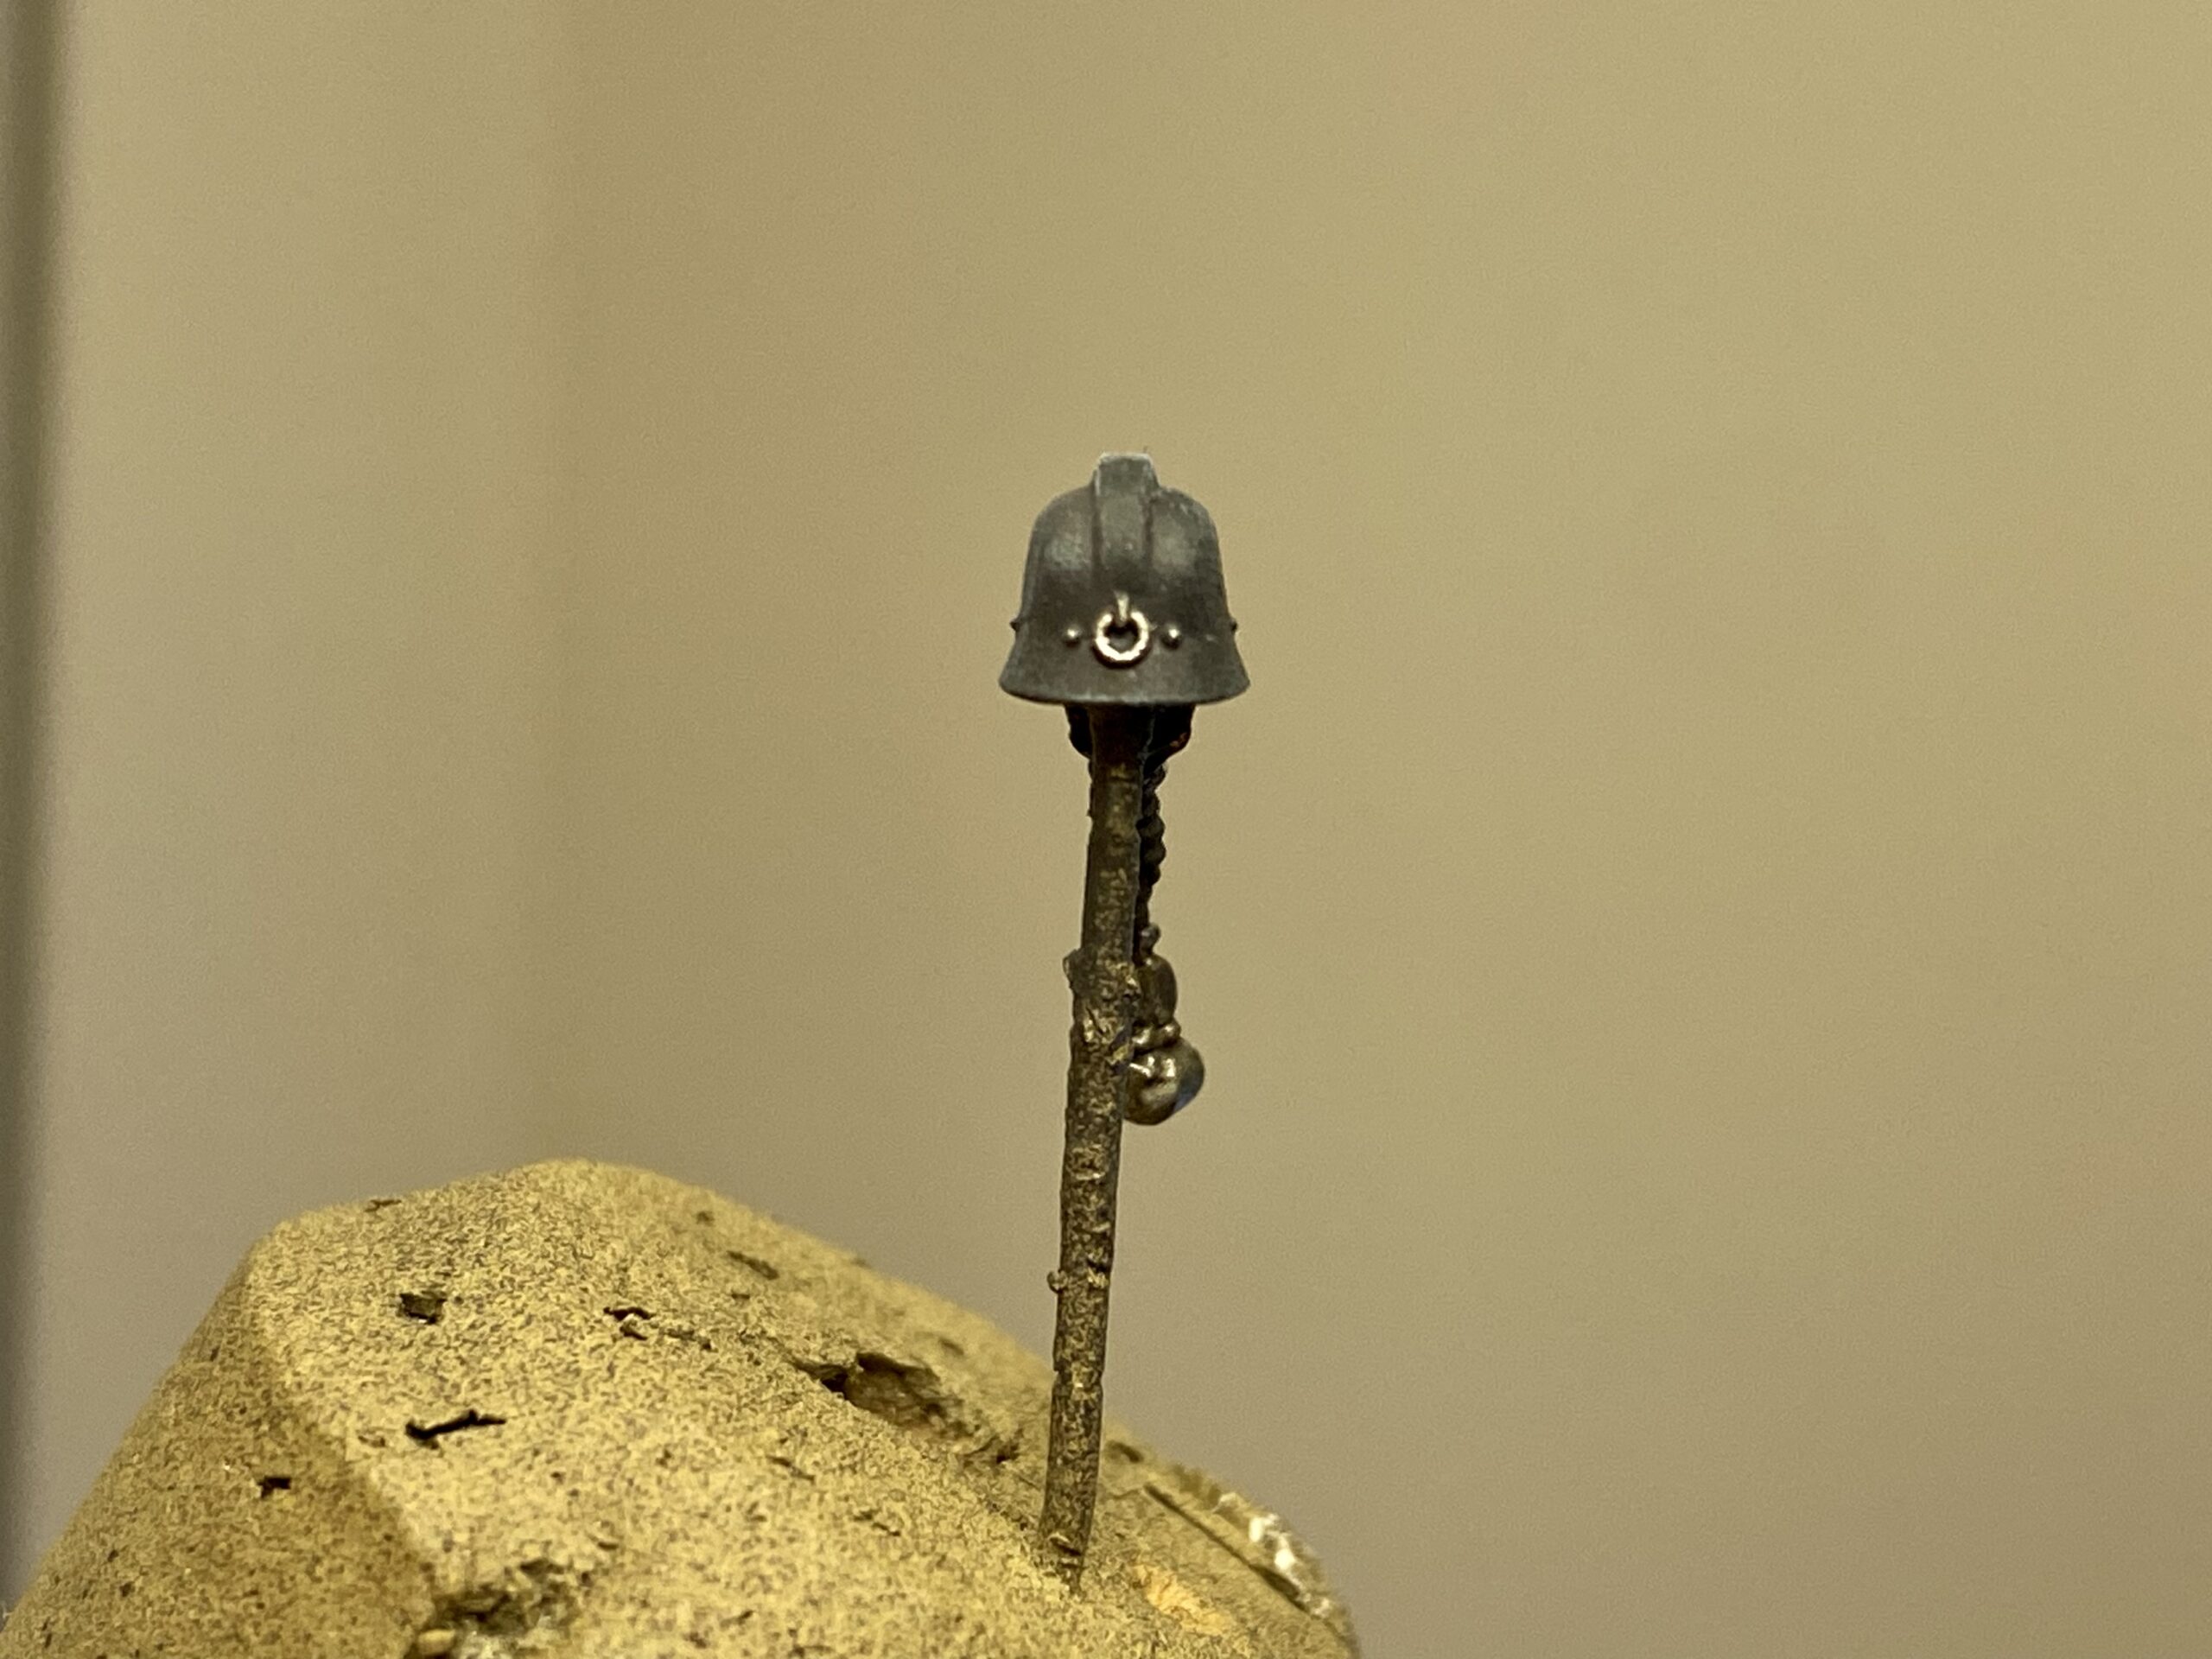
- Primed in Raven Black from Colour Forge.
- Dry brush Dark Reaper and then drybrush Fenrisian Grey on the armour and helmet.
- Paint thin scratches on the cloak using Skrag Brown and Doombull Brown.
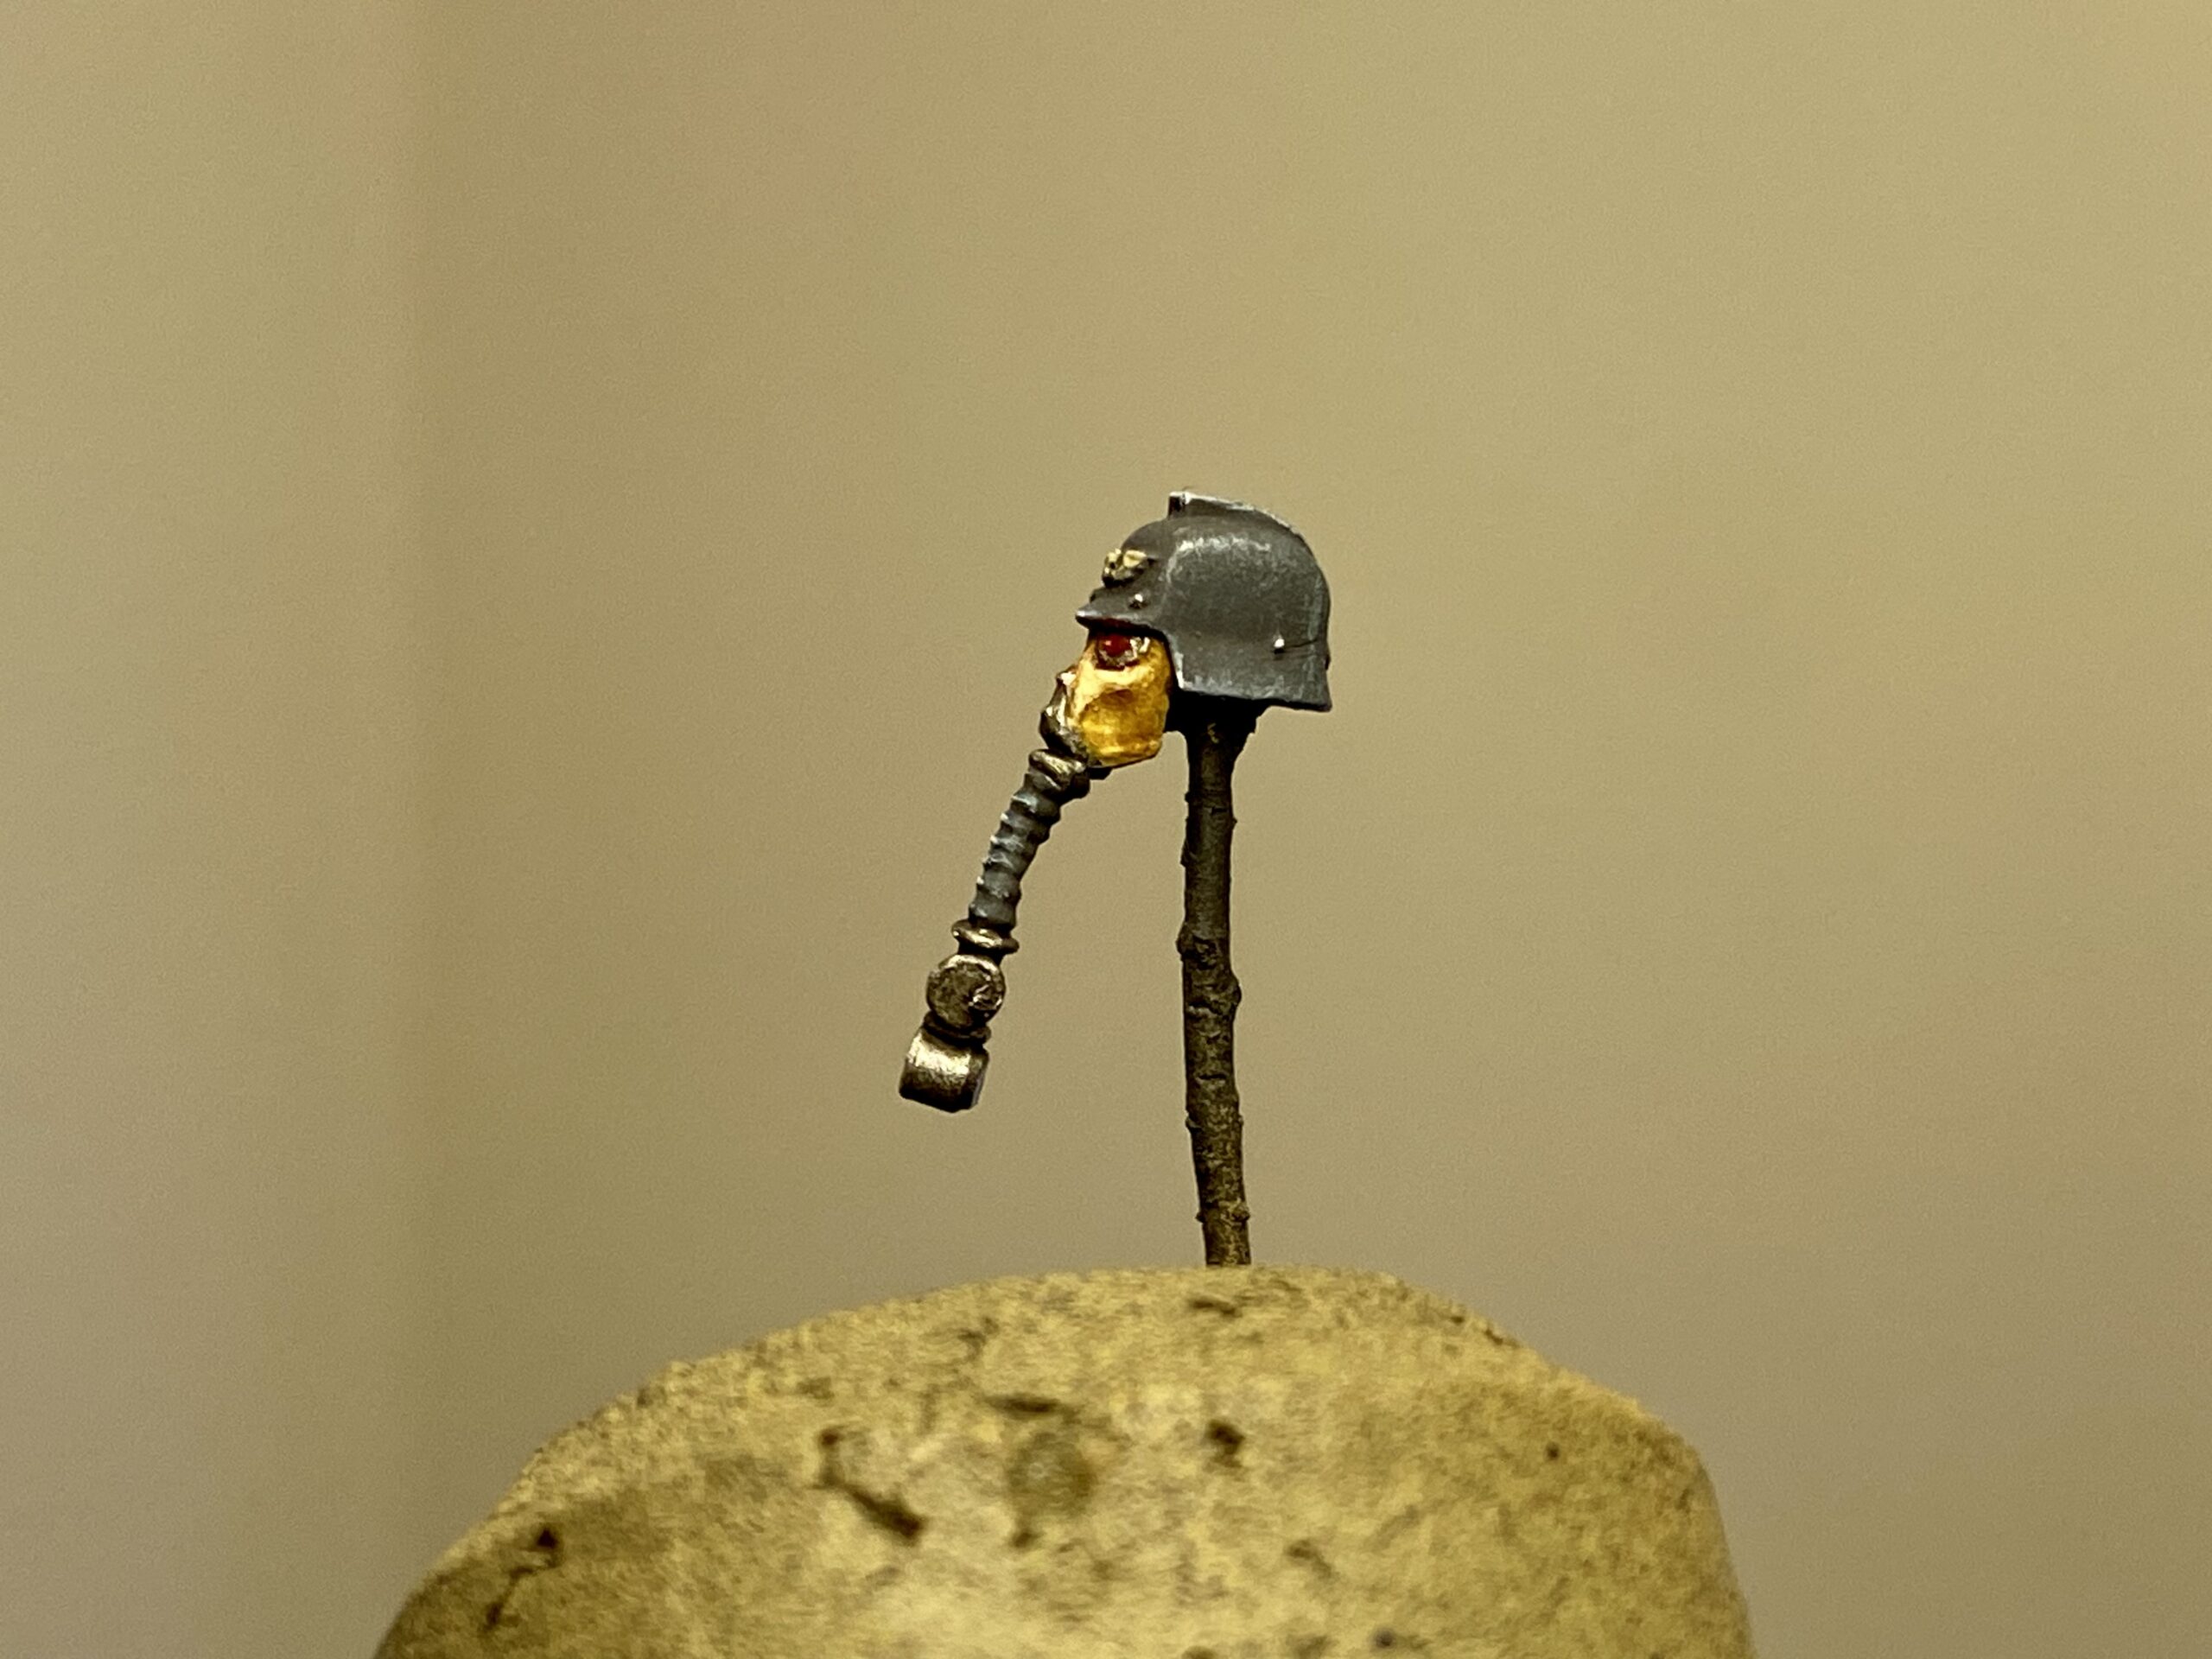
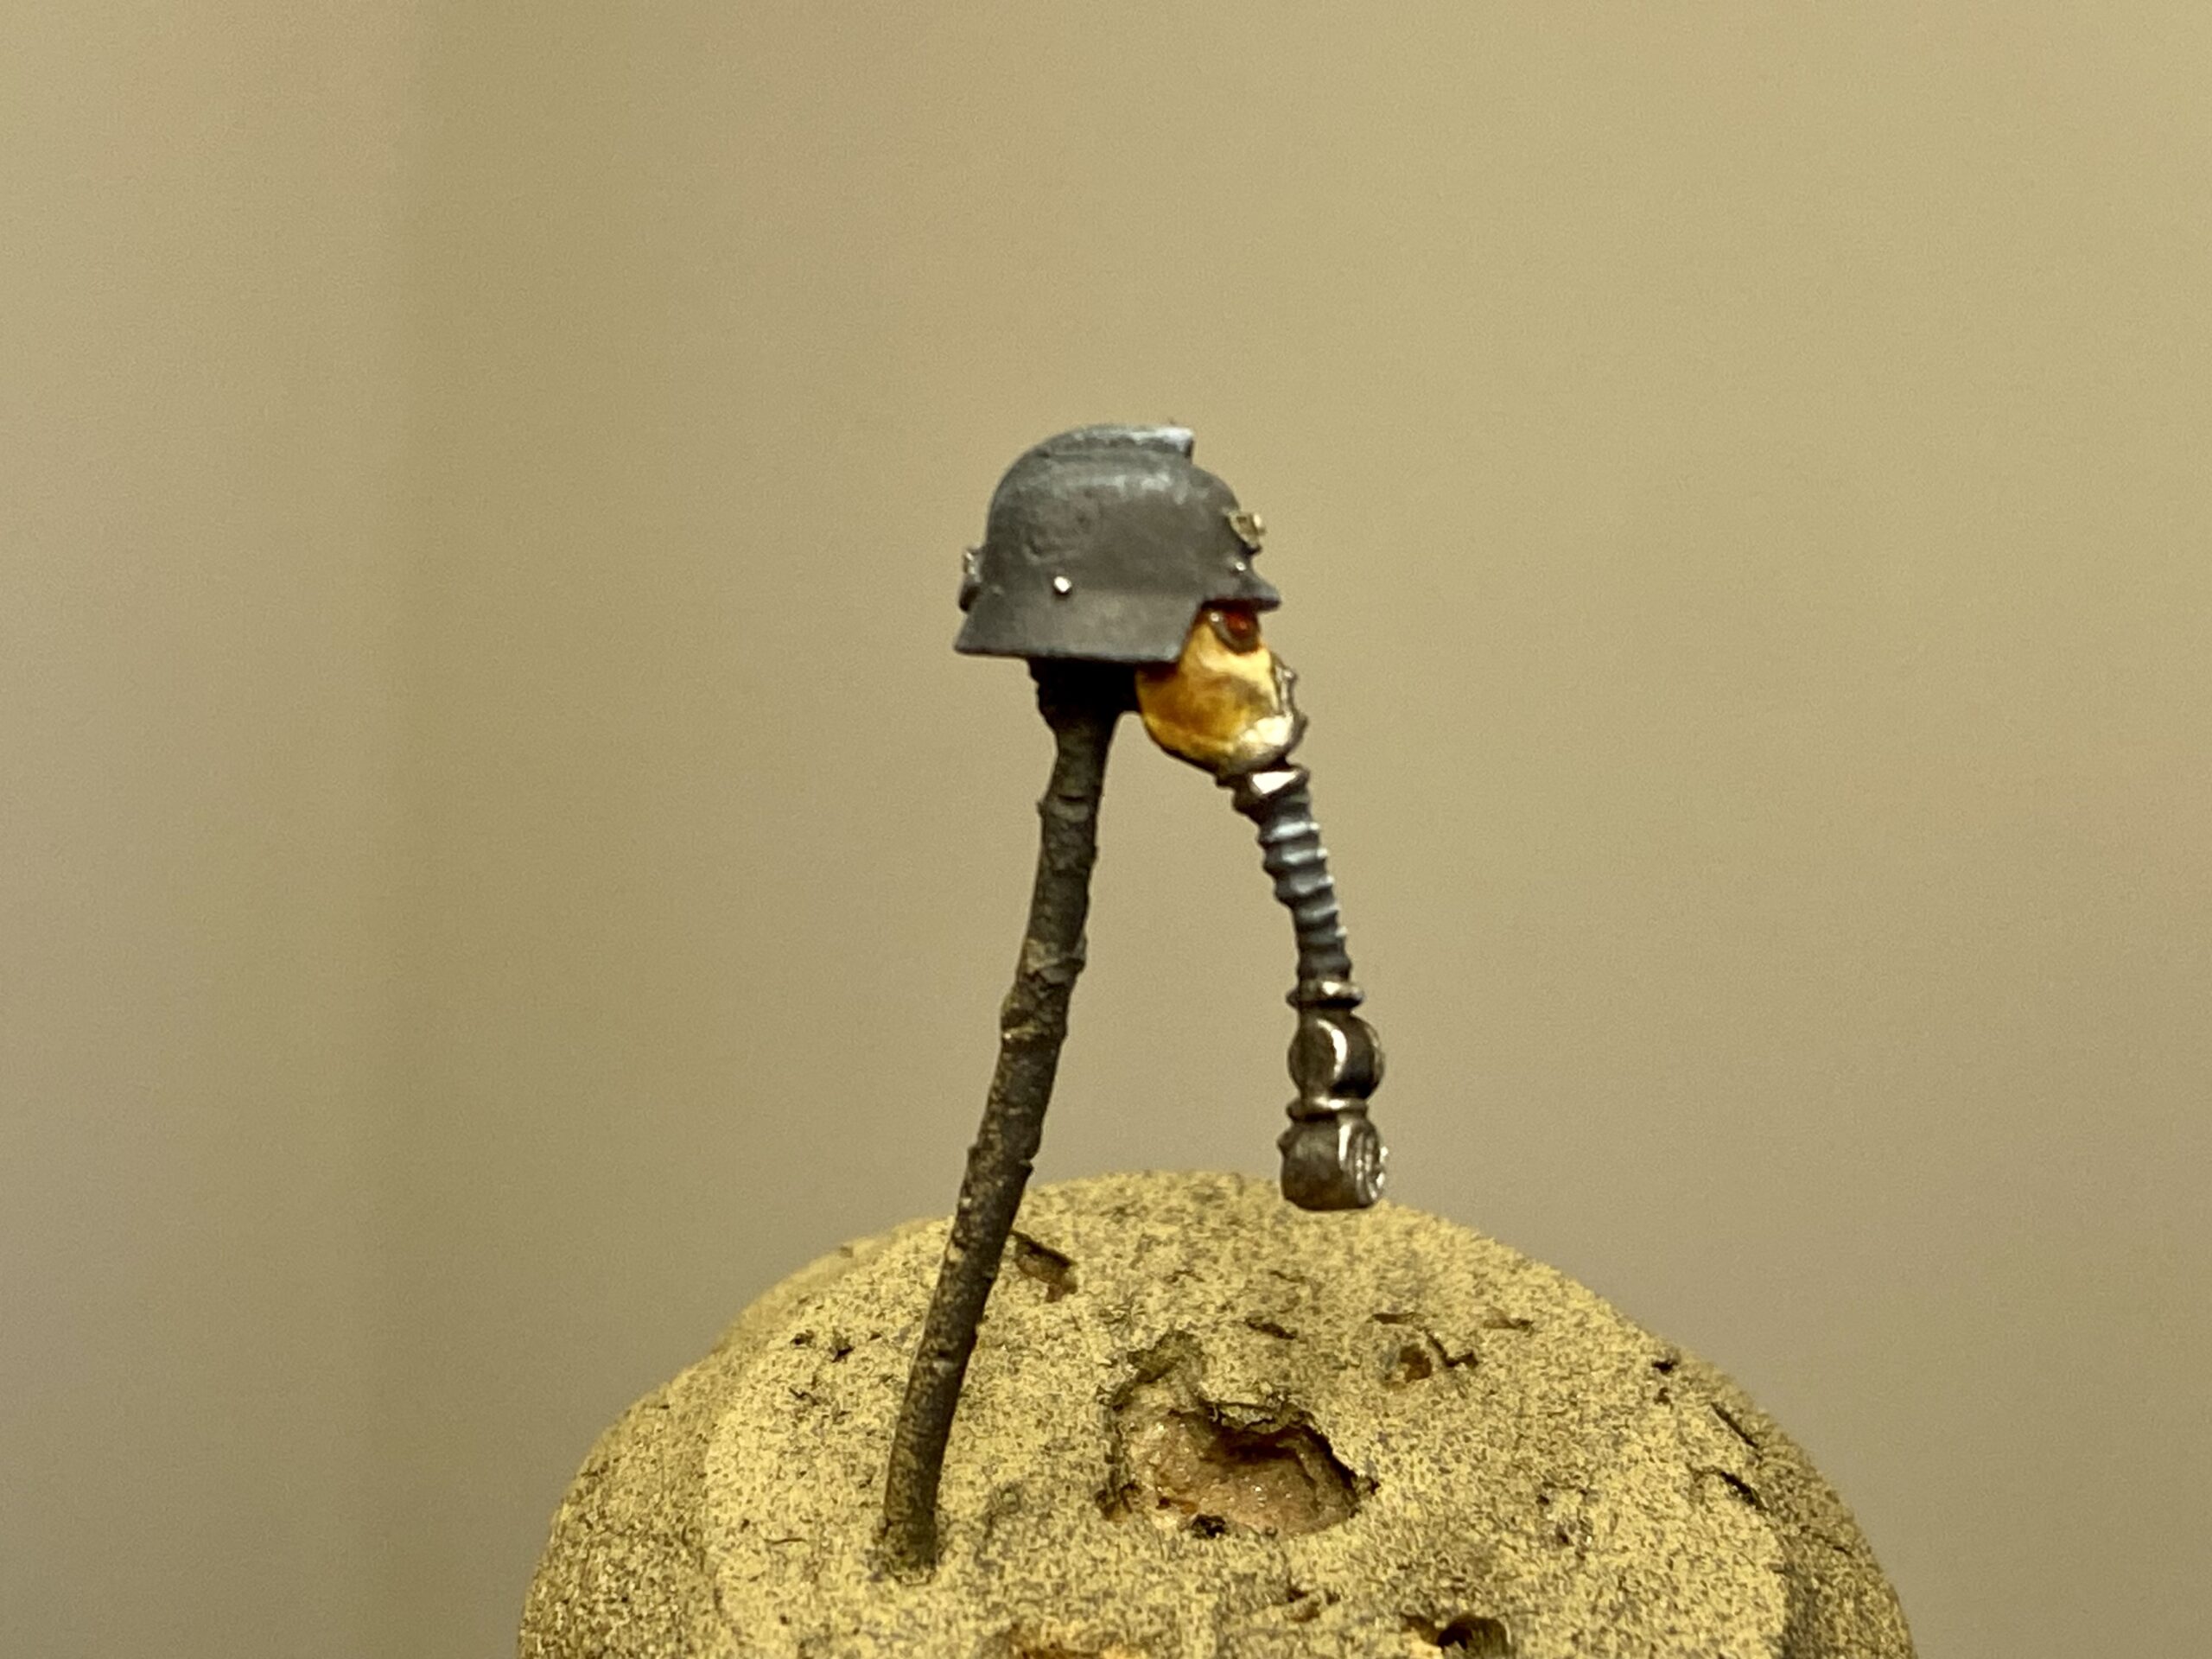
- Bedrolls, gasmask, skulls, socks etc, are in Ushabti Bone.
- Wash the whole model in a brown oil wash and wait a day.
- Do the same oil wash again, but on the clothing, leaving the armour brighter.
- Rhinox Hide on all the leather, then highlight leather with Skrag Brown.
- All metallics are painted with Leadbelcher, washed with Nuln Oil, and finally highlighted with Stormhost Silver.
- Stormhost Silver on buttons.
- Reddish pigment on the boots and lower cloak brings the model together with the base.
- Finally, I went in with a small amount of black pigment powder to the weapons, arms, chest, helmet back and sides.
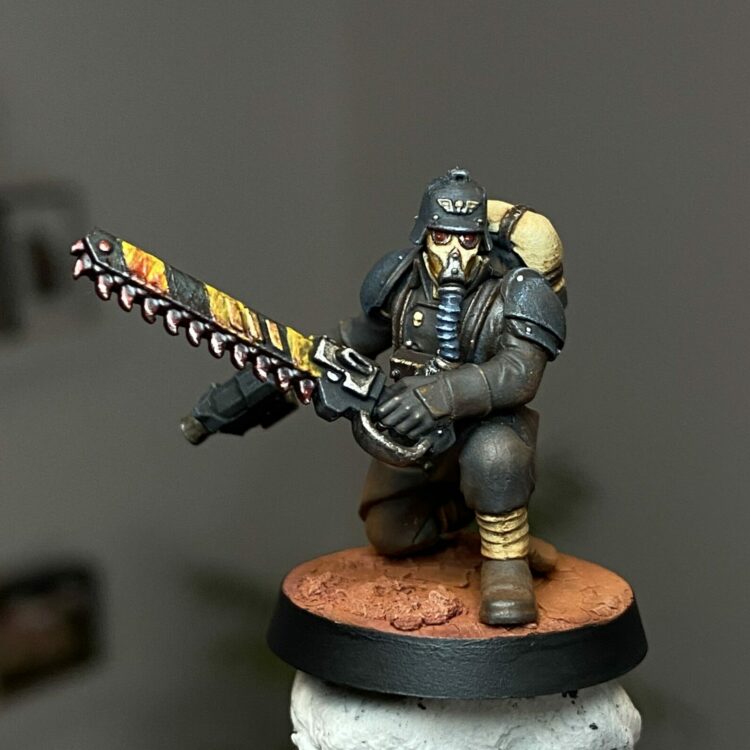
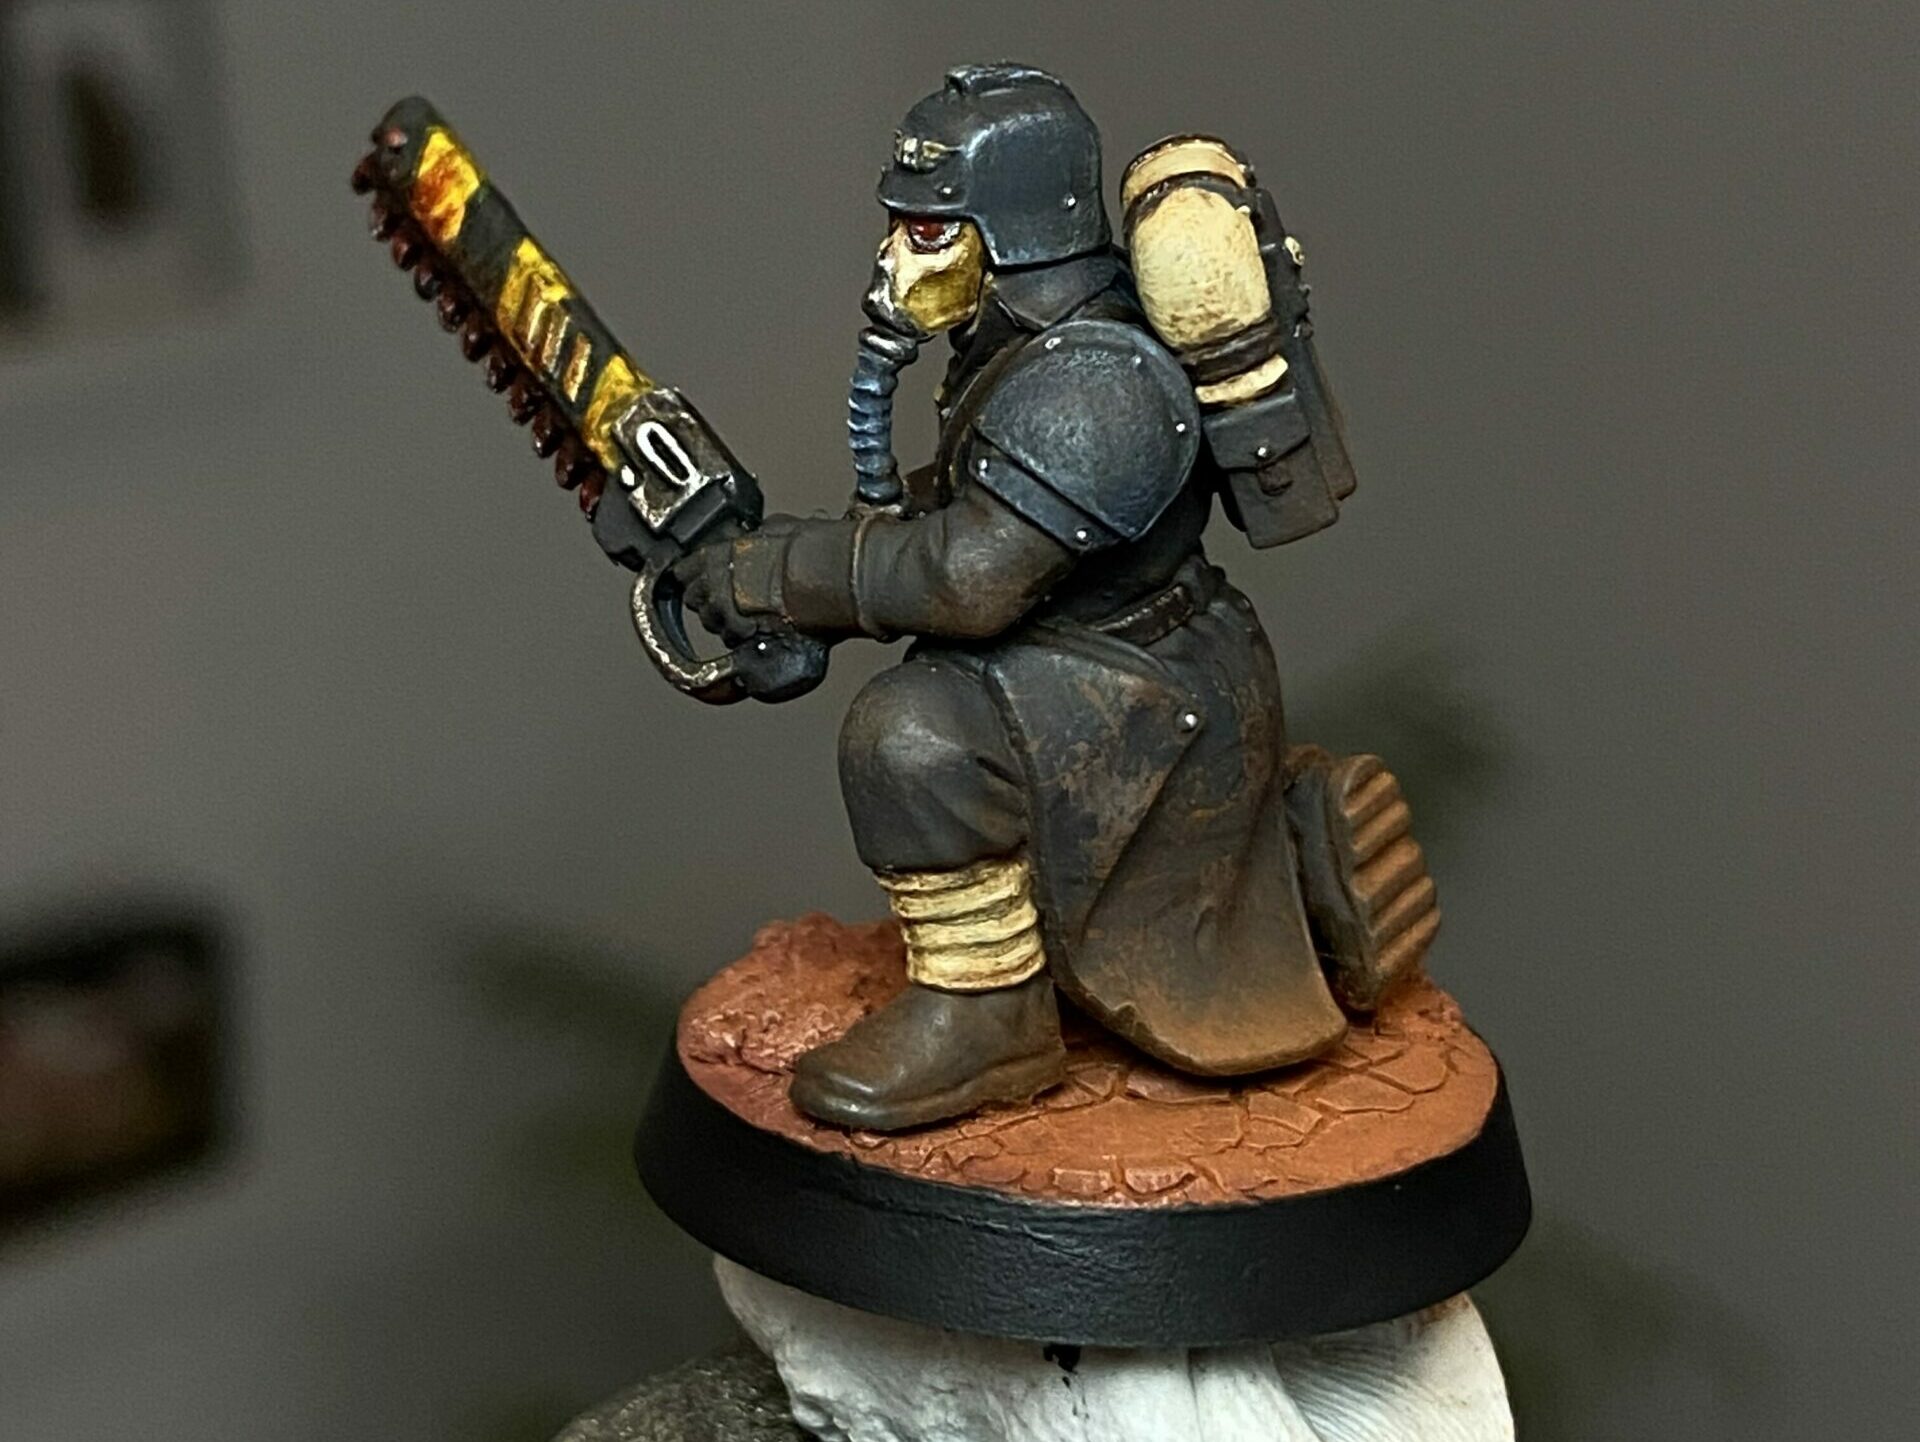
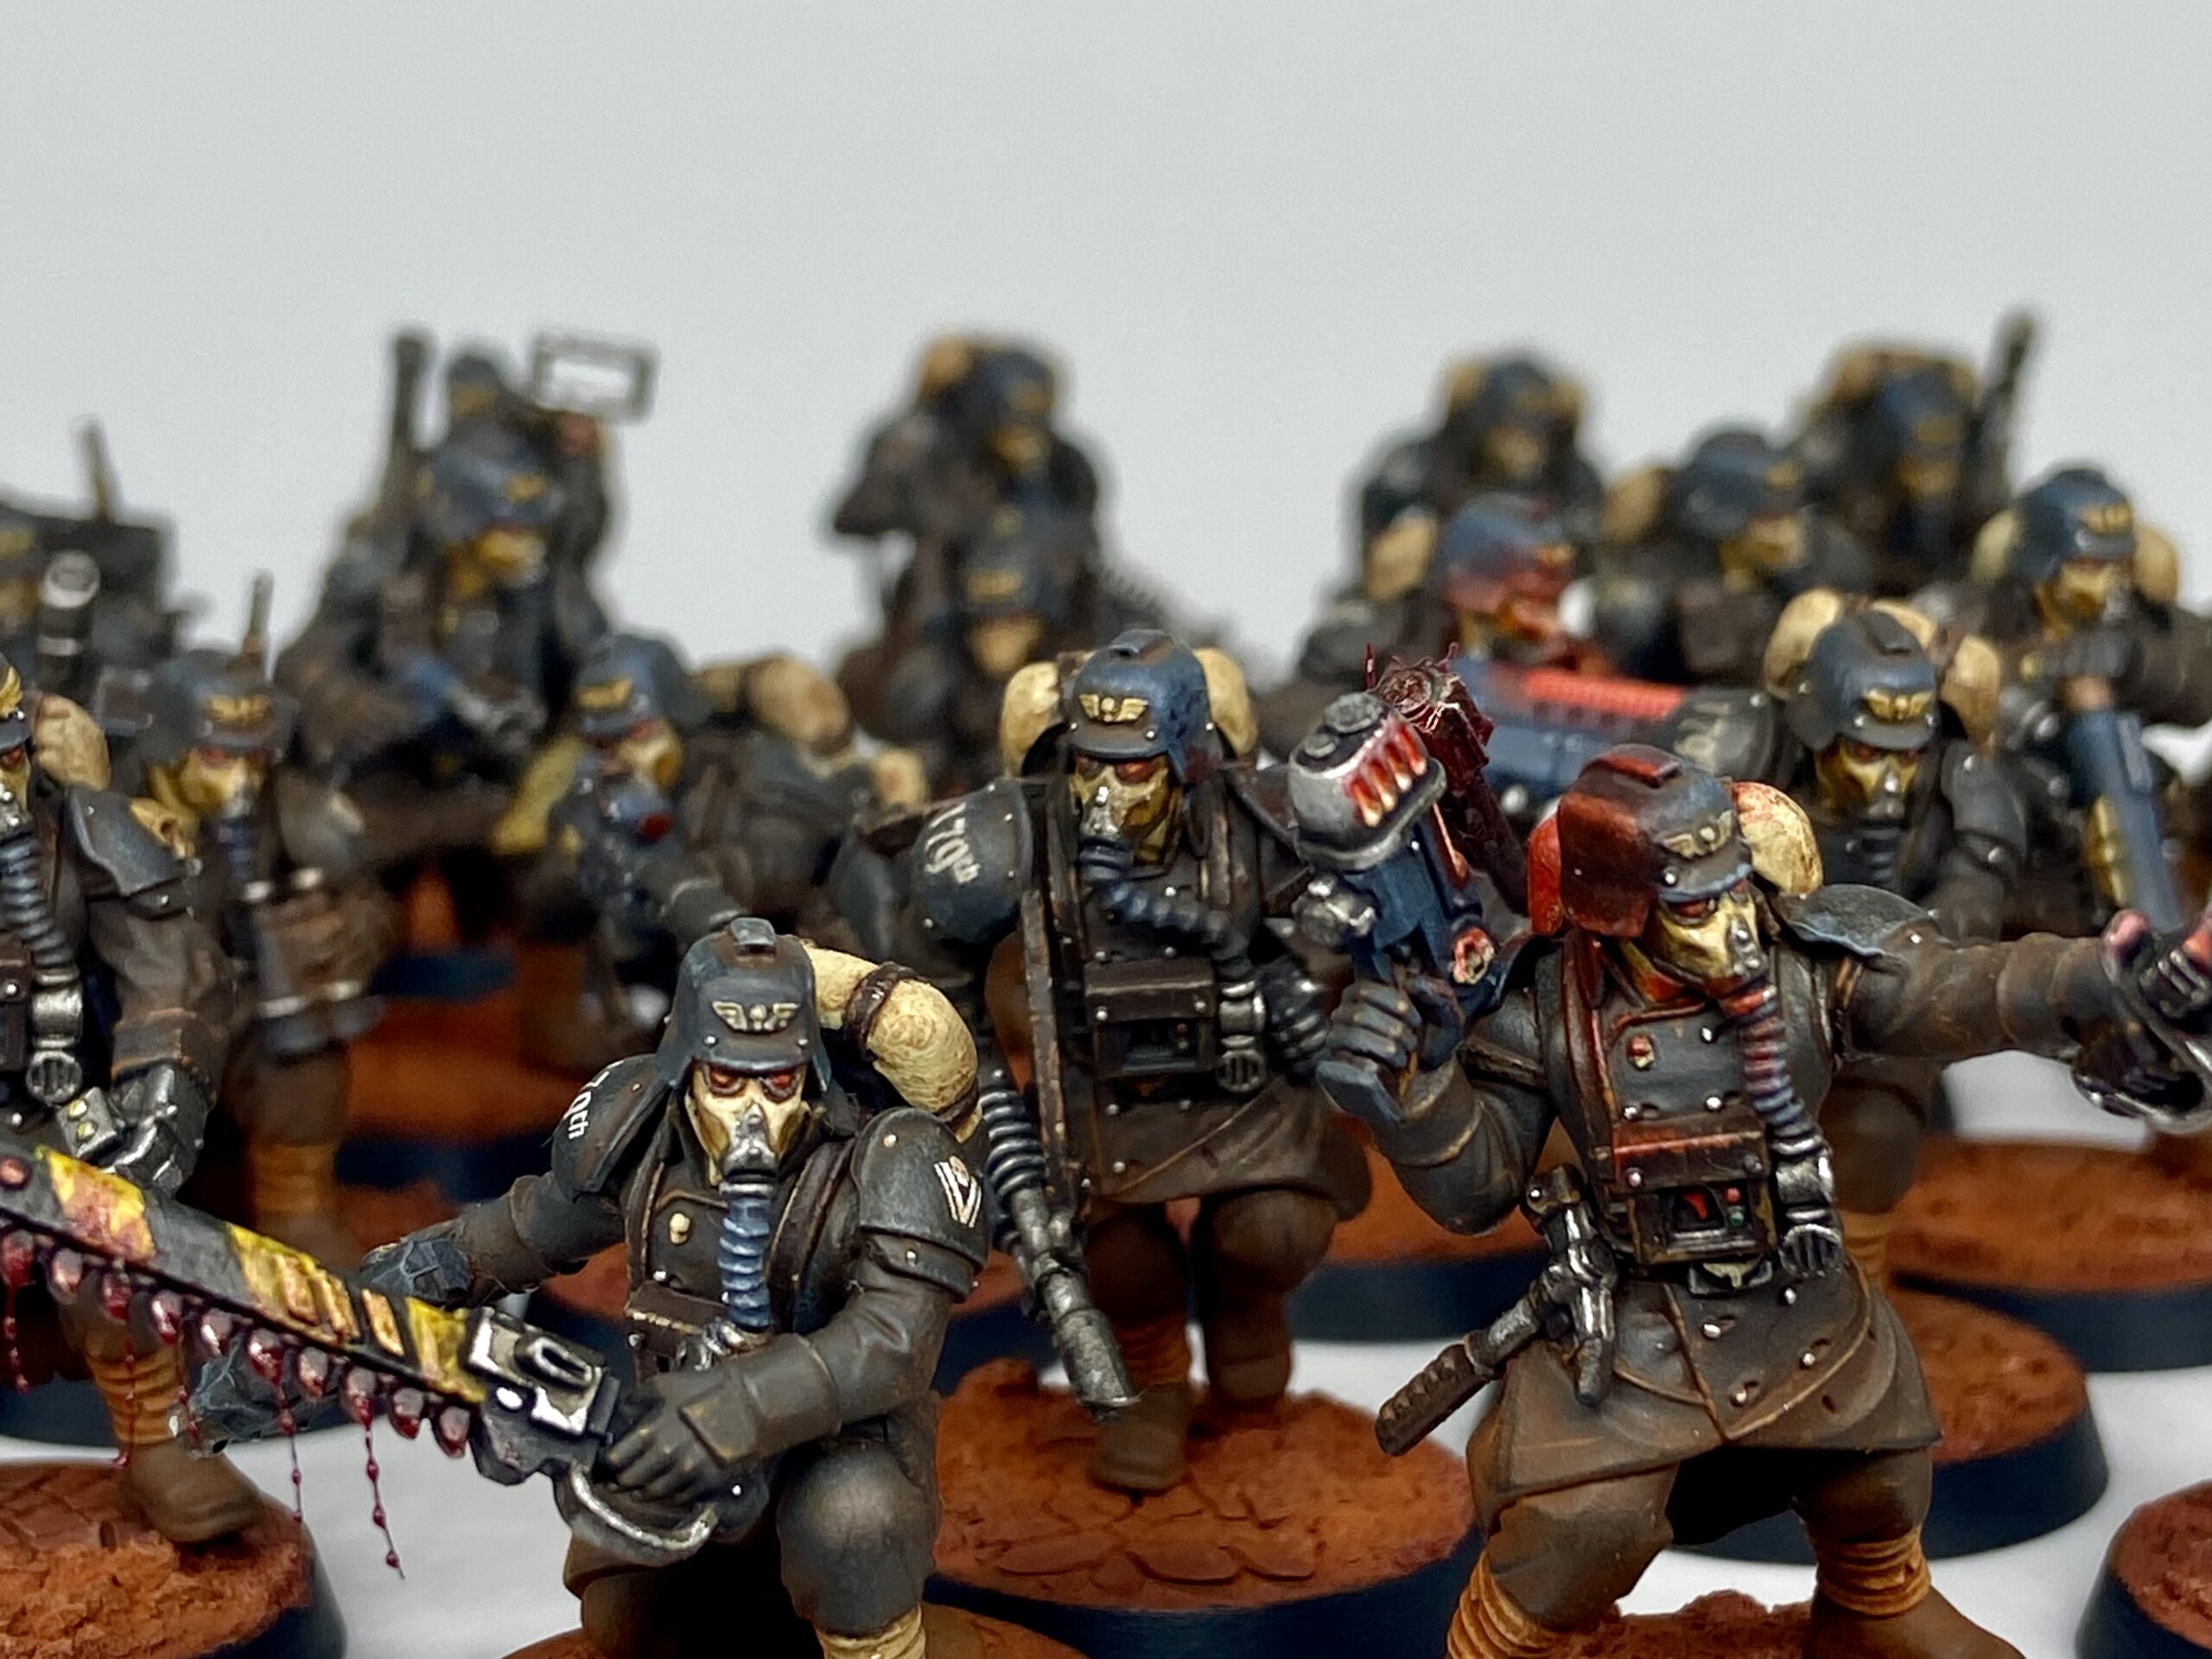
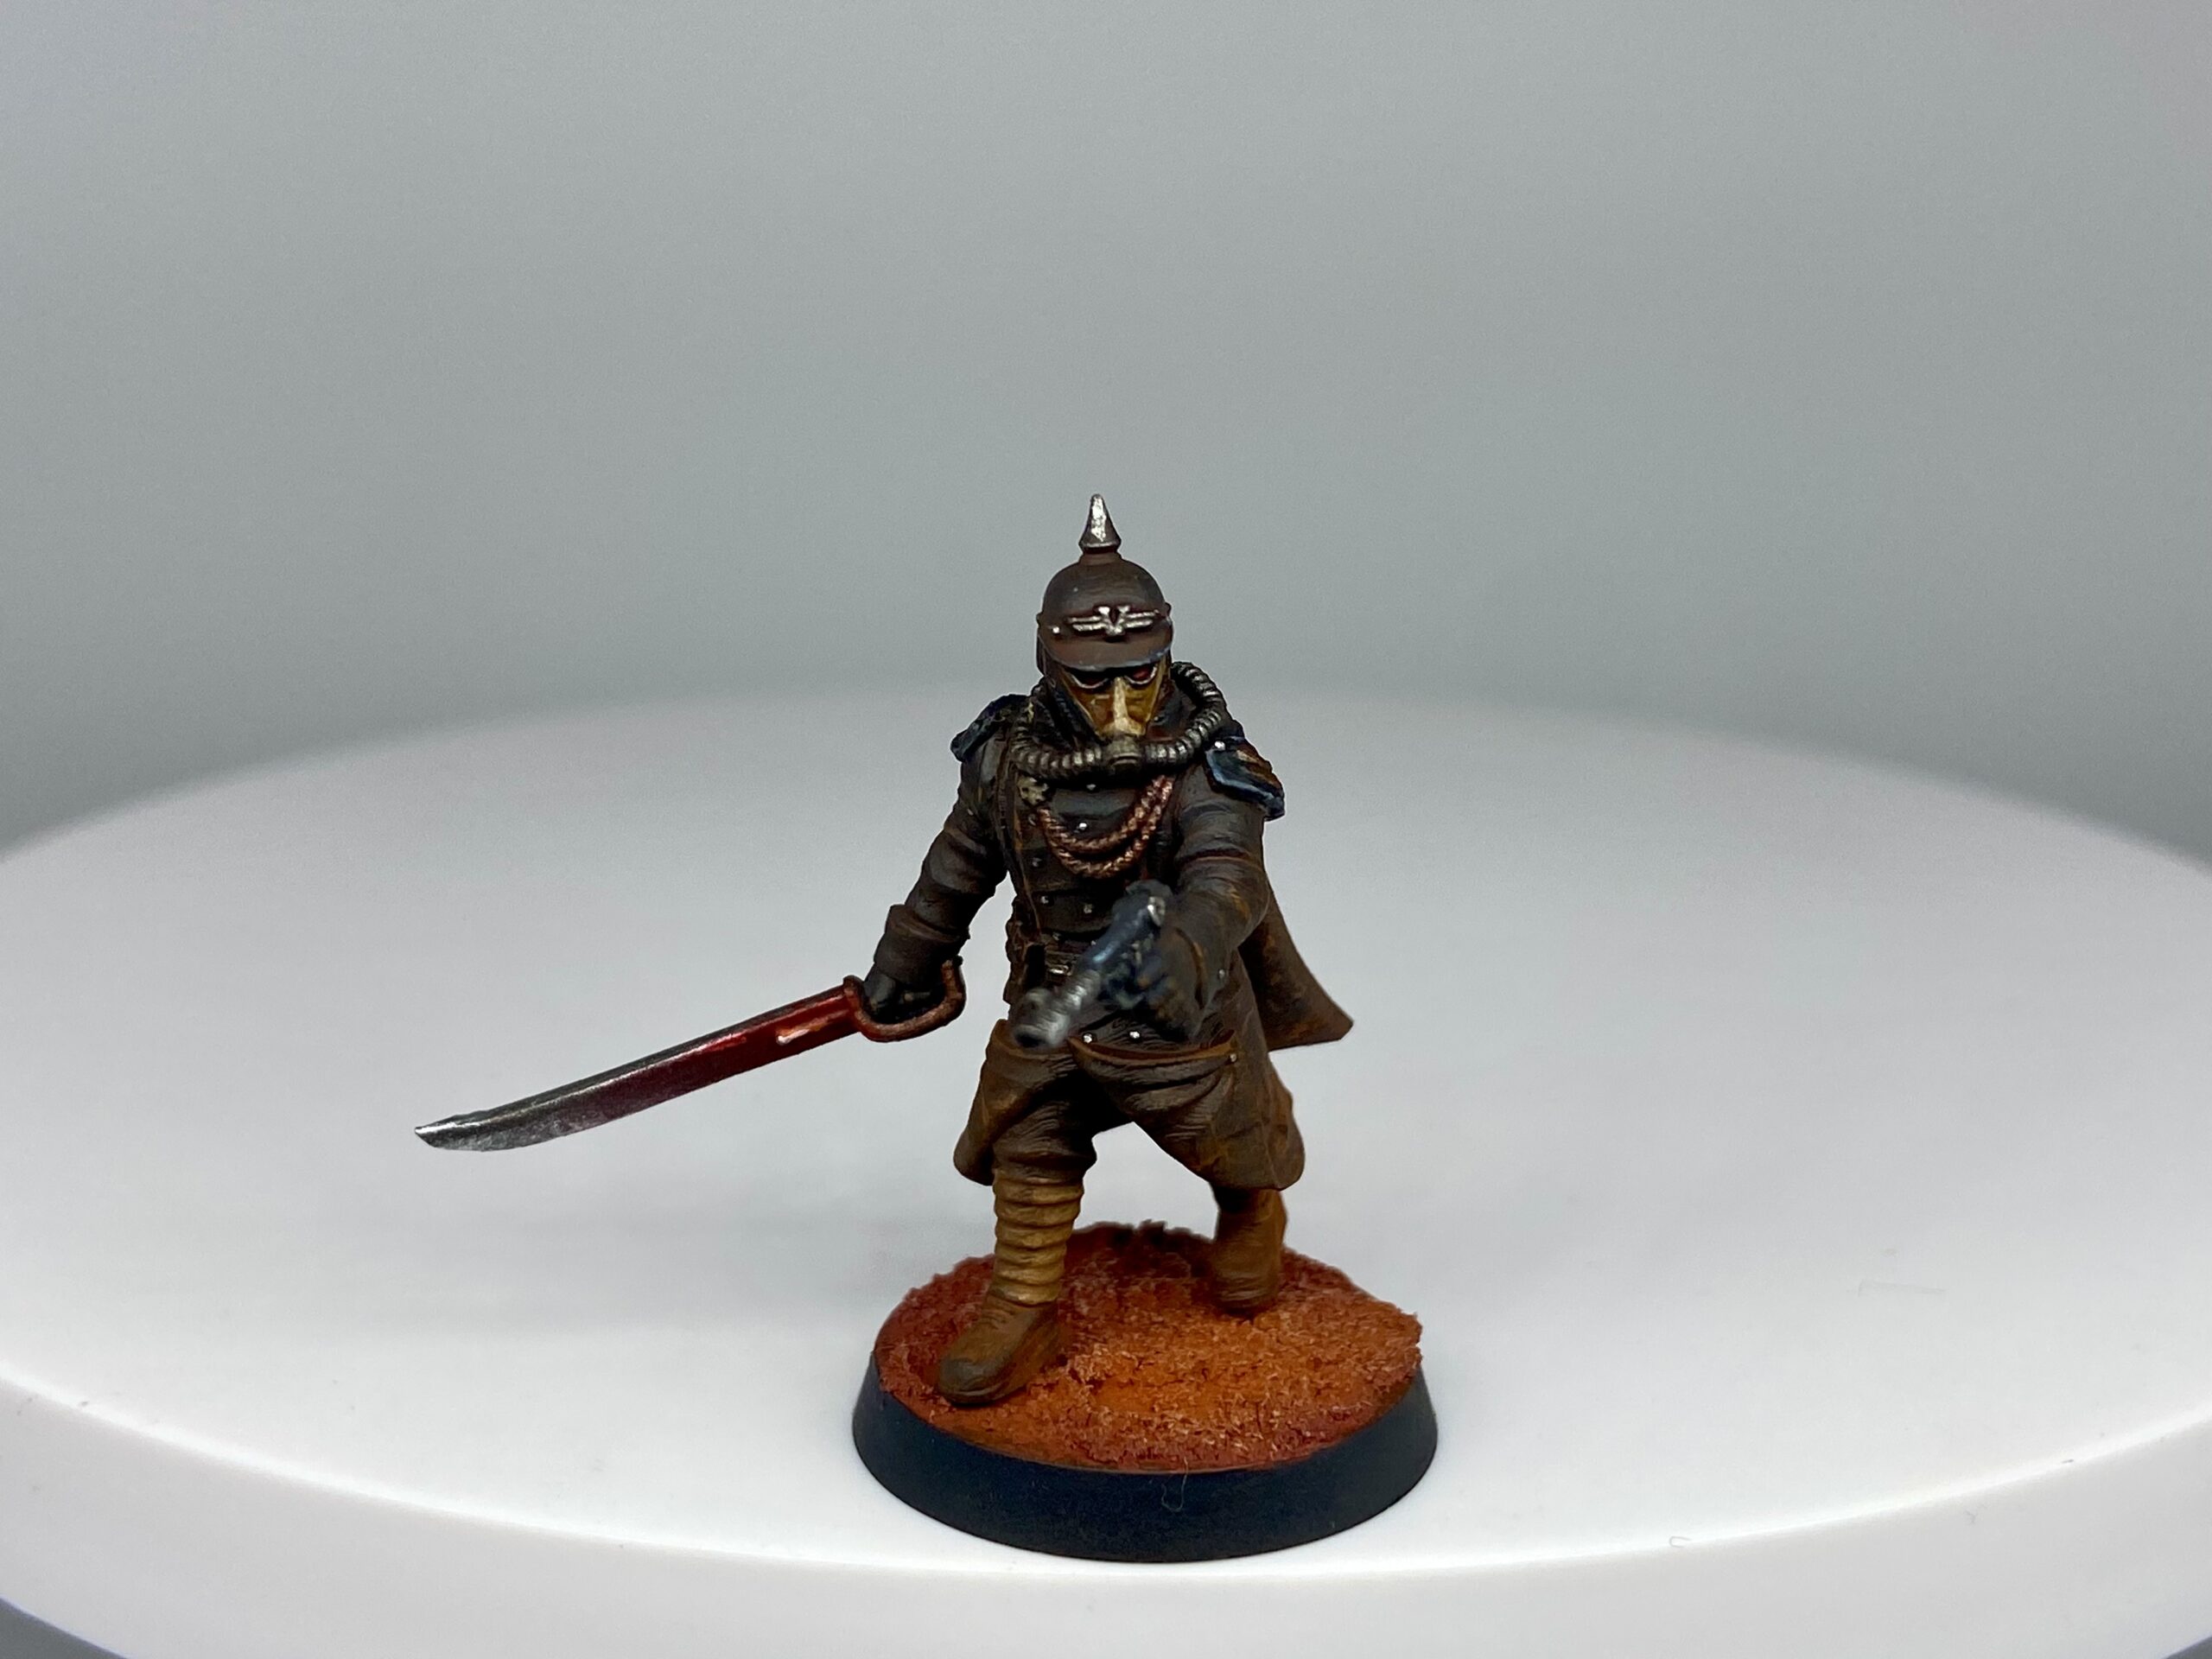
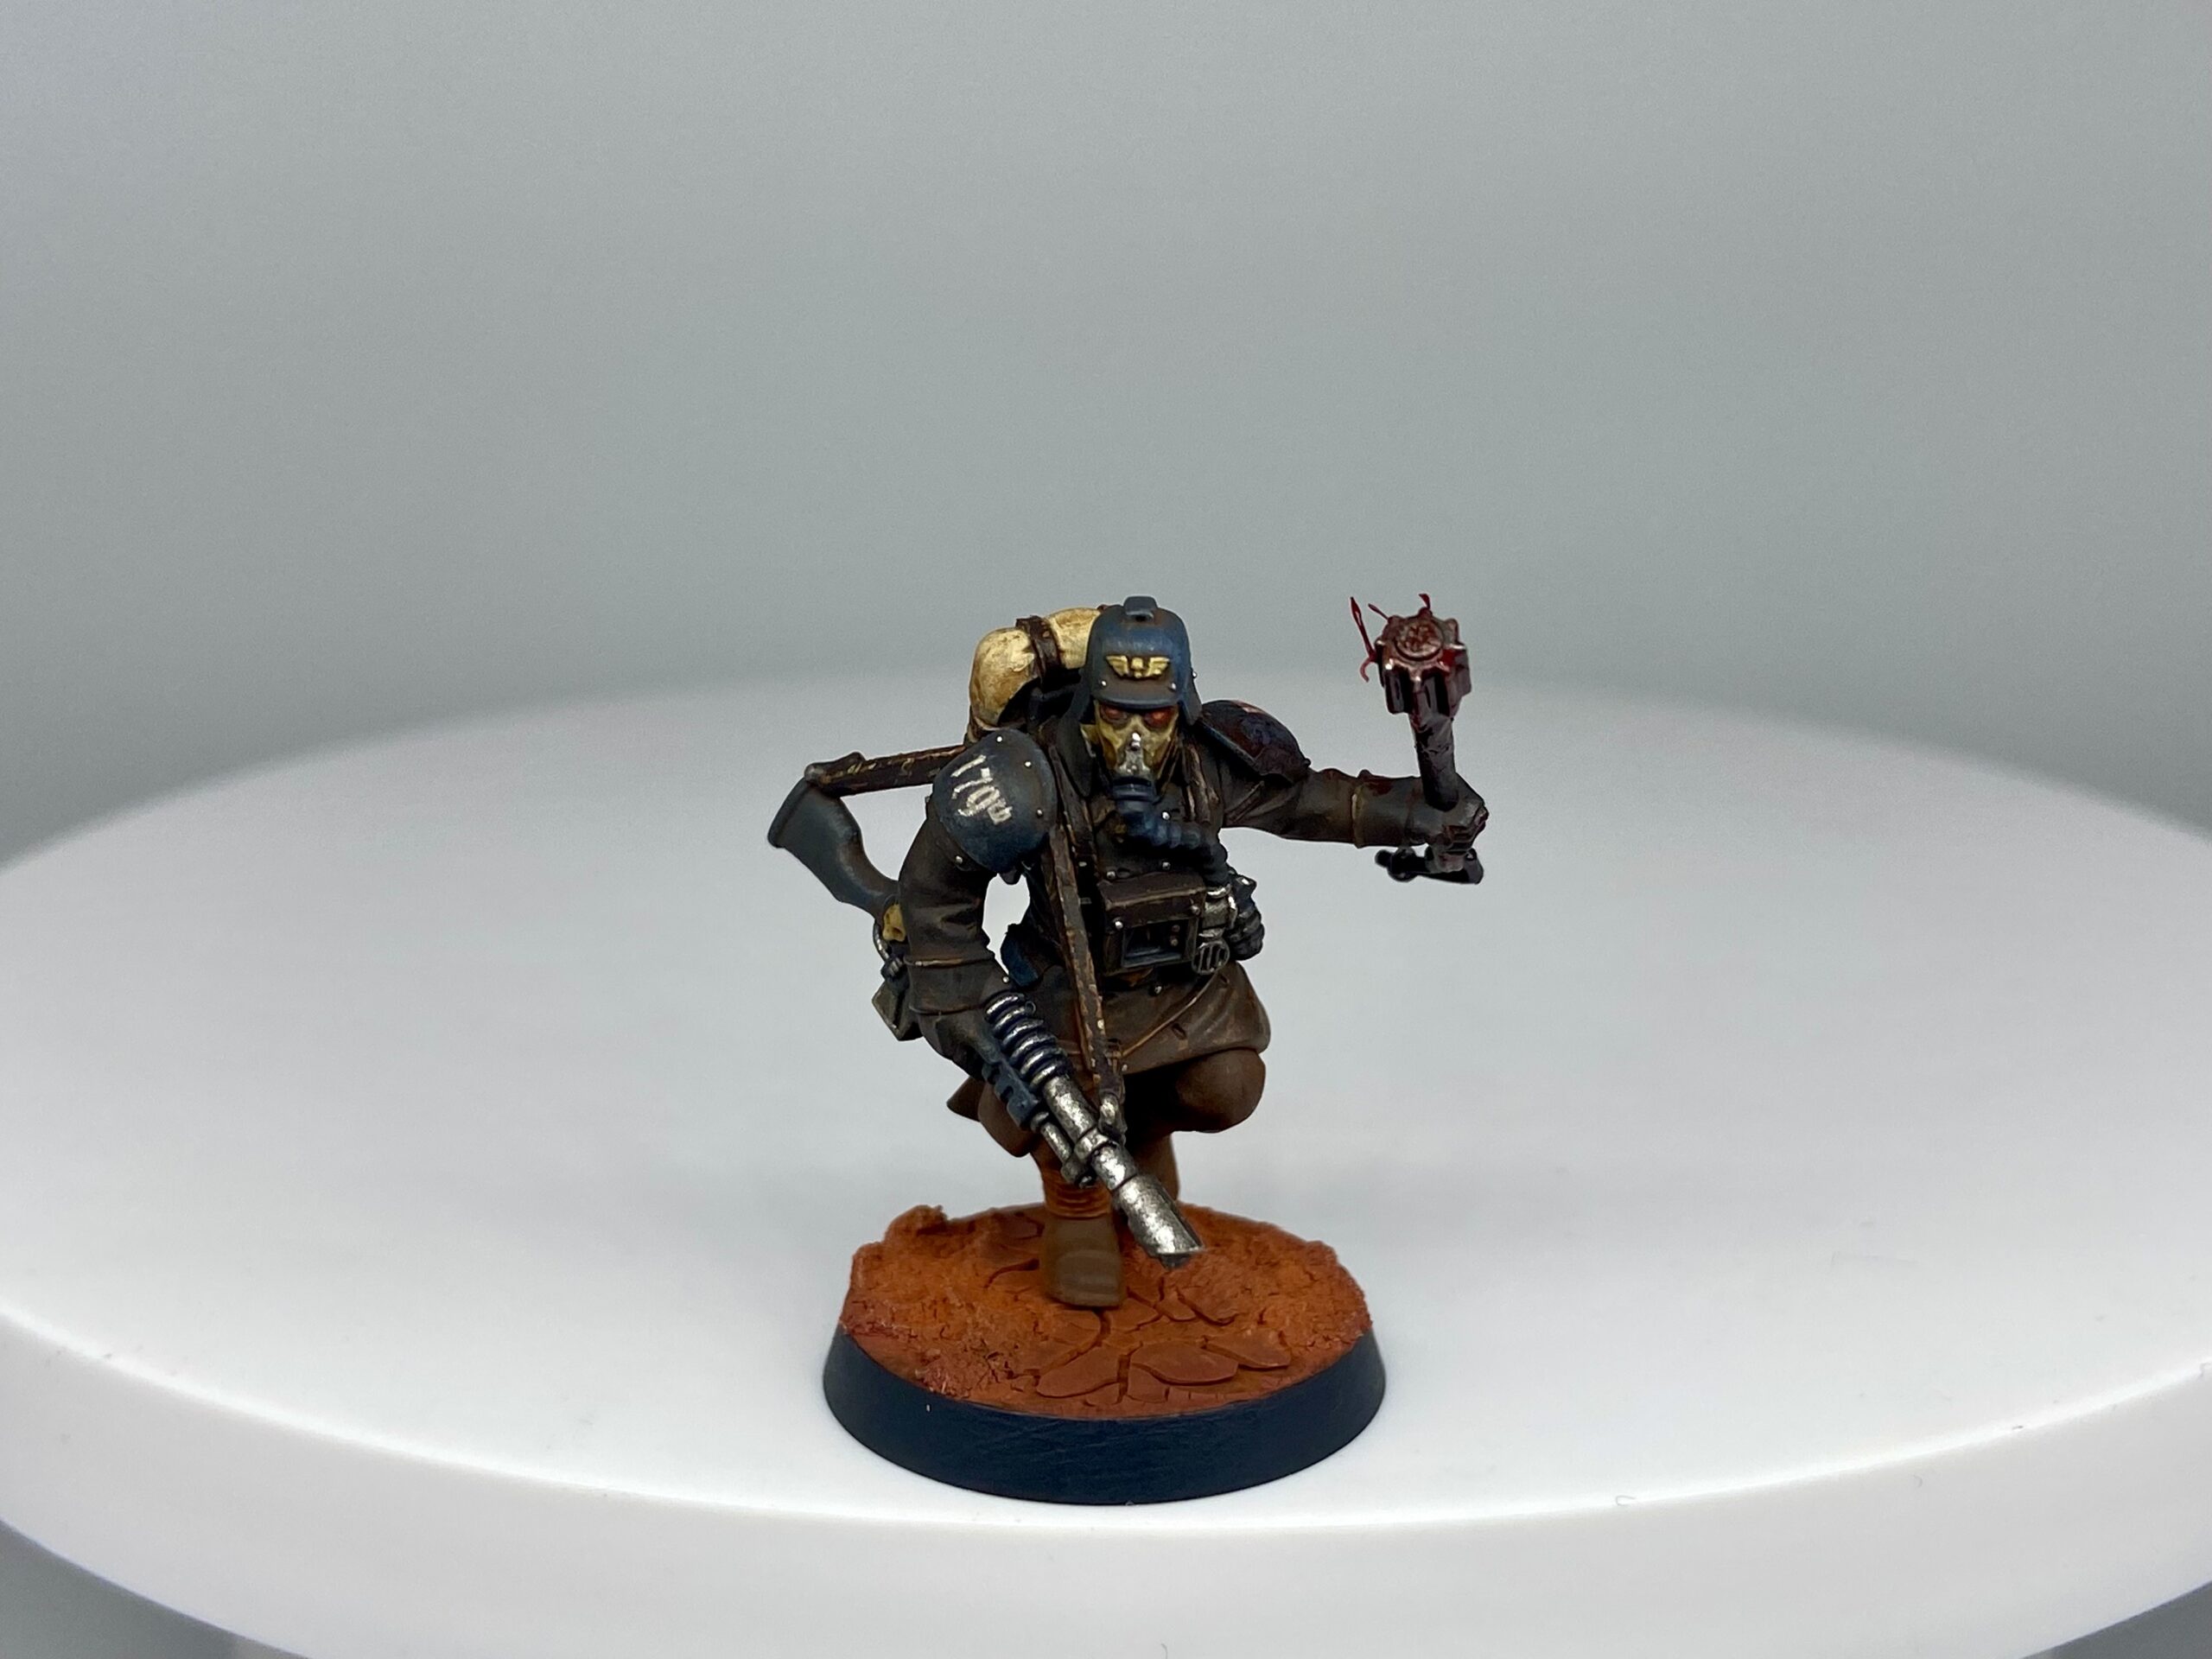
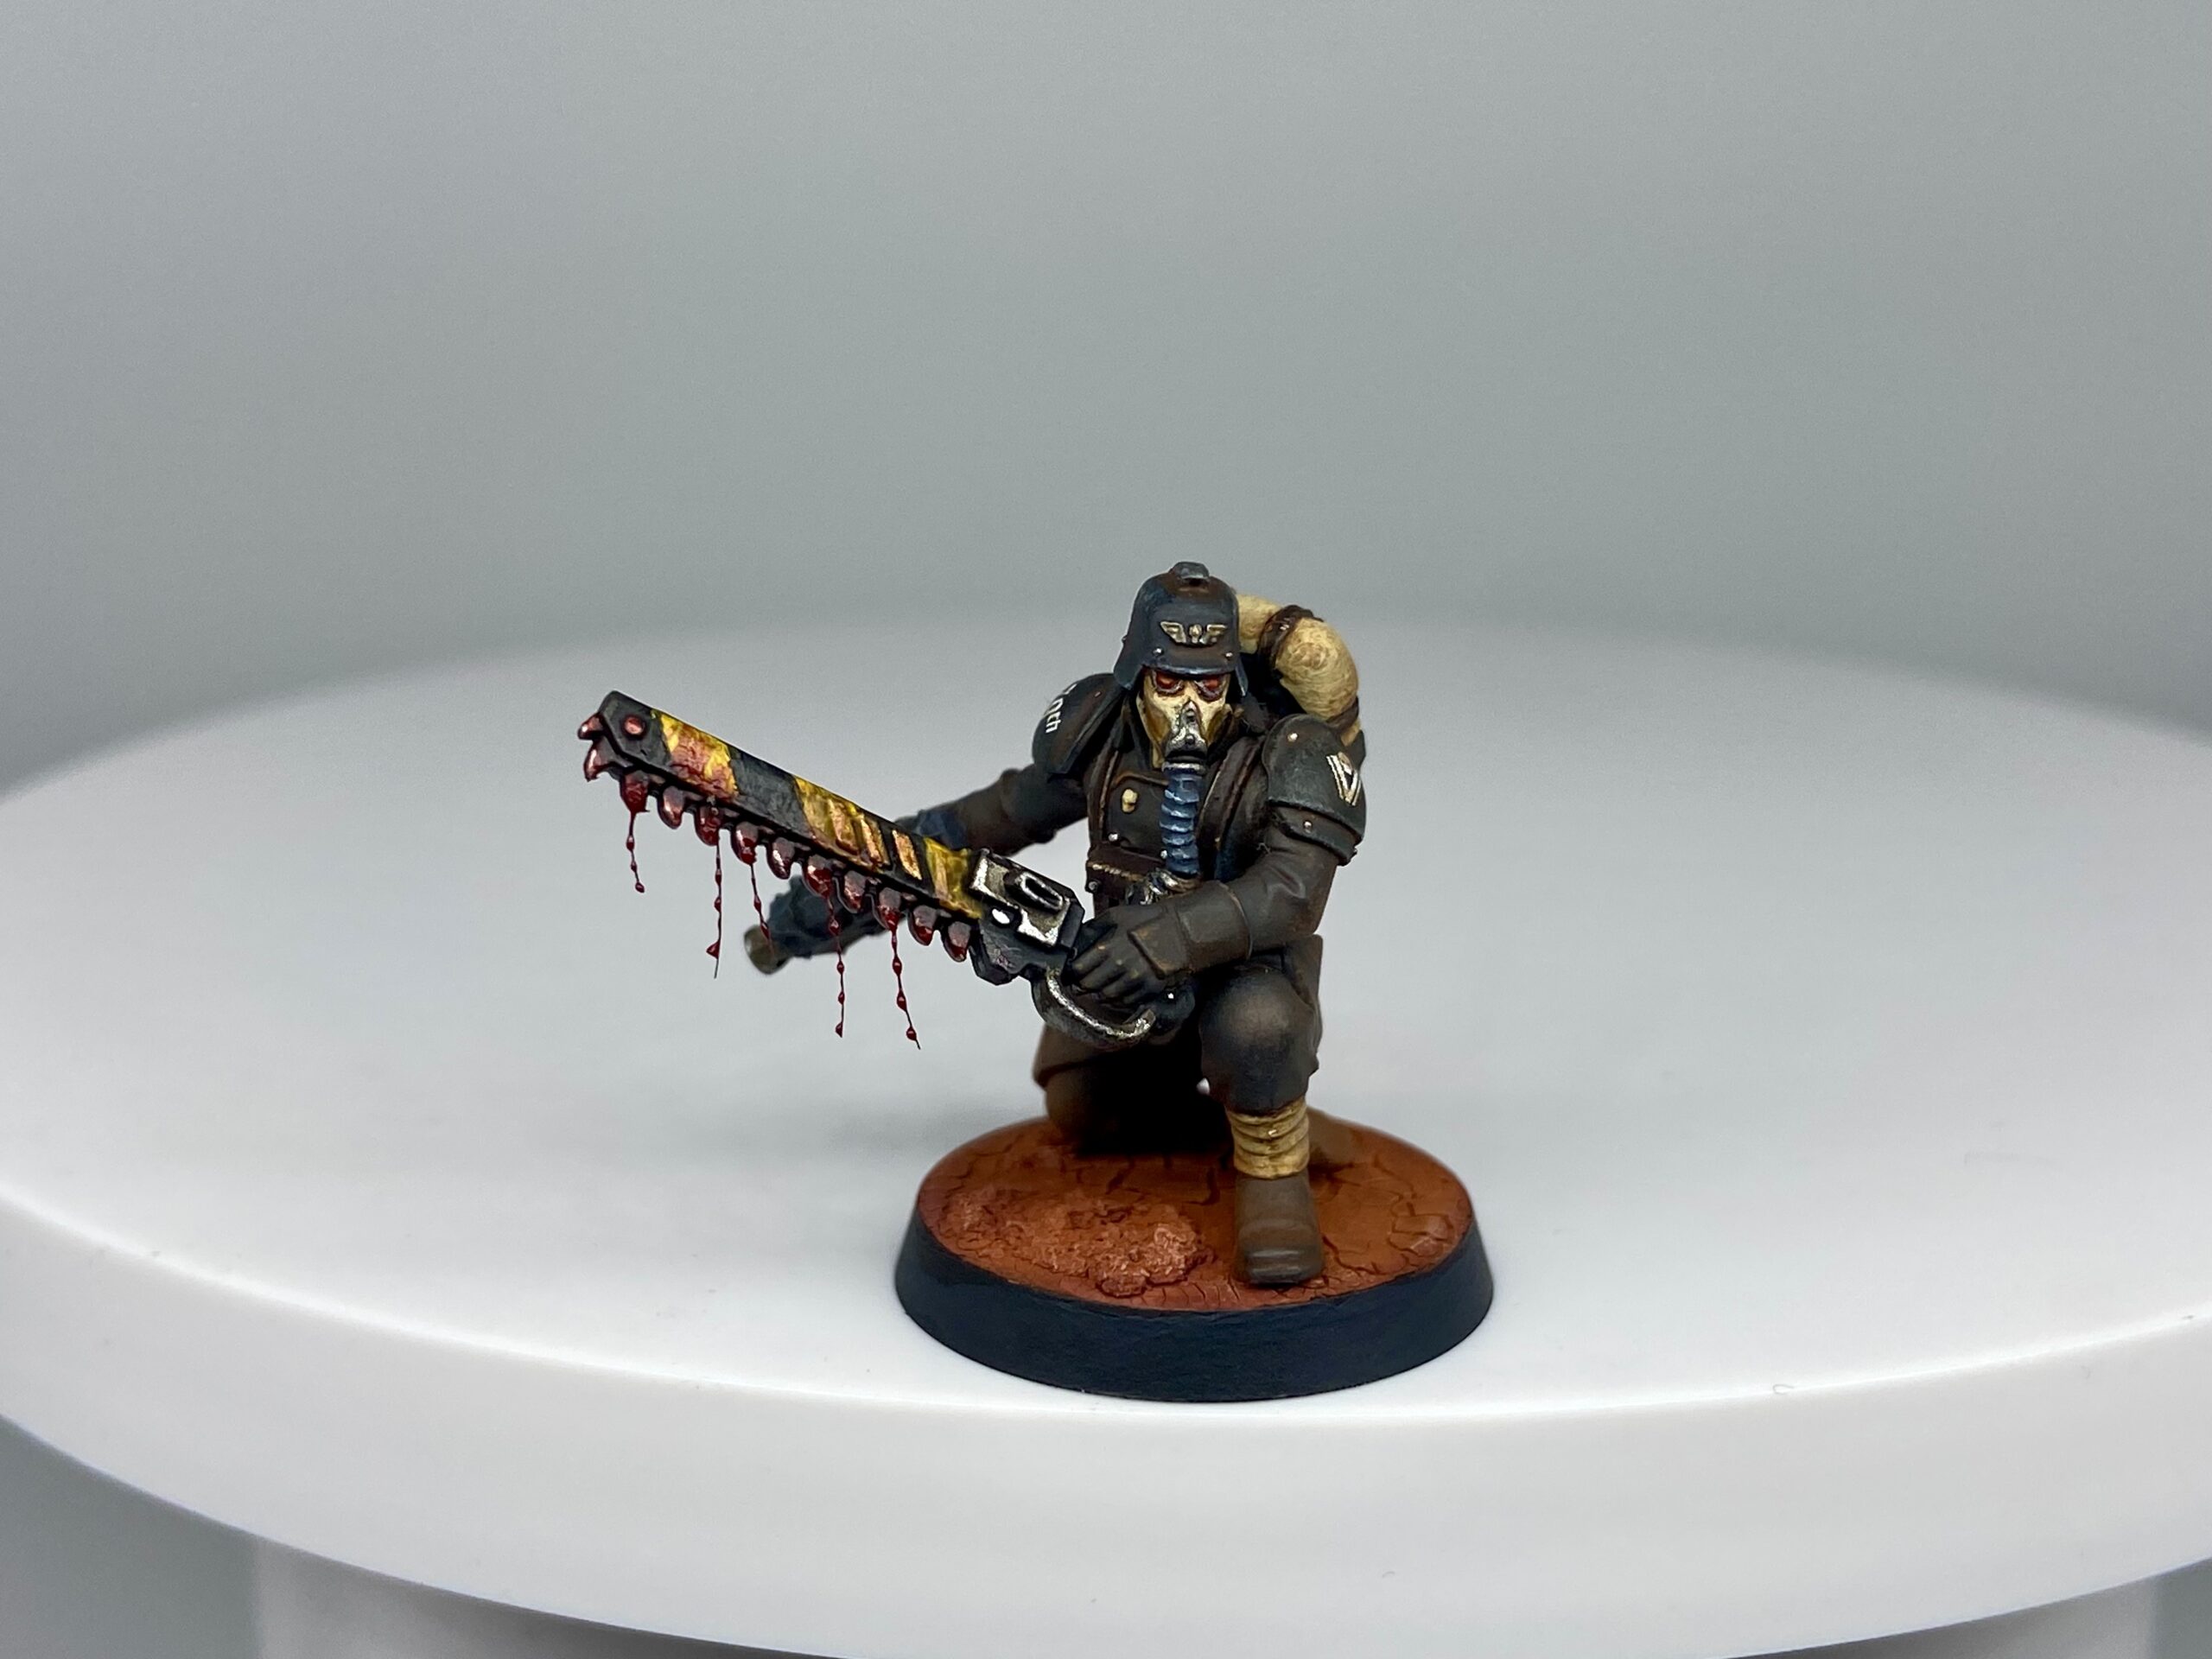
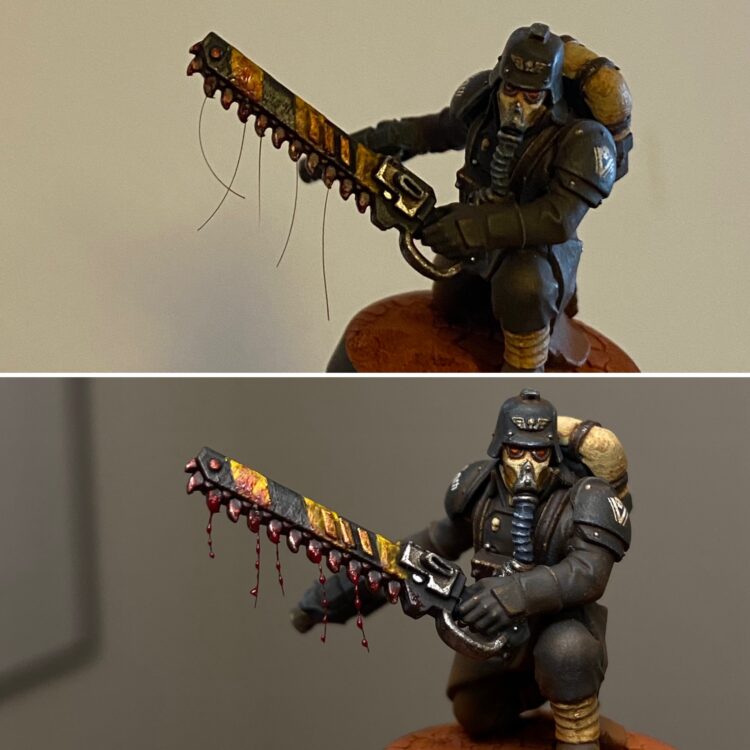
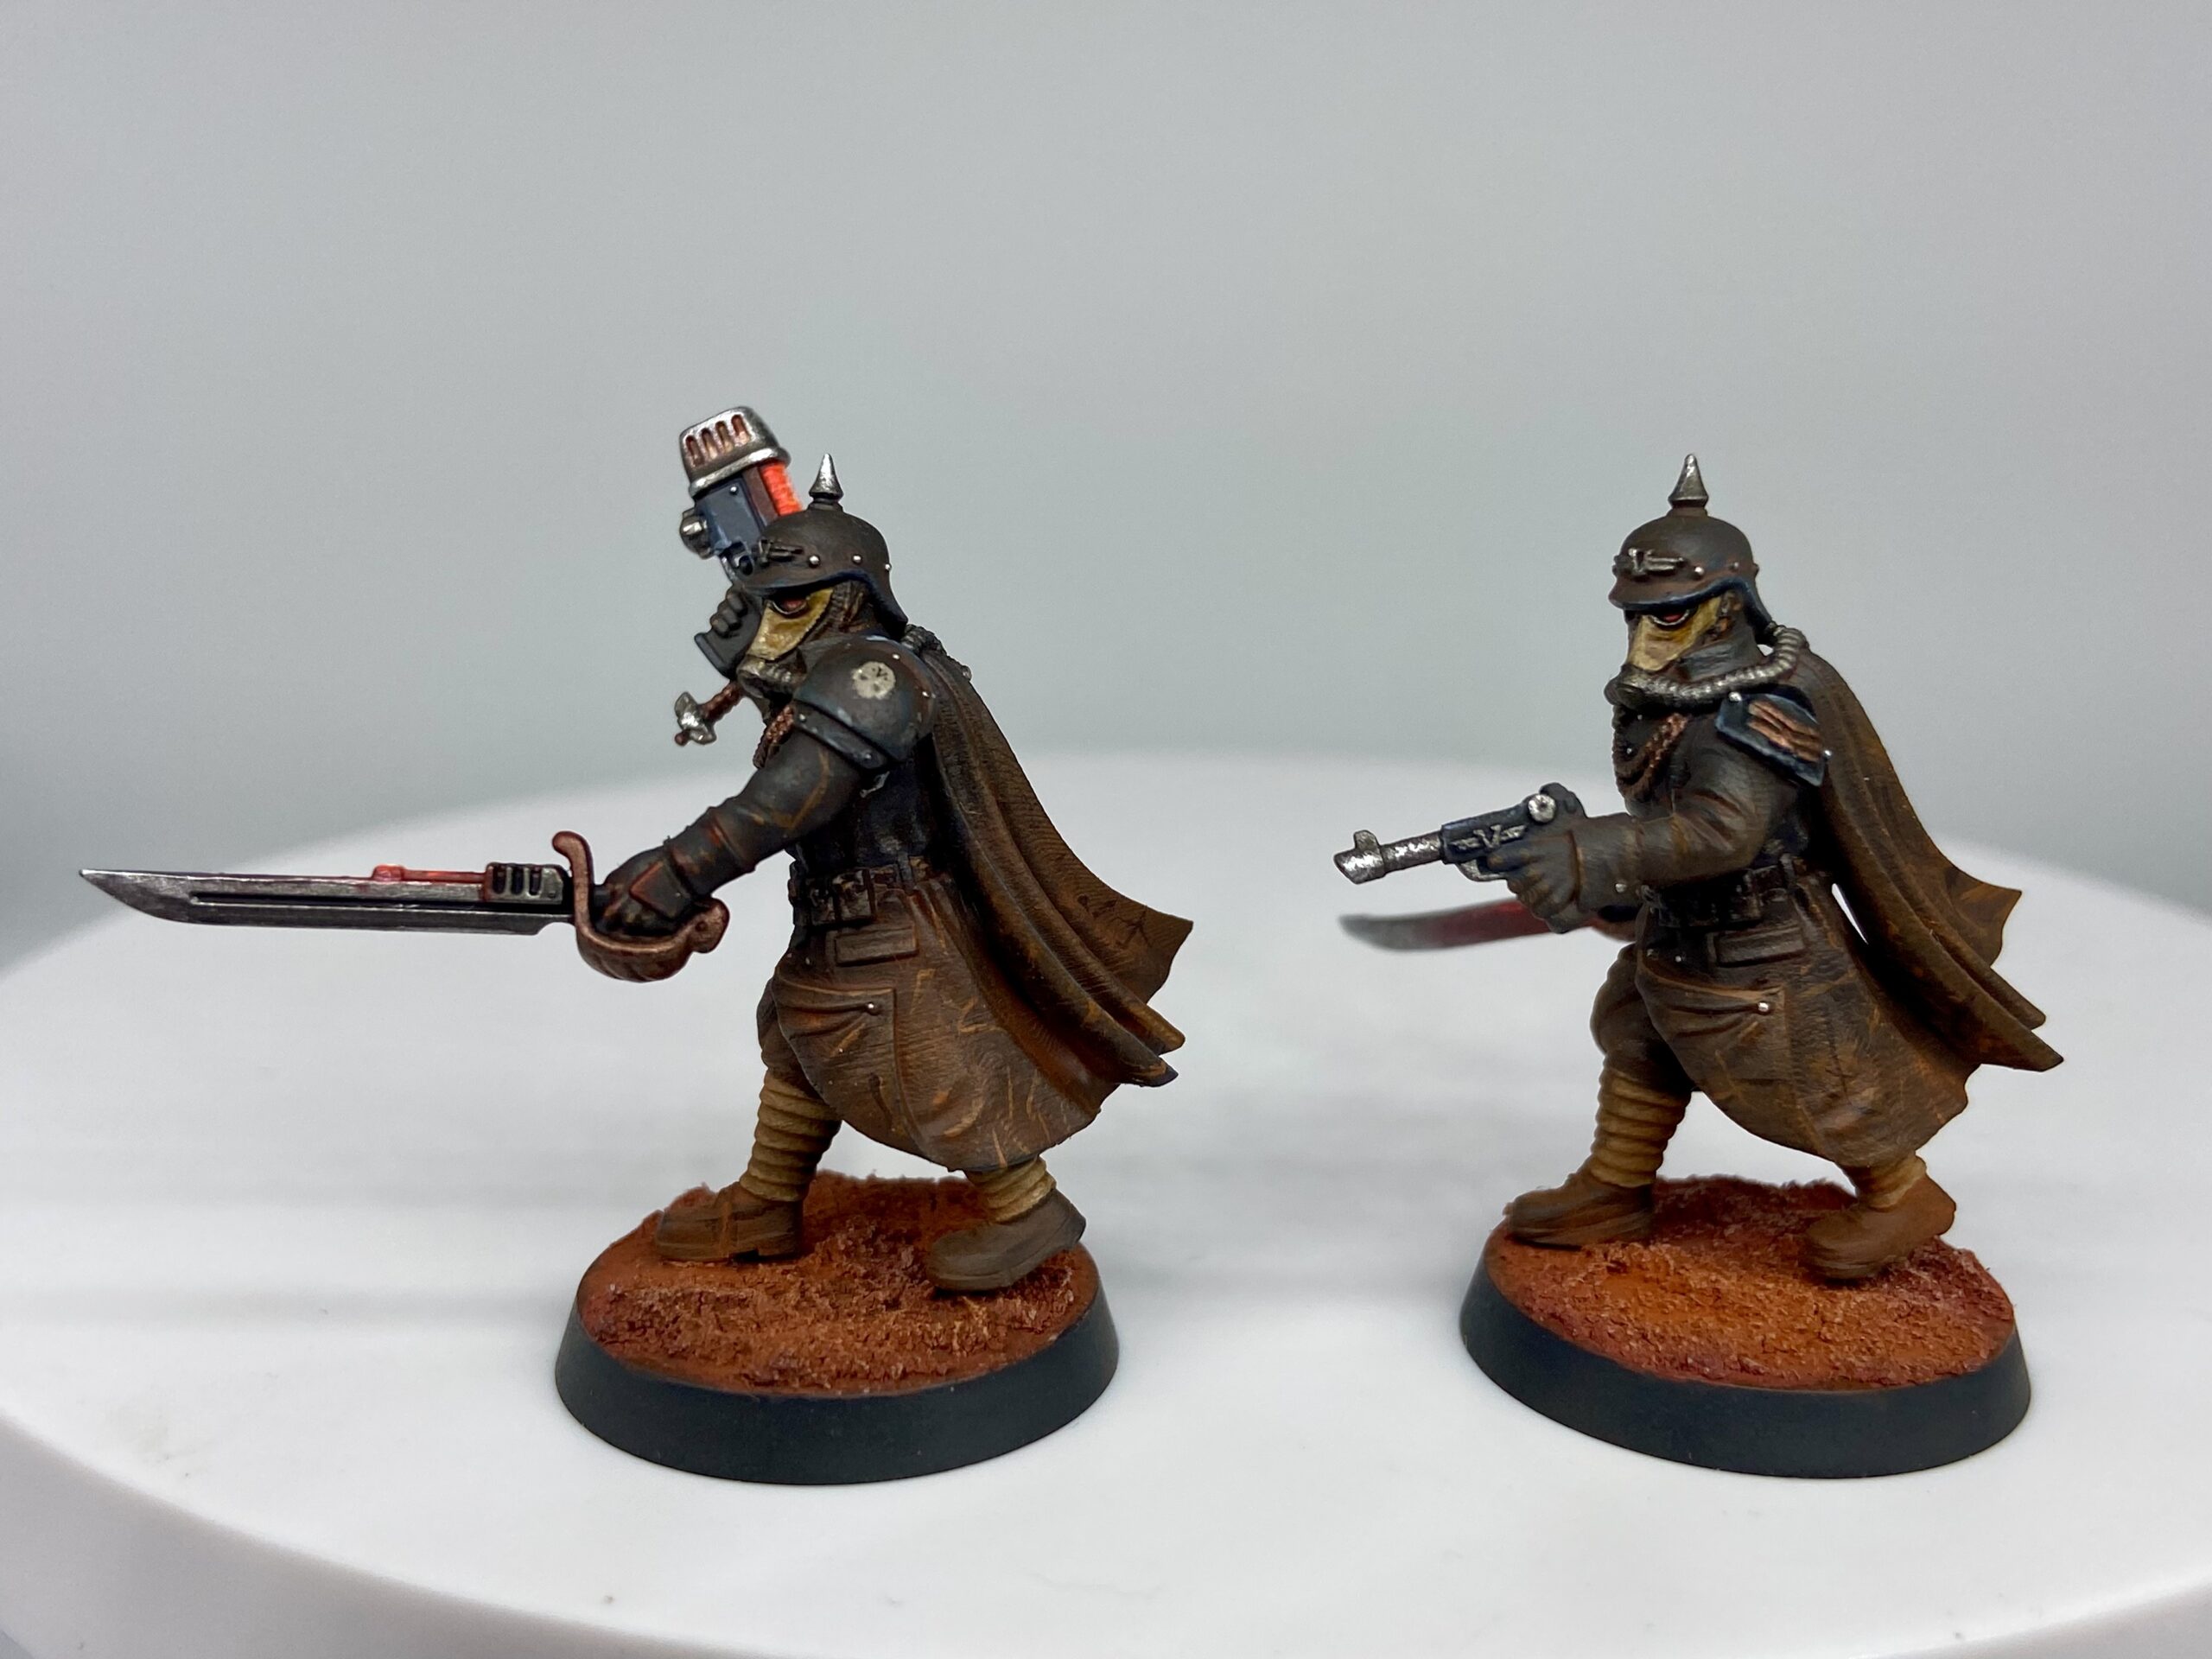
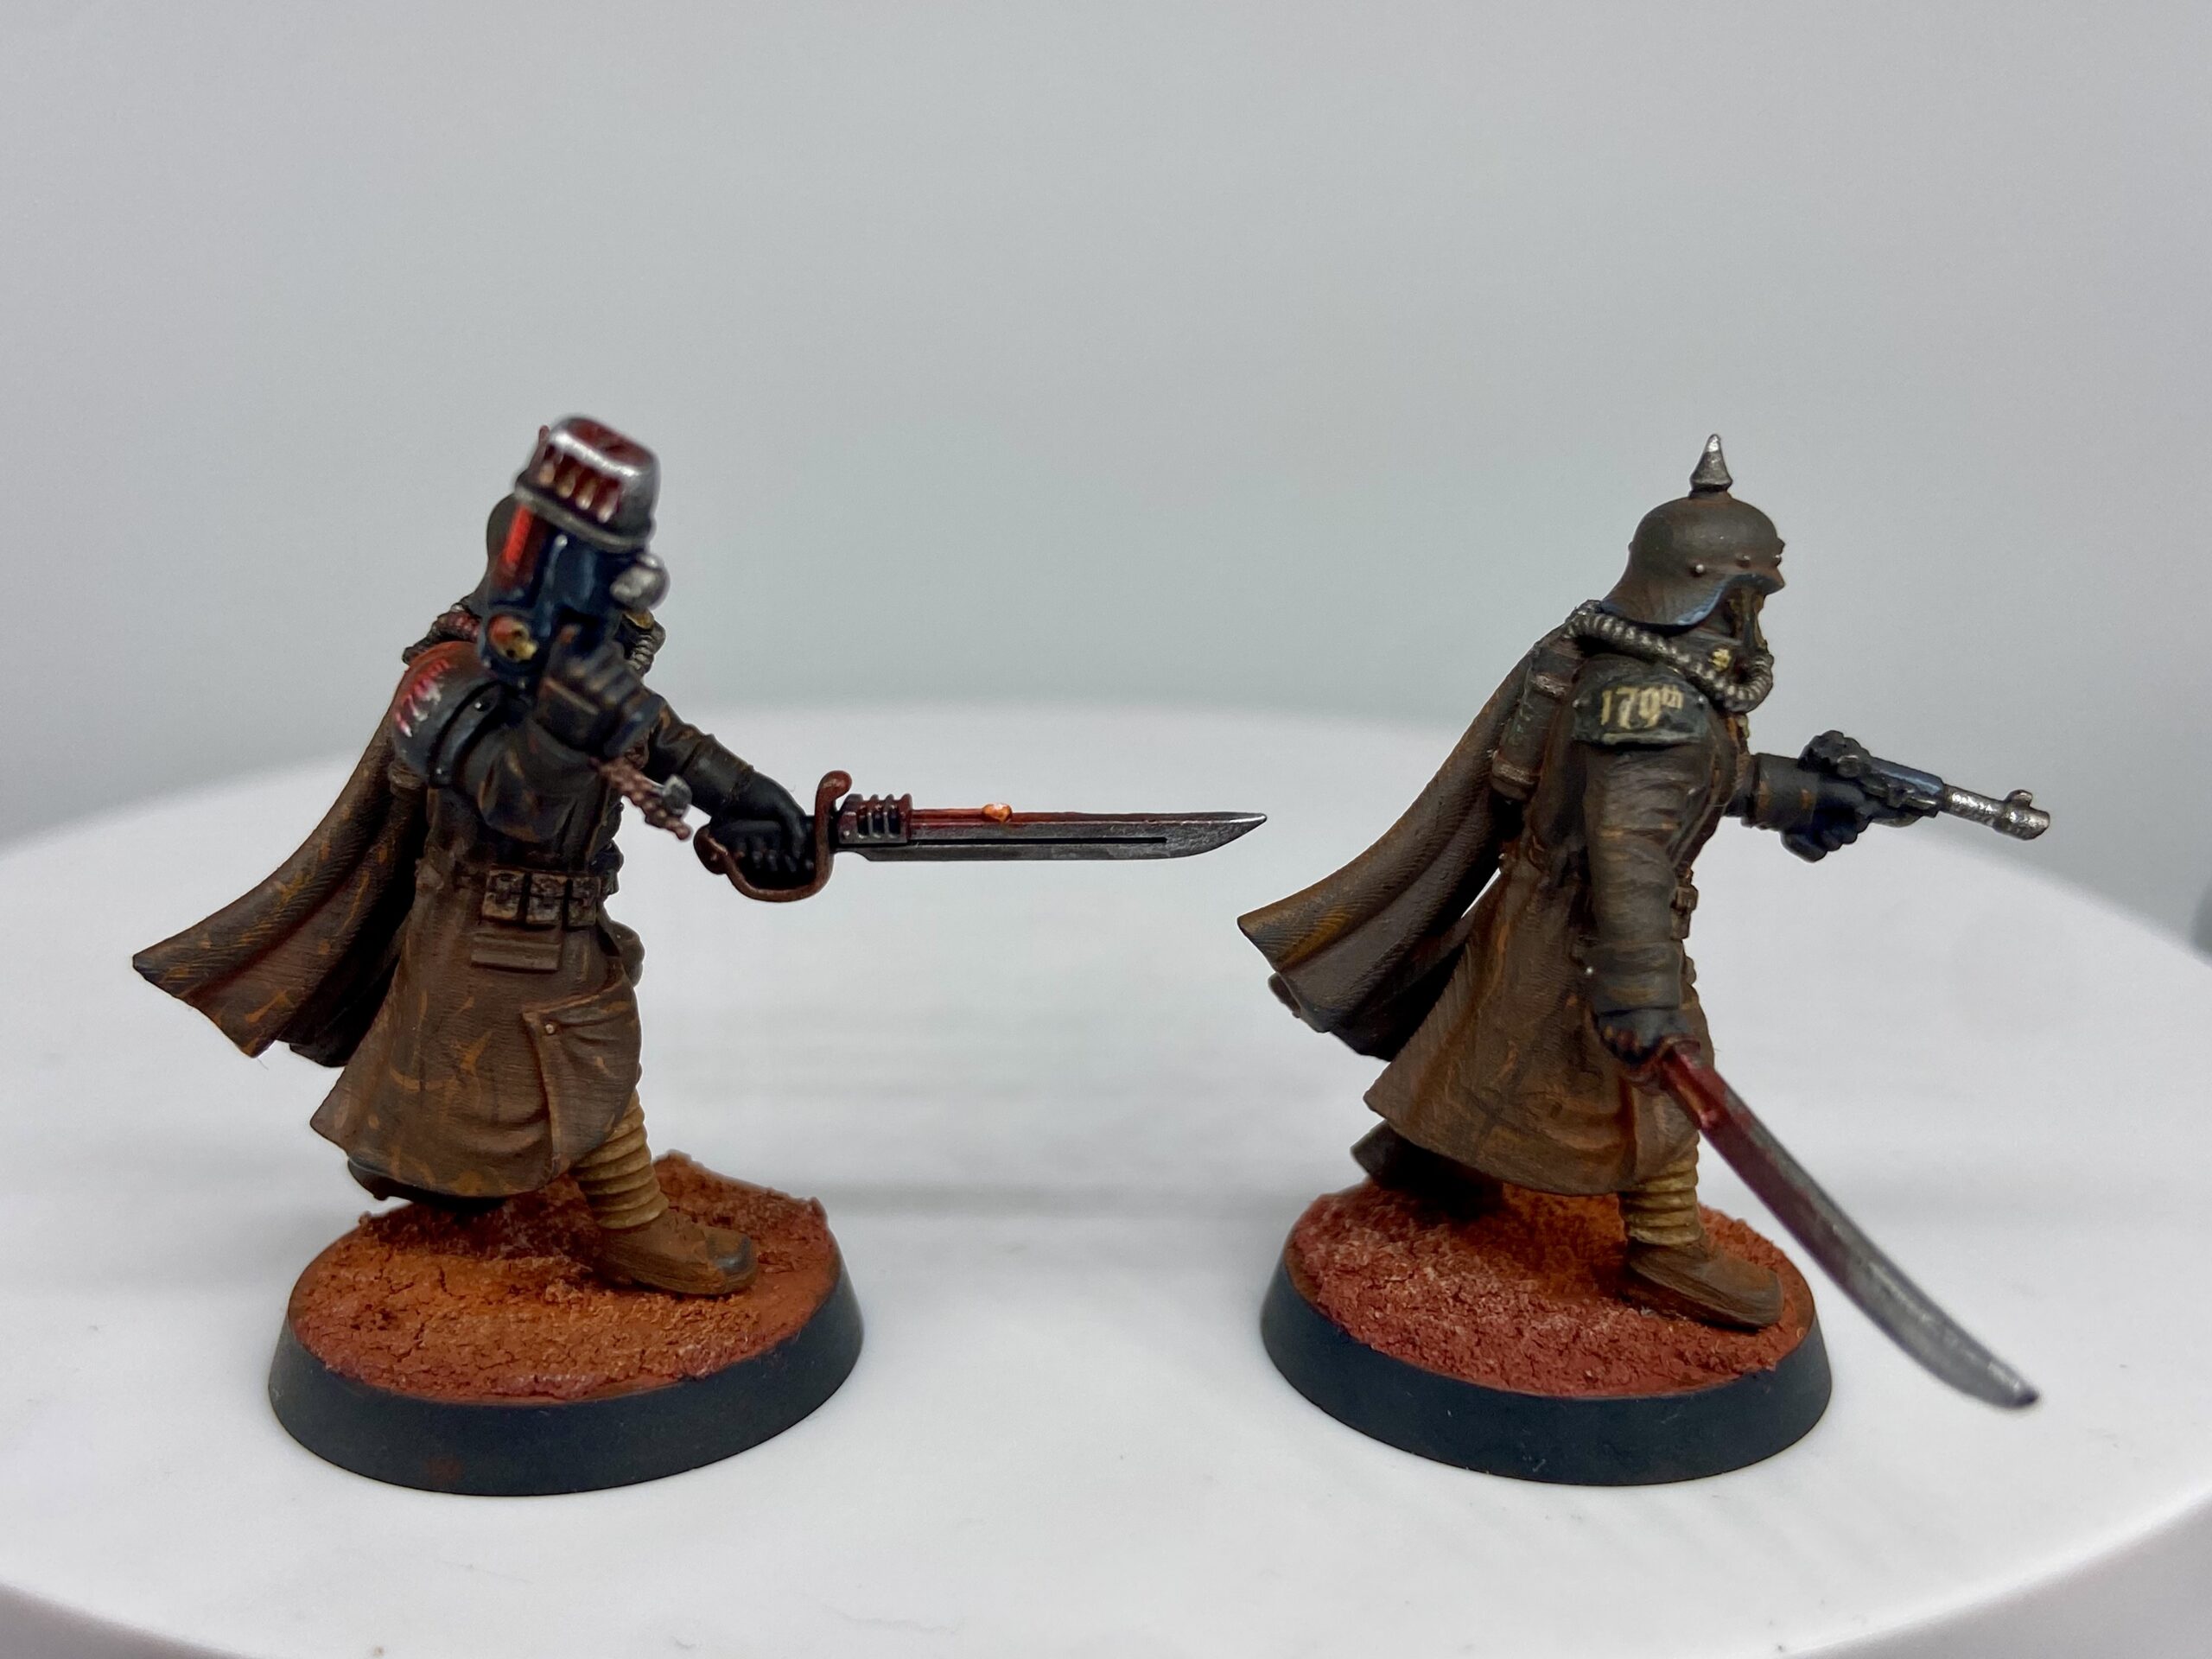
Blood Chainsword
The bloody Chainsword was done using my tried and tested method: human hair!
- Glue hair to the blade.
- Trim it to size using clippers.
- Apply Blood for the Blood God.
- Keep applying Blood for the Blood God to build up the drips until it is right, 2 or 3 applications I find is good.
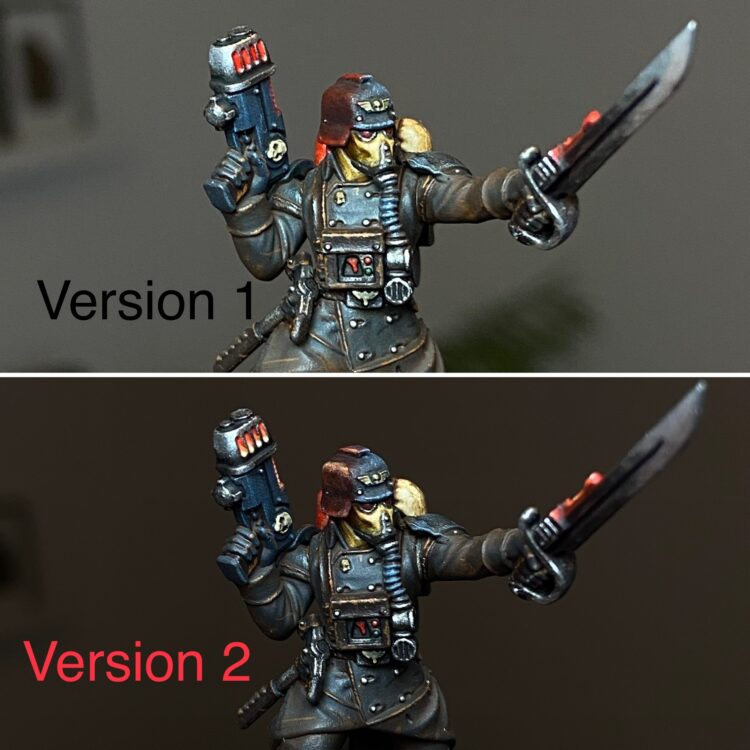
Red OSL
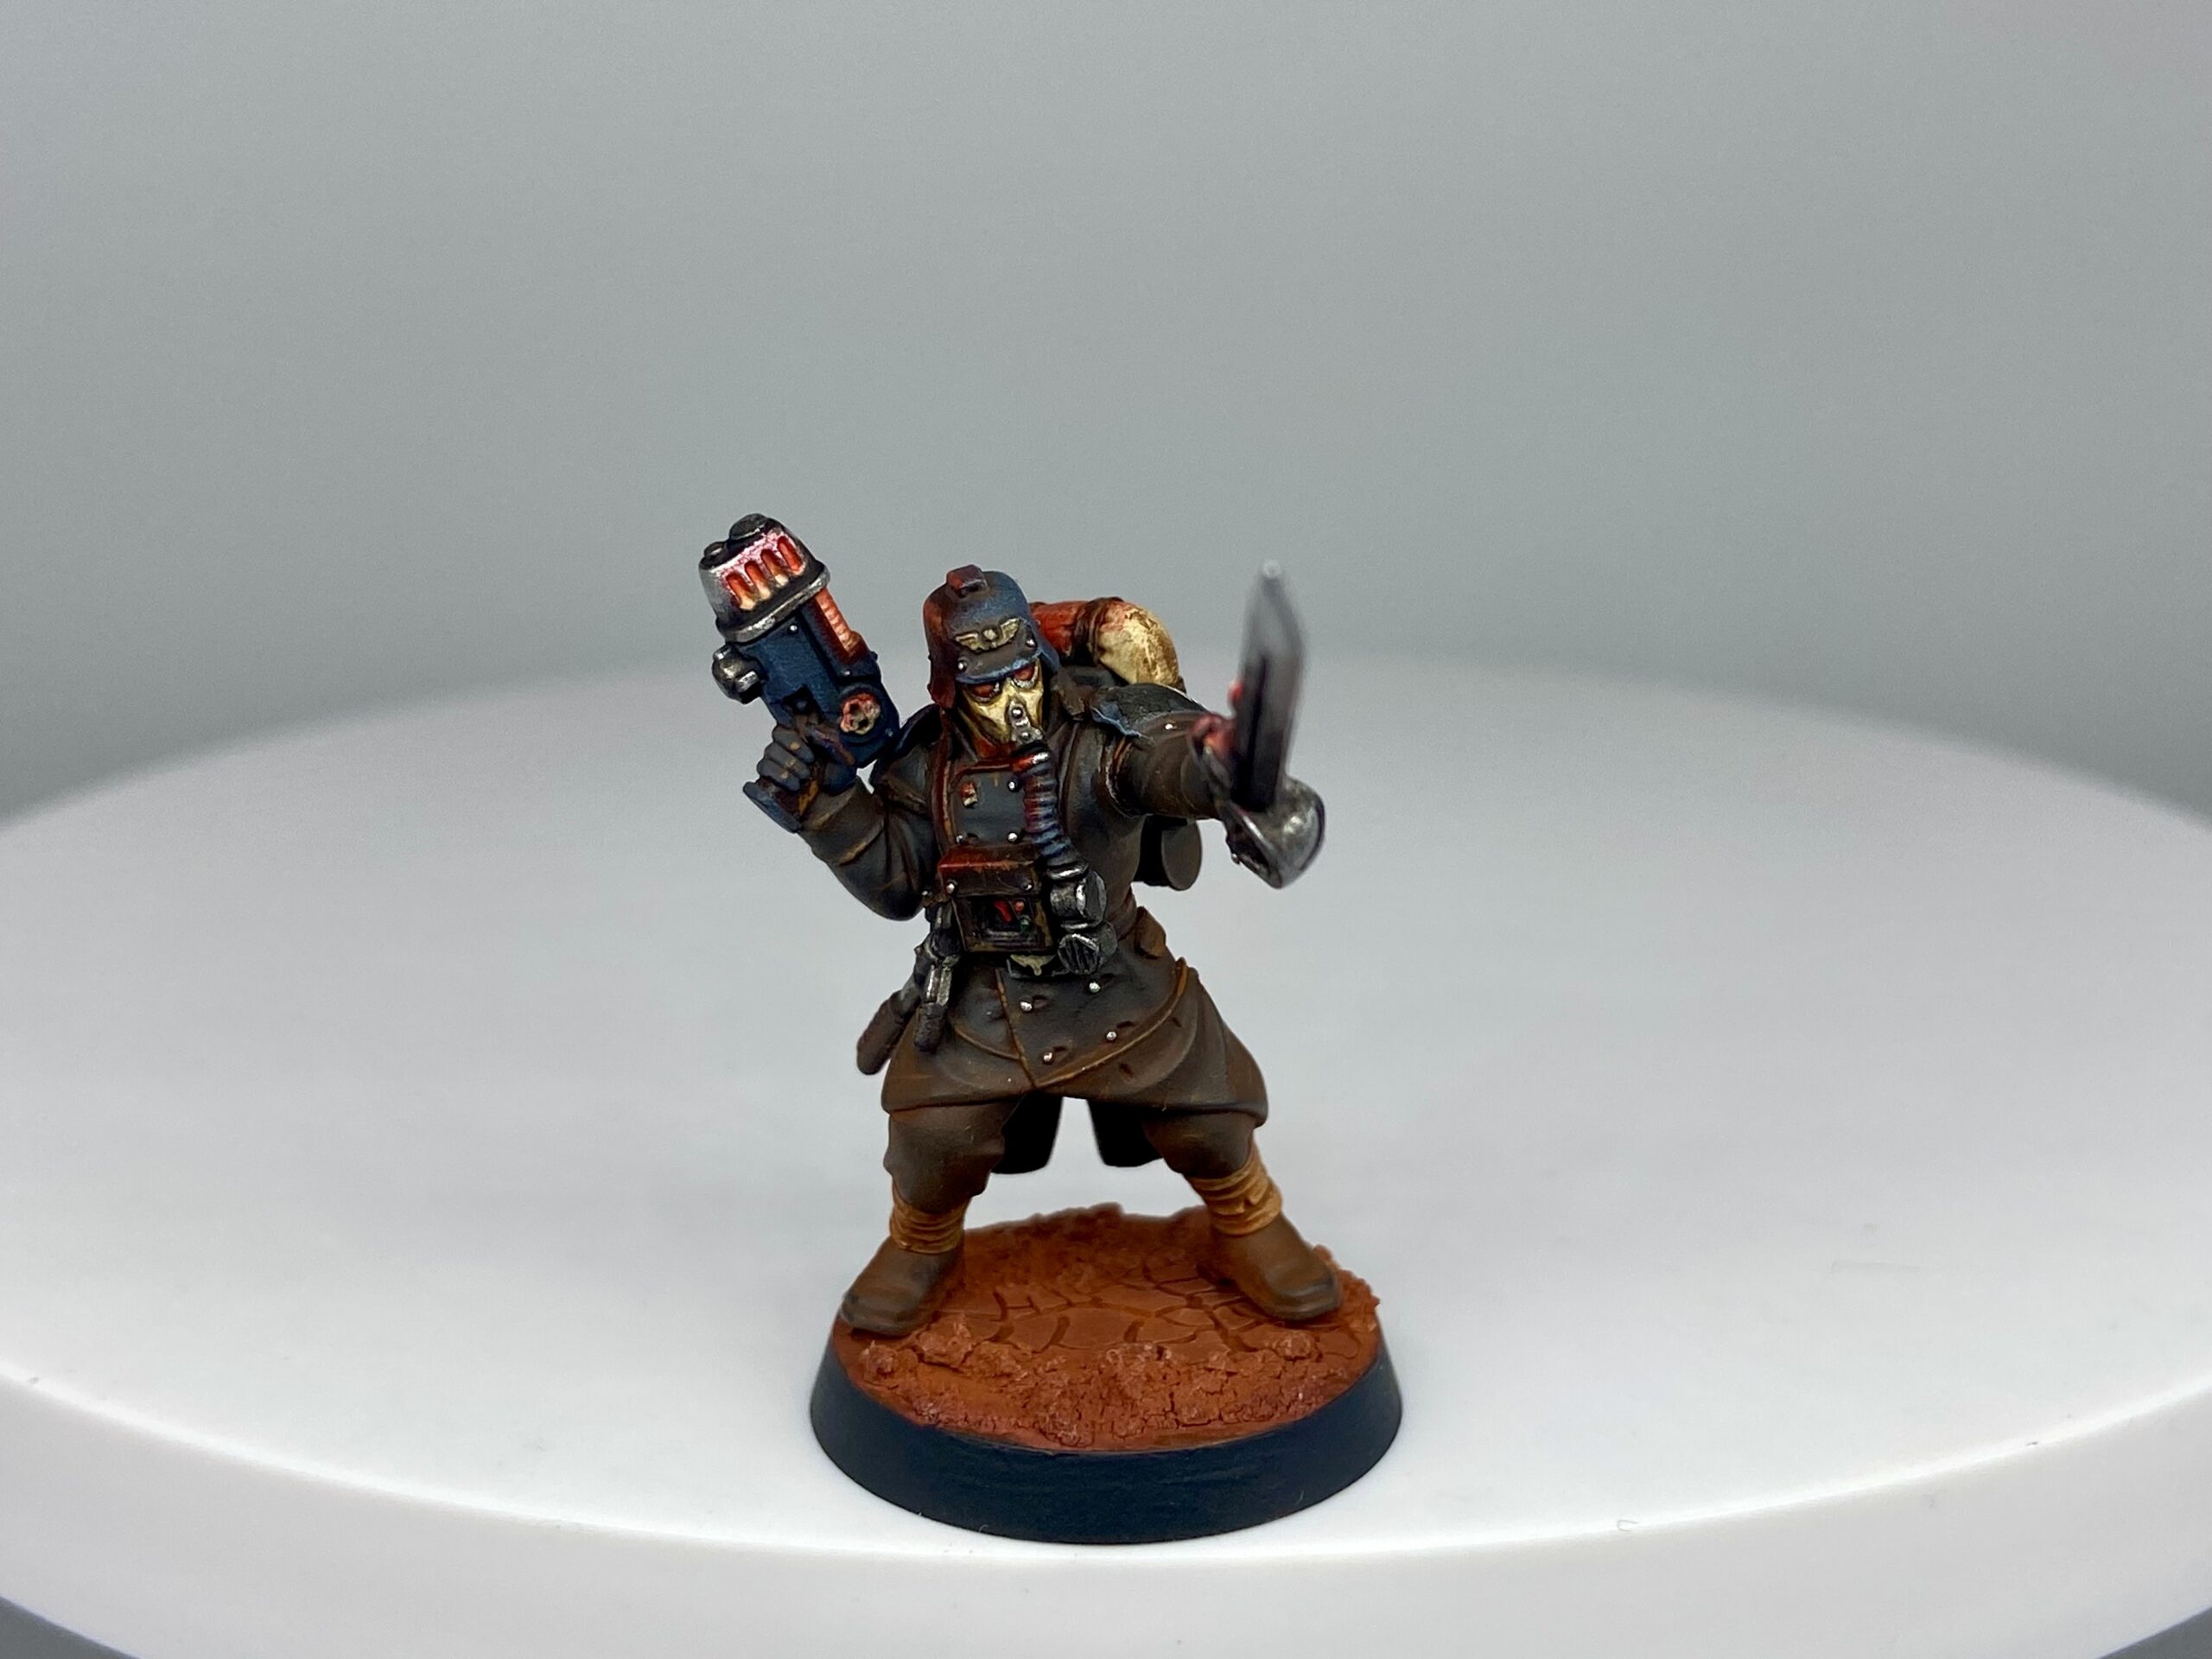
I used Vallejo Red Game Color Ink for the red OSL on my Plasma and Power Sword Krieg Sergeants and Marshals.
This was the first time I had used ink, and after some issues to start with – that colour is intense – I gradually got used to it. I built it up where it needed to be slowly, which worked well.
The version 2 below had some orange added at the highlight points and within the pistol barrel slits. It added a little extra contrast, which I was happy with.
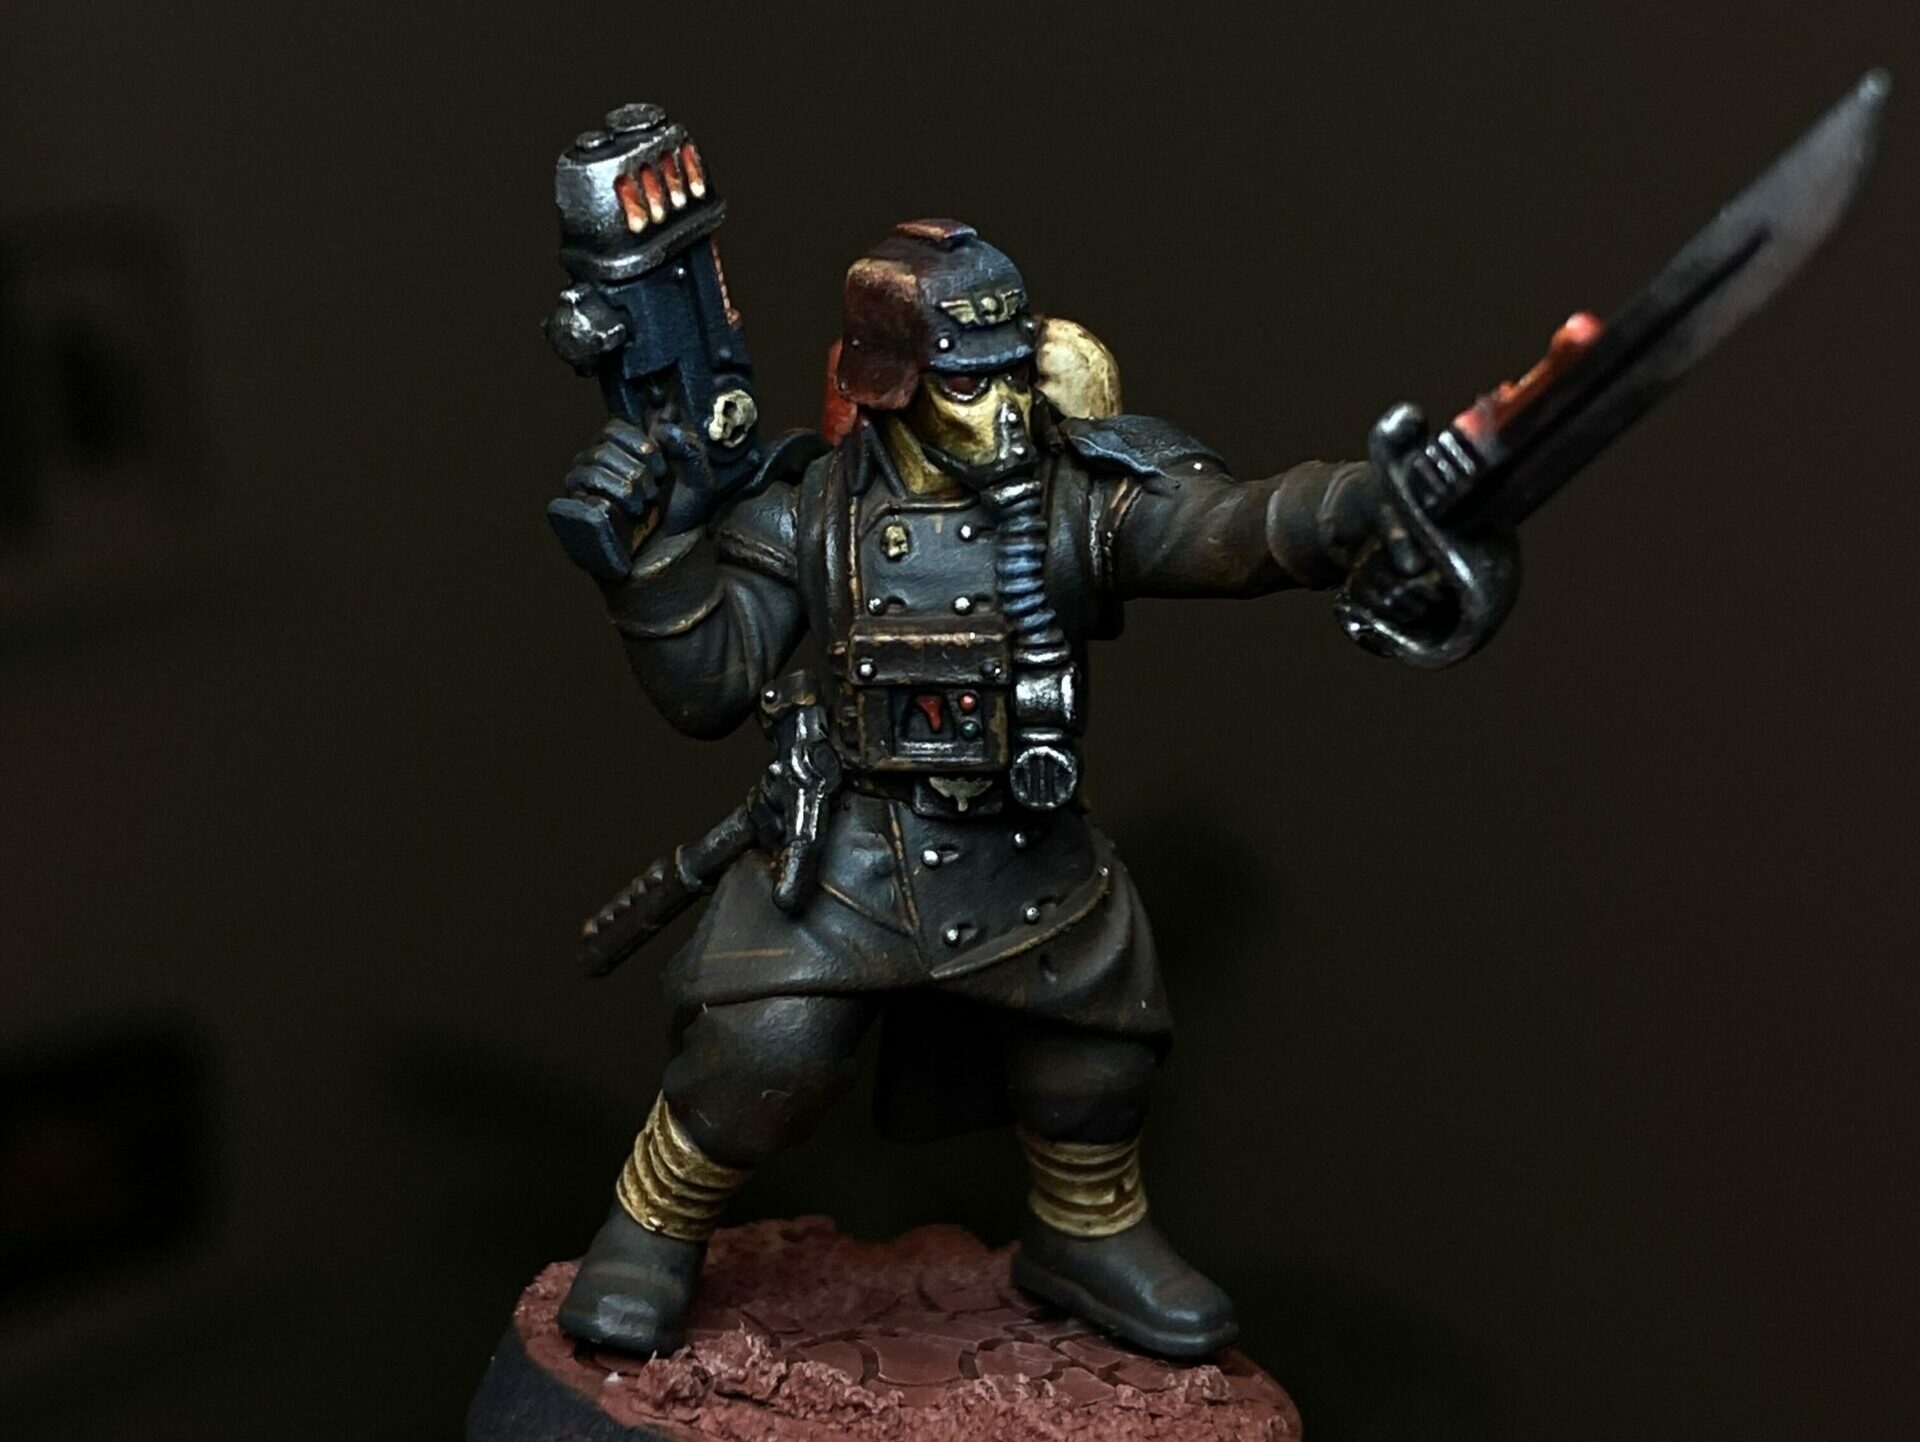
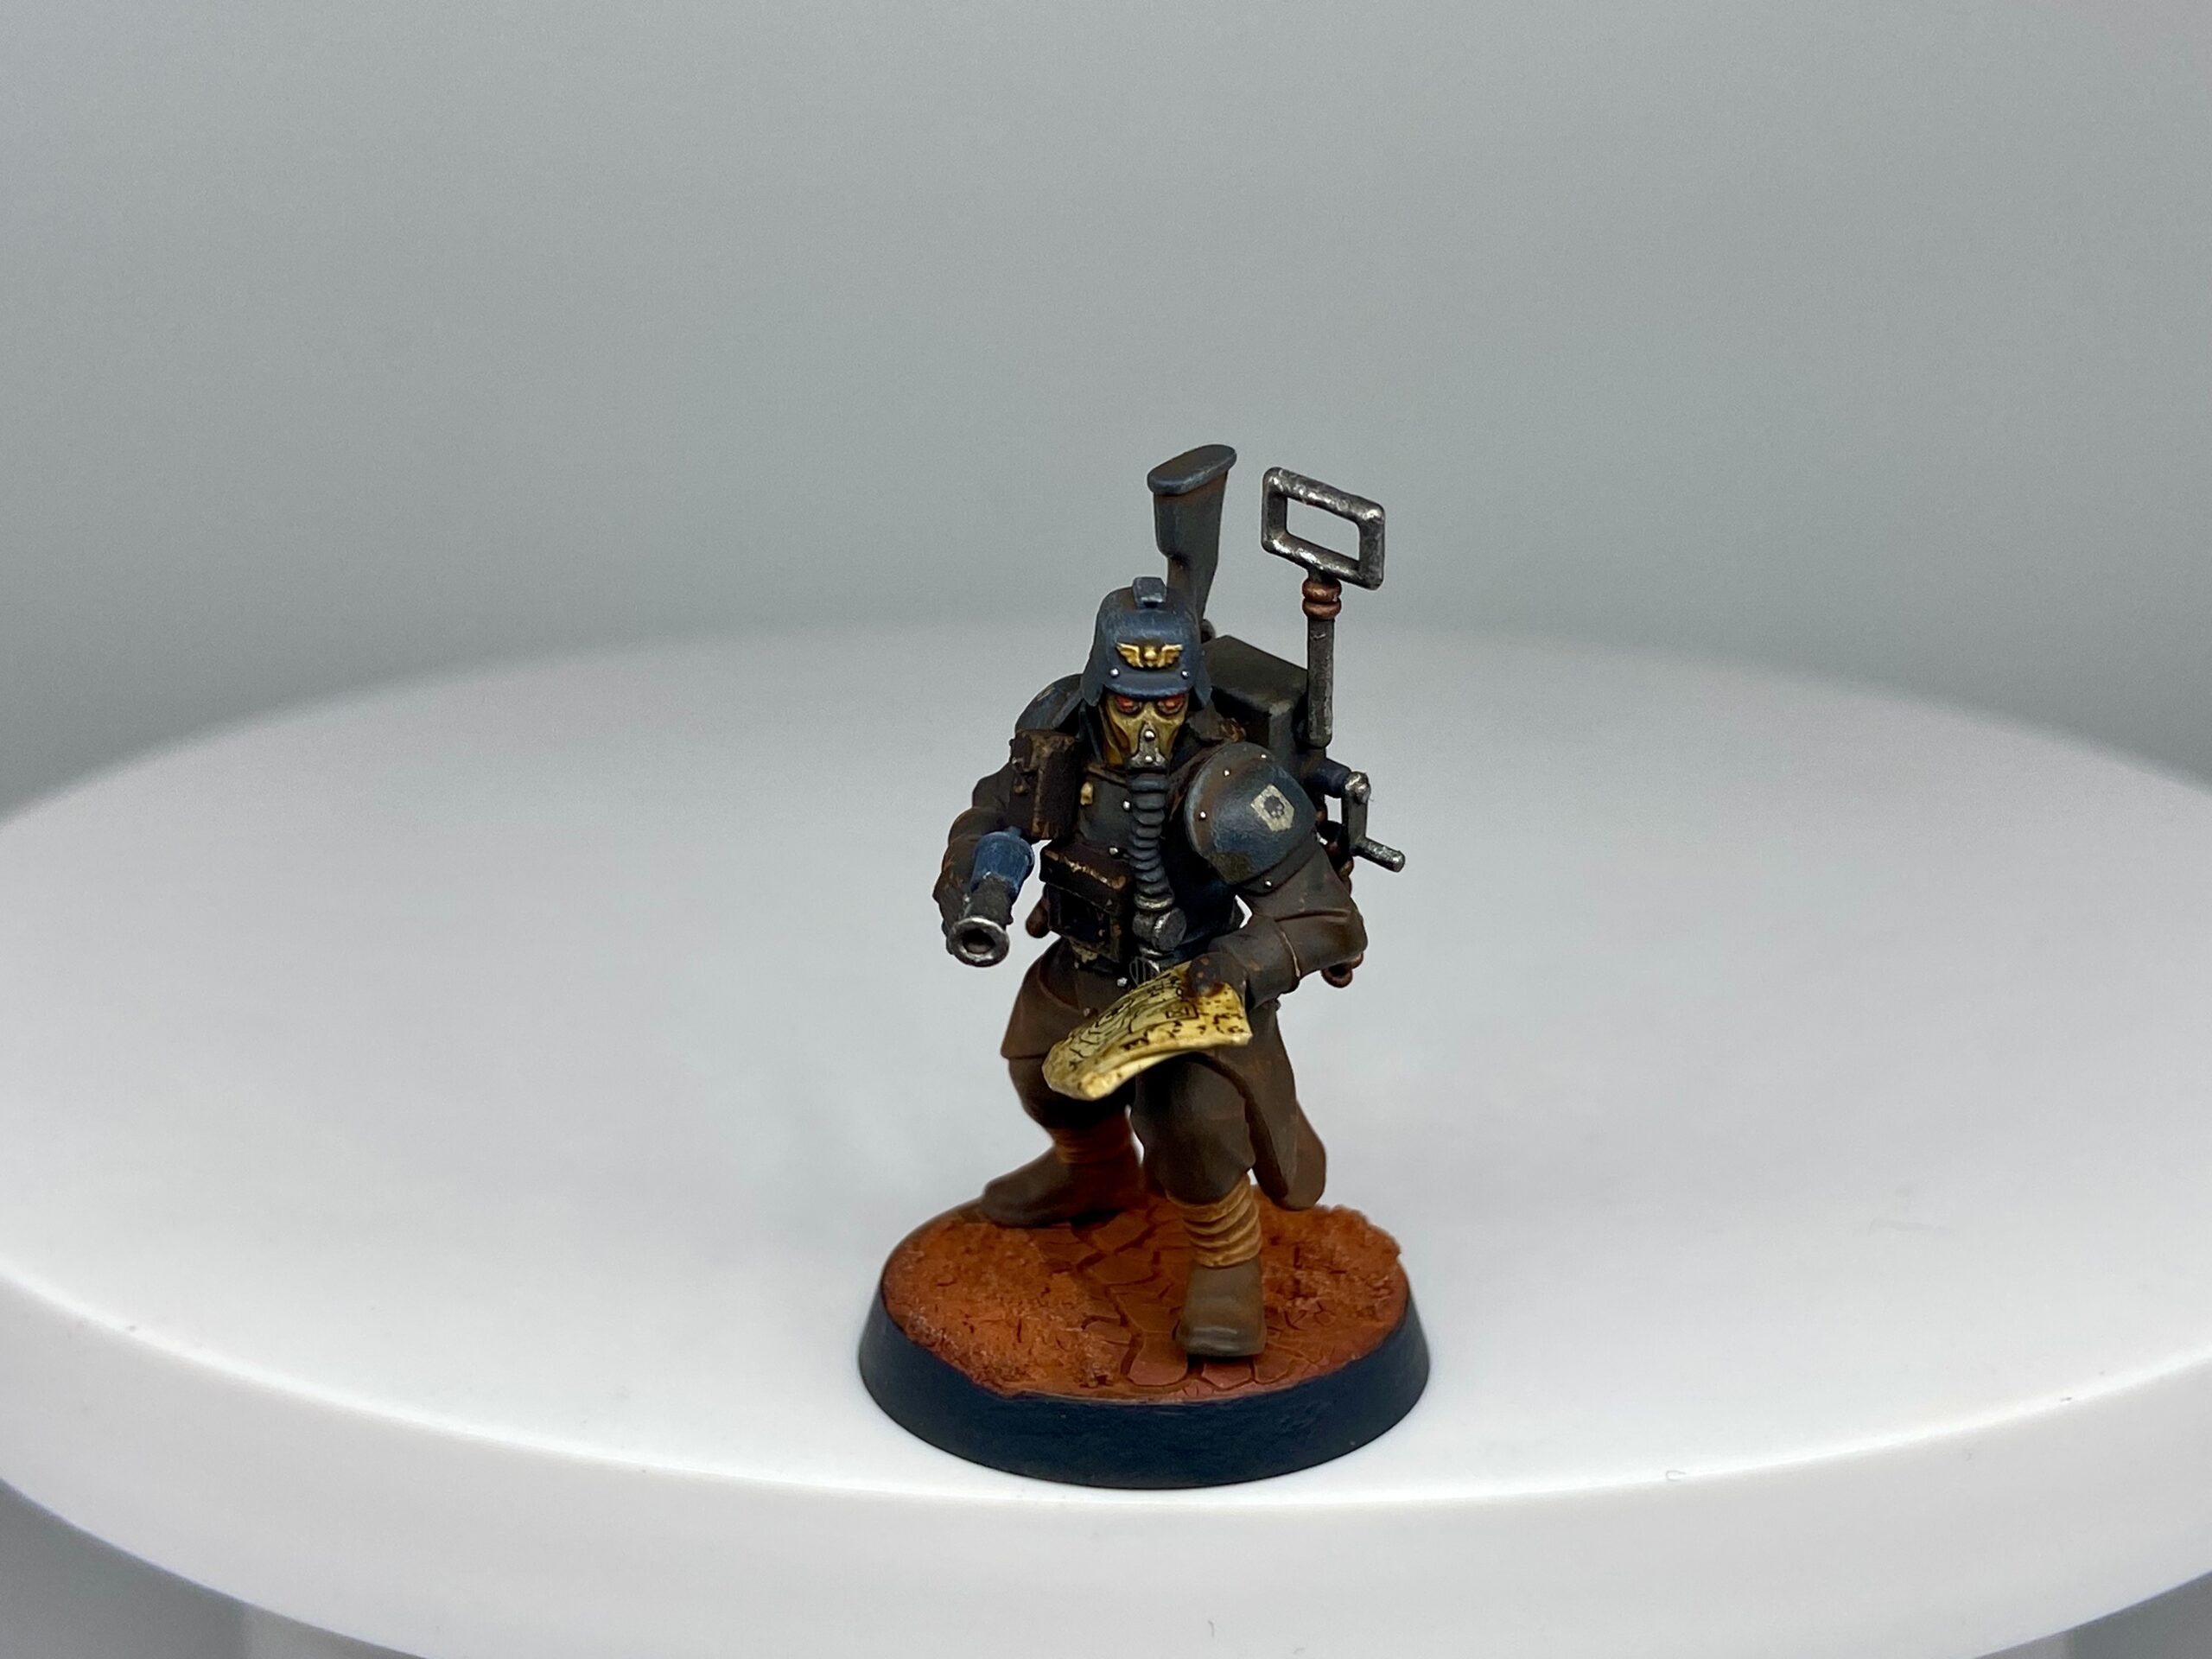
Krieg Marshal
I used the The Makers Cult Valour Korps model from Etsy for my Marshal. After a misprint on the first (Laspistol model), I got another one, which I modelled with a Plasma Pistol using the original Krieg bits.
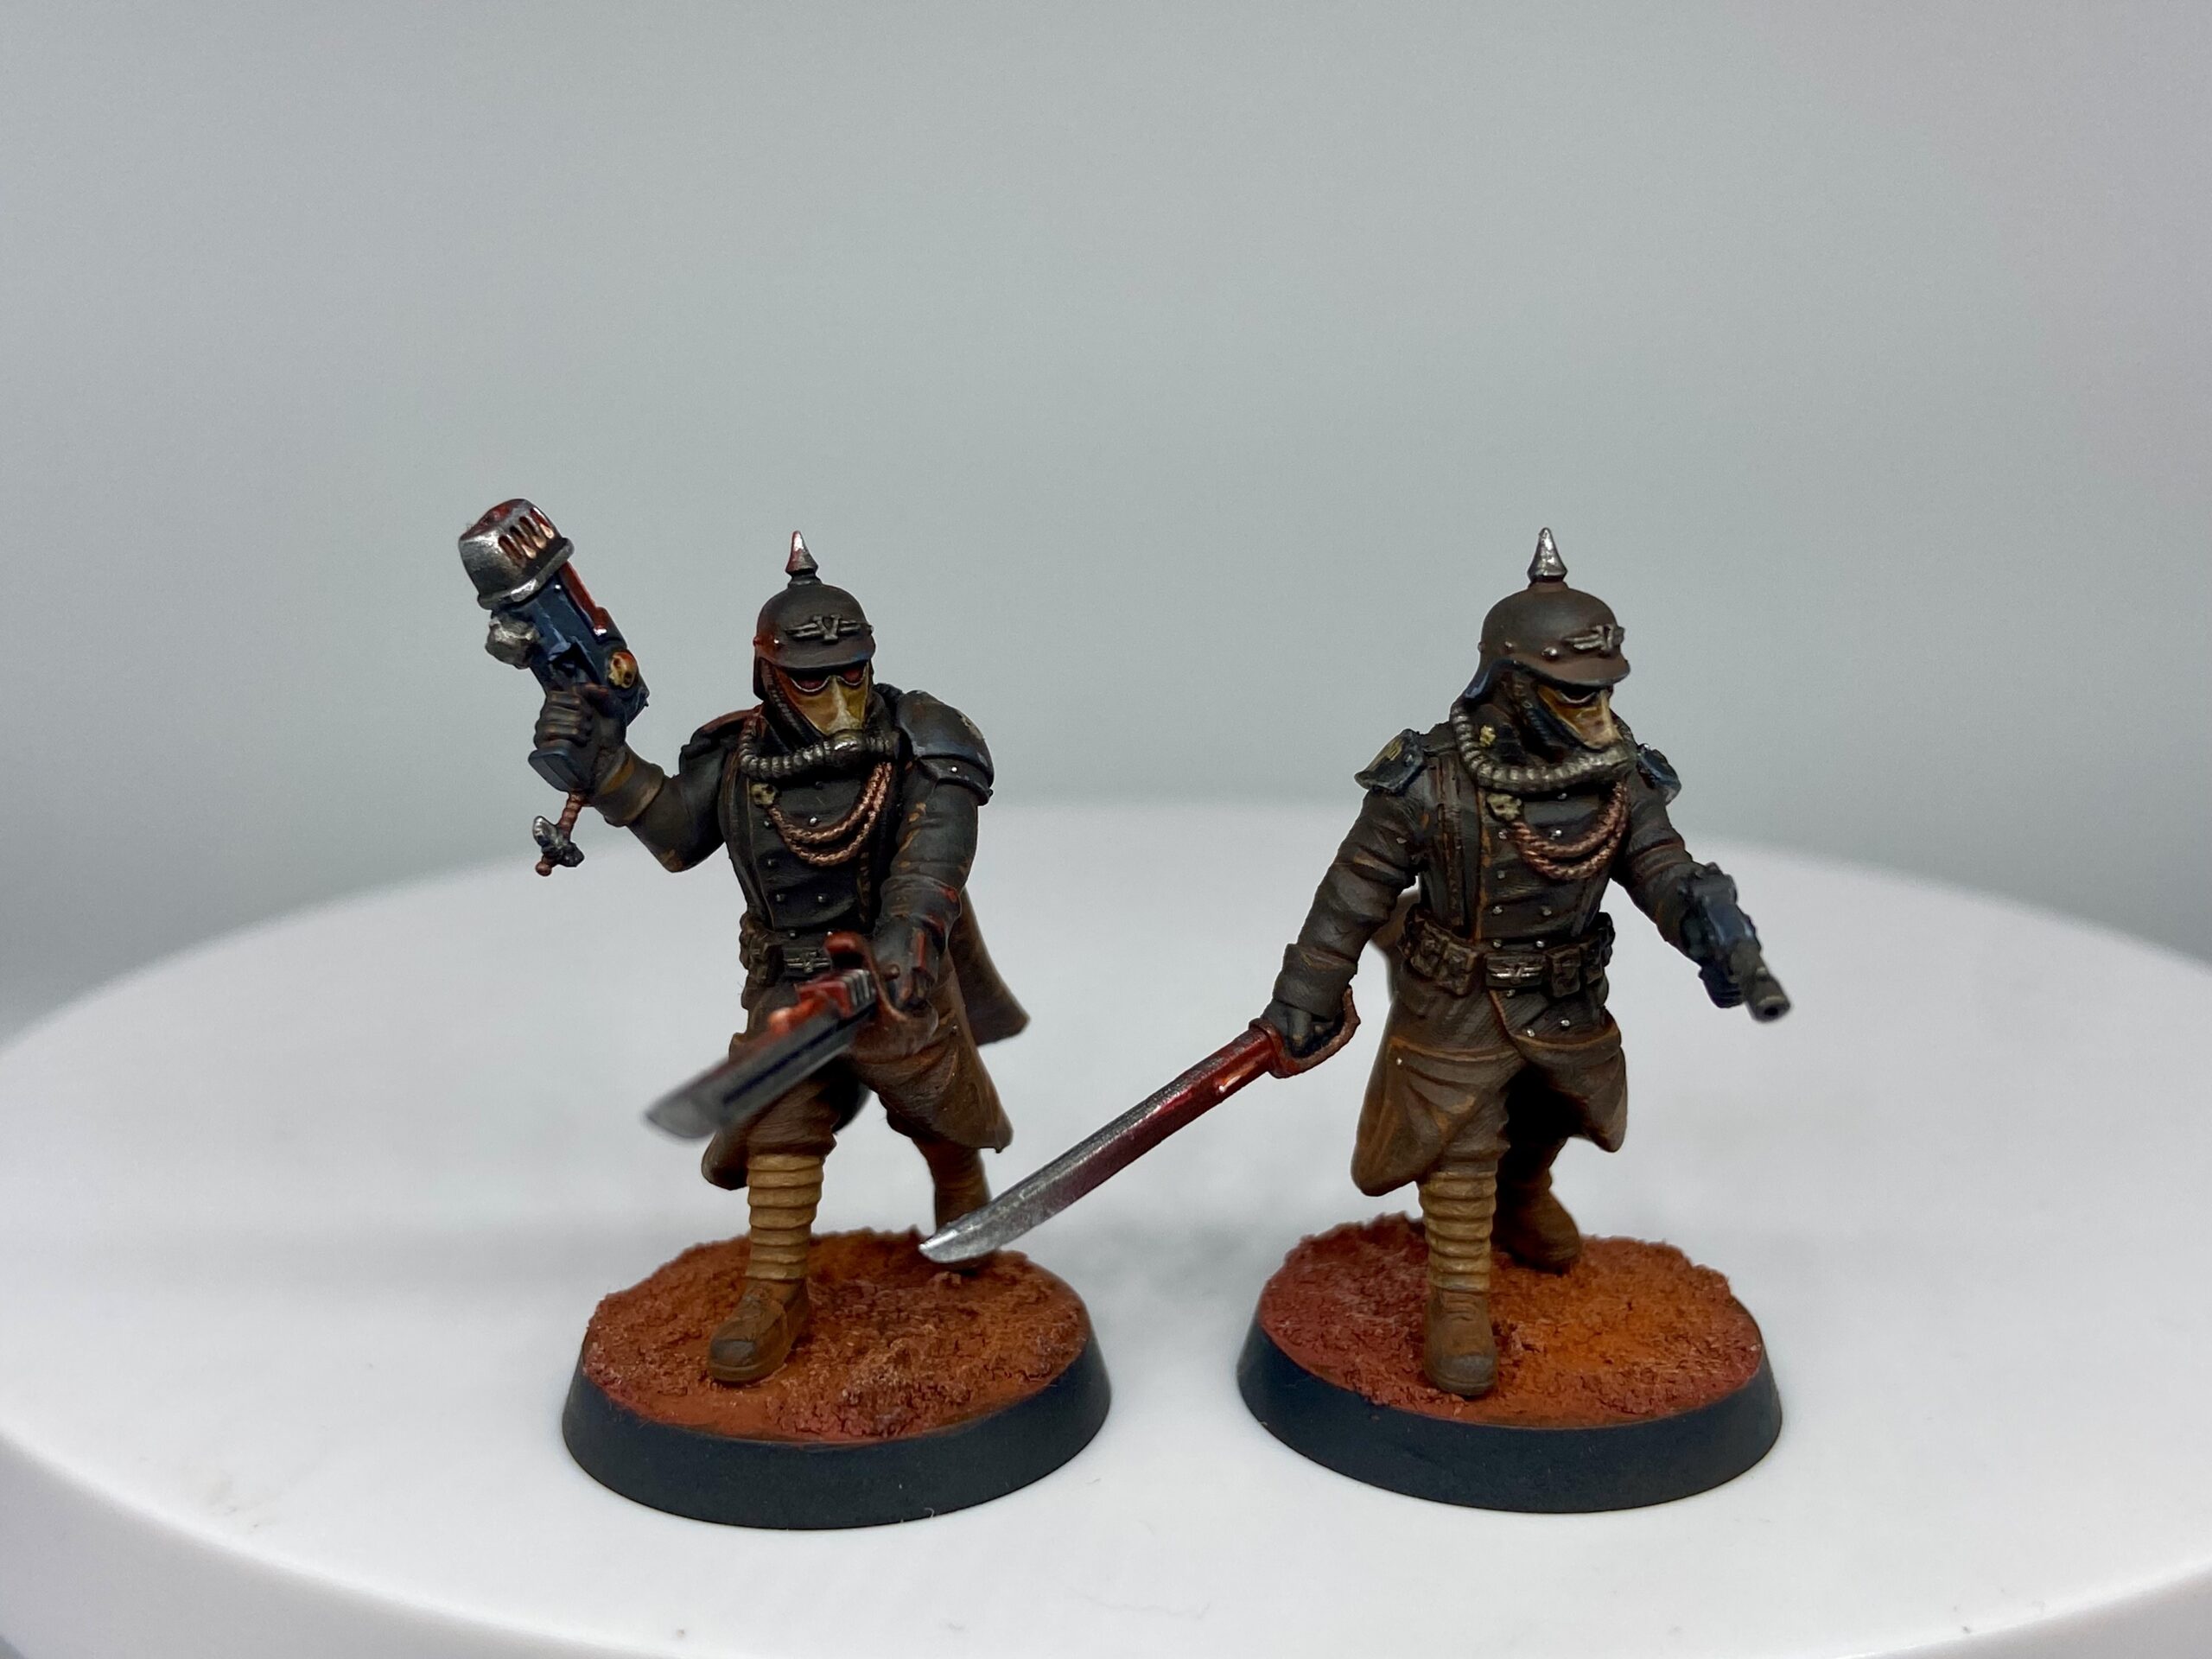
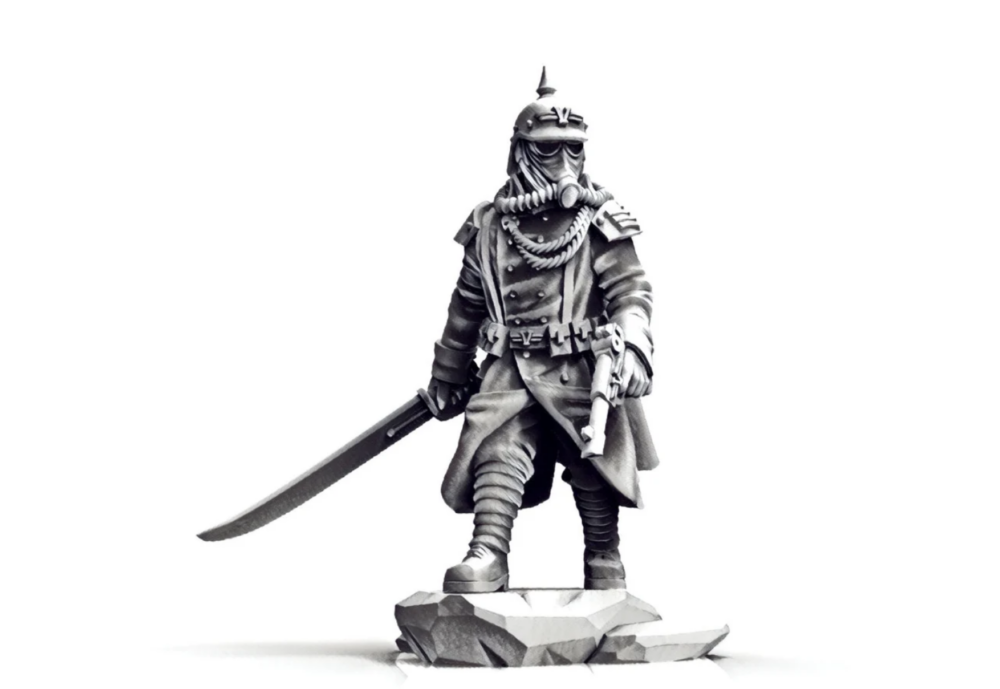
The Makers Cult Valour Korps
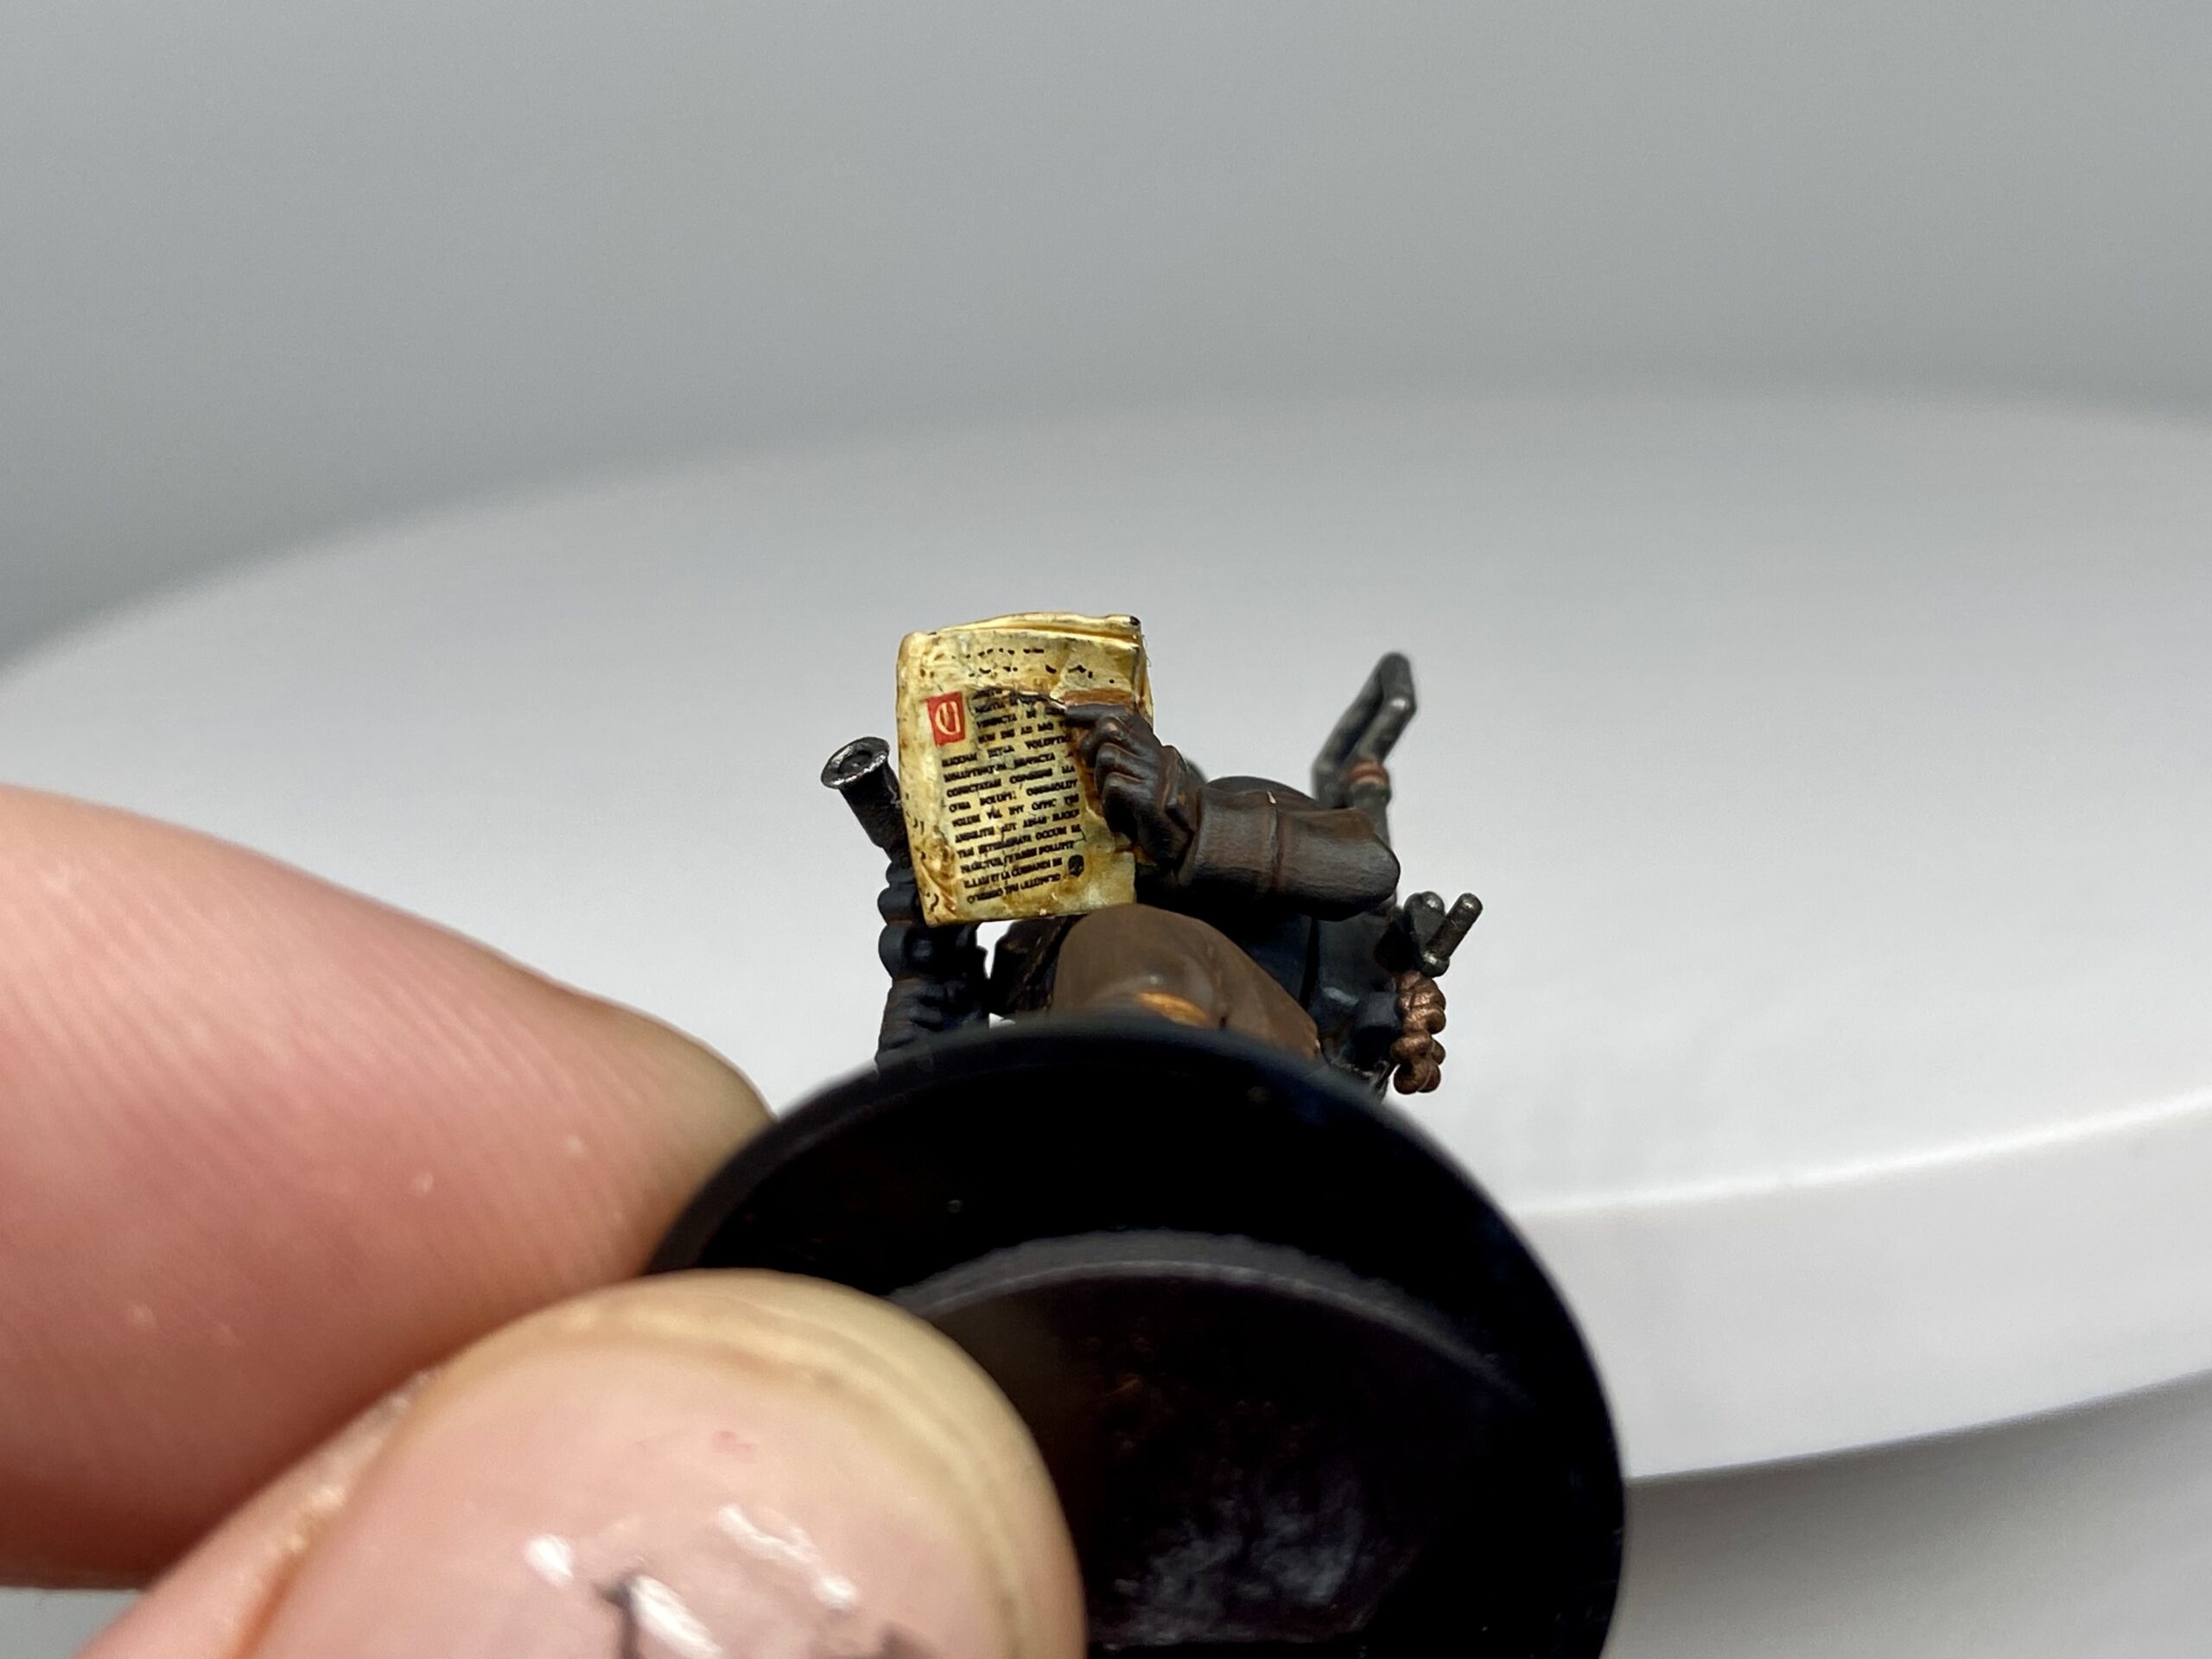
Transfers
I used transfers from The Mighty Brush for the map and book.
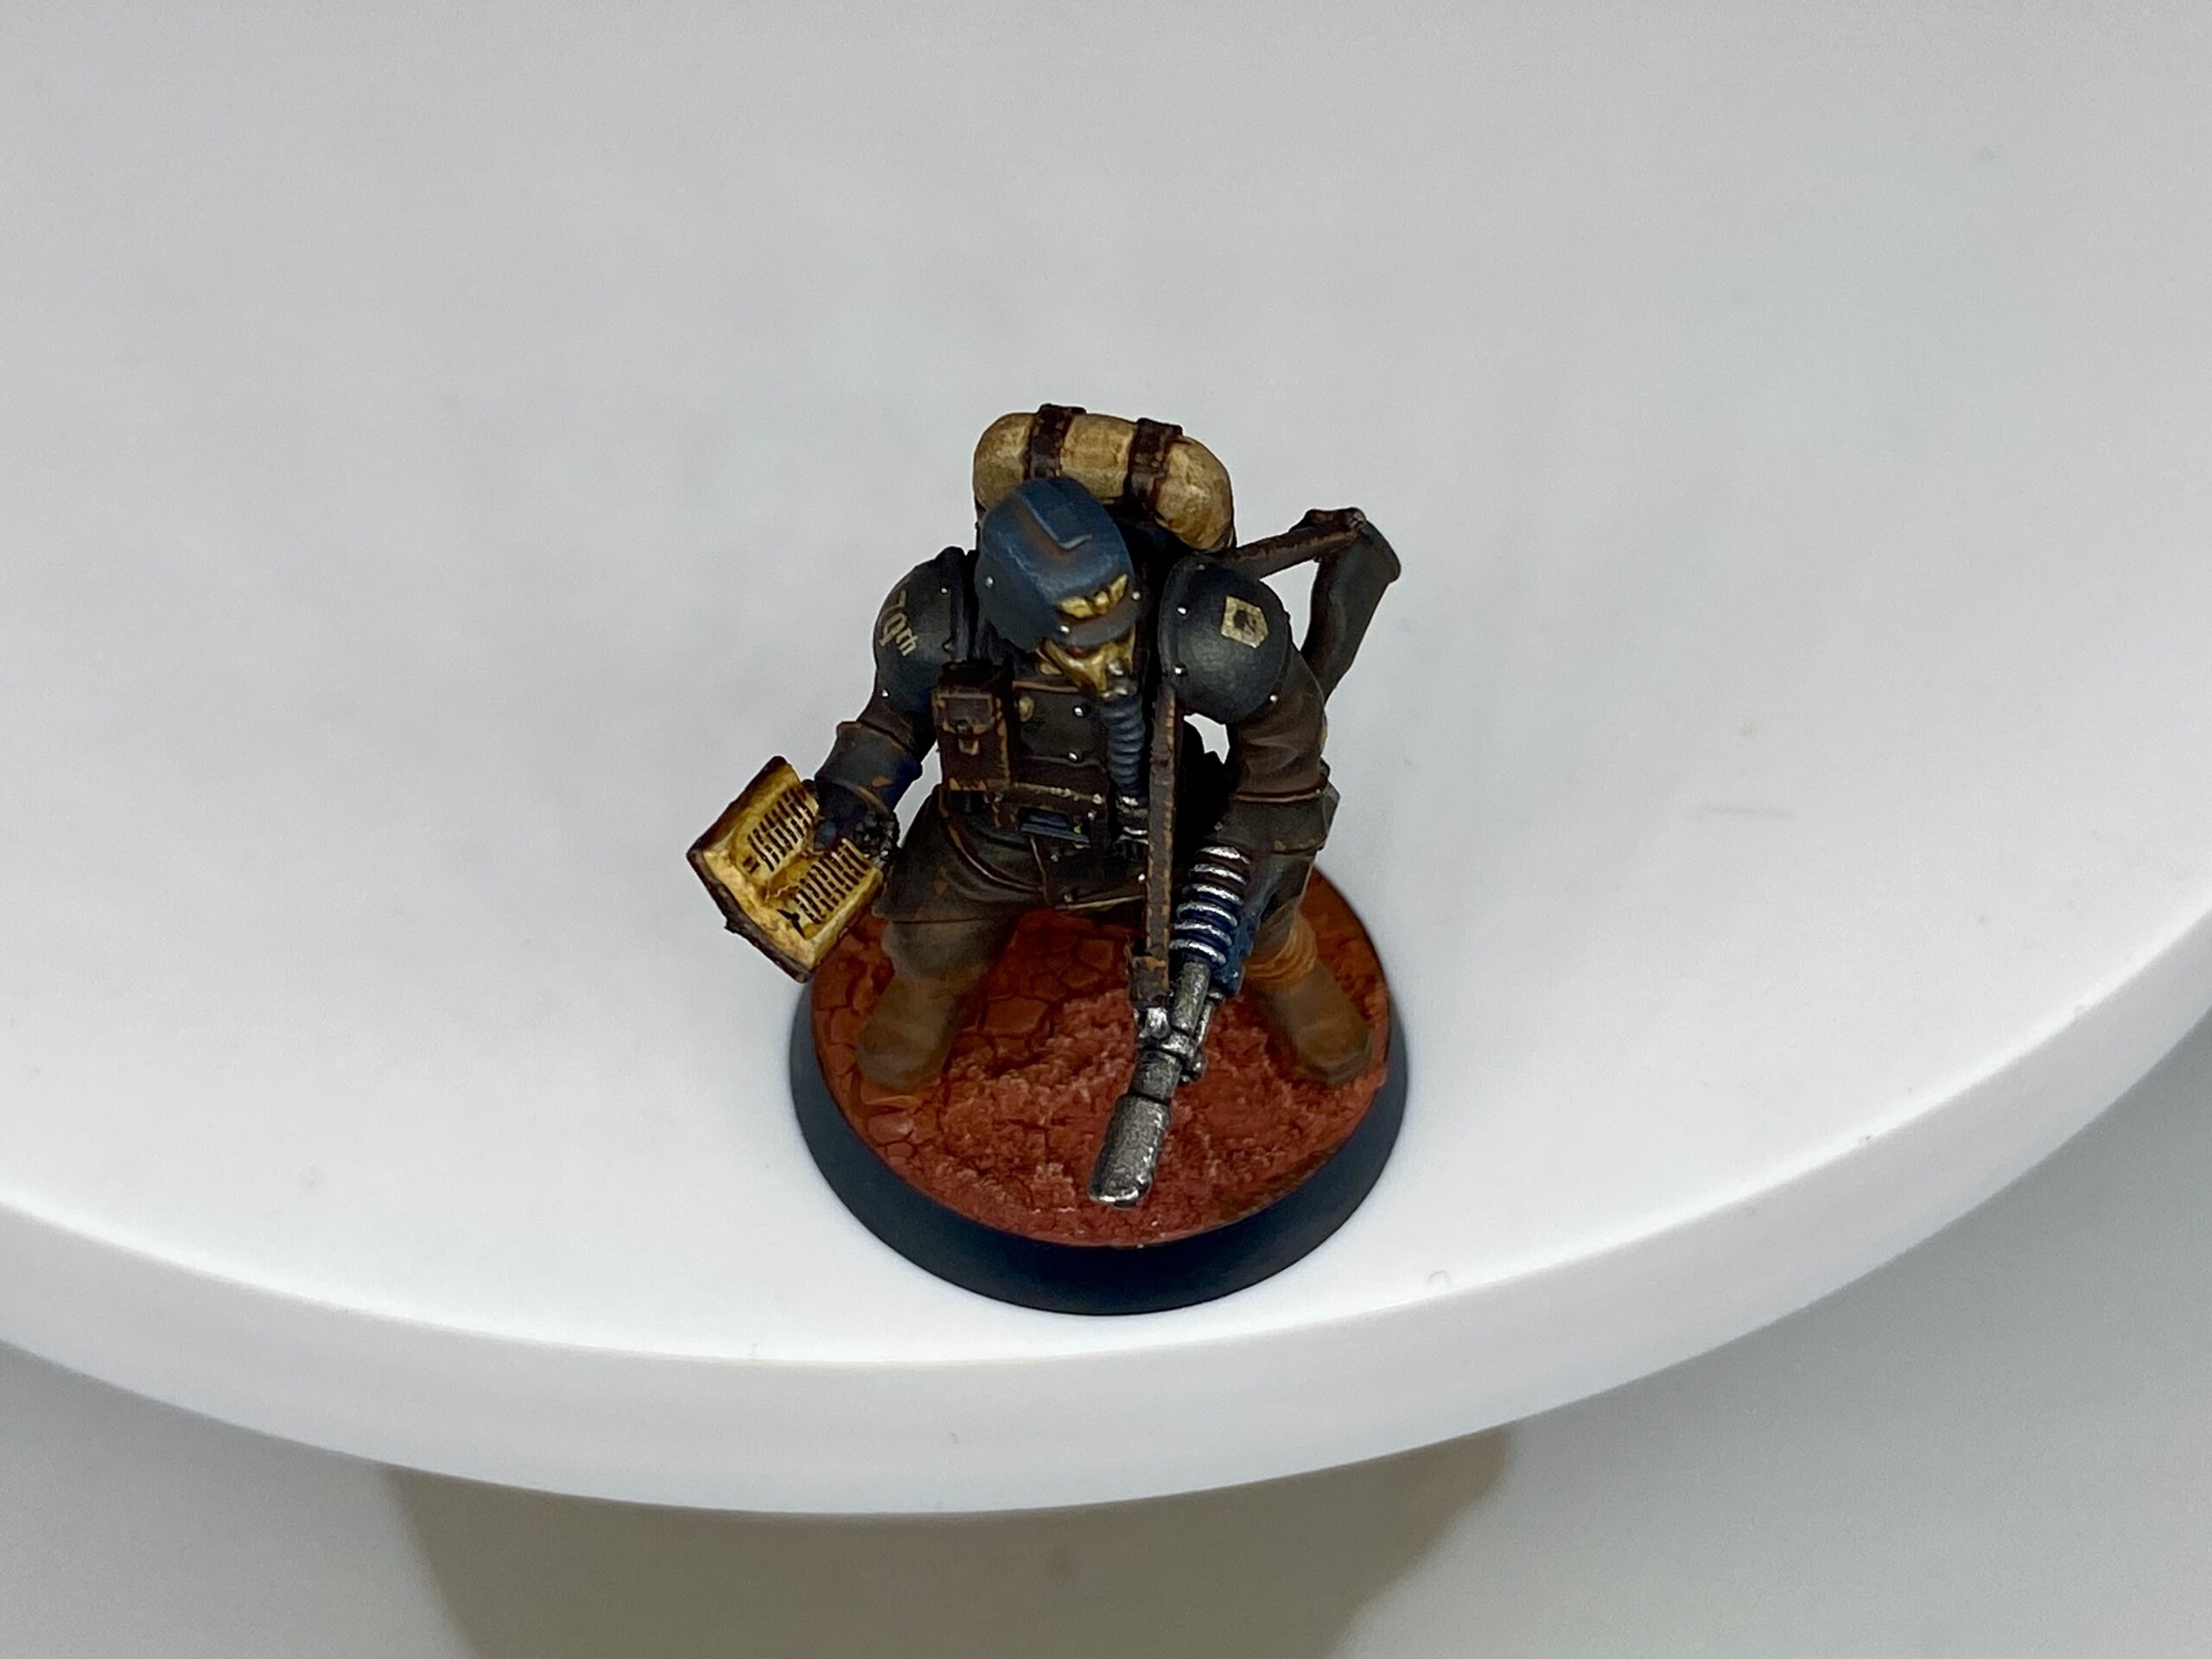
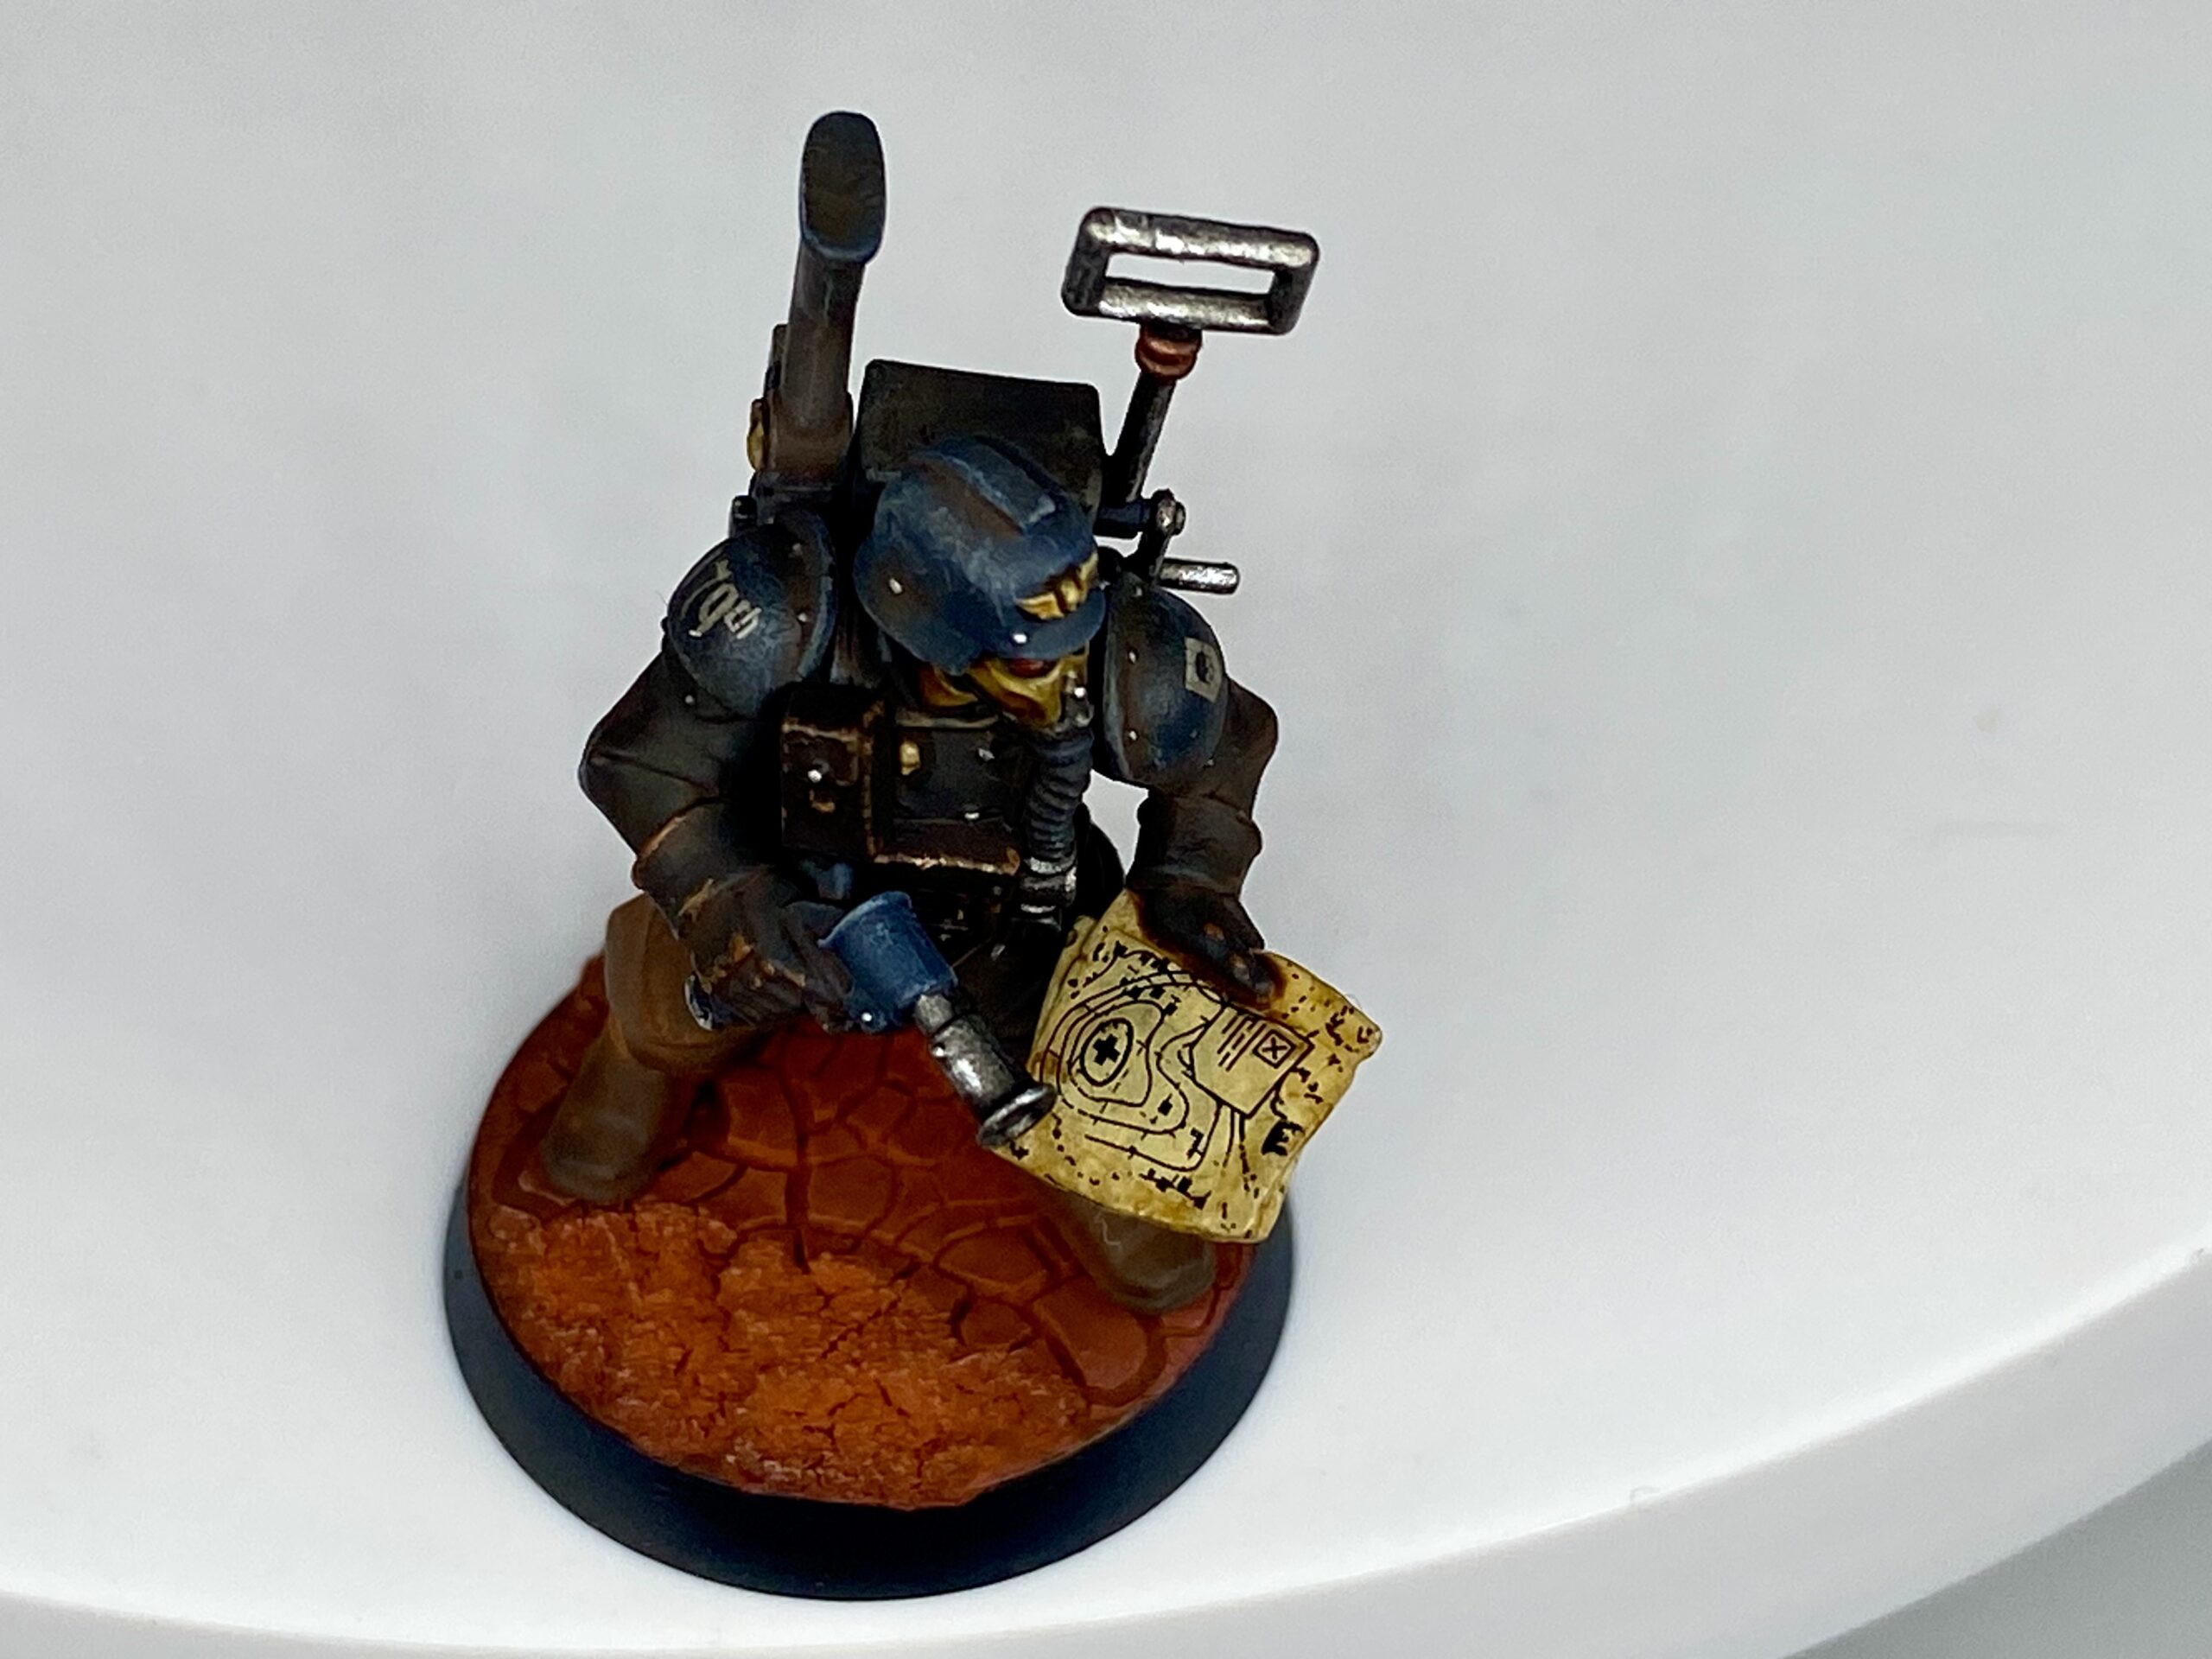
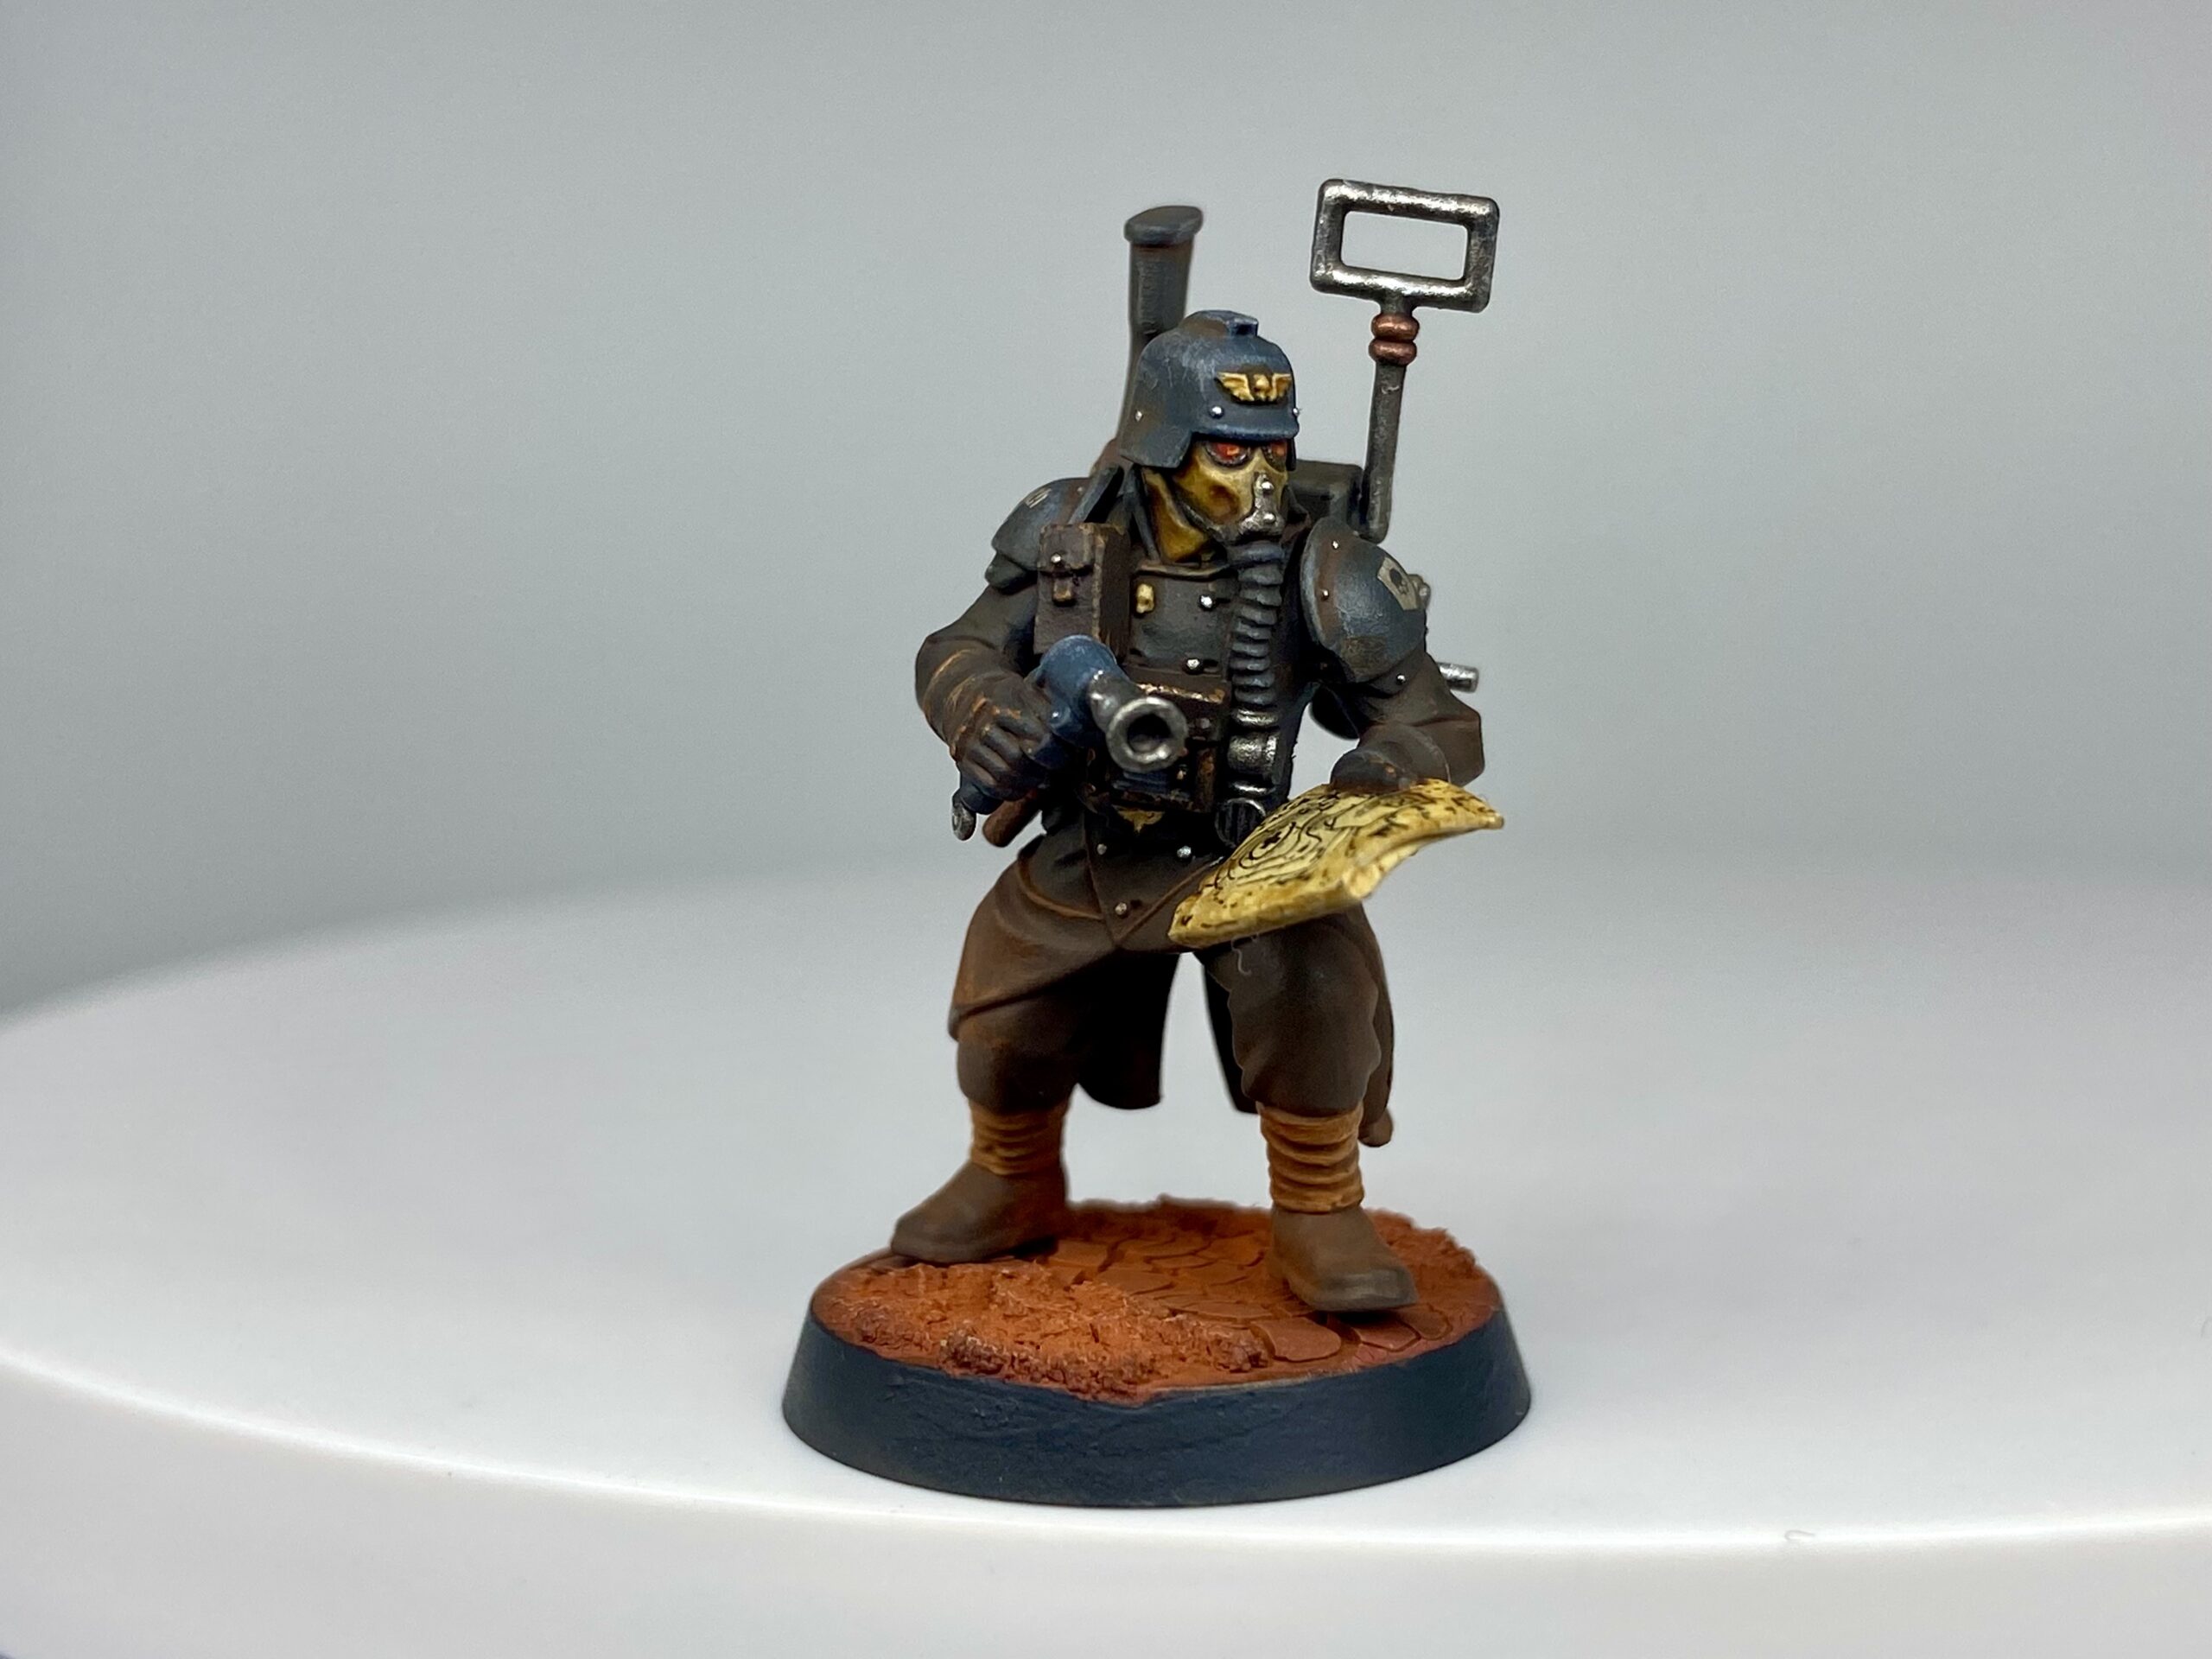
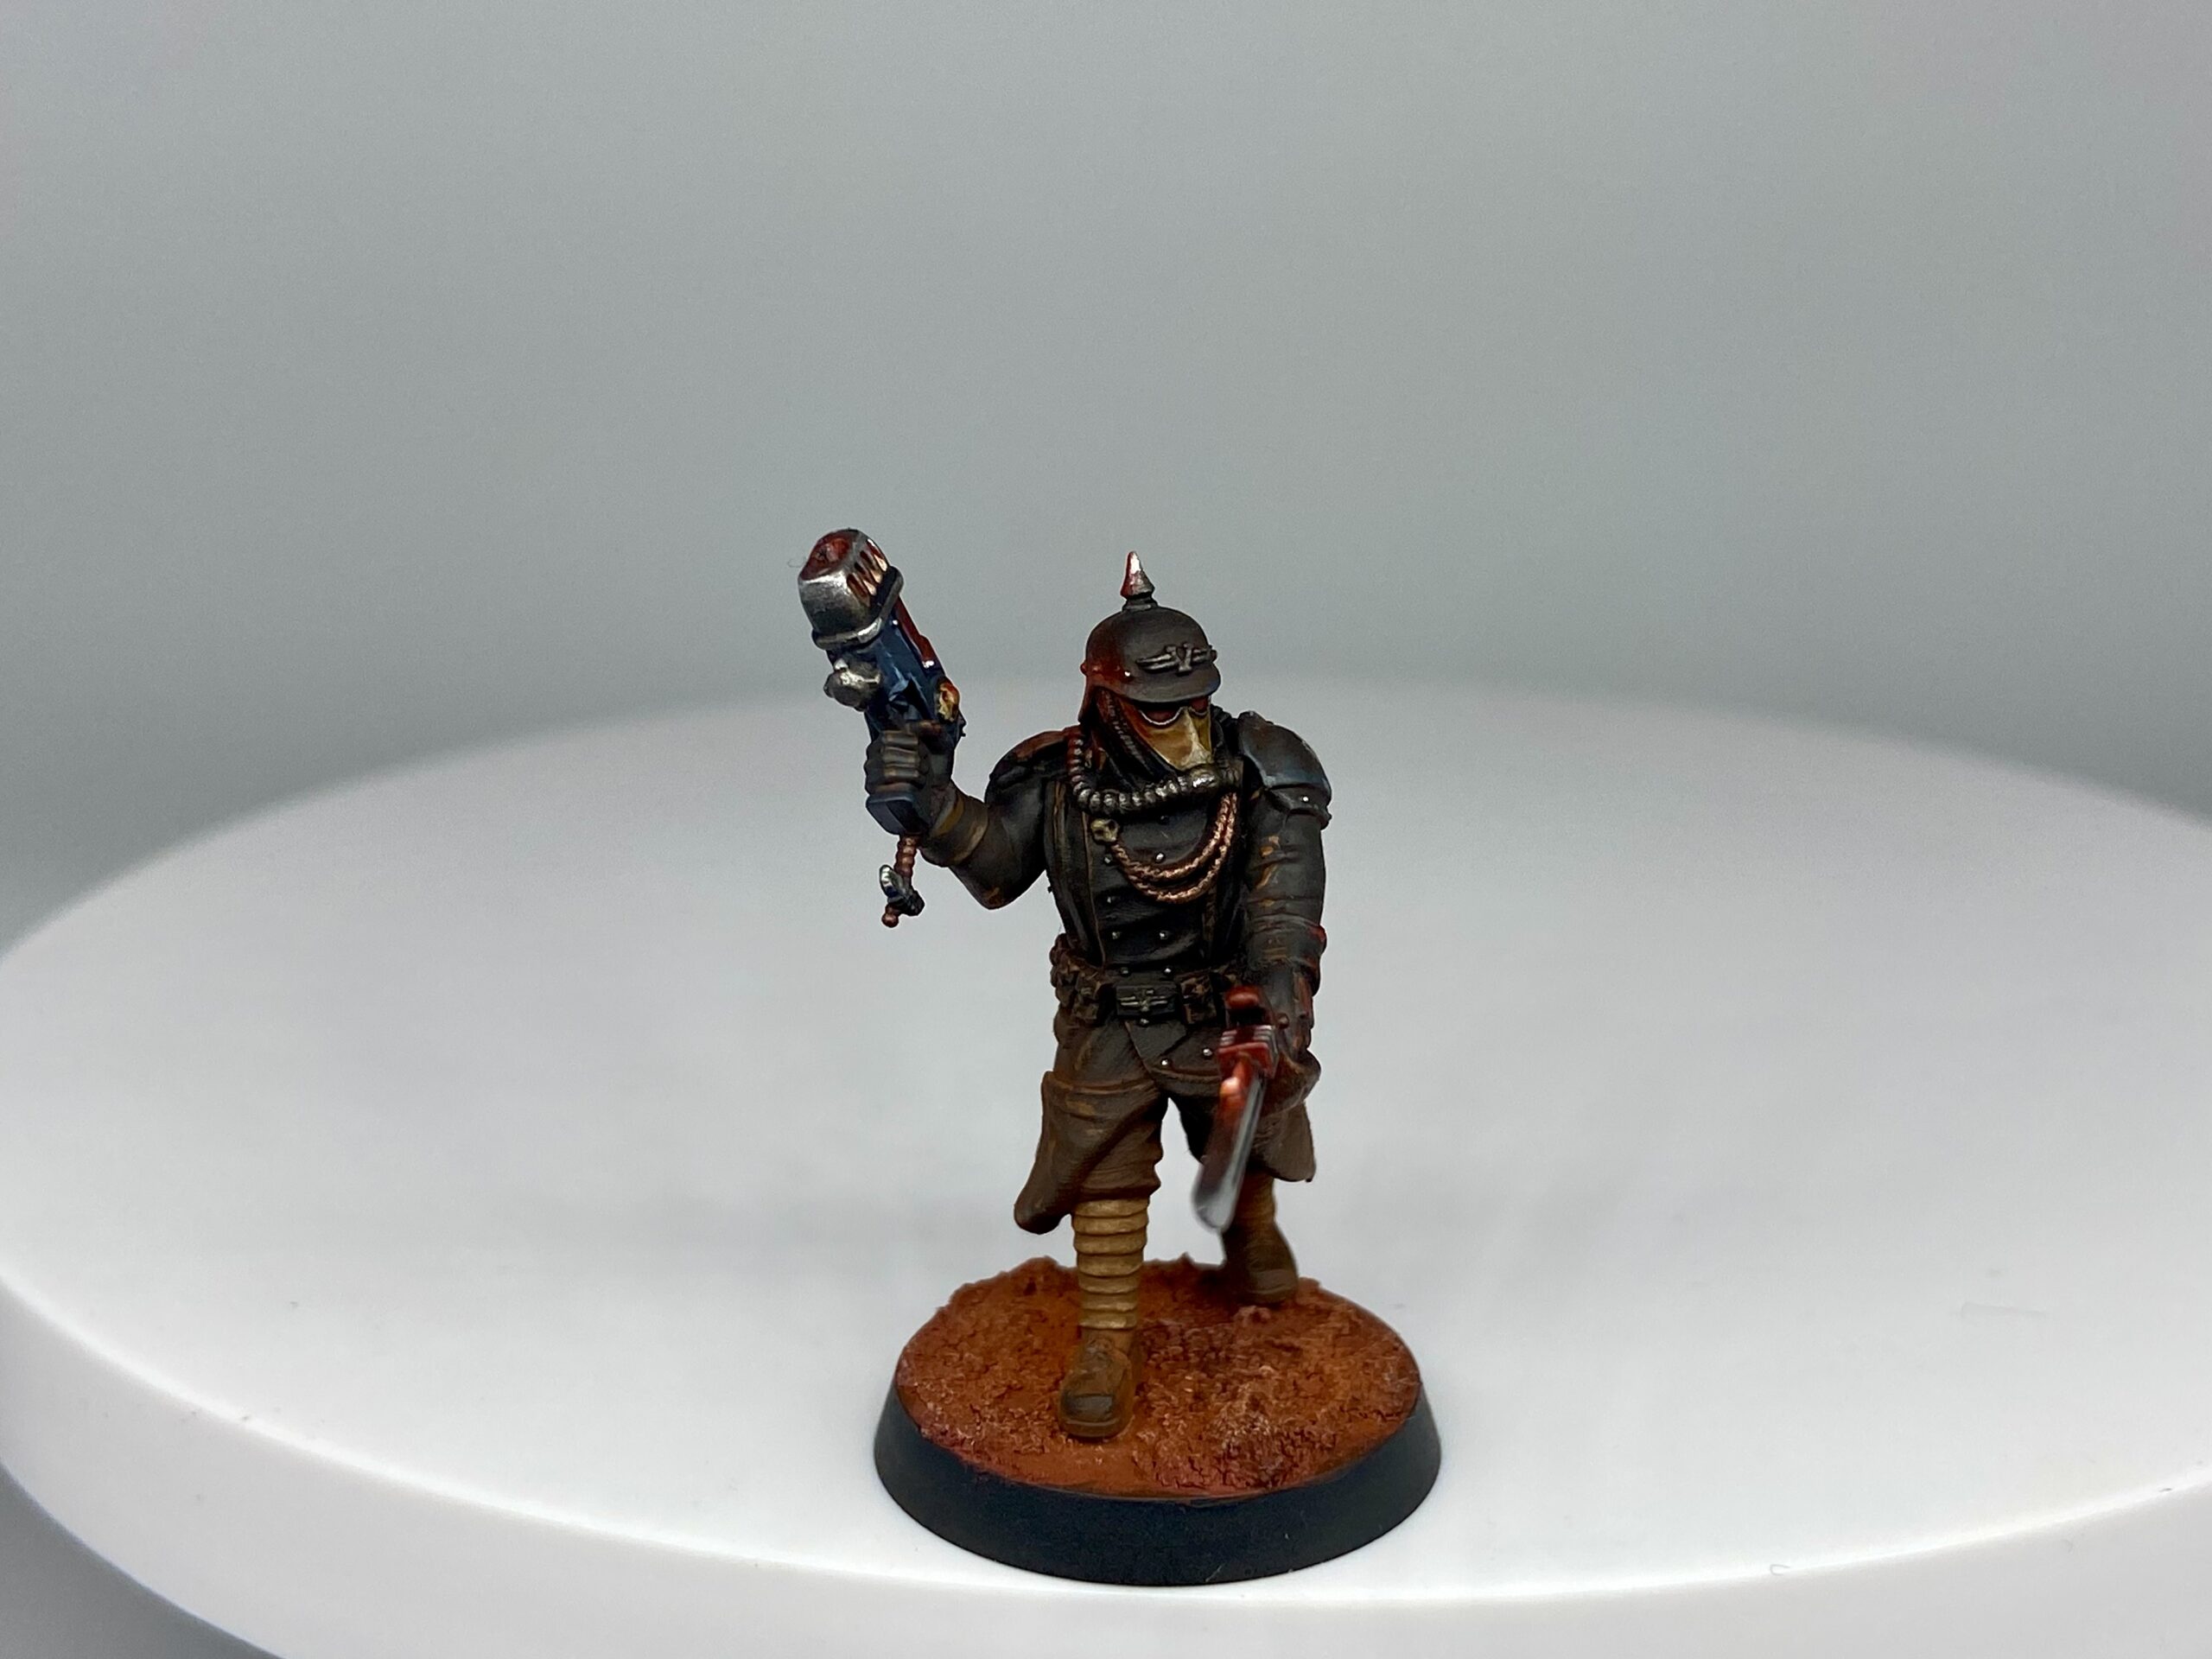
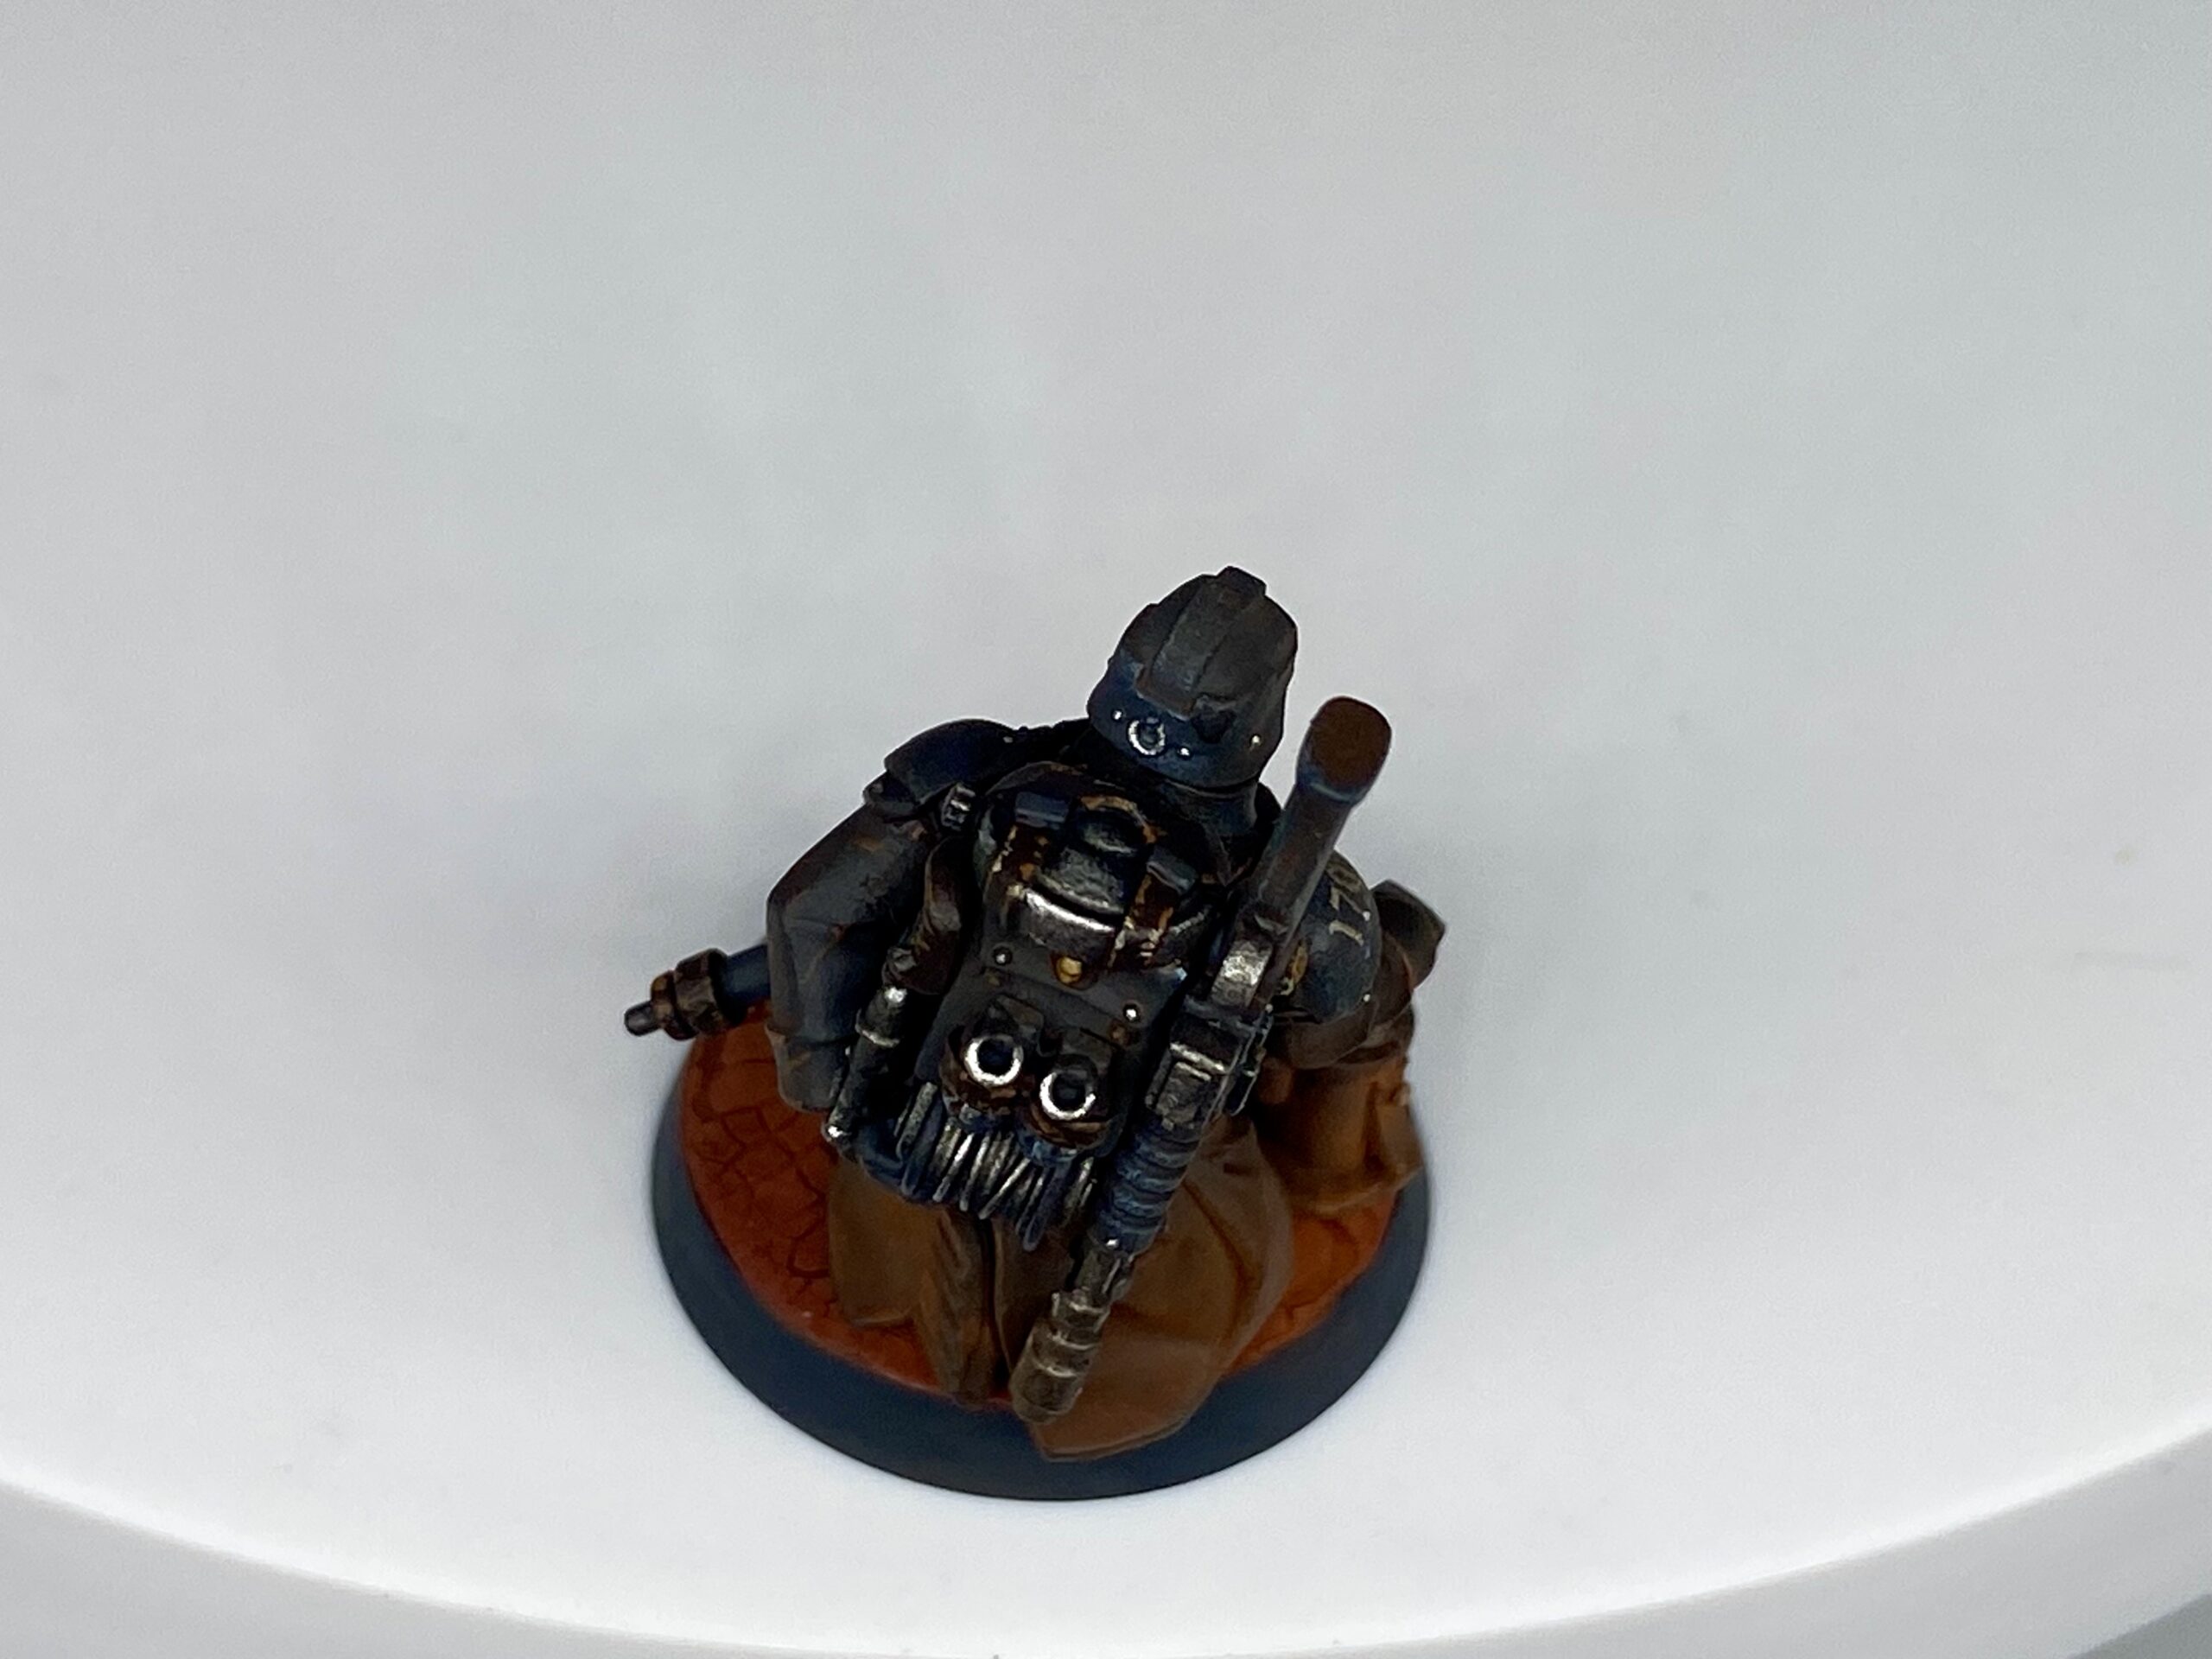
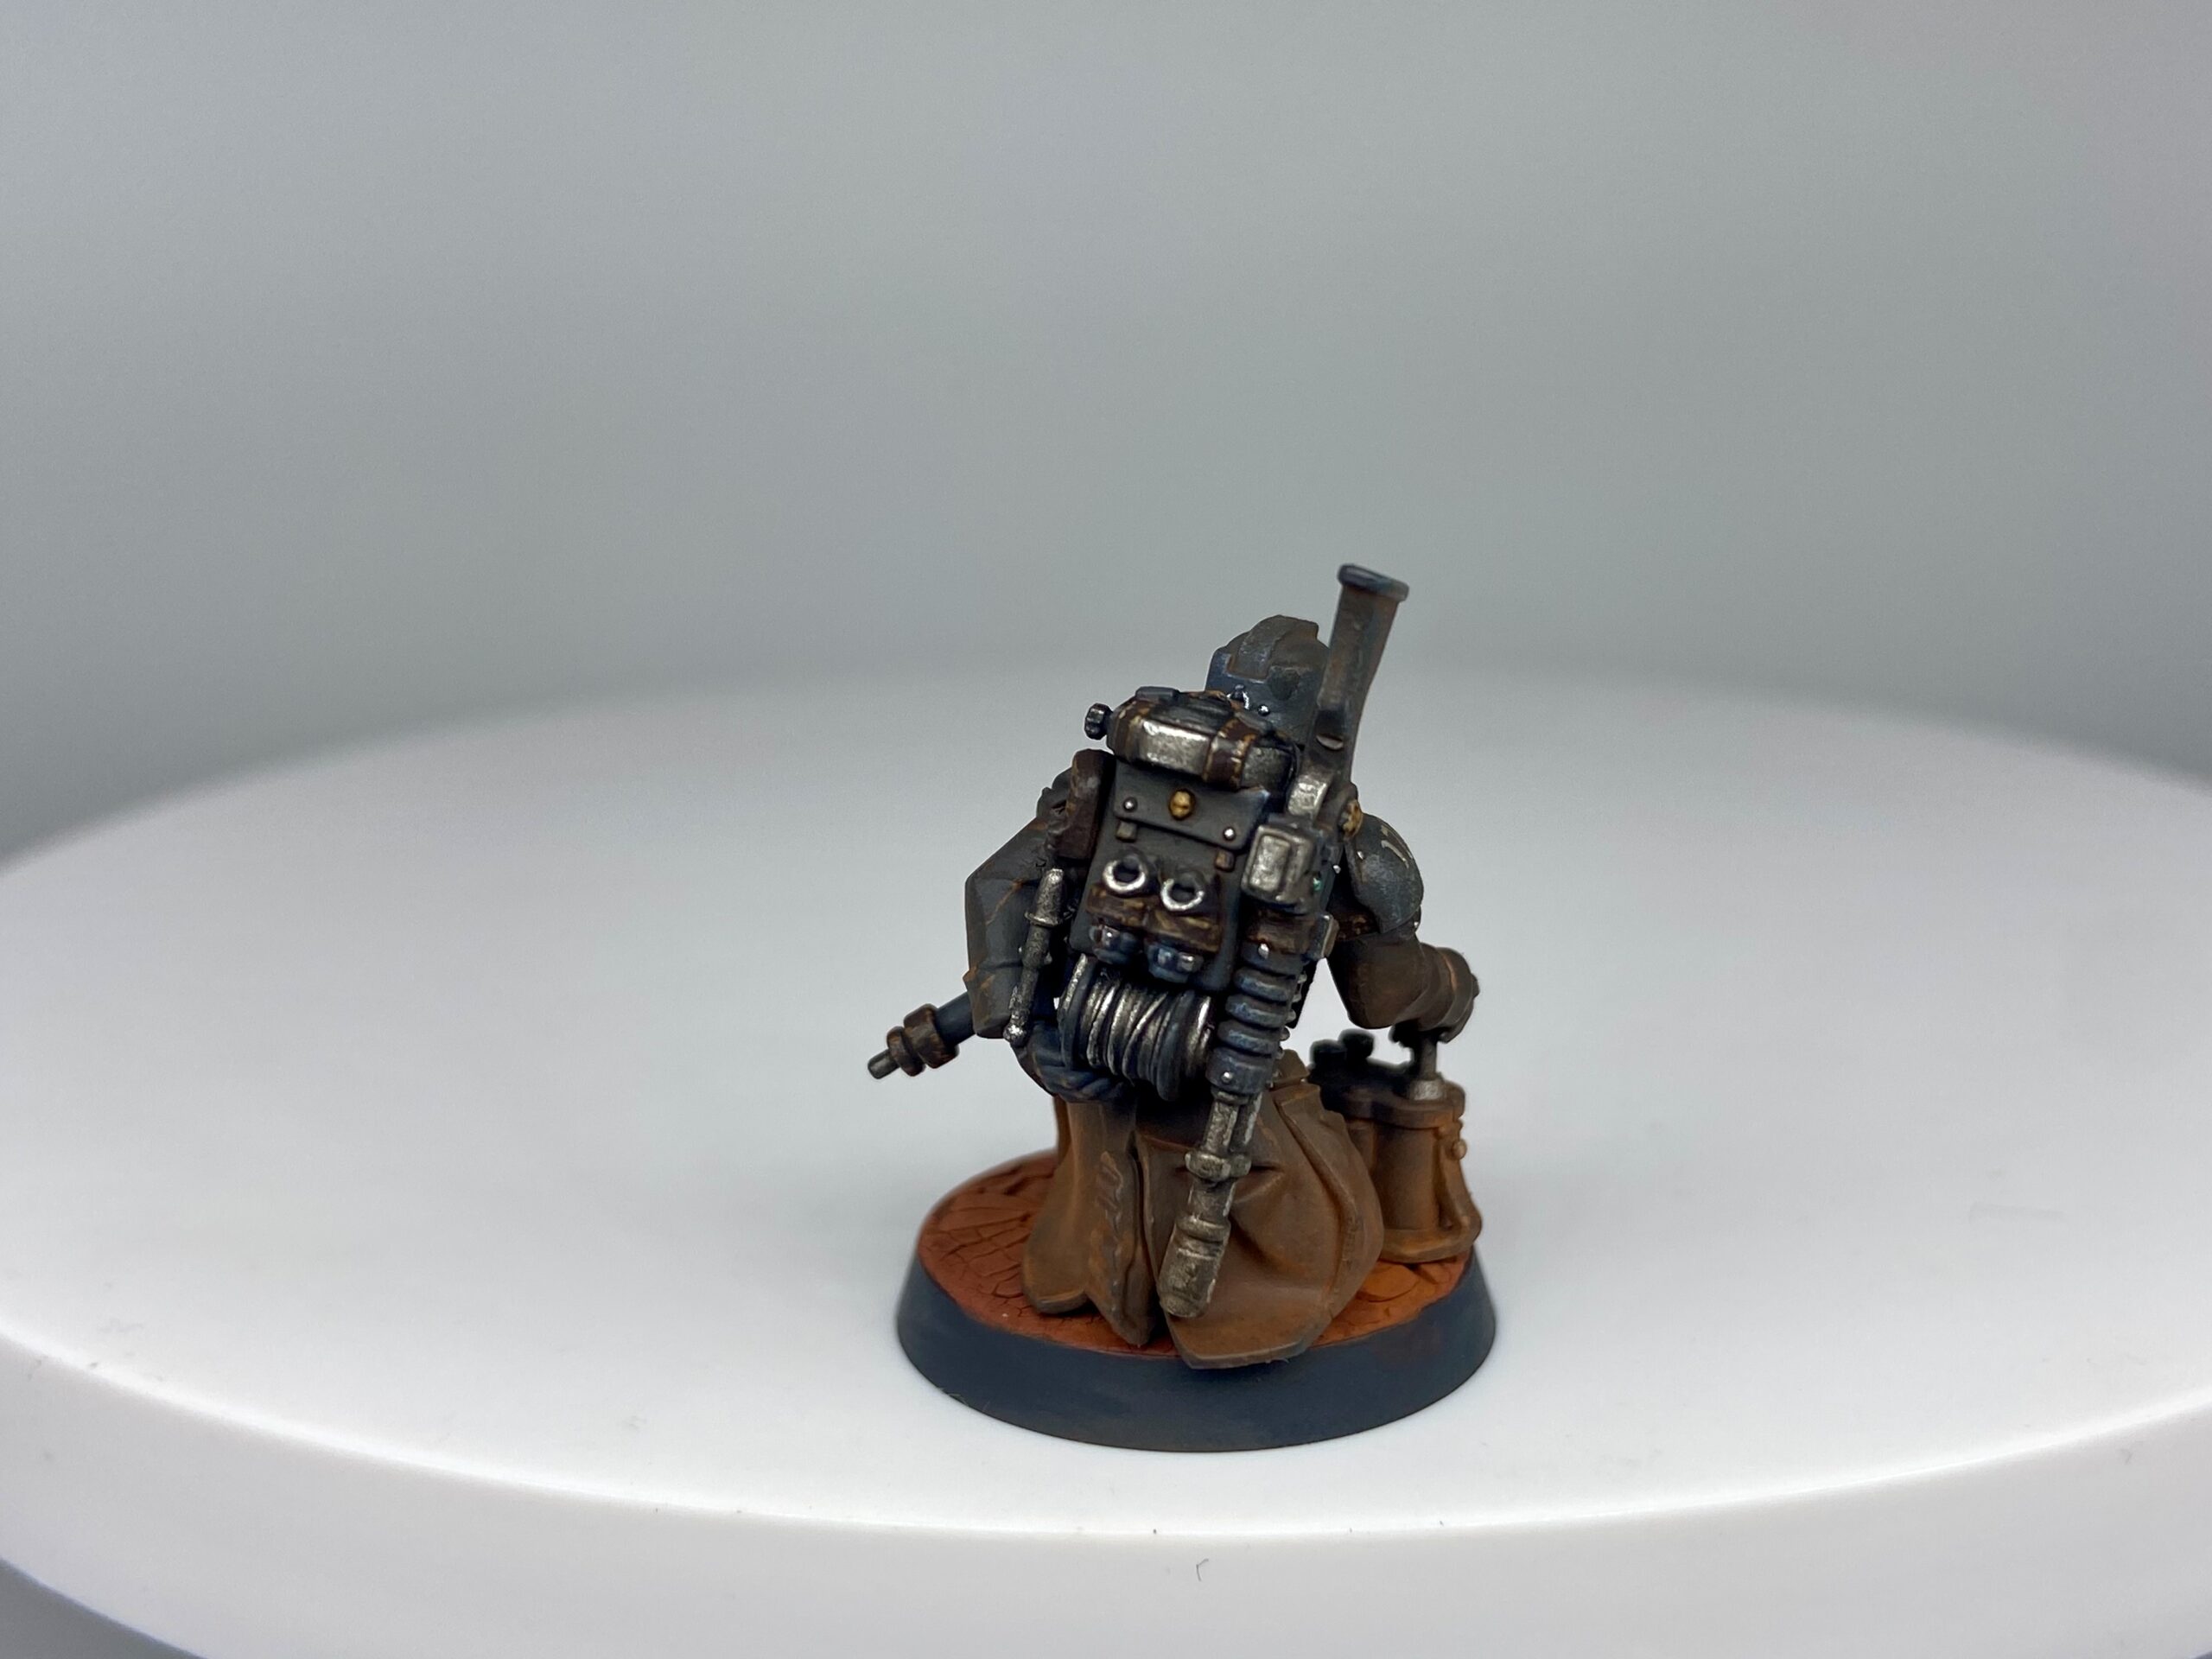
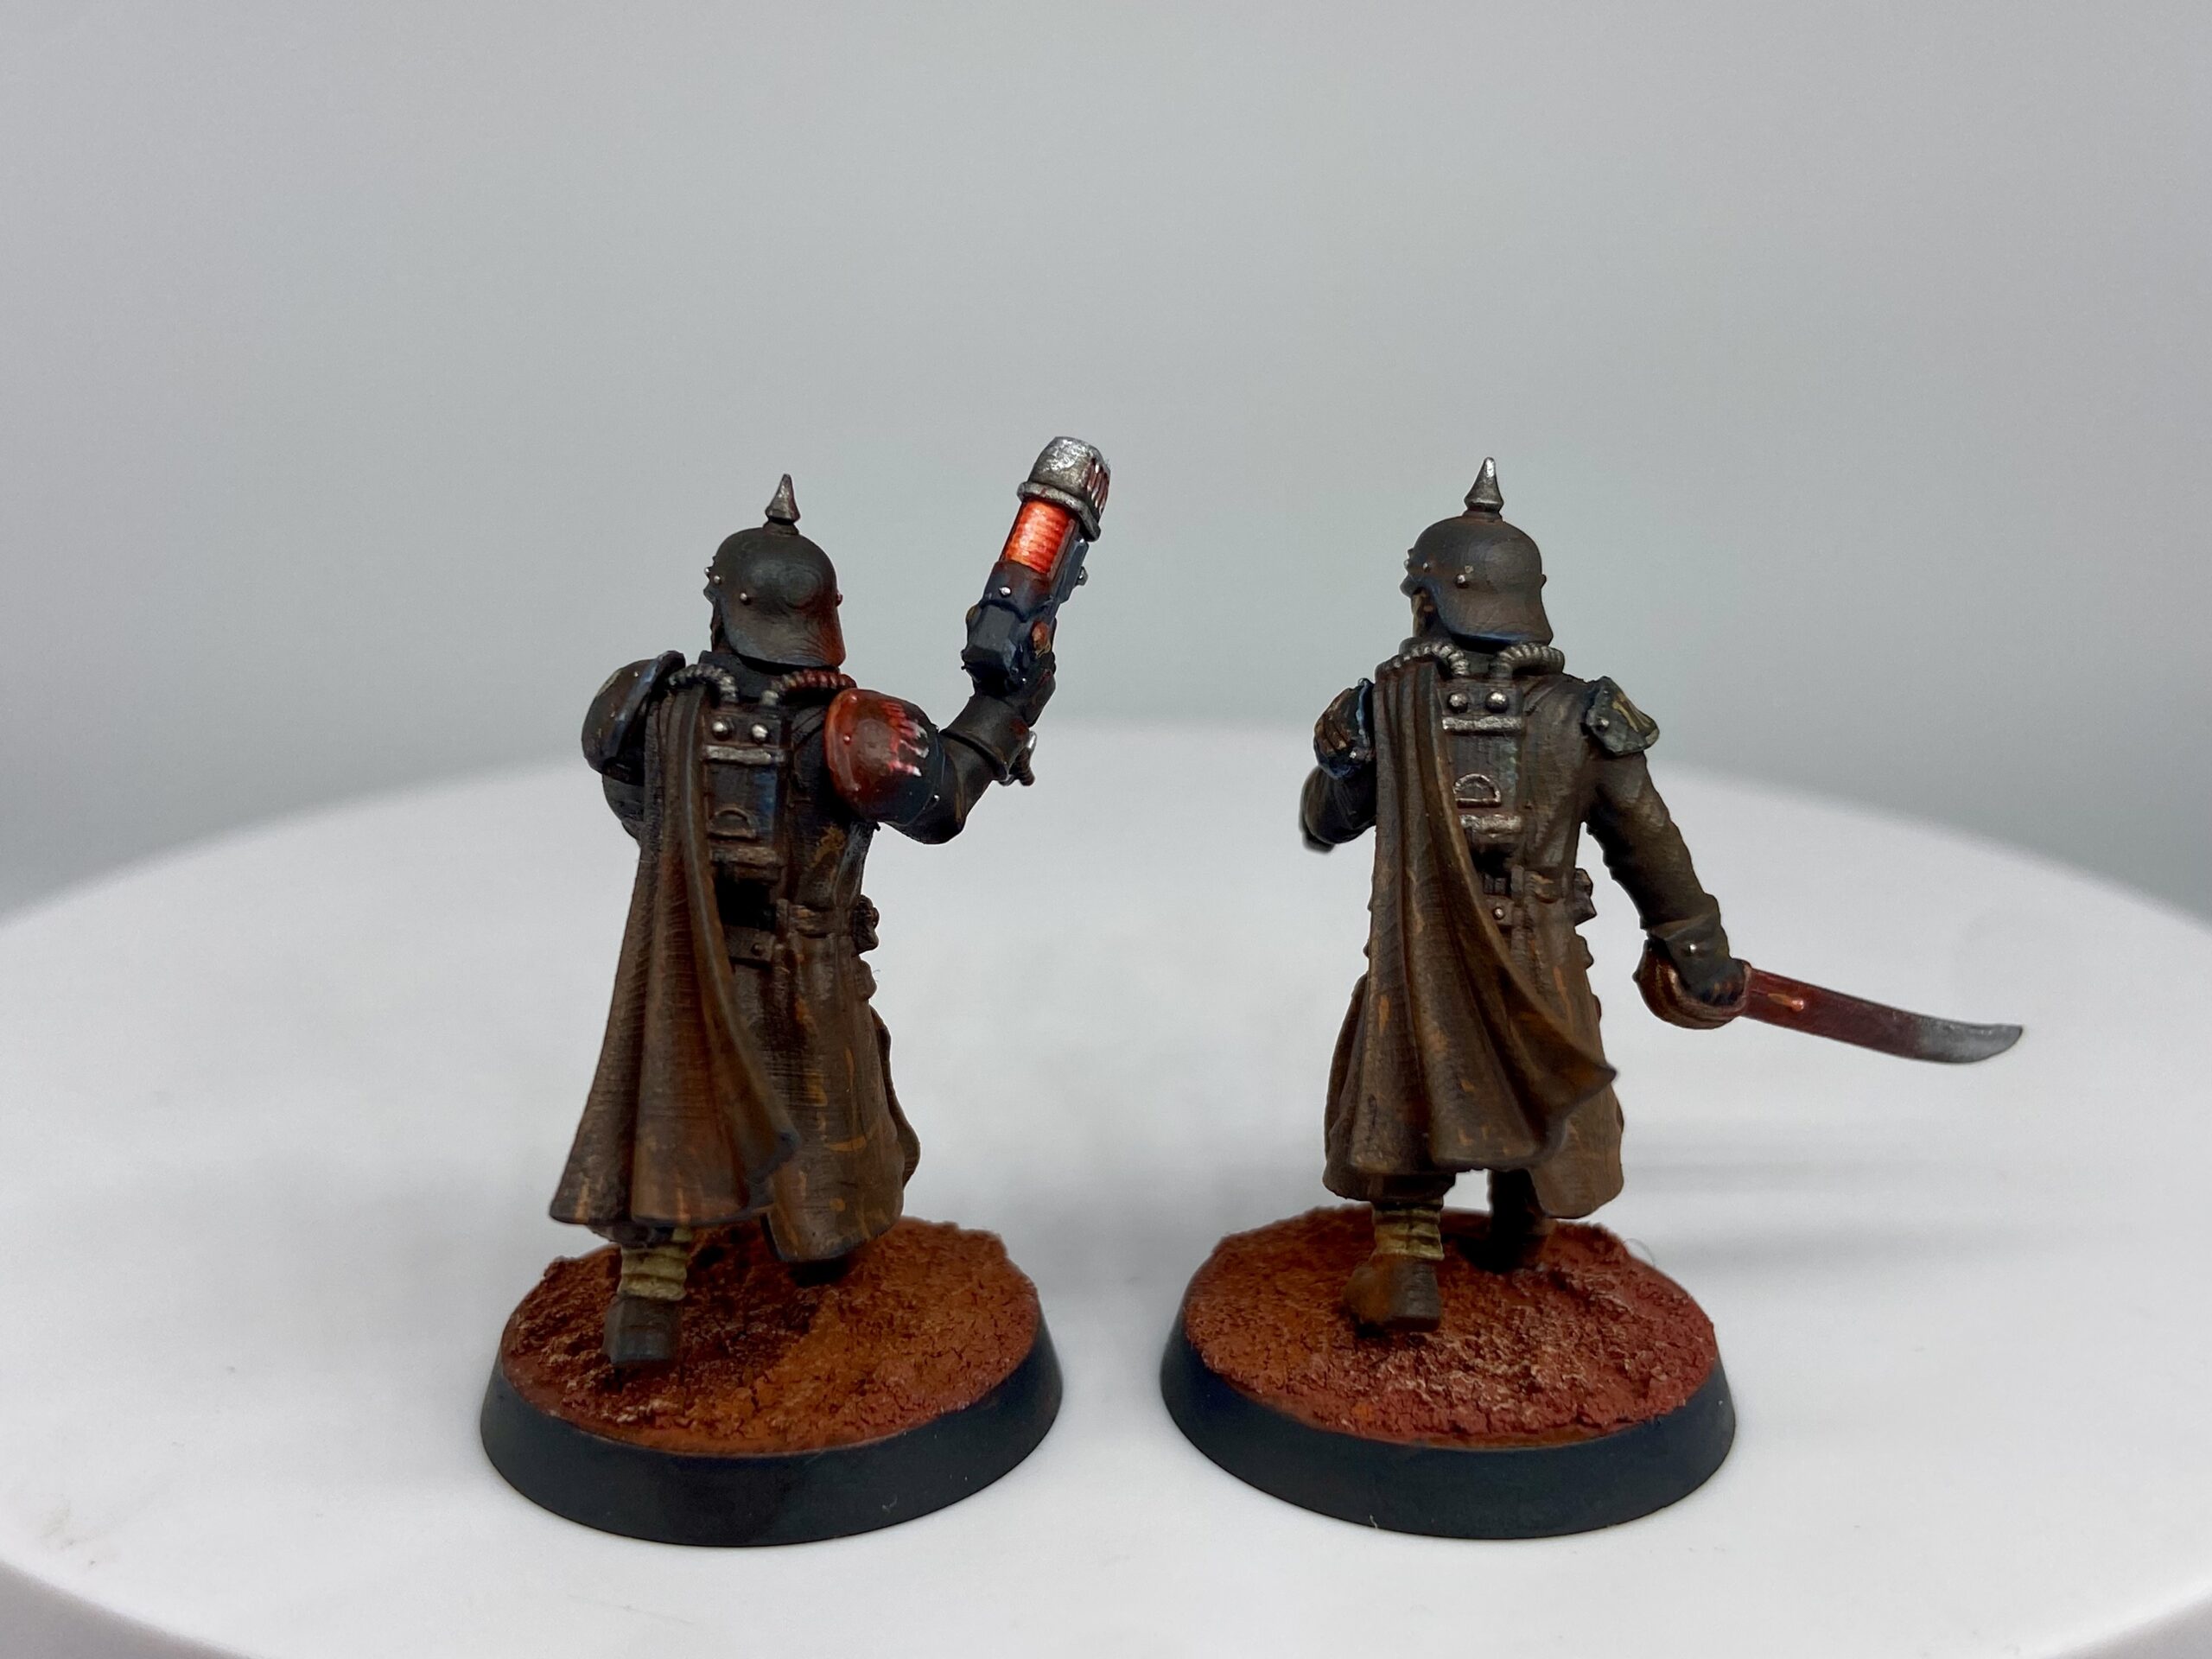
Martian Basing
These are the same as my Iron Warrior bases. I chose this base type because the red contrasts nicely with the models’ black.
- Sprayed black, Colour Forge Raven Black
- Doombull Brown base coat over the black
- Reikland Fleshshade wash
- Dry brush with Tuskgor Fur
- Dry brush with Ushabti Bone
- Dark red/rust pigment
The basing got an article of its own, Iron Warriors Martian Bases. I was really happy with these, especially on the model with the pigments on his legs. This photo below does not do them justice at all. I give myself a 9/10 here.
360° Video
WIP Gallery