
Doomhammer Astra Militarum vs Death Guard – 1,500 points
The Doomhammer rides!
Well, it’s time to break out the big guns after my last defeat against Death Guard, specifically the Doomhammer Big Gun. This list has had more changes and replacements, than the Emperor’s Astropathic choir. This game took place at Board & Swords.
Never miss an article? Subscribe!
Astra Militarum List
They will all use the following Regiment Doctrines; Jury-Rigged Repairs and Gunnery Experts.
- Company Commander with Kurov’s Aquila – Warlord
- Company Commander
- Executioner Tank Commander with Plasma Sponsons and Lascannon
- Basilisk with Full Payload Tank Ace
- 2x Cyclops Demolition Vehicles
- 3x Infantry Squads
- Tech-Priest
- Astropath with Nightshroud
- 2x Plasma Gun Command Squad (some of these use Flamer models)
- A Veteran Squad with three Melta Guns
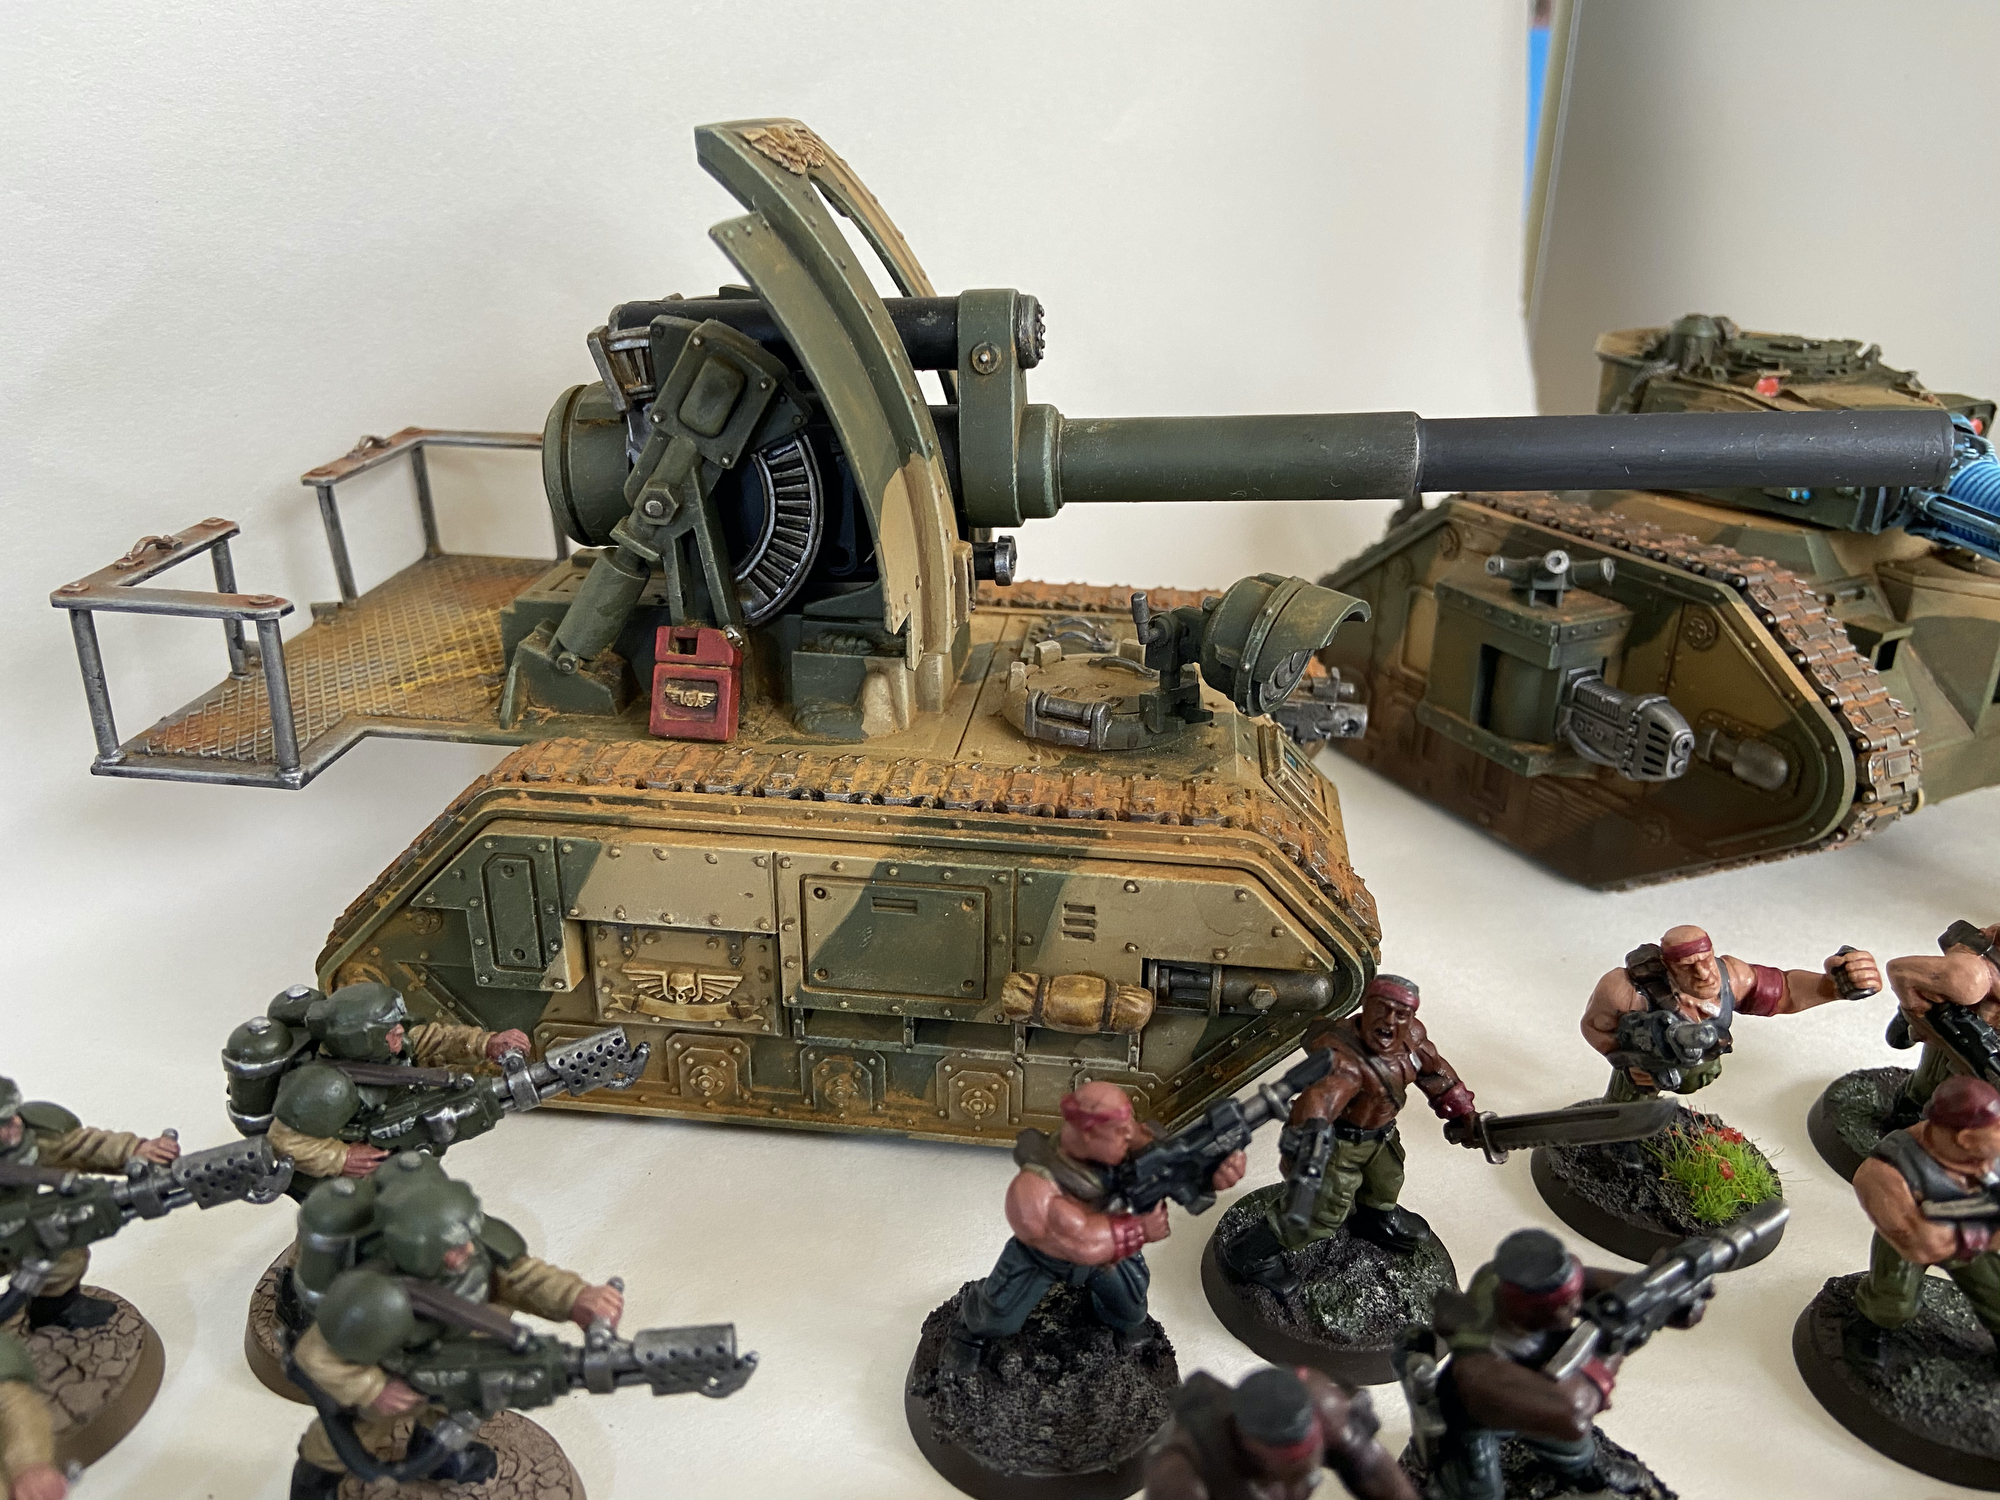
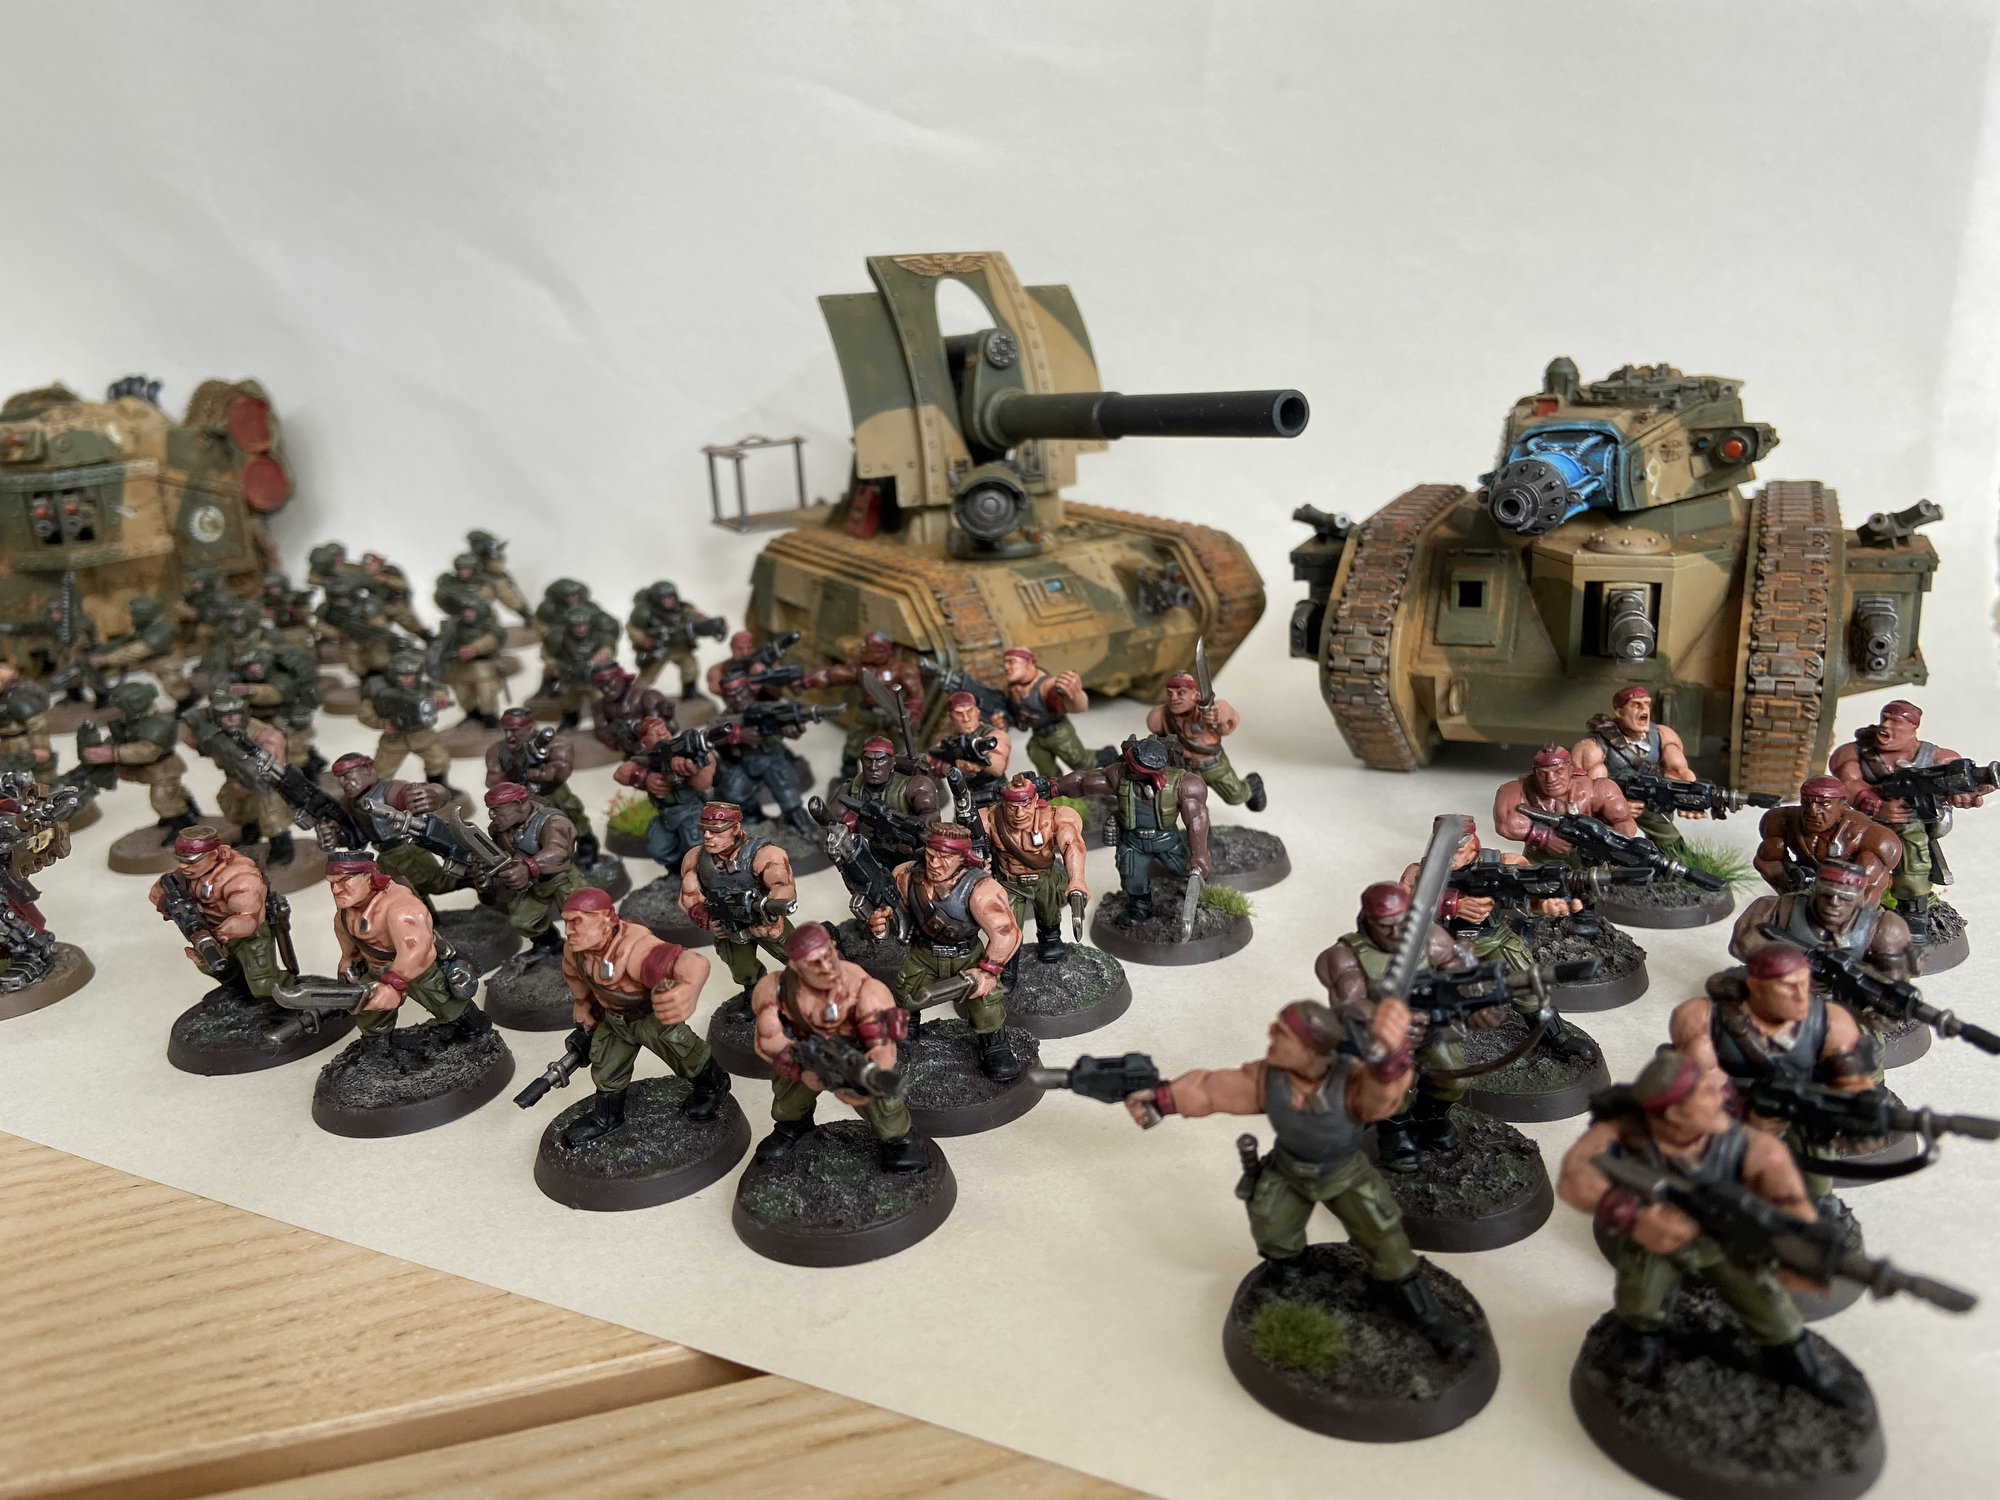
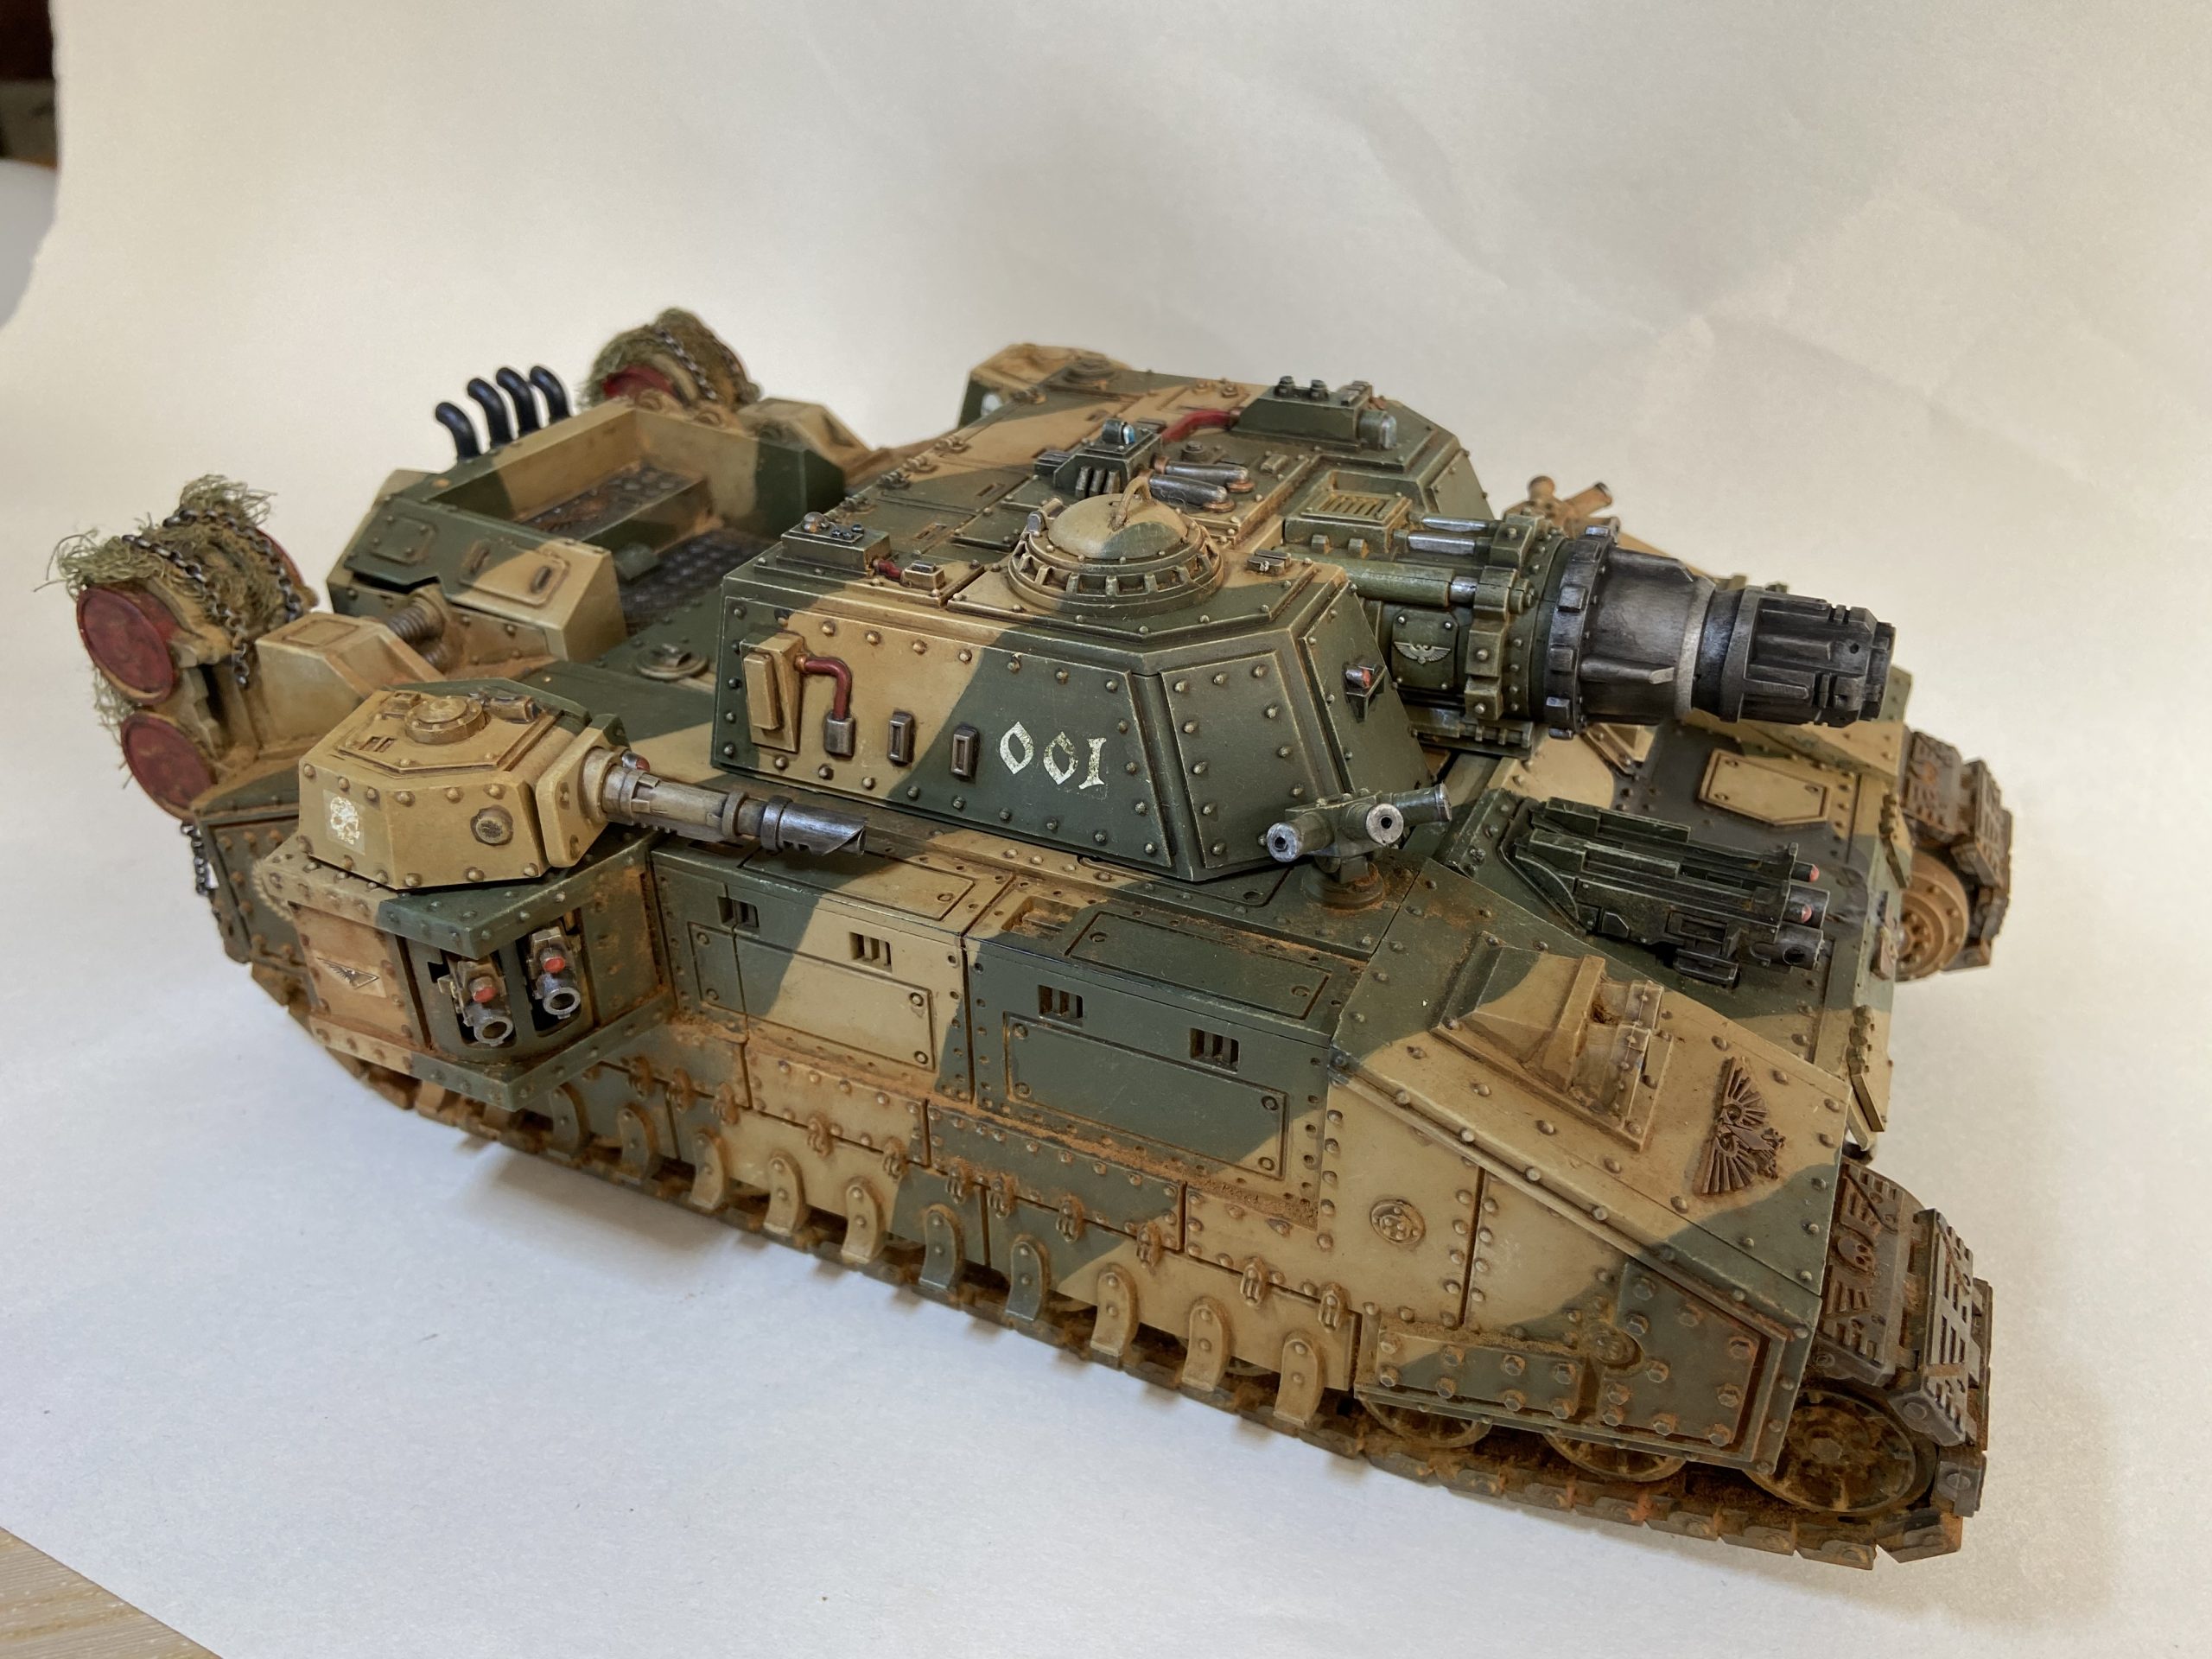
- Doomhammer with Lascannon/Twin Heavy Bolter Sponsons and Steadfast Leviathan Tank Ace in a Super Heavy Auxiliary Detachment
The Steadfast Leviathan Tank Ace allows the unit in a Super Heavy Auxiliary Detachment to take a Regimental Doctrine.
Astra Militarum List Summary
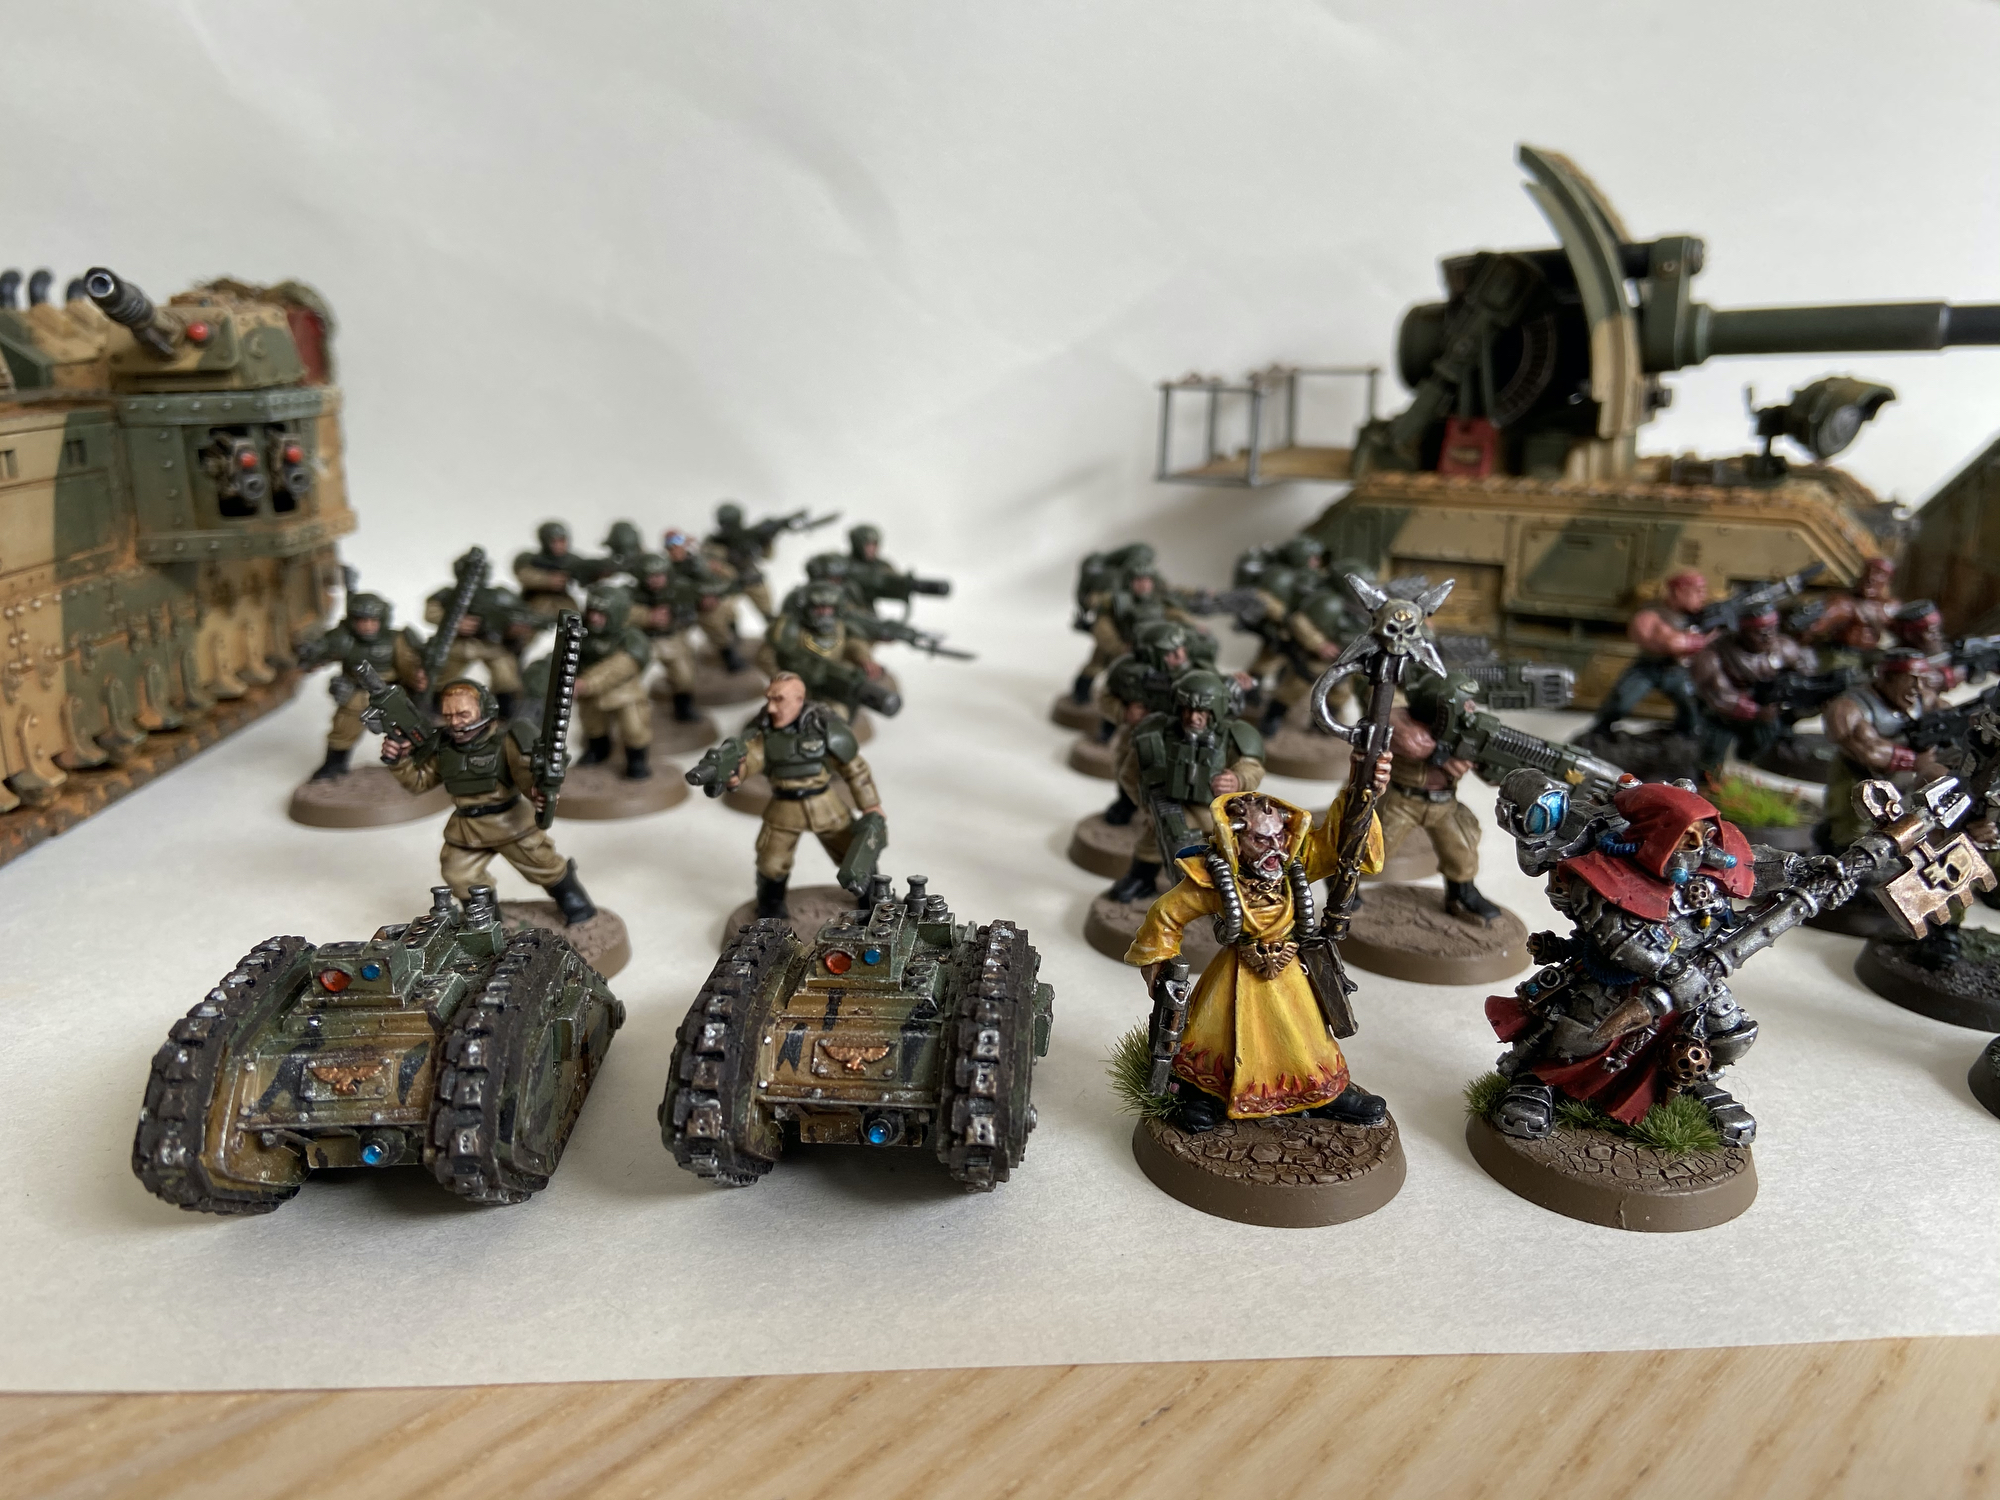
The Astropath, Tech-Priest, Veterans and Command Squads will deploy in the Doomhammer along with the two Company Commanders – 22 models in total. It can hold 25 models. Ten of these can shoot out of the Doomhamer, this will be mainly for the Plasma Guns.
I have 8CP, to begin with;
- A Strike Force starts with 12CP
- -1CP for a Tank Ace
- -3CP for the Super Heavy Auxillary
12 – 3 – 1 = 8CP
Stratagems of interest include;
- Vengeance for Cadia – 1CP – Re-roll all failed hits and wounds for a single unit vs a Chaos unit
- Defensive Gunners – 1CP – A vehicle can Overwatch on a 5+
- Aerial Spotter – 2CP – Basilisk re-rolls fail hits
- Crush Them – 1CP – Vehicle hits on 2+ in melee
- Jury Rigging – 1CP – Repair 1 Wound if the Vehicle does not Move, Fall Back or Charge
- Experienced Eye – 1CP – Improve AP by 1 for Veterans – From The Greater Good Supplement
Astra Militarum Secondaries
- Bring it Down
- Grind Them Down
- Engage On All Fronts


Death Guard List
- 2x Chaos Lord
- 2x Squads of Plague Marines with 3 Plasma Guns
- A squad of Plague Marines
- A Foul Blightspawn
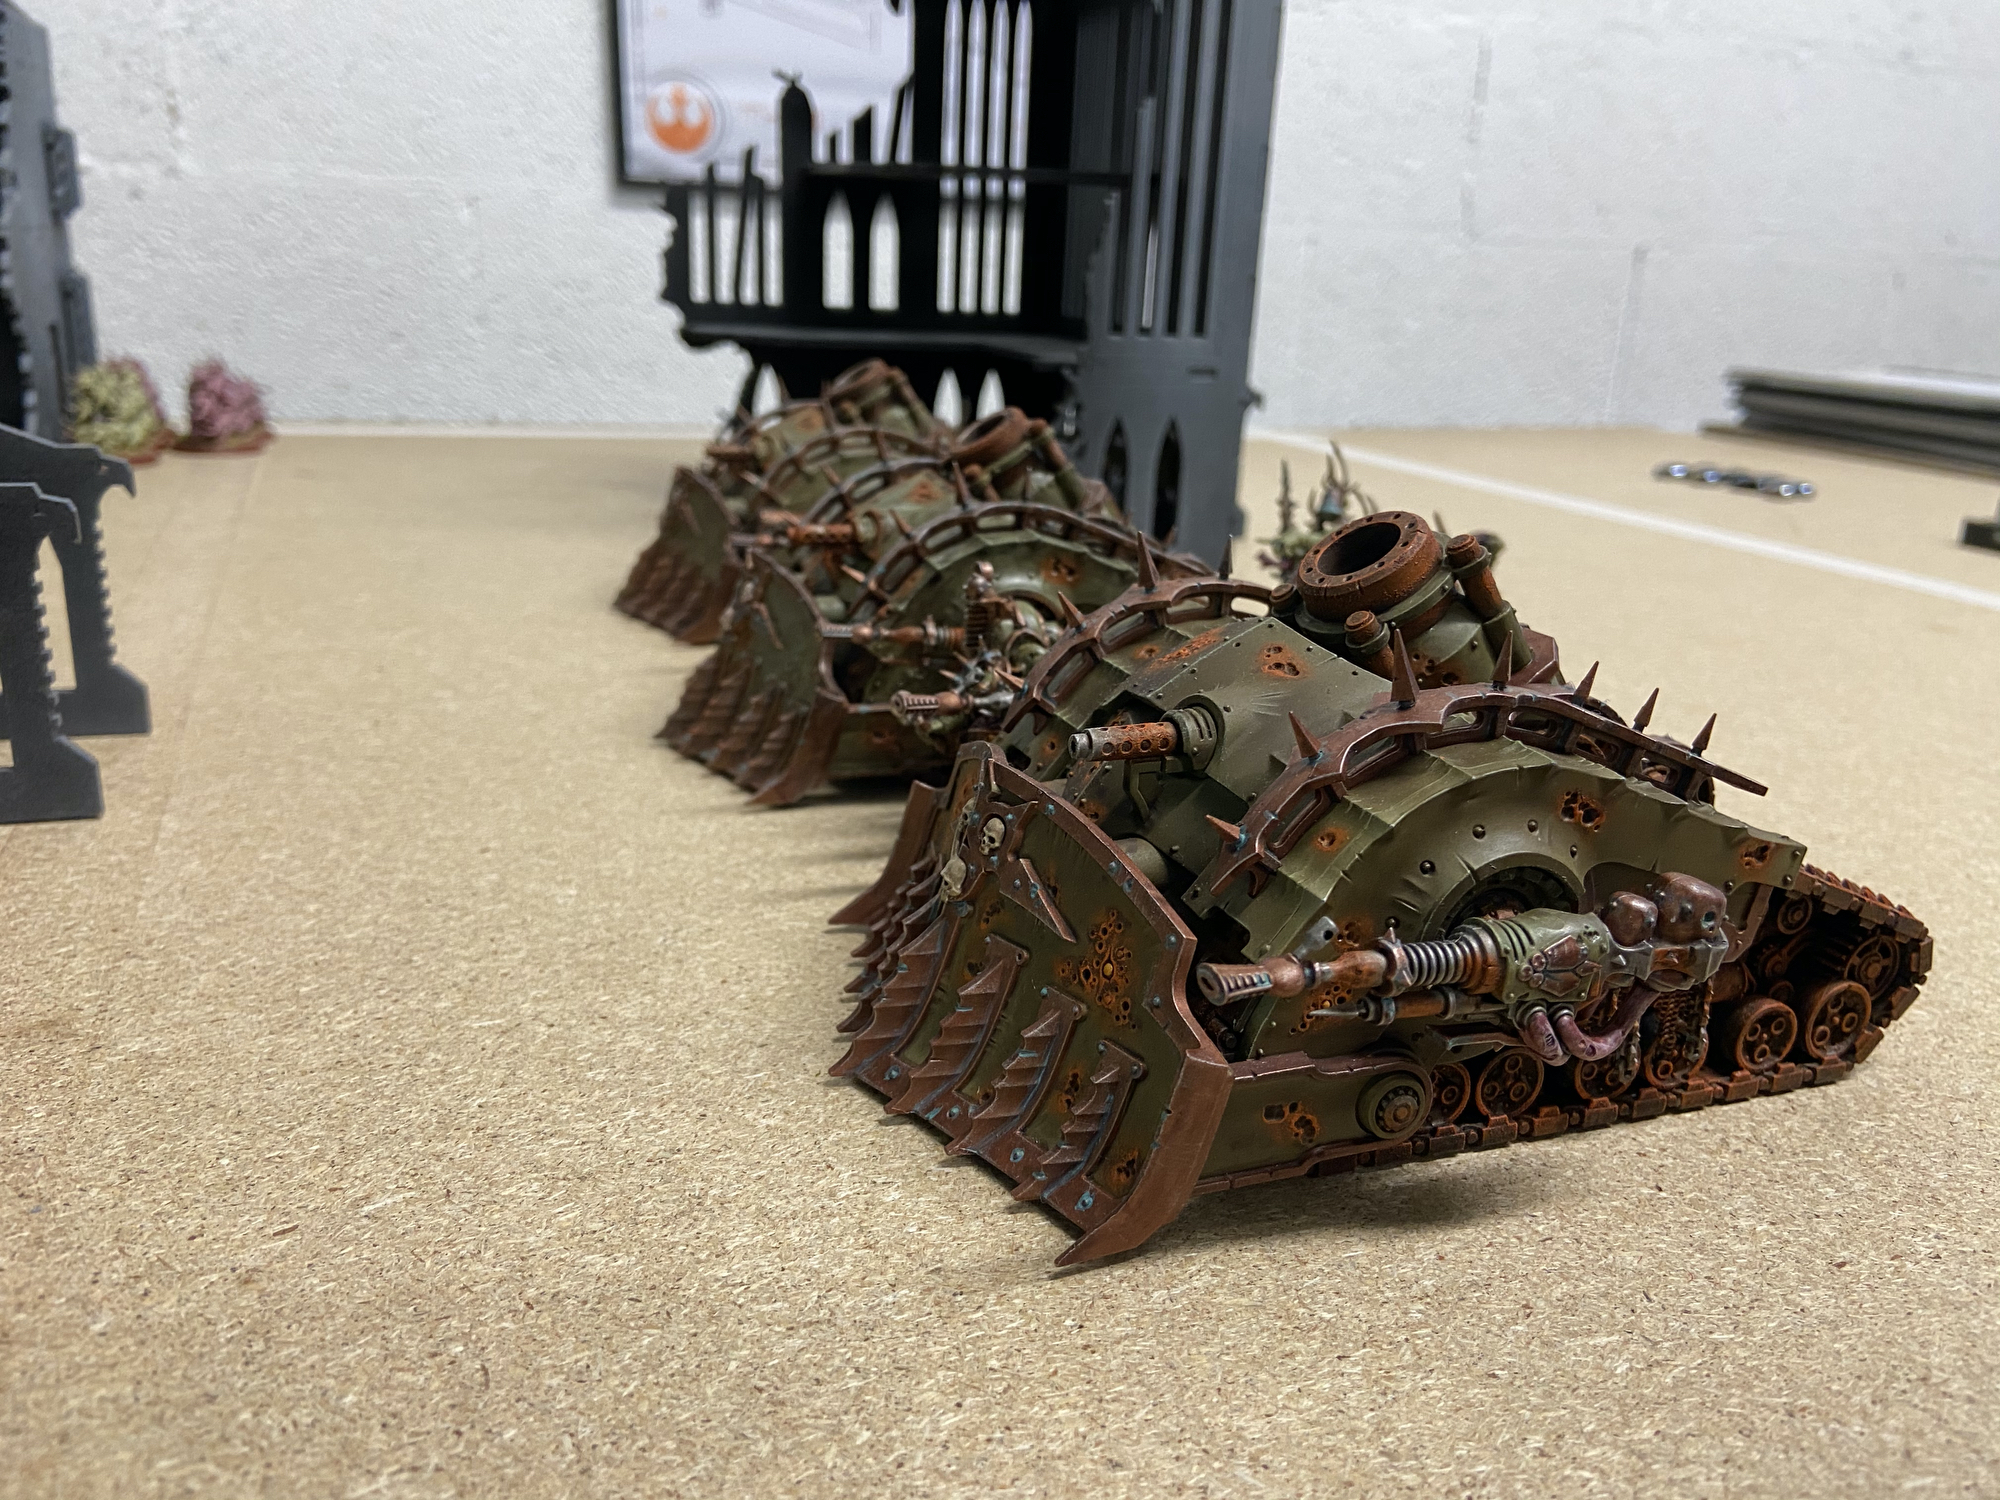
- 3x Plagueburst Crawler
- Contemptor Dreadnought with Butcher Cannons
- A Poxbringer
- 2x units of five Nurglings
Death Guard Secondaries
- Raise The Banners
- Vital Ground
- Thin Their Ranks
Mission and Deployment
We rolled the Battle Lines mission from the GT 2020 Chapter Approved book. Its the standard Take & Hold Primary objective with a mission-specific Secondary called Vital Ground, which Death Guard took.
The Vital Ground Secondary can be done from the second Battle Round only, like the Primary, and you gain 2VP for each of the central objectives you hold and 3VP if you hold the objective in the enemy deployment zone at the end of your Command Phase.
-
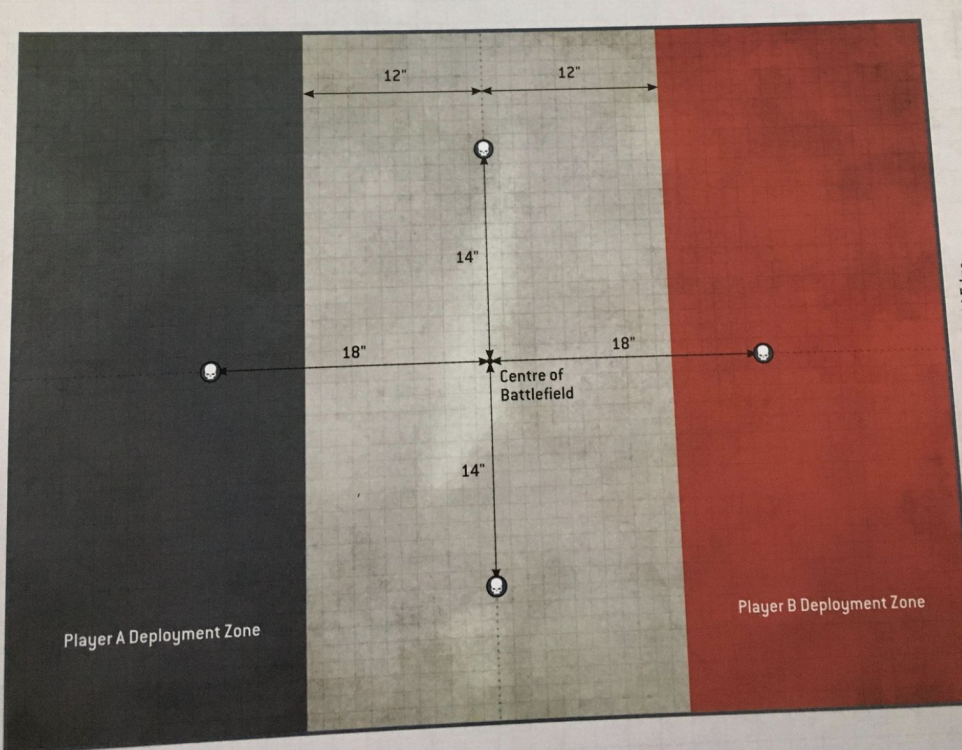

- Battle Lines Mission


-
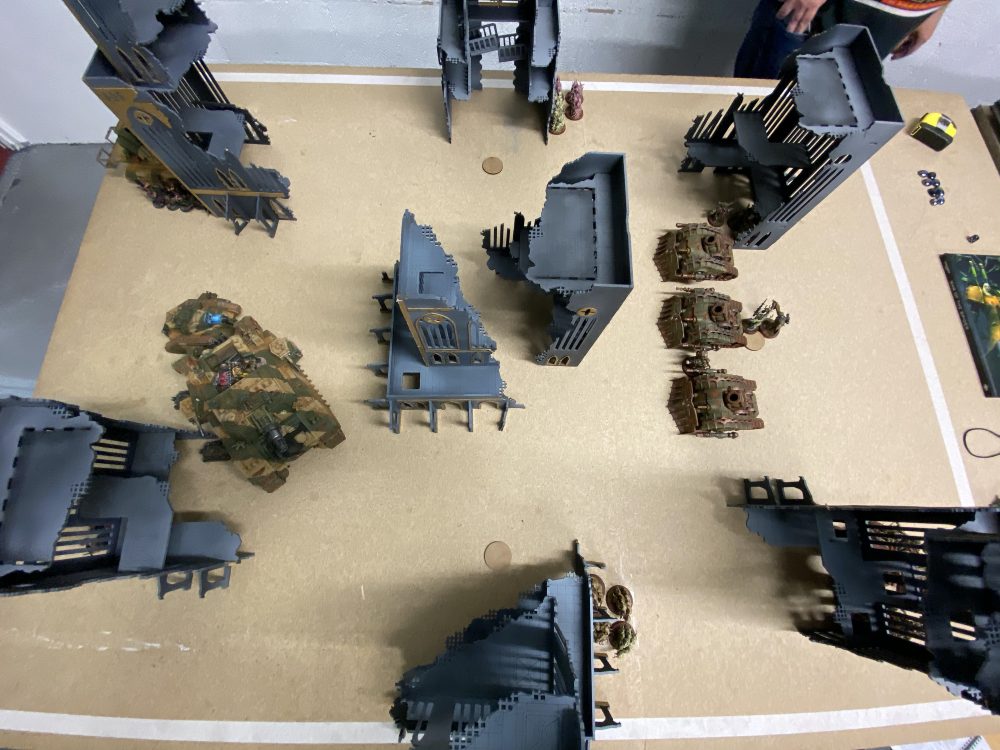

- Deployment

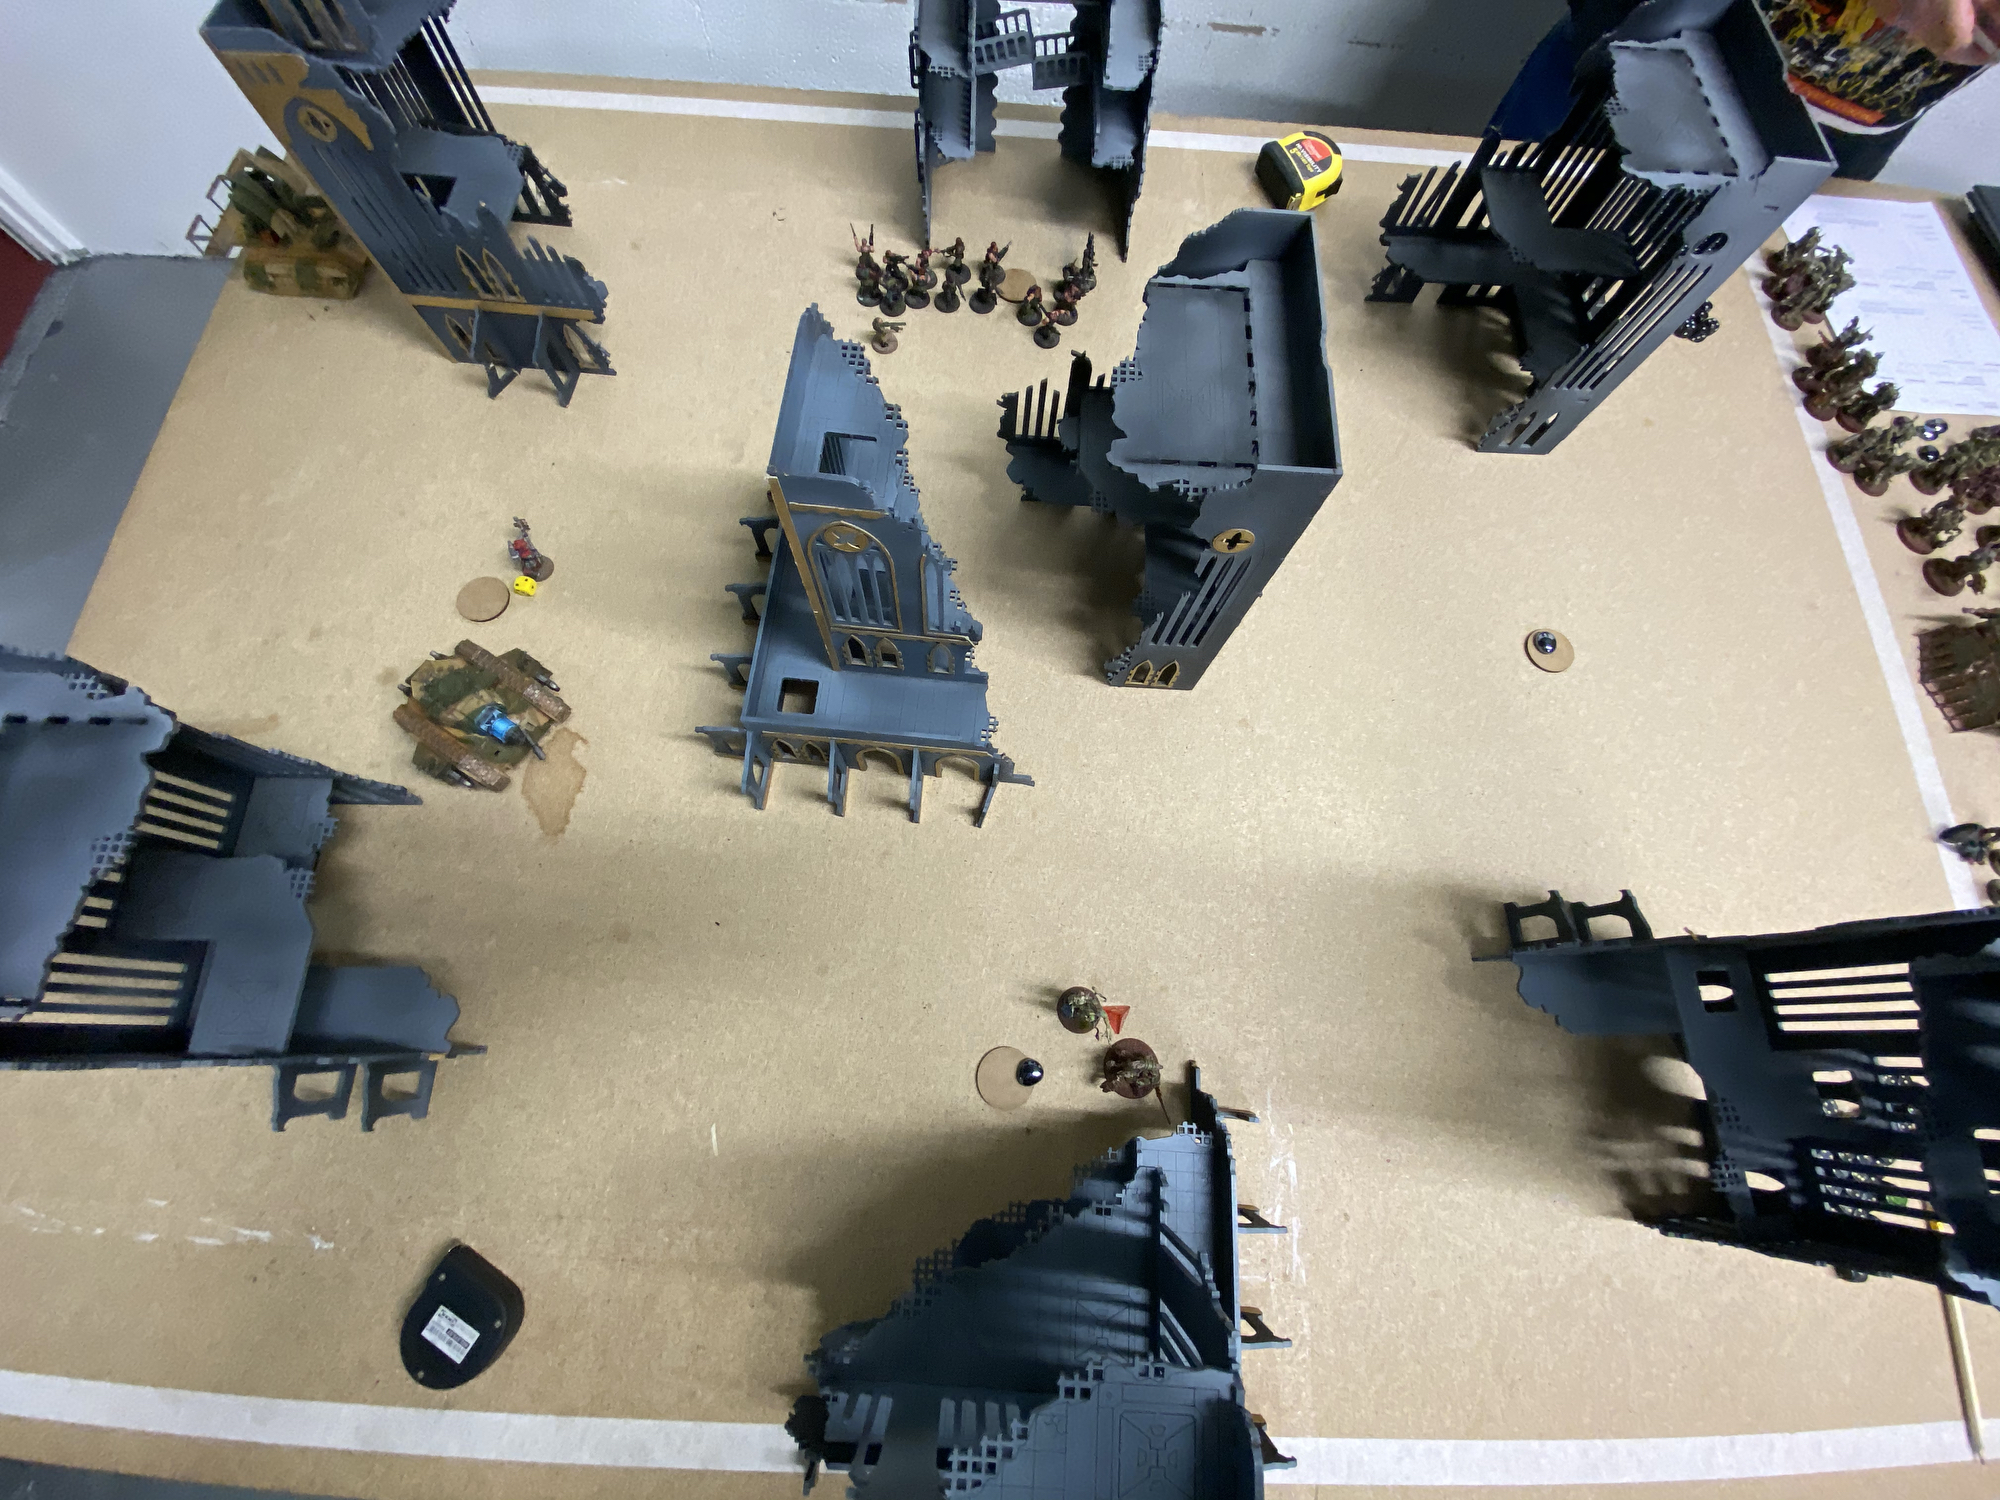
Battle Round 1
I won the roll-off for the first turn and took the first turn. I did not want to risk the Foul Blightspawn and PBC one shooting the Doomhammer in my deployment zone.
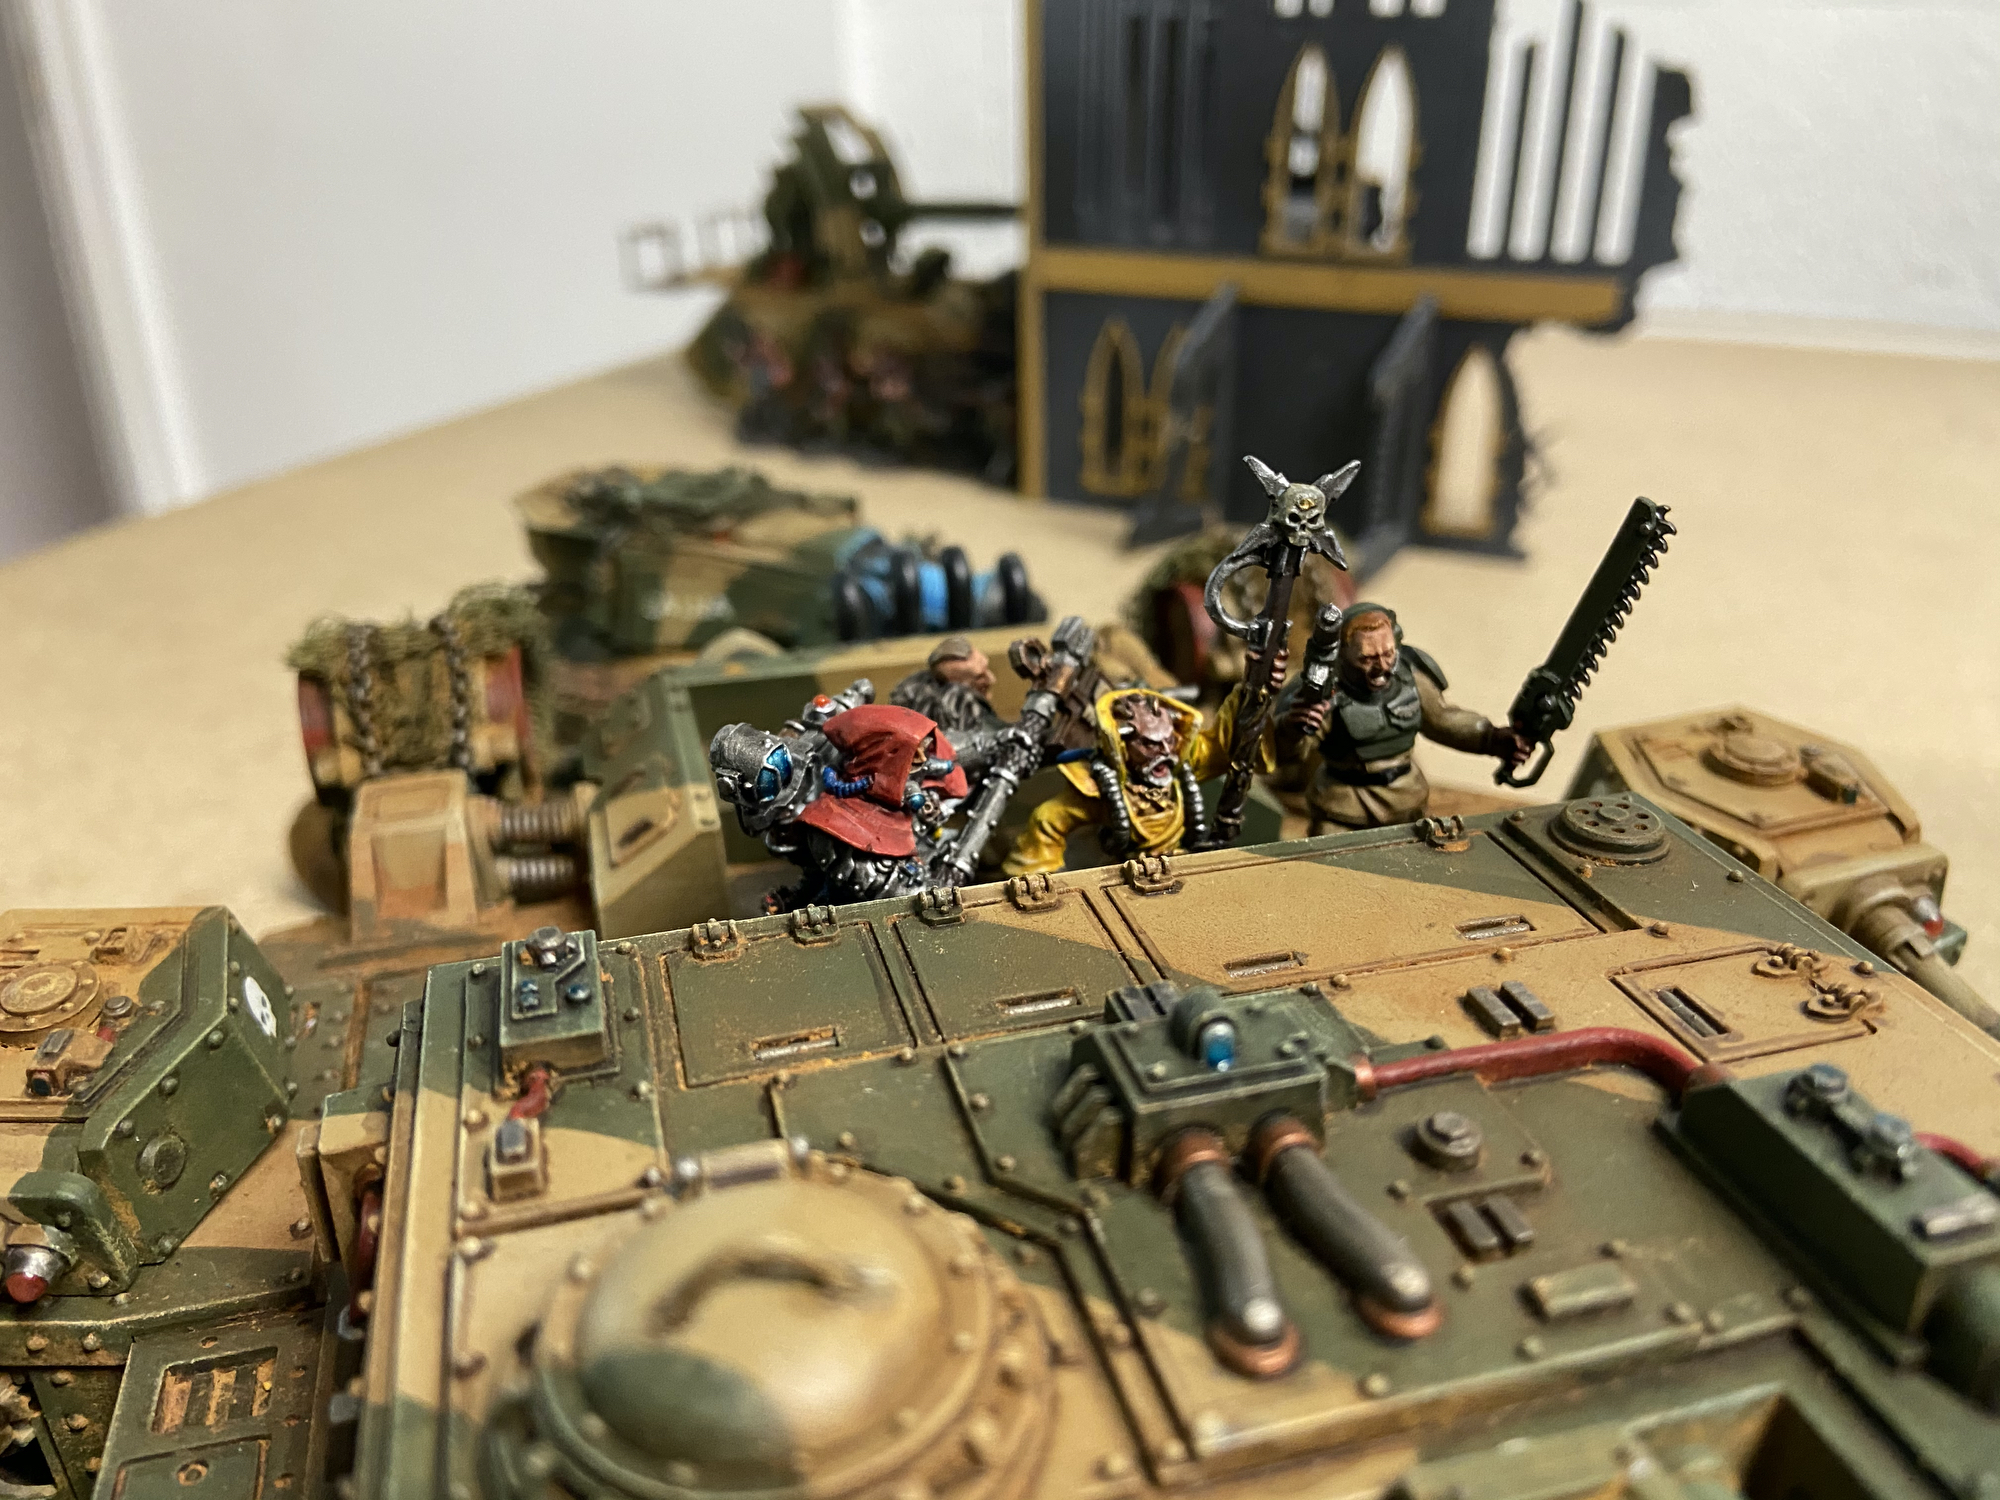
After deploying so far back I moved and Advanced my infantry forward, while the Doomhammer moved it’s full 10″ forward. Although I scooted him back to try and mitigate the Foul Blightspawn’s horrible weapon. I left all the Veterans and Commanders in the Doomhammer but disembarked the Astropath – who successful cast Nightshroud onto the Doomhammer. It was now -1 to hit.
The Doomhammer then came to firing with Vengence for Cadia and nearly killed a PBC on it own, the Plasma’s inside finished it off though. The Tank Commander went for another PBC and got it down to 5 wounds. I then had to, reluctantly, fire the Basilisk at it too to finish it off. Which it did. I wanted to take out some Nurglings on an objective though with the Basilisk.
One of the PBCs exploded and dealt wounds to the remaining PBC and the three surrounding characters. Which was nice!
It was worth noting that these PBCs all had a 4+ Invulnerable Save, because of some character. They were tough.
The Nurglings felt like they could be a problem being on the objectives so early, but the Vital Ground Secondary and Primary could not be scored until the start of the second Battle Round – so I had a turn to go.
The Death Guard then had their turn and moved up, but somewhat more cautiously than usual, I think. The Foul Blightspawn did manage to get in range of the Doomhammer though, using the +6″ range Stratagem the Death Guard had. The Plasmas were out of Rapid Fire range though.
Mark was debating if to focus on the Doomhammer or not, my infantry were juicy targets too, as they are my scoring units. He decided to go for it and went for the Doomhammer. Starting with the Foul Blightspawn he took off 12 of the Doomhammer’s 26 wounds! The Foul Blightspawn’s weapon is horrible;
- 15″ range with the extra 6″
- Auto Hitting
- 2D6 Strength
- D6 Hits
- AP3
- 3 Damage
For a CP this can be changed to 3D6 Strength, discard the lower and 2D6 Hits, discard the lowest – Mark did this. That was brutal!
The rest of the shooting took the Doomhammer down to 11 wounds, which was its middle tier. Most of my force was untouched, but the Doomhammer had, er, taken a hammering? The loss of the two PBCs did men I bagged Grind Them Down.
| Attacker | Mark (Death Guard) | |||
| Primary Objective Take & Hold | Secondary 1 Raise the Banners | Secondary 2 Vital Ground | Secondary 3 Thin Their Ranks | |
| 1 | 0 | 0 | 0 | 0 |
| Defender | Jake (Astra Militarum) | |||
| Primary Objective Take & Hold | Secondary 1 Bring it Down | Secondary 2 Grind Them Down | Secondary 3 Engage On All Fronts | |
| 1 | 0 | 0 | 3 | 0 |
-

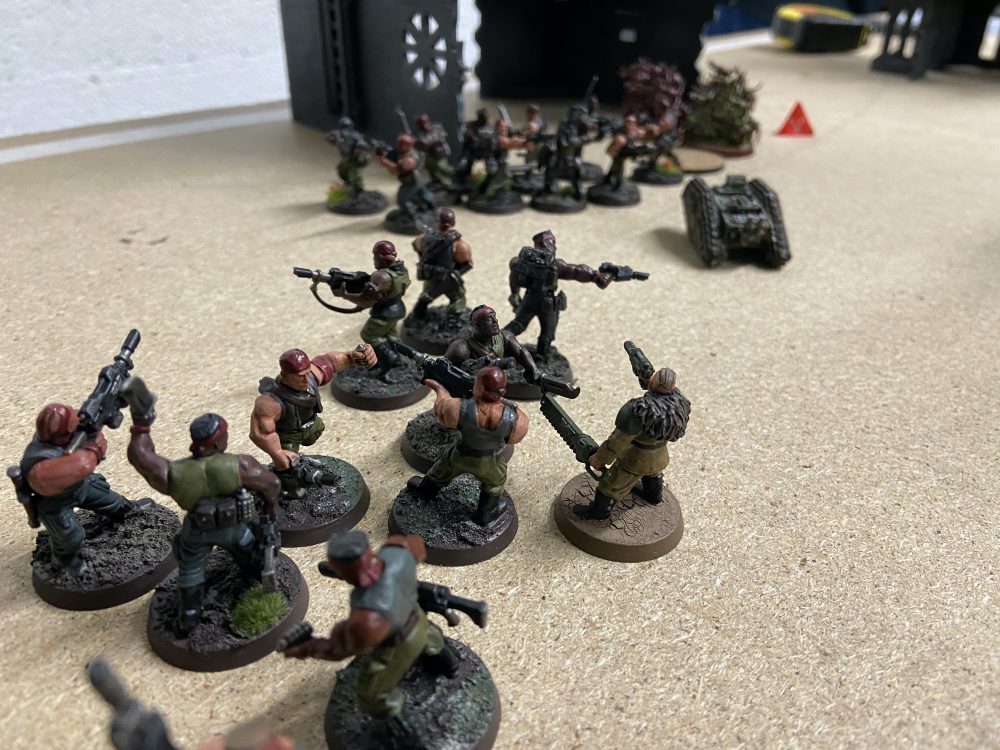
- Guard Turn 1
-
- The aftermath after Guard turn 1 shooting

-
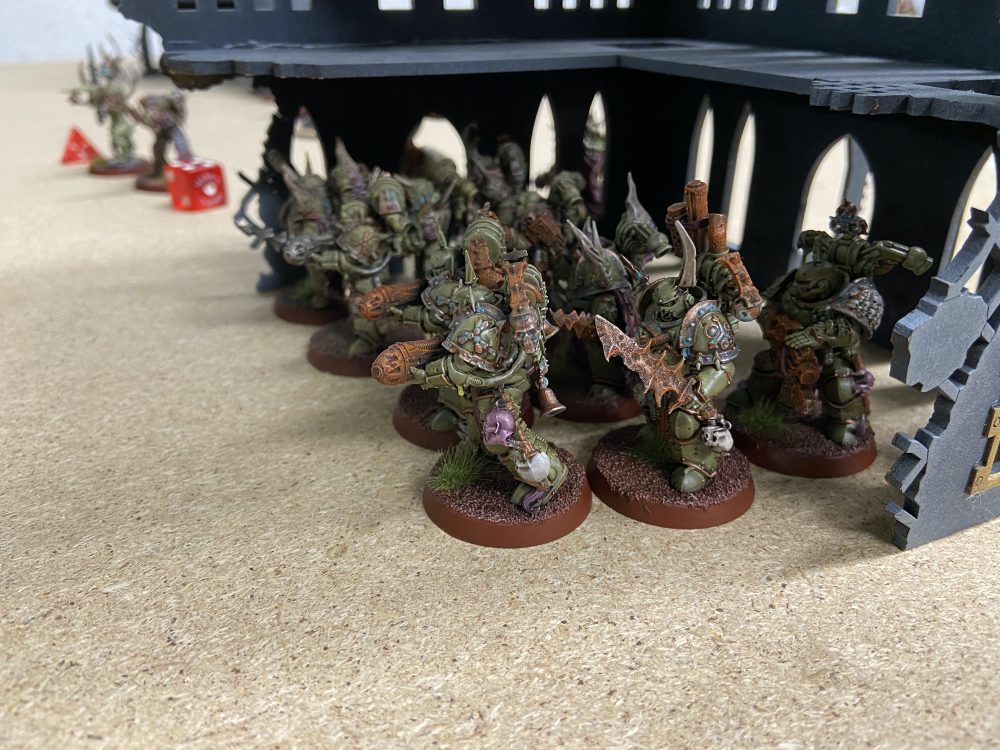
- Plague Marines move up through the ruins

-

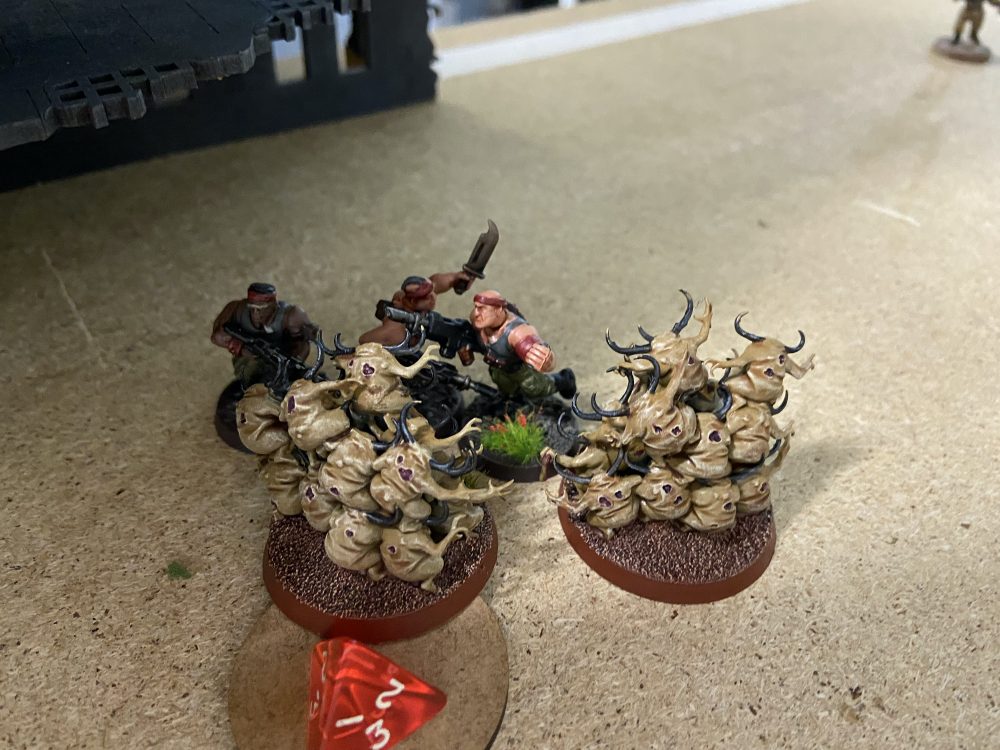
- Nurglings look on at the Doomhammer
Battle Round 2
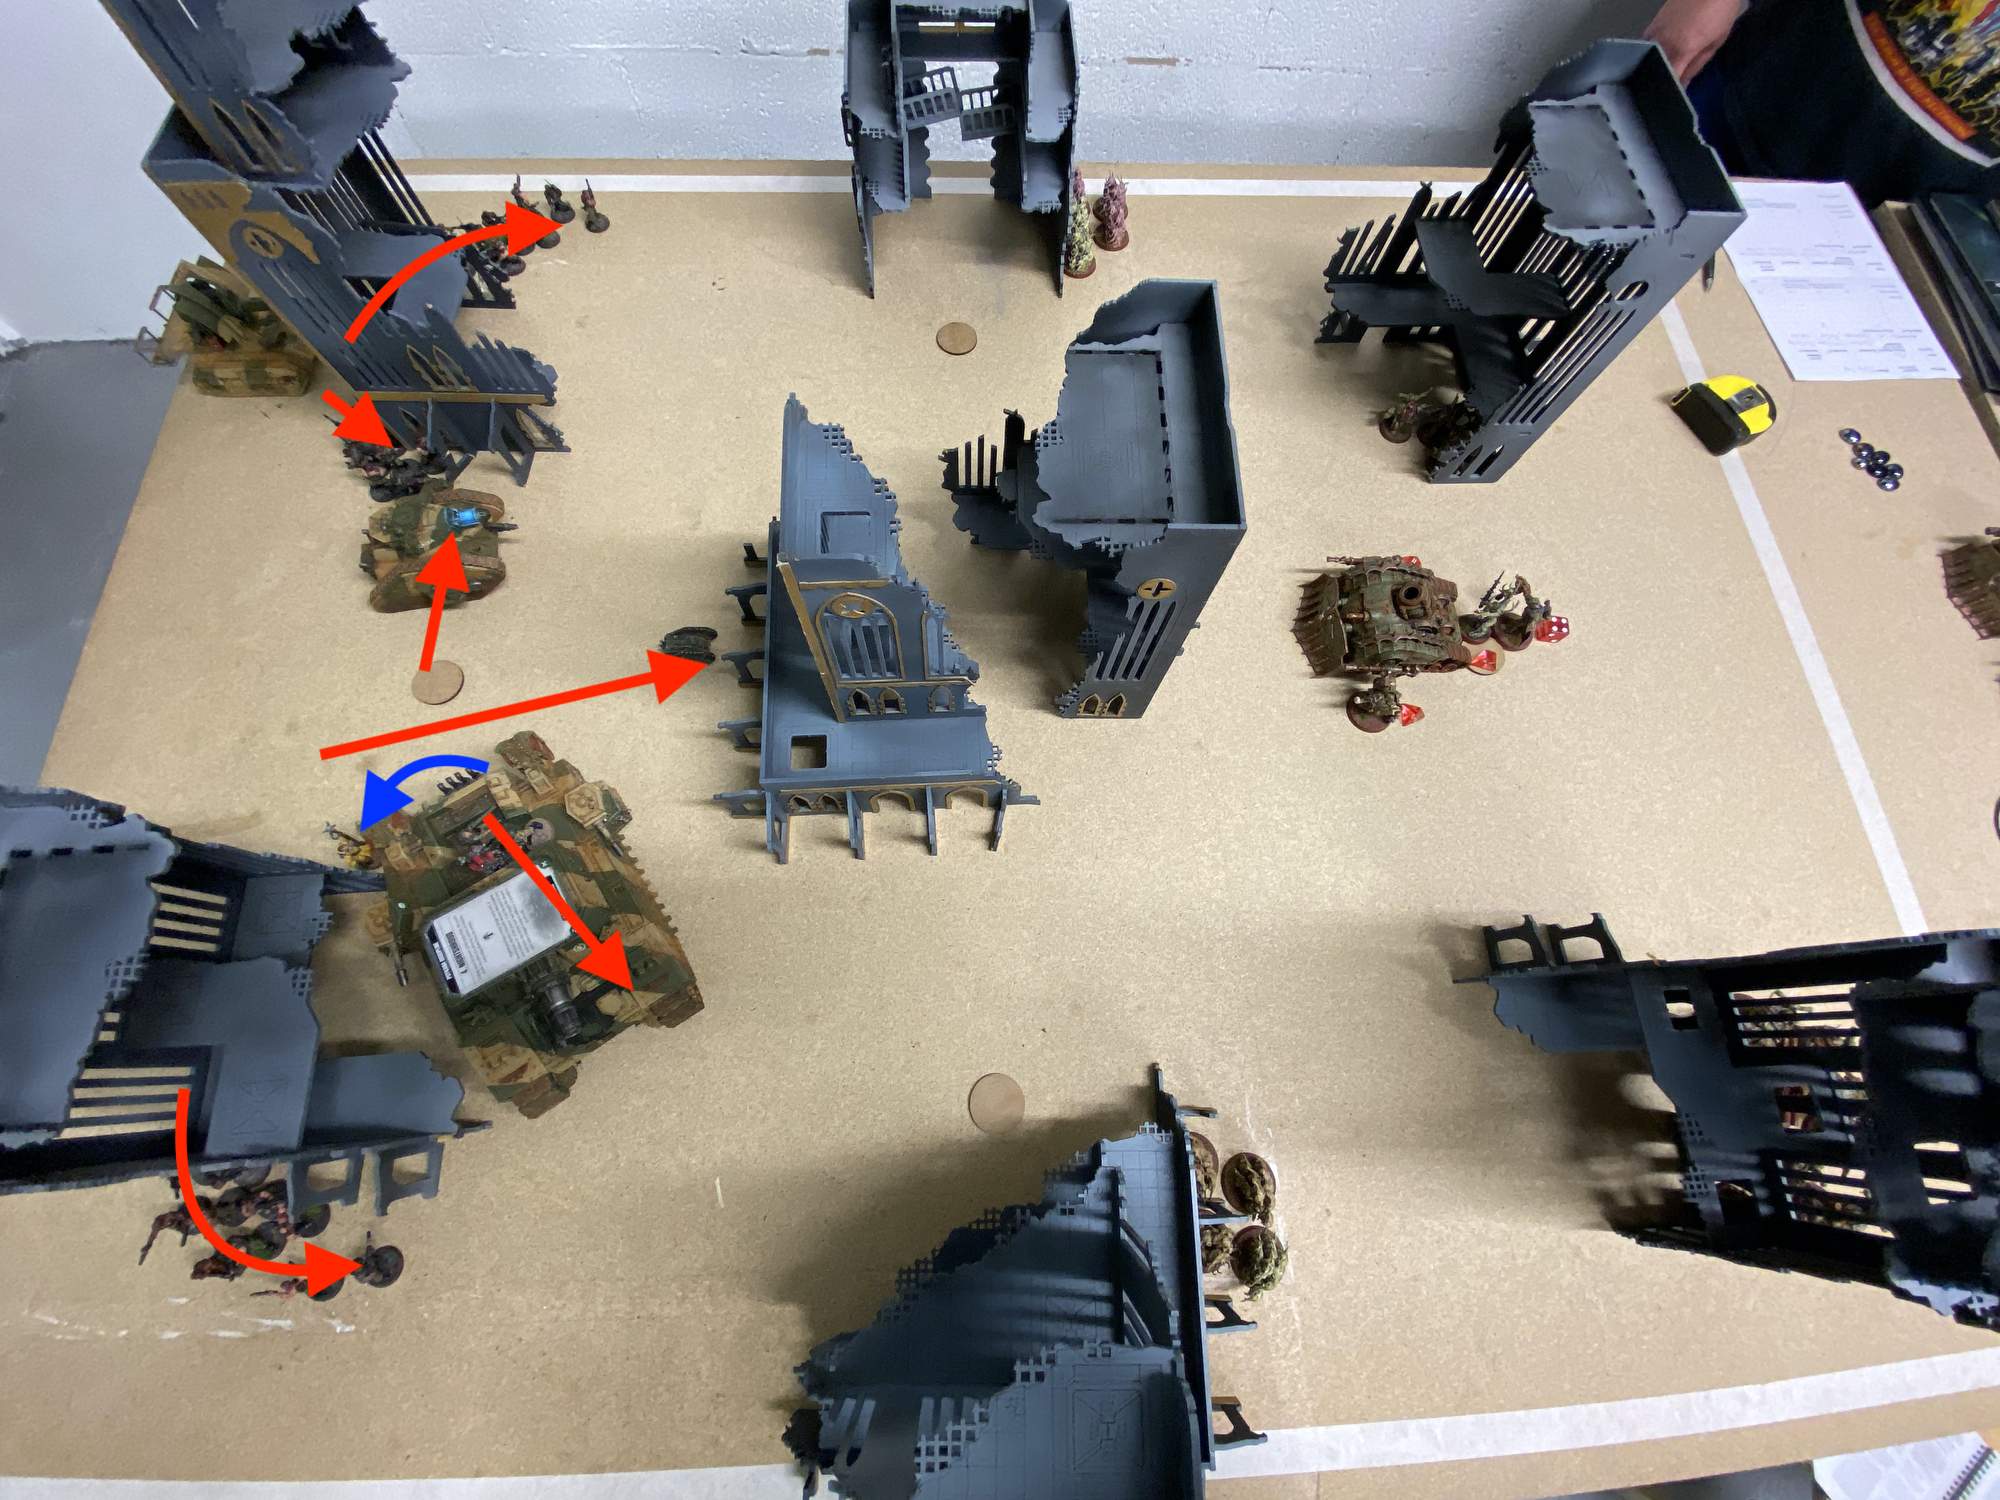
With my Jury-RIgged Repairs and Tech-Priest, I just managed to get the Doomhammer back to its top tier! The Nurglings were still camped on the two central objectives so I only received 5VP for having one objective for the Primary.
My shooting was less effective this turn and the Doomhammer plus its Veteran occupants failed to finish off the final PBC. It even failed to finish it off on the charge, but during the charge, it was knocked back down to its middle tier, which took it from nice to six attacks on the charge. I did use Crush Them though for hitting on a 2+.
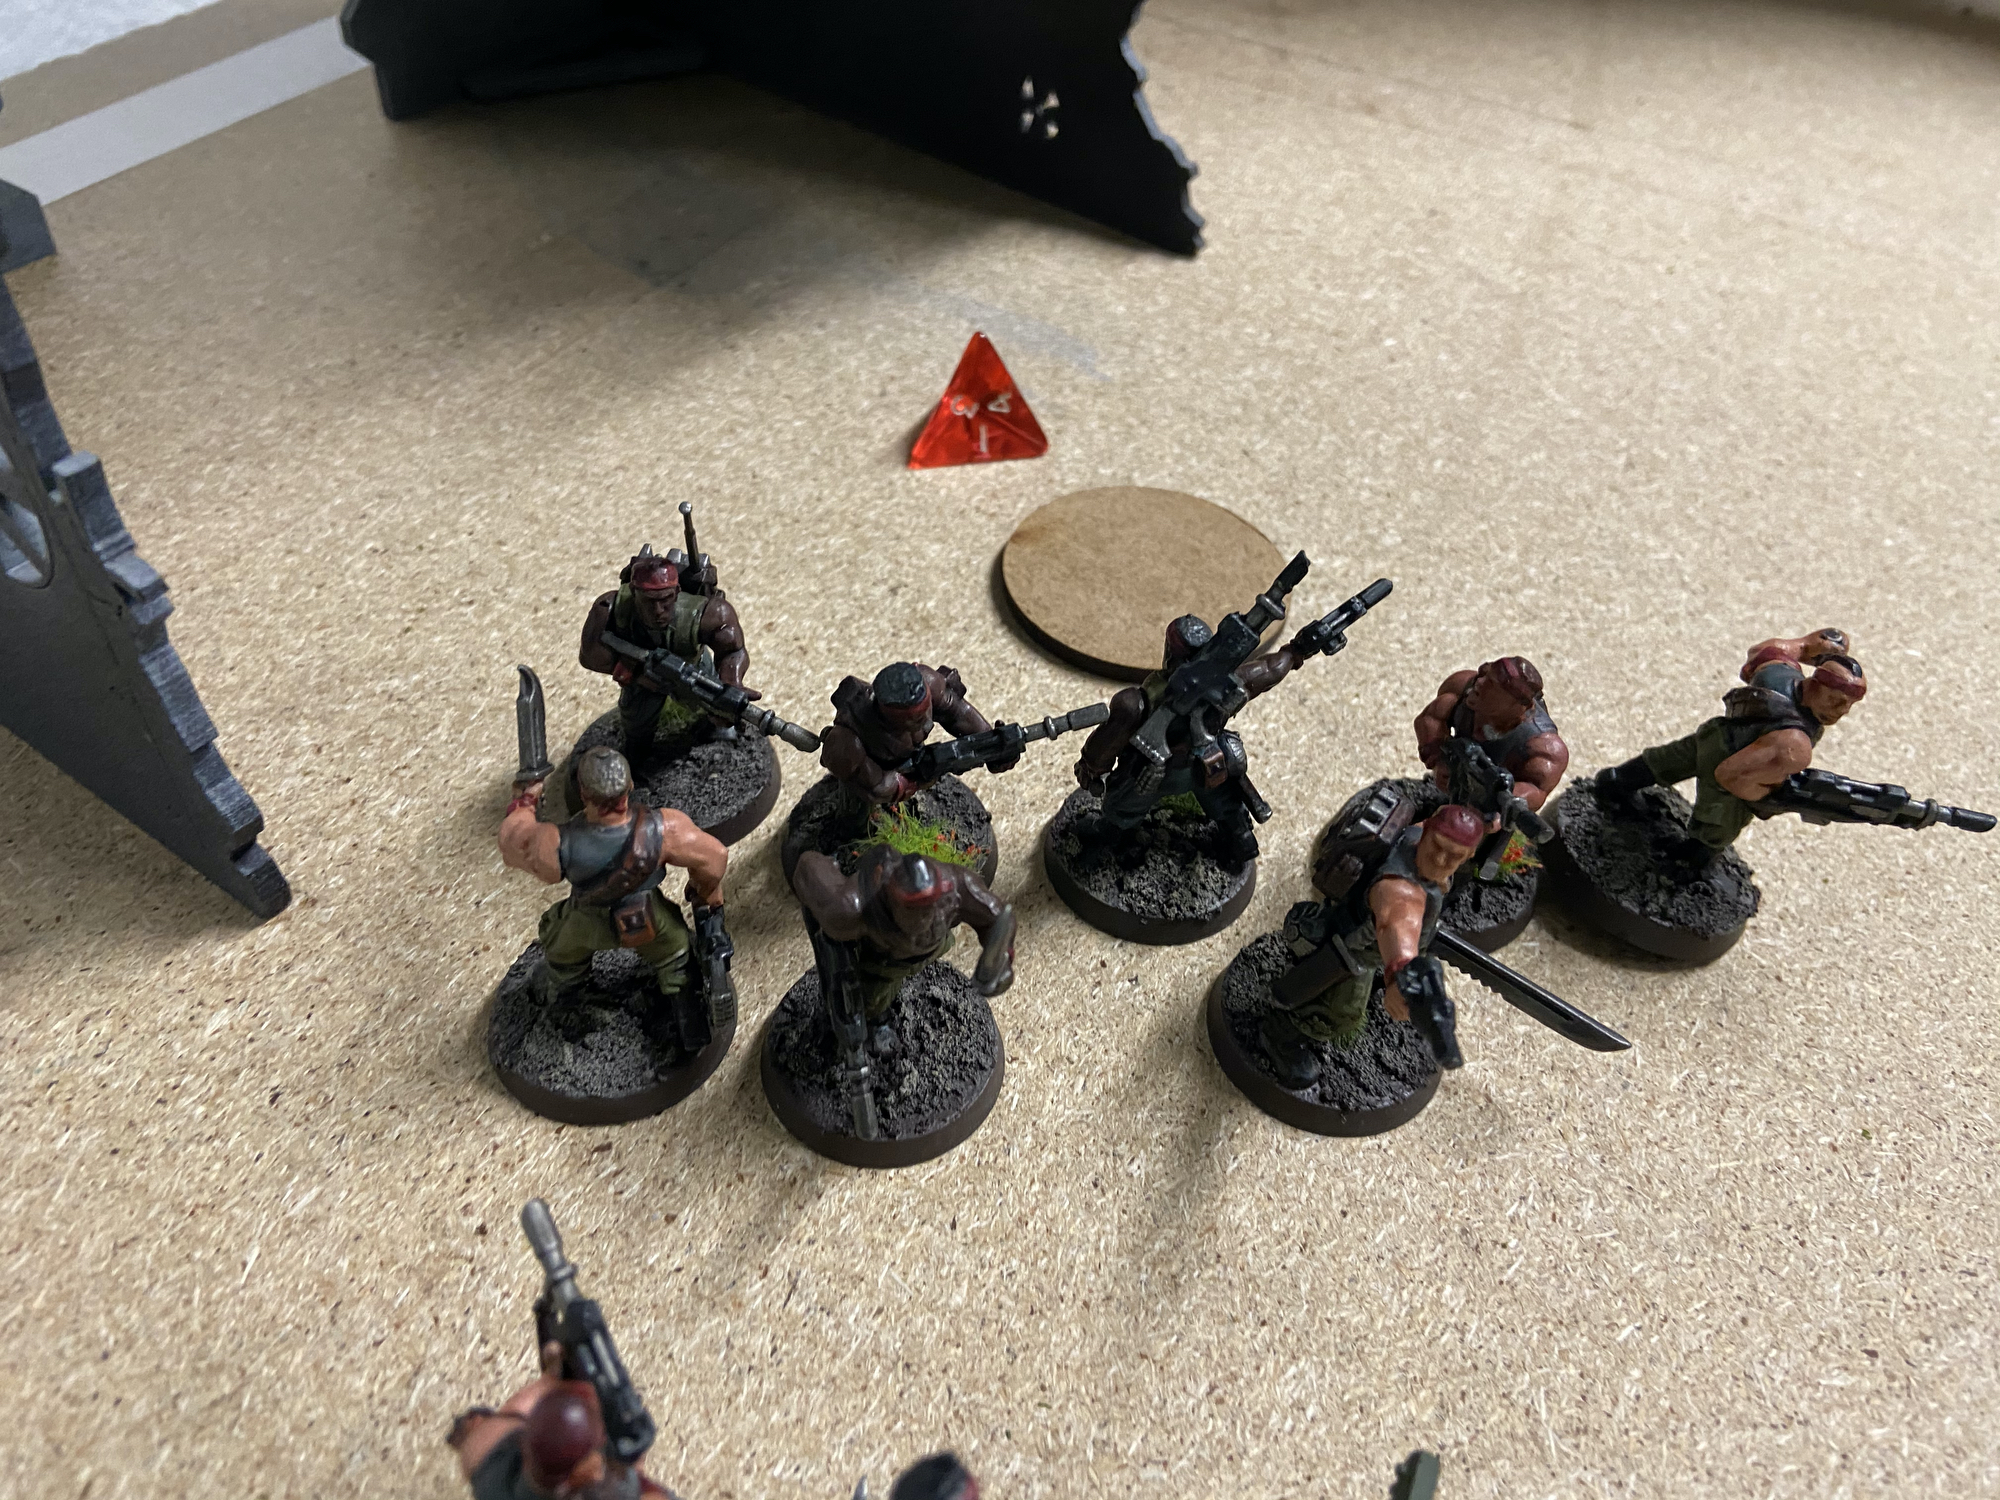
I had moved up my Infantry again this turn to try to take or contest the objectives from the Nurglings. Which I did manage to do! On both of the central objectives. Some heavy Lasgun fire and grenades saw to the Nurglings on the left side – only two remained. I had similar luck on the near side too and only two remained there.
If you can use First Rank Fire, Second Rank Fire and you’re within range for a grenade throw then the Sergeant should throw the grenade. His Laspistol does not benefit from FRFSRF, but a grenade should get more than the one-shot the Laspistol offers. Taking these objectives removed Primary VP from the Death Guard, but I would have to survive on them to get the Primary VPs next battle round.
The PBC I charged withdrew and the Doomhammer got shot up again. It died this turn and went off in a massive 8″ explosion causing D6 Mortal Wounds to a lot of units. This explosion finished off the PBC, which did not explode and it also removed one of my Cyclops Demolition Vehicles. I lost the Astropath too, plus a few Guardsmen and the Tech-Priest lost two wounds. Three out of the four remaining Death Guard characters were now on one wound each.
With the Doomhammer gone the Veterans were now exposed and many died from incoming Plasma and Bolter fire from the Plague Marines. I lost both Command Squads and a few Veterans from the bigger squad.
I certainly did not get Grind Them Down this turn.
But I did survive on the objectives, despite charges from the Nurglings and no Nurglings came back to life!
| Attacker | Mark (Death Guard) | |||
| Primary Objective Take & Hold | Secondary 1 Raise the Banners | Secondary 2 Vital Ground | Secondary 3 Thin Their Ranks | |
| 1 | 0 | 0 | 0 | 0 |
| 2 | 5 | 1 | 0 | 0 |
| Defender | Jake (Astra Militarum) | |||
| Primary Objective Take & Hold | Secondary 1 Bring it Down | Secondary 2 Grind Them Down | Secondary 3 Engage On All Fronts | |
| 1 | 0 | 0 | 3 | 0 |
| 2 | 5 | 0 | 0 | 0 |
-

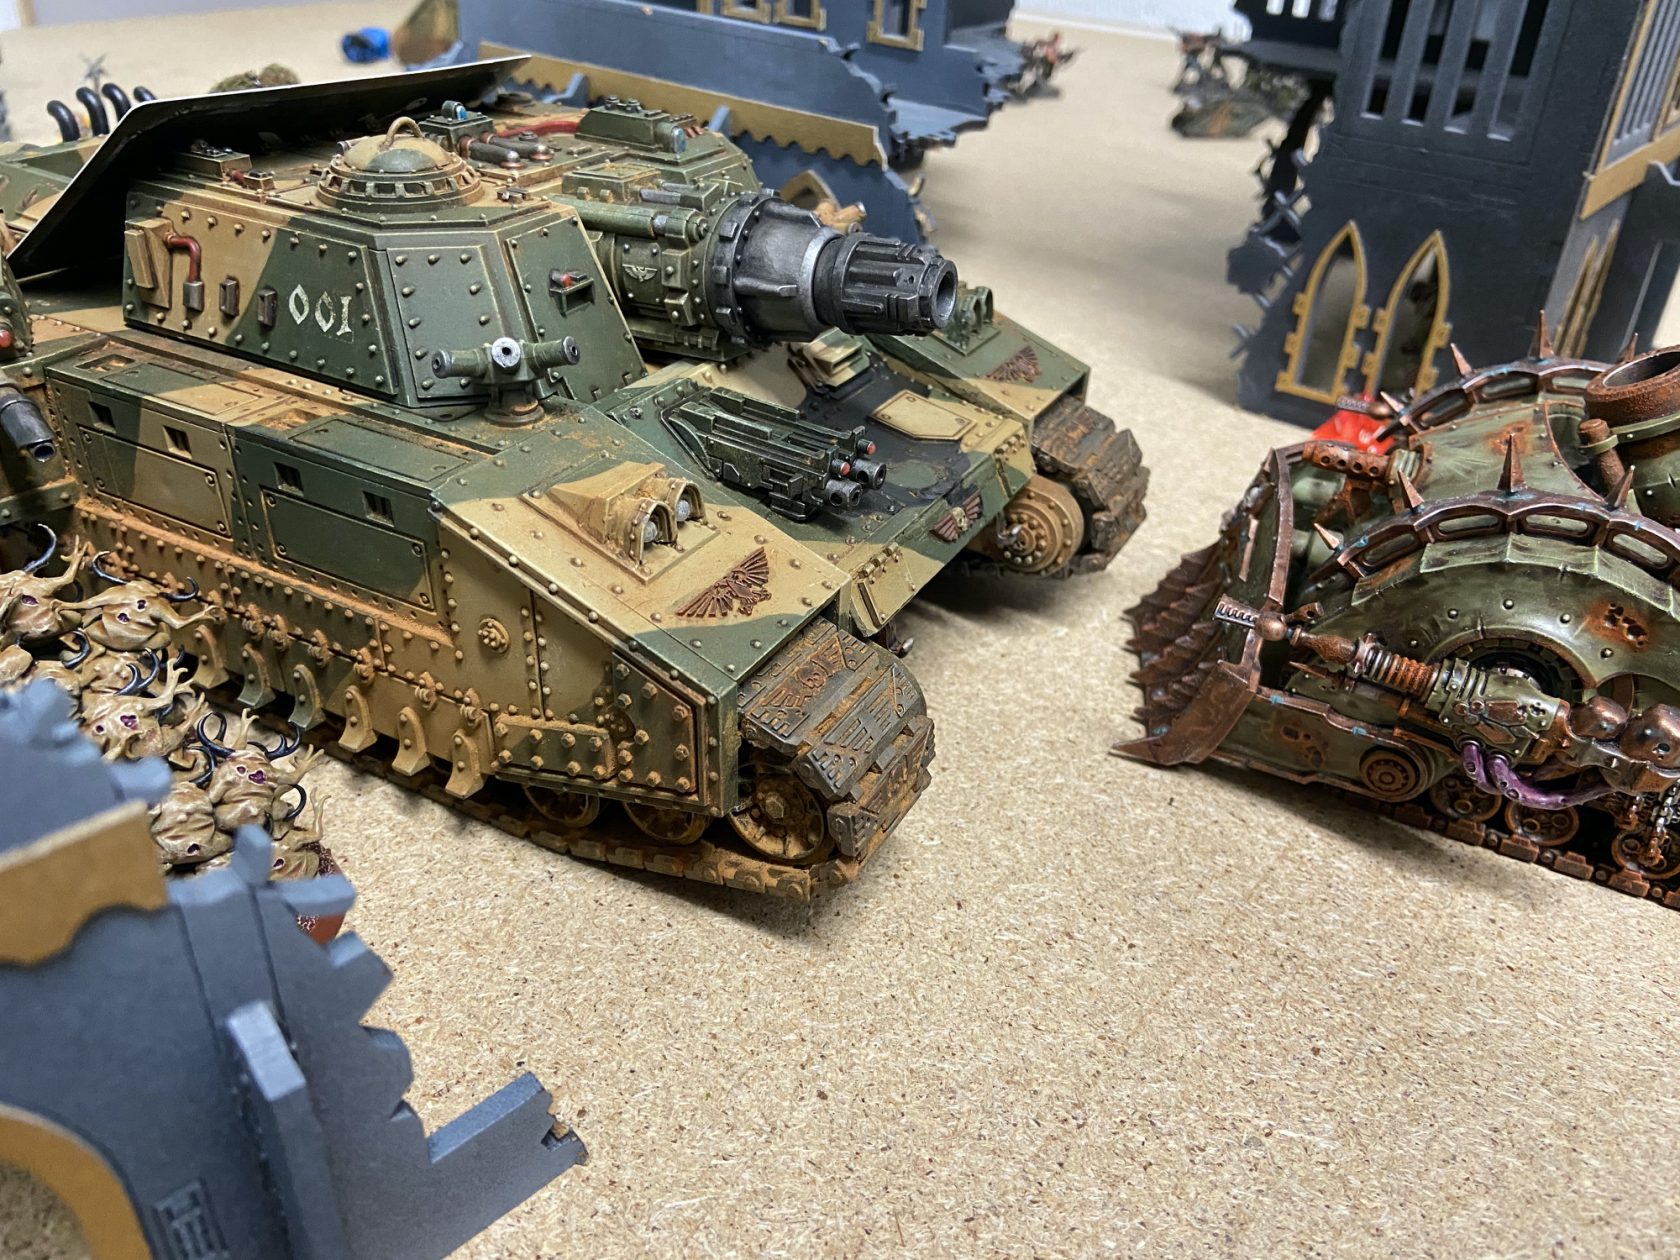
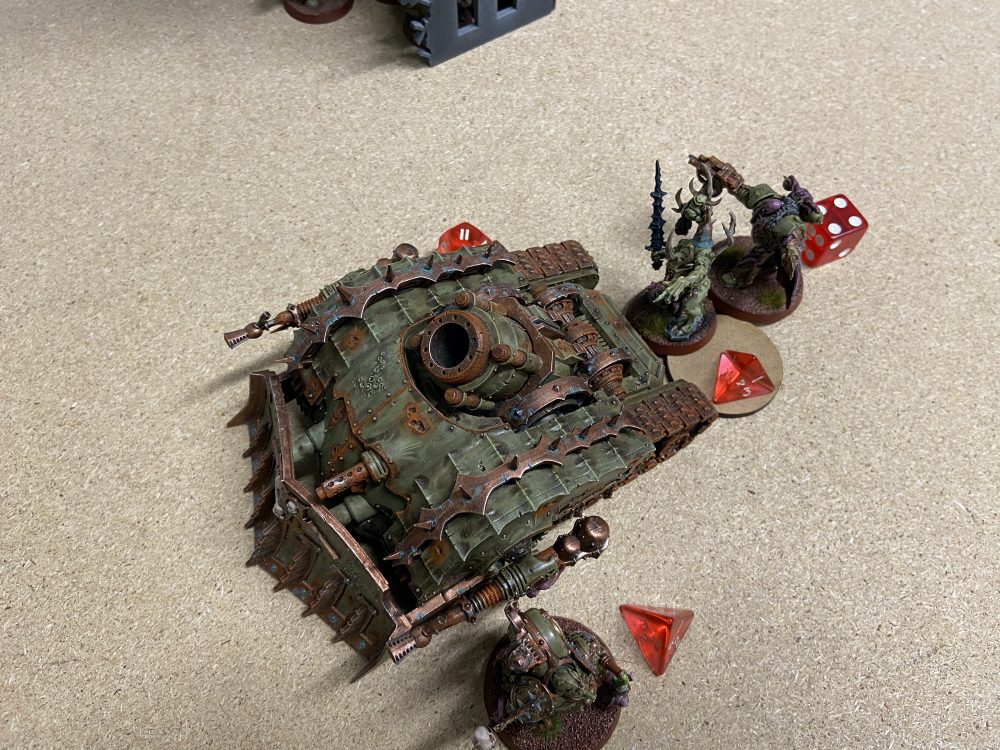
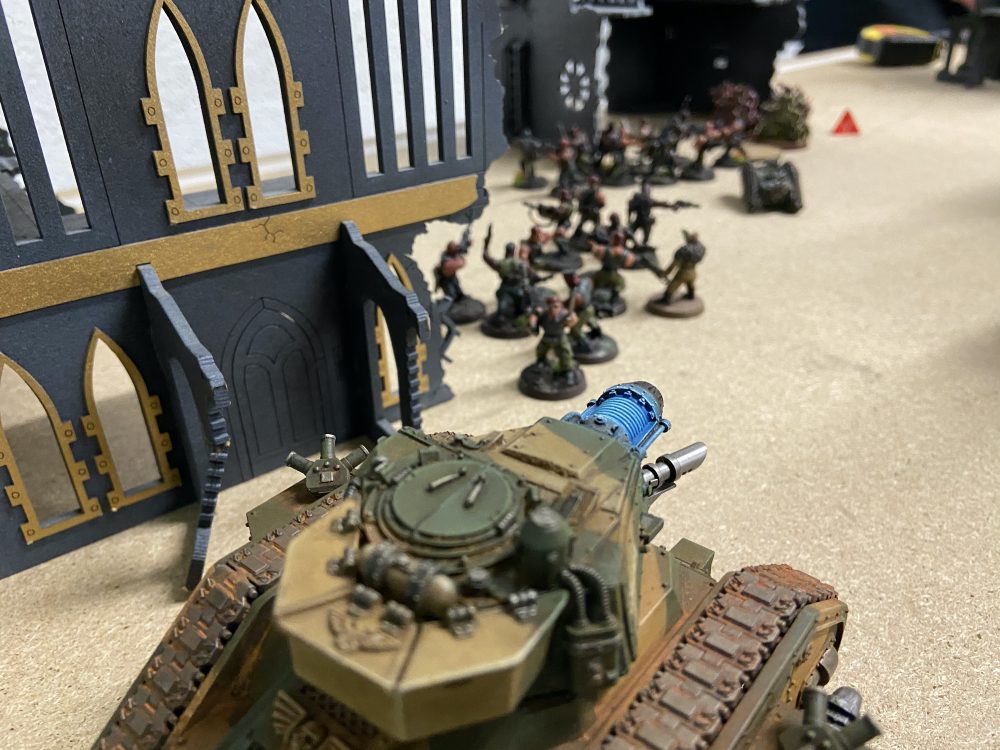
- The Doomhammer and PBC face off

-
- The far objective

-
- The far objective, but zoomed out more

-
- The far objective, but zoomed out more – again

-
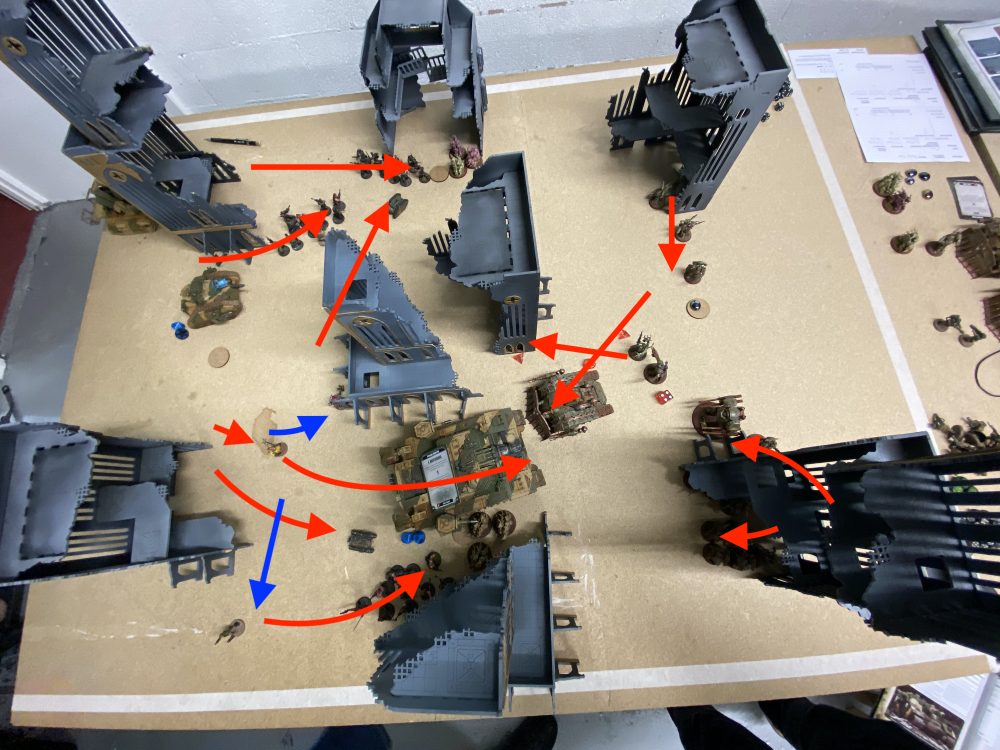
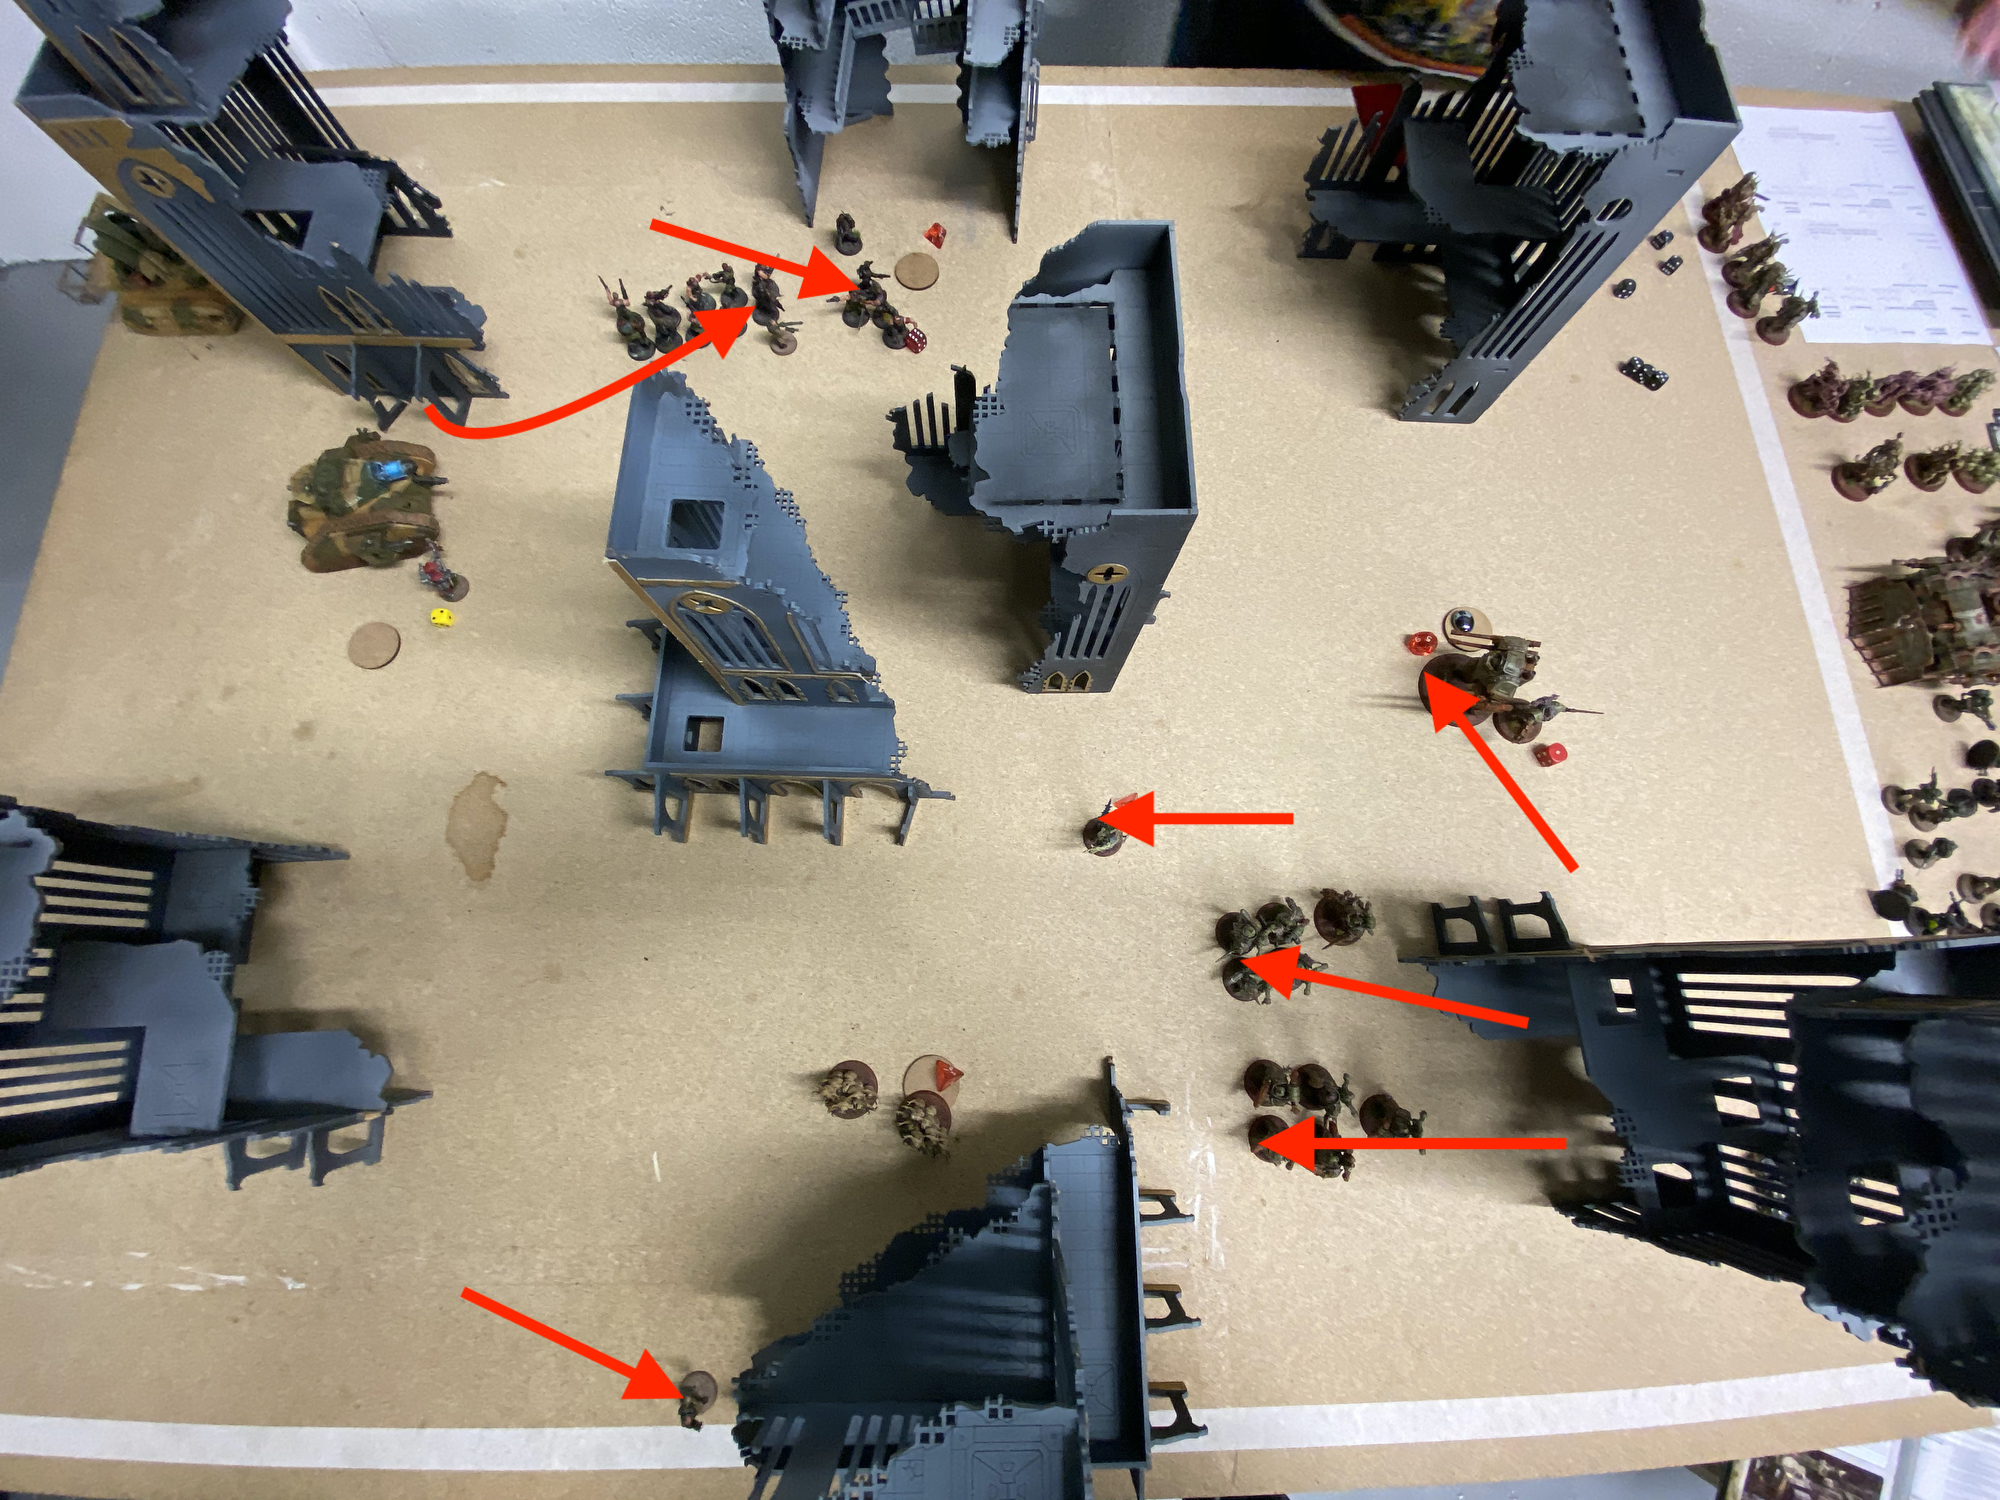
- Turn 2 Movements – blue is disembarking units

-
- The big hole left by the Doomhammer explosion

-
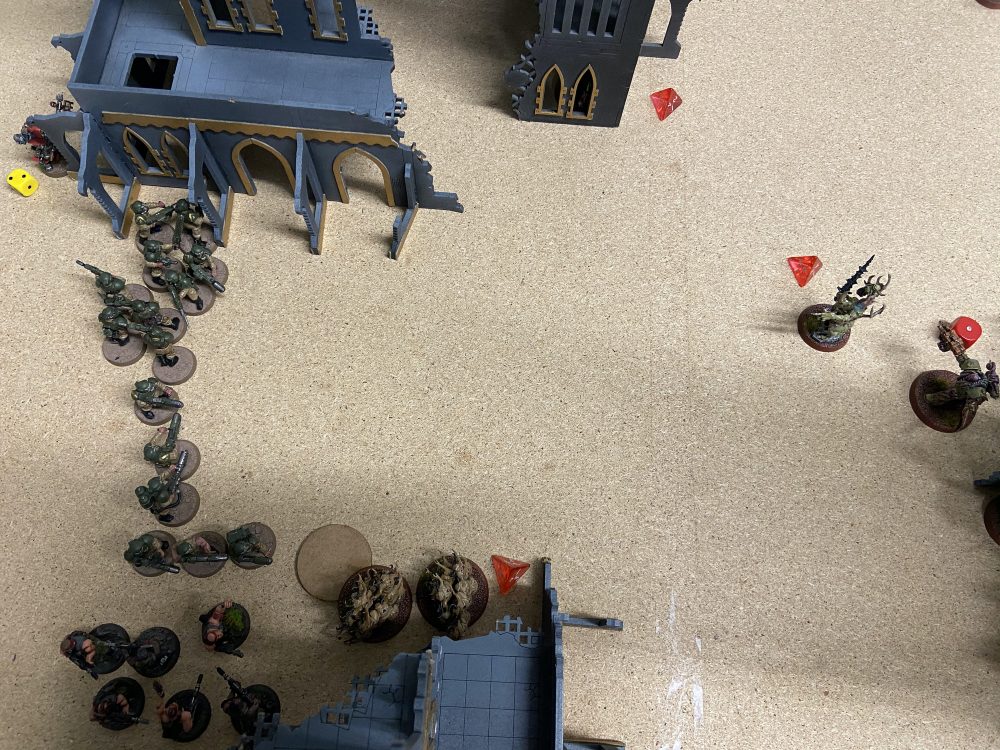
- Objective secured!

-
- Objective secured!

Battle Round 3
After taking the central objectives I score well on the Primary. But my main source of firepower was now gone. I finished off the Nurglings on the far objective and now had that well under control. My Guardsmen pulled back on the other way to allow the Basilisk to kill the Nurglings left there.
My Tank Commander put everything into the Plague Marines on the far side of the battlefield which was in cover and just holding the objective in the enemy deployment zone. It was overkill, 2D3 Plasma Cannons, 2D6 Turret Executioner Plasma shots and a Lascannon – but it got the job done 100%!
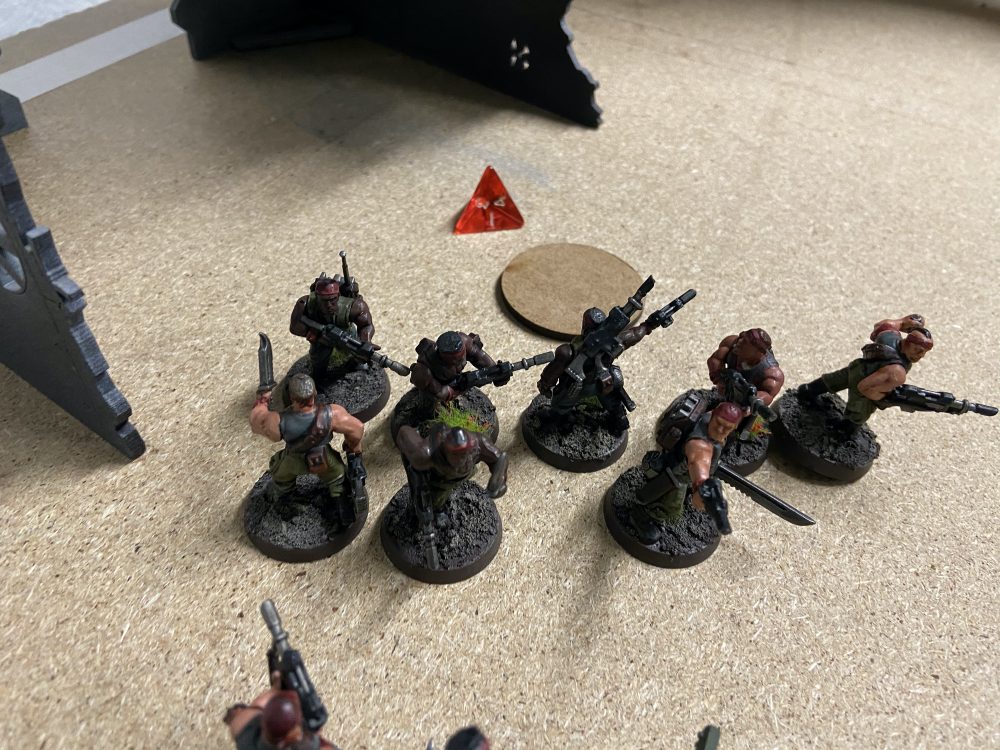
My position on the central objectives was a bit weak now, my Guardsmen had died and the enemy Plague Marines would make light work of what was left of them. But, more importantly, the Death Guard were not on the objectives. The Meltagun Veterans hiding in the central ruin killed the Foul Blightspawn who was now exposed and on one wound. Three Meltaguns was perhaps overkilling too! This was the first time I had killed one of these guys in a long time, if ever!
The Contemptor and Chaos Lord moved onto the objective in the enemy deployment zone and the Plague Marines moved up killing the Guardsmen on the near side of the battlefield. The Contemptor was also killing Guardsmen very effectively and the -2 to a unit’s Leadership per model killed was also hurting me.
I did get Grind Them Down this battle round though, thanks to killing the Plague Marines and Nurglings.
| Attacker | Mark (Death Guard) | |||
| Primary Objective Take & Hold | Secondary 1 Raise the Banners | Secondary 2 Vital Ground | Secondary 3 Thin Their Ranks | |
| 1 | 0 | 0 | 0 | 0 |
| 2 | 5 | 1 | 0 | 0 |
| 3 | 0 | 1 | 0 | 0 |
| Defender | Jake (Astra Militarum) | |||
| Primary Objective Take & Hold | Secondary 1 Bring it Down | Secondary 2 Grind Them Down | Secondary 3 Engage On All Fronts | |
| 1 | 0 | 0 | 3 | 0 |
| 2 | 5 | 0 | 0 | 0 |
| 3 | 15 | 0 | 3 | 0 |
-

- Turn 3 Movements
-
- Far-side objective secured
-
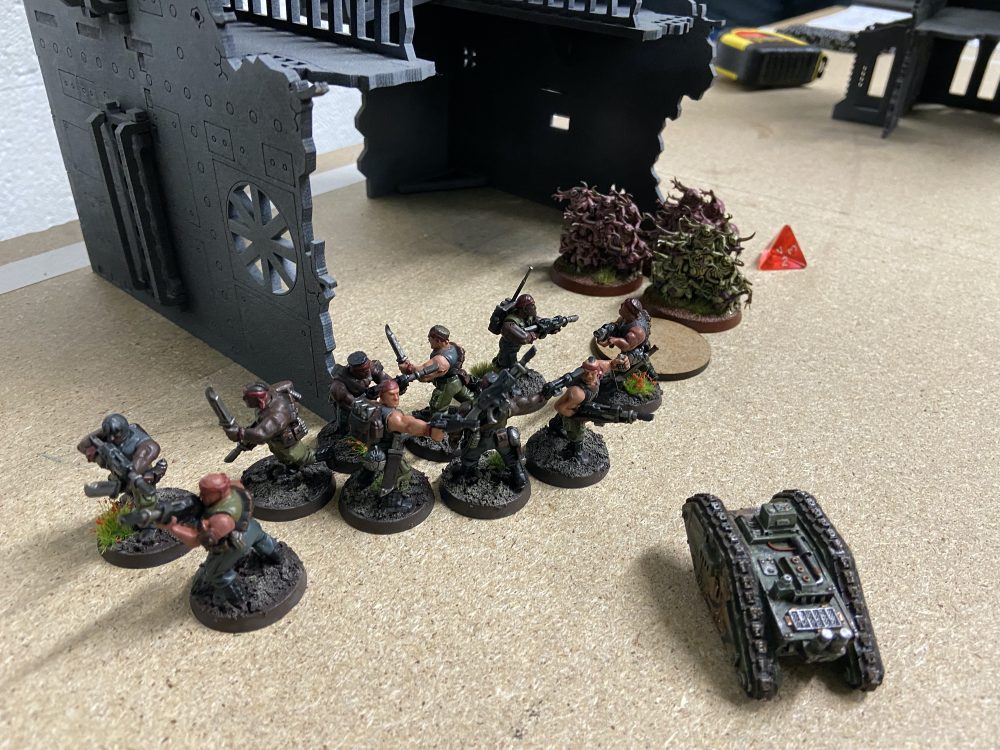
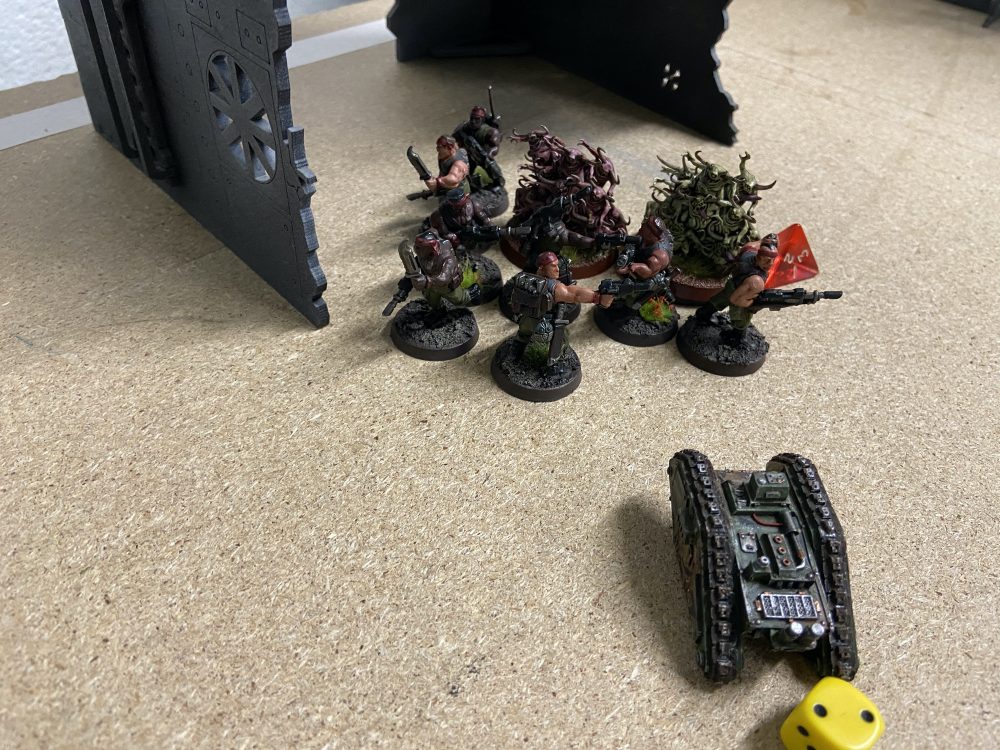
- Veterans hiding in the central ruin

-
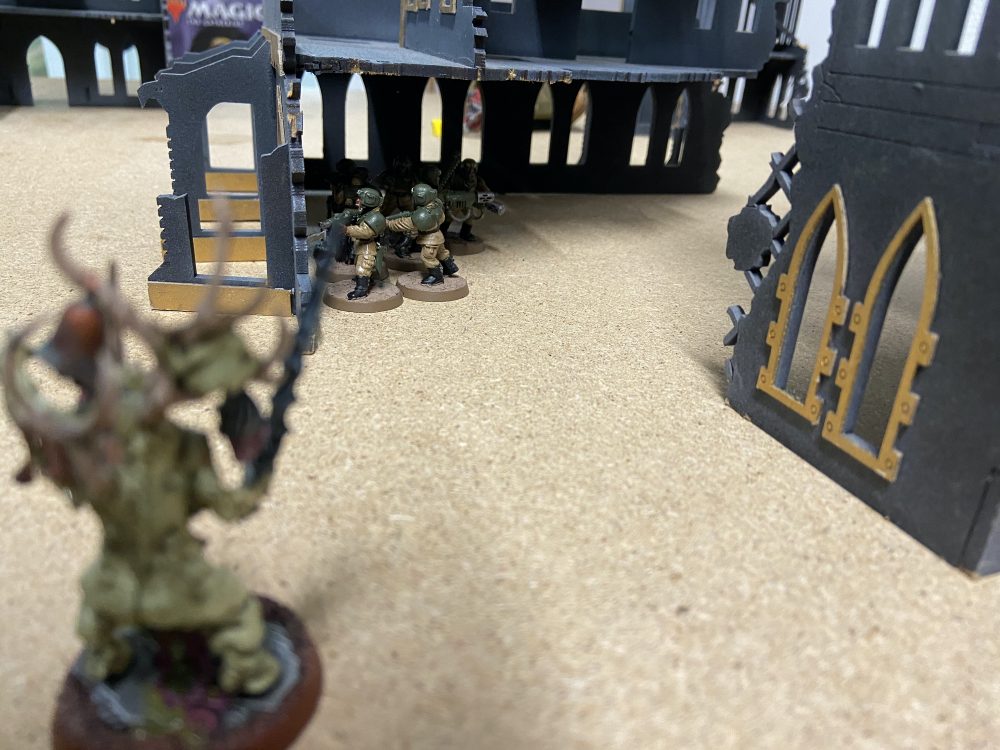
- Veterans hiding in the central ruin

Battle Round 4
I think the game was definitely over by this point as the Death Guard did not have a lot left and I was able to move Troops onto at least two objectives. Although we both had two objectives now so I got 10VP for the Primary. I was also scoring well for Bring It Down which is basically, kill vehicles. All three PBCs had gone and I just had the Contemptor to go.
To that end, I sent the last Cyclops towards the Contemptor and the Chaos Lord. They both were vapourised. The little Cyclops had spent the whole game moving and advancing up the battlefield, right into the enemy deployment zone!
| Attacker | Mark (Death Guard) | |||
| Primary Objective Take & Hold | Secondary 1 Raise the Banners | Secondary 2 Vital Ground | Secondary 3 Thin Their Ranks | |
| 1 | 0 | 0 | 0 | 0 |
| 2 | 5 | 1 | 0 | 0 |
| 3 | 0 | 1 | 0 | 0 |
| 4 | 0 | 1 | 0 | 0 |
| Defender | Jake (Astra Militarum) | |||
| Primary Objective Take & Hold | Secondary 1 Bring it Down | Secondary 2 Grind Them Down | Secondary 3 Engage On All Fronts | |
| 1 | 0 | 0 | 3 | 0 |
| 2 | 5 | 0 | 0 | 0 |
| 3 | 15 | 0 | 3 | 0 |
| 4 | 10 | 0 | 3 | 0 |
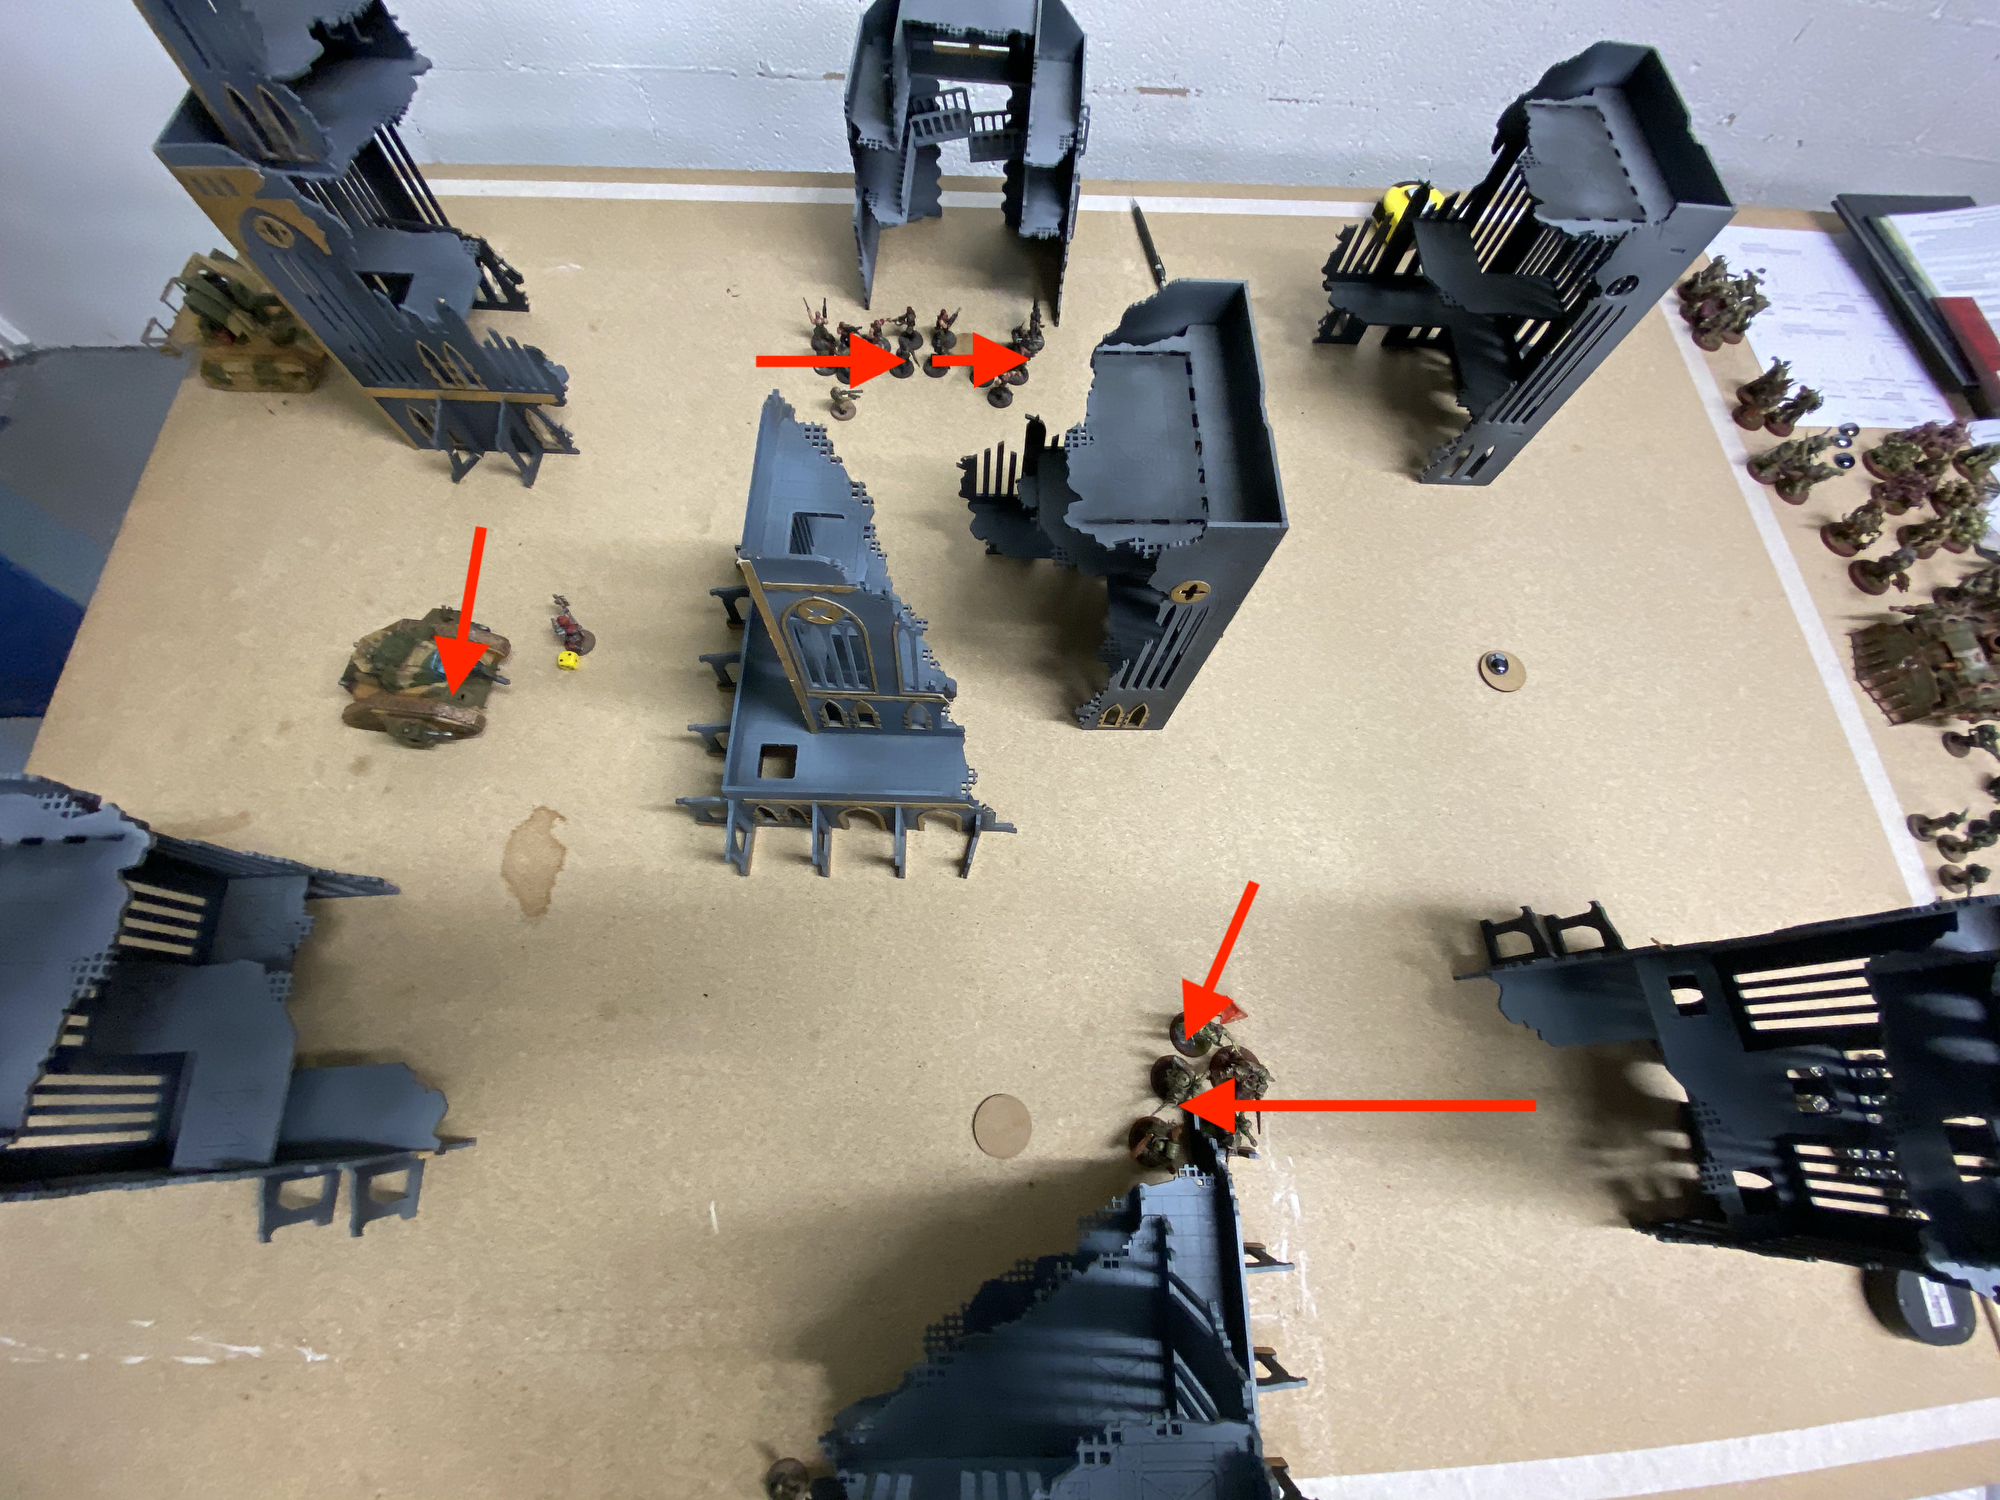 Turn 4 Movements
Battle Round 5
The game was up by this point and the Death Guard were beaten! They were not tabled, but it was close!
| Attacker | Mark (Death Guard) | |||
| Primary Objective Take & Hold | Secondary 1 Raise the Banners | Secondary 2 Vital Ground | Secondary 3 Thin Their Ranks | |
| 1 | 0 | 0 | 0 | 0 |
| 2 | 5 | 1 | 0 | 0 |
| 3 | 0 | 1 | 0 | 0 |
| 4 | 0 | 1 | 0 | 0 |
| 5 | 0 | 1 | 0 | 0 |
| Defender | Jake (Astra Militarum) | |||
| Primary Objective Take & Hold | Secondary 1 Bring it Down | Secondary 2 Grind Them Down | Secondary 3 Engage On All Fronts | |
| 1 | 0 | 0 | 3 | 0 |
| 2 | 5 | 0 | 0 | 0 |
| 3 | 10 | 0 | 3 | 0 |
| 4 | 15 | 0 | 3 | 0 |
| 5 | 15 | 0 | 3 | 0 |
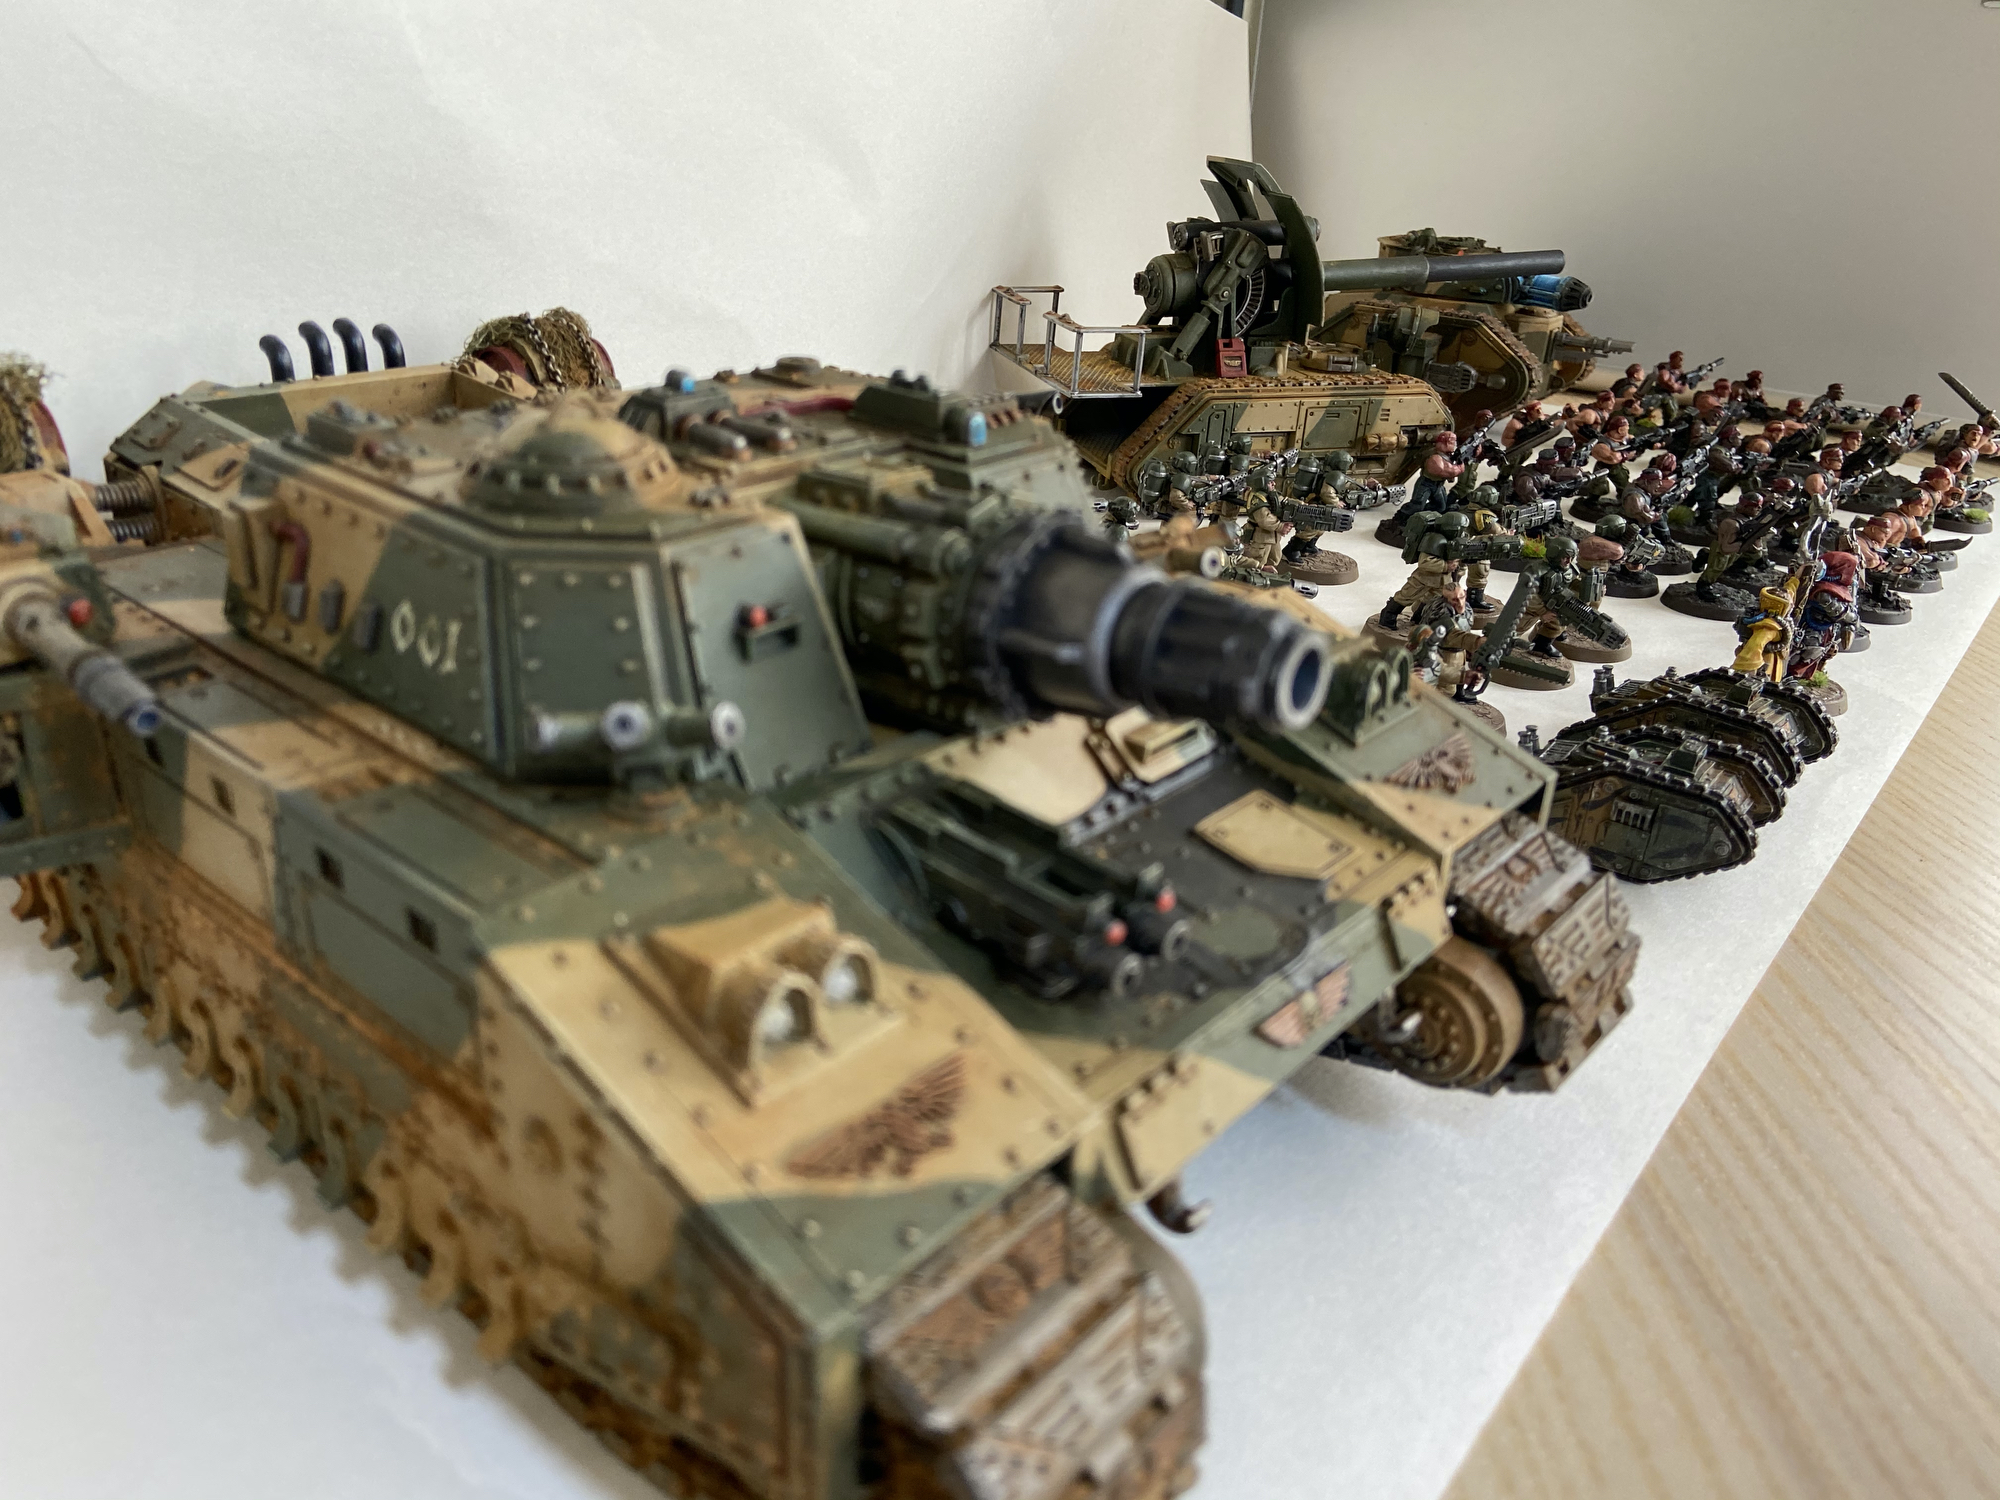
 Final overview
Doomhammer & Astra Militarum Summary
Mark has always said that the Death Guard struggle against Toughness 8 Super Heavies and this was the first time I had fielded such a model against them. It has given me my most decisive victory against them.
Even though it died in turn 2 and only accounted for one outright kill of a single Plagueburst Crawler, it did take up nearly two entires turns of shooting from the Death Guard. This meant my infantry survived longer than they usually do, and certainly longer than they did in the last game.
I am not sure how I feel about taking the biggest and badest toy I can field to beat them. But, with 4++ Saves, on Toughness 8 PBCs, what else is a man to do?
Mark’s bat rep is here – interesting post-game thoughts from him…
Final Score Sheet
| Battle Size | Incursion | Mission: Battle Lines | ||
|---|---|---|---|---|
| Attacker | Mark (Death Guard) | |||
| Battle Round | Victory Points Scored (Attacker) | |||
| Primary Objective Take & Hold | Secondary 1 Raise the Banners | Secondary 2 Vital Ground | Secondary 3 Thin Their Ranks | |
| 1 | 0 | 0 | 0 | 0 |
| 2 | 5 | 1 | 0 | 0 |
| 3 | 0 | 1 | 0 | 0 |
| 4 | 0 | 1 | 0 | 0 |
| 5 | 0 | 1 | 0 | 0 |
| End Game | 0 | 2 | 0 | 0 |
| Objective Totals | 5/45 | 6/15 | 0/15 | 4/15 |
| Battle Ready Score | The army was Battle Ready = +10 victory points | |||
| Victory Points Total | 25/100 | |||
| Defender | Jake (Astra Militarum) | |||
| Battle Round | Victory Points Scored (Defender) | |||
| Primary Objective Take & Hold | Secondary 1 Bring it Down | Secondary 2 Grind Them Down | Secondary 3 Engage On All Fronts | |
| 1 | 0 | 0 | 3 | 0 |
| 2 | 5 | 0 | 0 | 0 |
| 3 | 15 | 0 | 3 | 0 |
| 4 | 10 | 0 | 3 | 0 |
| 5 | 15 | 0 | 3 | 0 |
| End Game | 0 | 0 | 0 | 0 |
| Objective Totals | 45/45 | 11/15 | 12/15 | 0/15 |
| Battle Ready Score | The army was Battle Ready = +10 victory points | |||
| Victory Points Total | 78/100 | |||
Final Score
Astra Militarum – 78
Death Guard – 25
Astra Militarum Victory
 Doomhammer