
150 Astra Militarum Infantry vs Eldar
With 150 infantry, can I take on this low model count Eldar force...
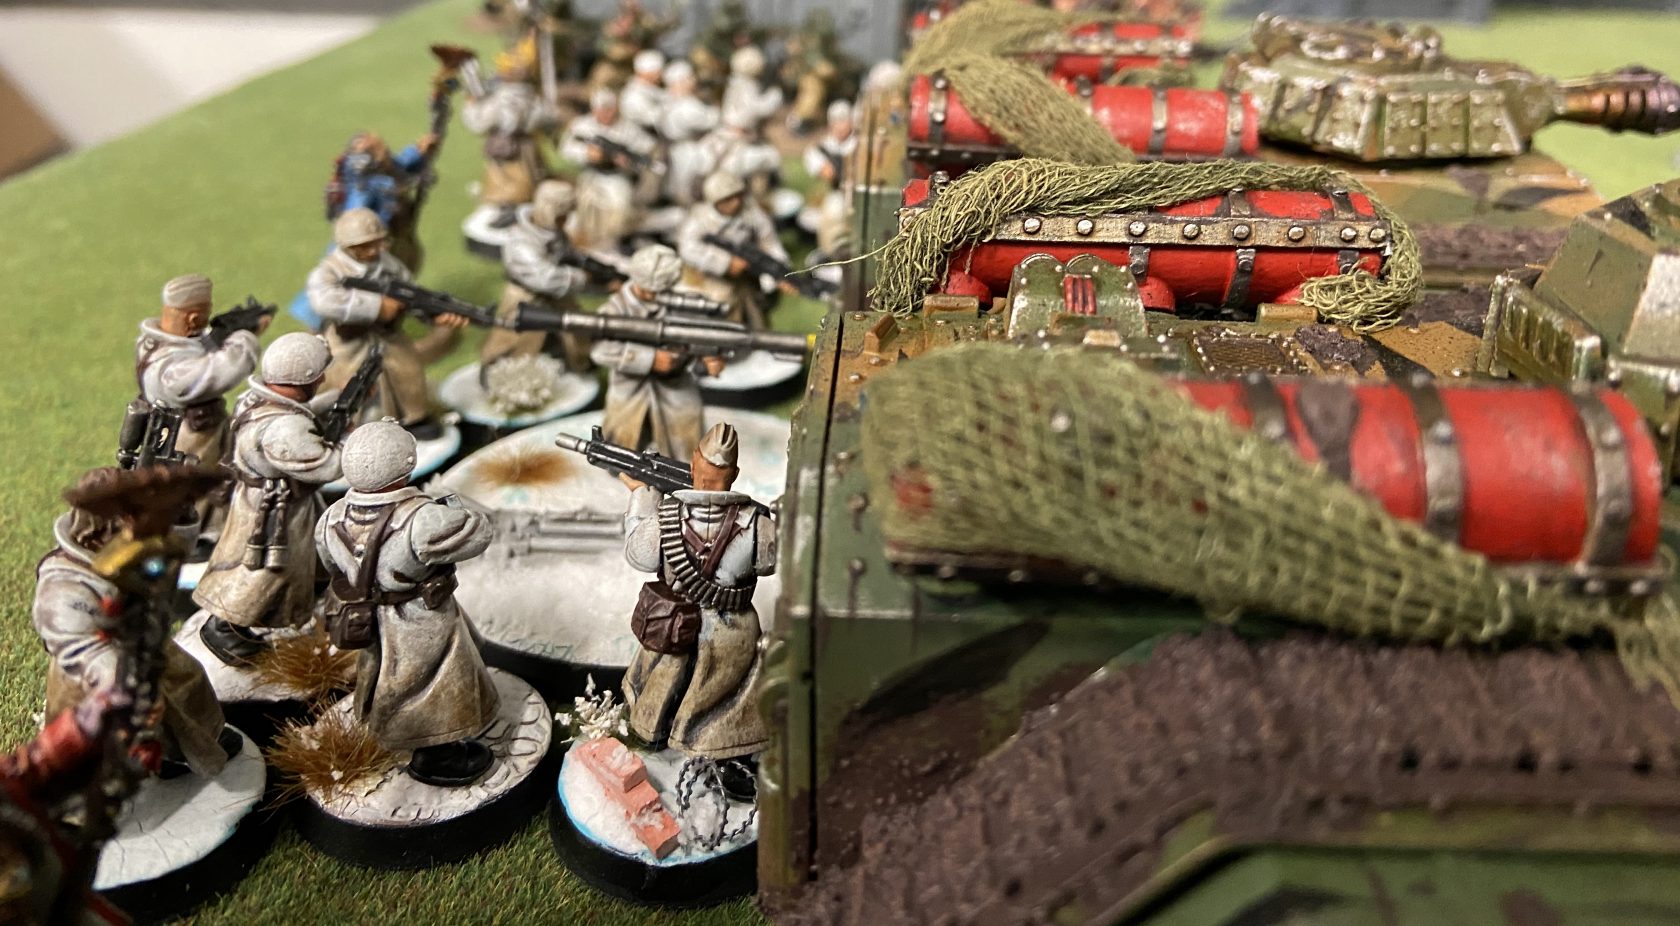
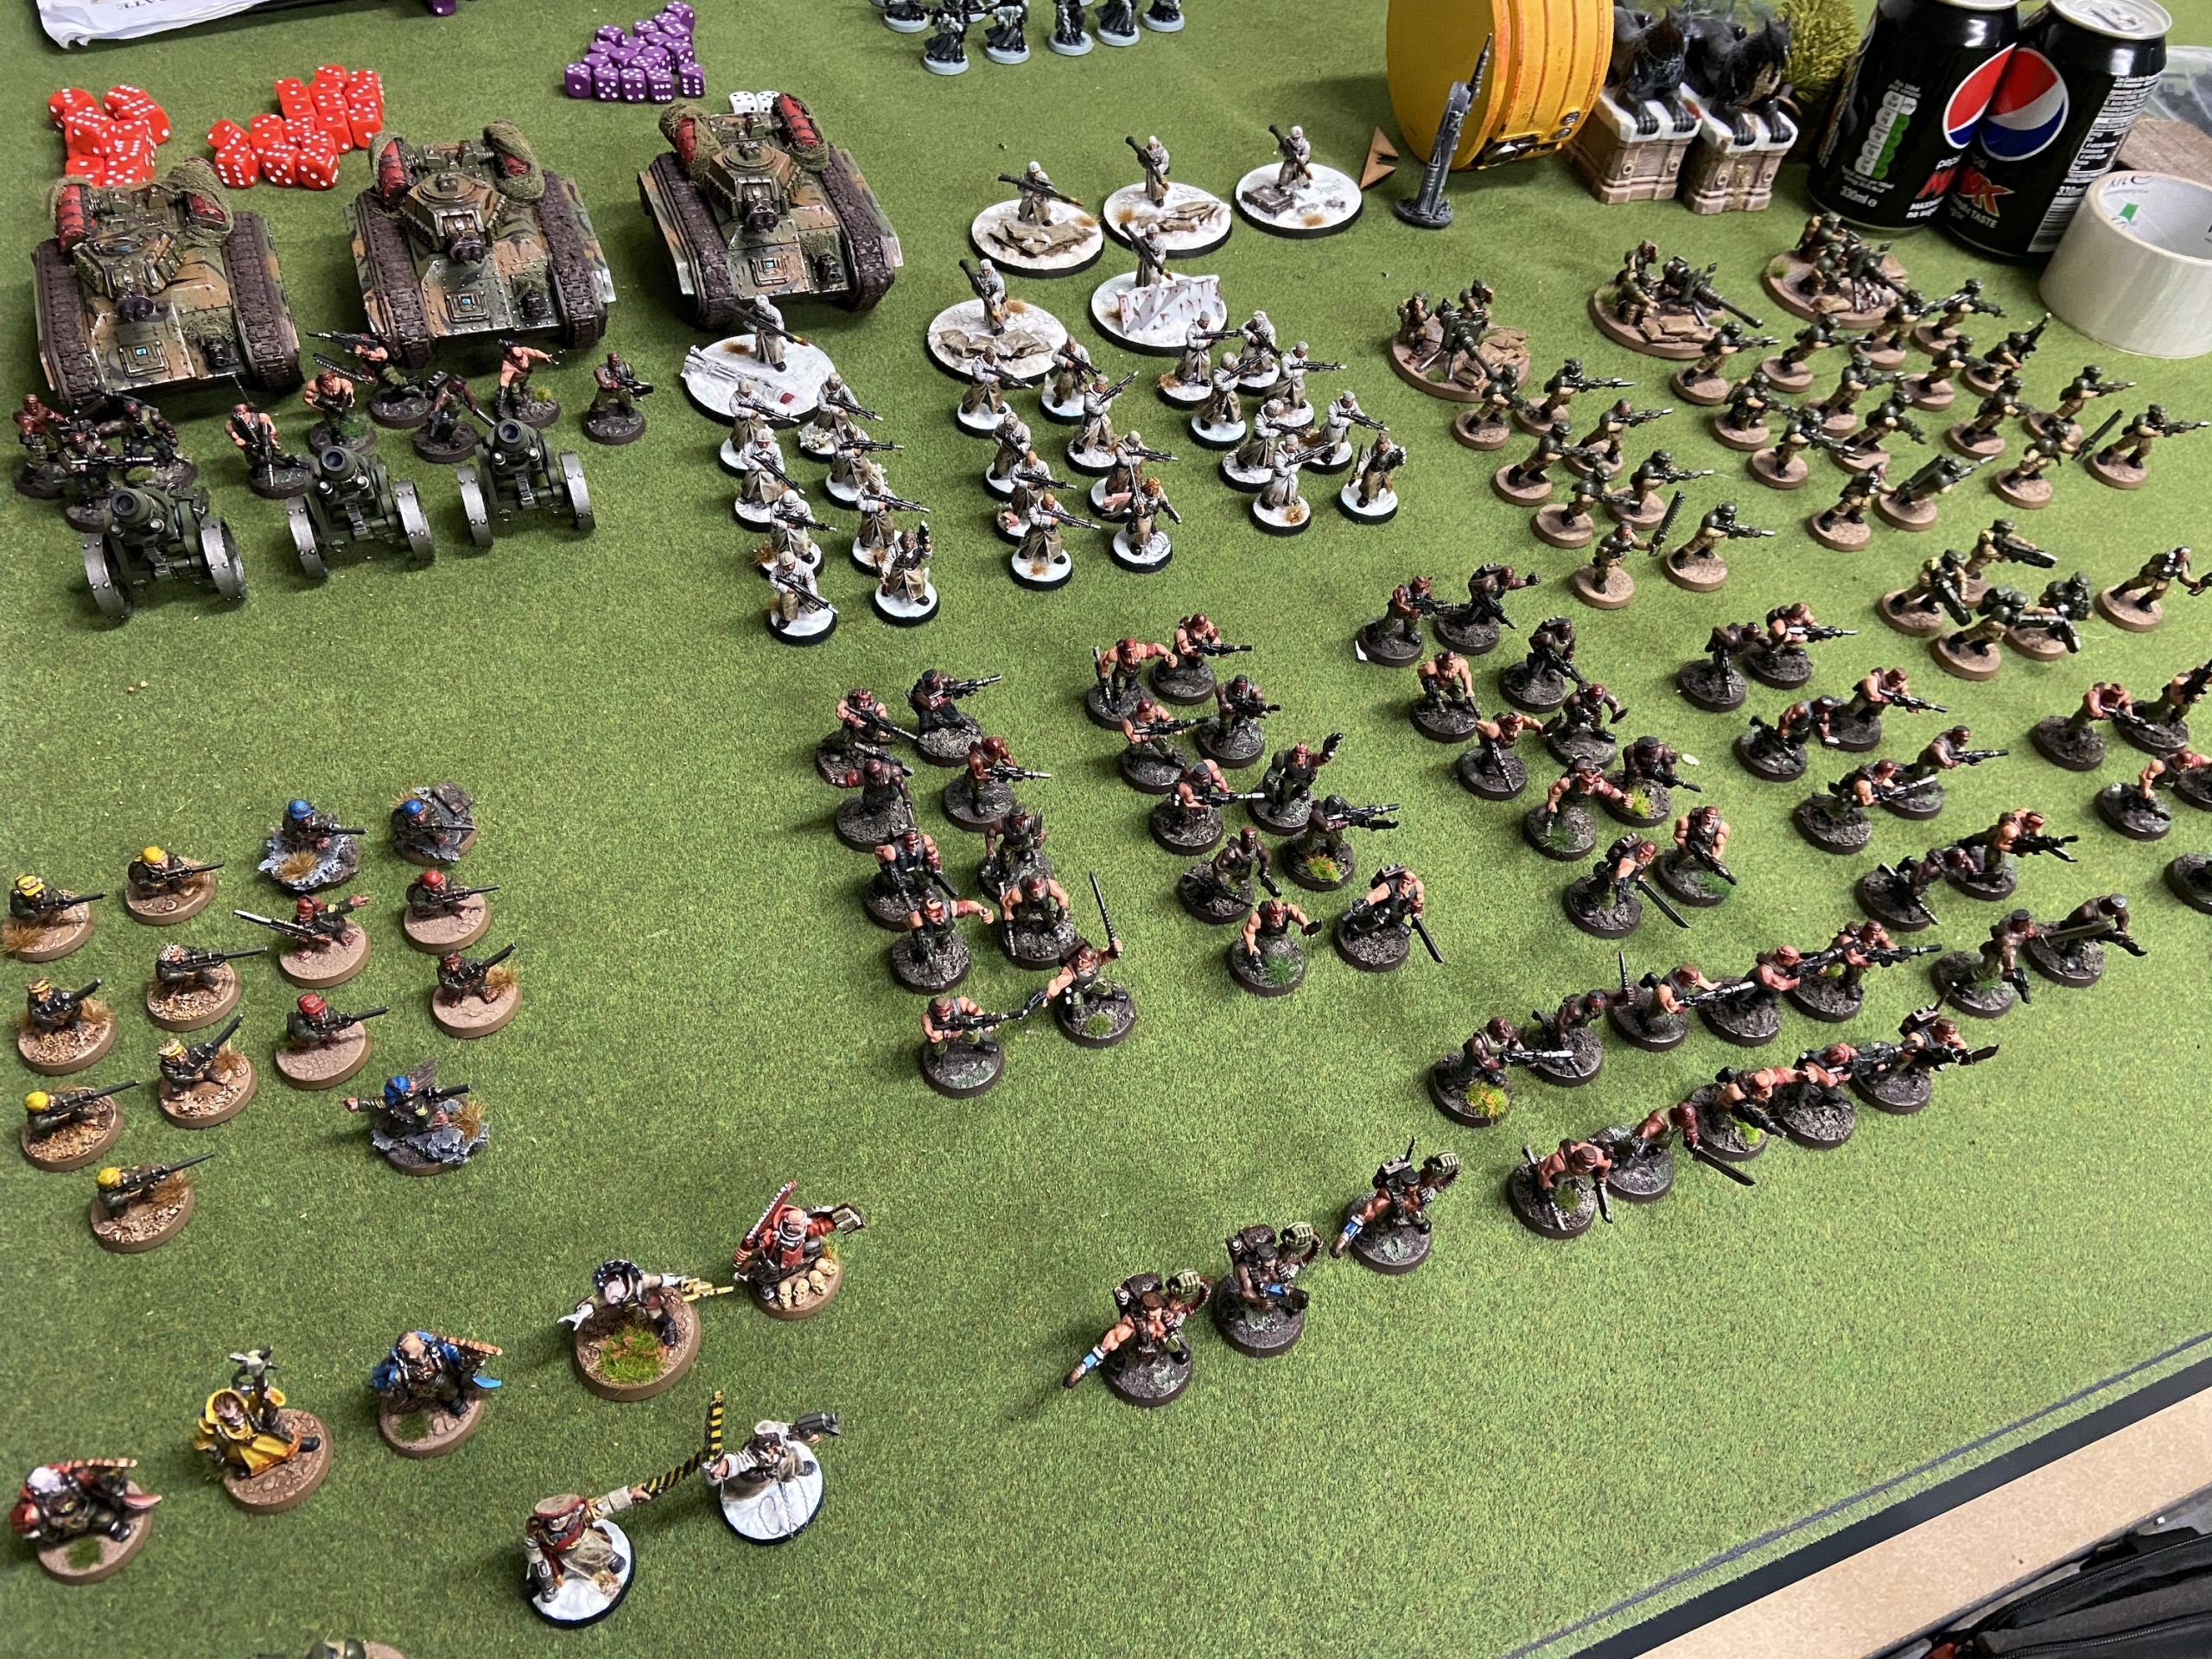
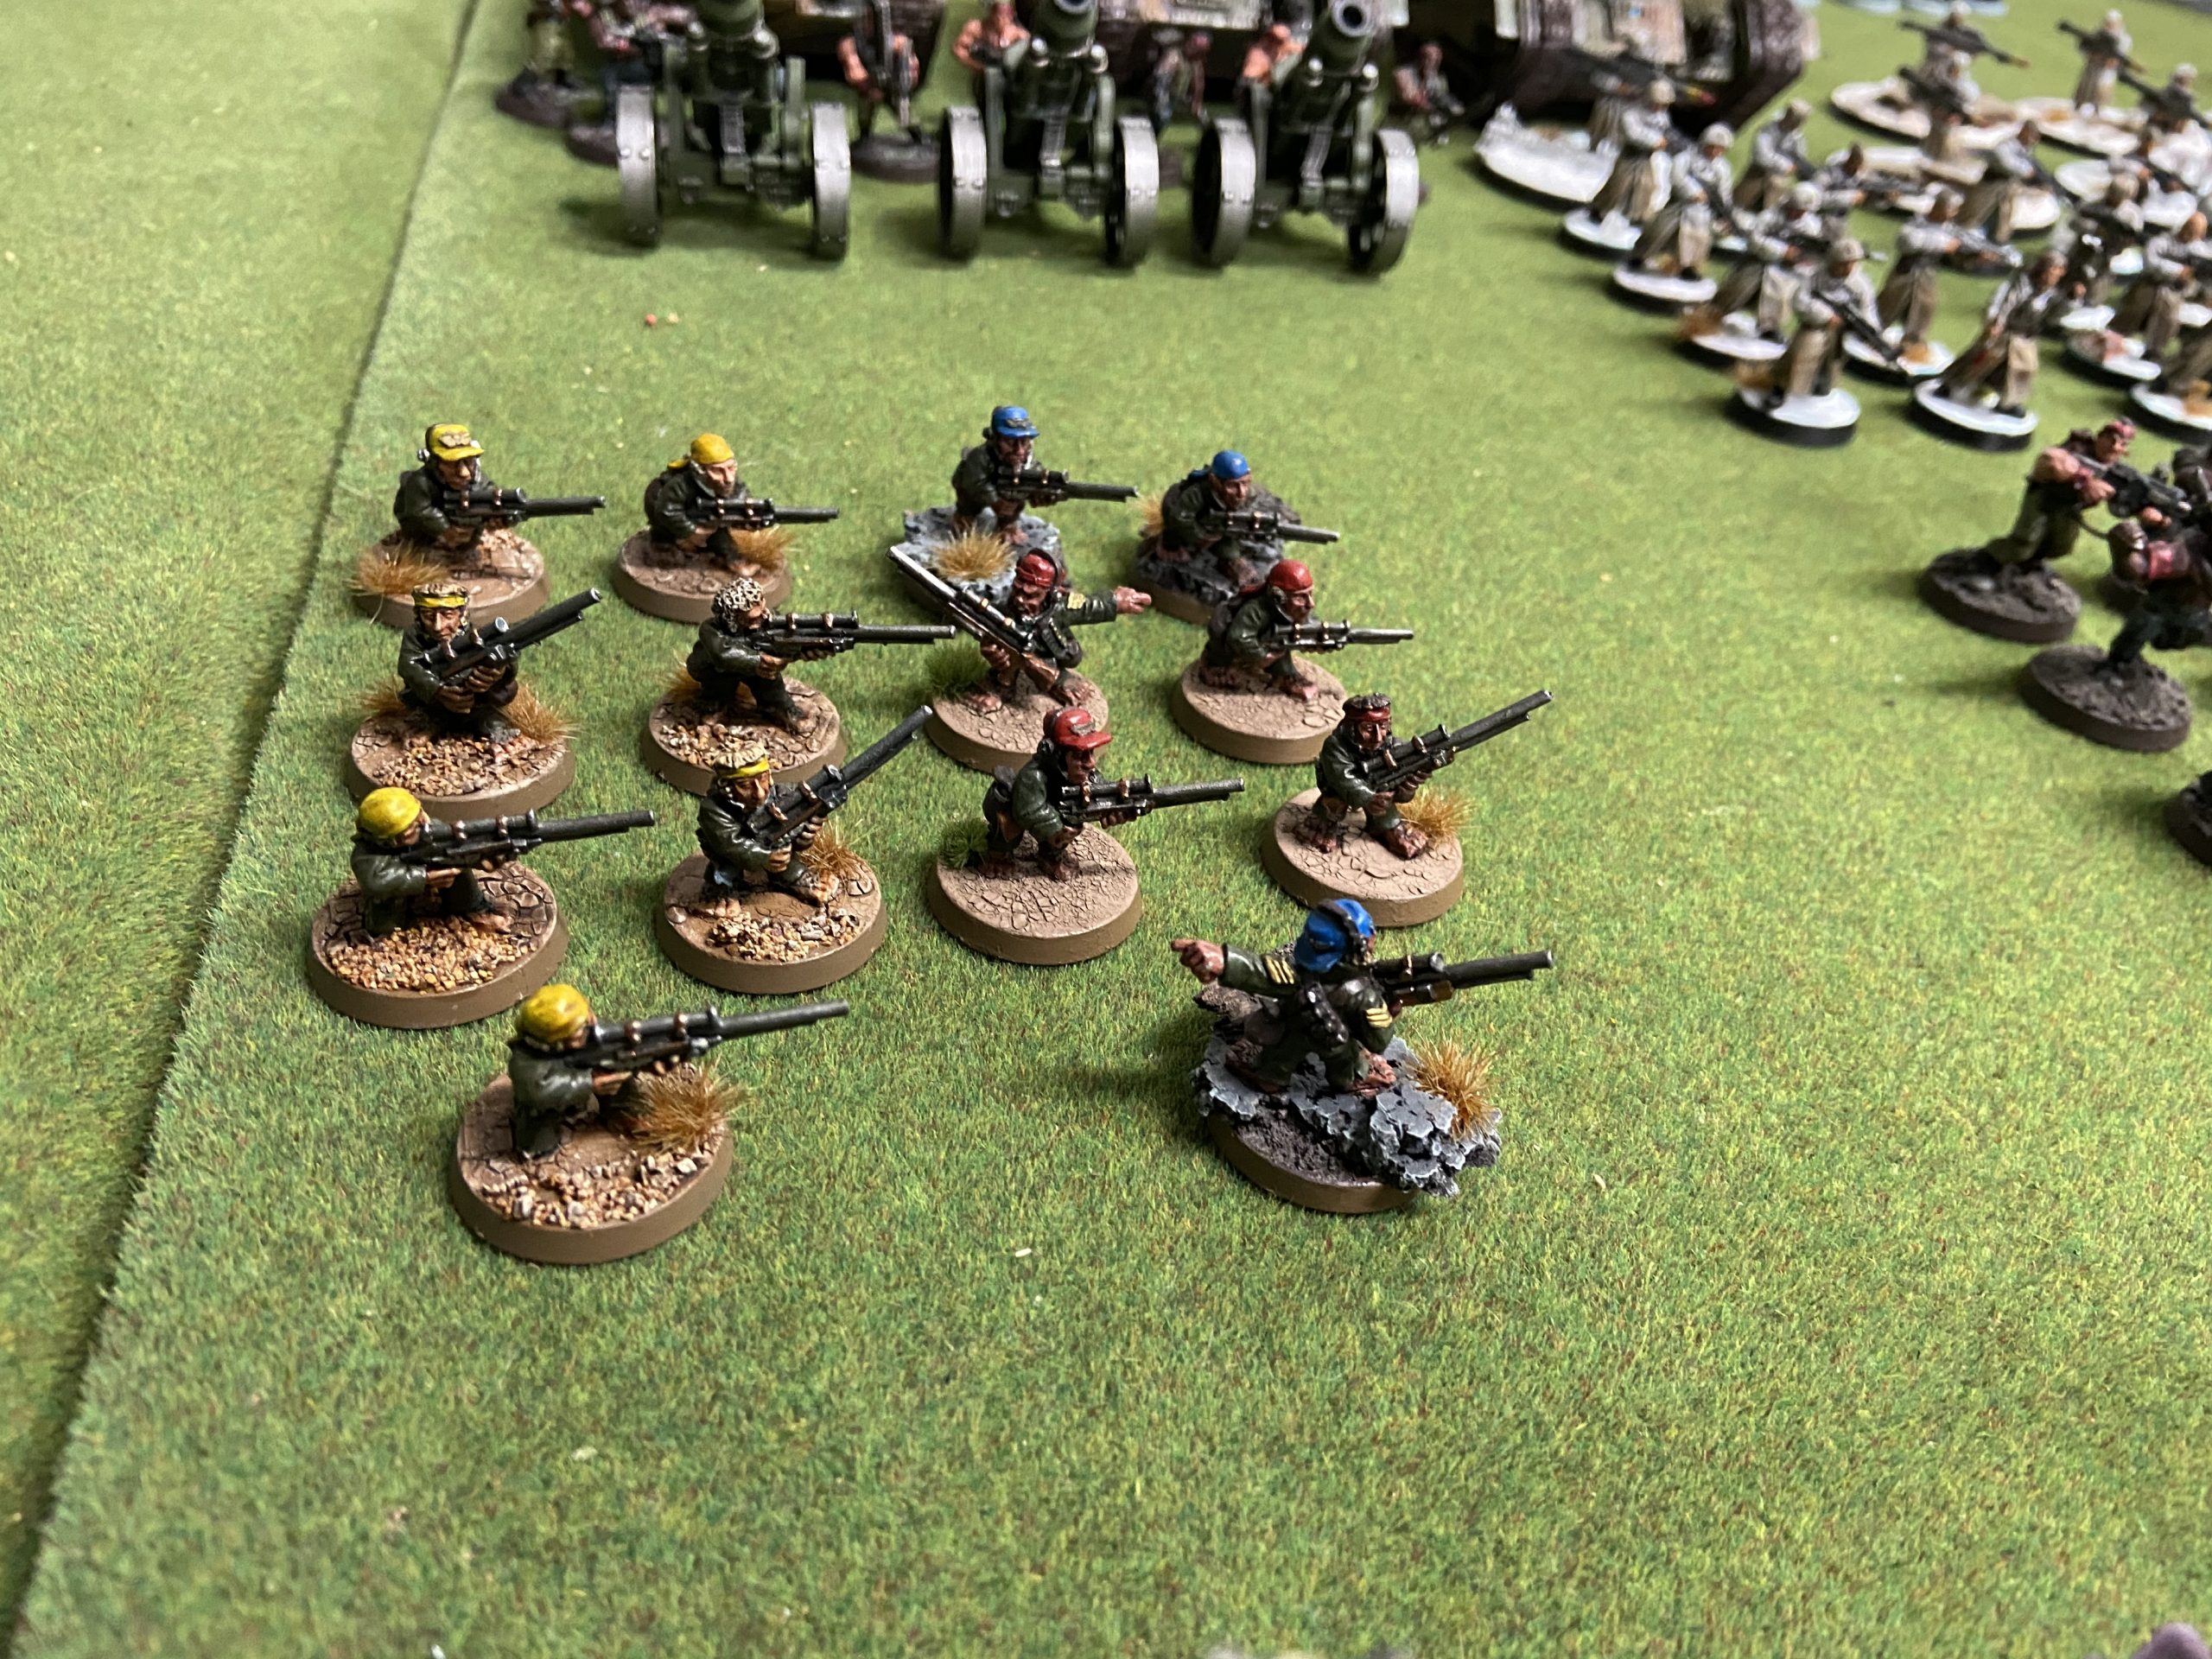
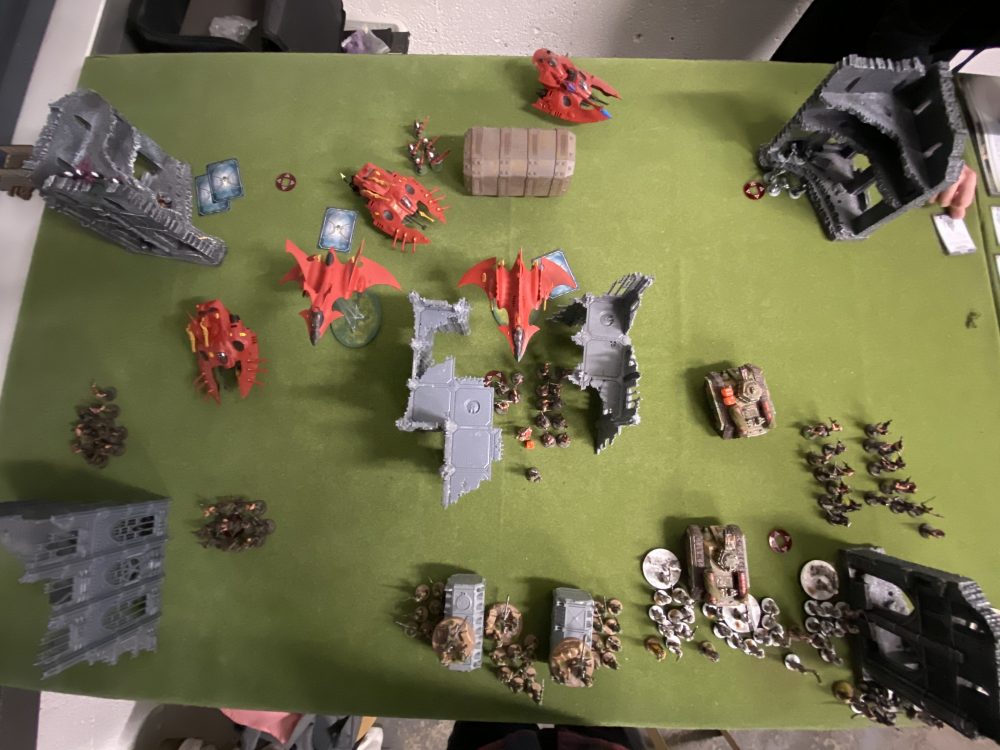
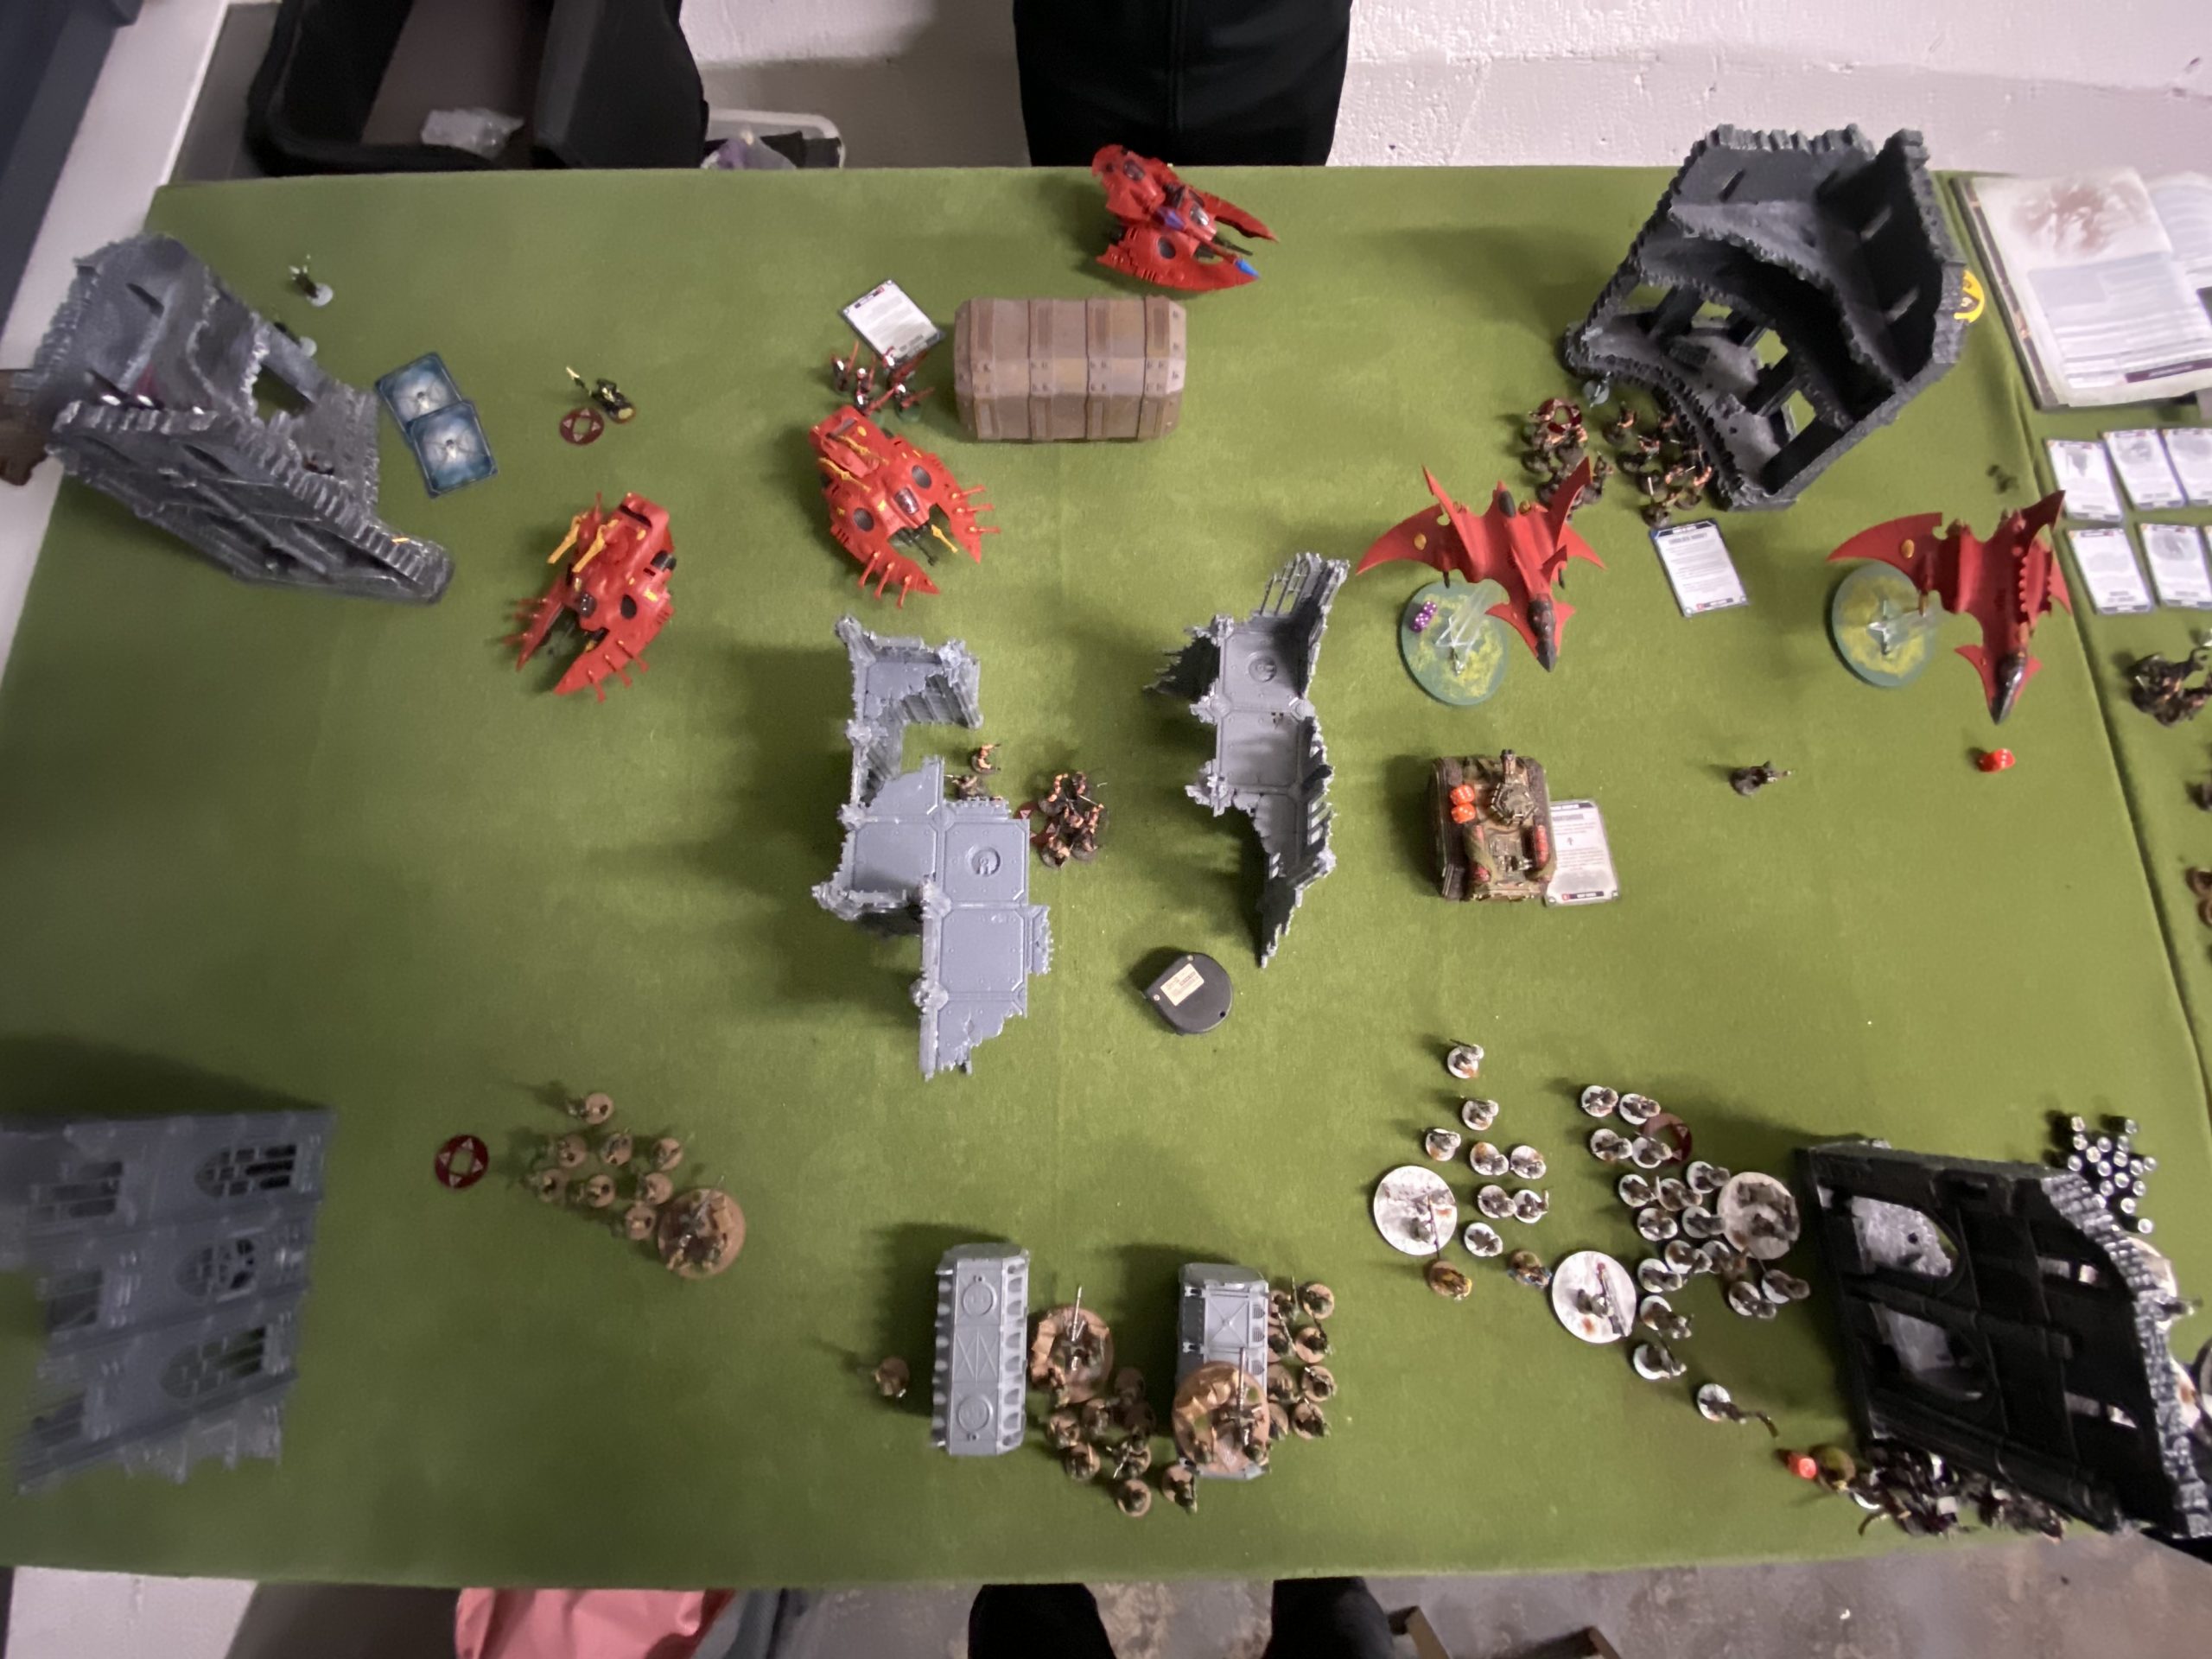
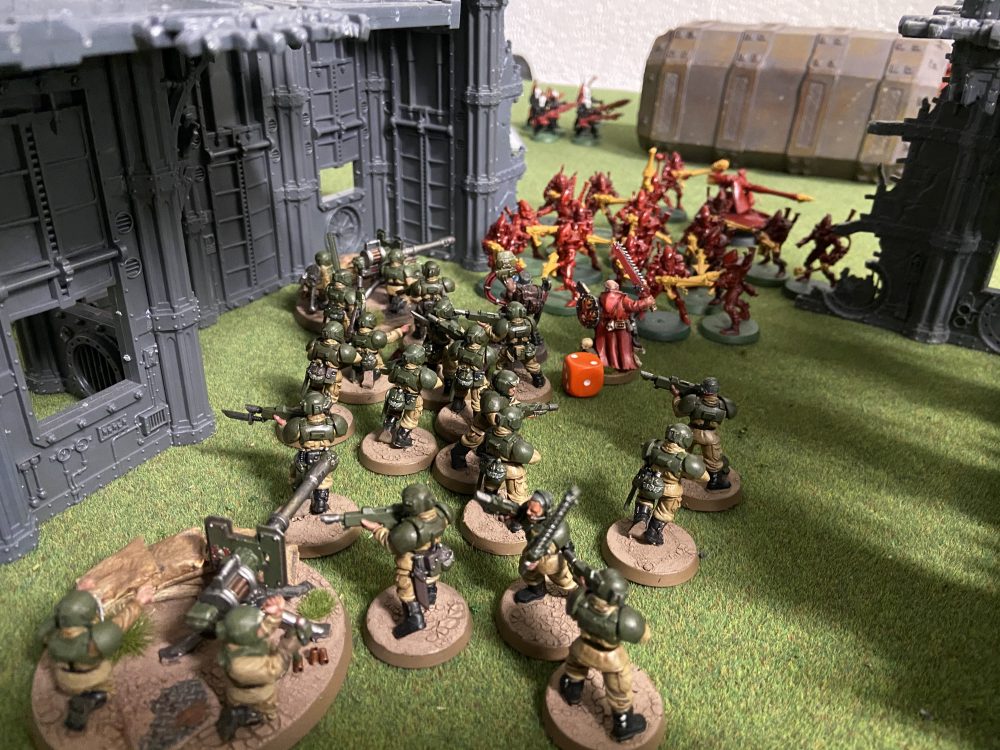
Today I have another game against the Eldar, played at Boards & Swords, I am taking 150 Astra Militarum Infantry! This will be quite the battle as both forces have completely different lists and styles of play. Also, what do you think of my overview photos, see later…
150 Astra Militarum Infantry List
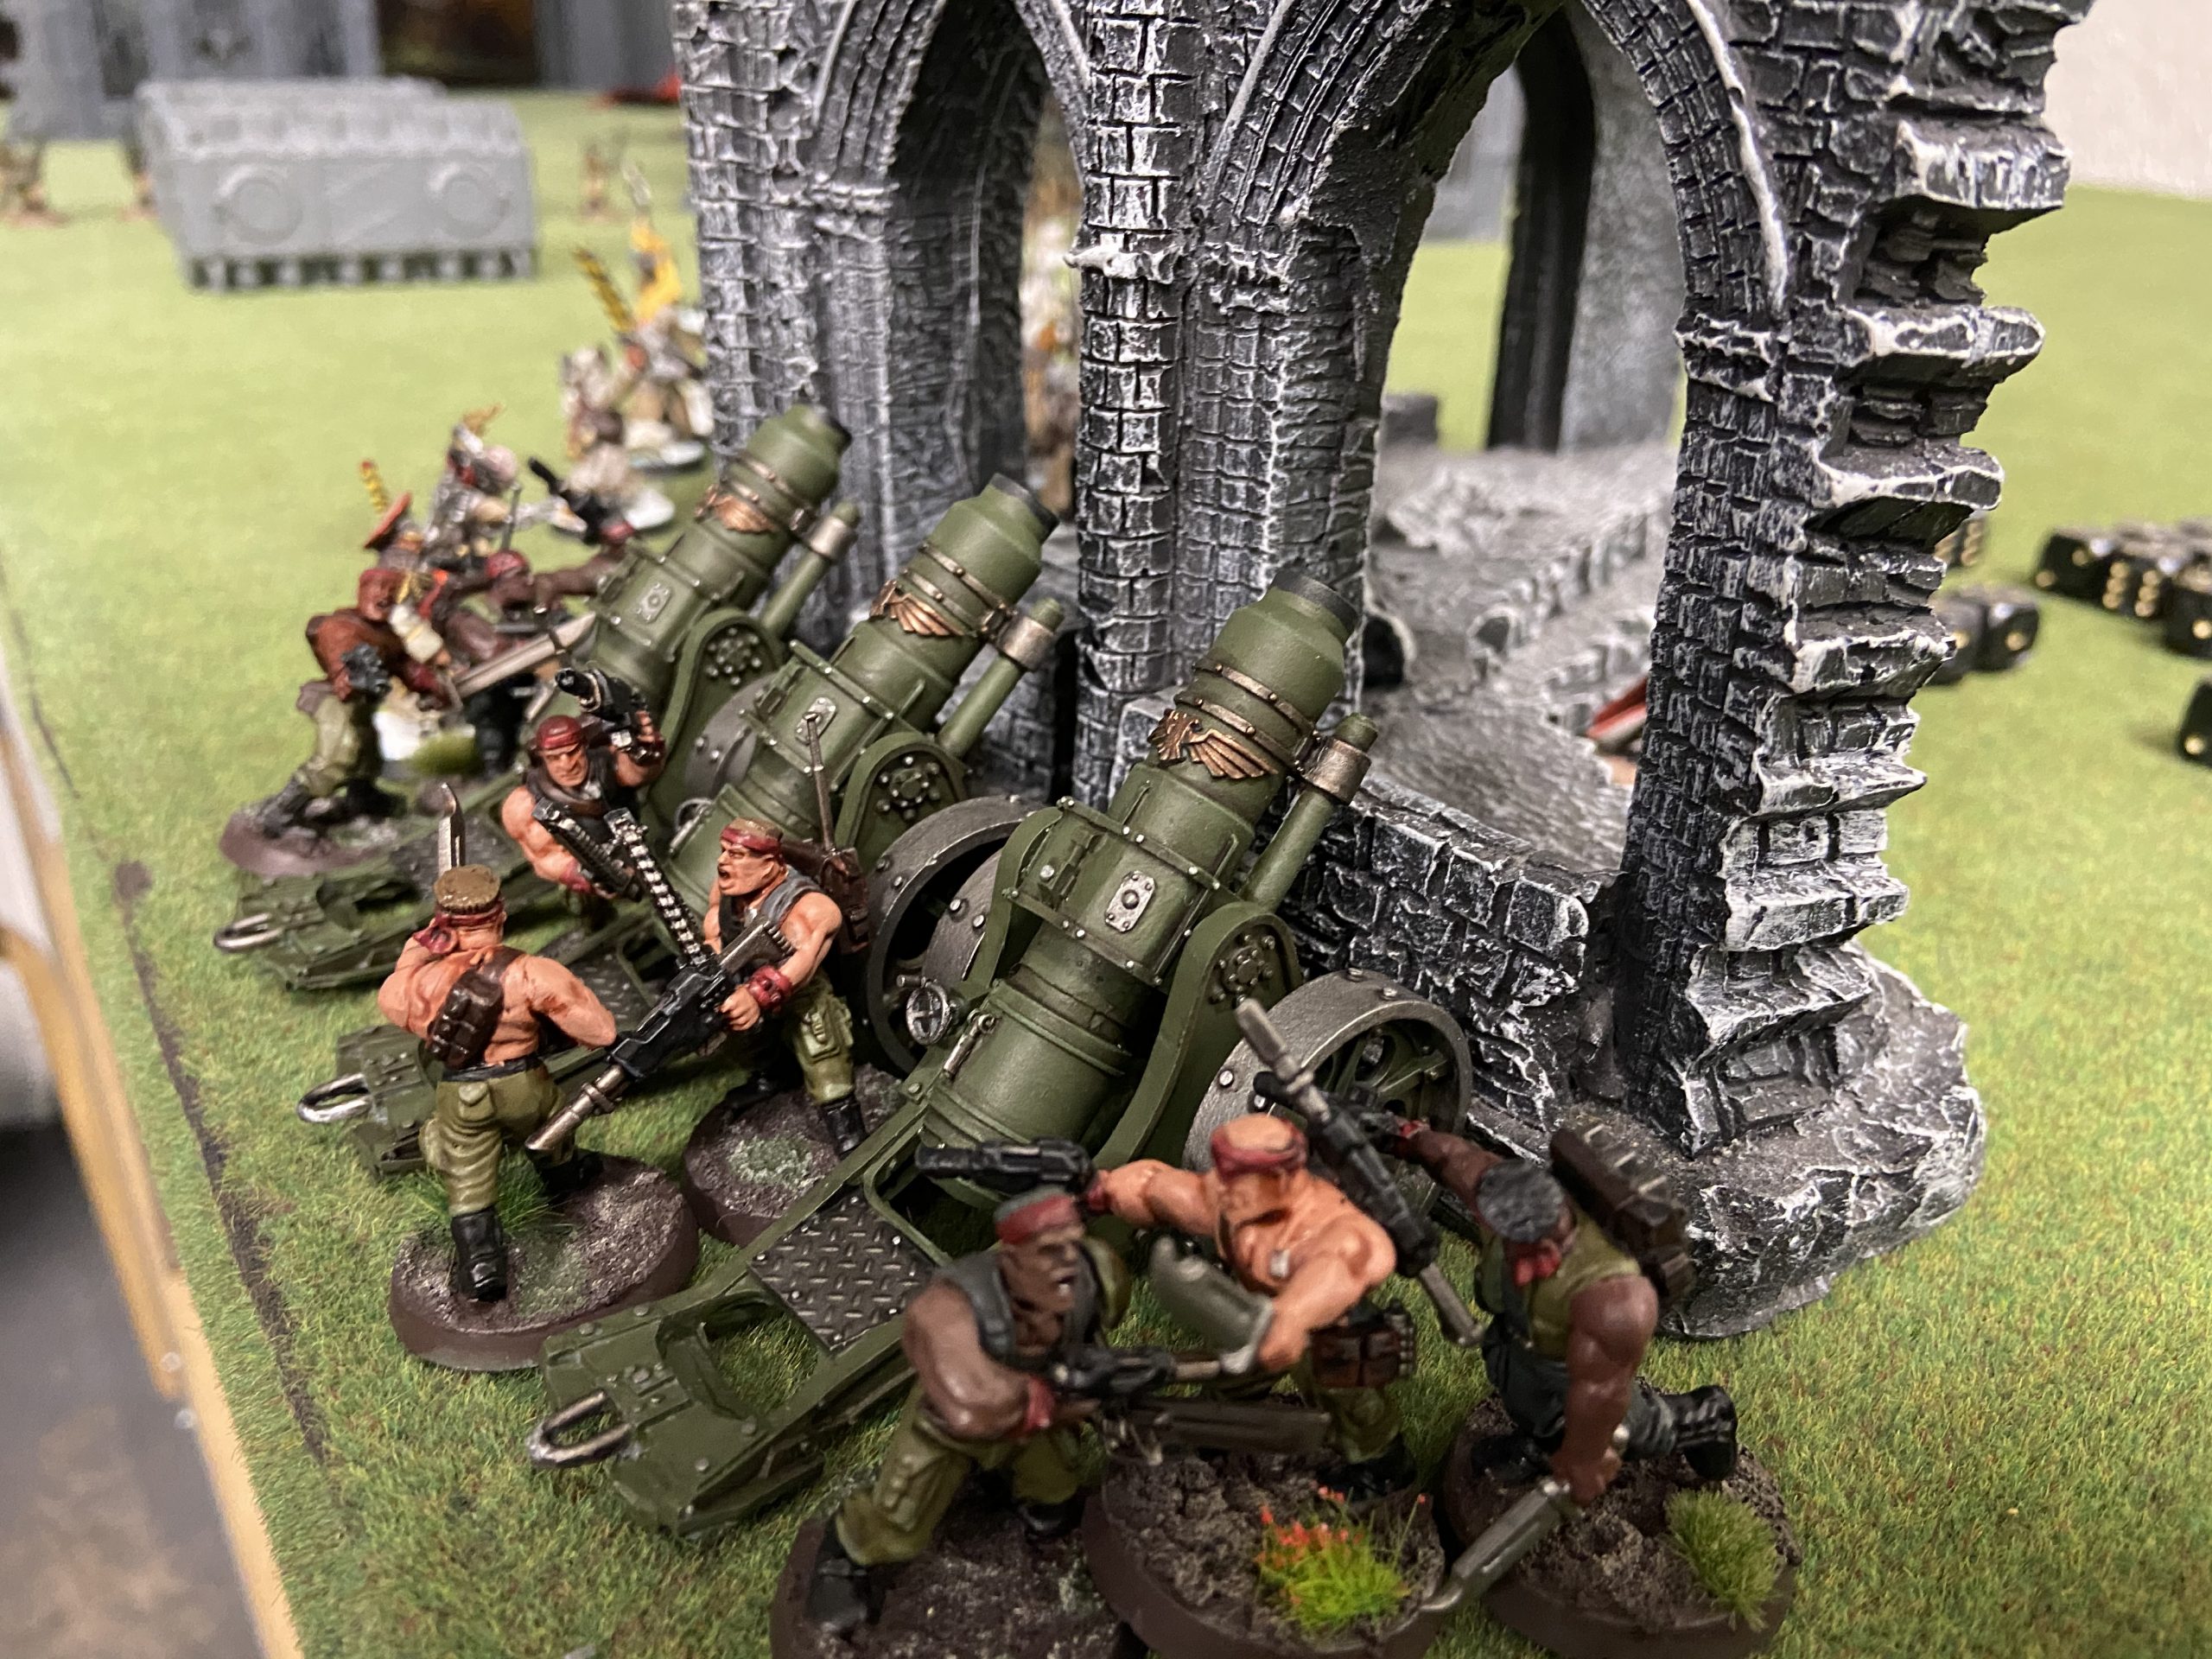
I just wanted to go infantry heavy in this game, because it is fun. I also wanted to work in my new Psykers and my new Heavy Mortars from Forgeworld (nearly done).
Overview
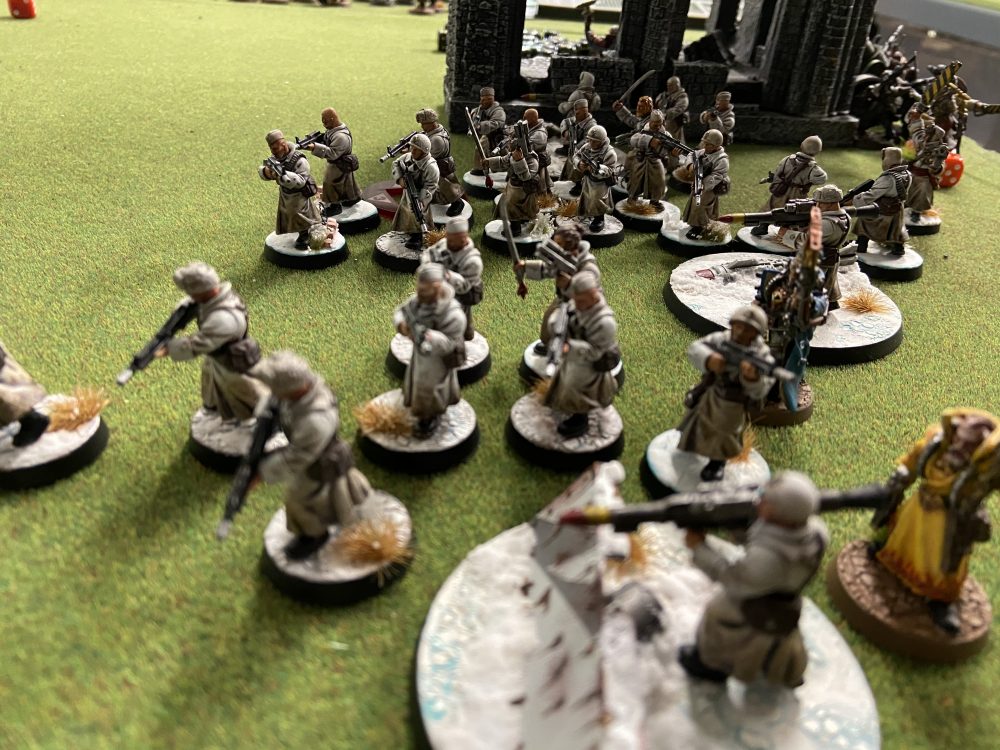
Valhallan Battalion Detachment
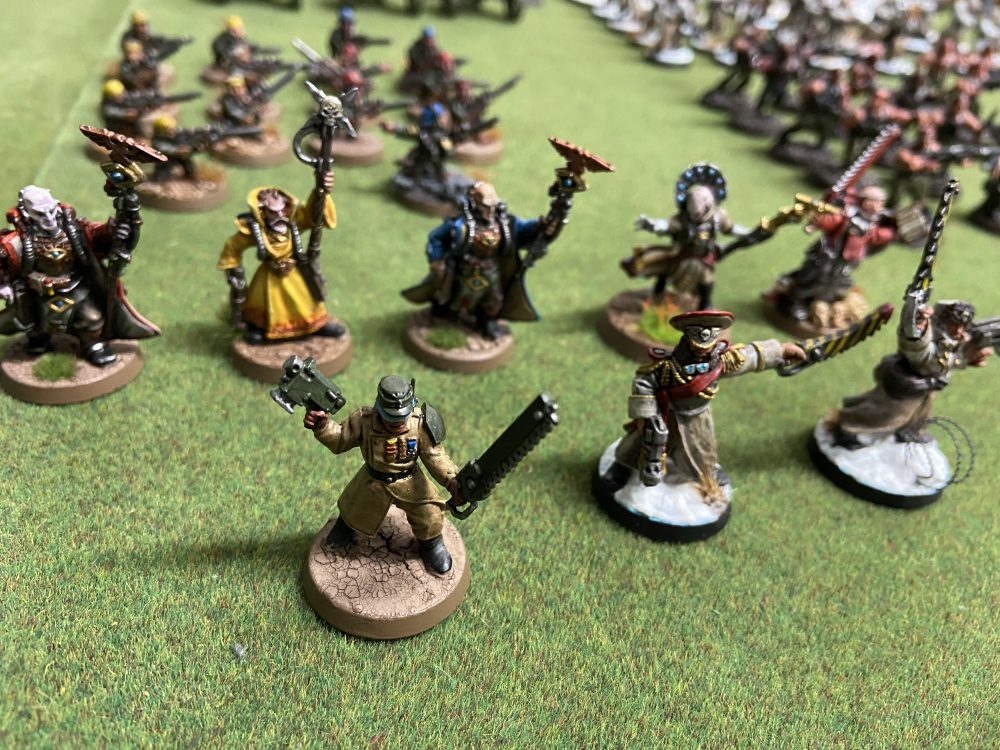
- A Company Commander Warlord with Old Grudges and Laurels of Command – HQ
- A Company Commander with Pietrov’s MK 45 – HQ
- A Primaris Psyker – Psychic Maelstrom and Terrifying Visions – HQ
- 3x Infantry Squads with Missile Launchers – Troops
- Heavy Weapons Team with Missile Launchers – Heavy Support
A total of 33 infantry models.
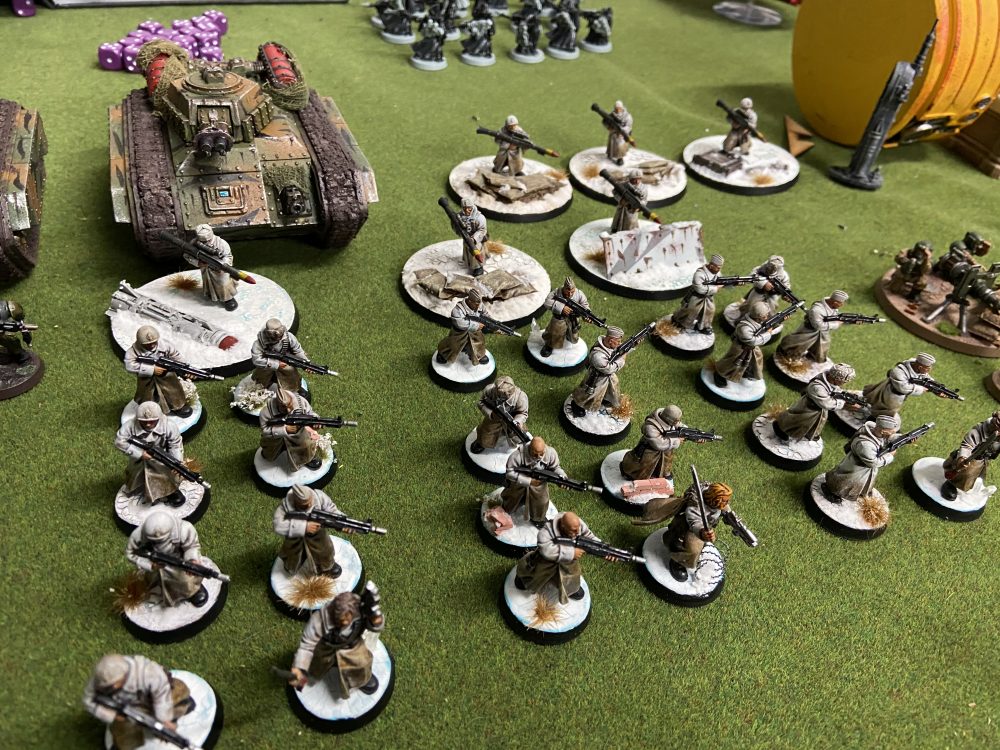
Cadian Battalion Detachment
- A Company Commander – HQ
- A Primaris Psyker – Nightshroud and Psychic Barrier – HQ
- 3x Infantry Squads with Autocannons – Troops
- Platoon Commander with Plasma Pistol and The Dagger of Tu’Sakh – Elite
- Command Squad with Plasma Guns – to arrive with the Platoon Commander – Elite
A total of 34 infantry models.
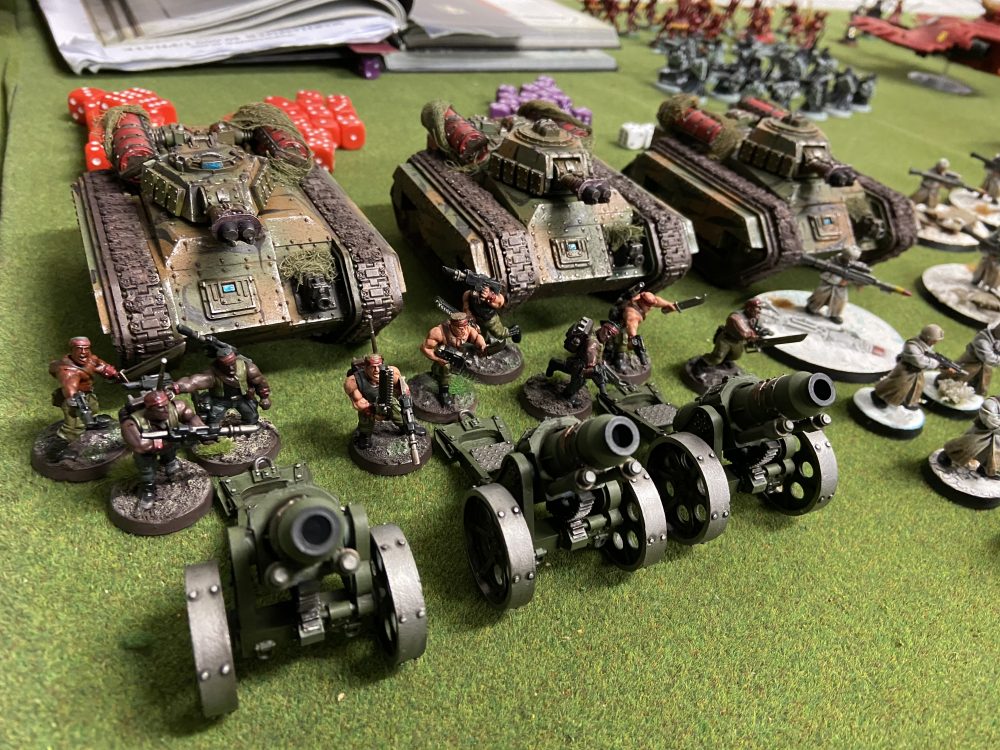
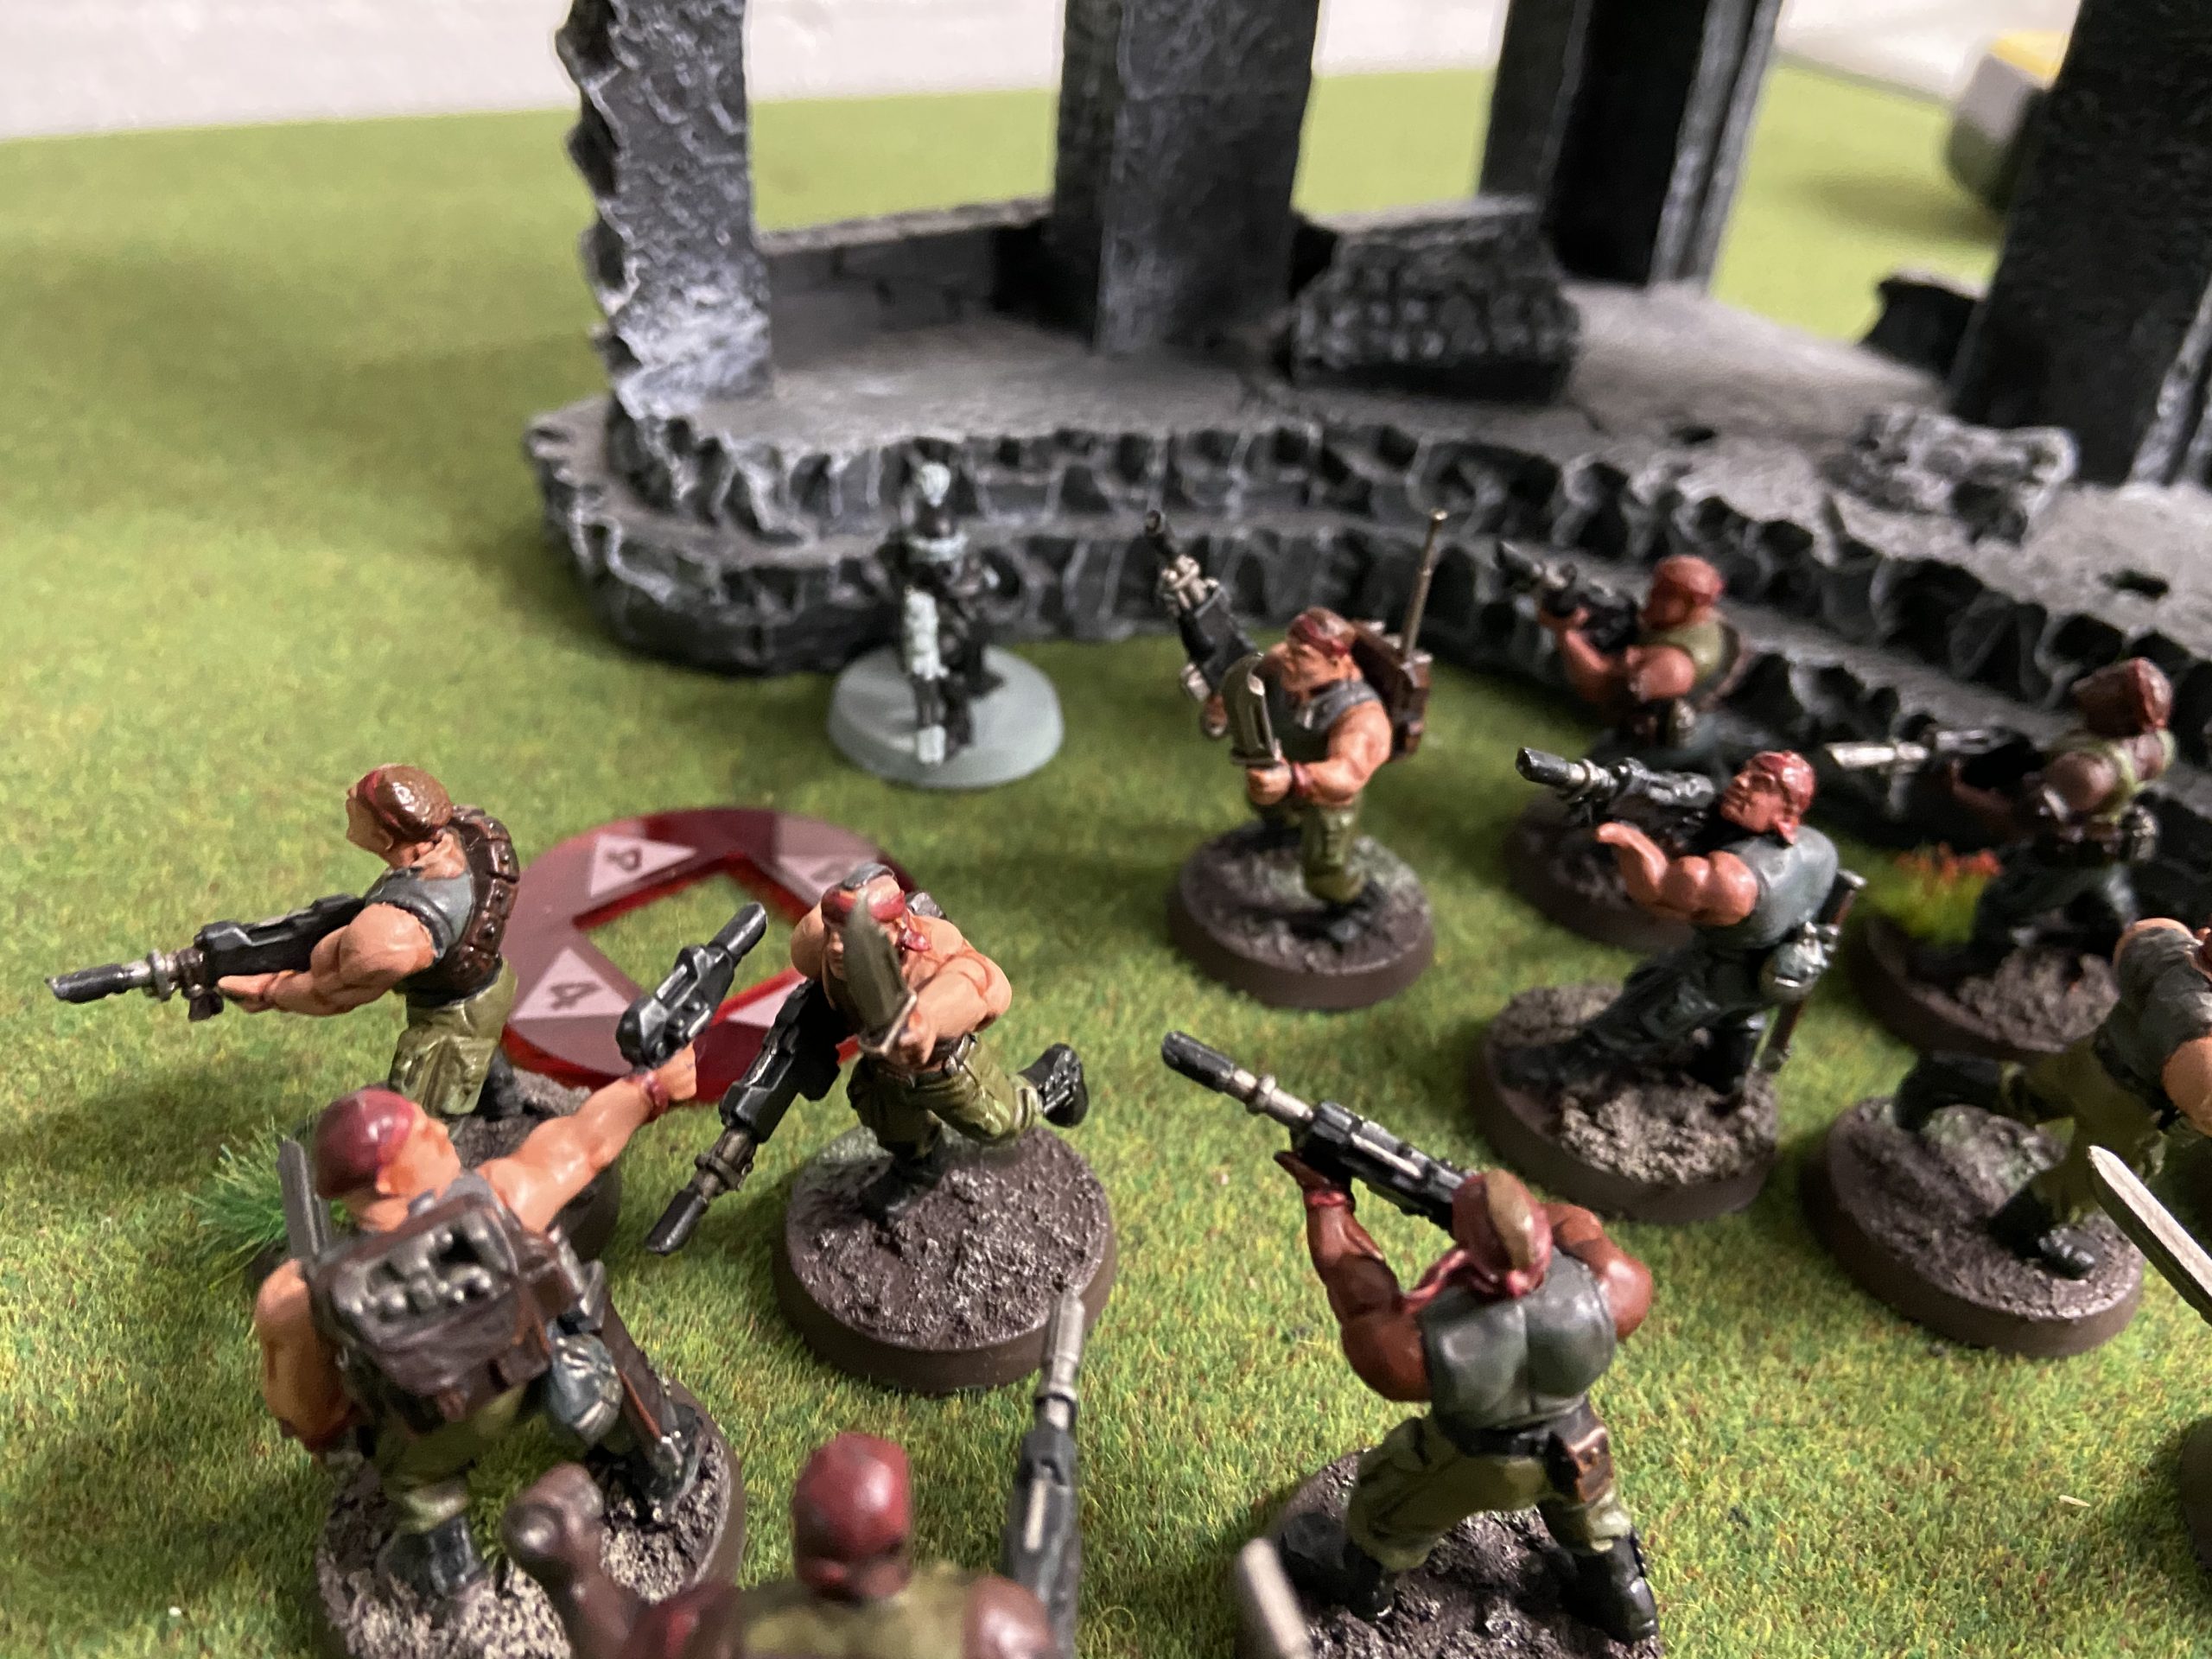
Catachan Brigade Detachment
- A Primaris Psyker – Nightshroud and Psychic Barrier – HQ
- Aradia Madellan – HQ
- 3x Company Commanders – HQ
- 6x Infantry Squads – Troops
- A Preist – Elite
- 7x Ratlings – Elite
- 7x Ratlings – Elite
- 3x Hellhounds – Fast Attack
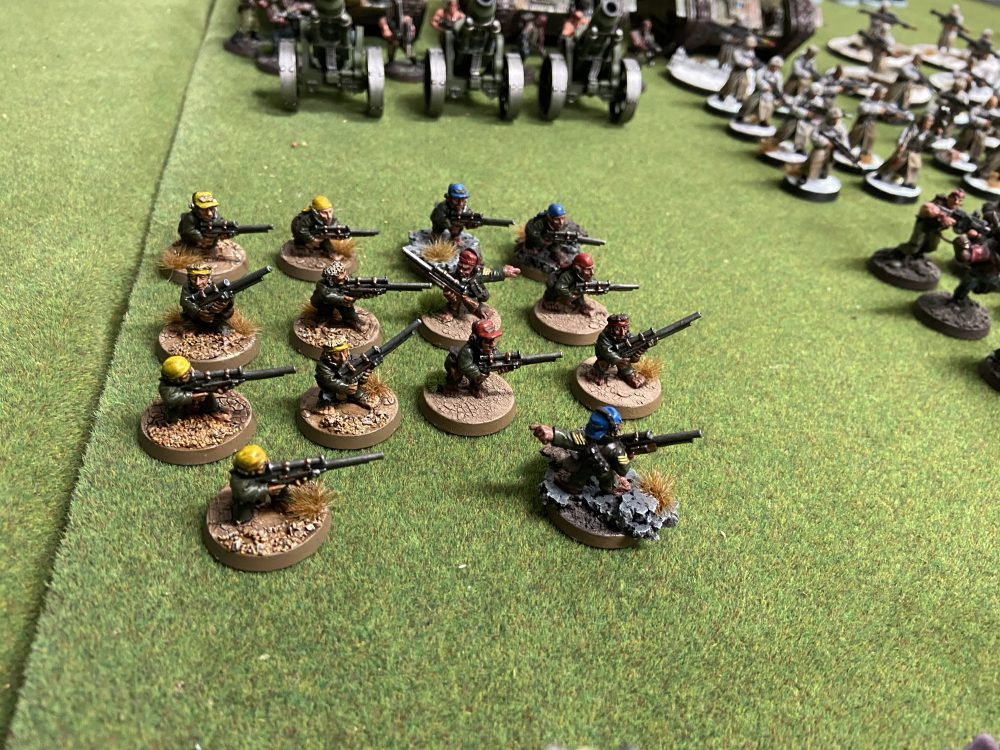
- 3x Heavy Mortars – Heavy Support
A total of 80 infantry models, excluding the Heavy Mortar crews.
That’s a grand total of 147 infantry models. 156 including the Heavy Mortar crew!
CP wise I will have 22CP.
3 + 5 + 5 + 12 – 3
The -3 is for the two extra Heirlooms of Conquest.
Key Stratagems
I think writing this now, a week before the game might benefit me – noting my key Stratagems.
- The first is, of course, Consolidate Squads for maximising Aradia’s Psychic Power and the Laurels of Command on the Missile Launchers within the squads.
- Inspired Tactics might be useful for when I am missing an order. But with so many Commanders and Consolidating Squads, I should be OK.
- Overlapping Fields of Fire may come in useful on those Cadian Autocannons for placing some wounds on a bigger target.
- With so many CP to go around, Fire on my Position may actually be a possibility. At 3CP it has a hefty price, but with some suicide squad and decent placement, I could be doing multiple Mortal Wounds to multiple enemy units.
- A Preliminary Bombardment might also be in order for 2CP, given how many CP I will have.
I may struggle to deal with high wound models.
-

- HQs and Elites

-
- Ratlings
-
- Catachans

-
- Valhallans

1,750 Point Eldar List
- A Farseer
- An Autarch
- A Warlock
- 2x Wave Serpents
- 3x Units of 5 Rangers
- A Hemlock
- A Crimson Hunter
- 2x Units of Dark Reapers
- A Fire Prism
- 20x Guardians with 2x Bright Lances
Eldar forces
The Mission
We played the Vital Intelligence mission from Chapter Approved 2018. John wanted to play this as he had seen it on Tabletop Tactics and fancied it. I had not played it before, so I said yes. The mission was set.
Vital Intelligence has five objectives, one in the centre and then four setups no diagonals halfway between the corners of the board and the centre. Each objective is worth 1VP at the end of each Battle Round. But at the start of each Battle Round, a D6 is rolled, if between 1 and 5 is rolled then the corresponding objective is wort 2VP this Battle Round. If a six is rolled, all objectives are worth 2VP this Battle Round.
Slay the Warlord, Linebreaker and First Strike are also in play.
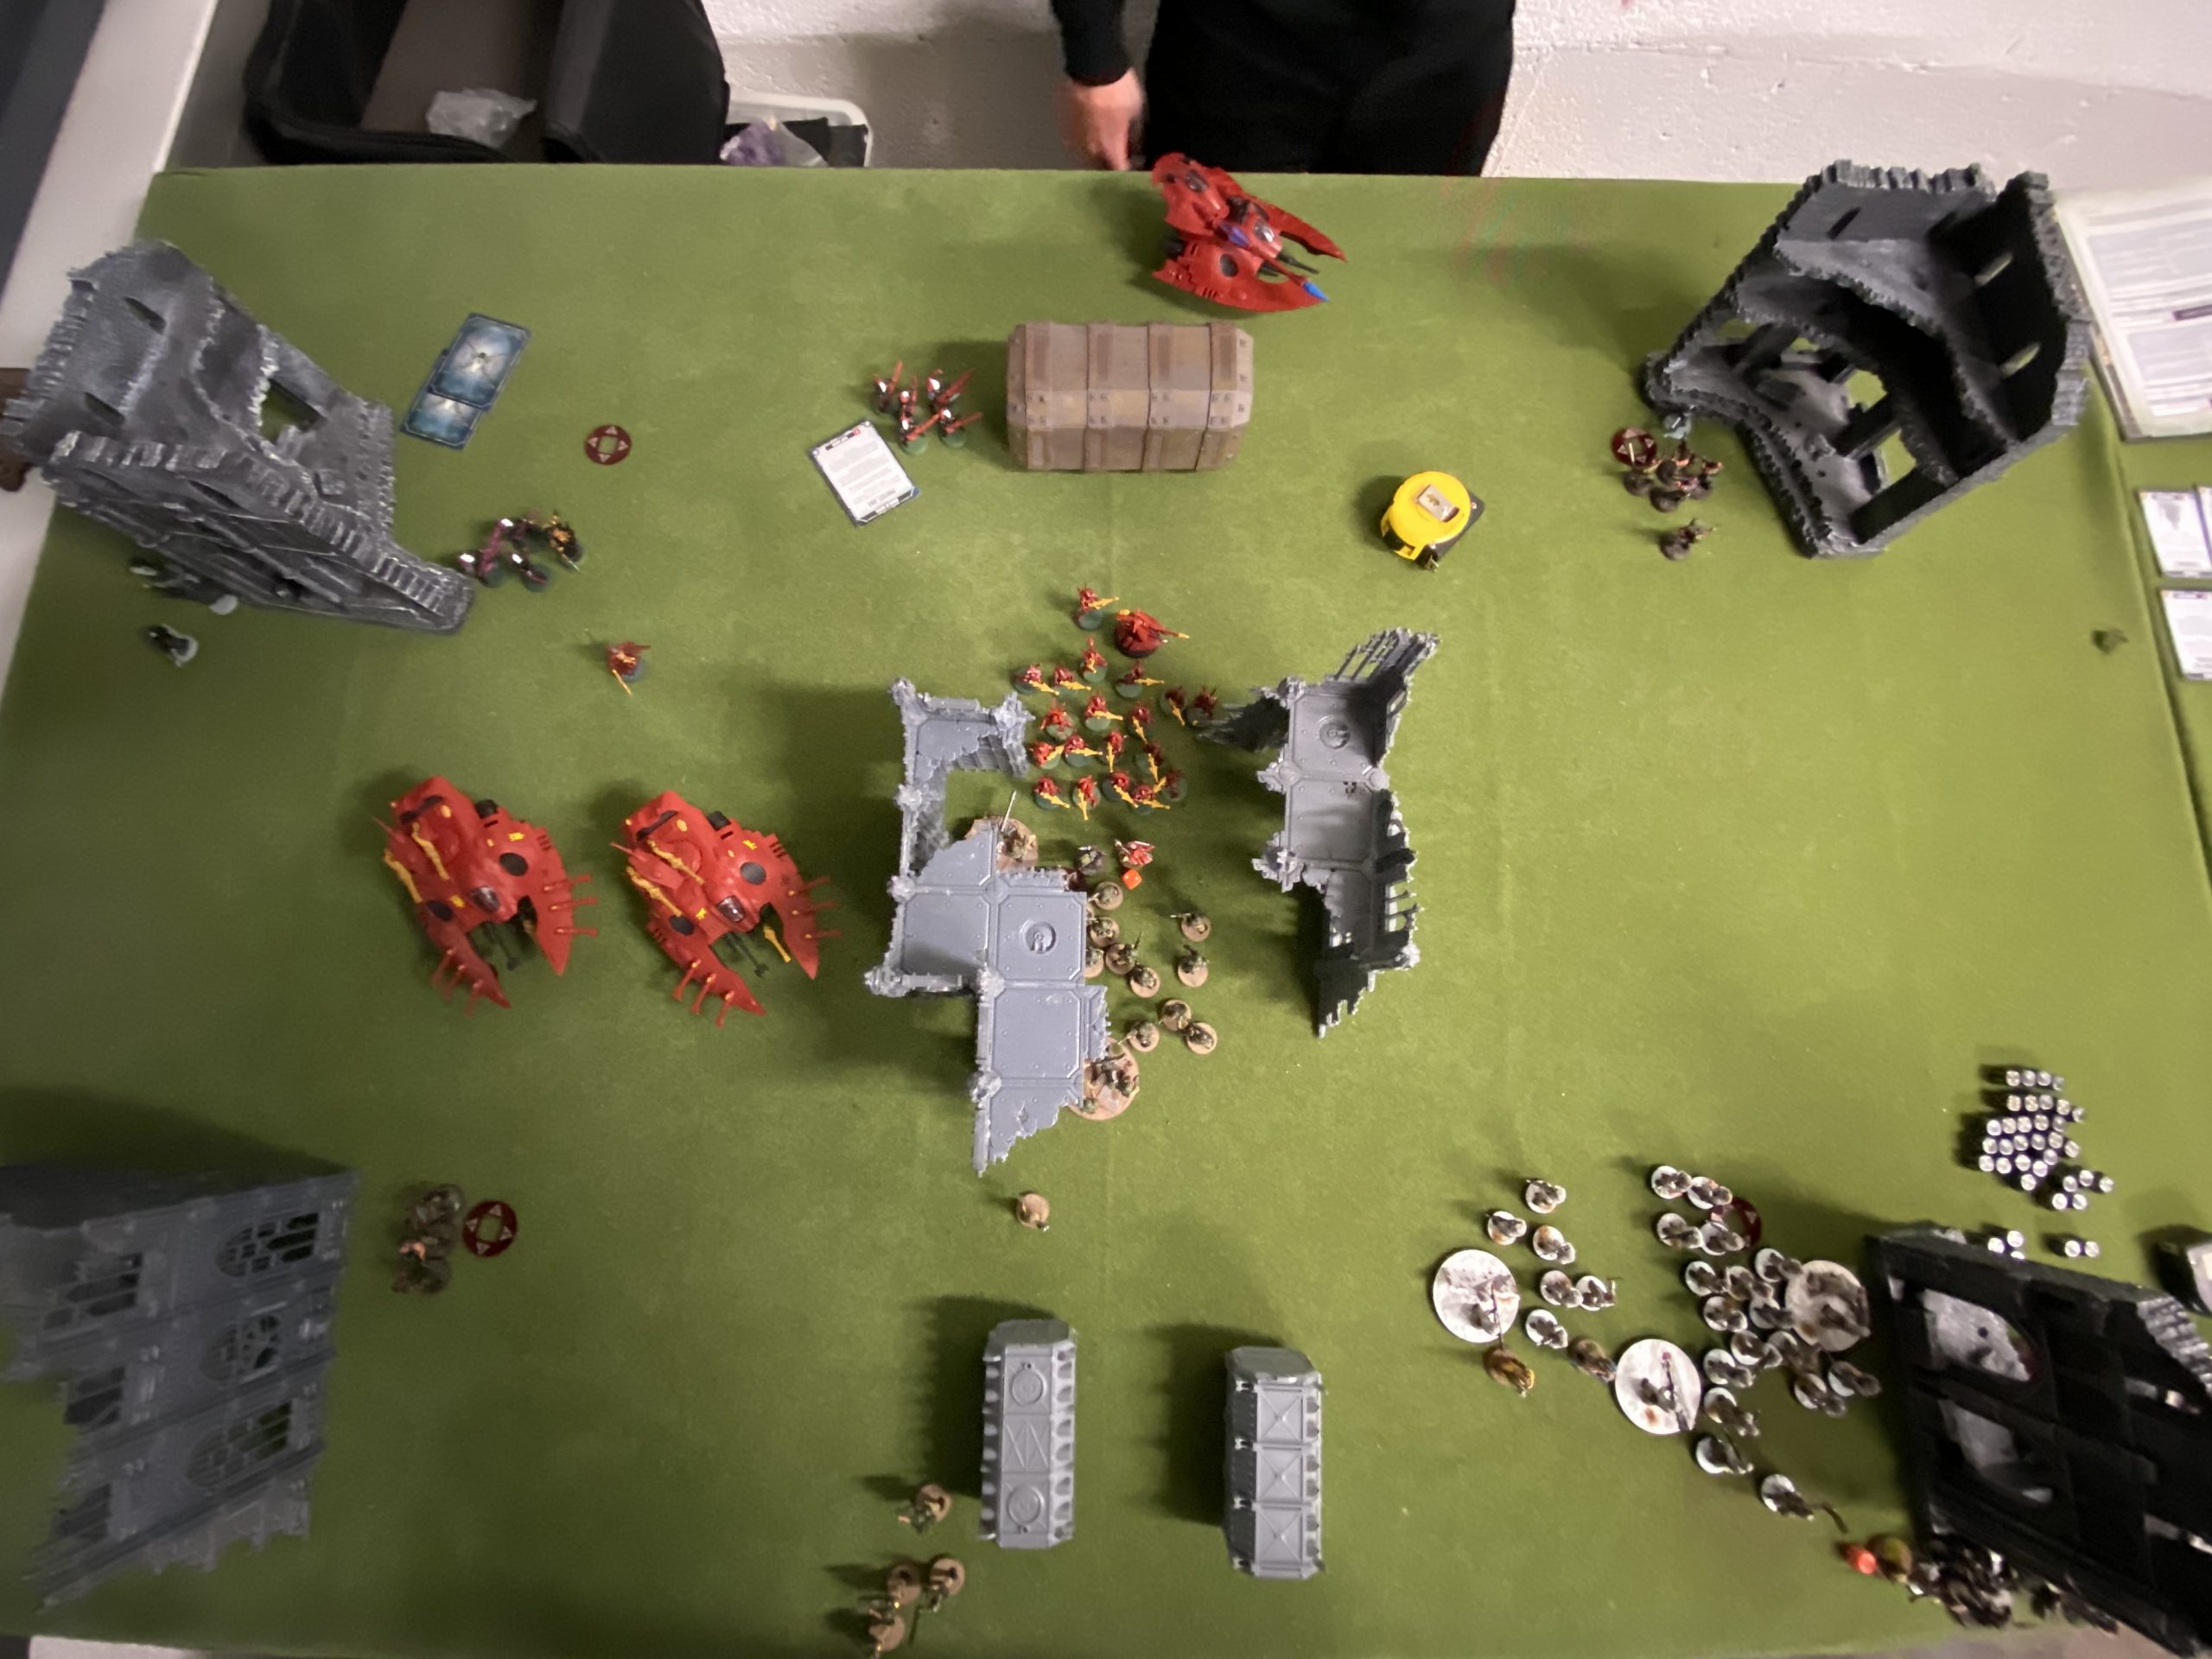
We also played the ITC rule, where all lower floors are blocked and no line-of-sight can be drawn through them. This was needed due to the terrain we were using – without it, you can draw line-of-sight from nearly anywhere to anywhere.
Deployment
The Eldar kept two units of their Rangers in Deep Strike and placed the Guardians in Deep Strike too. I just had my Plasma Squad with Platoon Commander in Deep Strike.
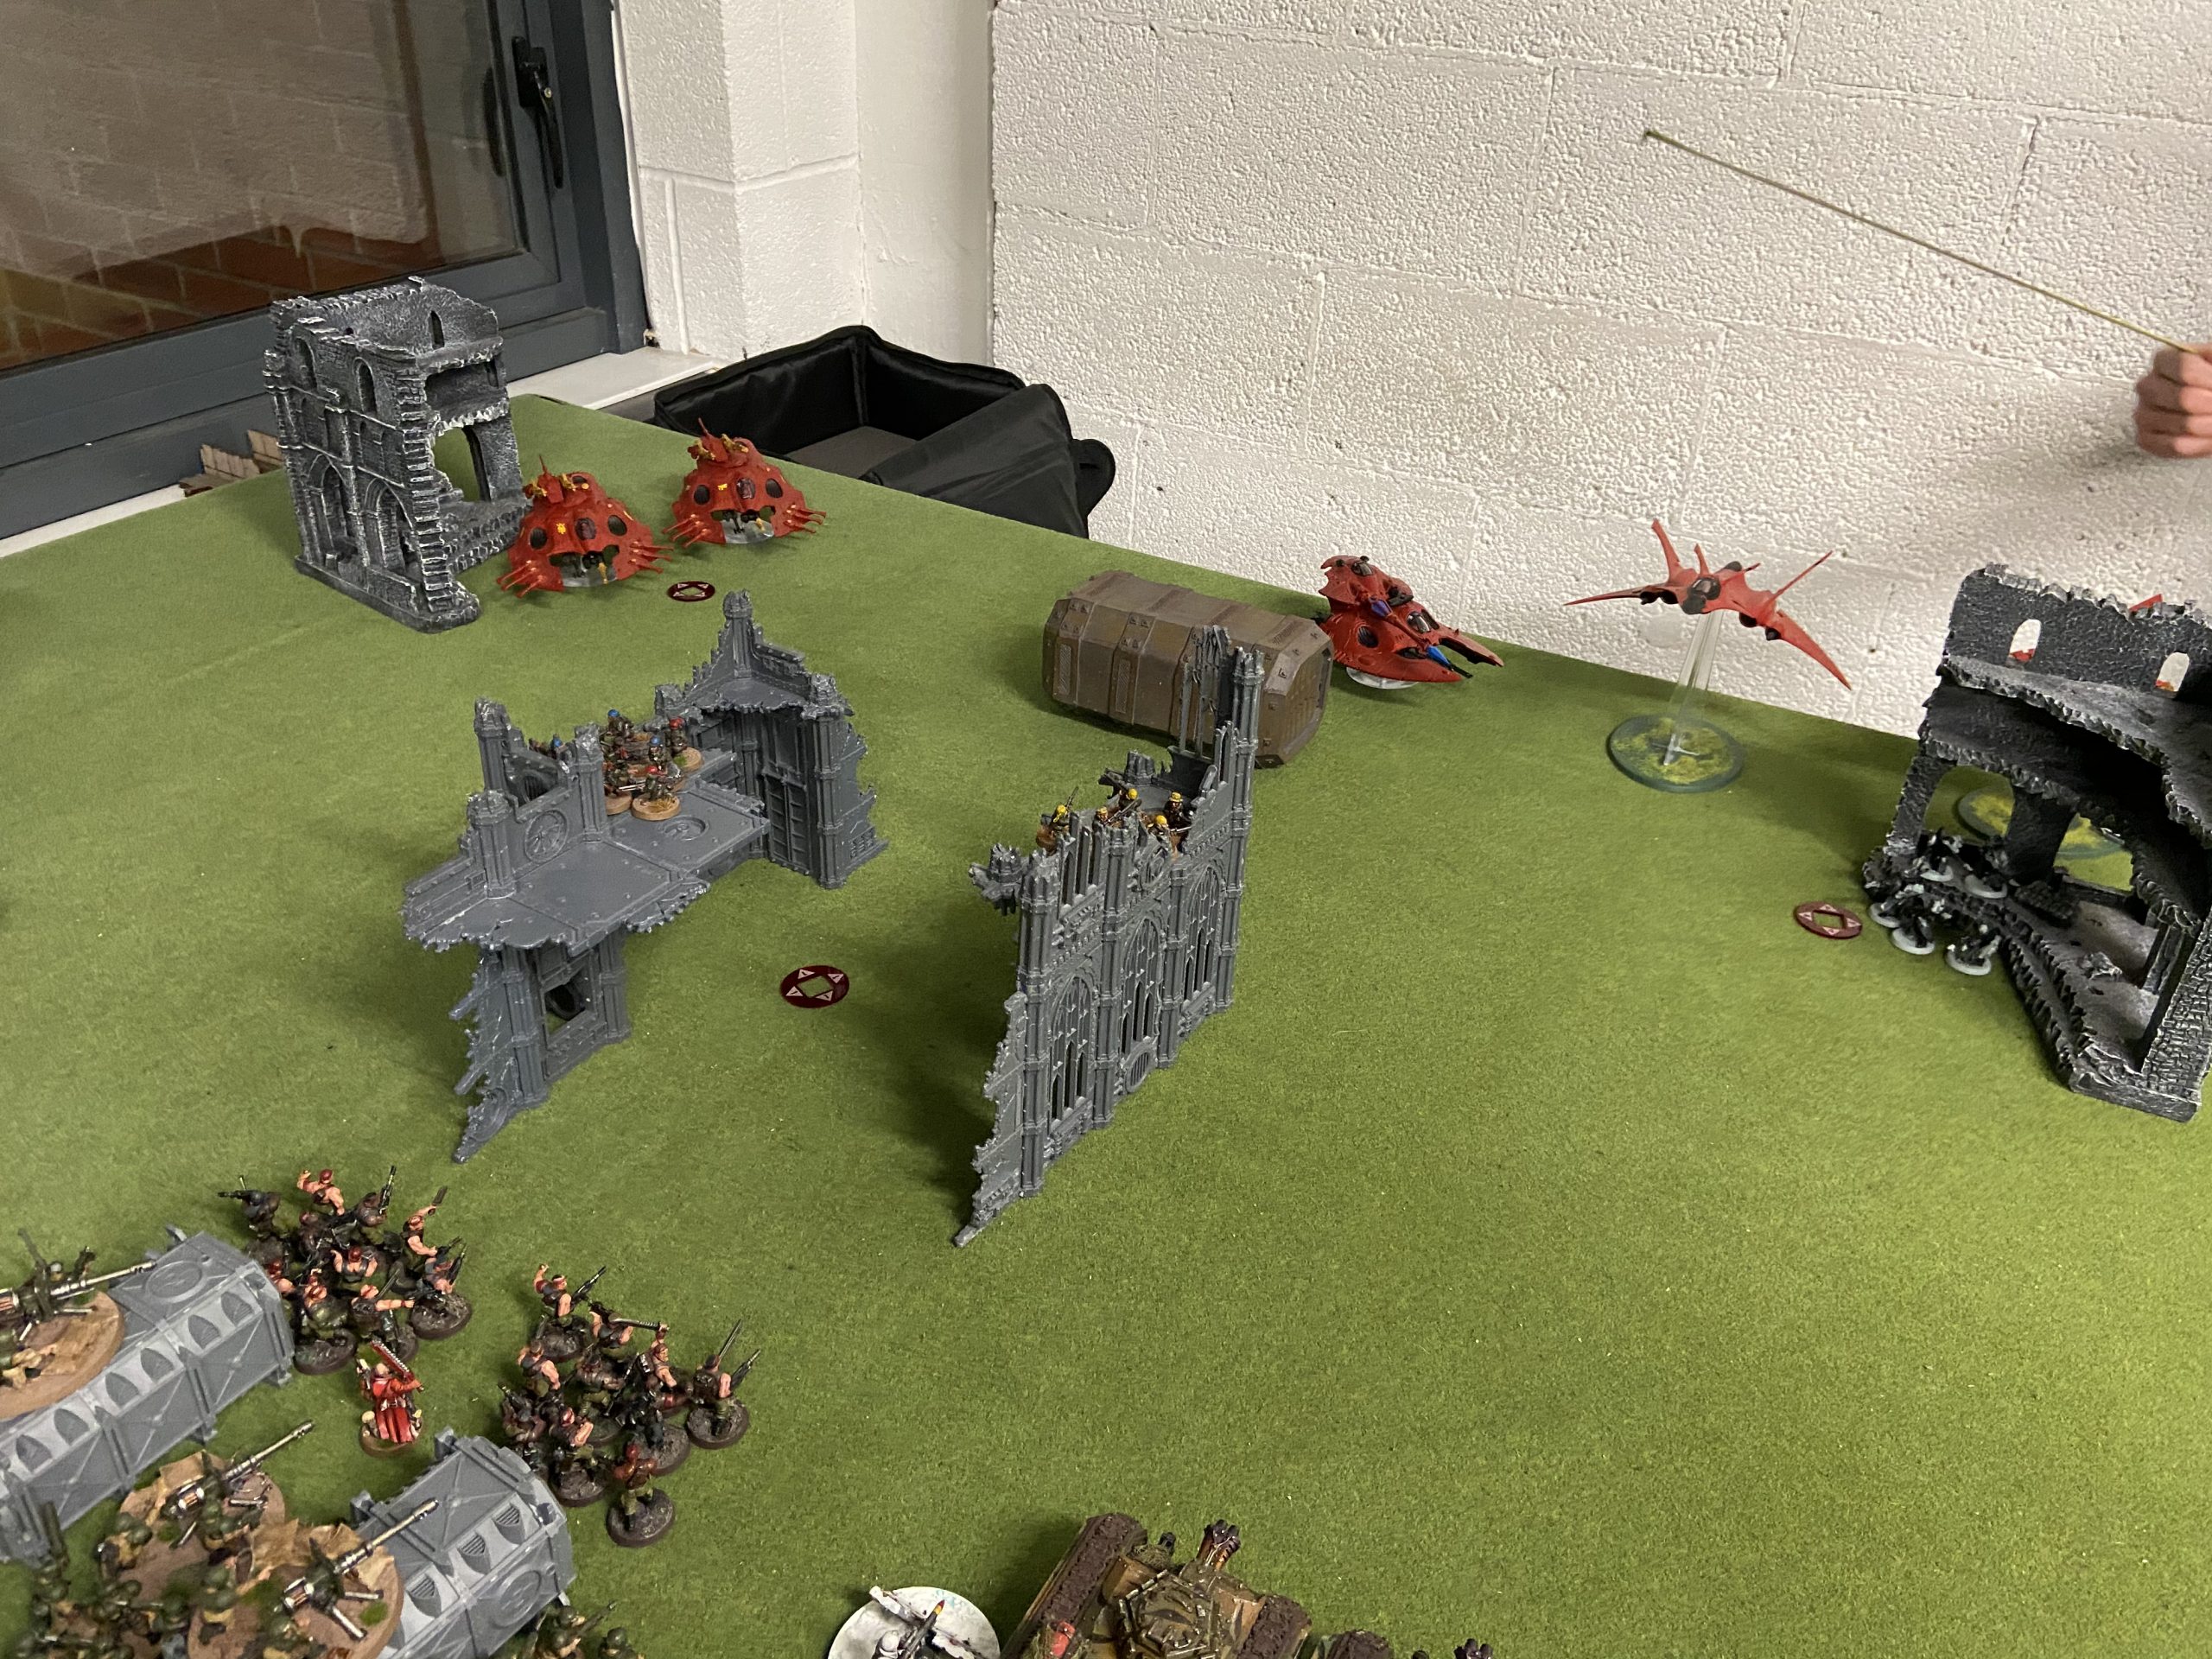
The Eldar, having a lot fewer units were quick to set up. But I took ages, placing all my infantry across my Deployment Zone. I did try and overload the right flank as that is where the Flyers were and because I thought I could take out that side and then move across. Rather than spread out too much.
-

- Eldar Deployment
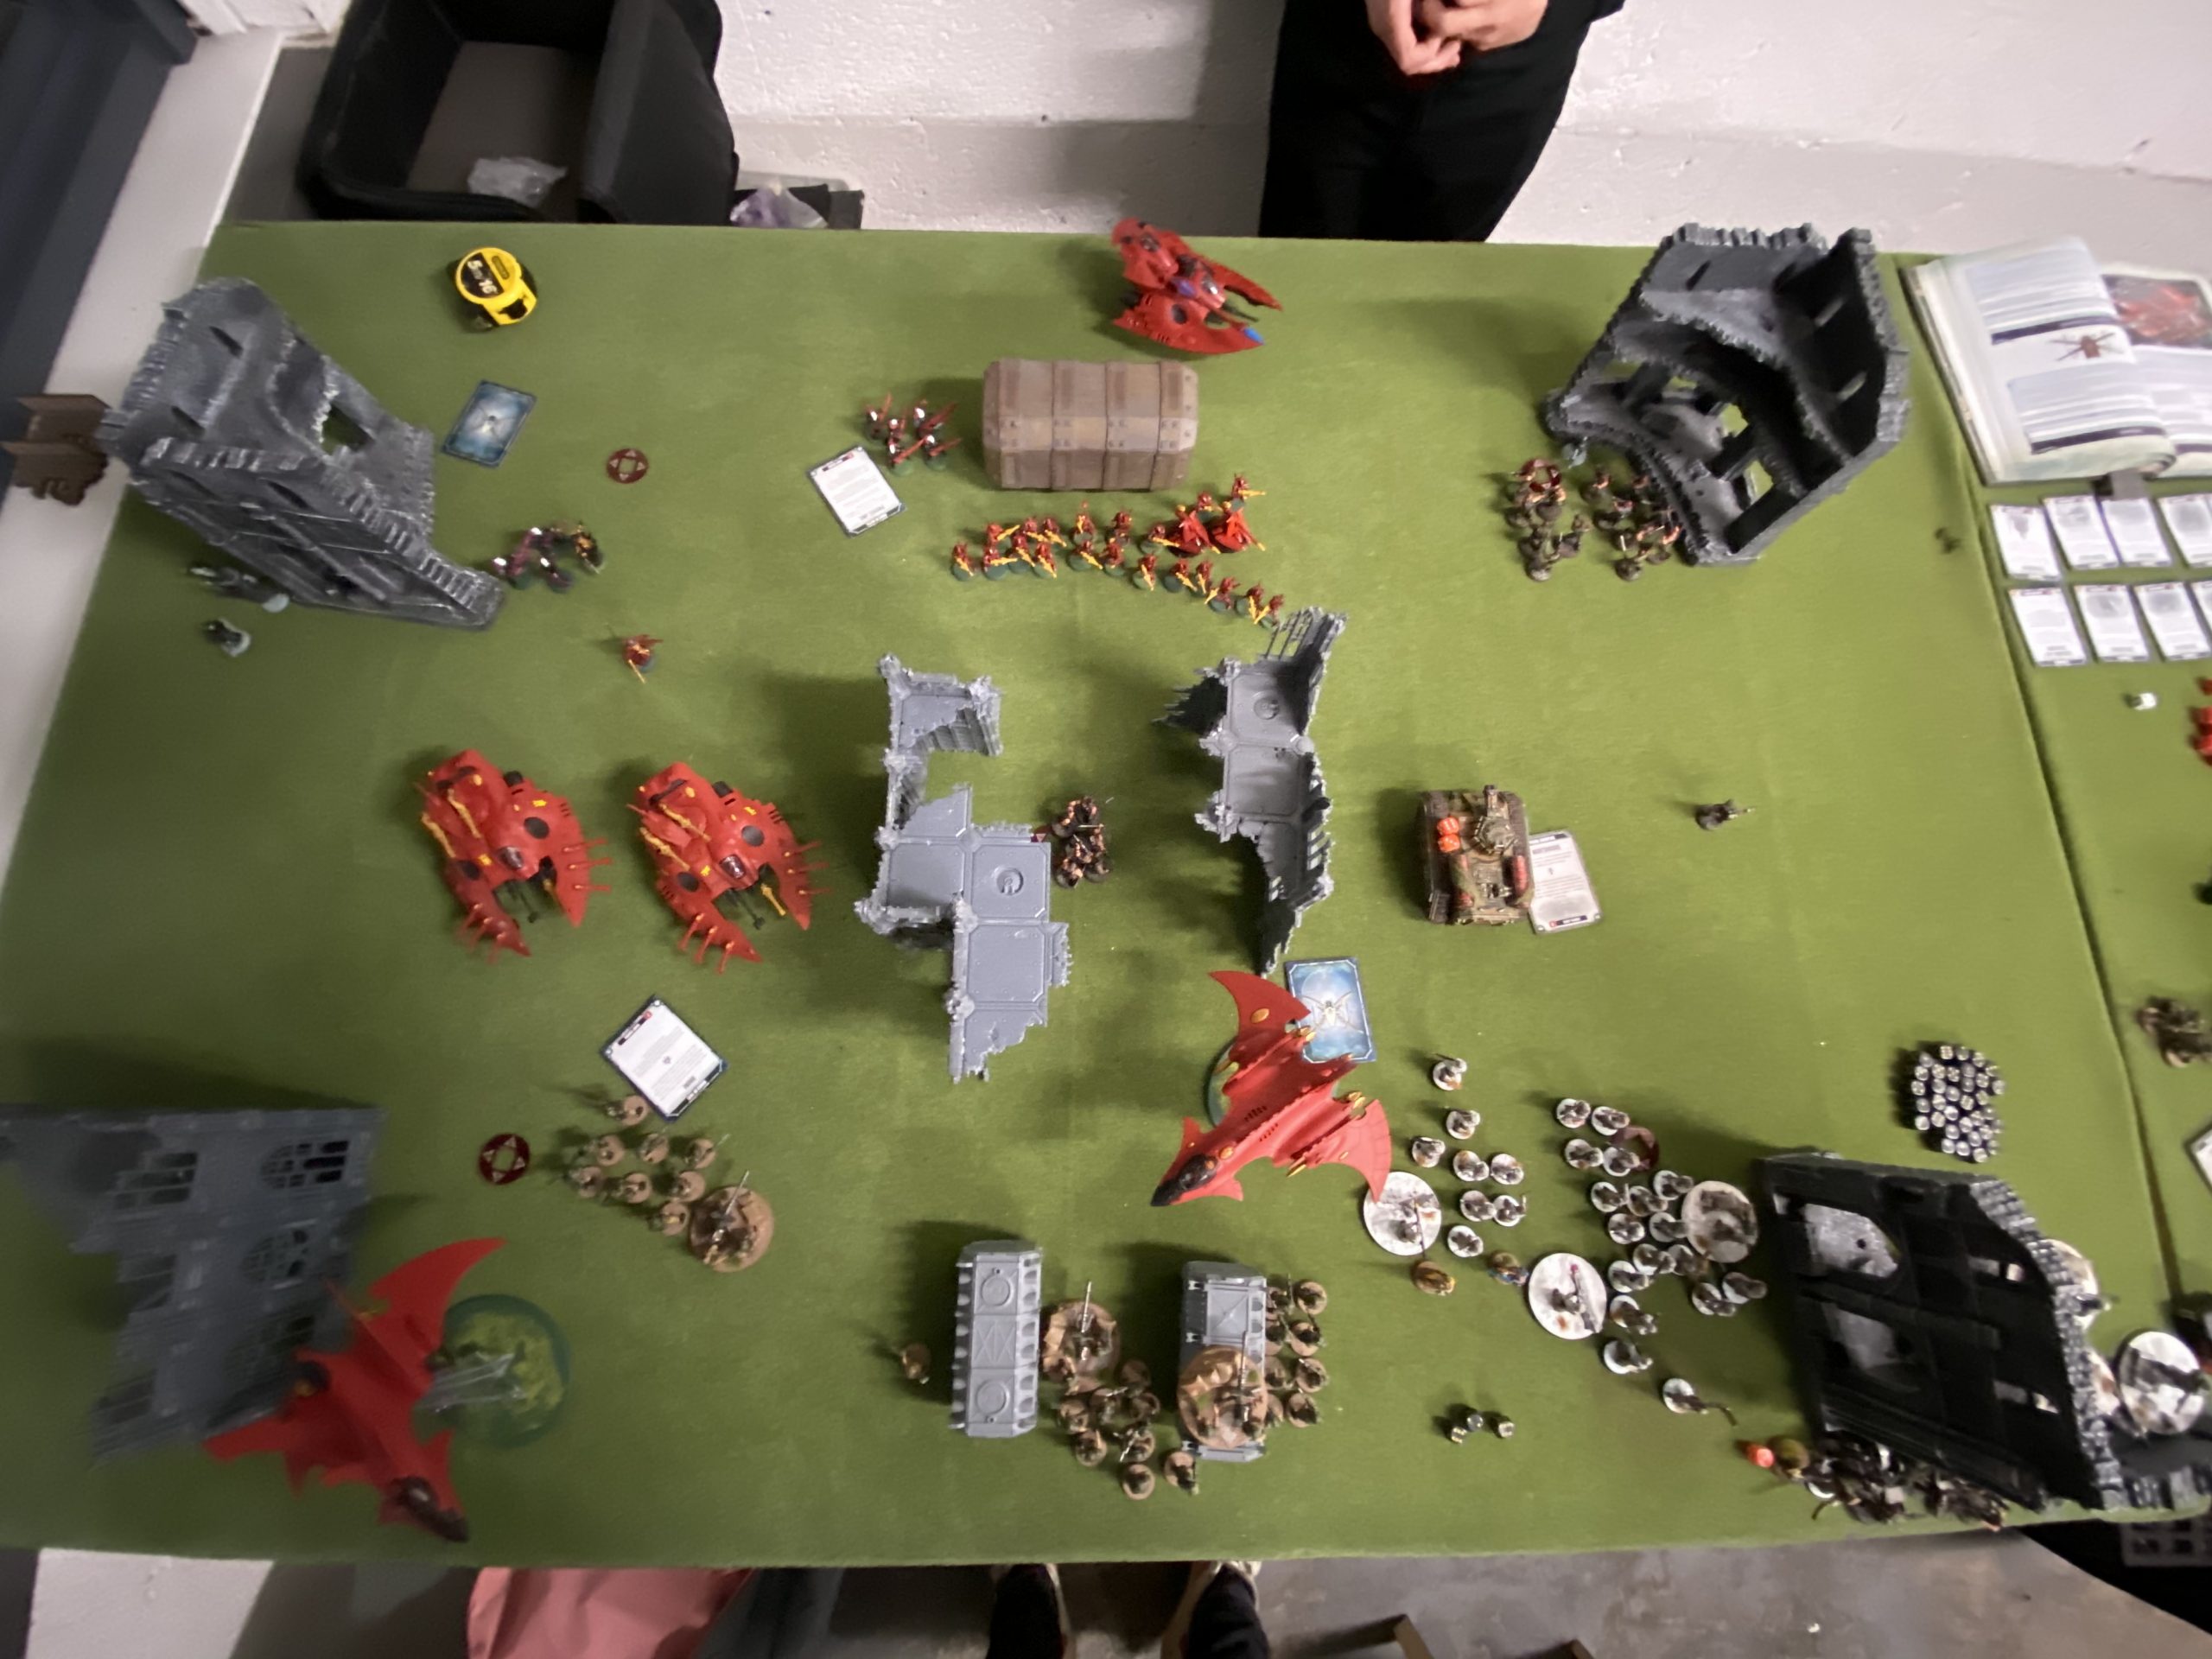
-
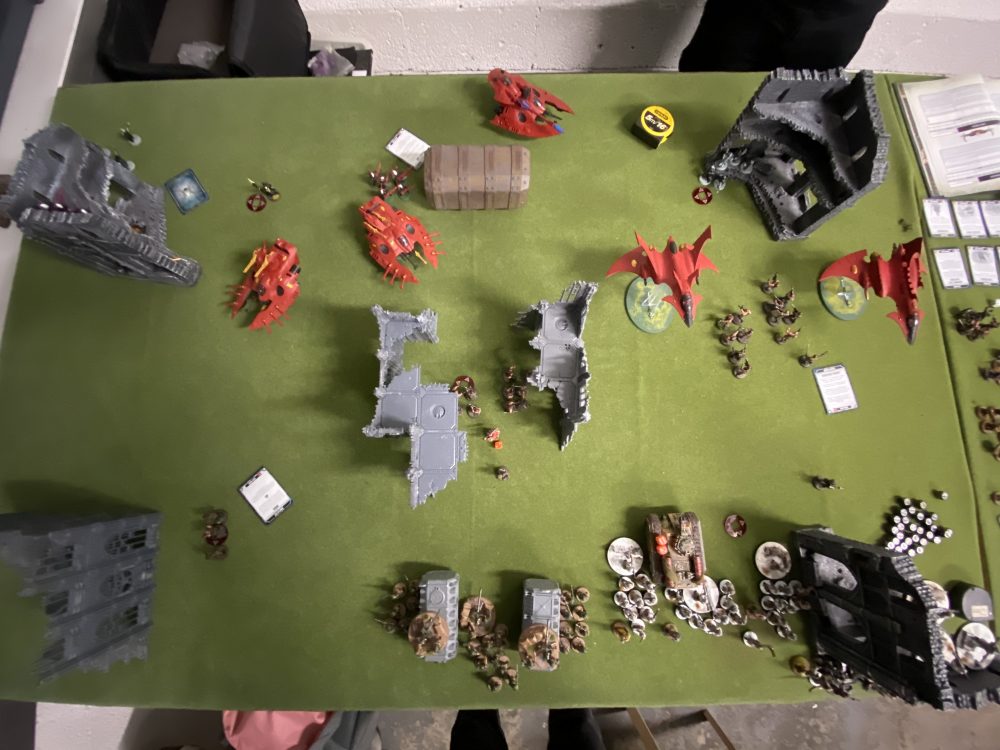
- Overview before the first turn

-

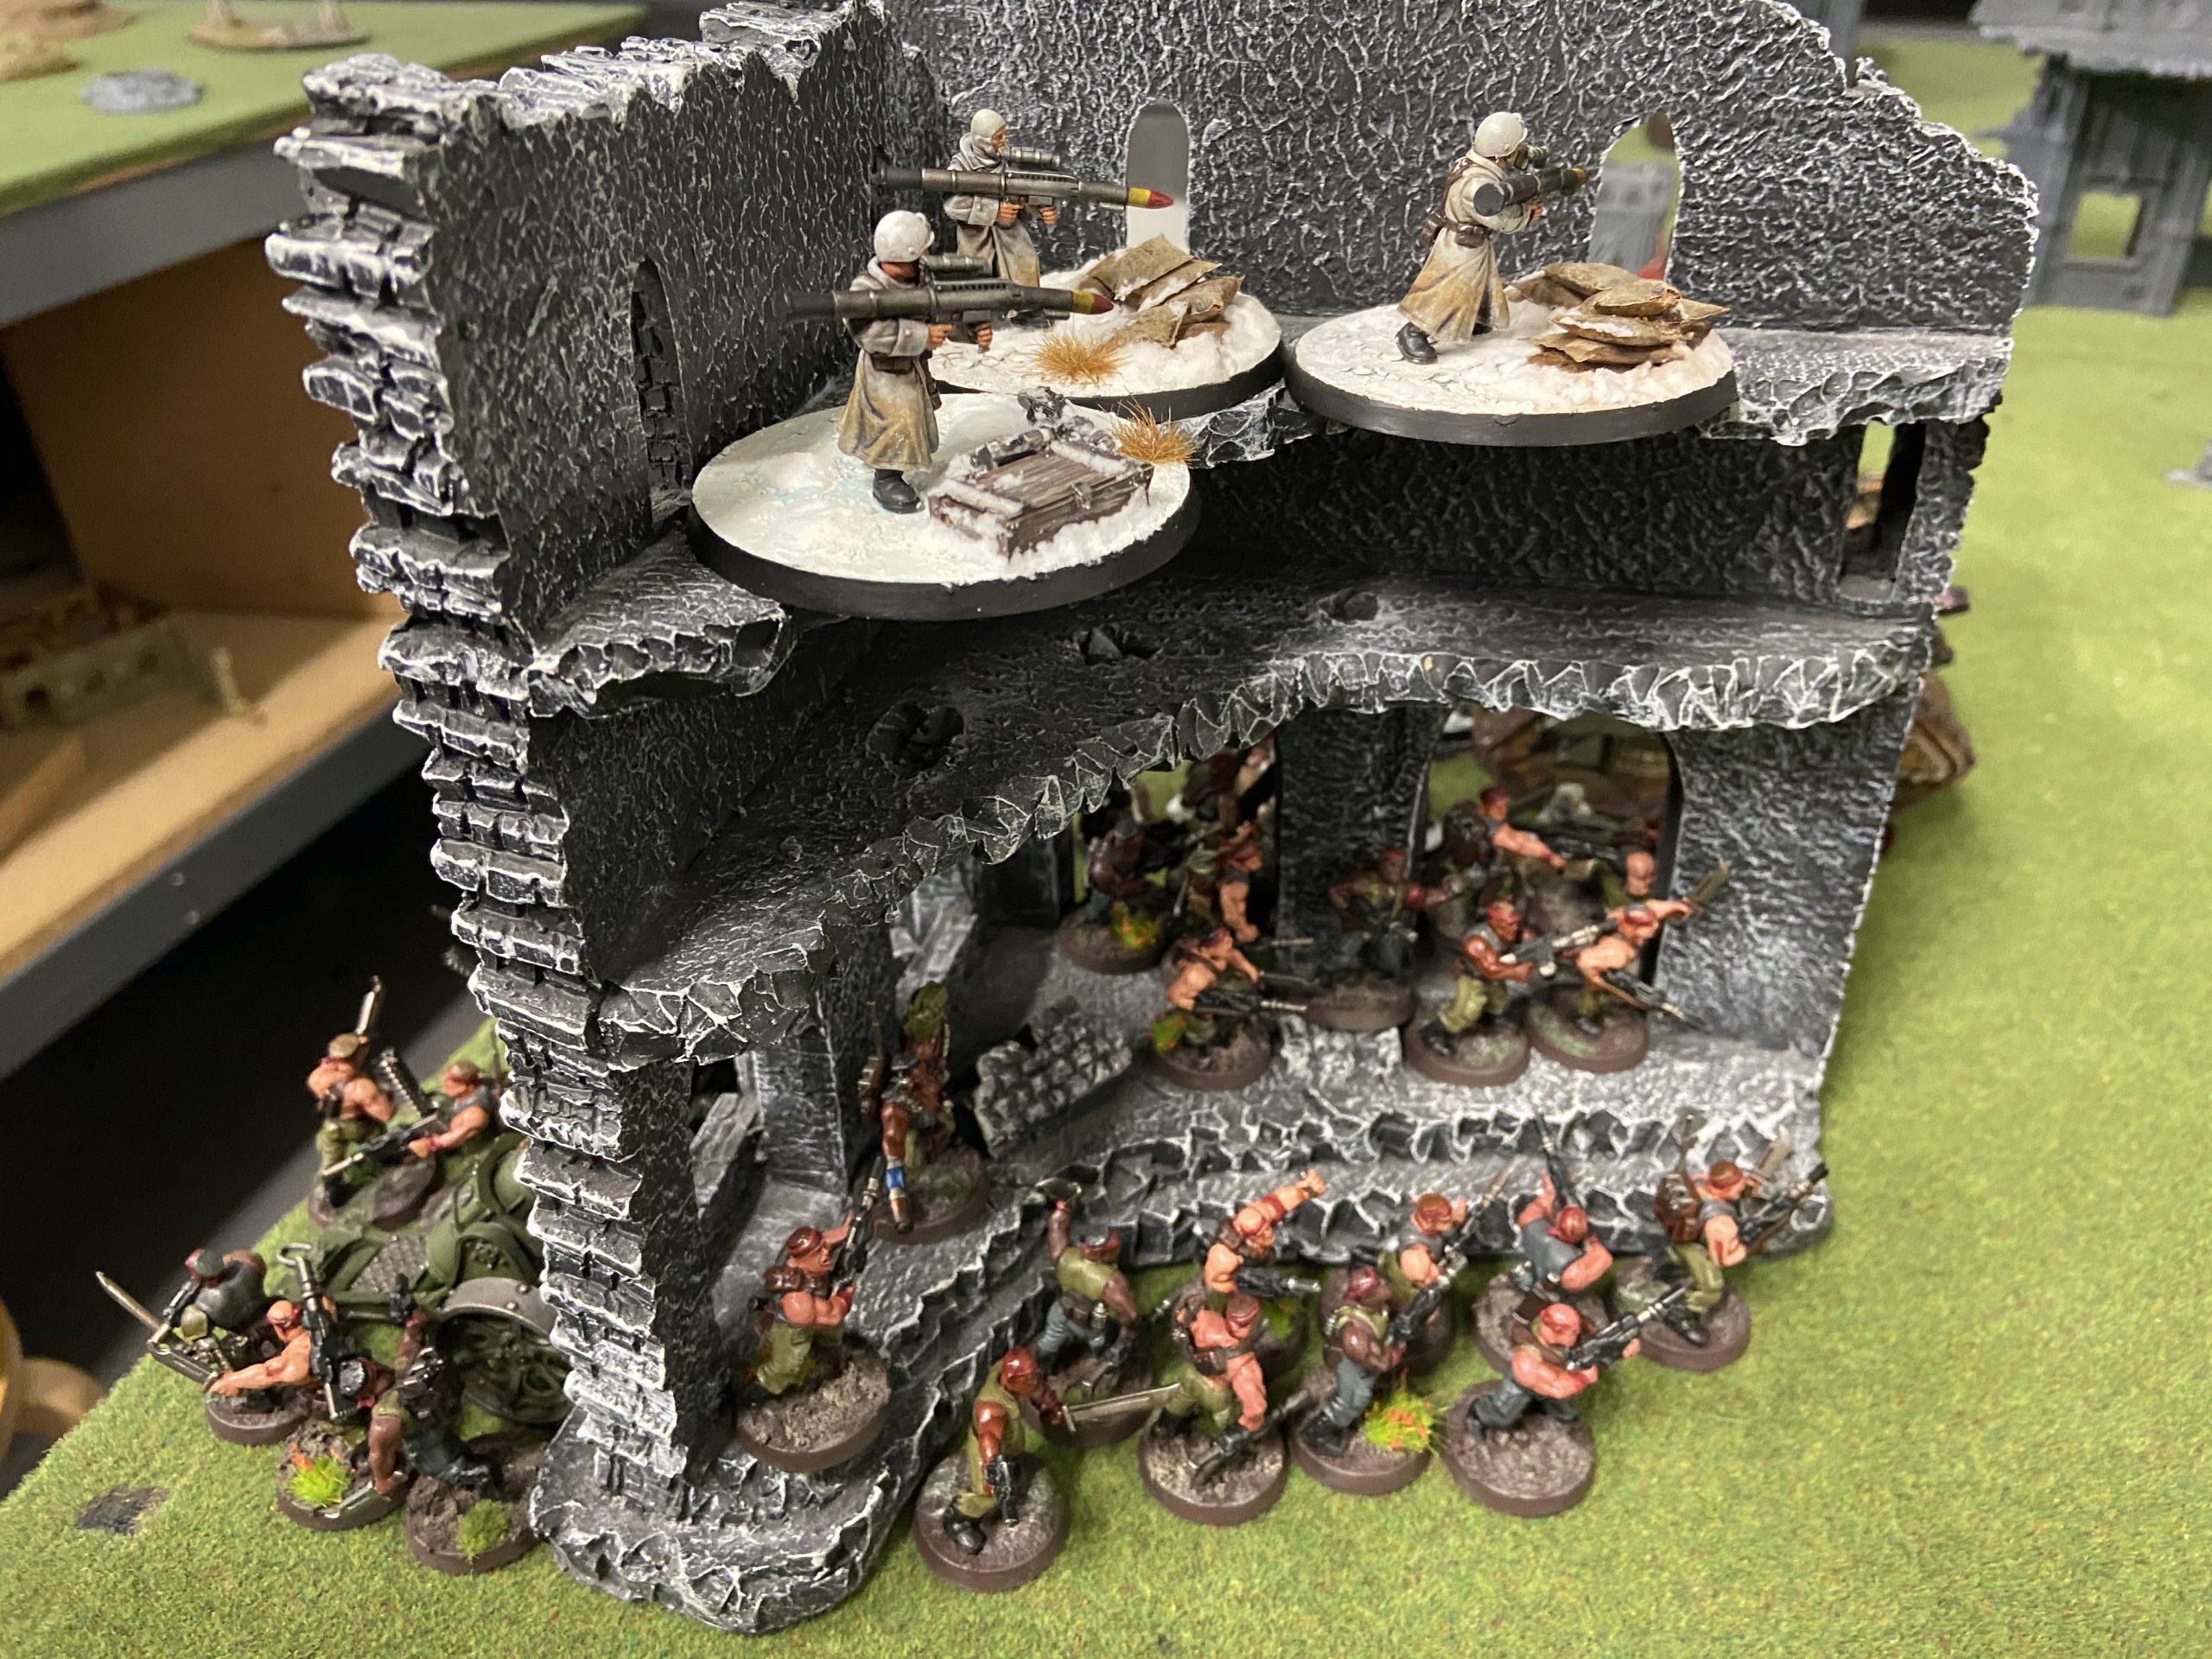
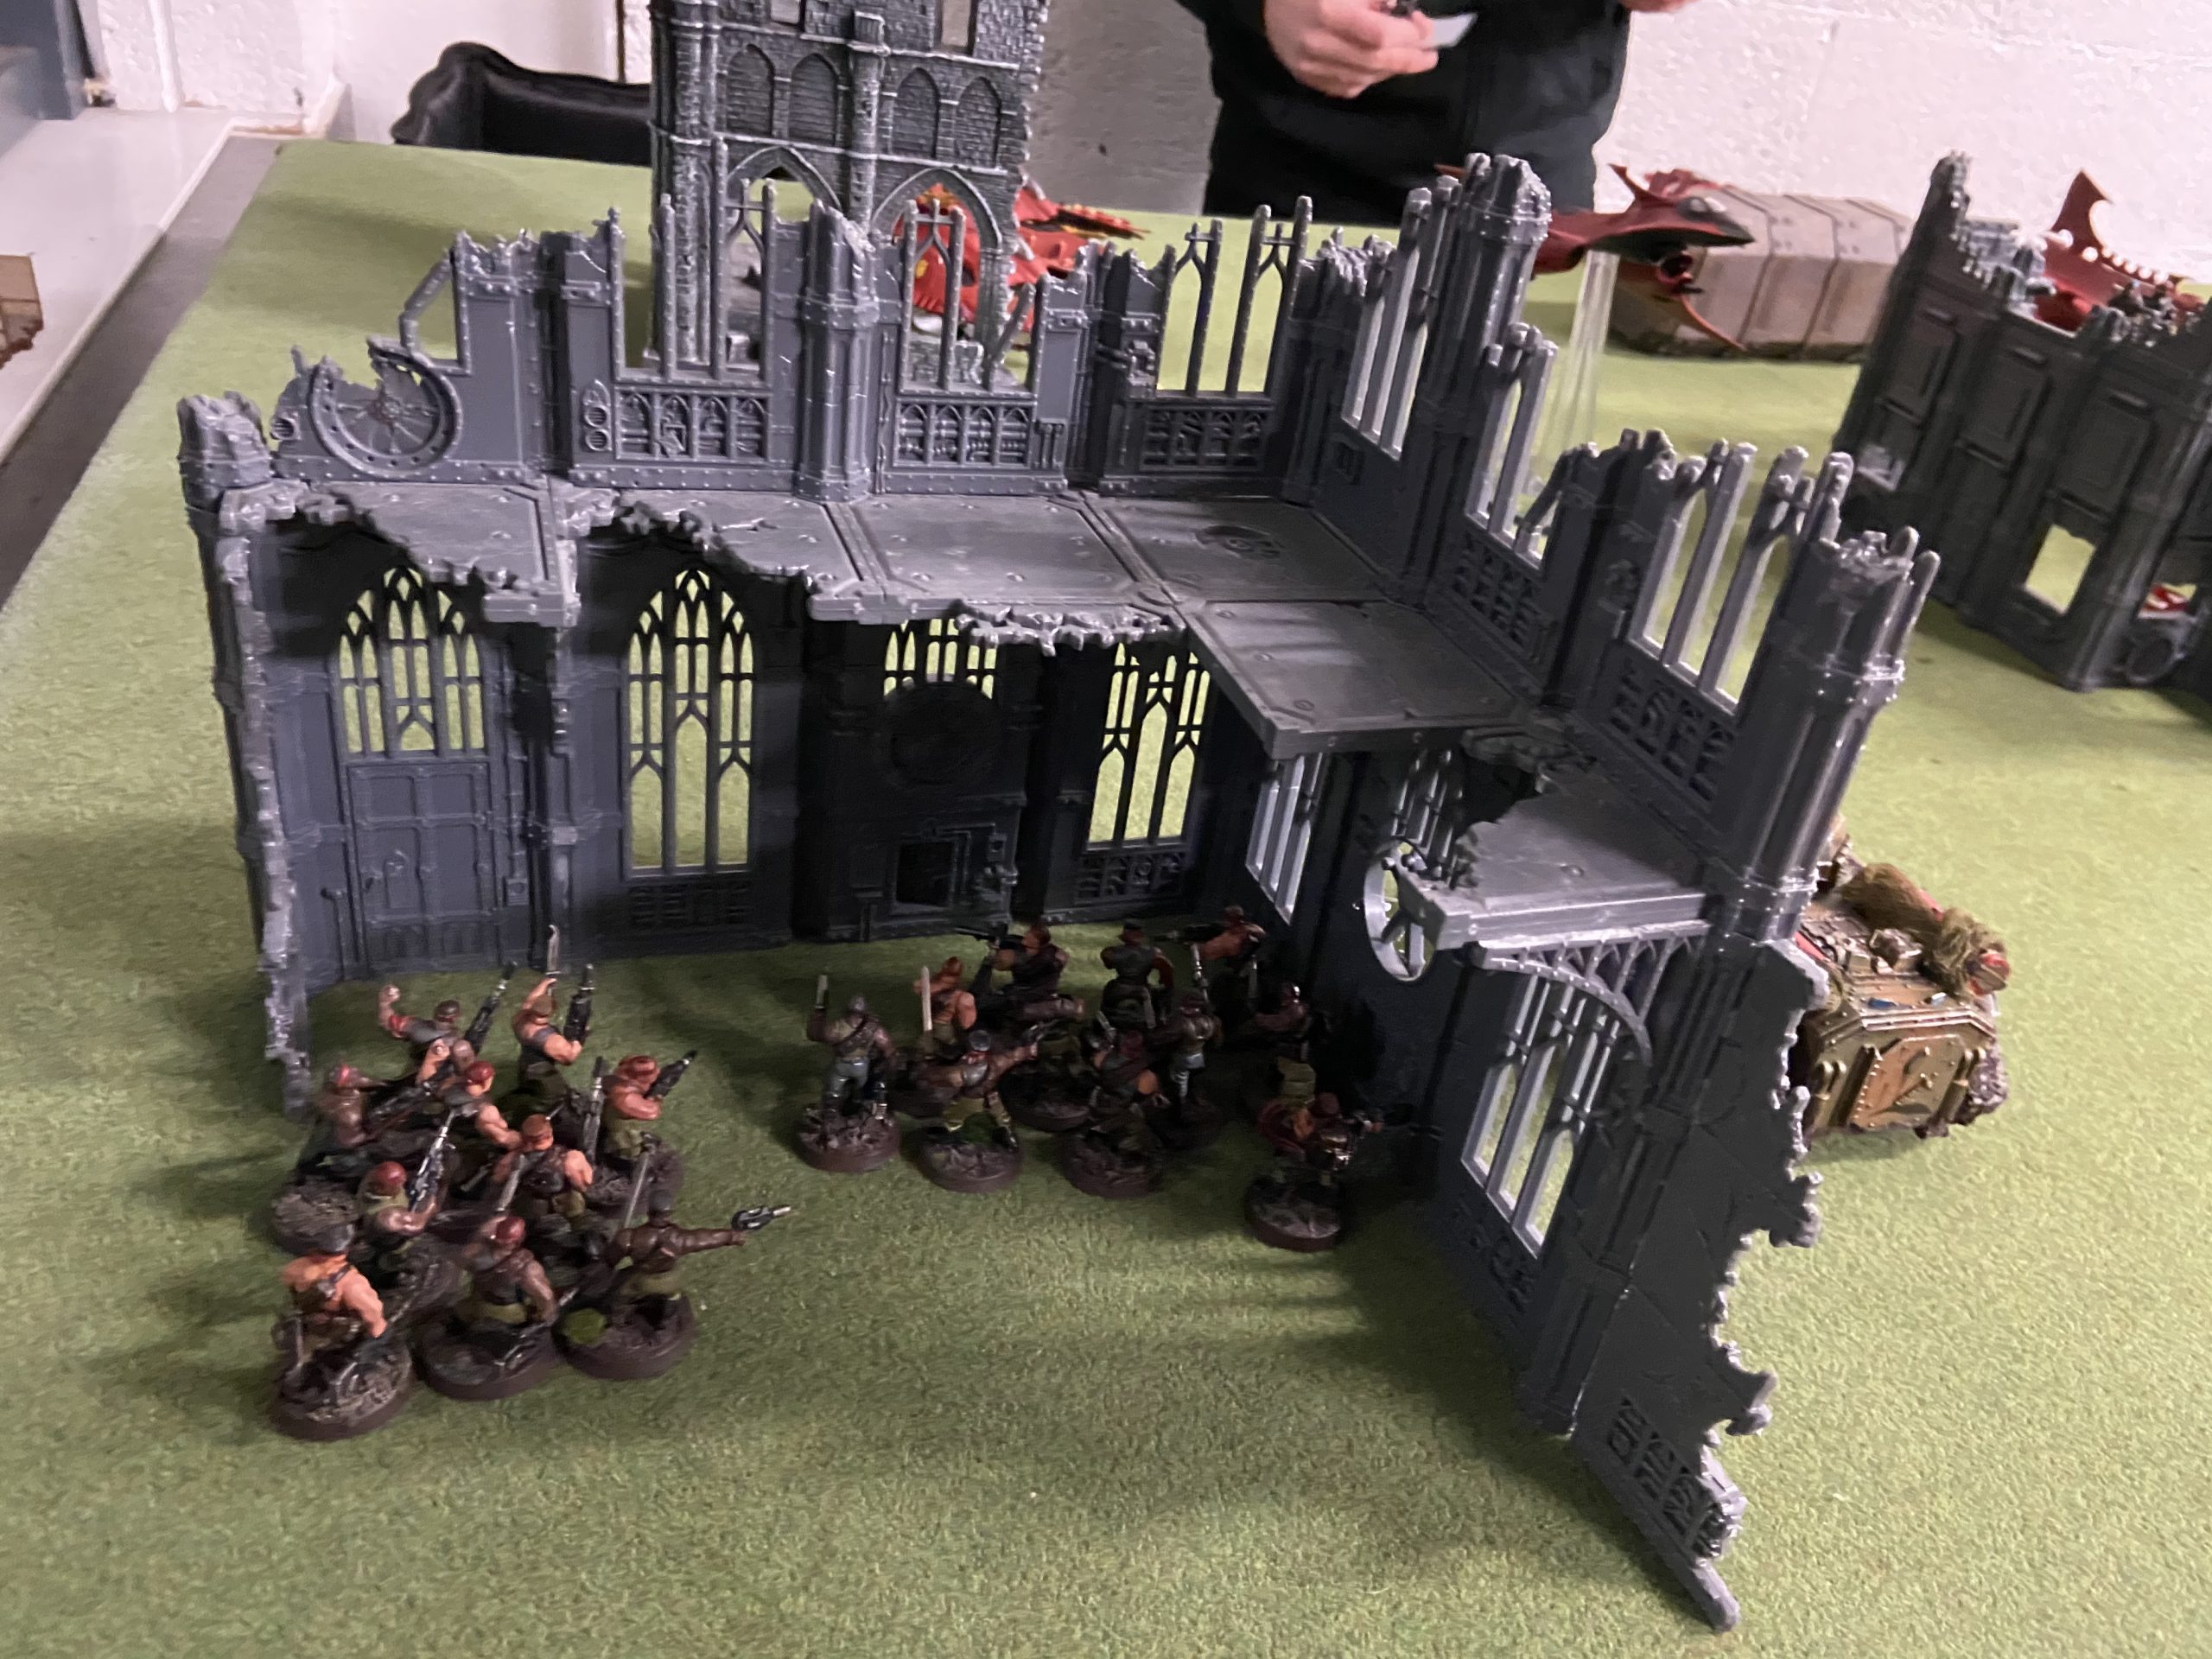
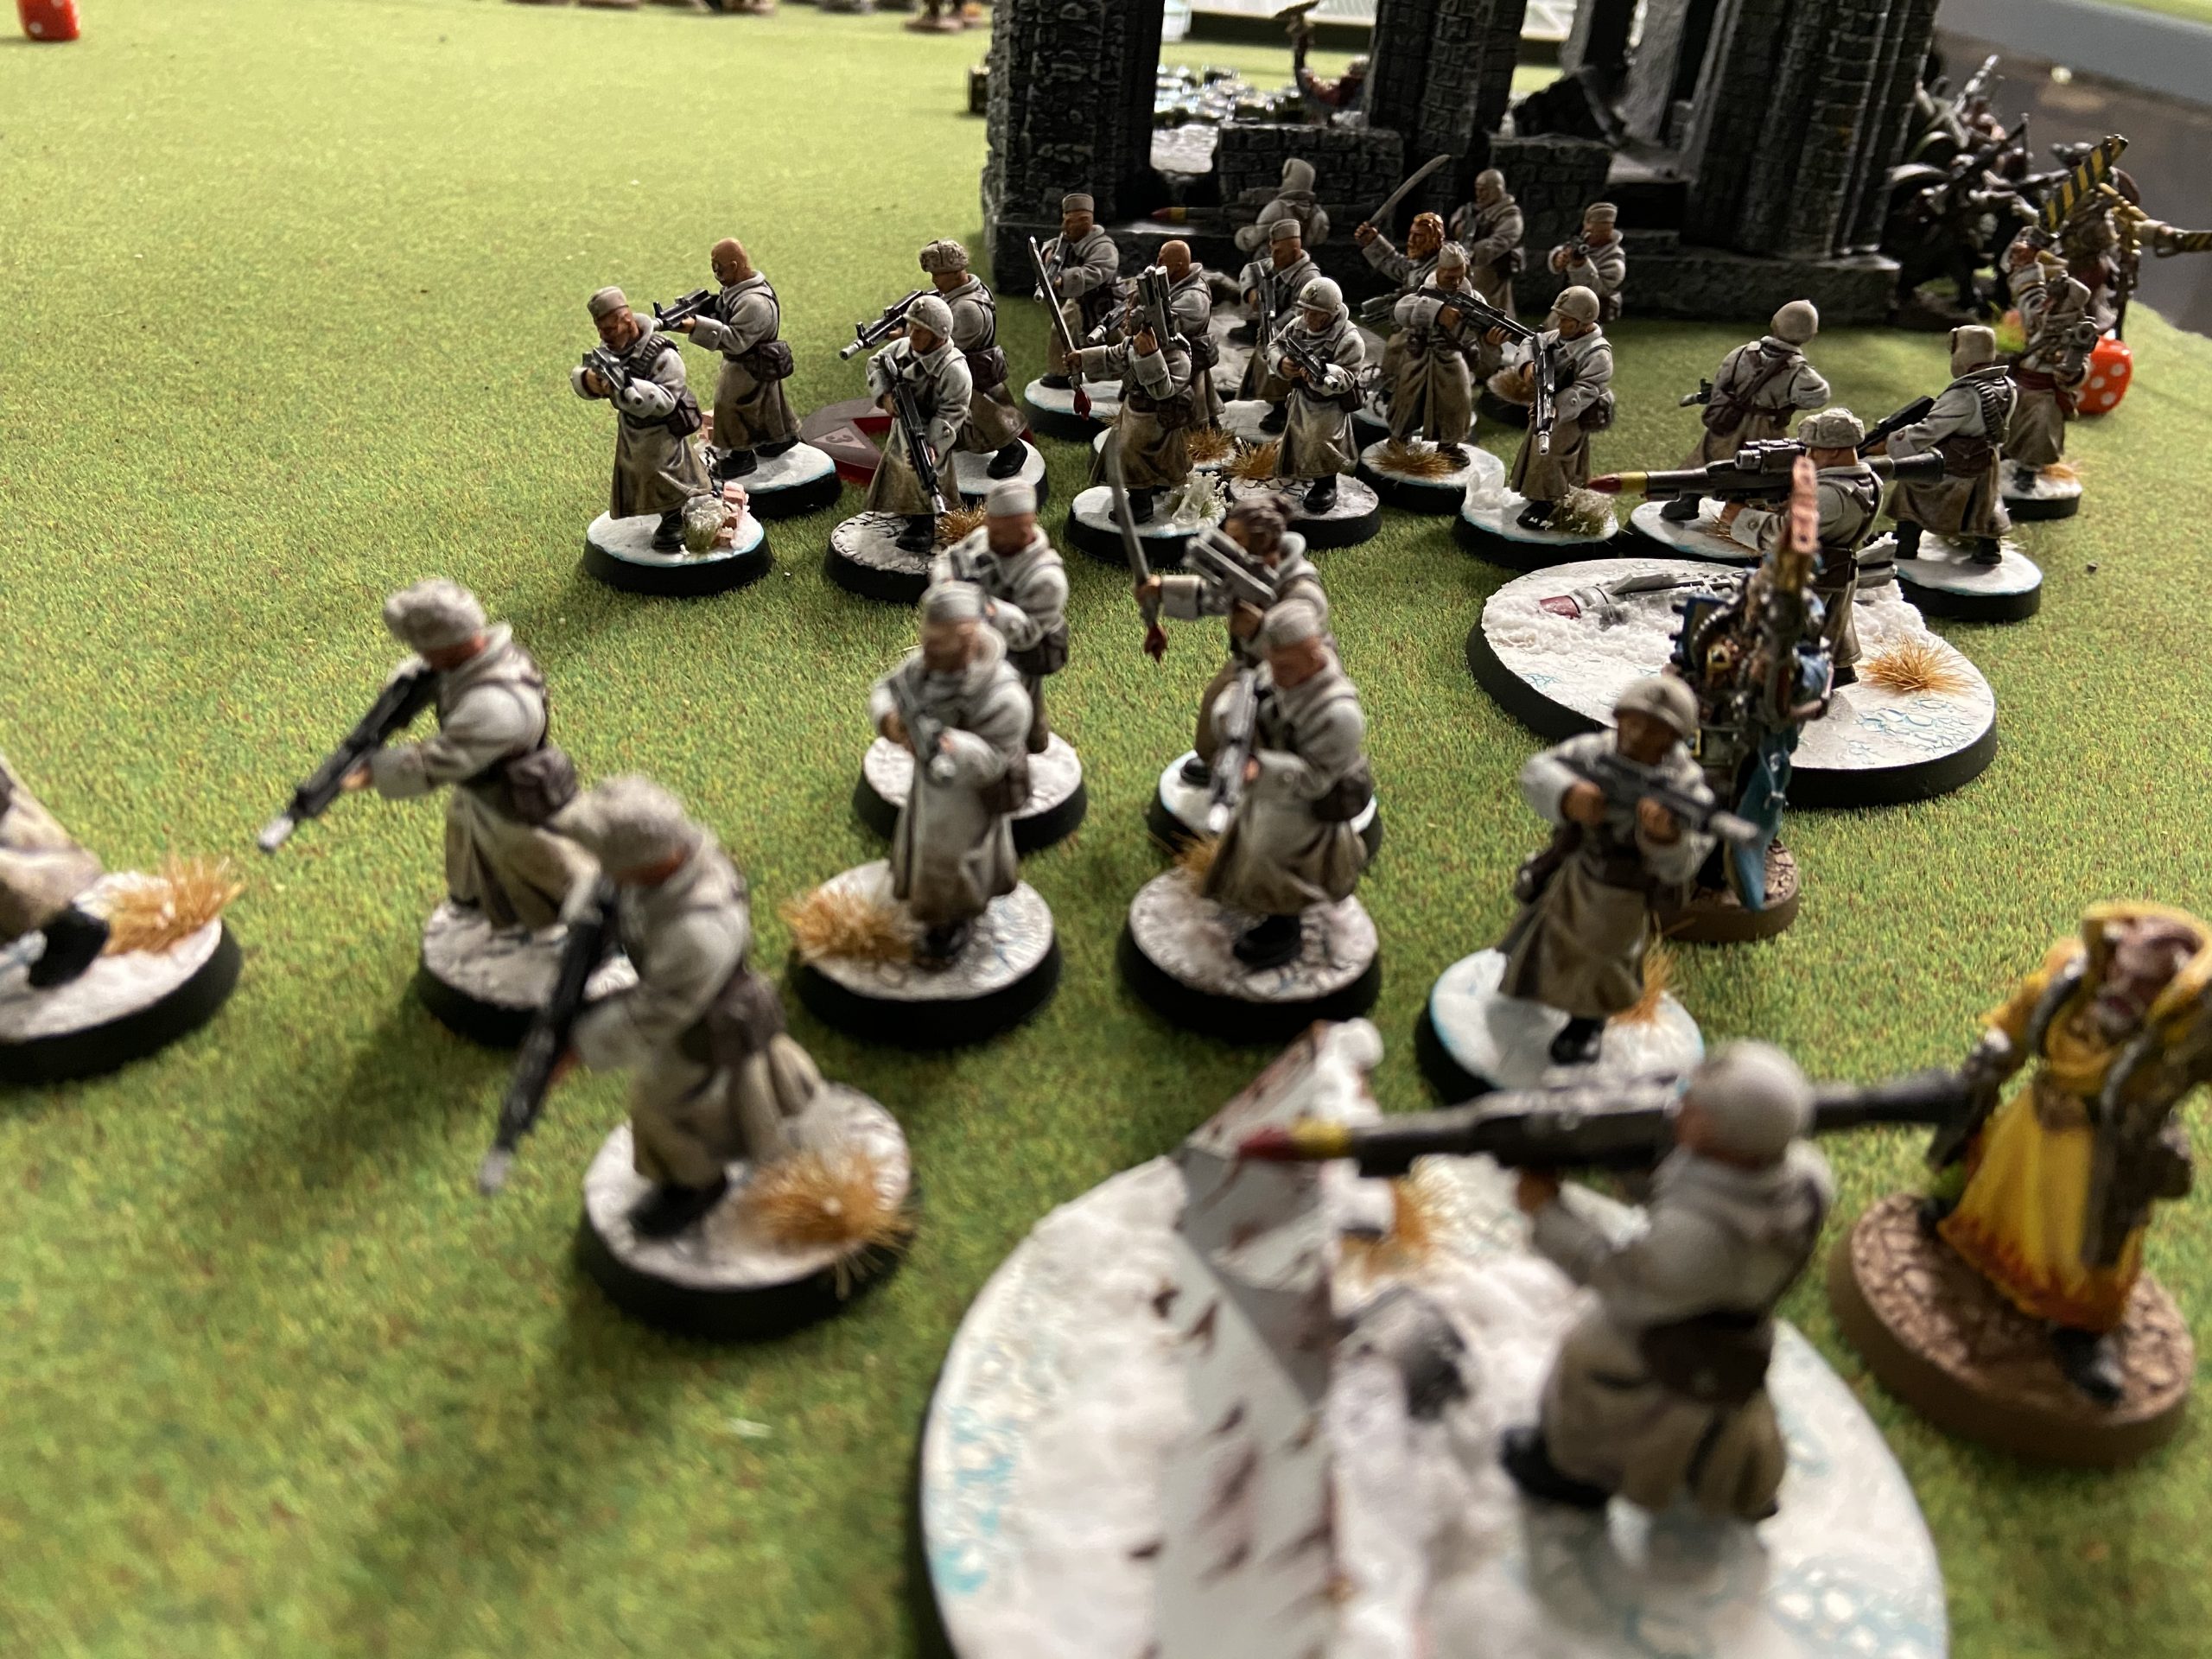
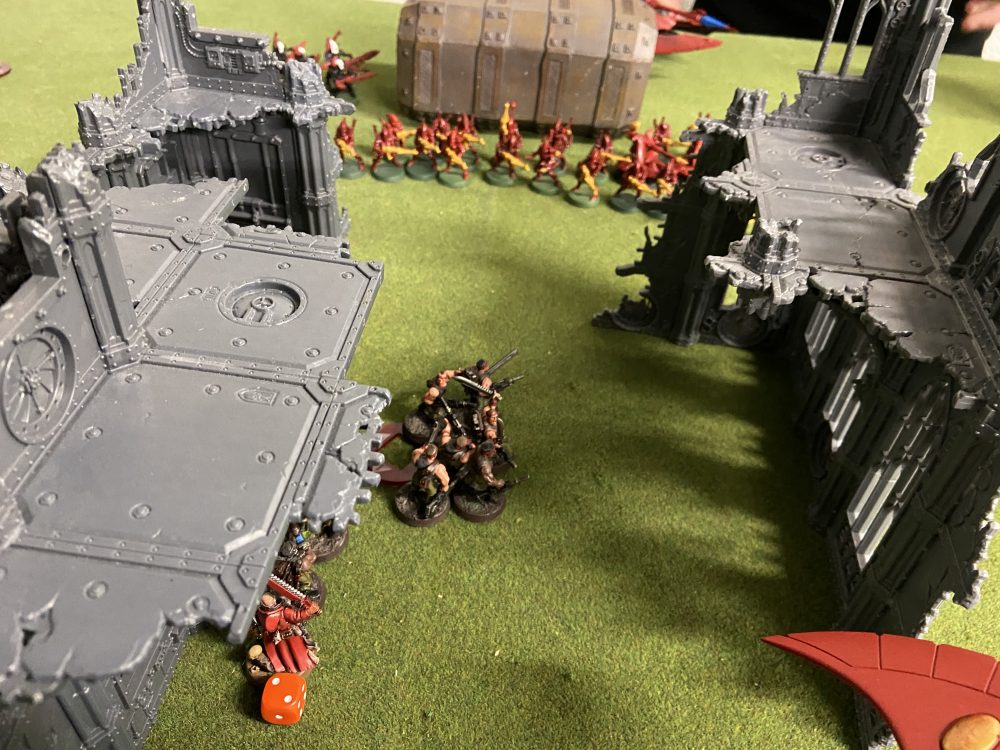
- Taking advantage of the ruins
-

- Gun line!
-

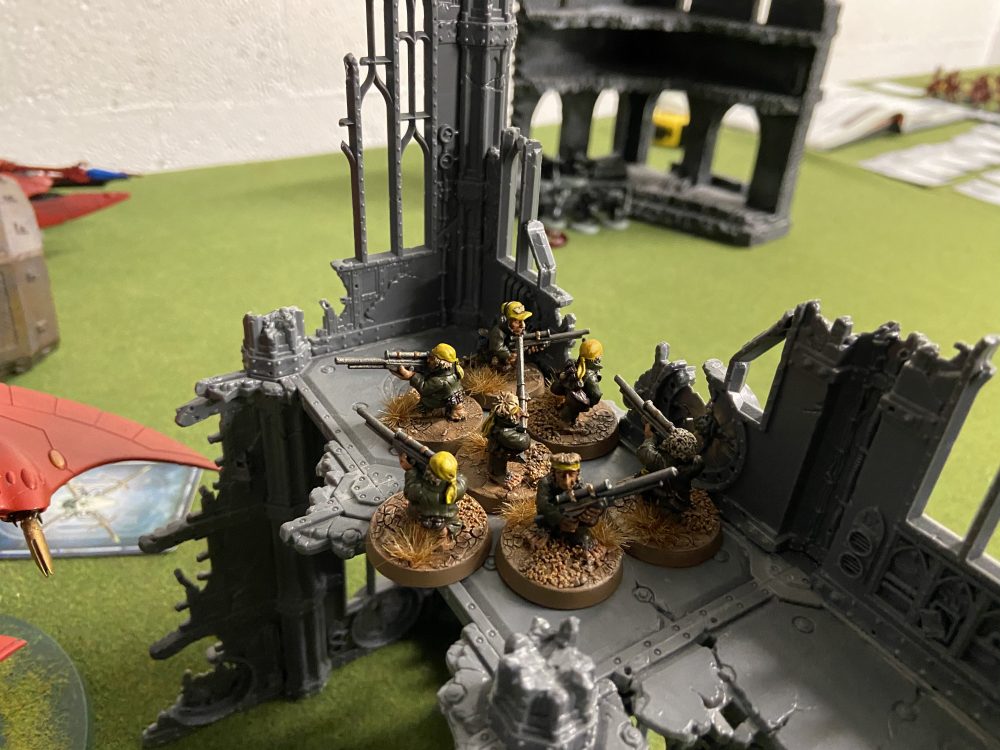
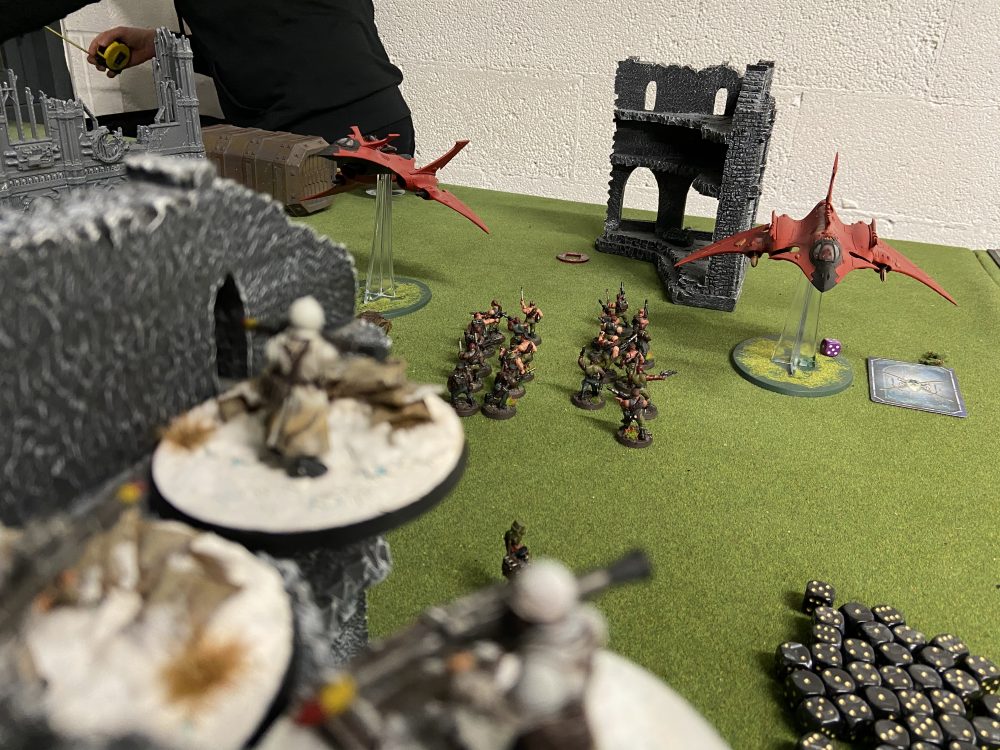
- This was my left flank, with no sight into this building, these guys are safe
Eldar – Turn 1
The objective on my right flank with Rangers on it was worth 2VP this turn.
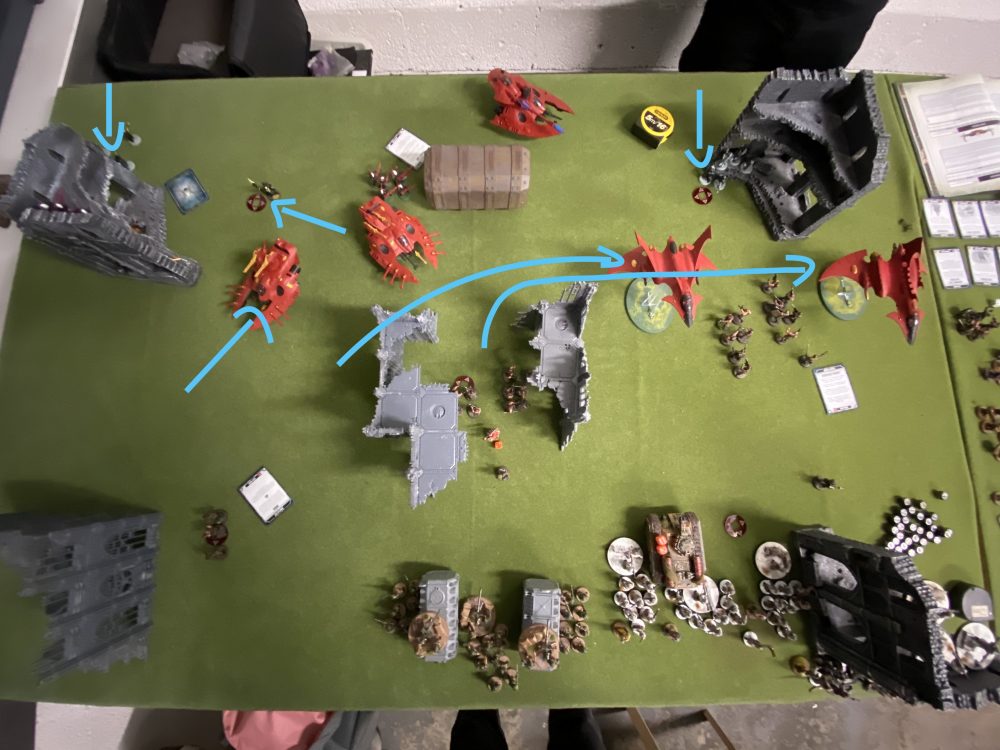
I did not take many photos during this first turn, but the below images do show the Eldar movement pretty well.
They really went after the Ratlings, I lost them all. They were in the ruins in the middle of the table. A Hellhound was wounded too, but survived – thank the Emperor! That explosion would have been really bad at this stage in the game in my Deployment Zone. I did lose another one on the left flank, but it was well away from any juicy units. It did not explode.
Not a devastating blow from the Eldar on turn 1 – but some damage was done. Losing all the Ratlings was good for them as their buffing characters and Pyskers were safe.
The Eldar obtained First Strike.
Show Score
Eldar: 1
Astra Militarum: 0
-
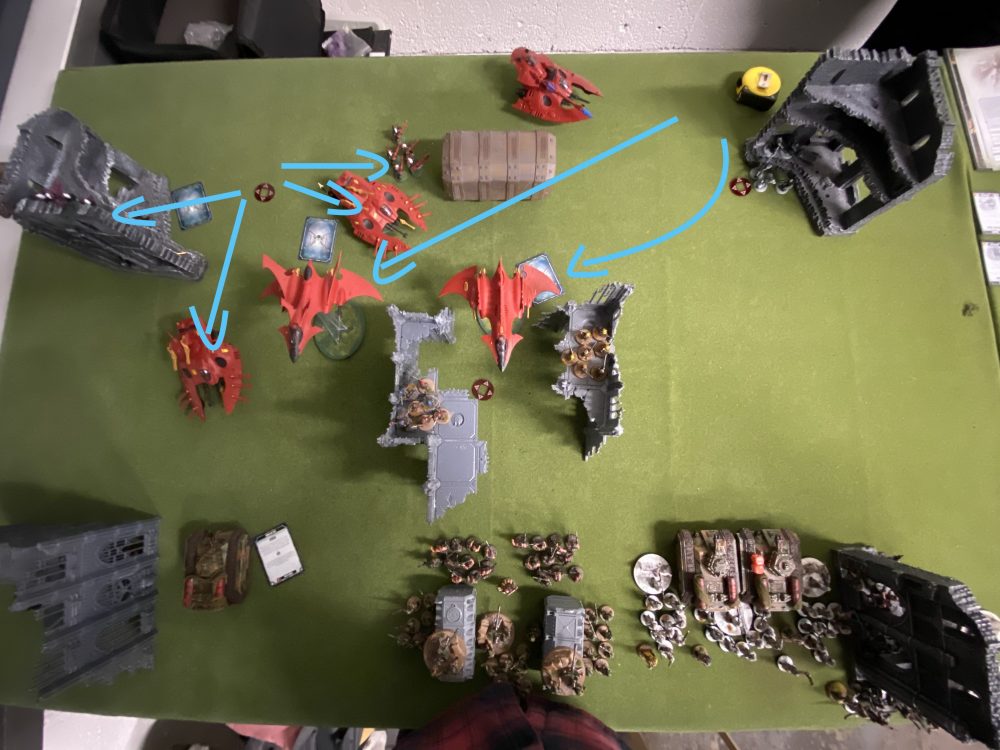
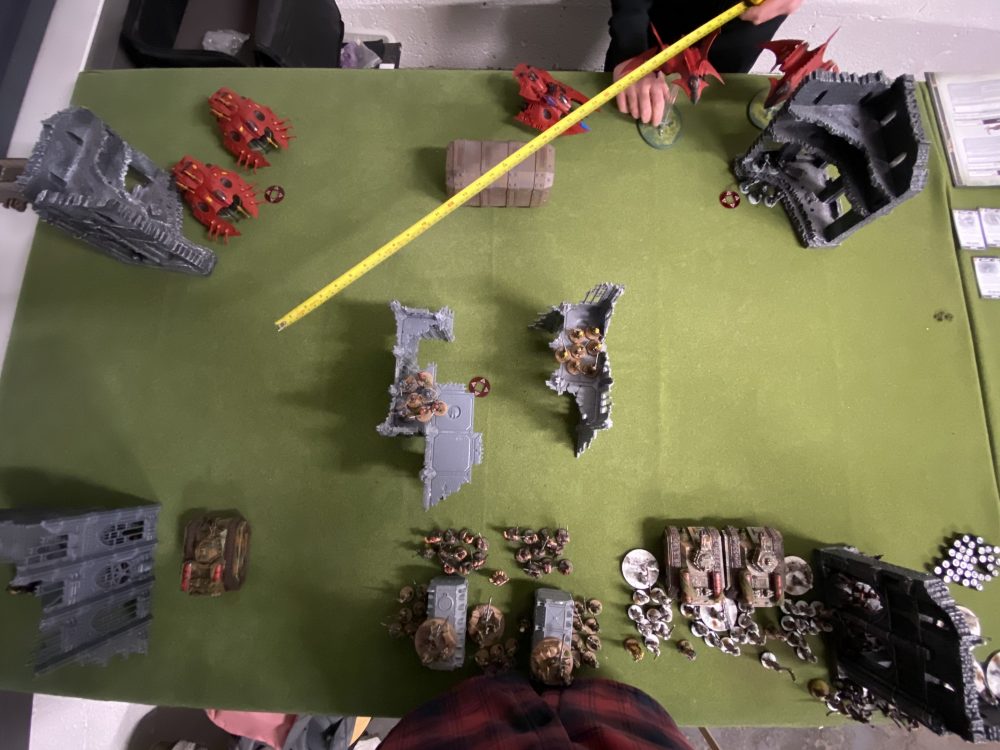
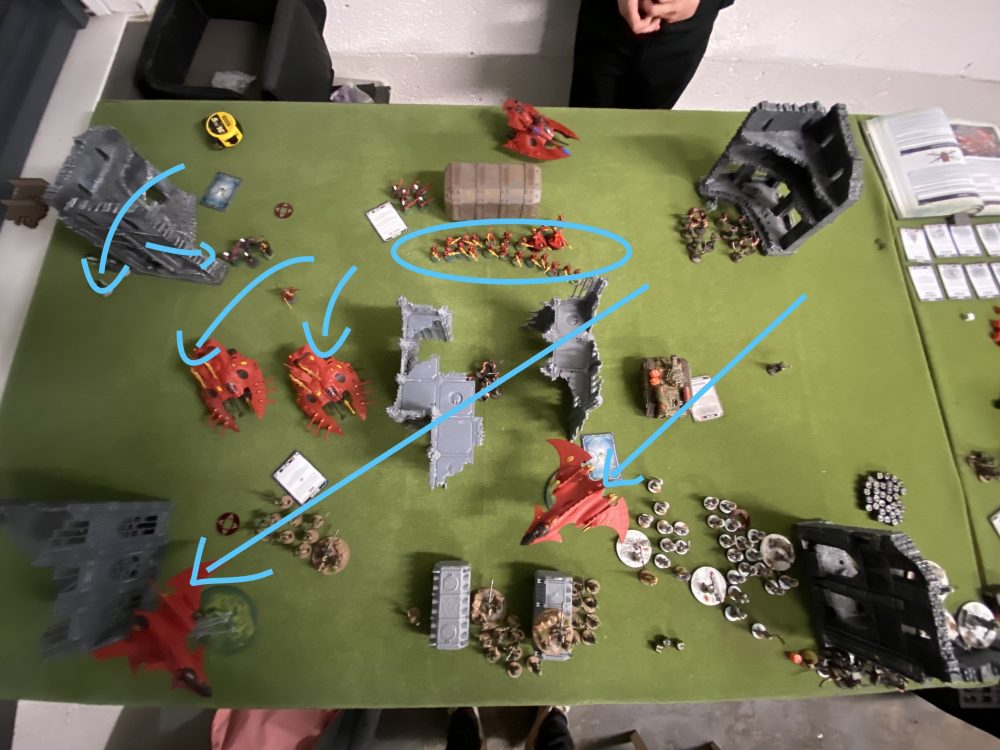
- Eldar movement

-

- Eldar turn 1 overview
-
- Ratlings in the centre

-

- The other Ratlings in the centre

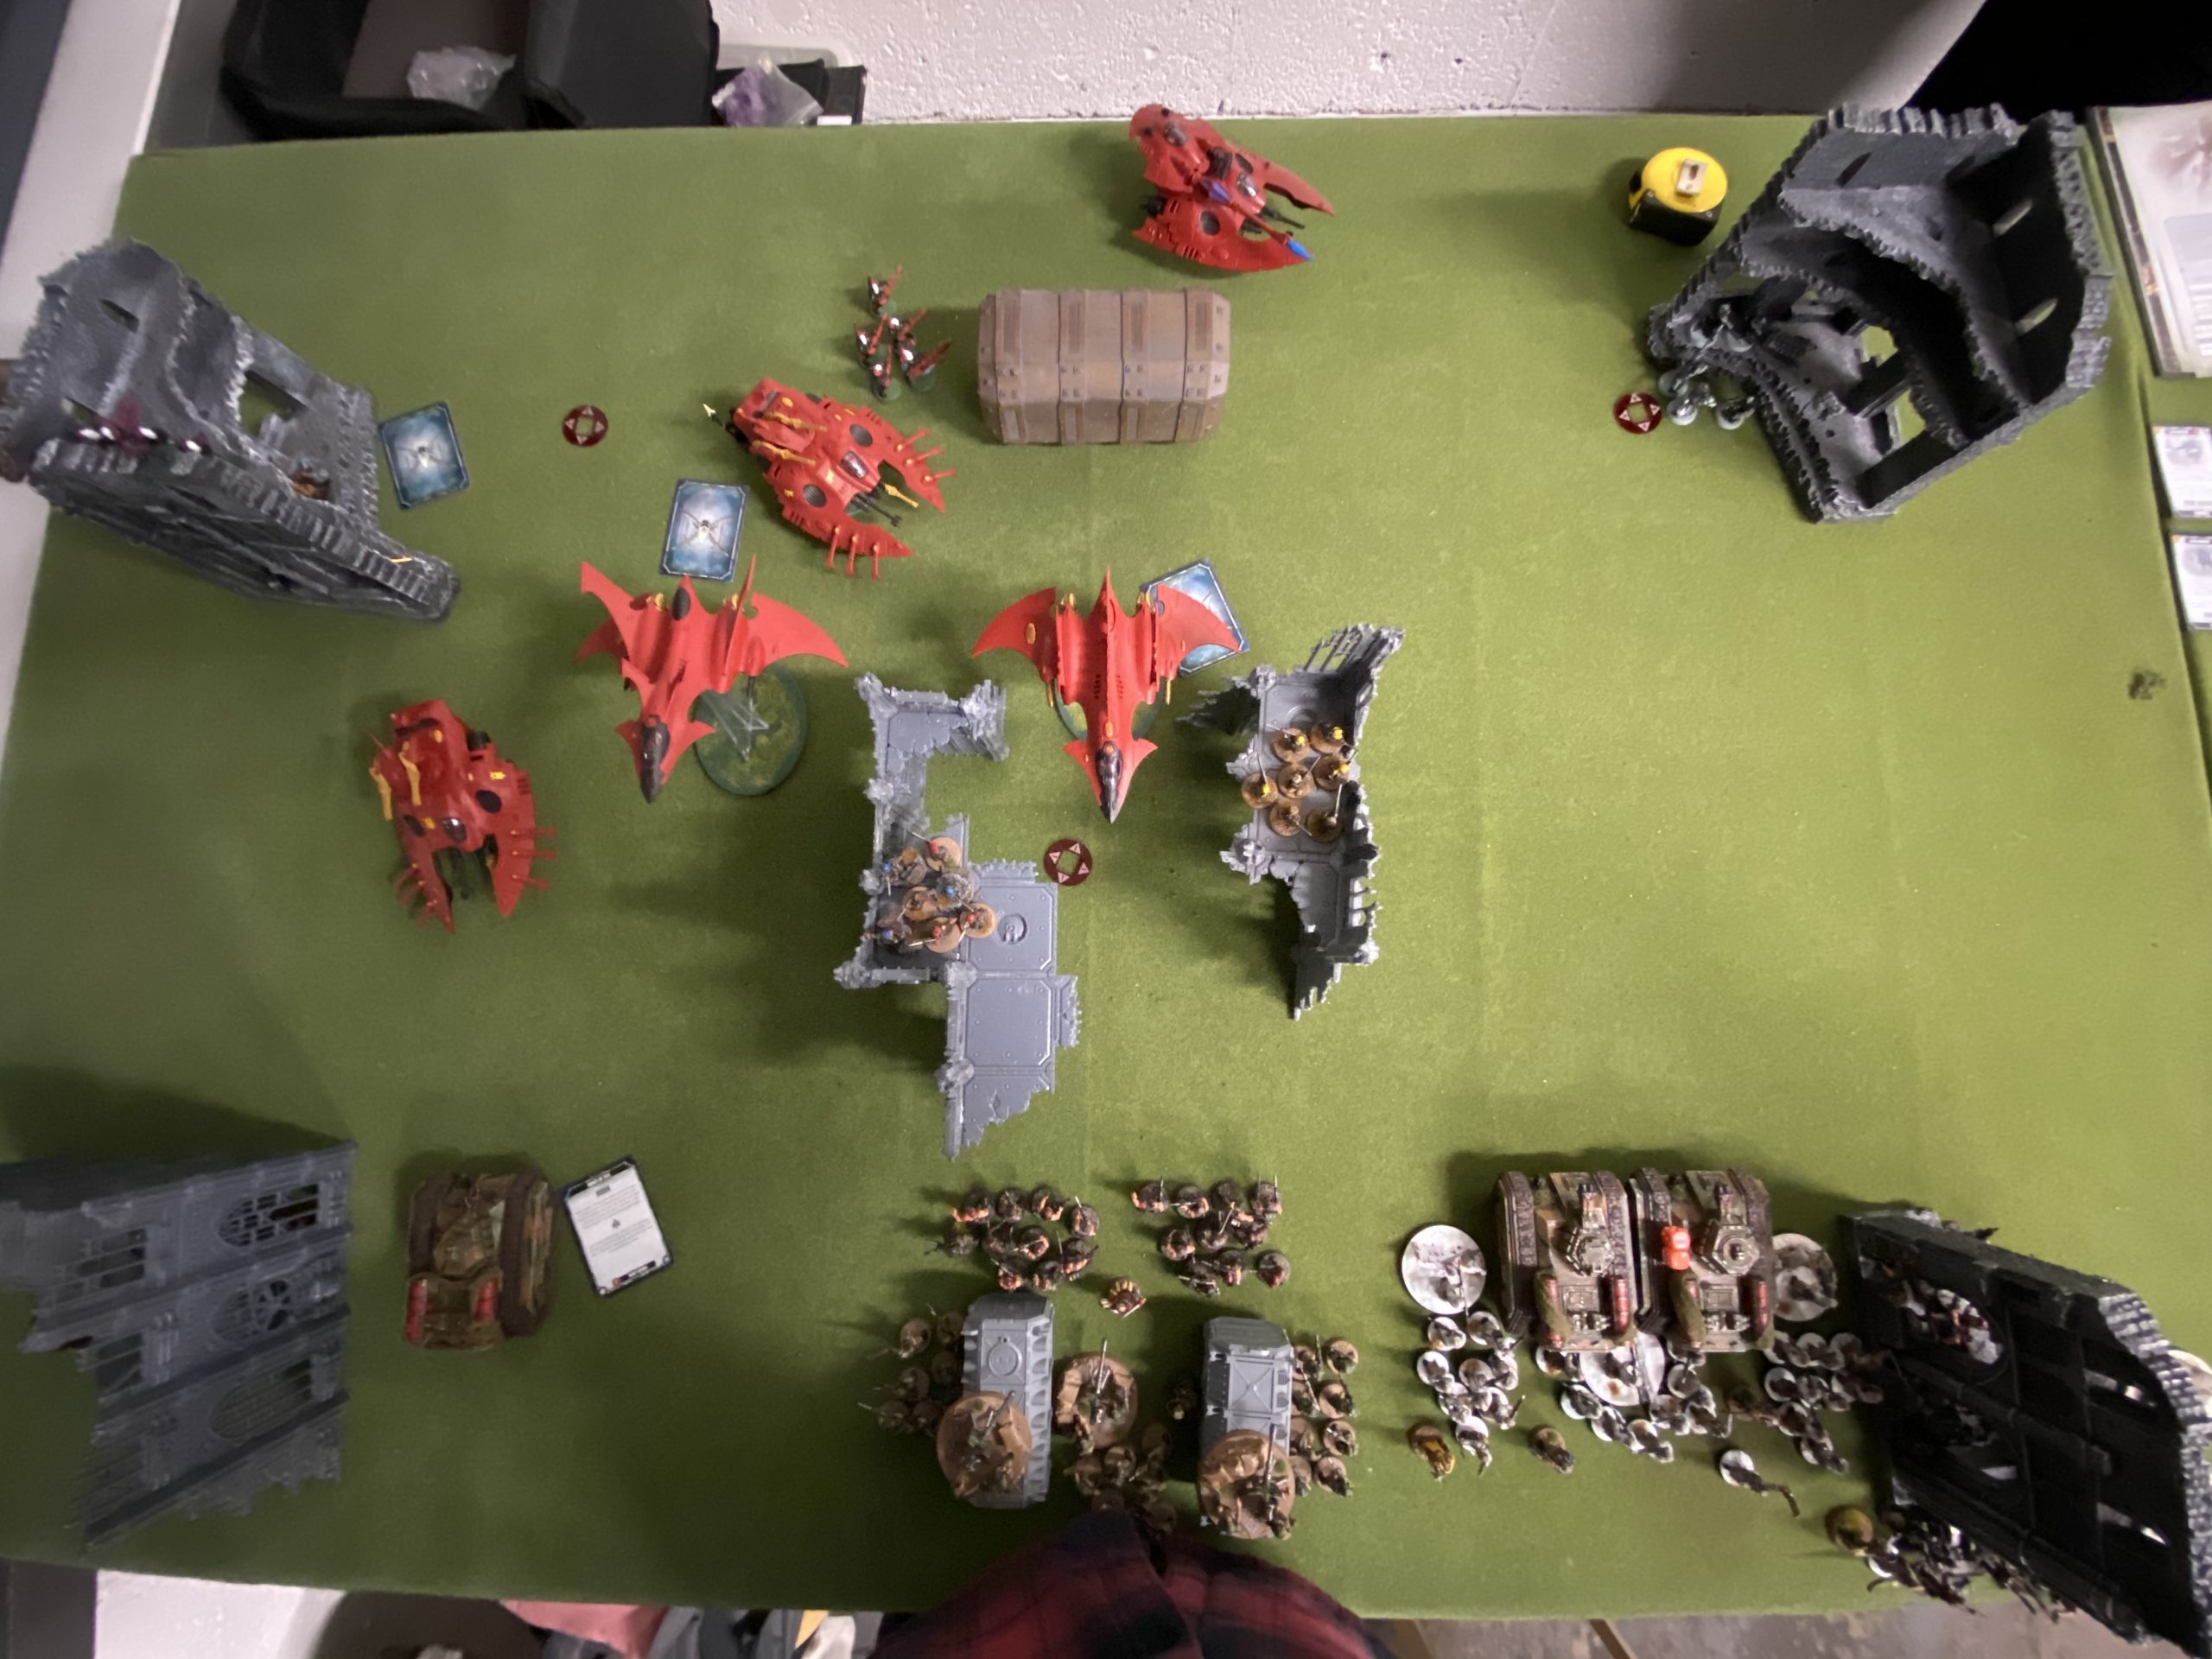
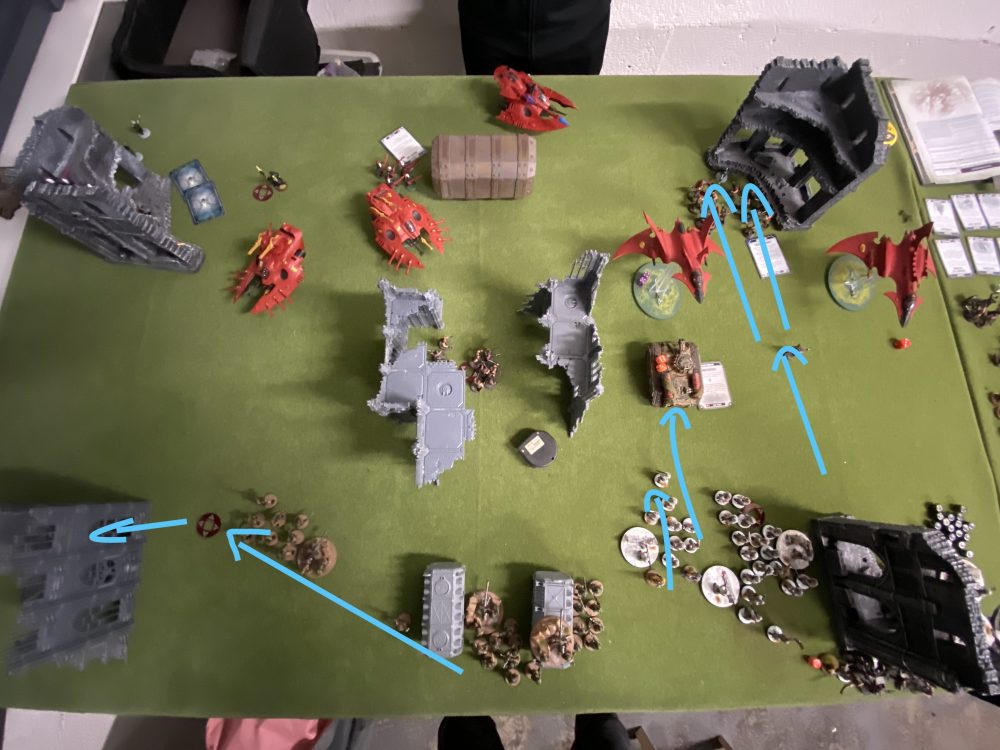
Astra Militarum – Turn 1
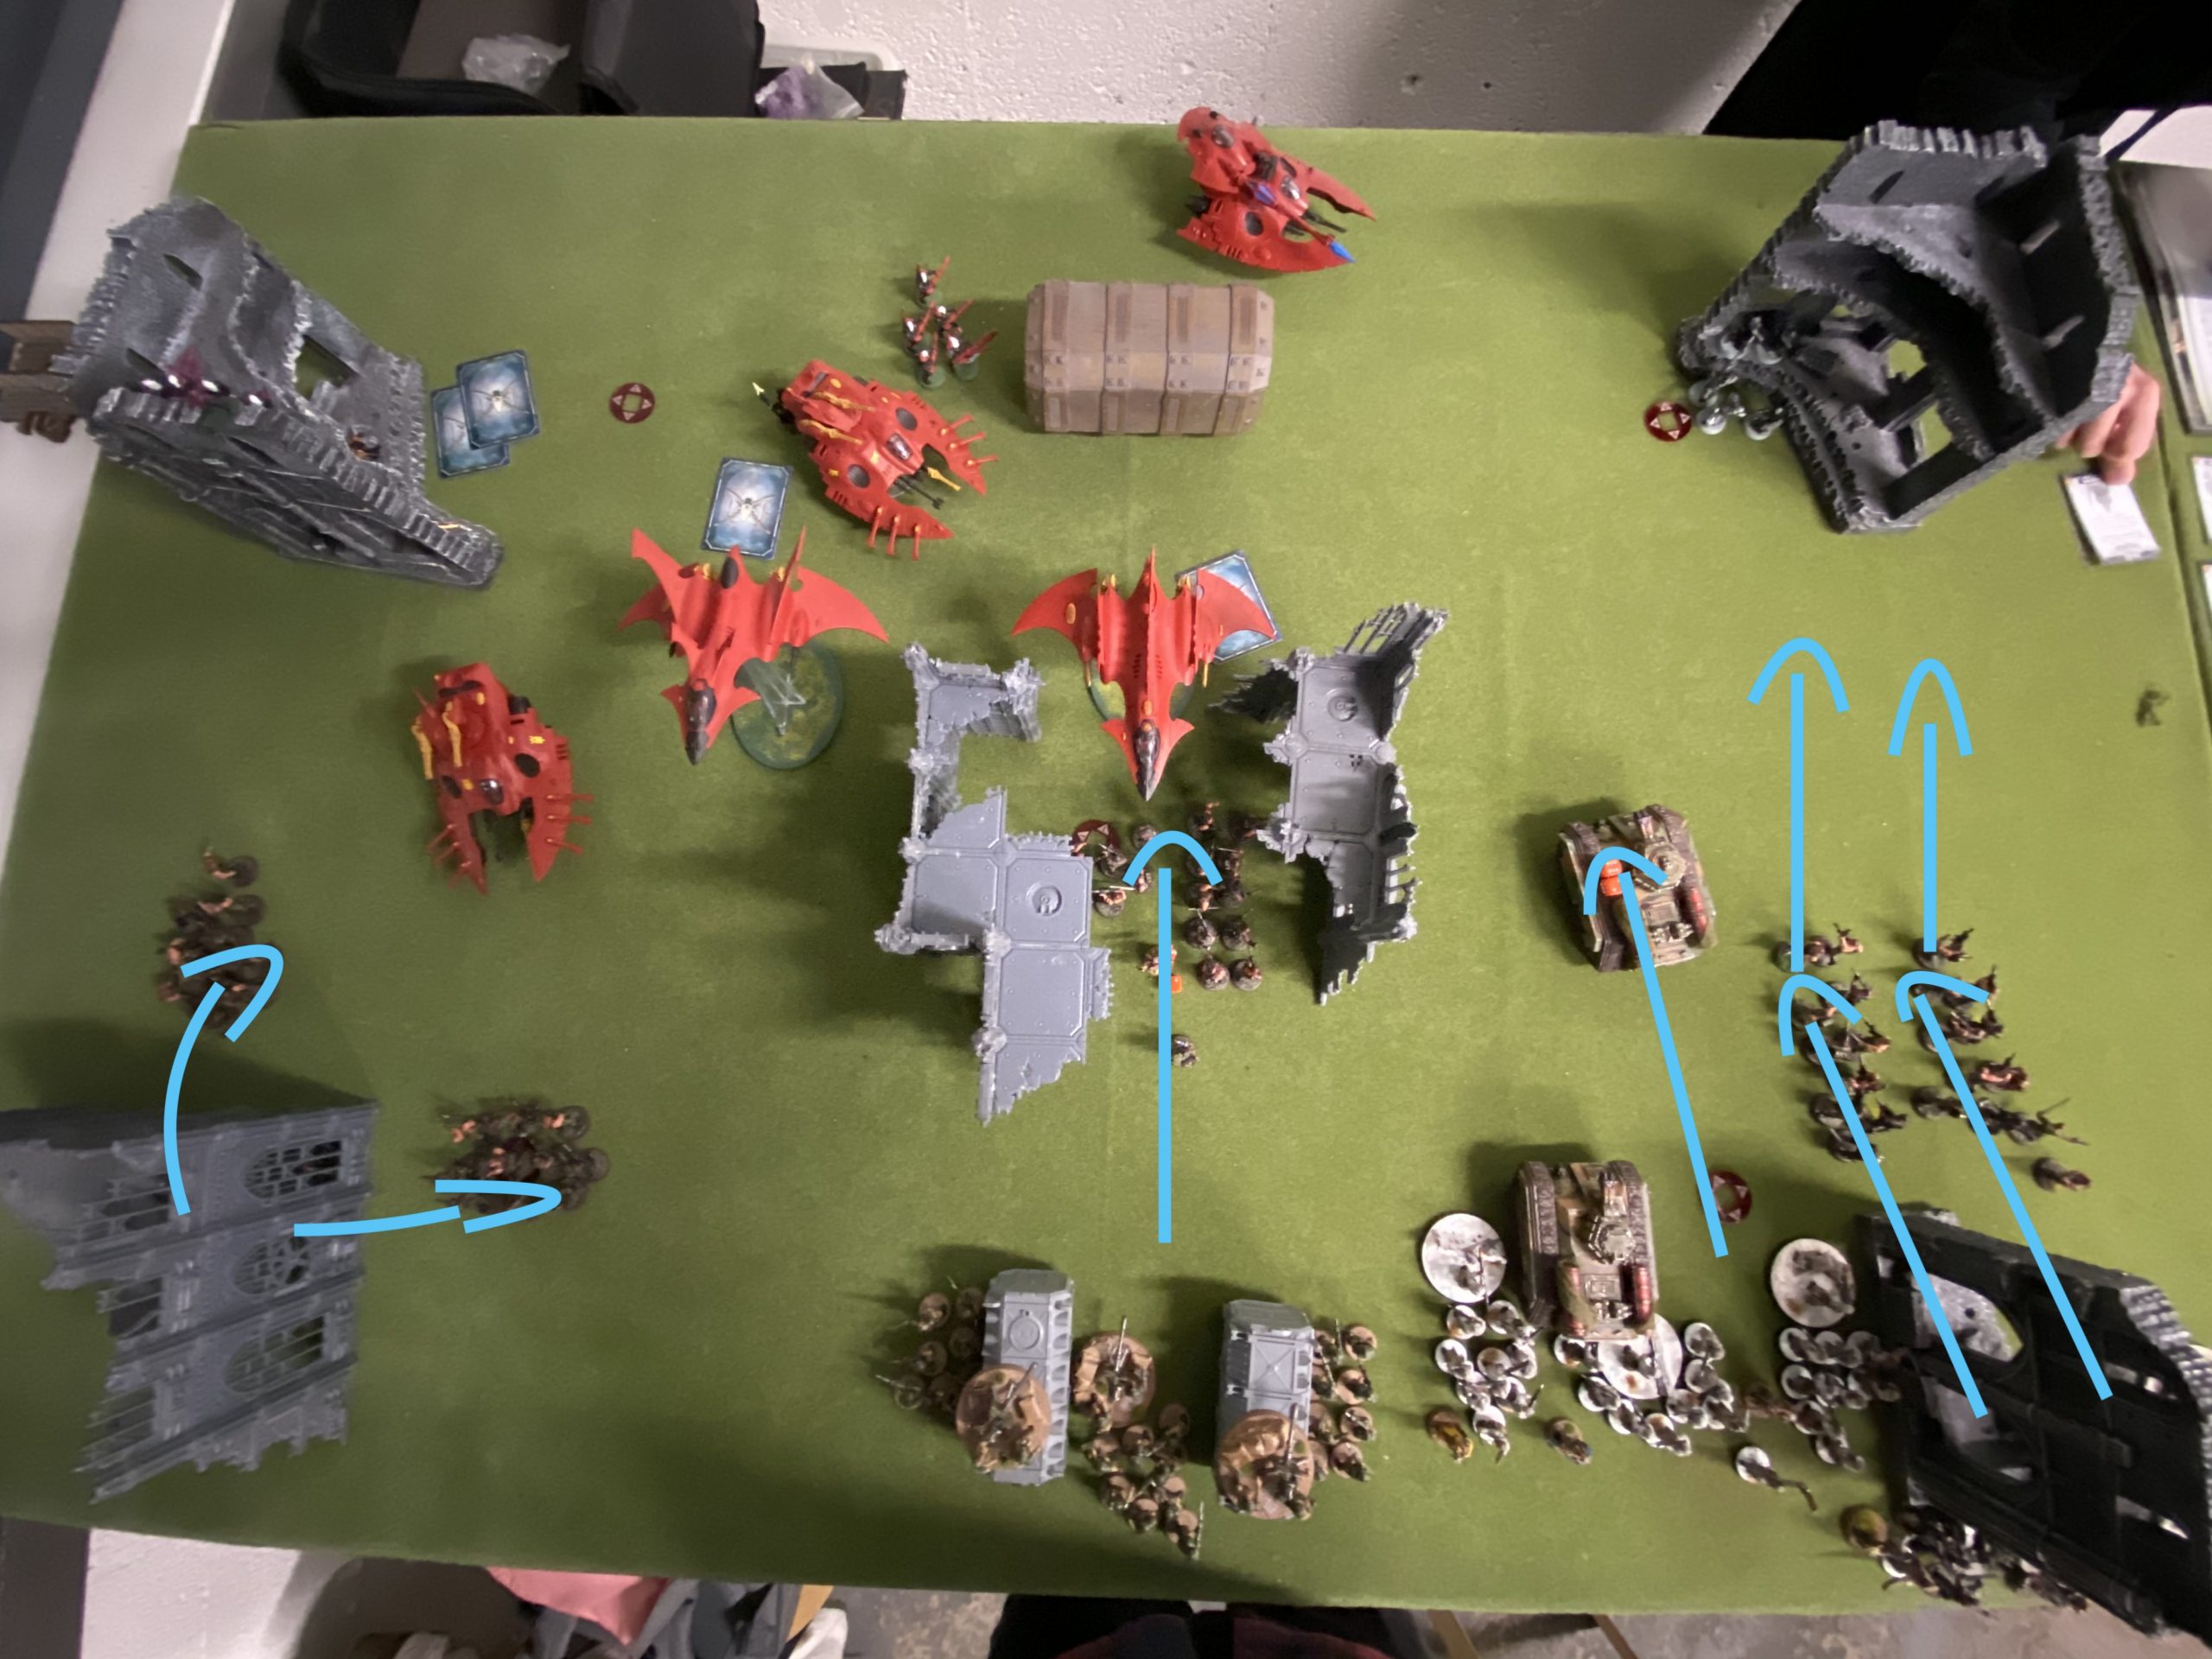
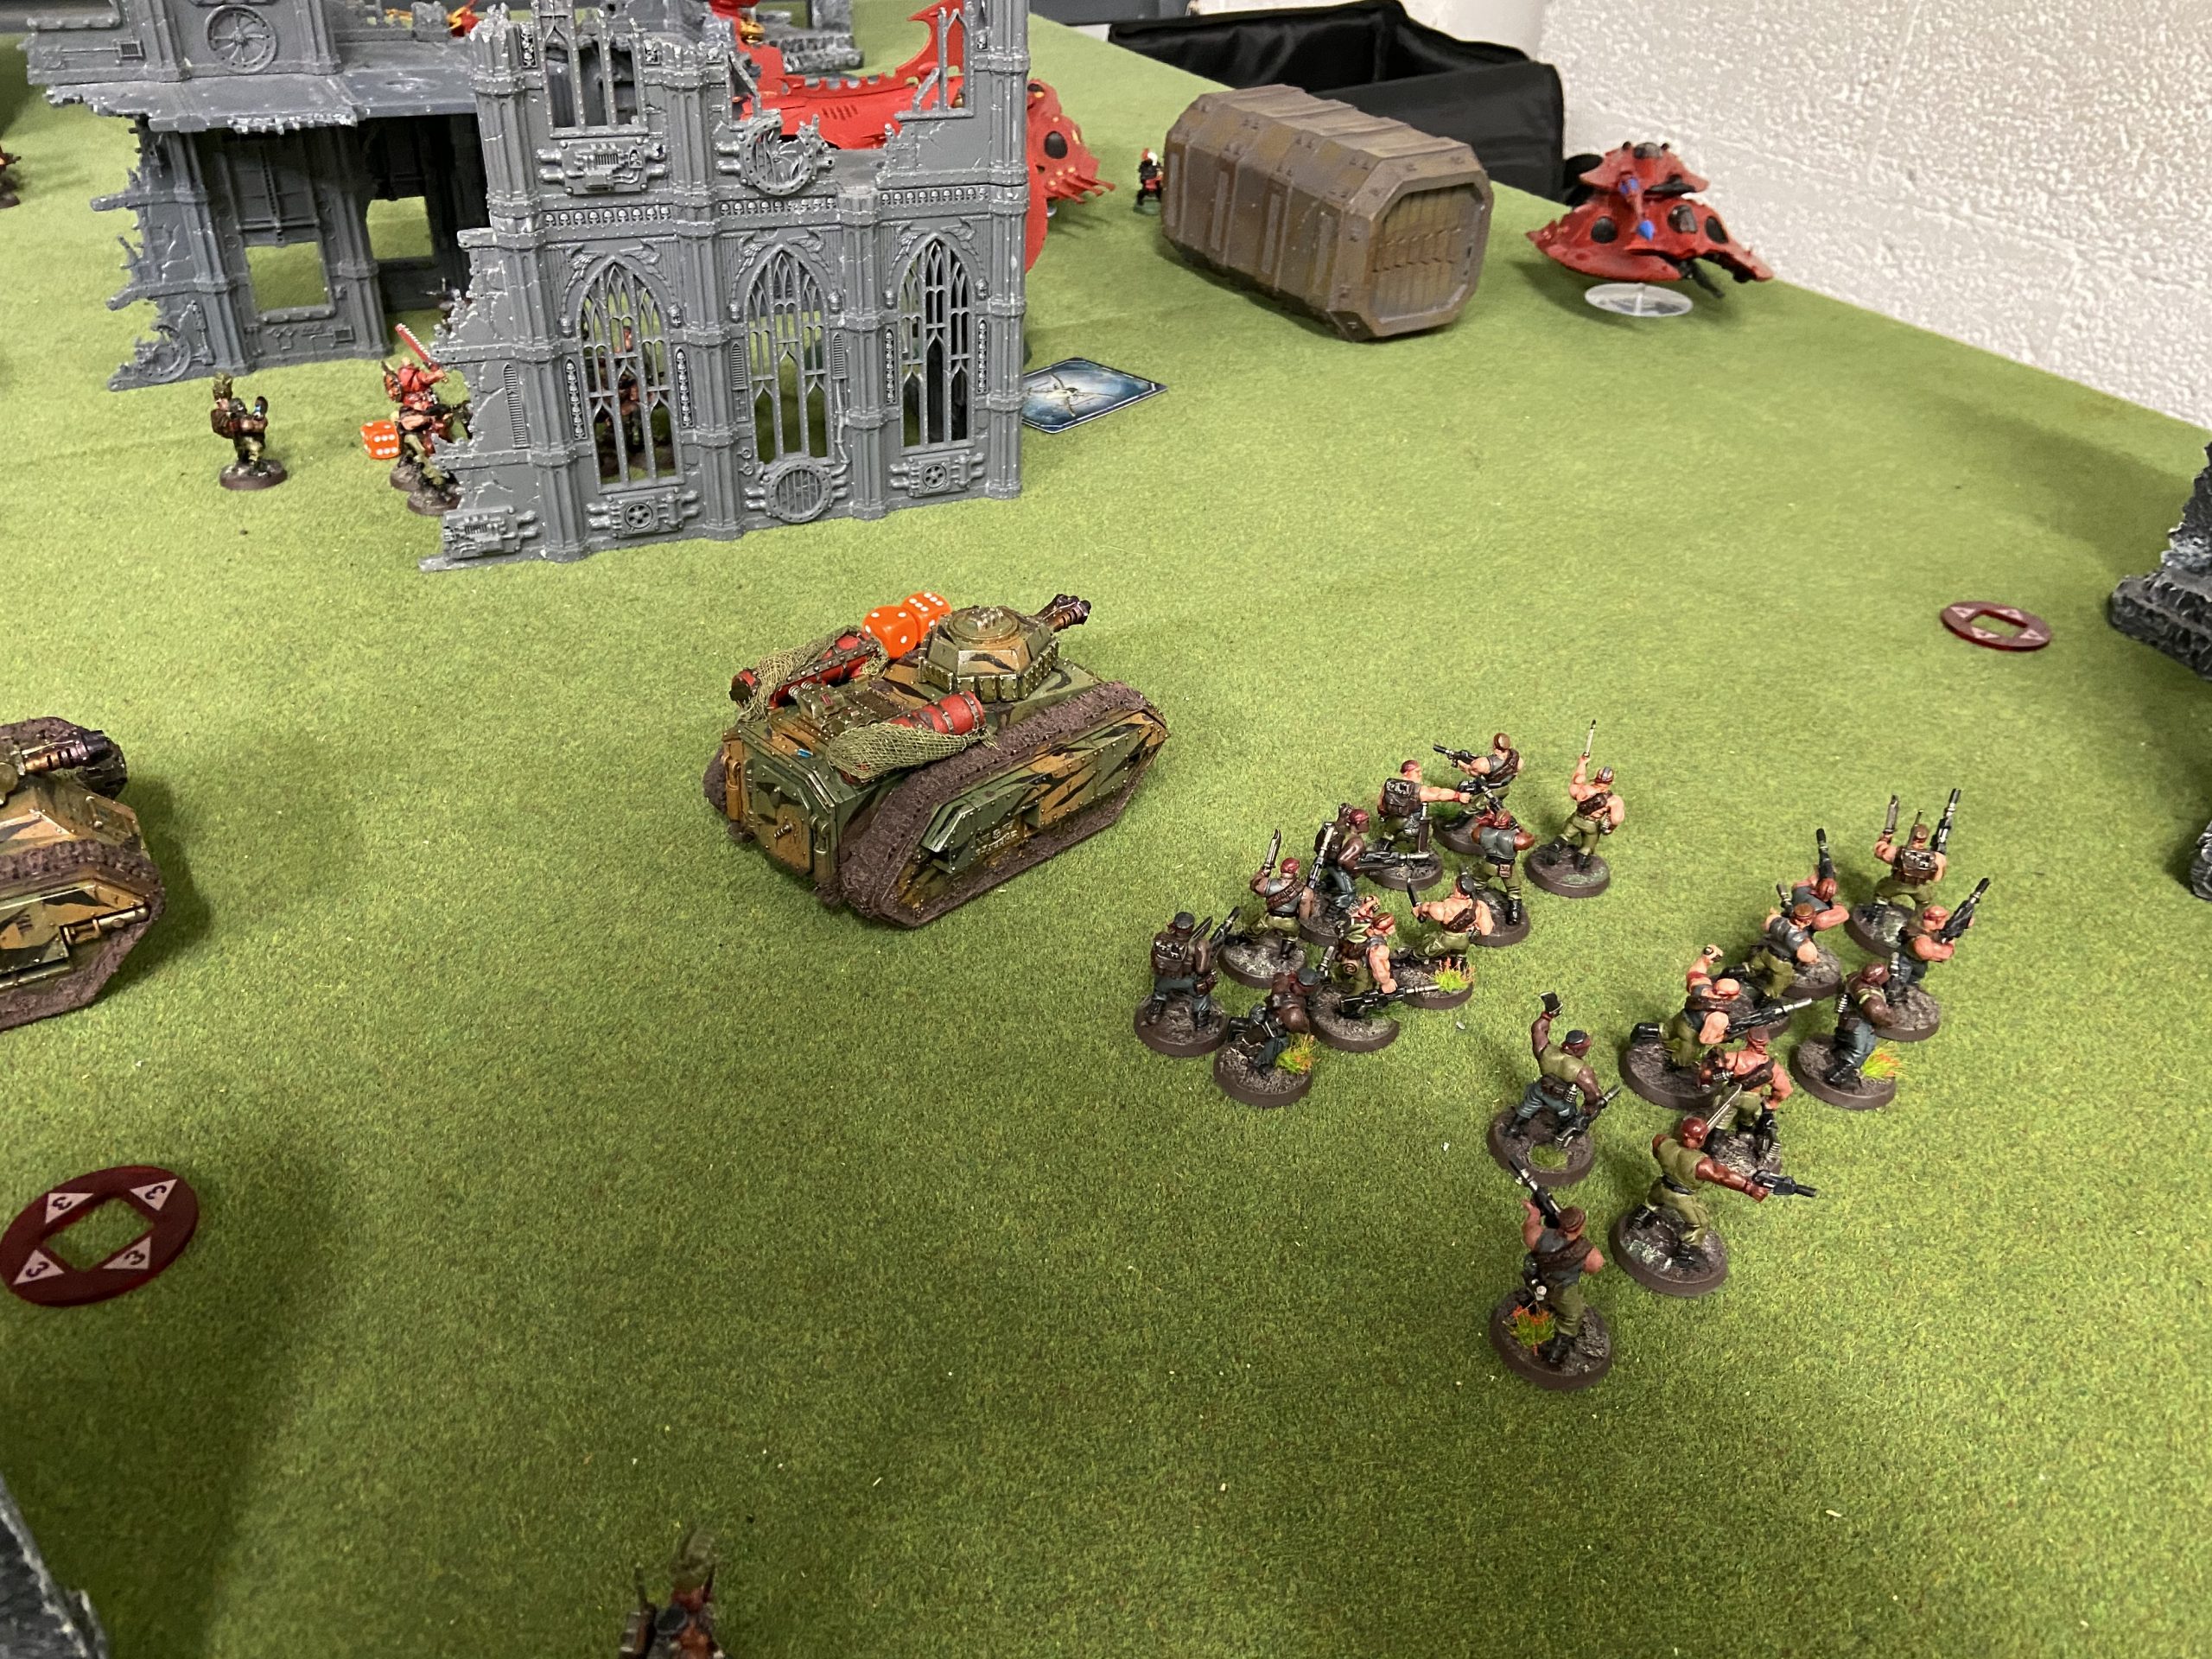
I moved a lot forward. Two units of Catachans with a Company Commander and Priest went for the middle and made it. On the right flank, two more units of Catachans moved right into the open towards the enemy’s objective that had five Rangers on it.
Two squads of Valhallans Consolidated. To benefit from the Laurels of Command – which never worked for the whole game.
My Psychic phase was not great. Psychic Barrier and Nightshroud both failed. But I did get +1 BS on my Valhallan Missile Launchers thanks to Aradia Madellan. But I was struggling for targets now that the Flyers had zoomed off towards my left. I failed to wound the Fire Prism with Krak Missiles and a limited amount of damage was done to the Hemlock. The wounded Hellhound did move up and toast the Rangers on the objective – to deny the enemy that VP.
John had also, accidentally, moved all his units off the top left objective in his deployment zone. So there were no objective VPs gained there either.
By using Move, Move, Move I had got to the centre for a VP. I also hold both of the objectives in my Deployment Zone. Killing the Rangers gave me First Strike too.
Show Score
Eldar: 2
Astra Militarum: 4
-
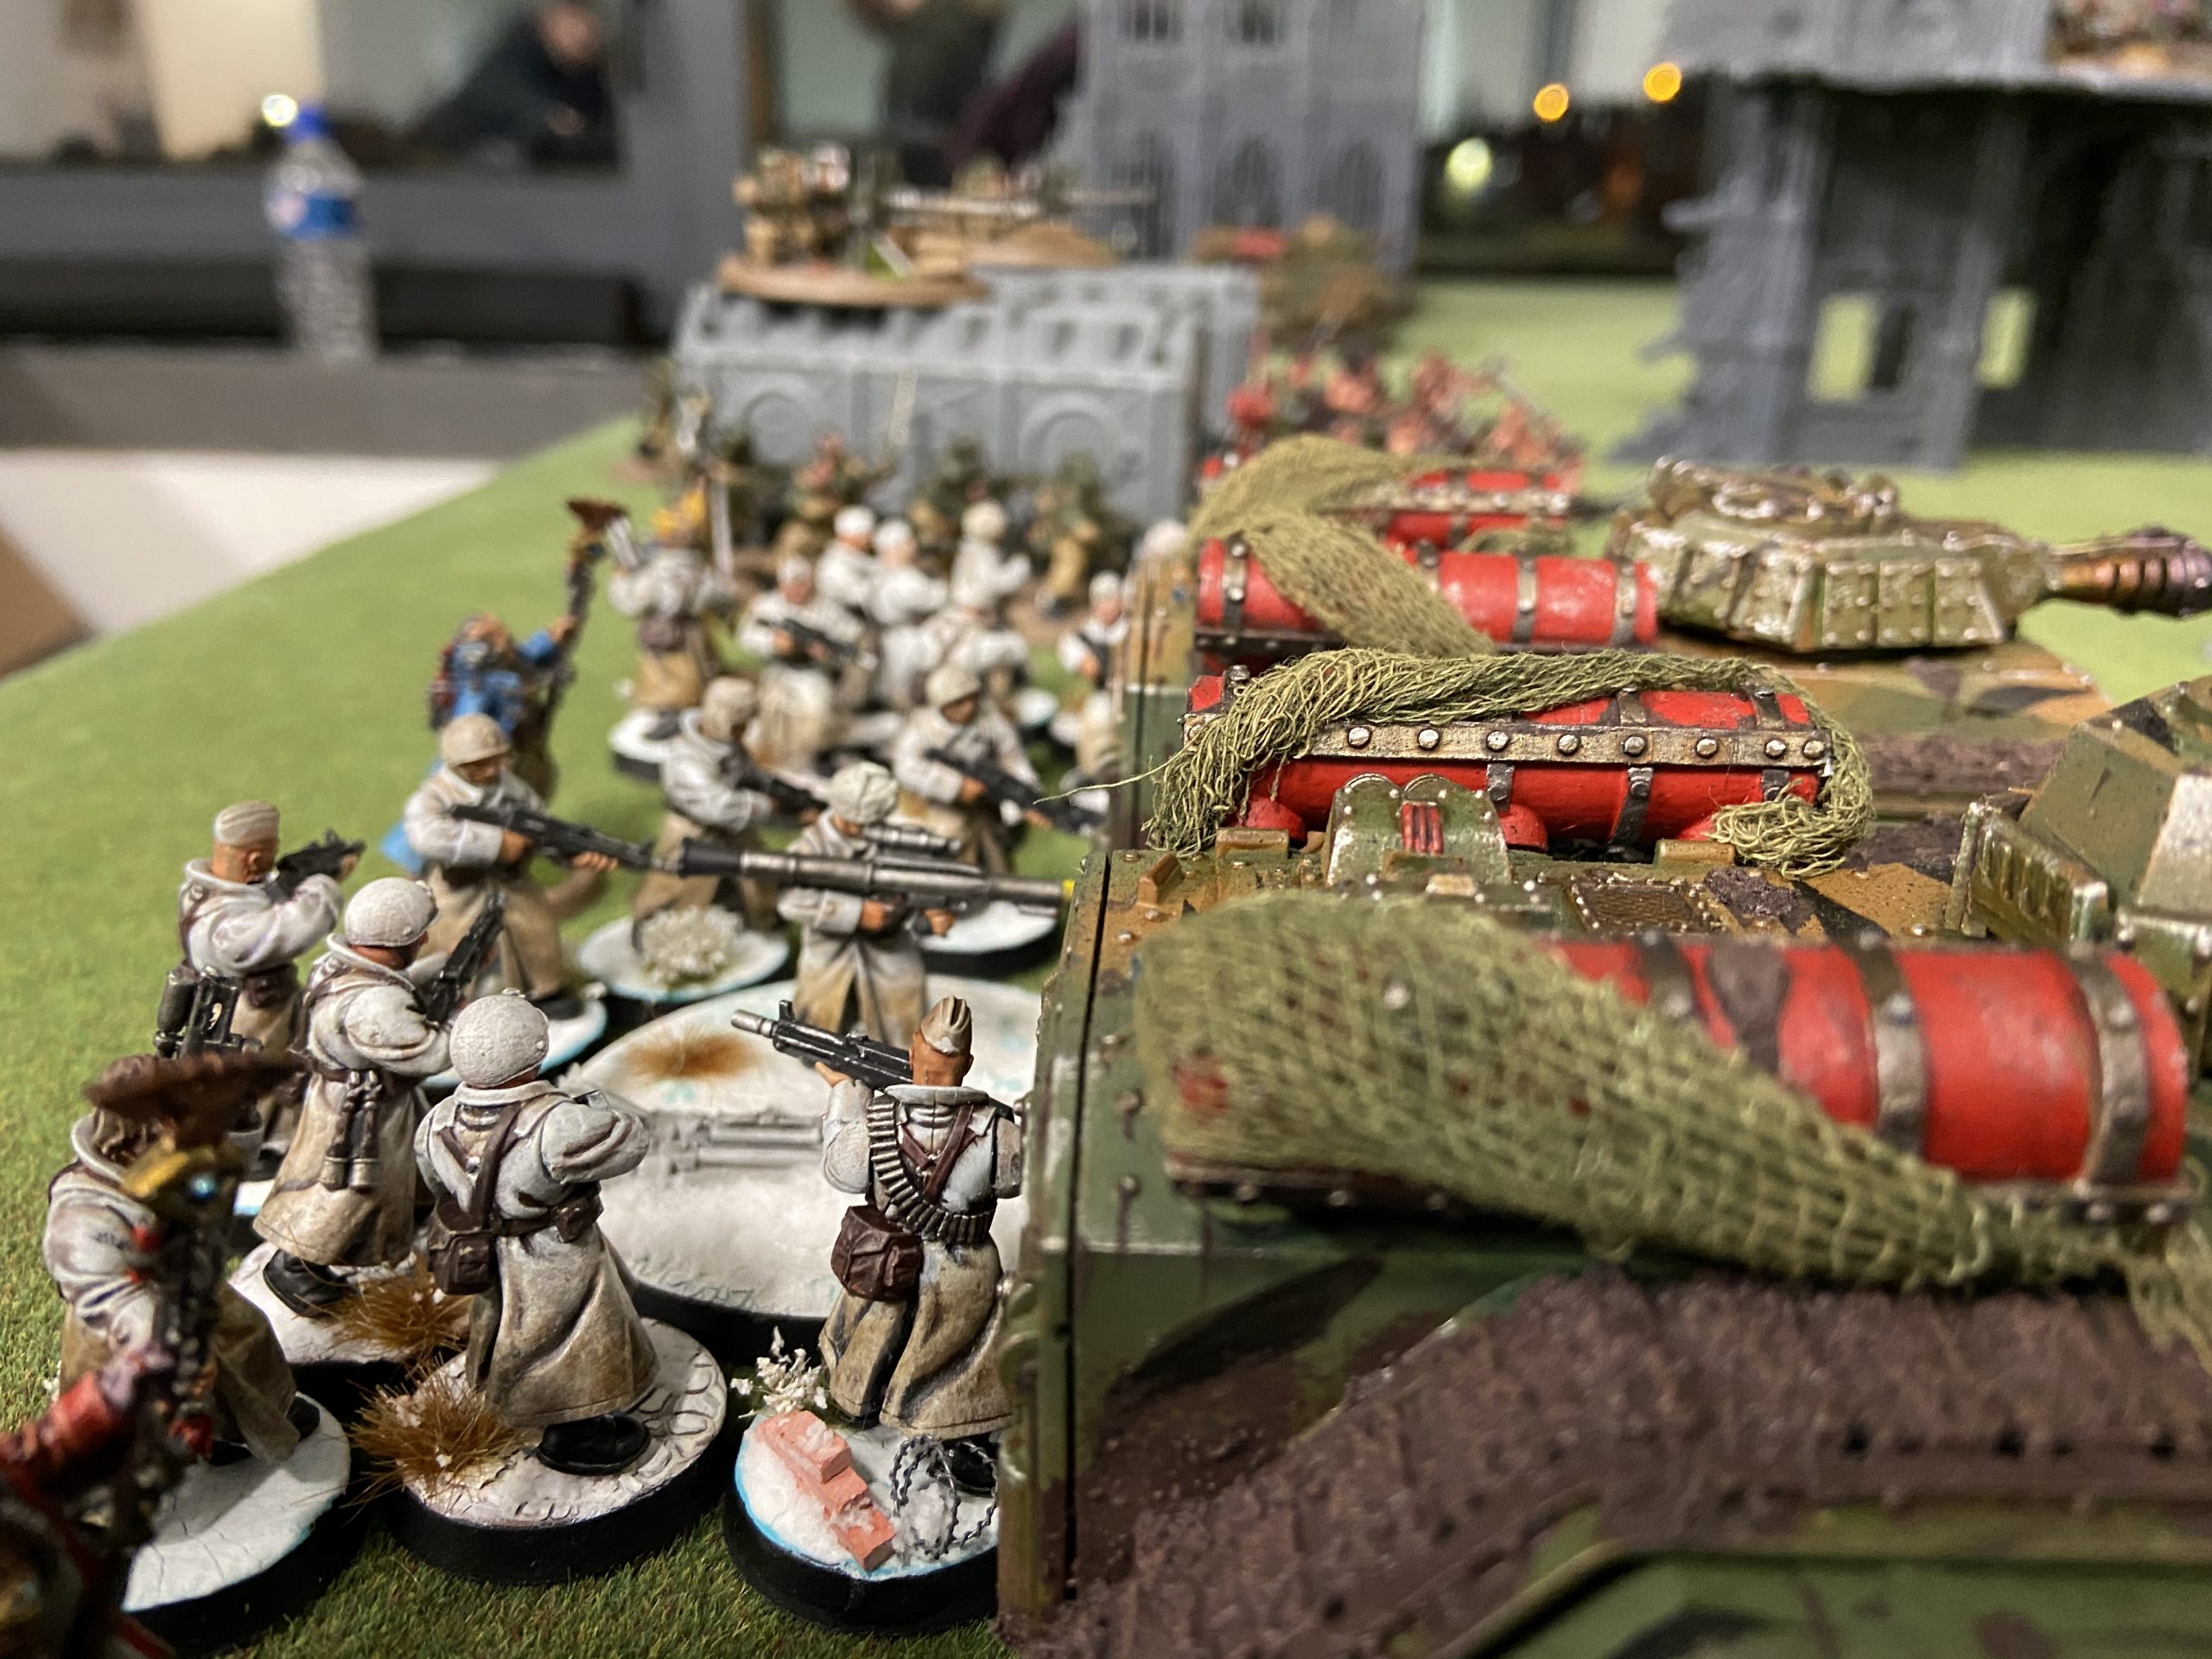
- Mid turn Astra Militarum

-

- Astra Militarum movement
-

- This is the Catachan position after Move, Move, Move
-
- The Valhallans look on as the Catachans take the centre

-
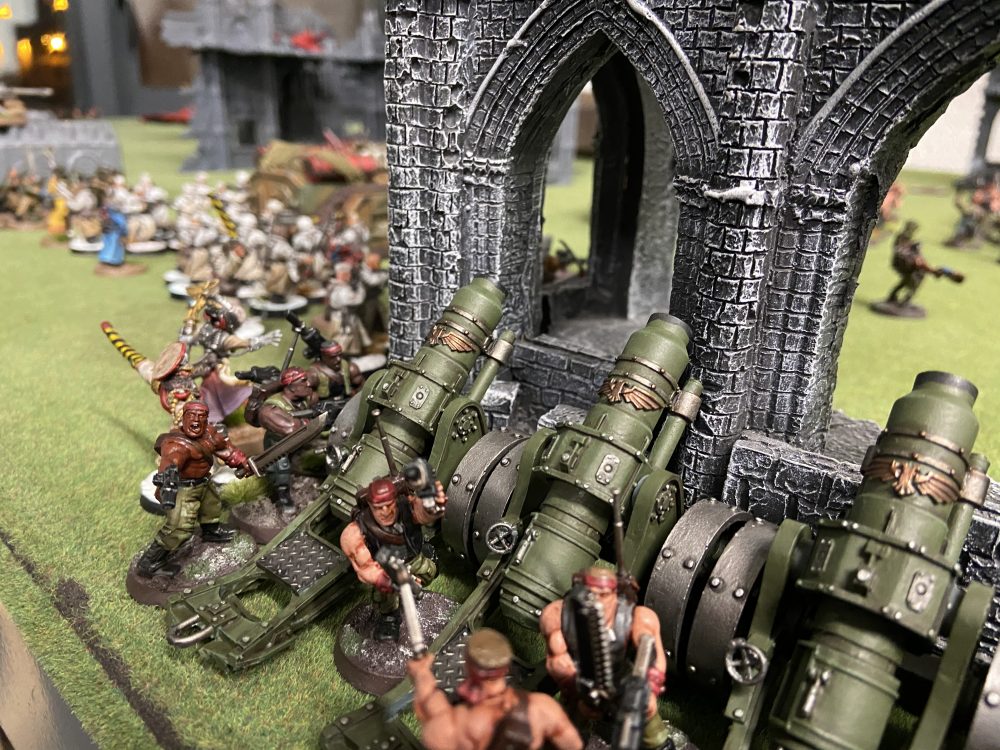
- Nearly completed Forgeworld Heavy Mortars

Eldar – Turn 2
The central object was worth 2VP this turn.
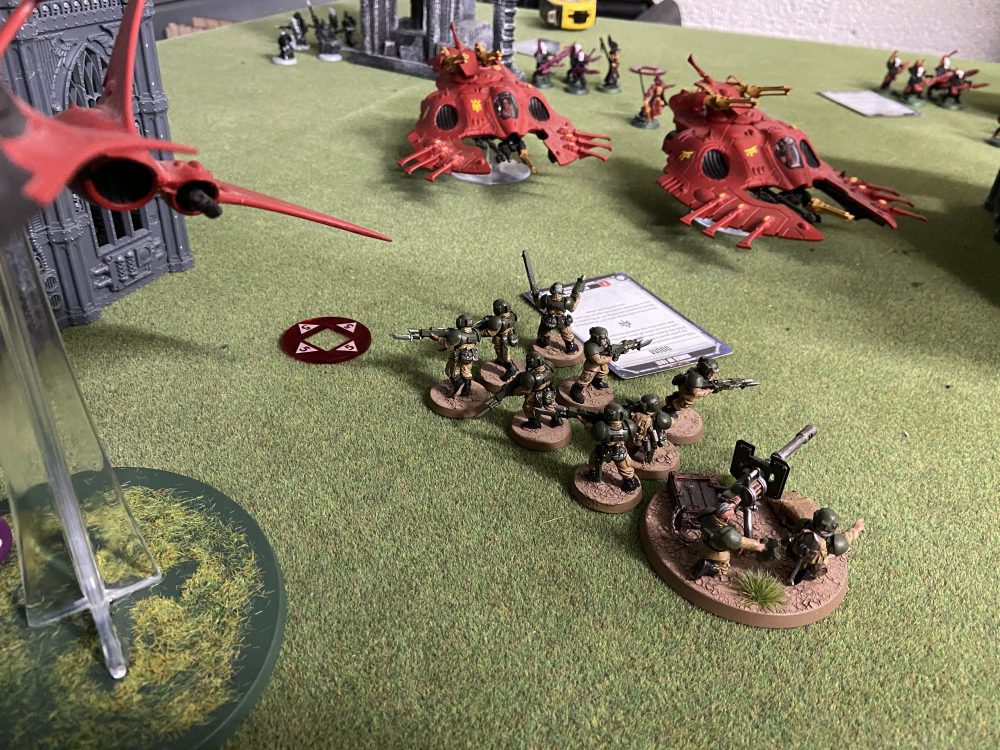
With the Hellhound on the left flank dead, the Eldar Flyers returned to my right flank to finish off another Hellhound. And along with the Fire Prism started to place wounds onto the third Hellhound.
The other two units of Rangers arrived to secure the backfield of the Eldar. John was worried about my Plasma Squad.
The fire against my infantry now came in thick and heavy. The Catachans in the centre were nearly wiped out and the Catachans on the left flank were also nearly destroyed. Only 3 remained from the 20 that were on the left. A similar story started to play our for the Catachans on the right flank under the Flyers. I had to auto pass one group due to the Hemlock making them -2 Leadership and the Horrify power making them another -1 Leadership. But I had the CP to burn!
Show Score
Eldar: 2
Astra Militarum: 4
-
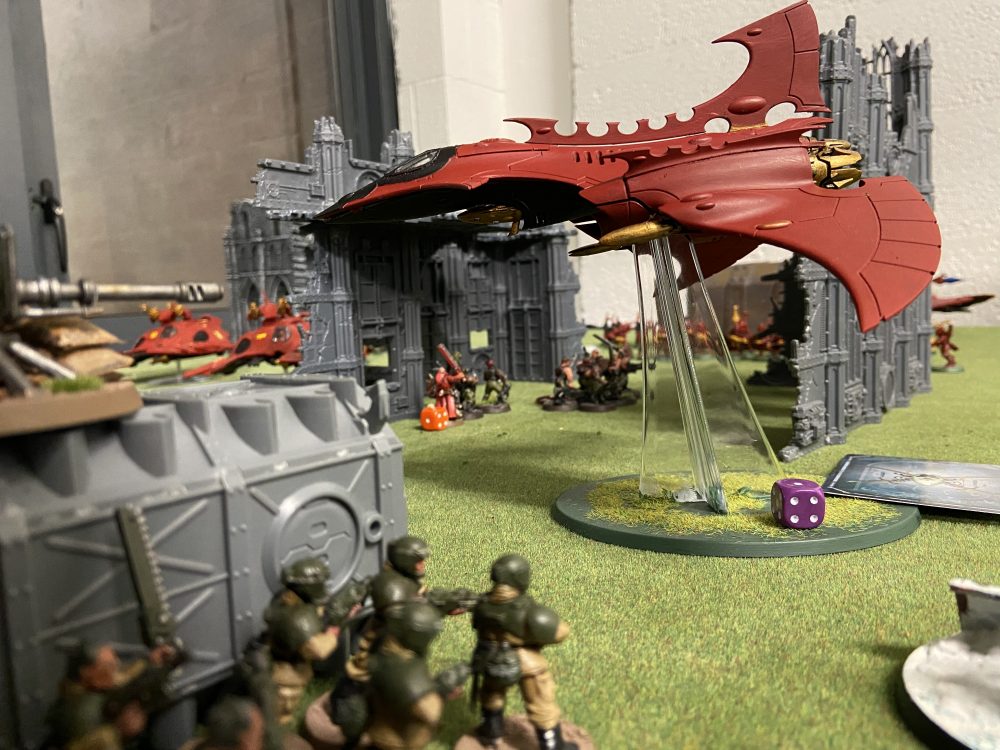
- Eldar overview
-
- Eldar movement
-
- The Eldar Flyers return to my right flank
Astra Militarum – Turn 2
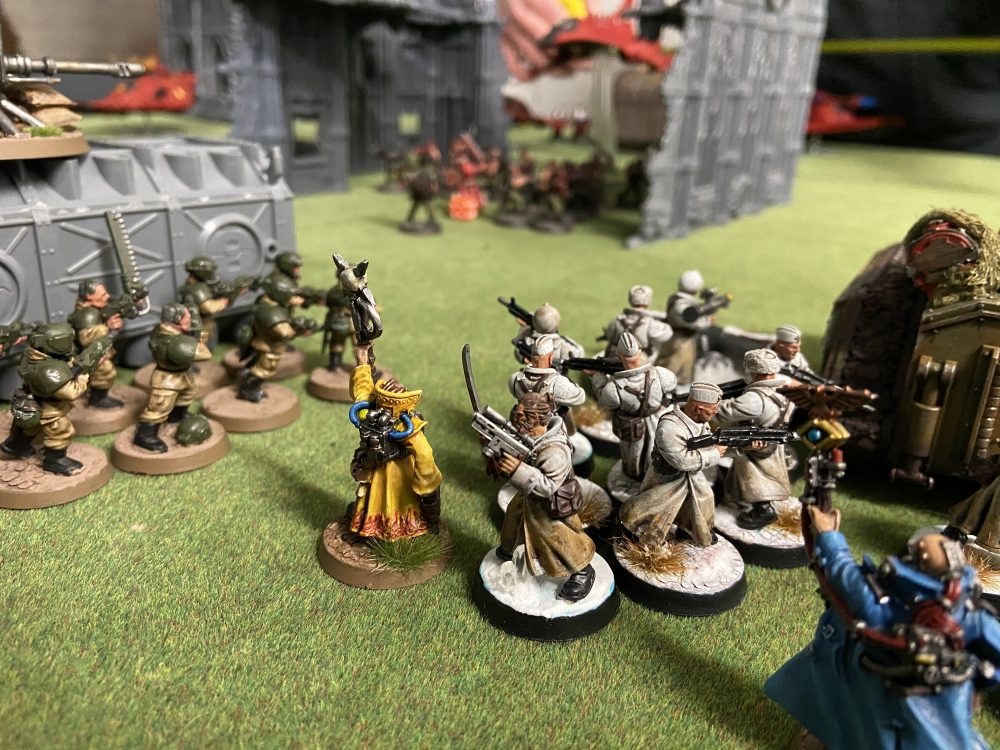
I once again used Move, Move, Move to get my Guardsmen into position. The two central-most Cadians Consolidated into one squad and remained in place. The other squad of Cadians moved left with an Advance move to get onto the left-most objective. Meanwhile, the three meaning Catachans that were there moved into the ruins and back into solid cover. On the right my Catachans that auto-passed their Morale and the other squad Advanced onto the Objective in the enemy’s Deployment Zone – where some Rangers had now appeared.
My Plasma Squad did not come in this turn, because I forget it!
The range of movement I had with so many Guardsmen was really something. I was throwing 20 forward, who would die and now I was replacing the 20 dead guys with 20 more.
A single Psyker had moved and Advanced to Smite the Hemlock – a wound was done. I did get Nightshroud on the Hellhound and I did get Psychic Maelstrom off which did few wounds to the Crimson Hunter.
I was struggling with Shooting though because of the -1 to hit when I was more than 12″ away. The Heavy Mortars on the first turn failed to do much and then failed to kill a single Dark Reaper in this turn. The -1 was really hurting them. The Hellhounds helped a little, but their poor AP and low damage meant the Flyers were tough to take down. I did get the Hemlock down to its middle bracket though in this turn. This was helped by Aradia Madellan getting her power off again.
My surge forward meant that I secured four Objectives, including the central one worth 2VP.
Show Score
Eldar: 2
Astra Militarum: 9
-

- Astra Militarum overview
-
- Astra Militarum movement

-

- The Catachan arriving at the far right objective
-
- The Valhallan line is still intact
Eldar – Turn 3
A 6 was rolled this turn which meant every objective was worth 2VP!
The Eldar were now starting to tighten their grip. I was running out of units and firepower. The Eldar Flyers once against switched flanks (as they often have to due to their movement) and hounded my left side. The Wave Serpents were also now getting stuck in – their weapons are very good at removing Guardsmen. I lost my Cadians on the left and my remaining Hellhound.
The Catachans on the far right flank managed to survive. but the Guardians arrived in the middle and easily removed all the remaining Catachans in the centre of the battlefield. They were helped along by the Dark Reapers too. The Company Commander and Priest were still there though.
Show Score
Eldar: 2
Astra Militarum: 9
-

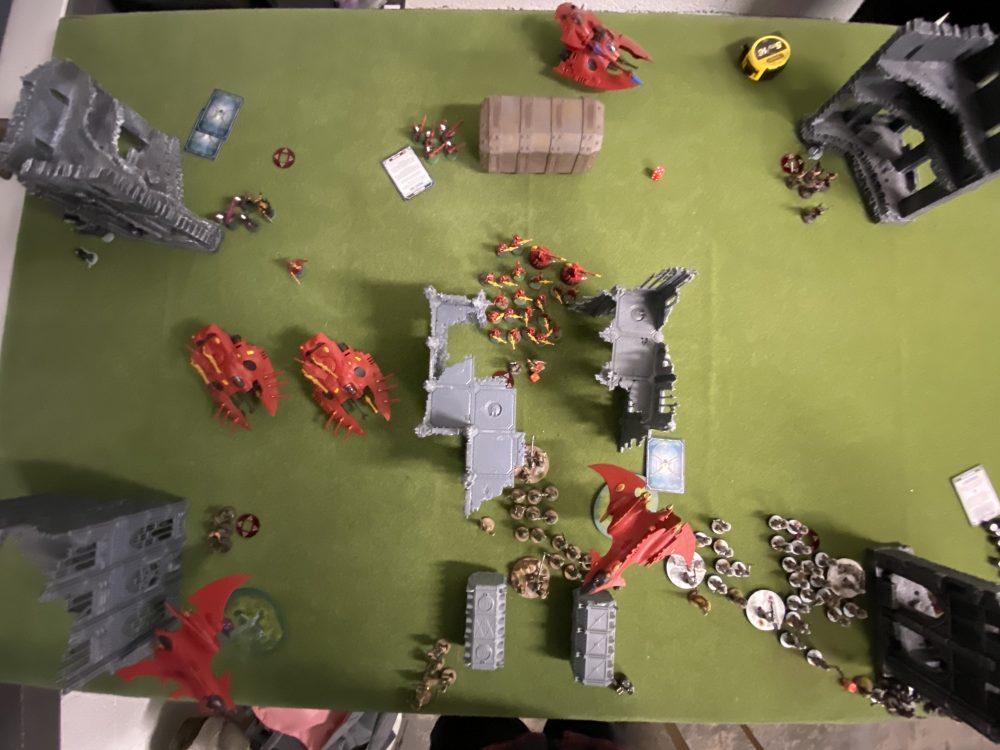
- Eldar overview
-
- Eldar movement

-
- The Astra Militarum left-flank

-
- The centre – the Guardians now arrive

-
- The Hemlock overhead

Astra Militarum – Turn 3
So now we go into turn 3 and every objective is worth 2VP. The Eldar are struggling to hold ground as the Guard move up in numbers.
My Consolidated Cadians move into the centre using Move, Move, Move to get them well and truly on that objective marker. The Catachans on the far right stay in place and the Catachans on the left come out of their cover and onto the left objective in my Deployment Zone. My Plasma arrives.
The Hemlock and Crimson Hunter now go down from Valhallan Missle Launchers and overcharged Plasma Guns.
I hold 4 objectives again, for an extra 8VP.
Show Score
Eldar: 2
Astra Militarum: 17
-
- Astra Militarum overview

-
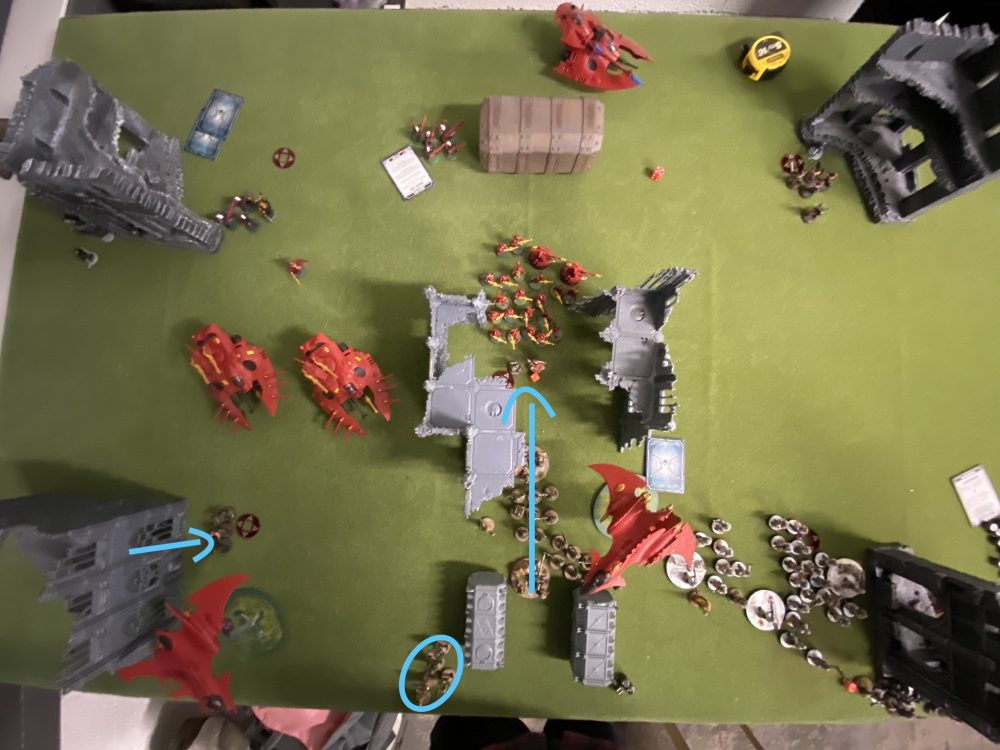
- Astra Militarum movement

-
- The centre

-

- My useless Heavy Mortars
Summary – 150 Astra Militarum Infantry
This was a great game, despite the scoreline. And it would probably have been a lot closer had we not run out of time. I was starting to lose units and lose ground to the Eldar. I am not sure that the Eldar could have won but I think it would have been a lot closer in the scoreline had we got 5 or 6 turns in.
My list, purely by accident, was perfectly suited to this mission because of the amount of infantry I had. It was a lot of fun to play with and there are so many decisions to make with a list like this. So much movement to consider. I used Move, Move, Move more than in any other game. Some units just received that order every turn until they died or nearly died – like the Catachan that ran across the battlefield on my right flank.
The Heavy Mortars were a bit of a disappointment and they ignored completely by the Eldar weapons for the whole game. The -1 to hit was a big deal and meant I maybe had one or two wounds by the end of the rolling. Then AP1 is not that strong so the enemy is still getting a decent save.
I just need Harker for them to get their re-rolls of one…
Final Score
Show Score
Eldar: 2
Astra Militarum: 17
Final overview