

Magnetised Deathstrike/Manticore
I’ve a little show case for you today. A magnetised Deathstrike and Manticore!
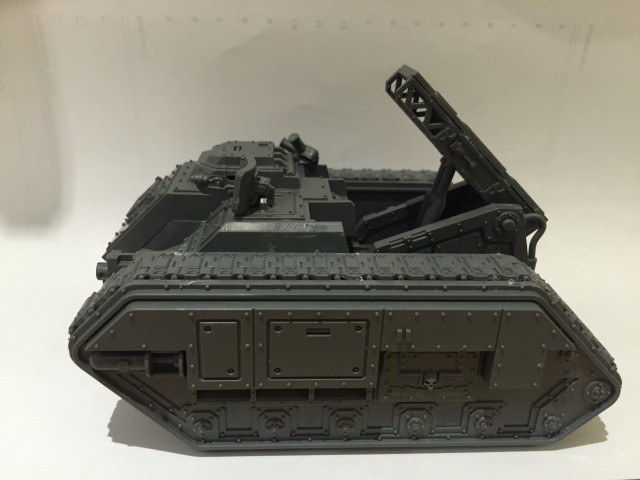
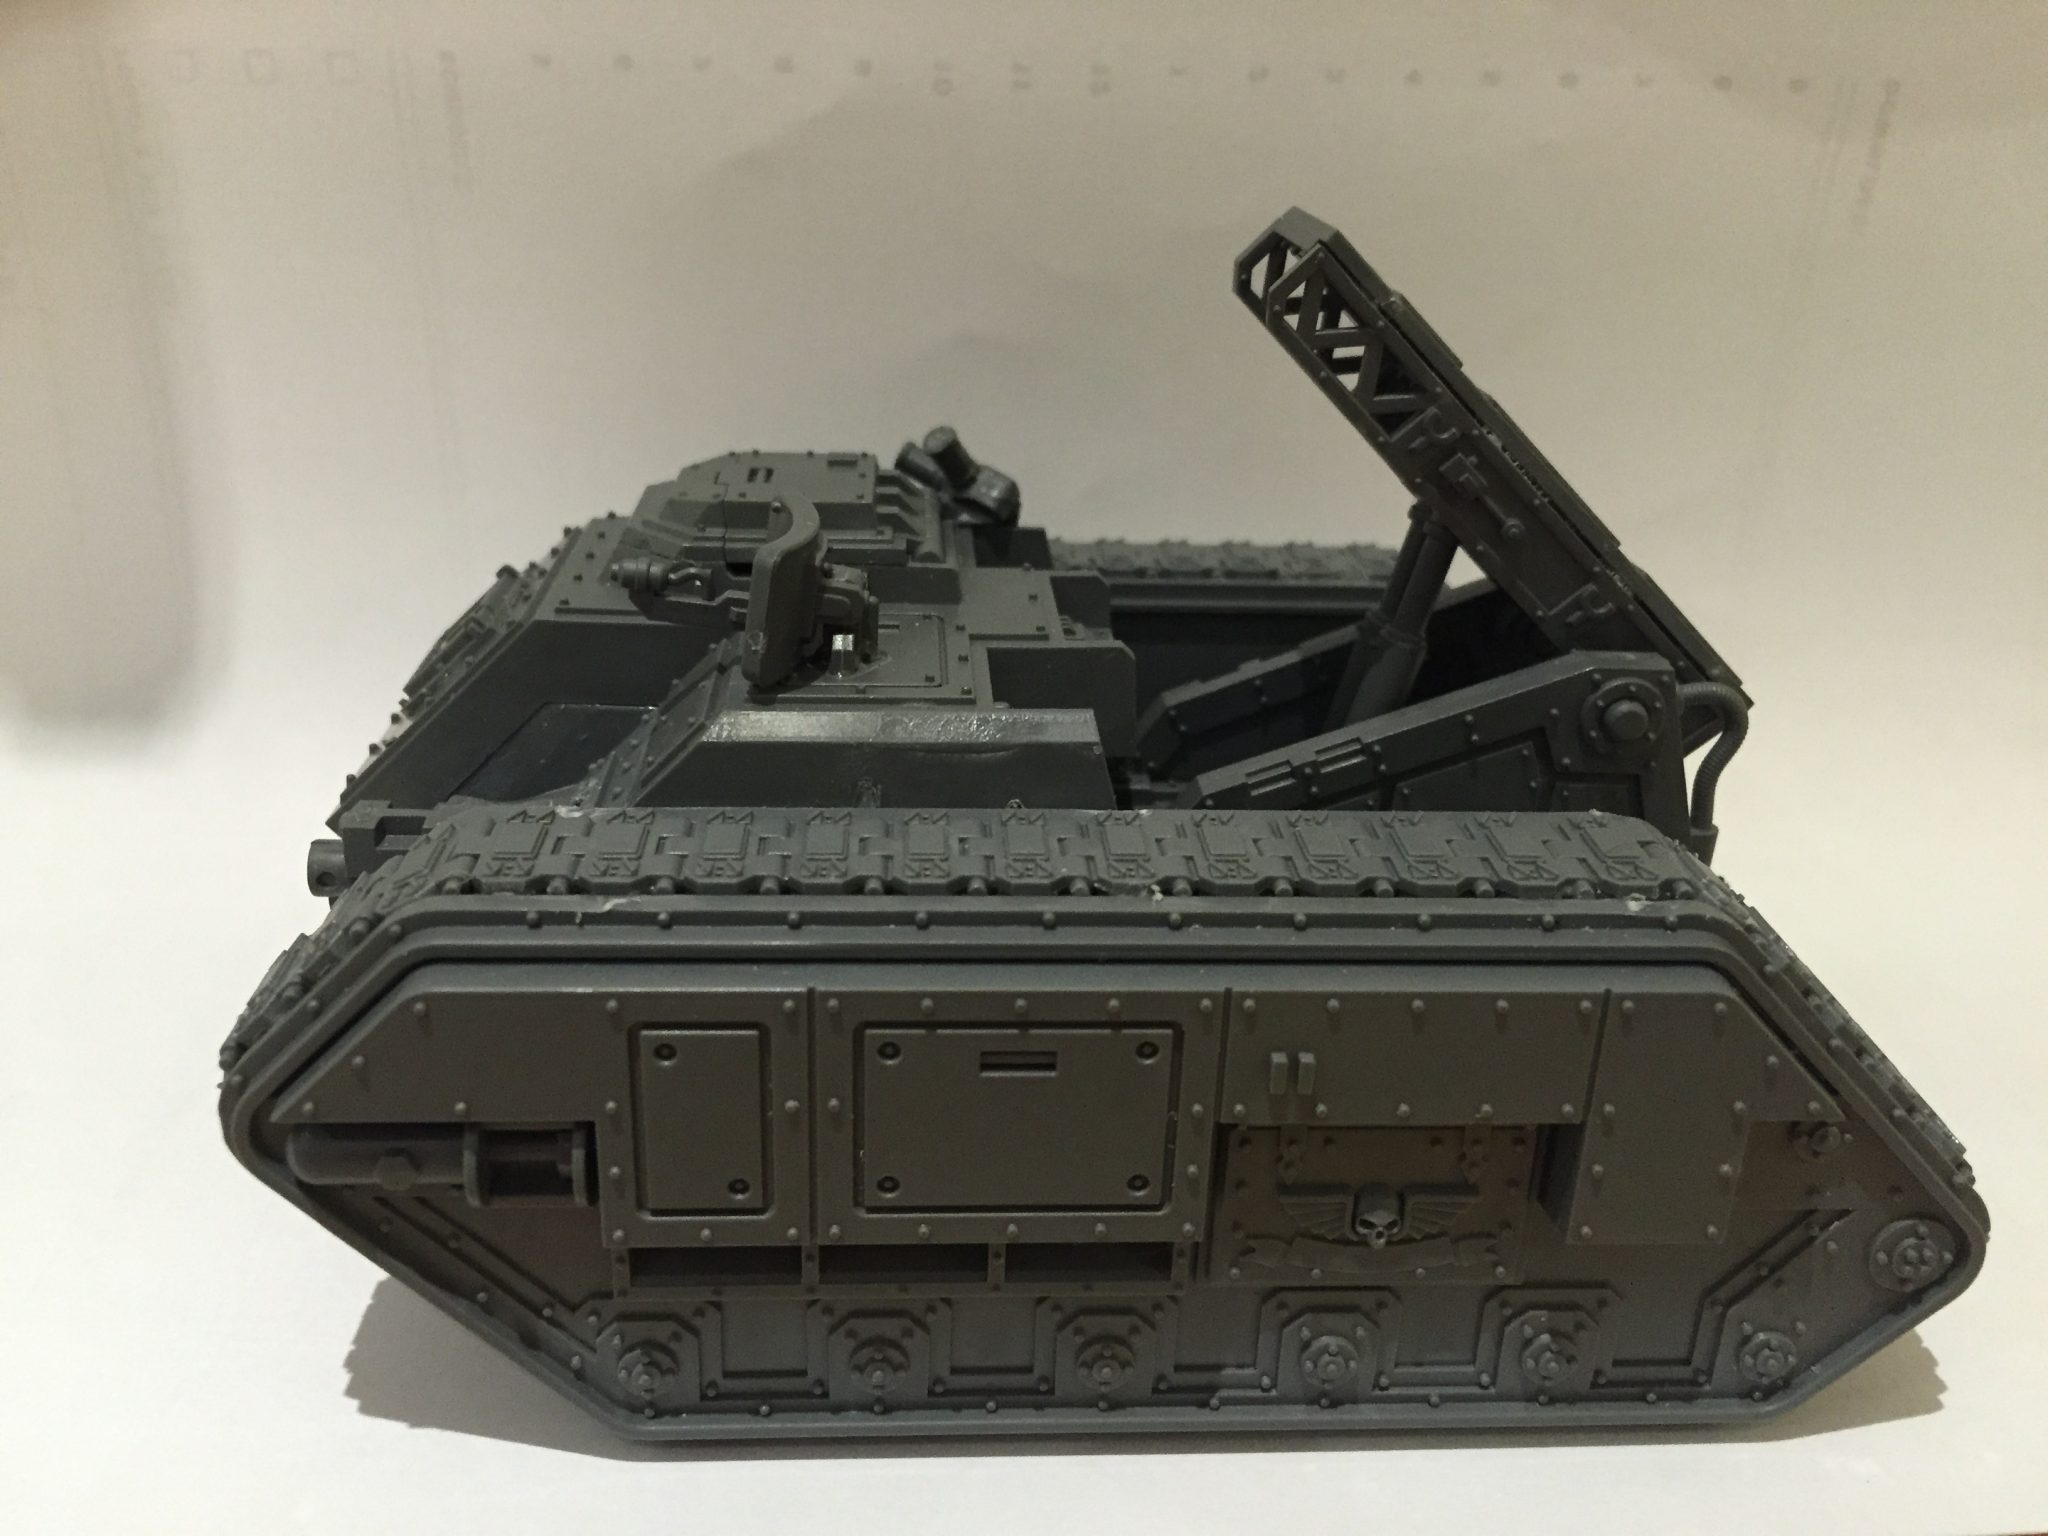
The reason for this project was to save money! Surely the best reason for using magnets. With the Deathstrike and Manticore being a Heavy Support choice that cannot be taken in squadrons of multiple vehicles I am only ever likely to field one. So there seemed little point in buying two models.
Magnets would let me have both models but with just one kit, saving me a mean £25 or so. The only problem with this is that the 4 external half missiles on the large Deathstrike missile are also needed to make the 4 smaller rockets on the Manticore. And I glued them on before I realised this!
I think if you wanted to truly magnetise the whole model including those rockets it would be tough. But do-able. I managed to find 4 spare rockets on eBay from Bits World in the USA. They were £9.60 including shipping – so I was still saving money over buying two kits! Plus by doing it this way we ended up with this awesome article and lots of magnets practice :-)
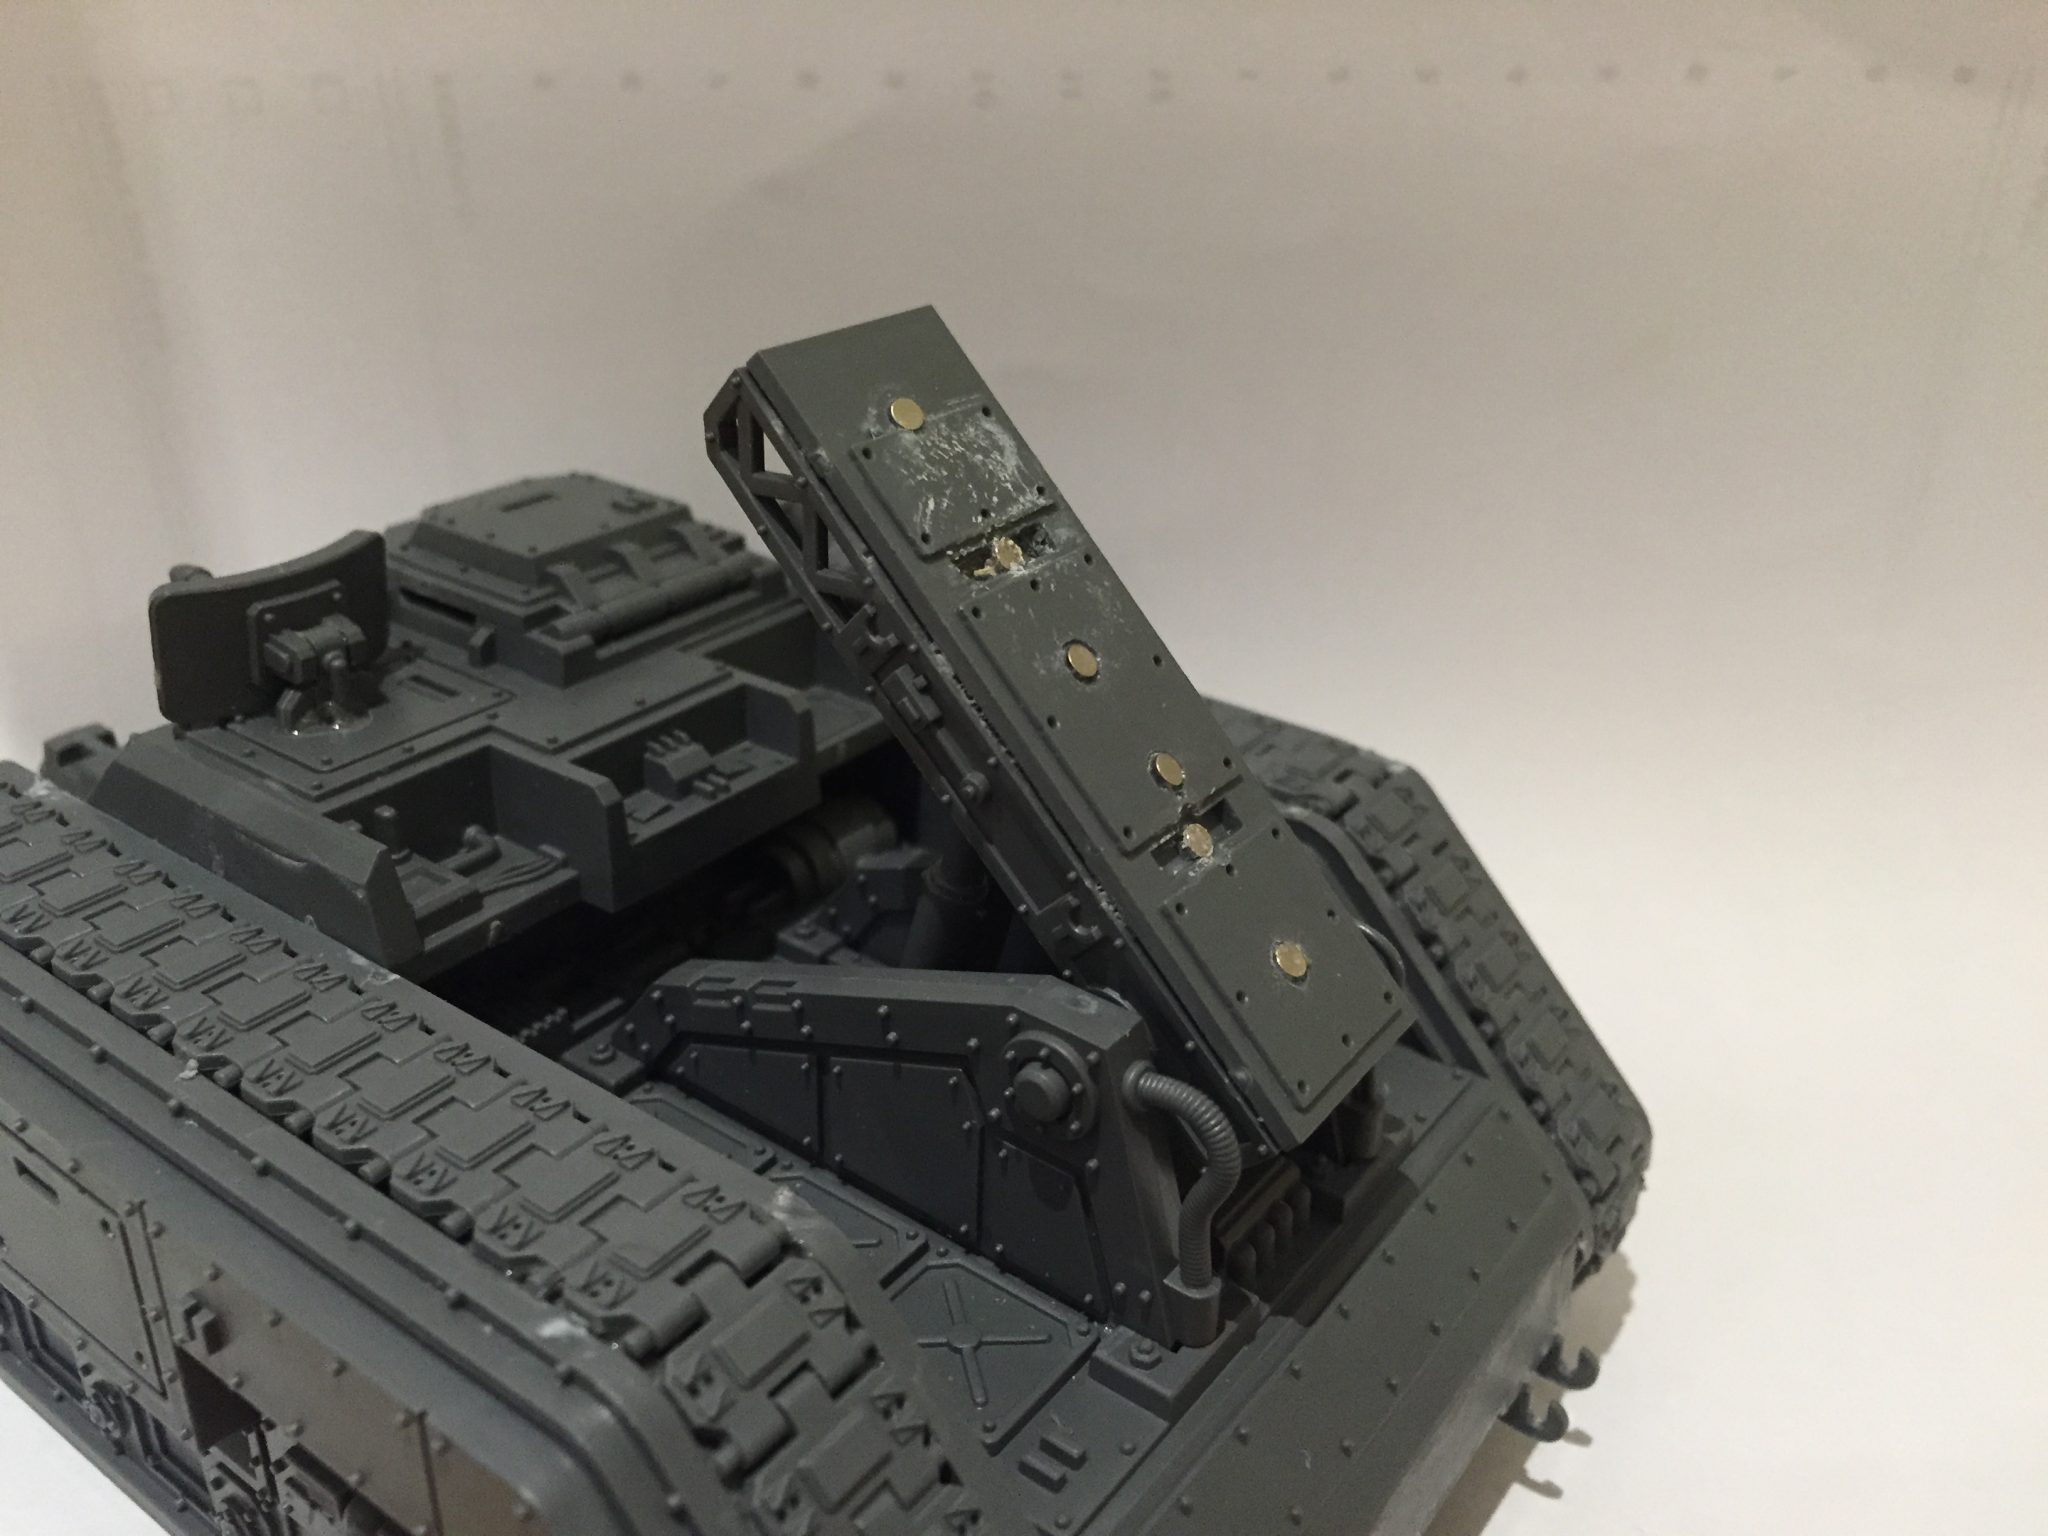
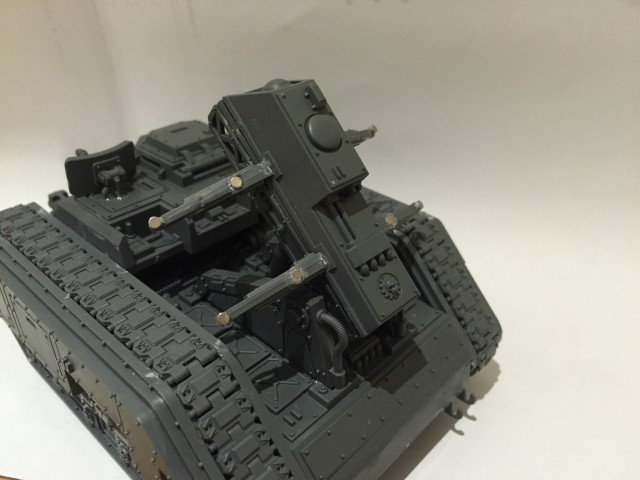
Finally I now had the 4 spare rockets plus all the original bits from the kit. I was now able to build the 4 Manticore Storm Eagle Rockets as well as magnetise all the missile rack pieces so that both the Deathstrike and Manticore weaponry would be able to sit on the main chassis.
To do this I used the Army Painter Drill and 5mm Rare Earth Magnets. Make sure that the drill you have has a wide enough bit to drill holes for your magnets. The first drill I bought from eBay many months ago was terrible, it came with a 5mm bit but the actual drill was unable to house that bit and so a 5mm hole was not possible – despite the tool coming with a 5mm drill bit!
The magnets seem a little messy, thats down to the super glue. I need to file them a little and paint them and they’ll look much better, I hope.
The photos below show this much better than I can ever explain in words.
-
- The default mounting rack
-


- Mounting rack with no attachments
-
- Manticore attachment

-
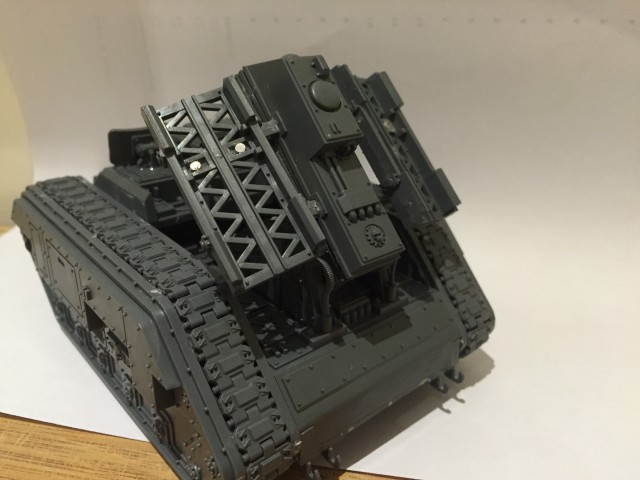
- Manticore attachment with side racks

-

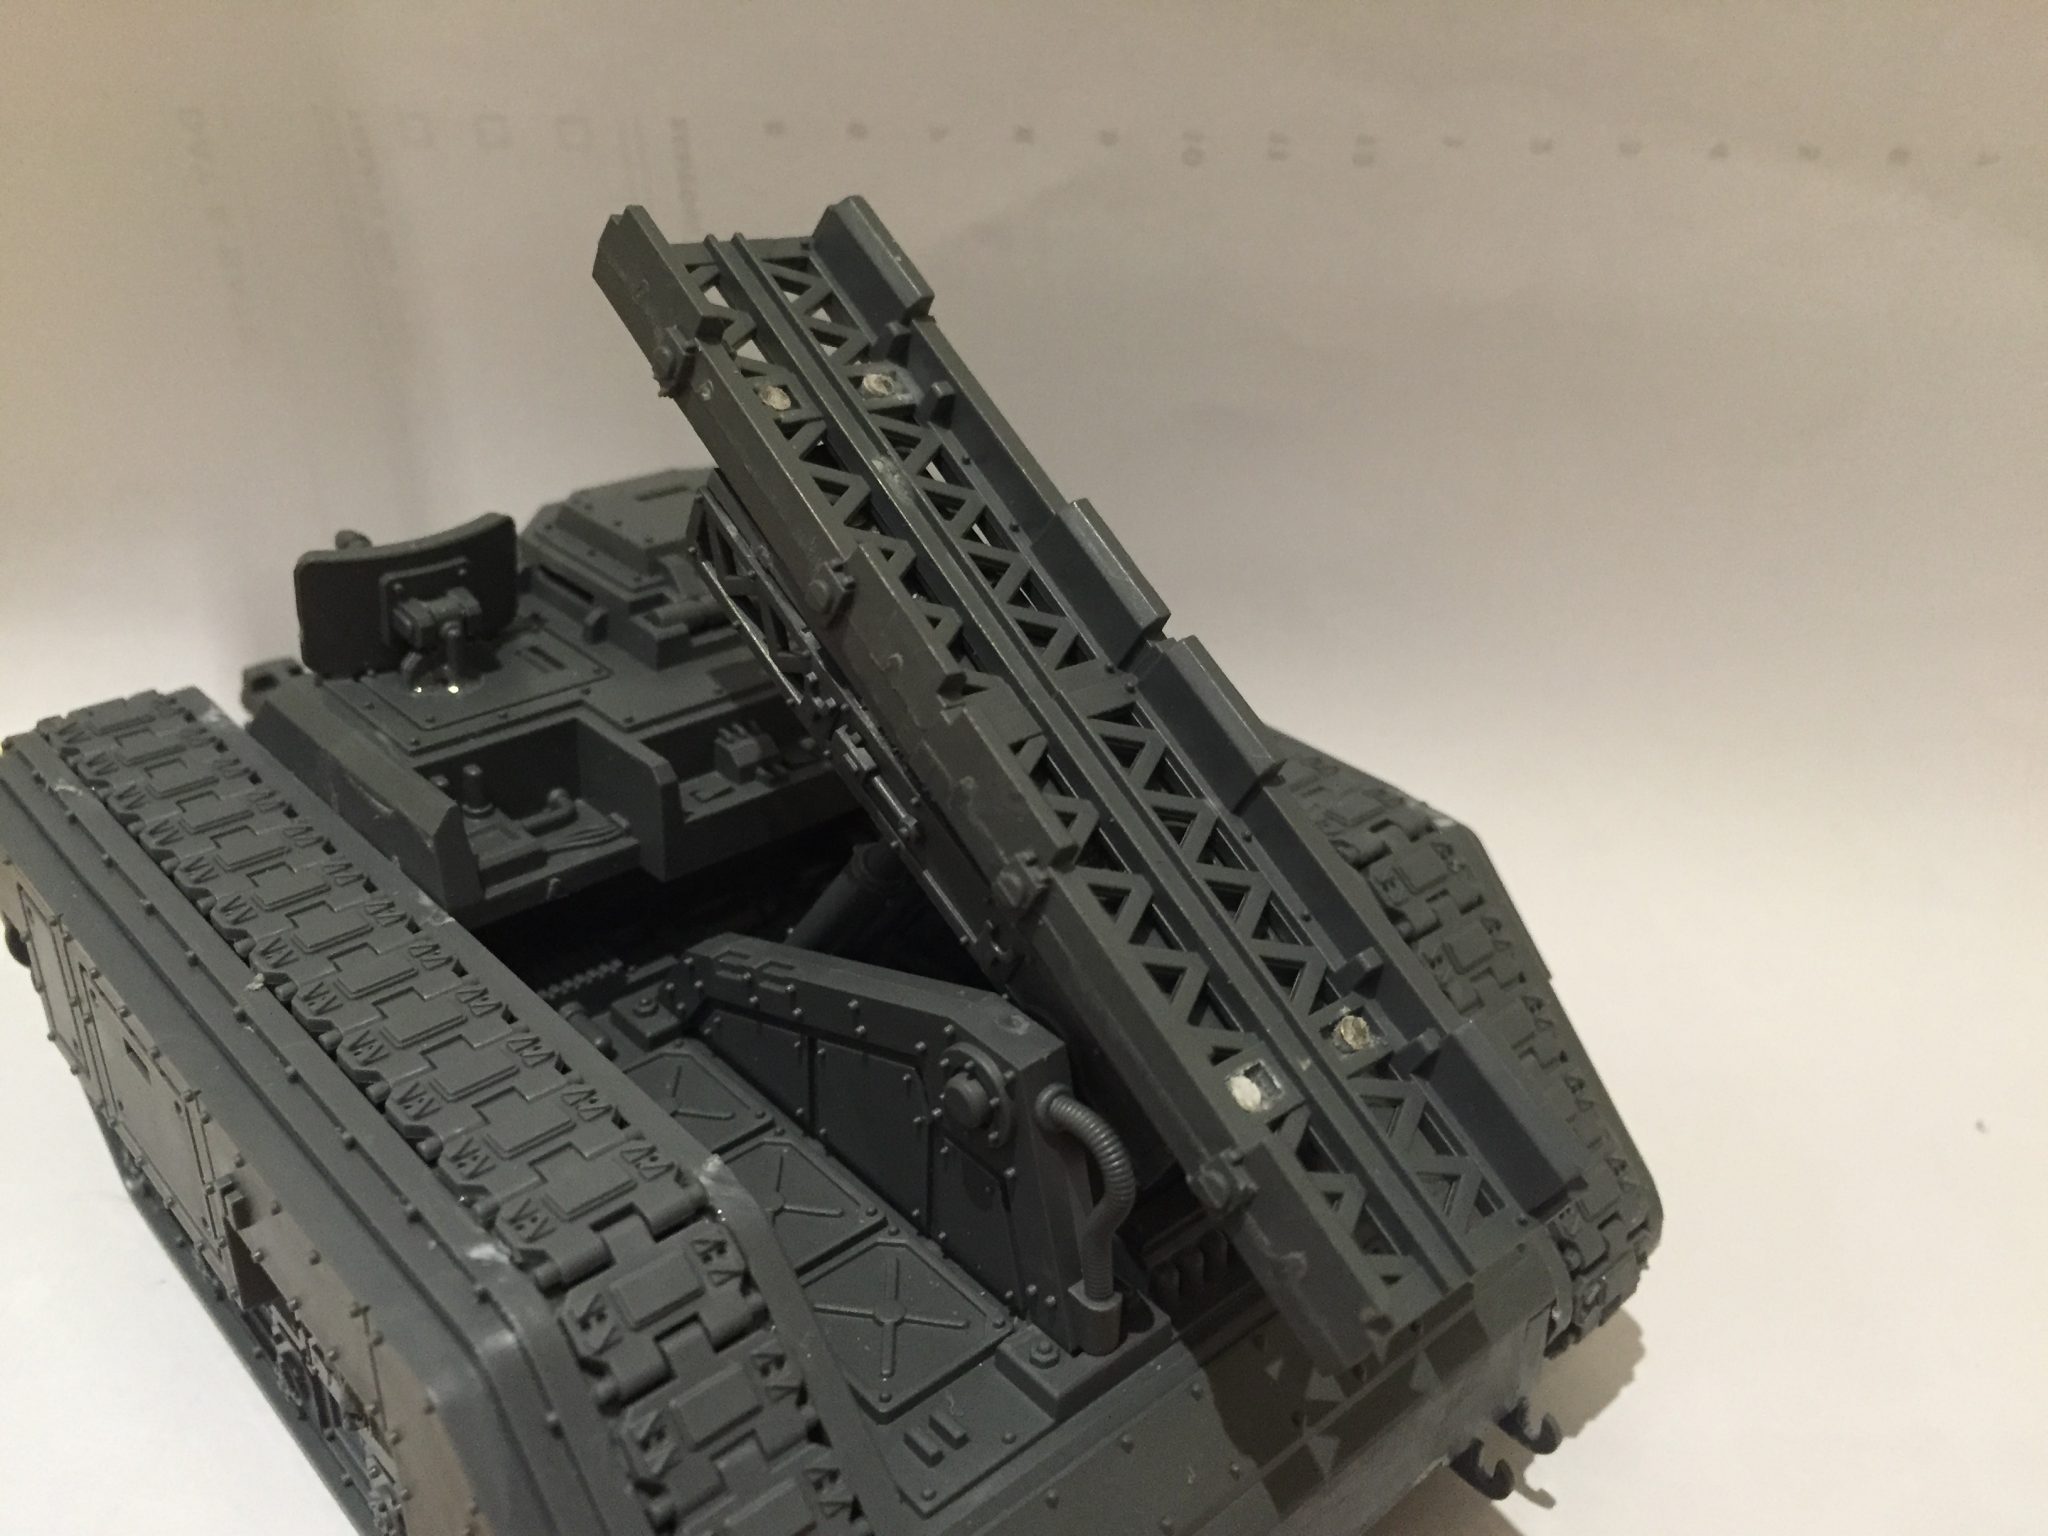
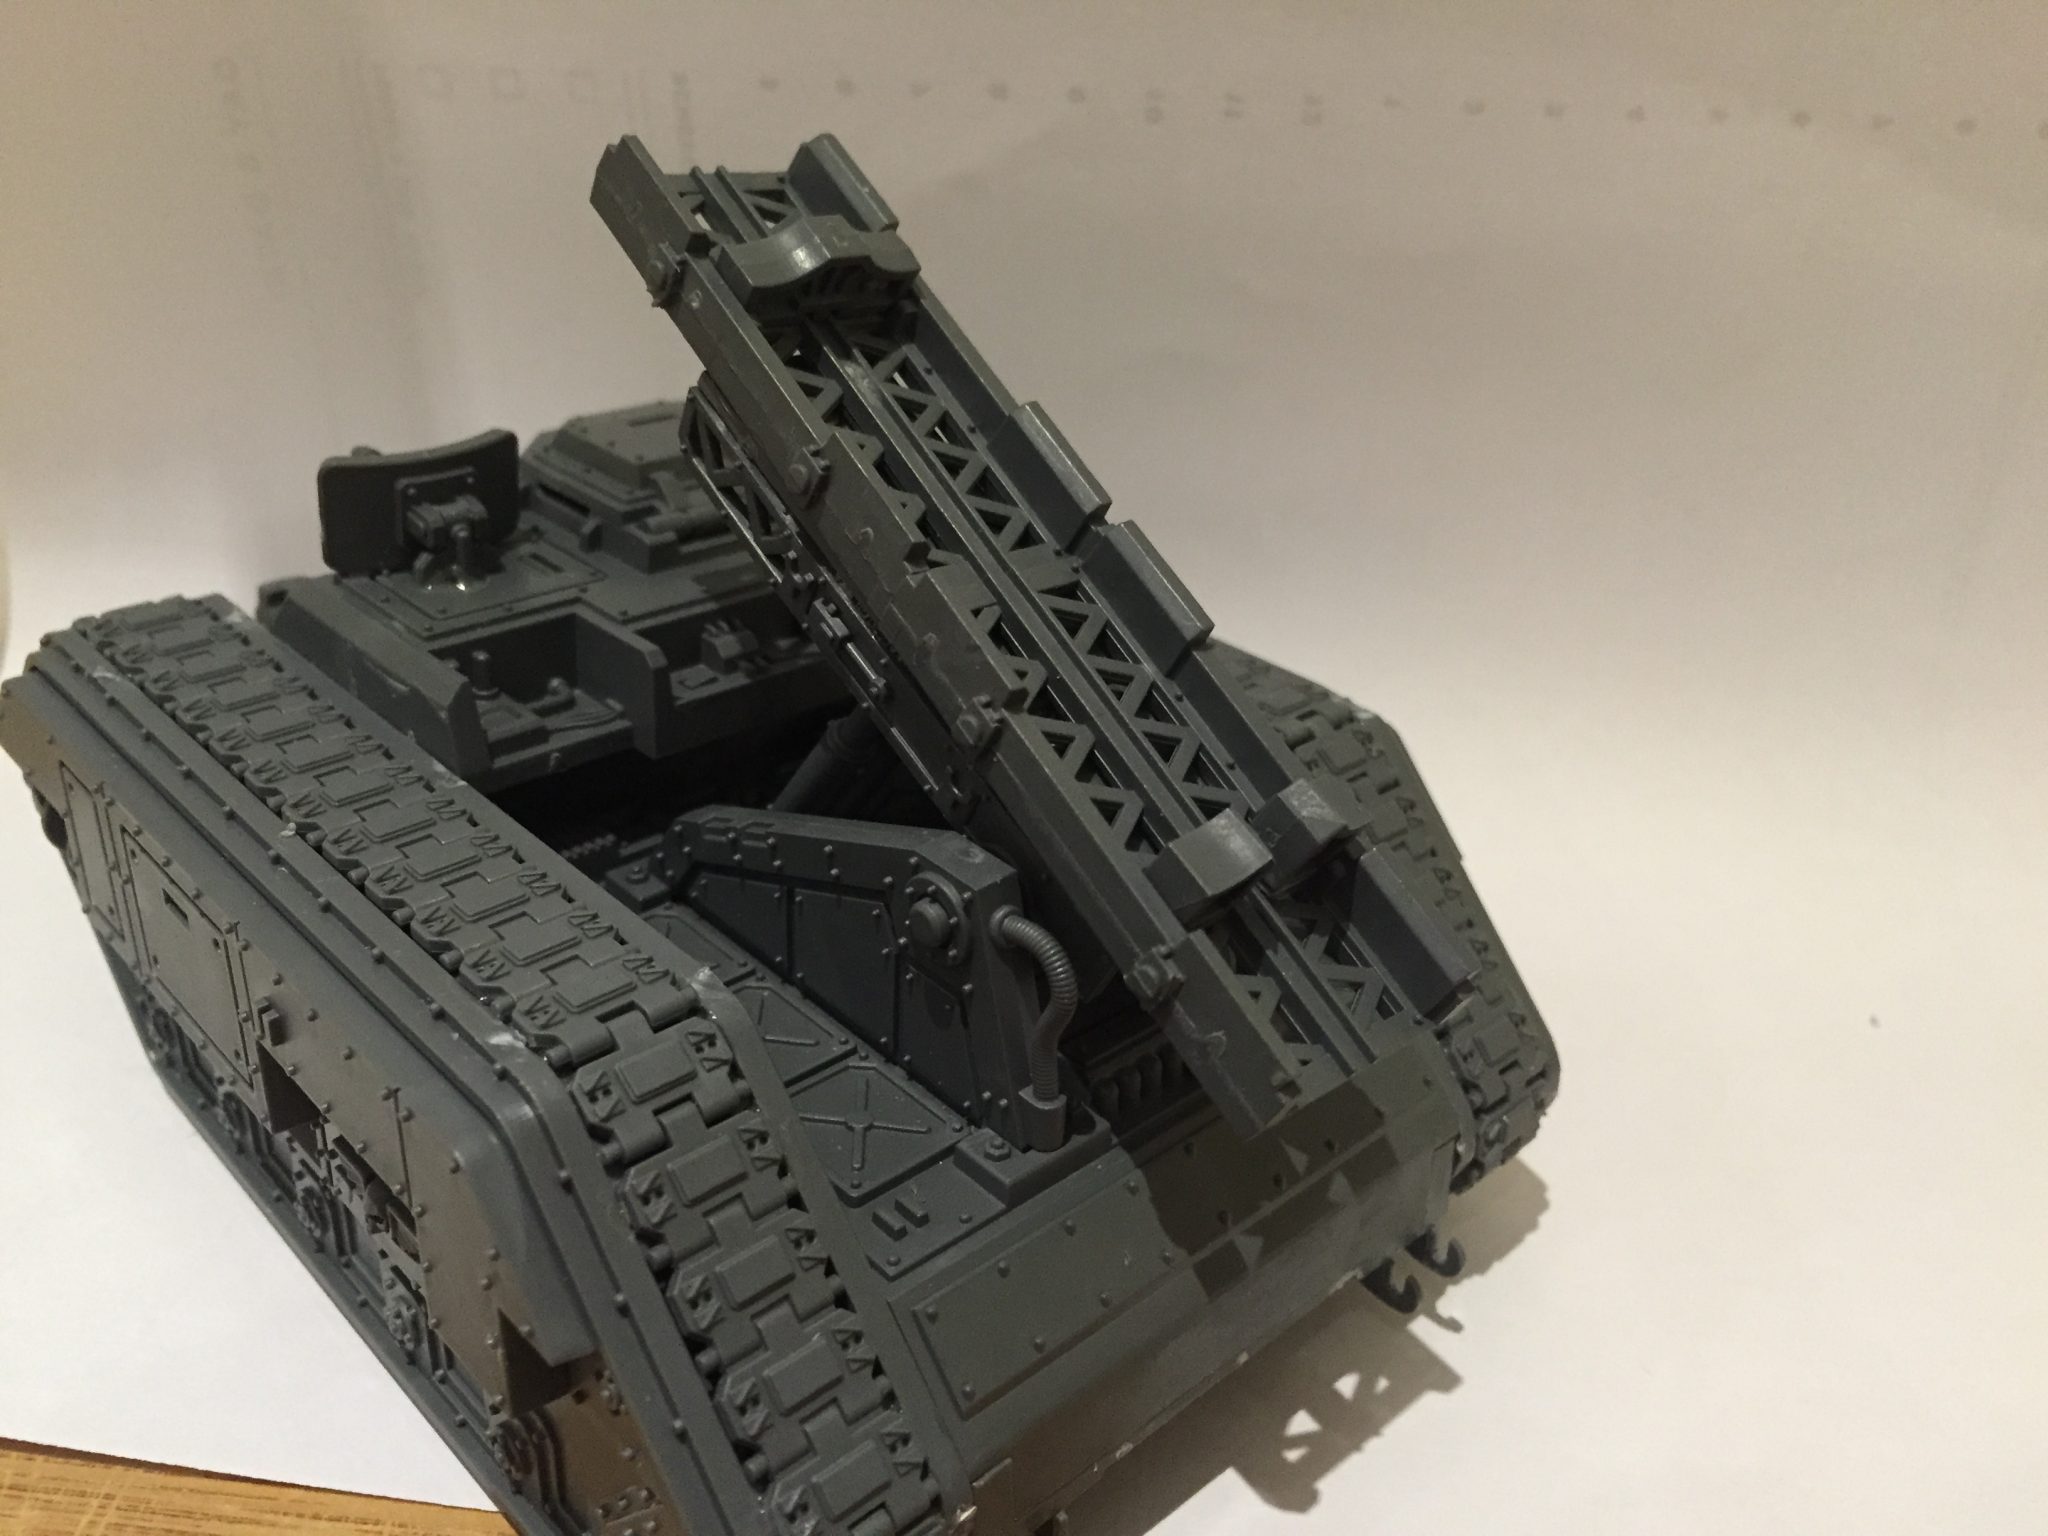
- Manticore with rockets

-
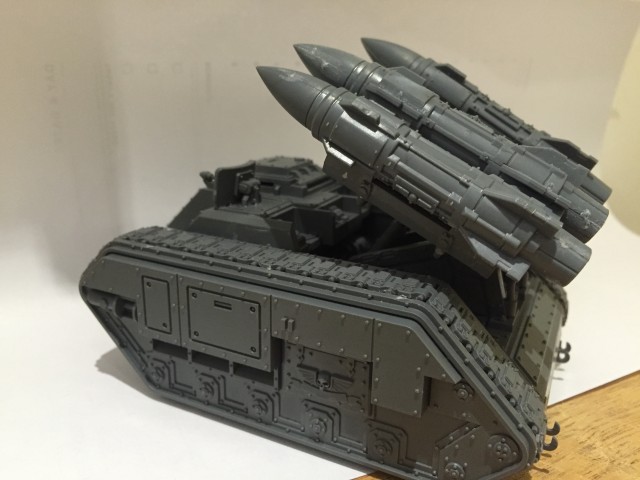
- The Manticore rockets are just placed on the rack
-
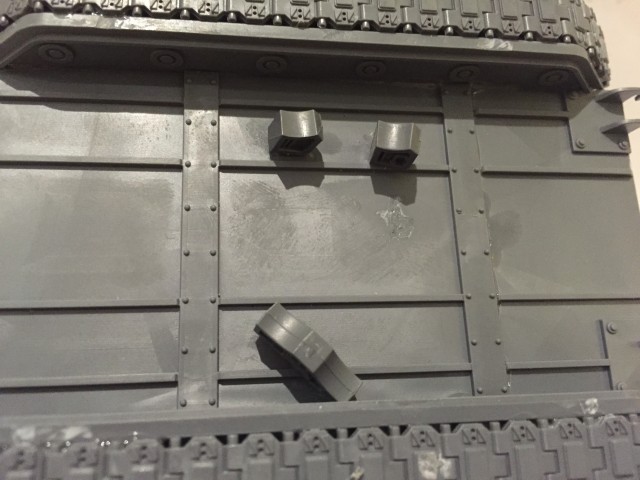
- The underside houses the extras for the Deathstrike
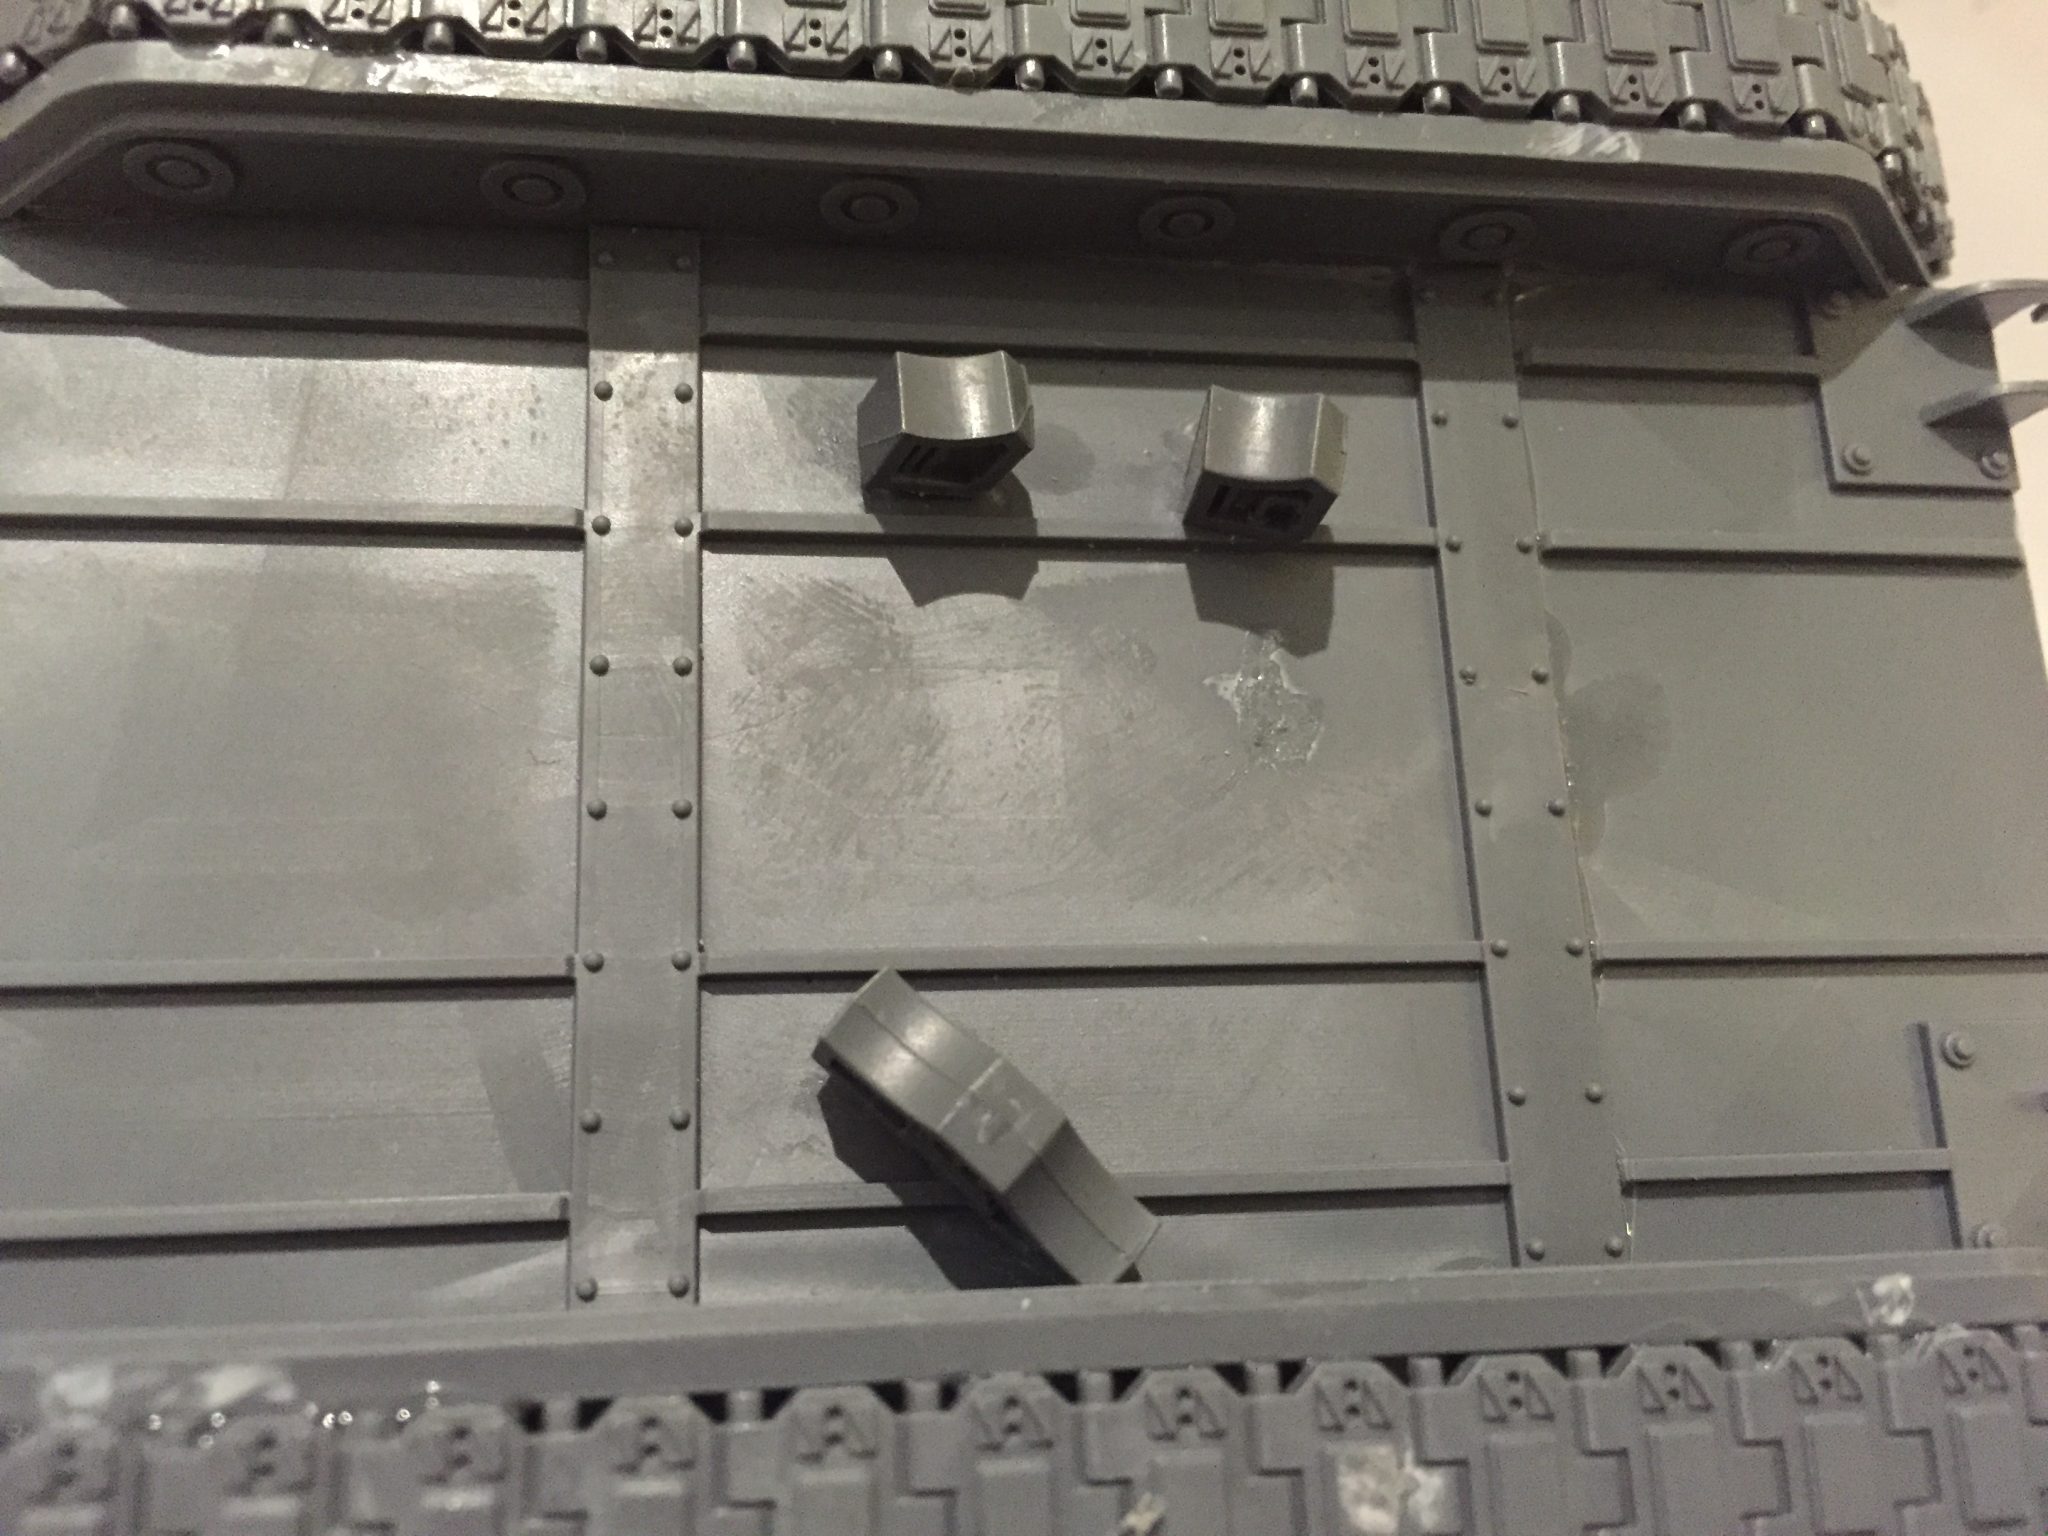
-
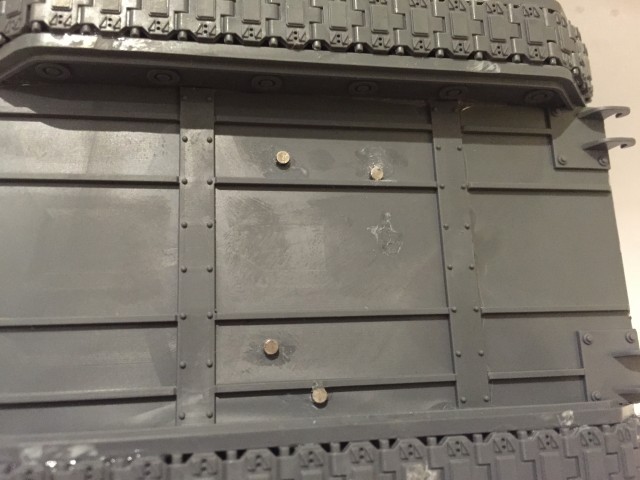
- Magnets for the Deathstrike extras

-

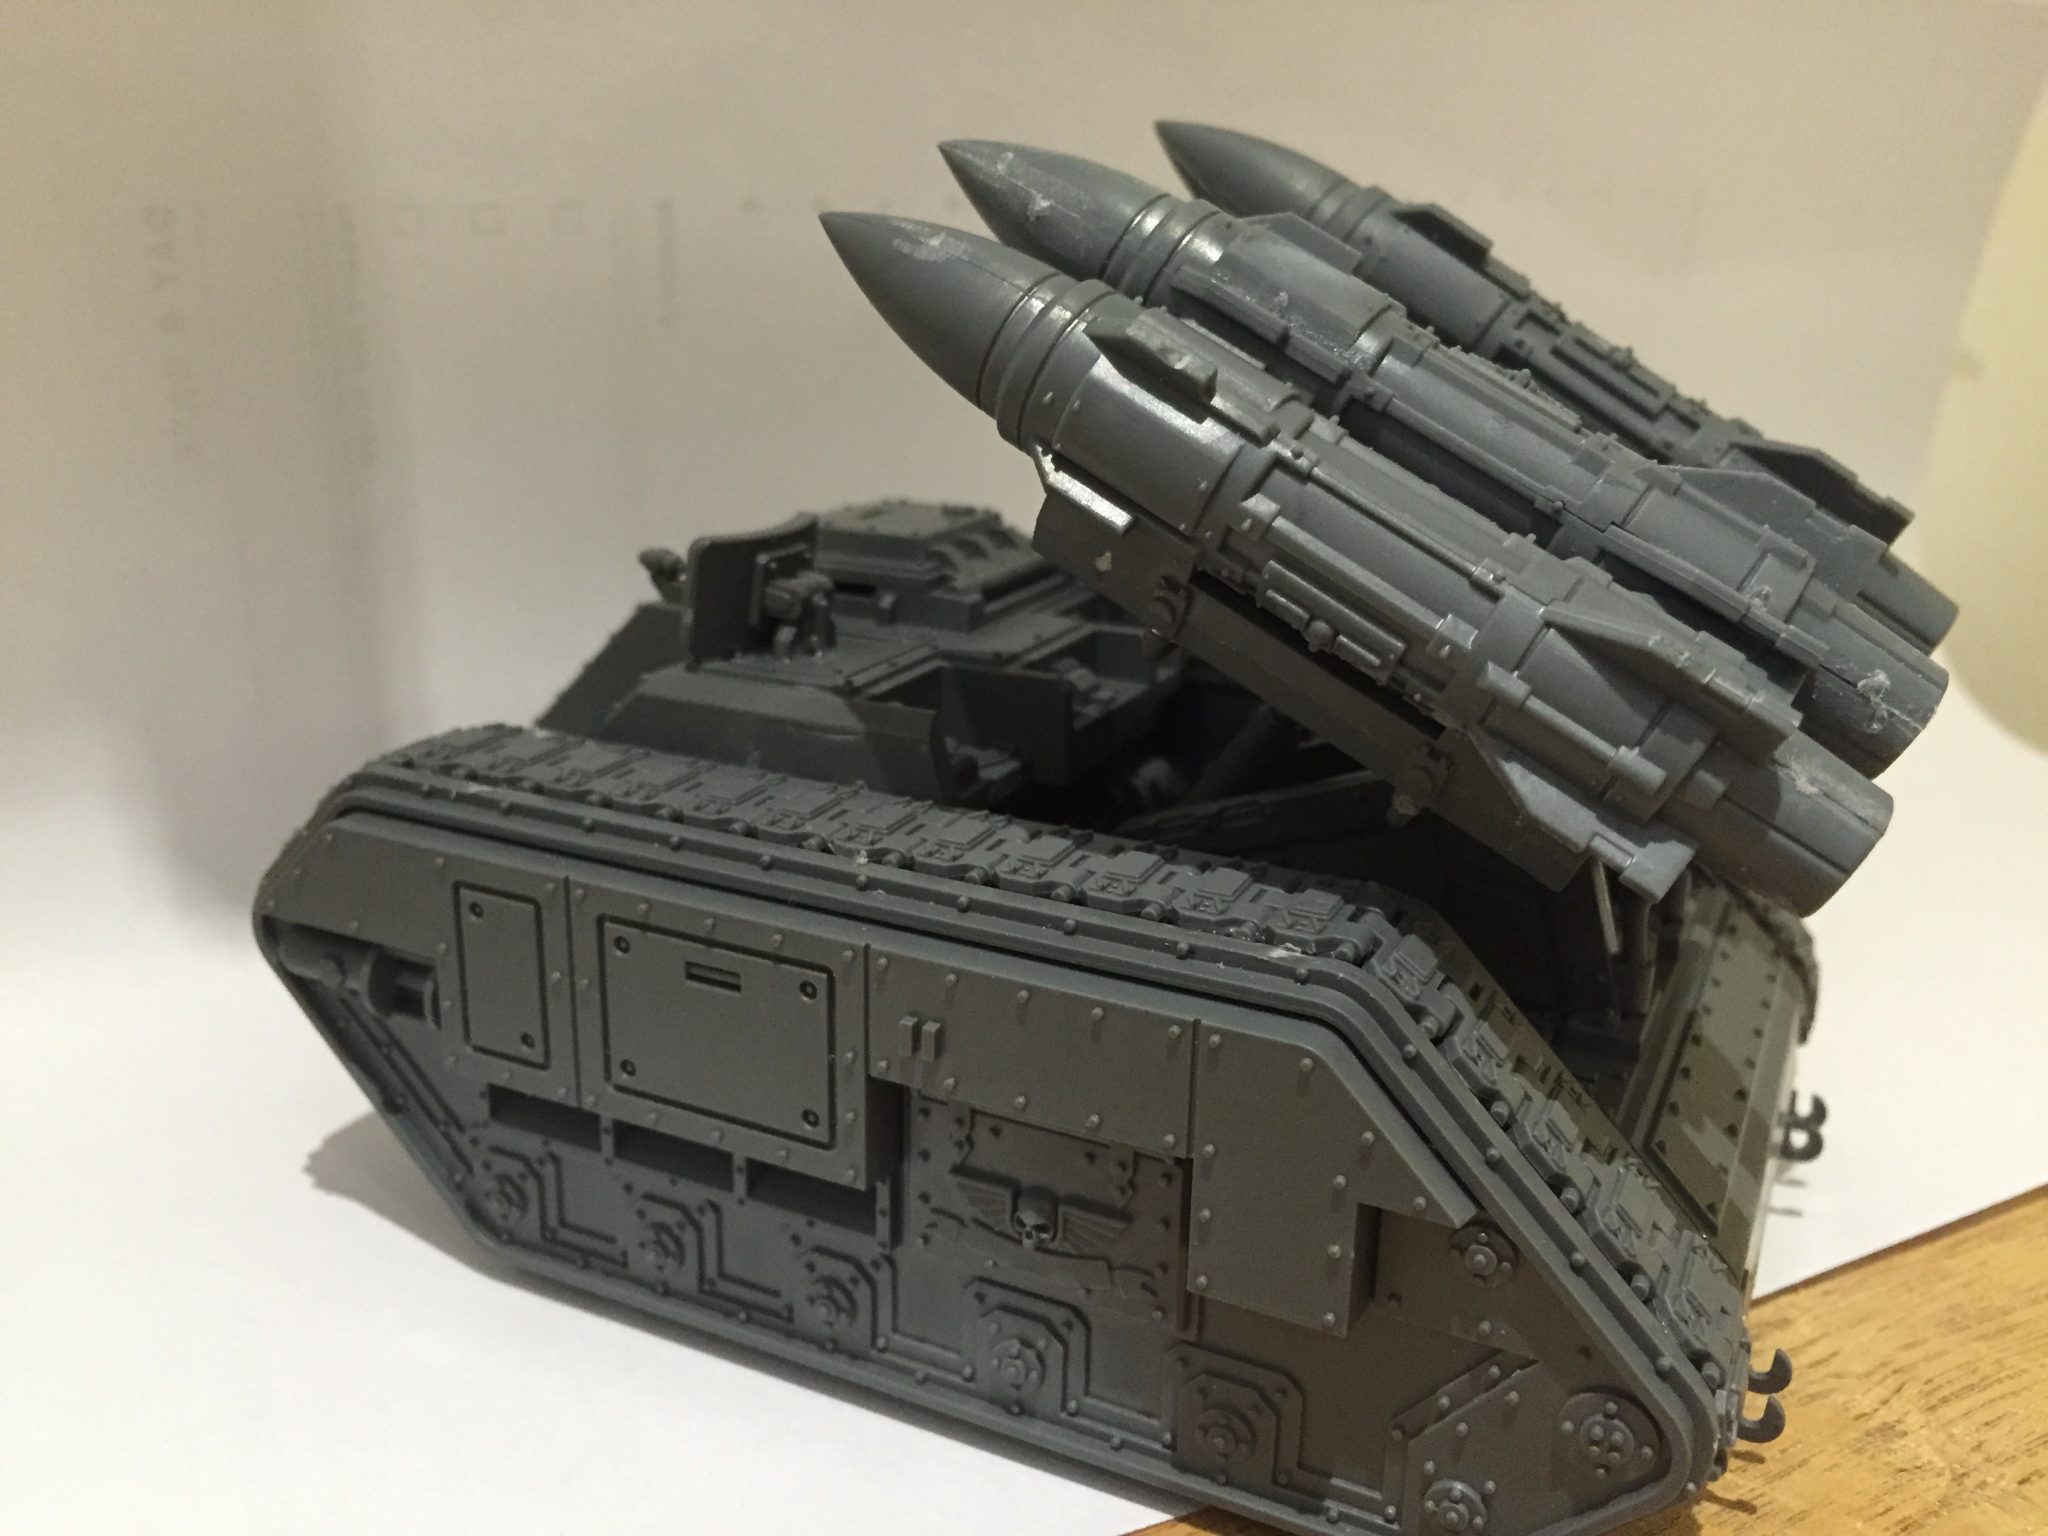
- The Manticore side racks go end to end for the Deathstrike
-

- Extra attachments to stop the Deathstrike slipping
-
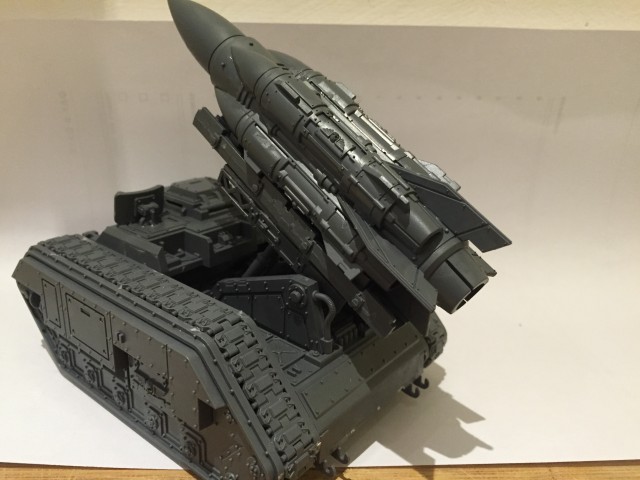
- Deathstrike in place, its just placed not magnetised
